In this article: We unbox and review Sony's XAV-9500ES head unit, walk through all of its features, compare it to other Sony head units in the past and provide our opinion along the way.
We've covered Sony's new lineup of Mobile ES products throughout the year. We tested them out in a Ram 1500 and even did a full custom installation in a heavily modified Volkswagen MK7.5 GTI. I was blow away with the performance after we tuned the system in the MK7.5.
Sony initially released the Mobile ES lineup with a series of speakers and a 10″ subwoofer to round it out. It was pretty much a comprehensive speaker setup, but lacked amplification and a matching head unit. As Sony introduces new products to this high performance lineup of products, we've been covering and reviewing them as they become available to us. Most recently, Sony provided us with a demo XAV-9500ES unit to review and test out.
Prior to the XAV-9500ES, this year we've reviewed their XAV-AX8100 and XAV-AX5600 units which made several leaps in features and functionality since their previous sister models. But the XAV-9500ES steps into its own and really enters another level of head unit.
In this review, I'll walk you through the unboxing of the 9500ES and document my experience with it. Using a custom demo box, I'll turn the unit on and detail out all of the features, pointing out some of the differentiating things that make this head unit unique. I'll also provide my own input and opinion on the unit and its features along the way. By the end of this review, hopefully you'll have a good understanding of what this head unit will bring to your car and what its capable of.
Unboxing and First Impressions
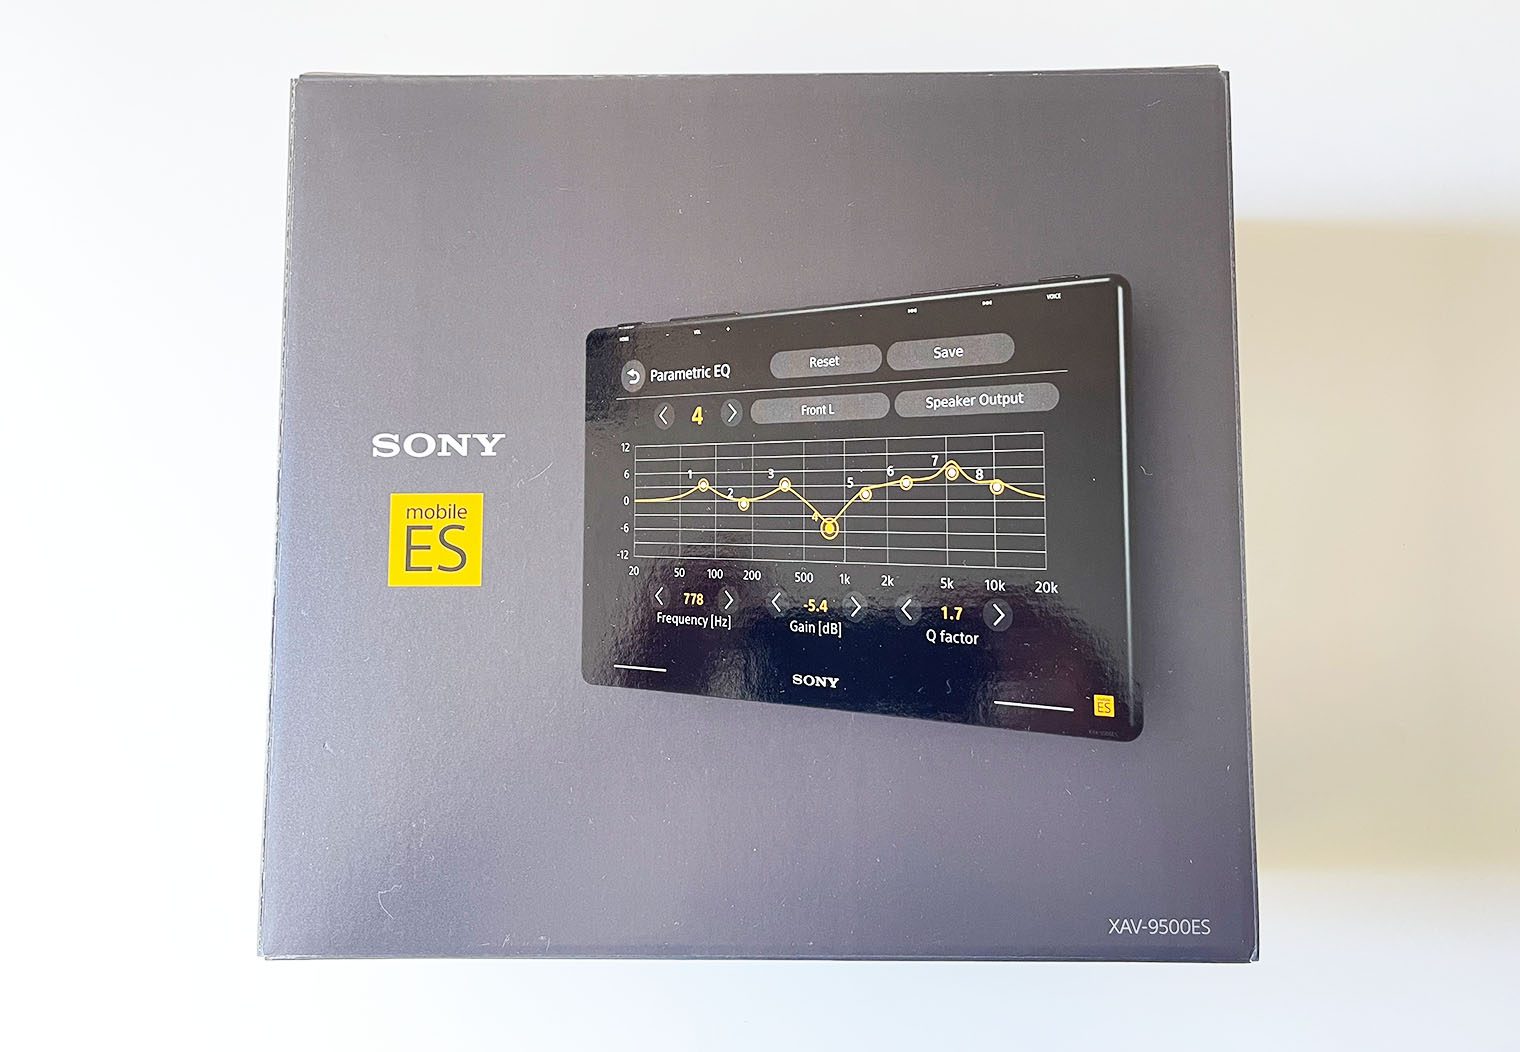
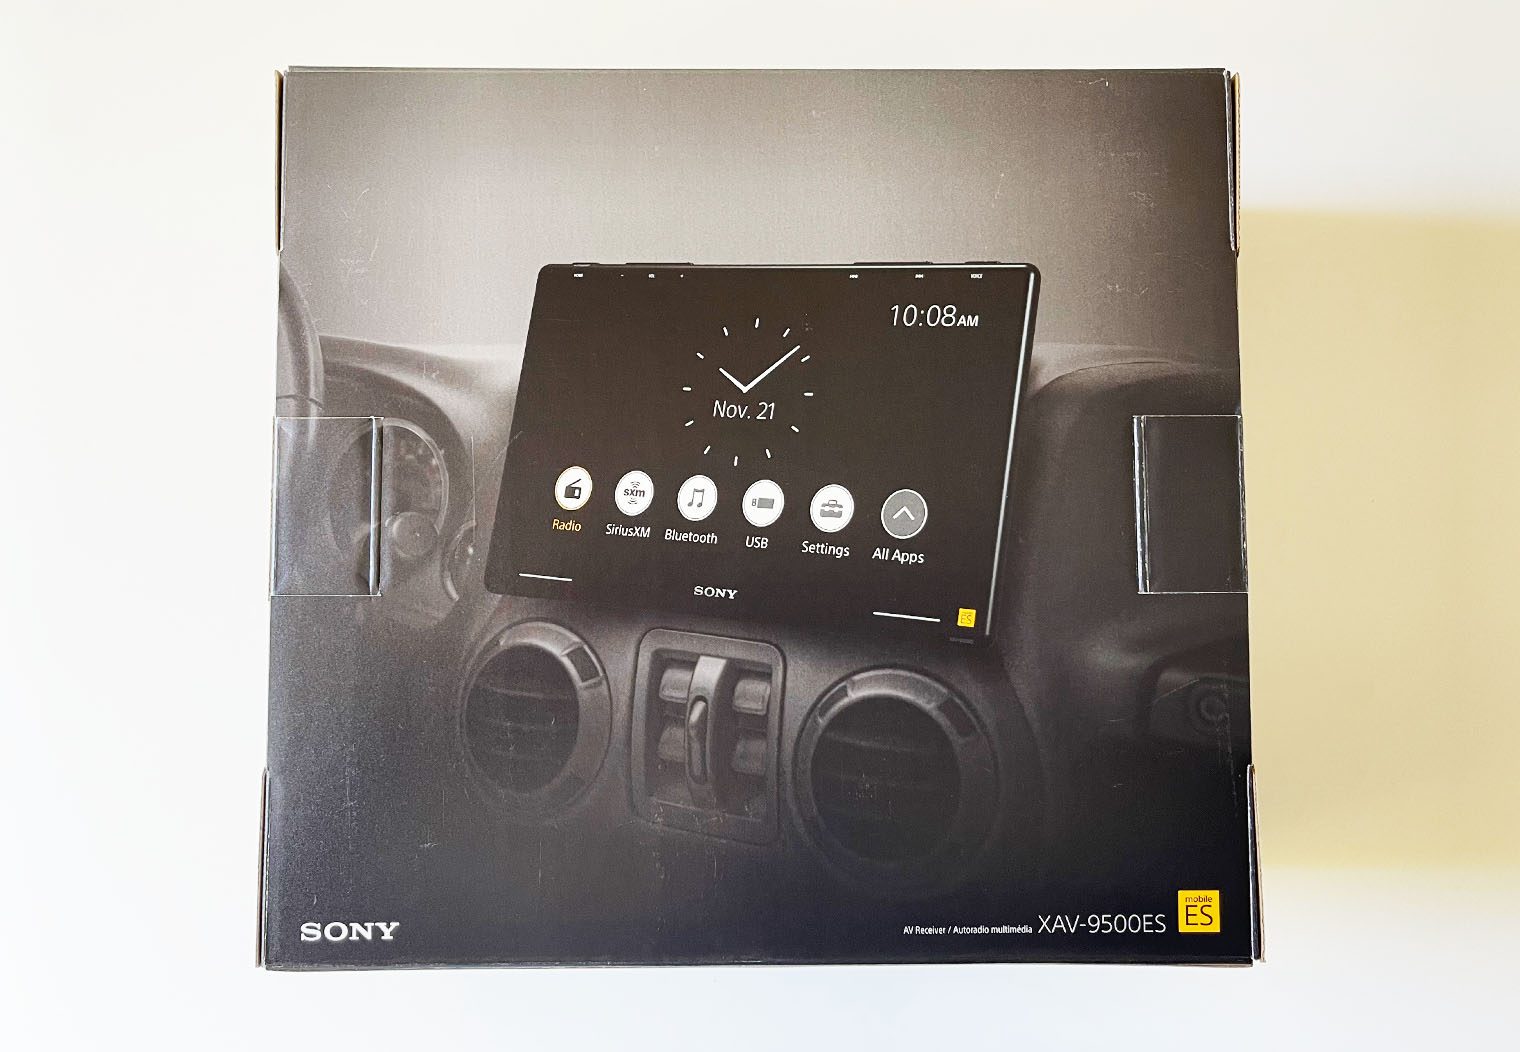
The packaging for all of Sony's Mobile ES lineup of products is unique. They all match, so if you're looking at their products in a store and trying to match up speakers to head unit to subwoofer, their packaging makes it pretty easy. Straight away I felt like this was a premier car stereo product with it's textured and design-esque box. You get a pretty good look and feel for what you're about to open up just by looking at the packaging.
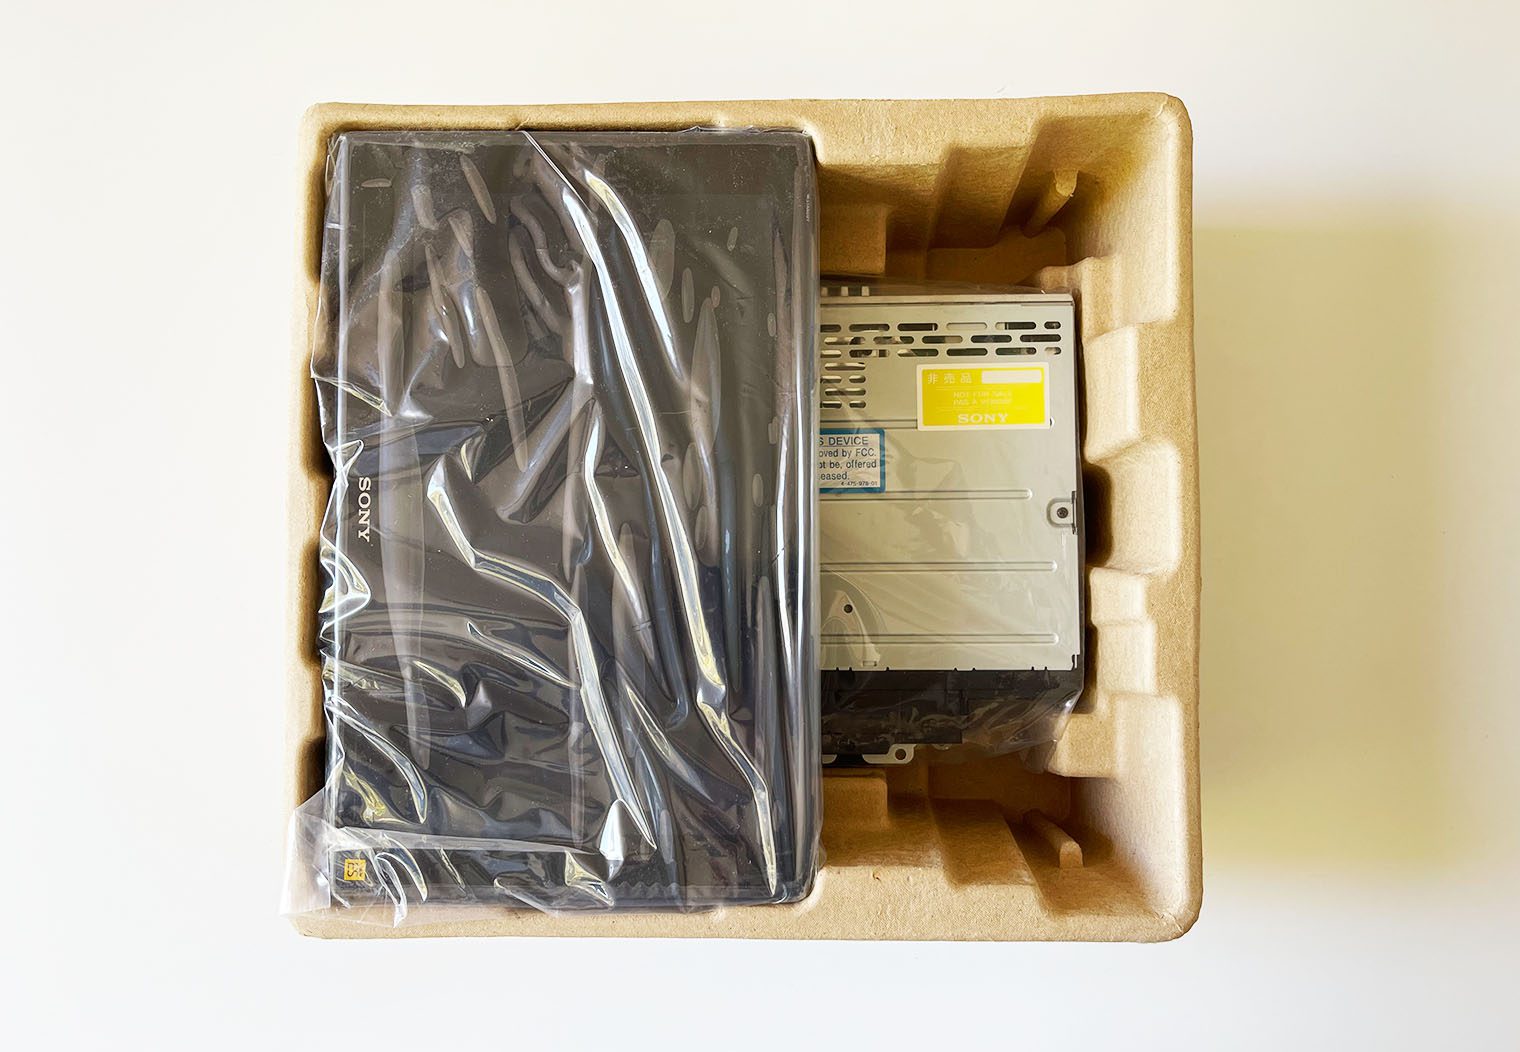
When you open the box, you're greeted with the manuals along with all of the different components and wire harnesses that come with the unit. Underneath sits the fun stuff – the massive 10.1″ oversized screen and the single din chassis. Both wrapped neatly and tucked tightly in their respective moulded inserts. The screen, in particular, is pretty central in the box and surrounded by other components. It's also double wrapped to ensure that in the chaos of shipping, it won't scratch.

What's In the Box
So what all comes with the XAV-9500ES? Here's a look and list of what to expect the head unit to come with.
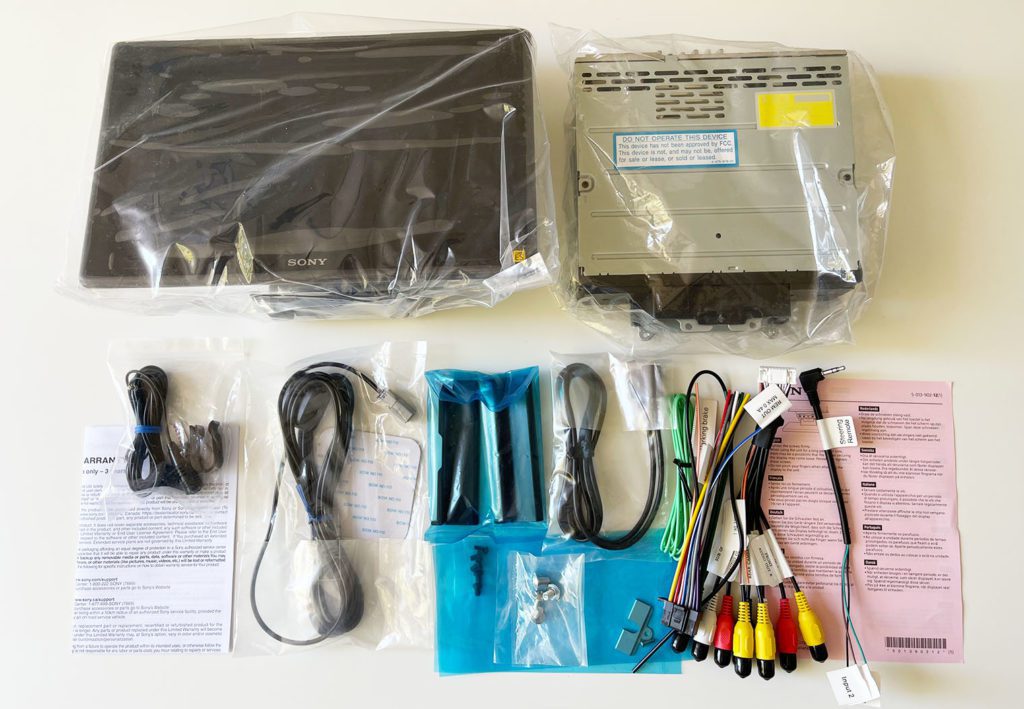
- Single-DIN source unit (10A fuse)
- 10.1″ Touchscreen monitor
- Wiring harness (attached 6.5′ parking brake wire)
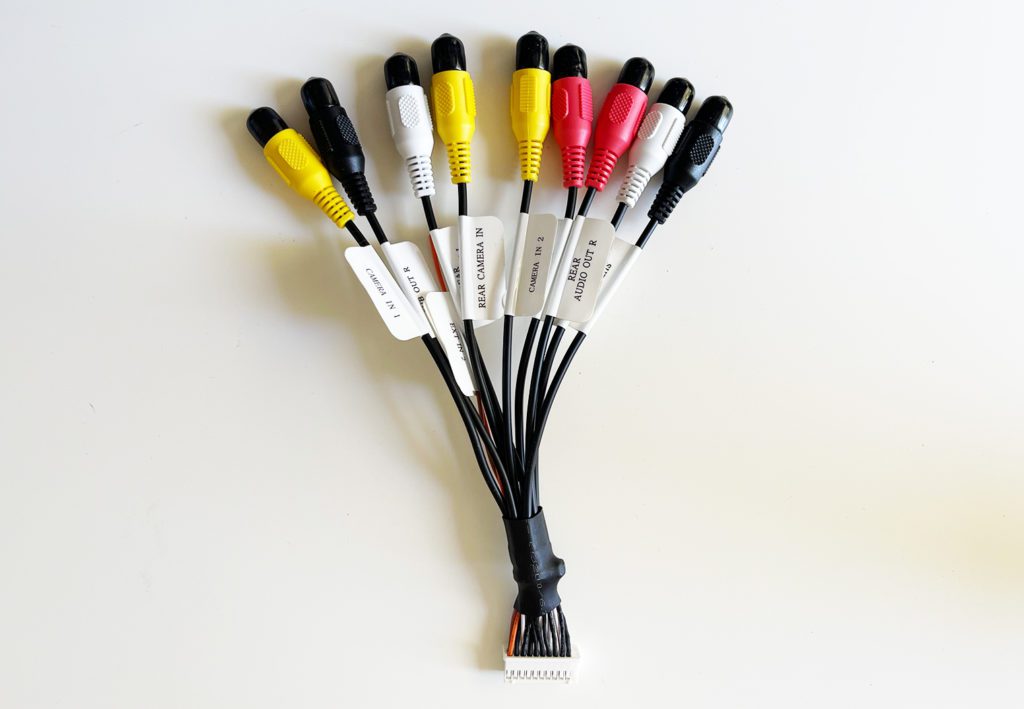
- A/V Input and Output RCA harness
- 3-Wire to 3.5mm SWC adapter
- 52″ USB-C extension cable
- Microphone w/ visor-bracket (attached 12′ cable terminated by a right-angle mono-3.5mm connector)
- Surface bracket
- Two-sided tape
- GPS wire and unit
- Four M5x6mm ISO-screws
- Four M4x6mm machine screws
- M3x8mm machine screw
- Joint-cover
- 2 Rear-panel covers
- Operating Instructions
- Warranty Information
- Installation Note
Sony XAV-9500ES Overview and Specs
Sony's XAV-9500ES is a digital media receiver with an oversized 10.1″ capacitive touchscreen. The chassis is a separate single DIN, that attaches to the screen with four mounting screws via the three-way mounting mechanism. Between the single din chassis that will slightly simplify installation and give you more room behind the dash, and the three-way mounting mechanism it's a pretty universal setup. Long gone are the days that you need a double DIN opening to have a nice touchscreen head unit.
Sony introduced the XAV-9500ES to complement its lineup of high resolution speakers and subwoofer. Introduced shortly after the unveil of the Mobile ES lineup in 2021, its a nice addition to the lineup and really was designed to match the quality of the speakers, enable the level of audio control that one would want when tuning the mobile es lineup of speakers, and also bring some of the latest technology and vehicle integration/control to your fingertips.
Unit Specifications
- 10.1″ capacitive HD anti-glare touchscreen with four-way adjustable mount
- digital multimedia receiver with AM/FM tuner (no CD player)
- single din chassis
- Bluetooth for hands-free calling and audio streaming
- High-Resolution audio and High-Resolution wireless LDAC audio support
- built-in ESS digital-to-analog converter
- built-in 192-kHz / 24-bit digital signal processor
- wireless Apple CarPlay and wireless Android Auto compatible
- plays MP3, WMA, WAV, AAC, FLAC, ALAC, DSF, and DSDIFF music files
- 14-band graphic equalizer with independent 8-band parametric EQ per channel
- 3-zone crossover
- plays MP3, WMA, WAV, AAC, FLAC, ALAC, DSF, and DSDIFF music files
- inputs: rear USB Type-C port, backup cam input, two additional camera inputs
- outputs: 6-channel preamp outputs (5-volt front, rear, sub)
- wired connection to parking brake required. access to settings and other features may be limited without it
- built-in internal amp (20 watts RMS CTA-2006/55 peak x 4 channels)
- compatible with most factory steering wheel audio controls (adapter required)
The 10.1″ Oversized Screen
I'll start with the screen of course. Isn't this really the reason why you want this head unit? Pioneer's DMH-WT8600NEX and Alpine's HALO 11 are really the only other notable head units right now that offer a screen of this magnitude. It really is a thing of beauty. If you look at all of the new vehicles on the market, they're coming with huge upgraded touchscreens that really change the look and feel of the dash and integrate with so many cool features of the car. This is also changing the standards and expectations of aftermarket providers like Sony.
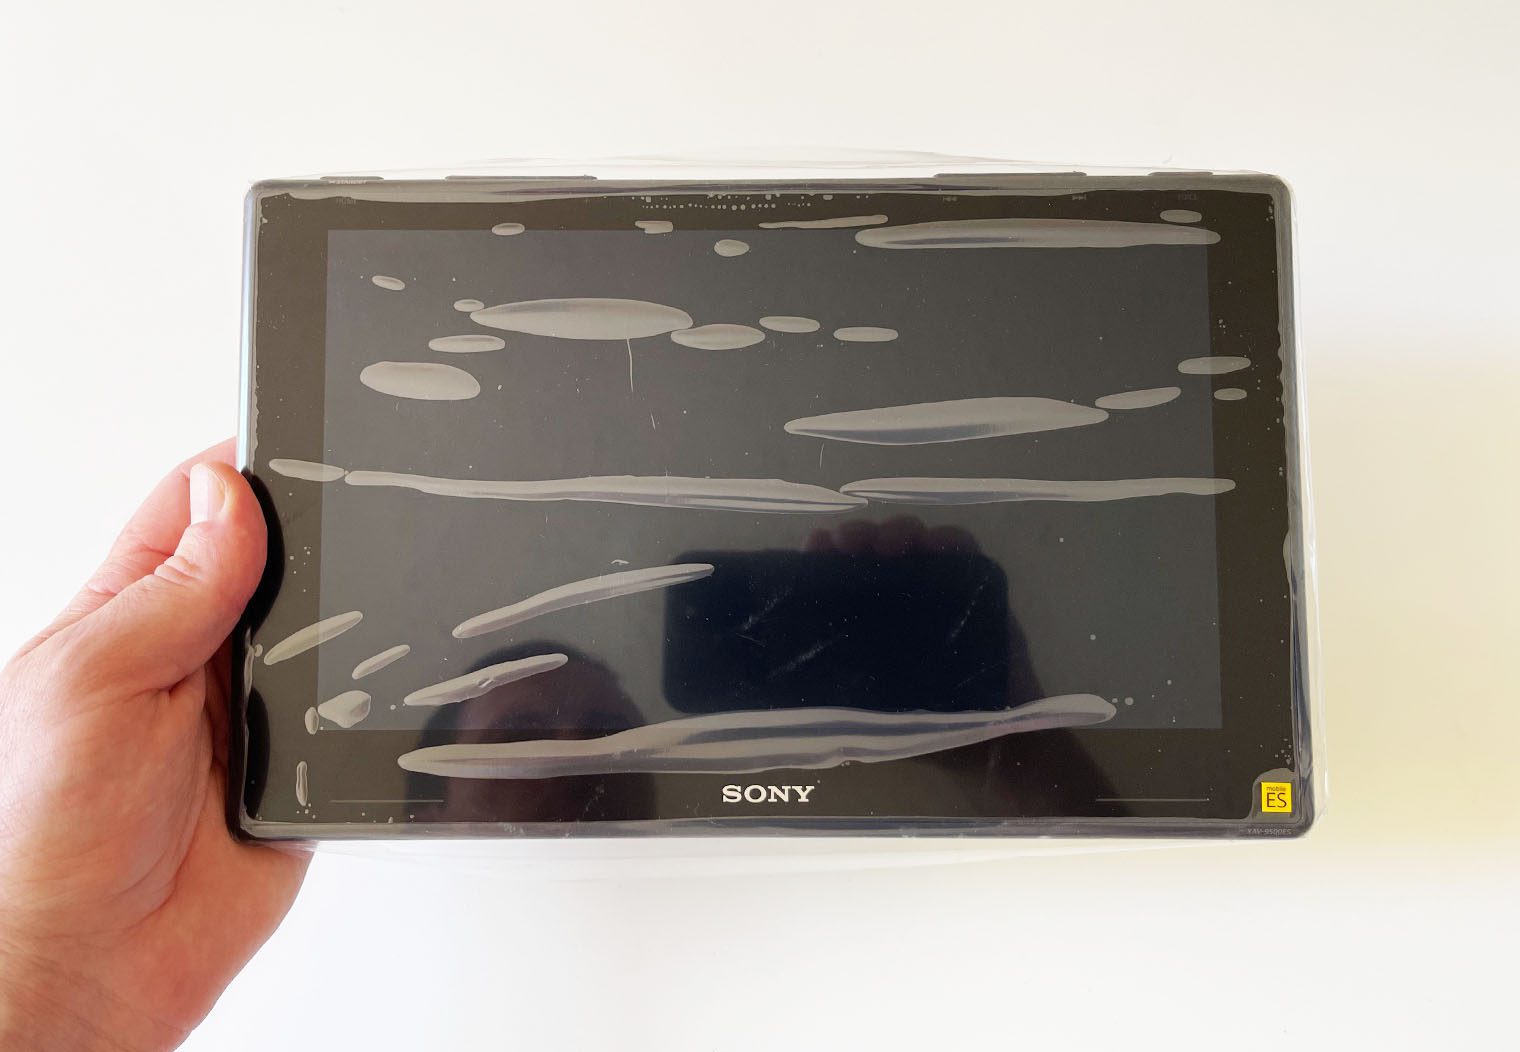
The XAV-9500ES features a 10.1″ capacitive touchscreen. It's an LCD screen bonded directly to a protective glass giving it a very clean look and very responsive to the touch. It feels more like touching an iPhone screen than previous models like the XAV-AX8100 which use a resistive screen. In terms of resolution, the screen boasts a 1280 x 720 screen res which is higher than Alpine's 11″ screen on the HALO 11.
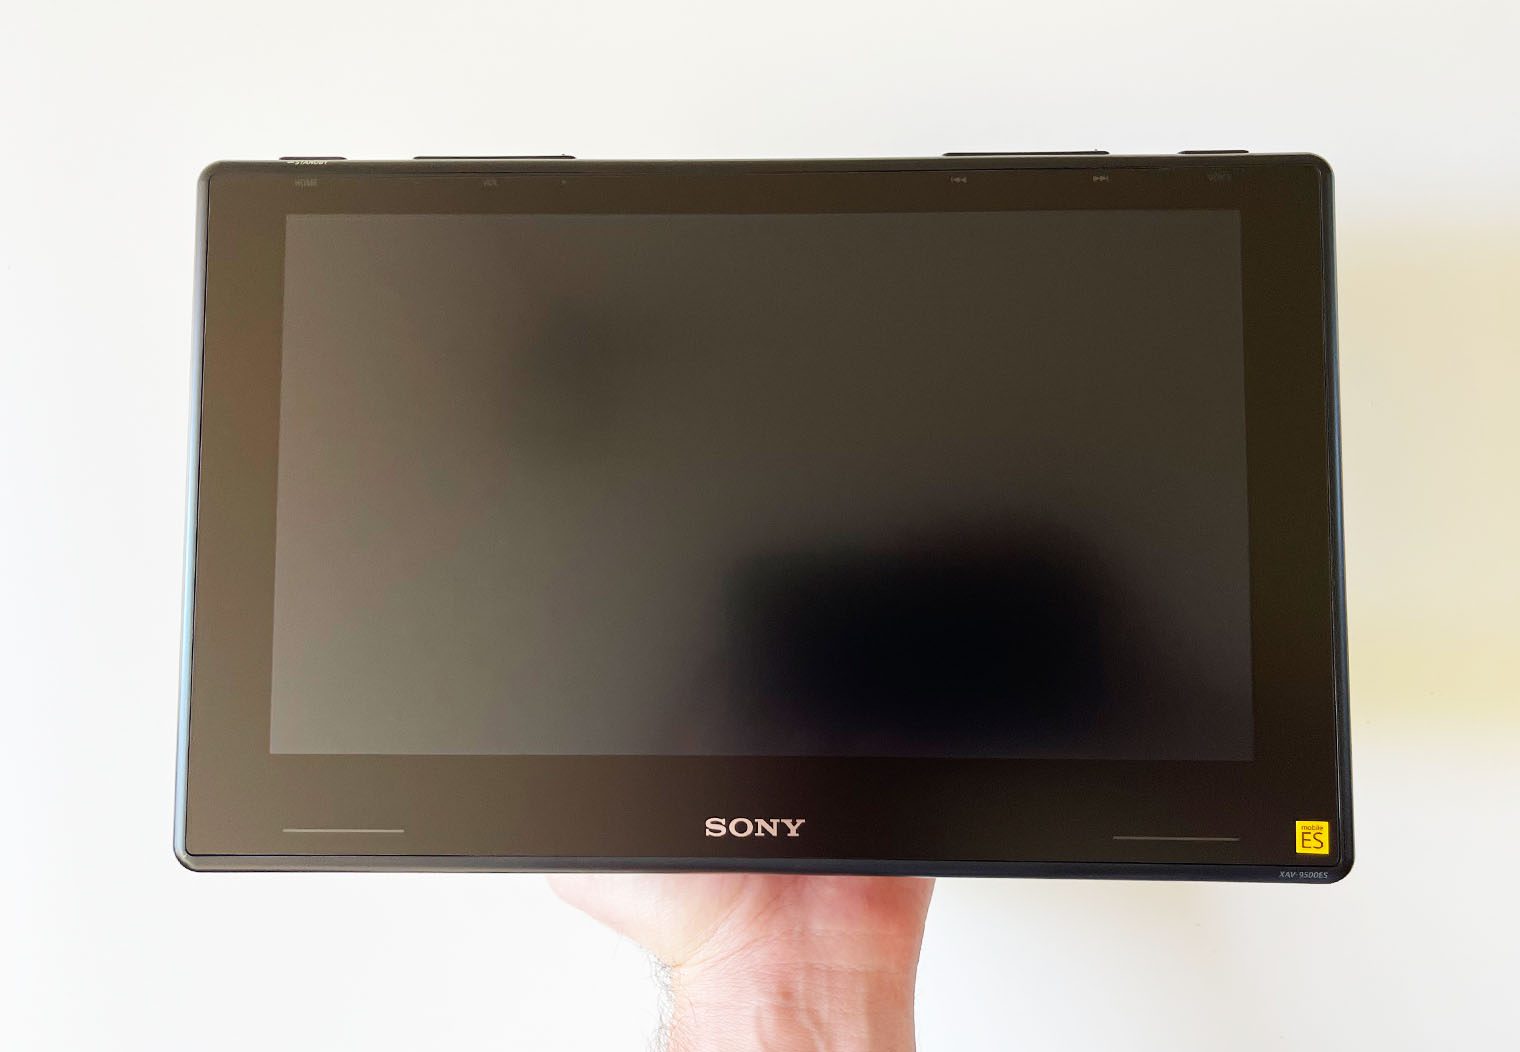

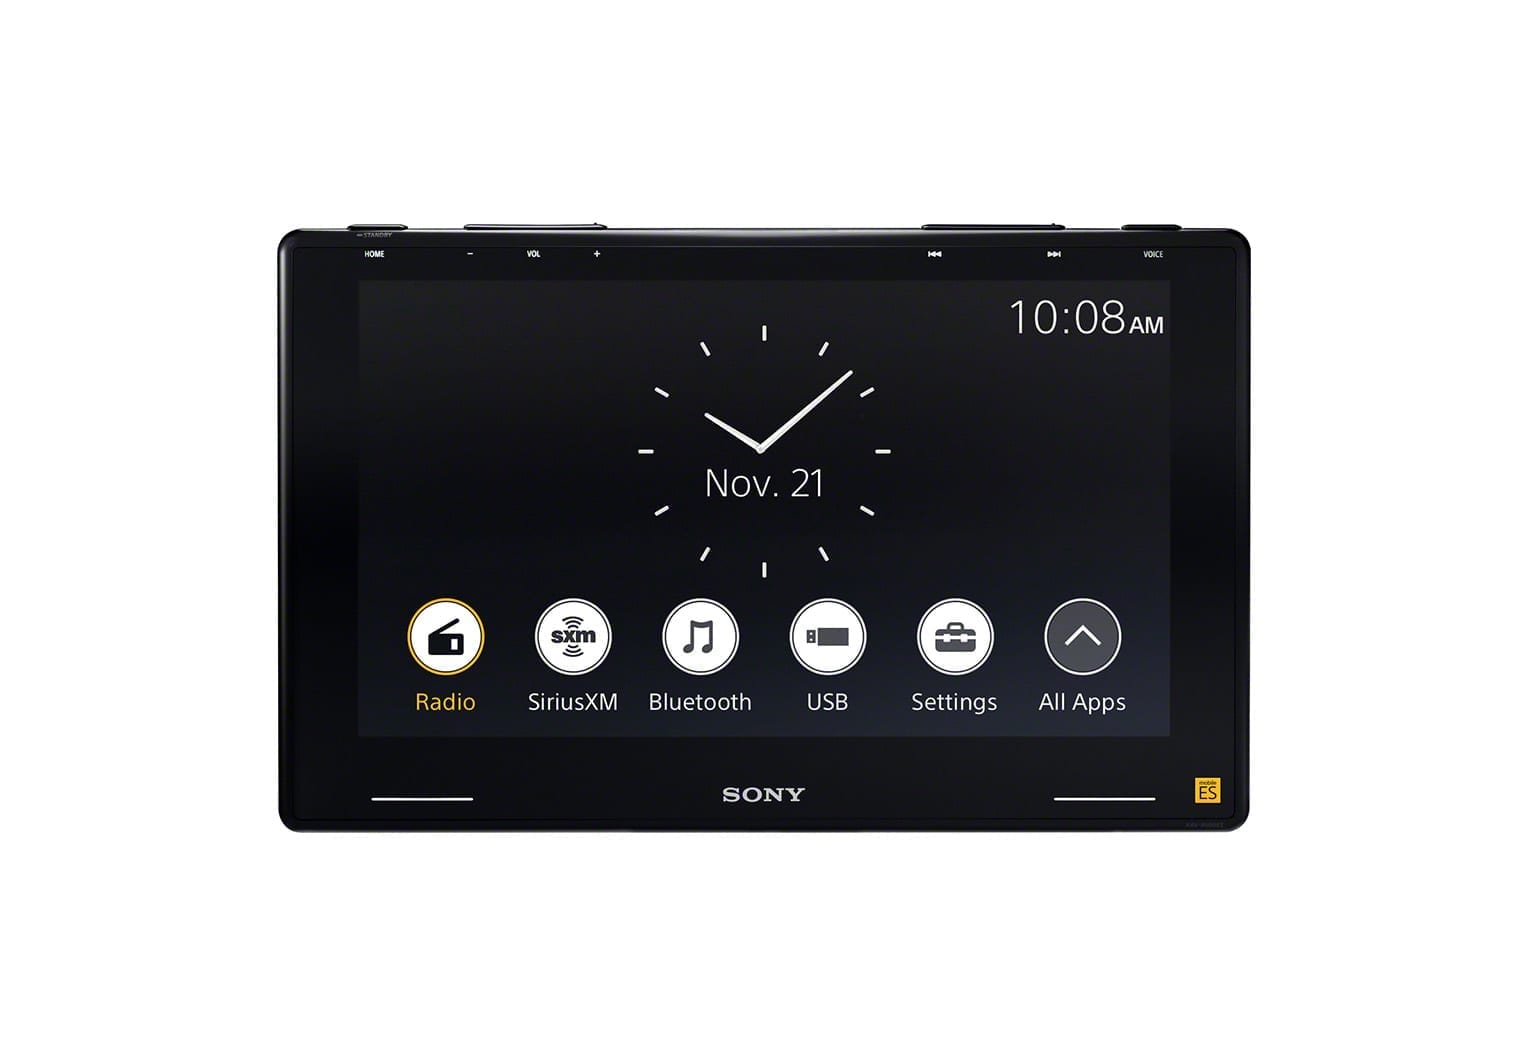
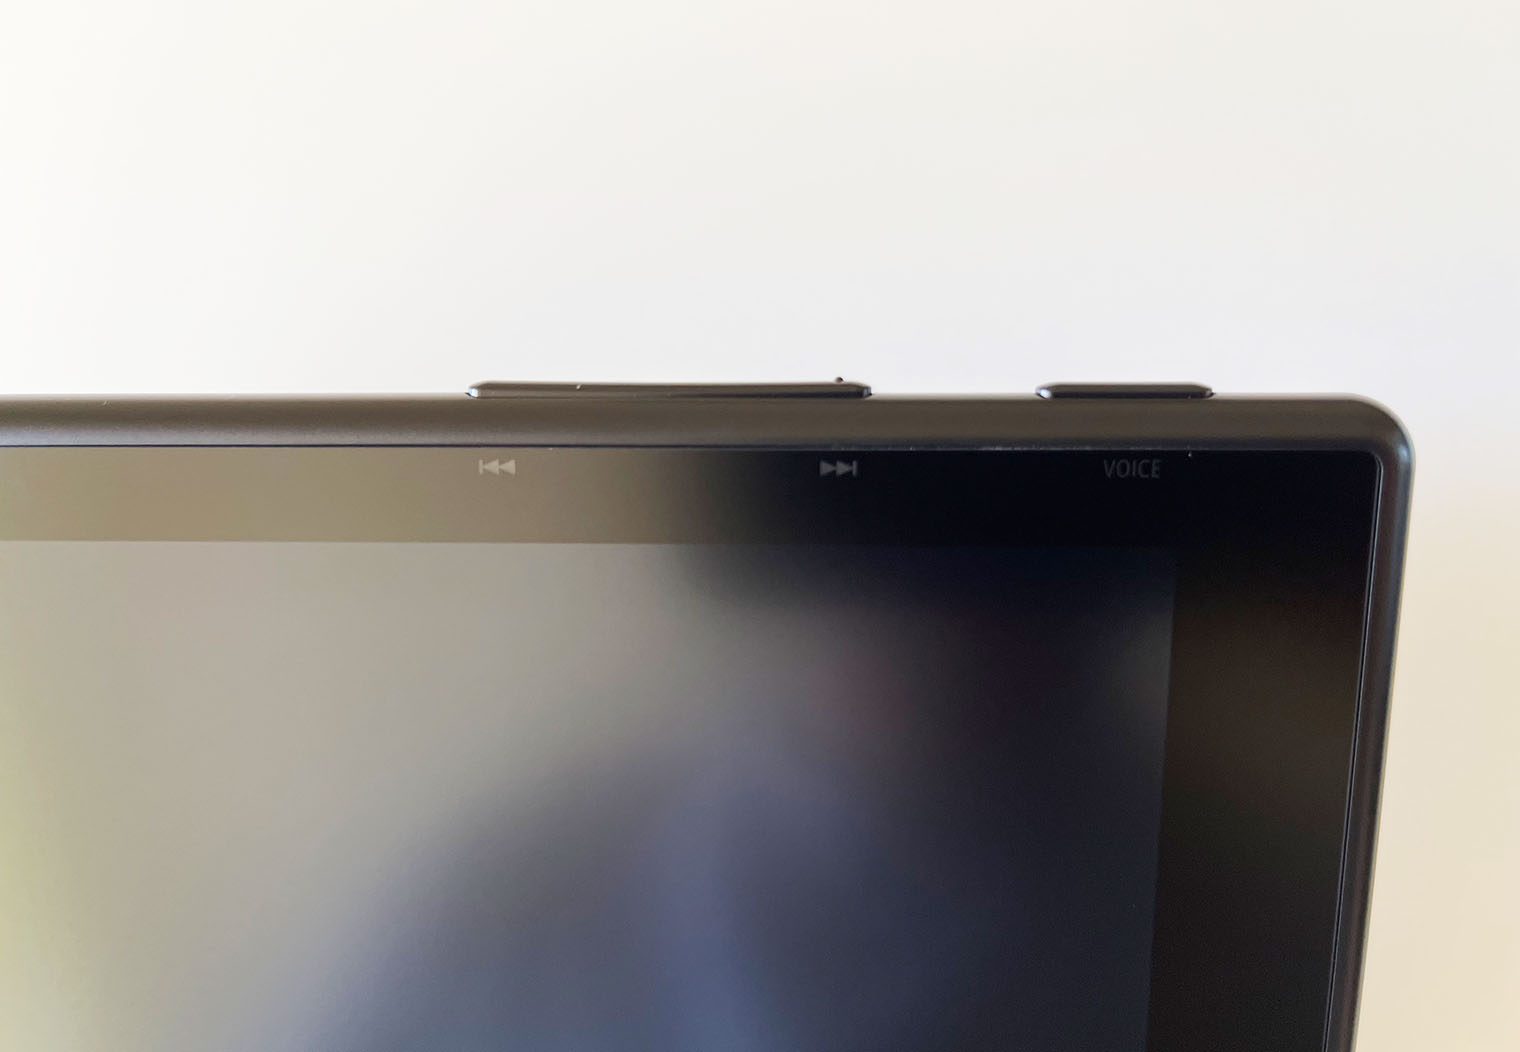
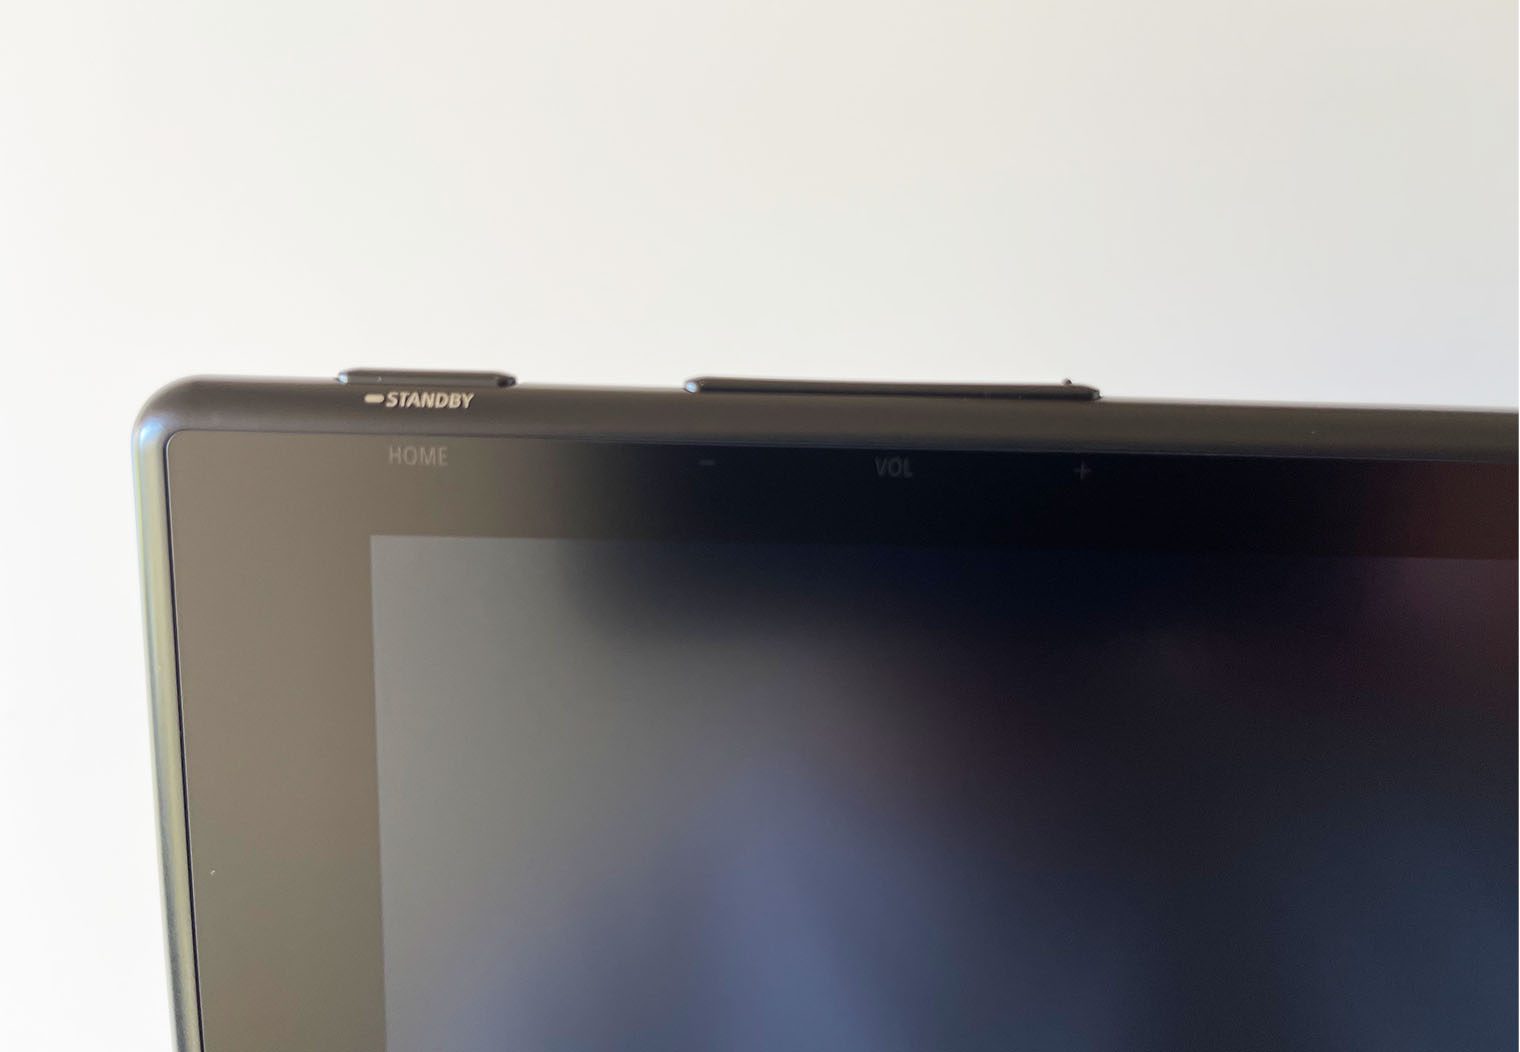
Let's talk about buttons. The first thing that's worth noticing is in the pictures above is the control buttons and their placement on the unit. Located on the bottom of the screen you will see two lines on the outer edges. These lines indicate touch buttons that can be customized in the settings to control a variety of options. I'll detail this more in the customization section below. Then, on the very top of the screen, you'll find all of your typical push buttons. Things like volume, power/stb, voice activation and next/prev. On other oversized units from Sony, I complained about the button location and the inability to change the white backlit button color. I actually like the placement much better on the top of the unit where they're hidden. It makes the screen look much more sleek and modern than other models like the AX8100. And the touch buttons on the bottom are a really nice touch, especially since you can modify what they control in the settings.
Resistive vs Capacitive Touchscreens
For those who might not know what a resistive or capacitive touchscreen is, here's a quick overview. Per wikipedia, a resistive touchscreen is a touch-sensitive computer display composed of two flexible sheets coated with a resistive material and separated by an air gap or microdots. So, when you touch the AX8100's screen, you can somewhat feel the flexible sheets as you push down. In comparison, when you touch your iPhone's screen is like touching a hard piece of glass.
One of the benefits of a resistive touchscreen is that any object that touches it – nails, pens, hands with gloves, etc – will trigger the touchscreen. It's the easiest, most universal type of screen between the two which makes it (in reality) more ideal for the automotive use case. The downside is that the layers of flexible sheets that enable the ‘touch' can change the way that the screen looks and the quality of the image.
On the flipside you have capacitive touchscreens. And the easiest way to describe them is to reference your iPhone or smartphone. iPhones have capacitive touchscreens, which use an electrical charge to detect touch and movement on the screen. Most folks who own an iPhone know by now that not every surface will trigger the phone's touchscreen. That's because you have to touch it with something that's conductive for it to work. Nails, pen tips, etc aren't conductive so they won't work.
What's nice about a resistive touchscreen is that it registers touch from anything. For example if it was cold out and you were still wearing gloves until your car warmed up, you'd still be able to use the head unit to it's fullest. Again, more ideal from a user-friendly perspective but capacitive will give you a higher quality image at the end of the day.
Anti-Glare
Anti-glare features are a little controversial. On one hand, they help with glare (obviously) when you're driving and you have that perfect angle of light entering your window making the contents of the screen completely illegible. On the other hand, they also impede the clarity of the screen.
Per Sony, “Unlike a conventional display, the LCD is bonded directly to the protective glass touch layer with a transparent adhesive. The result is an extremely precise touch experience along with enhanced contrast and visual performance.” They don't really give much more clarity into what actually makes the screen Anti-Glare.
Looking at the screen, I can say it definitely does make a difference but it's not ‘Glare Free' by any means. All this feature really does is cut out a portion of the scenarios where you can't see the screen in glare. It definitely works, but you also notice a little difference in the clarity of the screen when you aren't worrying about glare. It has a very slight haze to the screen. In reality though, it is barely noticeable when the screen is actually lit and has little impact to the clarity of the image.
Four Way Adjustable Mount
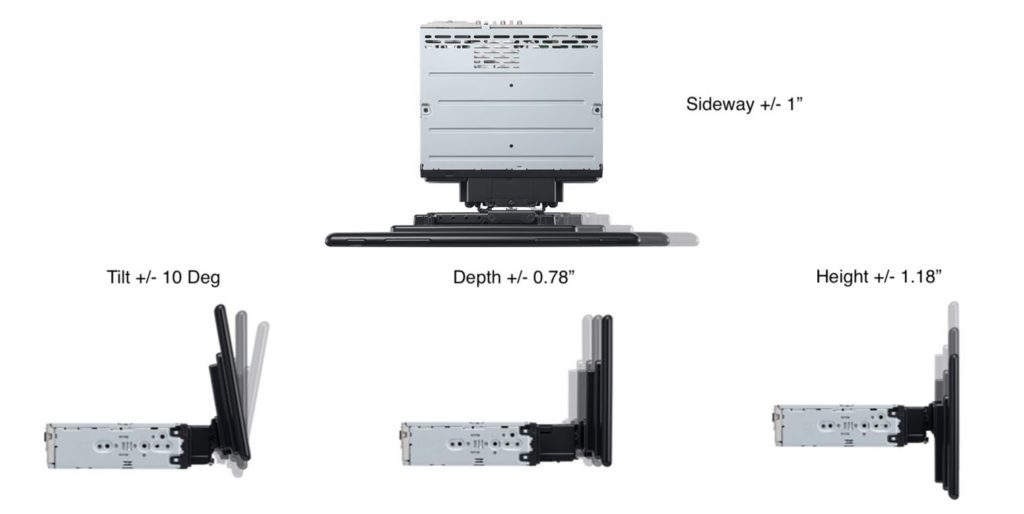
Since the screen is so big, it really needs a wide variety of adjustments to fit properly on as many cars as possible. Sony introduced the three-way mounting on the XAV-AX8000 a couple years back, and they extended this tech to the 9500ES as well with the addition of one new axis – sideway adjustment. After working and installing the AX8000 and AX8100 in different vehicles of varying dash sizes and configurations I can say that this mounting system is very effective and provides ample adjustments to make the screen fit on your dash exactly how you want it. The one thing that I would have liked to see from this adjustment mechanisms though is the ability to pull it closer to the dash. At its closest, it's still a couple inches away from the dash.
But overall, the adjustments will give you the ability to put the screen where you want it so that you're not covering up buttons or other switches and adjustments that might be on your dash near the screen.
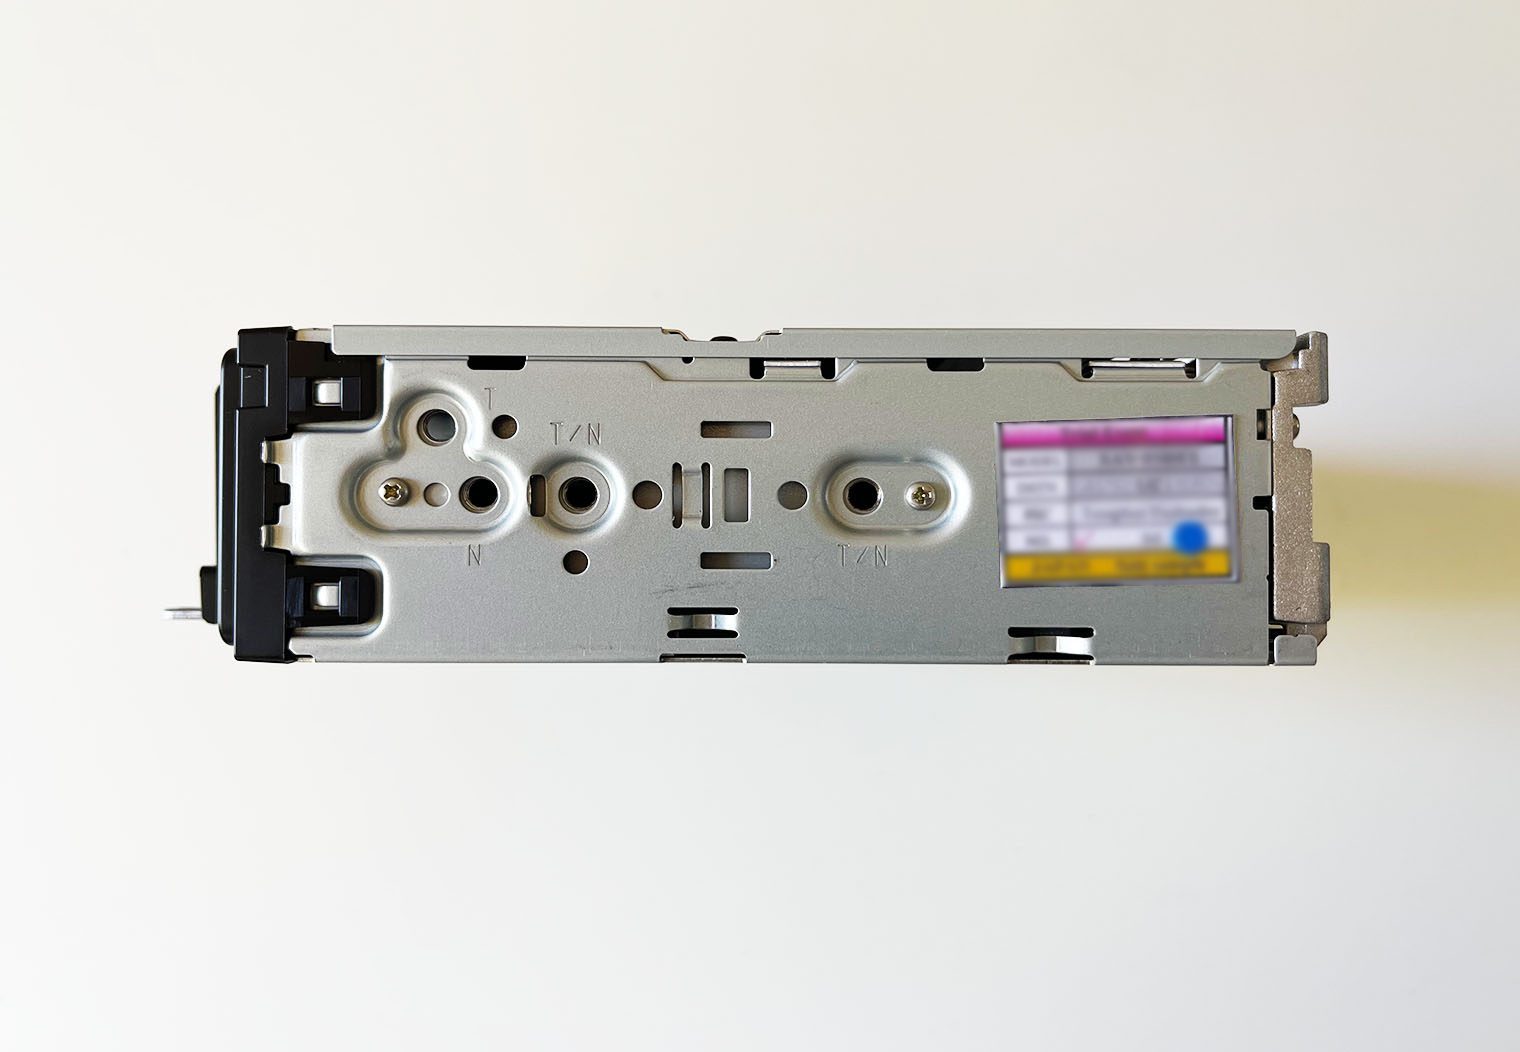
Single DIN Chassis
Even though the XAV-9500ES comes with a massive 10.1″ touchscreen, it hooks into a standard single DIN sized chassis. Double DIN chassis are pretty rare now, and for the most part are only found on the lower quality, lower cost units. The main benefit of a single DIN chassis like the one on this unit is that it pretty much opens up the compatibility to any dash. Unless you have a classic, custom, or other oddball car, this unit is likely to fit in the dash.
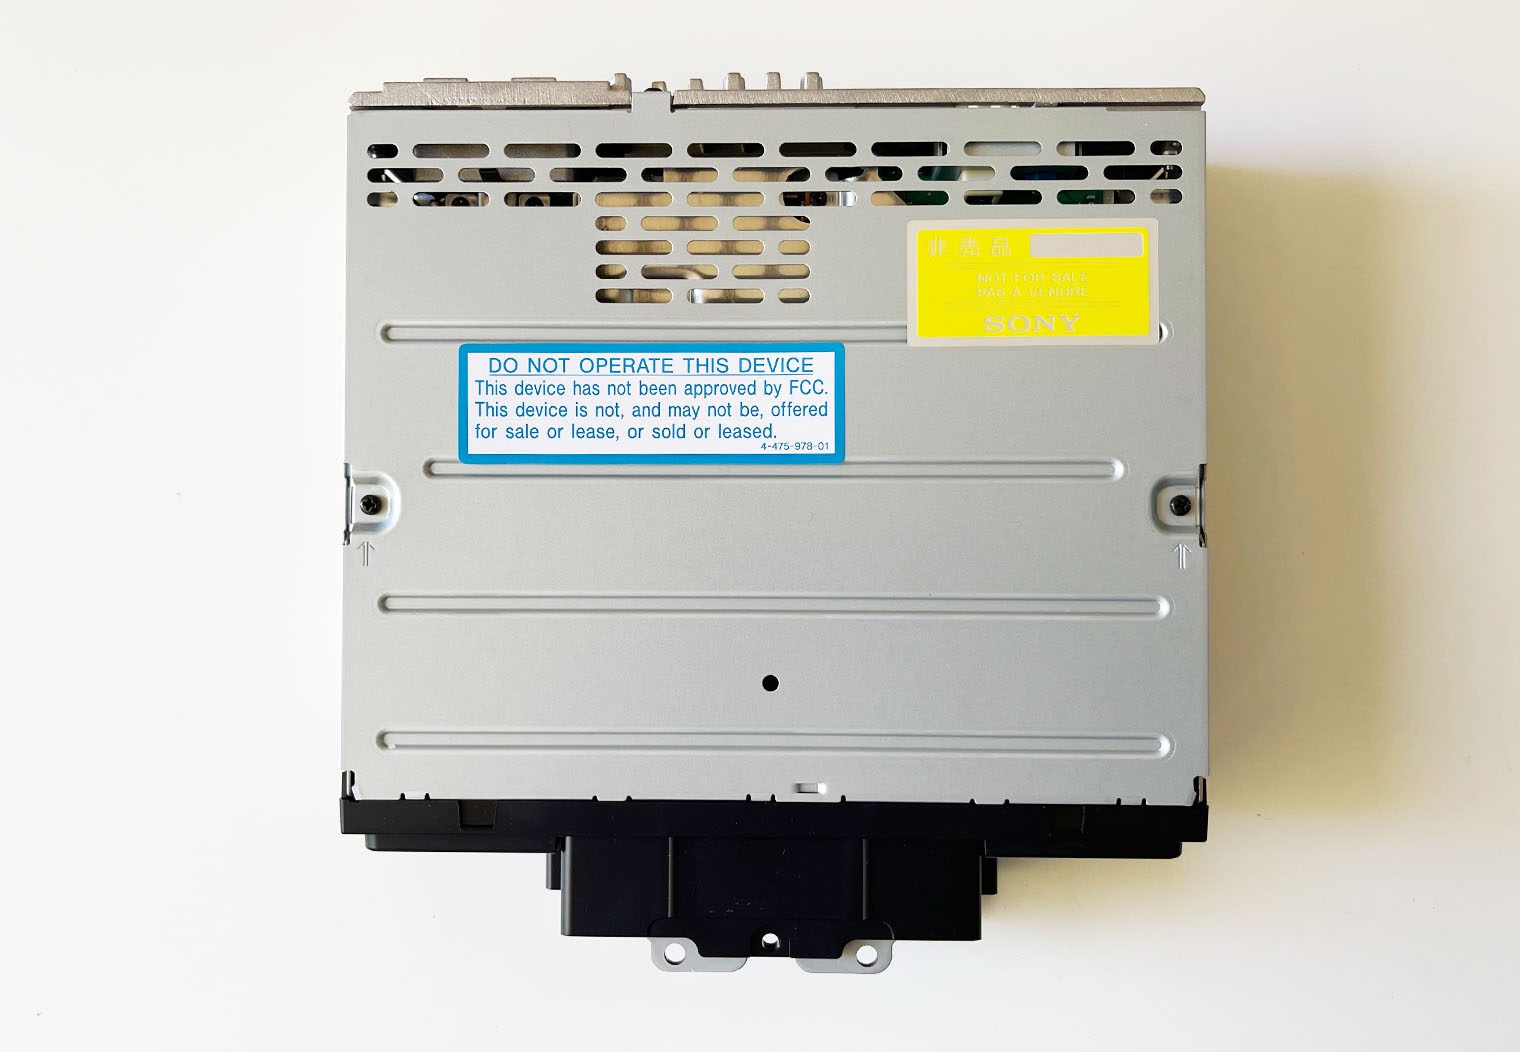
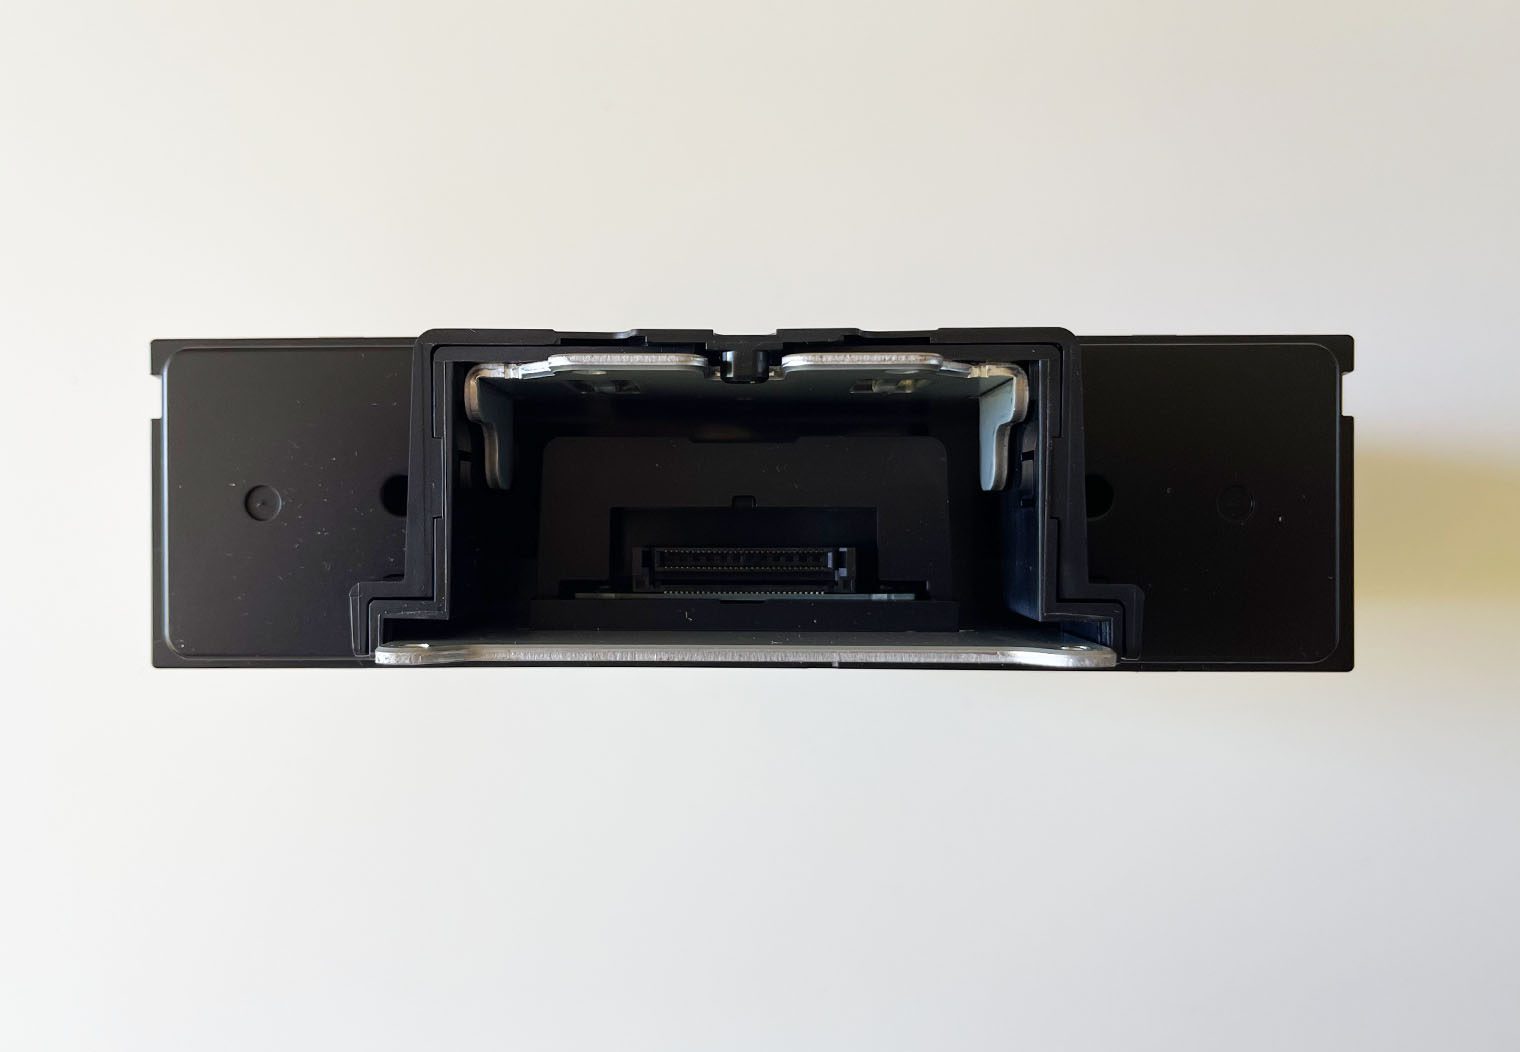
On the front side of the chassis you'll see the mount for the screen. It's a pretty simple connection – simply slide the male end of the screen into the female end of the chassis and use the mounting screws to hold the two together.
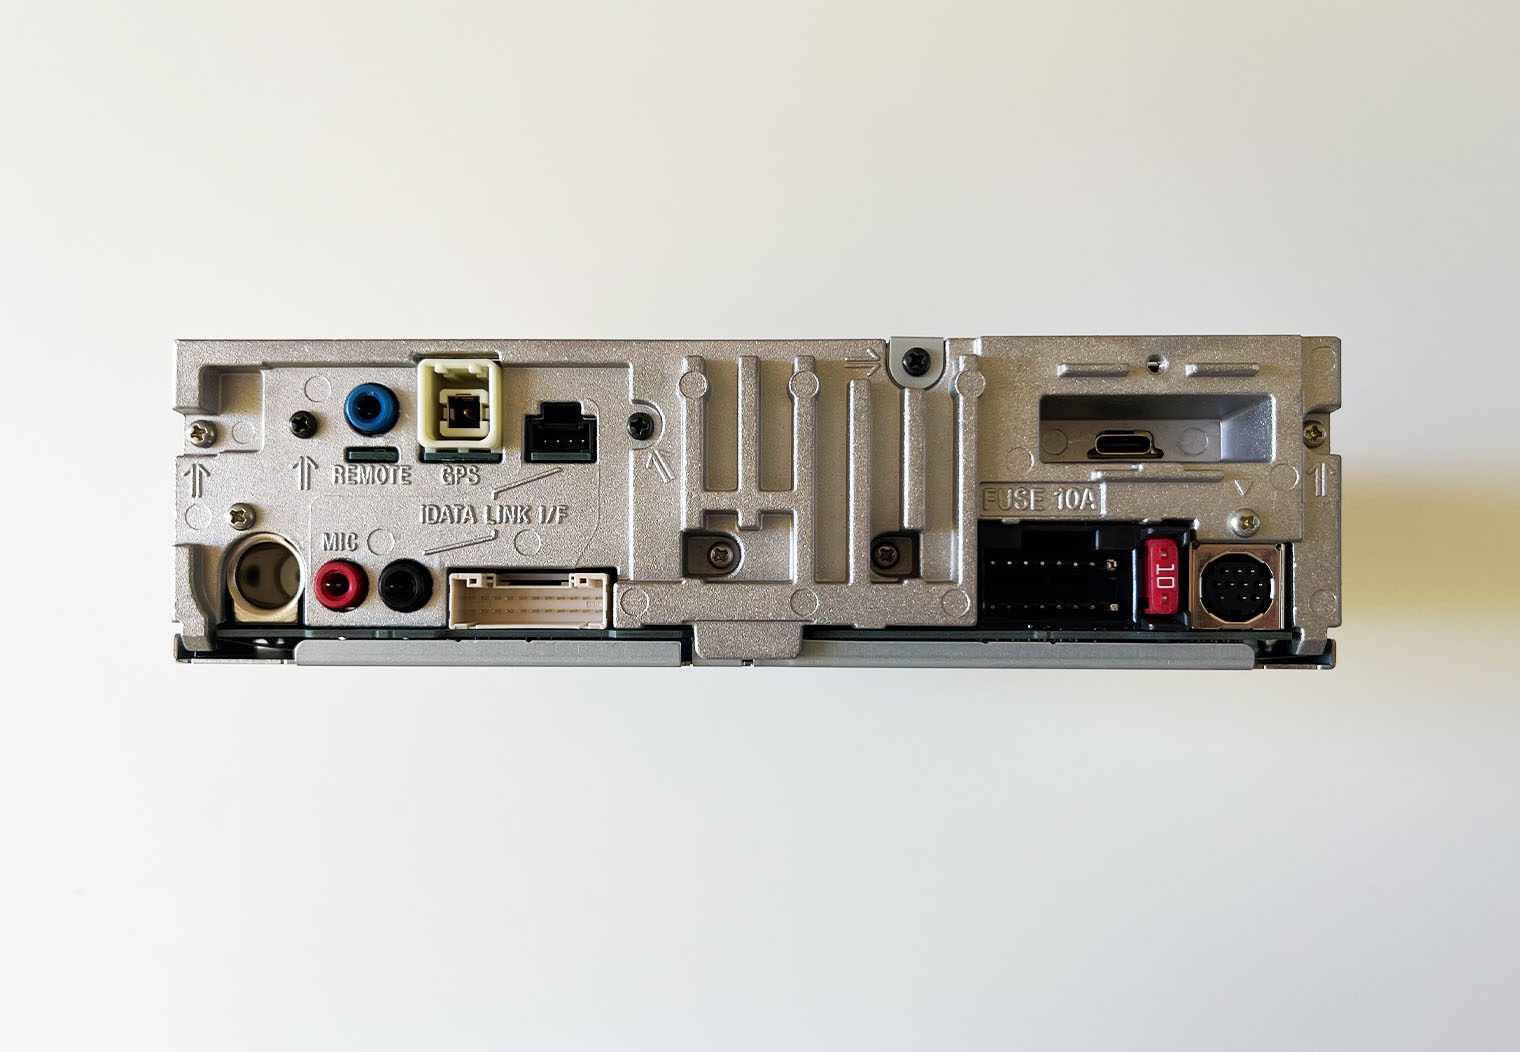
On the rear, you'll see all of the outputs and inputs on the unit. See the specs above for the full list of inputs and outputs. This is one of the first units from Sony that I've seen start to use the RCA harnesses instead of RCAs directly in the back of the unit. They did this (likely) because if you look at the RCA harness itself there's several RCA inputs and outputs – too many to fit on the back of a single din chassis. It makes for a much cleaner looking chassis but the added harness takes up more room behind the unit.
Key Feature Walk Through & Demo
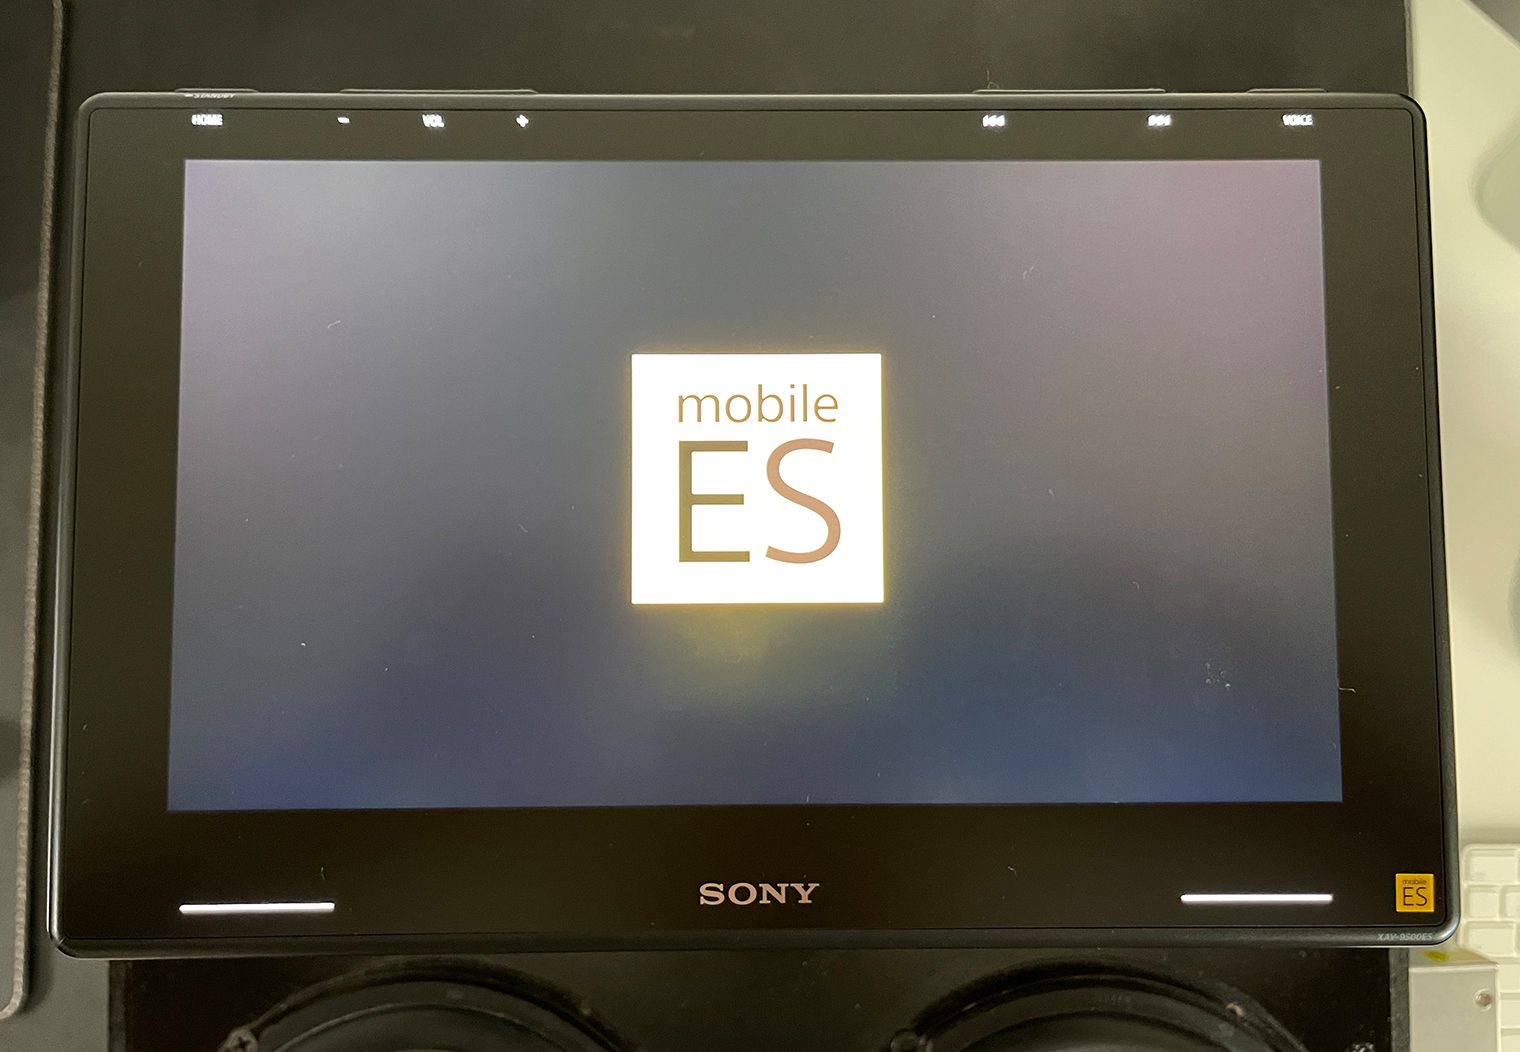

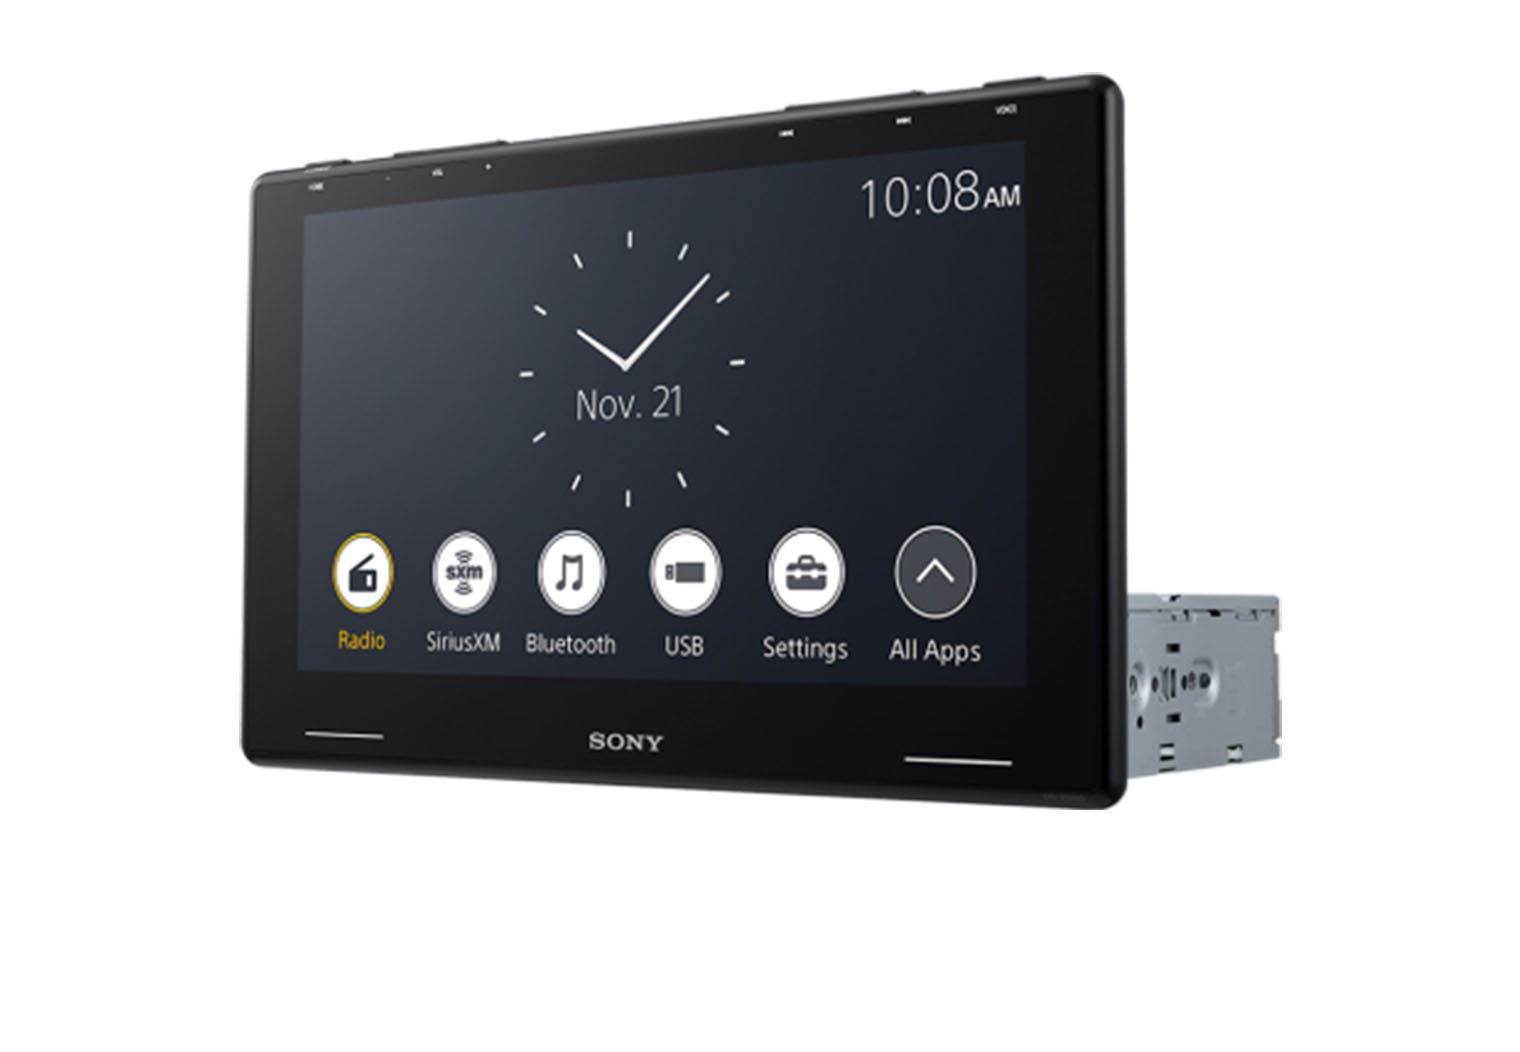
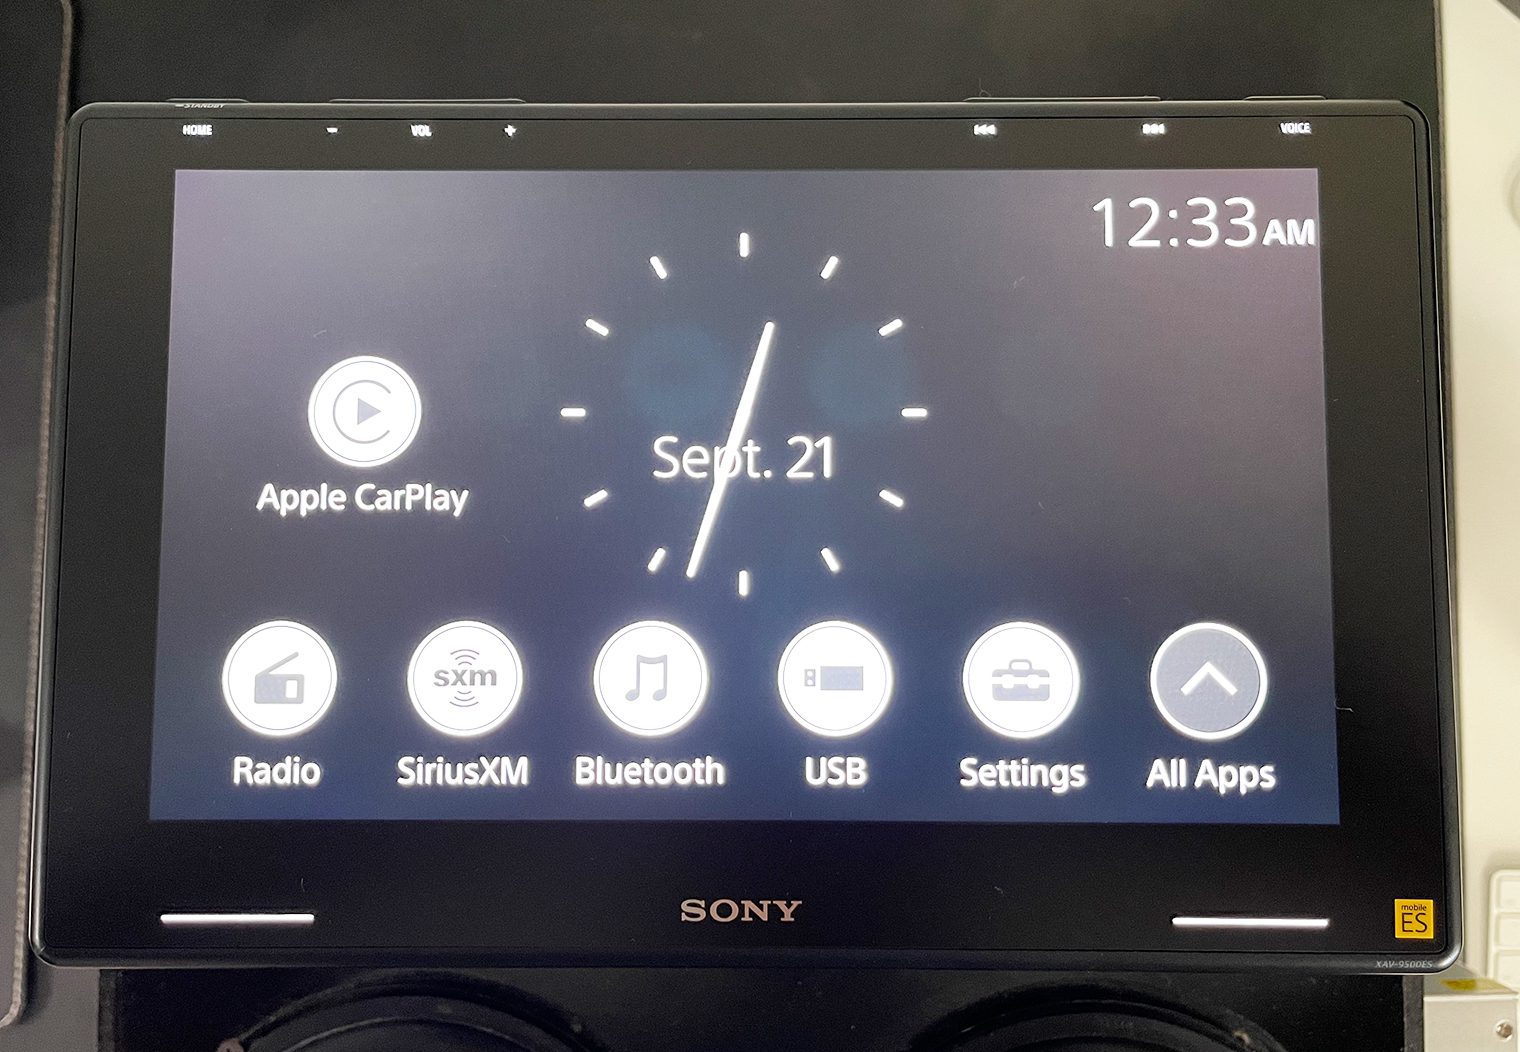
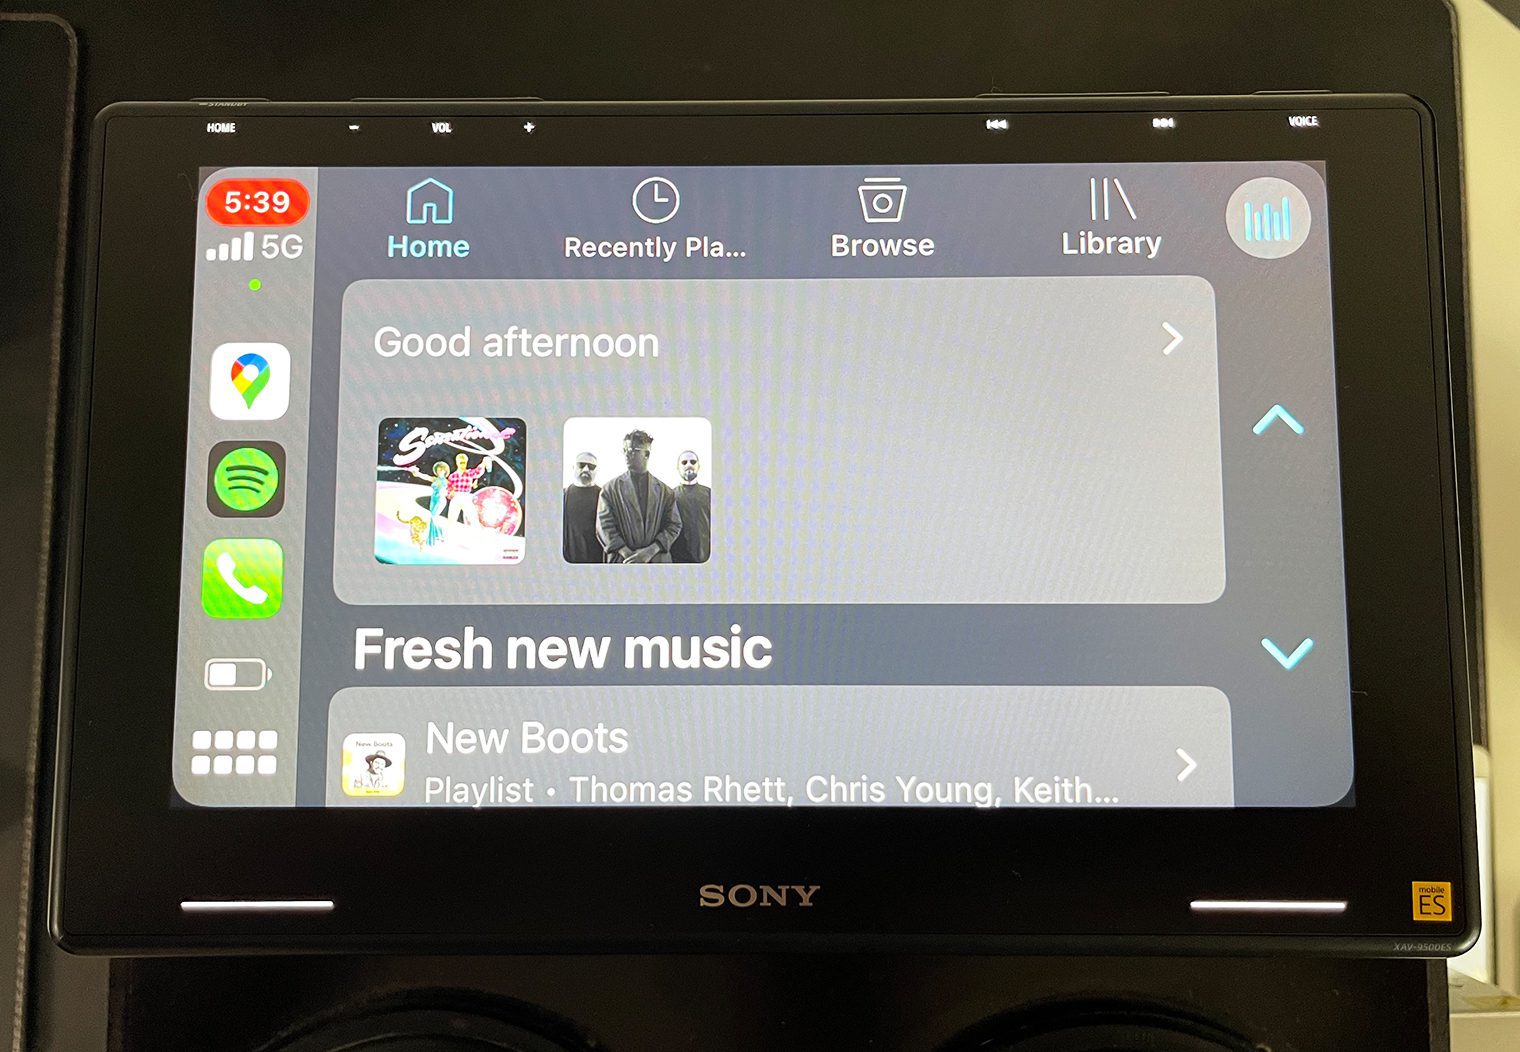
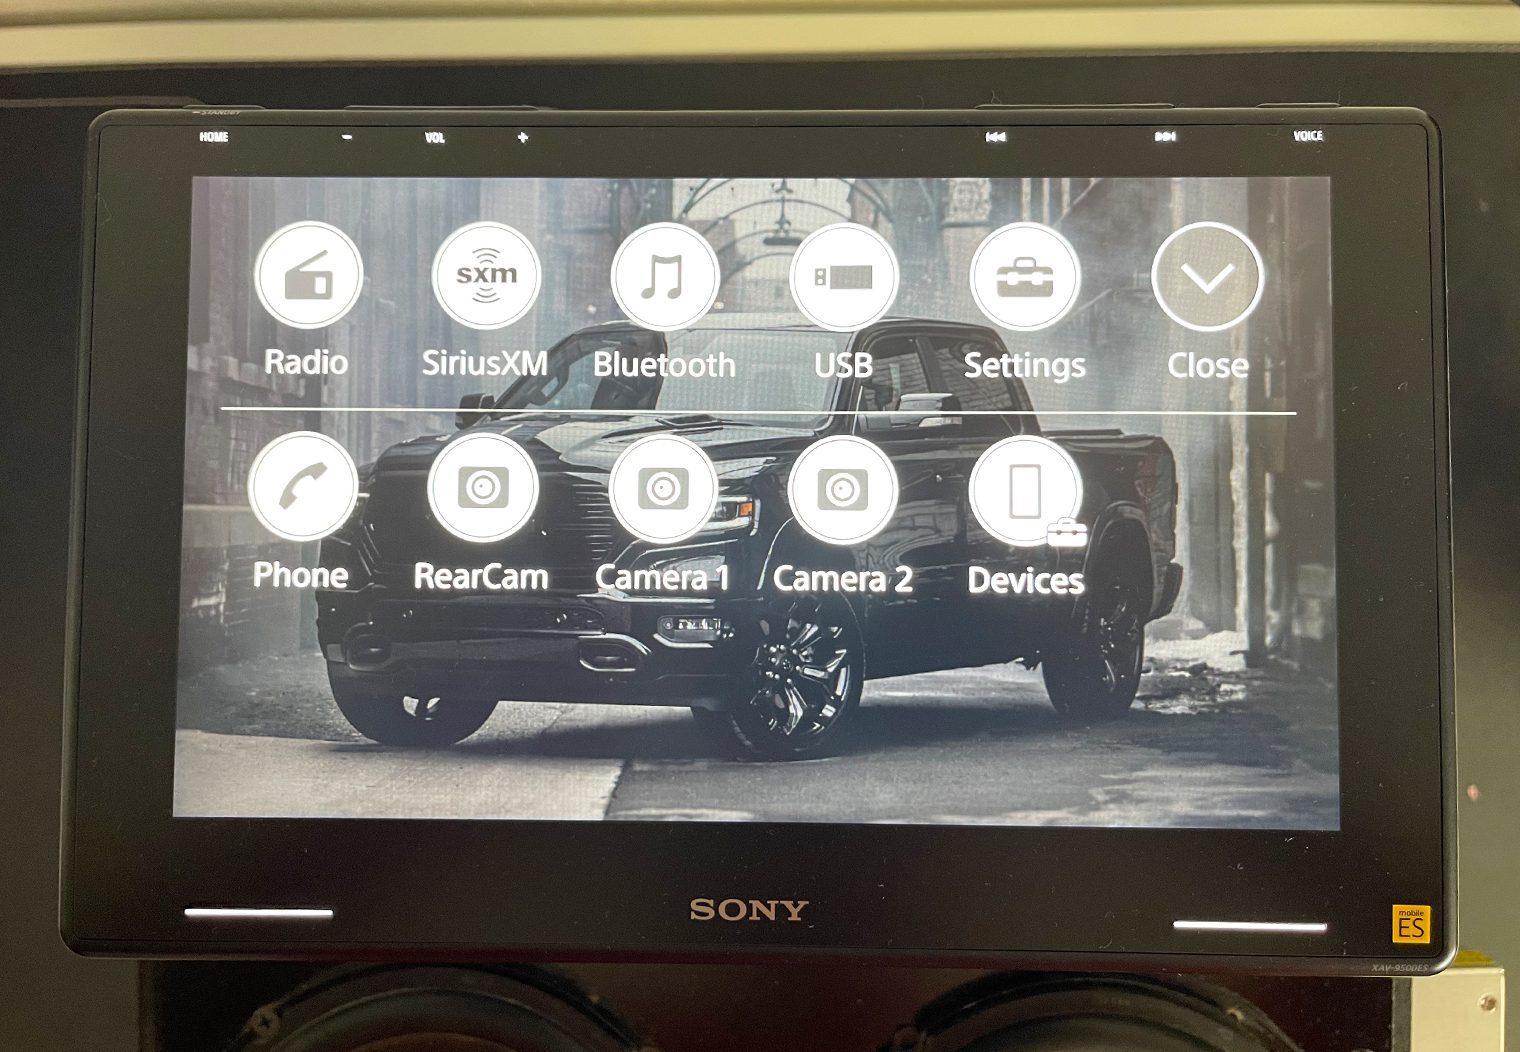
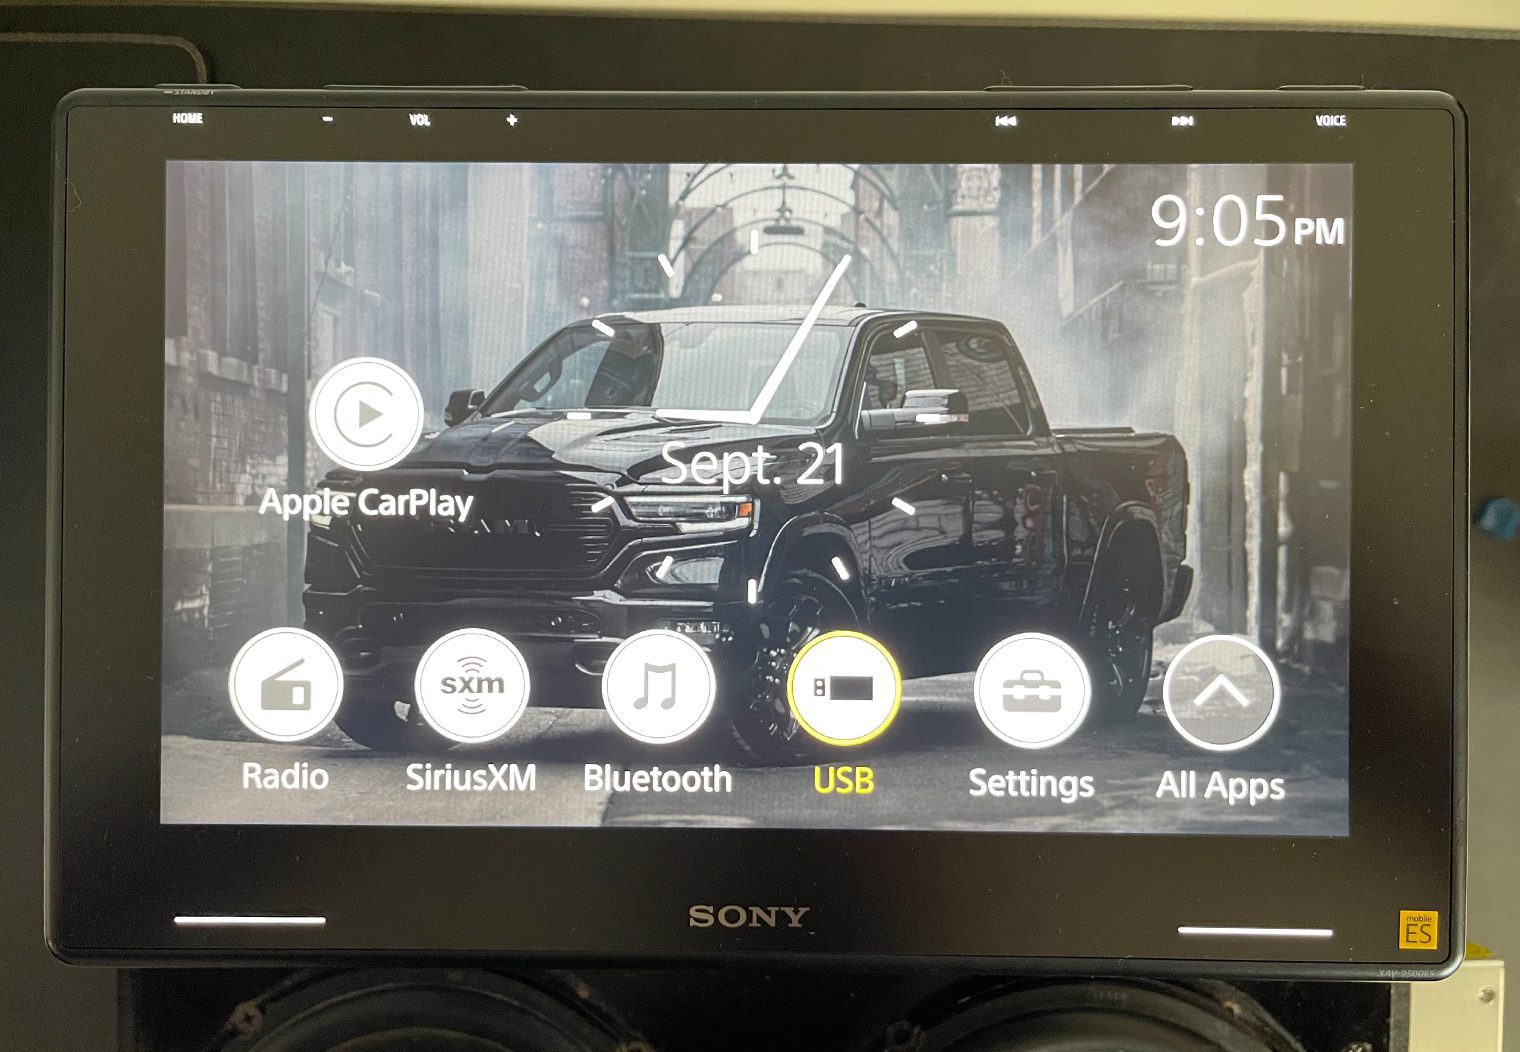
I hooked up the head unit to my demo box and started to run through as many of the key features as I could. The XAV-9500ES has a lot of awesome new and additional features over the XAV-AX8100 and AX5600 from this year. A few less too. The interface is pretty similar to all of their other units as well with the exception of the homescreen. First thing to note is the startup time – it's pretty quick at around 4-5 seconds total. The homescreen design is really elegant and clean, especially once you get the background you want on it.
Let's walk through all of the key features that the unit has.
Smartphone Connectivity
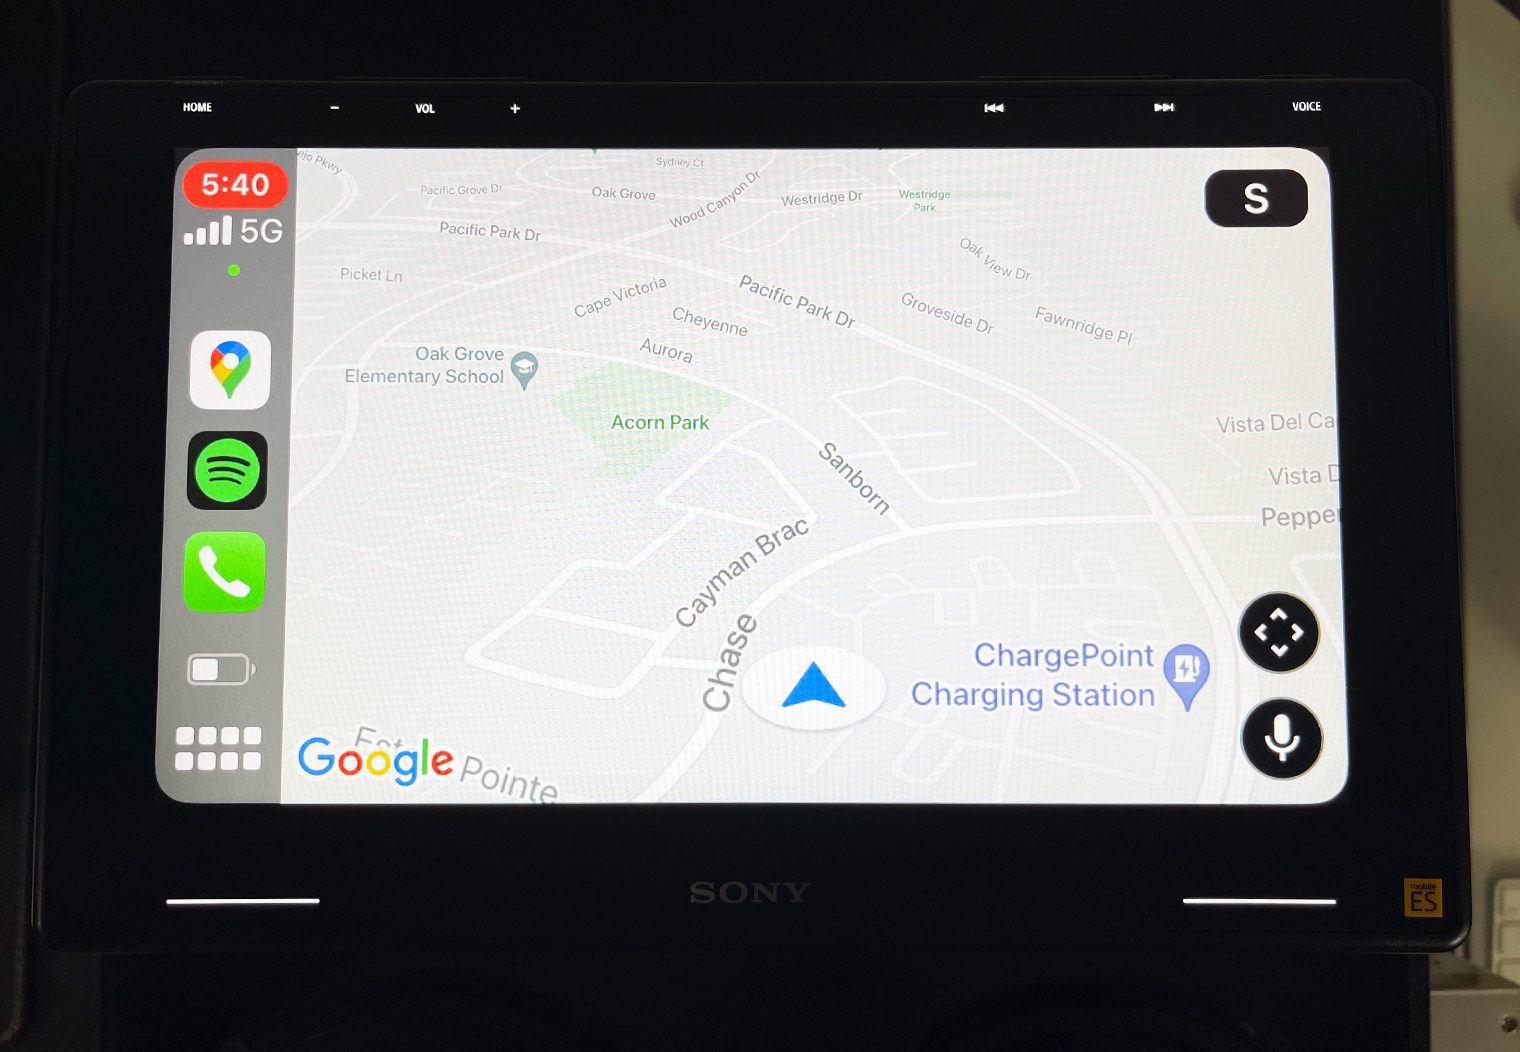
Sony really stepped it up with the smartphone connectivity features on this unit. In particular Wireless Apple CarPlay and Android Auto. This is a game changer. Only the newest vehicles and head units on the market are offering this capability, and it really makes a difference.
Apologies in advance to Android users. I do not have access to an Android device so my demo is limited to CarPlay. You can assume that all of the standard features that come along with Android Auto when you're wired in via USB will be available wirelessly on this unit.
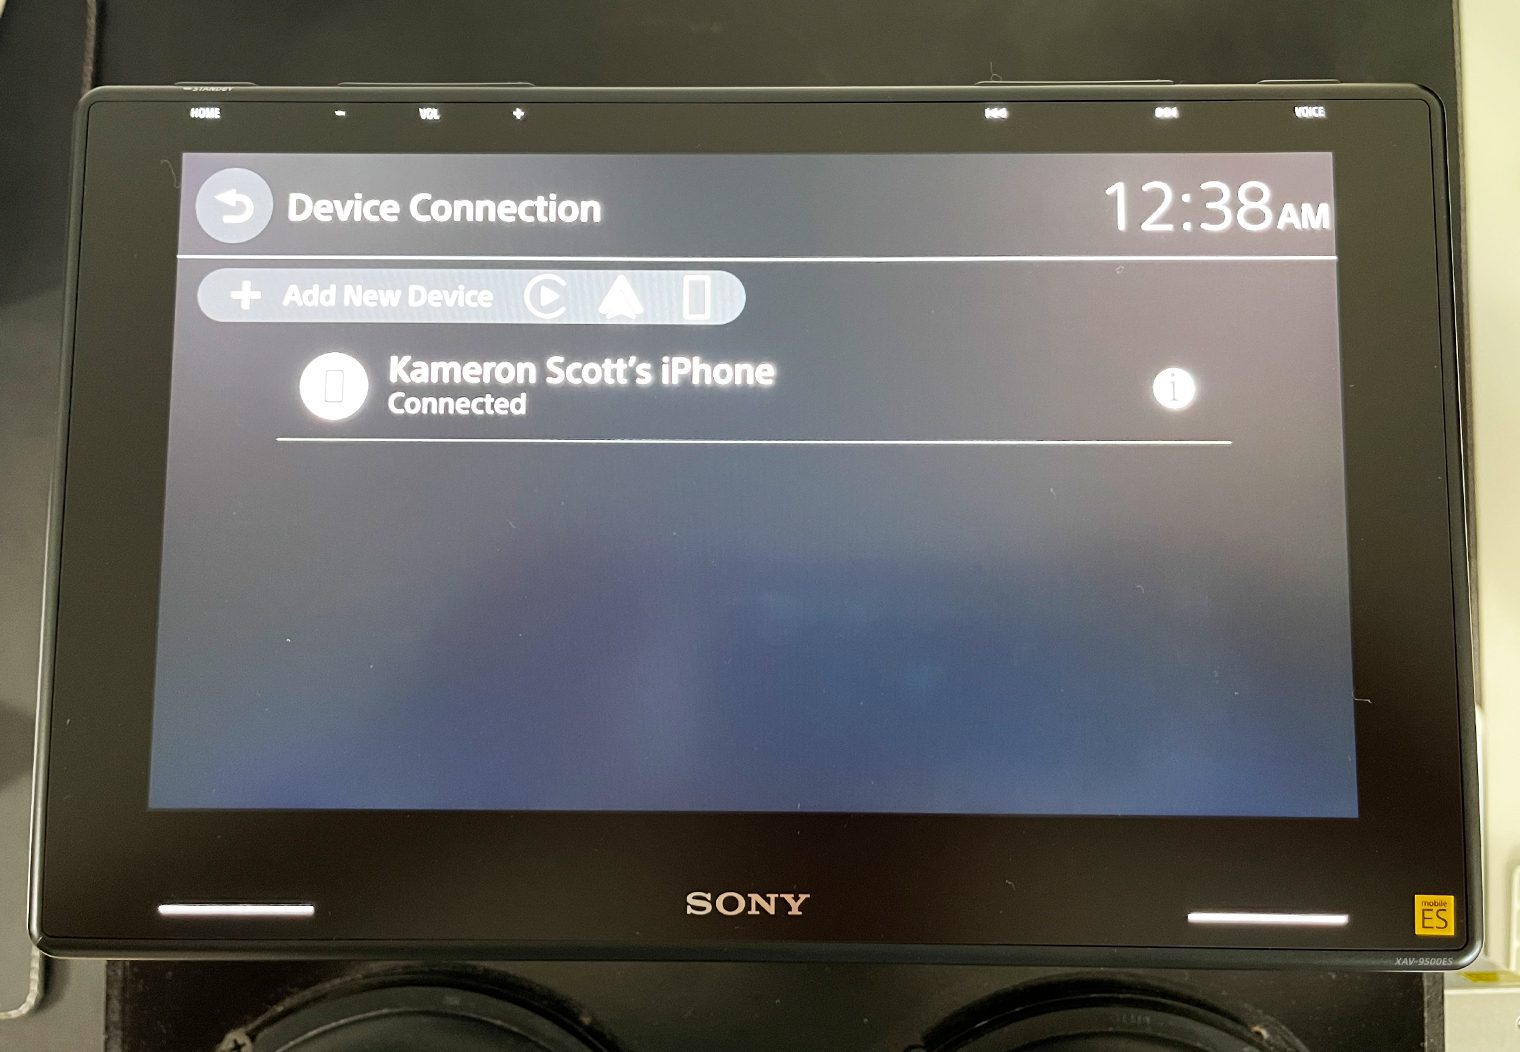
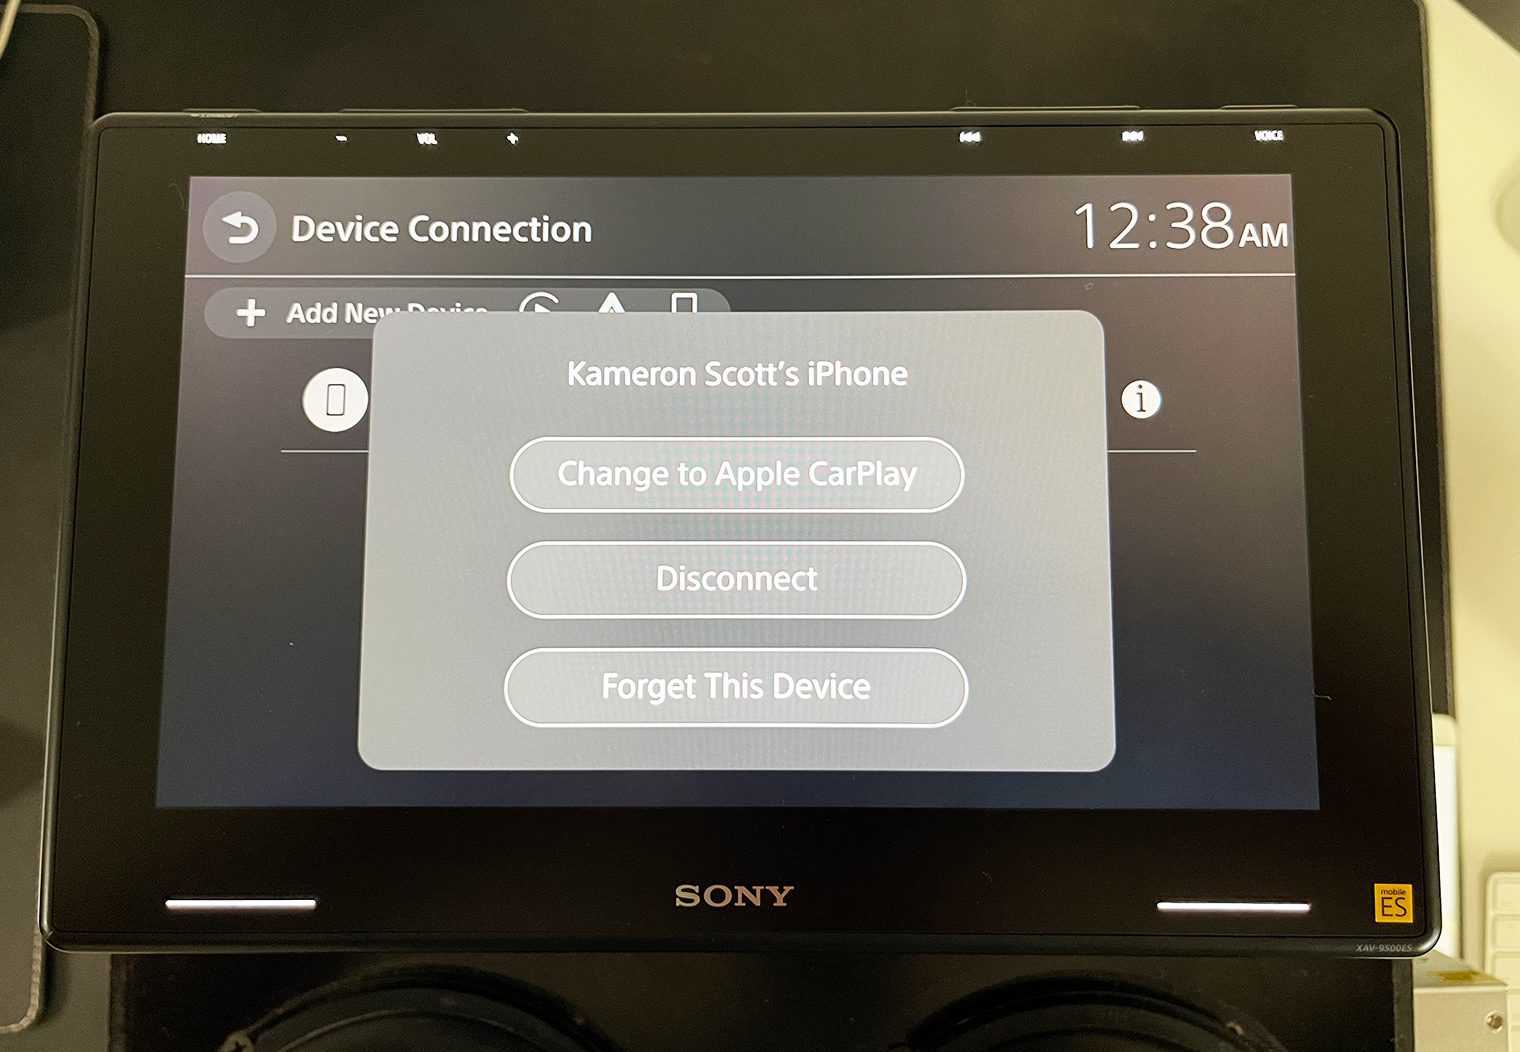
To access Wireless CarPlay or Android Auto, you simply connect your phone to the unit via Bluetooth. It will ask you for permission to switch to Wireless CarPlay and boom. Done. From here on out, it will default to CarPlay or Android Auto and automatically display the CarPlay screen once hooked up.
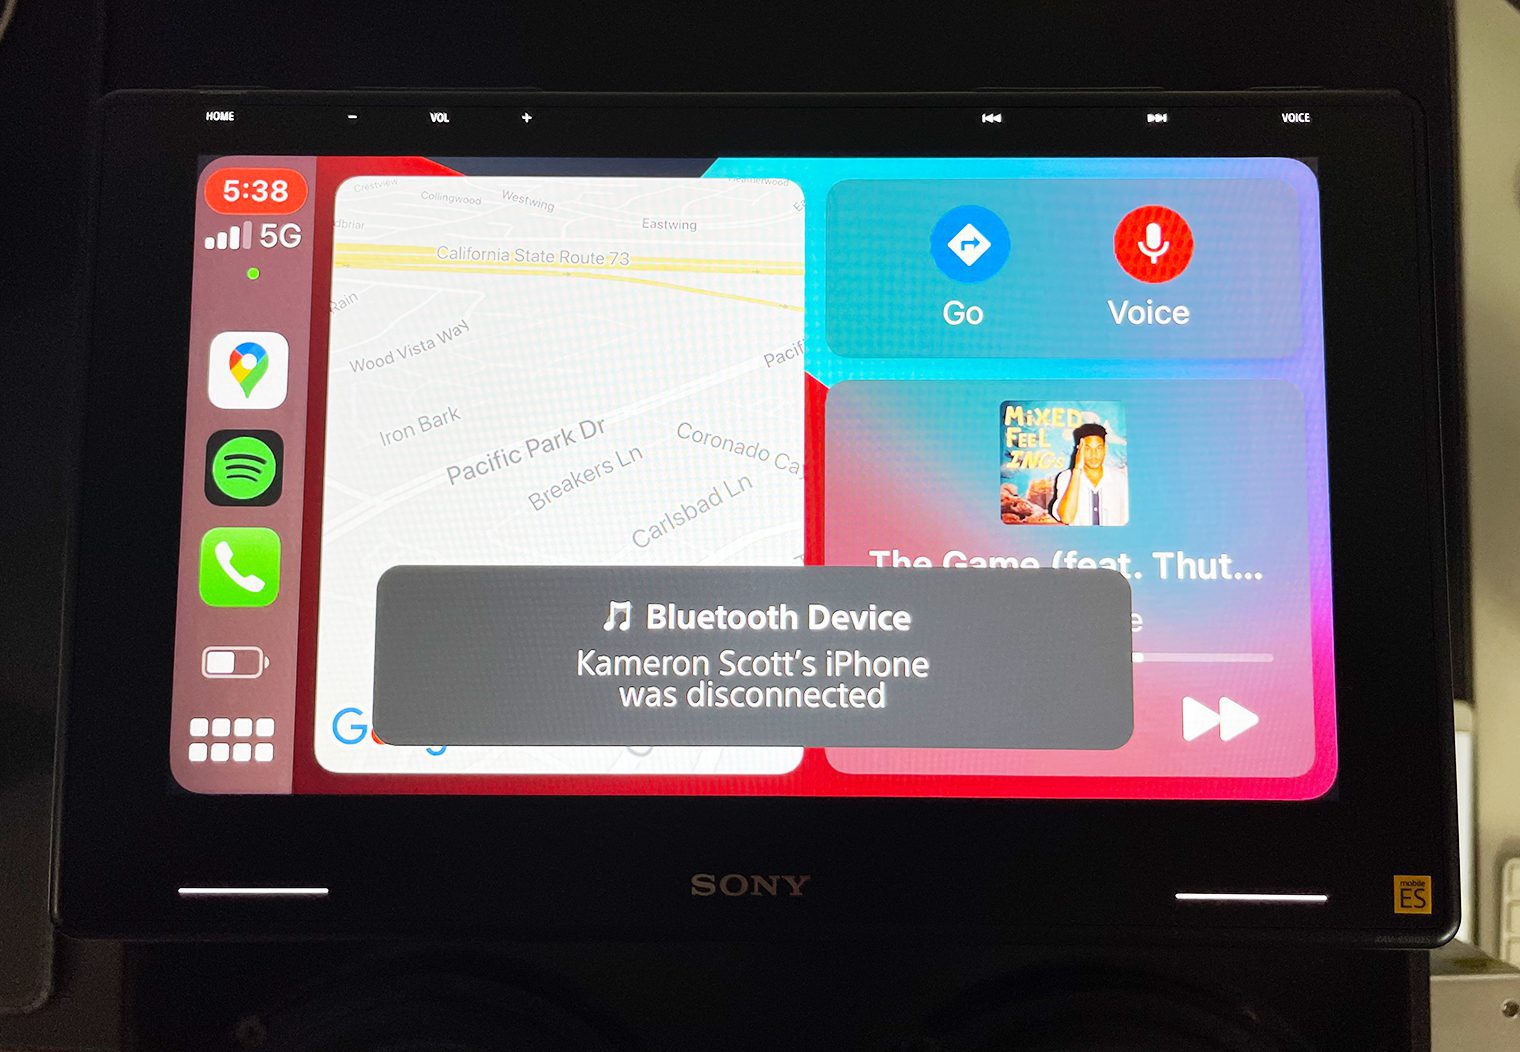
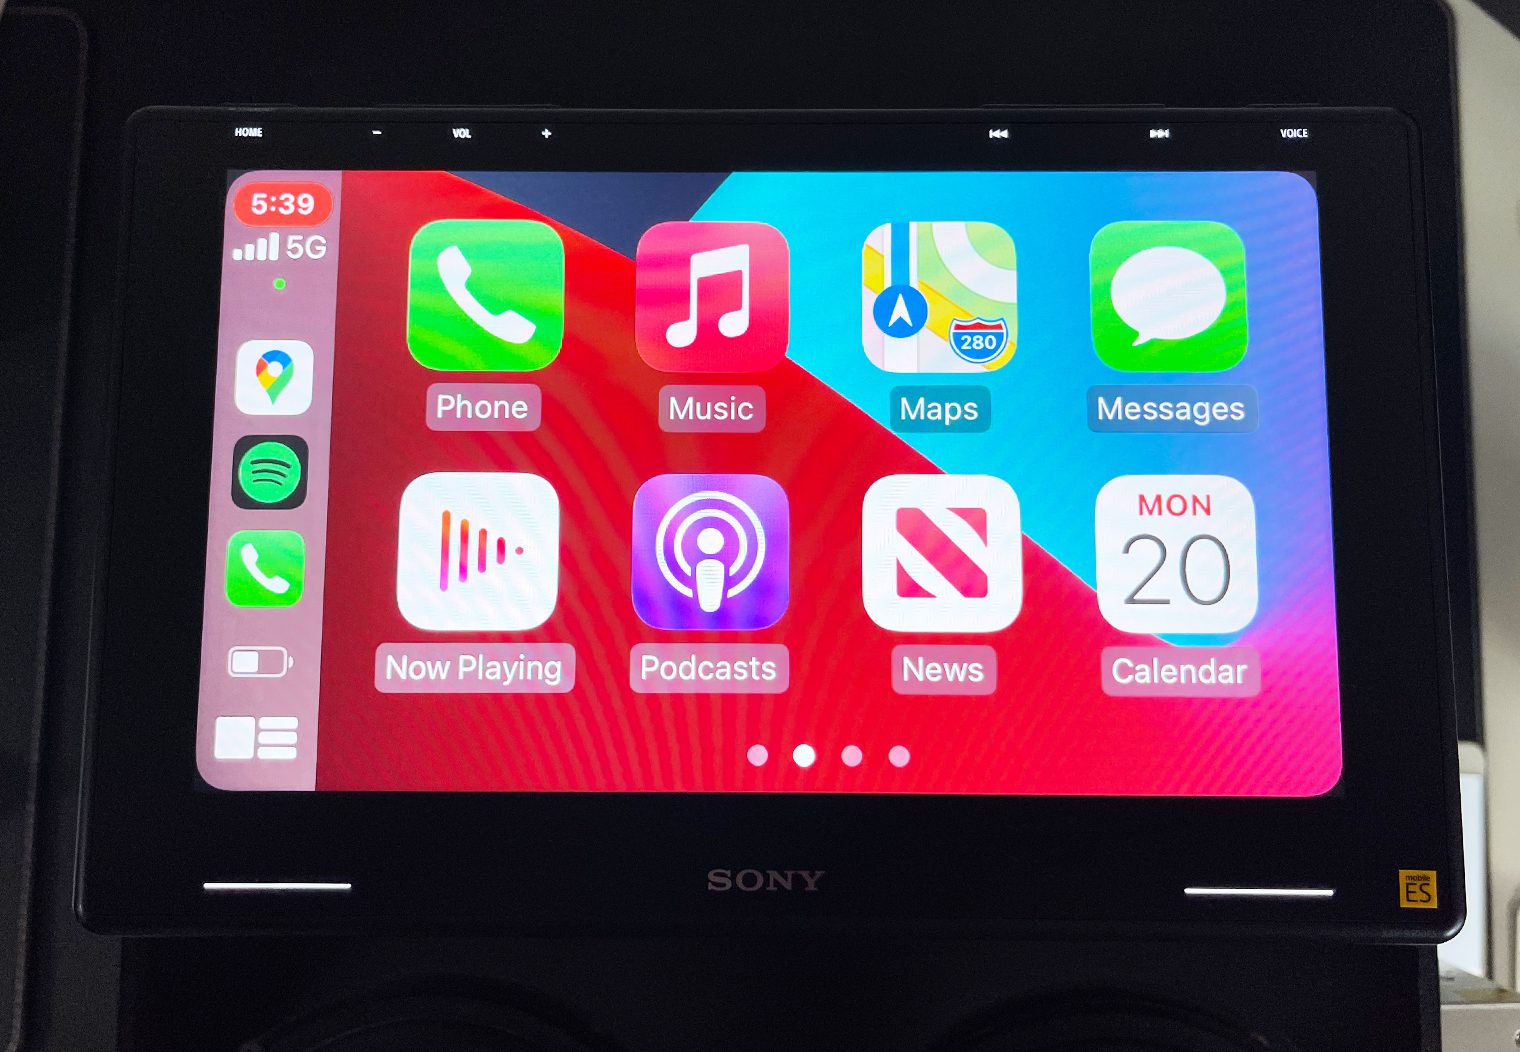
Once you're connected, it's the exact same as if you hooked in using a USB cable, only better because you don't have to pull your phone out of your pocket or purse when you get into the car. If you're looking for more information on what Apple CarPlay is and what it does, be sure to read our Why You Need CarPlay article.
If you don't want to use CarPlay or Android Auto, they give you that option too. In the device settings you can switch to the standard Bluetooth connectivity and take phone calls, stream music and access all of the standard Bluetooth functionality.
USB Connectivity
Like almost every head unit on the market today, you'll be able to connect to the 9500ES via USB. It'll enable you to play music from a music device or a thumb drive and will also enable Apple CarPlay and Android Auto if opt out of wireless. However, there's a couple things to note about the USB on this device:
- It's USB C. So if you have any charging cable or USB thumb drive that isn't USB C that you want to connect to this head unit you'll need an adapter. Even for demo purposes I had to purchase this USB C to USB adapter in order to upload a photo for the custom background (see the section below).
- It doesn't support multimedia and video files. If you want to play video from your USB drive, you'll want to get the XAV-AX8100 or XAV-AX5600 instead.
Audio/Sound Features
The XAV-9500ES was really designed for precise tuning and control over your stereo. Sony has stepped up to the plate and really produced a head unit that has exceptional sound-control functionality that will meet the needs of a high-output and high-performance stereo. Let's take a look at some of the key features this unit has that will let you really tune up your stereo exactly how you want.
14-Band Graphic EQ
This unit features a 14-band graphic equalizer, which is an additional four bands of control over the XAV-AX8100 and AX5600 (which has a 10-band). The more bands that the EQ allows you to adjust, the more accurately you can tune the sound to the music that you love. So having an additional four bands will give you much more control over your music than these previous, comparable units from Sony.
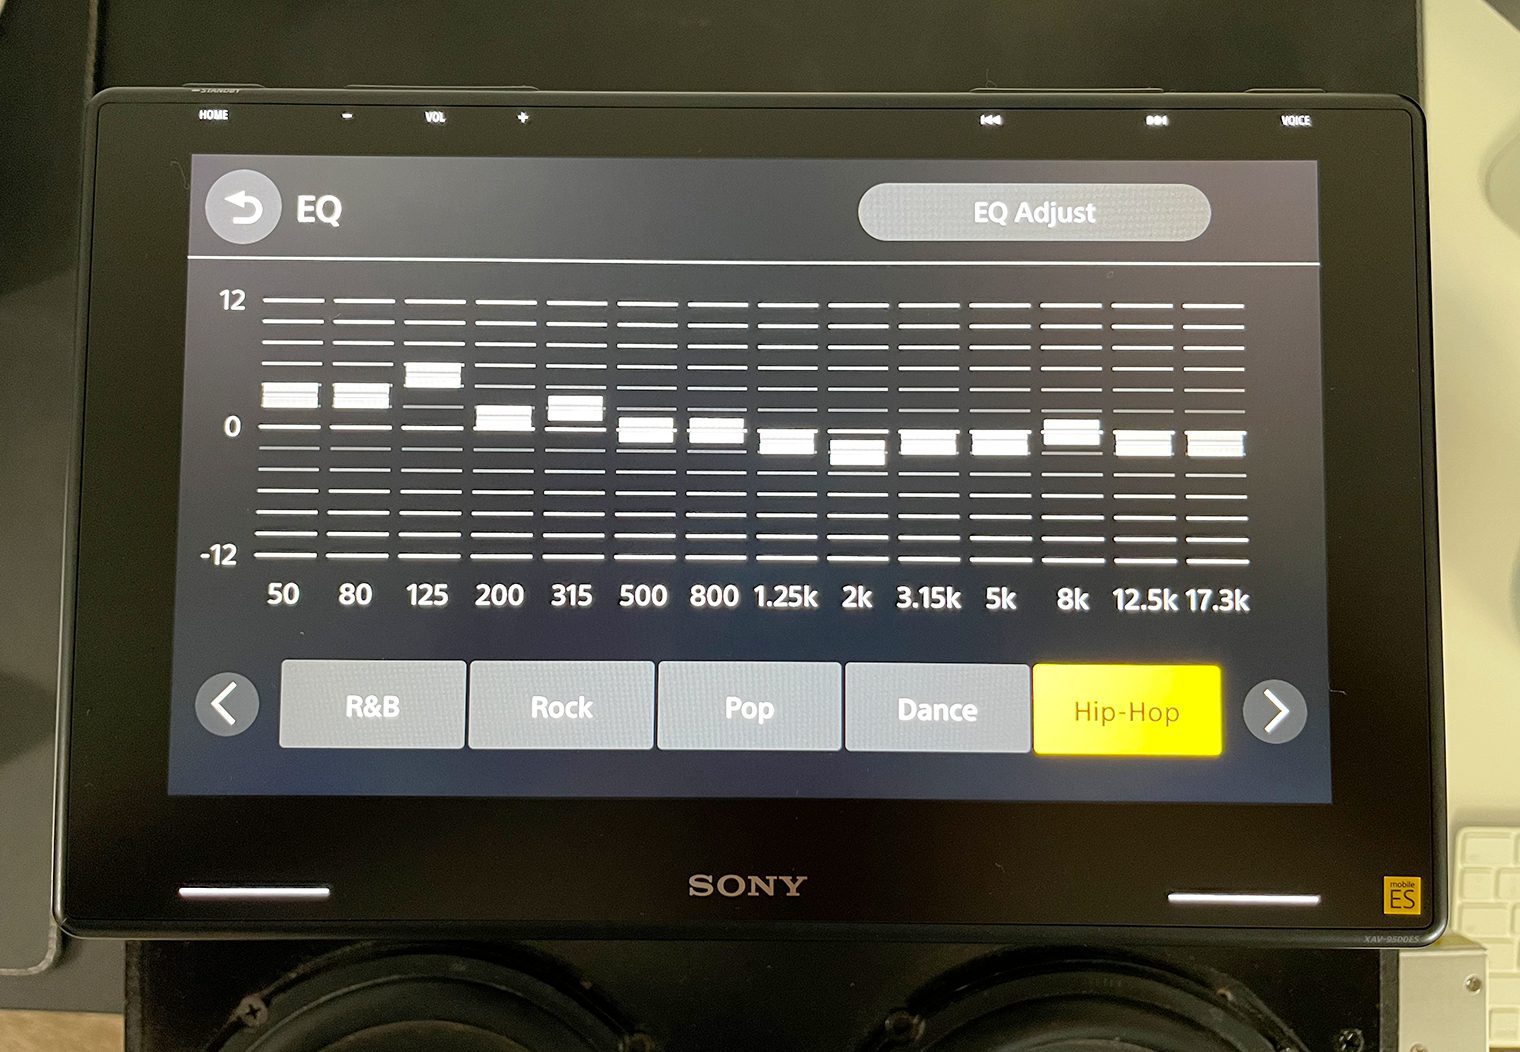
The graphic EQ interface is really intuitive and clean and gives you very easy and accurate control over the different bands of frequencies. Within the interface, you can choose from a variety of presets, including R&B, Rock, Pop, Dance, Hip Hop, Country and many more.
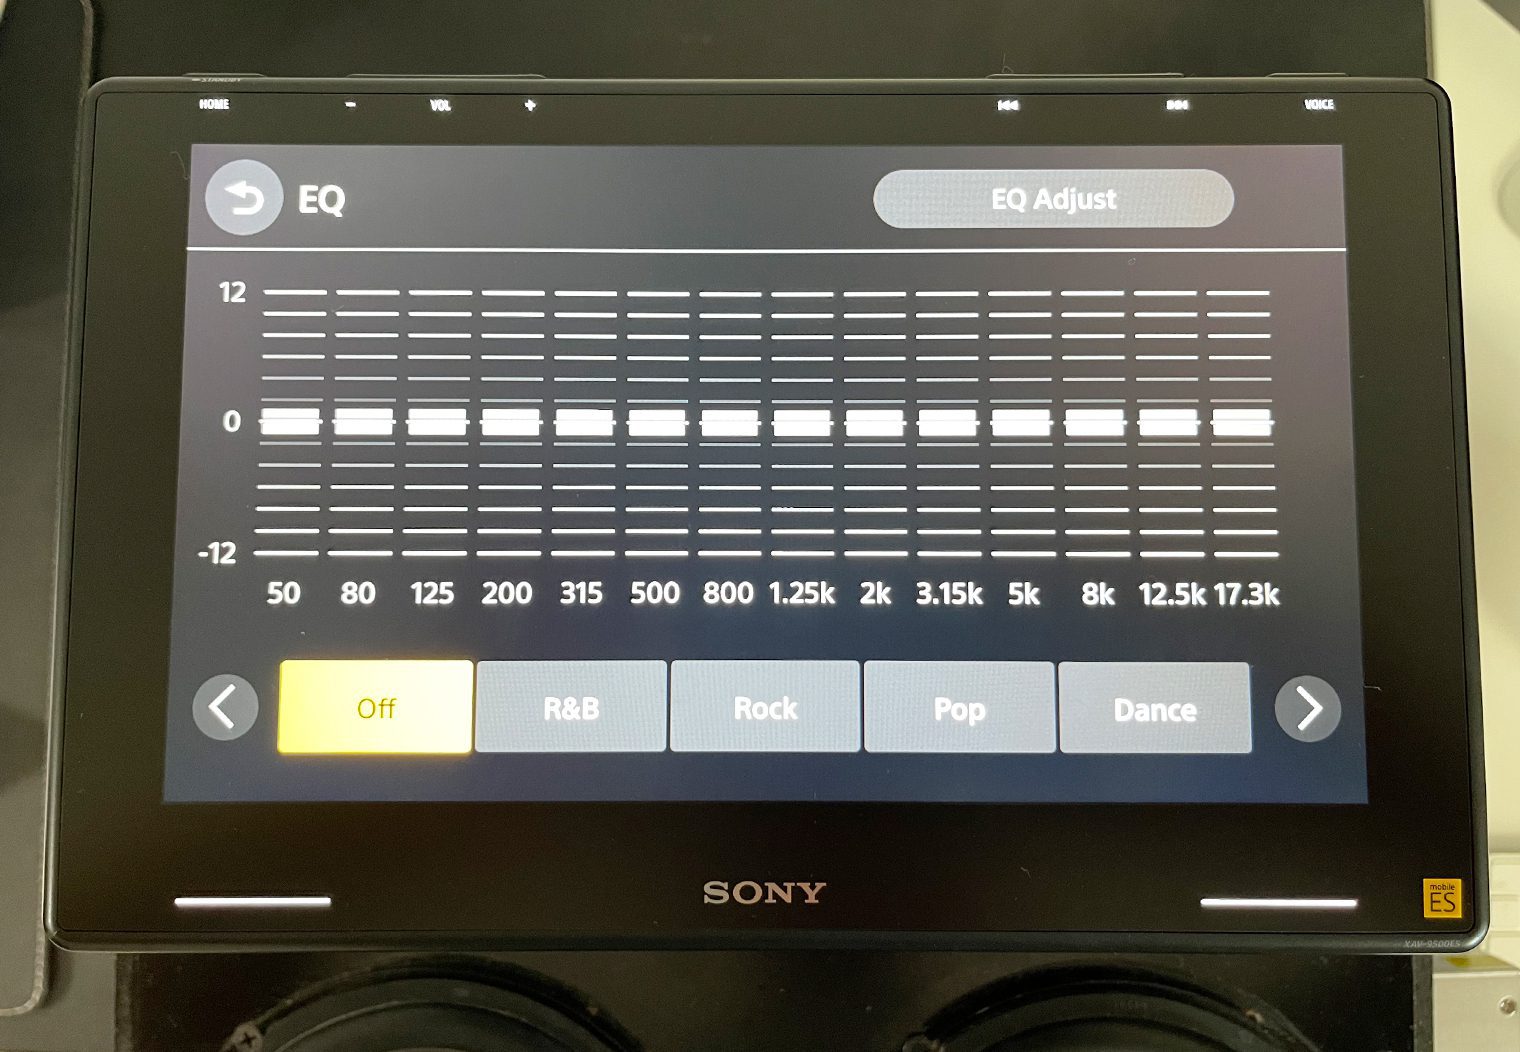
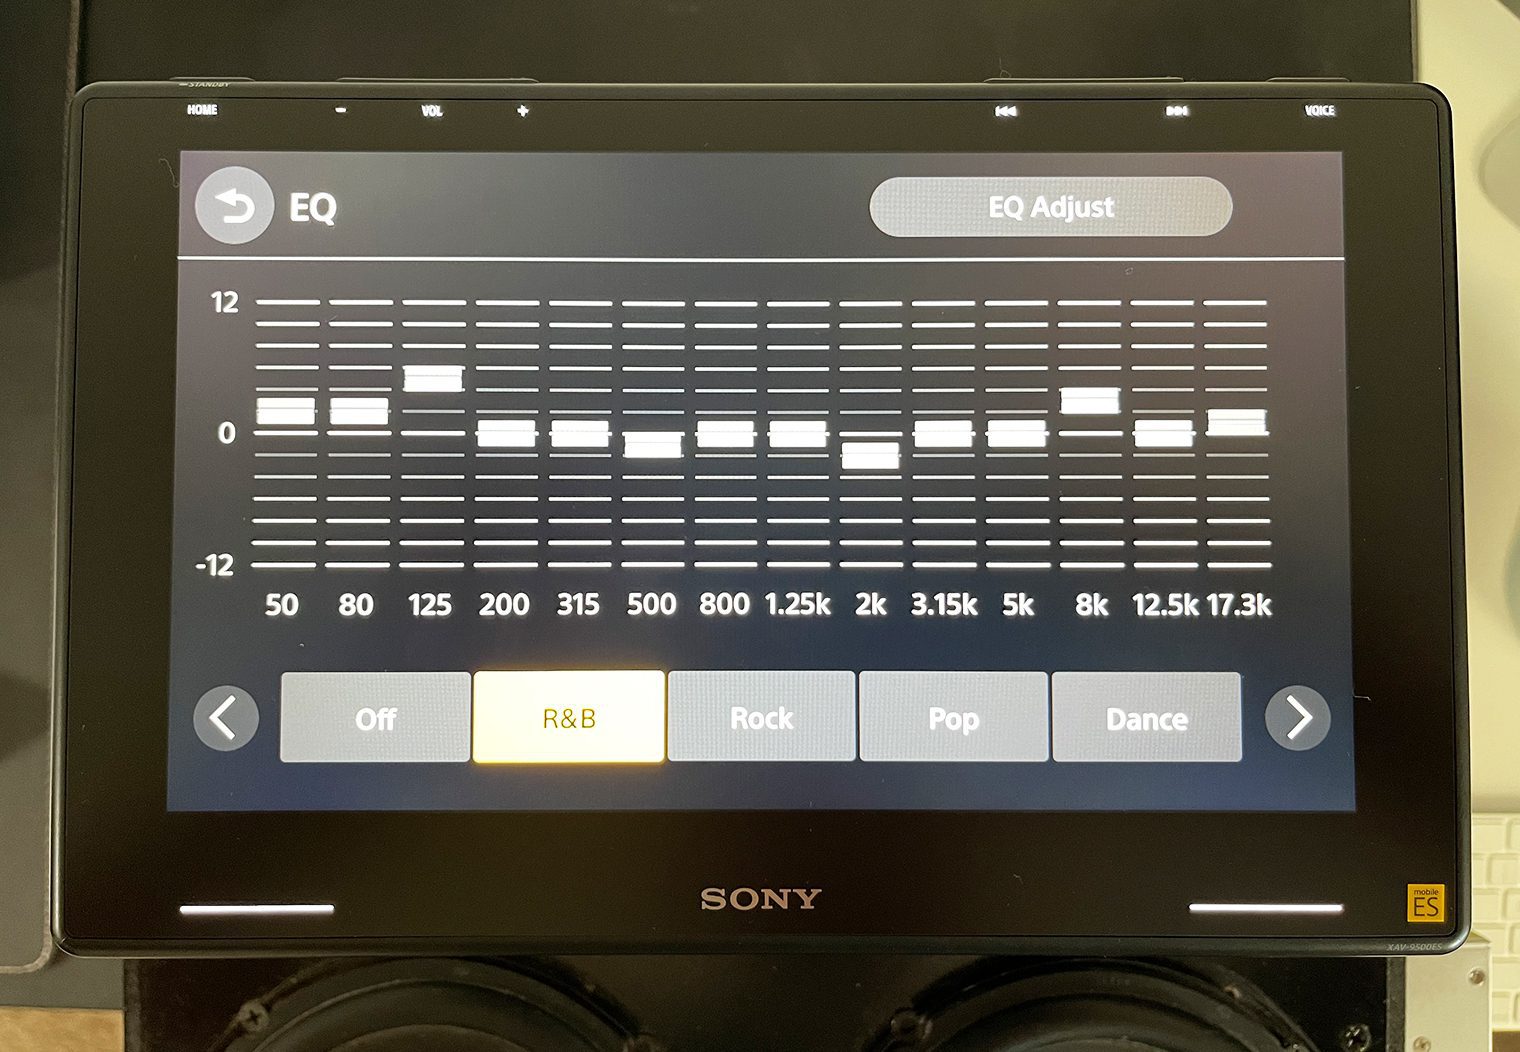
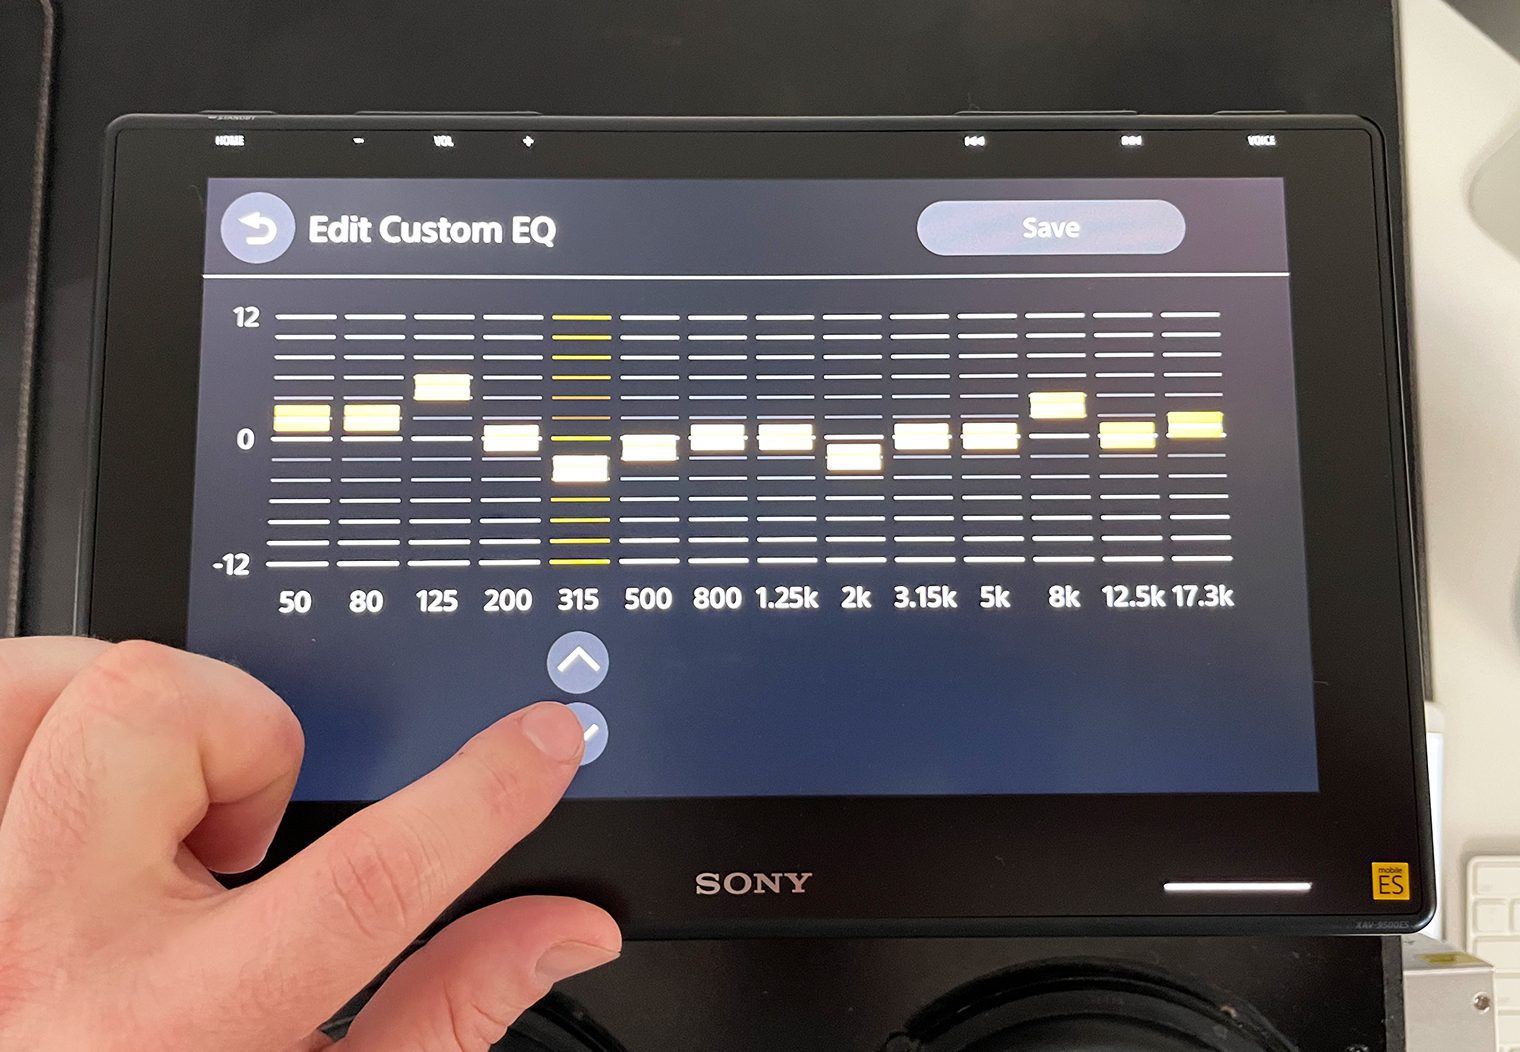
Or, if you want to have more control you can click on the “EQ Adjust” and create your own from scratch and save it. You can also start from one of the presets and use it as a base to adjust your own custom settings too which I found really helpful. Many units don't allow you to build off of an existing preset. Having the preset as your base gets you 75% there in most cases, and with this head unit you can make minor tweaks on the existing preset without having to reconstruct the whole thing.
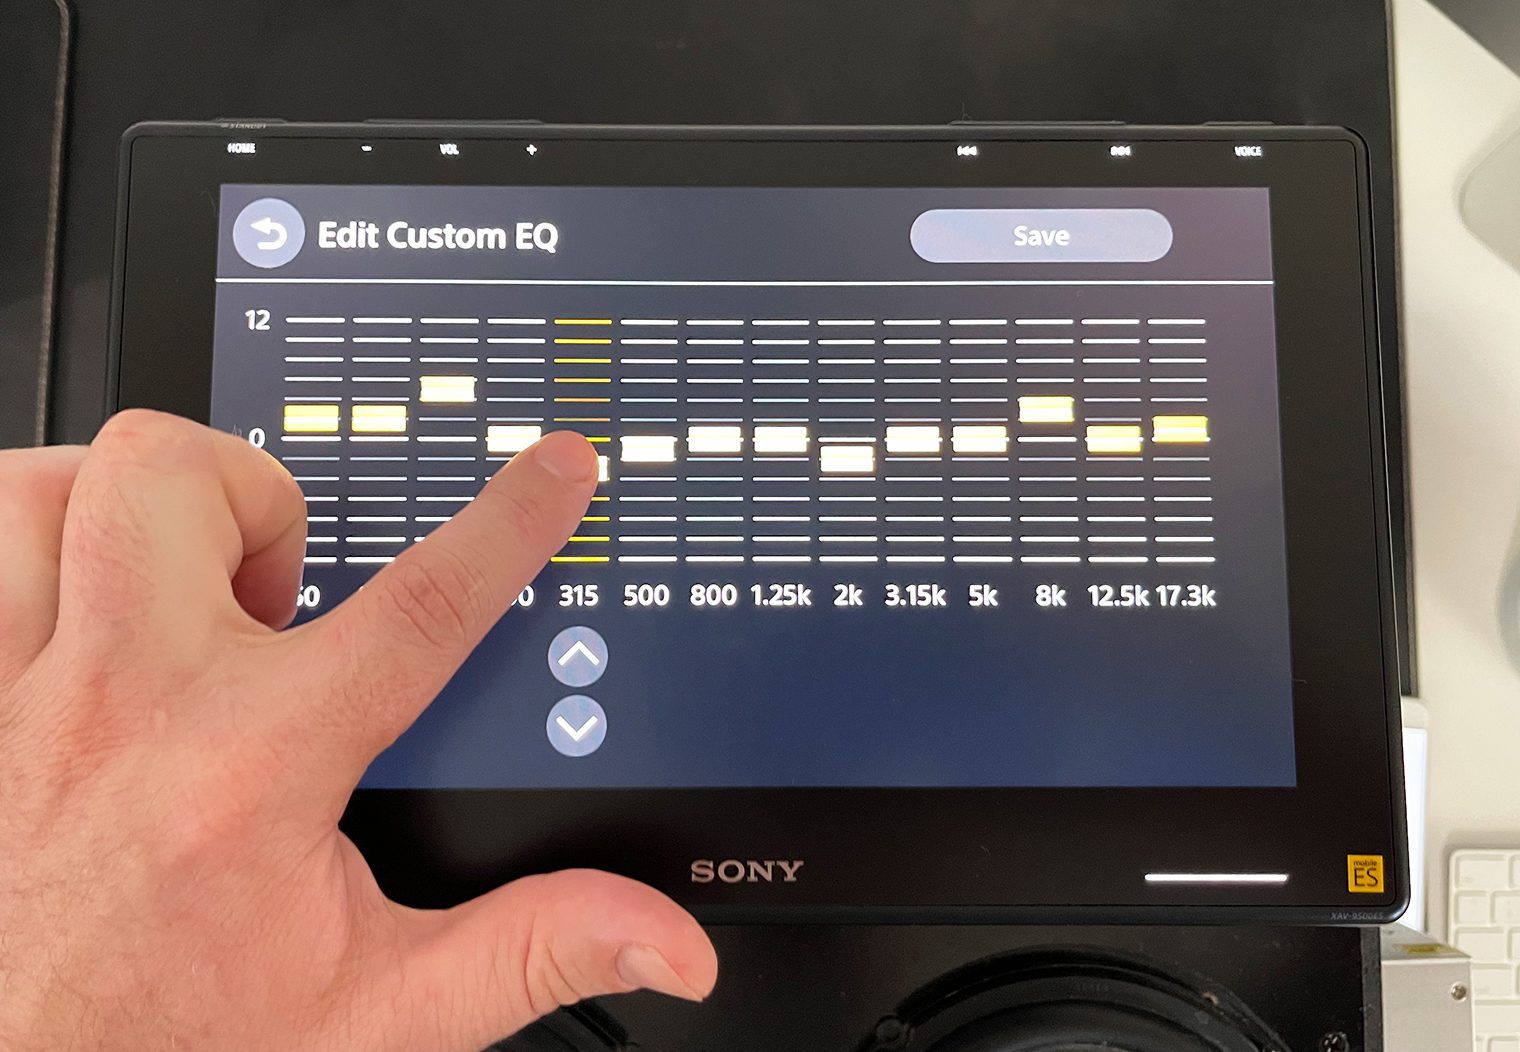
Using your finger, you can either drag the gain of each band to where you want it, or you can use the button below the selected band to move the gain up and down.
Parametric EQ
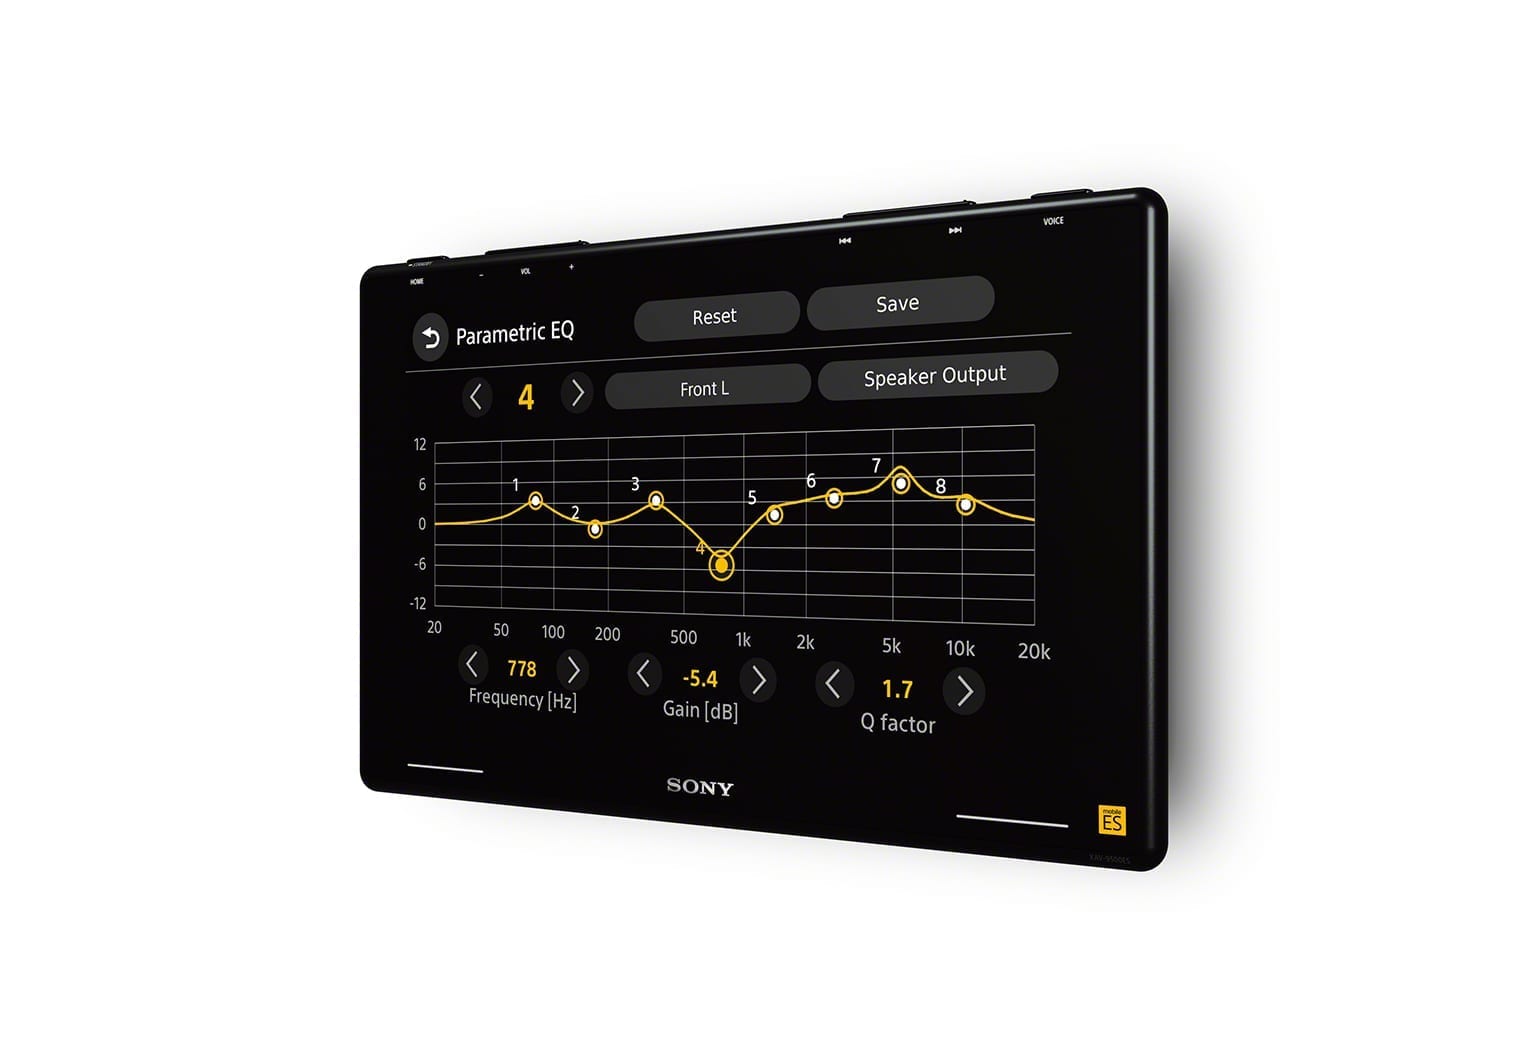
In addition to the 14-Band graphic Equalizer, the XAV-9500ES also has a Parametric equalizer that will give you even greater control over the sound. While graphic equalizers are a little more intuitive than a parametric one, they are also a little more limited than parametric if you're looking for precision tuning.
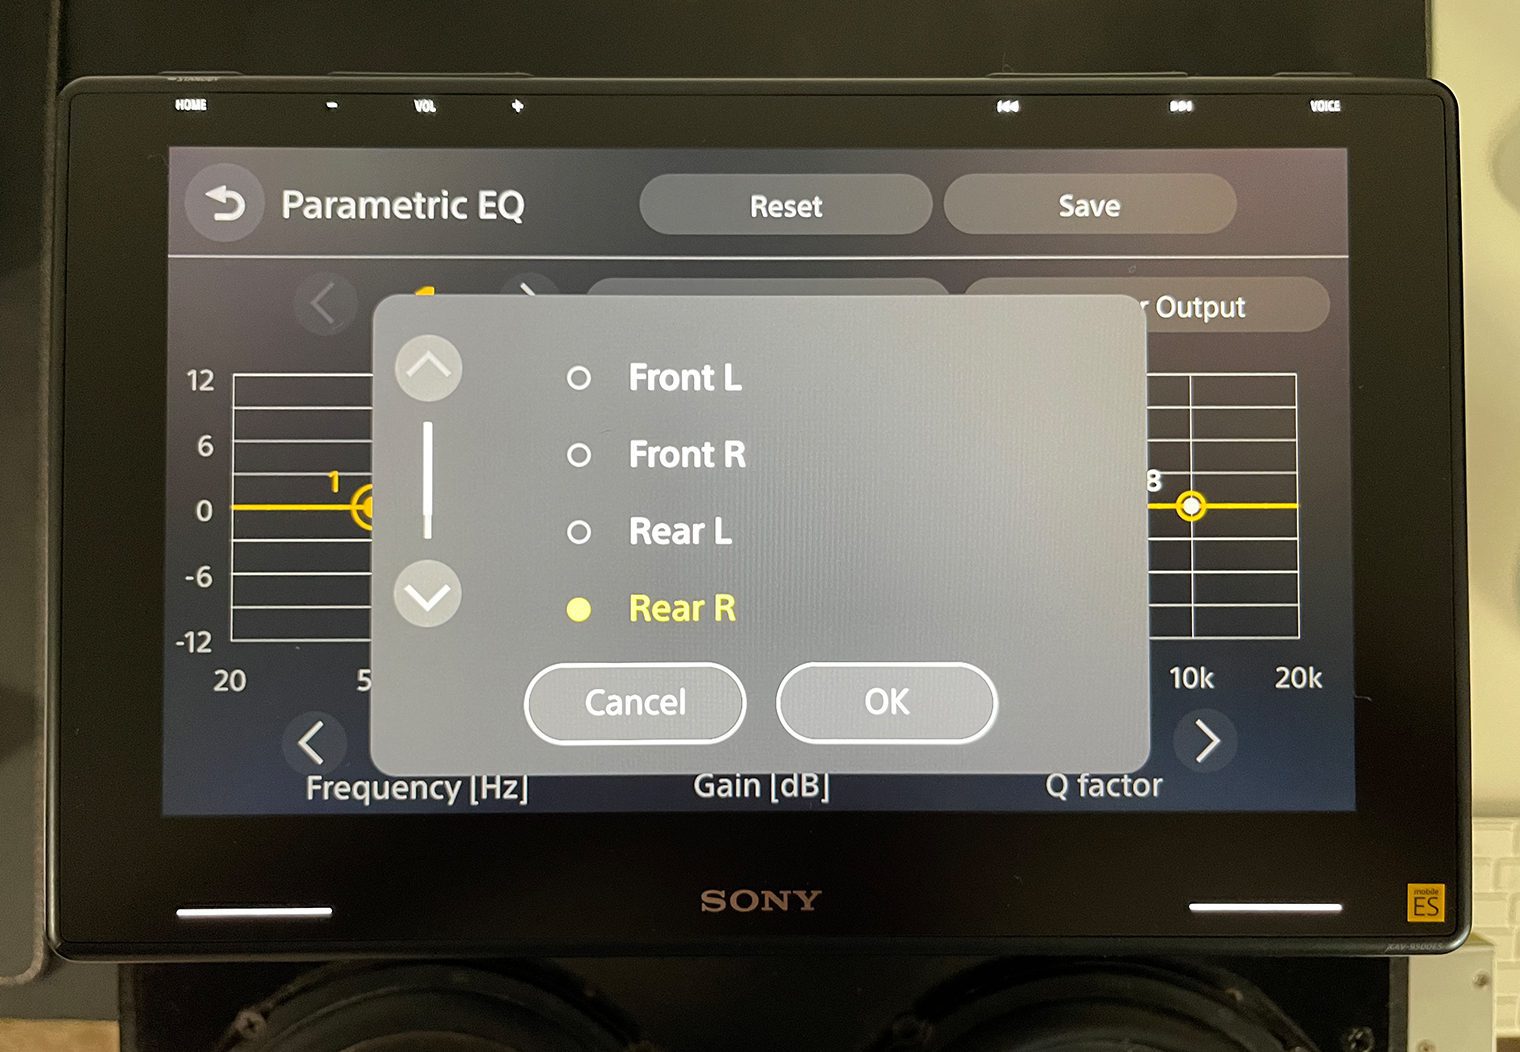
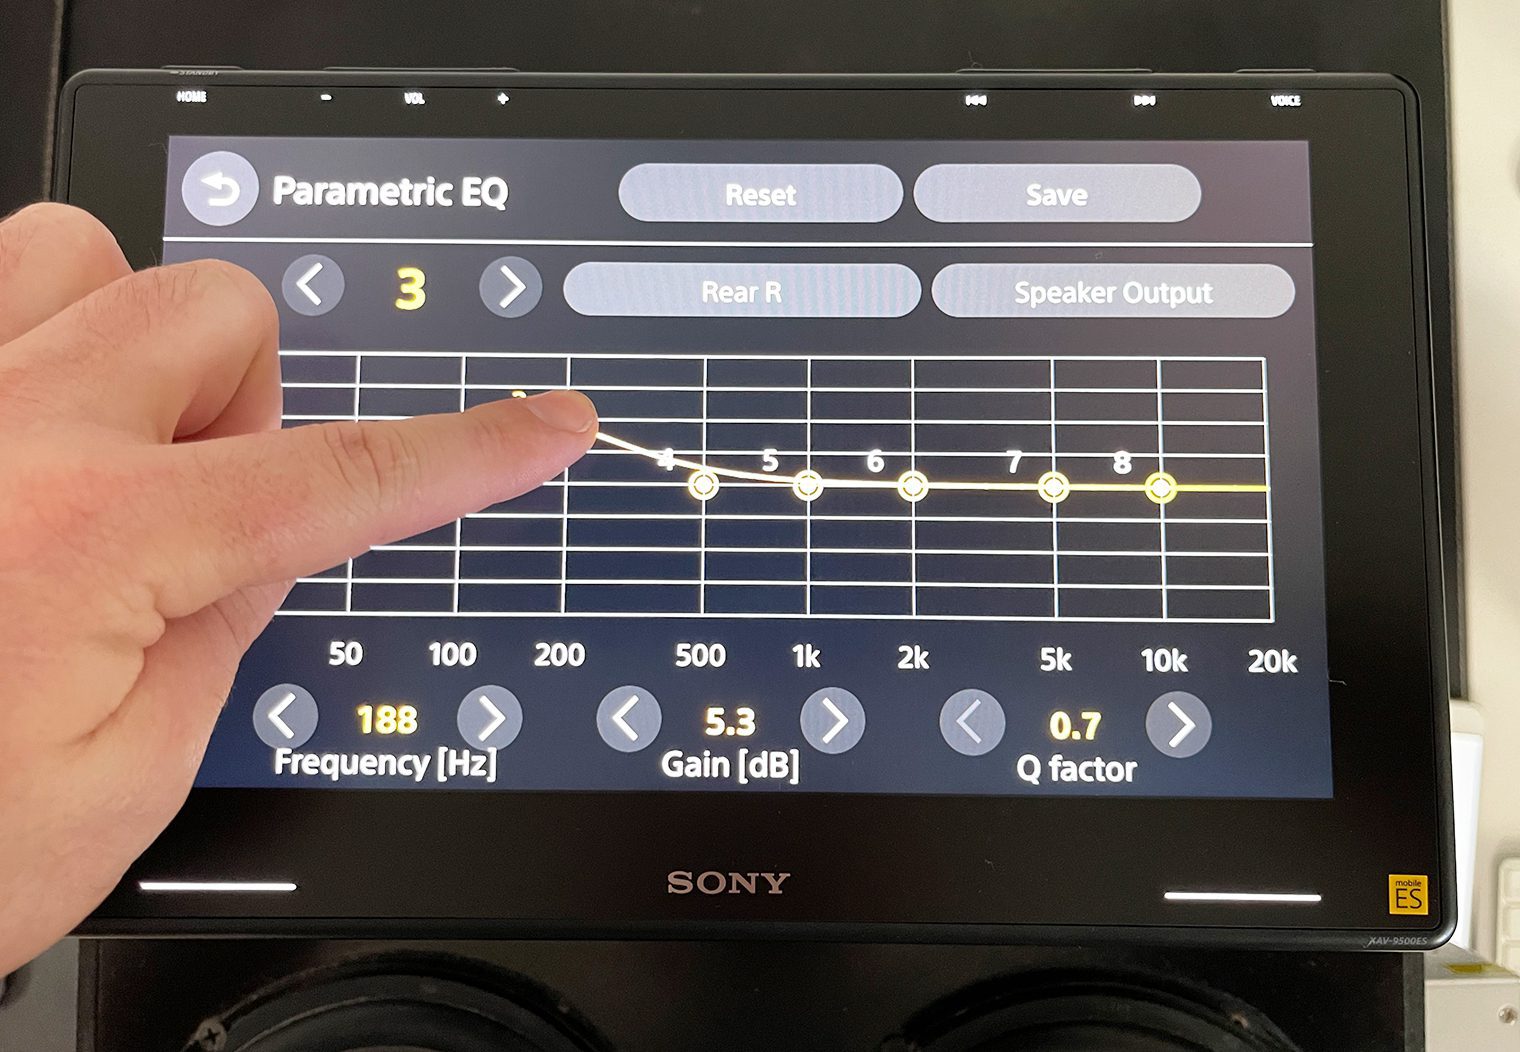
Parametric EQs are most definitely for the advanced tuner and I don't recommend you going in and poking around here. But the parametric EQ in this head unit will allow you to custom tune each channel output with precision. Furthermore, after you select the channel, you can select the frequency that you'd like to adjust the gain and Q factor for. Here's a look at the interface:
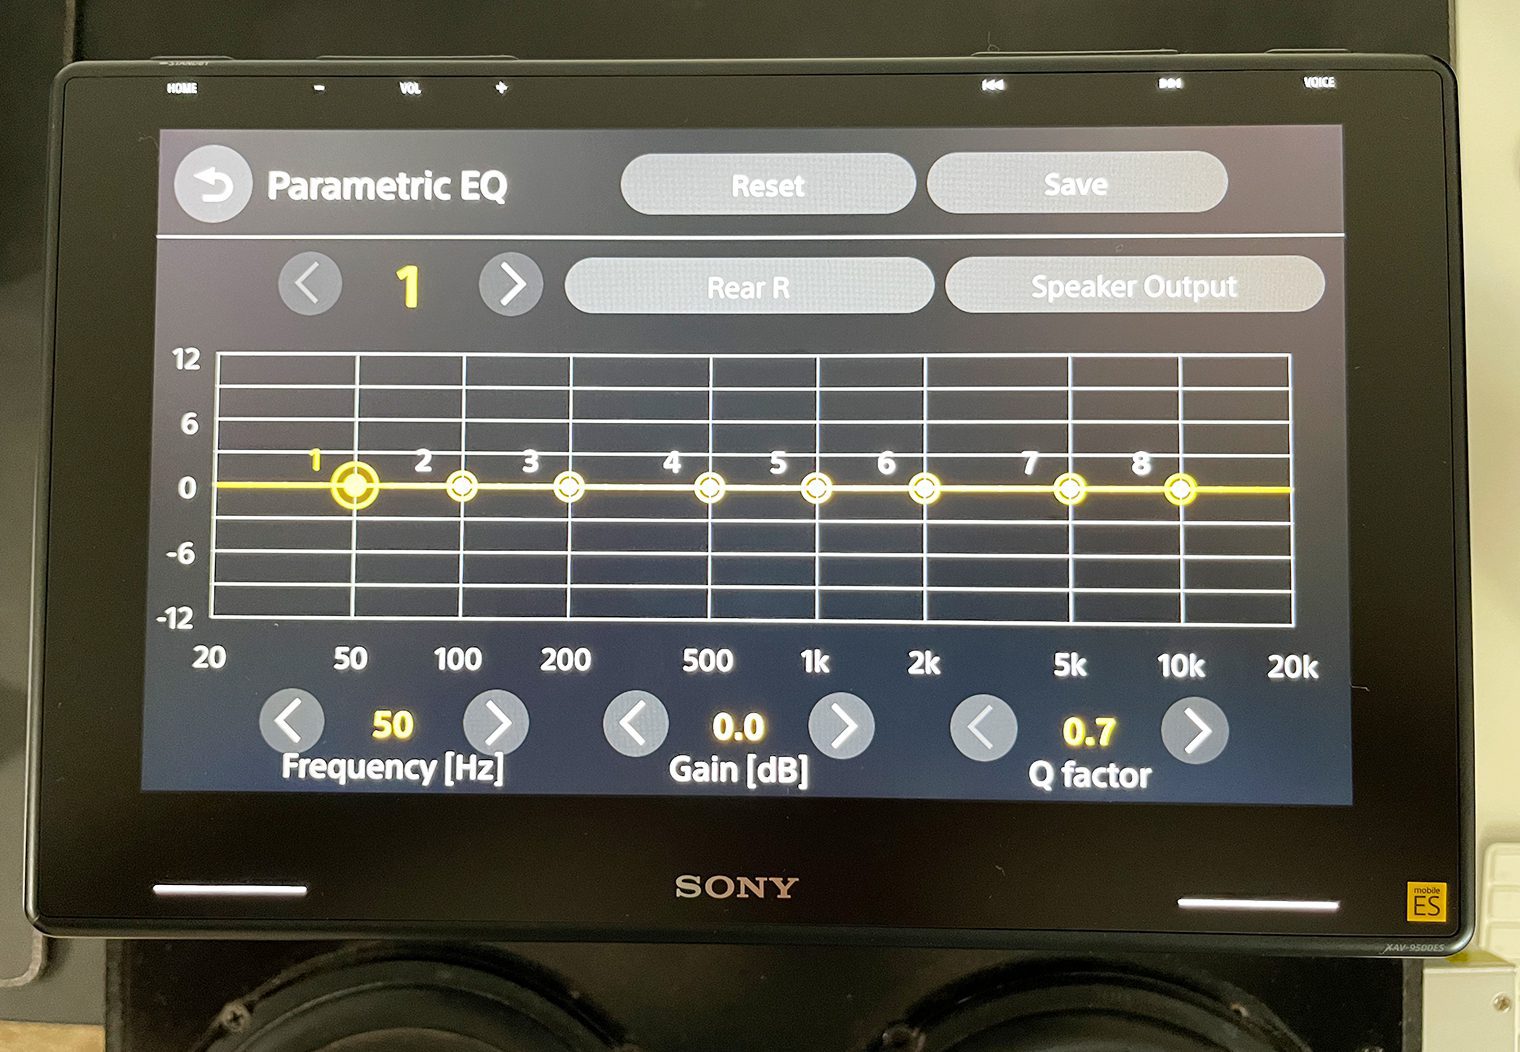
If you want to read up a little more about parametric equalizers I'd recommend taking a look at this article for a high level overview.
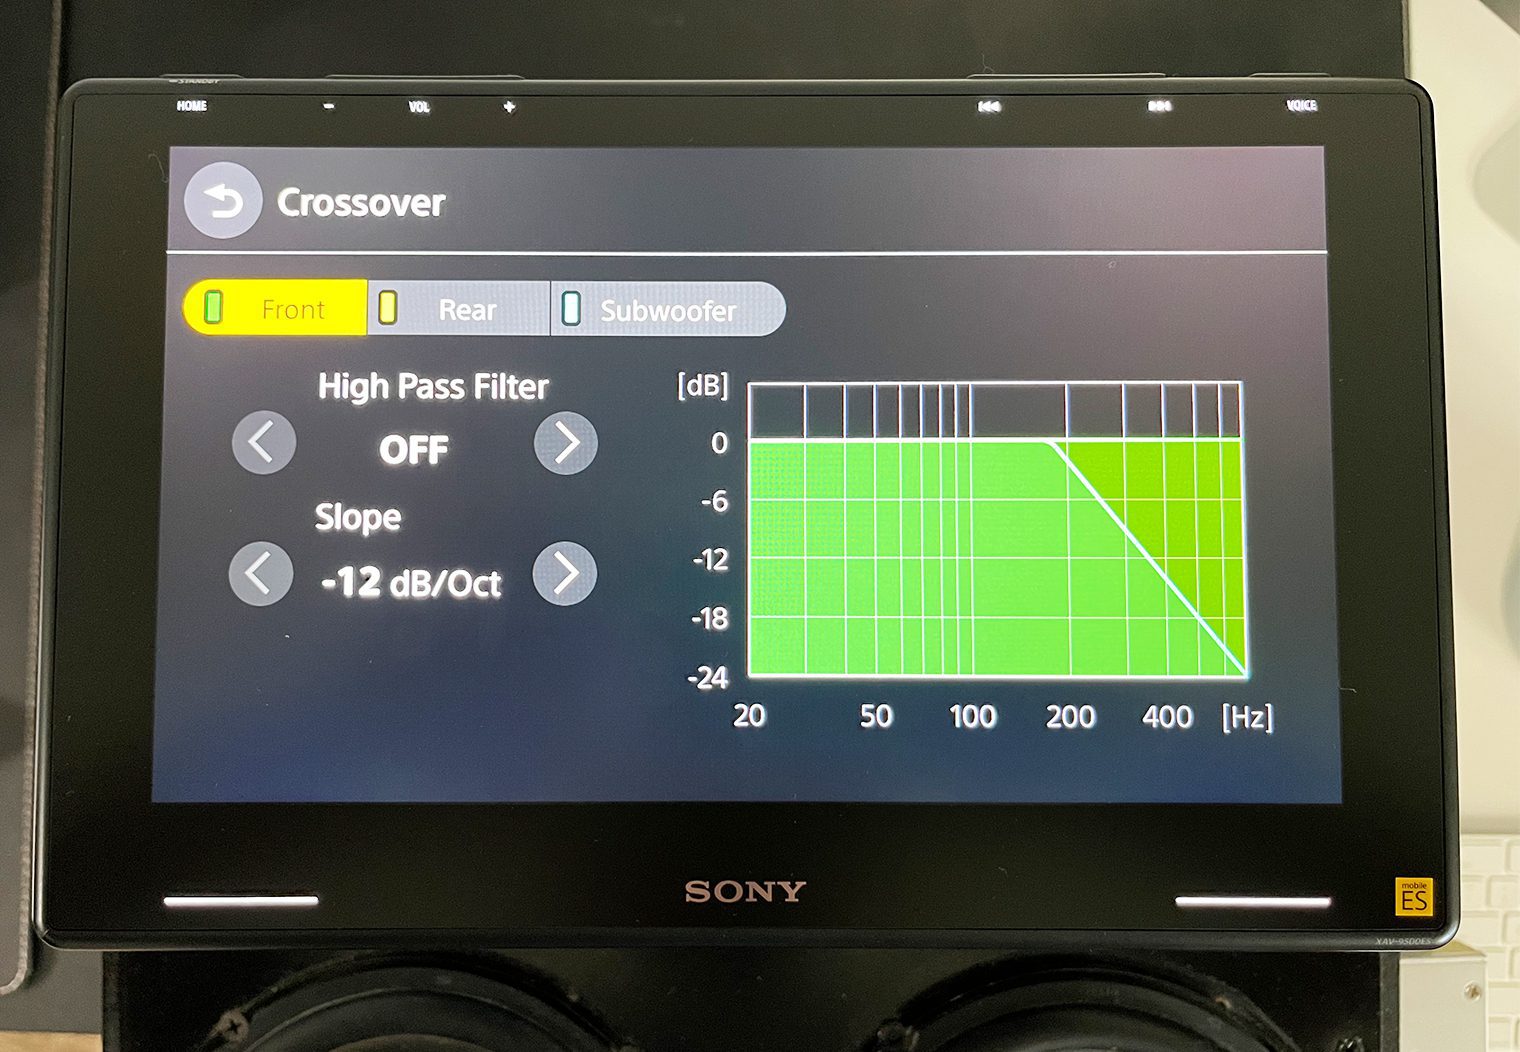
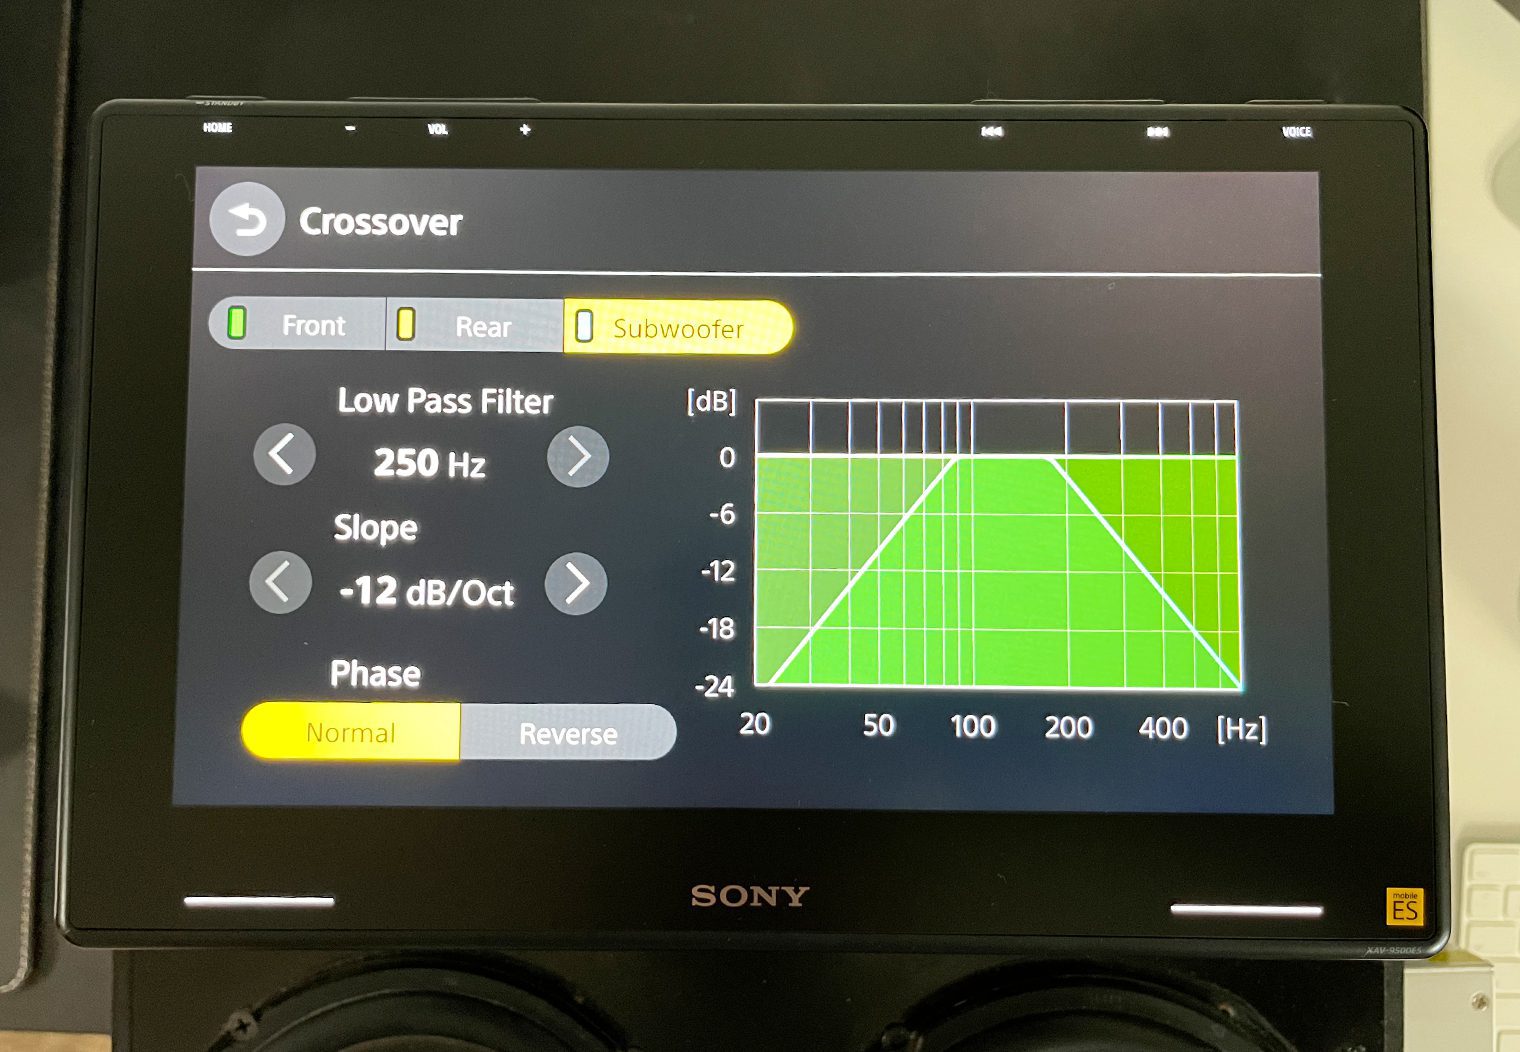
Advanced Crossover Control
One of my complaints about the XAV-AX8100 and AX5600 was specifically around crossover control at the channel level. Having the control of the crossover from the head unit really simplifies tuning of an aftermarket amplifier. You can essentially set the crossover on the amplifier to ‘full' and then adjust the crossover directly from the head unit.
Sony added an advanced crossover control feature to the XAV-9500ES that allows that exact level of control directly from the head unit in a nice graphic user interface. In the crossover control, you can effectively set the high pass filter for the front and rear channel separately, and also set the low pass filter for the subwoofer. The high pass filter will set the floor of frequencies that get passed out of that channel so that the speakers don't emit too much bass and the low pass filter will prevent the subwoofer from emitting too high of frequencies.
You'll also see a ‘slope' setting. Crossovers are meant to be used by a professional tuner or installer to tune your system, and slope is even more of a professional adjustment. Slope essentially will adjust the rate at which the audio will increase and decrease for the defined level of frequency. You can read up a little more on the difference between a filter and slope in this article. I would recommend letting a professional configure these settings though unless you know what you're adjusting here.
This crossover control feature is a great addition, and will give users much more flexibility to tune their stereos. Especially those who are installing high performance component speakers.
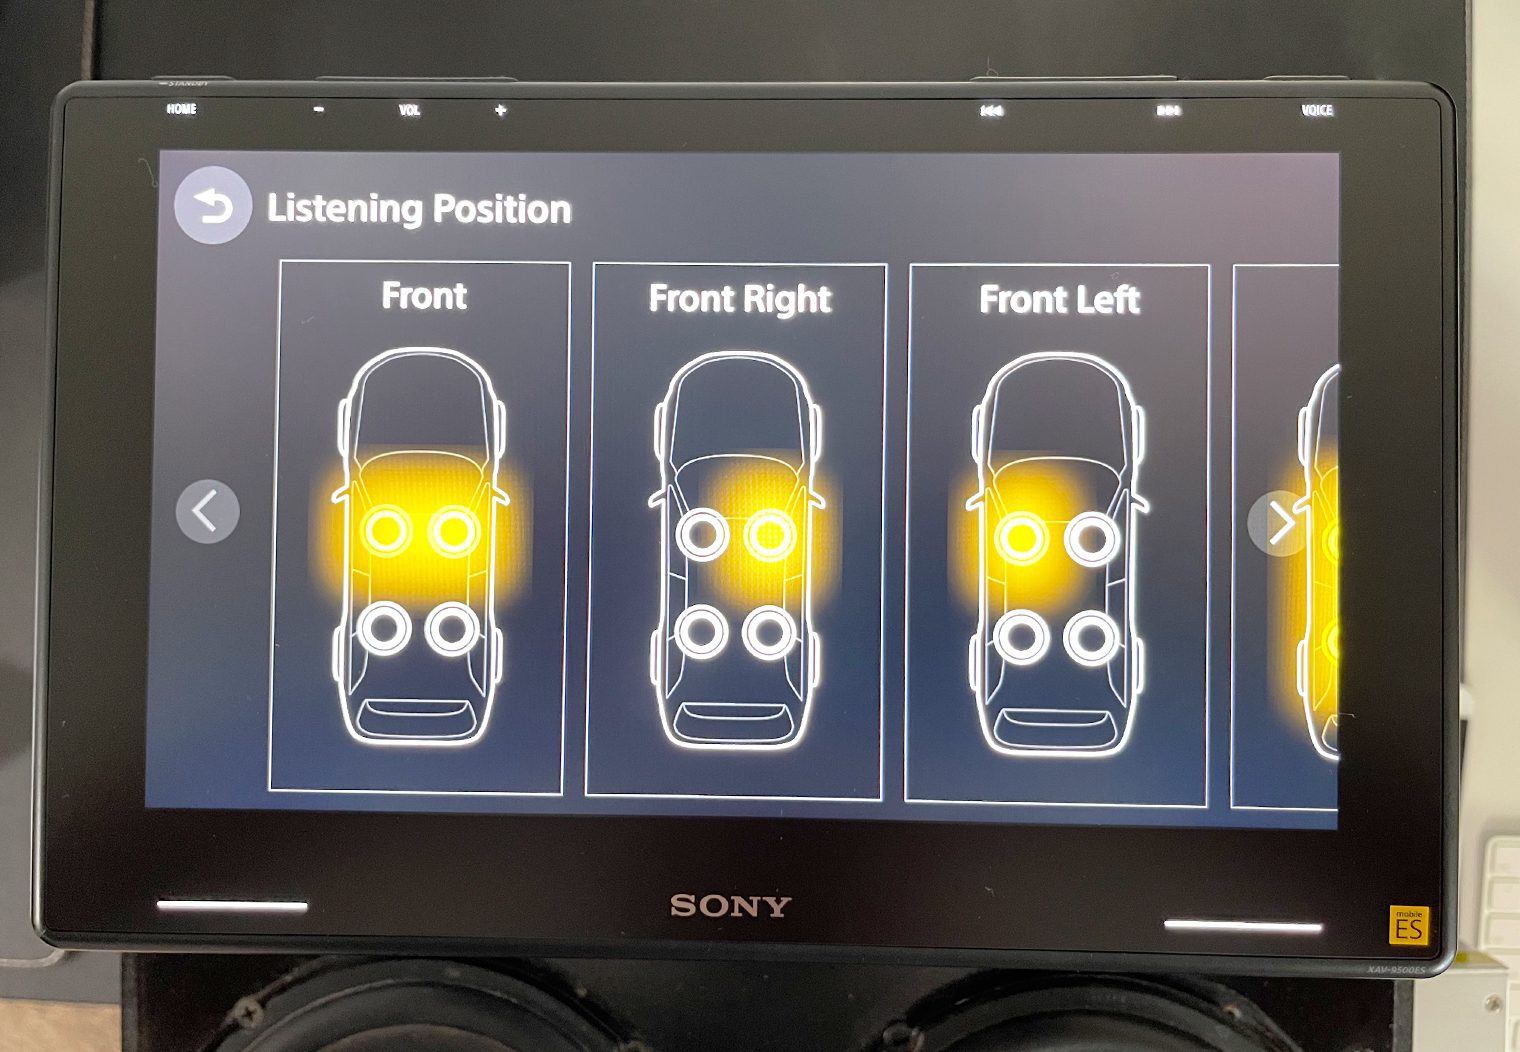
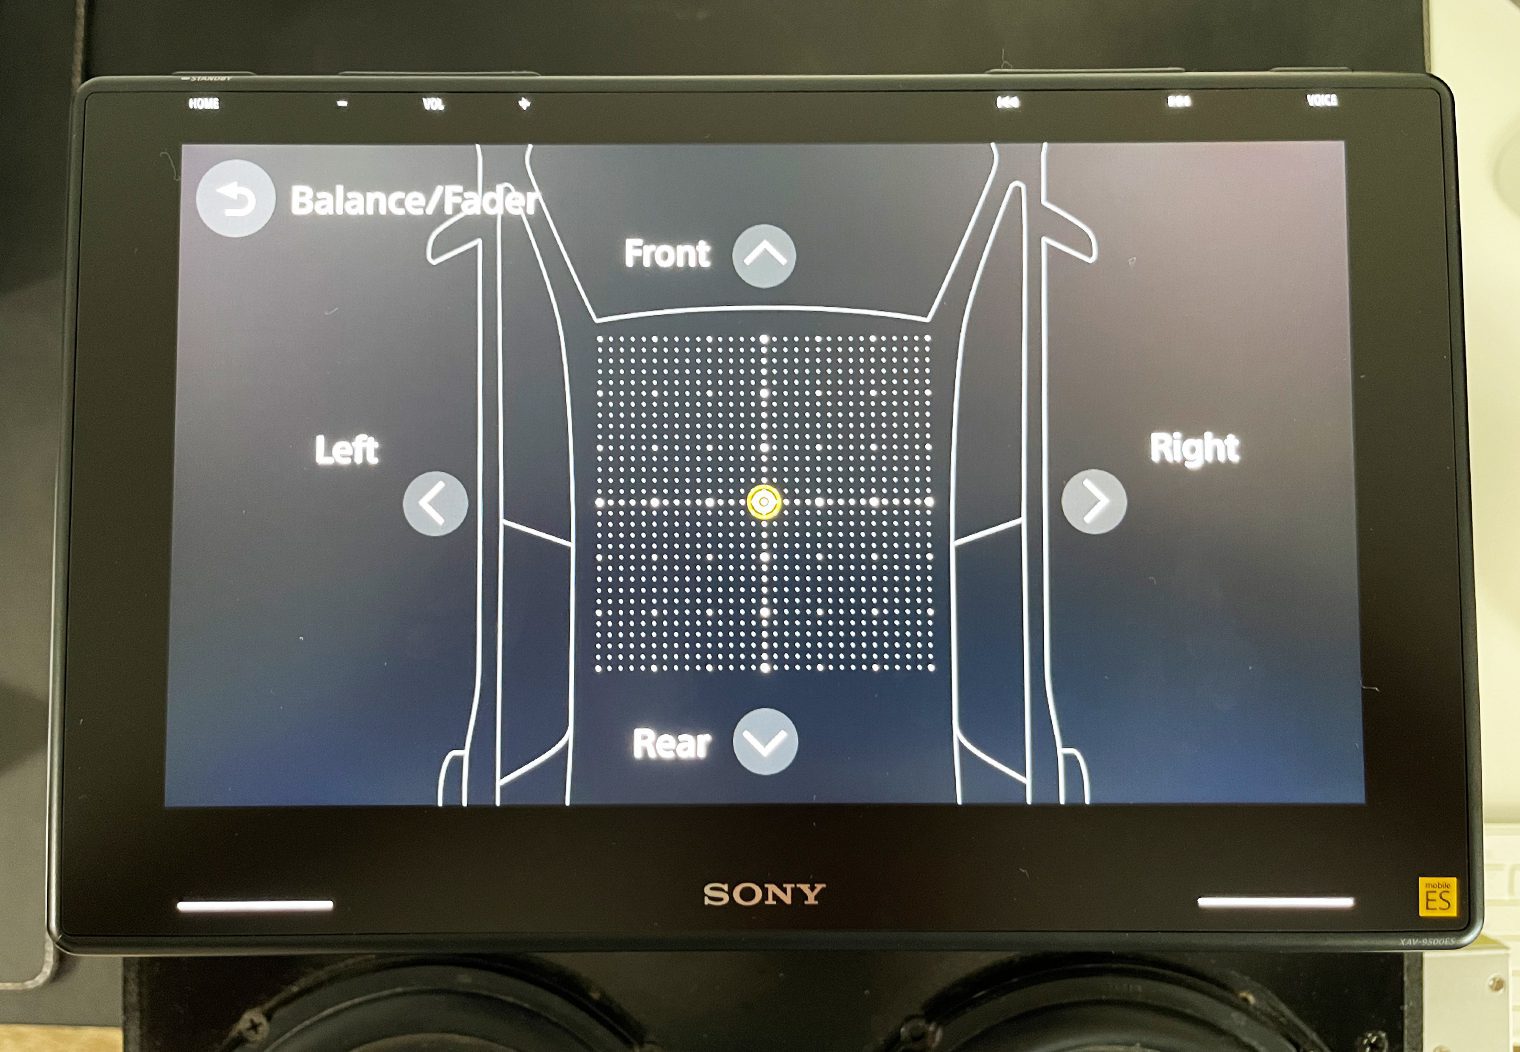
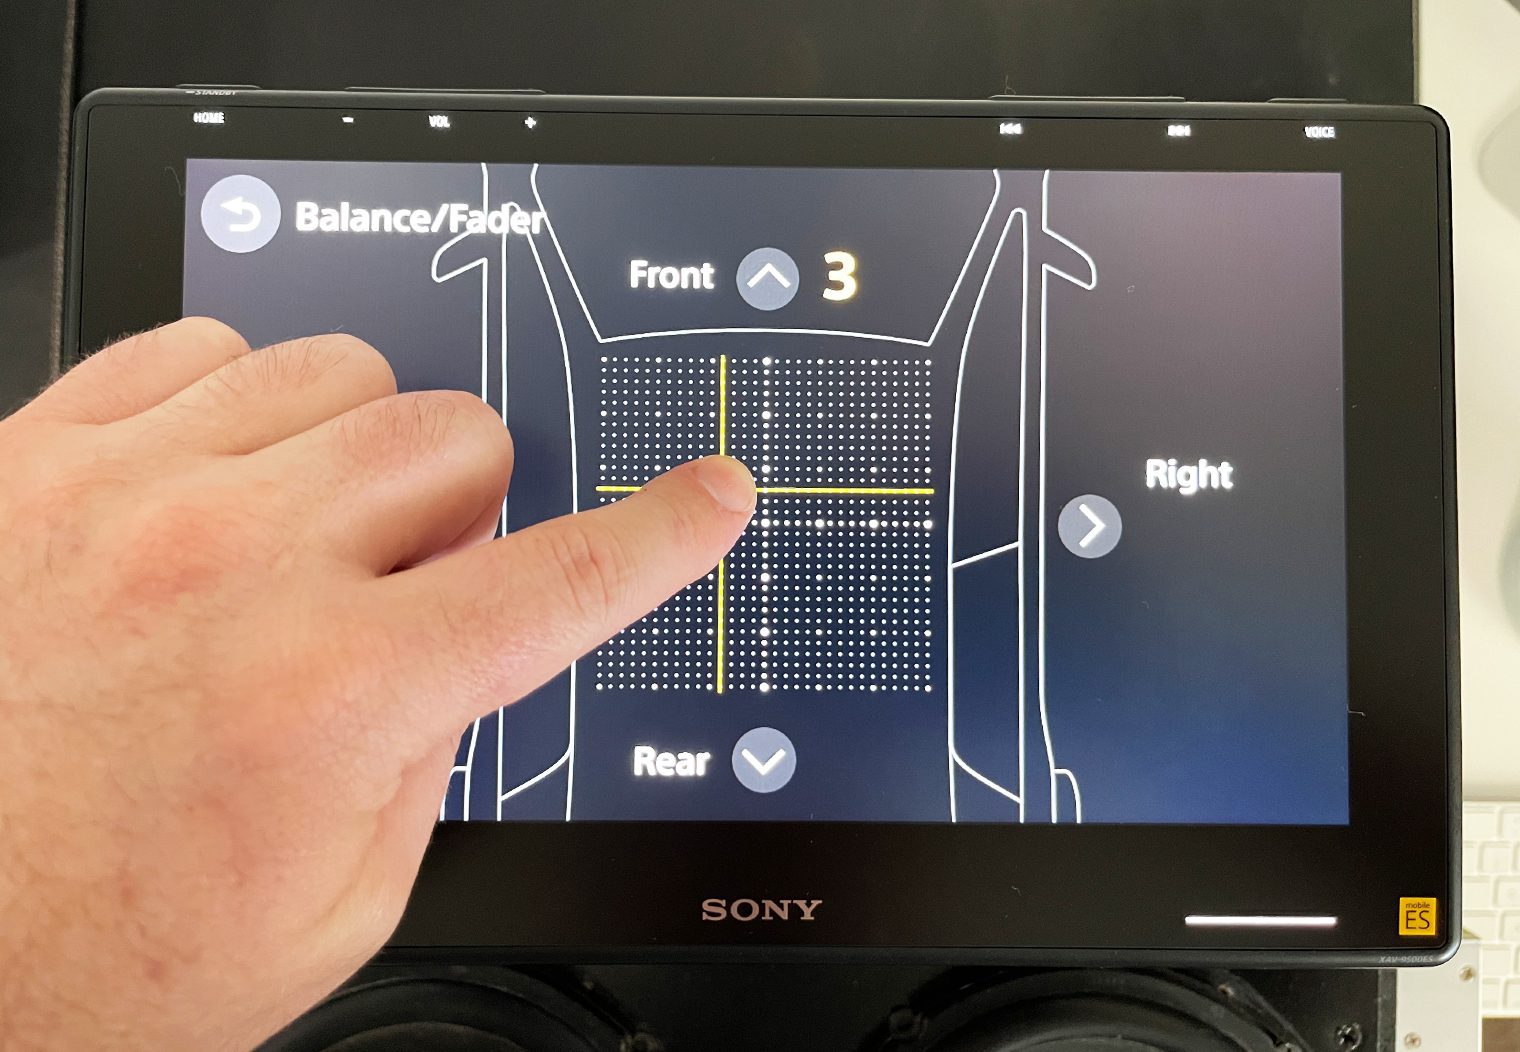
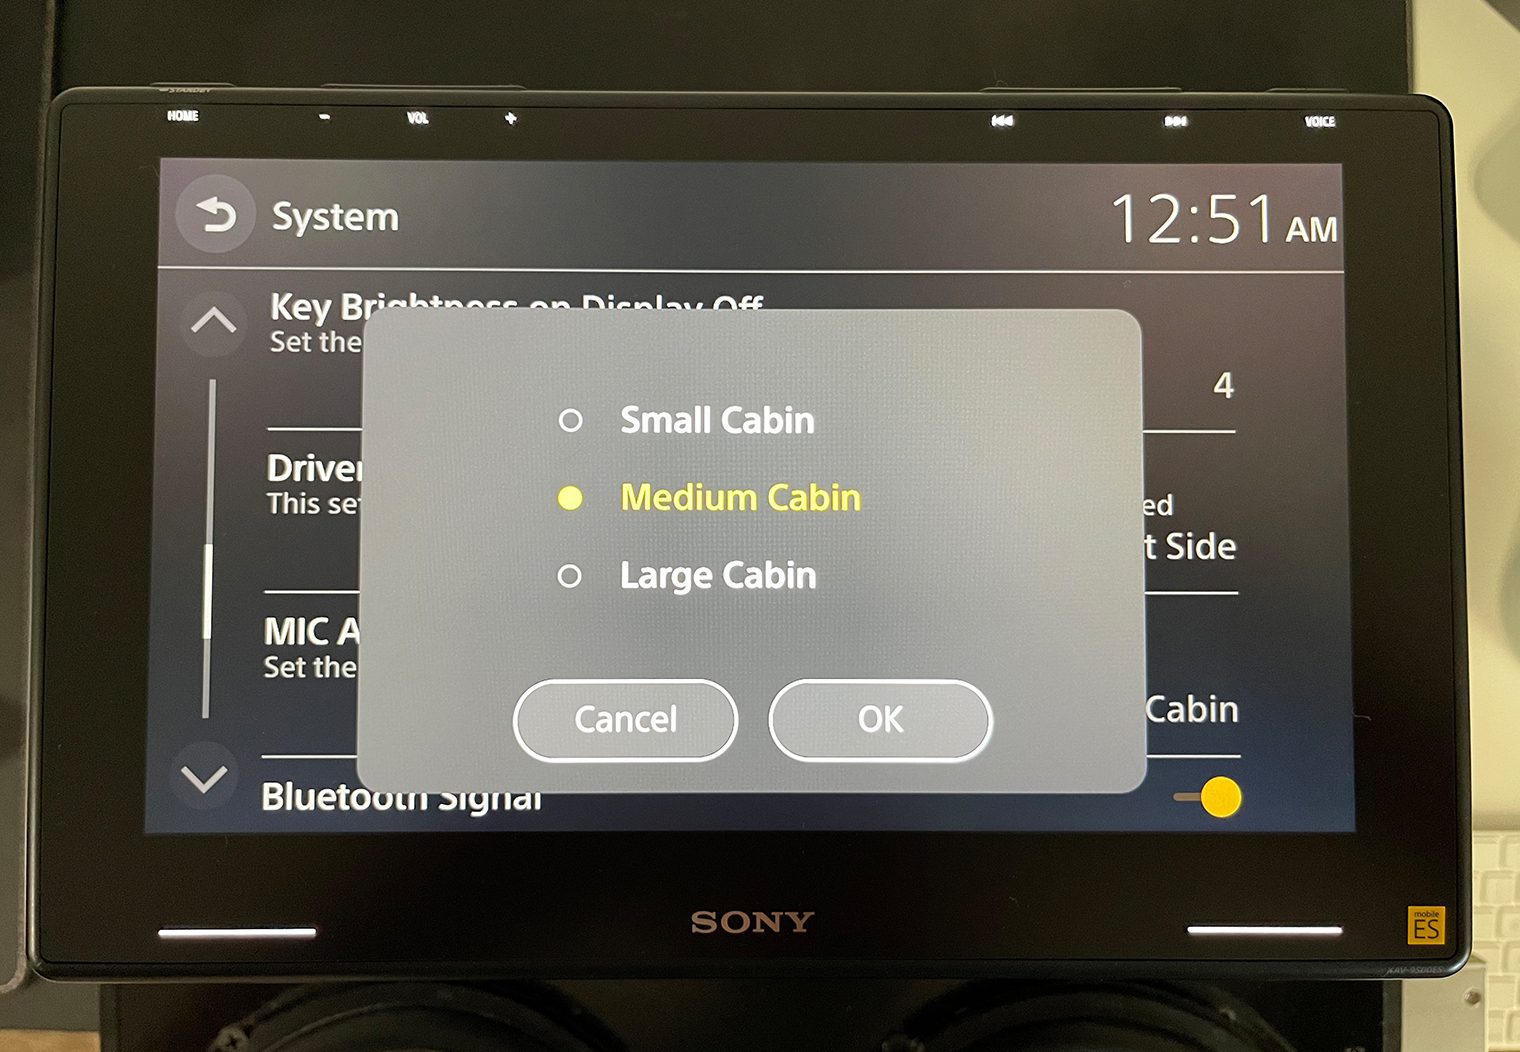
Listening Position & Timing
Listening position and timing are important if you're trying to optimize the sound for a particular position in the vehicle. It allows the sound from the speakers to reach the position at the exact same time so that all of the speakers are in sync when the sound reaches your ear.
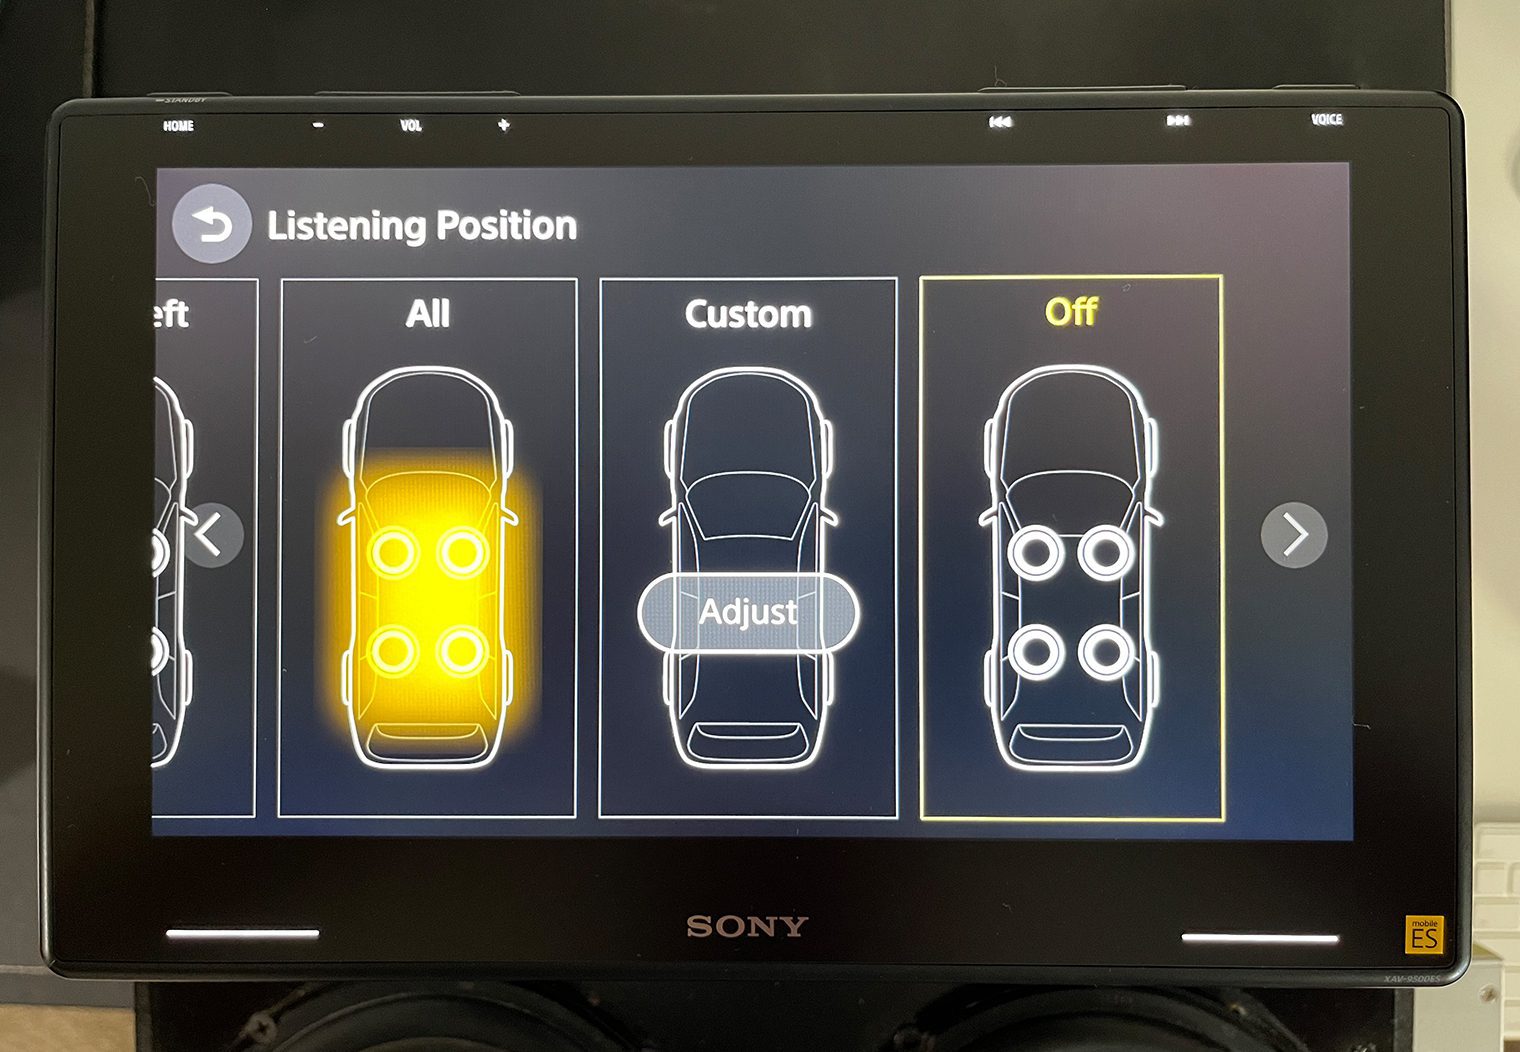
The XAV-9500ES lets you control this in two ways: with presets and manually. You can navigate to the interface and select from 6 different options: Front, Front Right, Front Left, All, Custom or Off. With the exception of the custom option, the rest are pretty self explanatory and use average measurements in order to estimate the distance of the preset position you select.
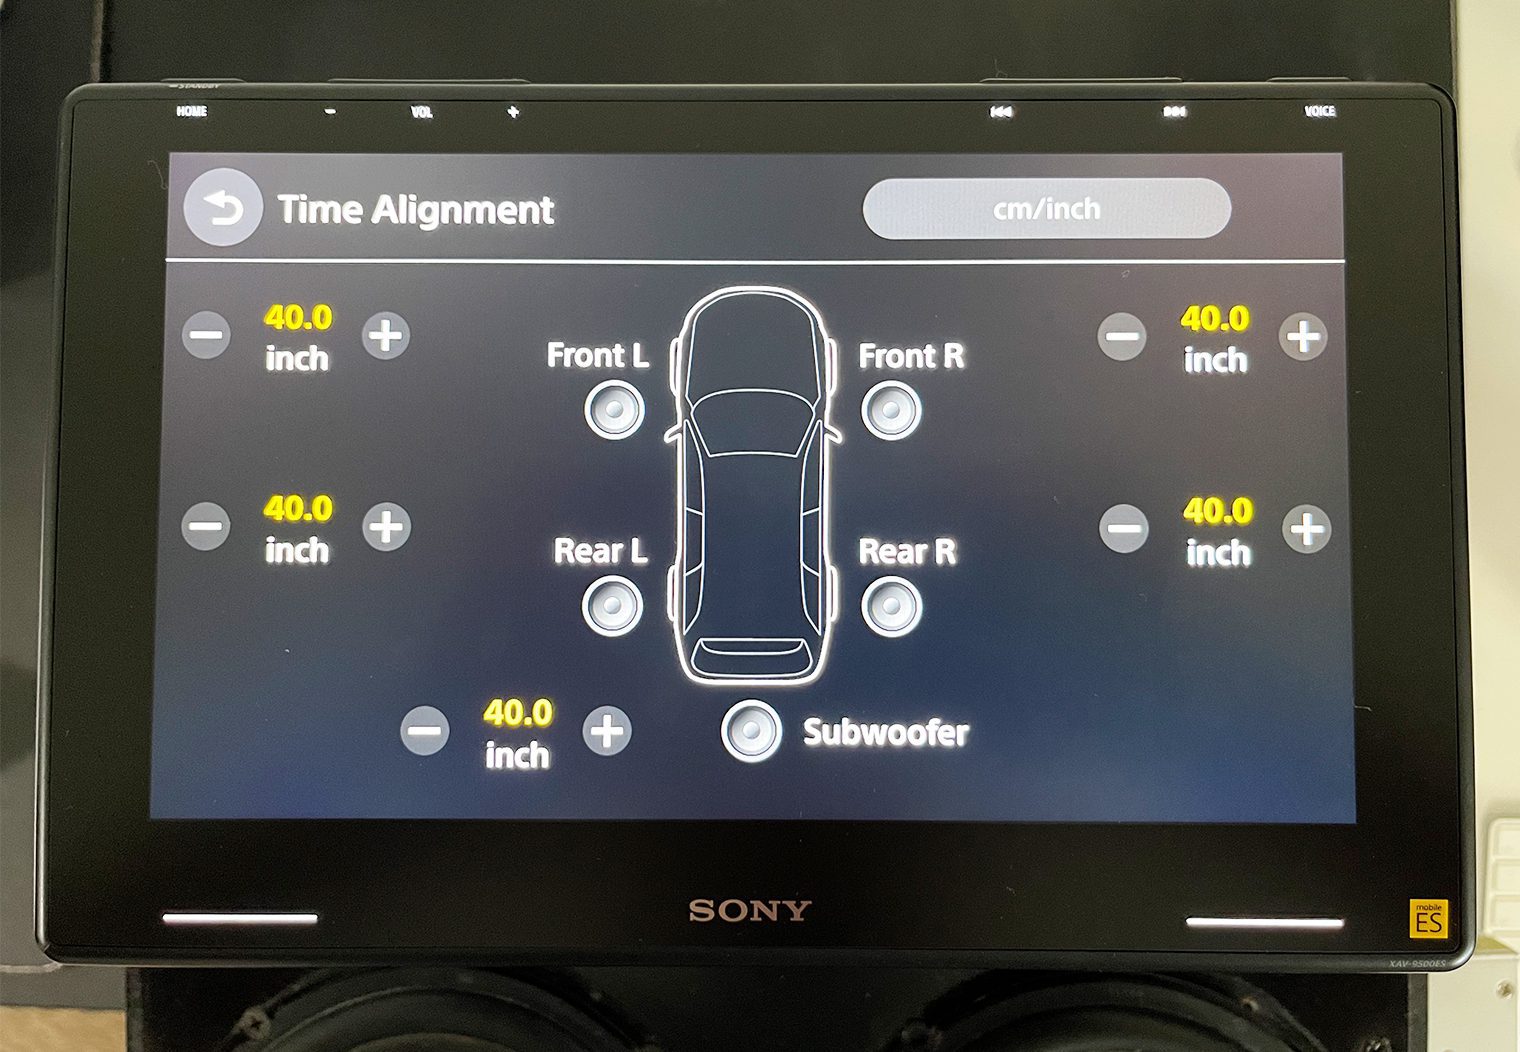
But, if you really want to get to an additional level of precision you can go into the custom settings and set the distance from the speaker to the position you're tuning the system manually speaker by speaker, including the subwoofers.
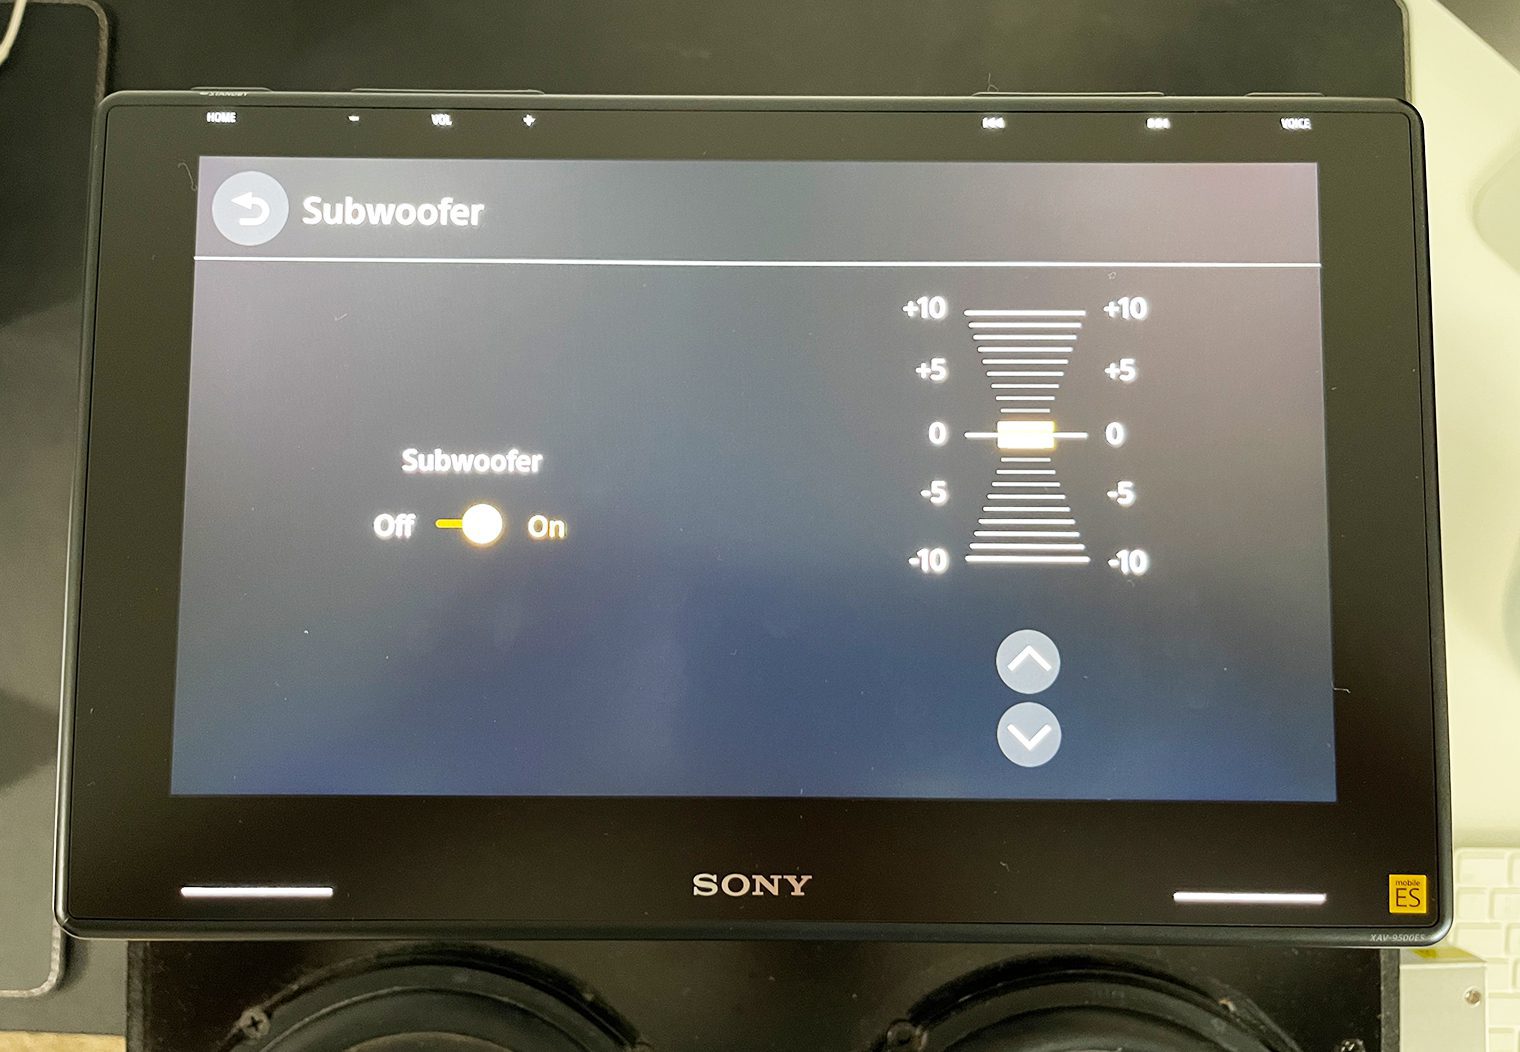
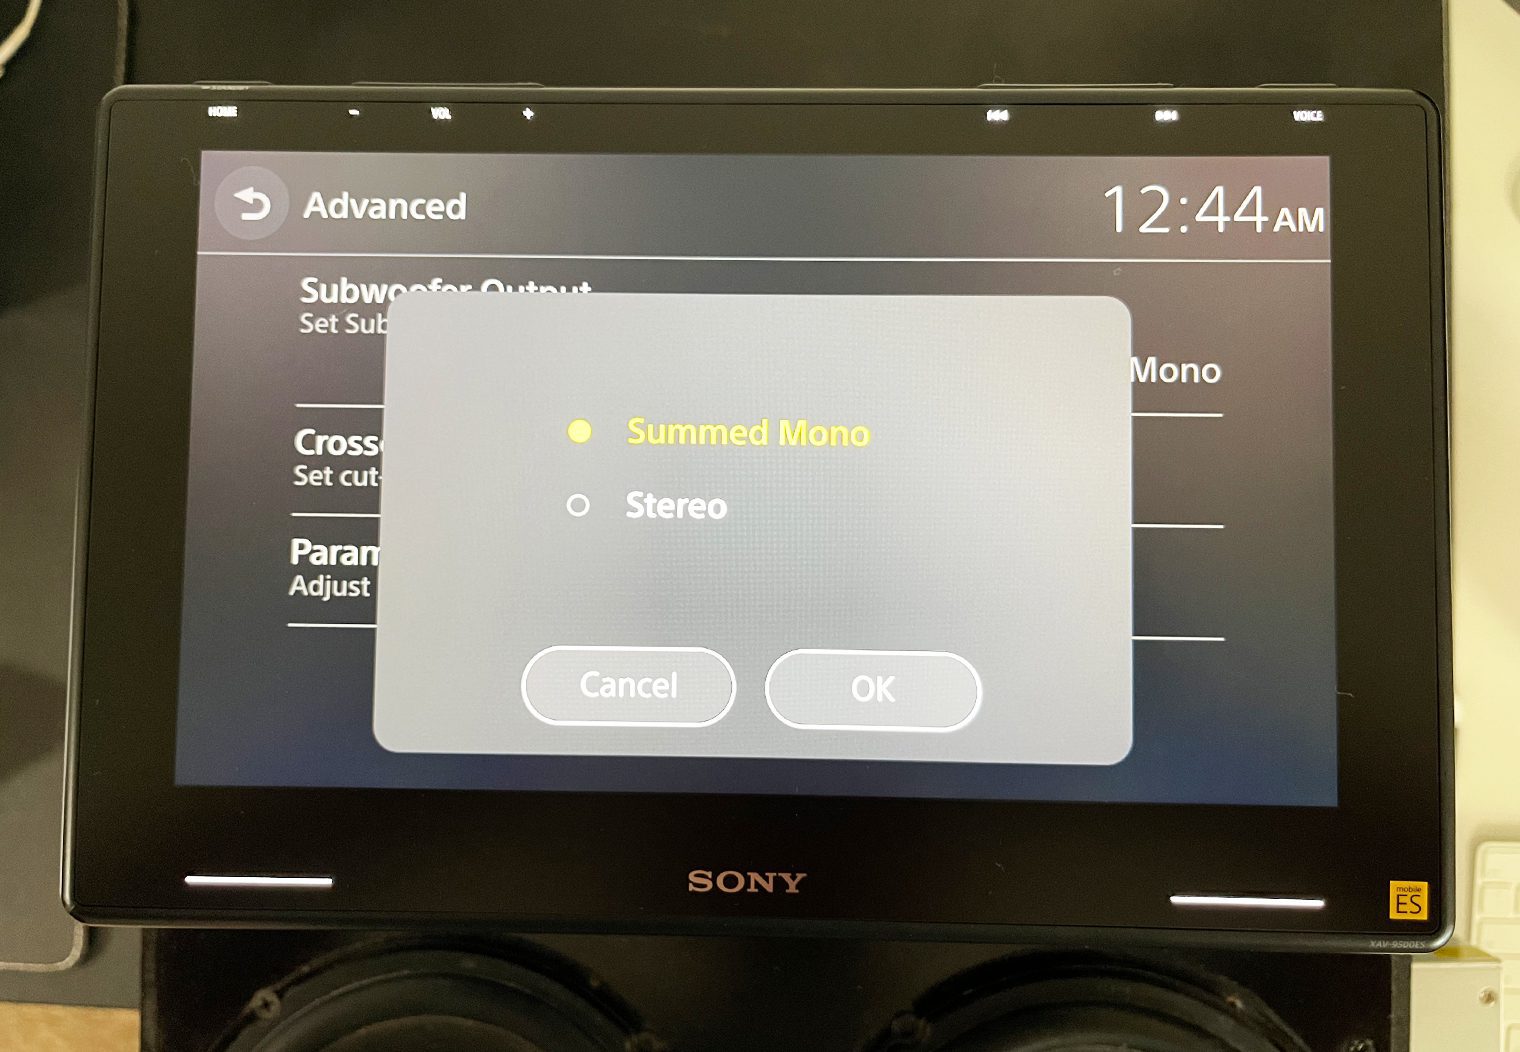
Other Audio Features
Here's a few additions, more standard features that are worth covering but don't really need much more explanation but worth pointing out:
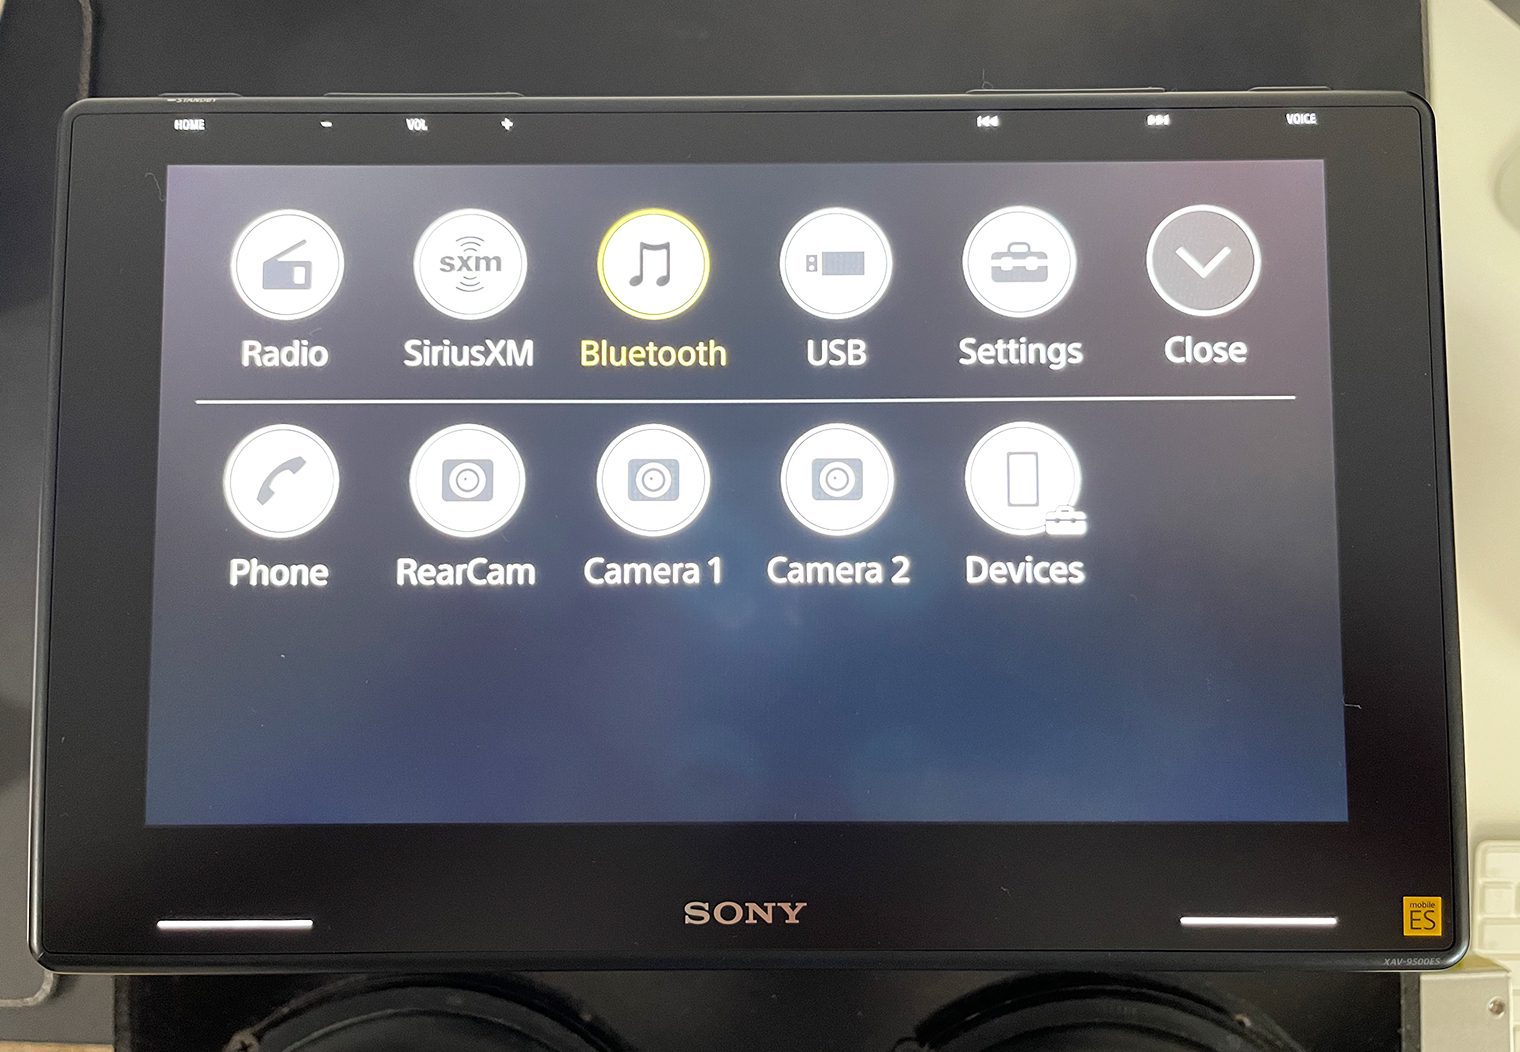
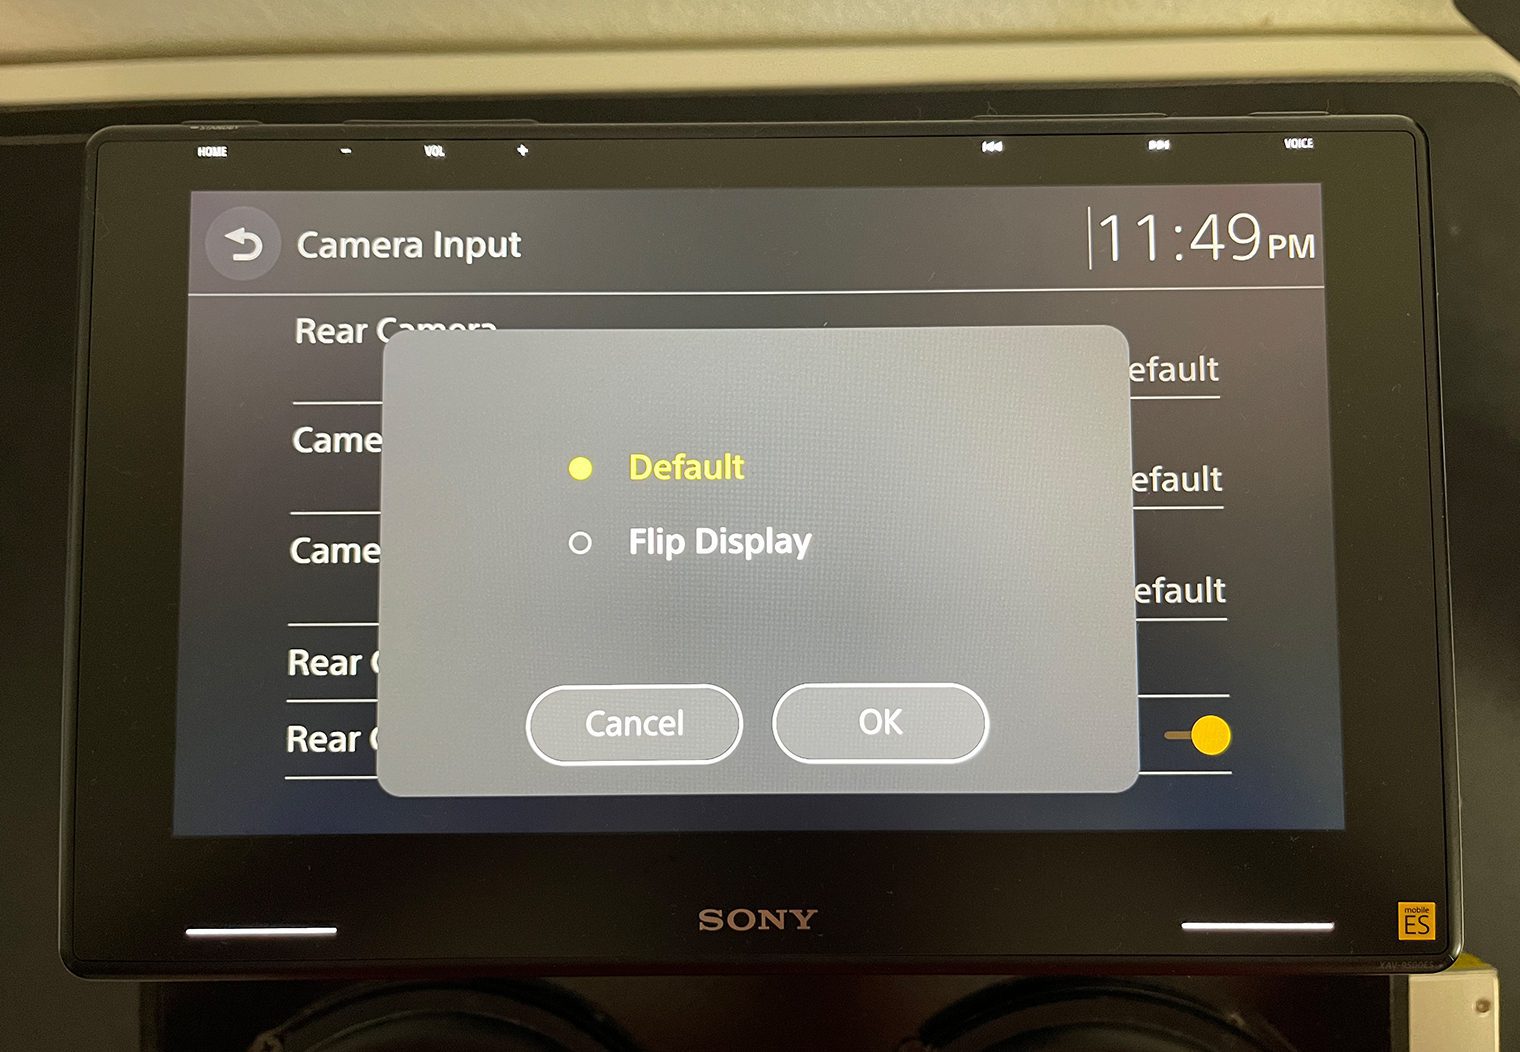
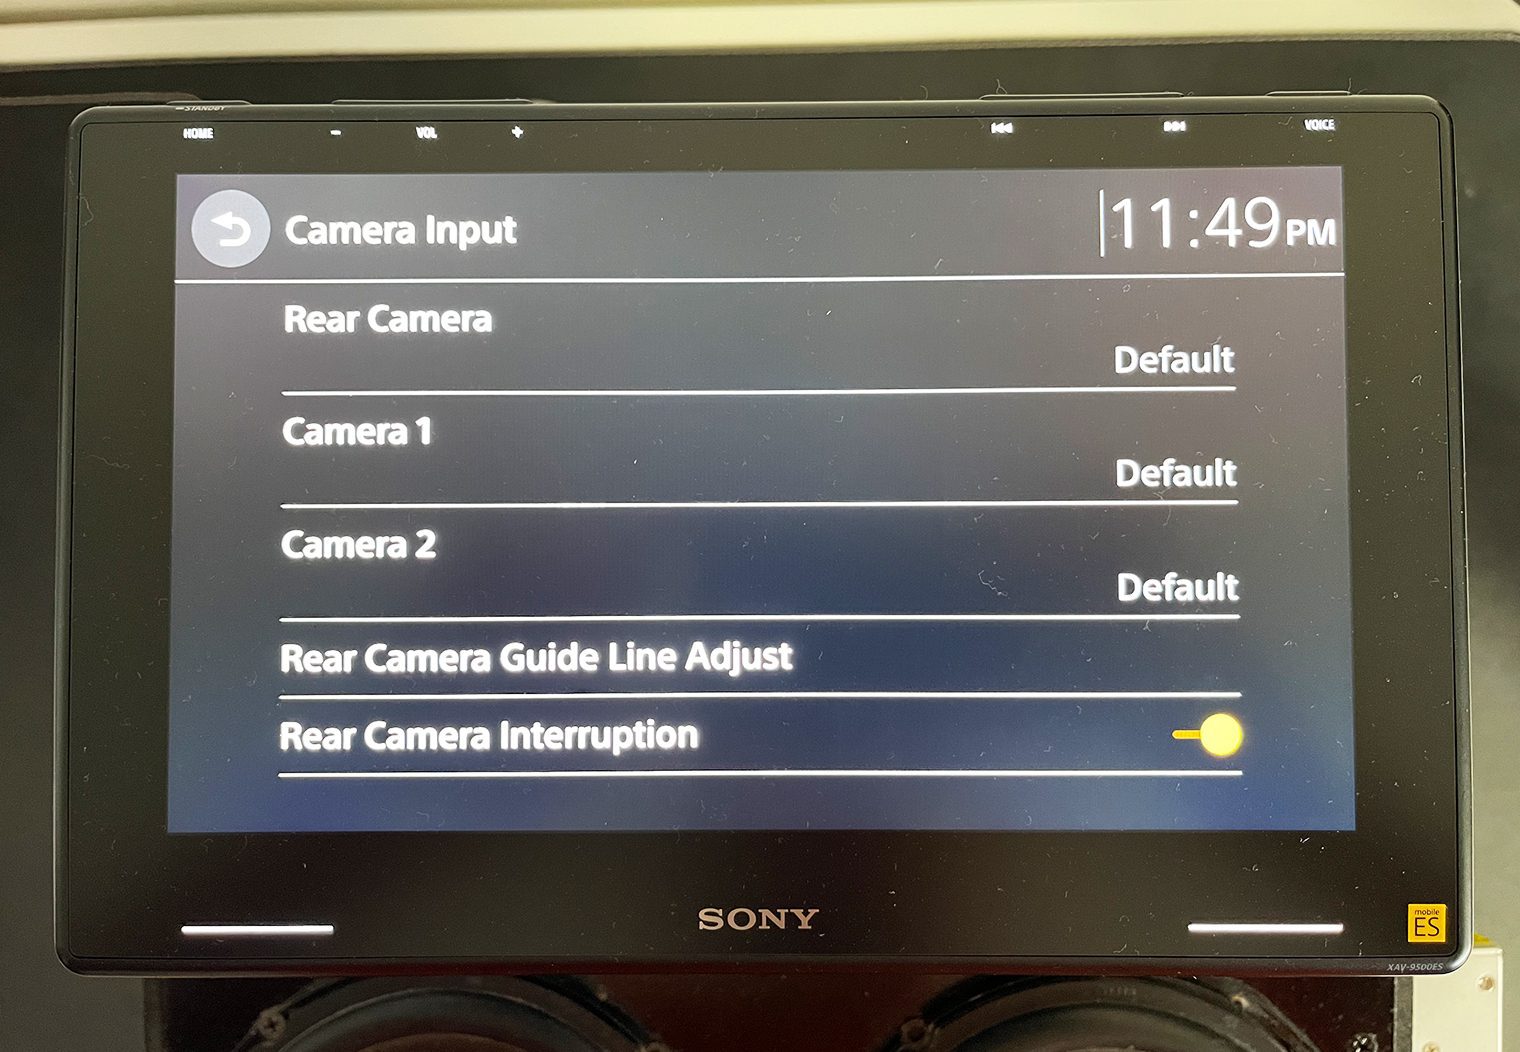
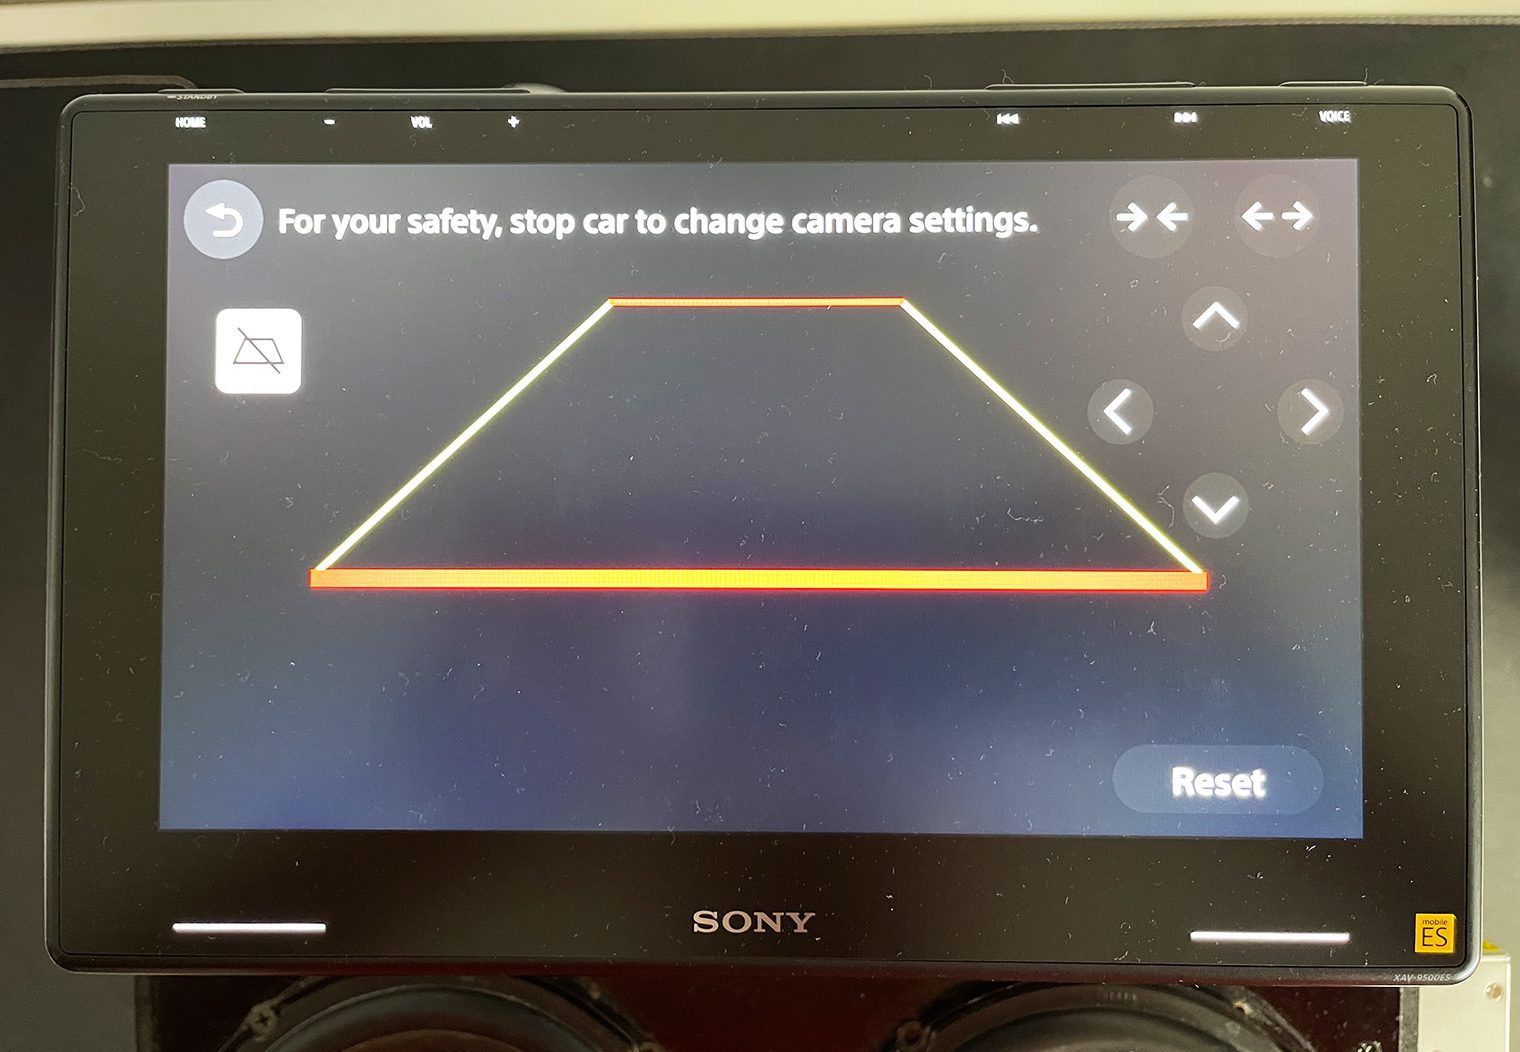
Camera Inputs
It's becoming more common to have multiple cameras throughout your car. Whether it's a front facing camera, rear backup camera, camera on your trailer. The list goes on. One of the differentiating new features on this head unit is the fact that it has three separate camera inputs that can be controlled independently:
- Backup Camera
- Camera 1
- Camera 2
The backup camera is tied to functionality like triggering the camera on-screen when you shift into reverse. But the Camera 1 and 2 inputs are pretty universal and you can view the camera feed at any time. I wasn't able to test the camera feed out in my demo unit, but I was able to navigate to each of the feeds from the homescreen.
iDatalink Maestro
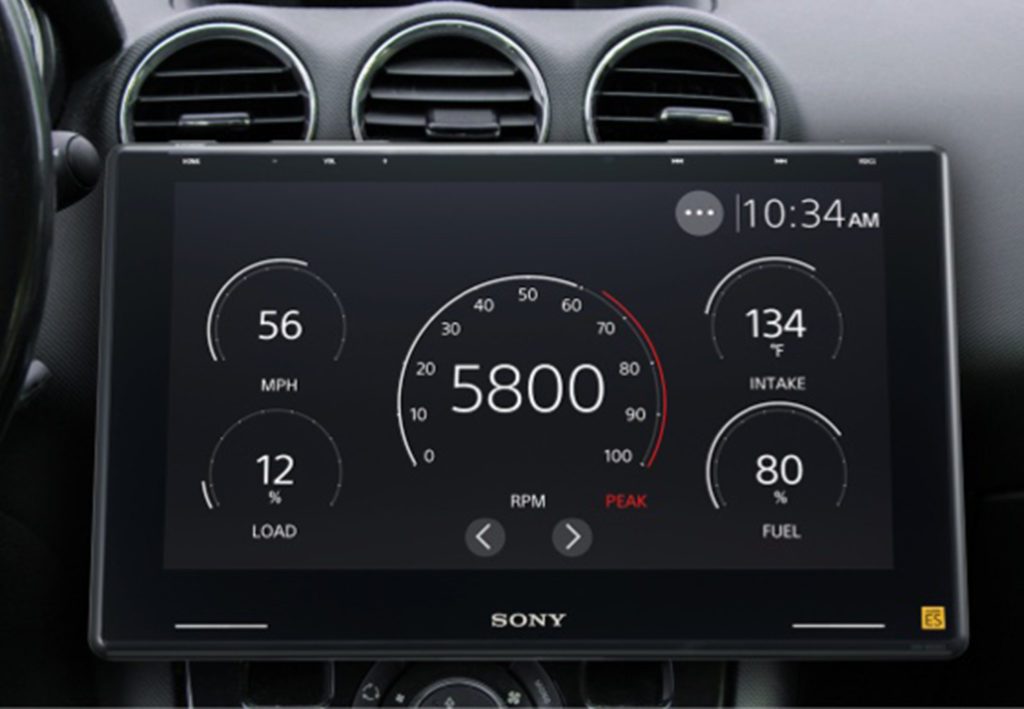
iDatalink is a relatively new feature that was introduced into the aftermarket stereo space to bridge a connection between your vehicle's computer and the aftermarket stereo. You can see this connection on many new vehicles from the factory where RPM, Speed, Boost, and other vehicle related information is displayed directly on the screen of the car.
A head unit that's compatible with iDatalink Maestro will create that connection and, in this case, allow the XAV-9500ES to display vehicle information like MPH, RPM, Fuel, tire pressure, battery voltage, check engine light, door alerts, and more. You can select the different gauges you want to view, and can customize the look and feel too. It's a great way to bring your vehicle into the modern age.
Unfortunately, I wasn't able to hook iDatalink Maestro to the unit in my demo box, but it comes fully capable. You'll need to purchase an iDatalink Maestro adapter and install it separately. I'd recommend finding the appropriate product directly at iDatalink's Website.
Customization Features
What's a head unit without the ability to make it your own? The XAV-9500ES has a few cool features that allow you to customize the look and control of the head unit.
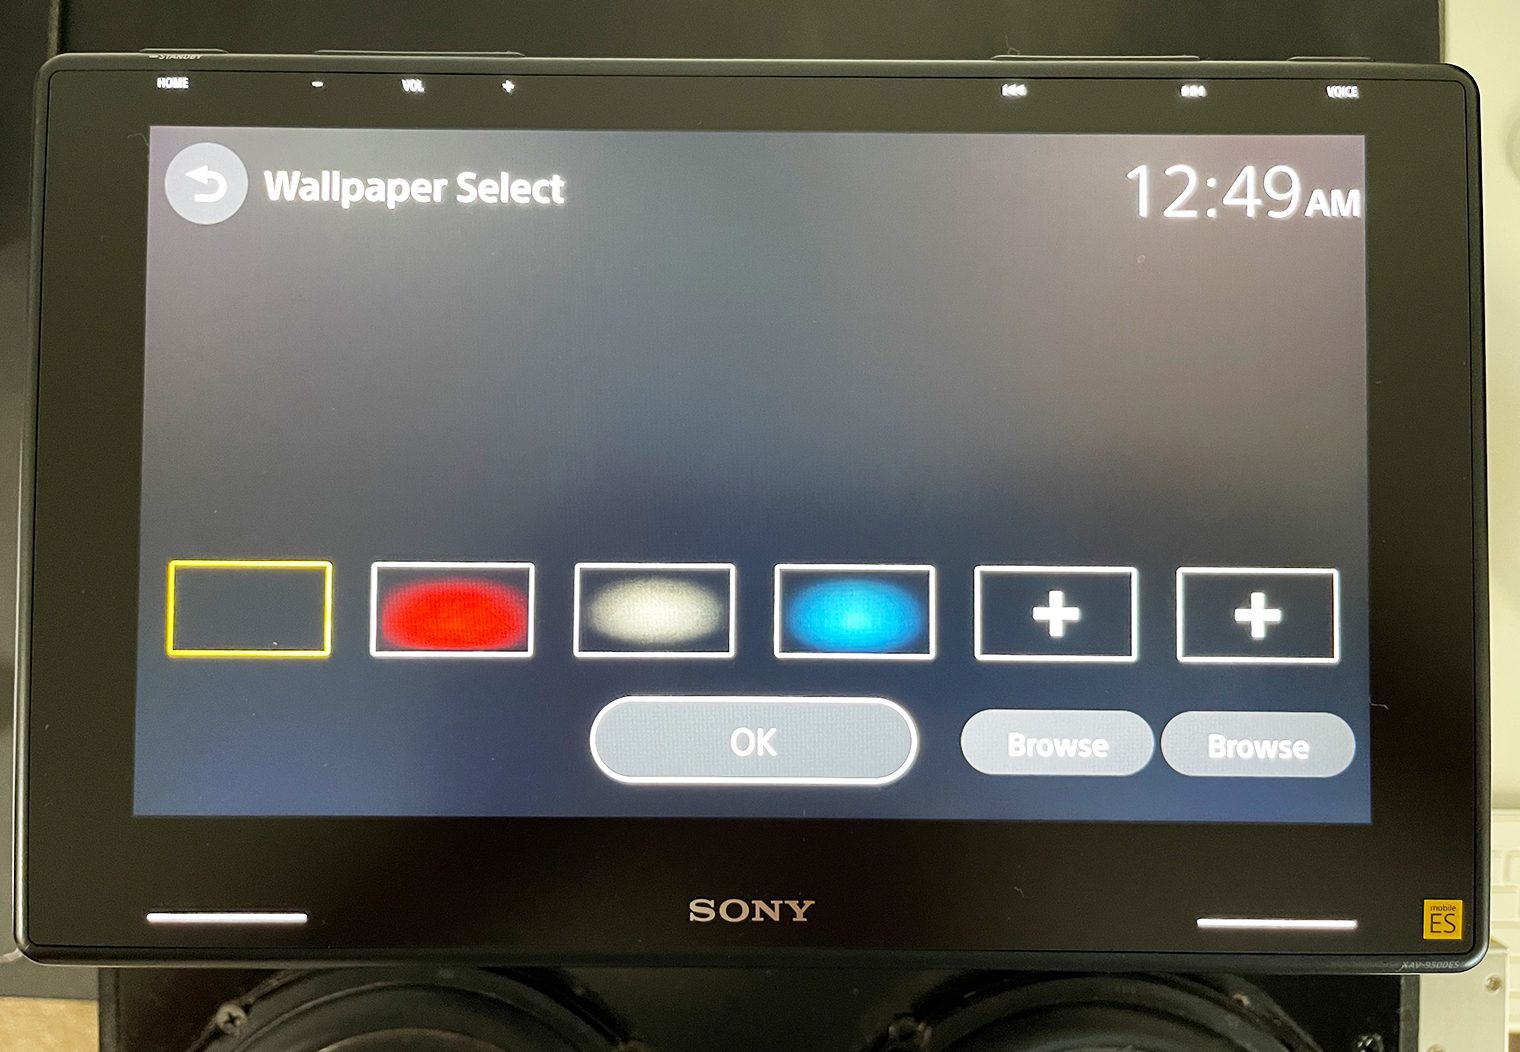
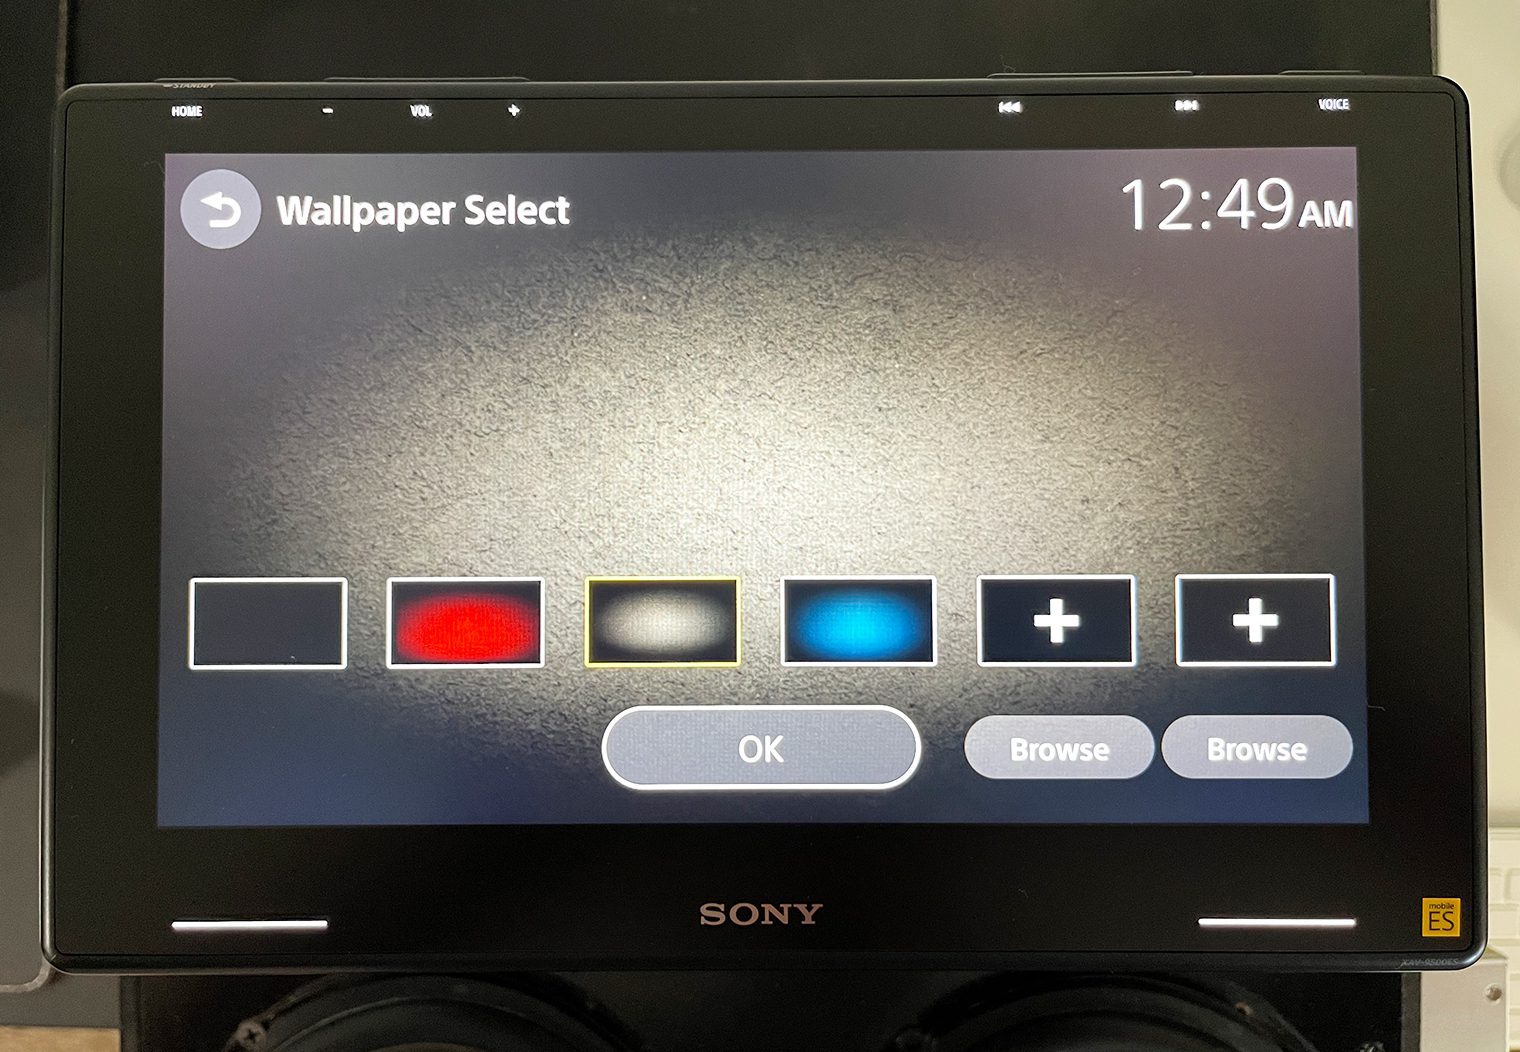
Customized Background
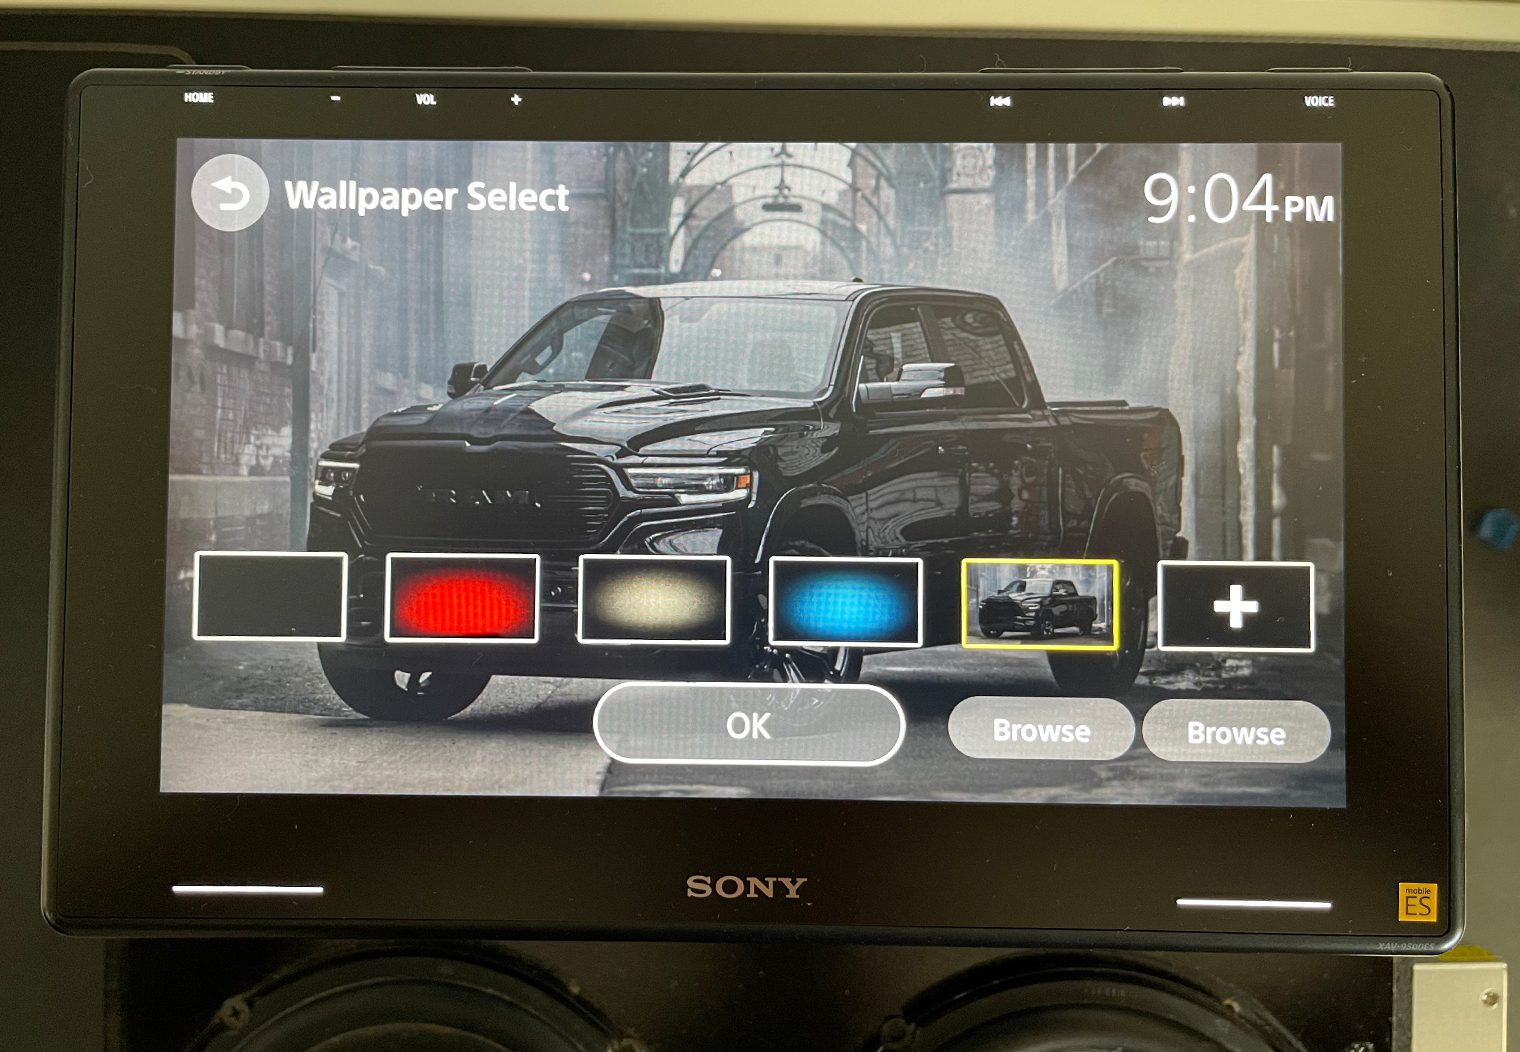
This is always a big one. Believe it or not, it wasn't until 2020 that Sony integrated custom backgrounds on their most recent XAV head units. The 9500ES comes fully capable of uploading an image and applying it to the background of the unit. It also has a four presets you can select from if you don't want a custom image.
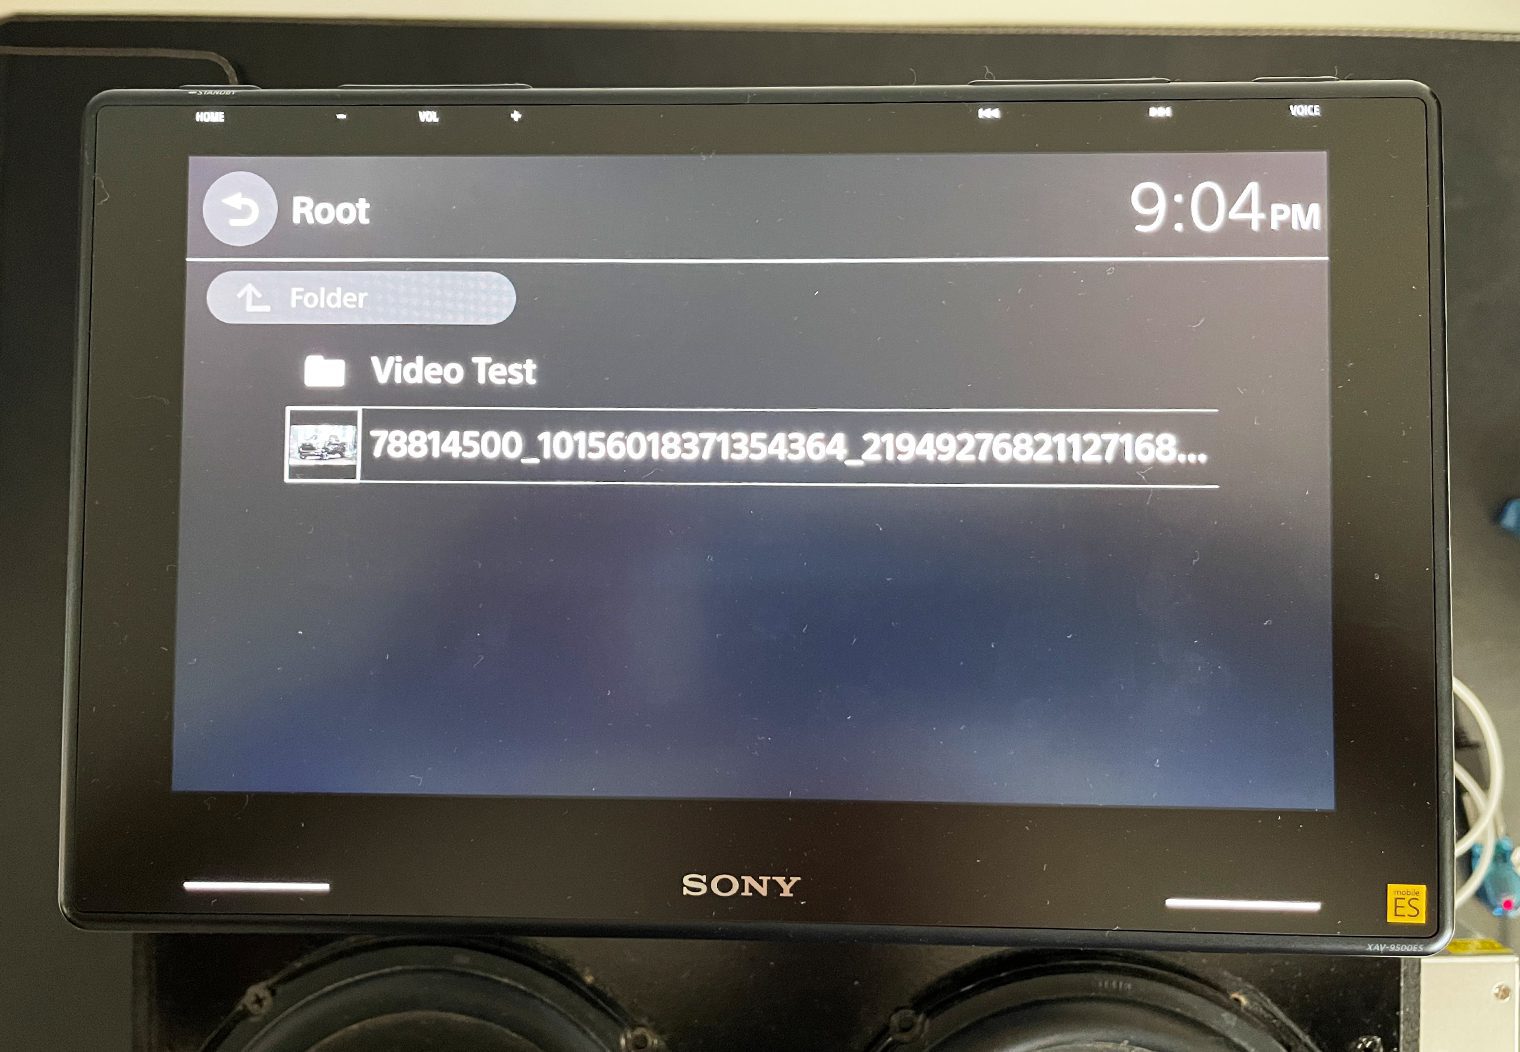
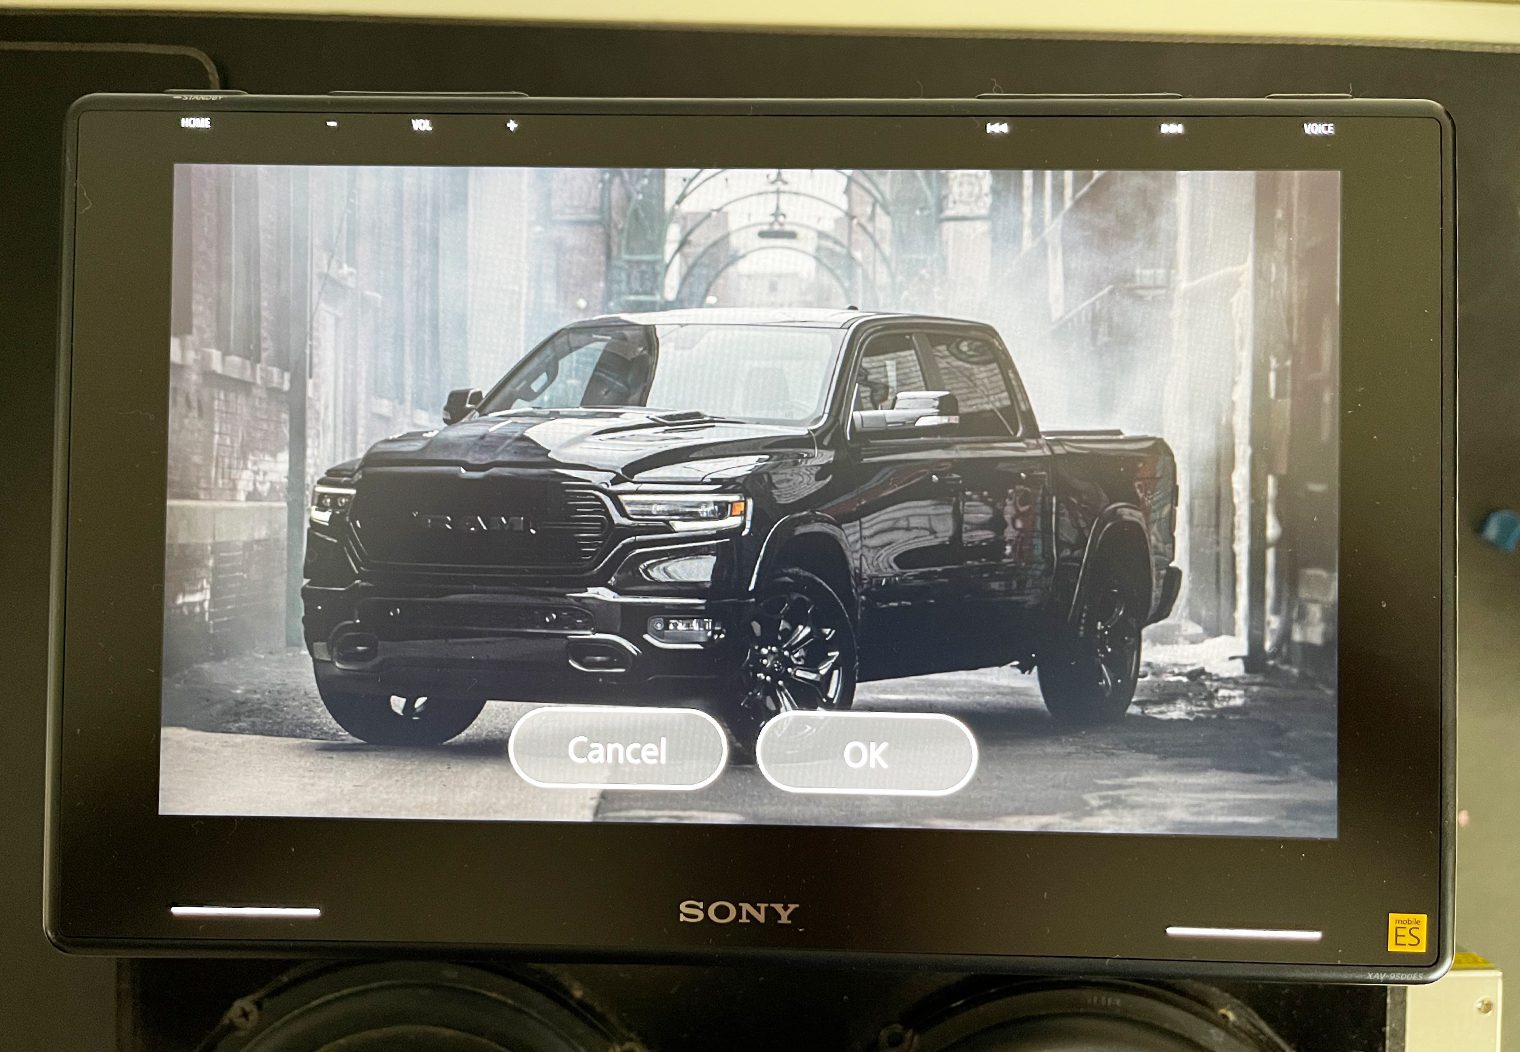
Uploading a custom background image is pretty simple. You'll just need to upload an image to a USB flash drive (it cannot be your phone), connect it to the unit and then select the image to apply it. Here's a few photos of the process.
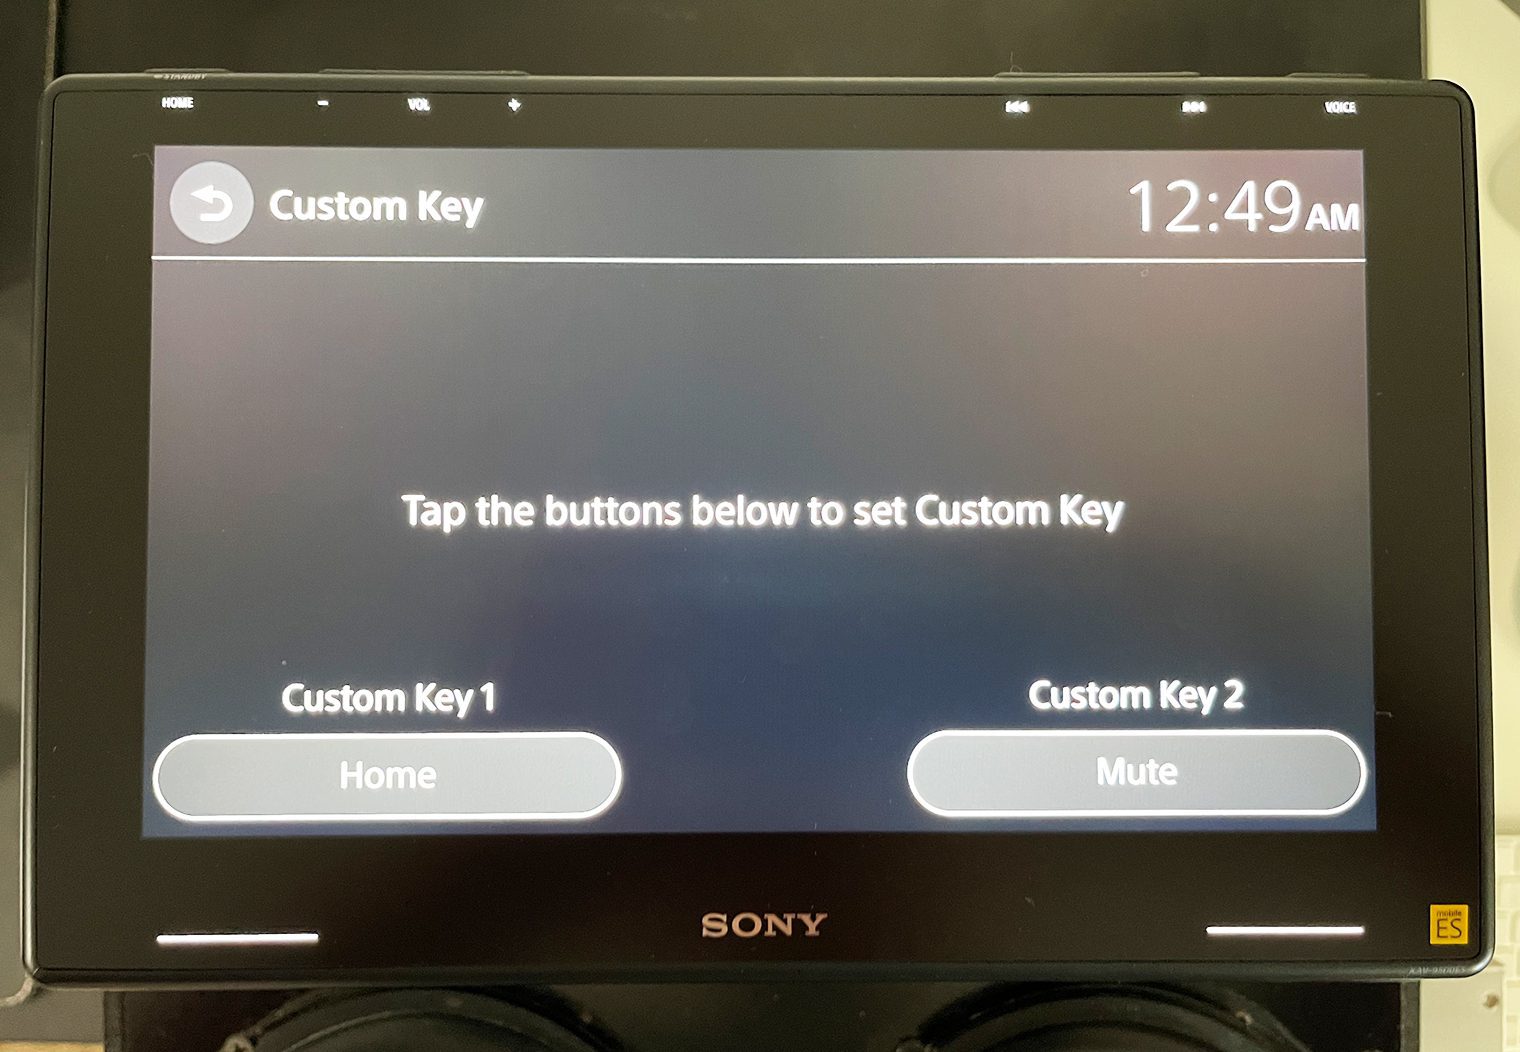
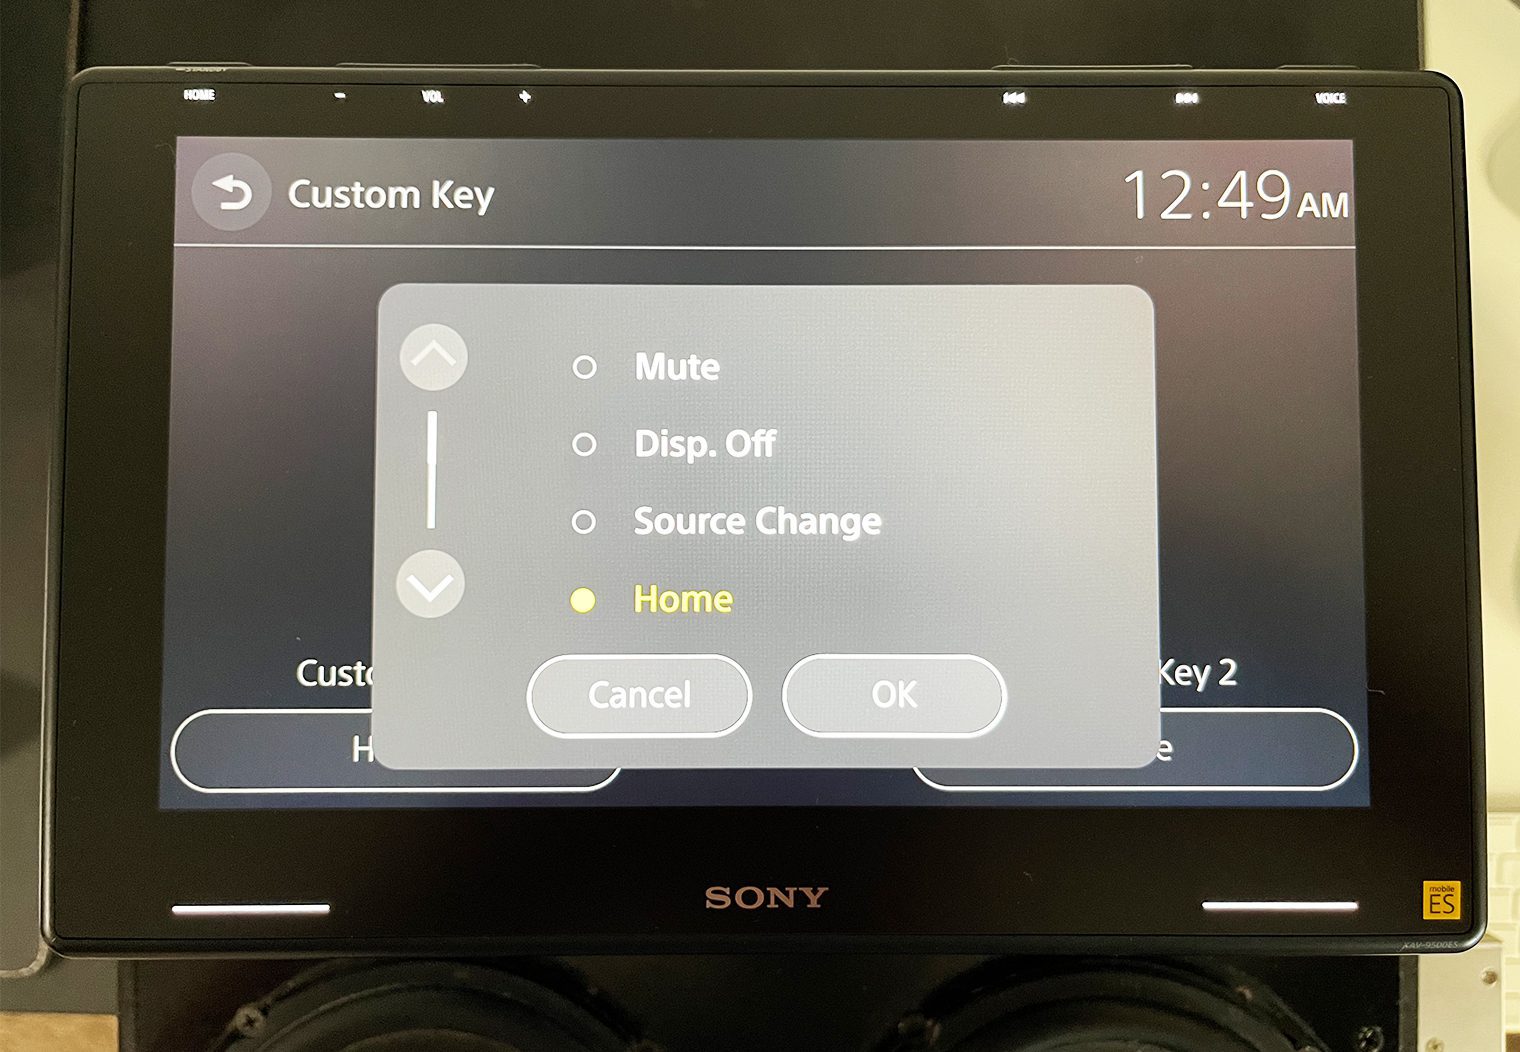
Custom Touch Buttons
One of the cool new features of this unit is the ability to customize the two touch-buttons that are located at the bottom left and bottom right hand side of the screen. Since the primary buttons are located on the top and might be a little less convenient to use, Sony added two touch-sensitive buttons on the screen that act as shortcuts. You can program them to do a variety of things, including:
- Mute
- Display Off
- Source Change
- Home
- Next
- Previous
- Vol +
- Vol –
- None
So for example, if you wanted volume control via these two buttons you would select the ‘Vol -‘ for the left and ‘Vol +' for the right. Whatever you decide you would like to use these buttons for, you can go into the settings and configure them accordingly.
Custom Steering Wheel Control (SWC)
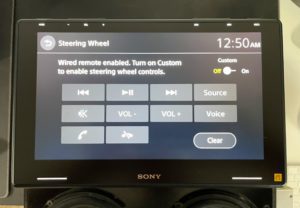
Many of the Sony head units that we've tested come with steering wheel control compatibility, along with the ability to customize what each button on your steering wheel does on the head unit. Similarly, the XAV-9500ES has a dedicated settings interface that will allow you to program each of the buttons that are on your steering wheel.
There's two approaches to adding steering wheel control to this head unit:
- You can get a vehicle specific adaptive module that will plug into your OEM wire harness. This adapter will pre-configure all of the functions on your steering wheel to the appropriate functions on the head unit by default. The downside to this is that you'll have to buy an additional adapter that typically costs between 30 and 60 dollars but it will simplify the installation.
- You can use the included SWC adapting wire harness (basically looks like a headphone jack), find the appropriate wires in your vehicle's harness that send the steering wheel control signals and then use the program functionality to program each key manually. It's a little harder but saves you the few extra bucks. Note this wiring method is only compatible with some vehicles.
What's Missing or Could be Improved?
There's a few things that are worth pointing out that are missing from this head unit, or things I think might not make total sense. These are some of the items that might make a difference in your decision to purchase this unit.
- Sony went all in on USB C on this unit and didn't even provide an adapter. I don't know if this was a cost thing or what, but most people are still using regular USB and for those who still are, you'll need an adapter like the one I used. Simple fix.
- This is NOT a multimedia player. It can't play video, doesn't have HDMI or anything. If you want multimedia, consider the XAV-AX8100 which has a dedicated HDMI input directly on the unit.
- After installing a few of these units now with the three-way mounting, I really think that the depth should have more room to get closer to the dash. I would like to see these units be within an inch or less away from the dash (for those who won't be blocking any buttons behind it).
- This unit also doesn't have WebLink. Now, if it had HDMI I probably wouldn't be mentioning this but there's no screenshare capability on this head unit. Beyond Wireless CarPlay and Android Auto you're pretty much out of luck.
- You still can't customize the color of the buttons or the newly added touch-bottons on the face. This really isn't a big deal and I'd consider it more of a ‘nice to have' feature. But it would be nice to match the color of your interior.
Conclusion
Sony's XAV-9500ES digital media player was designed for the audiophile. It was developed as a matching head unit to their high performance Mobile ES lineup of speakers and sub, and built around control. Control of the output and sound of your stereo. It will do this extremely well. Better than most head units I've seen on the market. It's certainly one of the best options for an oversized head unit.
I really like that they integrated the DataLink Maestro capability with this unit. I think it was a long time coming considering that capability has been out for years now. And of course, I love the size of the screen, clarity of the screen and the fact that they added shortcut keys on the face and placed the traditional buttons on the top.
One of my favorite new features, and game changers while you're in your car, is the wireless Apple CarPlay and Android Auto. I would upgrade from one of their previous units just to have this feature. CarPlay blows standard Bluetooth out of the water and enables Google Maps (and other navigation apps) which is HUGE.
All that said, it definitely lacks multimedia functionality. I think this was a lower priority for Sony considering it doesn't have HDMI, WebLink or multimedia features when you hook up a USB. For folks who are looking for multimedia you'll want to consider one of their other other units, which happen to be on our best multimedia and dvd player lists.
This unit was built for a performance car stereo system with a ton of great new features that really set the bar high for a head unit. If you're installing a custom stereo with high quality speakers and amplifiers and don't care too much about multimedia, this is one of the best options out there right now hands down.

Thanks Cameron. It’s also worth noting the following:
1. While this unit may be geared toward sound enthusiasts, the lack of bandpass crossovers on the front and rear outputs is puzzling. This means the unit is not suitable for a wide range of system configurations and requires the user to employ a separate dsp if they need both LPF and HPF filters on the outputs.
2. There is no digital output. The previous flagship Sony RSX-GS9 has an optical digital output. This unit does not. Competitors like the Stinger Heigh10 and others do include this feature.
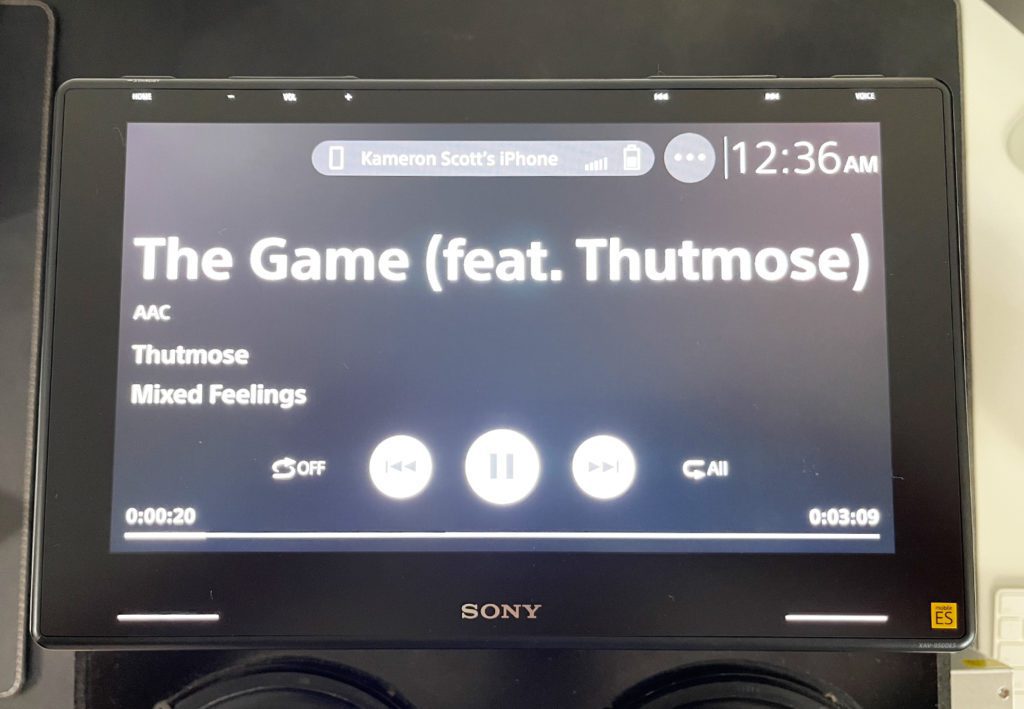
3. What’s with the giant lame analog clock display? Sony could have stepped up the display options- that’s disappointing.
4. A volume knob would have been a welcomed addition. The little buttons on top are terrible ergonomically.
A few questions:
-Does the unit down sample higher res sources to a specific output rate? (ie 48khz?) If I play DSD files or 24/192Khz files, how are they being output?
-What is the actual ESS dac being used on the unit? The RSX-GS9 used the ESS9018.
-Can the internal amp be disabled when using preamp outputs? Can preamp outputs be used while using speaker level outs?
-How quickly does the unit recognize a (full) USB drive and is there a long delay before being able to access the folder structure? (RSX-GS9 took a long time before being able to access files)
Hi Steve, answers to your questions below from Sony.
YOUR QUESTION: Does the unit down sample higher res sources to a specific output rate? (ie 48khz?) If I play DSD files or 24/192Khz files, how are they being output?
SONY RESPONSE:
DSD >>> Down-converted to 192 kHz / 24-bit
Native file playback other than DSD >>> Compatible up to 192 kHz / 24-bit. Non-native file playback other than DSD (when file property exceeds 192 kHz / 24-bit , up to 768 kHz / 32-bit) >>> Down-converted to 192 kHz / 24-bit
Further details as follows:
Supported Formats for USB Playback
– WMA (.wma)*1 *2
— Bit rate: 32 kbps – 192 kbps (Supports variable bit rate (VBR))*3
— Sampling frequency*4: 44.1 kHz
— Channel number : 2ch
– MP3 (.mp3)*1 *2
— Bit rate: 32 kbps – 320 kbps (Supports variable bit rate (VBR))*3
— Sampling frequency*4: 32 kHz, 44.1 kHz, 48 kHz
— Channel number: 2ch
– AAC (.m4a)*1 *2
— Bit rate: 16 kbps – 320 kbps (Supports variable bit rate (VBR))*3
— Sampling frequency*4: 8 kHz – 48 kHz
— Channel number: 2ch
– ALAC (.m4a)*1 *5
— Sampling frequency*4: 8 kHz – 384 kHz
— Bit per sample (Quantization bit): 16 bits, 24 bits
— Channel number: 2ch
– FLAC (.flac)*1
— Sampling frequency*4: 8 kHz – 384 kHz
— Bit per sample (Quantization bit): 16 bits, 24 bits
— Channel number: 2ch
– WAV (.wav)*1
— Sampling frequency*4: 8 kHz – 768 kHz
— Bit per sample (Quantization bit): 16 bits, 24 bits, 32 bits
— Channel number: 2ch
– DSD(.dsf/.dff)*6
— Sampling frequency: 2.8 MHz, 5.6 MHz, 11.2 MHz, 22.4 MHz
— Channel number: 2ch
*1Copyright-protected files and multi-channel audio files cannot be played back.
*2DRM (Digital Rights Management) files cannot be played back.
*3Non-standard bit rates or non-guaranteed bit rates are included depending on the sampling frequency.
*4Sampling frequency may not correspond to all encoders.
*5Displaying the tag information is not supported.
*6Converted to PCM internally (192 kHz).
YOUR QUESTION: What is the actual ESS dac being used on the unit?
SONY RESPONSE:
– The RSX-GS9 used the ESS9018. XAV-9500ES uses ES9080Q.
YOUR QUESTION: Can the internal amp be disabled when using preamp outputs? Can preamp outputs be used while using speaker level outs?
SONY RESPONSE:
– Speaker out will be output even when Line out is used. It is not possible to turn off either of them.
YOUR QUESTION: How quickly does the unit recognize a (full) USB drive and is there a long delay before being able to access the folder structure? (RSX-GS9 took a long time before being able to access files)
SONY RESPONSE: It takes a few seconds to find the file to play, but you can start browsing as soon as it is found. The maximum number of files for the 9500ES is set at 25,000.
Latest updated has added video playing capabilities. May want to update your review.
Hi Kameron,
In your video you stated you had an iPhone. I wanted to ask whether you could play music from your iPhone via USB-C as opposed to CarPlay. I have ALAC files on my iPhone and want to play them via a wired connection as opposed to LDAC.
Looking forward to hearing from you,
FP
Unfortunately, wired CarPlay and music is not available on this unit. Only wireless CarPlay and standard Bluetooth
You can play them via USBC Drive plugged into the USBC port, just mount a 2TB drive in your glovebox and never have to touch it. I think you can store them on your phone too in the files section and play them off phone storage, but Cheap hard drive sounds way better.
Hi . Between buying pioneer z9350 and this Sony model, which one is better
Hi Cameron,
How much modification was required to get this fitting in the dash position of the vw gti you mentioned in the article?
Metra and PAC both make an adaptive dash kit and wire harnesses which would simplify the process. You don’t need any ‘modification’ per se but would need to remove the old head unit, wire the harnesses together (sony + a metra or pac adaptive wire harness for a GTO) and then install it using the adaptive dash kit. Pretty standard process.
Is the screen removable?
Can you please direct me as to where the USB-C port is? The owner manual says there’s one behind the unit, however i have no idea how to remove it from the console to get to it or know what to do with the cable for future needs (like updates). There isn’t one on the front? It came installed in a motorhome we purchased in June. The dealer won’t touch it.