In this article: We'll unbox and review a brand new Sony XAV-AX5500 head unit and give you a first look at what's inside the box along with features, opinion and more.
We recently installed a brand new Sony XAV-AX5500 receiver in a base model 2015 Subaru STI. The stock stereo in the base STI is severely lacking in features, sound quality and in general just doesn't get loud enough. At any given time with the stock trim, we were constantly at about 90% volume level. So we decided it would be a great opportunity to upgrade to a new Sony.
For those of us who are familiar with the STIs, it’s really nothing new that the OEM stereos in Subaru’s are pretty plain. In fact, when the STI was relaunched back in 2004 it didn’t even come with a stereo at all. They were designed for performance, not for luxury or comfortability. Today the newer models do have some optional upgrades from Harmon Kardon and Kicker, but even these are often swapped out for aftermarket alternatives to bring more life and functionality to the car.
Even though these cars are focused more on performance than electronic features, it’s nice to have some of the modern features available today in a car. And it's especially important for those who daily drive them and don't just take them on the track.
Sony has always put out high quality units, and they've always scored highly on the style scale for us. So we were excited to get a new double din touchscreen head unit installed in our STI that would give the dash a facelift, and also give us the latest features in all of the new cars on the road today.
In this review we'll walk through some of the key features of the XAV-AX5500, what we liked about it and what we felt may have been lacking. Things like Apple CarPlay, WebLink, sound enhancements and quality/volume – we'll cover it all. And of course, if you have questions about this unit that you think you'd like answered before you buy one please leave us a comment!
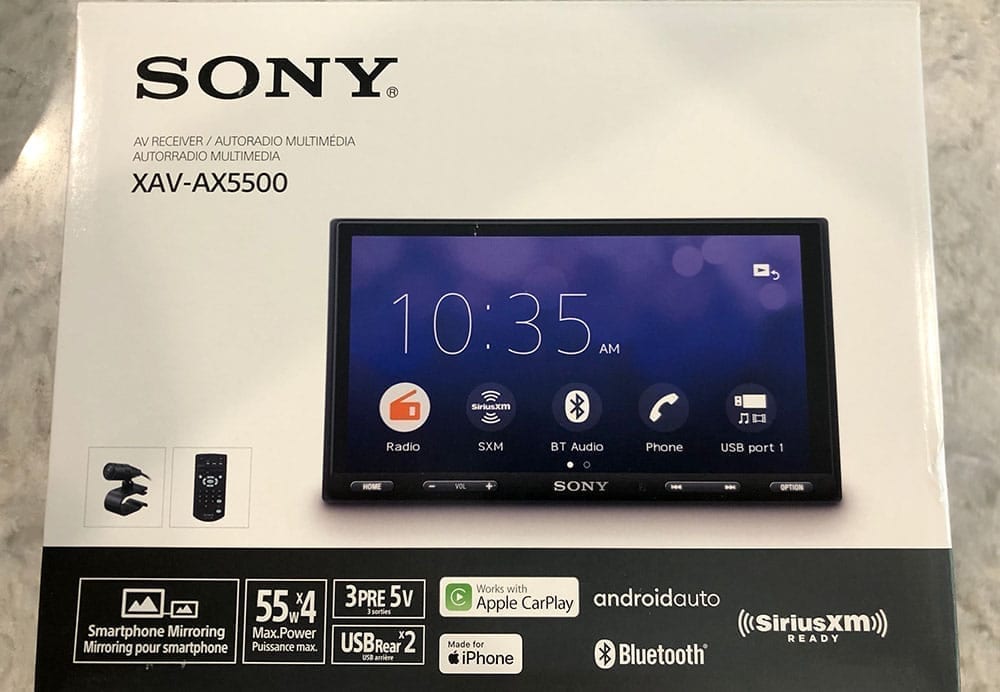
Unboxing the XAV-AX5500
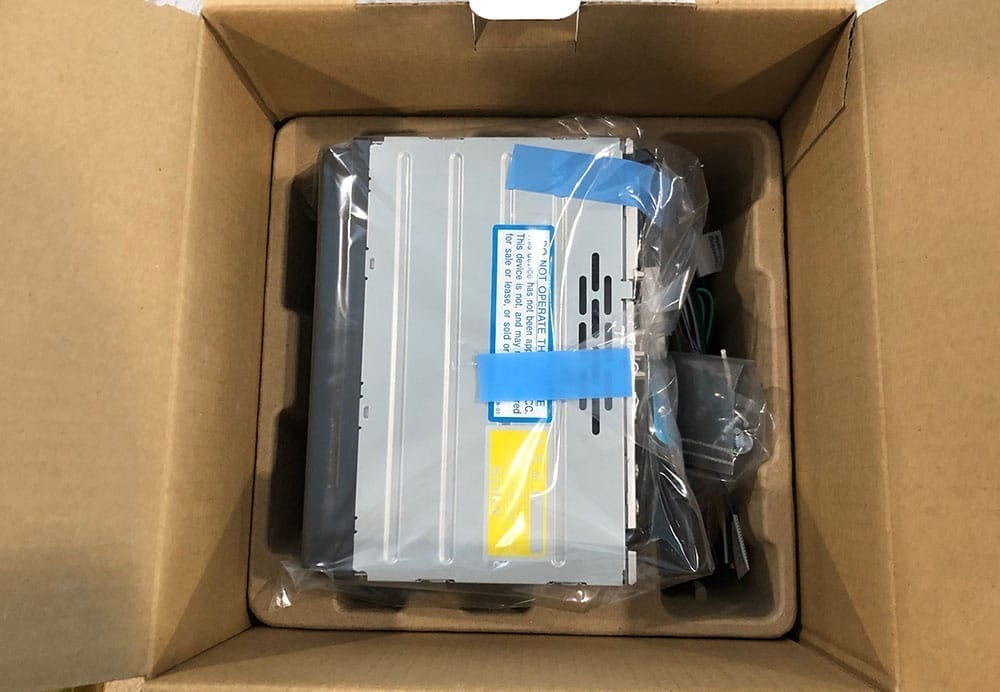
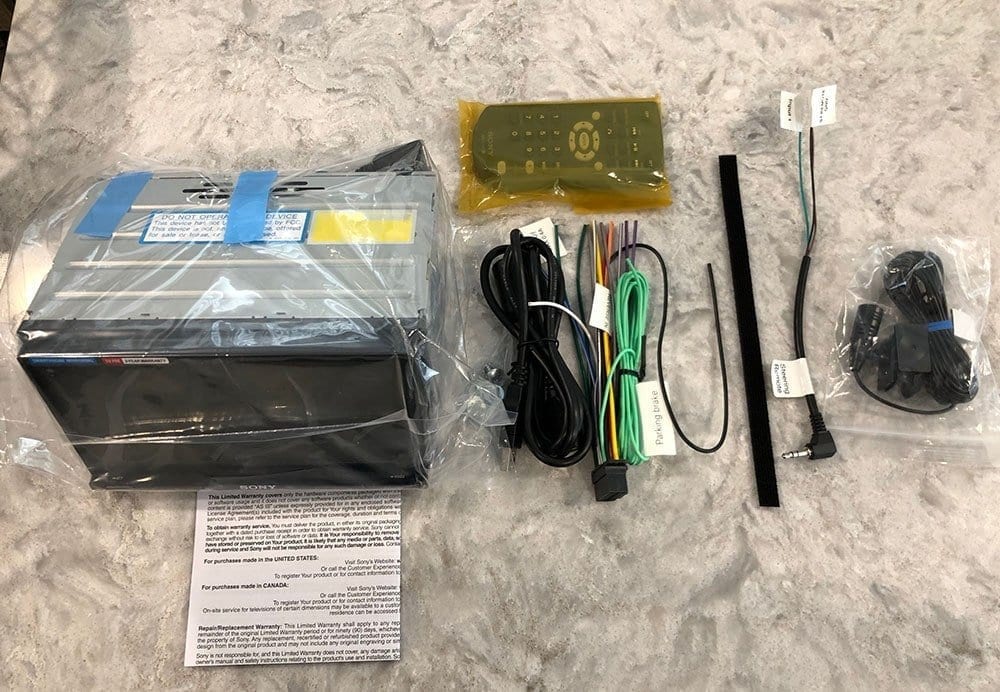
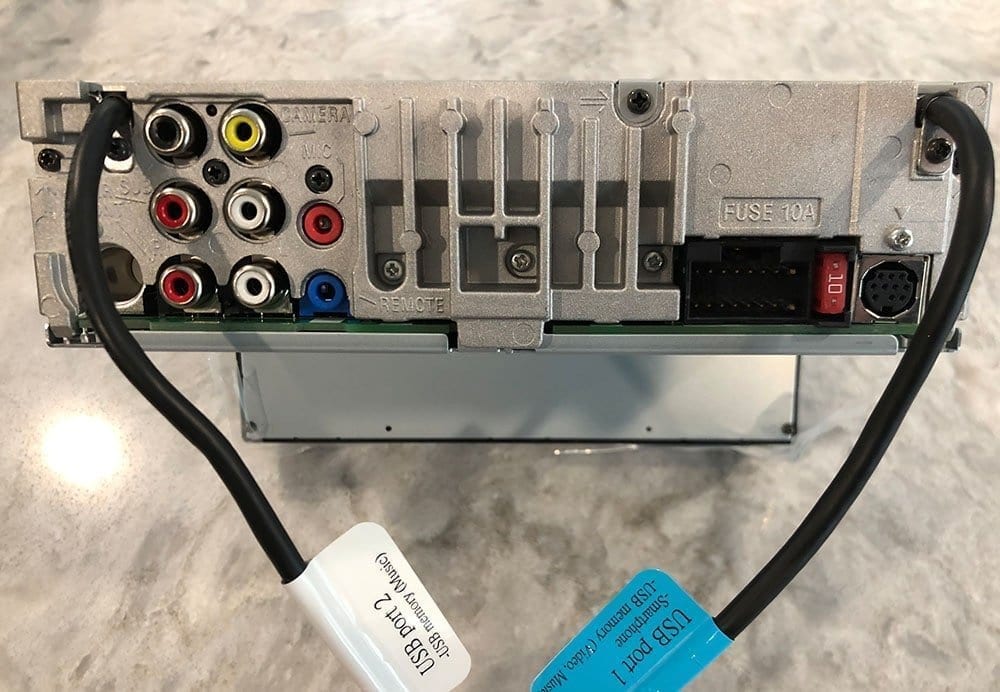
Sony's XAV-AX5500 comes shipped with all the standard components in a head unit. Everything you need to install it and make it work. This includes:
- Chassis
- Wiring harnesses
- Steering wheel control adapter
- Remote control
- Microphone
- USB extension
- Owners manual
Like almost all universal units you'll purchase, it doesn't come with the vehicle specific dash kit (if your vehicle doesn't have the standard double din opening) or the wire harness to adapt the Sony head unit's wire harness to your vehicle. These need to be purchased separately – we recommend finding the vehicle specific parts you need on metraonline.com.
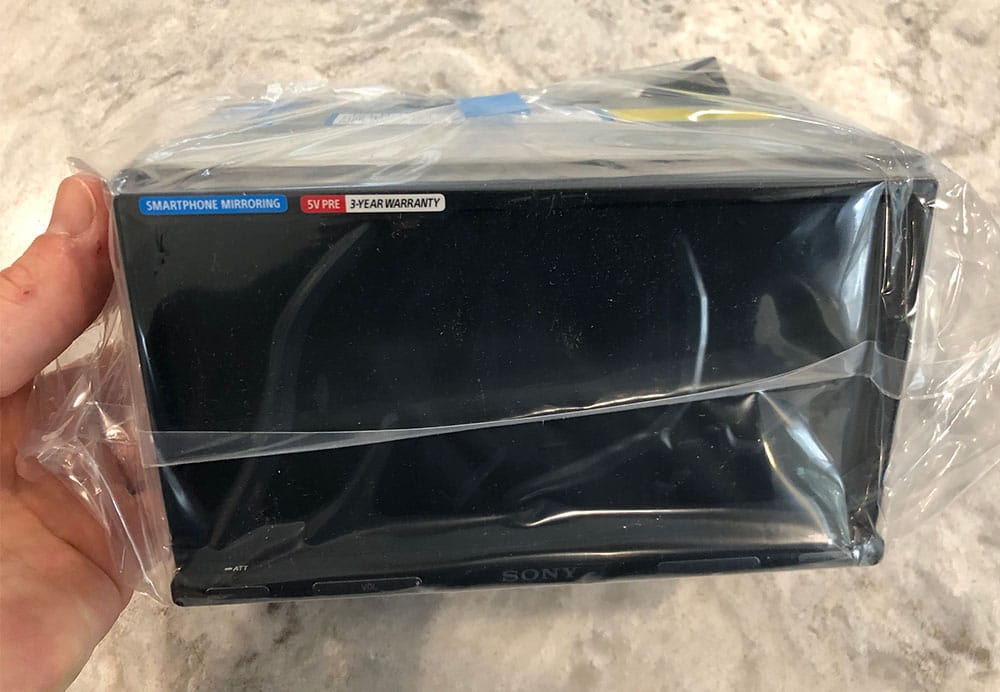
Here's a few photos we took as we were opening up the unit for the first time.

First Look and Impressions
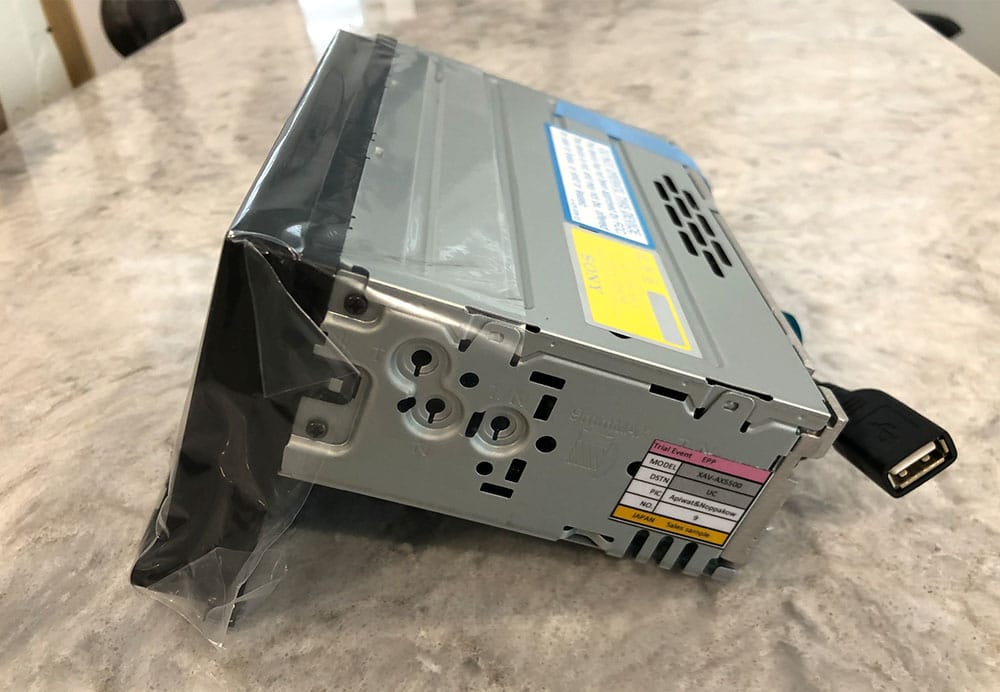
When we opened up the XAV-AX5500, the first thing we looked at was the chassis and screen. All of Sony's latest double din size units actually are fitted in a single din chassis, making it more compact and easier to install in your dash. From the front of the screen to the back of the unit, it's only 5.47 inches deep. This is especially helpful for installations in vehicles that have tight dashes like Audis and Mercedes.
But more important than the chassis, and one of the key enhancements of the AX5500, is the bevel-less 7in (6.95″) capacitive touchscreen. This is one of the main reasons you buy these units right? Once you peel back the protectant film, you can see the beauty of it. Even before we installed the unit in our STI, it looked incredibly sleek and we knew it would be seamless in our dash and we were excited to see how it looked.
The 6.95″ touchscreen is a capacitive touchscreen. Note that 6.95″ is measured diagonally, not from side to side. For those who don't know what a capacitive touchscreen is, there's two types of screens in head units – capacitive and resistive. What we like about capacitive touchscreens is that they're very similar to the feel of an iPhone. Capacitive touchscreens use an electrical signal to sense touch, where as other screens like resistive use the pressure from touching the screen to detect touch. A resistive touchscreen is a touch-sensitive computer display composed of two flexible sheets coated with a resistive material and separated by an air gap or microdots. One of the benefits of resistive is that any surface can trigger the touchscreen – a nail, pen tip, whatever you'd like. Capacitive, although a much cleaner and nicer feel, can only be triggered by something that's conductive like your finger.
Installation
We installed the XAV-AX5500 in our 2015 Subaru STI. Using a combination of vehicle specific and universal parts, it was fairly straight forward. Note that these are vehicle-specific parts. Refer to either Crutchfield's part finder or metraonline.com to find the specific dash kit, wire harness and other vehicle-specific parts.
Parts Required for Install (2015 Subaru STI)
- Metra 95-8905B STI Dash Kit – $11
- Subaru Wire Harness w/steering wheel controls – $17
- *Note if you buy this specific harness you do not need to buy the Metra Axxess ASWC-1 Universal Steering Wheel Control Interface that is commonly used with this setup to retain steering wheel controls. This saves you about $45.
- Optional Harnesses for added functionality:
- Metra AX-TOYUSB USB Integration – $15
- This harness will retain the existing USB port that is in your center console.
- Metra AX-TOYUSB USB Integration – $15
- 16-pin harness wired with RCA connectors for the auxiliary input connections (can’t find link, I didn’t use it for my install cause who uses a headphone jack these days…)
- MFD Backup Camera Relocation Harness – Many Subaru vehicles use the small Multi-function display (MFD) in the dash to display the OEM backup camera. They have developed a harness to allow you to relocate the backup camera image from the MFD to the new larger screen. https://www.autoharnesshouse.com/81491_rec.html – $55
- SiriusXM Satellite SXV300V1 Tuner – $55
2015 Subaru STI Stereo Installation Quick Guide
- Disconnect your battery.
- The dash trim removal on the STI is simple. You can use a small tool like a flat head screwdriver or even your fingernails to pry the top of the trim towards the rear of the vehicle. Once you get that pulled off you will notice a few harnesses still holding you back. Unclip the 3 harnesses using a small flathead and pushing up from the bottom of the harness white tugging on it gently to release. Now you can remove the 4 screws holding in the OEM unit with a Phillips screwdriver. Remove all the harnesses from the OEM unit. You may need to pry on them if they are being stubborn and won’t move.
- Wiring Harness – I always suggest soldering all connections rather than using crimped connections to reduce the chance of them ever coming apart. My harness colors matched up perfectly, even the steering wheel harness. I strip the wire and solder them 1 by one, saving the Black Ground Wire for last as you will have a few that need to be wired together. You can ground the neon green E-Brake wire to eliminate this safety feature, otherwise, you have to run that wire to the E-Break or fuse panel.
- Install your Metra dash kit to the new Sony Head Unit with the instructions provided. You can compare the mounting points to the old unit for reference. I took my time here to make sure I had the bezel of the new unit totally flush with the dash kit for that OEM look and feel.
- You are almost ready to hook everything back up. Now you have to decide where to run the microphone. I took the overhead dome light down by popping off the clear plastic, removing the lights and finding 2 screws hiding behind them. Once I removed that I found the original microphone and I was able to simply move that out of the way (2 small screws) but left it in place. I then used the supplied sticky mount for the microphone to stick it in place of the old one near the vent slots. I ran the wire towards the passenger side by pulling the headline down gently, then down the A-Pillar behind the door weather stripping and into the glovebox area. Then I simply ran the wire behind the glove box towards the center console. This only took about 5 min to do.
- The most important thing you have to figure out is where to run the USB extension cable. You do have some options here. The unit comes with 2 USB ports in the back. 1 is strictly for use with CarPlay, the other will play music files but not CarPlay. So with the USB harness from above, you can hook either one to the OEM USB port. I chose to use the supplied extension and run it into the glovebox for the CarPlay port. I then use a long iPhone Cable that runs along the passenger side of the center console and simply hangs there. I like it this way because the cable is hidden between the console and the passenger seat until I grab it for use.
- Finally, you can connect all the harnesses to the car, then to the Sony Unit, and install it with the 4 mounting screws. Reconnect the 3 harnesses to the dash and clip it back in place.
- Reconnect your battery and test out the unit! Enjoy!
Powering it Up for the First Time
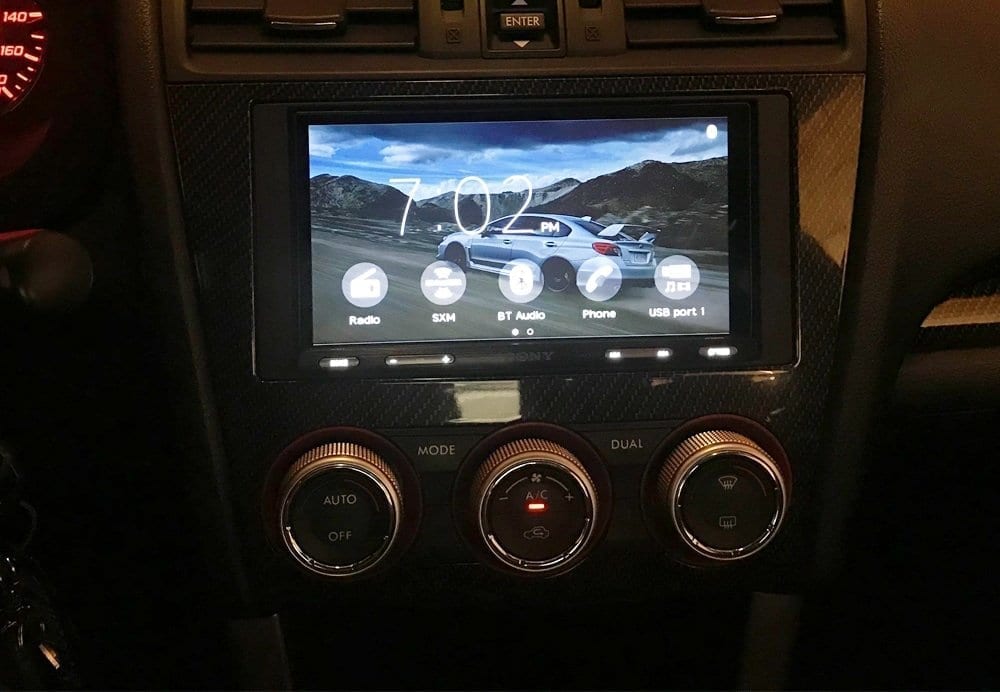
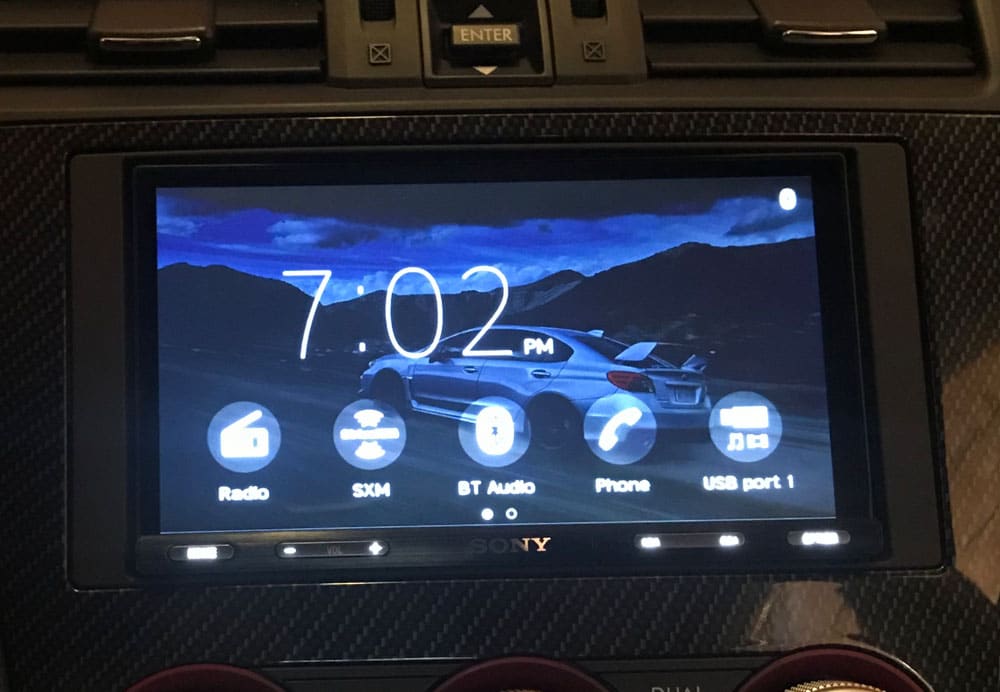
Once installed, we really got to see what Sony meant by the “Bezel-less” touchscreen. With a little bit of finesse and adjusting the Metra dash kit, we were able to align the screen perfectly flat with the dash. This really creates an OEM look and feel with this aftermarket unit. The only part that protrudes is the button selection on the bottom of the head unit. They did a great job with button placement and it looks like its meant to be.
The startup of the unit is very fast. Once you turn the car on and plug in your phone it is already ready to go and CarPlay opens up before you are in gear and ready to drive off. The screen quality great with good contrast and adjustability, more than enough for navigation and rearview cameras.
The user interface feels a lot like an Apple product, its very simple with not a lot of options.
Running Through the Key Features
The XAV-AX5500 has just about all the features that you're going to want in a double din head unit. Let's walk through some of the key features and areas of the AX5500's interface, what we liked and what we didn't. Note that we used this head unit on a non-amplified system so there may be a few features that we didn't put to the test fully.
Display, Interface & Customization
Starting with the display, we have to say that we really love the screen on this thing. It's vibrant, clean and sleek and makes the features, buttons, imagery and just the general interface pop. The UI is really simple and easy to use which is always helpful considering you're using this while you should have your full attention on the road.
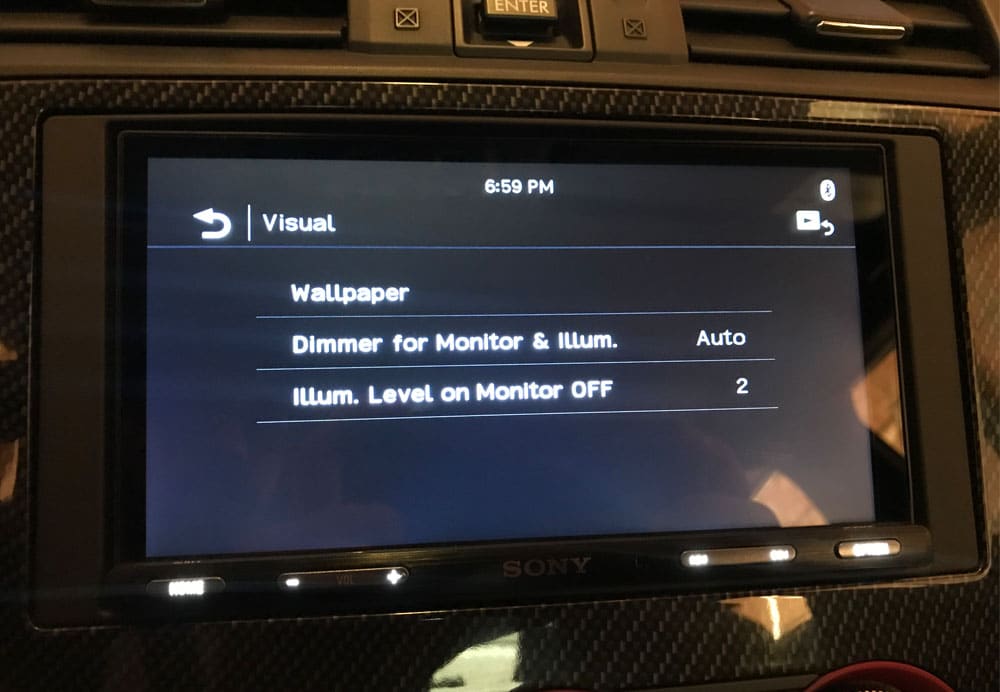
You have all of the basics that you need like screen brightness, audio control, radio functions, Bluetooth, etc. However, like the Sony XAV-AX8000 we felt like there's an opportunity to have more customization functionality in the unit. You're not really able to match the interior of your car very well because the buttons are permanently illuminated white. They look clean, don't get us wrong but it would be nice to have an RGB theme selection for the buttons and more broadly the color scheme of the interface and it just doesn't have that. Combined with the bezel-less screen, this kind of customization would really make it look OEM in your vehicle.
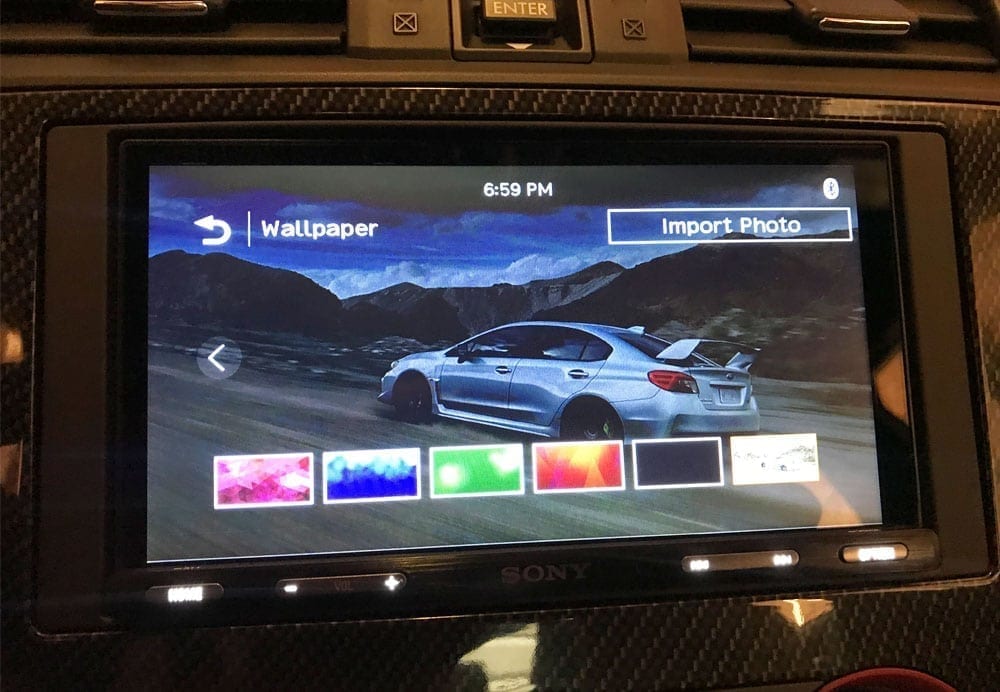
One feature that we did like about this unit that other units like the XAV-AX8000 don't have is the ability to upload custom wallpaper images. All you need to do is load your image onto a USB thumb drive, insert the drive into the USB input and select it from your SD Card. It really adds a custom look and touch and if you have a high quality image, the screen on this head unit will definitely pull out the detail of the image. Note you can only add one image at a time.
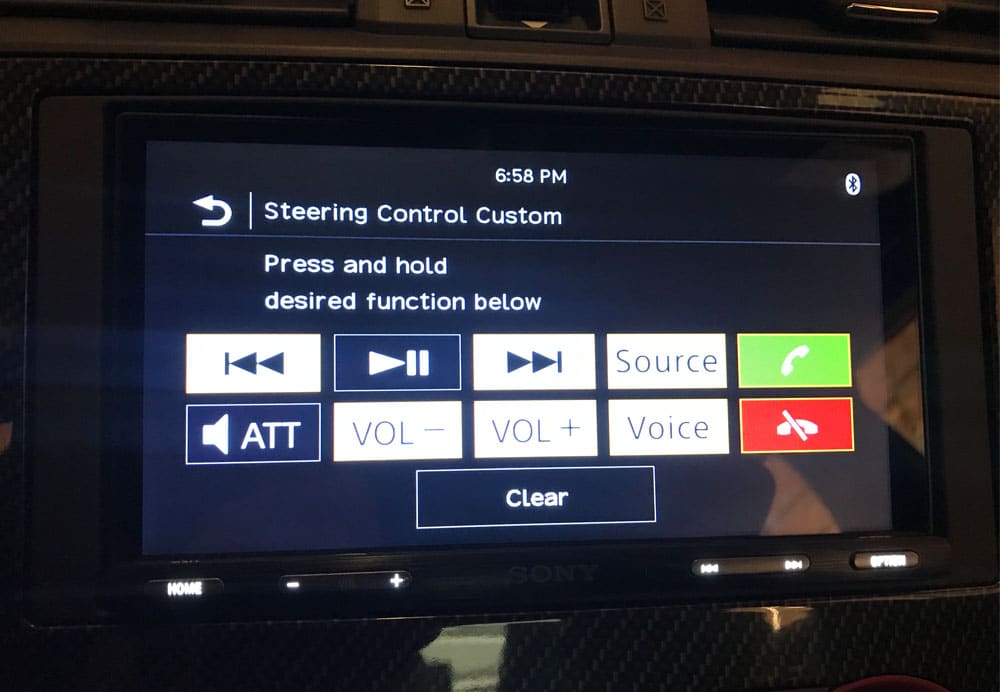
Additionally, we found the steering wheel control settings very intuitive and easy to use. We didn't even need to purchase an adapter for the STI. We simply wired it up to the OEM signal wires, plugged it in and programmed it. See our video up top for a walk through. Note that not all vehicles are readily adaptable to aftermarket head units like the XAV-AX5500 and you may need an adapter.
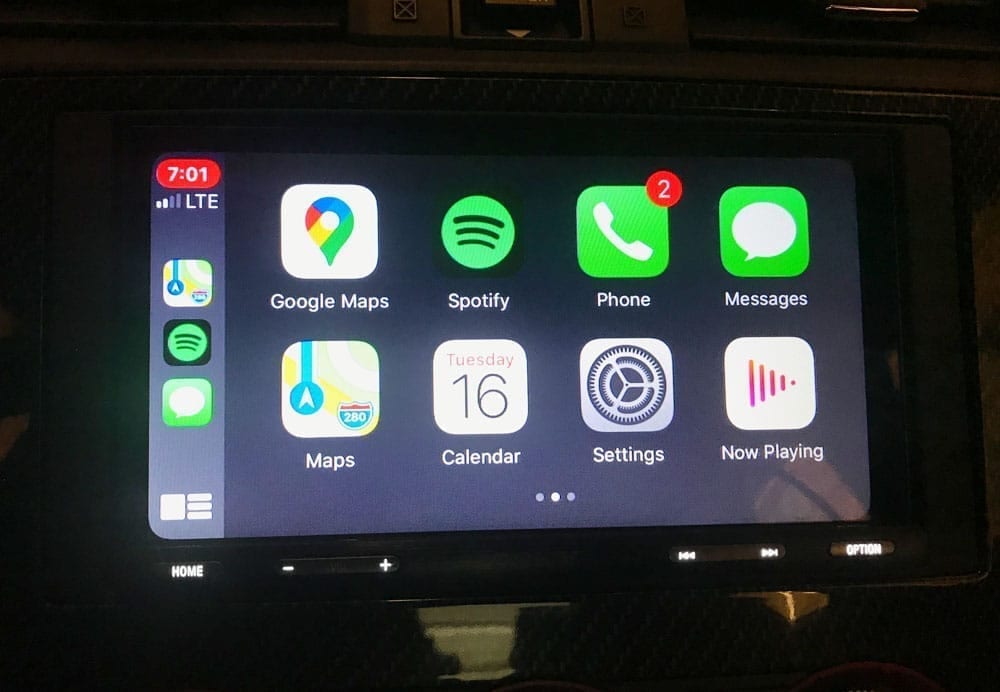
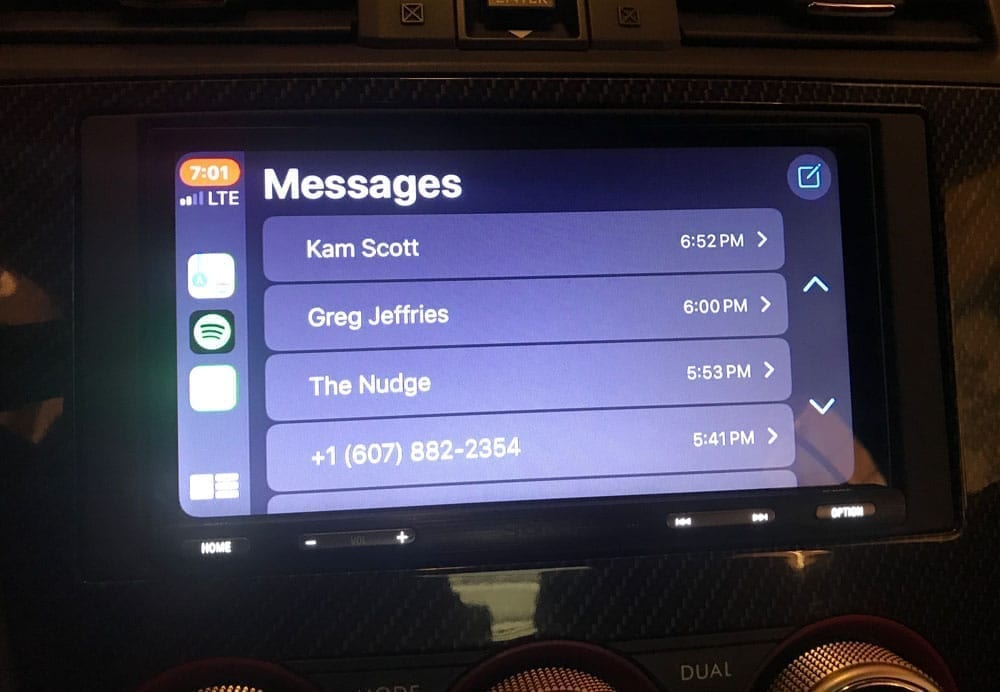
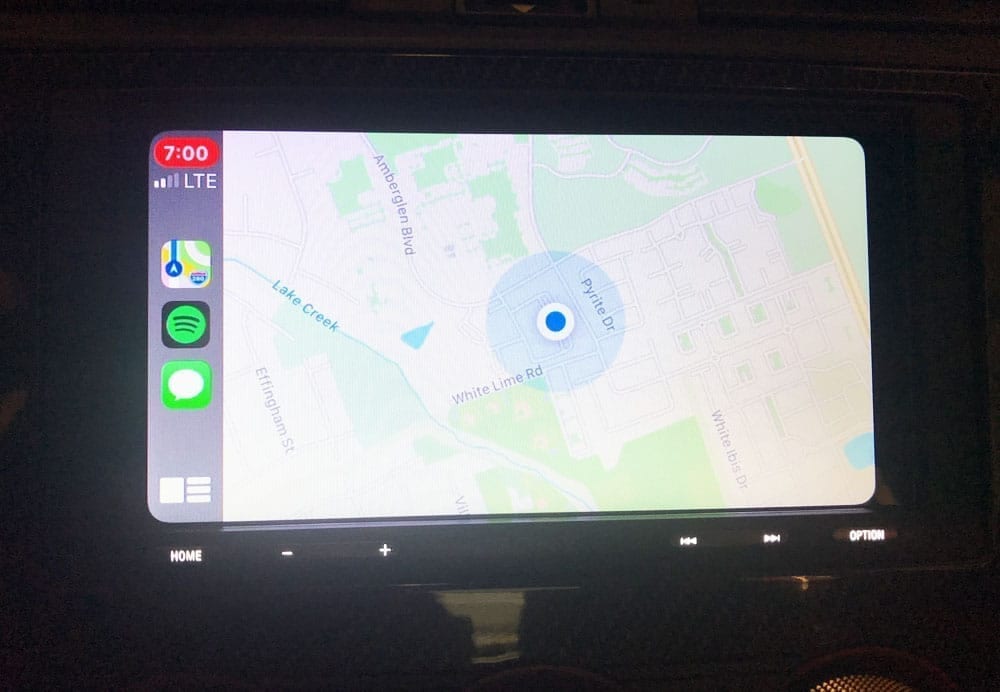
Connecting Your iPhone to Apple CarPlay on the XAV-AX5500
CarPlay is becoming a standard, so it's a pretty big deal if the double din unit that you're buying doesn't have it. Sony's with the trend and has fully integrated Apple CarPlay and Android Auto into the unit to bring the Apple/Android interface directly to your car so that you don't have to pull your phone out every time you want an app opened. This was a pretty huge feature add to the STI so we were excited to finally be able to use it.
We're Apple folks here so we only had iPhones to test Apple CarPlay. Sorry Android users but you can safely assume that this unit fully supports Android Auto.
Apple CarPlay is still in its infancy at the time of this article (in our opinion!). It's a powerful feature but Apple still has a way to come to really make it feel like it's the preferred interface in your car (over your phone itself). And this isn't specific to Sony by the way, Apple CarPlay is the SAME in pretty much all head units – it's from Apple not the manufacturer of the head unit.
Right now, Apple CarPlay covers the main features though:
- Voice command for opening apps or audio within apps. I frequently ask Siri to play the latest news on the way home from work. You can use it to dial numbers or people in your contact list and even write or respond to texts. You can use it to play music or open up apps or even use it for navigational purposes. For example “take me to the nearest gas station”.
- Voice read text messages and voicemail. You can use it to read your latest text messages, respond to those text messages via voice and listen to voicemail.
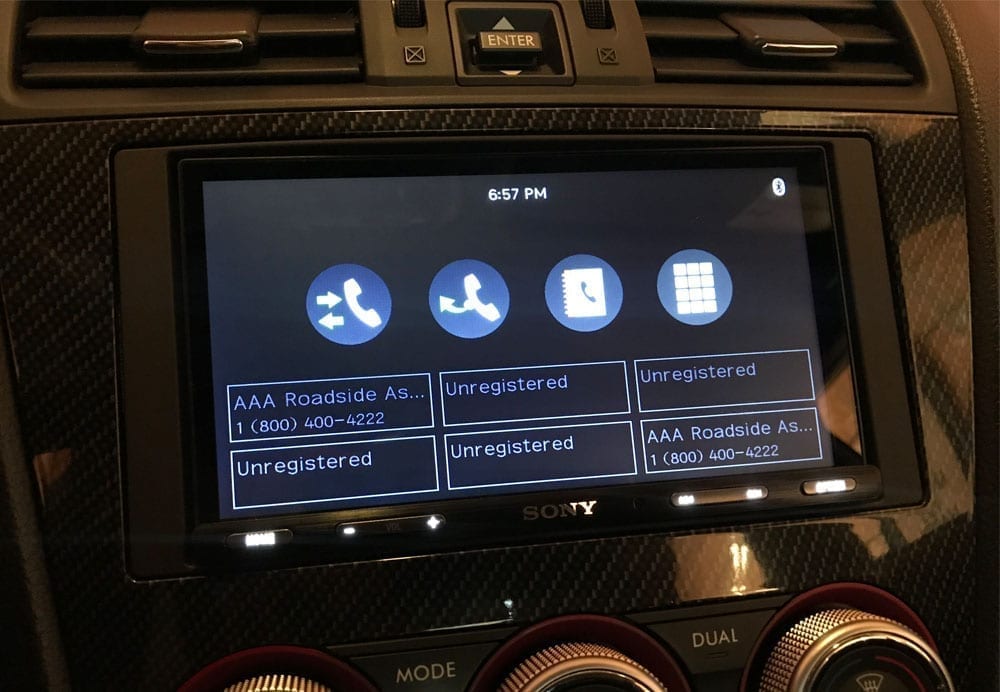
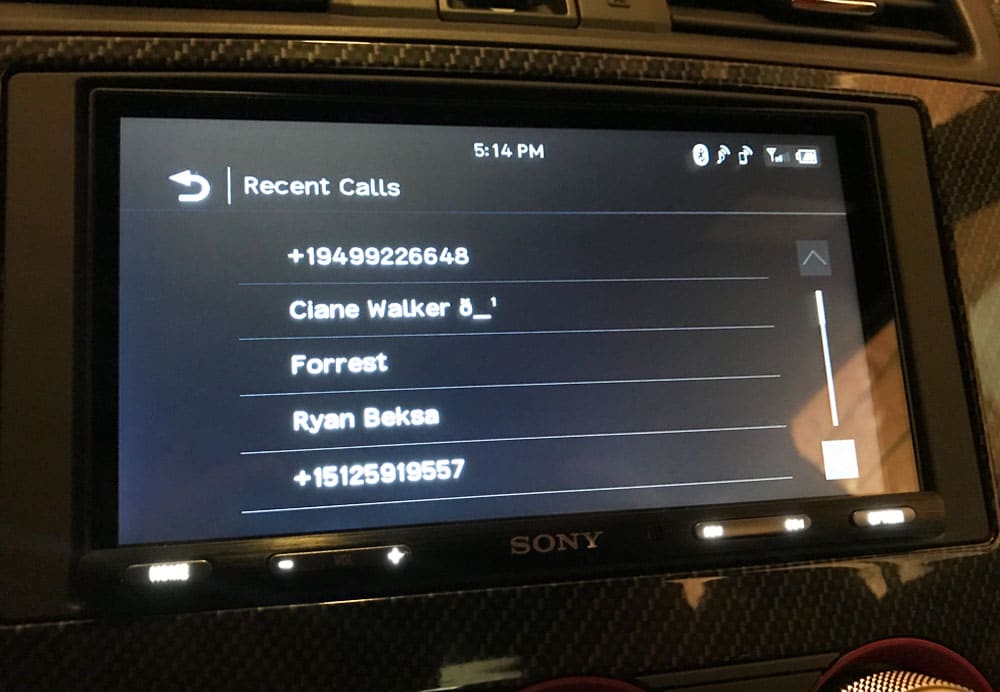
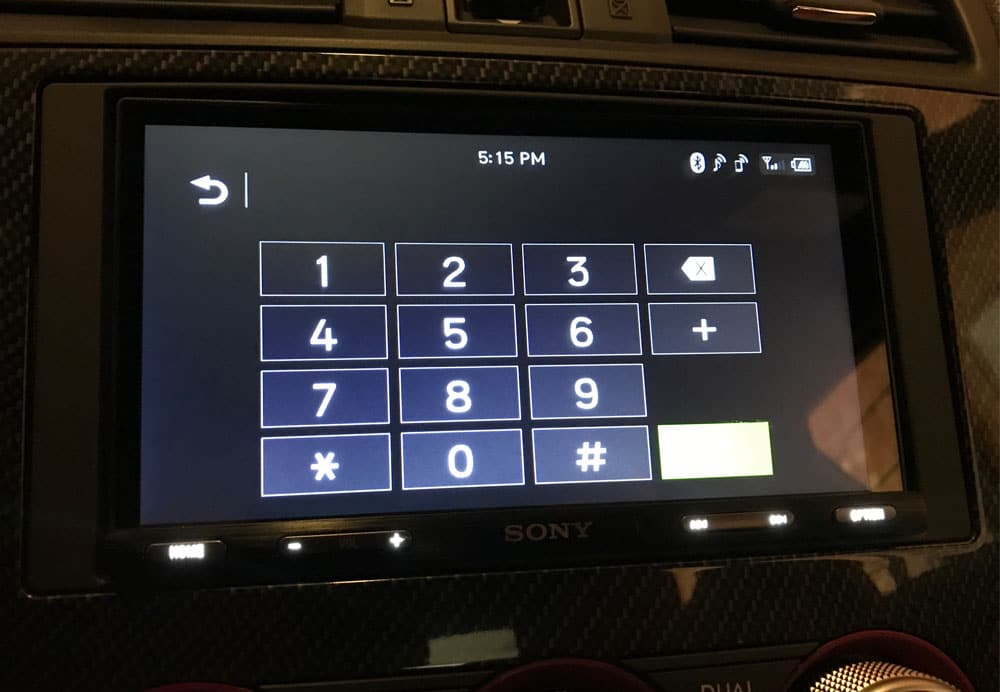
- Calls – you can obviously make phone calls! Your entire contact list will appear on the screen so you can interact and click on a contact to call them directly.
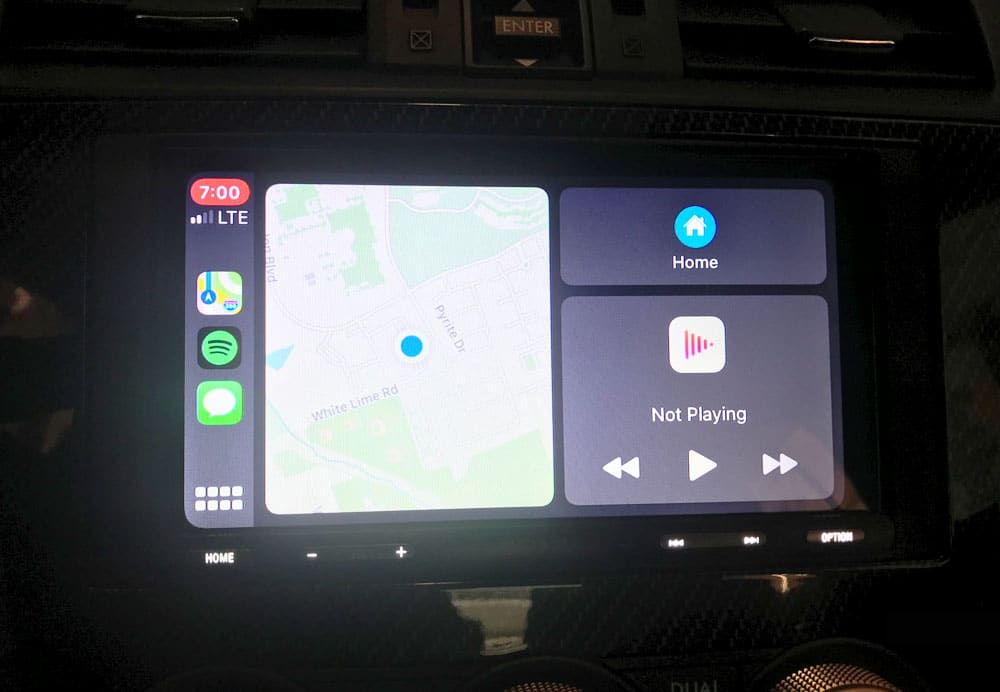
- Directions – use your voice to ask for directions to a location or point of interest, or manually input it on your phone. CarPlay defaults to your Apple Maps but you can open up Waze or Google to punch in and navigate to destinations as well.
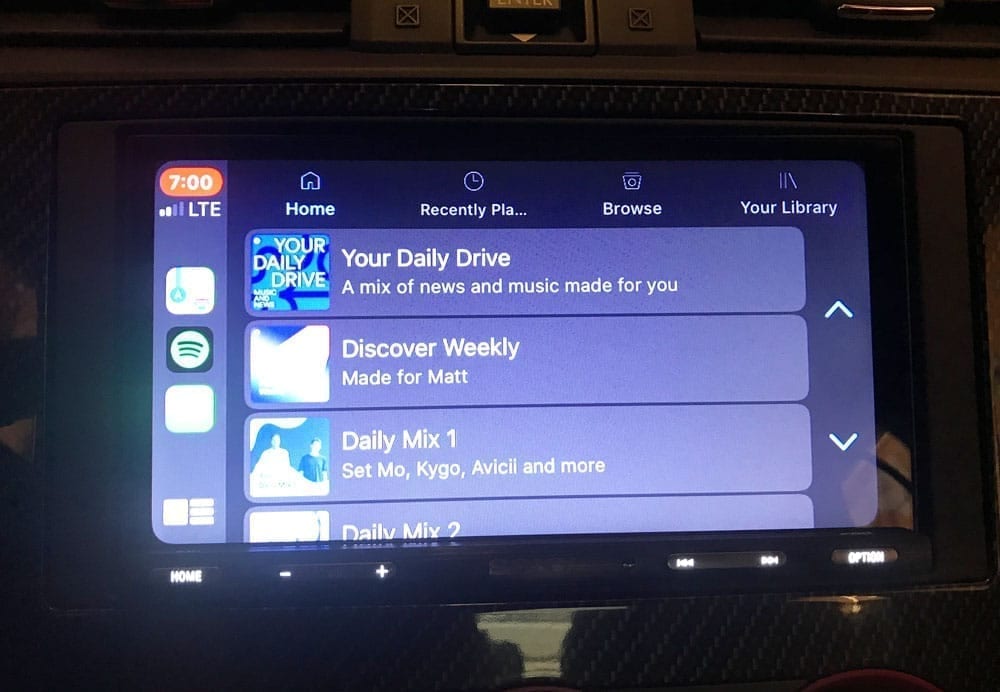
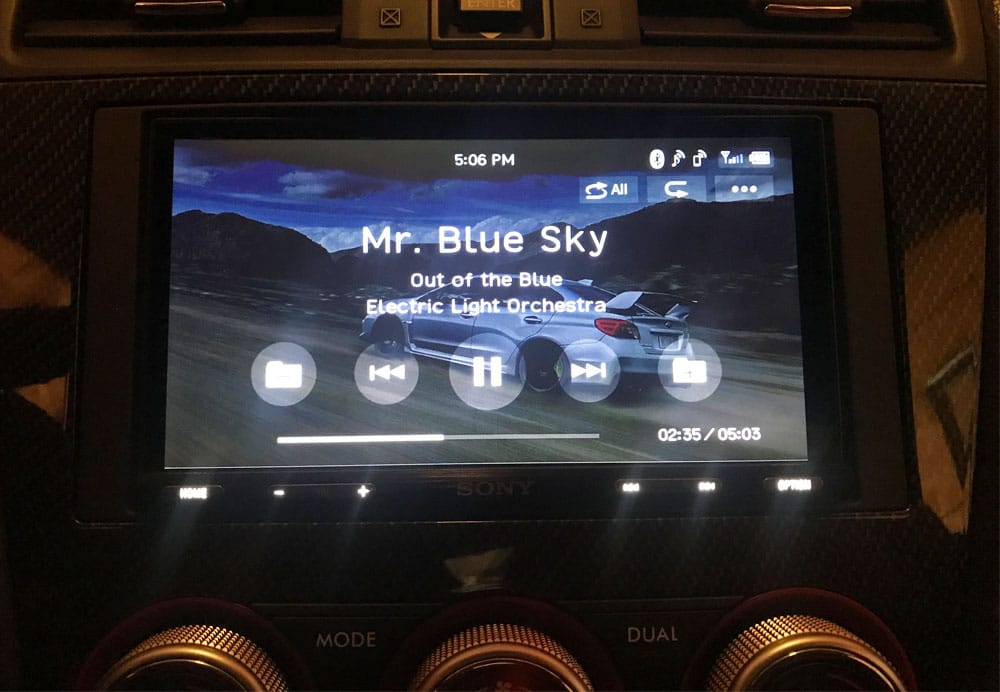
- Streaming music – all of the key players in the audio streaming space have apps – Spotify, Apple Music, Pandora, Audible, etc. Although the features aren't identical to what you find on your phone I found it relatively easy to use and, in general, very functional when I was browsing and trying out Spotify and Pandora.
For the full readout of CarPlay and its features, you can find a readout directly from Apple Here. But overall, the XAV-AX5500 checks all the boxes when it comes to CarPlay. It still does require you to connect directly to the unit via USB to access CarPlay though. One day, we hope this'll change!
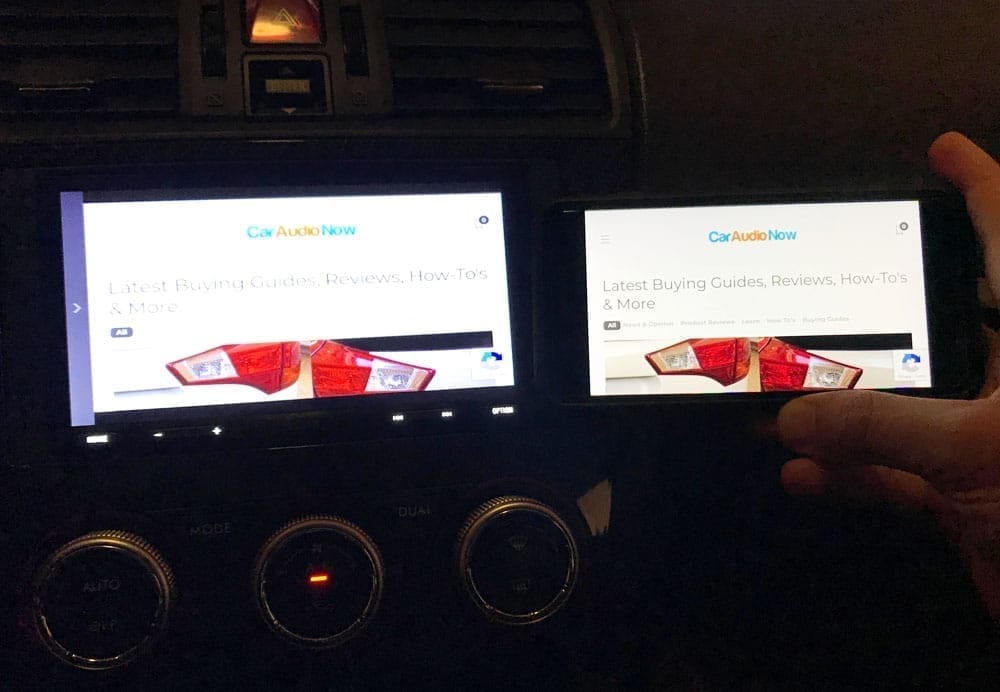
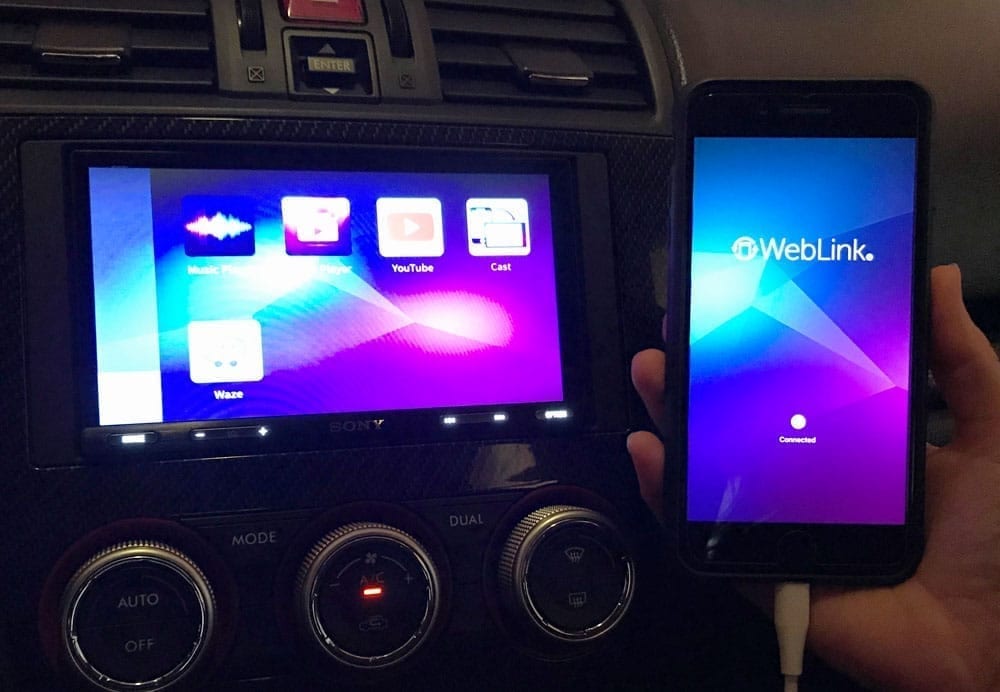
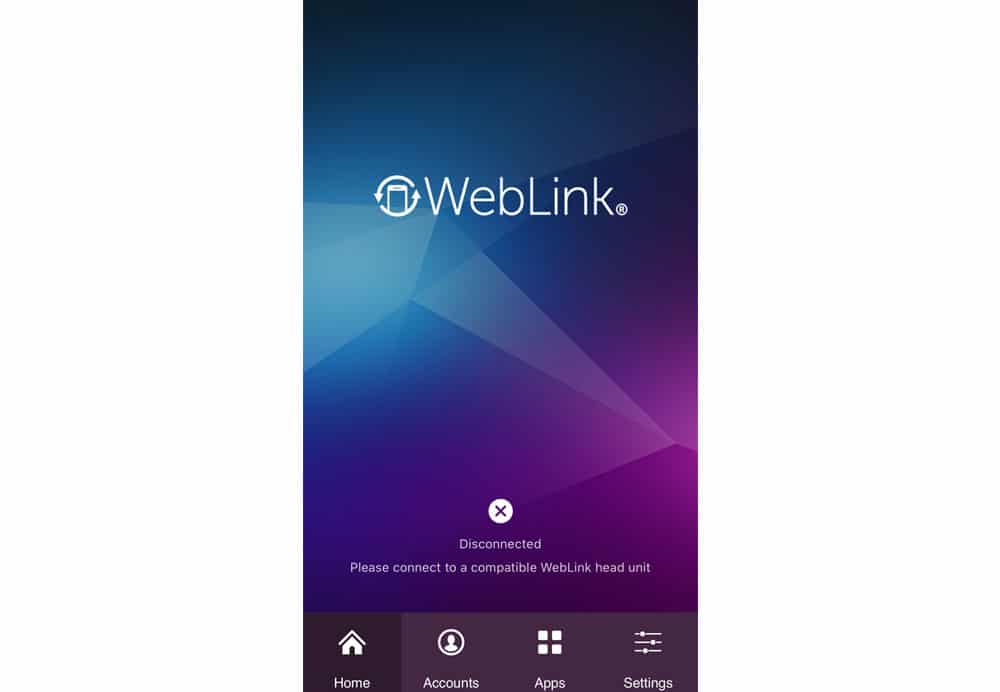
Phone Mirroring or Casing With WebLink
WebLink is a feature that allows you to mirror the screen of your phone or ‘Cast' it straight onto the XAV-AX5500. When you connect your phone and select the cast option from the head unit, you will be prompted to download an app on your device called WebLink. With this app open on your phone and it selected on the head unit, you will have the option to either Cast or Mirror your phone. Once selected, anything that you do on your phone will be reflected directly on the head unit's screen.
Overall, we love the idea and the feature. But we struggled a bit with the feature as it is today and we think that it may have some room for improvement in future software updates. The reaction time was a little laggy which would create a delay between audio and video if you wanted to stream video. And YouTube was a bit unreliable. We used three separate phones and had the same result. The resolution quality while streaming wasn't fantastic either. All in all, it's a cool feature for using apps that aren't on CarPlay, but if you want to watch a video (which is NOT recommended by the way but being that most people want to do that we wanted to mention it), it still seems like mounting your phone is a better option.
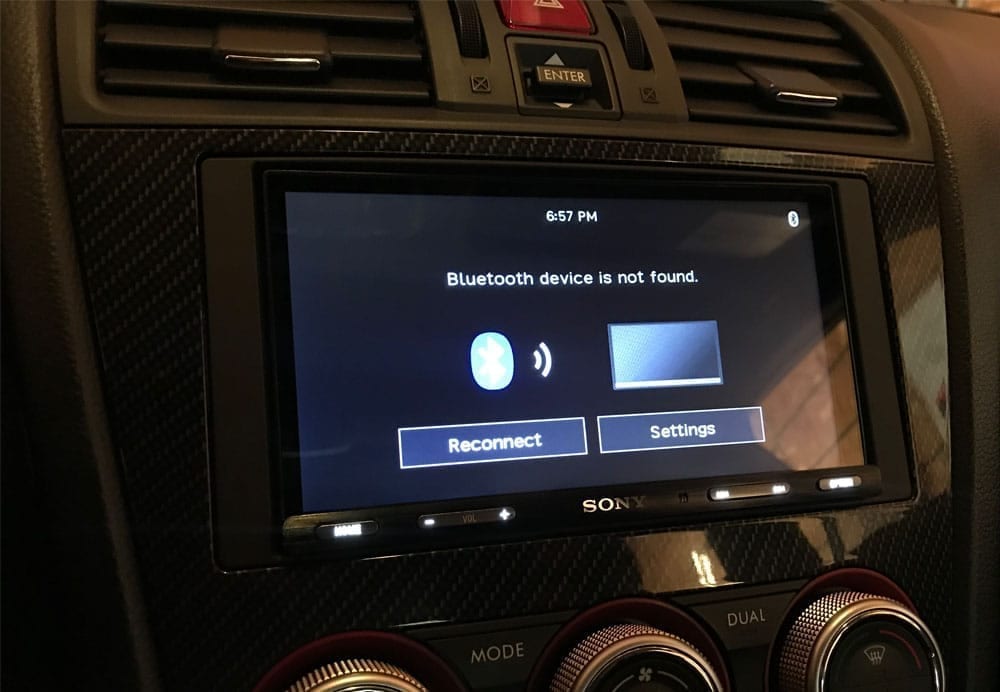
Bluetooth Connectivity
Bluetooth is a standard feature, and it's what you'd expect it to be on the AX5500. Similar to their other units, the interface is seamless, easy to use and the process of adding new devices is simple and quick. After you've synced your device, you'll have access to a number of wireless features such as:
- Streaming music on your app of choice
- Hands free phone calls and text messaging
- Voice command (via phone)
But if you want to get the most out of your phone in the car, connecting it to Apple CarPlay or Android Auto is going to be the way to go. Bluetooth is quick and easy – you don't even have to pull your phone out of your pocket. But maps, navigation, apps – all of these are gonna be accessible from CarPlay and you'll need to plug your phone in for that. We prefer CarPlay over Bluetooth now.
Audio & Sound on the XAV-AX5500
Like we mentioned before, we did a direct swap of the OEM head unit to Sony's XAV-AX5500. We didn't amplify the stereo, upgrade speakers or add a sub. But by simply swapping the OEM head unit in our 2015 Subaru STI, we noticed an impressive increase in both sound volume and quality. Even bass was significantly improved.
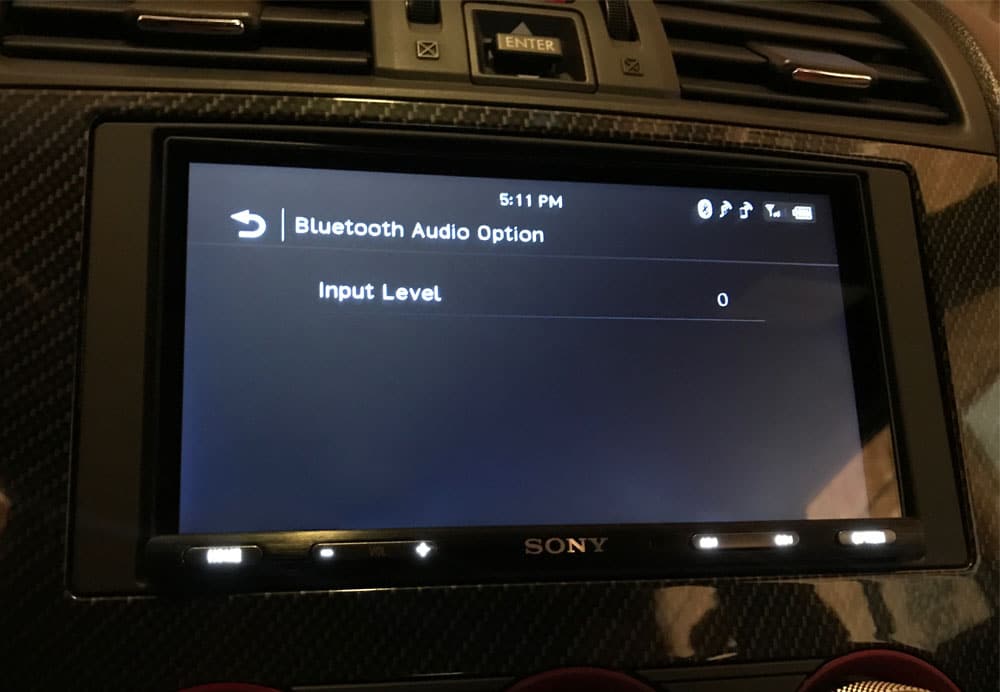
If you were to amplify your system, the XAV-AX5500 has you covered too with it's 5V preouts, making it a pretty well rounded and universal multimedia unit for both OEM systems and custom amplified stereos.
I know that we didn't utilize the features for a custom, amplified system but let's walk through them anyway. Most of Sony's new units come with 5V preouts for front, rear and mono sub channels. Like we just mentioned this is key for amplified systems. 4V preouts are a thing of the past, so if you're looking for amplification you need the 5V preouts. You can also configure each preout channel (front, rear, mono sub) to output high pass or low pass frequencies. This is nice, because you can just set your amplifier channels to full range and adjust the crossover and frequencies directly from the head unit now.
For people like us, who would like to use the built-in amplifier in the head unit for an OEM replacement, it offers an output of 20 watts RMS and 55 peak x 4 channels.
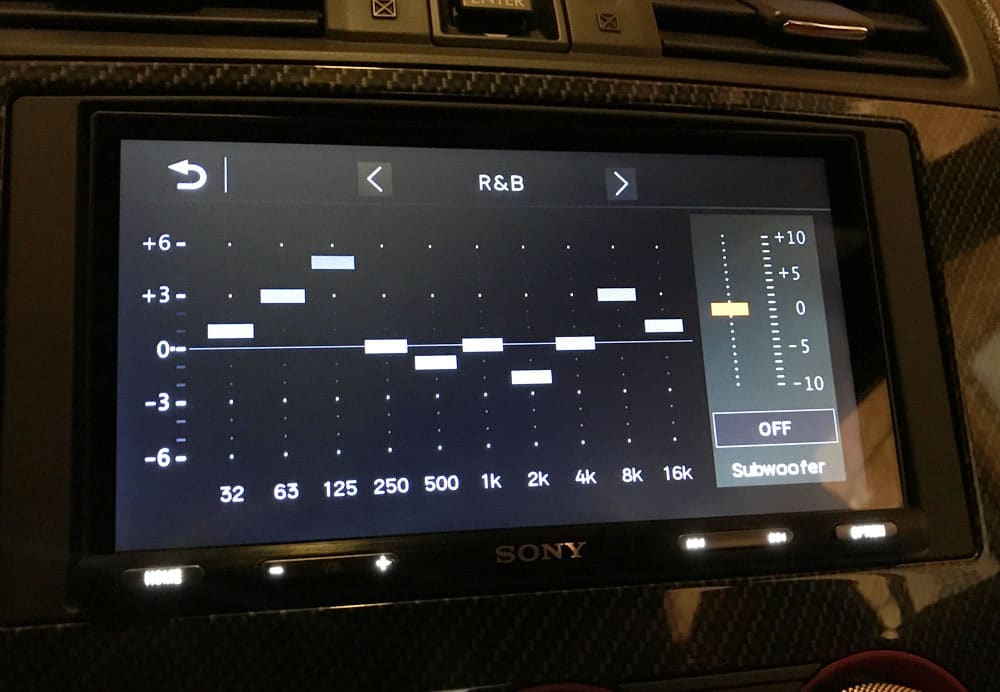
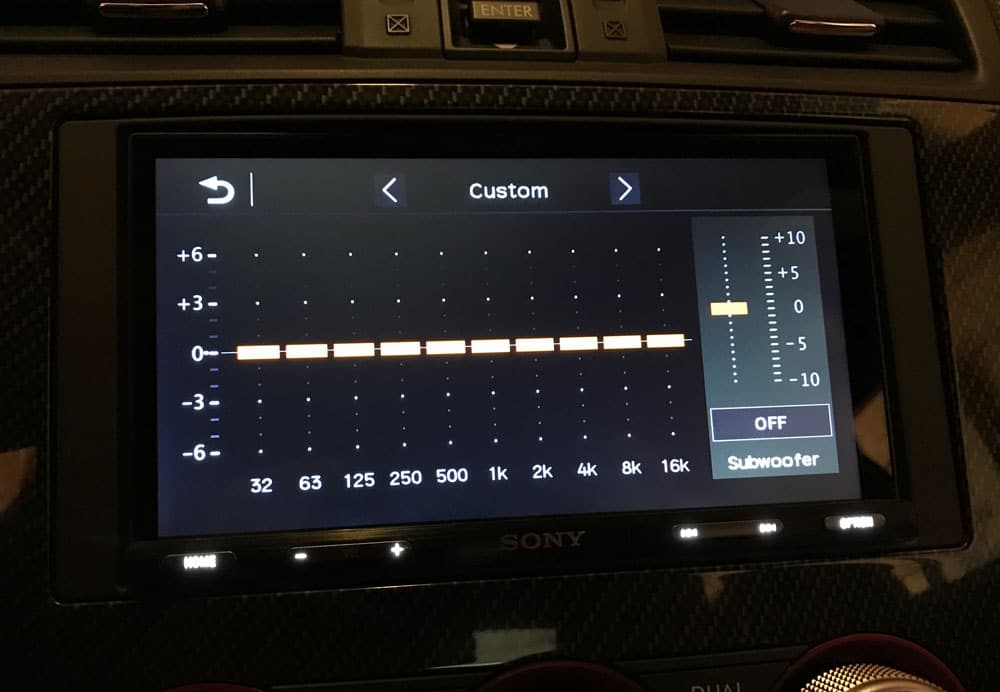
10-band Equalizer
The XAV-AX5500 features a 10-band equalizer, which means you basically can adjust the sound output in 10 ranges of frequencies. Simply touch and drag each of the bands with your finger on the screen. It has a number of presets from the factory too if you don't want to mess with every single frequency range (pop, rock, jazz, etc).
Typically, on OEM systems we just run through the presets at about half volume and choose the one we like the best. But it will vary depending on the type of music that you listen to.
On the same screen as the 10 band equalizer, you can also adjust the gain for the subwoofer or turn it off completely. This is nice because it makes it pretty easy to adjust. Honestly we don't think you'd really even need a subwoofer dial if you didn't want it anymore.
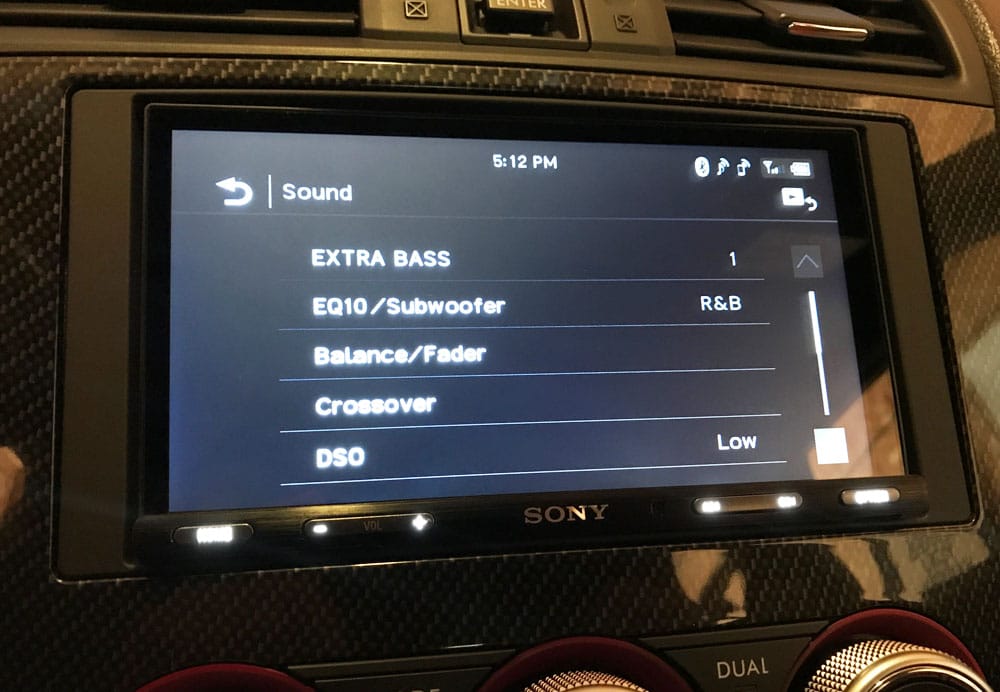
Dynamic Stage Organizer (DSO)
Sony head units feature what's called a Dynamic Stage Organizer, or DSO. It's designed for speakers that are built into door panels, that vary in their distance away from your ears, or are generally mounted lower/further from where you're seated – anything that could alter the way that the speaker sounds as a result of where they're installed (in a bad way). With DSO, the frequency output of your speakers is altered to make the speakers and sound more natural given their placement. It's meant to make the sound appear as if it was coming from your dashboard rather than your feet. Sony calls this “virtual speakers in your dashboard”. There are four adjustments – low, medium, high and off.
This setting is going to be vehicle specific, and we recommend that you adjust it, listen, adjust, and then pick the one that sounds natural in the car. The goal is to make the sound from your speakers appear more naturally placed instead of from your feet. We can say that there is a noticeable difference in the sound and where the sound appears to come from when you adjust. The higher the setting, the ‘higher' the sound appeared to come from. Literally.

What's Missing or Could Be Improved?
No head unit is perfect. And with that said, we felt that it could still have a few more custom features to make this unit really integrate well with any car's dash. It looks amazing in the STI (just look at the pictures), but having an RGB color scheme selector that would change the interface and the buttons to match your car's dash would really go well with the bezel-less design.
WebLink was a bit of a let down to be completely honest for us. But it's also worth noting that we received this unit prior to its actual release. Technically it was a test unit. So some of the issues that we may have experienced with WebLink will likely be addressed in a software update prior to you even purchasing it. We'll keep this thread up to date as we install software updates.
Conclusion
Sony's XAV-AX5500 is a sleek looking unit with the bezel-less screen. It really reminds you of the look and feel of an iPhone screen when you're navigating through the features of the unit. And it looks amazing in the dash of our 2015 Subaru STI.
From an expandability perspective you can do almost with this unit – from Bluetooth connectivity and music streaming to WebLink and phone mirroring and custom wallpapers. It's ideal for both an OEM system upgrade or a fully custom, amplified stereo. In a car like the STI, where performance is priority and comfortability and multimedia is second it was a HUGE upgrade and really brought the dash (and car) into the new era of connectivity in your car. But if you're looking for a unit that will serve as a hub for video and multimedia, this may not be the perfect unit for you as it doesn't have a video output.
From an audio perspective, we heard a significant boost in both the sound volume and quality from the OEM STI head unit. It has plenty of power without the need of an external amplifier, but it's designed to satisfy the audiophiles as well. The 10 band EQ was great, although probably best utilized in a custom setup. Instead we used the presets which is a great, easy way to tune the sound to the music you love. And features like DSO really made a difference in the way our music sounded, artificially lifting where the music sounded like it was coming from.
And as far as usability, Sony's interfaces are always simple and easy to use and we don't feel like it was overly complicated or poorly organized in a way that makes it tough to navigate.
All-in-all we're fans of the unit and it'll be in our STI for the long haul!

I’ve recently added the Sony XAV-AX5500 to my Toyota Tundra. I’m disappointed that in almost every review (including yours) you don’t address USB capabilities. I’ve have several issues I’m still trying to work out, but have yet gotten any answers to. If a manufacturer is going supply not just one, BUT TWO USB ports (one of which is dedicated to USB drives) and then not support a decent file system or the ability to sort on genre, etc., why the heck have it in the first place? If I’m missing something, please let me know. Else, don’t them for crappy software.
I’m intending to instal the Sony XAV-AX5500 in my Porsche 911. I’m told that the built in interface is only compatible to Japanese cars and I need to install a 3rd party interface unit. Please advixe
They haven’t updated the weblink all yet. It keeps disconnecting and useless. Still sony is installing weblink in their new systems.
Try to get one for 2019 Honda Ridgeline, just make sure a unit has backup camera connect feature? and how to get the kits for my vehicle ?
Yes, this does have a backupcamera input. I would check metraonline.com for any required harnesses and dash kits.