Every aftermarket head unit requires some wiring in order adapt the receiver's harness to your vehicle's wiring harness. In this article, I'll walk you through through 3 common methods that are used to merge an aftermarket head unit harness to a vehicle specific adaptive wire harness. This includes using a crimper and butt connectors, solder seal connectors (our personal favorite), and the traditional solder seal method with shrink tube. No splicing needed!
Understanding Aftermarket Head Unit Harnesses
Every aftermarket head unit comes with a specific harness or plug that connects to the back of the unit. This harness contains important signal and power wires such as power, ground, accessory, illumination, power antenna amp turn-on, and speaker power output. However, if you plan to use an aftermarket amplifier, your stereo may also come with a separate harness or inputs for RCA plugs.
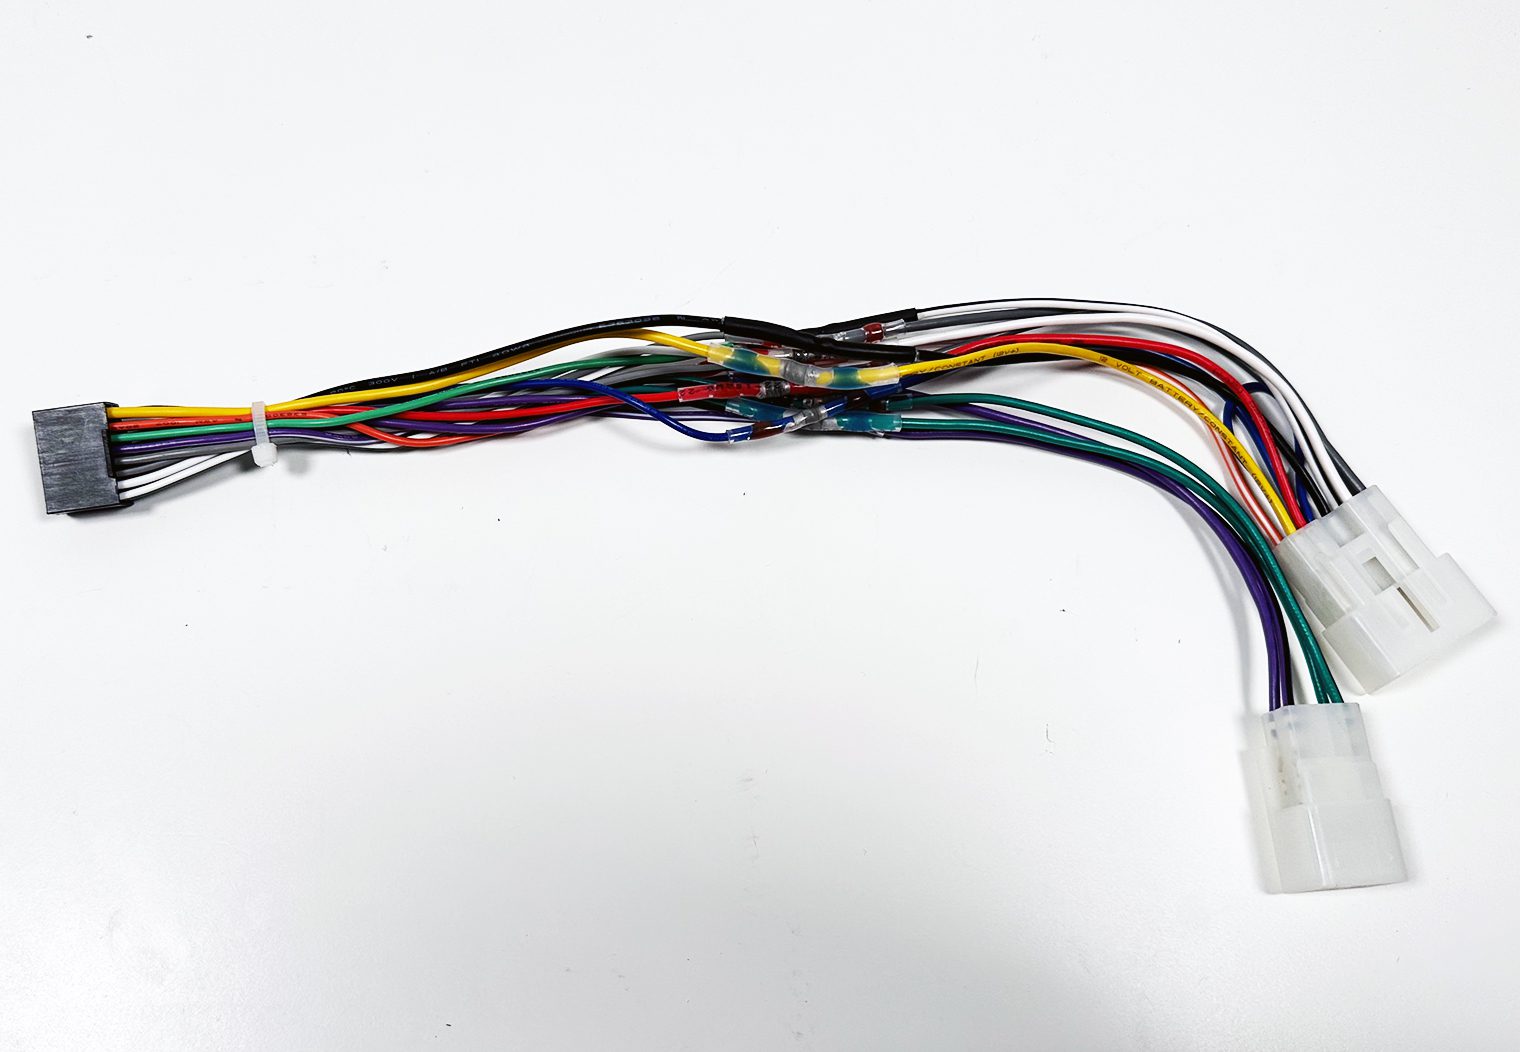
To simplify the wiring process, I highly recommend using an adaptive wire harness to connect the wires from the head unit harness to the factory harness plugs in your vehicle. This ensures that you'll a seamless connection without the need to cut, splice or tap into any wires, making the installation process much more straightforward. What's also great about using an adaptive wire harness is that it takes all the guesswork out of the wiring process. Both the wire harness that comes with your head unit and the adaptive wire harness use industry standard wire colors so the only thing you need to do is match the colors and then merge them using one of the techniques in this article.
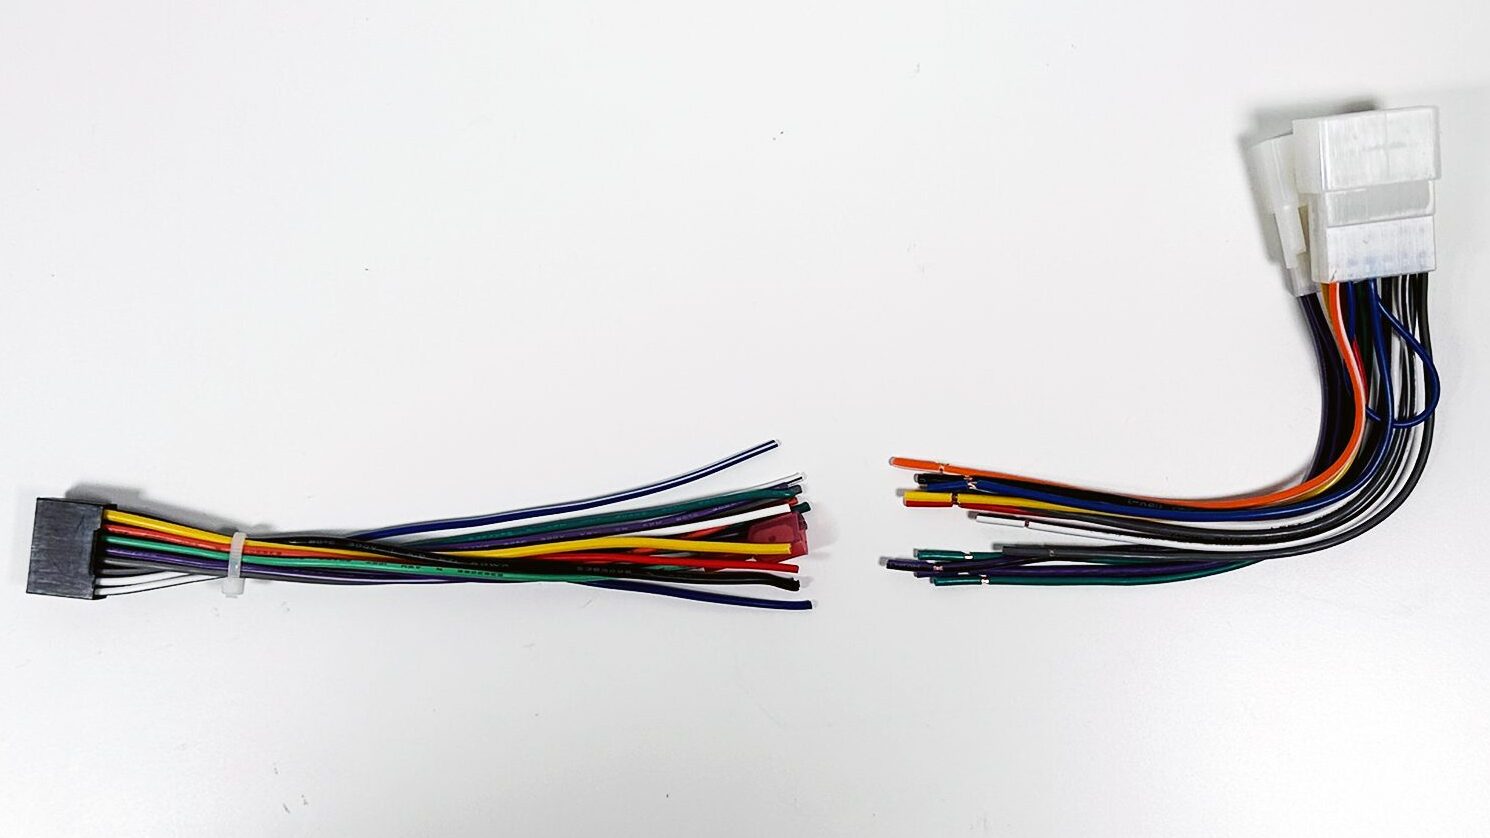
You can find your vehicle's wire harness adapter from manufacturers like metraonline.com, schosche.com. In this walkthrough I used a Metra harness for an older Toyota to demonstrate the wiring process. Be sure to enter in all of the correct details about your vehicle when searching for your harness (e.g. whether or not it has an OEM amplified system, Bose, JBL and so on).
Wiring Methods
There are three common methods of wiring/merging your harnesses together, each with varying cost, reliability and also difficulty/time required. Let's walk through each of the methods.
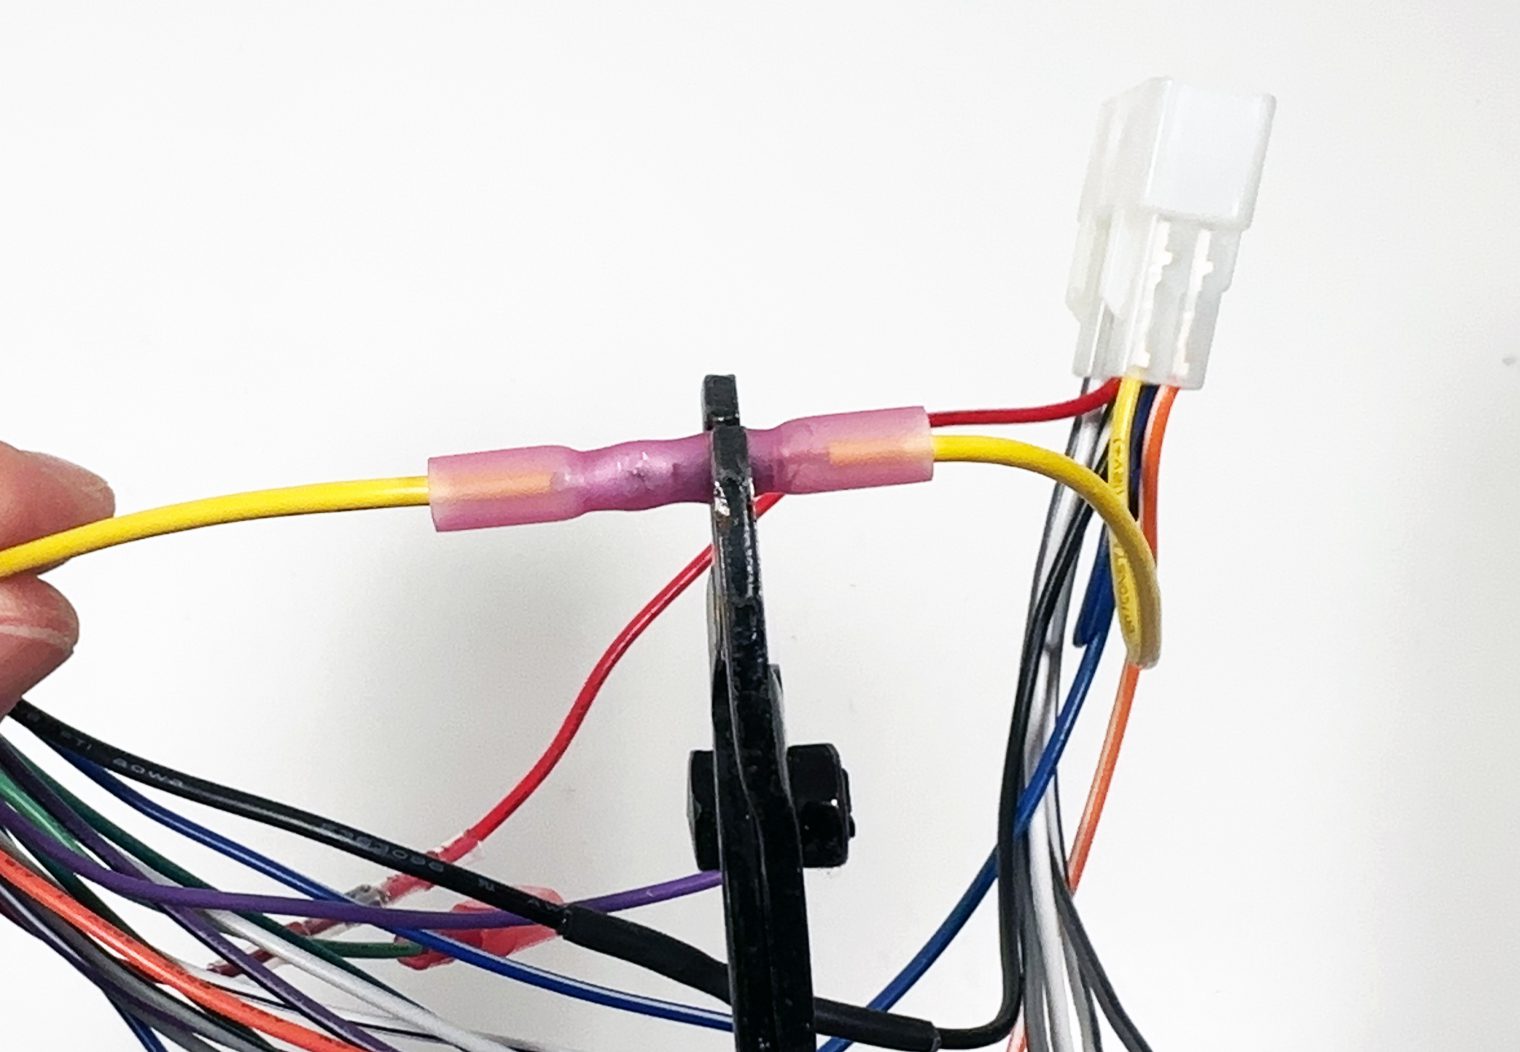
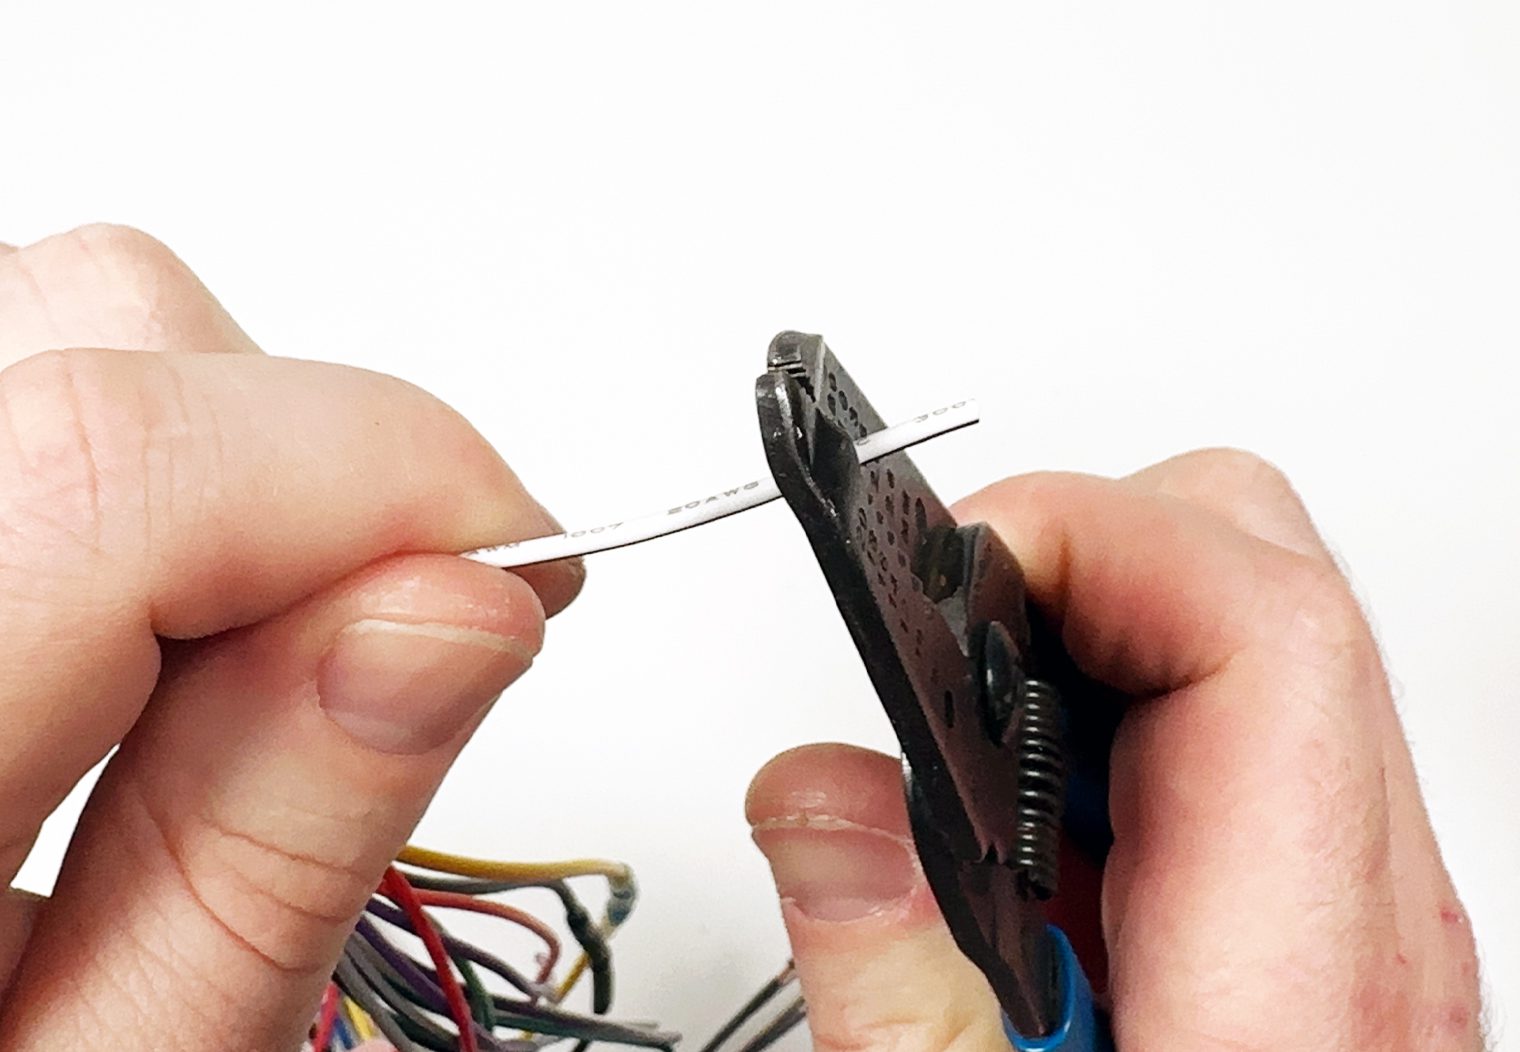
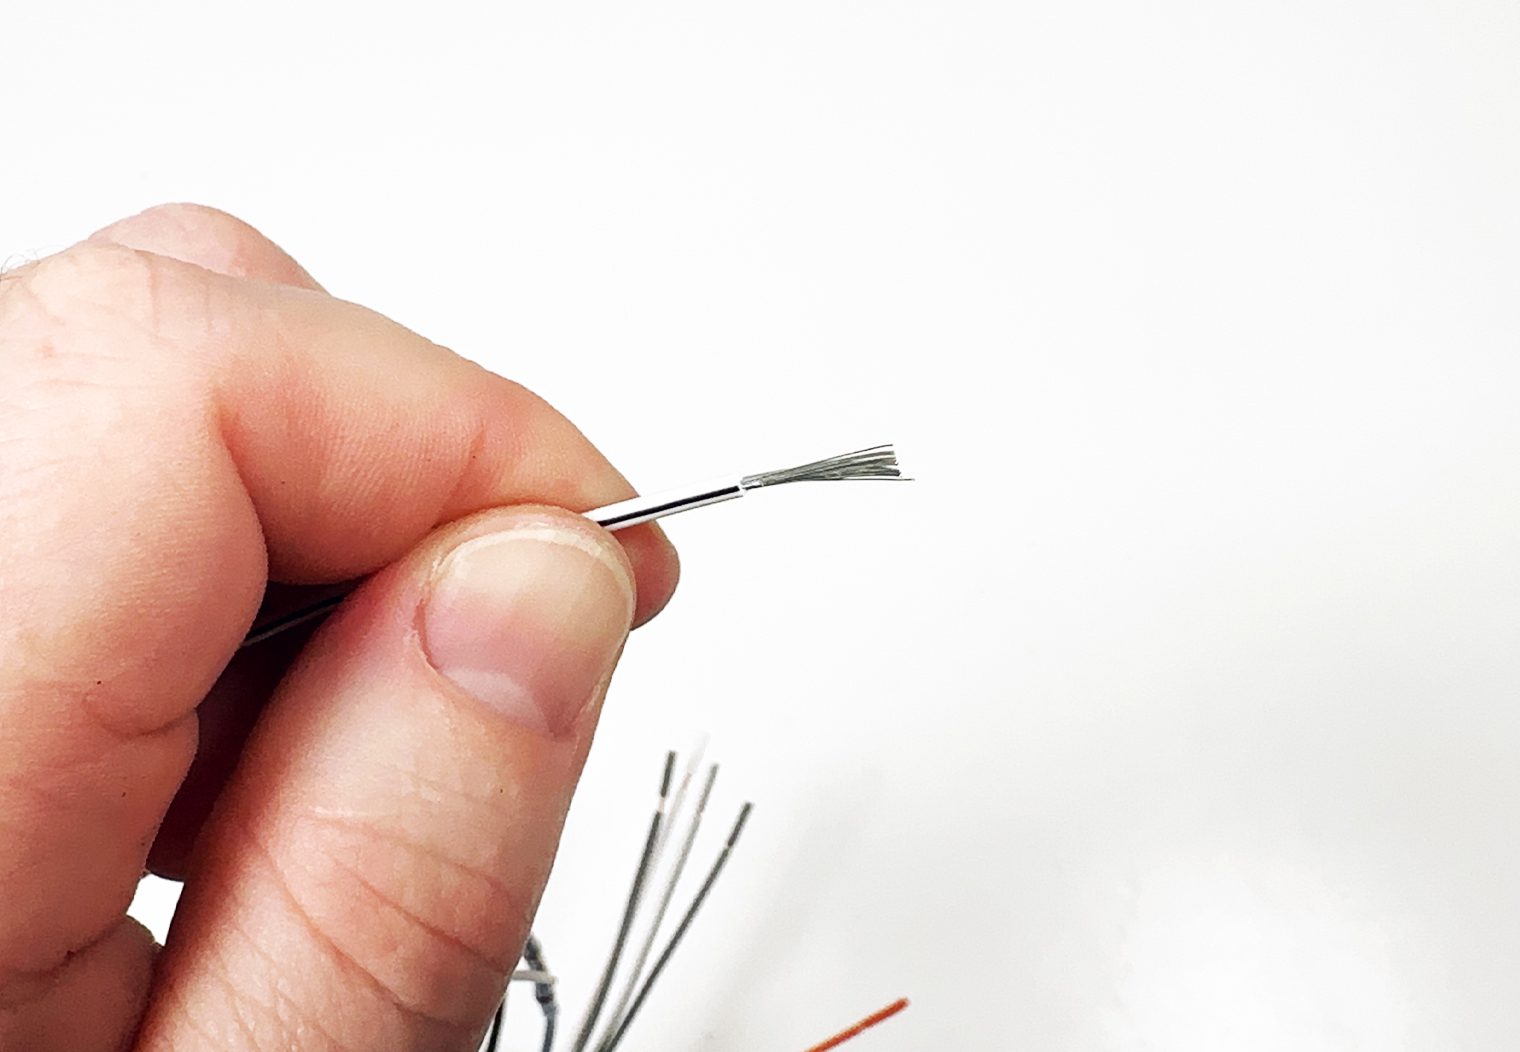
Method 1: Crimping
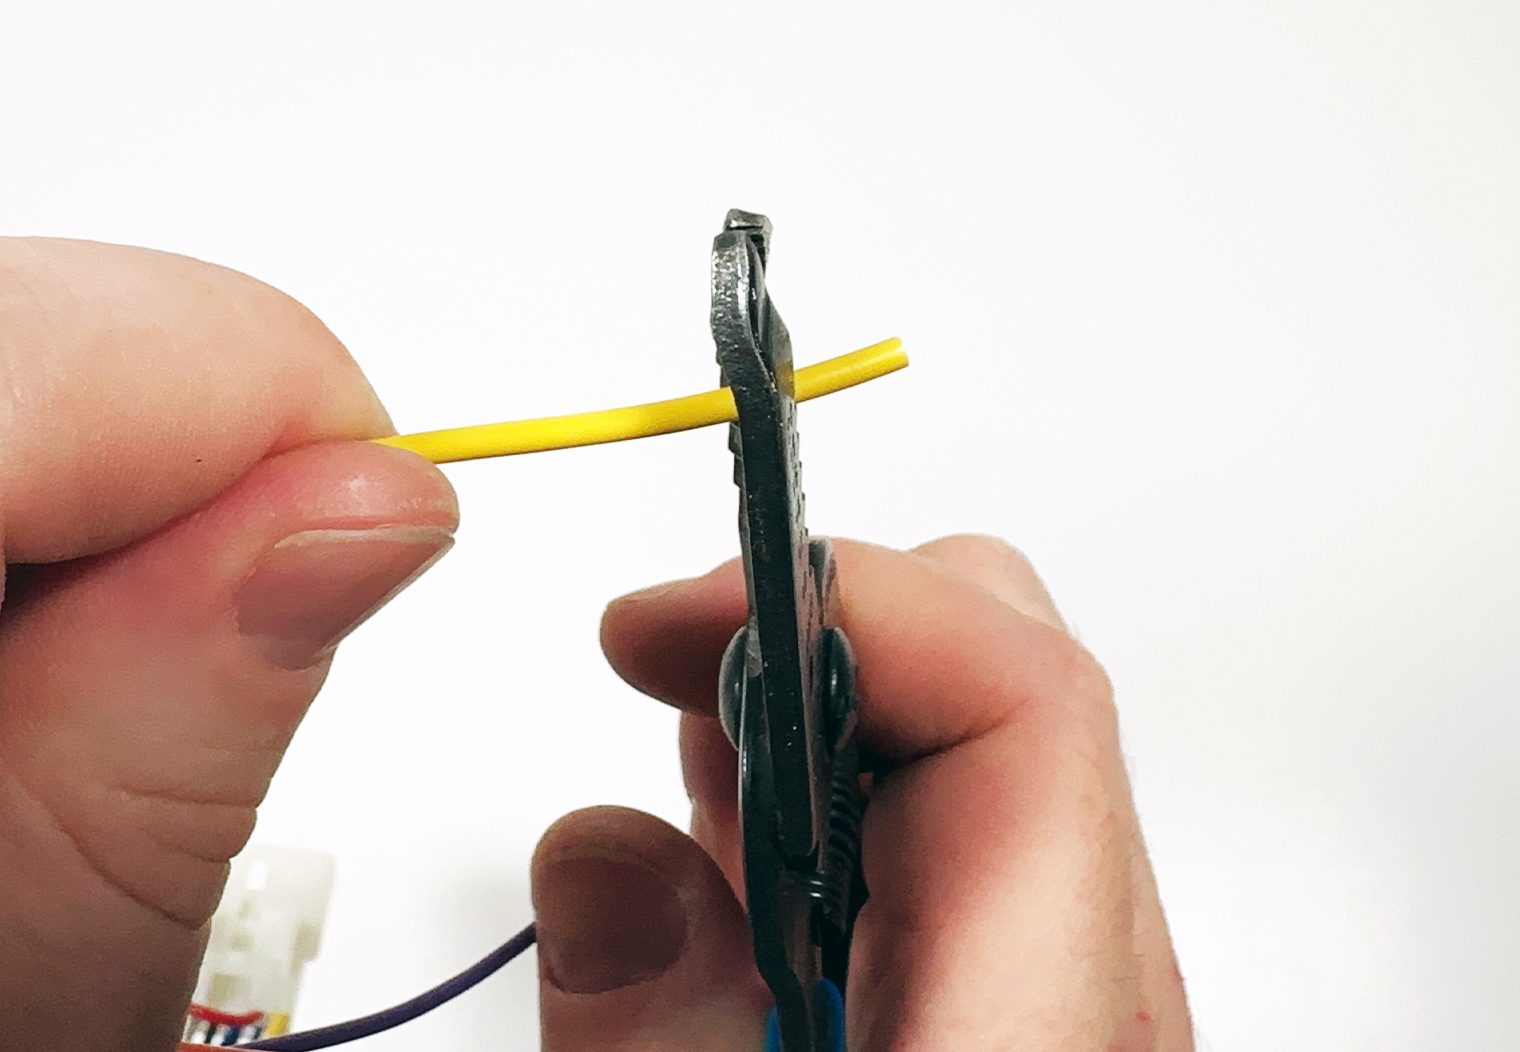
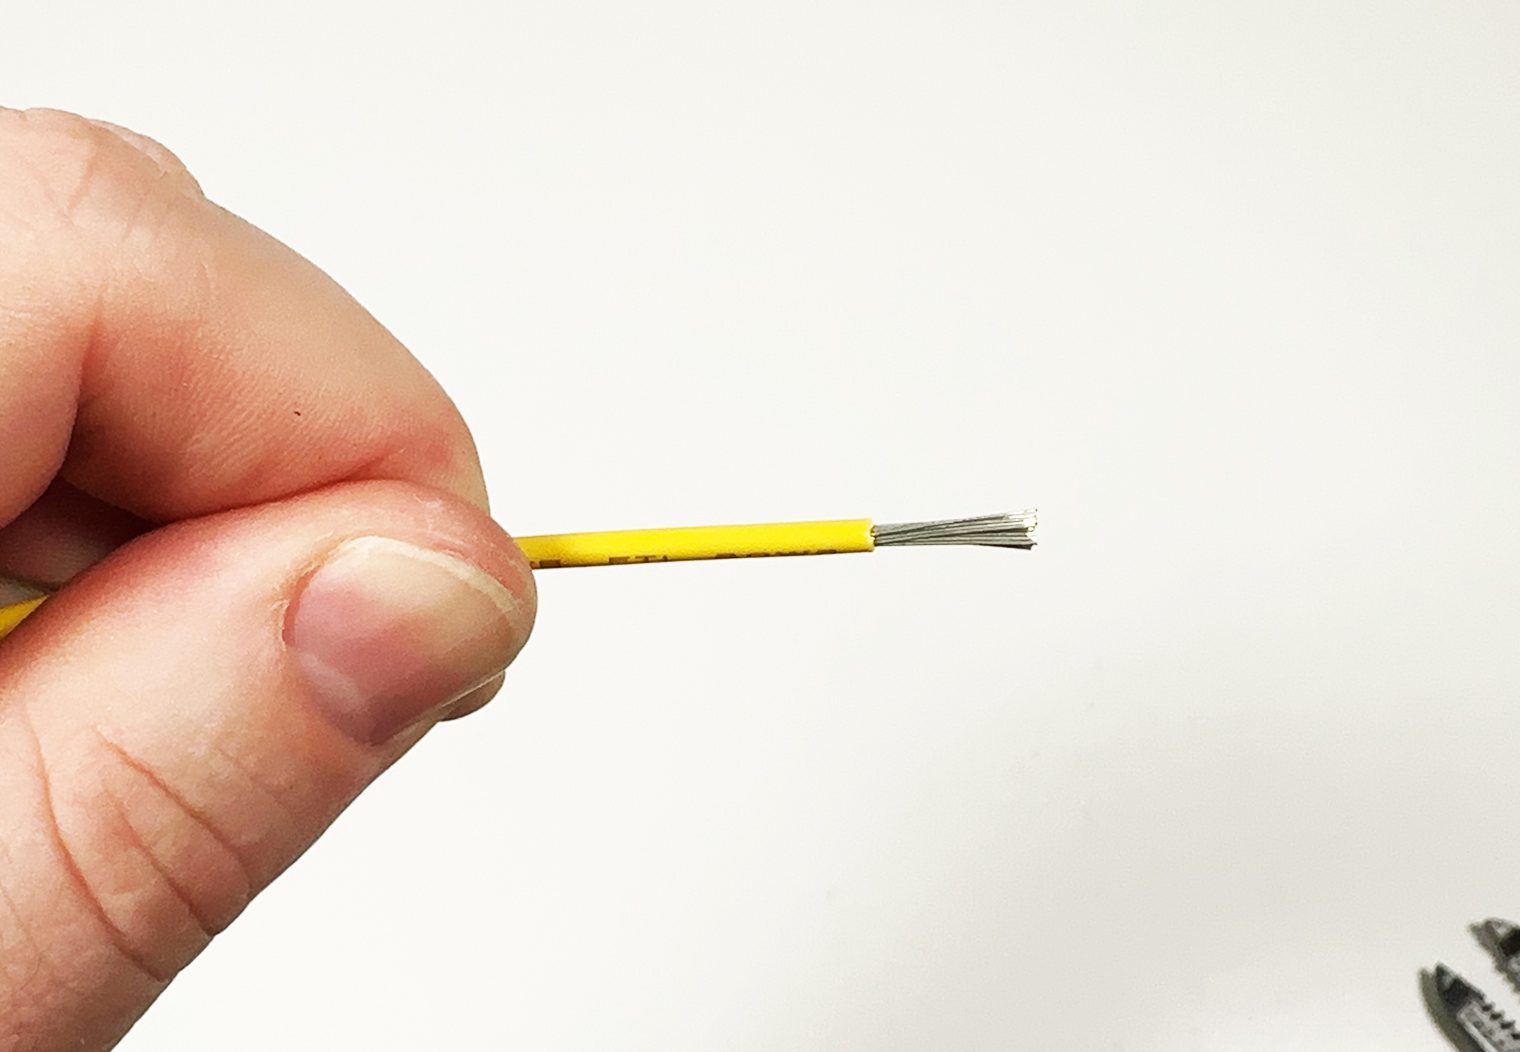
Crimping is probably one of the most common and cost-effective methods of the three. Butt connectors are cheap and crimping is a simple concept. But it may not be the most reliable in the long term. I see this method used in many stereo shops, who might have more commercial grade tools than you do at your house. So if you're a DIYer, this is probably my least recommended approach unless you have a high quality crimper.
To crimp two wires together a wire stripper, crimper and butt connectors. After stripping the wires, you'll insert them into the butt connectors and use a crimping tool to secure the connection. While this method is quick, it may not always provide the most secure connection and can lead to shorts or loose connections after years of vibration in your vehicle.
Here is a quick look at the process of crimping.
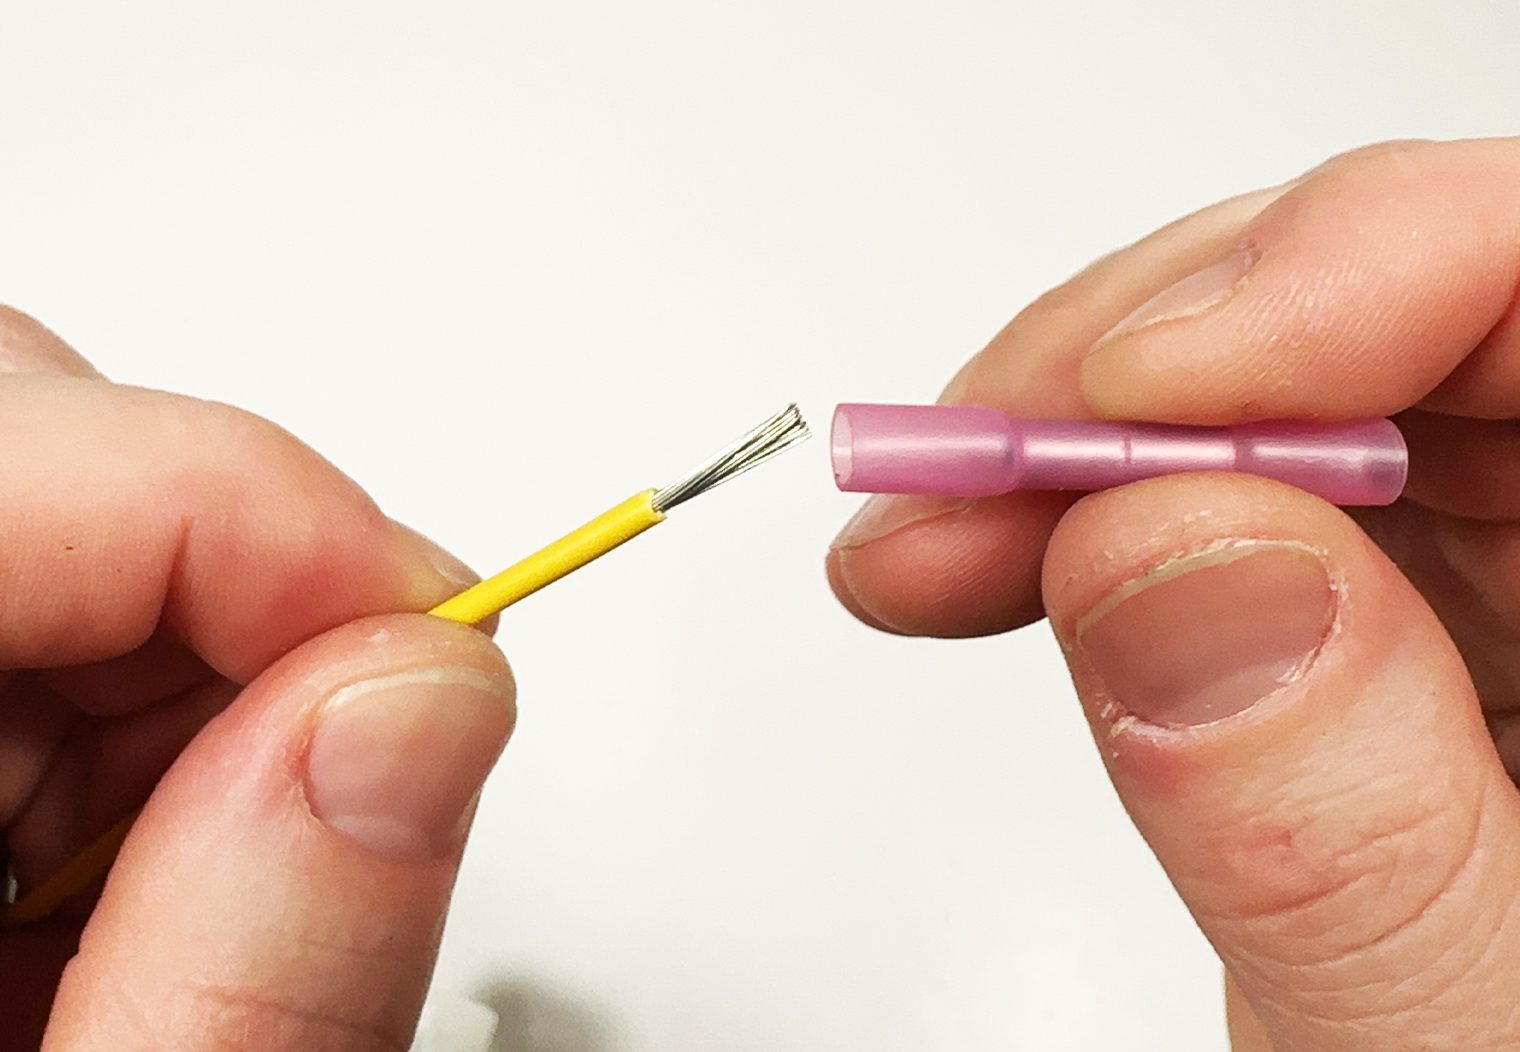
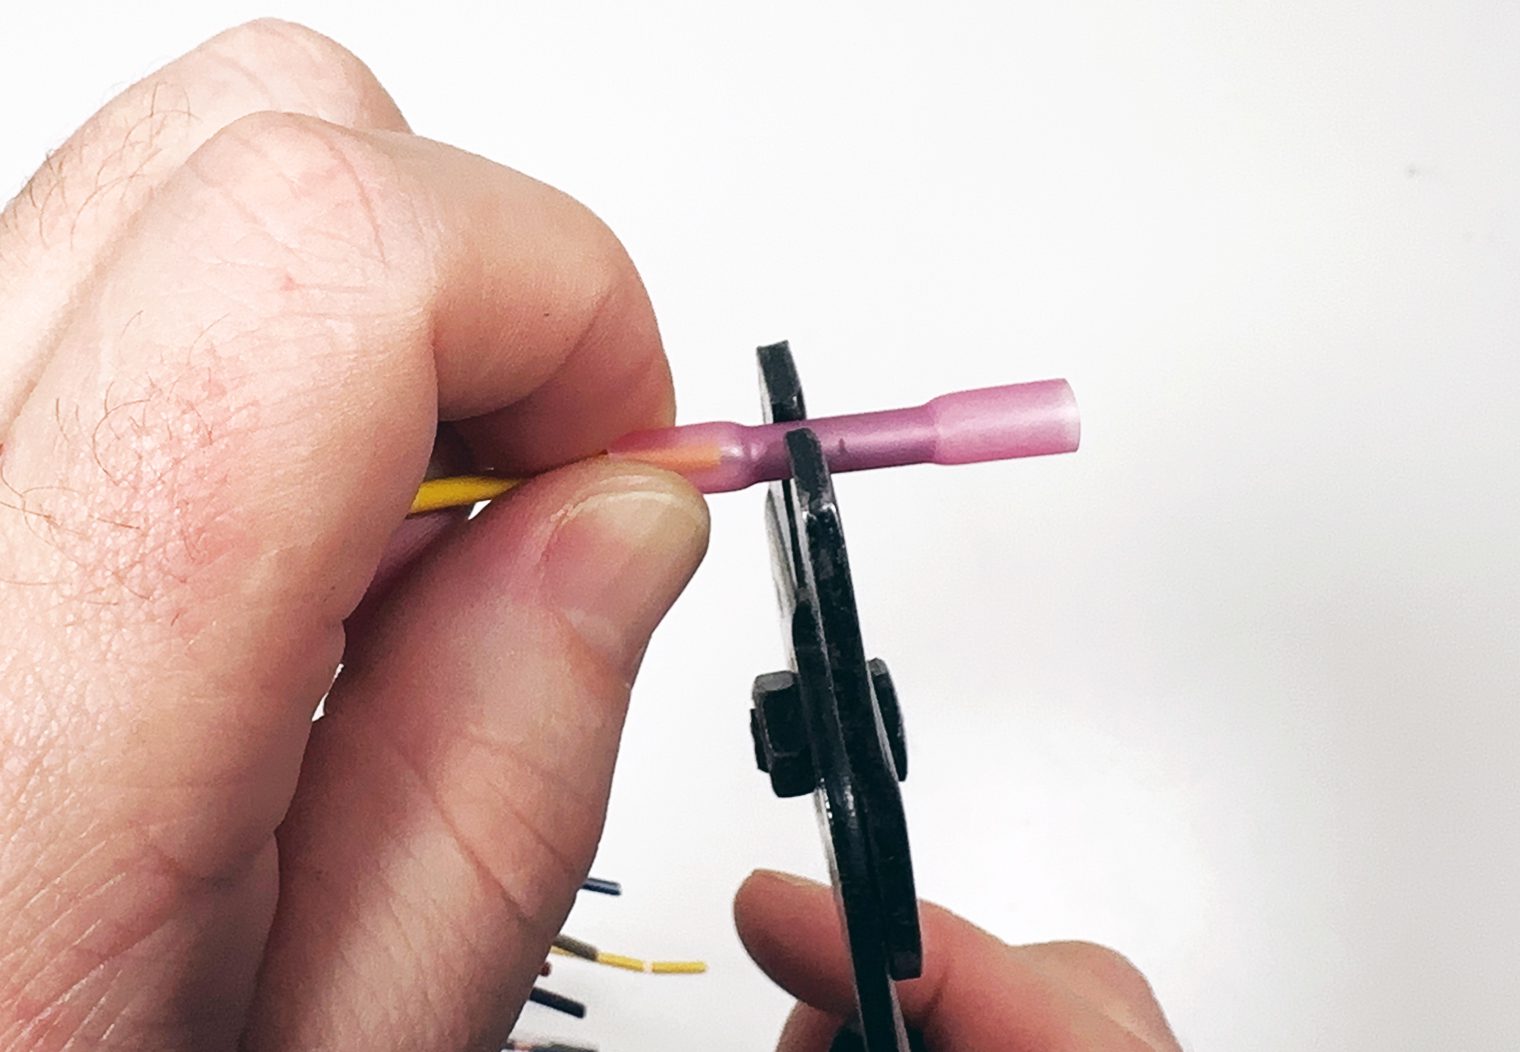
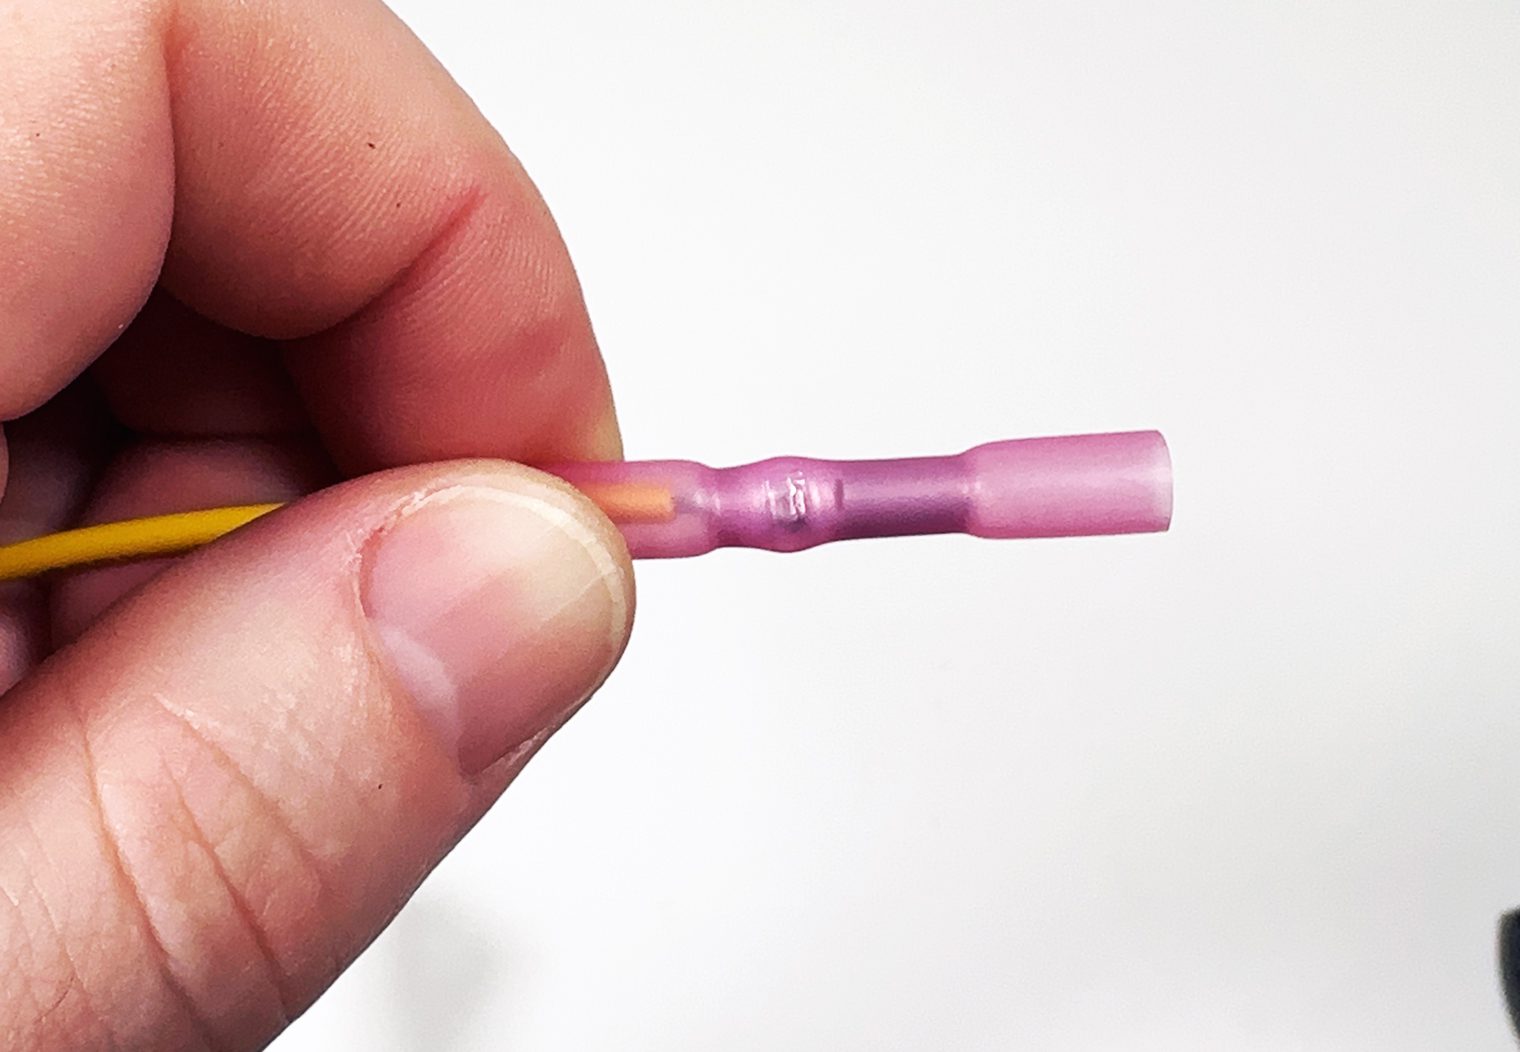
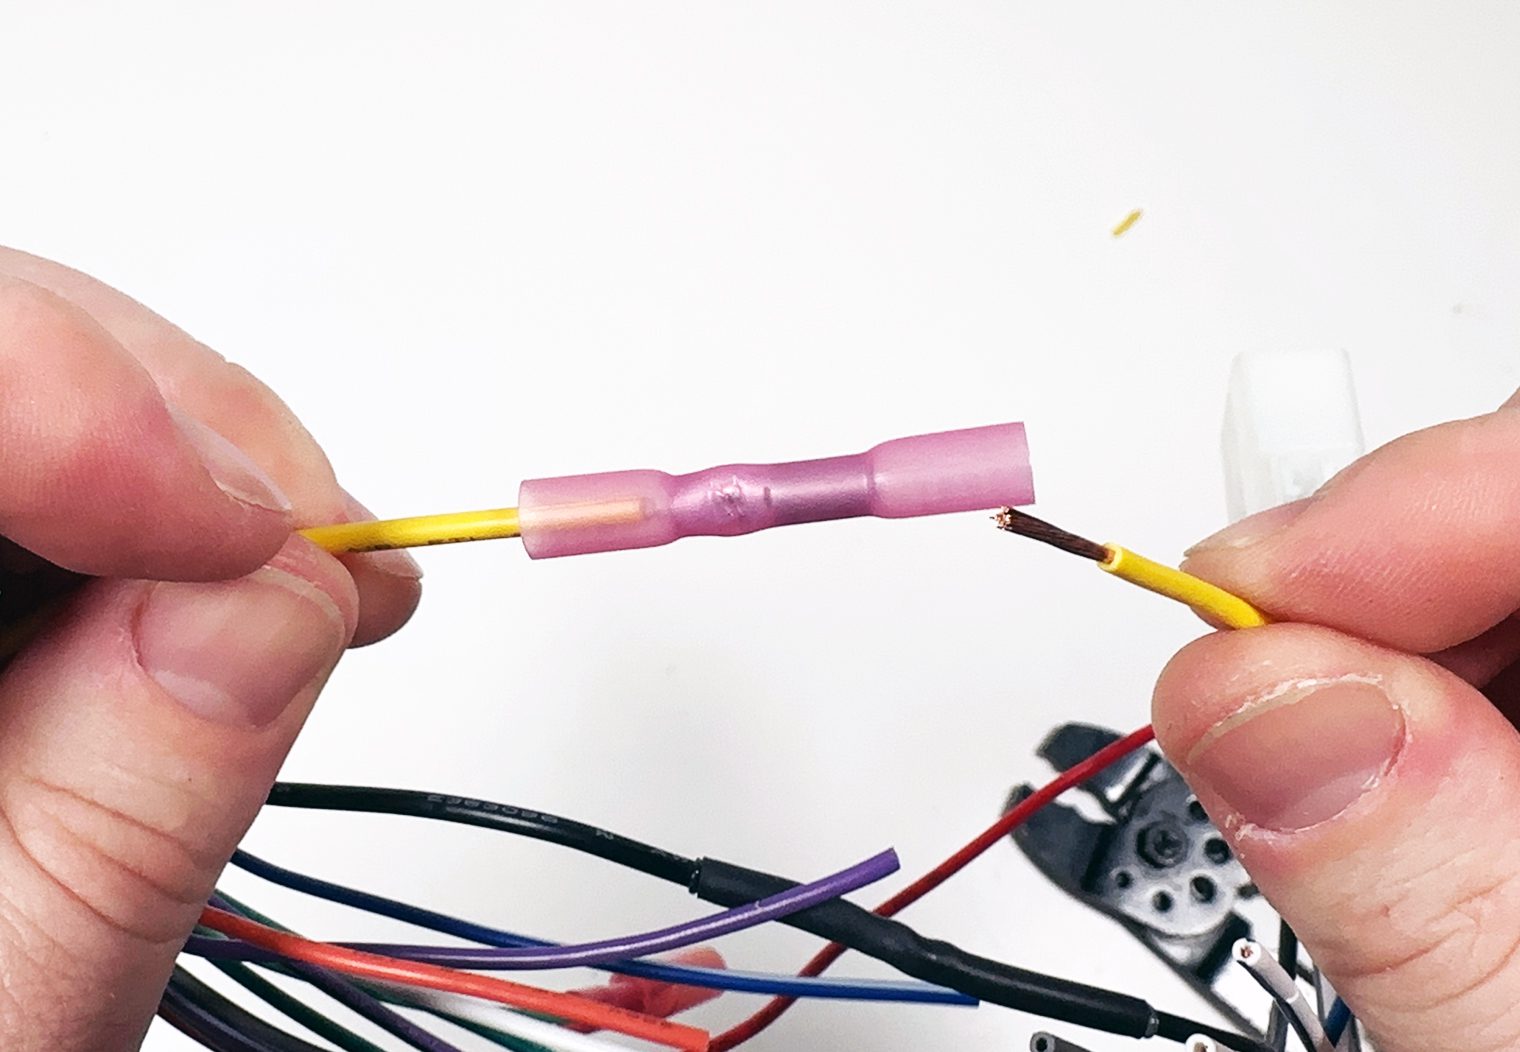
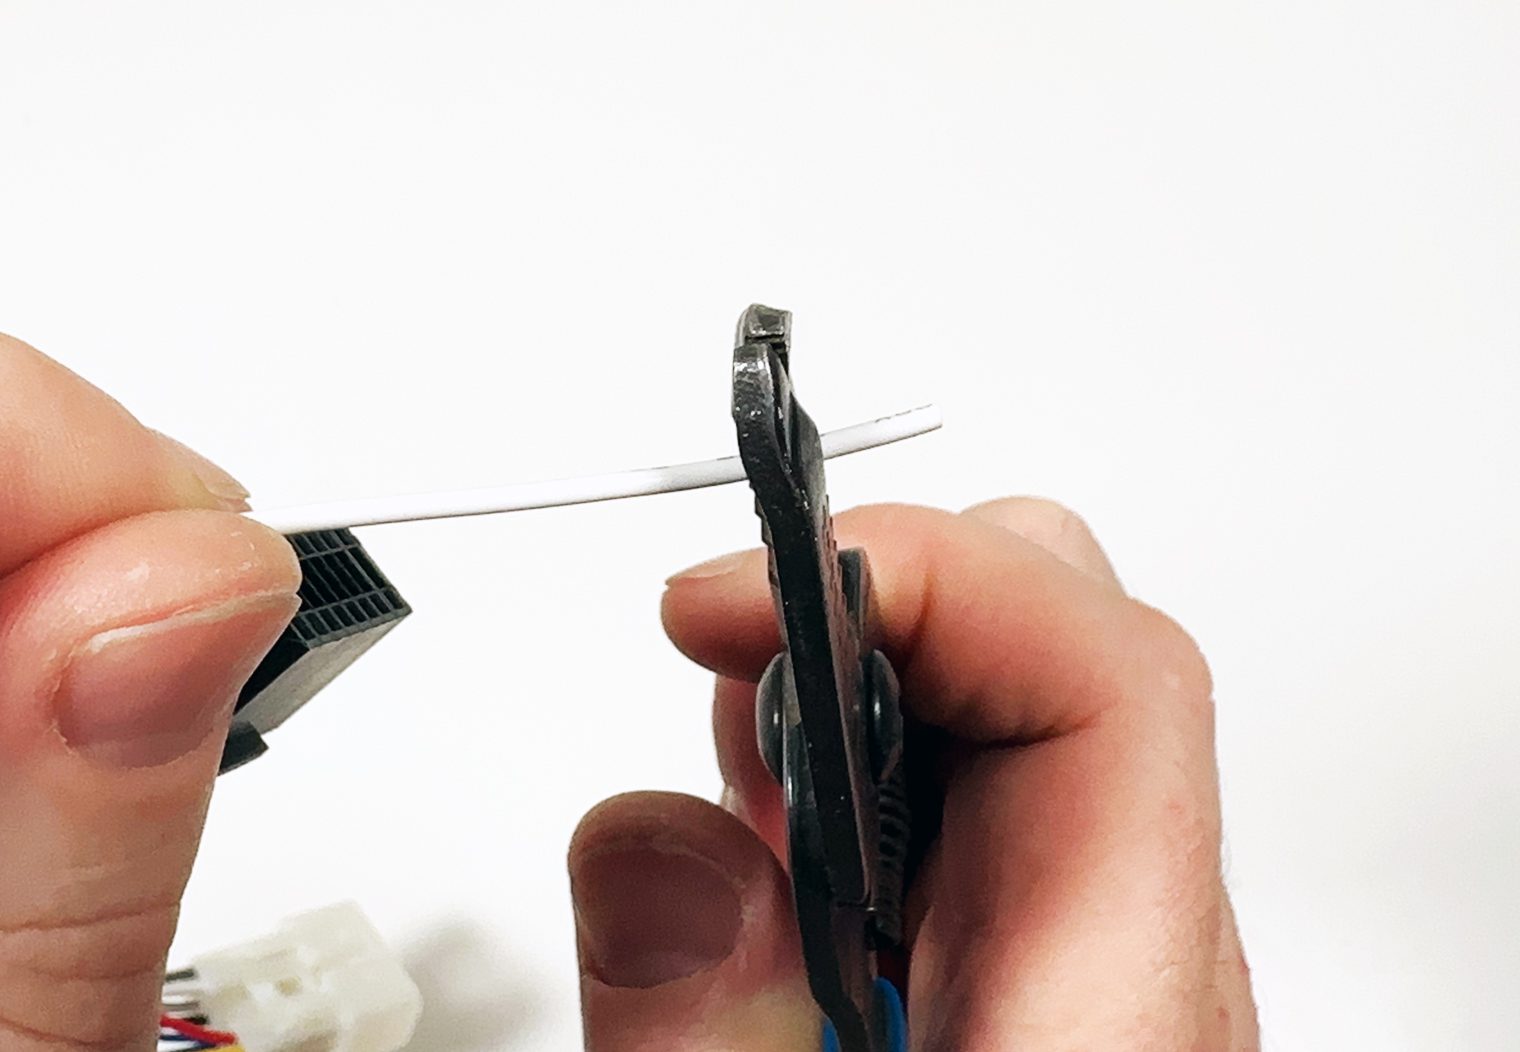
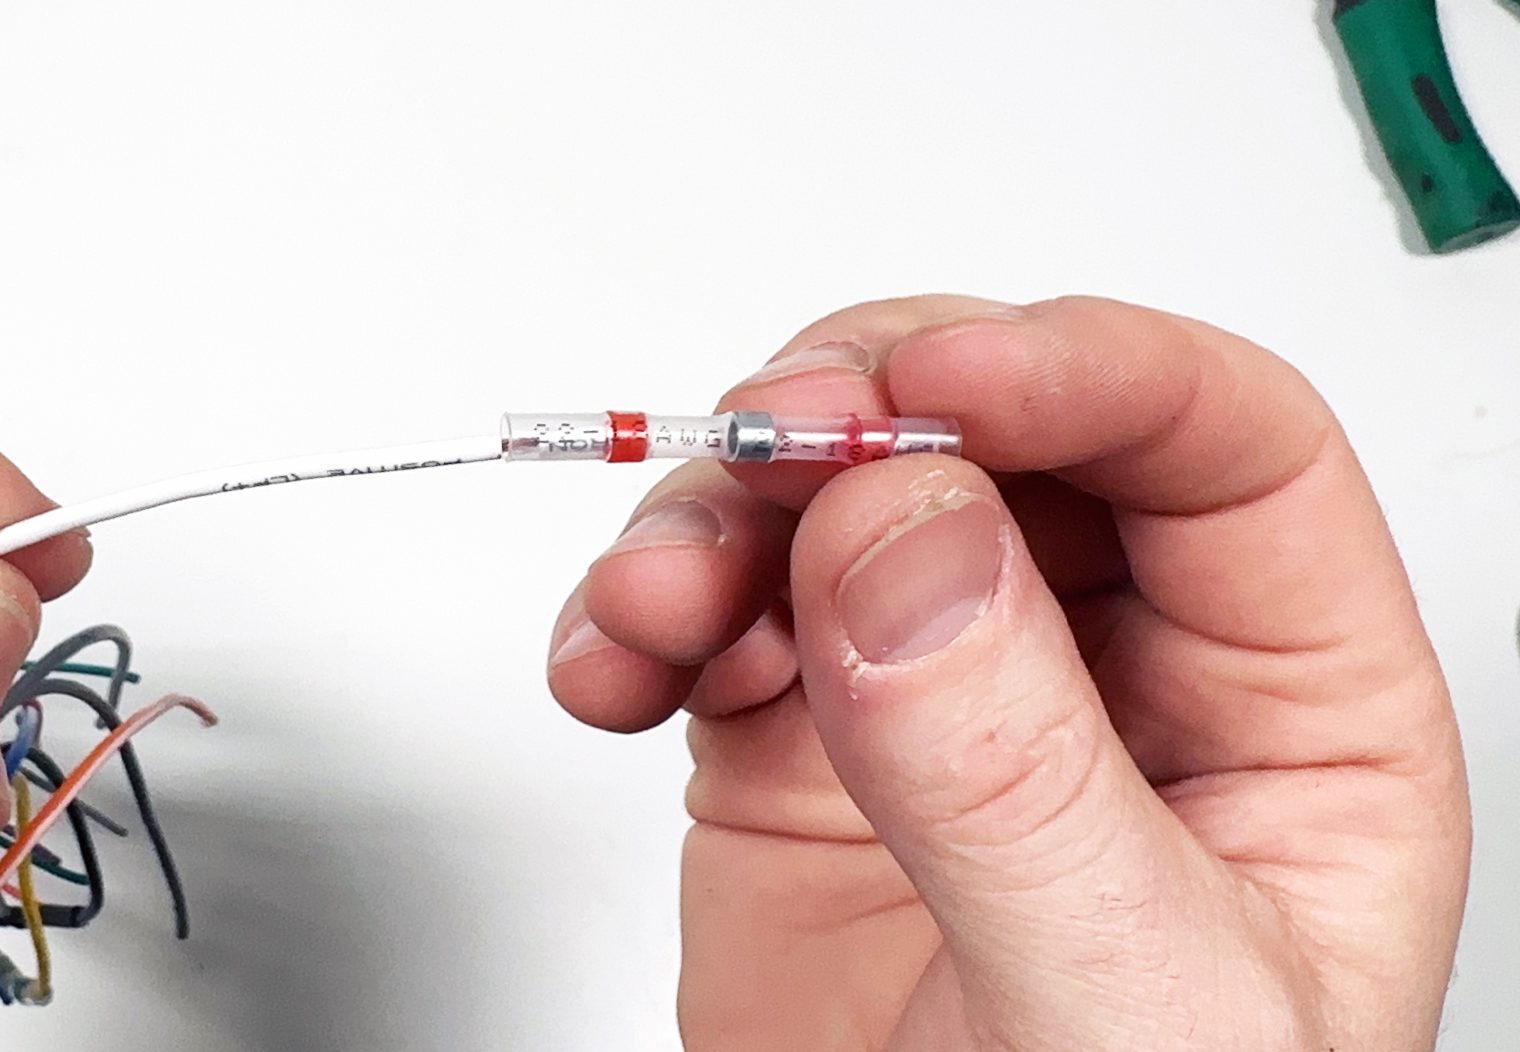
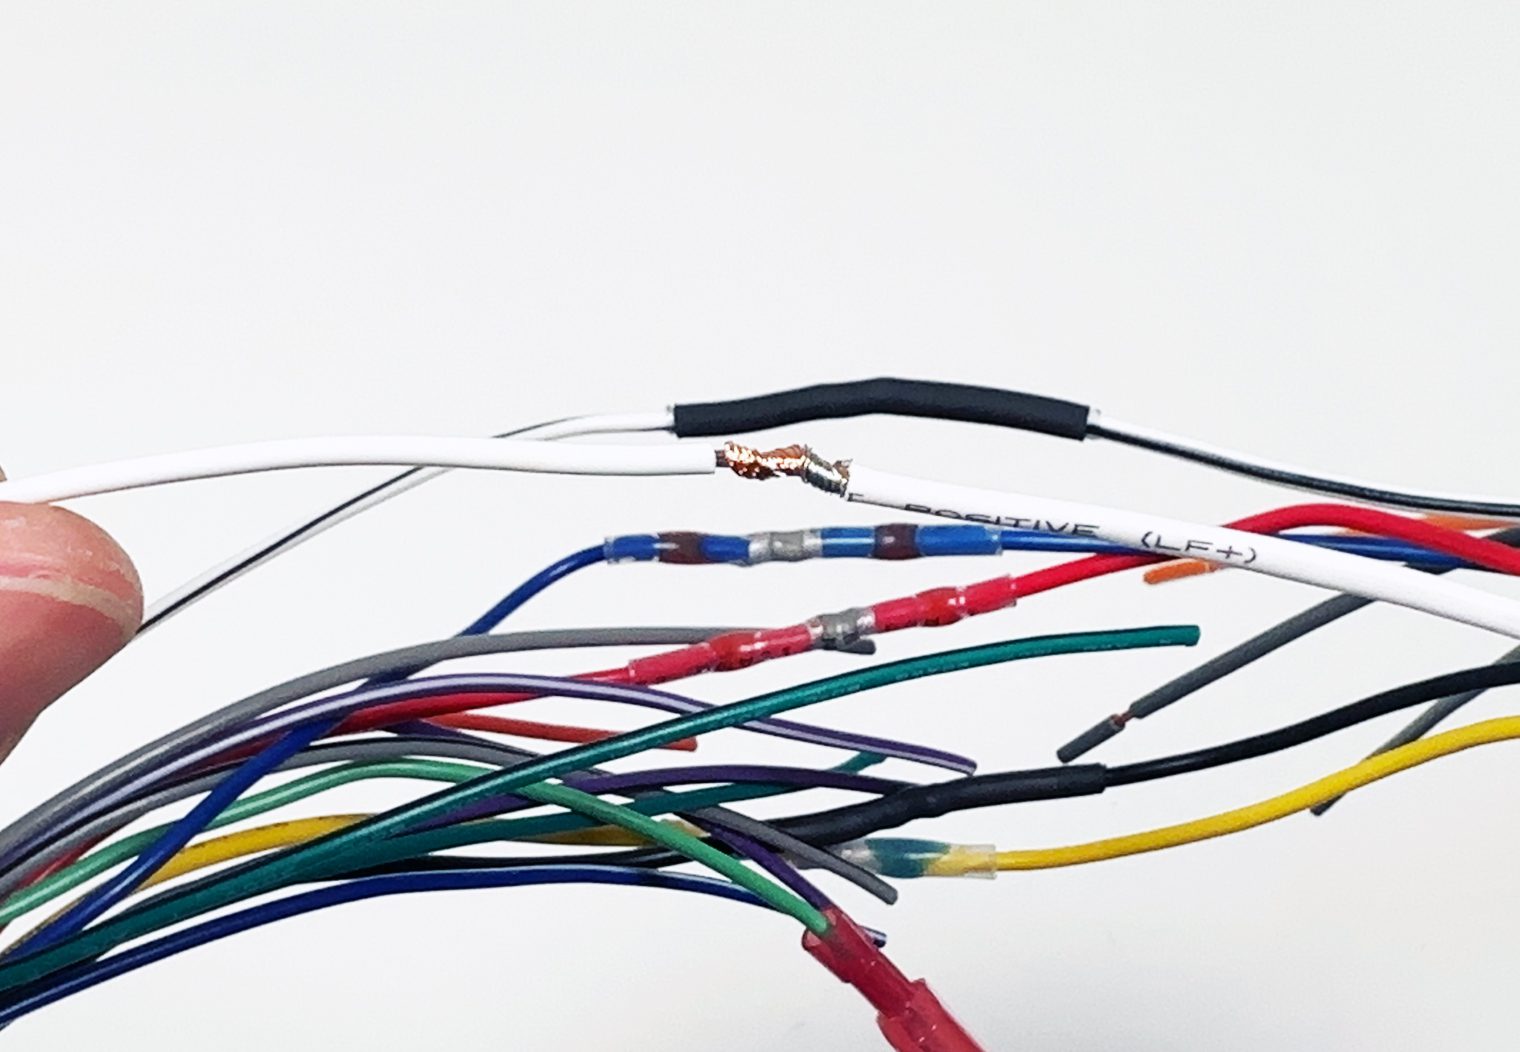
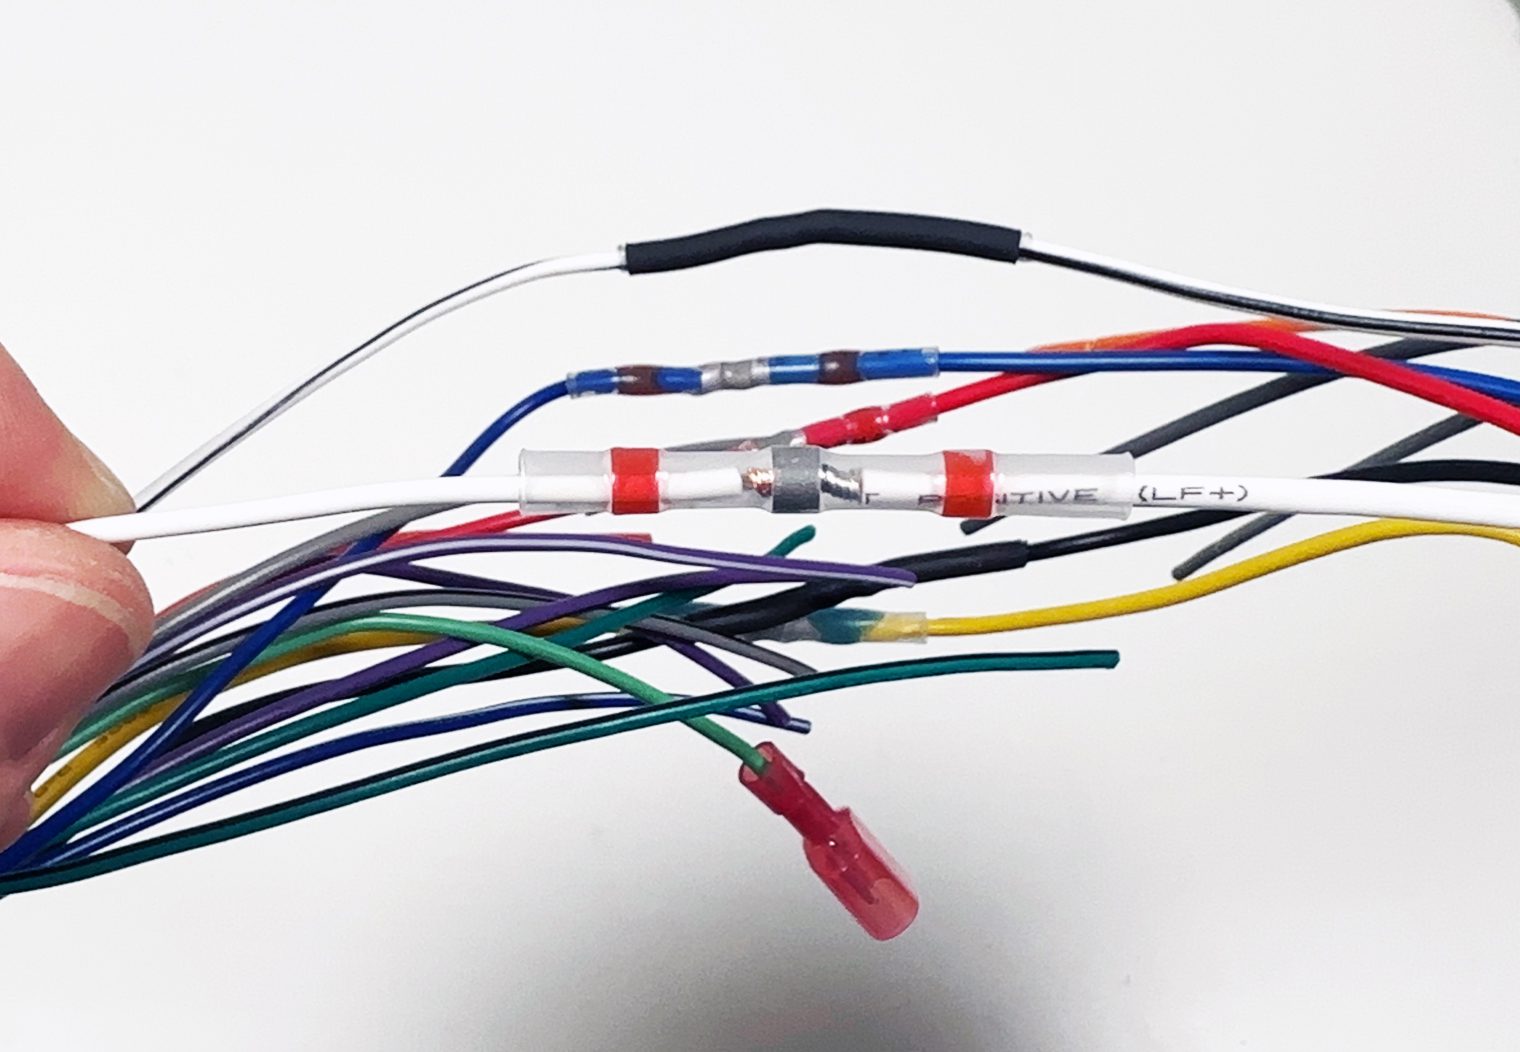
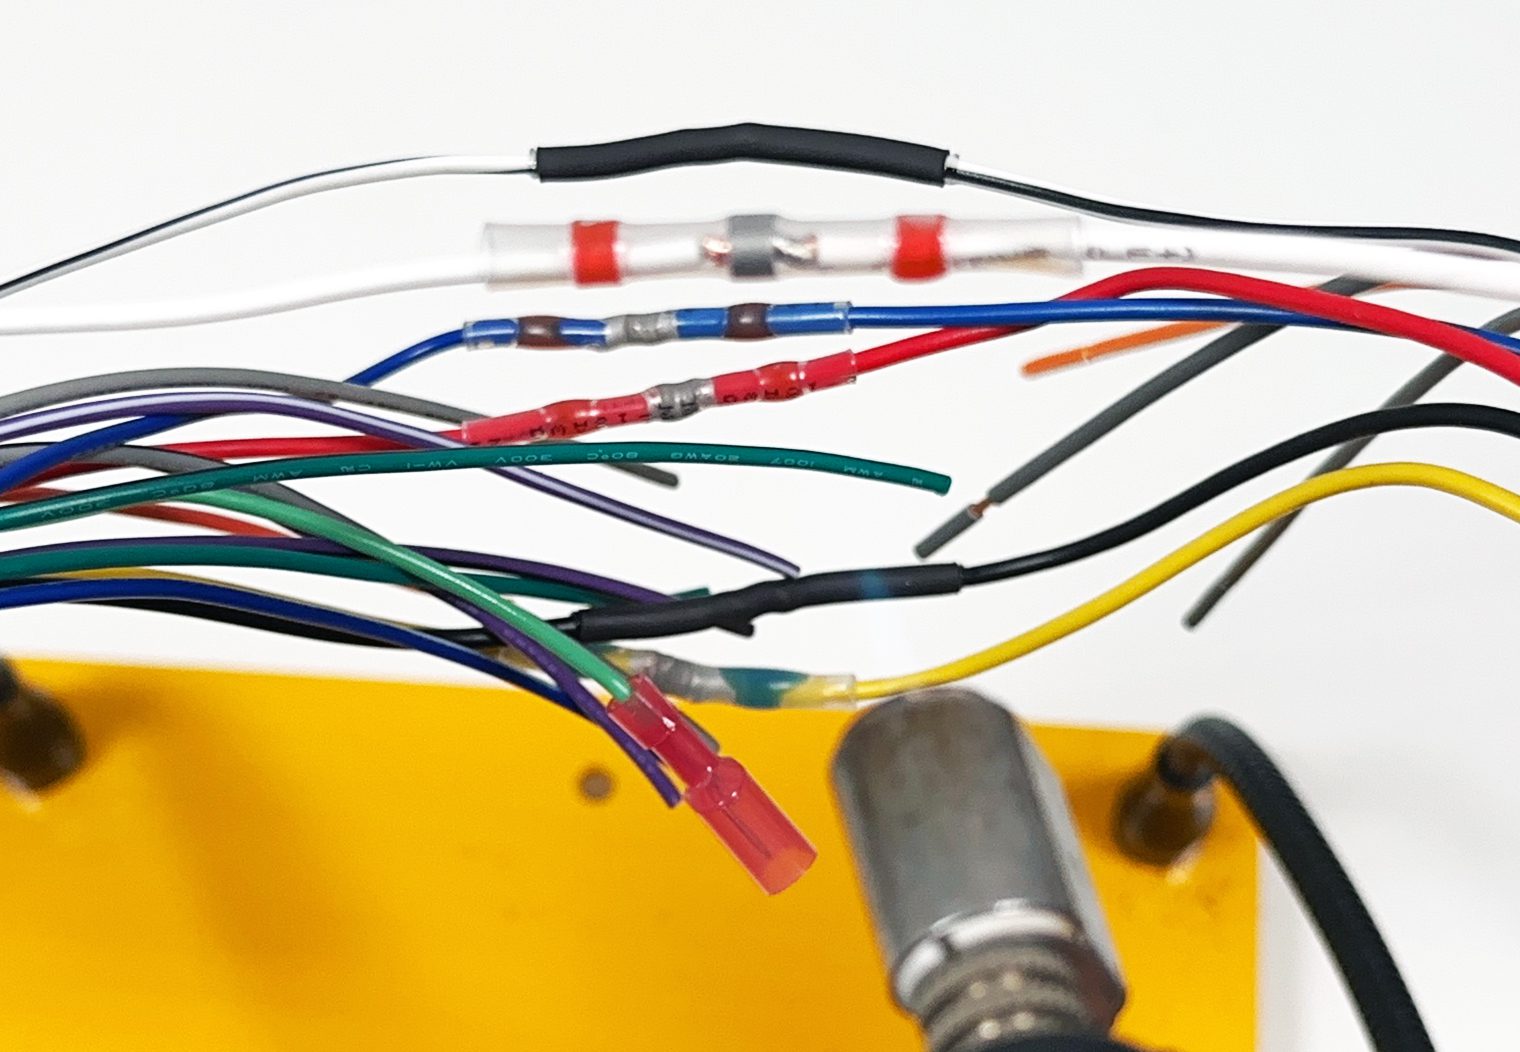
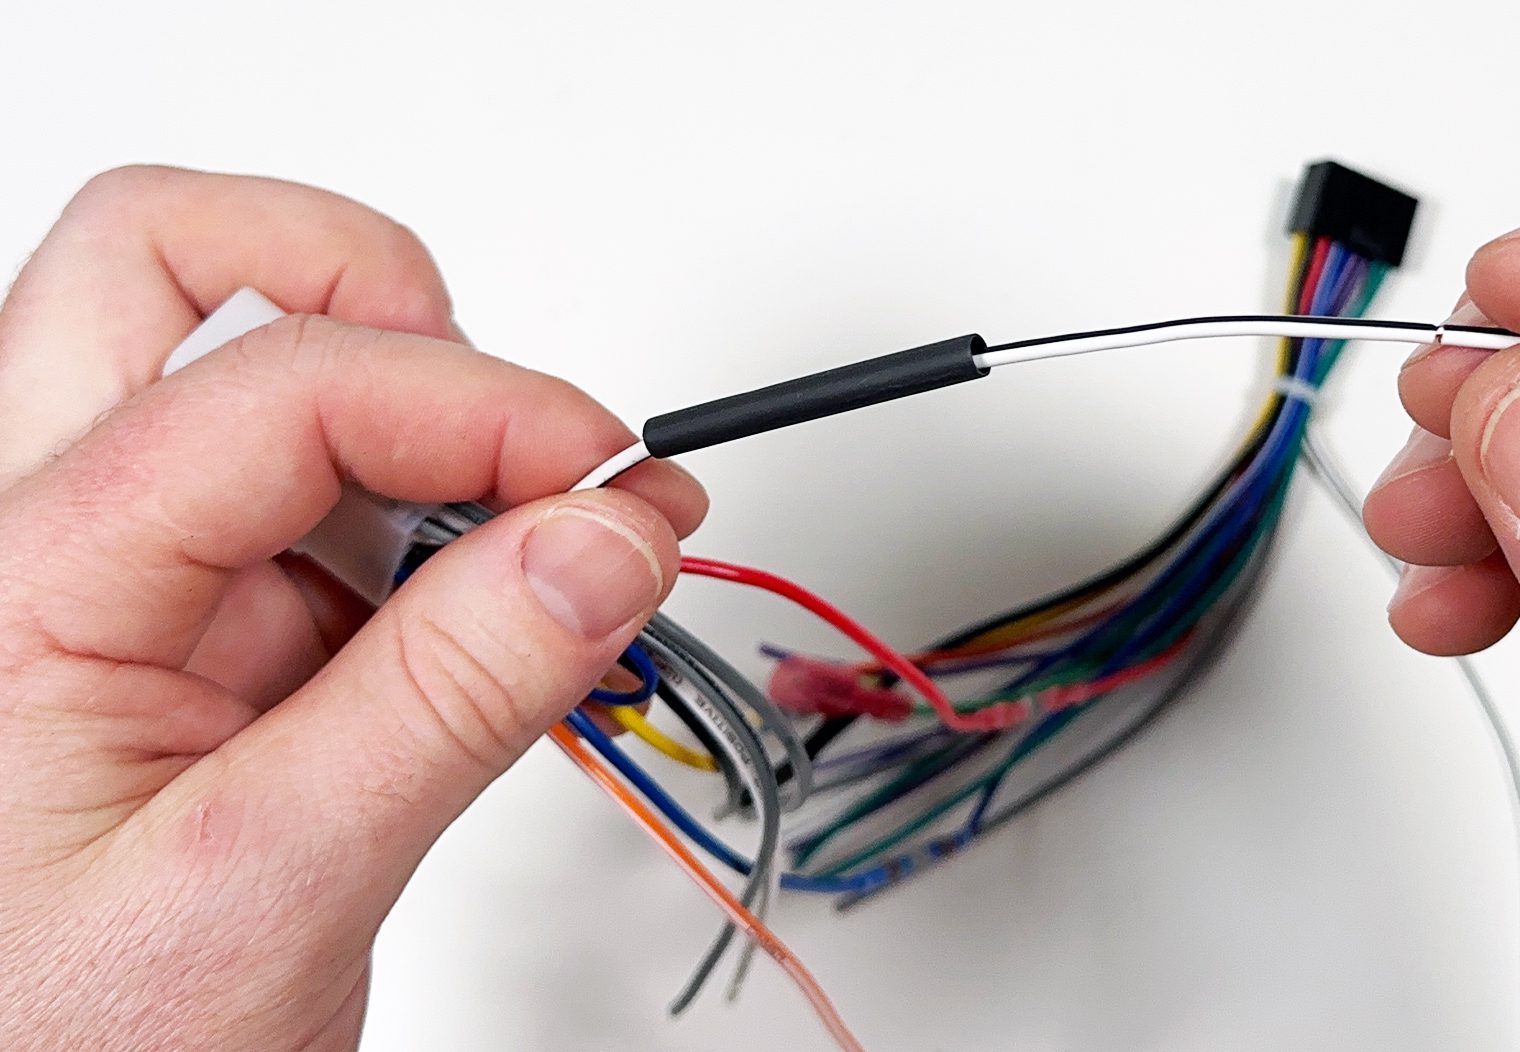
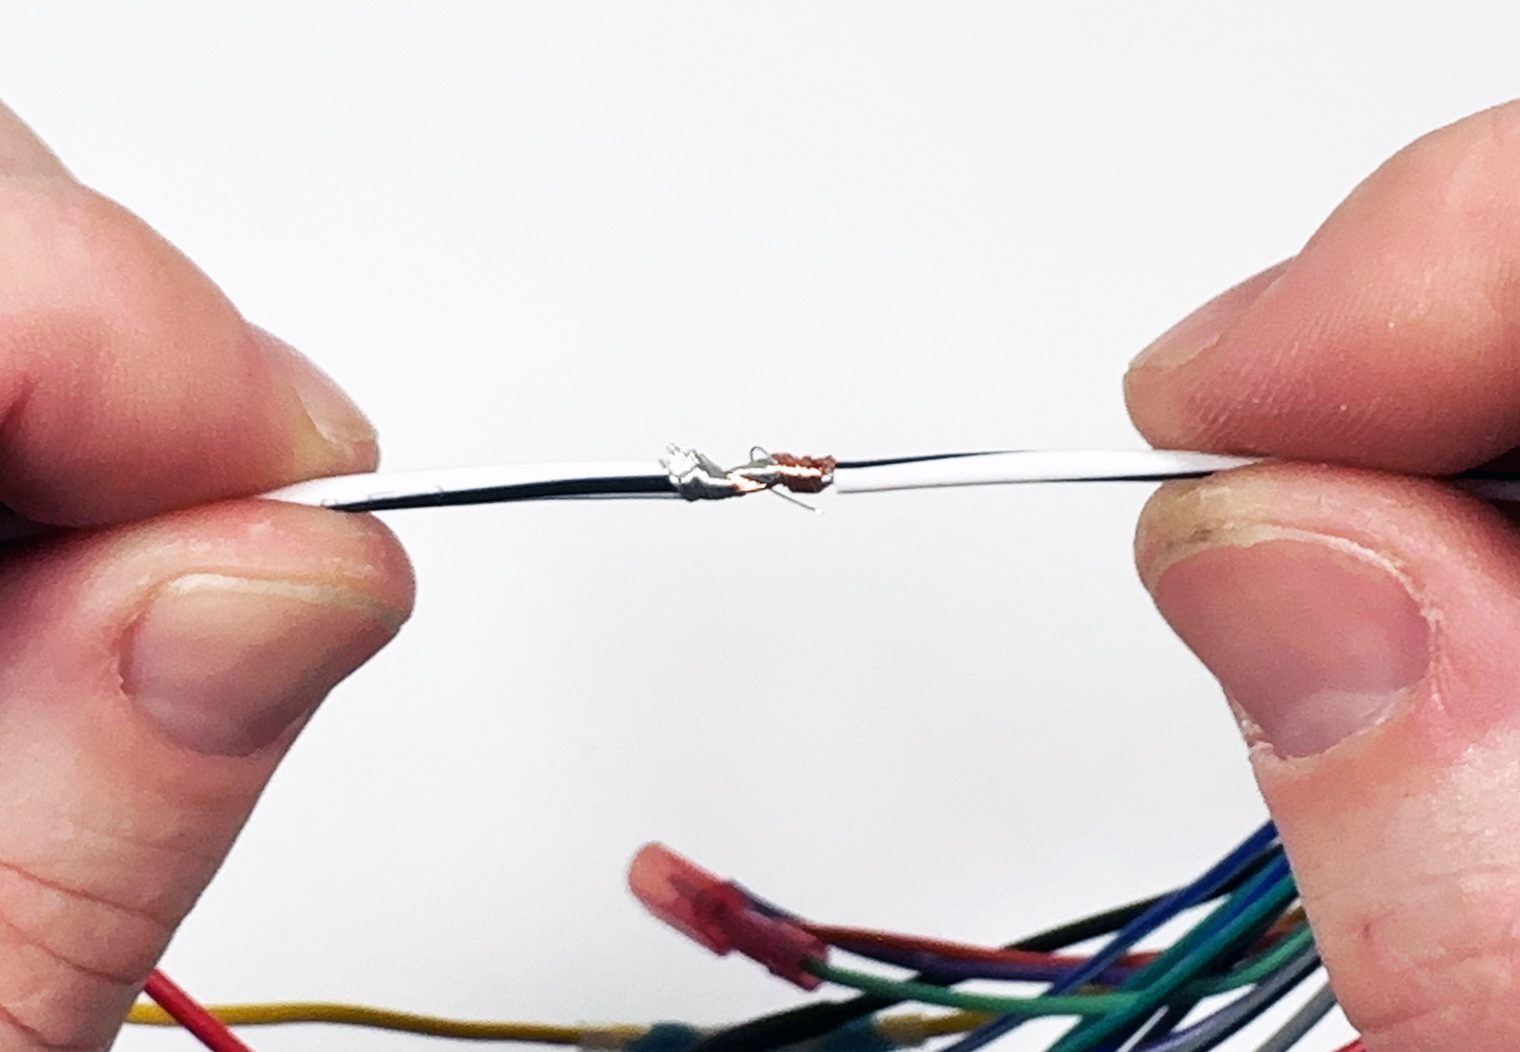
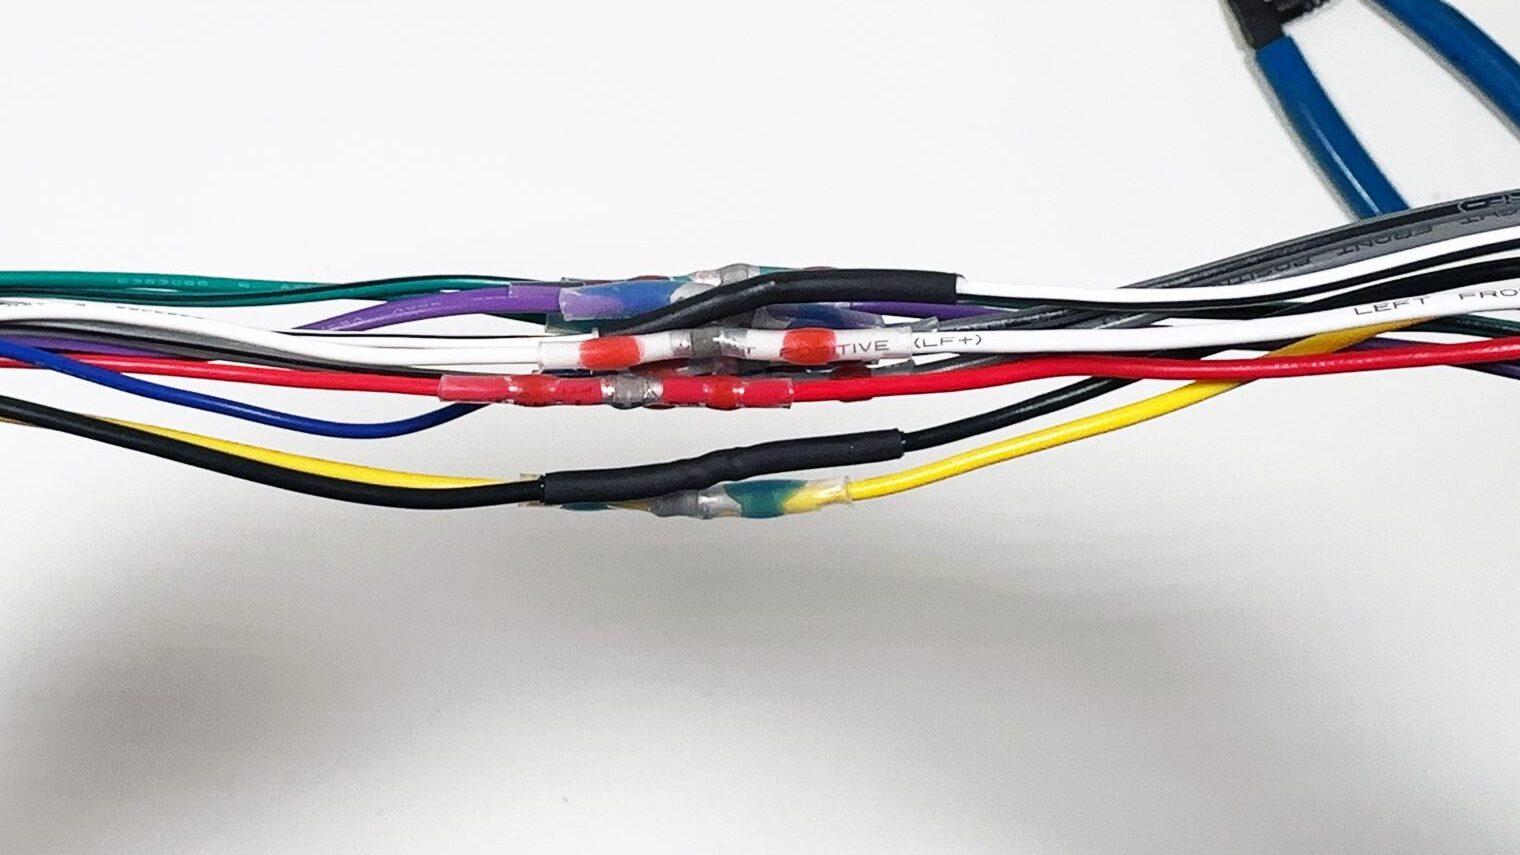
Method 2: Solder Seal Wire Connectors
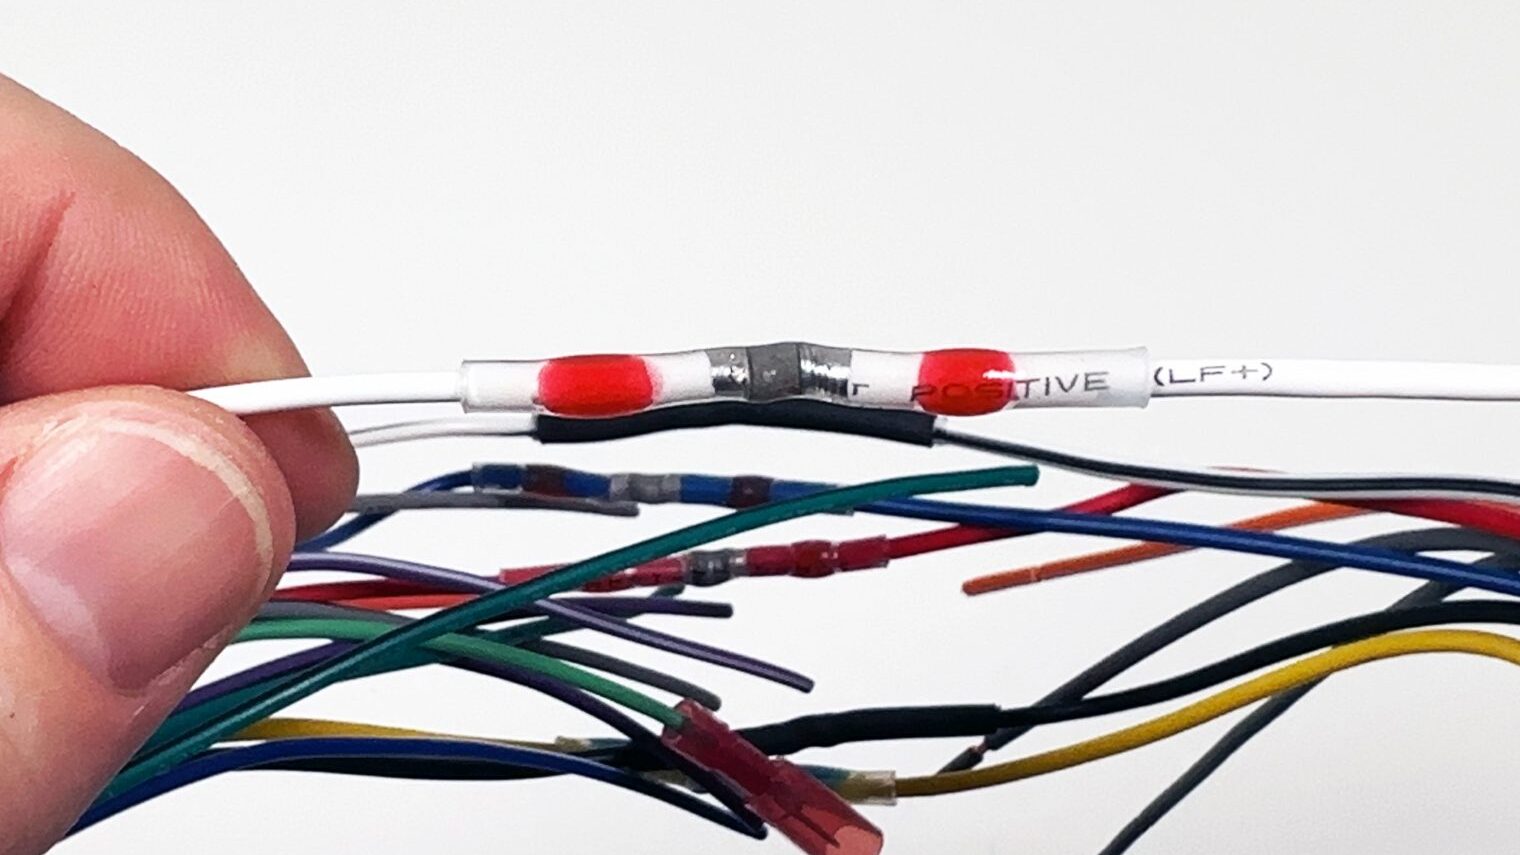
Solder seal wire connectors are my personal preferred method for merging wires together. If you don't have these in your garage, you should. These connectors use a combination of solder and heat shrink tubing to create a secure and sealed connection between the wires. After stripping twisting the wires together, the solder seal is heated to melt the solder and create a strong bond. At the same time, shrink tubing seals the connection as you heat it, ensuring a long-lasting and high quality connection/seal. And the best thing about these connectors is you can use a variety of heating sources like a heat gun, a standard lighter or a torch.
Here are a few photos of this process.


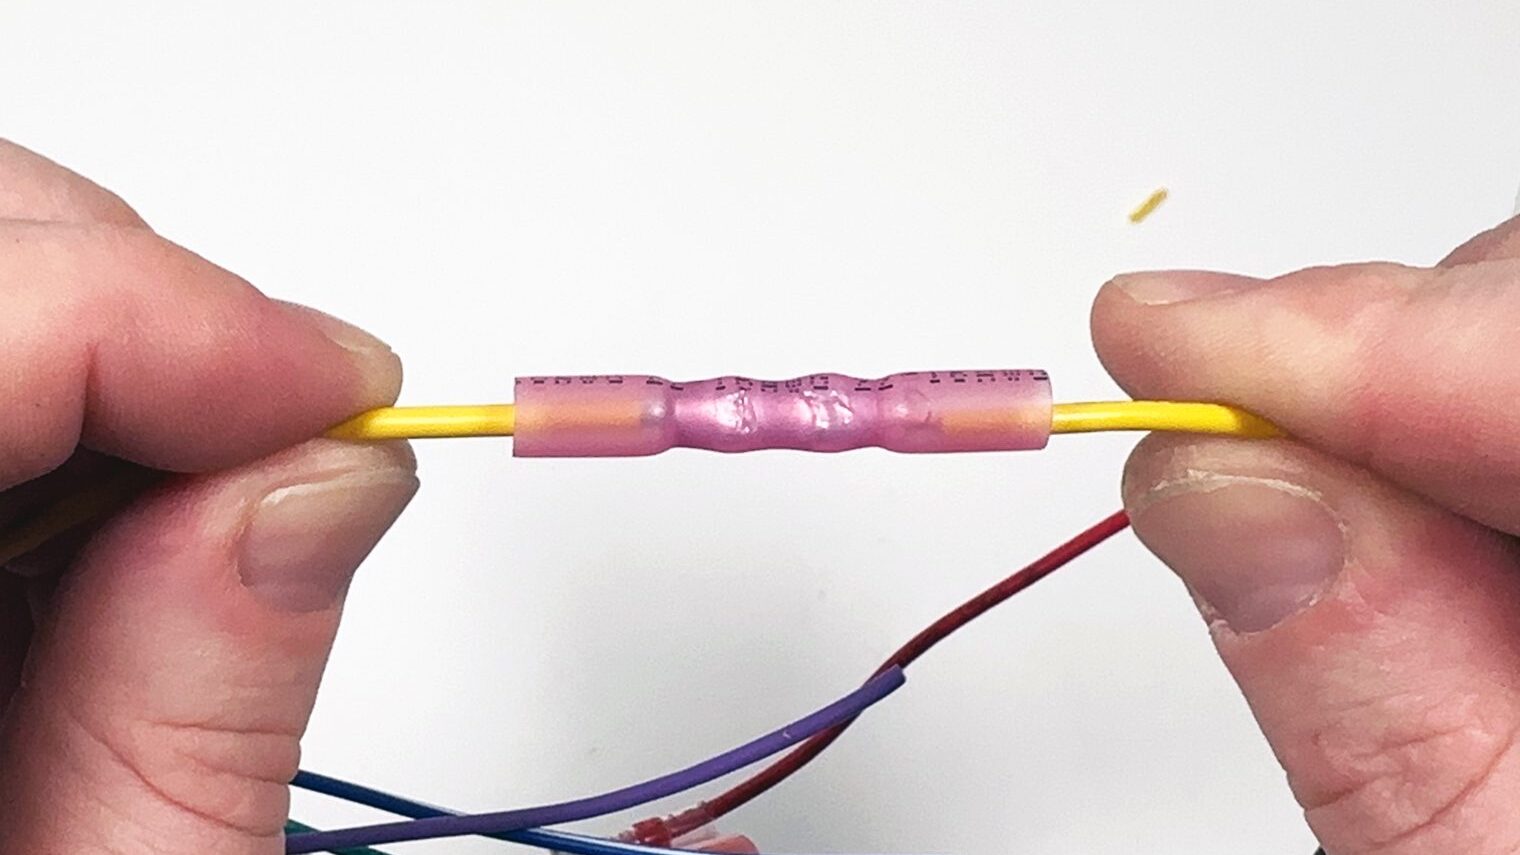
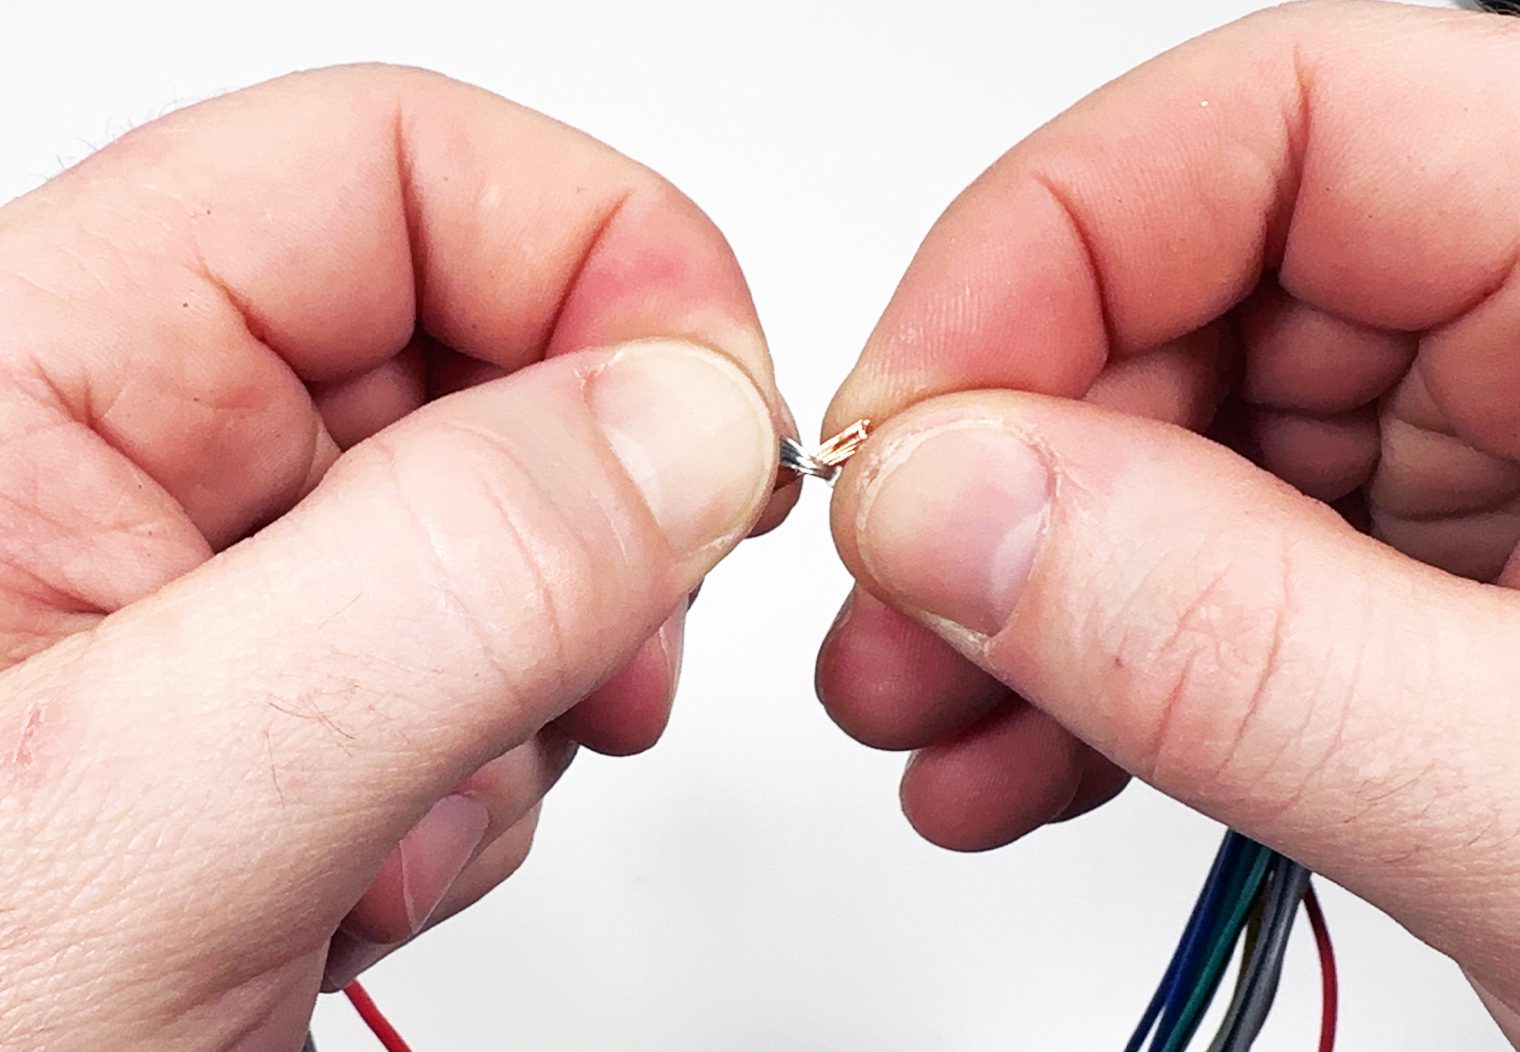
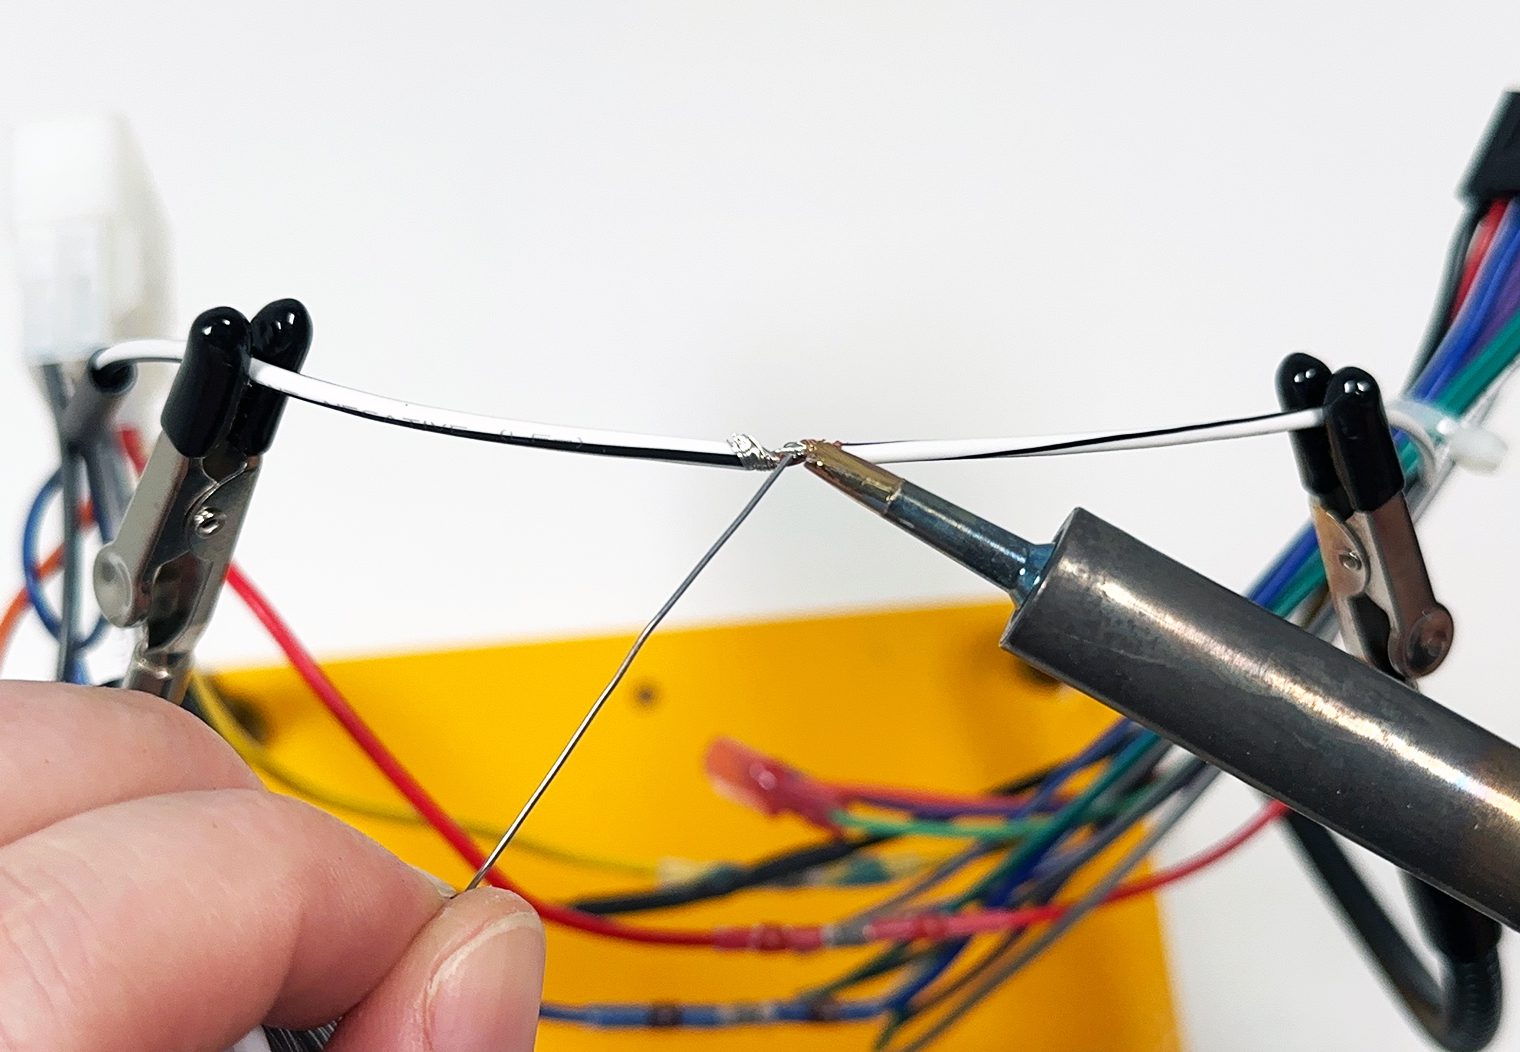
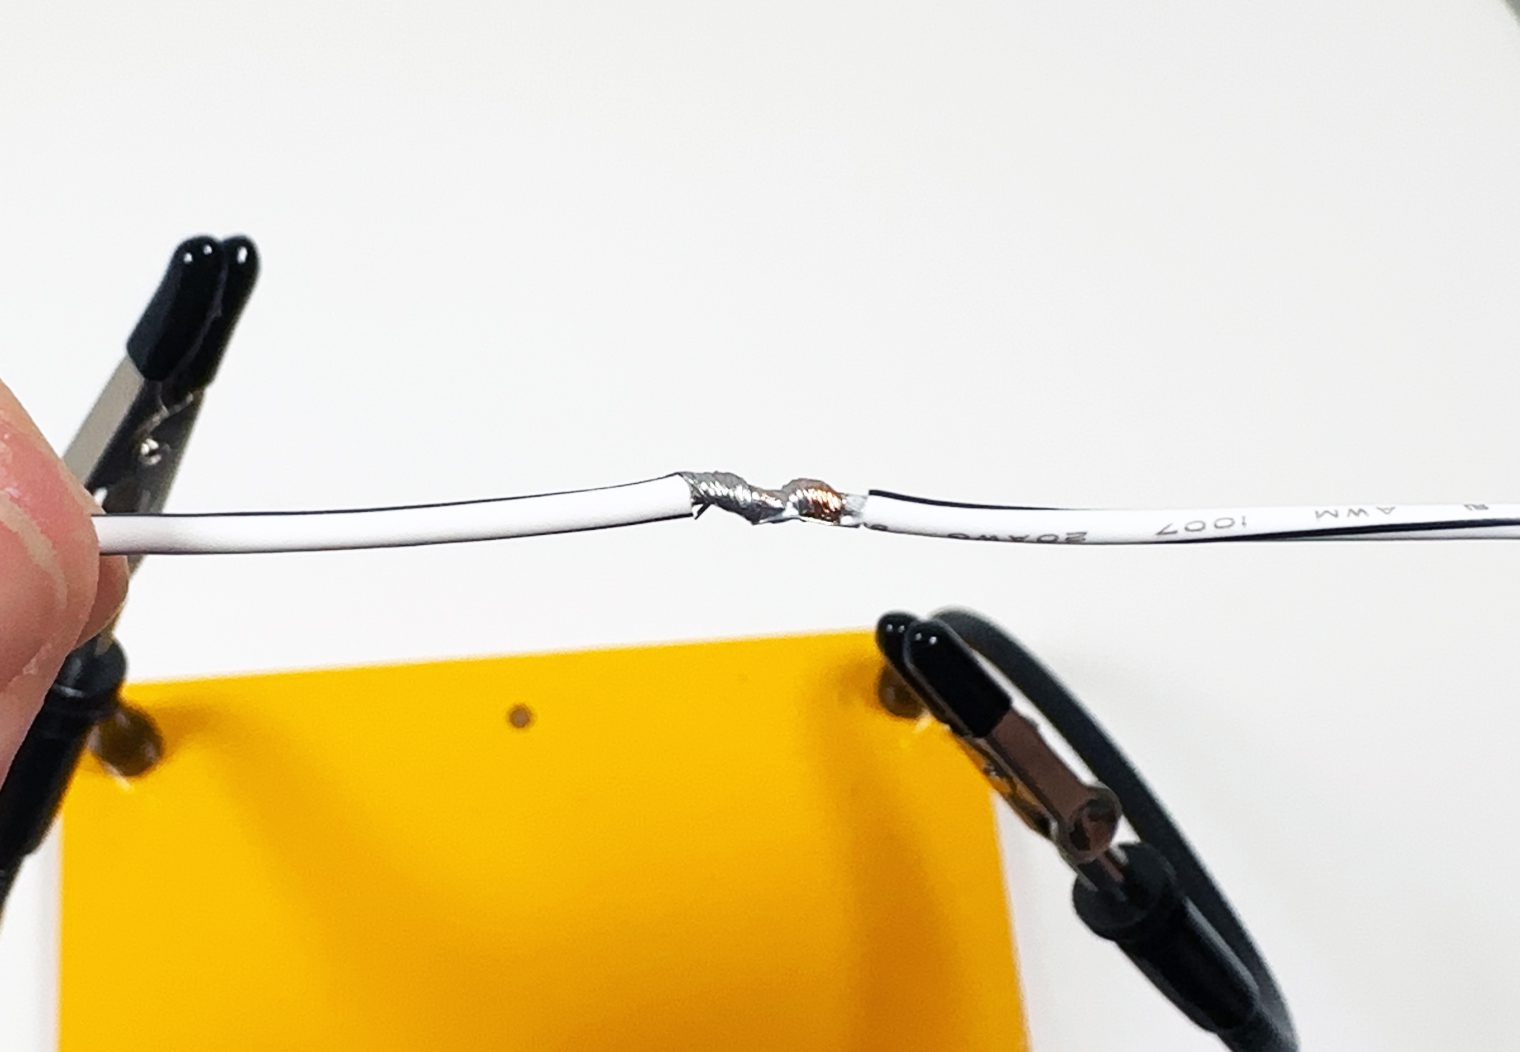
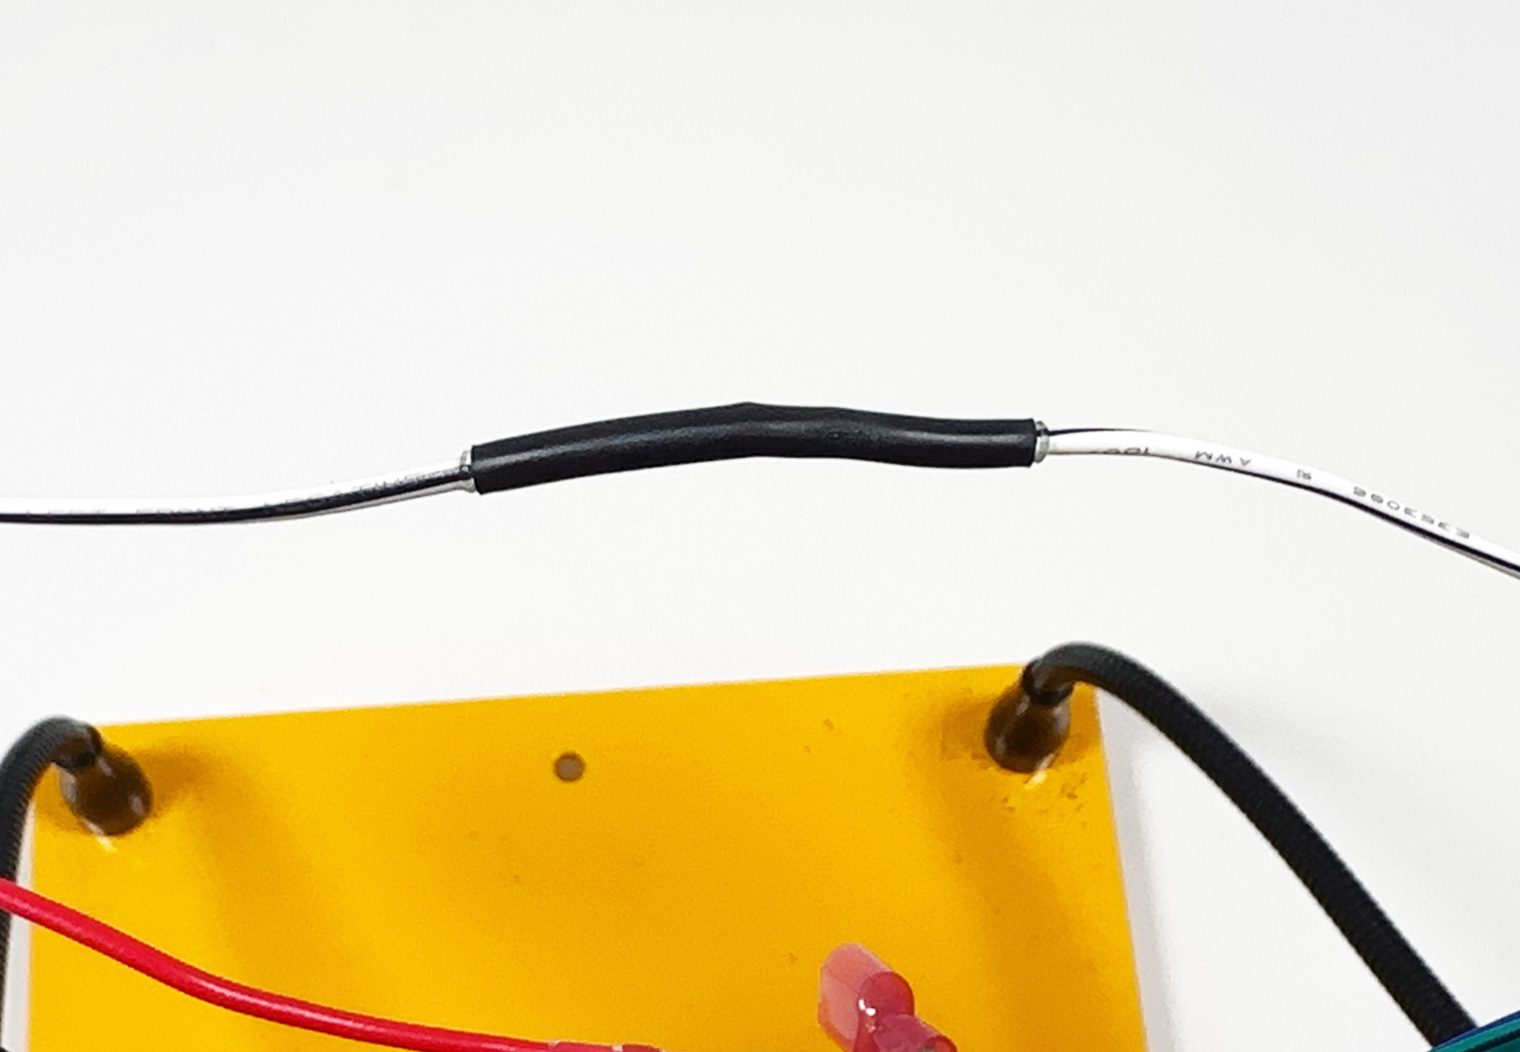
Method 3: Soldering and Shrink Wrap
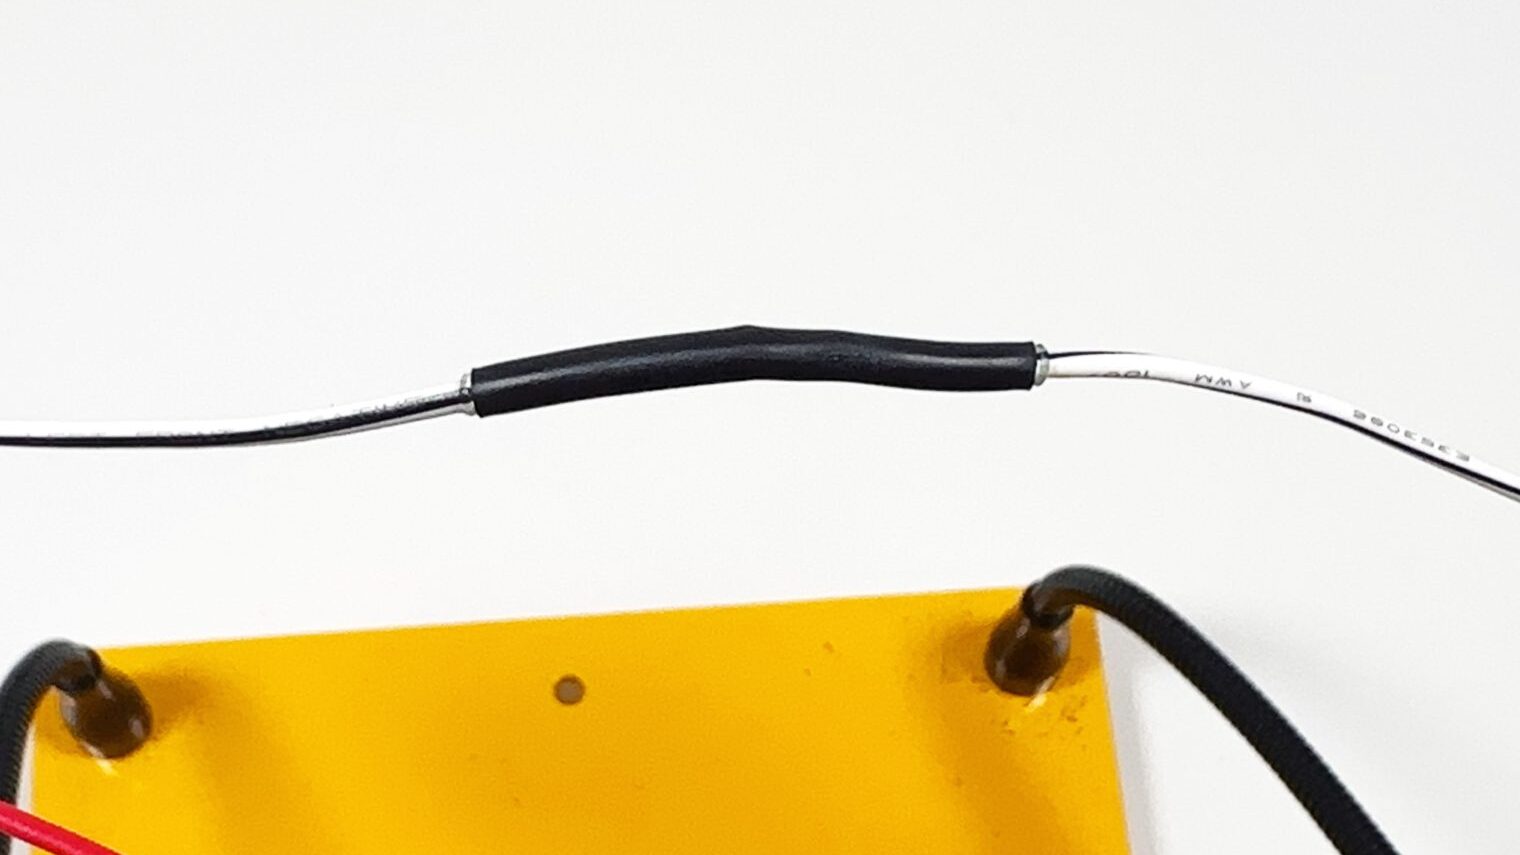
Soldering the wires together and using heat shrink tubing is another reliable method and used to be my preferred method before I started using the solder seal connectors. It involves using a soldering iron and solder to fuse the wires together and then covering the connection with shrink tubing to provide insulation and protection from shortage.
Soldering this way is probably the most reliable way of merging these types of harnesses but is definitely the most time consuming (and expensive if you don't have a solder iron). If you have all of the tools to use this method and don't want to purchase solder seal connectors, his would be my second preferred method for you.
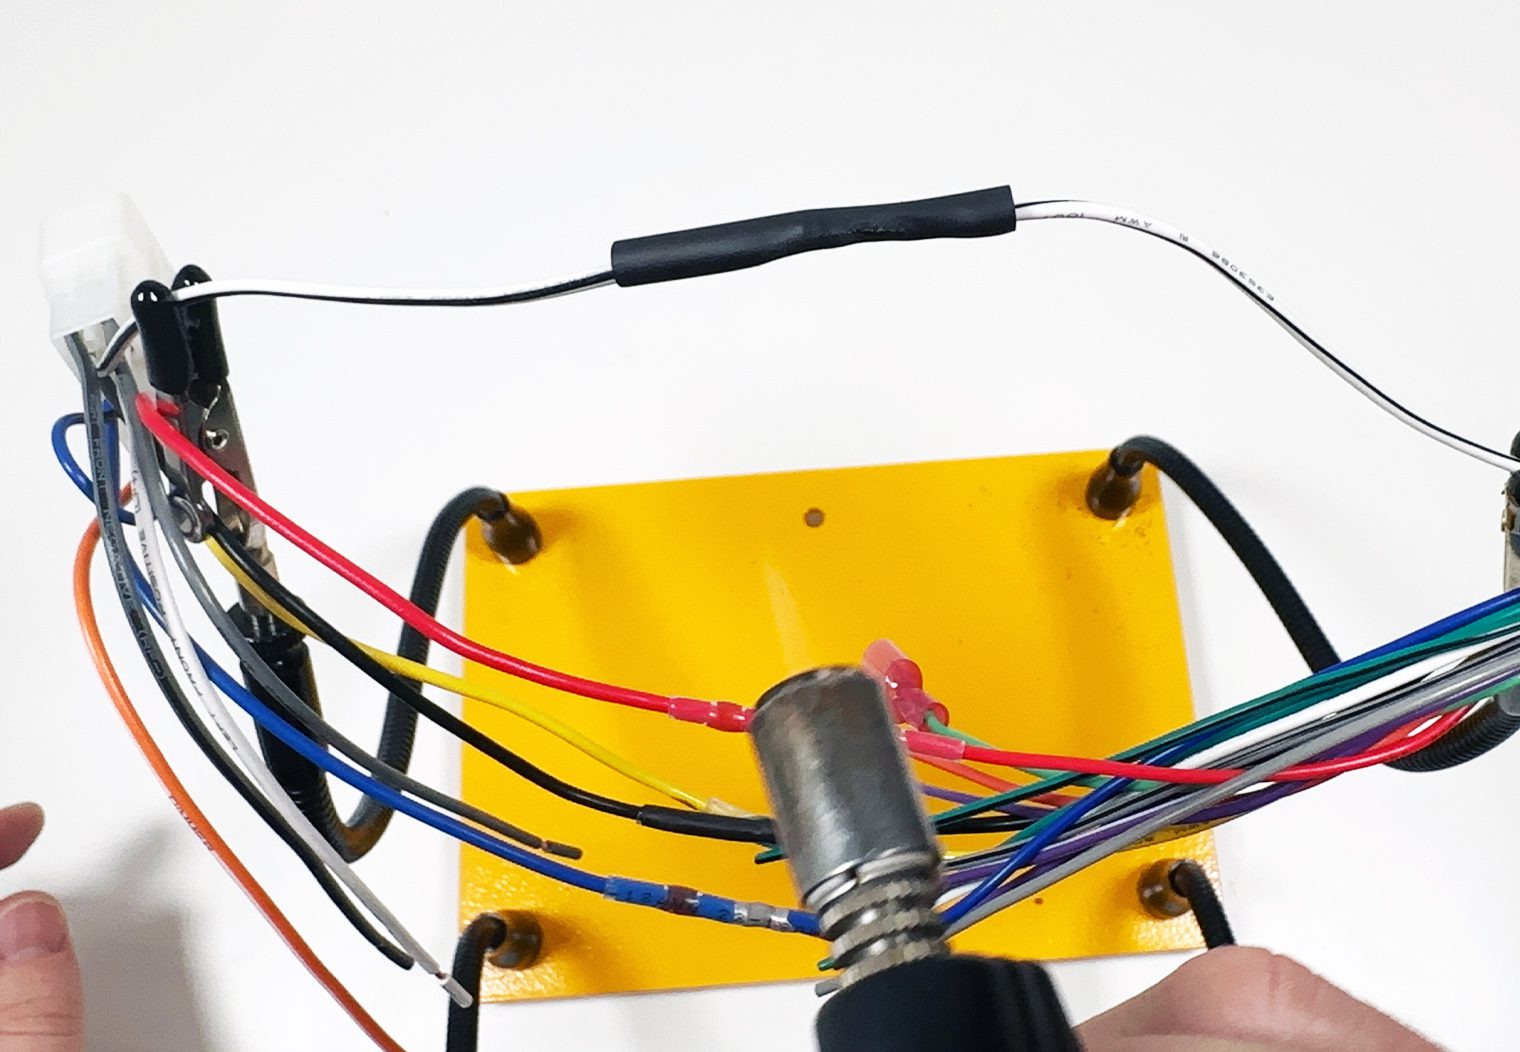
Here's what the process of soldering and sealing two of the head unit wire harness wires together using a solder iron looks like:
Additional Considerations
In some cases, not all the necessary wires that are in your head unit's wiring harness may be present in the adaptive harness. For instance, older harnesses may lack wires for features such as parking brake, reverse signal, and amp turn-on. It's essential to identify and connect these additional wires directly in your vehicle's wiring harness to ensure the proper functioning of specific head unit features. Most modern vehicles in the early 2000s and newer will have all of wires you need though so this is more of a call out for those of you installing a head unit in pre 2000 era vehicles.
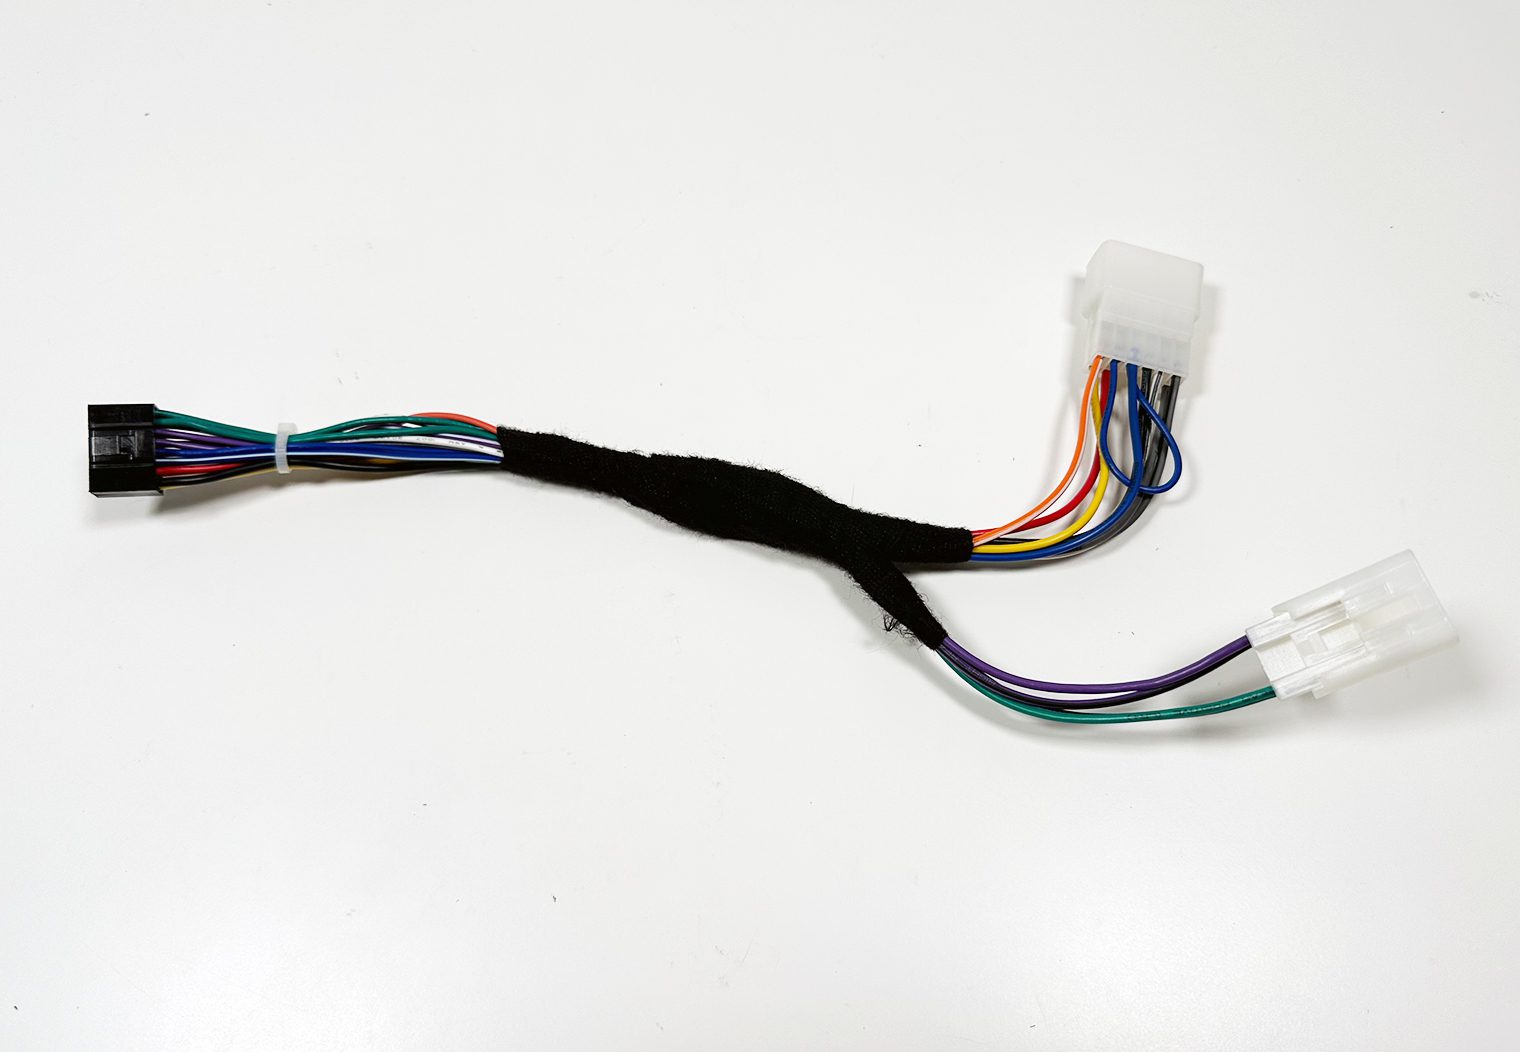
Also, something I recommend to streamline the overall look of your merged harness and prevent any potential wire snags and rattles is to use wire harness fleece tape to neatly wrap the wires together. This not only enhances the aesthetics but also contributes to a more organized and professional installation.
Wrapping Up
Properly wiring your aftermarket head unit is key to a successful installation without shorts, popped fuses or surprises. By understanding the different wiring methods and utilizing the right tools, you can ensure a secure and reliable connection between your head unit and your vehicle's factory harness without any guesswork. Whether you opt for crimping, solder seal connectors, or soldering with shrink wrap, taking the time to wire your head unit correctly will result in a hassle-free and seamless stereo installation.

excellent article, thank you for your clear and concise descriptions and instructions. Really appprciate your time, effort, and advice