In this article: We'll review how to upgrade your head unit on a 2009 – 2012 Ram 1500 step by step with photos and more.
Time required: 3-4 hours
Difficulty: Easy
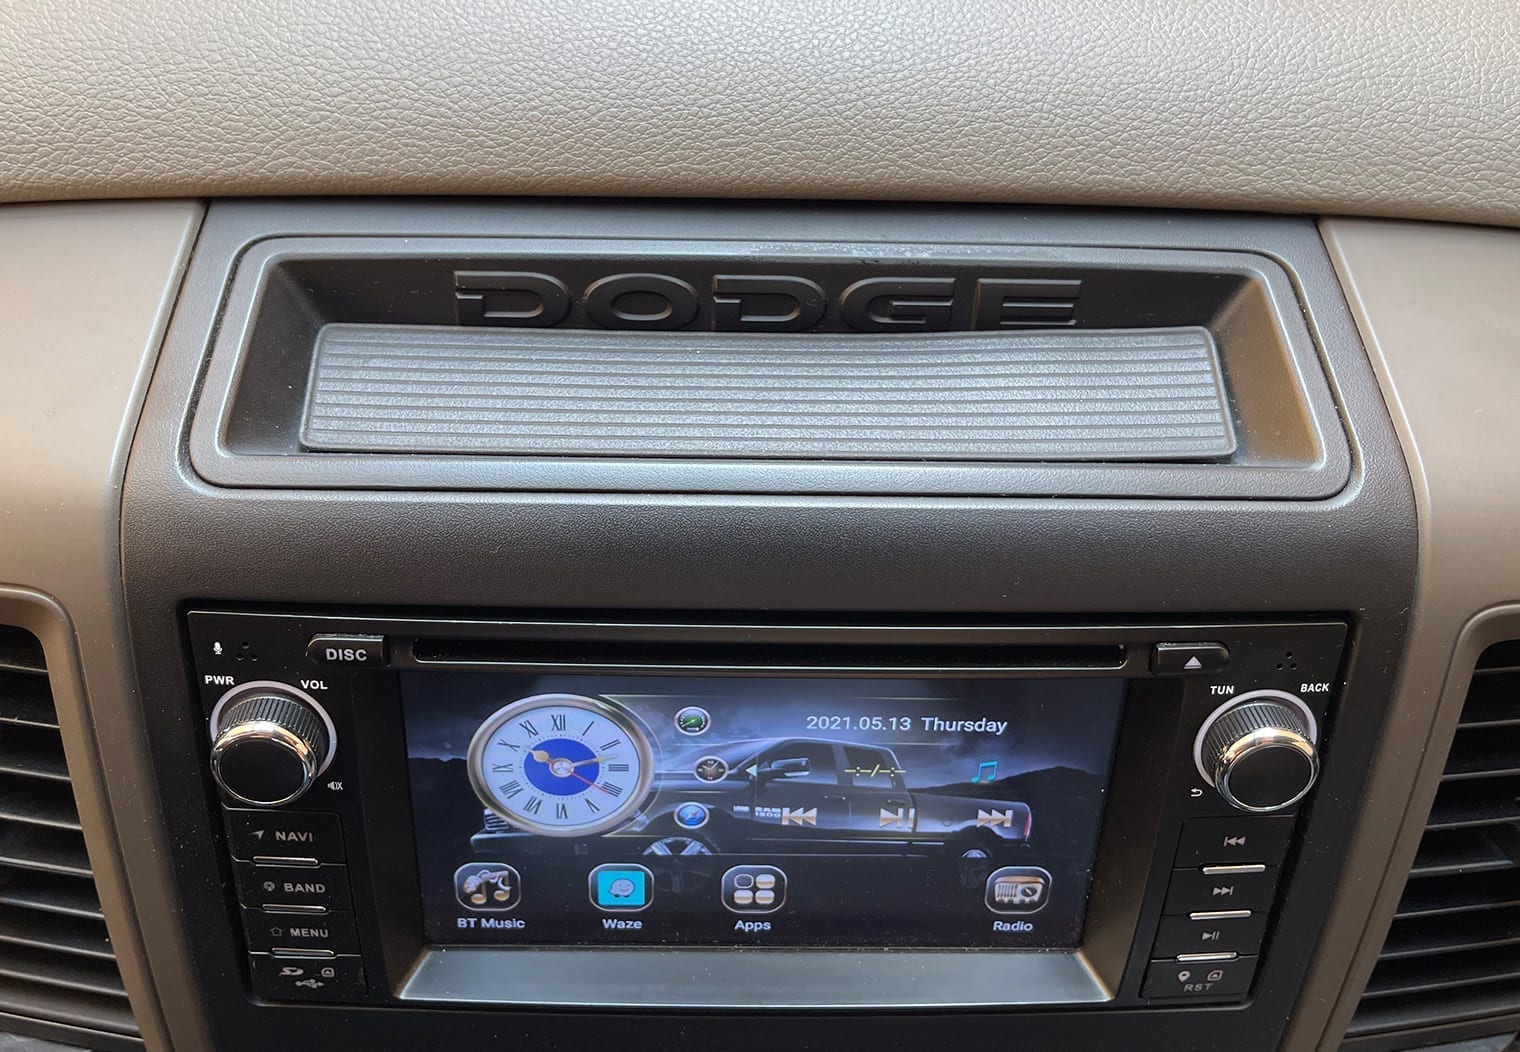
Ram introduced the 4th generation of the Ram 1500 in 2009. Between 2009 and 2019, it went through a few face lifts, some significant interior and technology improvements among other things. 2009 – 2012 were the first ‘versions' of the 4th generation. From the outside, a 2009 looks very similar (if not identical) to a 2018 with the exception of the interior, dash and tech package.
In the 2009 – 2012 models of the 4th generation, the technology was pretty primitive compared to the later years of the gen. In particular, the features of the truck weren't integrated into the head unit of the truck (e.g. honk when locking, how long the lights stay on for once you lock the truck, etc). The head unit also wasn't as integrated into the dash with odd dimensions – it's a double-DIN. So even though you might be a little bummed with your 2009 – 2012 Ram 1500's OEM head unit and its lack of features, it's actually a much better candidate for upgrading with an aftermarket car stereo than the 2013+ models.
In this article, I'll walk you through the steps to remove and replace your Ram 1500's head unit with an aftermarket touchscreen head unit. In this particular install, I chose to use Sony's XAV-AX8100 oversized touchscreen unit. I did a separate full review of the Sony XAV-AX8100 if you're interested in reading more about it's features and my general thoughts of the unit.
Parts Needed:
In order to upgrade the head unit on your 2009 – 2012 Ram 1500, you'll need the following parts:
- Head Unit: The Sony XAV-AX8100 is what I used
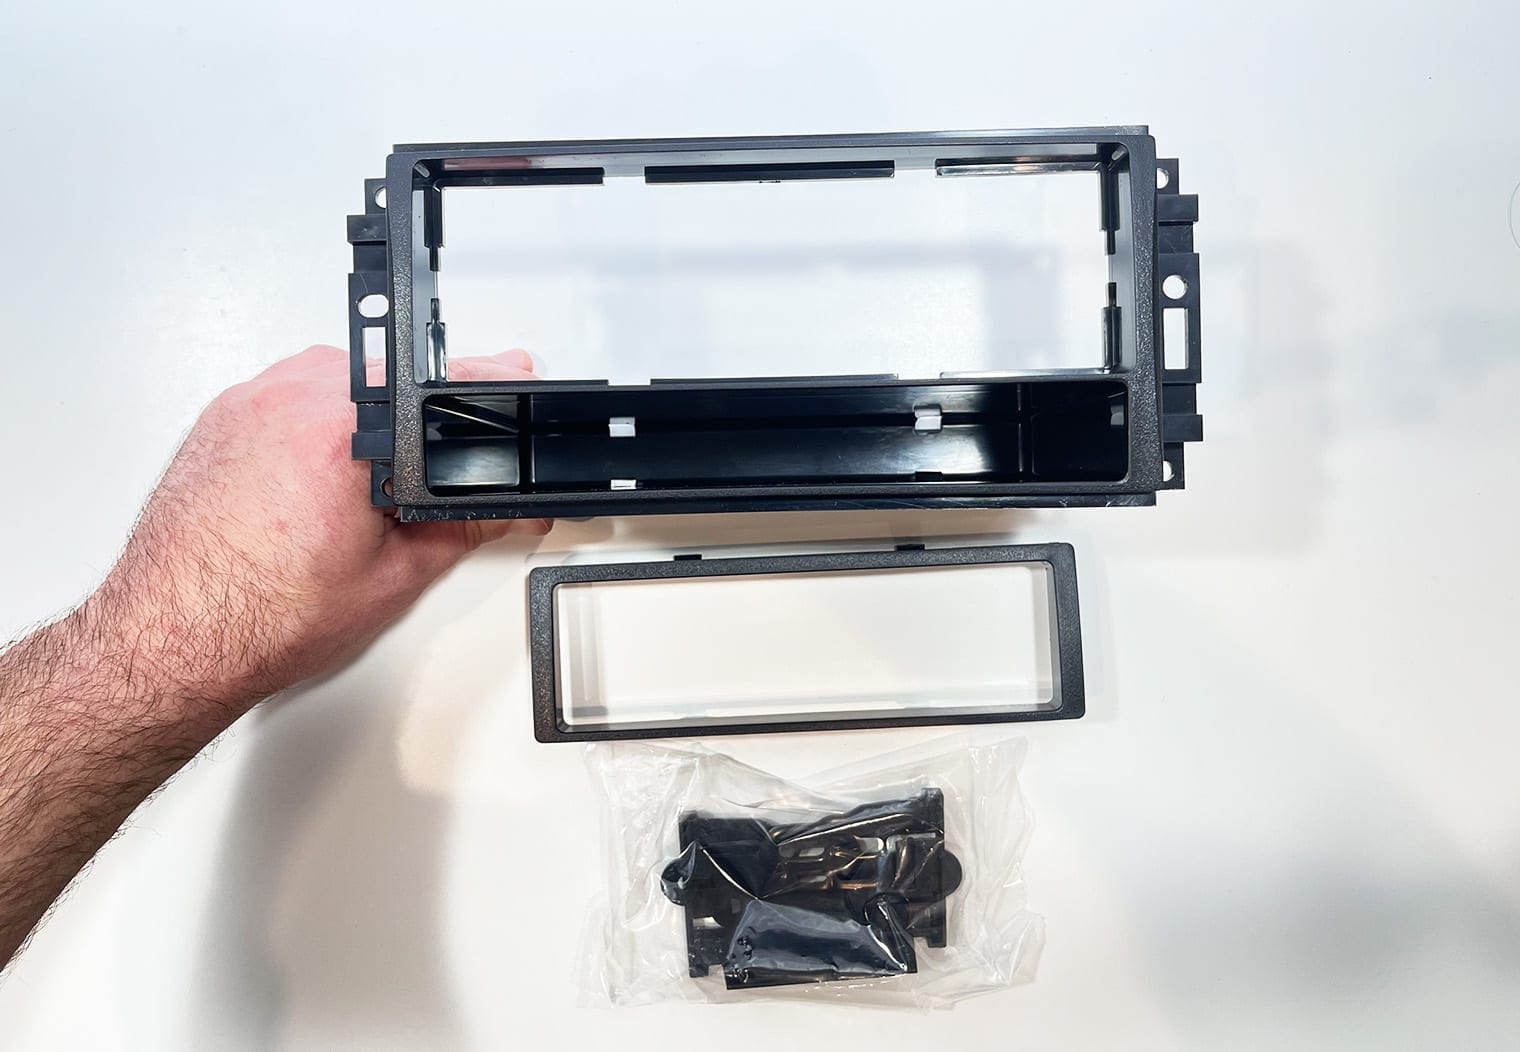
- Dash Kit: This adapts the aftermarket head unit to the size of the hole in your dash. I used a single din head unit which required the Metra 99-6511 (~$12) but if you're using a double din head unit you'll need the 99-6511-17 (~$10)
- Wire Harness: This adapts the head unit's wire harness to your Ram's OEM harness. You'll need the Metra 70-6522 (~$13)
- Wire Solder Seal Connectors (~$21): I'll get into this in step 2, but I would highly recommend these for merging your harnesses.
Step 1: Remove Dash Trim
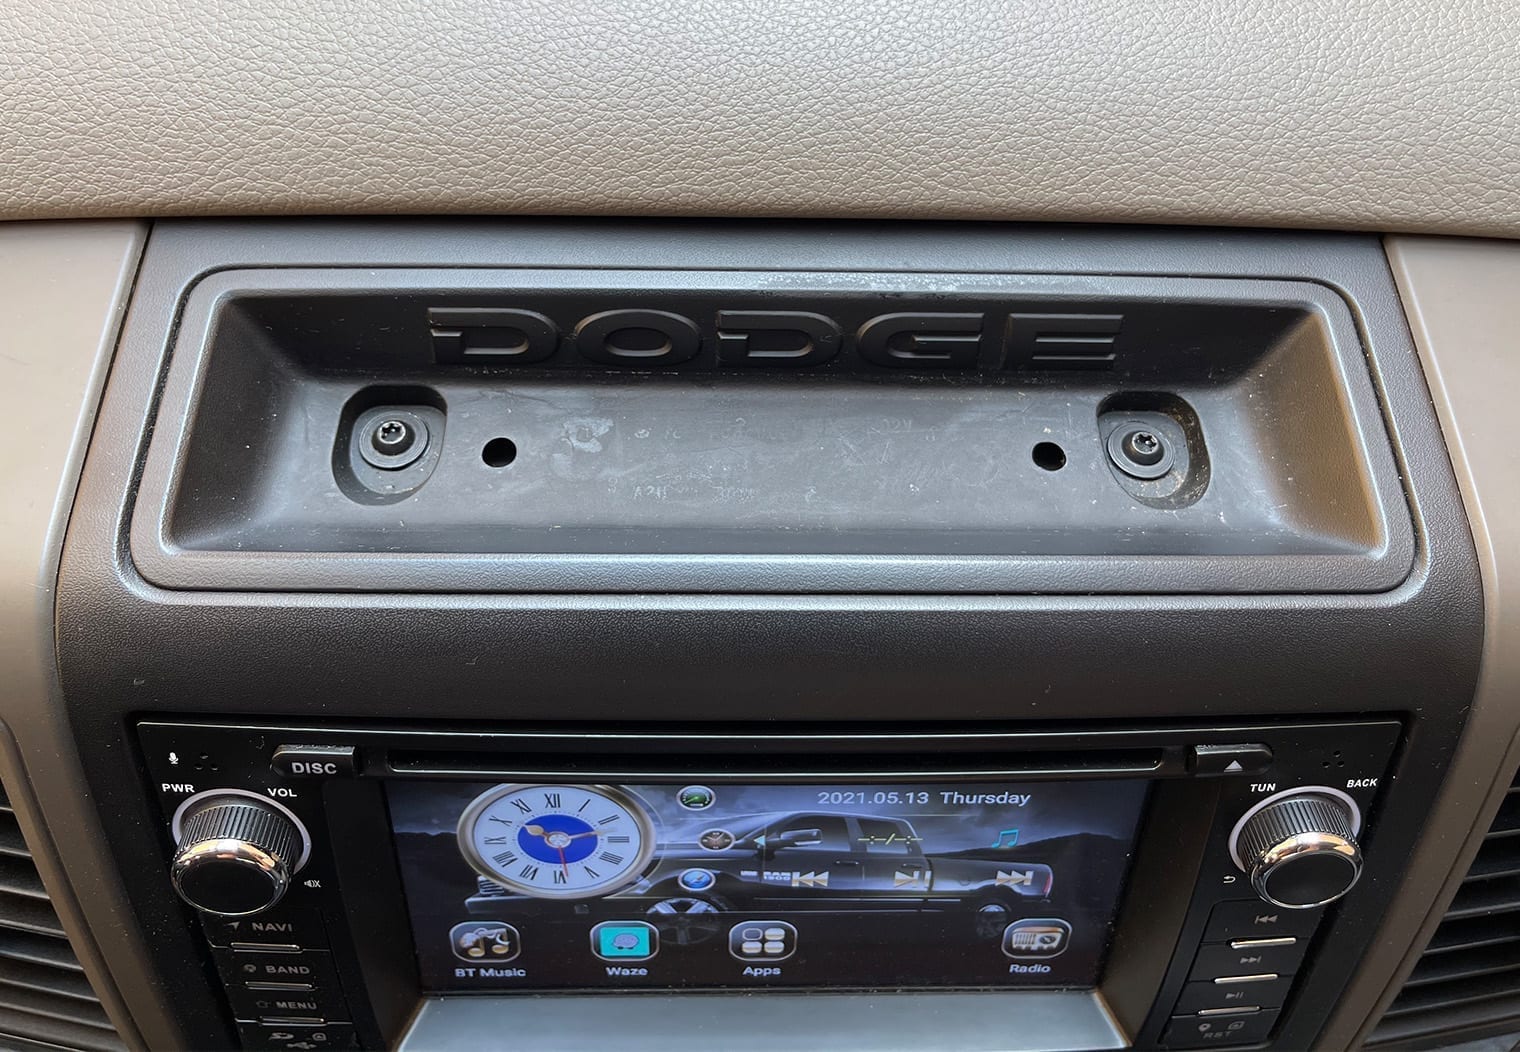
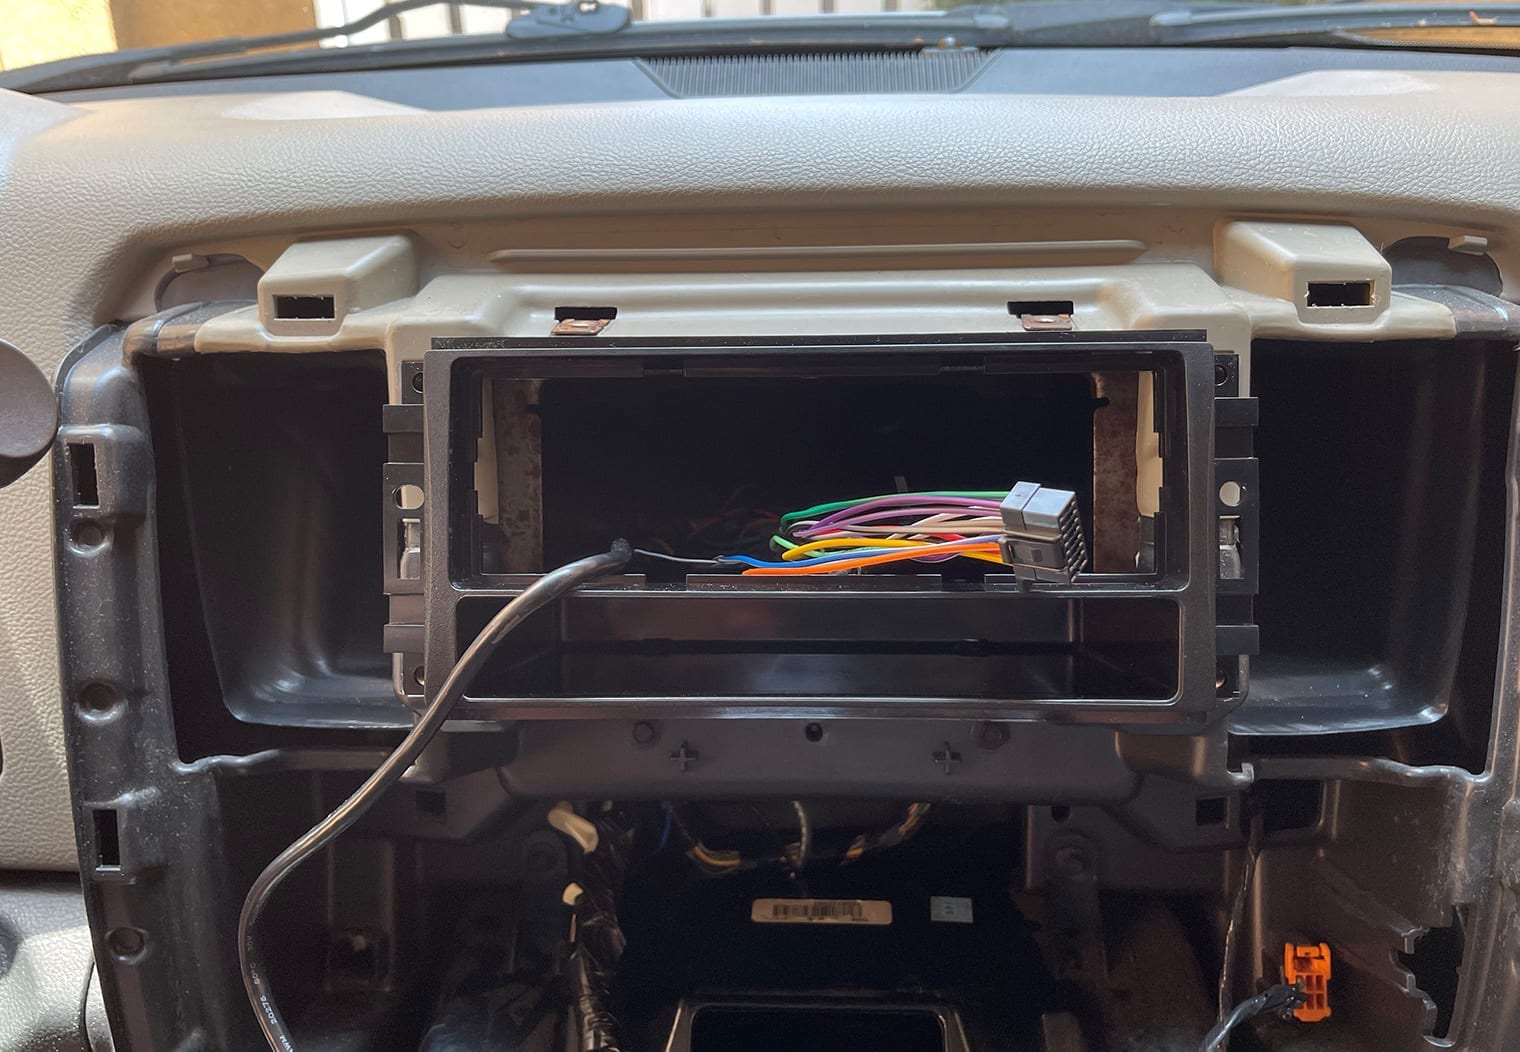
The first step to the process is to remove the outer dash trim that surrounds your Ram 1500's head unit. Removing the dash trim will give you access to the screws that hold the head unit in place. To do this, locate the small cubby above the head unit and remove the plastic insert to expose two screws.
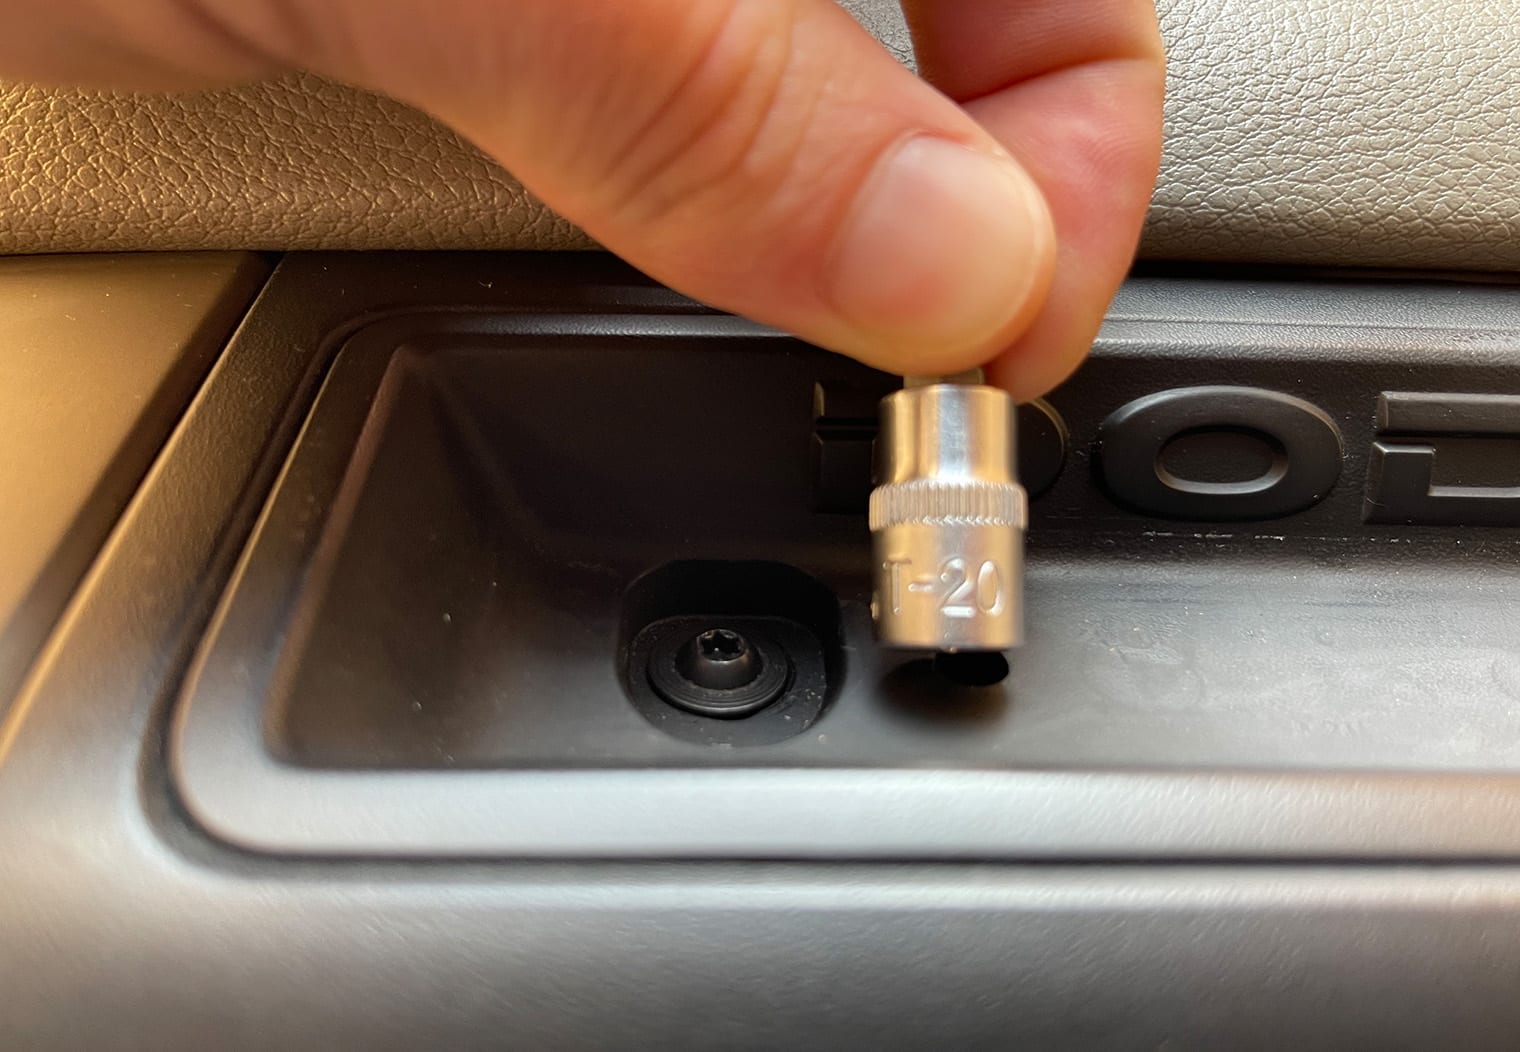
Once you've located the two screws, use a T-20 torx bit to remove the two screws and begin pulling the dash trim to unclip it.

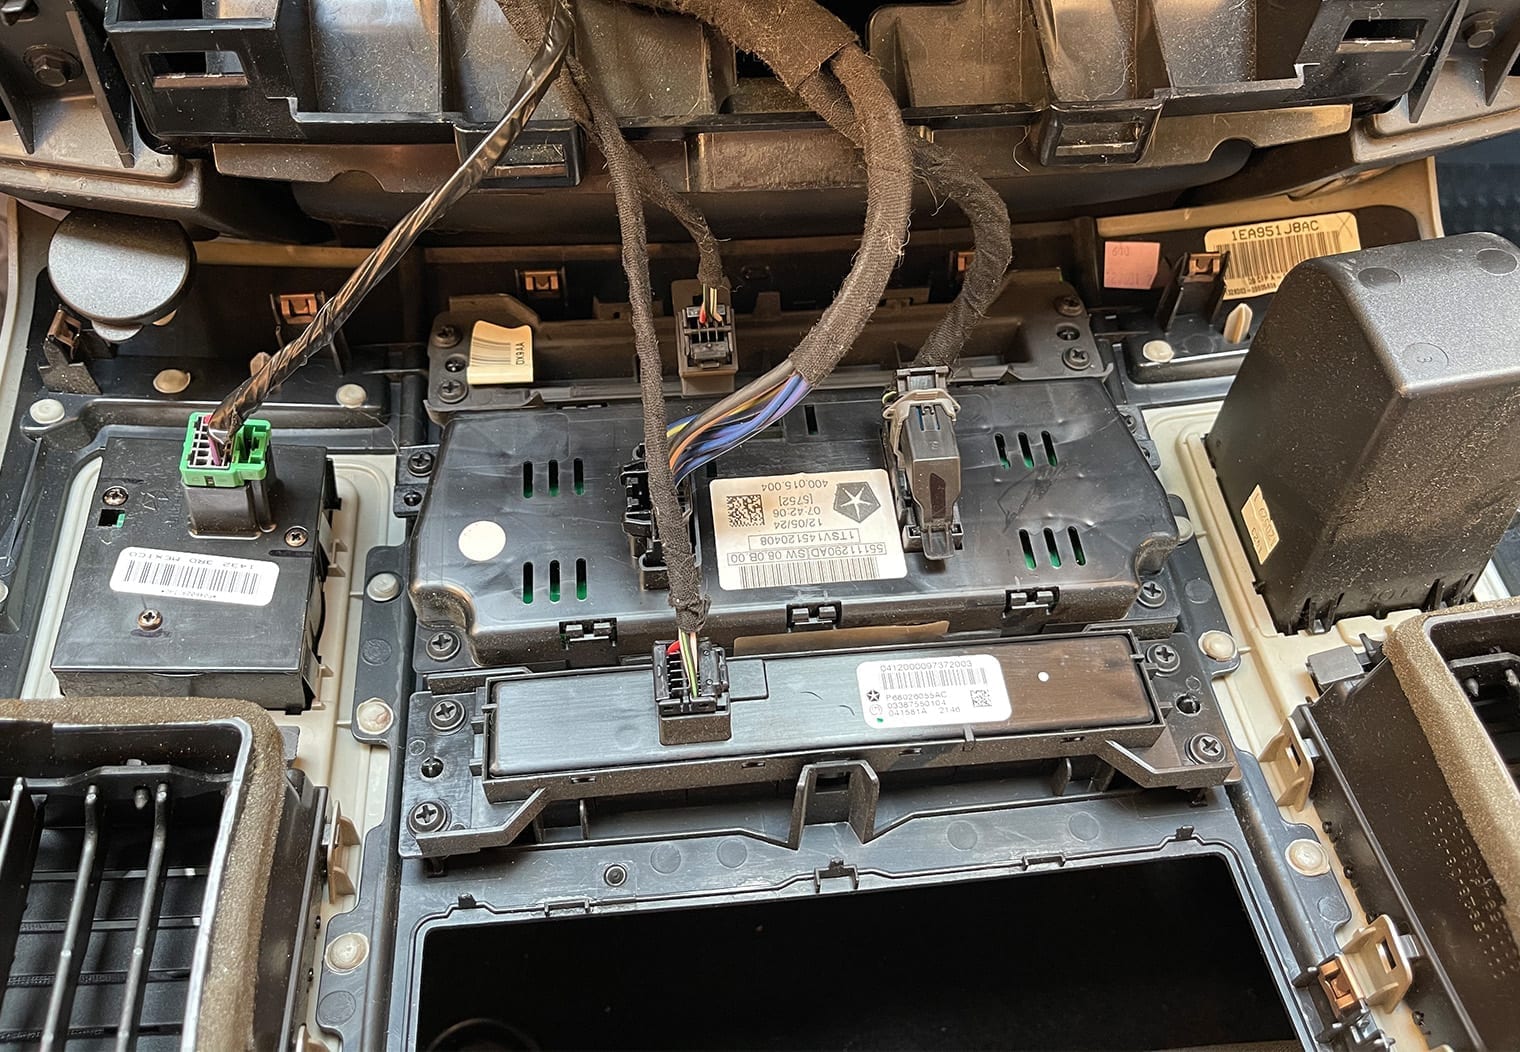
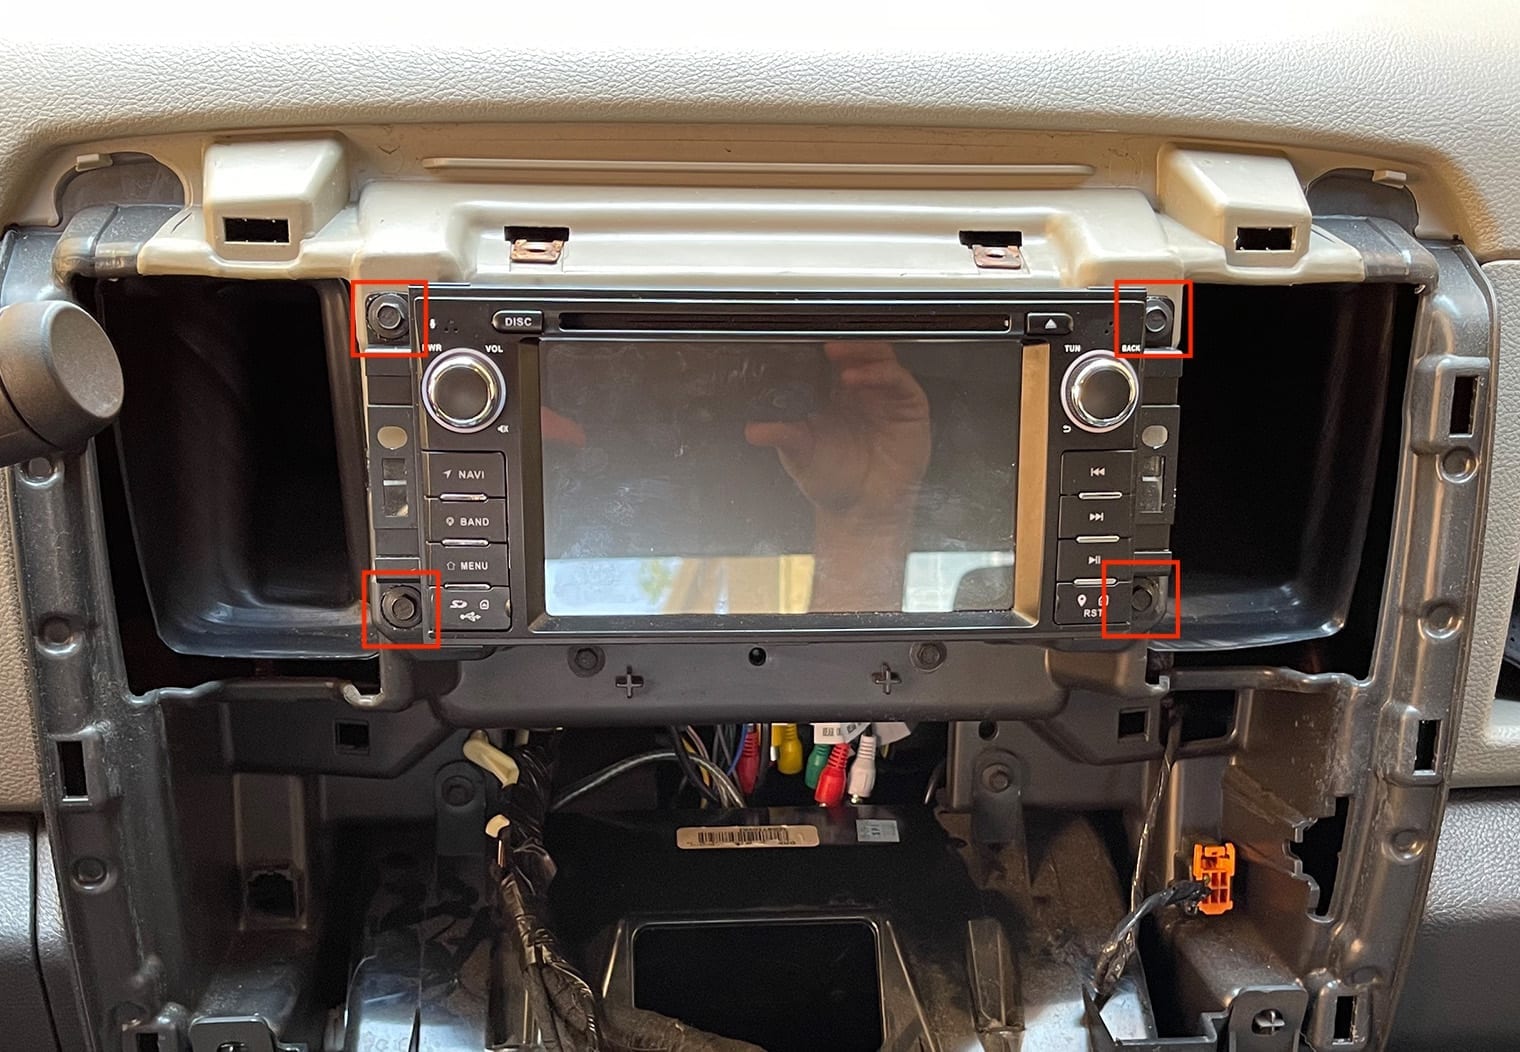
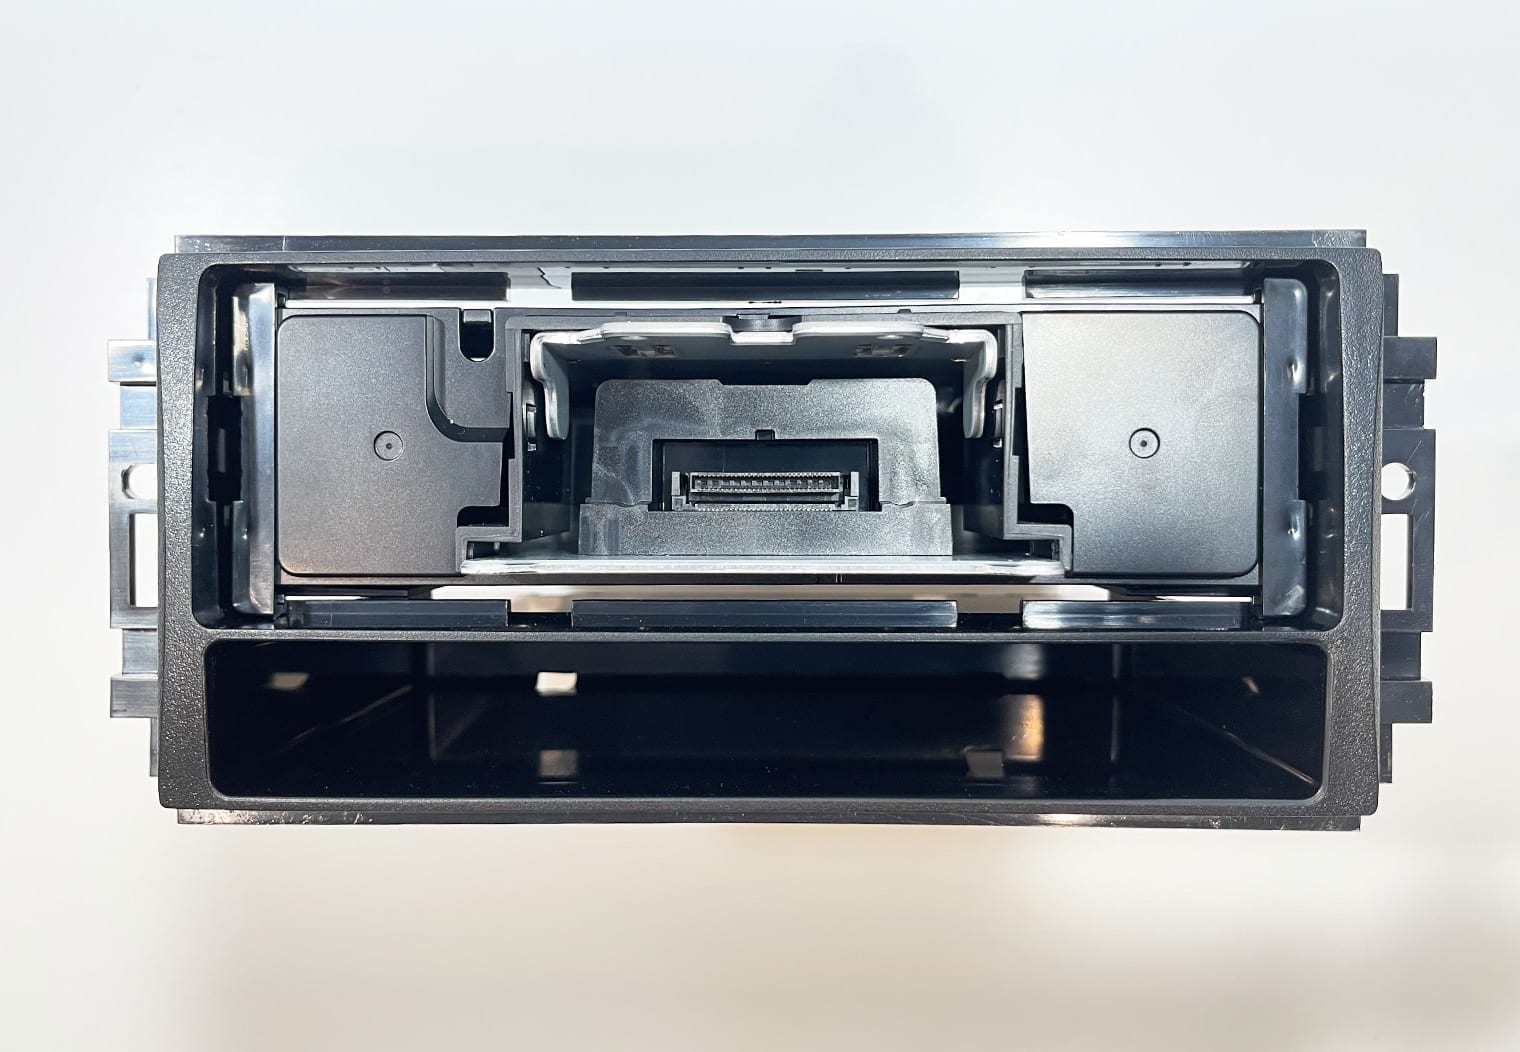
As you pull the top of the trim from the cubby area, the dash trim will unclip and pull outwards to expose the back side of the trim and the inner dash. Personally, I left the trim resting on the center seat of the truck while I removed and replaced the head unit. But, if you'd prefer, you can also unplug the wires from the back of the trim piece completely to give yourself a little more room. With the trim piece out of the way, you can access the four 7mm screws that hold the OEM head unit in place. *Note that the head unit in this truck wasn't OEM, but the mounting screws and this process is identical.
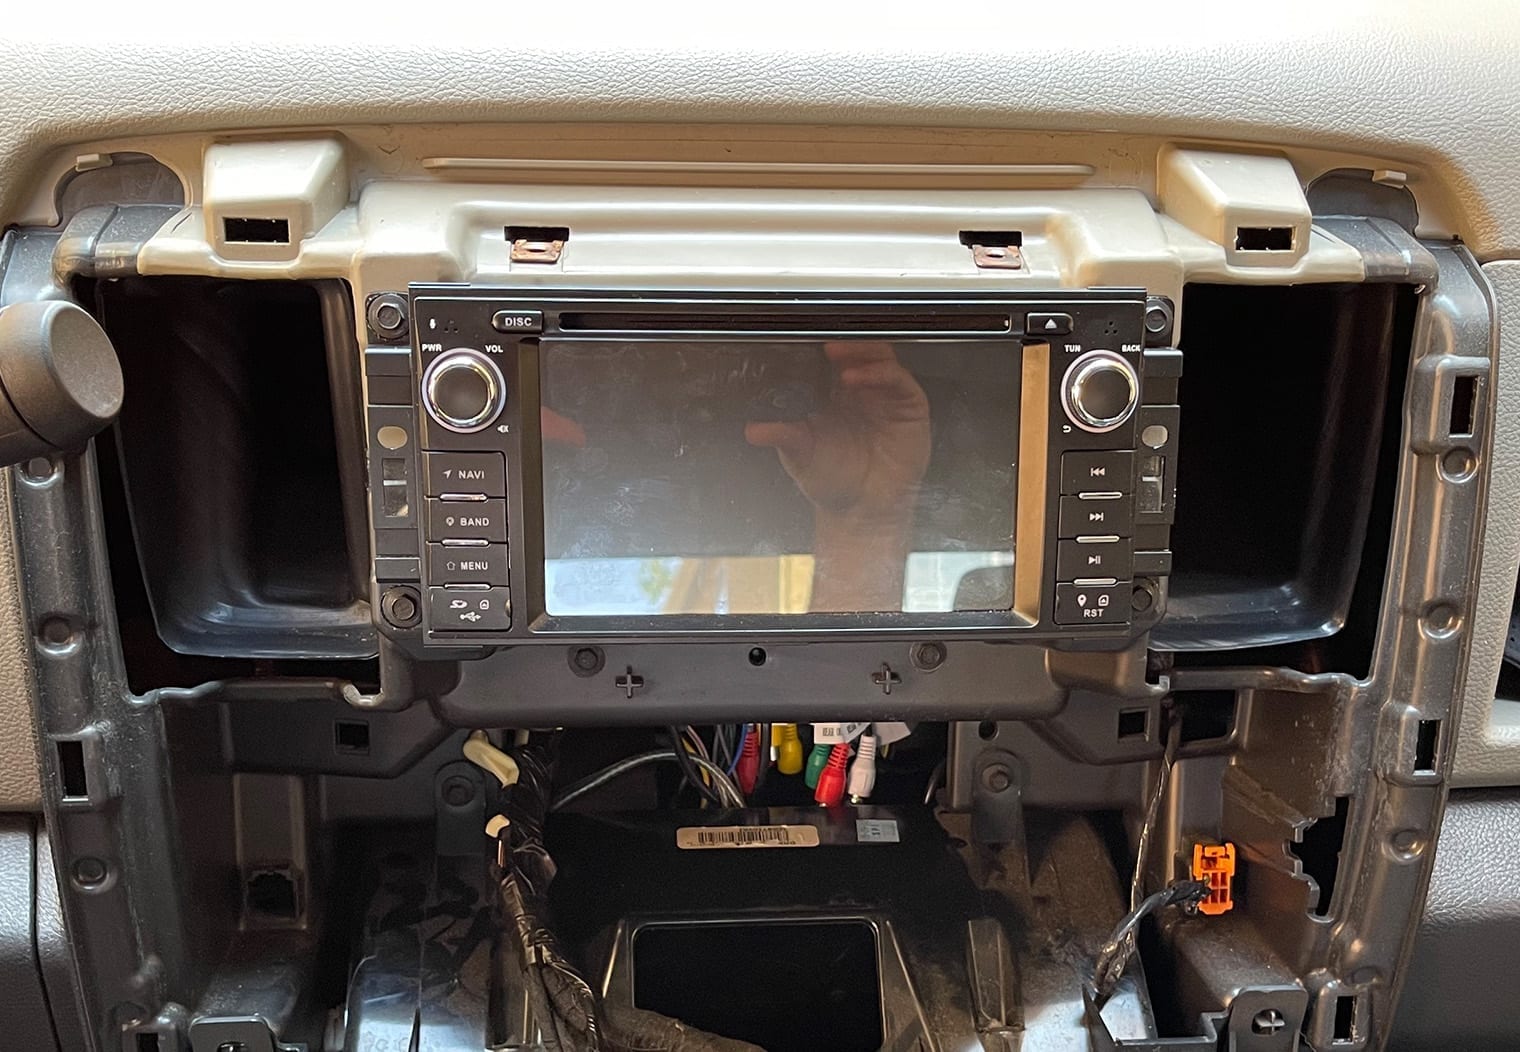
Step 2: Prep Aftermarket Head Unit & Wiring
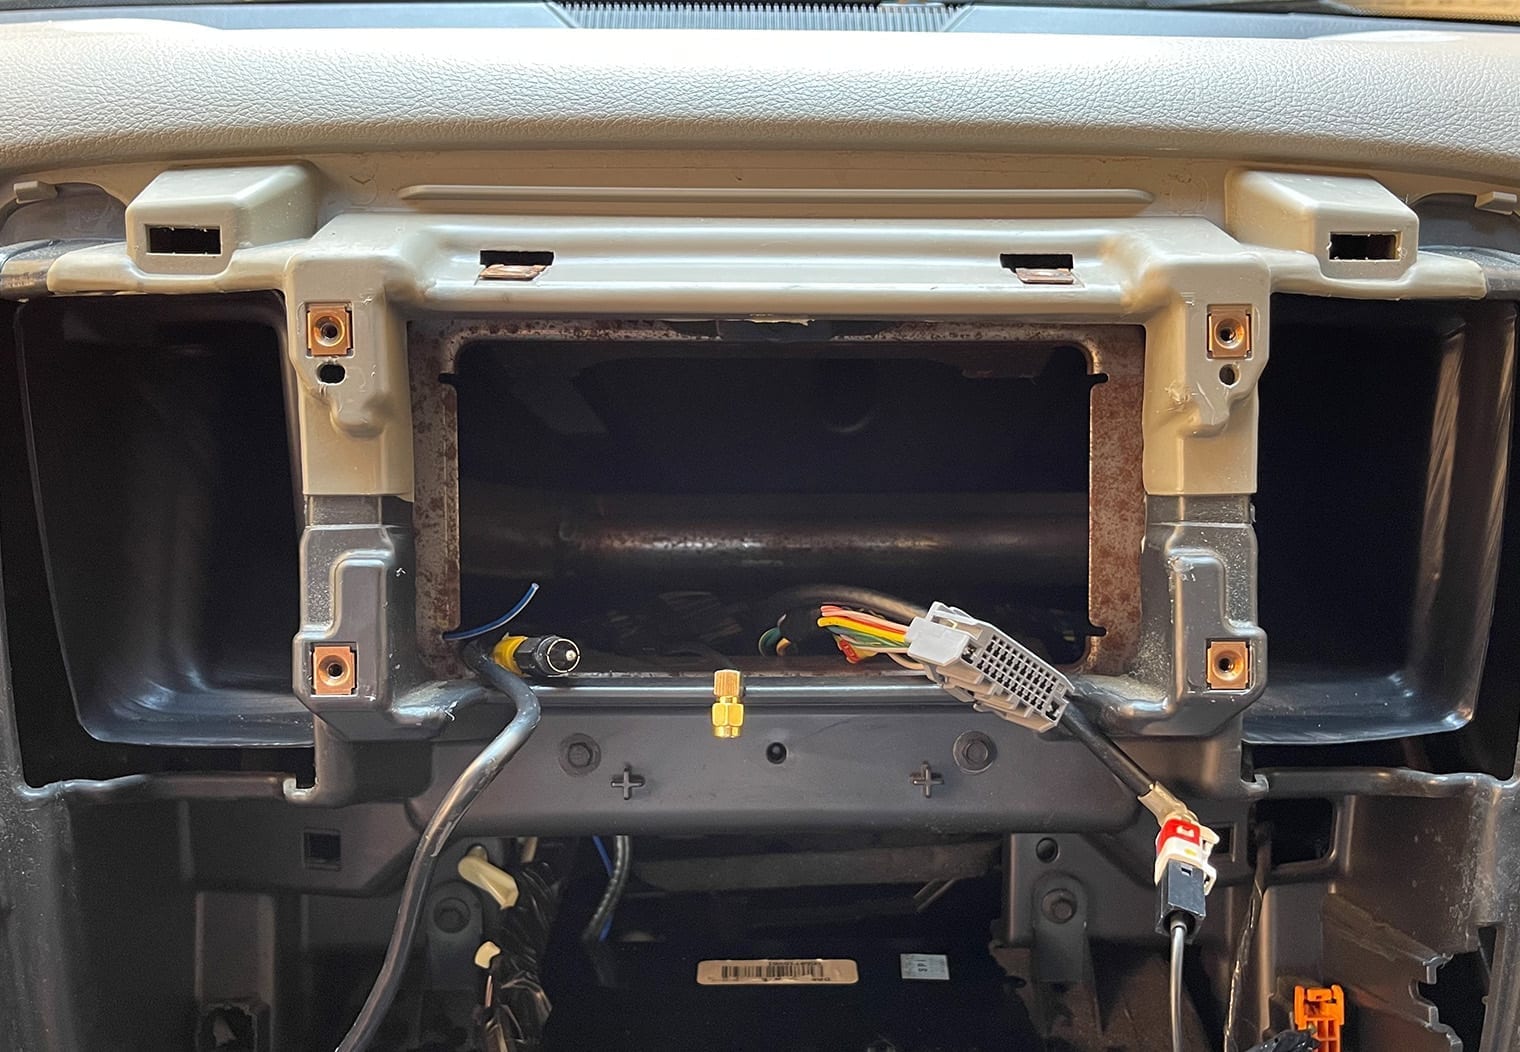
Now that you've removed your head unit, you can access the wiring behind the dash and you can double check two things: 1) that your aftermarket dash kit fits as expected and makes sense and 2) that your wire harness plugs in as expected.
I put this step as #2 because you should always check the parts you purchased fit before you prep the wiring and the head unit for installation. If you accidentally purchase the wrong adapting wire harness or dash kit, this will save you a ton of time early.
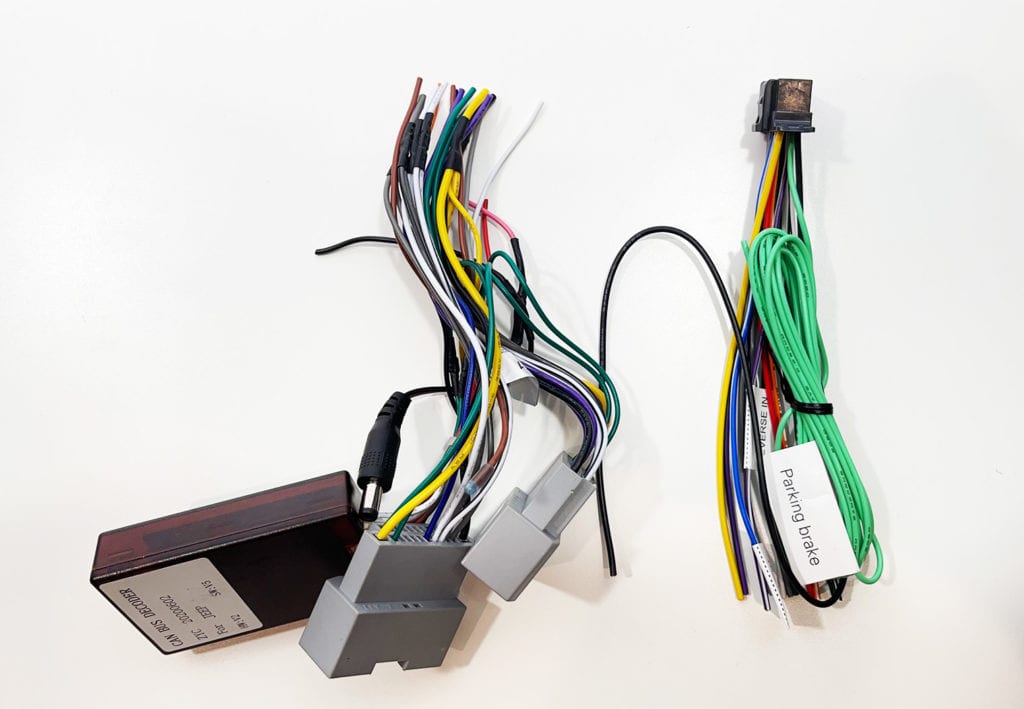
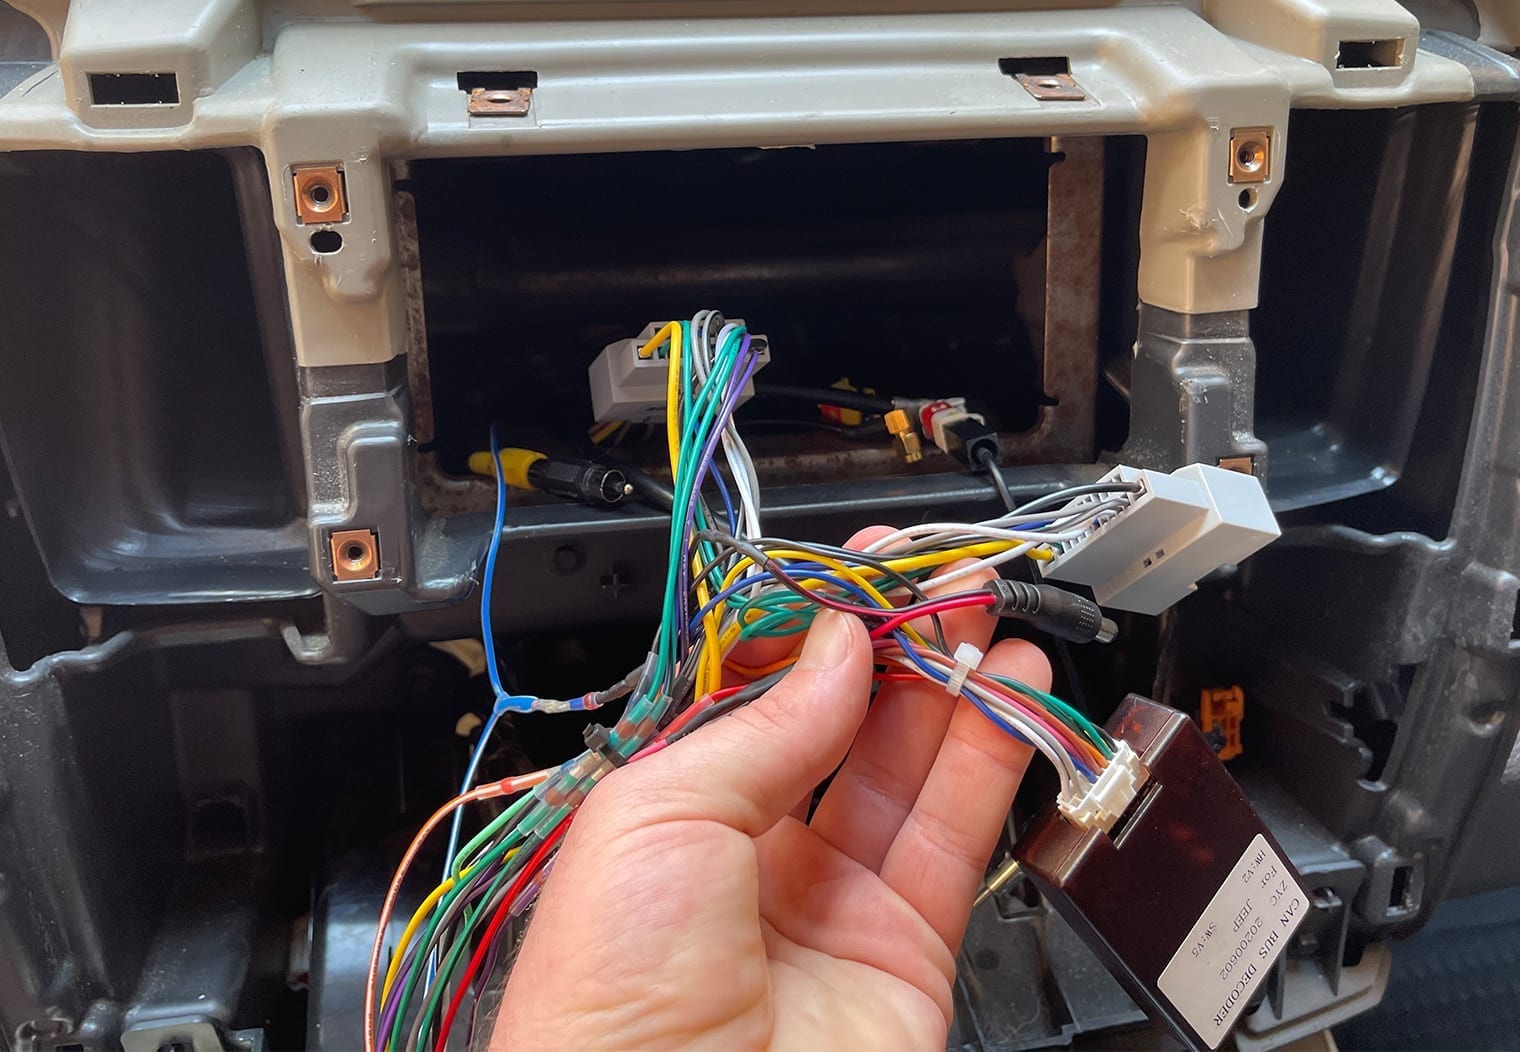
If your wire harness and dash kit check out, you can move to prepping the head unit wiring. To do this, you will take the adapting wire harness that you purchased for your Ram and merge it with the wire harness that came with your head unit. It's typically pretty easy – all of the colors from the adapting wire harness will match the colors of the harness that came with your head unit (they're normally labeled too). But if you're unsure what each wire color is, check out our aftermarket wire color article.
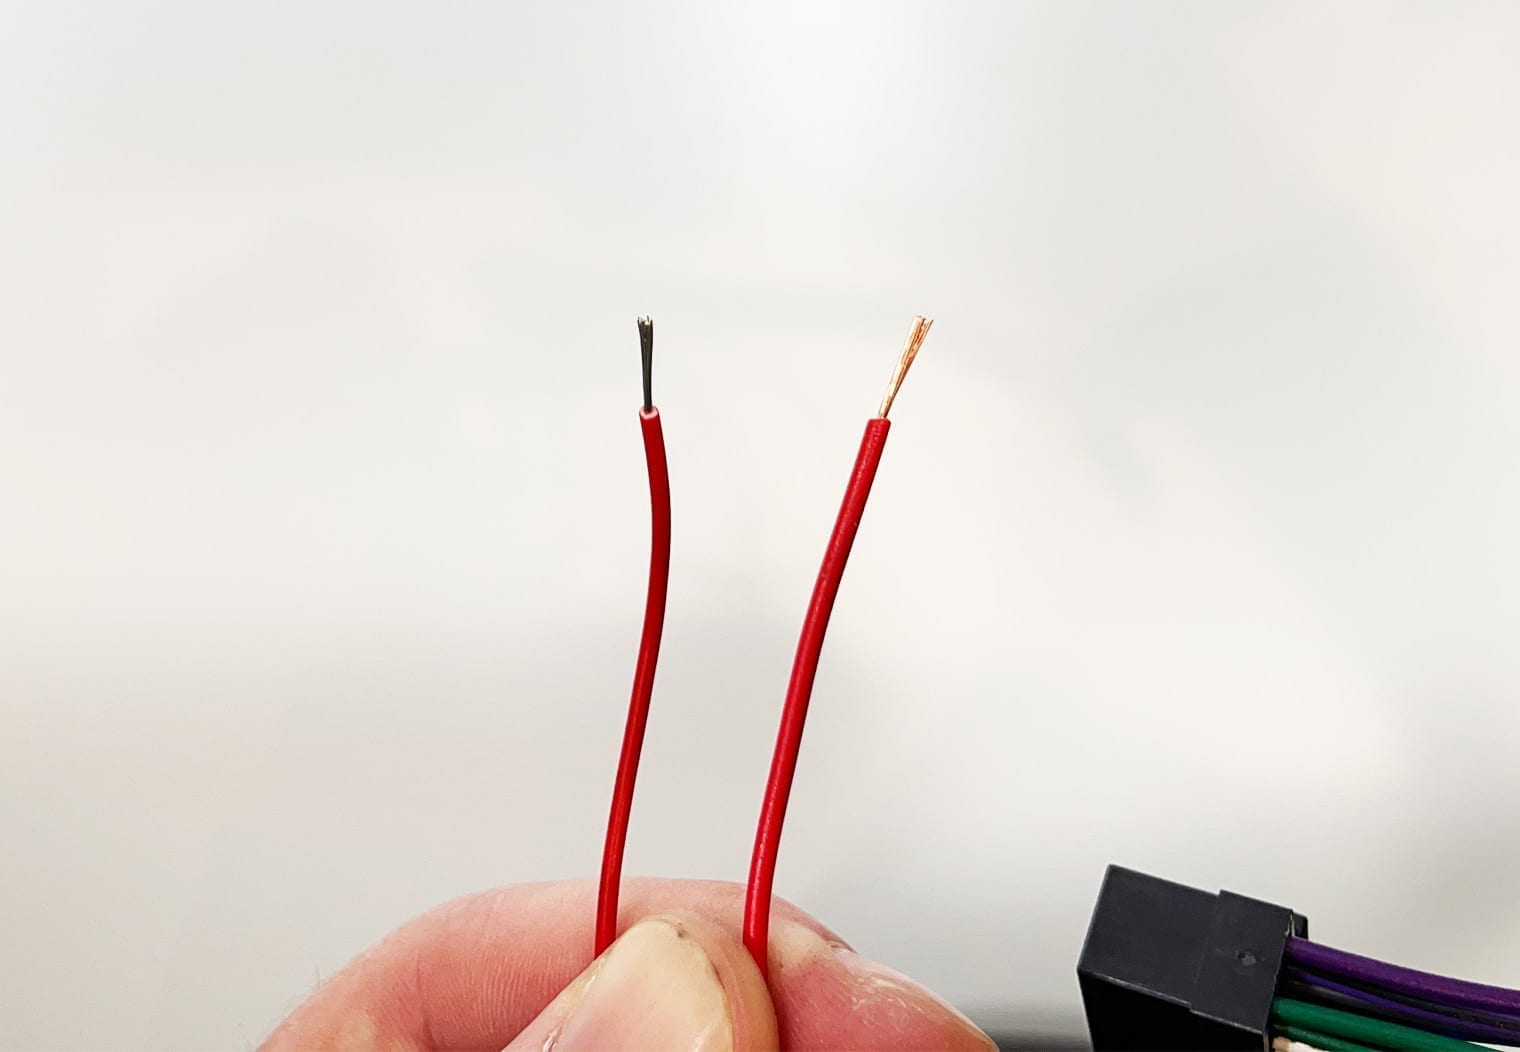
In this process, you will strip each wire on both harnesses and then use either a crimp, solder or solder seal wire connectors like I did to connect them. I highly recommend the solder seal wire connectors – they're simple and they're higher quality (in my opinion) than most of the off-the-counter crimps. They are also much quicker than soldering. In the images below, note that the wire aftermarket harness I'm using might look a little different than the harness I suggested in the parts section above.
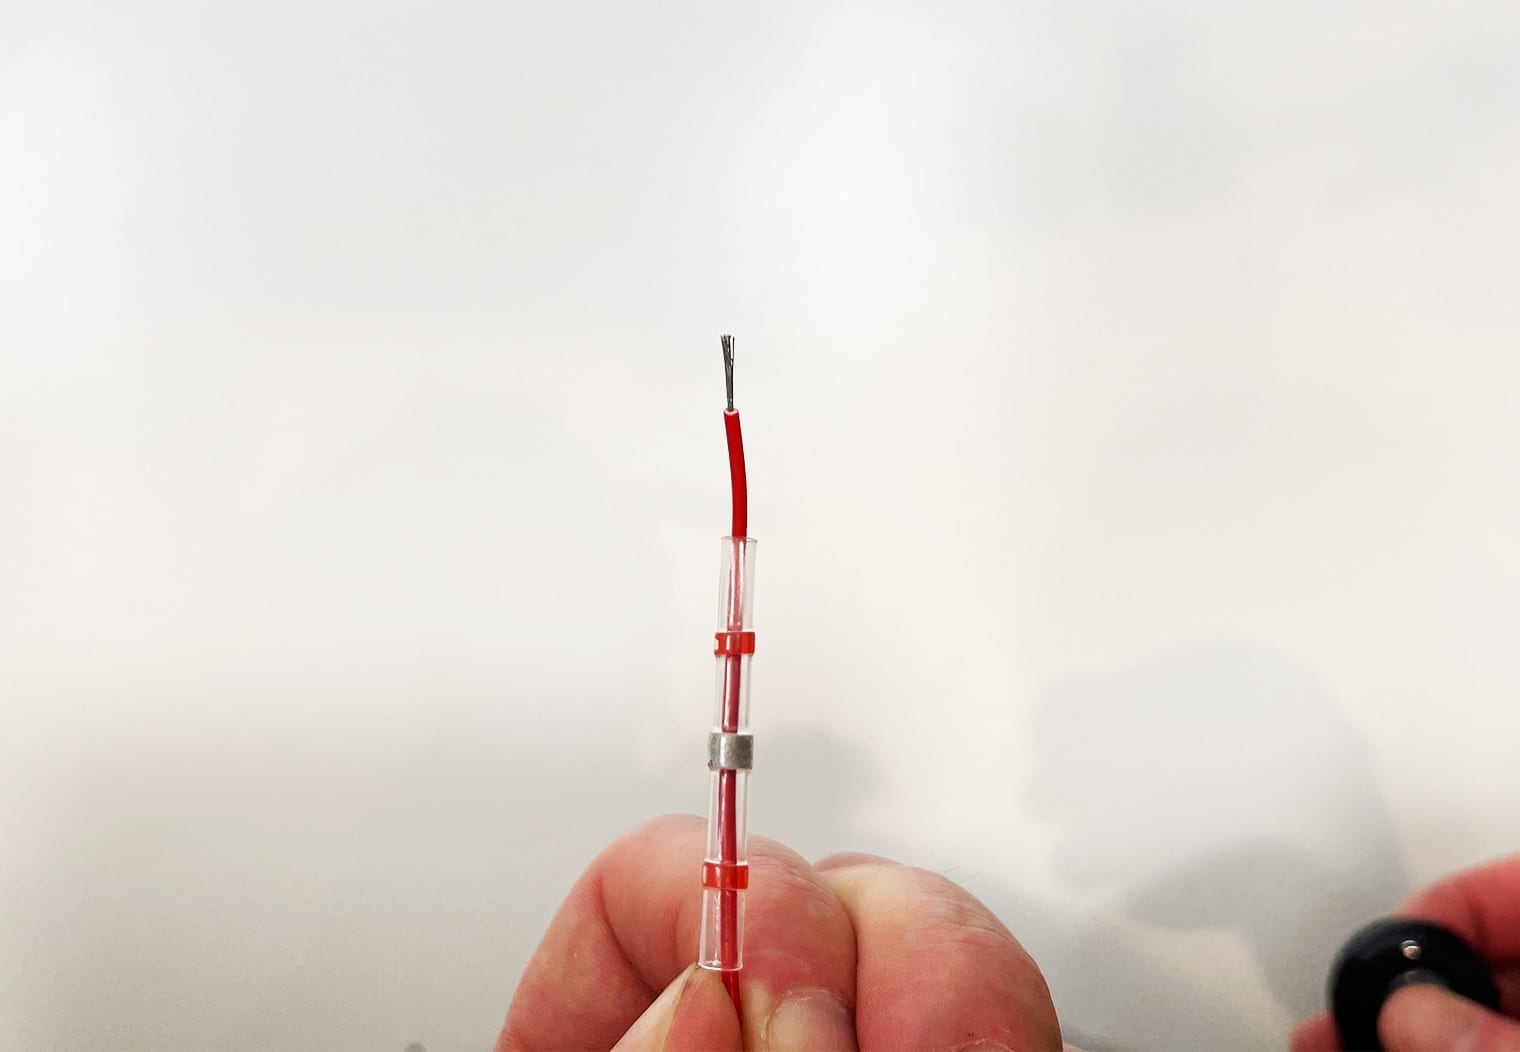
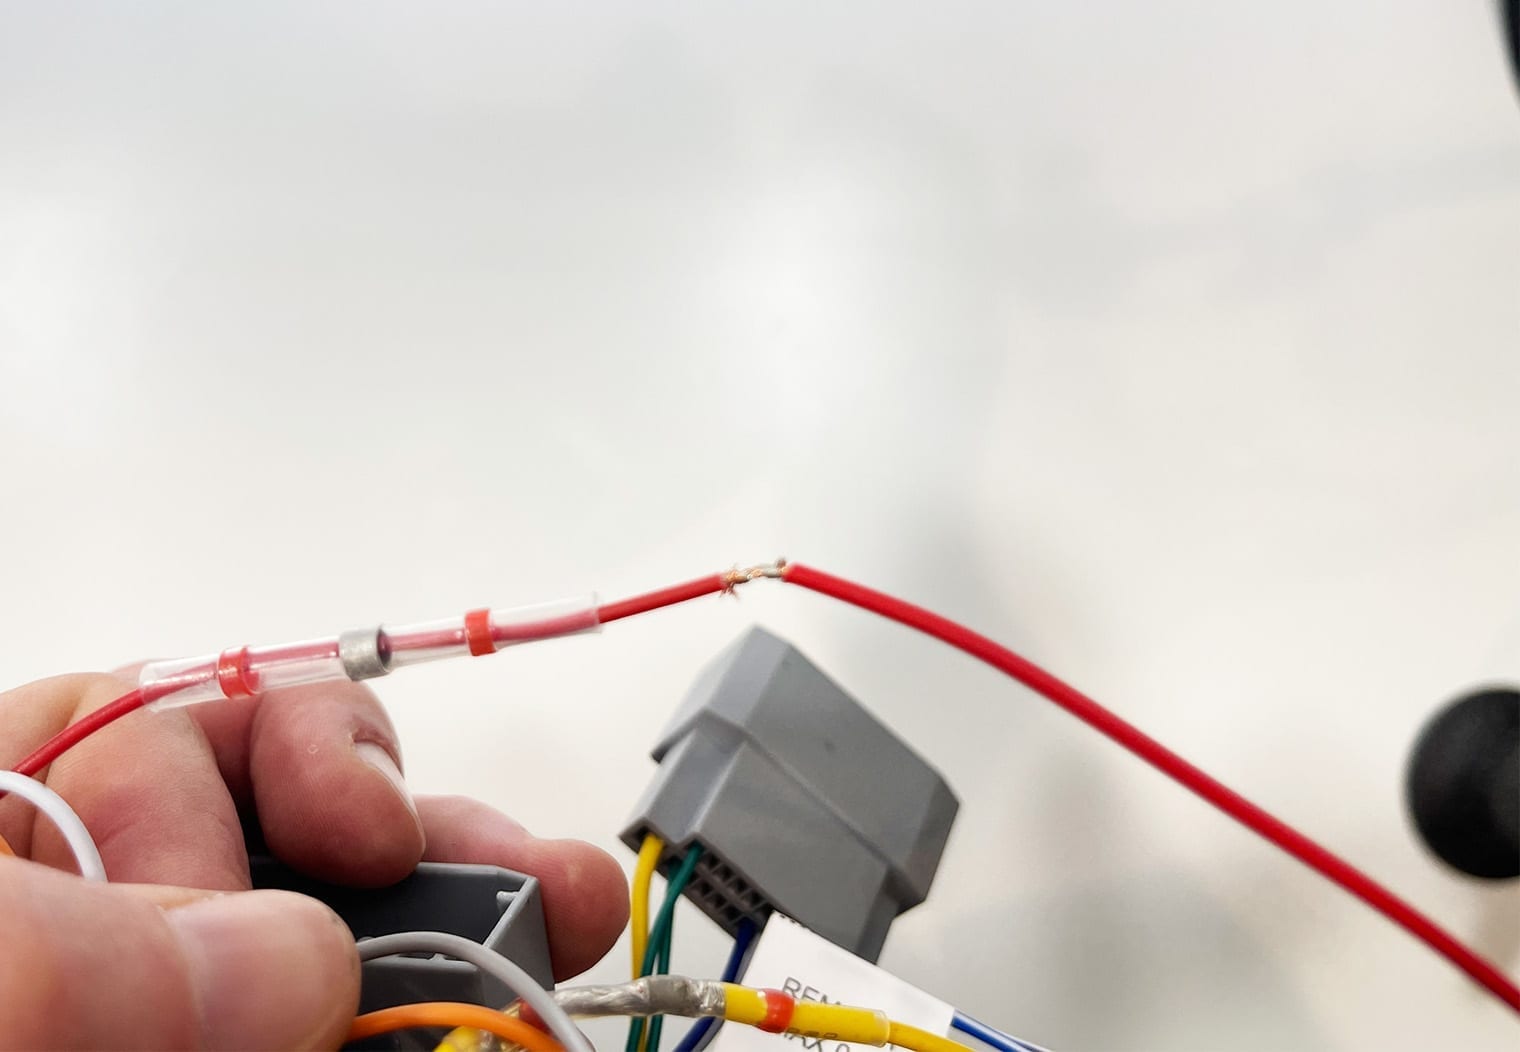
Start by identifying all of the wires on both harnesses to plan which ones you'll merge. Then, strip and twist each wire together after inserting a solder seal connector on the wire. My recommendation would be to strip, twist and solder/seal each one individually instead of as a bunch. Using a heat source like a heat gun, torch or even a lighter will shrink the tube and melt the central solder on the wire. Here's what the process looks like:
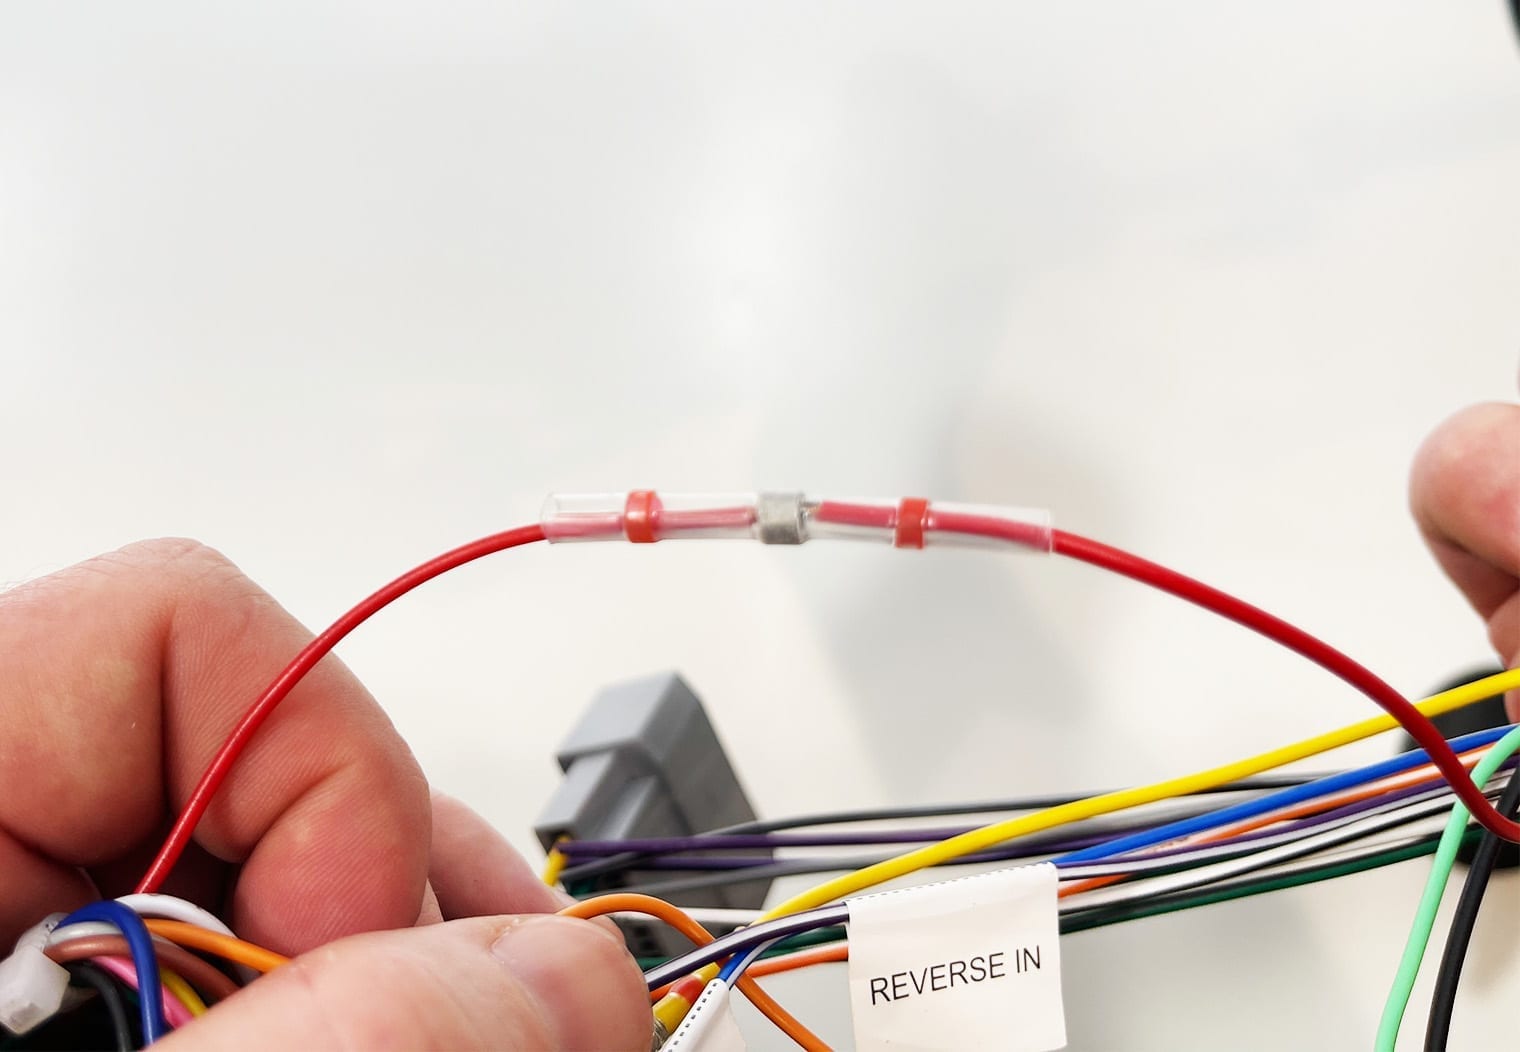
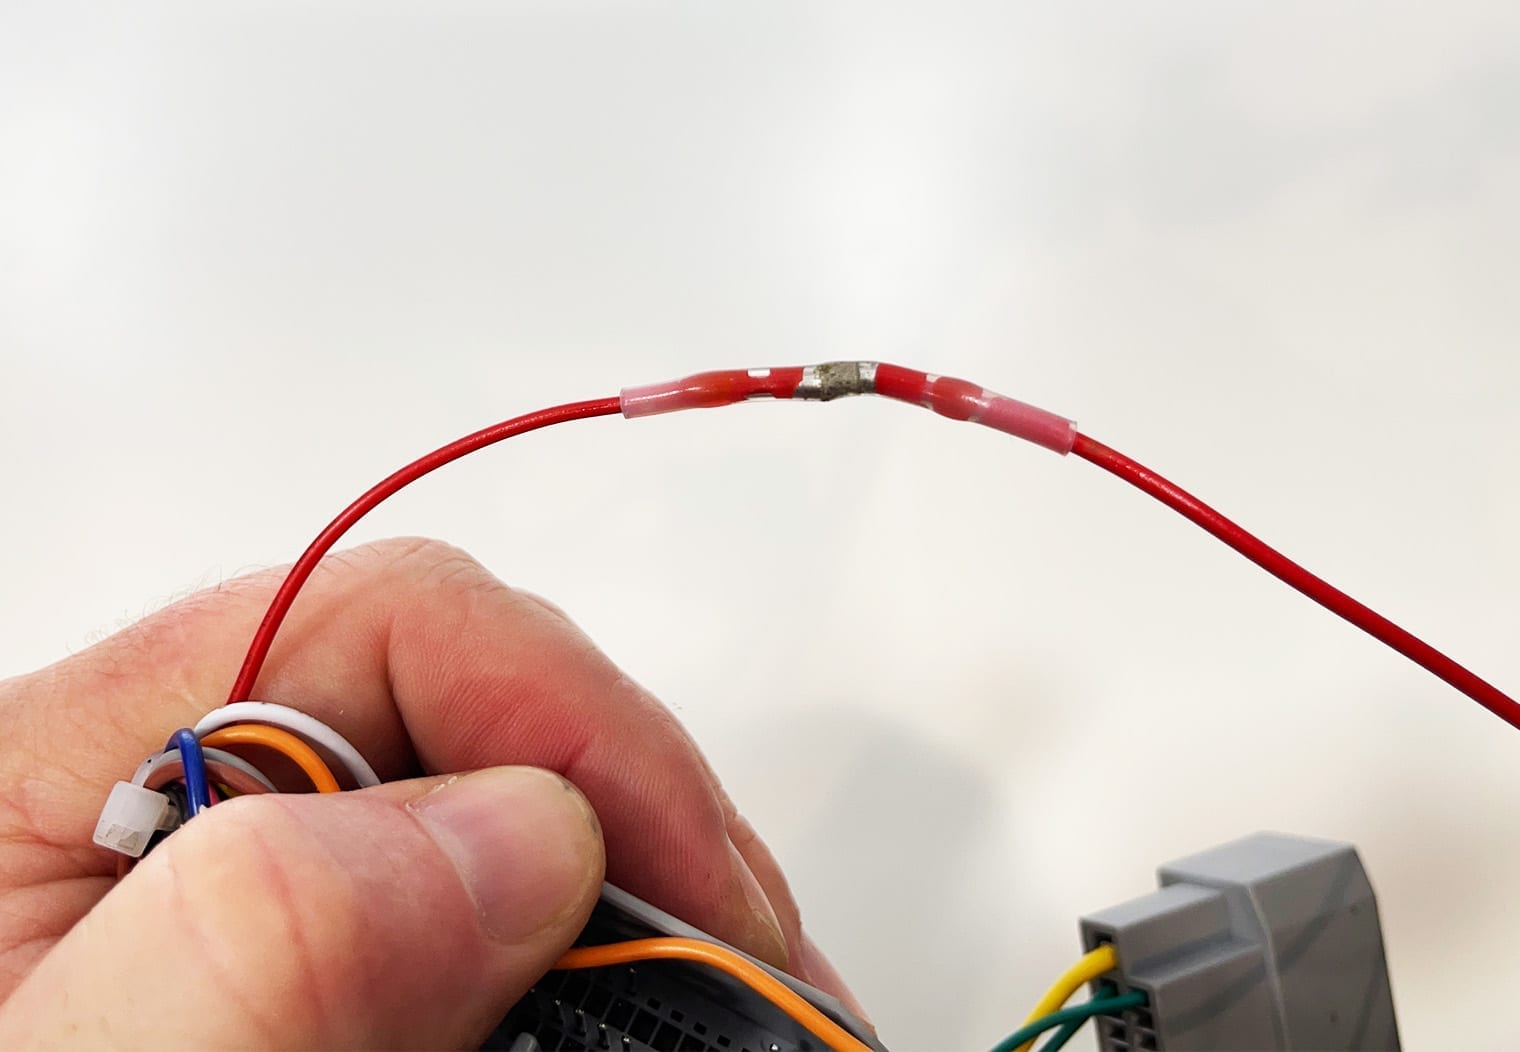
The end product should look something like this. I used a zip tie to keep the wire clean and bundled in the center of the wire.
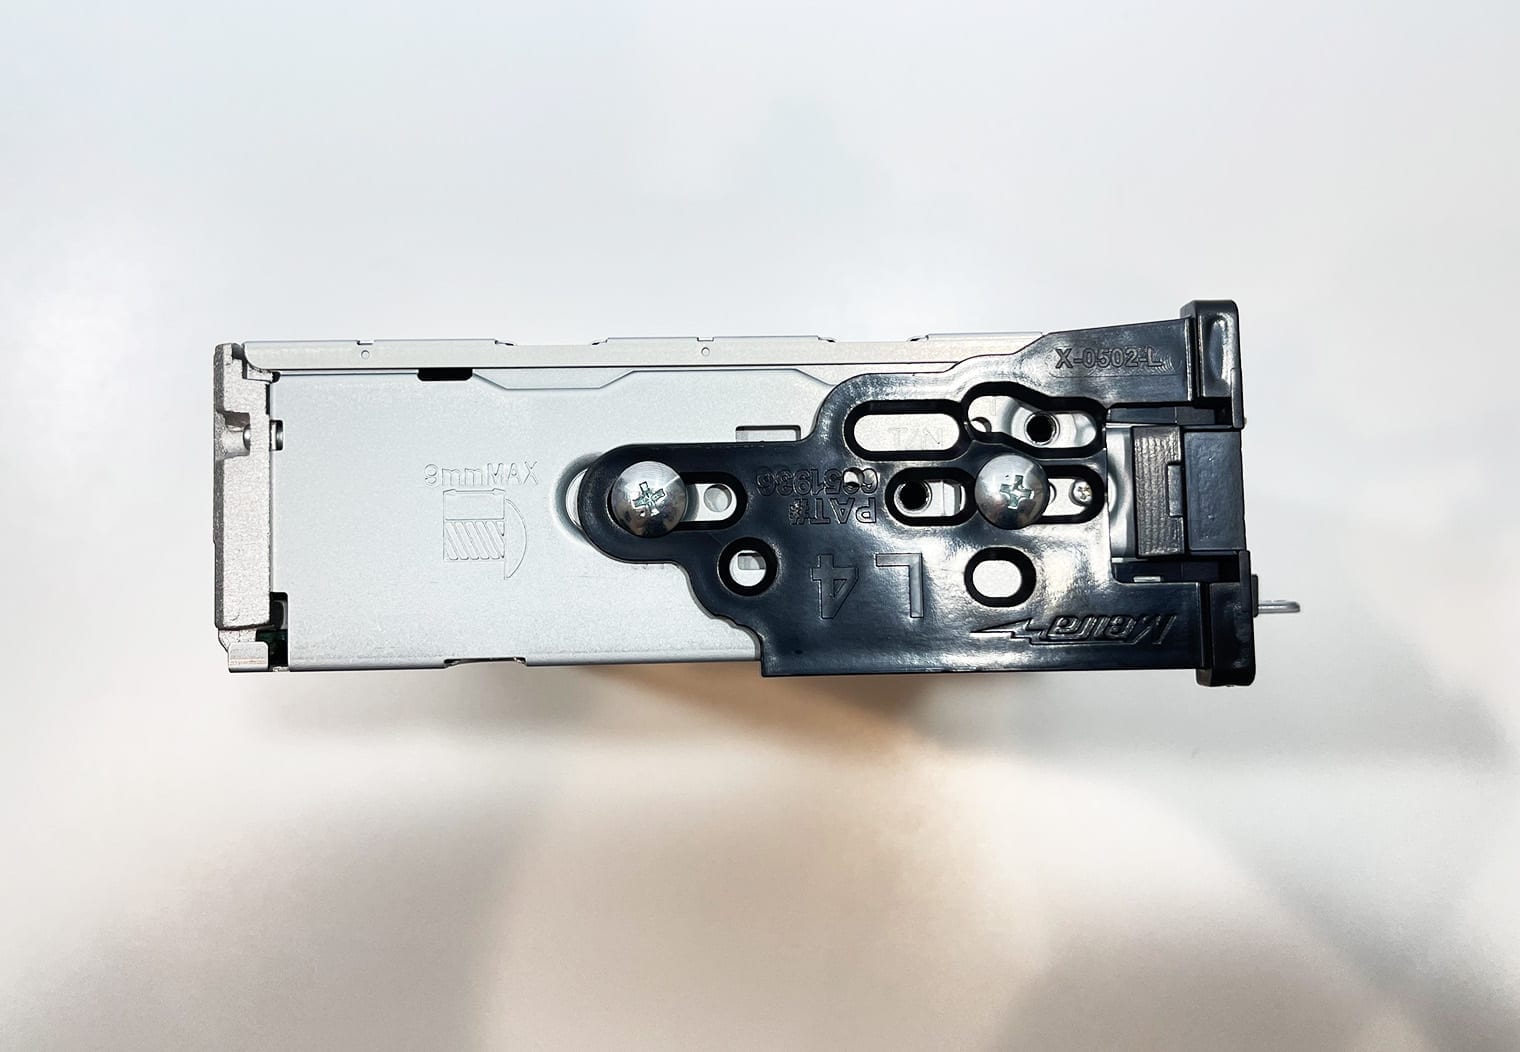
After you've completed your wiring, you can now move on to prepping the head unit with your aftermarket dash kit that you purchased. The dash kit will adapt your aftermarket head unit to the mounting that's in your Ram 1500. Remember the four screws you removed to pull the OEM head unit out? Your dash kit will allow you to mount your new head unit via these same screws and also fit into the opening of the dash trim piece you removed without any gaps.

Step 3: Installing New Head Unit
With your wiring harnesses merged and your head unit ready to install in the dash kit you can now move forward with installing your new head unit. First, if your head unit has a microphone, wire it through while the head unit is removed still. I always like to mount it on the pillar to the upper left hand corner of the windshield.
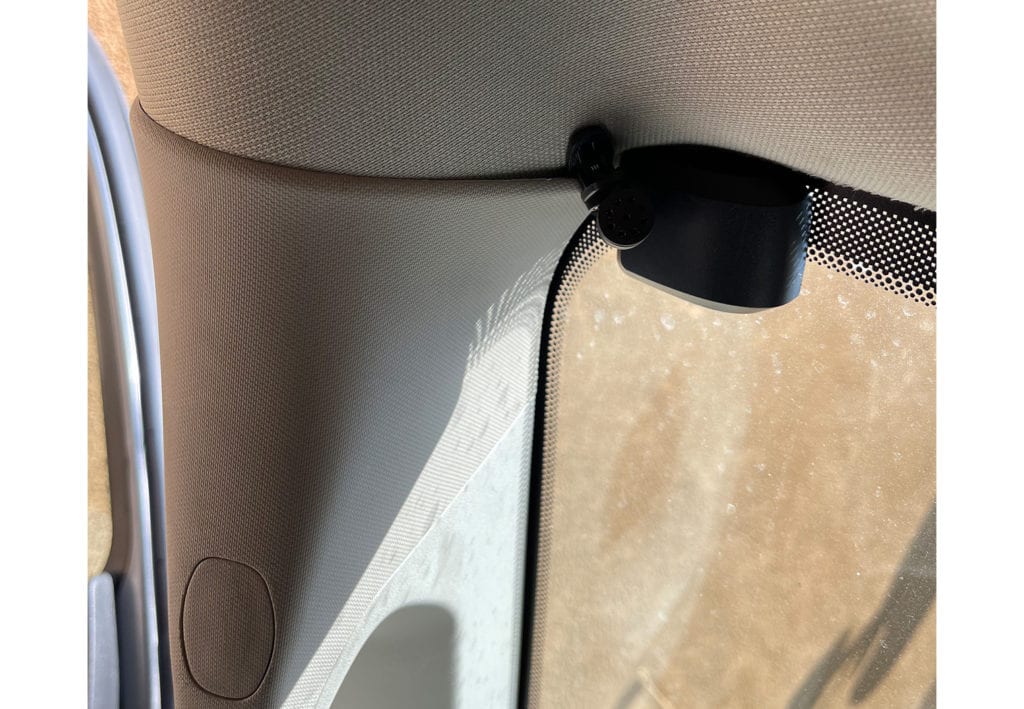
To wire your microphone you can remove some of the weather seal on the outer part of the pillar trim where the door seals to the pillar and then wire the microphone down to the dash. Once at the dash, you can wire it through and under the panel at the driver's feet and into the area behind the head unit. Use zip ties to secure the wire underneath the driver panel so that the wire will not interfere with the petals.
Once the microphone is installed you can connect your completed wire harness and mount your dash kit.
Finally, connect your wire harness, microphone, antenna and any RCA outputs that you might be using for an amplifier (optional). After plugging everything in you can slide in the head unit until it clips into place and test it. I would recommend testing everything out before re-installing the dash trim kit.
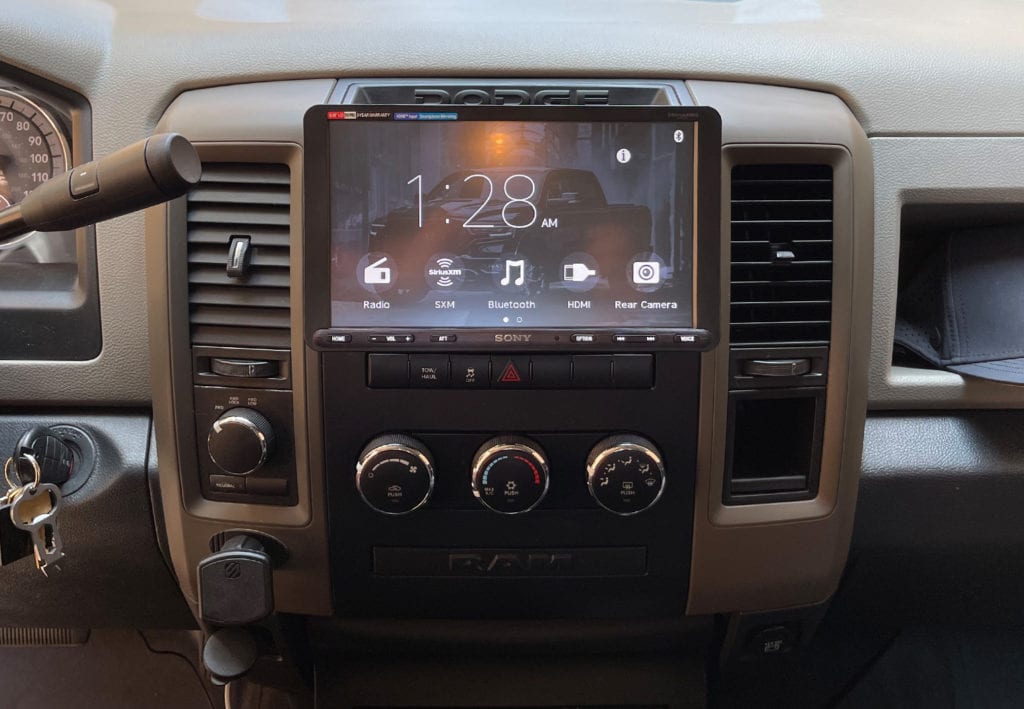
If everything is functional on the head unit after plugging it in and installing it, you can finally re-install the dash trim kit to complete the upgrade! Here's the final product with Sony's XAV-AX8100 installed in my 2012 Ram 1500
Have any questions or comments? Leave us a comment and we'll get back to you!

So if i have a double din head unit do i need to purhcase a double din or single din for this new unit….was kind of confused on that part. Thanks in advance.
Hey Scott, thanks for your comment. You can purchase either. It has a double din opening, which means that it will also fit a single din. Depending on which unit you choose – 1DIN or 2DIN – you’ll just need to make sure you purchase the corresponding 1DIN or 2DIN dash kit. I recommend typing your vehicle info into metraonline.com to find the dash kit part number.
Will this also work with steering wheel controls?
Yes, it does work with steering wheel controls for compatible vehicles (most vehicles).
I’m sort of confused on the harnesses that you showed to get in the harnesses that you put in your truck because I have the Alpine Soundsystem steering wheel controls and the rear entertainment that I want to work so what harness do I need for that?
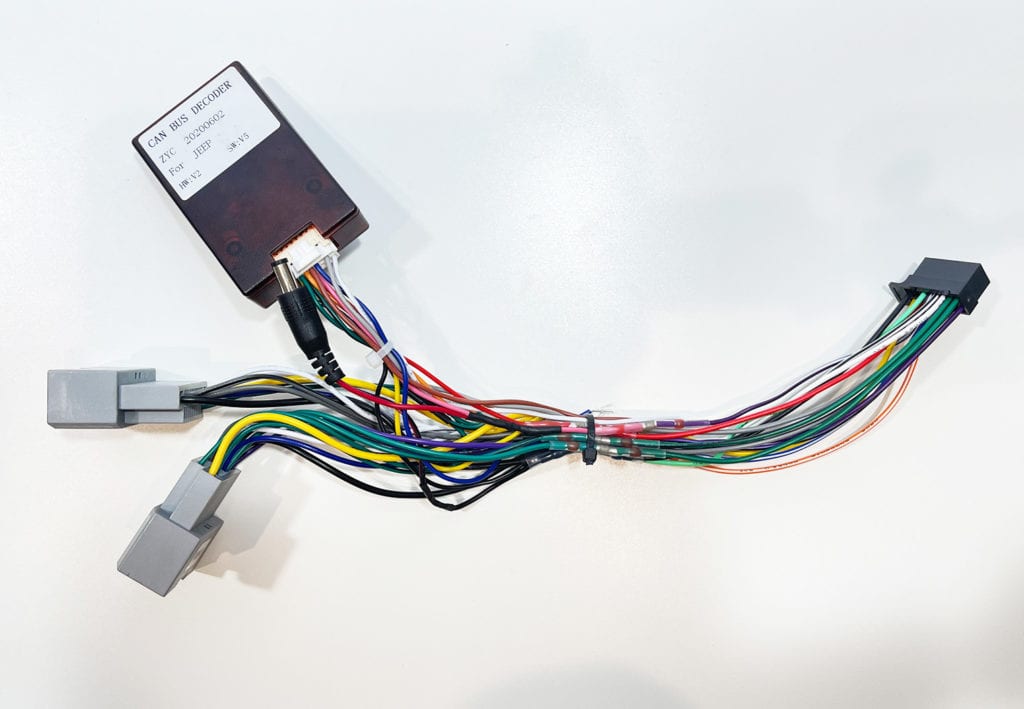
Love way this looks.. I see that you are using a can bus decoder.. what’s the part # for that?
Do you have any problems with being able to pull the stereo out of the mounting bracket with out undoing the 4 factory screws. I have the same set up. I know the mounting bracket instructions tell you to bend up the tabs on the single din metal sleeve. But as you know this unit doesn’t have one.
You have to unscrew the 4 factory screws in order to remove this unit. There’s no way around it.
You can use this for the canbus decoder: https://www.americantrucks.com/scosche-ram1500-link-interface-with-steering-wheel-control-retention-lpcr15.html
Will this work with the factory DVD player or is there one you’d recommend to work with it?
I also installed a new radio. But I can’t get the subwoofer and the rear speakers to work? How did you do that?
My 2011 ram has the simpler radio, is this still applicaple for the basic stock radio?
Looks good other then I’m concerned it’ll move/bounce around when hitting a bump or somthing? Or is it solid in there?
Thanks for your comment! I did not have any issues with movement with the unit. It was solid.
Hey quick question I have the SIRIUS RADIO with the Alpine amp what wiring harness adapters do I need. Any thing would be much help atm.
My question is will this unit work with the factory microphone in the truck, I have the alpine system with integrated Bluetooth phone and I’d like to keep that and the built in back up camera, is that possible?
I saw where you posted the link for the canbus to retain steering wheel control. Does it also retain the factory backup camera on this same head unit and wire harness you installed. If so this is the setup I’m going to run in my 2012 dodge ram Laramie. Thank you sir.