Toyota's build quality and reliability has always kept me a loyal fan of their vehicles, yet their head units and technology packages often feel a step behind. One of our most recent examples of this is in a 2019 Toyota Tundra head unit upgrade where we installed a Sony XAV-9500ES in a Platinum trim Tundra. In this guide, I'm tackling the upgrade of a 2014-2018 Toyota RAV4's head unit, which at the time had a number of great features like Bluetooth, navigation and so on but is largely outdated when compared to today's modern car stereos.
Why Upgrade?
A lot happens in a decade. The 2014-2018 RAV4, though dependable, lacks the benefit of a variety of new technology such as Wireless Apple CarPlay or Android Auto. Upgrading not only introduces these modern features but also brings to life enhanced connectivity, improved sound quality, and in general a more up-to-date in-car entertainment system.
Tools & Products Used in this Installation
Tools
- 10mm Socket
- Trim Pry/Removal Tool
- Wire Stripper
- Solder Seal Connectors
Products
- Sony XAV-AX6000 – See full review of this head unit
- CRUX SWRTY-61N adaptive wire harness and SWC Retention Module
- Metra 95-8242G 2DIN Dash Kit
How to Upgrade Toyota RAV4 Head Unit
Note: Prior to removing and installing the new Sony head unit in this RAV4, all wiring prep for the CRUX SWRTY-61N was completed, and the mounting brackets for the Metra 95-8242G dash kit were secured to the head unit. These preparation steps are unique to the combination of head unit and adaptive wire harnesses you purchase. The step-by-step guide below is only meant to detail my process of removing and re-installing an aftermarket car stereo.
Step 1: Disconnecting the Battery
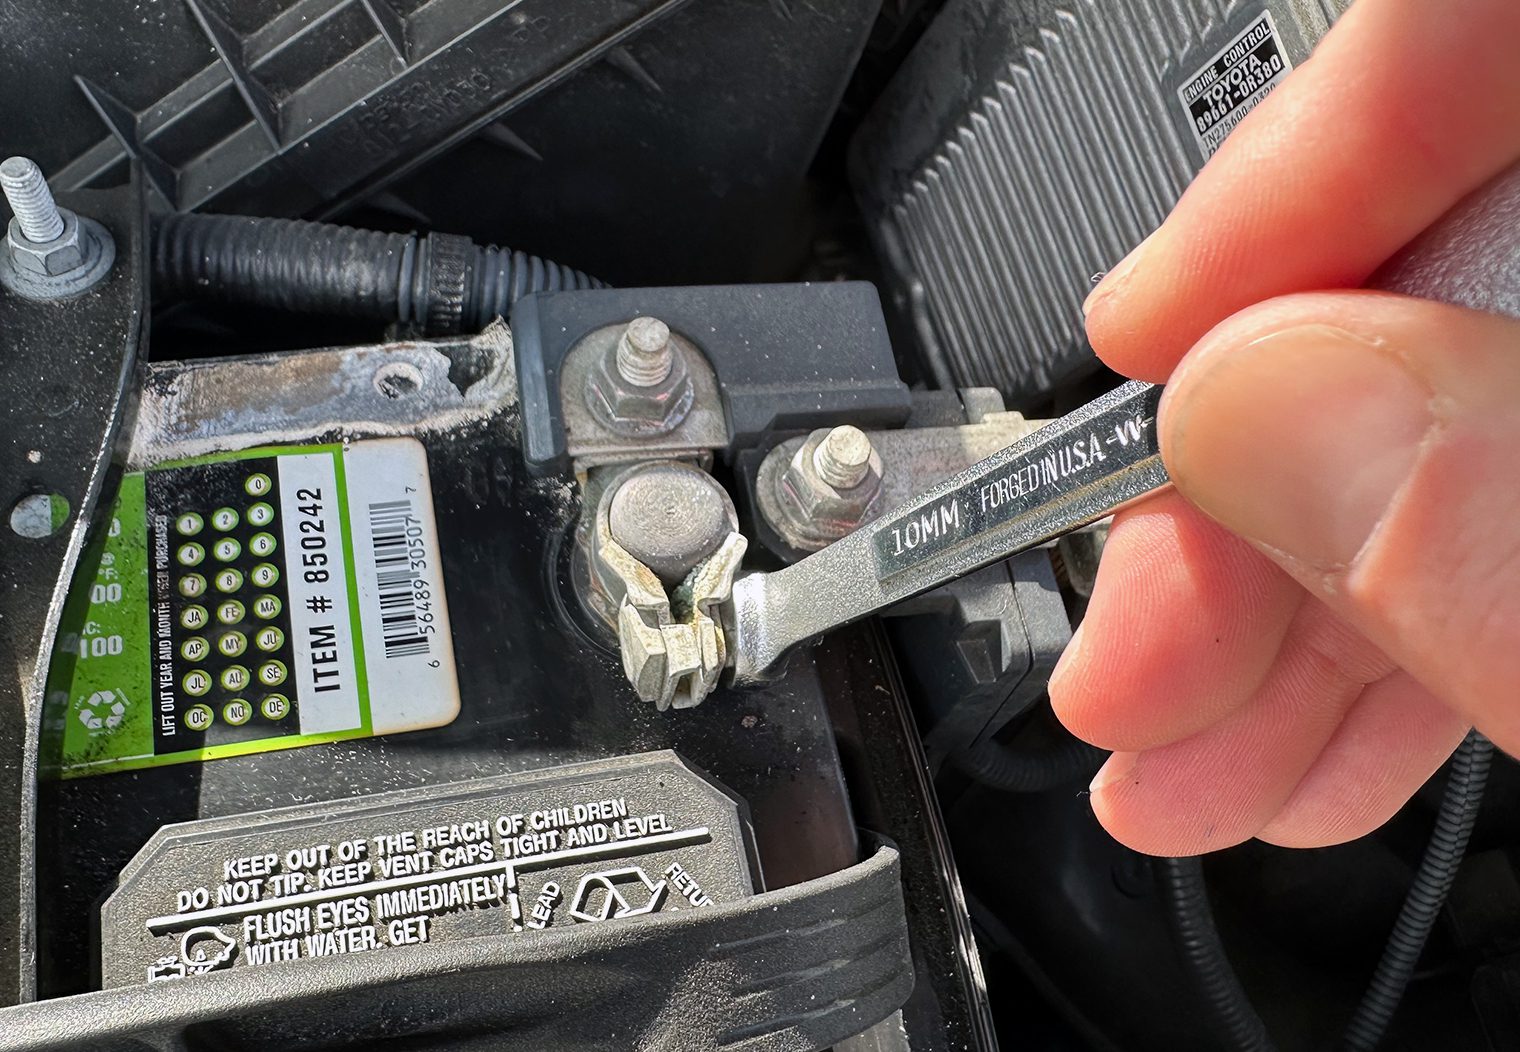
Safety and damage prevention is essential whenever you work on your vehicle and vehicle wiring. Always disconnect the negative terminal of your car battery to ensure a safe environment for working on electrical components. It's a simple precaution but can prevent serious damage to your vehicle.
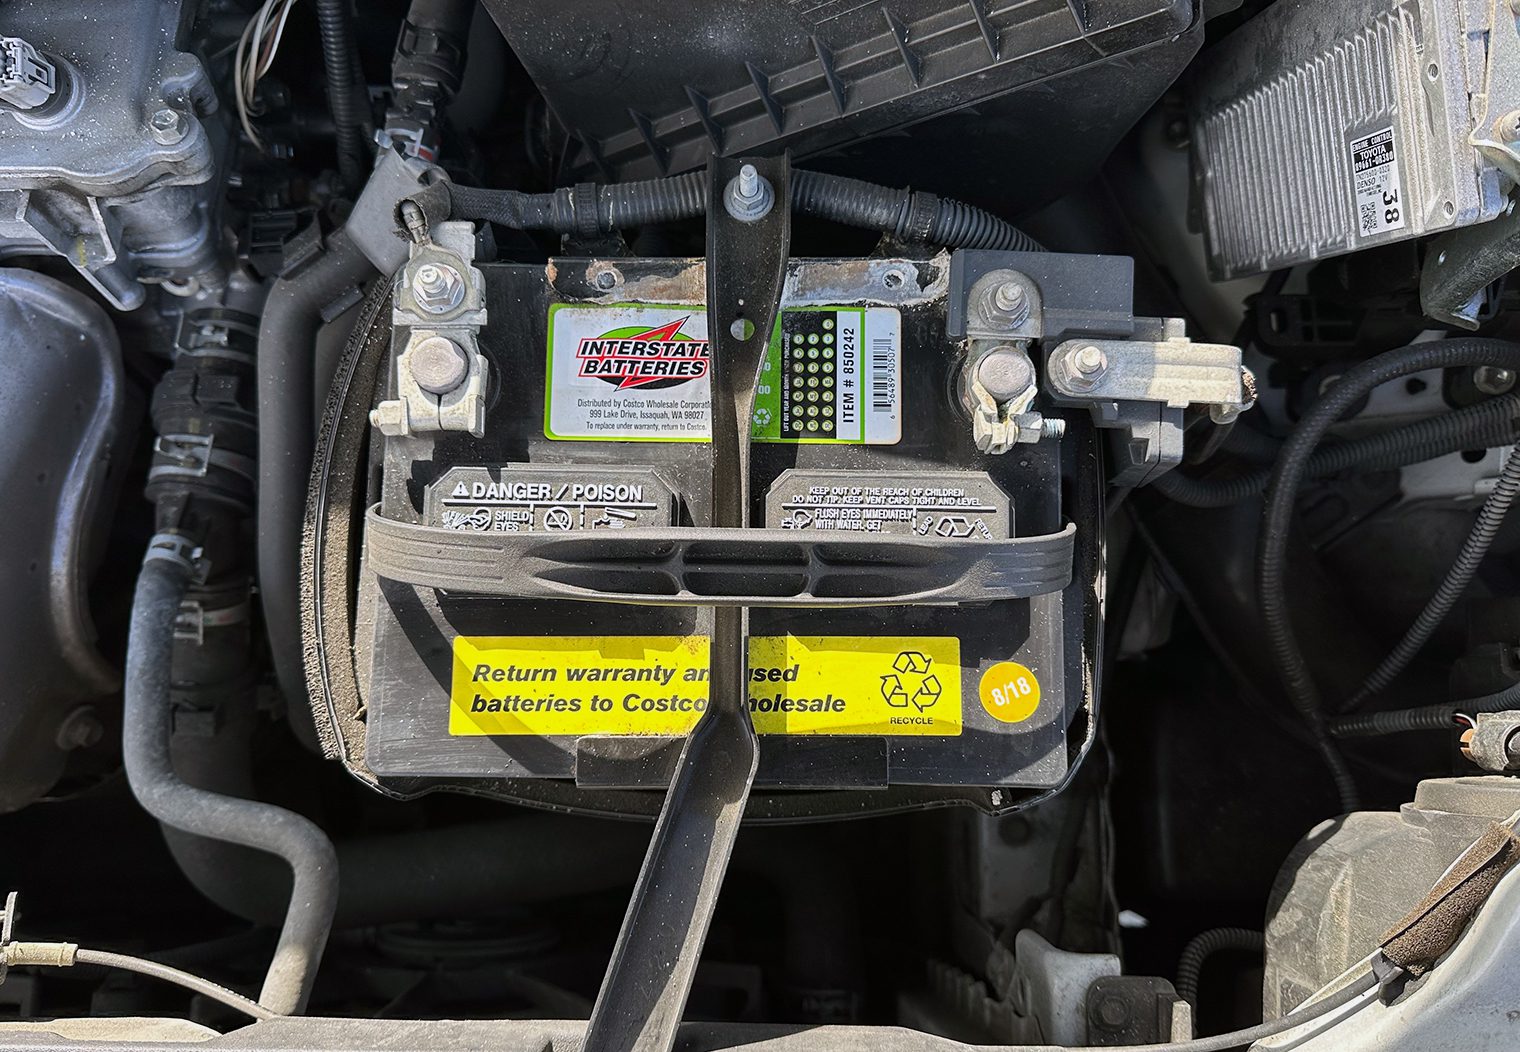
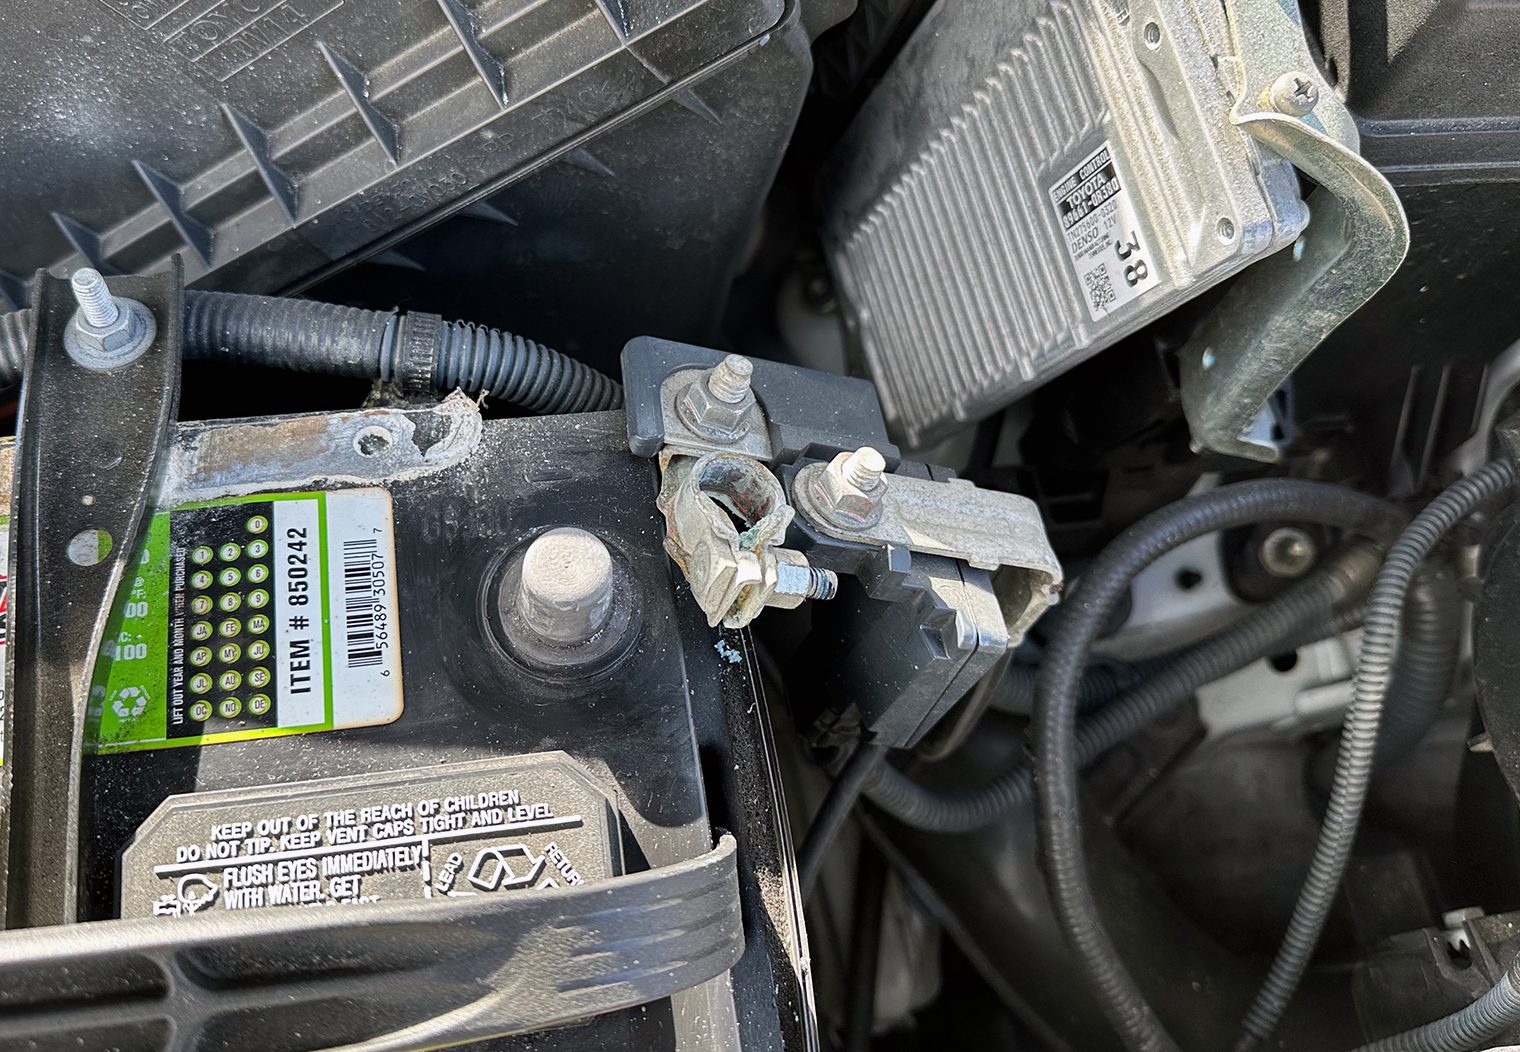
To do this on the RAV4, pop open the hood and locate the battery on the front driver side of the engine bay. Use a 10mm socket to loosen the negative terminal on the battery and set aside.
Step 2: Removing the Dash Trim
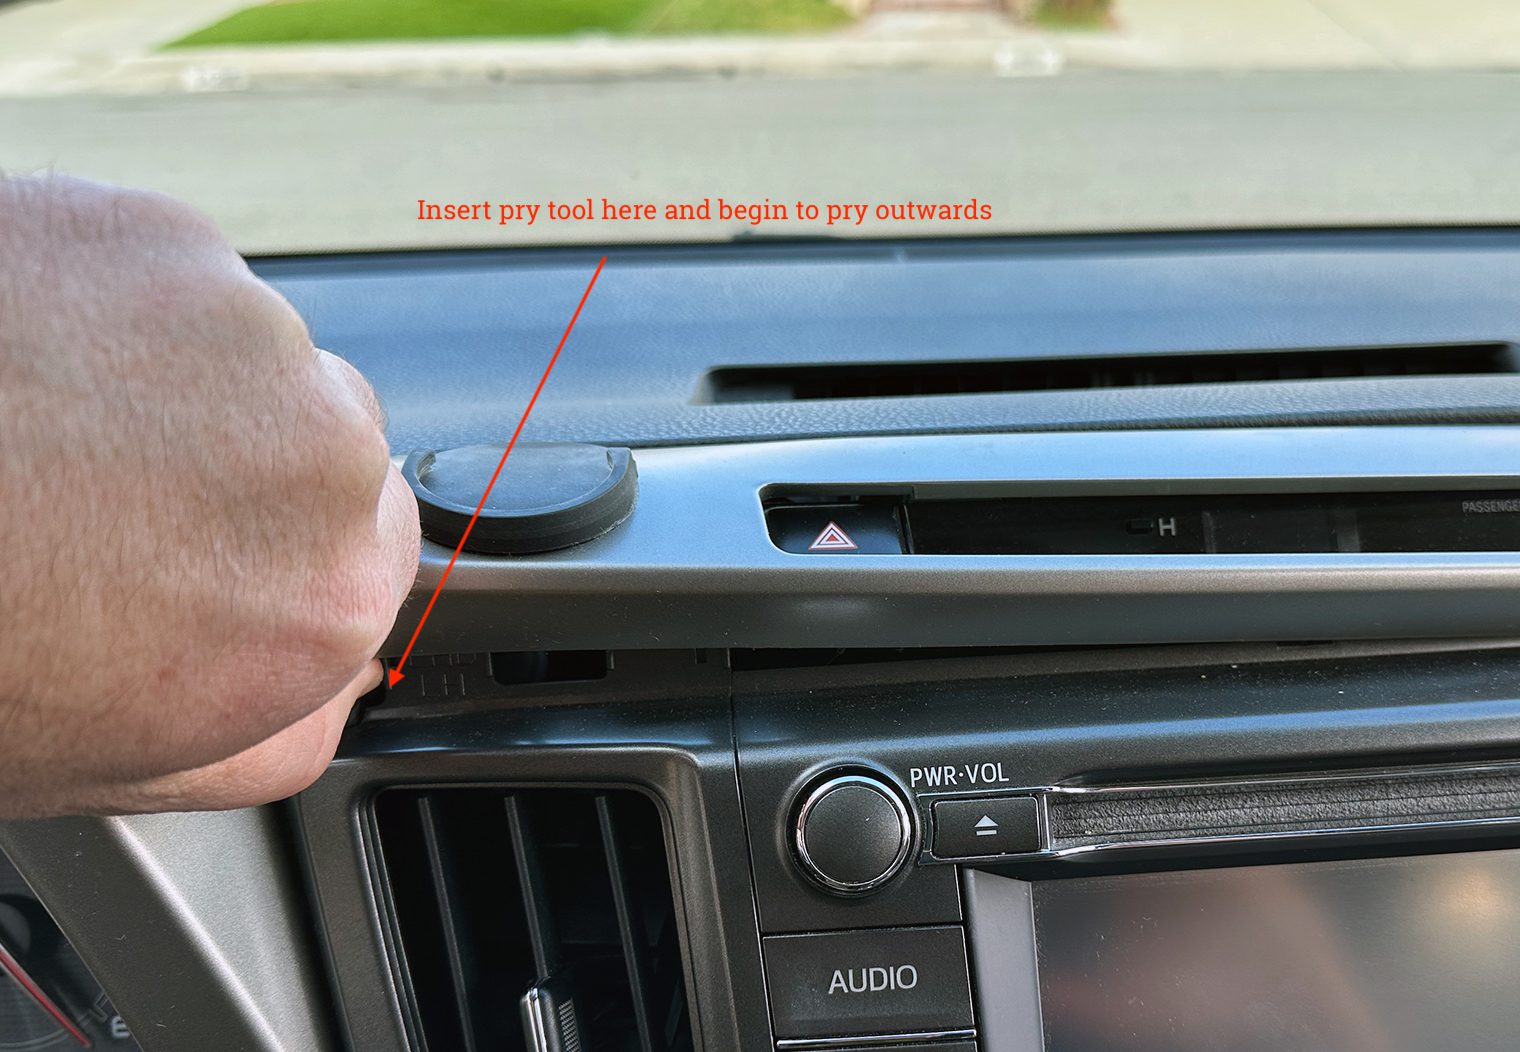
Once the battery is disconnected, you can start the process of removing the old OEM head unit from the dash, starting with the trim. The reason you need to remove the trim is to access the mounting screws for the head unit.
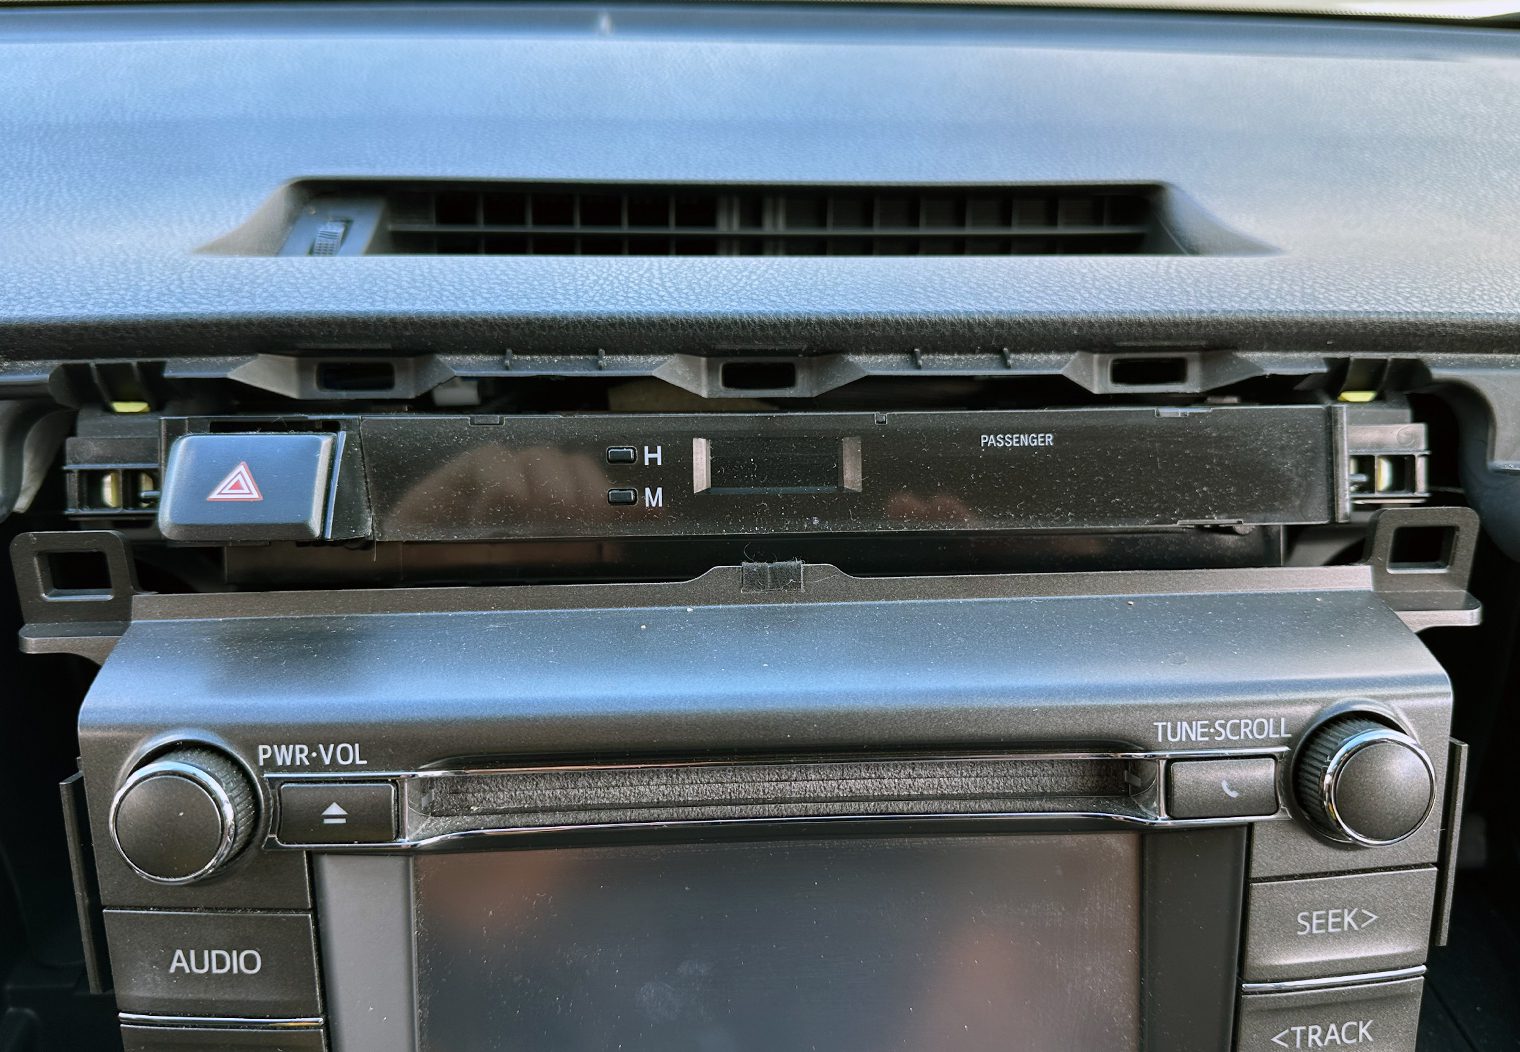
To do this, use a plastic pry tool (to prevent damage to the plastic trim) to slowly pry off the long horizontal trim piece that spans the dash on top of the head unit. This trim piece covers the clock and hazard button area. From left to right, use the pry tool to remove the trim. There are no screws on this piece, only clips.
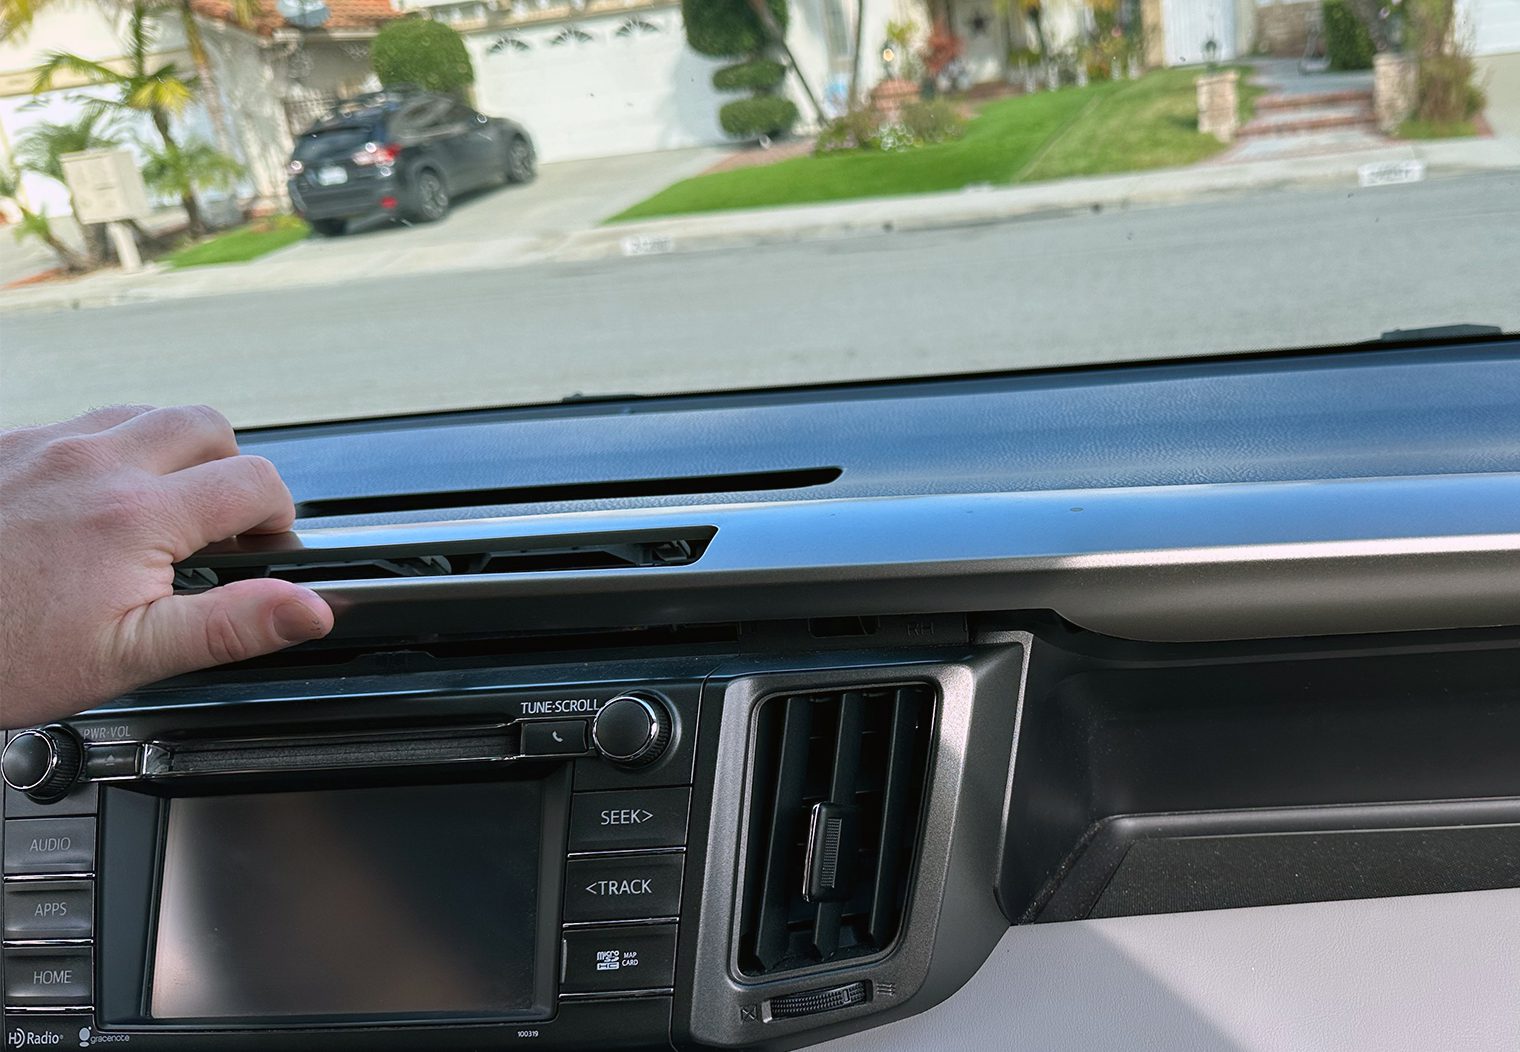
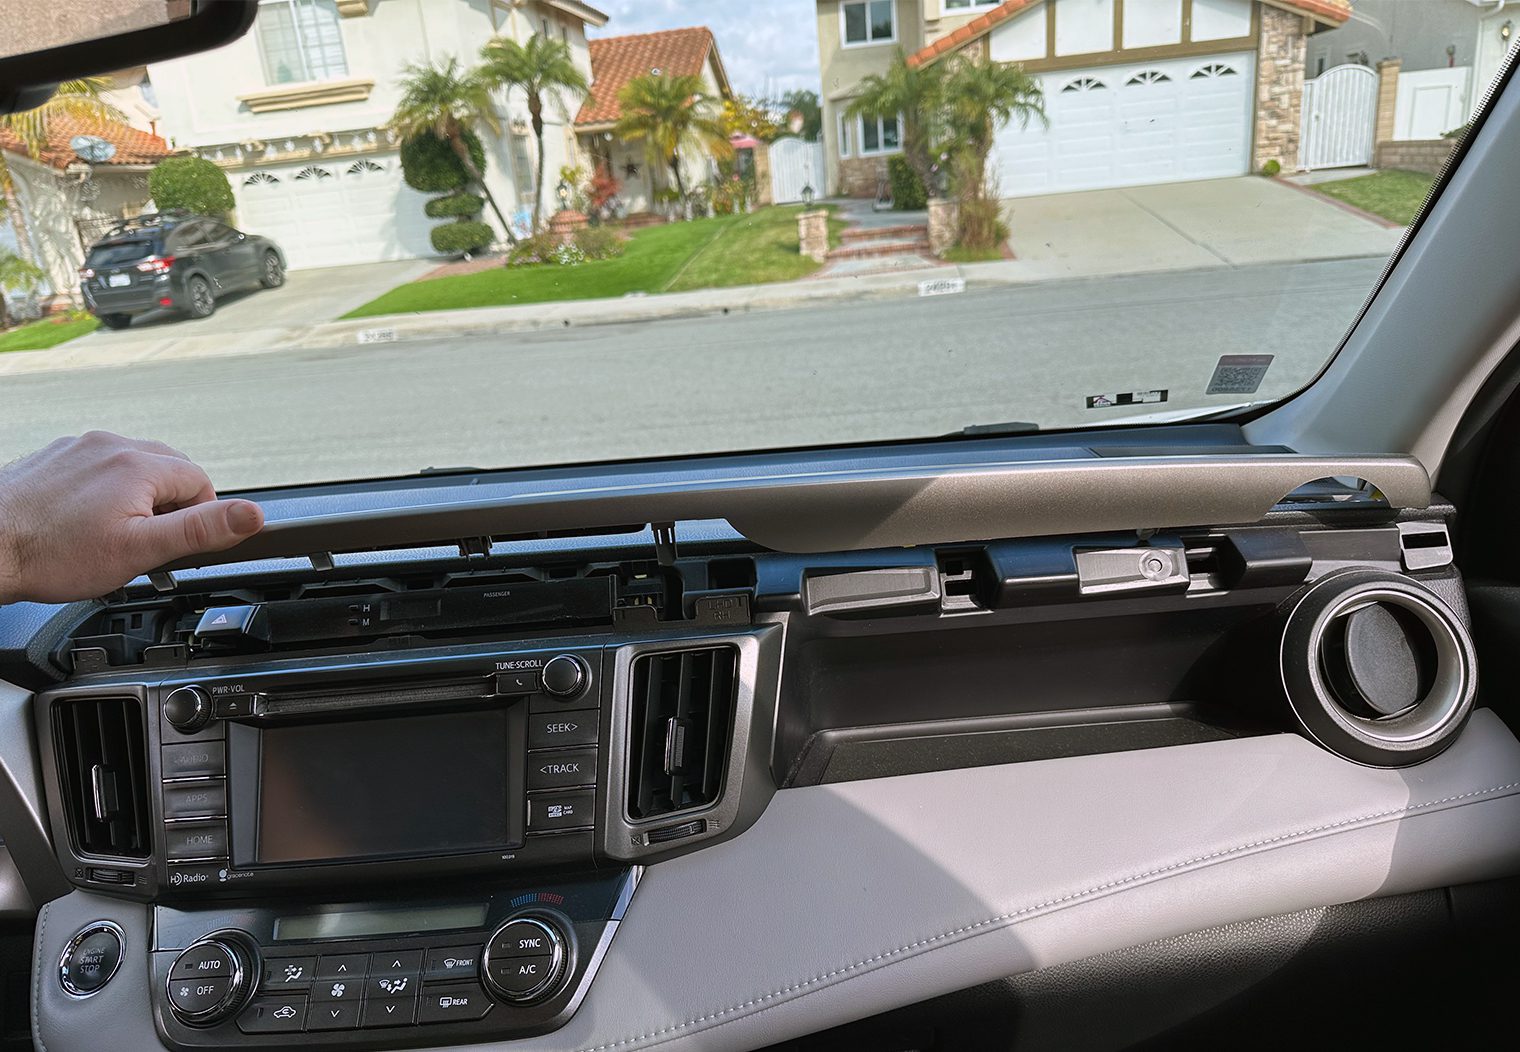

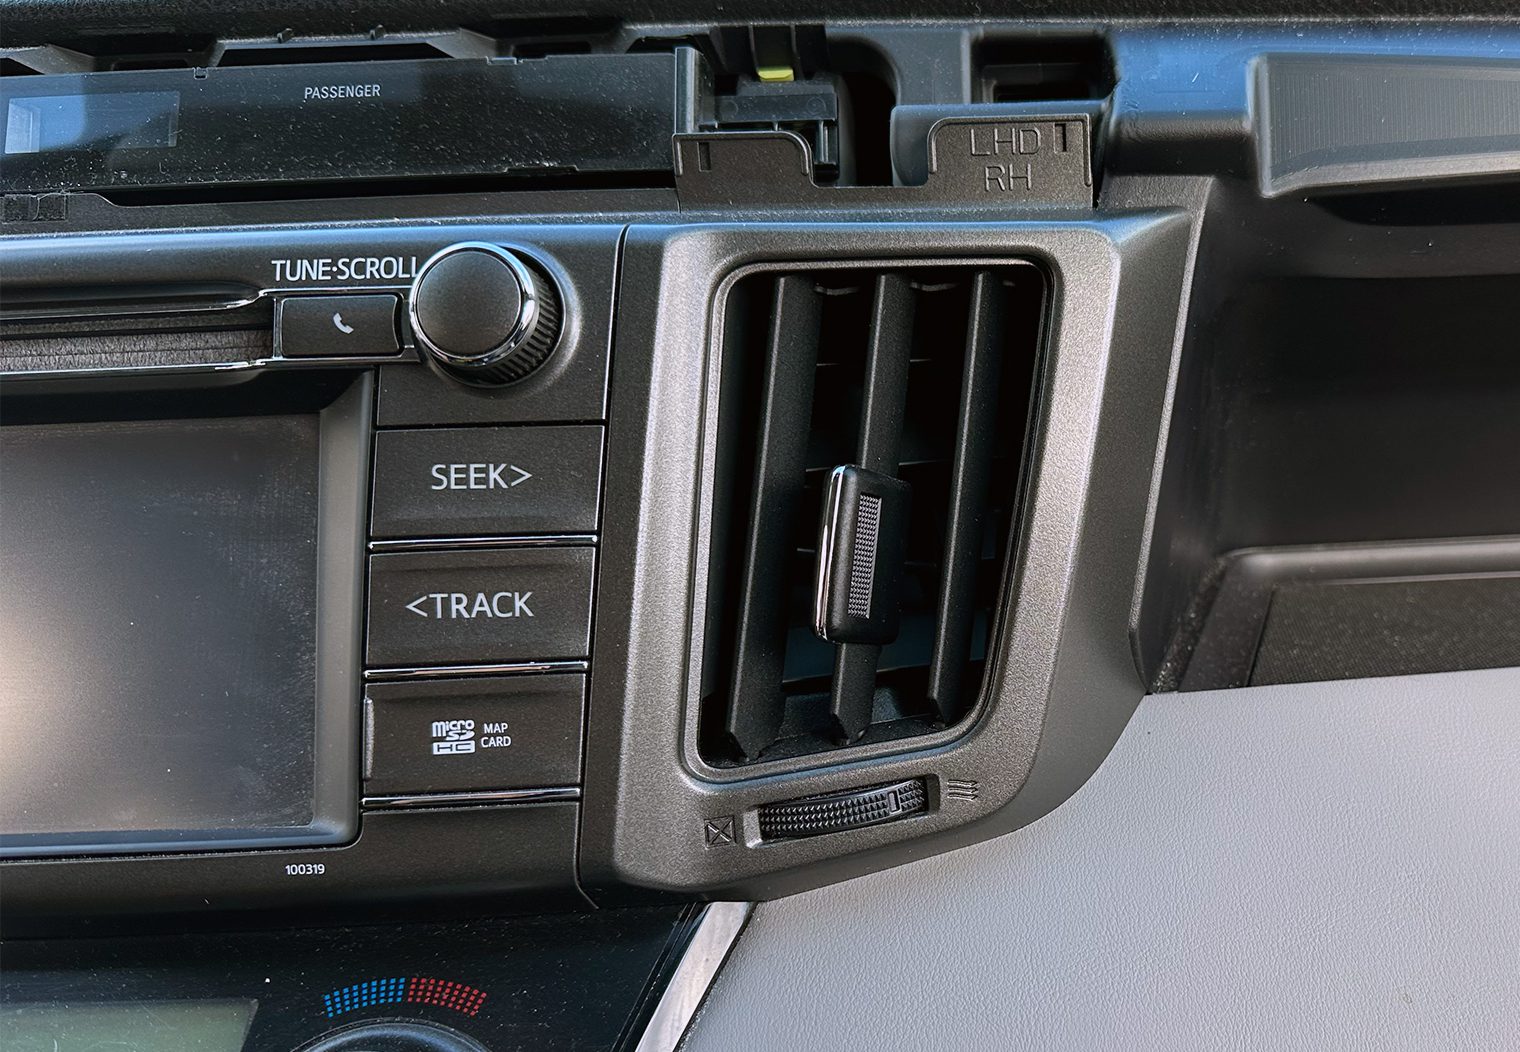
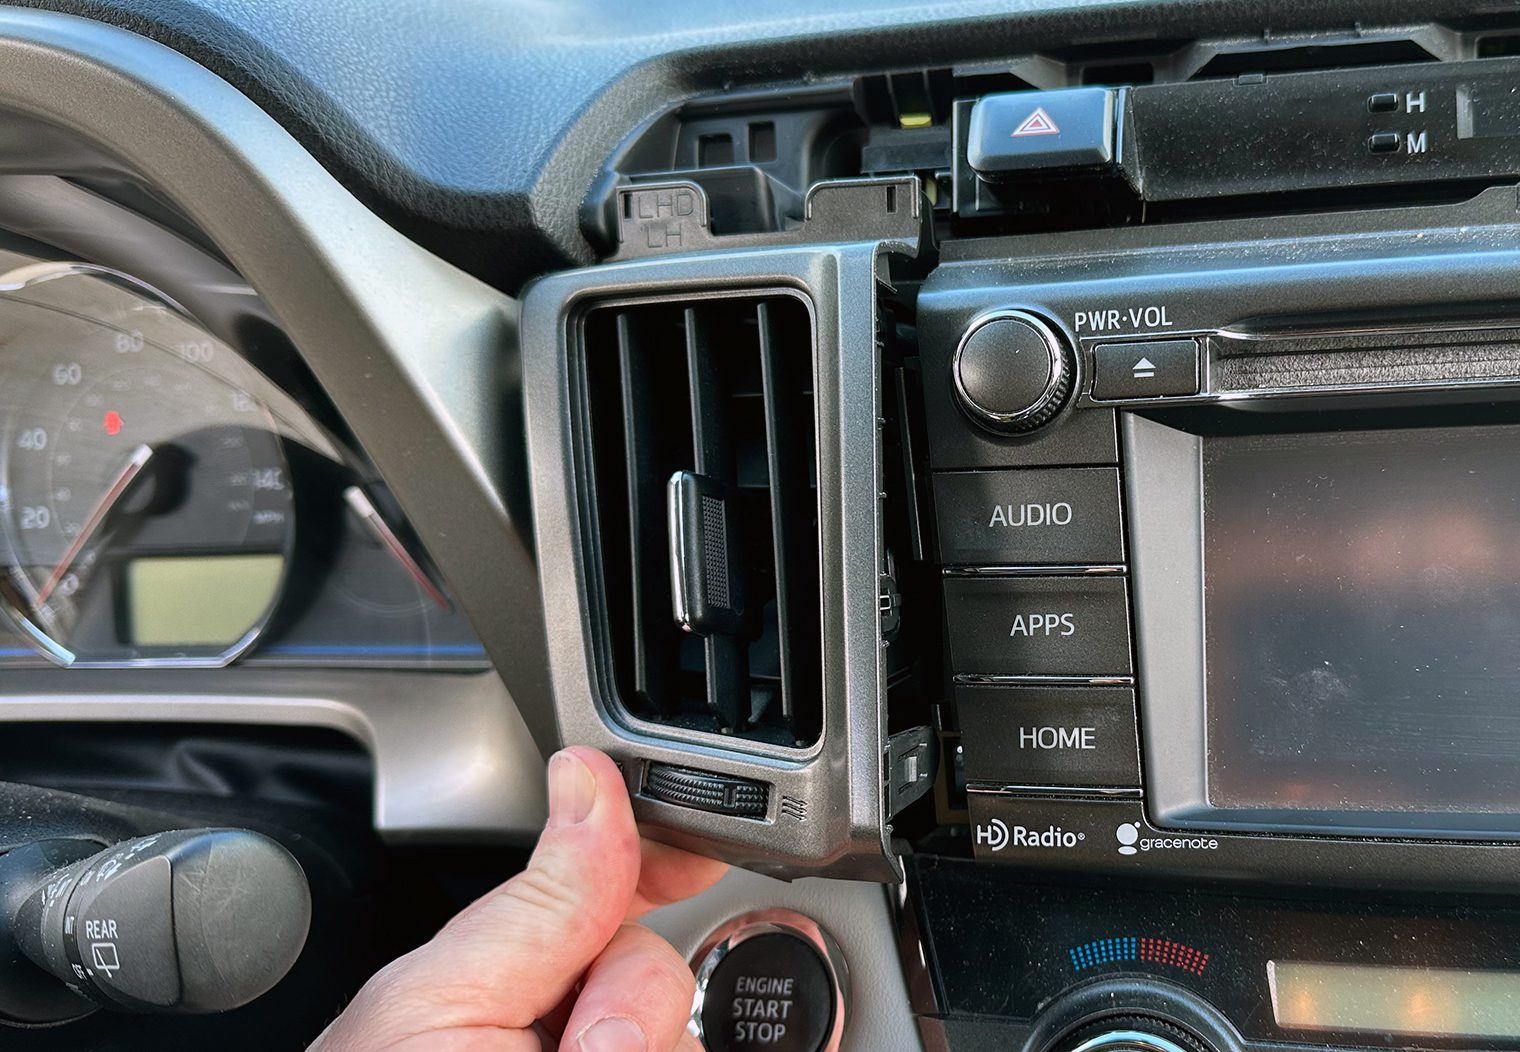
With the top trim piece removed, you can now begin to remove the two vents on the left and right side of the OEM head unit. Both of which use the same style clips to secure them in place. Simply pull/pry from the top to start and then pull the vent outwards.
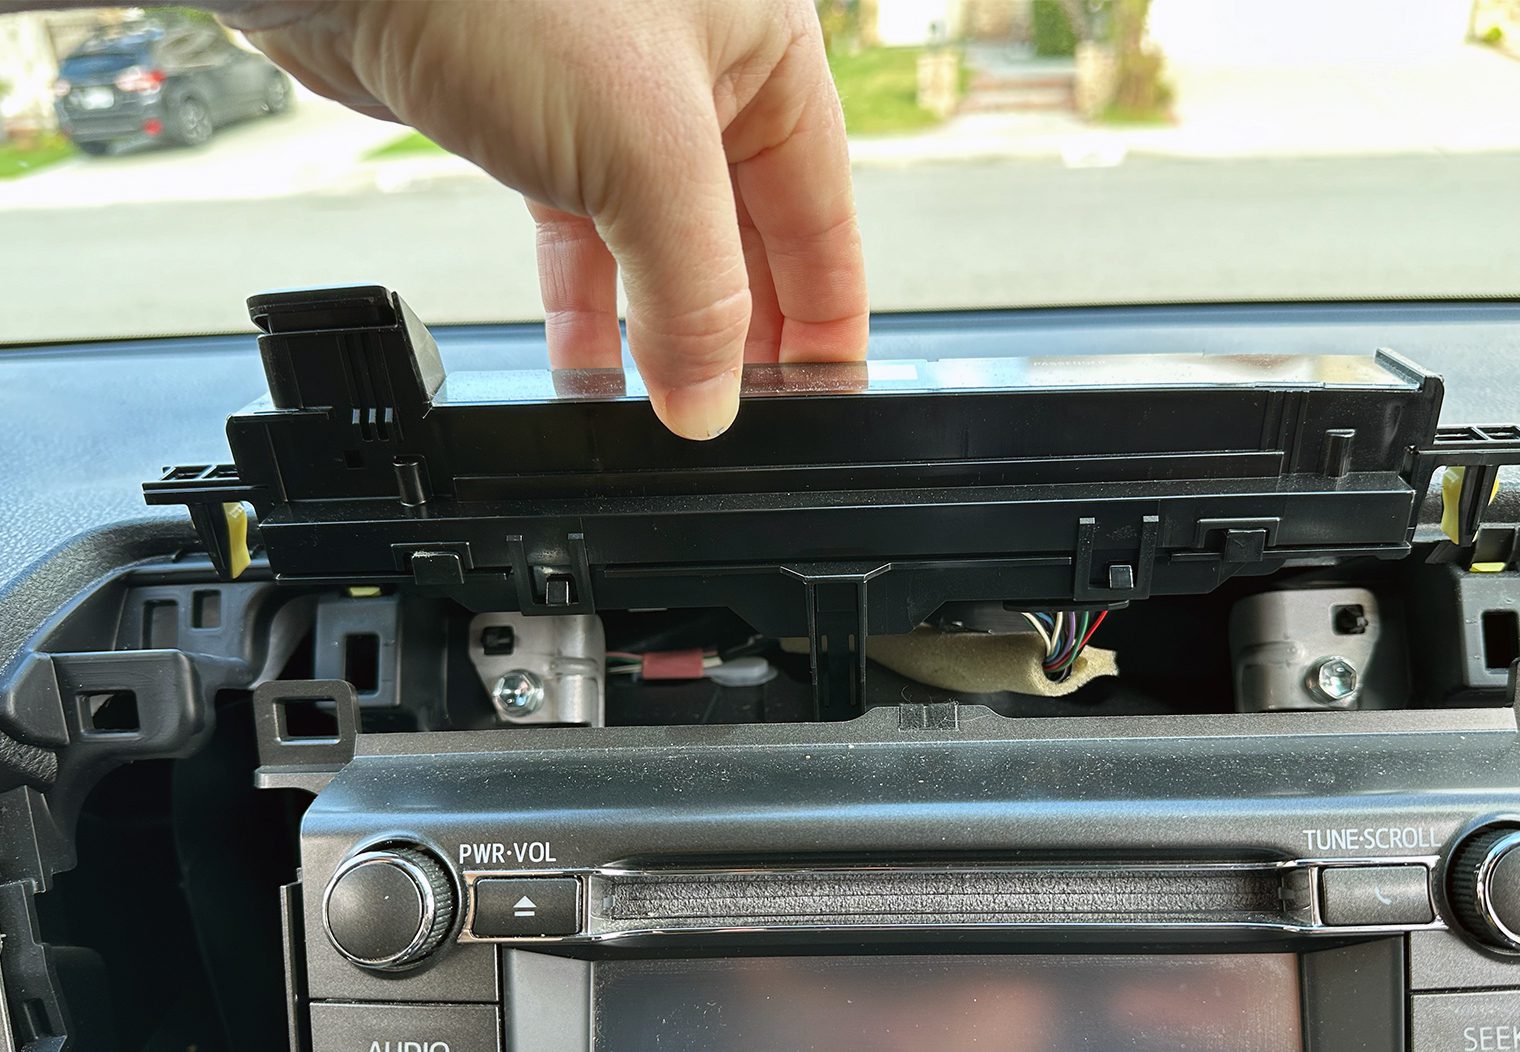
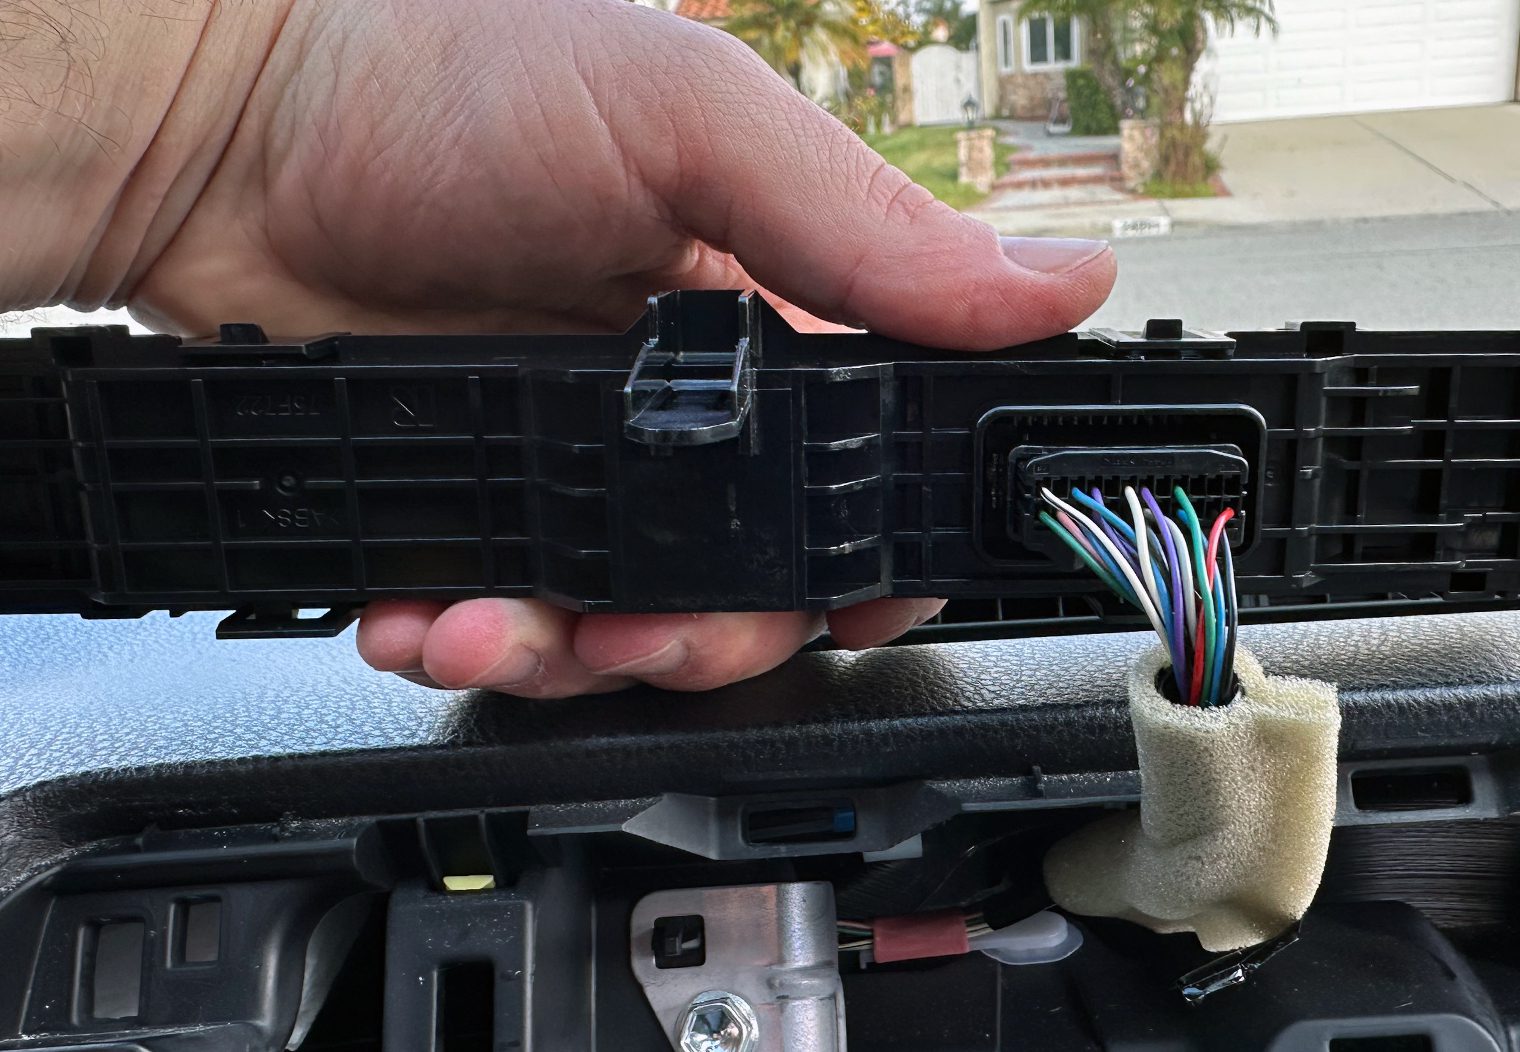
Unclip, unplug and remove the top hazard button and clock bar.
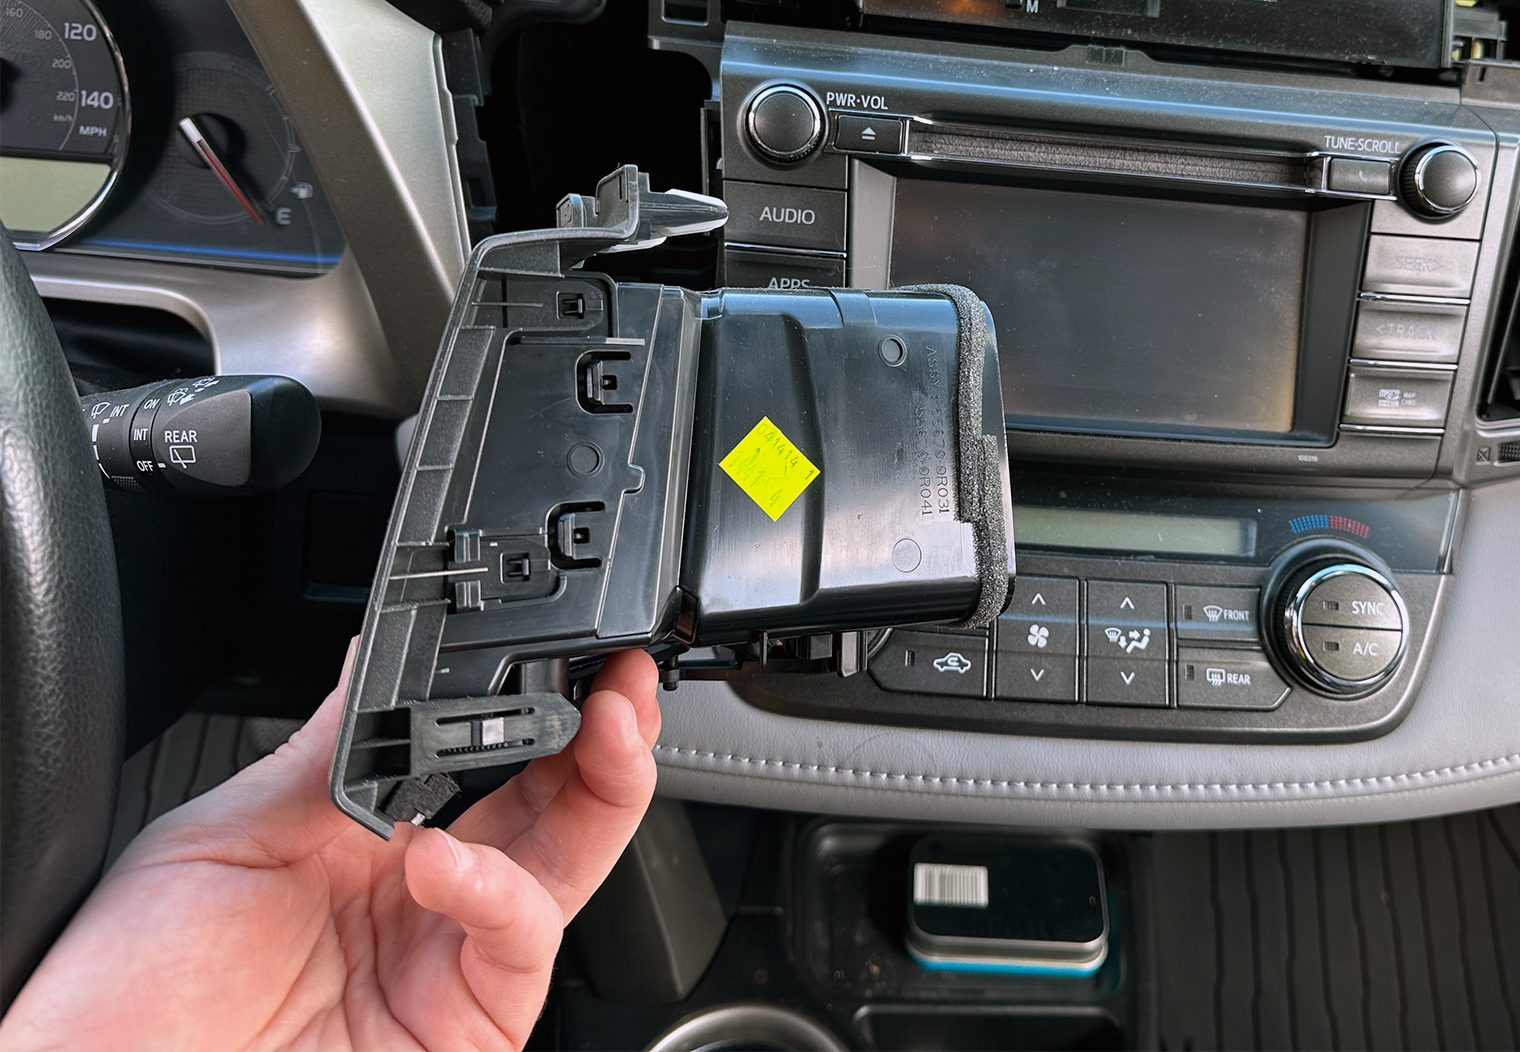
Step 3: Removing the OEM Head Unit
At this point, all of the trim is removed and you can access the four 10mm bolts that secure the OEM head unit in place. Locate and remove the four screws on the left and right hand side of the head unit and remove them.
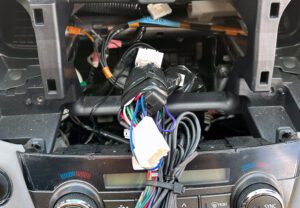
With the four screws remove you can pull the head unit out of the dash to reveal the wiring at the back. Be sure not to pull the head unit to hard as you can damage the wiring behind it.
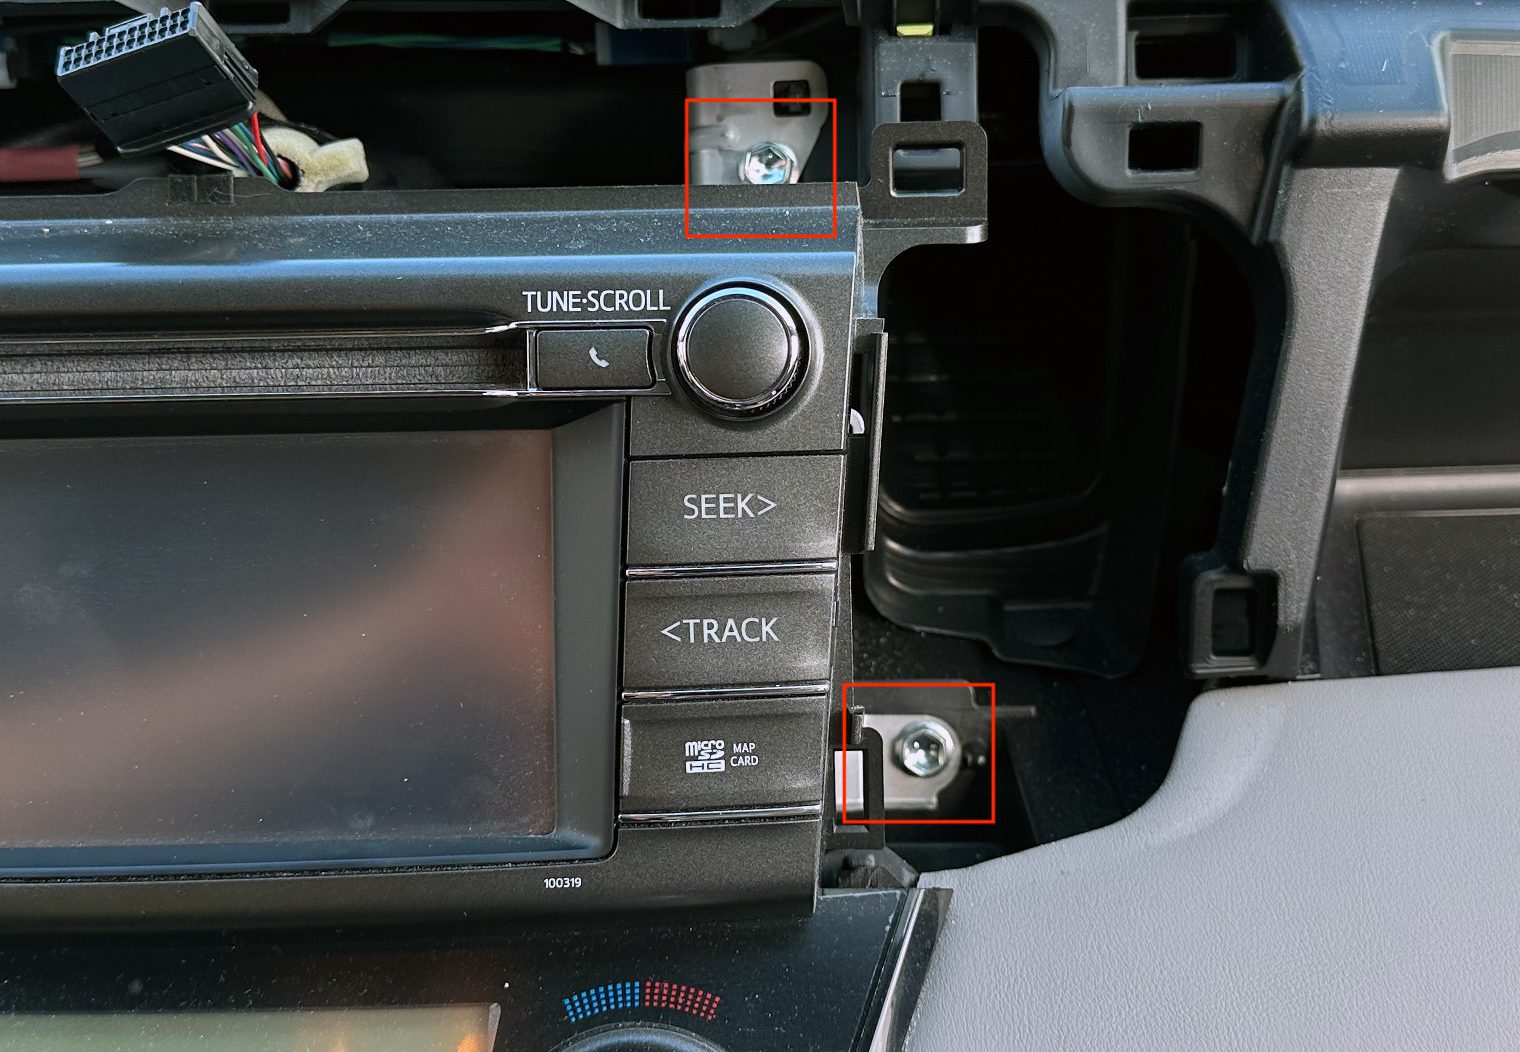
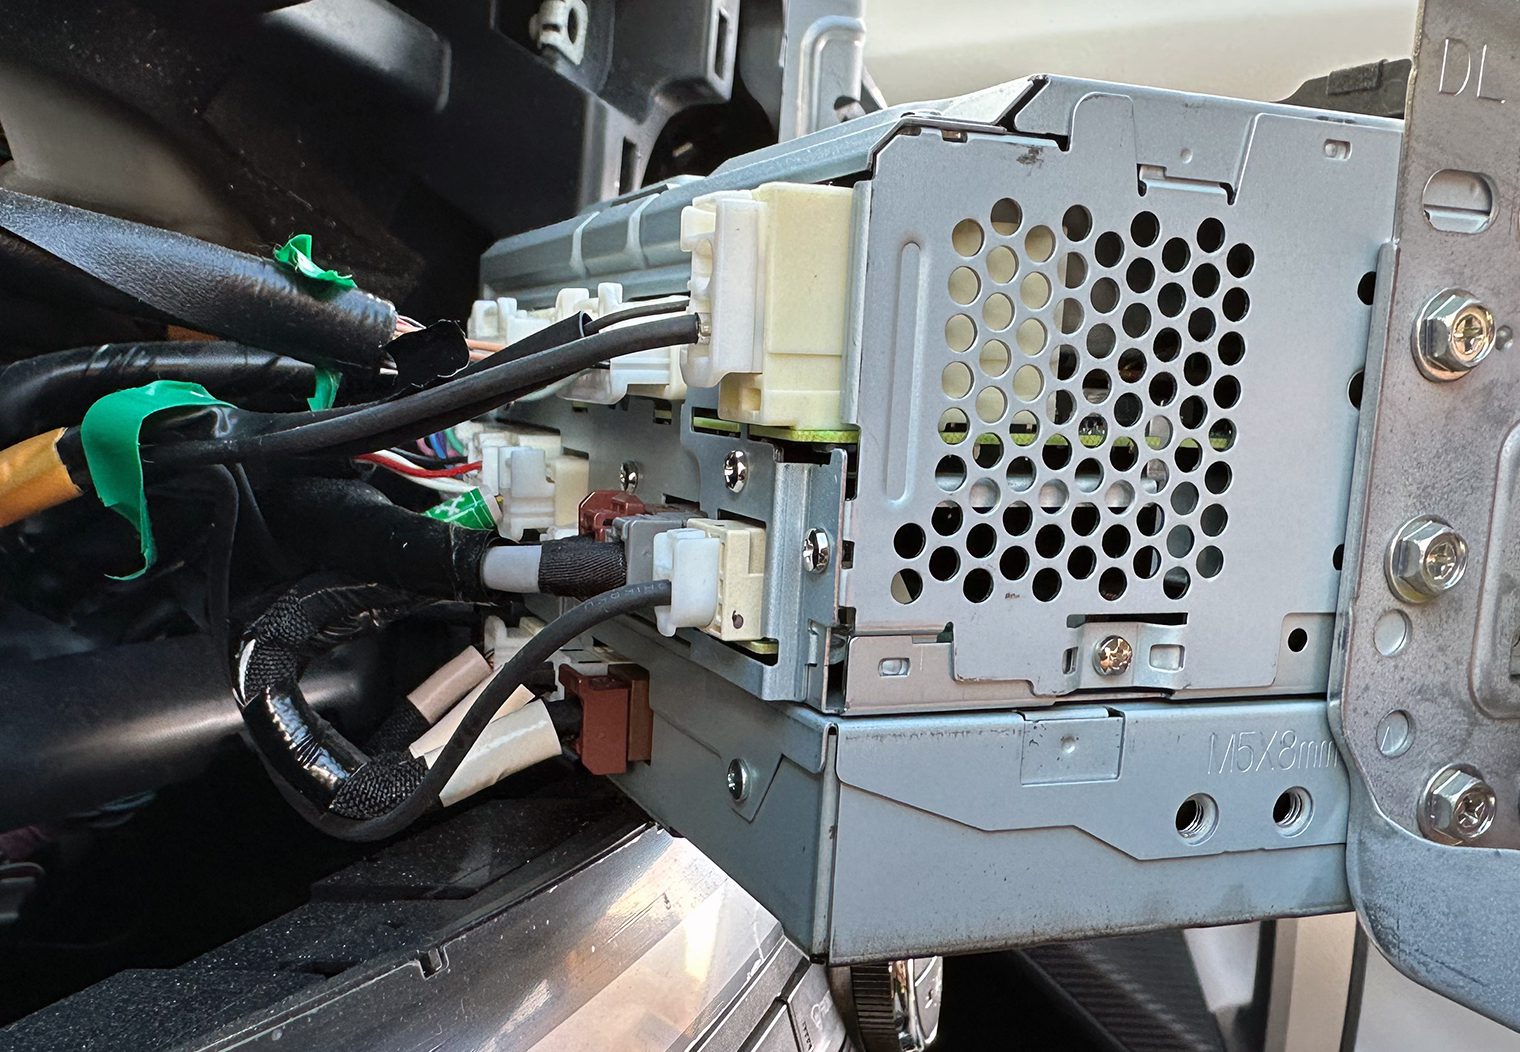
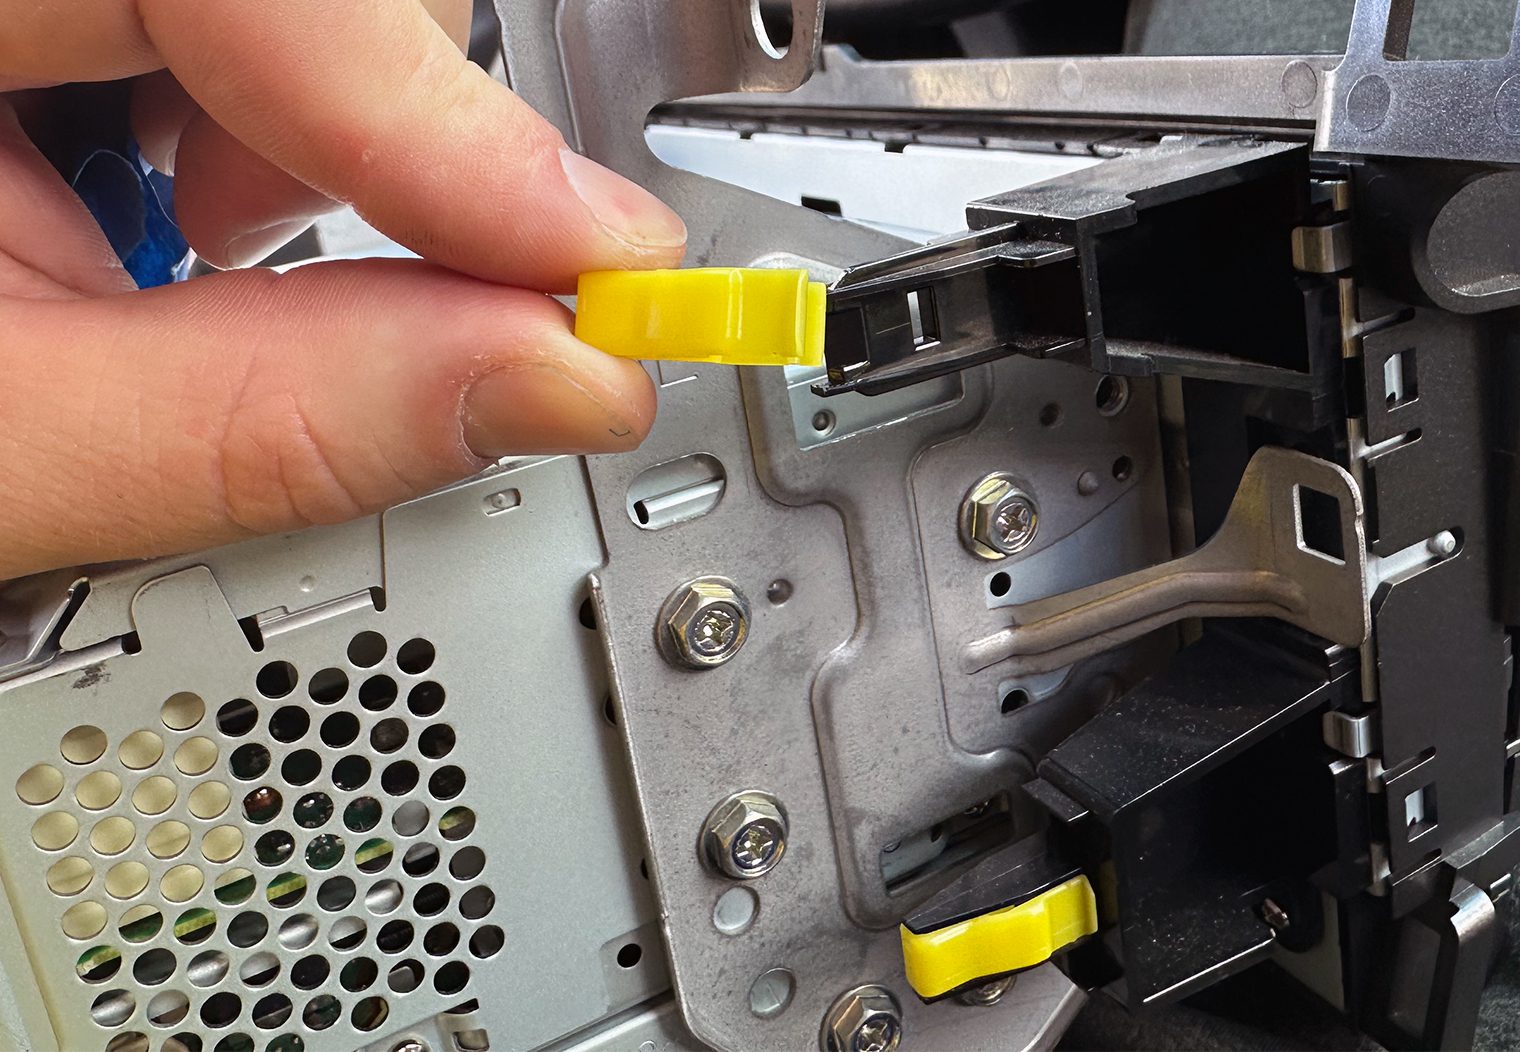
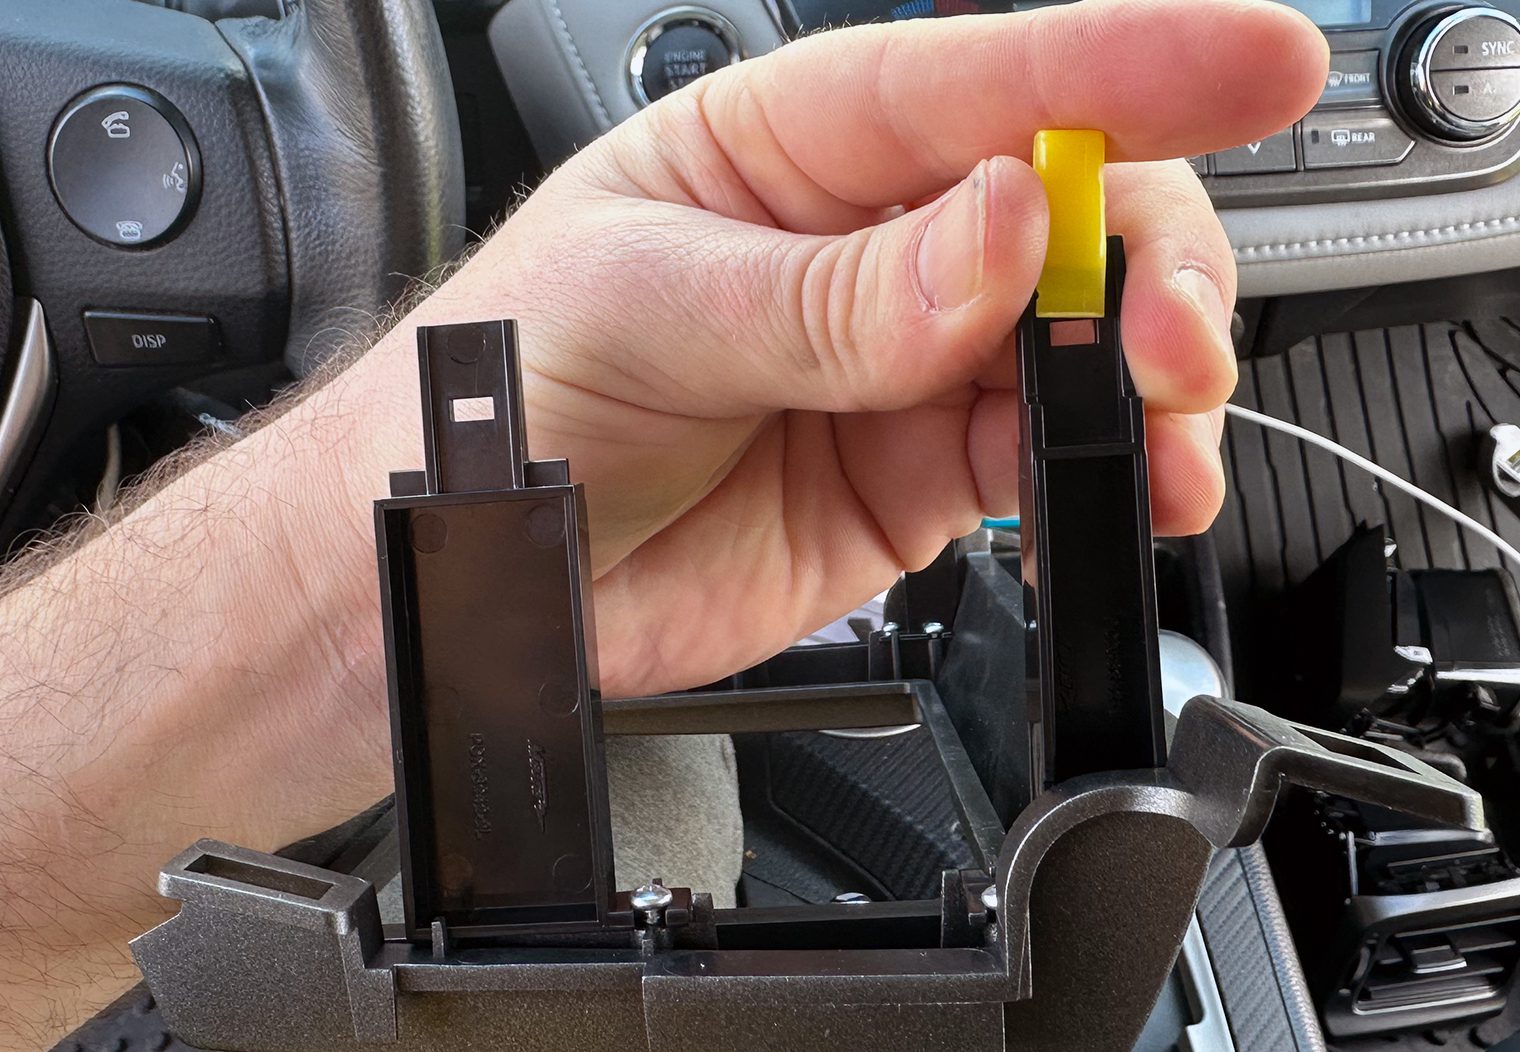
With the head unit in one hand, use your other hand to begin removing all of the plugs on the backside of the OEM head unit and then pull the head unit completely out of the dash and set aside. Also make a note of pulling the yellow clips off the side of the unit. These will be used in the new adaptive dash kit.
Step 4: Connecting the Aftermarket Wire Harness Adapters
I have already completed the merge between the CRUX aftermarket wire harness adapter and the Sony wire harness. I recommend completing this prior to working on the vehicle to reduce the amount of time your car is unusable. The next step here is to use the merged harness to connect to the RAV4's factory plugs. These adapters serve as an intermediary between the vehicle wiring and the wiring that will plug into the back of your aftermarket head unit.
Connect all of the respective plugs together along with any adapters and harnesses that go into the back of your head unit including (but not necessarily limited to):
- Main harness (power, accessory, ignition, speaker signal, illumination, etc)
- Input/Output harness (Pre-outs, Video/Camera inputs/outputs, etc)
- USB
- GPS
- Steering Wheel Control (looks like a headphone jack)
- Microphone (looks like a miniature headphone jack)
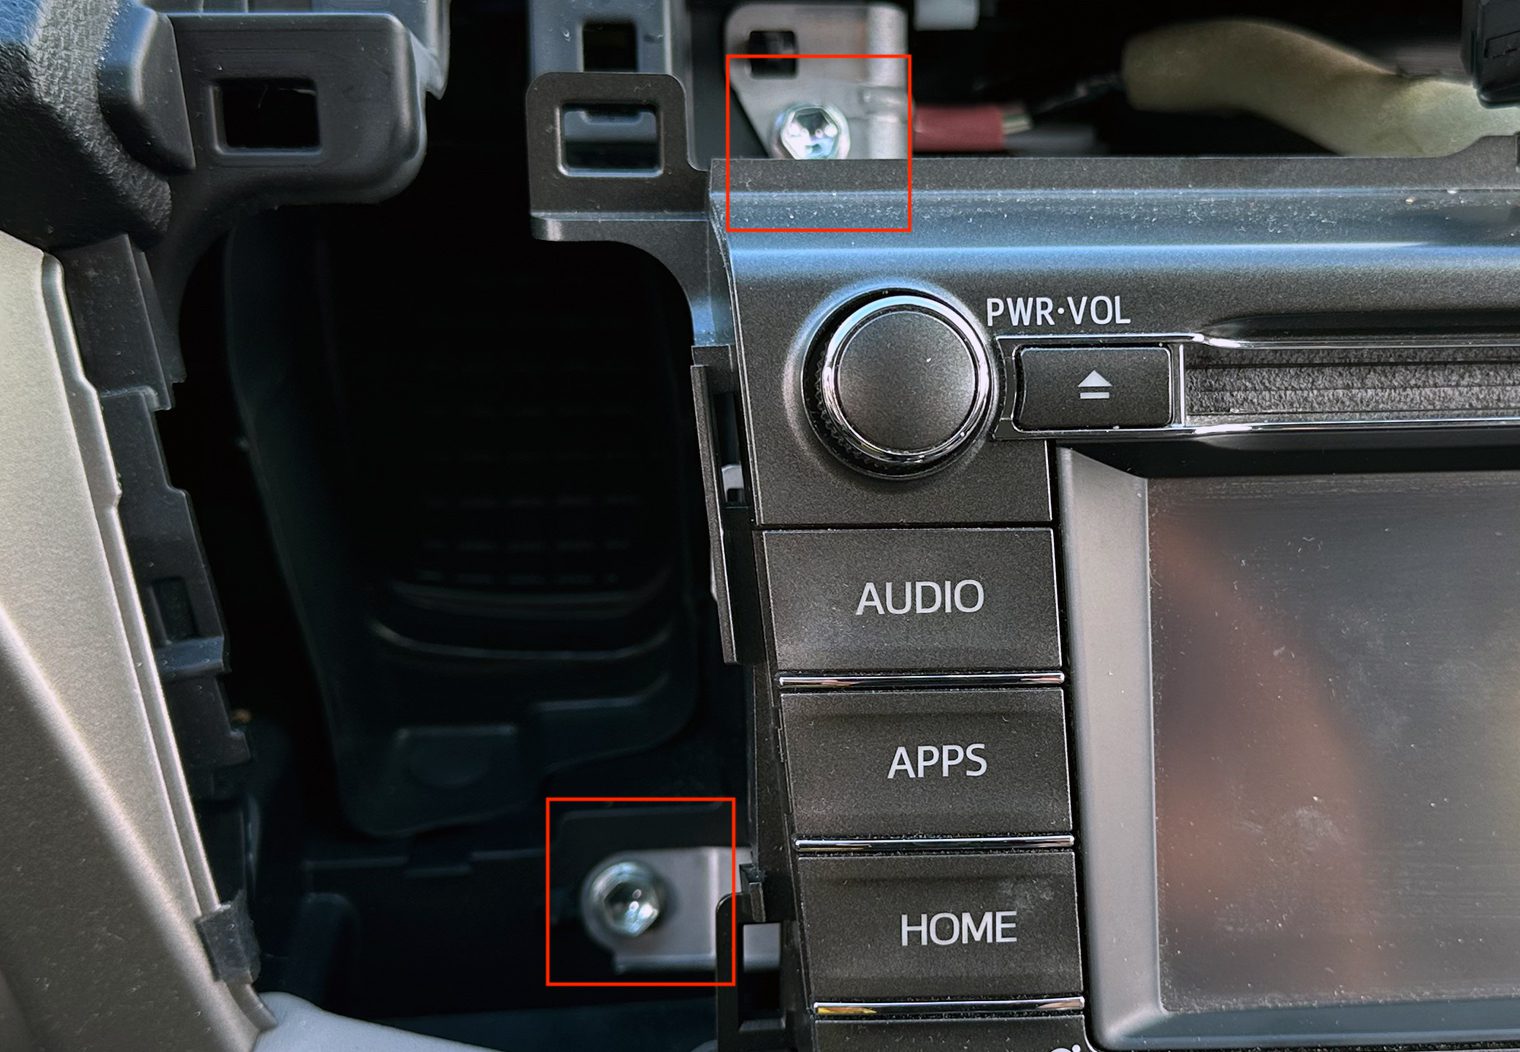
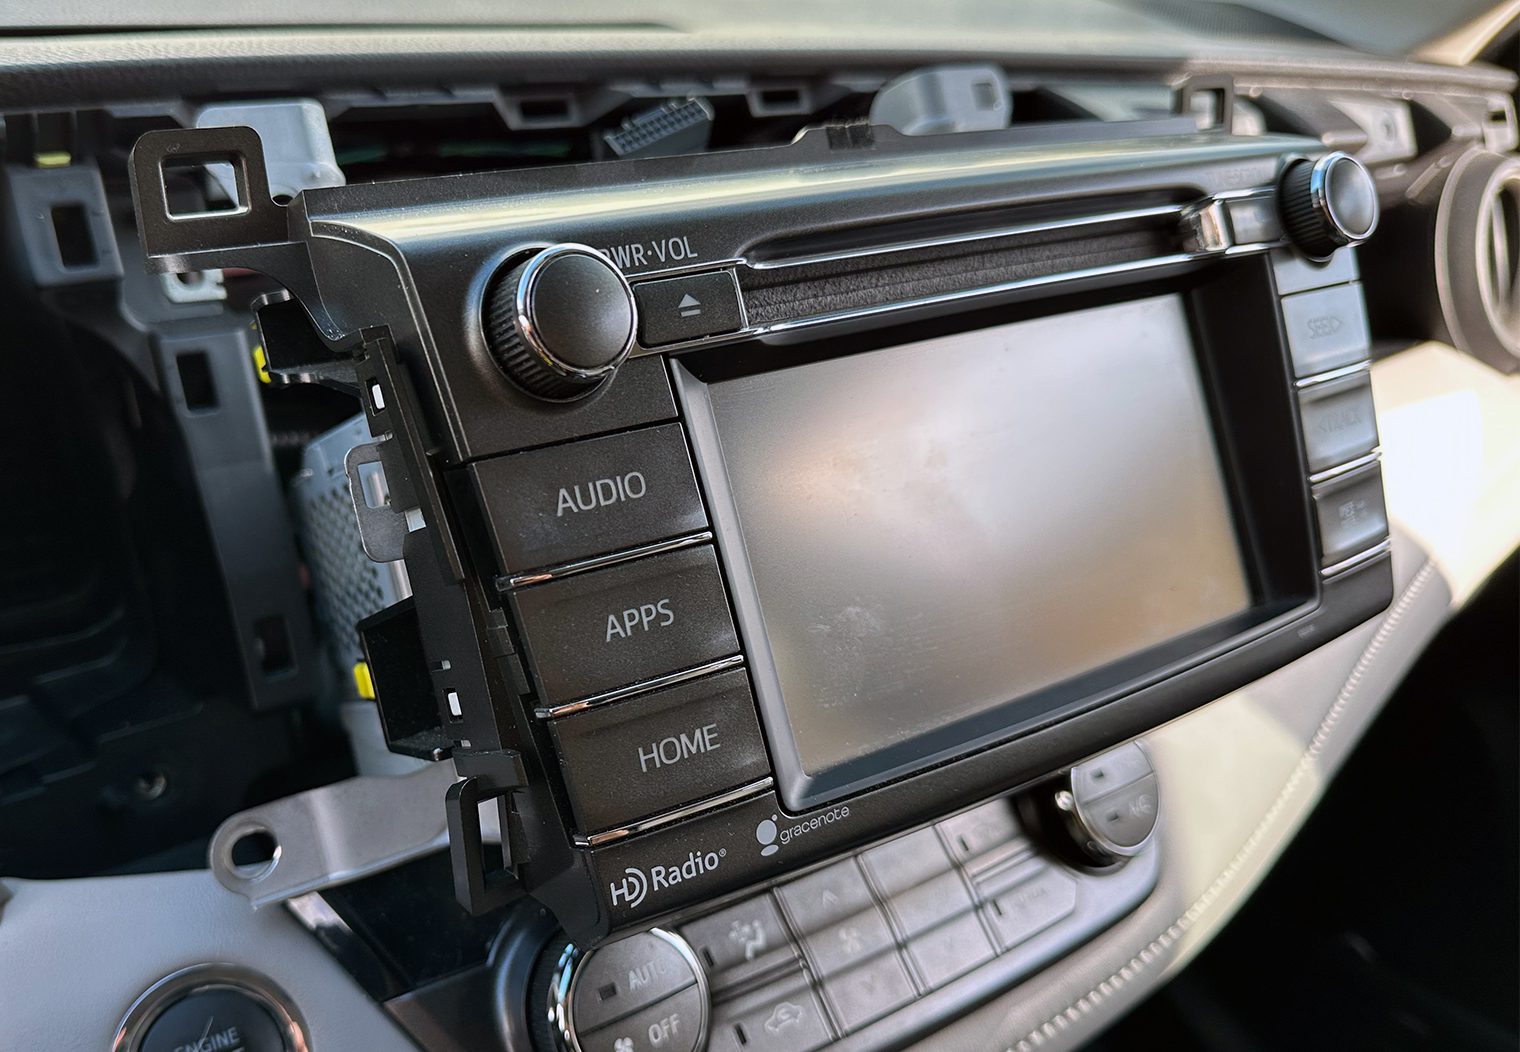
Step 5: Installing the New Aftermarket Head Unit
The moment of truth. With all of the harnesses connected, slide the new head unit back into the dash. Use the four OEM 10mm screws to screw your new head unit into place using the provided brackets in the Metra dash kit.
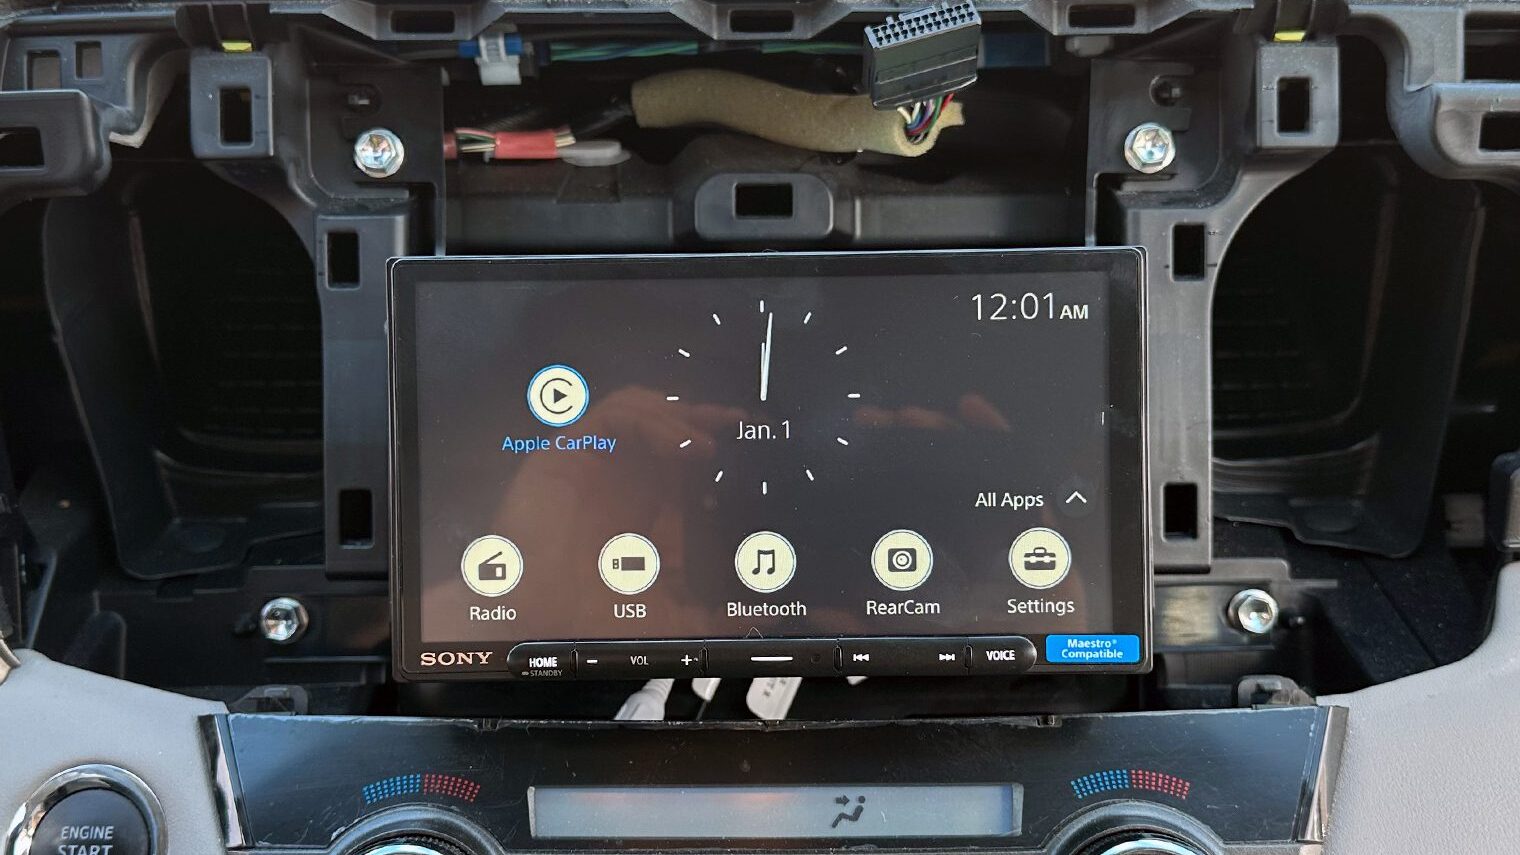
Step 6: Test
At this step, I always recommend to reconnect your battery and test all of the features and functionality of the head unit. Doing this before you re-install the trim pieces ensures that if there is a problem, you still have easy access to the head unit and can resolve it.
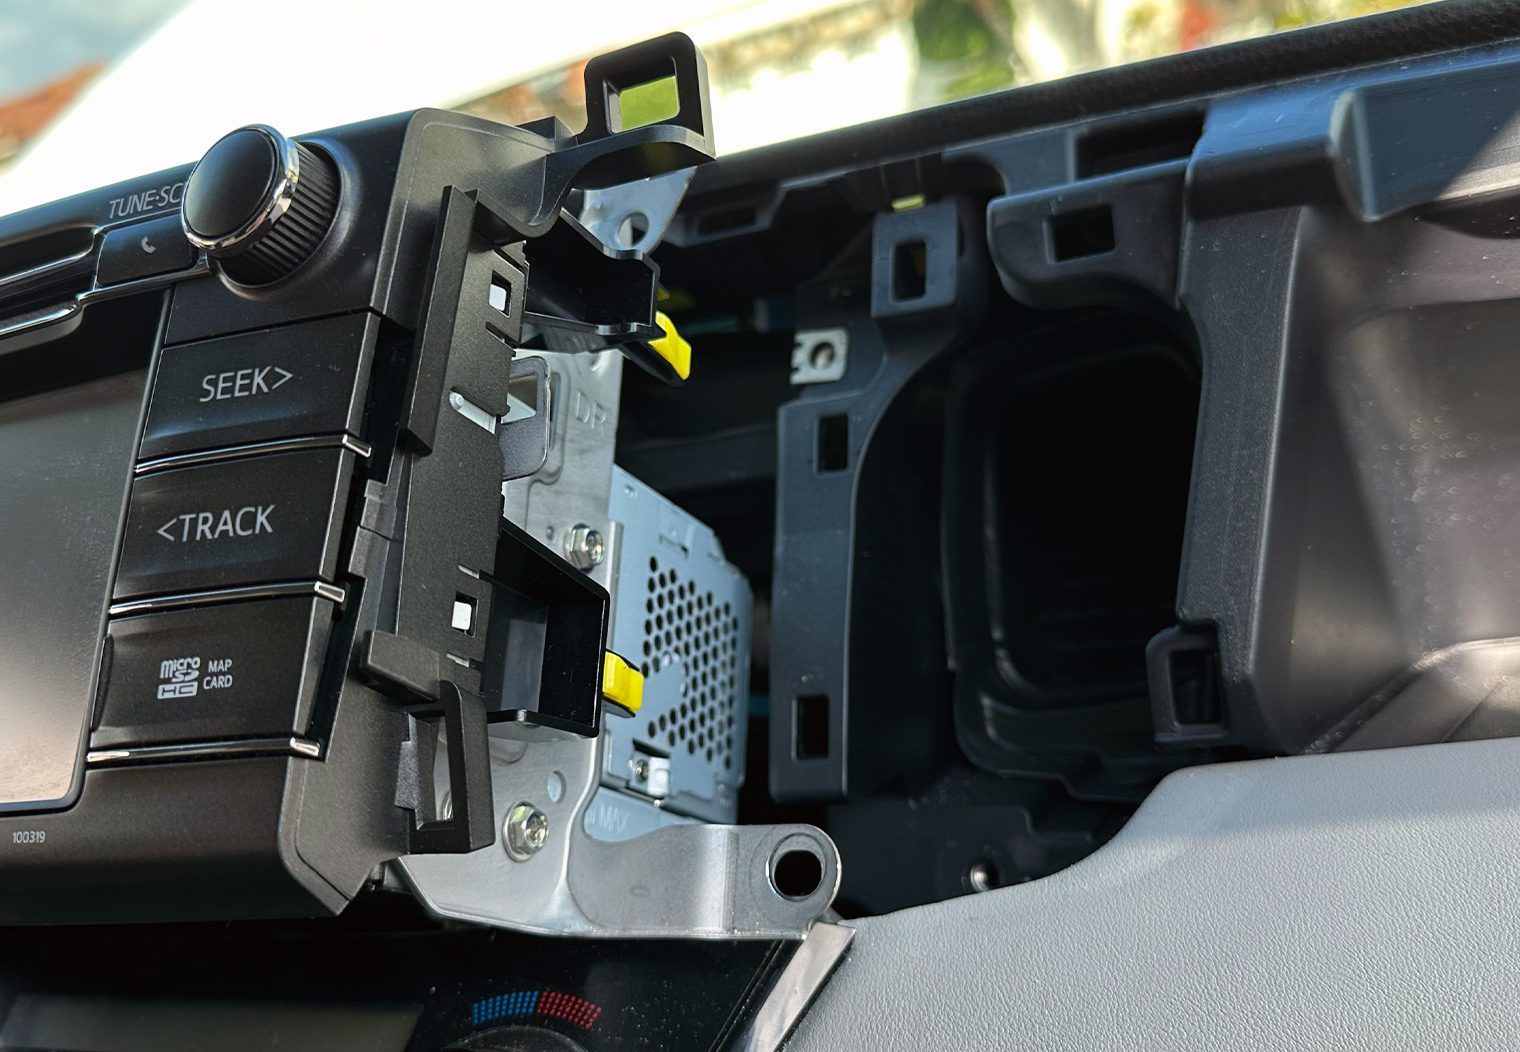
Step 7: Reinstalling the Trim
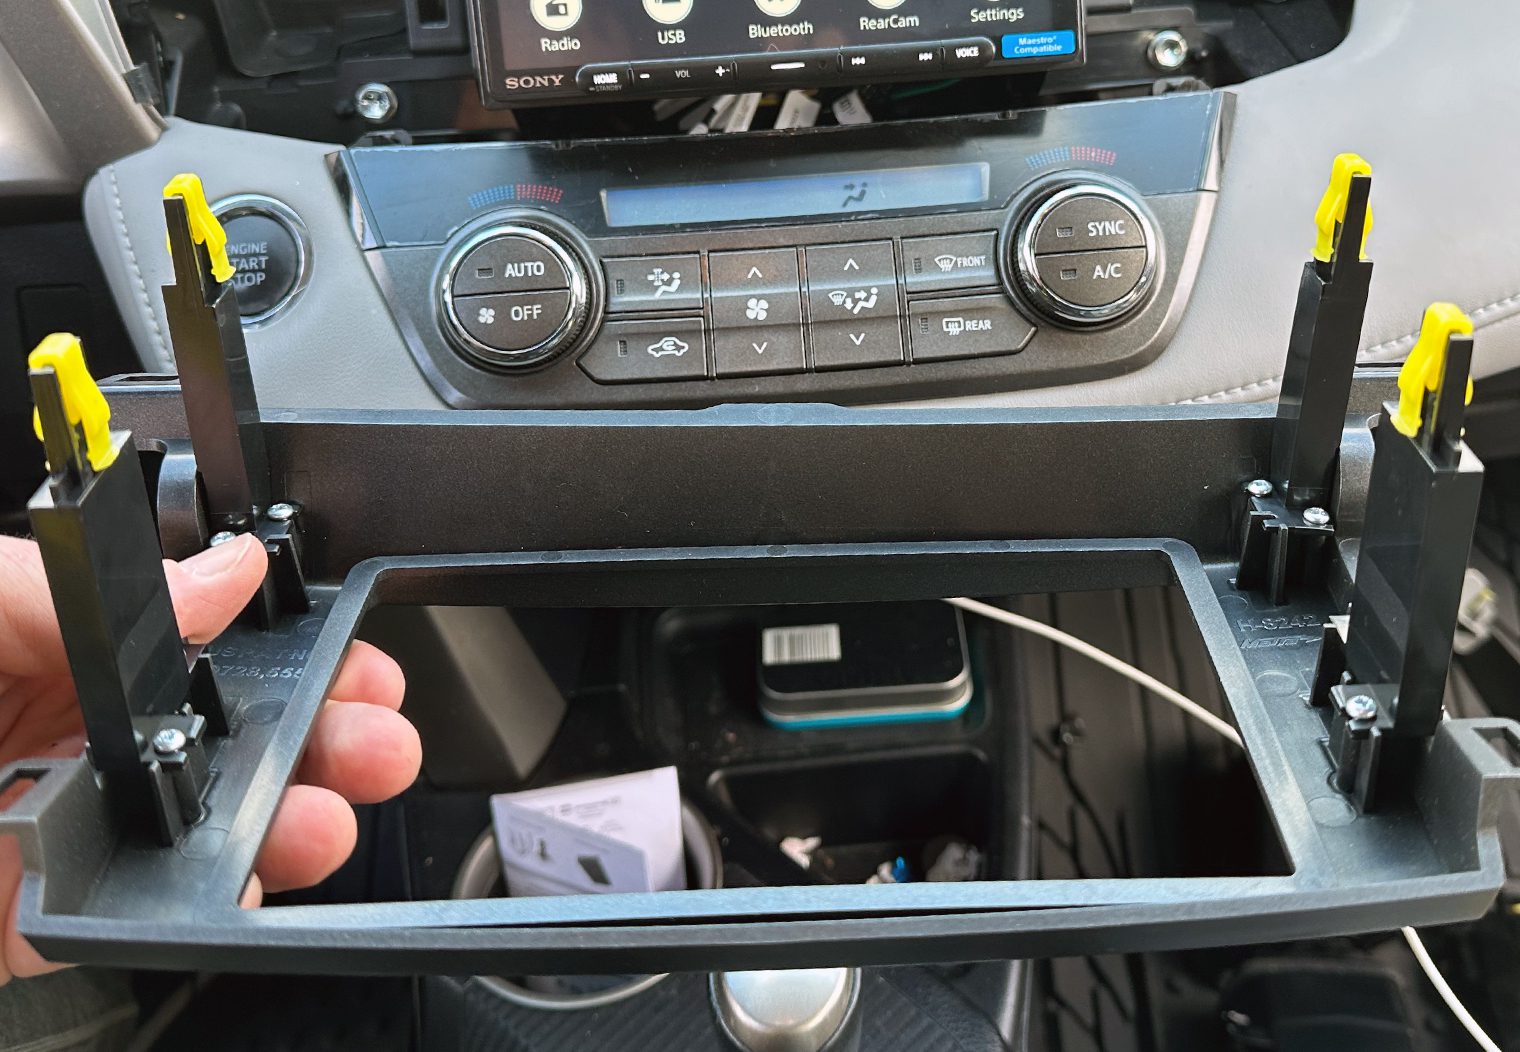
Bring back the aesthetics – the first thing to do is snap into place the adaptive dash kit trim piece that came in the Metra kit, being sure to use the OEM yellow clips I mentioned earlier. Then, reinstall the hazard button/clock bar by plugging and clipping it back into place.
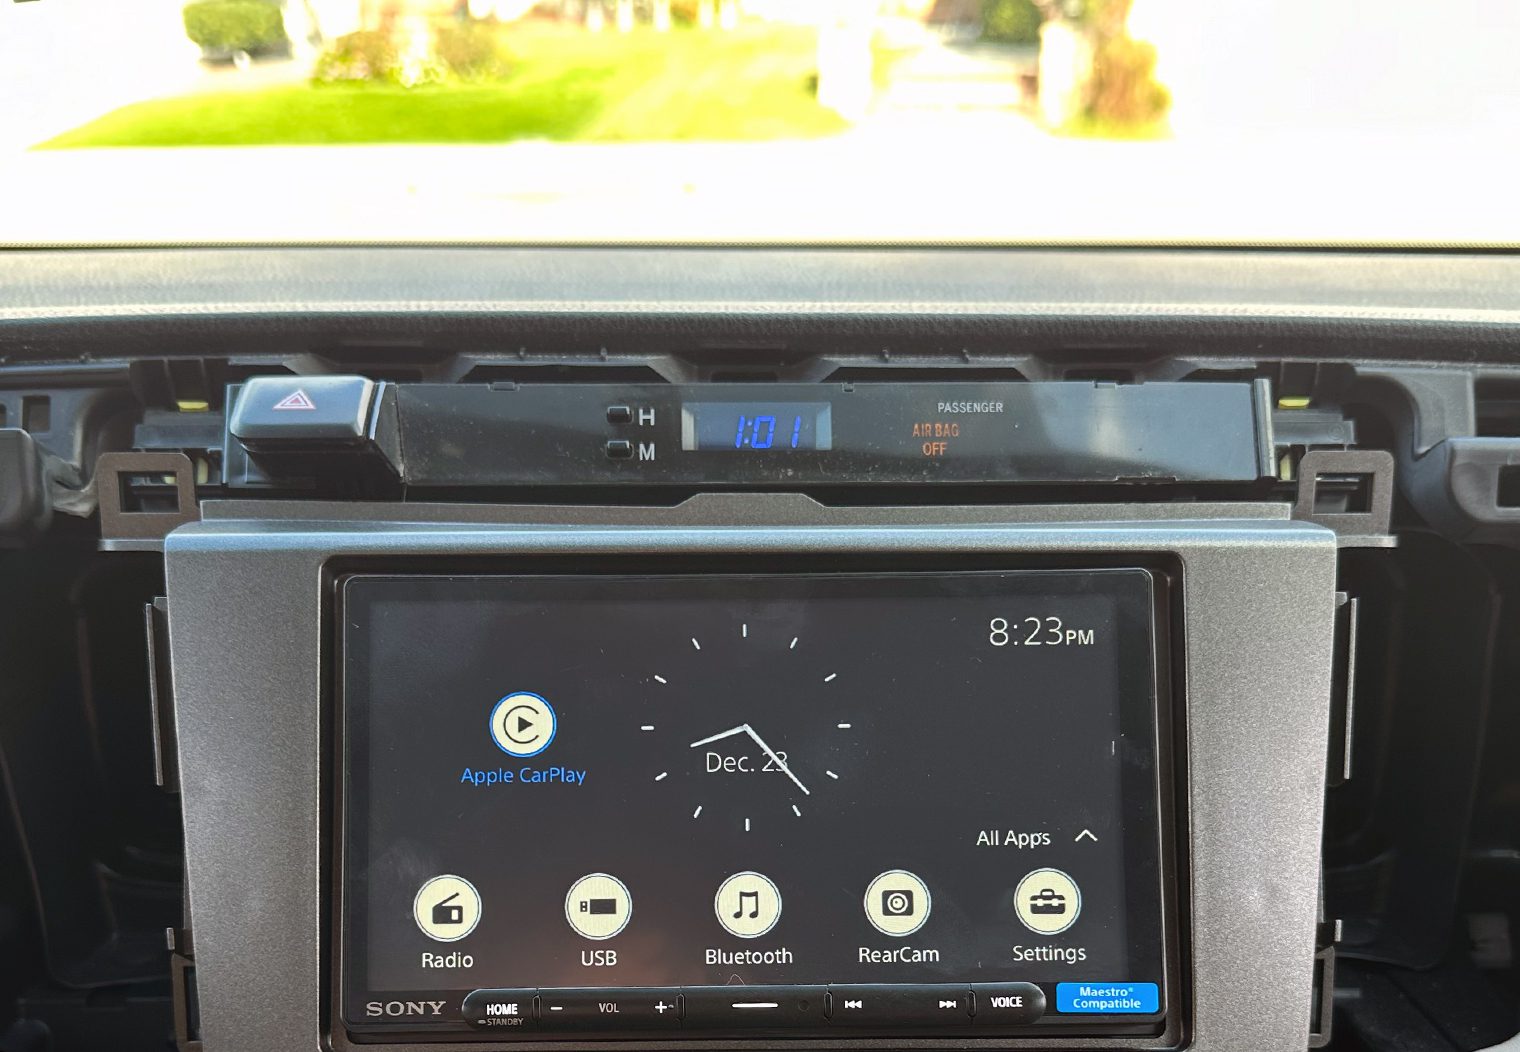
Now, re-install each of the two vents along the side of the new head unit and dash kit by pushing back into place. And finally, re-install the long horizontal dash trim piece.
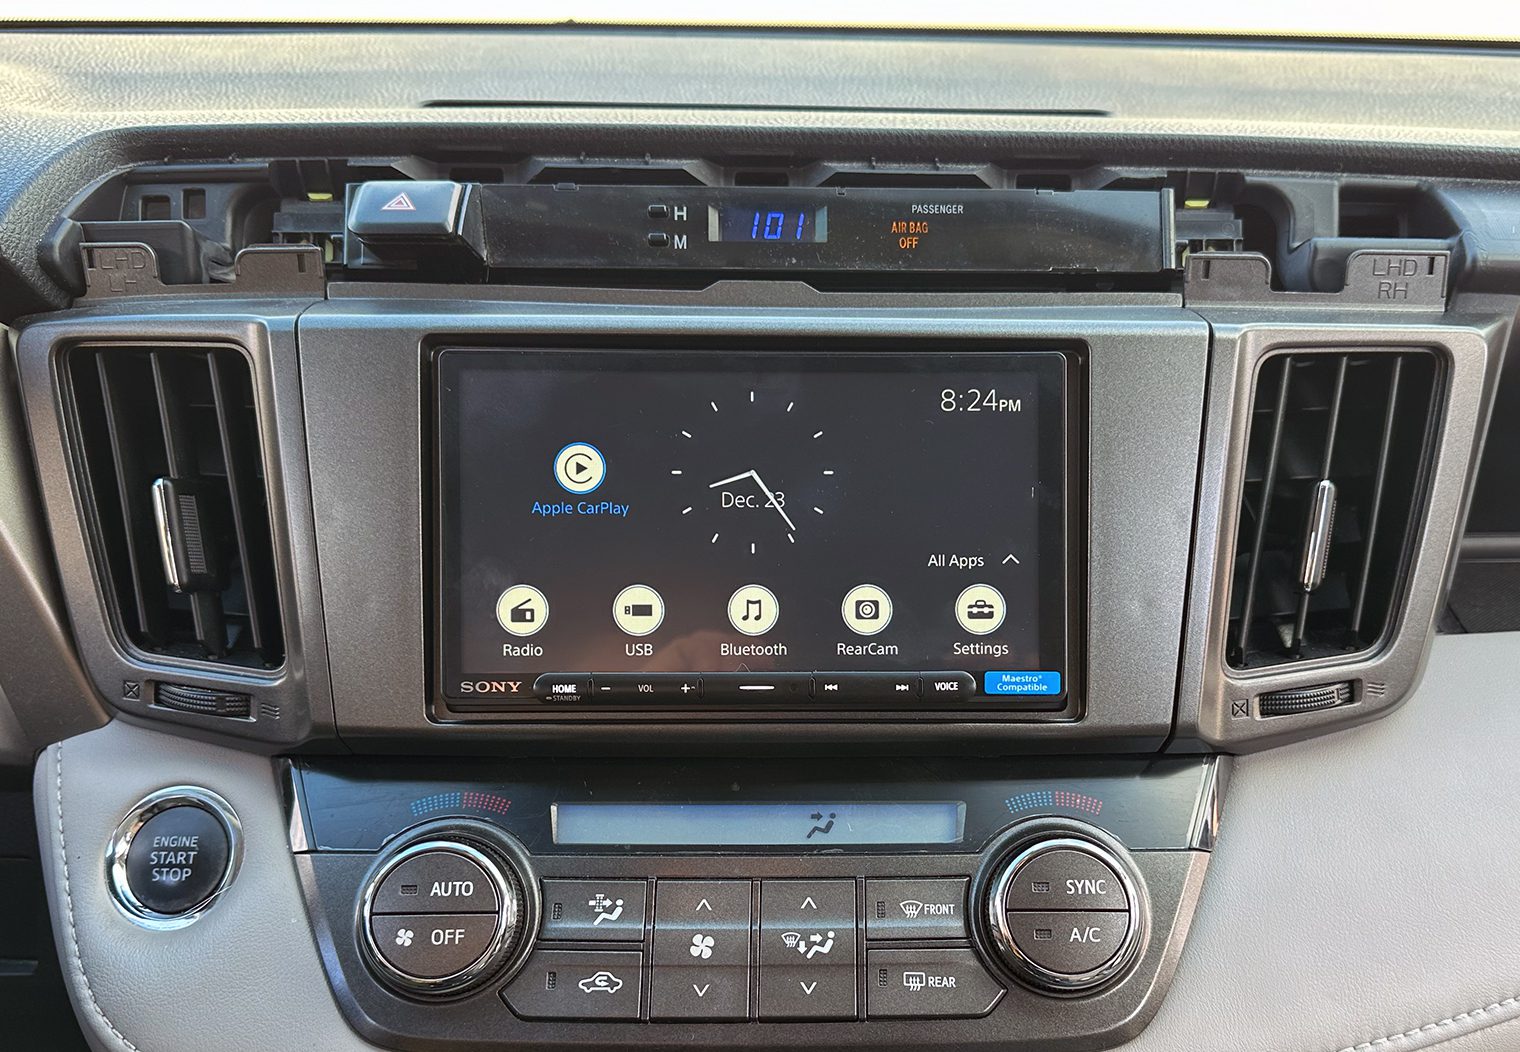

Congratulations on this successful upgrade! Now, reconnect the car battery, power on your new head unit, and bask in the contemporary features it brings to your Toyota RAV4.

What pin and plug is the reverse camera trigger wire for the 2017 rav 4 le? Cannot locate anything online with specifics. Clean install btw!
Good