In this article: We'll walk you through our full stereo upgrade on an Axis A22 wakeboard boat, including our installation process, system setup, product selection, wiring and more.
I recently had the opportunity to test out a number of Fusion's latest marine products. Way back when, I remember having two pair of Fusion's T6.5 tower speakers mounted to my 2004 Super Air Nautique 210 but beyond those tower speakers I hadn't really tested or heard Fusion's newer lines of products in person. That all changed a few months back when Fusion released their Signature Series 3 line up of coaxial speakers, subwoofers and tower speakers. I knew the owner of an Axis A22 that would love a stereo upgrade and Fusion happened to be looking for some folks to test out their latest and greatest lineup.
I worked with Fusion's product and engineering team to not only choose a system that best matched my needs for this installation, but also answer a bunch of questions first hand that I had throughout this process which I'll share throughout this writeup. The end result was a super well-matched, clean, simple but powerful system that I was very happy with and exceeded the Axis owner's expectations.
So let me walk you through this installation from soup to nuts, which products I decided on, how I wired everything and etc. Hopefully, at the very least this will give you a good starting point to upgrading your Axis's stereo or other wakeboard boat stereo. You can also check out our install on my personal Nautique G23!
Stereo Overview, Setup and Goals
I always like to start these write ups with a little more information about the boat, some of the challenges I'm facing, my goals for the project and ultimately the setup that we chose for the installation.
The Boat
Starting with the boat, the platform is a 2012 Axis A22. For those of you who may not be familiar, it's a 22ft wakeboard boat that comes from the factory with a variety of stereo configurations. Most of which are upgraded shortly after just like almost any wakeboard boat, especially those from the early 2010s and prior.
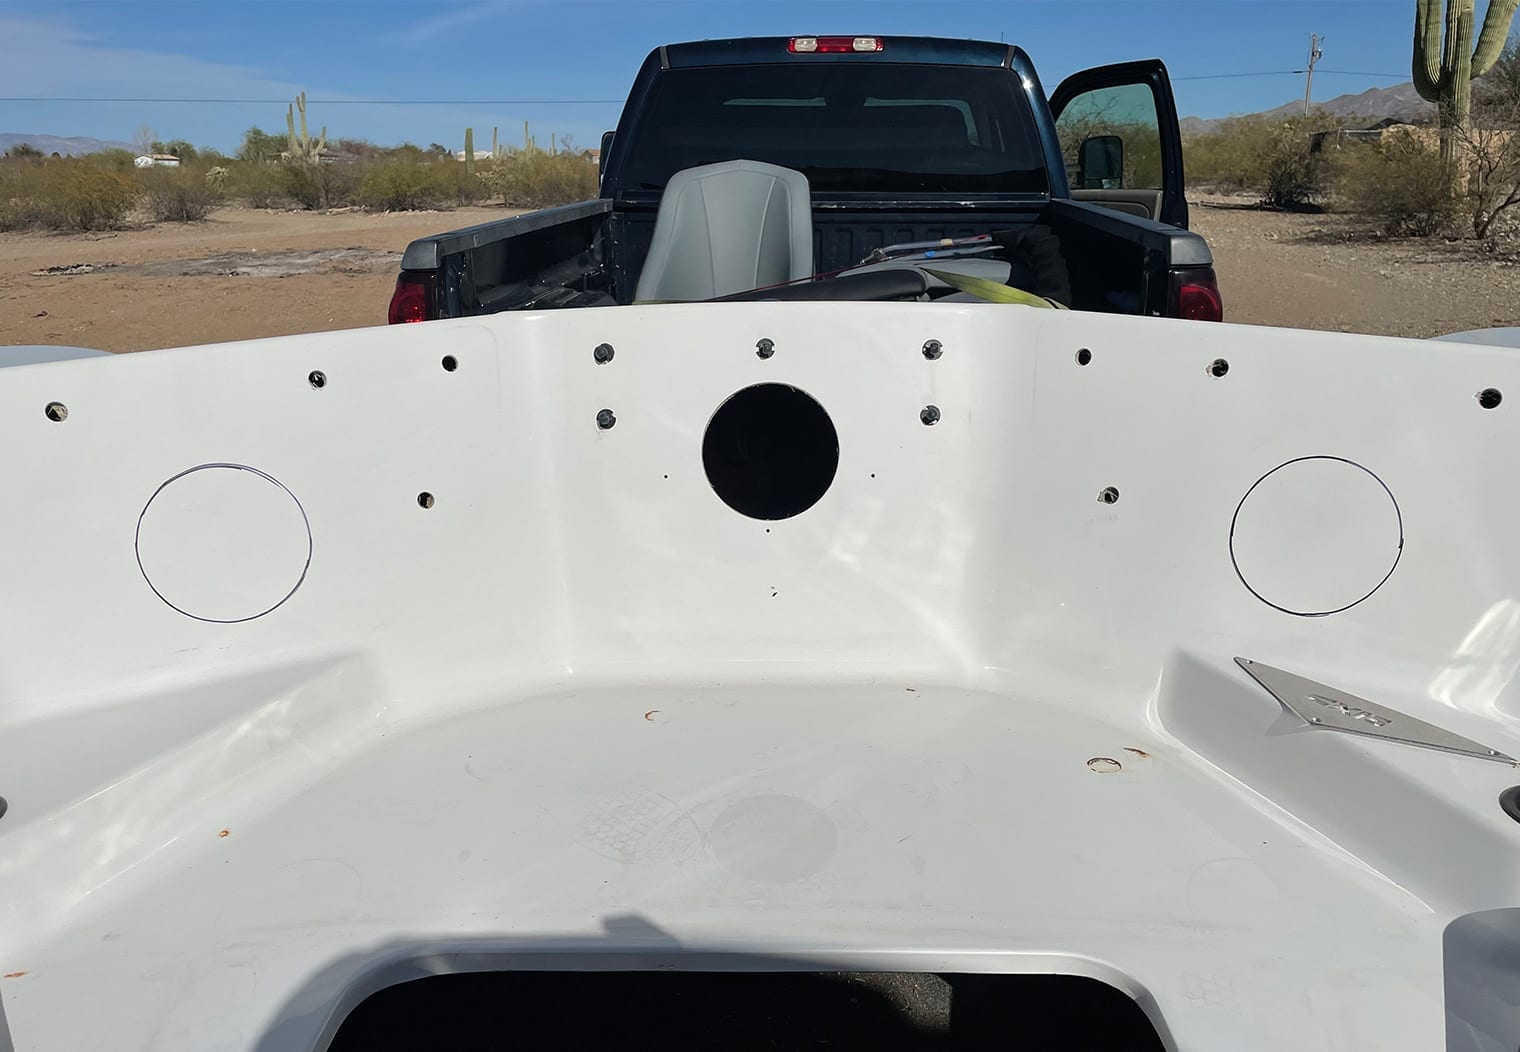
This particular boat was purchased used, and the stereo was a mess. It only had four interior speakers – none in the bow – which was very first thing that needed to change. From the factory, bow speakers were an upgrade apparently so if you didn't purchase this package they just put vinyl over bow cushions and called it a day. After some digging on the Axis forums I found a post of another owner who leveraged preexisting speaker holes in the bow cushions to mount speakers. I confirmed once I was at the boat that there was, indeed, pre-cut holes for speakers but Axis just didn't install them from the factory.
In addition to the lacking speakers in the bow, the amps were trashed and the wiring was spliced, cut and joined in all direction. They cut out unexpectedly without any troubleshooting codes. It had a WS-420BT equalizer, however it didn't have a head unit installed. I'm actually ok with the choice to run a boat stereo solely on the WS-420 but for the novice stereo user that may not be the best choice of products and it didn't really match the system well. The subwoofer was a pretty random 12″ Boston Acoustics but it was tucked in a nice enclosure that was perfect for an upgrade. On the tower were a pair of Wet Sounds REV8s, which were actually in good shape.
So that's what I was pretty much dealing with to design a system – 4 interior speakers (plus two additional in the bow), 2 tower speakers, a 12″ sub and a spot for either a WS-420BT with a custom Bezel or a new head unit.
Stereo Goals
If you're building out, pricing, or otherwise choosing a new stereo for your boat I would highly recommend at least jotting down a few bullet points that outline the goals you have for your system. Even if this is mental and not on paper it's good to think about. For me, when I build a system it's where I always start before I choose products. In your case, it'll help you do the same if your choosing and installing your own system but it's also helpful to have handy if you're planning on going into an installer.
Goals are what dictate the system design, speaker selection, amp configuration and so on. Here's a few of the goals that drove some of the key decisions for products for this installation:
- First and foremost I didn't want to blow out this boat and make it any sort of show boat. Simple, clean, powerful and loud was what I wanted but I also preferred to leverage as much of the OEM (if not all) factory speaker and amplifier locations.
- I did want a standard 6-speaker interior stereo with speakers on the bow however, which would require a little extra work cutting the vinyl and installing/wiring new speakers up there.
- I wanted the installation of this system to be very simple and fast. Most of the installs that I do aren't in a shop and I'm limited on time. You'll see this further in the article but I do a LOT of prep work in my home including building a drop-in amplifier rack (pretty much drop-in).
- A well-matched and powered system is always a must. I loathe installers that cut corners and short a system of power, resorting to a combination of the head unit and amplifiers to power speakers. This system was to have a dedicated channel for every speaker in the boat and perfectly matched from a specs perspective (power output @ 4 ohms).
- This wasn't necessarily a choice in this installation but I like to use one manufacturer for as many parts of a system as possible unless there's better matched products out there or I have a niche requirement that would make me break from using one manufacturer. Since Fusion was helping with the products and their configurations were perfect for what I was looking for I didn't have to really worry about this.
The Setup
Once I knew what I was looking for in a stereo, how I was going to install it, and what I had to play with in terms of the platform (boat OEM configuration), I put together the system list. Here's what I decided on and installed:
- Speakers:
- Interior:
- (3x) Fusion SG-FL652SPC : Signature Series 3 6.5″ Coaxial Marine Speakers
- Tower:
- (1x) Fusion SG-FLT882SPC : Signature Series 3 8.8″ Marine Tower Speakers
- Subwoofer:
- (1x) Fusion SG-SL122SPC : Signature Series 3 12″ Marine Subwoofer
- Interior:
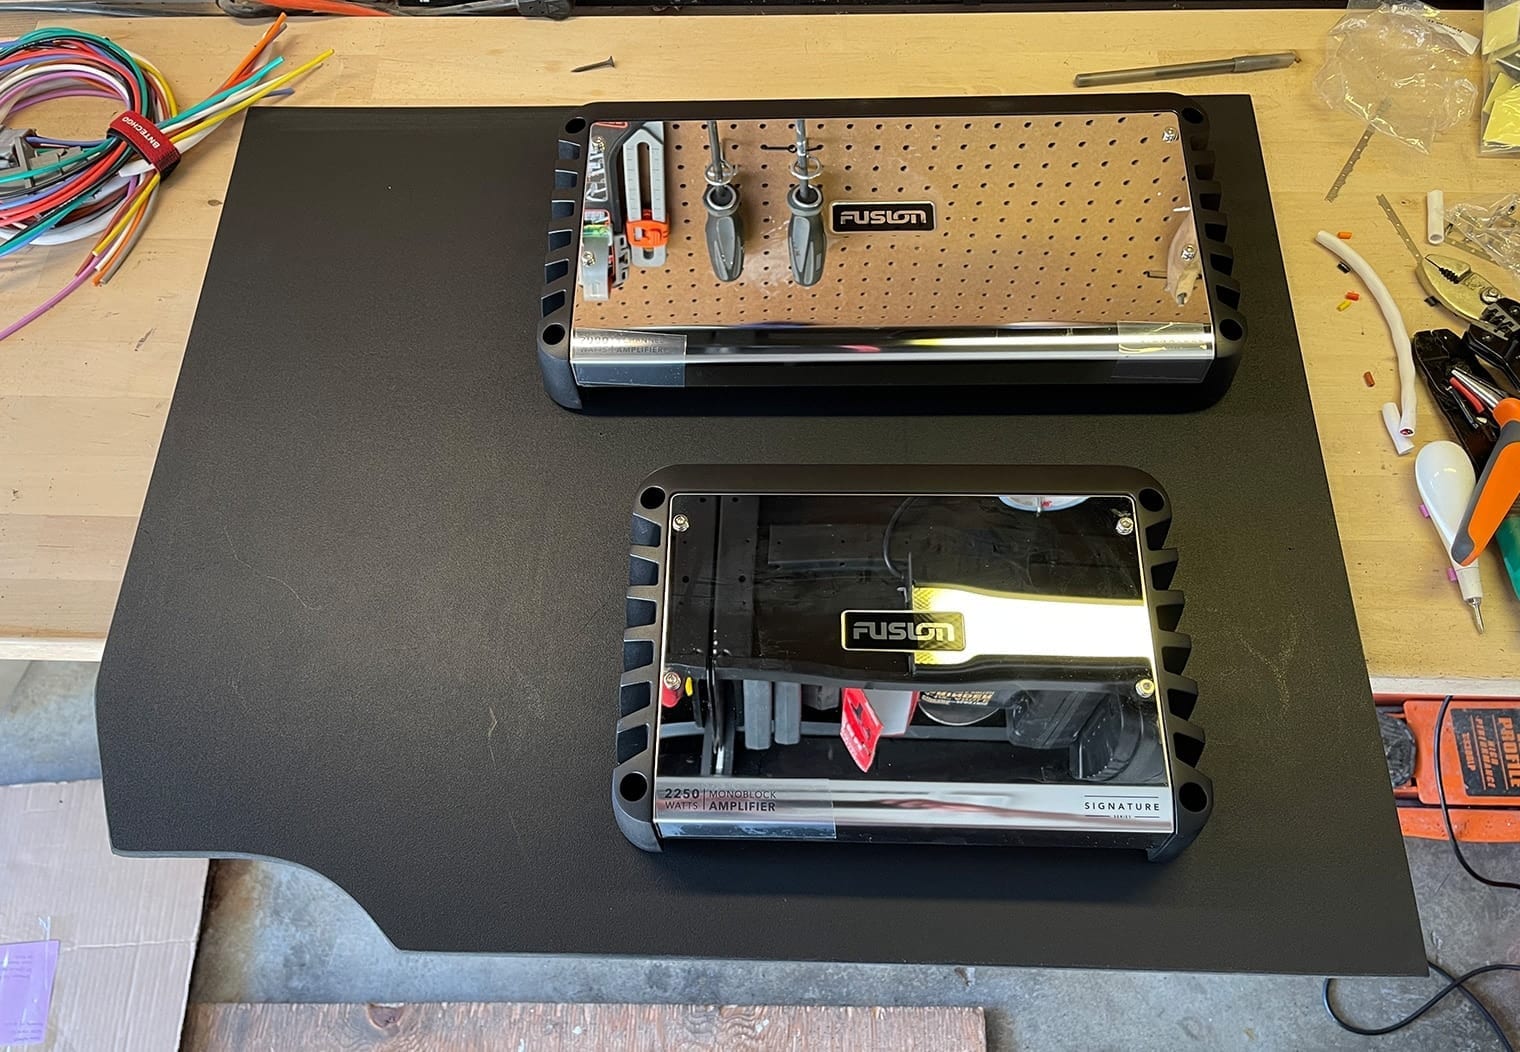
- Amplifiers:
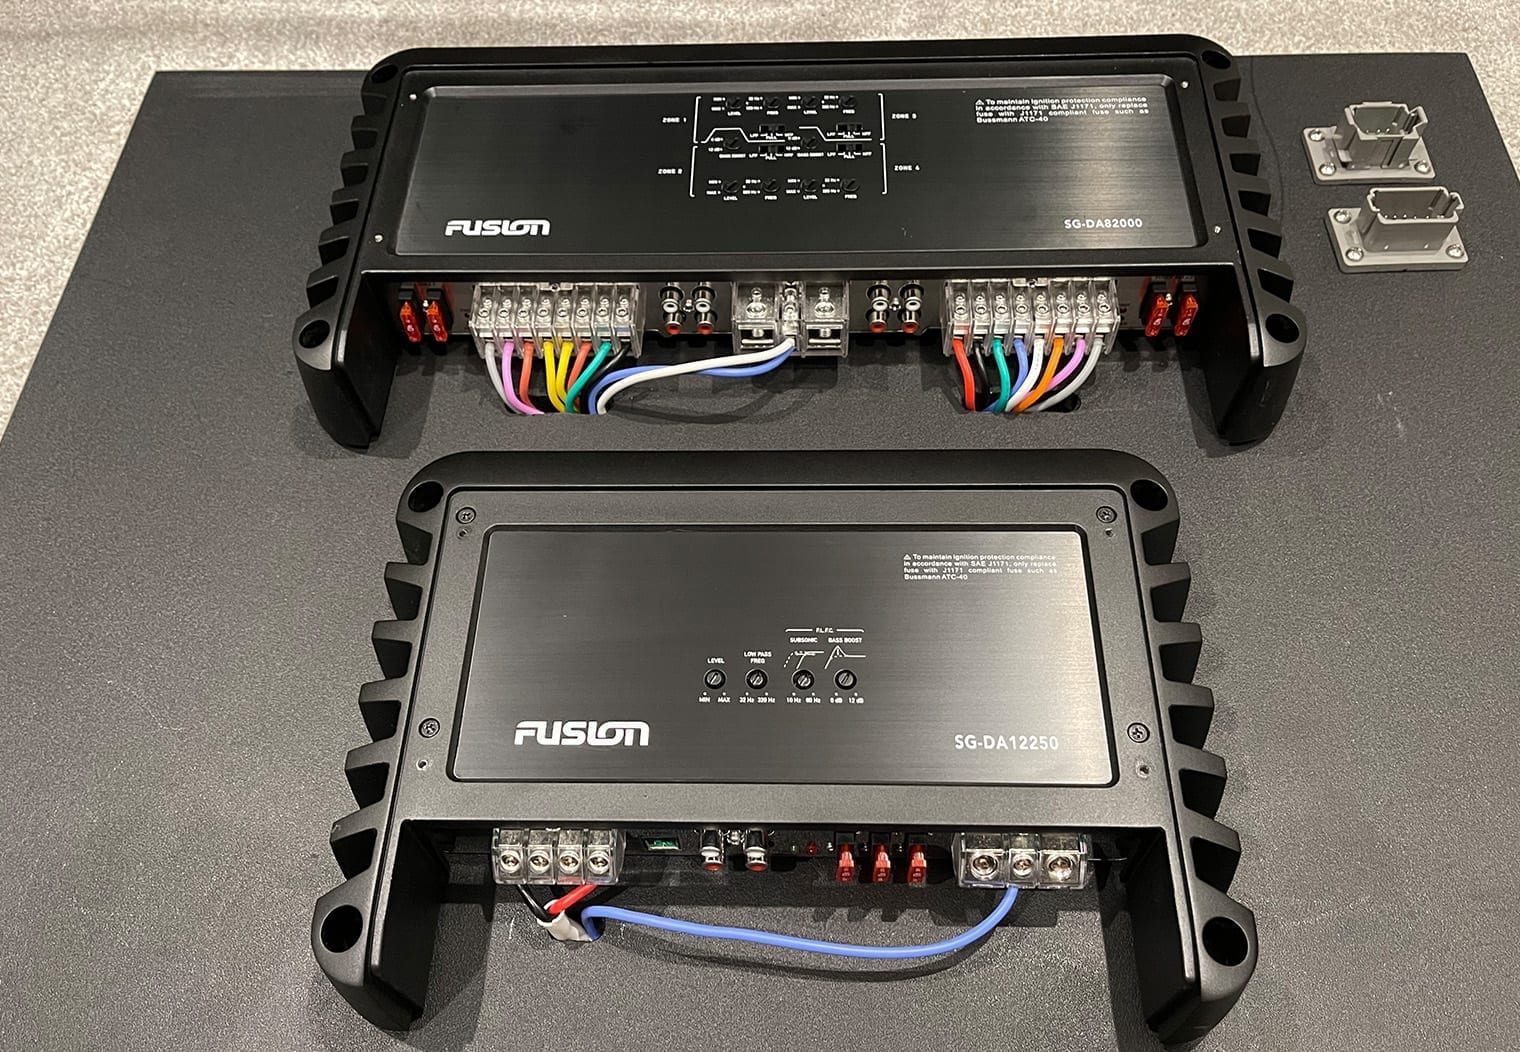
- Fusion SG-DA82000 : Signature Series 2000W 8ch Marine Amplifier
- Fusion SG-DA12250 : Signature Series 2250W Monoblock Marine Amplifier
- Head Unit:
- Fusion MS-RA770 : Marine Head Unit
Speaker Installation
Interior Speakers
I used 3 pairs of Fusion's SG-FL652SPC 6.5″ coaxial speakers for this upgrade. Fusion also makes a 7.7″ and 8.8″ version of these coaxials, but since I wanted to keep the installation straight forward and knew we'd have a subwoofer and 8.8″ tower speakers to cover the mids and lows well enough we went with the 6.5″ model.
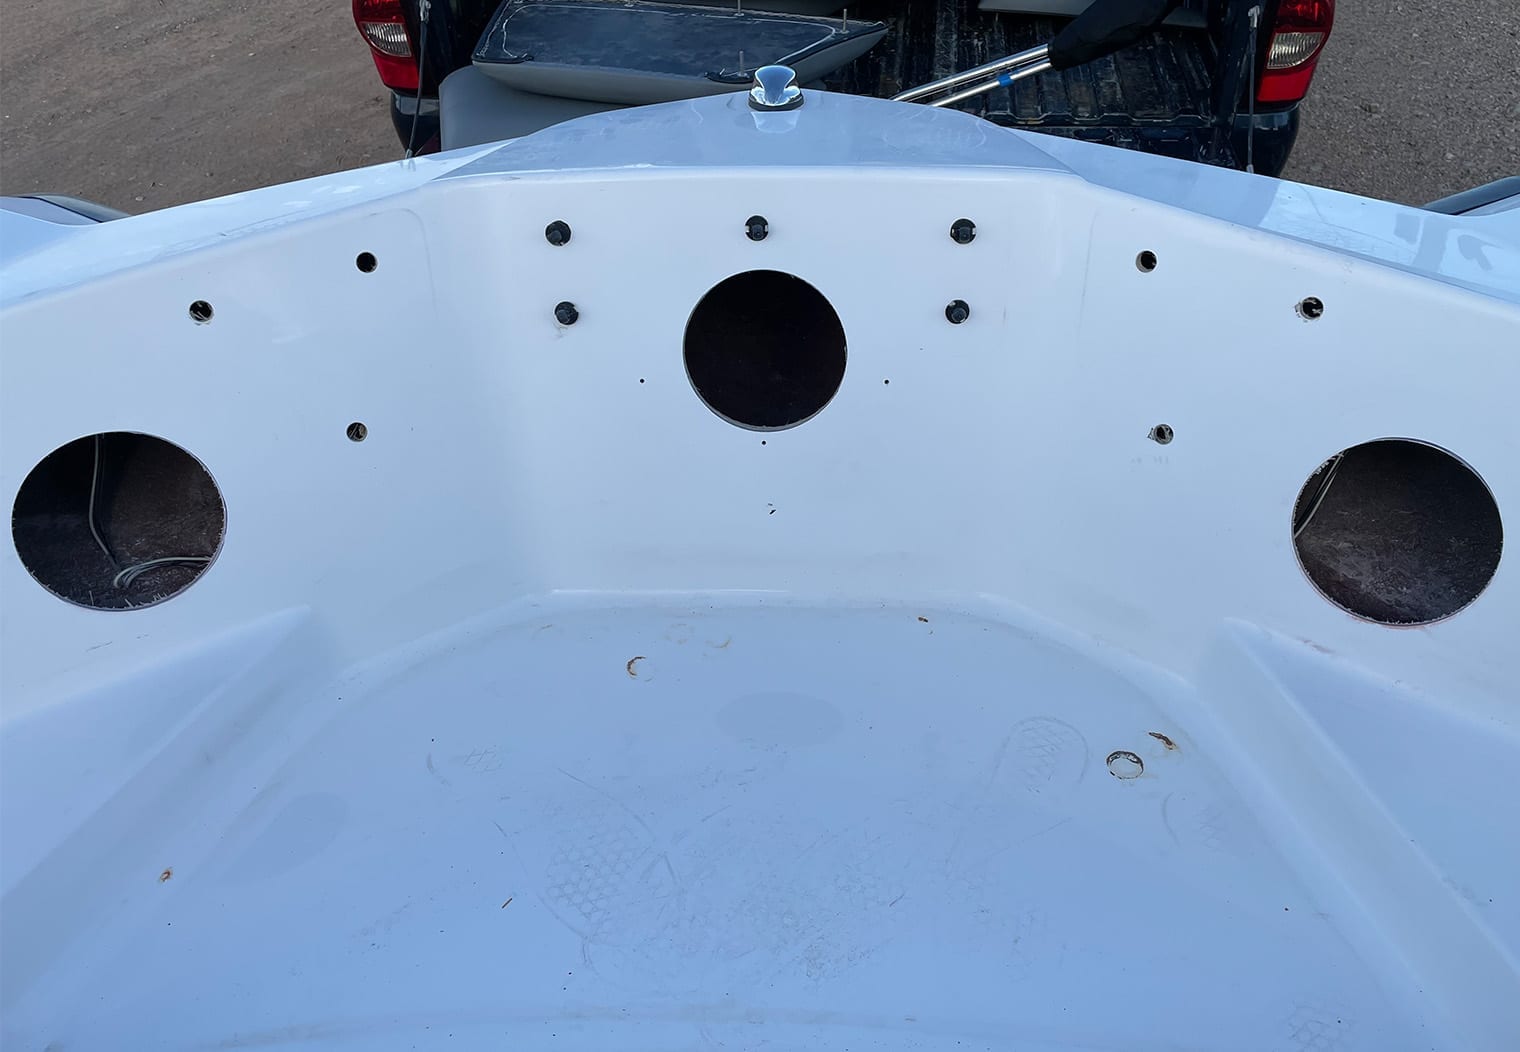
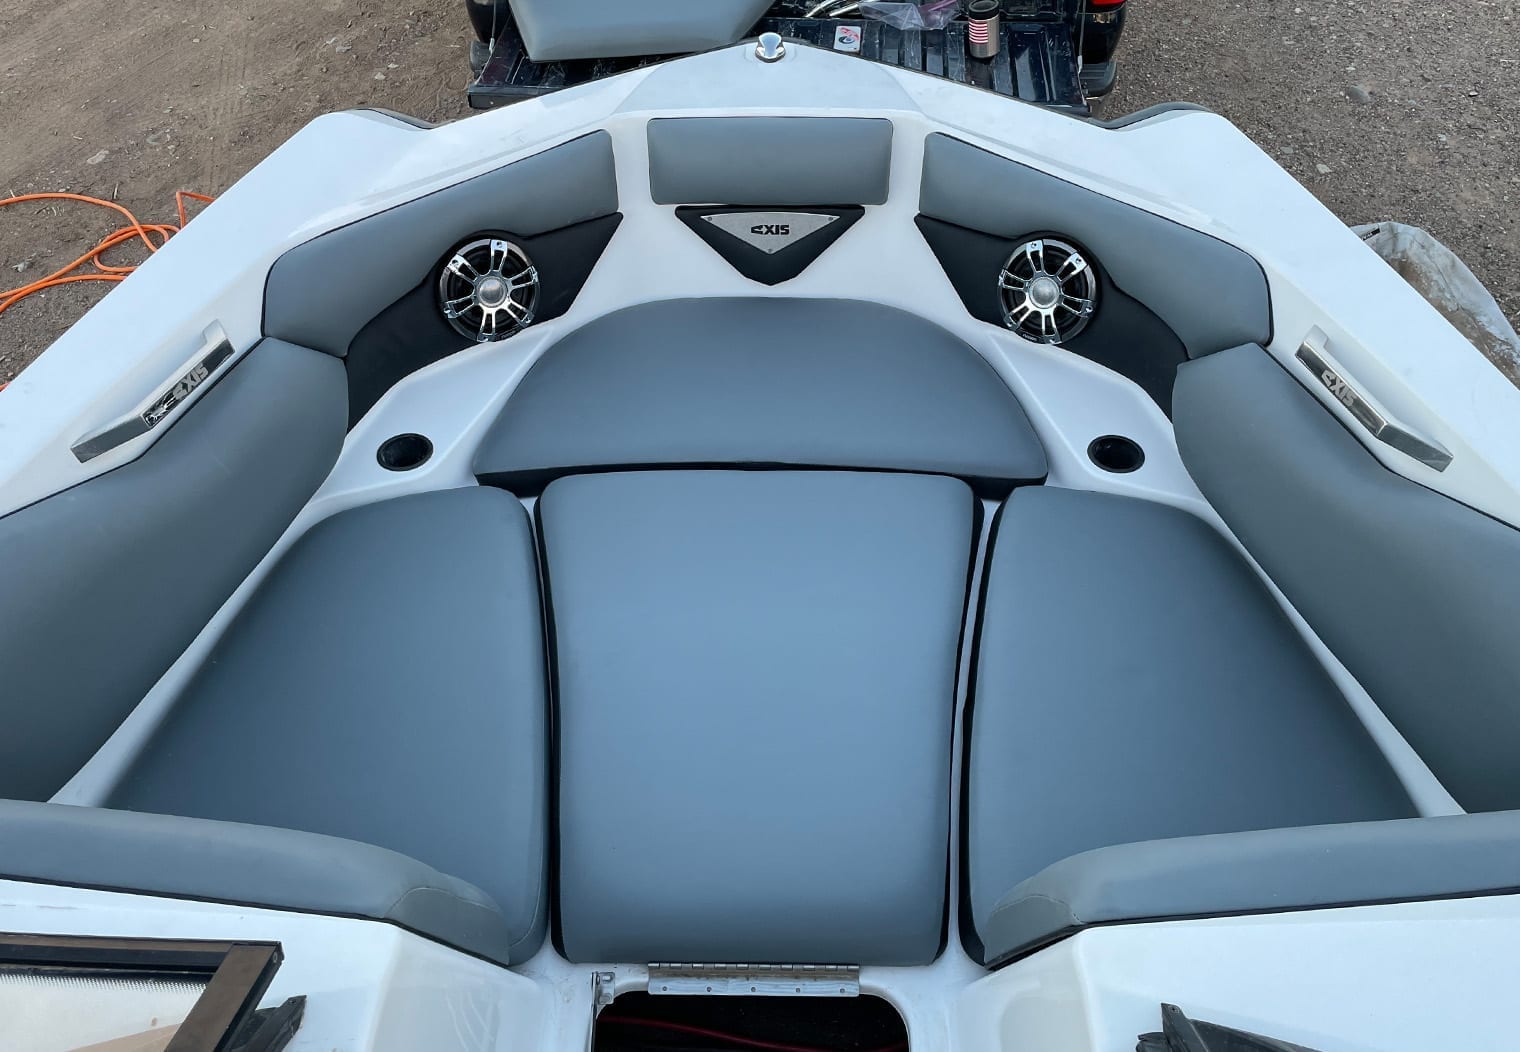
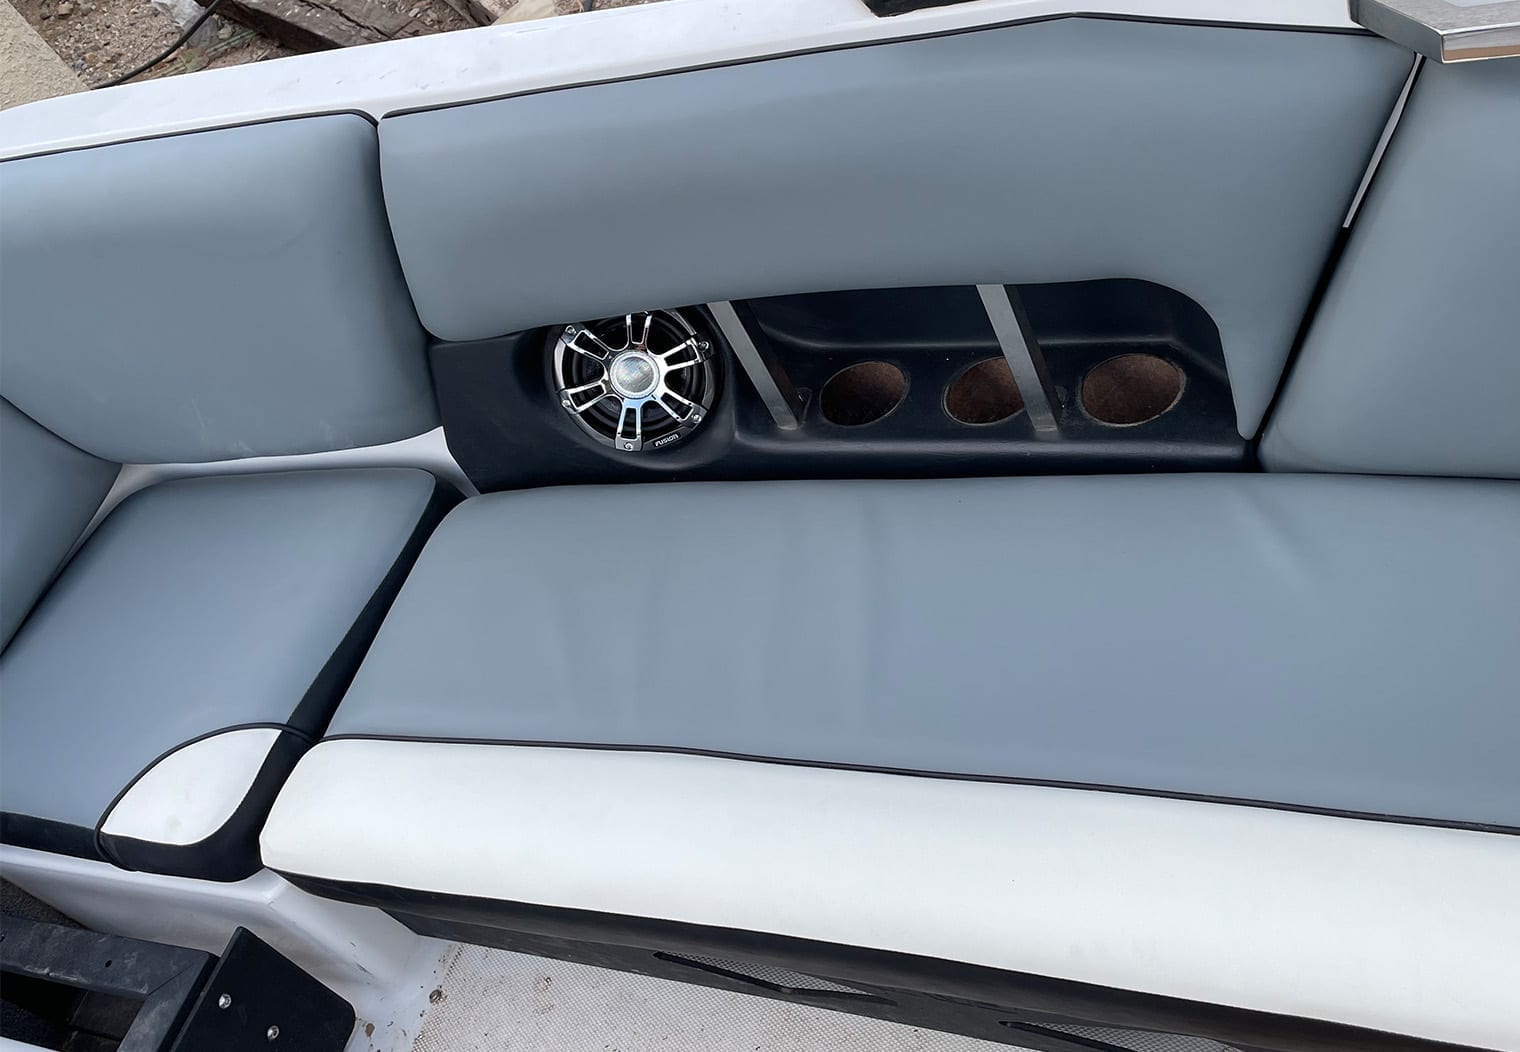
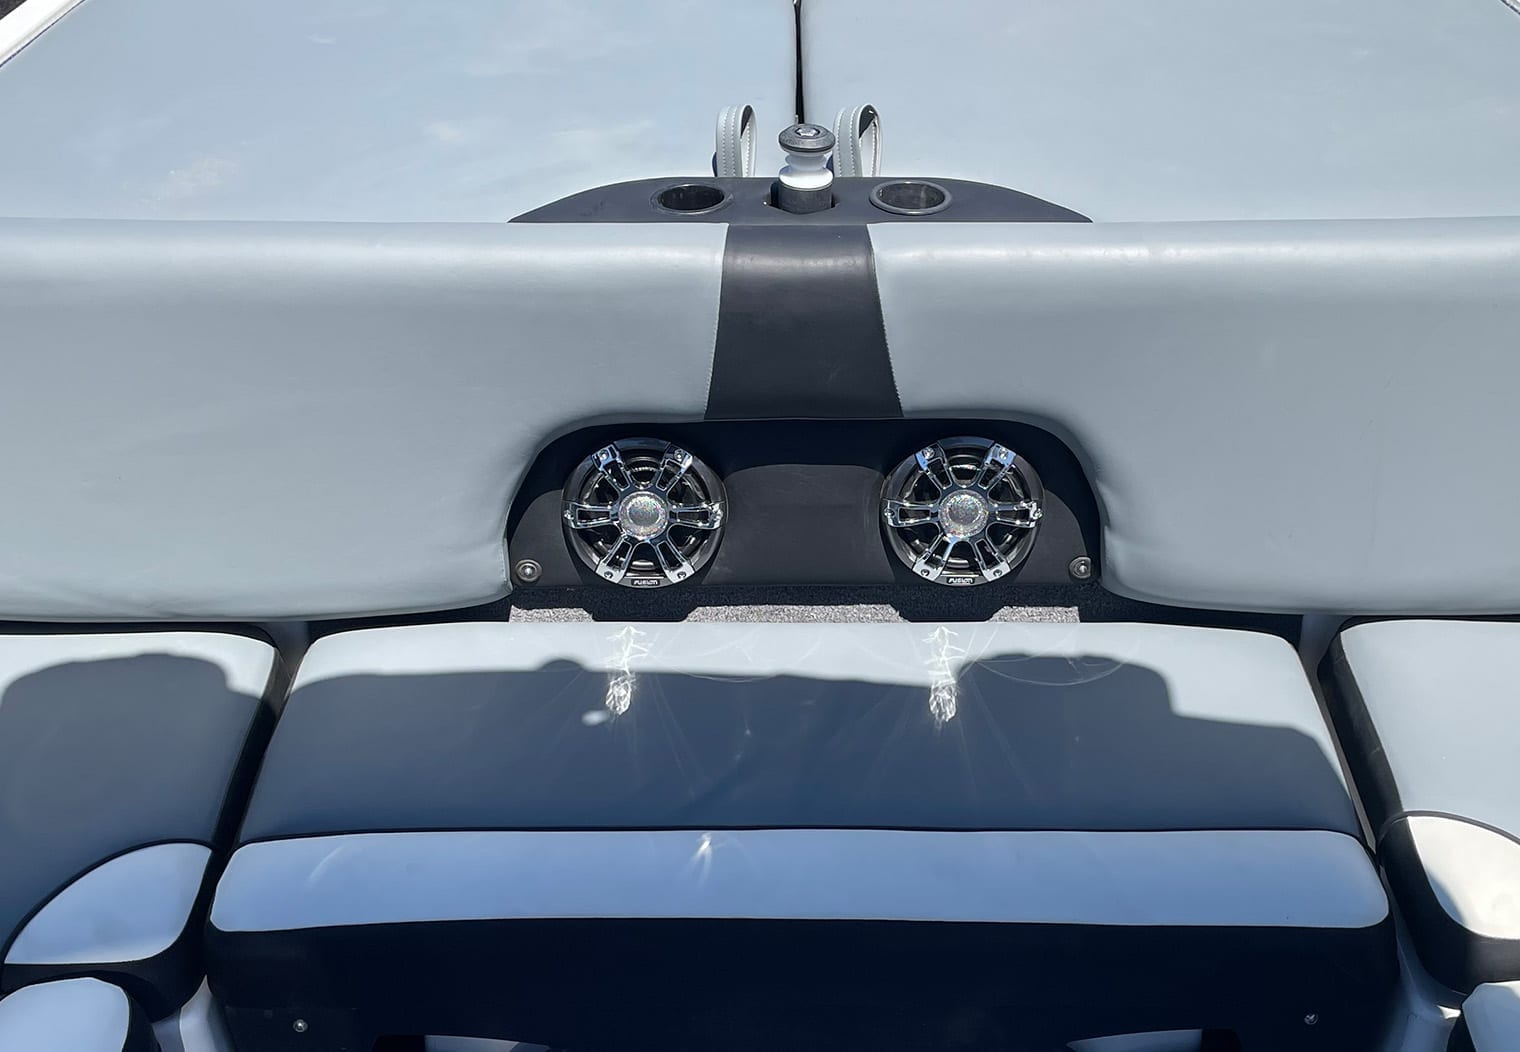
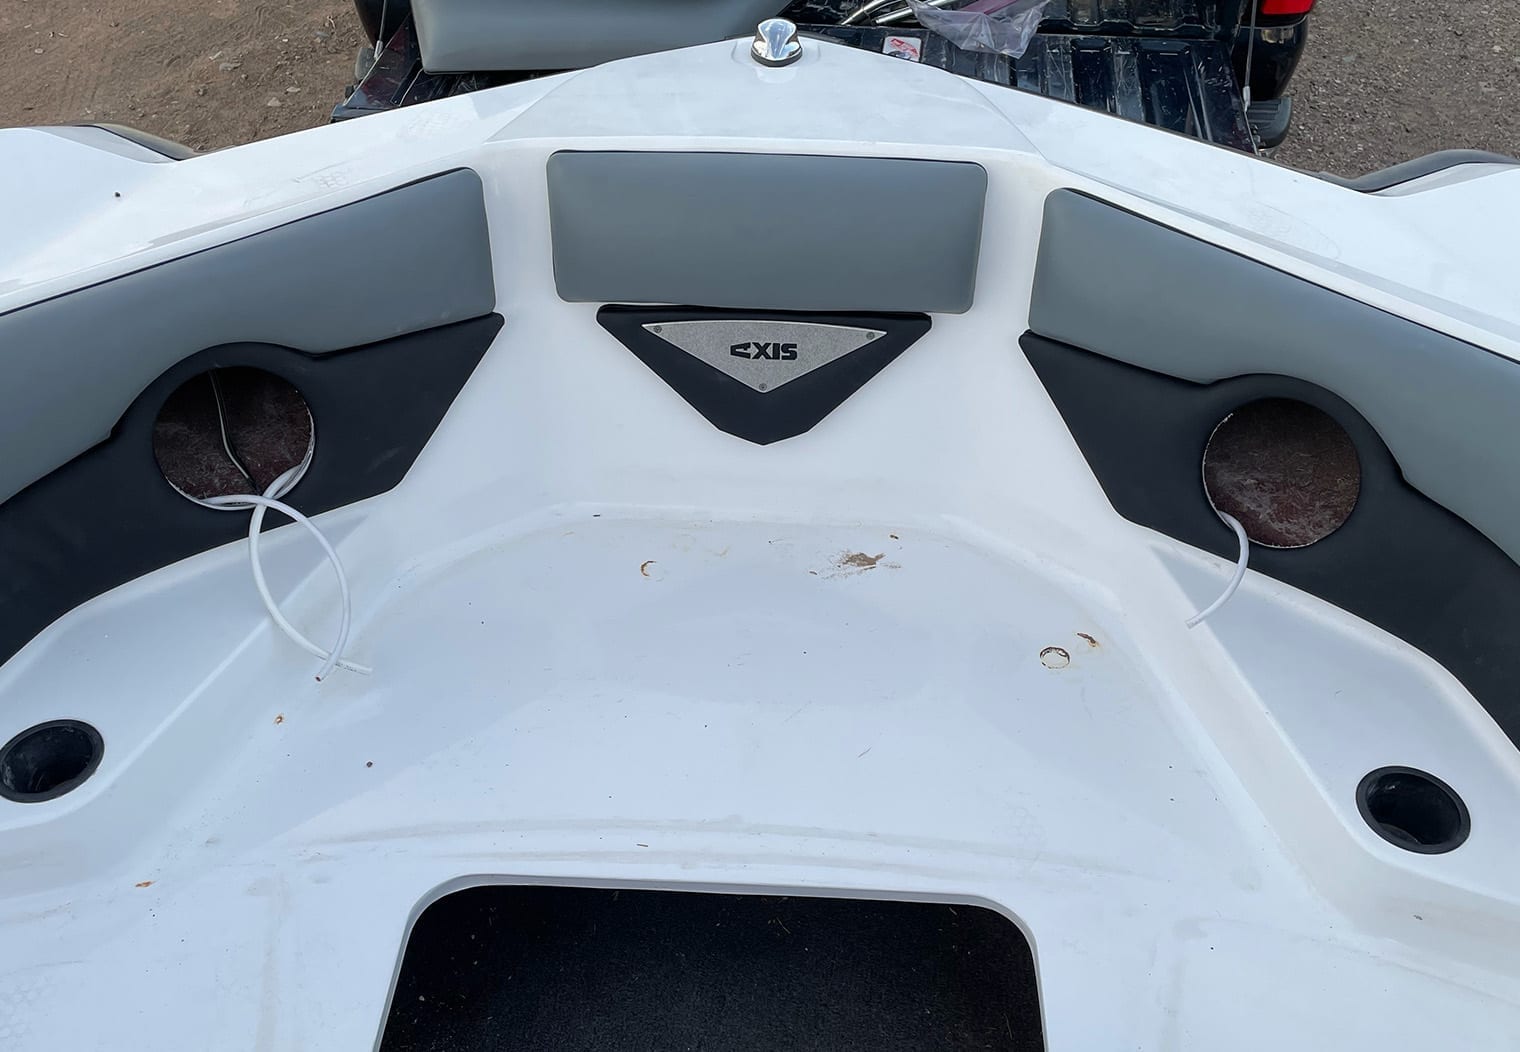
Like I mentioned earlier, from the factory this Axis A22 didn't come from the factory with speakers up in the bow. It only had four interior 6.5″ coaxial speakers with two tower speakers leaving the folks in the bow listening to wind in their ears. This was one of the first things I wanted to resolve and knew would be a huge upgrade for the boat. Come to find out, Axis has an upgraded stereo configuration that would come with these bow speakers and the interior cushion (not the fiberglass) were pre-cut with speaker holes and then covered with vinyl. So what I did was used the pre-cut holes from the vinyl cushions at the front to outline the holes in the fiberglass of the bow. Then, using a jigsaw, carefully cut the two speakers out of the fiberglass. And since this boat was re-upholstered during the process of upgrading the stereo, the interior cushions were just re-wrapped with a cutout for the speaker holes that were already cut out of the cushion panel.
The result was a factory looking bow speaker setup on this axis. And all-in-all, a pretty simple upgrade. Even if you aren't re-upholstering this boat, the surrounding speaker cushion panels should already have a pre-cut hole for speakers so the only thing you'd need to do is mark the speaker holes in the fiberglass, cut them, and then cut out the vinyl to make way for the speakers. Here's a few shots of the new speakers in the bow and the process:

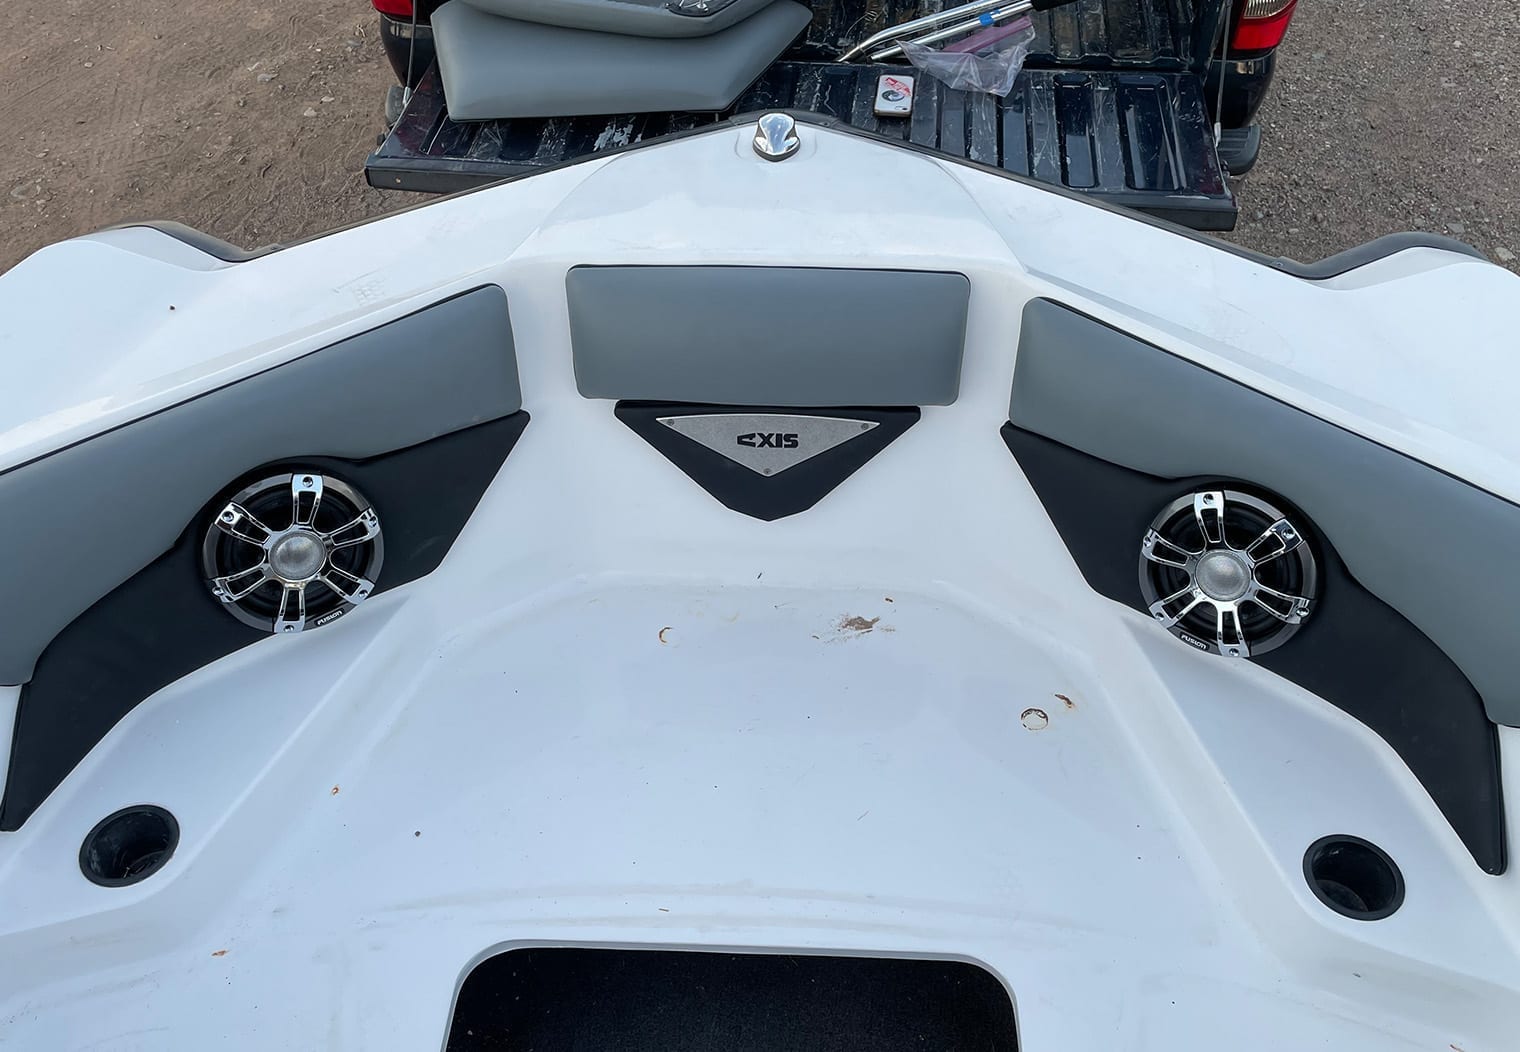
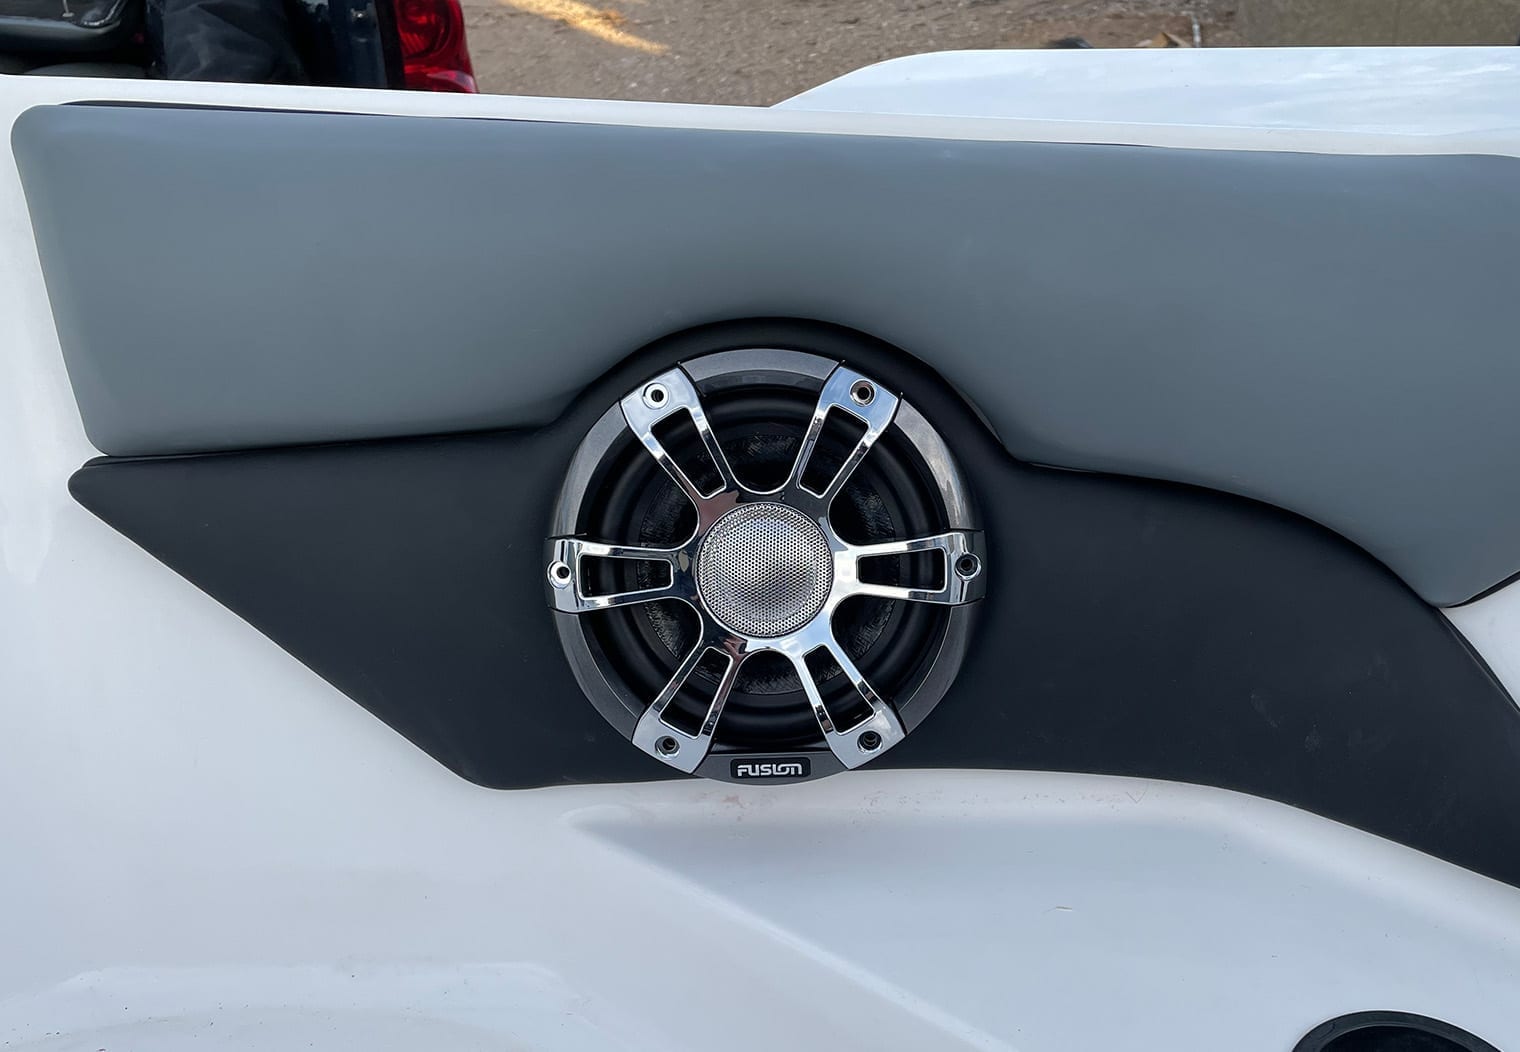
With the exception of the bow speakers, the remaining speaker installation was a direct swap. It was as simple as unscrewing and re-installing the new speakers since the originals were 6.5″ coaxial marine speakers and the new ones were the same. We did re-wire the entire boat though prior to re-installing the speakers. You can read up more about that in the Amplifier Installation & Wiring section. Here's a couple photos of what the new Fusion speakers look like after installing. Overall, I was really happy with their performance, looks and quality. You can read up more about these Fusion Signature Series 3 coaxial speakers in our Fusion Coaxial Speakers First Look Review.

Tower Speakers
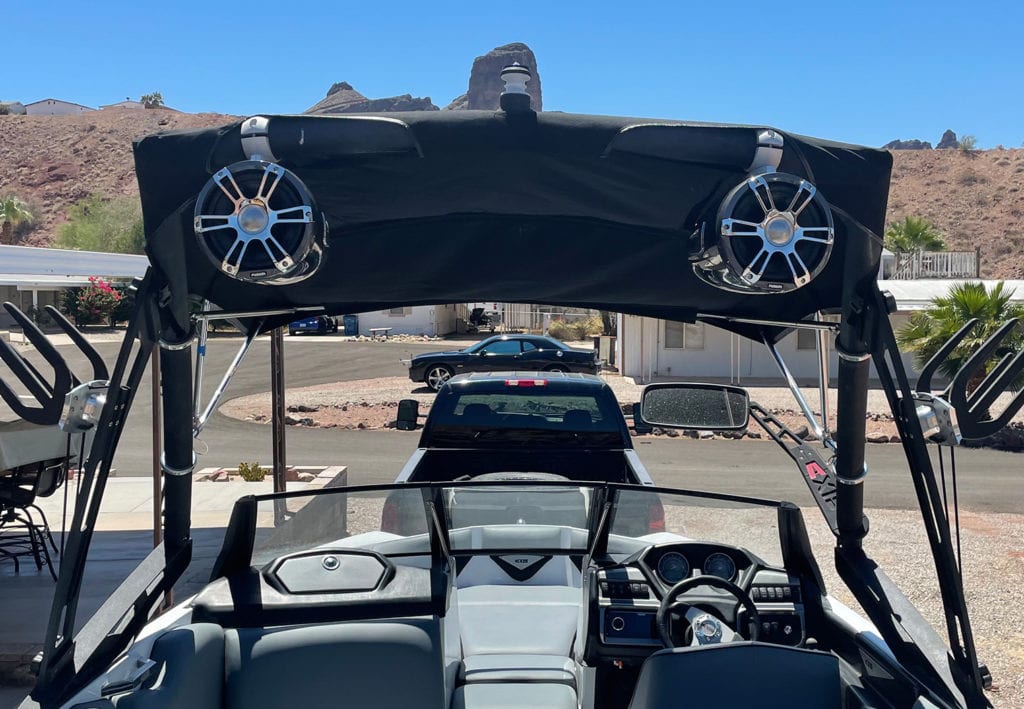
With the interior speakers installed, I moved onto the towers. Prior to this install, the boat had two REV8s installed already. But since I was installing all Fusion and would be using this boat primarily for wake surfing, I chose the 8.8″ sports chrome model for the towers. It was pretty much a direct swap with the existing tower speakers apart from the re-wire. When combined with Fusion's swivel clamp mounts, these speakers are a pretty powerful setup. They're large – 8.8″ is the outer diameter of the speaker casing. And we really loved the swivel clamp feature. I always recommend that you put at least one pair of swivel clamps on every tower I install speakers on so that if you wanted to direct the music somewhere other than behind or inside your boat, you can have that option. It's a great feature at the sandbar or if you're beached somewhere.
These tower speakers sounded fantastic with the amplified setup I used (see the Amplifier Installation & Wiring section). They're loud and have a great full-range sound. They aren't horn loaded, so wakeboarding 65+ feet behind the boat might be a tough one for these towers but they also don't struggle from the typical harsh highs that come along with the horn loaded speakers. All in all, these are a great choice for a setup like this.
The one thing I would recommend if you have an Axis A22 is to check the tower tubing diameter before you purchase these. This A22 had about a 3 1/8″ diameter tube which was too large for the Fusion swivel clamps. We had to modify them which was definitely less than ideal if you're trying to stay away from a custom setup. Also, one piece of feedback I would have for the Fusion team is to improve the swivel locking mechanism. On the side of the swivel clamps is a locking bolt but the bolt came loose once or twice while towing and in chop. To fix this, I (slightly) drilled out a slot out in the normal fixed speaker position for the nut to sink into to lock the speakers better. This feedback aside, totally happy and impressed with these speakers and think they are a great option. If you're interested in reading more about the tower speakers, we did an unboxing and first look review of the signature series 3 tower speakers too. They also made our list of best wakeboard tower speakers! Here's a look at the new tower speakers on the boat!
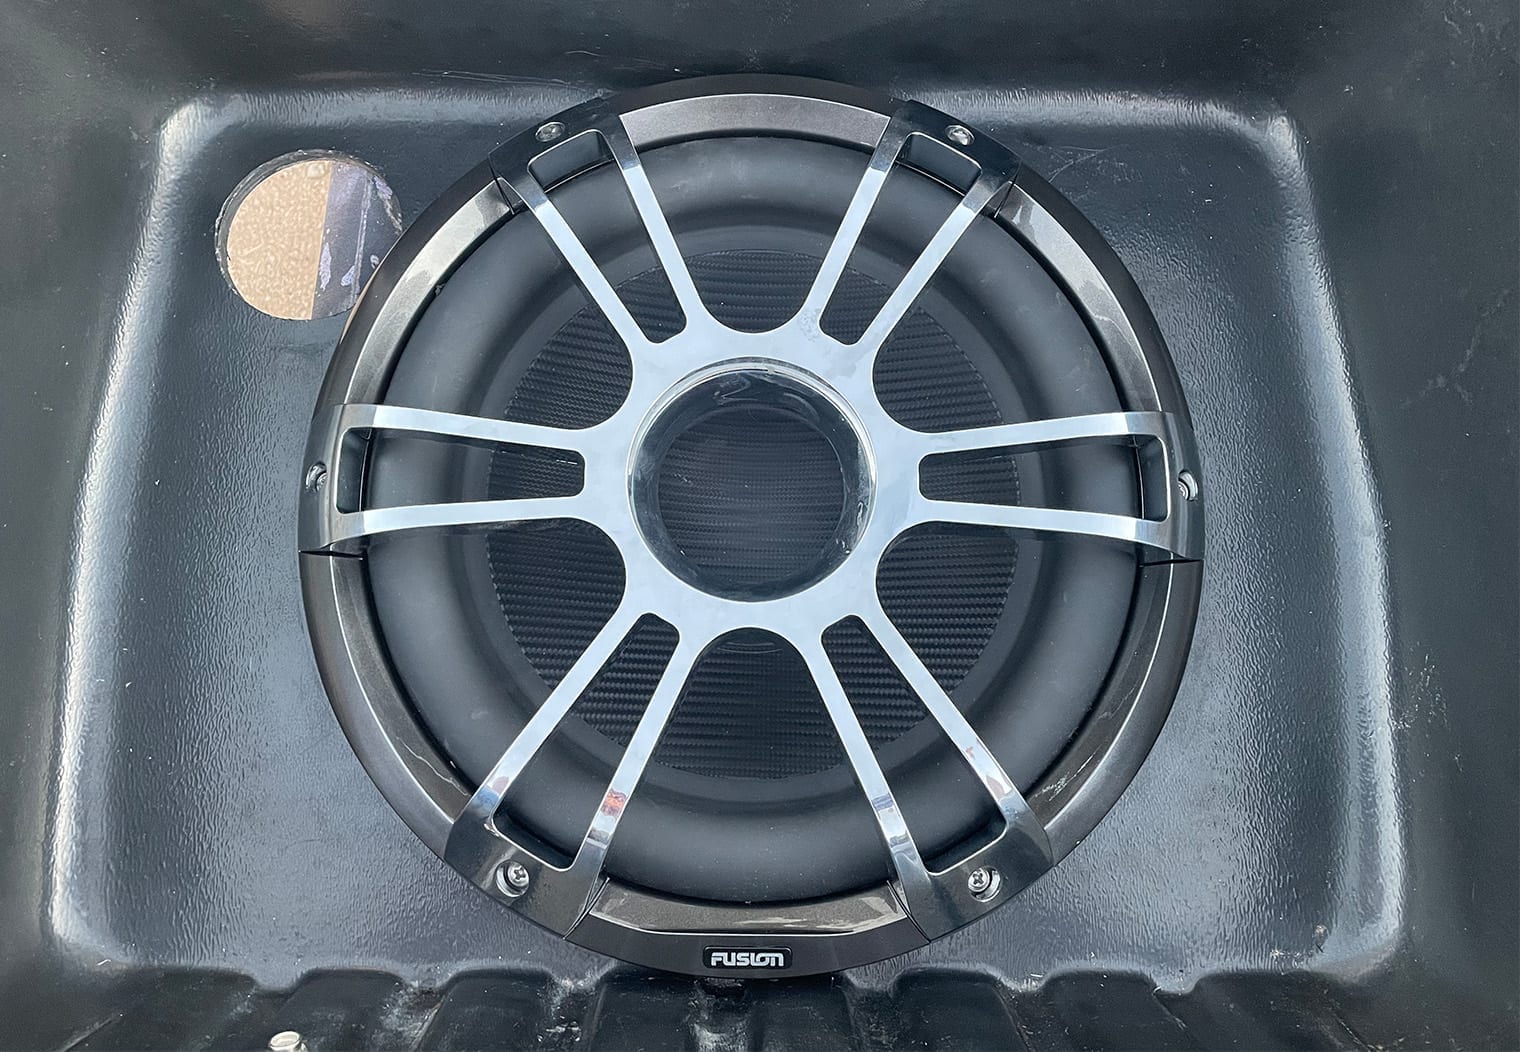
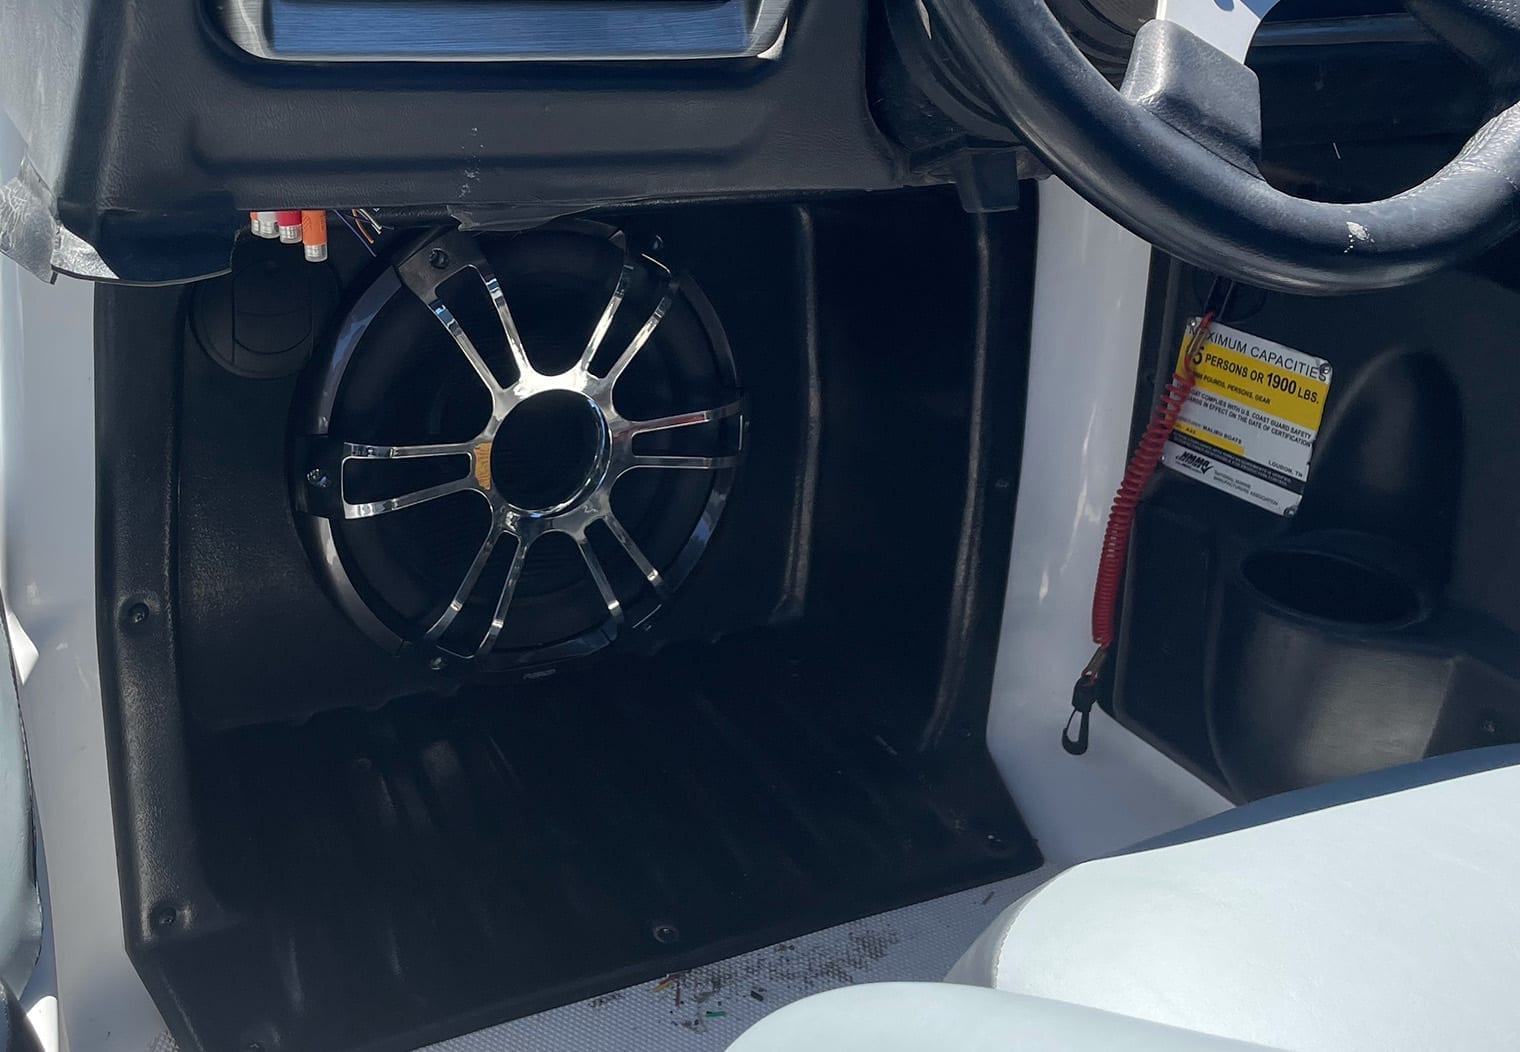
Subwoofer Installation
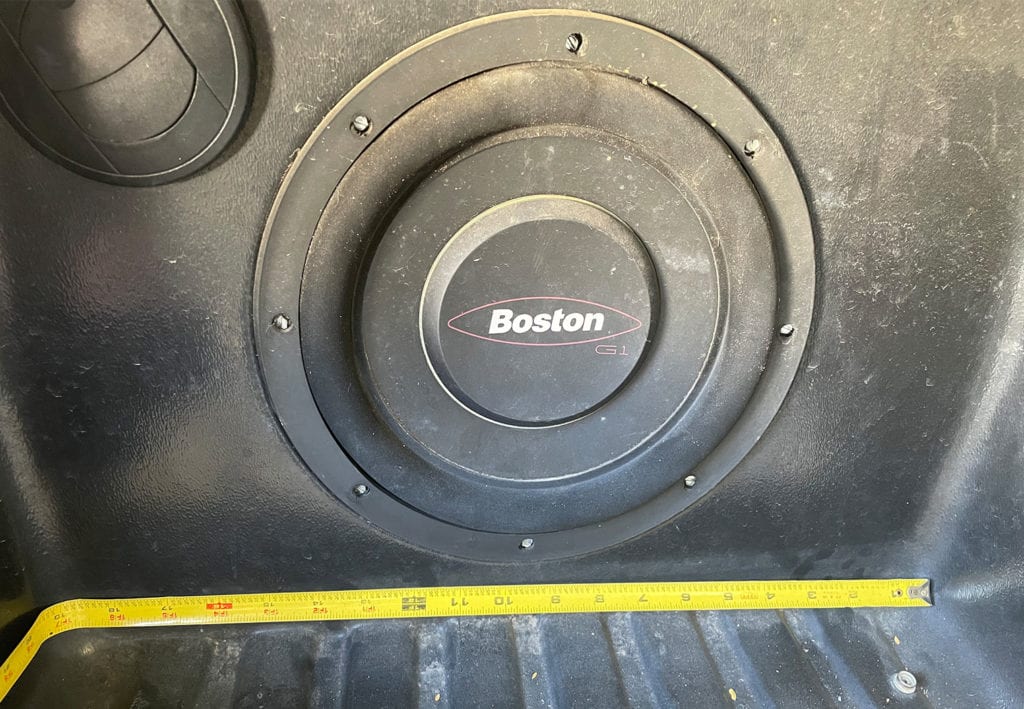
For the subwoofer, I was really excited to try out Fusion's new Signature Series 3 12″. This sub is an oversized 12, with an outer diameter of about 14″. Inside the Axis A22, before upgrading it looked like the subwoofer was a cheap Boston G1 10″ that was installed under the feet of the driver at the helm. I remember installing these Boston G1s in cars in the late 2000s as a super cheap/entry level option so I was surprised to see it in this application. Here's a look before it was upgraded.
I knew it would be a close fit to put this massive 12″ in this existing enclosure without completely removing and filling the heater vent and altering the edges of the panel itself. And it ended up being closer than I thought, but it worked.
I removed the panel, significantly widened the subwoofer opening and centered the new subwoofer using a jig saw and following a cutout that was based on the template that came with the Fusion sub.

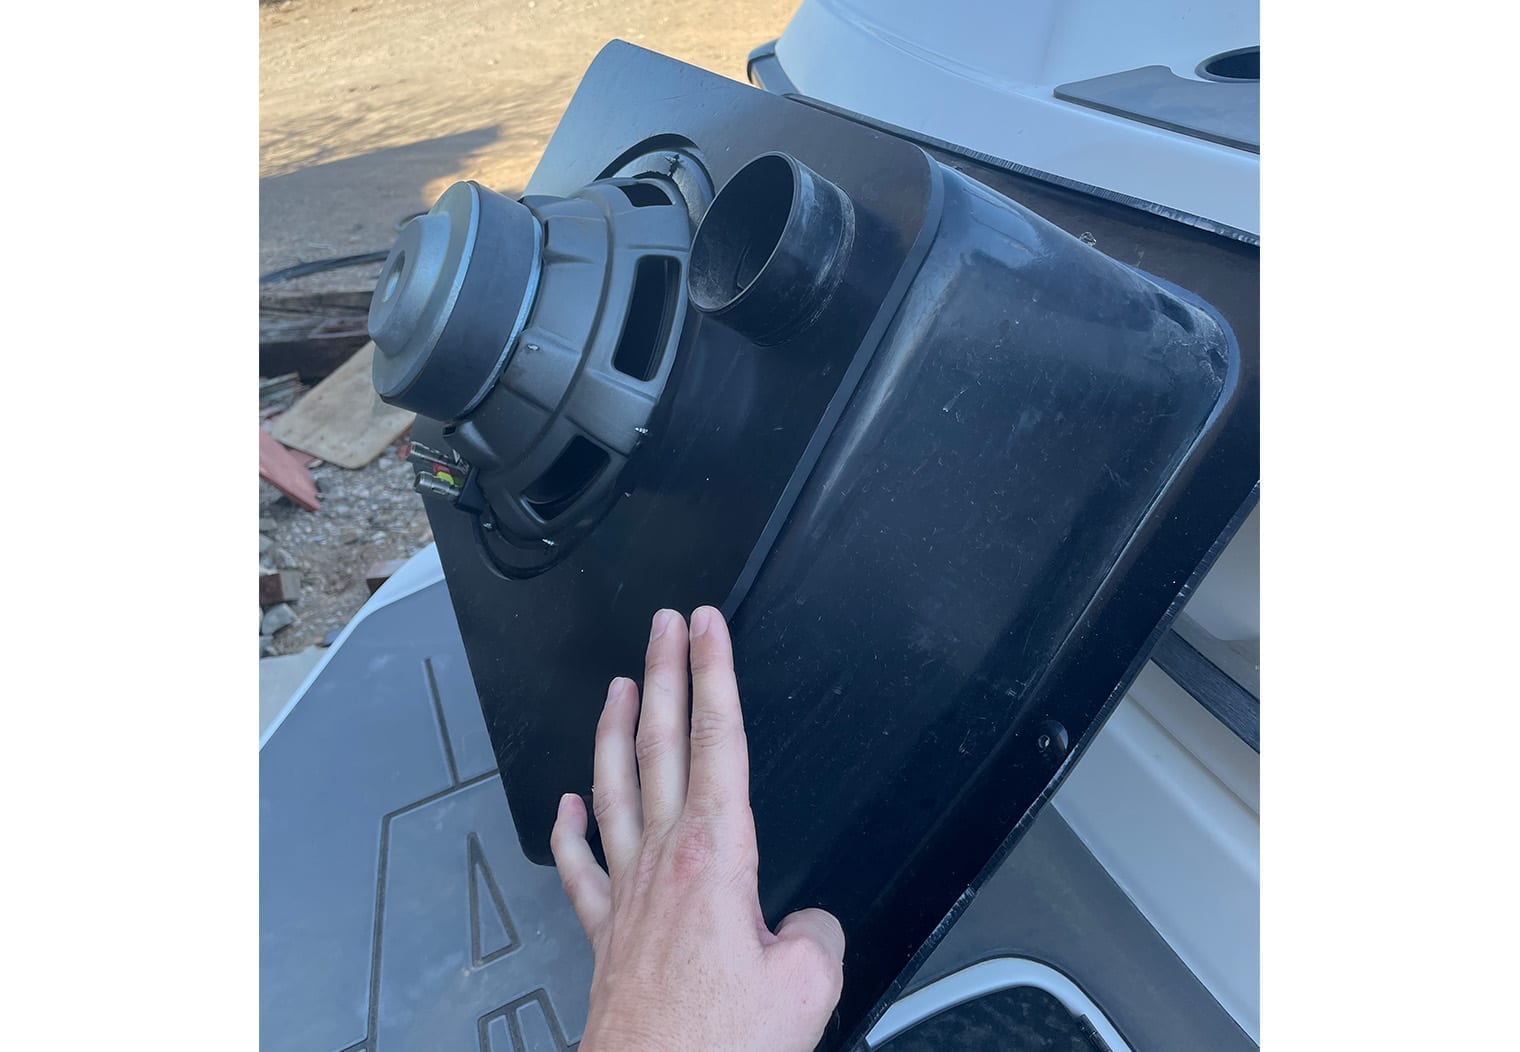
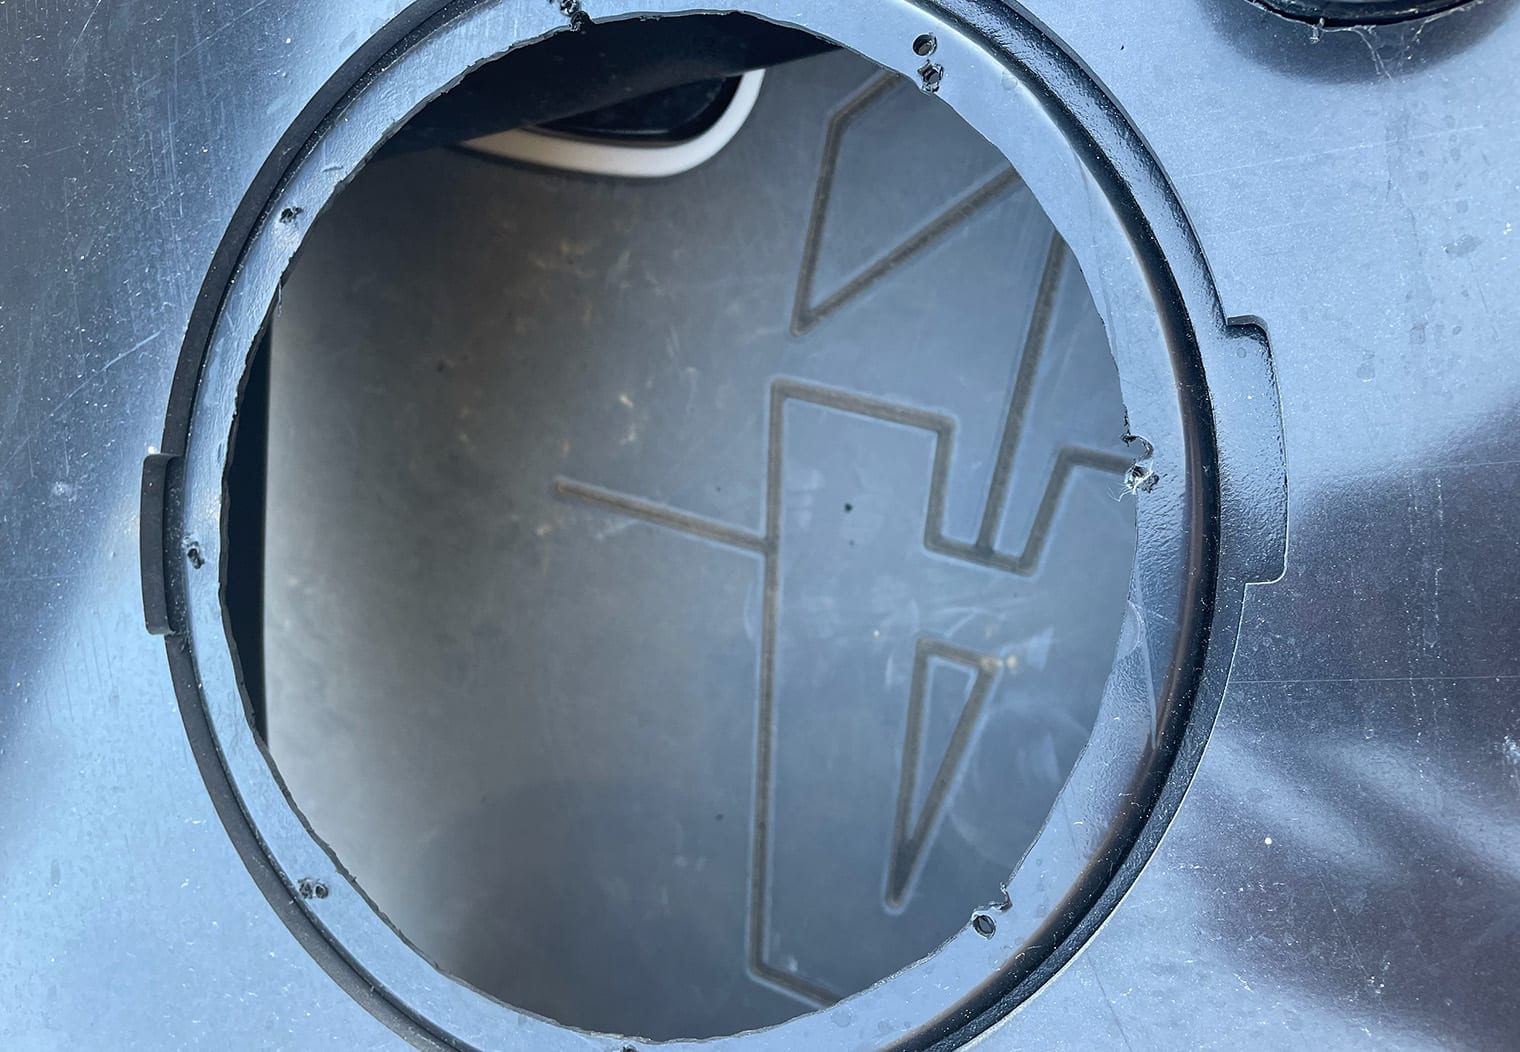
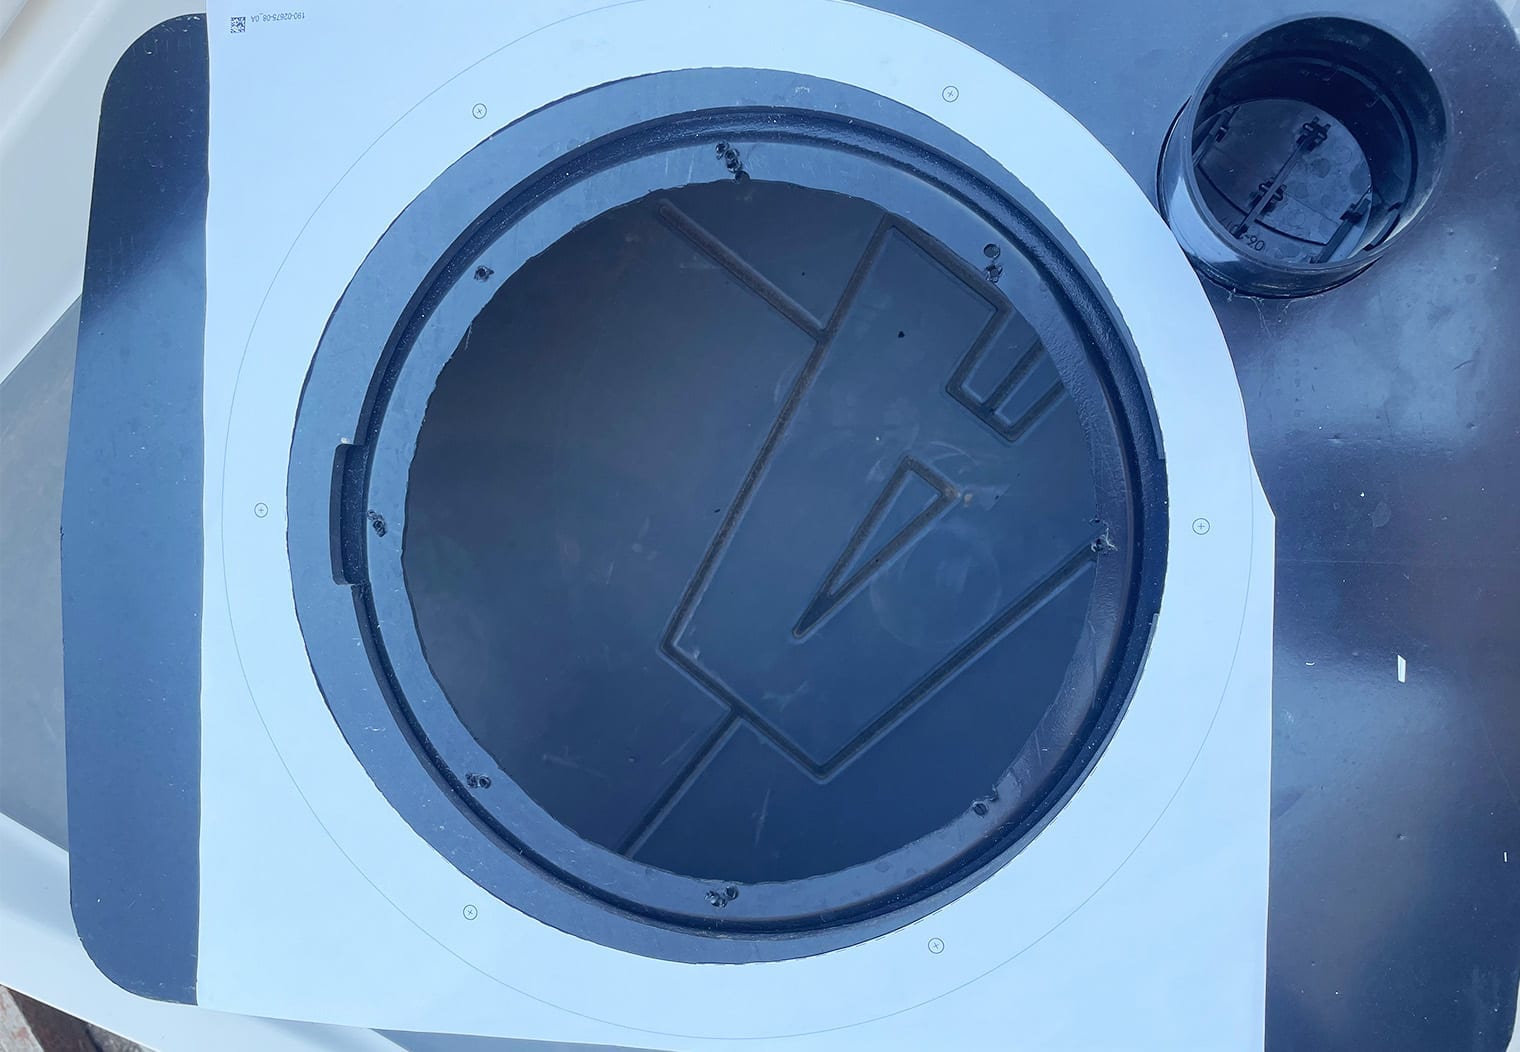
After cutting out the new subwoofer's mounting diameter, the first thing I did was ensured the outer diameter fit of the sub. The outer edge of the grille was just a little too big for the top of the subwoofer panel, and it overlapped just a little bit with the heater vent. In order to get this sub to fit, I heated up the back side of the top of the subwoofer's panel to make a small portion of the plastic malleable and then while it was still hot, dropped the subwoofer back into the panel with some pressure to bend out the heated up plastic in order to make it fit. It was only about 1/4 inch difference. Once that was done, I marked the very edge of the heating vent on the top left side of the panel and cut out a small piece in order to make the subwoofer edge fit. Here's how it came out!
Amplifier Installation & Wiring
I always have fun with wiring up marine amplifiers and building amp racks. I normally do these at home so I have a ton of time to be super meticulous. I can never stress this enough though – choose your amplifiers to match the specs of the speakers they'll be powering. Don't cheap out and turn your stereo into a spaghetti wired system with power pulling from amplifiers, head units and wherever else you can find. The cleaner and simpler your amplifier setup is, the less likely you are to mess something up (if you're doing it yourself) and the more control you'll have over your system to tune and really optimize the sound.
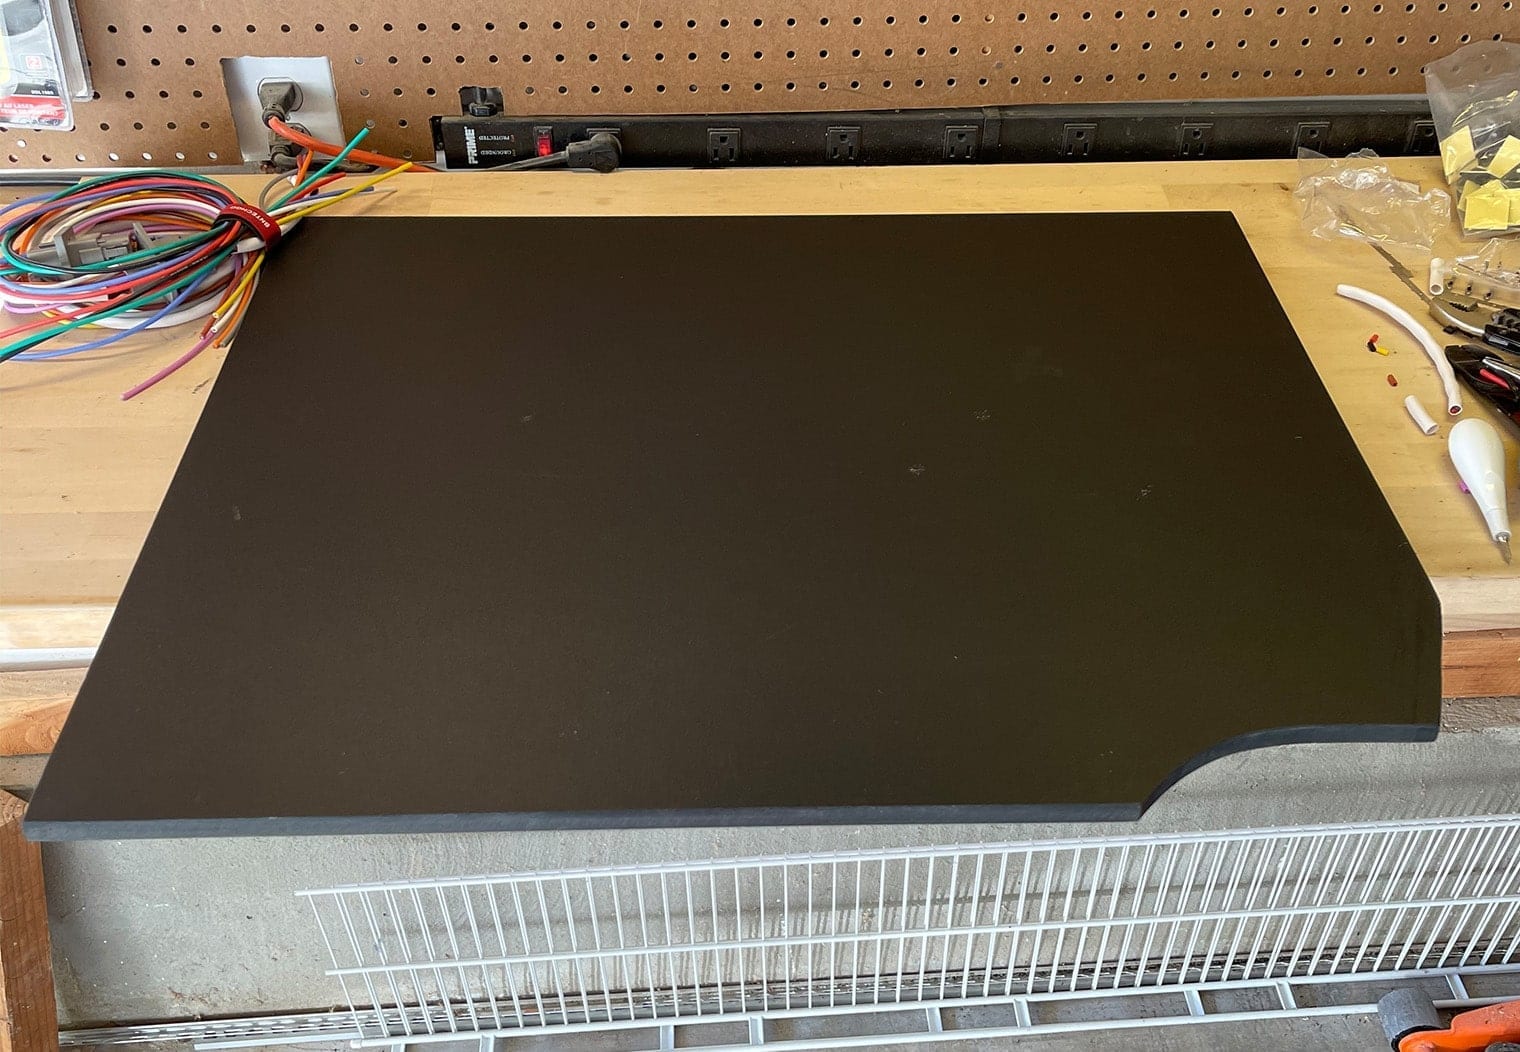
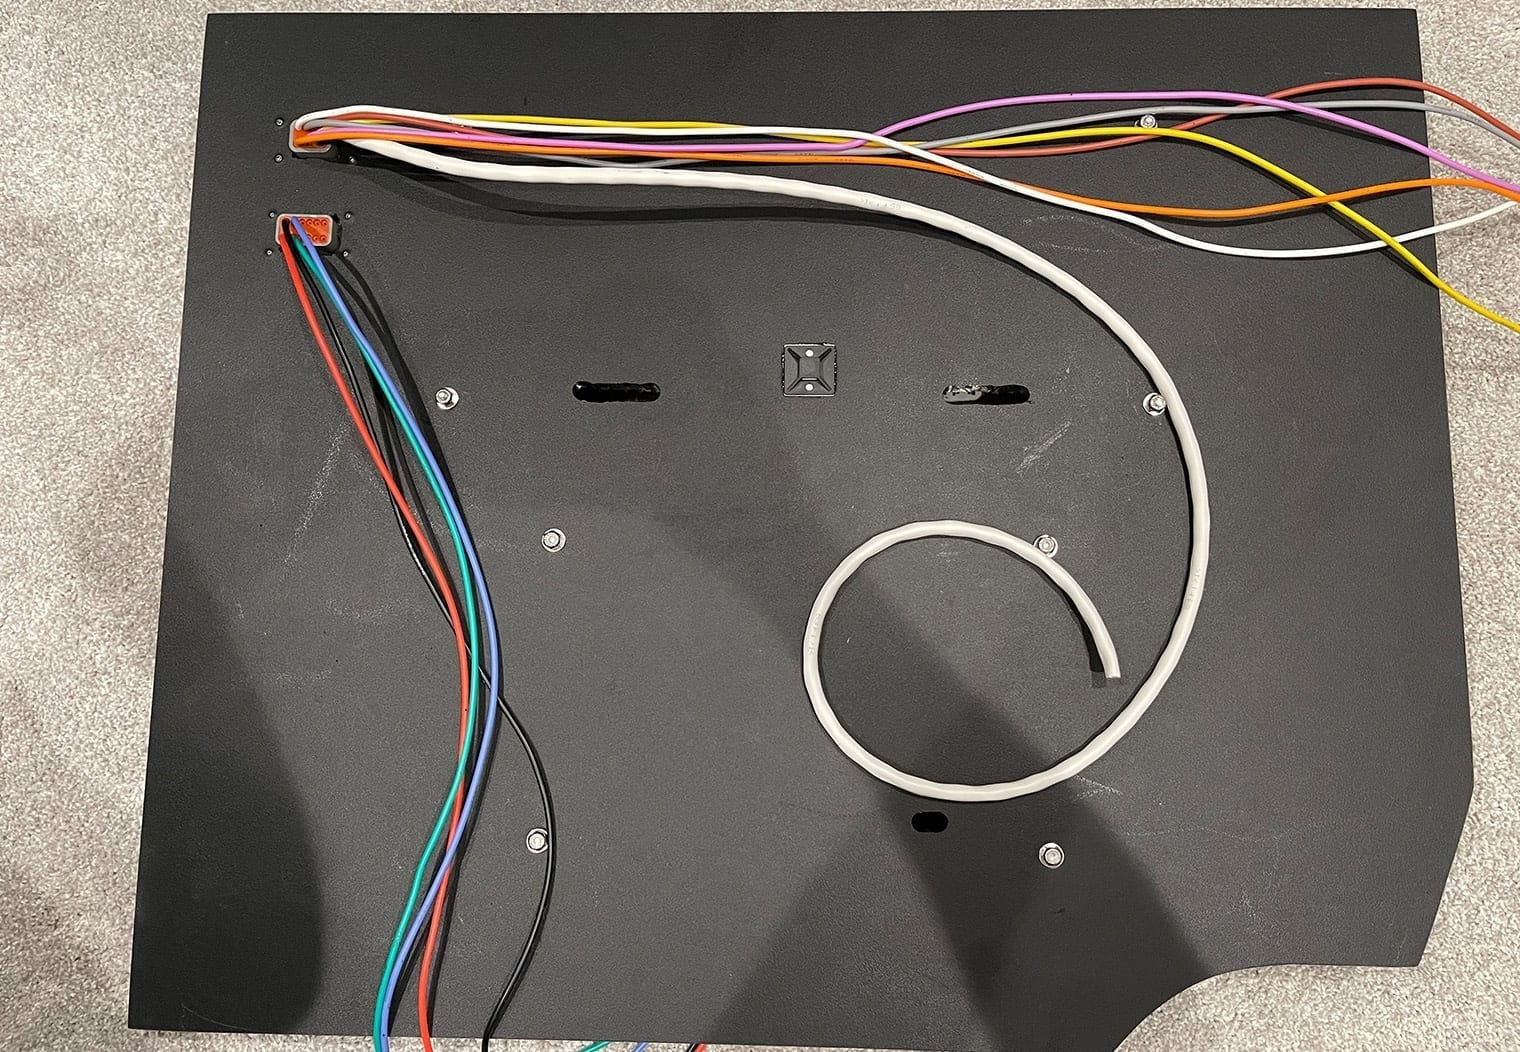
Back to the amp rack and wiring, I had a great time building this one. I first created a cardboard template of the area that I was planning on mounting the amp rack to. Using one of my favorite materials, Starboard, I cut the template out, placed the amplifiers, and pre-drilled all the holes to mount the amps and run the wire behind the rack. Here's a few photos of these steps.
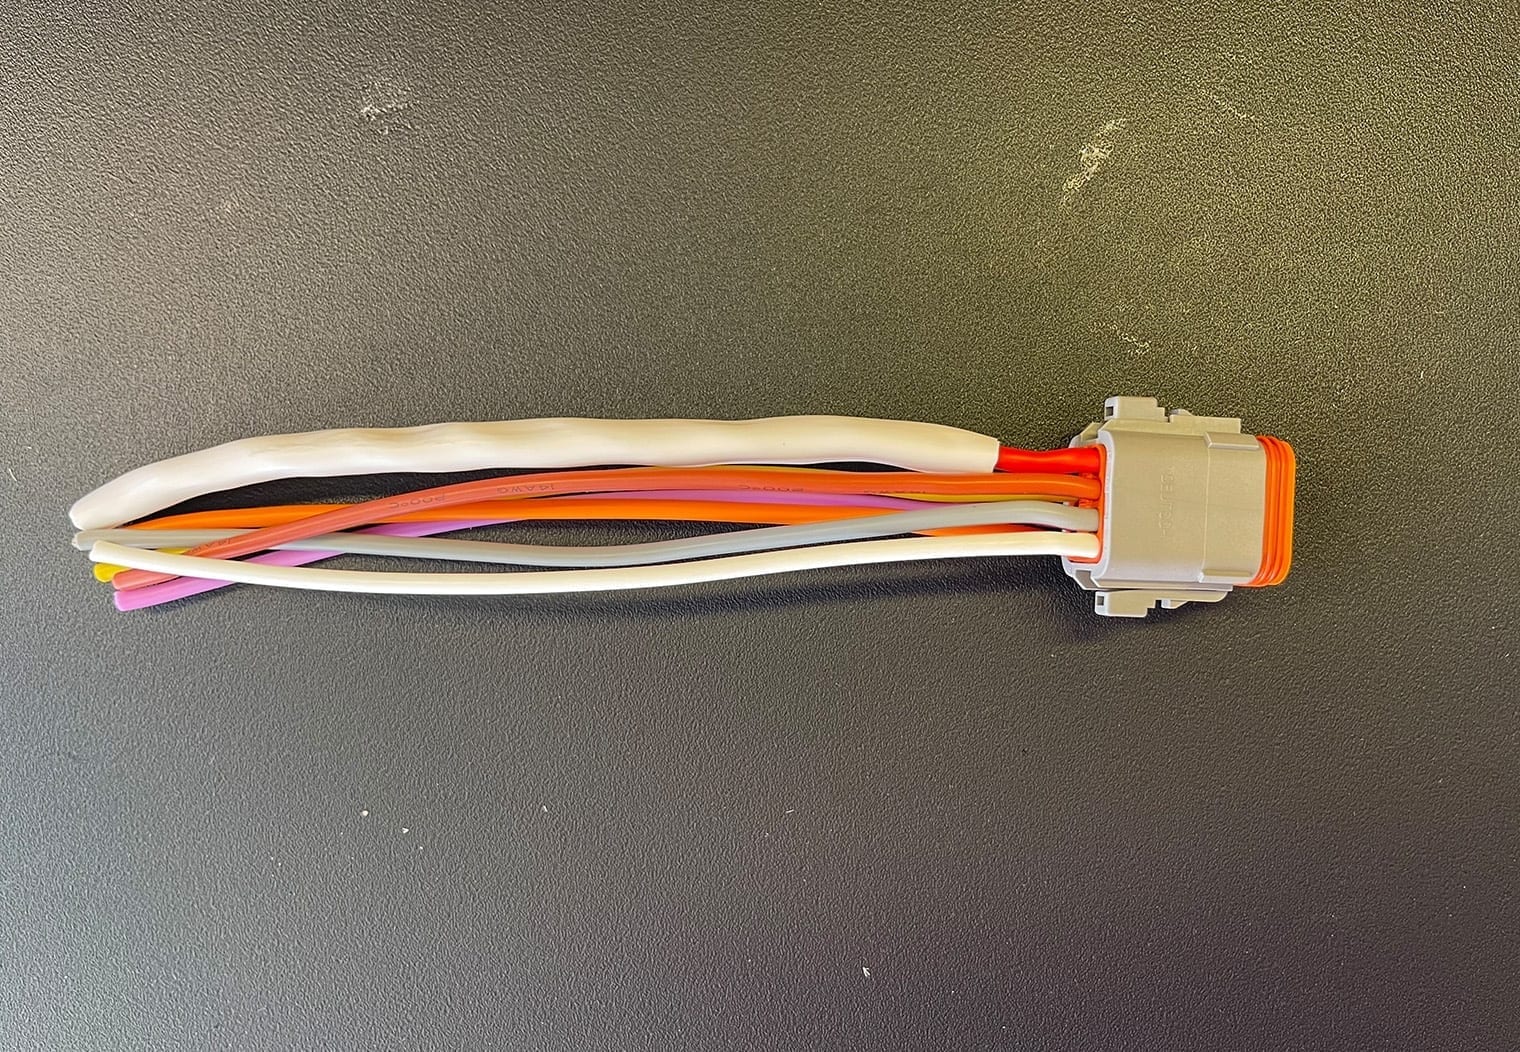
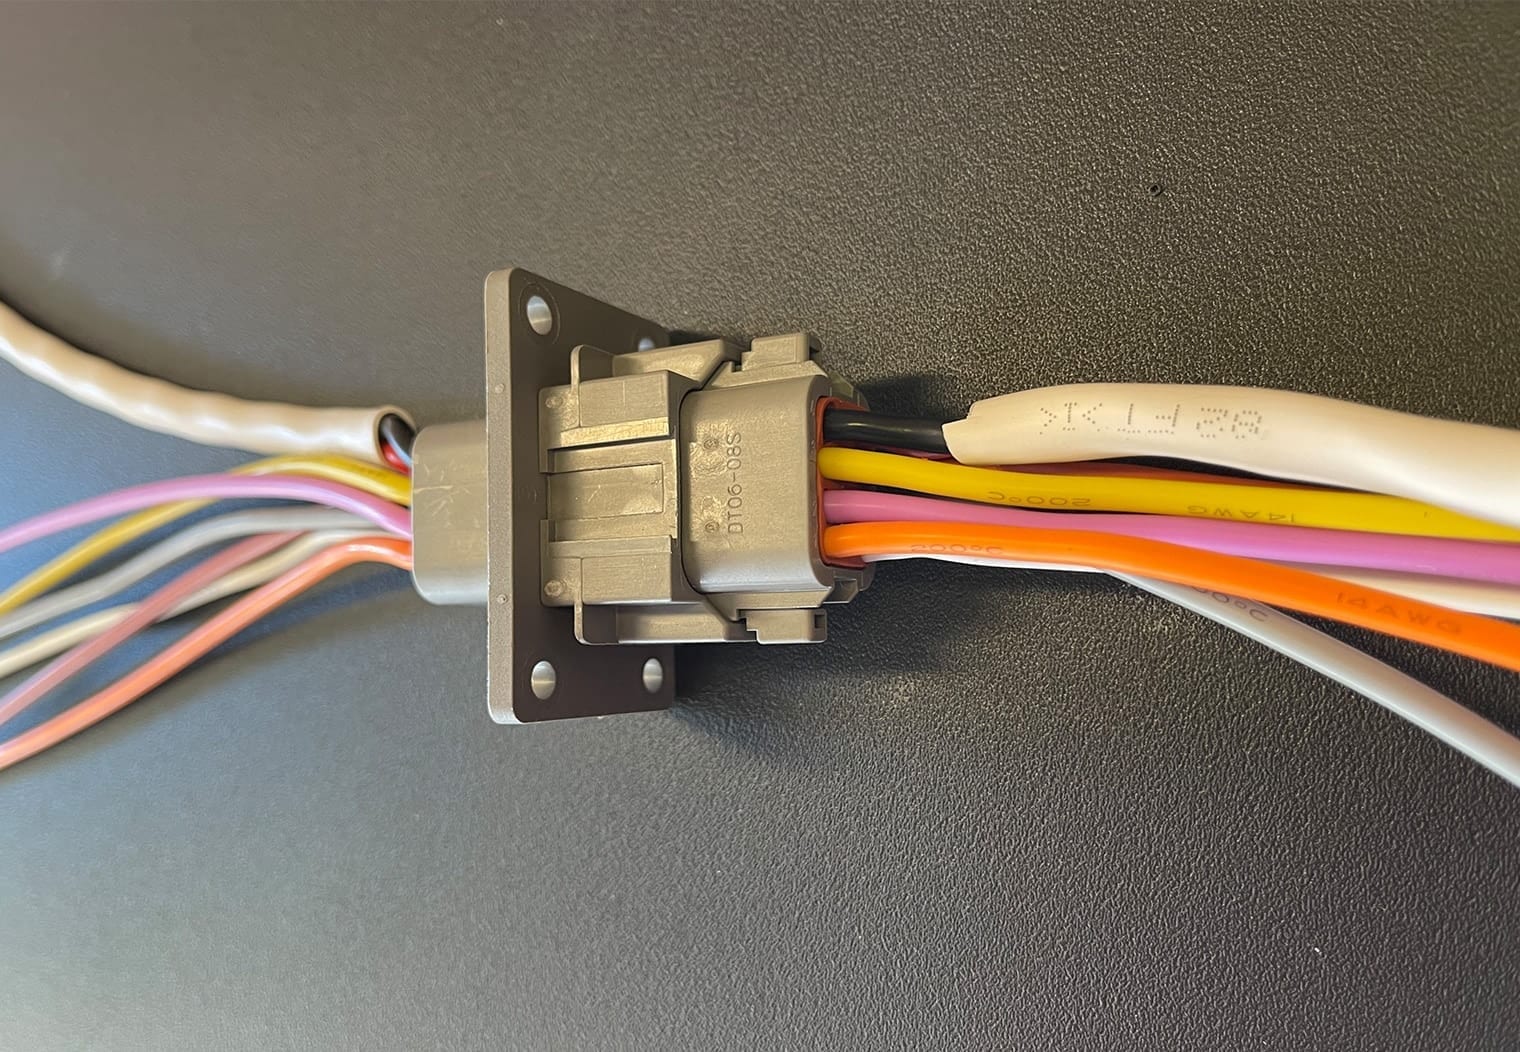
I'm also a HUGE fan of using deutsch connectors for these applications, so I ended up purchasing a 12 pin deutsch connector and an 8 pin and used those to pre-wire the entire amp rack and create a pigtail harness (which I also labeled) for wiring up when I got to the boat. This saved HOURS of install time once I got to the boat and was incredibly clean. It's not cheap though and cost about $75 extra bucks. Worth it in my opinion.
Here's a look at how I crimped each pin to each wire and created my own deutsch connectors.

Once I had the deutsch connectors all configured I began to run the wires along the backside of the amp rack, cut them to length and then installed them onto the amplifier power outputs how I wanted them.
With all of the speaker wire and remote wire completed, ran and fixed to the amp rack I then mounted up my distribution block (I really like the rigidity and quality of the Wet Sounds even though they're pricy), ran power wire and then ran my RCA signal wire as well. I always try to run my RCAs away from all other signal or power wire if I can. Some closeness to power or other signal wire (like the one RCA that skips over the power input) are inevitable though but for the most part I was able to seclude my RCA cables.
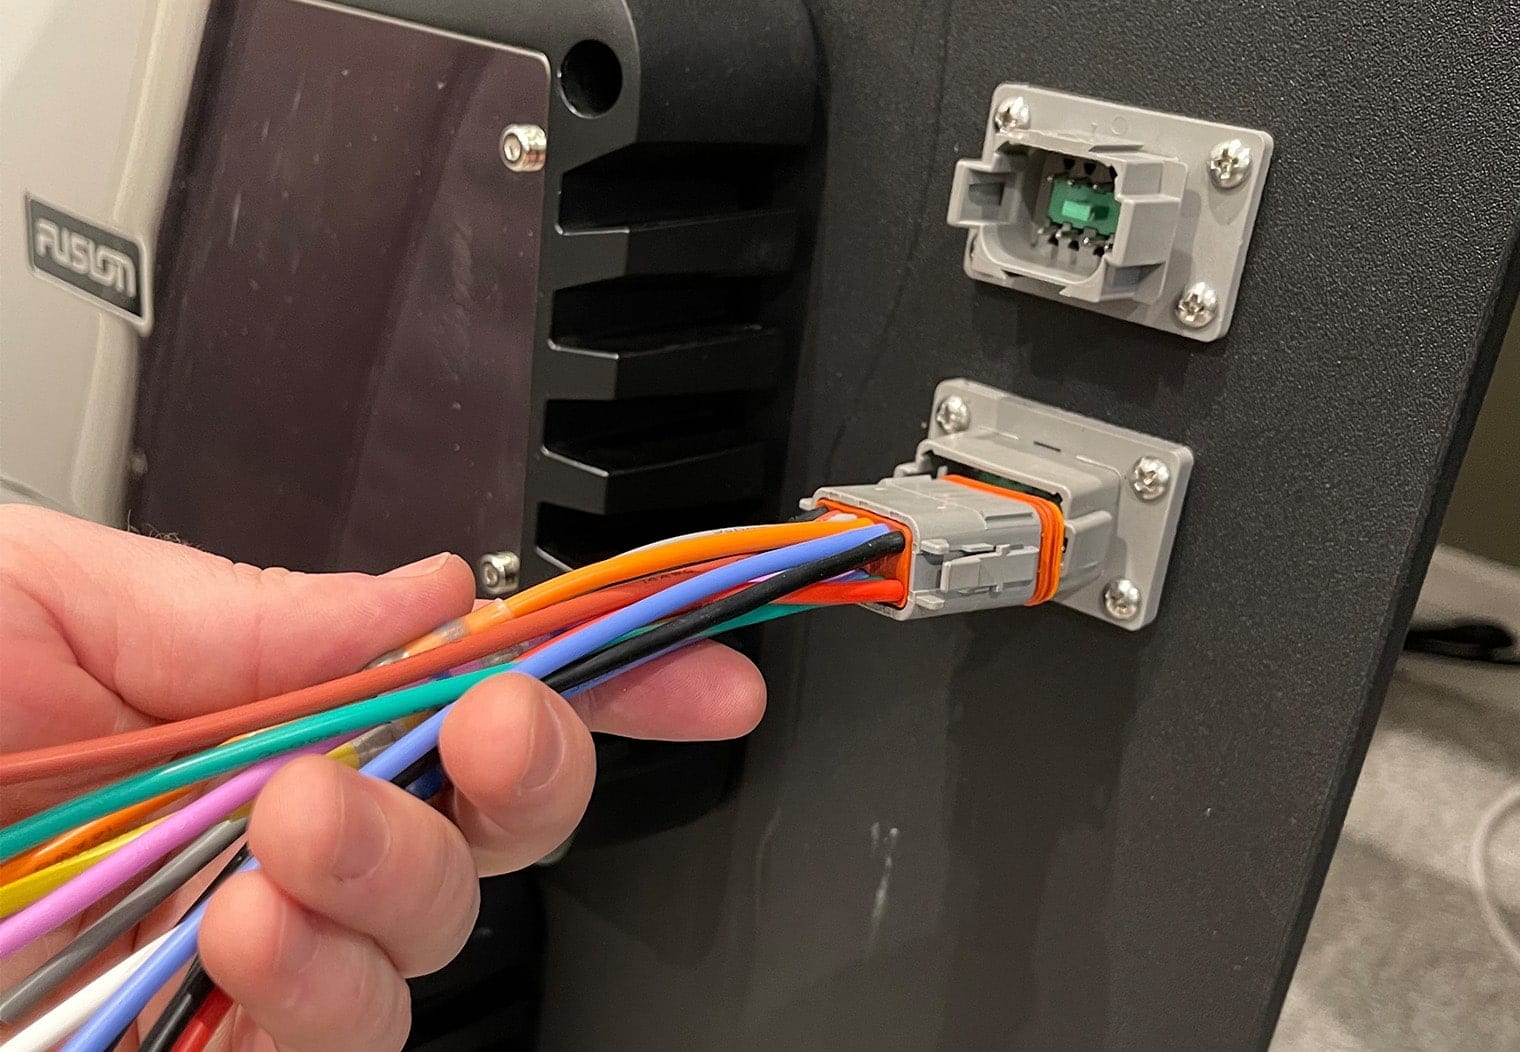
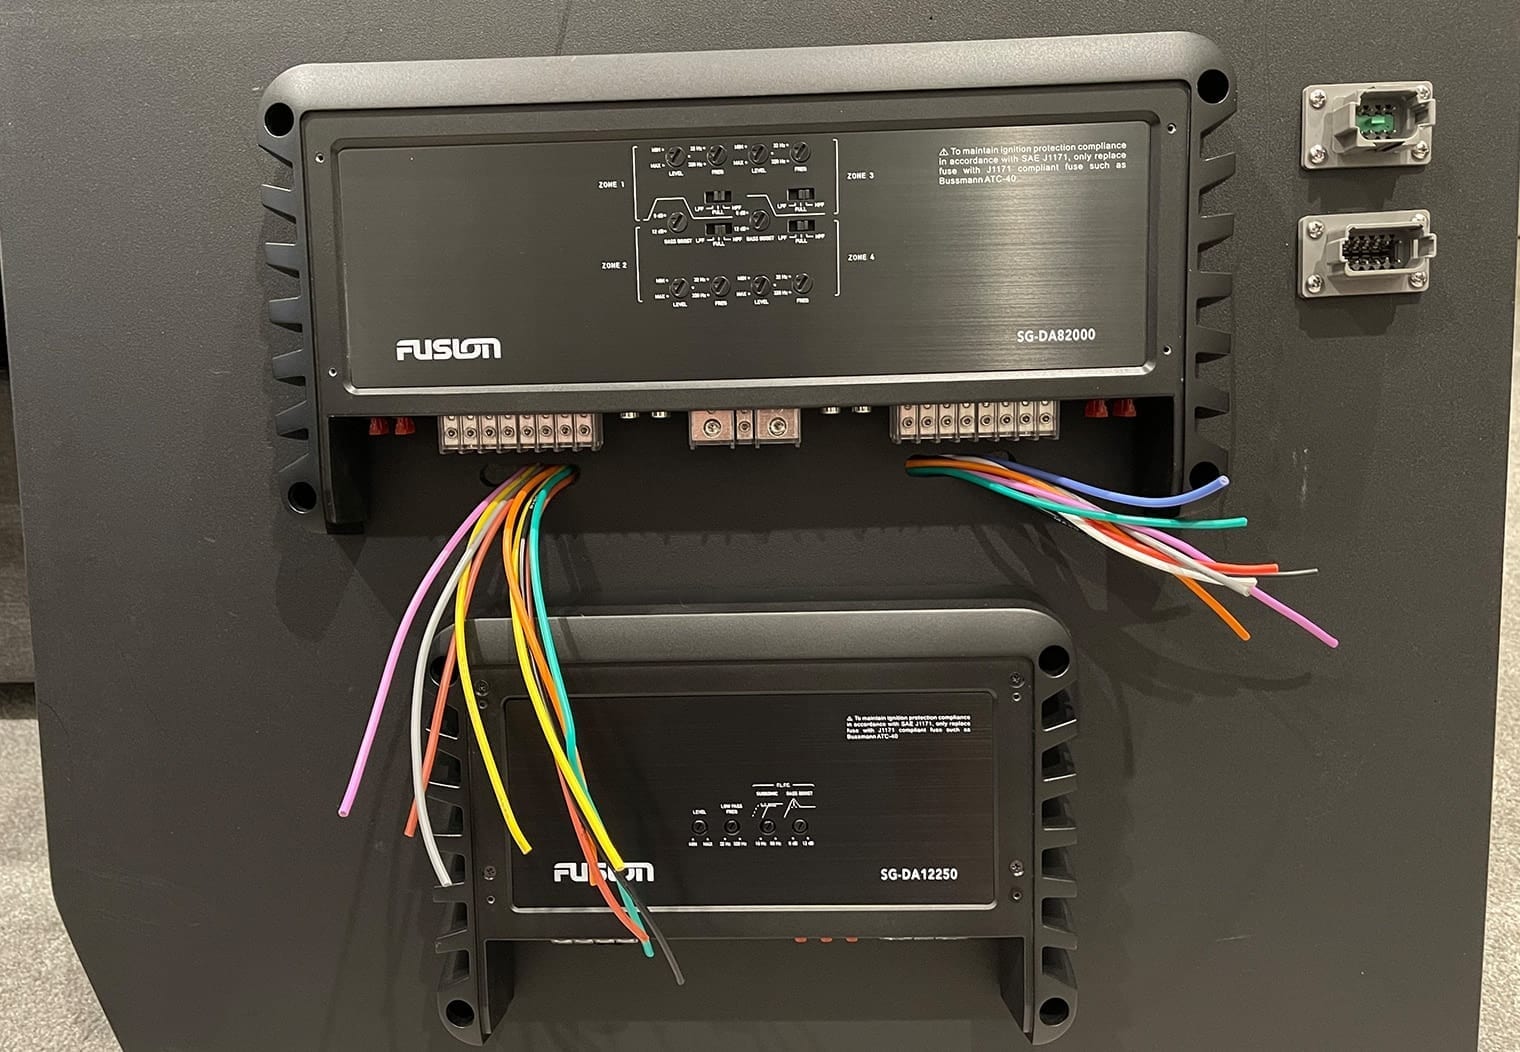
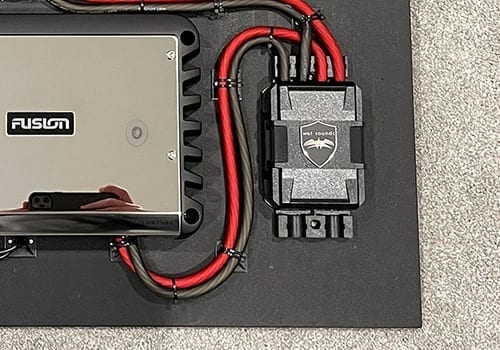
The end result came out really clean. The only thing left was to mount it in the boat, wire up the male pigtail harnesses to the speaker wire in the boat and plug them in! See for yourself.
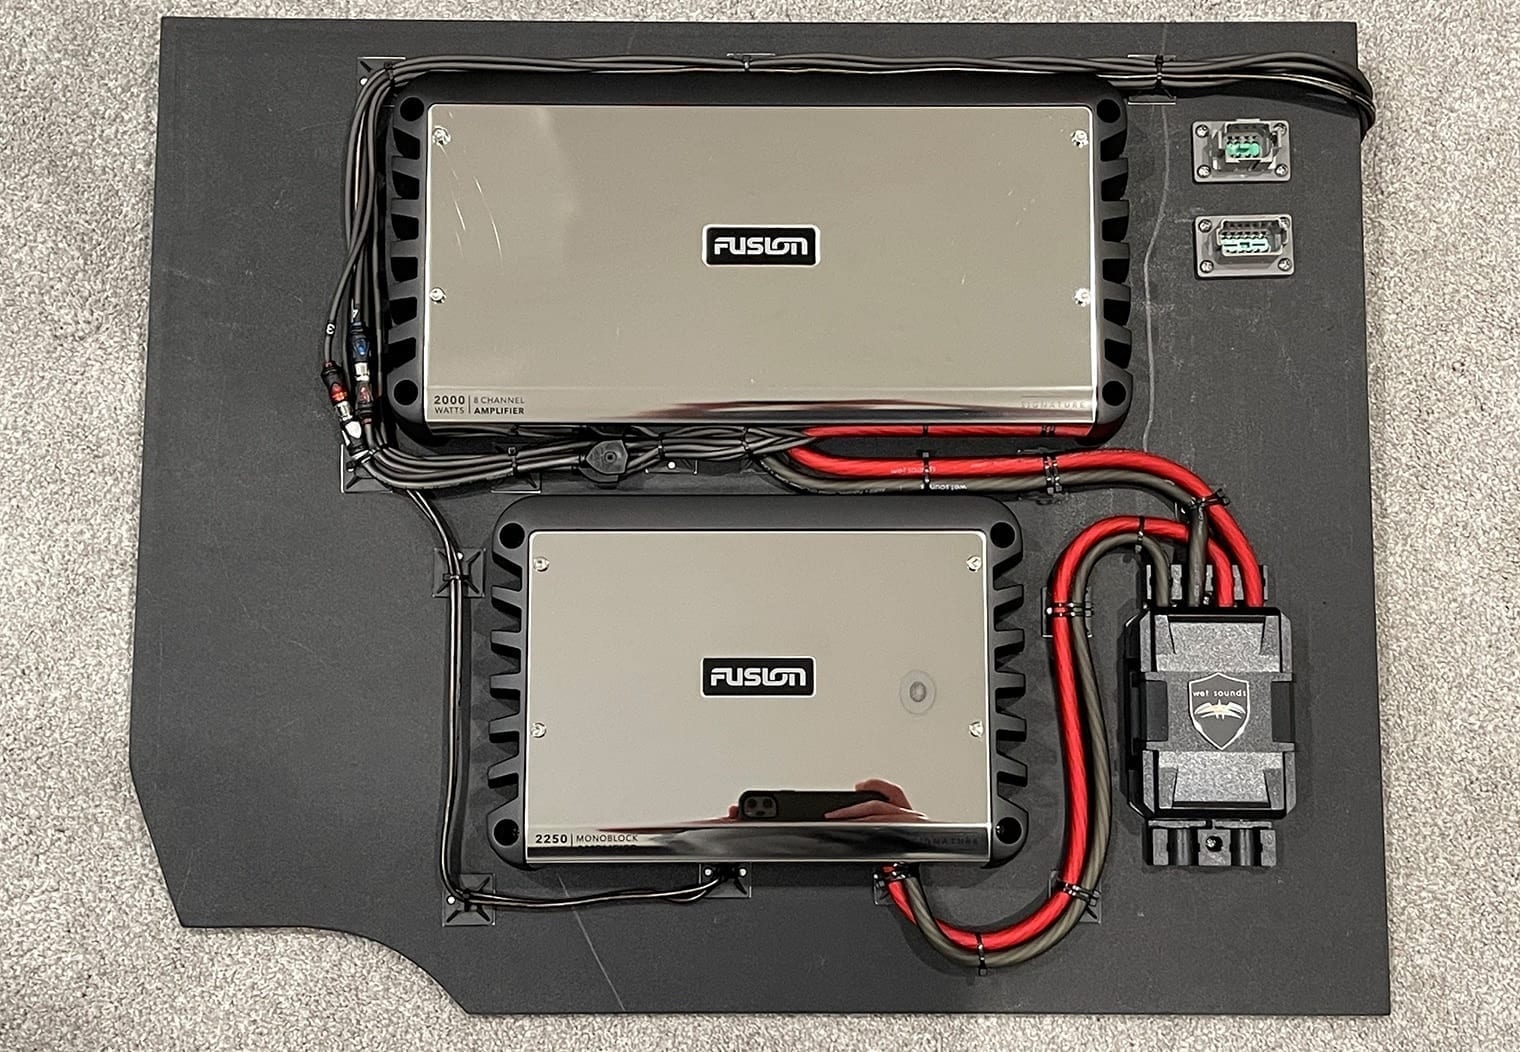
As for the channel wiring, I said this before but I love to keep it as simple as possible. The 8-channel amplifier powers 6 interior speakers and 2 tower speakers. Each speaker has its own dedicated channel on the amplifier. Then, the subwoofer is wired to the monoblock. Voila! A 2-amplifier setup that powers 8 speakers and 1 subwoofer. Gone are the 3 and 4 amplifier days for this kind of setup.
If you're looking to read up more about the amplifiers that I installed on this amp rack, check out my Fusion Signature Series Amplifier First Look Review where I detail all the features and provide my opinion while I unbox and inspect these amplifiers.
Speaker Wiring and Amplifier Channel Distribution
With the amplifiers mounted and wired to the deutsch connectors, you can get a sense of how the wiring is done but it's still tough to see how that translates into wiring the speakers on the boat. So here's a quick diagram of how I configured and wired up the speakers to each channel on these two amplifiers to give you a better visual of how simple it really is. One speaker goes to one channel. Or in Fusion's case, they call them ‘zones'.
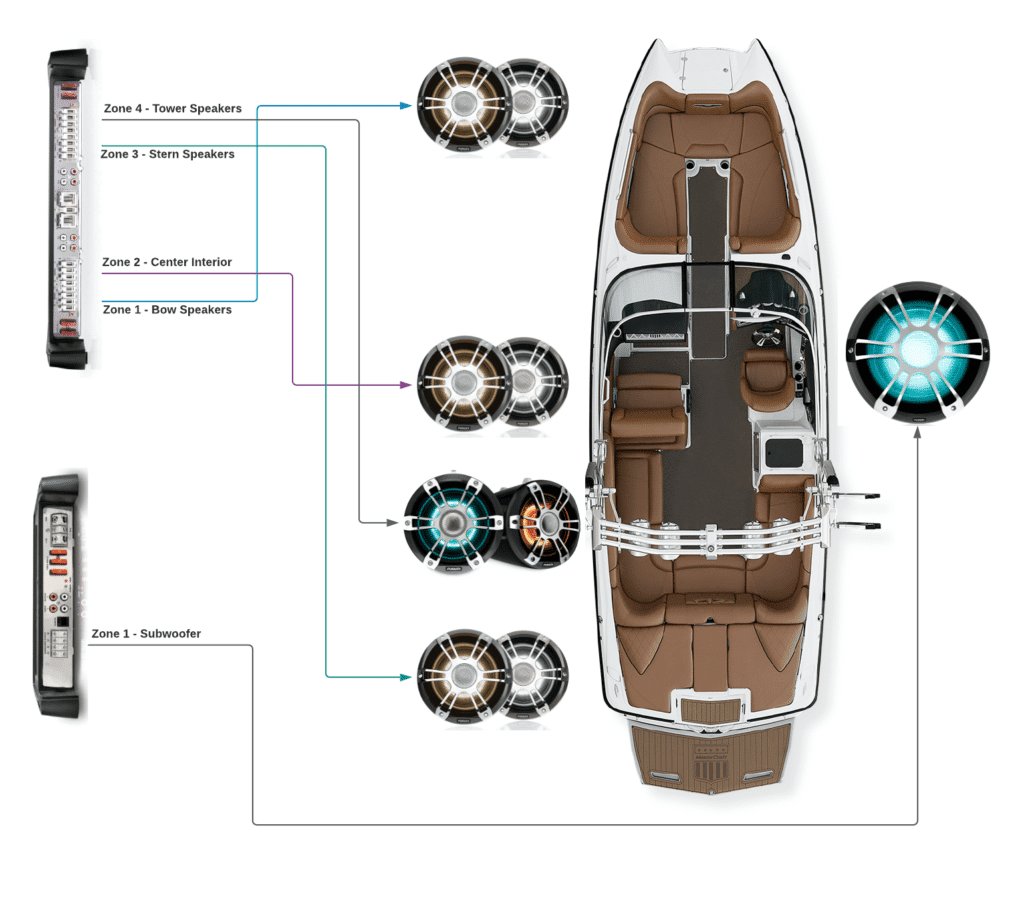
With this setup, the 8 channel amp powered all of the speakers with a dedicated channel per. And since there were 4 separate zones on the 8 channel amp, I could break them out separately at the head unit so that I could control interior speakers separately from the tower speakers. I tied zone 1, 2 and 3 at the amplifier to zone 1 and 2 on the head unit (zone 2 was linked to zone 1 so that they would act as one). Then I tied zone 4 on the amp to zone 3 on the head unit for the tower speakers.
Finally, since the subwoofer had it's own dedicated monoblock I was able to also break the signal out to the 4th zone output on the head unit and set up that zone for a subwoofer. I'll touch on this more in the head unit section of the article.
The one thing that I didn't like about this amplifier setup was that the 8 channel amp couldn't use one signal input for multiple zones. Each zone on these amps needs a dedicated signal input. I mentioned this above that I tied basically three zones on the amplifier to only two zones on the head unit… so where did the extra input come from on the amplifier? I had to split one zone output from the head unit into two on the amplifier using an RCA splitter.
Apart from this workaround, this configuration was clutch. It was incredibly clean, easy to setup, easy to wire and just in general easy to understand since every speaker had its own channel and every pair of speakers (apart from the subwoofer) had its own zone.
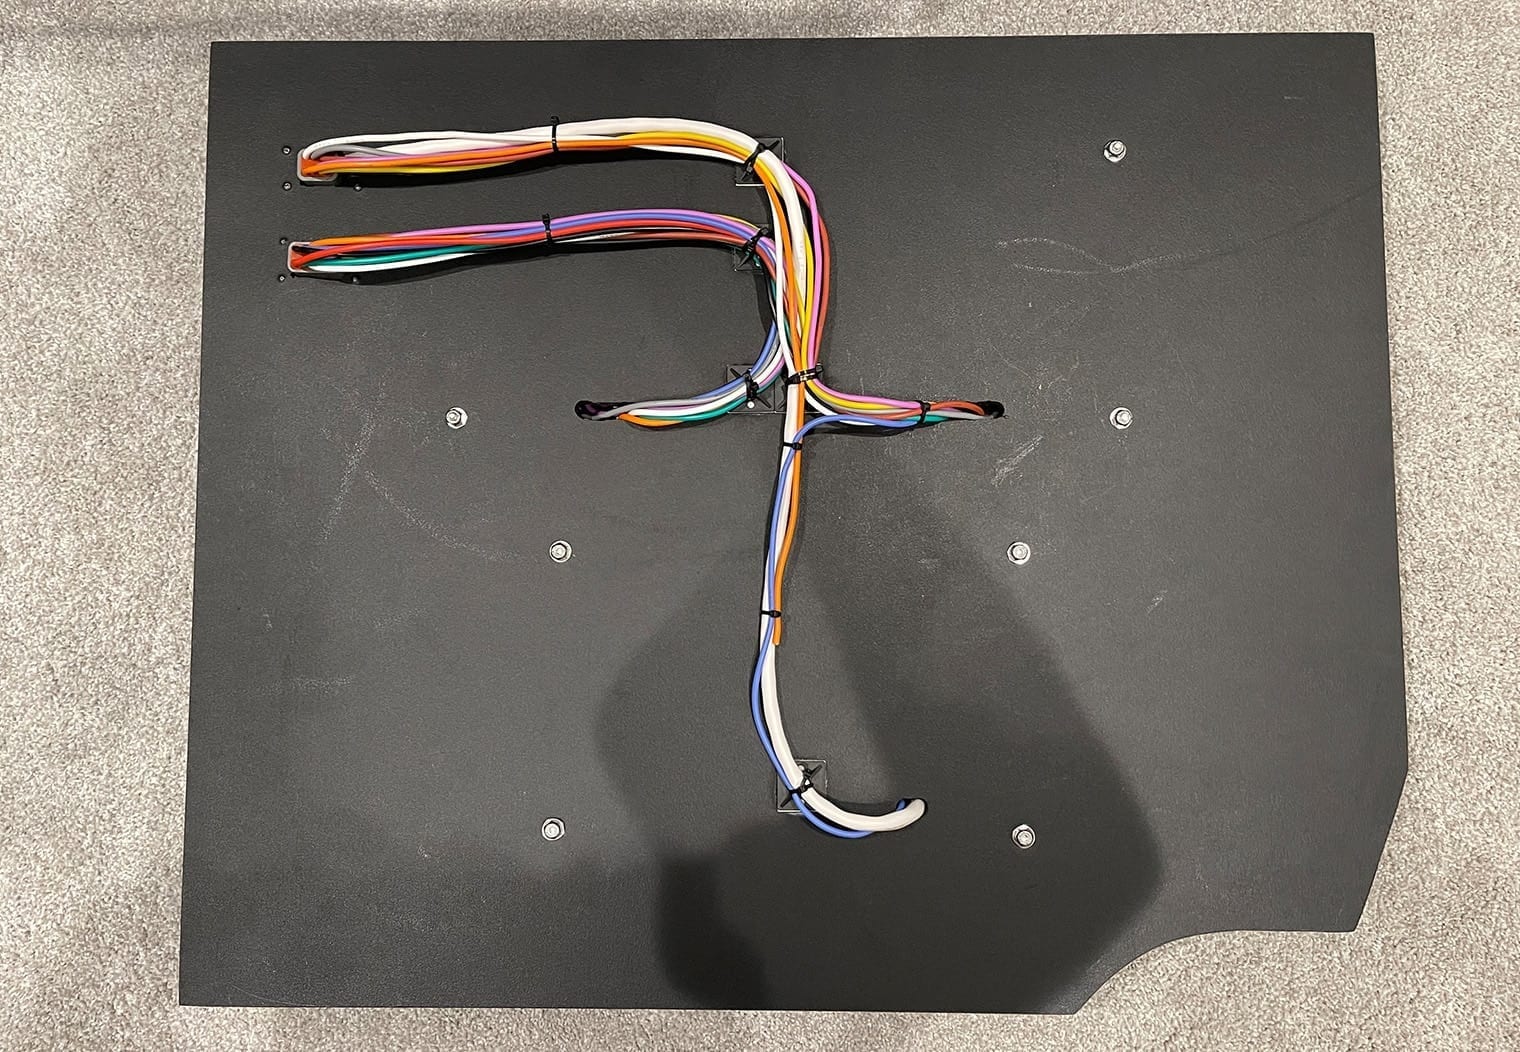
In terms of wiring placement for the speakers, I ran the wires along the underside rail of the boat. All of the interior was pulled out at the time of installation which made this pretty straight forward. Each speaker had an individual wire ran directly from the amplifier and was precut with some slack for when the interior was re-installed.
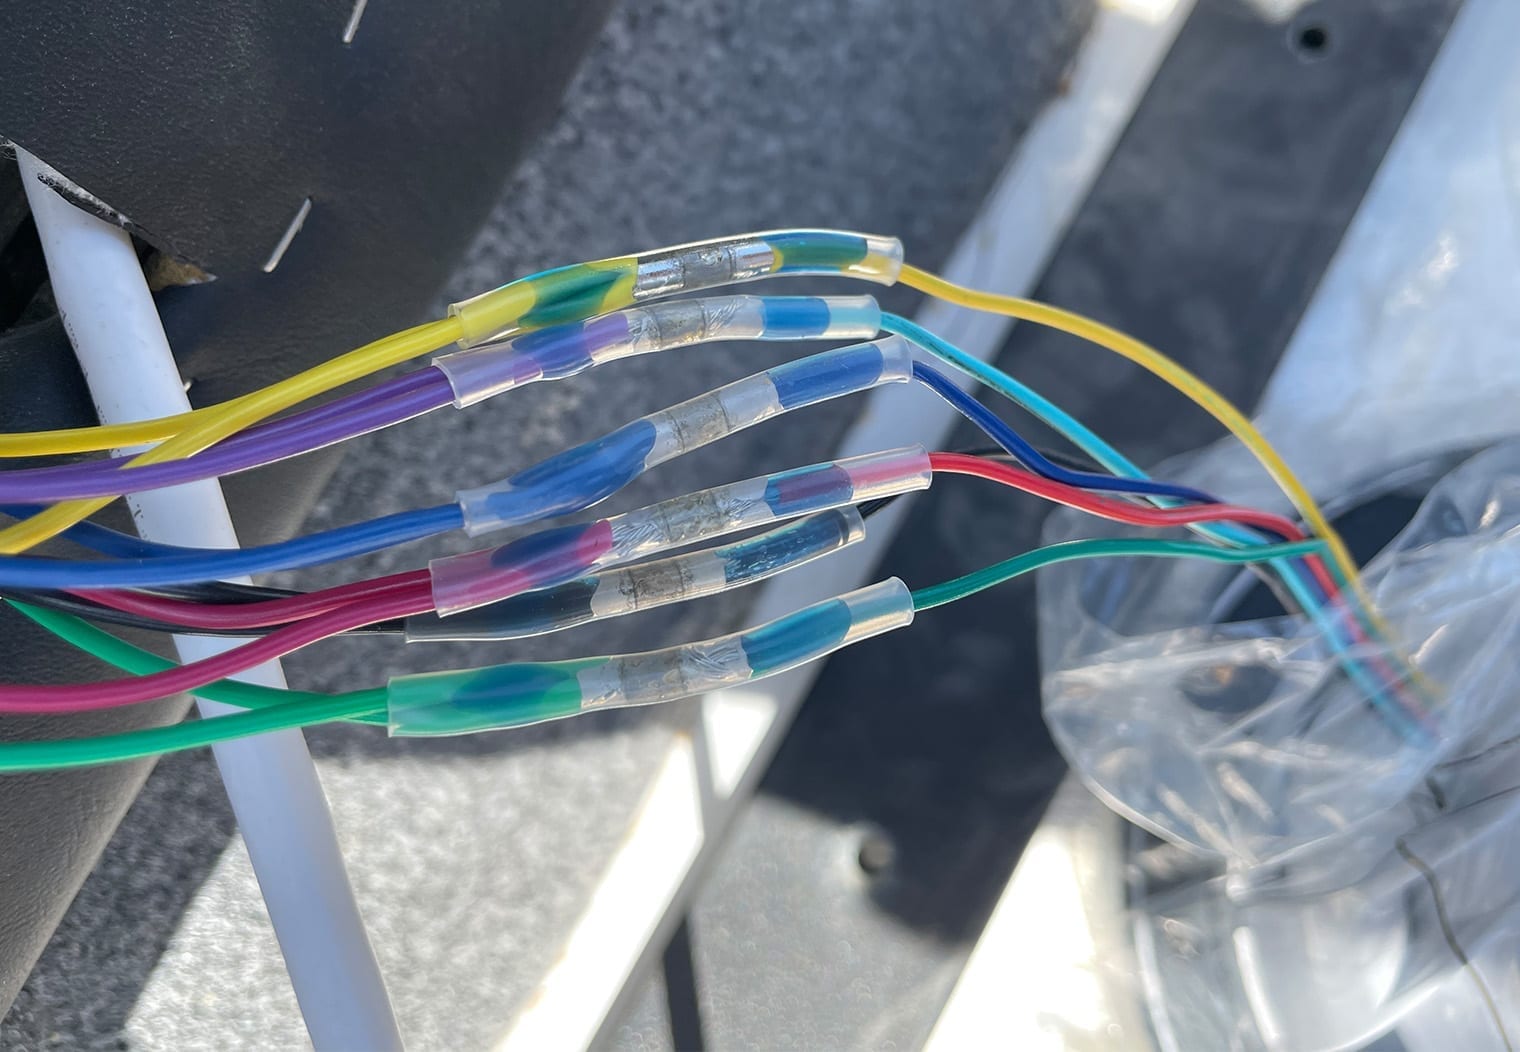
Once the wires were ran to each speaker, I tied all of the speaker wire together and used the solder seal wire connectors to tie each speaker wire to the pre-made deutsch connector pigtails that I custom made at home so that I could just plug them in after the amp rack was installed. By the way, I absolutely recommend these solder seal wire connectors for everyone – installers, DIY, anyone that ever does any wiring. They're really, really useful and give you a quality solder with a seal that's good as any shrink wrap. The difference is that you can do it with a heat gun or even a lighter! Here's a few shots at the wiring:
Power & Ground
All of the power and ground was pretty much prewired into the amp rack as well. What I did was used a Wet Sounds WWX-FUSE distribution block that took two 1/0 gauge wire and split them into four separate 4 gauge wire to power the two amps. Power was ran directly to the auxiliary battery. Pre-wiring the power and grounds on the amp made the installation in the tight quarters of the passenger storage compartment much easier.
Tuning the Amps
One of the really cool benefits to using Fusion Amplifiers in combination with a new Fusion head unit like the MS-RA770 is that you really don't need to know how to tune the amplifiers to get a decent tune. Fusion head units now have a DSP feature that allows you to setup each individual zone with a specific DSP configuration. And since my zones had the same type of speaker on each, I was a really good candidate to leverage this DSP feature on the head unit. I'll get into the DSP features more in the head unit section but from an amplifier configuration standpoint, you basically will go onto the Fusion Link app, enter in the details about what kind of speakers are on the zone that you're tuning and then the app will tell you exactly where to place each setting on the amplifier and then allow you to upload the configuration to the head unit.
Now, don't get me wrong, you're probably not going to get a highly tuned system with perfectly aligned timing and dB levels at individual points within the boat, but these pre-configured DSP settings are a fantastic start and will ensure that you don't damage your system while getting much more refined and tuned sound out of your speakers (if you really wanted to). They're perfect for the DIY stereo but can also be used to further refine the sound for the enthusiasts and experts.
Here's the end result after installing the rack into the boat.

CRGBW LED Lighting
I definitely wanted to add LED lighting to this boat. A stereo like this would feel like something is missing if it didn't have good lighting for a night time cruise. Fusion introduced an industry first CRGBW LED lighting feature with their Signature Series 3 lineup. All of the speakers come with it including the towers and subwoofers. CRGBW is basically your typical RGB lighting (which you can find on speakers like JL Audio, Wet Sounds, Kicker, etc) but adds two new ‘colors' to the mix making it a 5-color LED instead of 3. With these Fusions you have your typical red, green and blue but you also have added cool white and warm white. With these two added colors, you can really increase the spectrum of colors to a much wider range than traditional RGB. I did a demo of the CRGBW LED in my video here: https://youtu.be/sbmTTj6ttug but you can also find it on my Signature Series 3 Tower Speaker review.
Wiring Up the LEDs
I would say this is the worst part about adding any LED lights to your boat. Especially these new Fusions. Typical RGB speakers require an additional 4 wires to make them functional. This is in addition to the two speaker wire you normally power your speakers with. Manufacturers like Kicker and Wet Sounds have simplified the wiring of speakers like this by selling a 6 conductor cable wire – 4 for the RGB and 2 for the speaker. It's in one cable and you only have to run one wire per speaker.
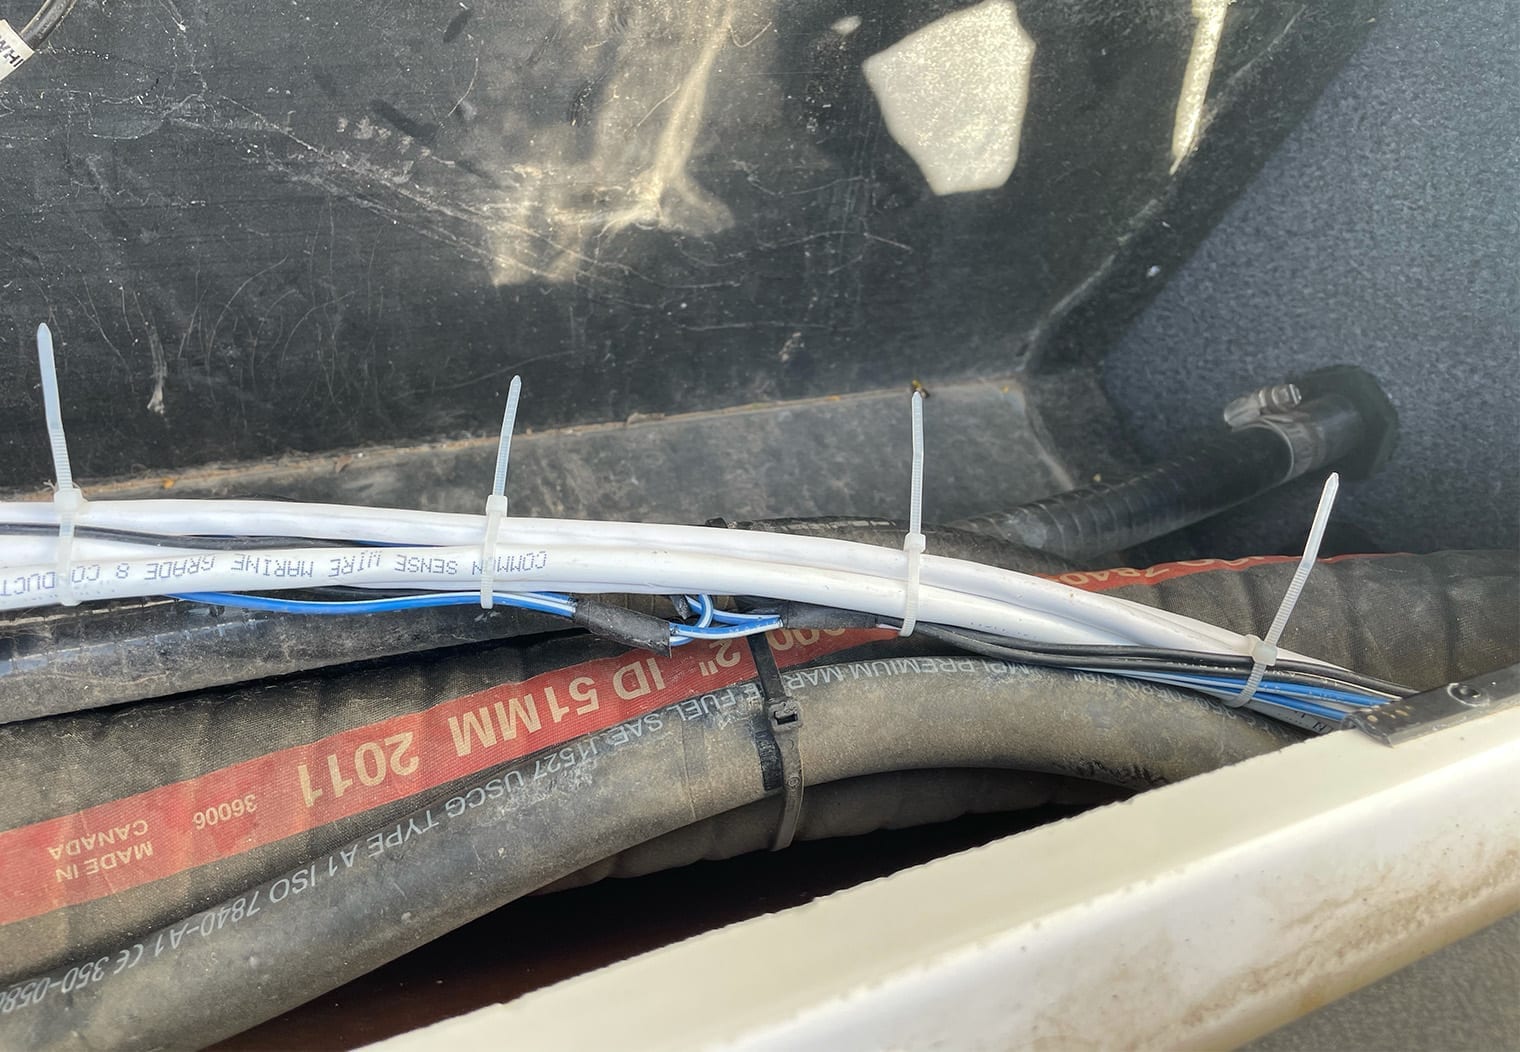
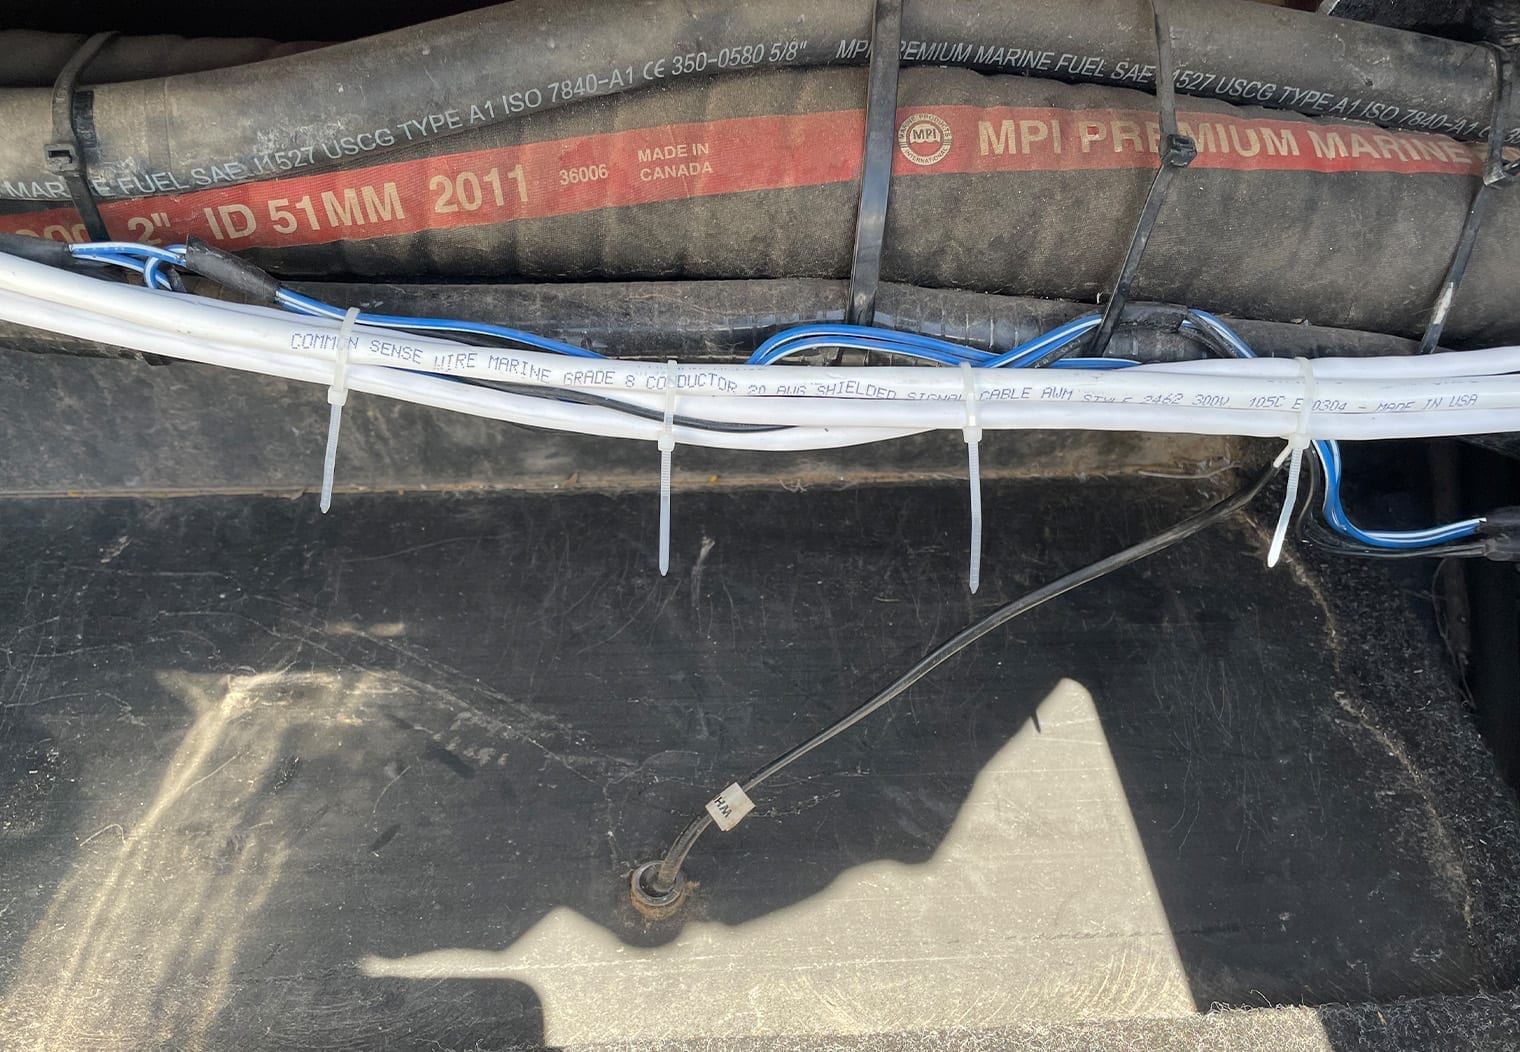
Fusion's LEDs require 6 wires instead of 4 so I had to wire up the traditional speaker wire separate from the RGB wiring. This wasn't too big of a lift for me since the entire interior of the boat was pulled out and we already planned on re-wiring the boat. But if you're looking to simply swap your existing RGB speakers out with these, just know you're going to need an additional two wires to make them work. When I spoke with the team at Fusion, they mentioned they might introduce an 8 conductor wire or something to support the easy wiring of their speakers but after an in-depth search myself there was nothing that fit the specs I wanted, which is why I chose to wire them separately. They also mentioned typical RGB speaker wire could lead to interference and that separating them out is the preferred installation method. So I ended up using a 20/6 marine grade, shielded cable to power the LED features and I basically ran only two lines around the boat, tapping into the line at each speaker. Here's how that looked from a wiring perspective:
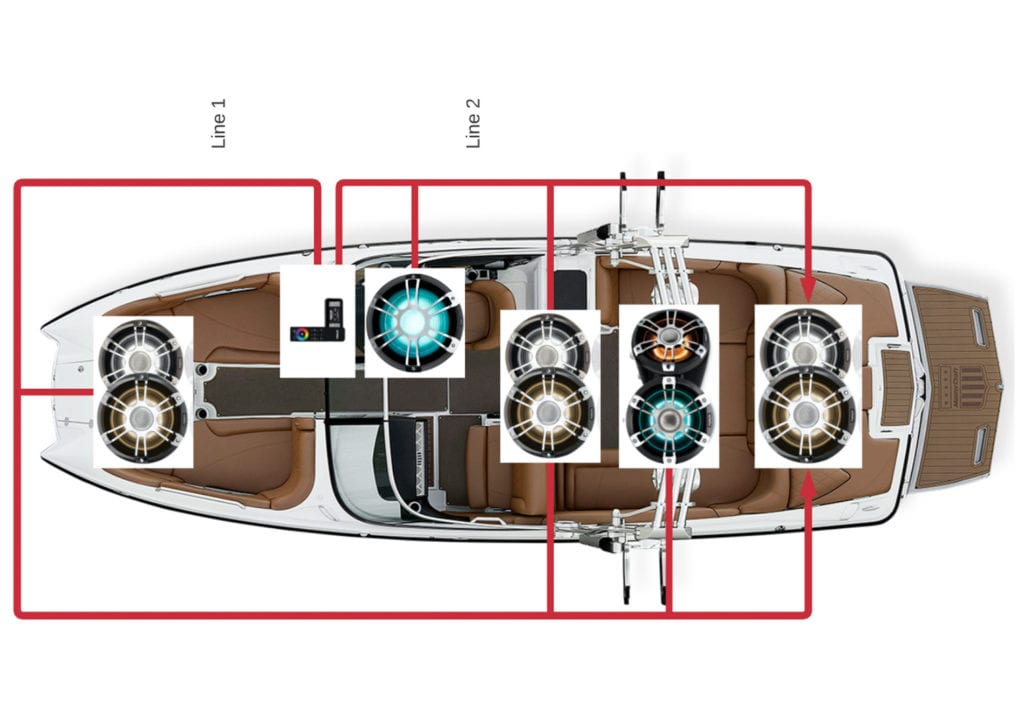
In the image above, you can see I installed Fusion's CRGBW wireless lighting remote control module underneath the helm. This was to ensure the remote worked flawlessly from the driver seat since the driver is the one who typically controls the lights. From this point, I used two long runs of wire on each side of the boat.
Line 1 has the port and starboard bows, port center, port and starboard towers and port rears tied to it. Line 2 has the subwoofer, starboard center and starboard rear speakers tied to it. These two runs of wire were combined at the helm and inserted into the module. Wiring at the module is pretty straight forward. Apart from the instructions telling you where to put your wire, it's clearly labeled and the wires on the back of the speakers align with the color labels on the module.
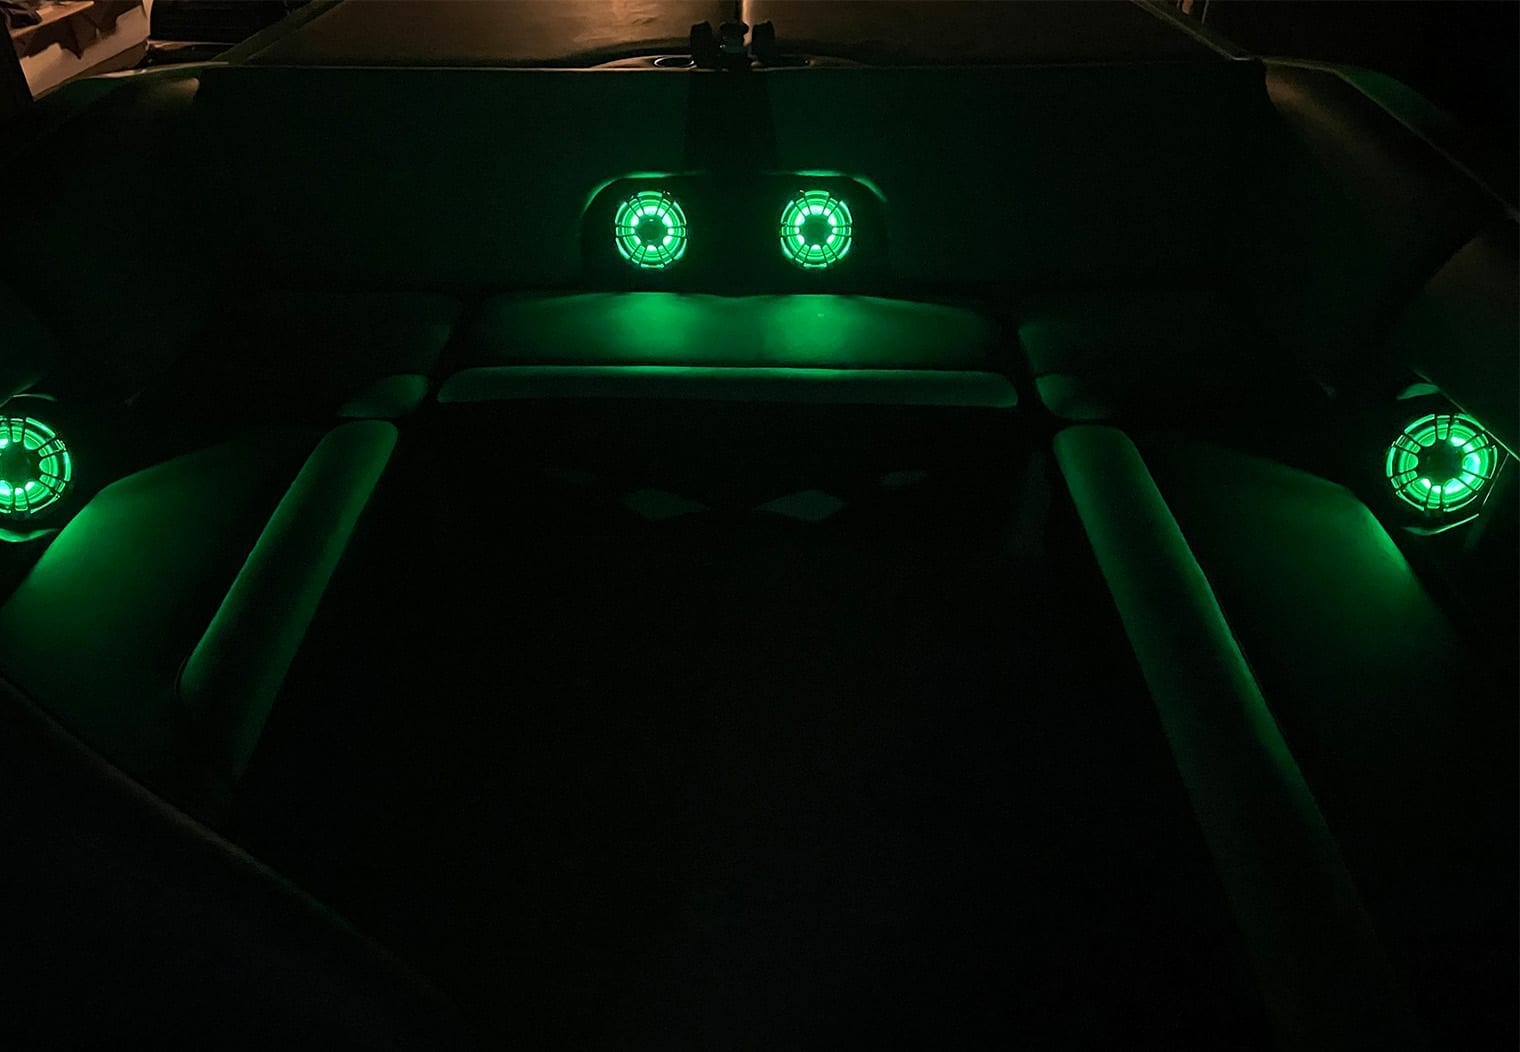
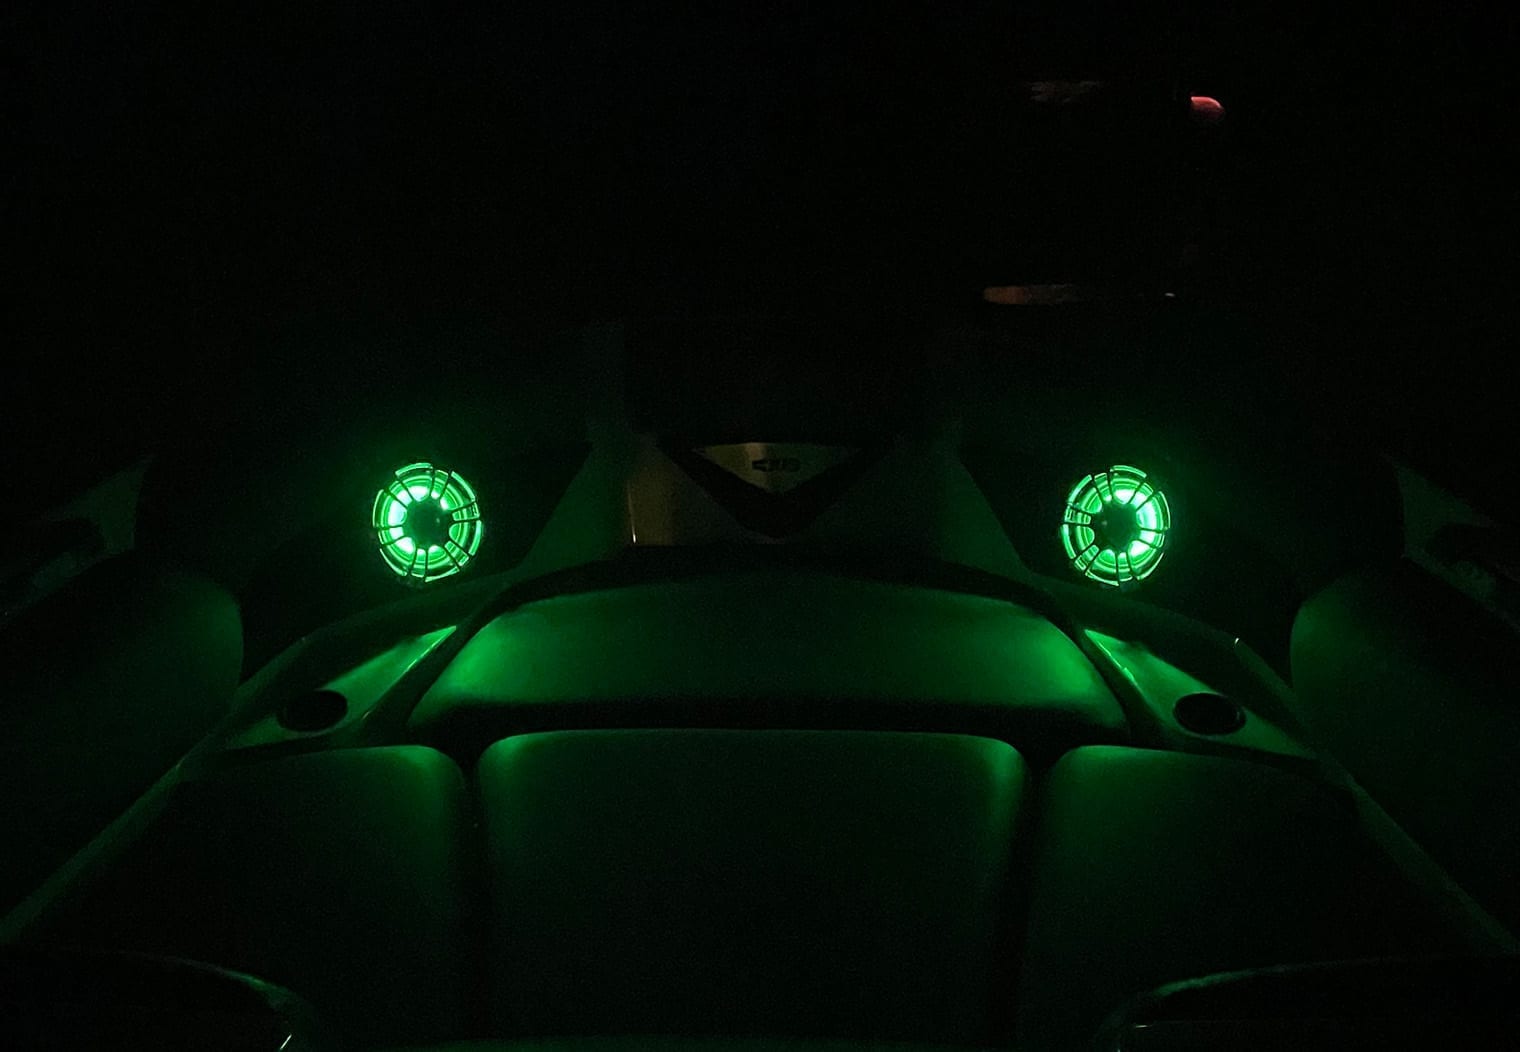
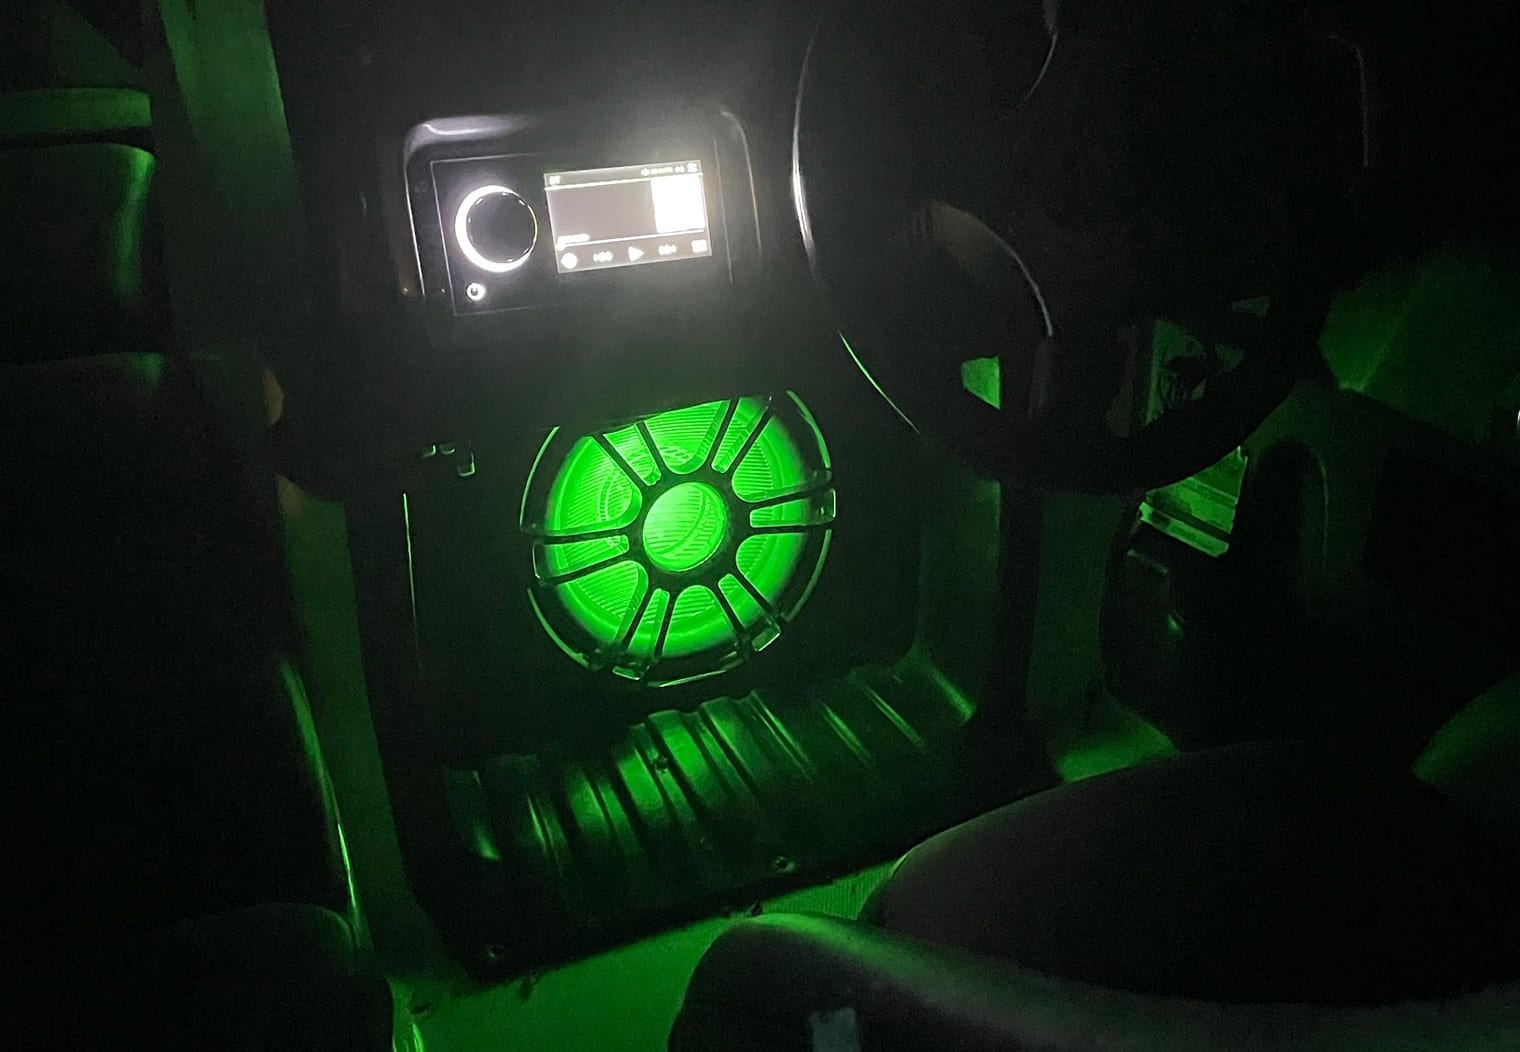
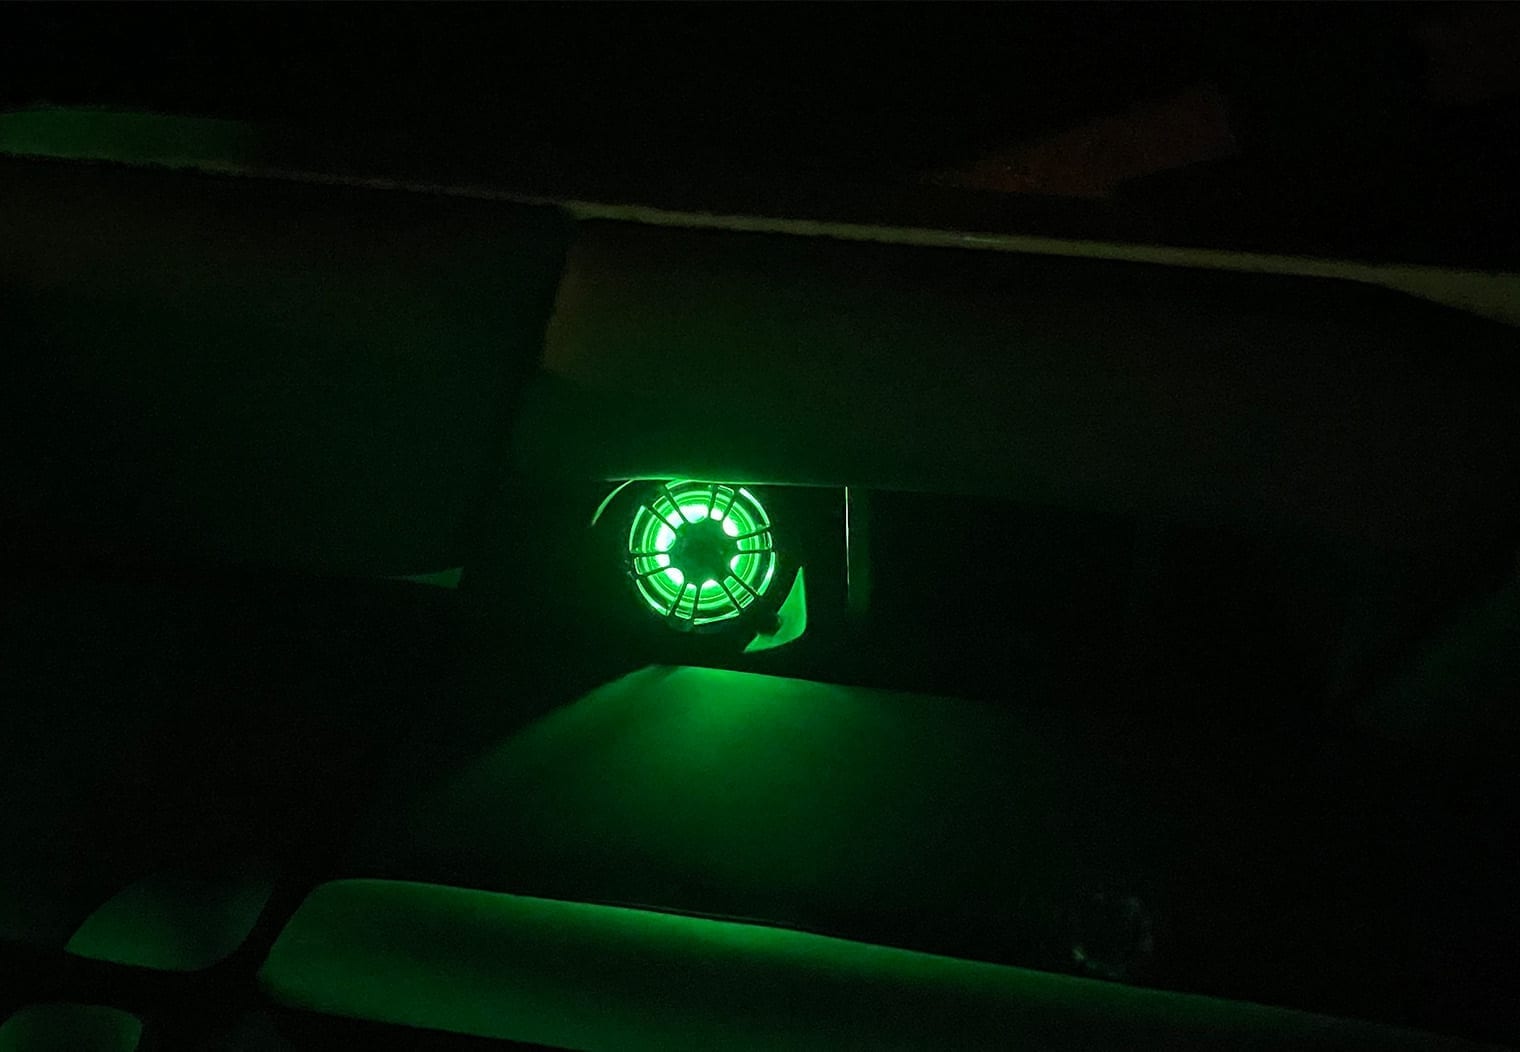
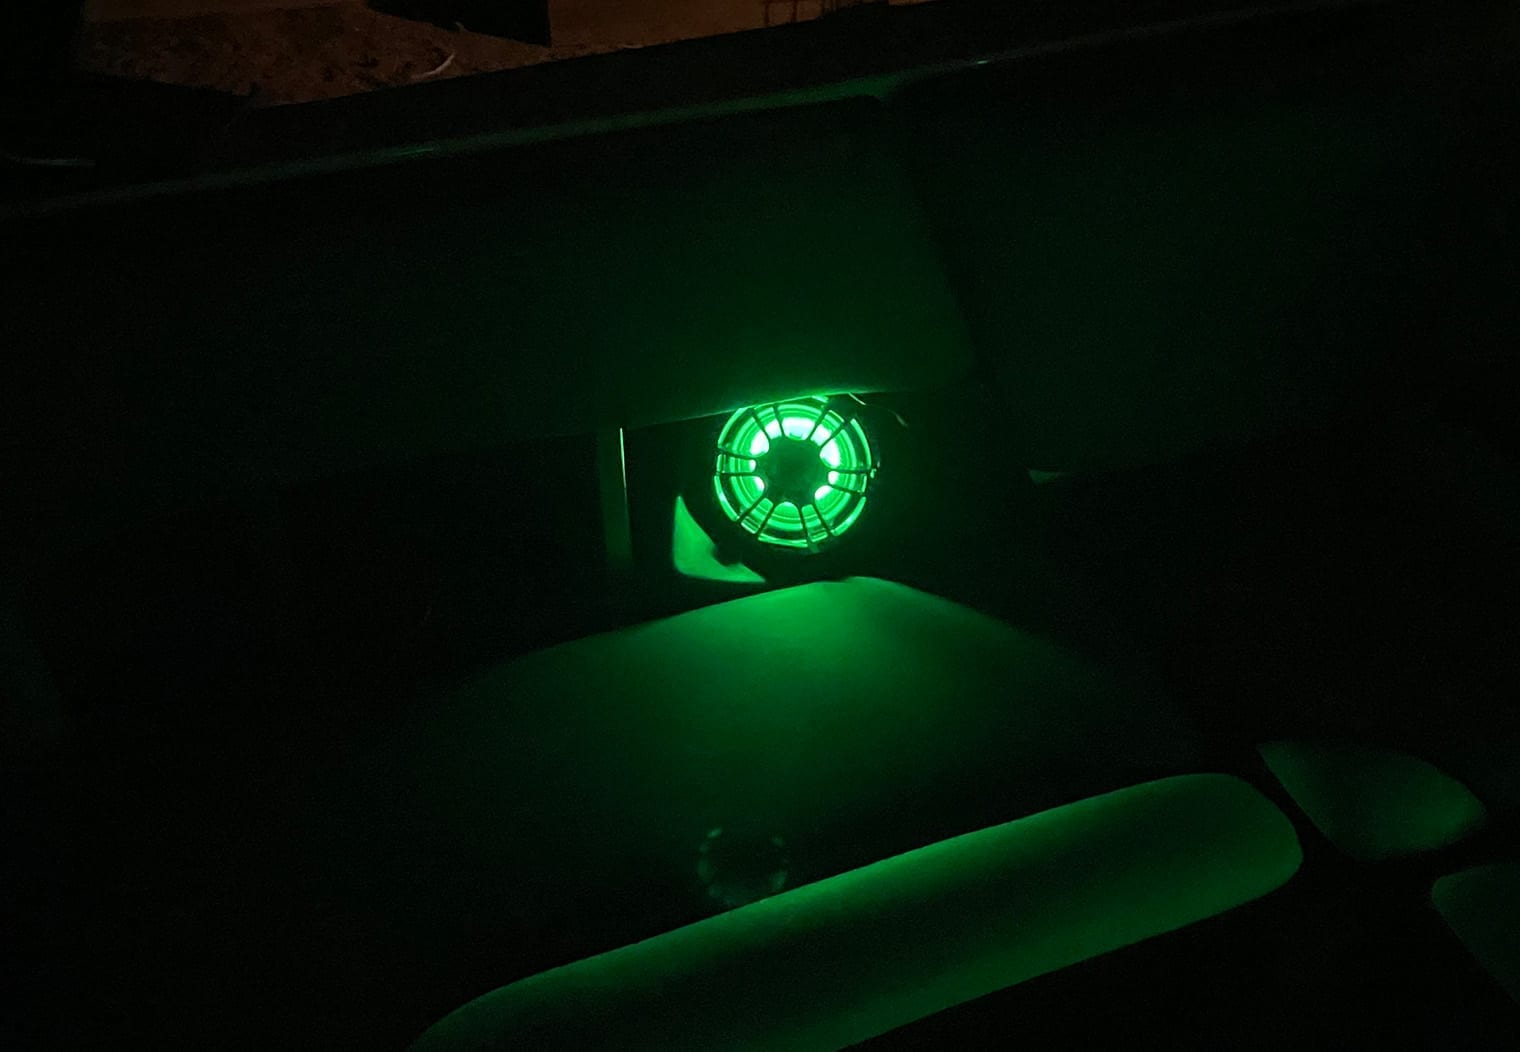
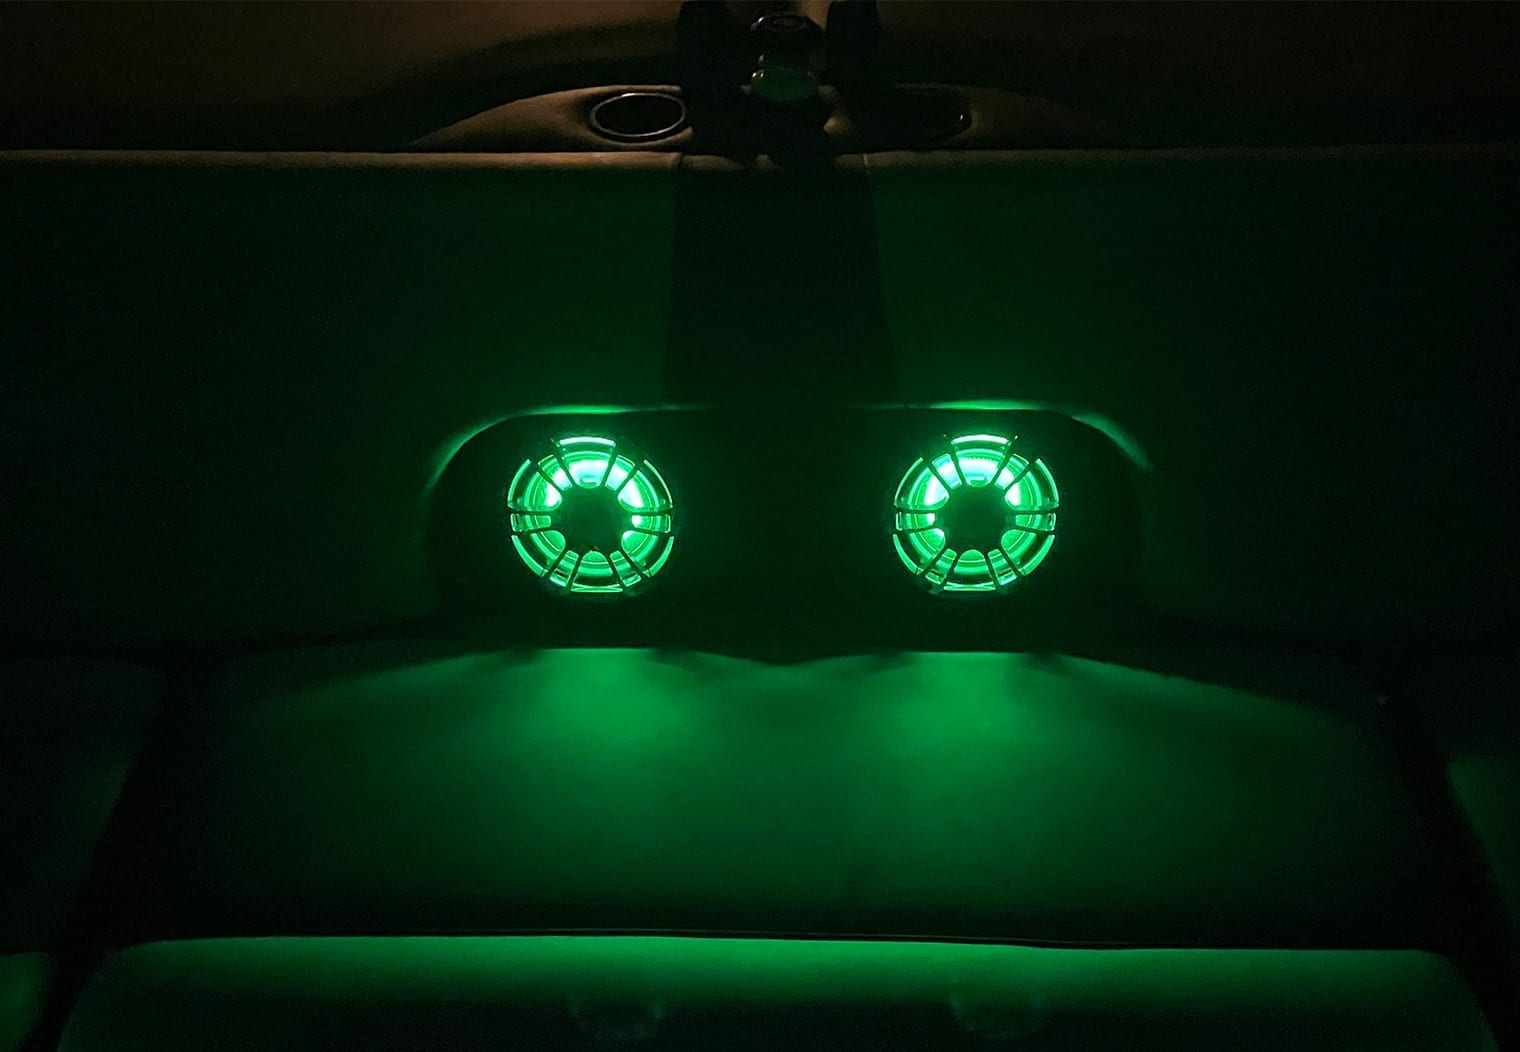
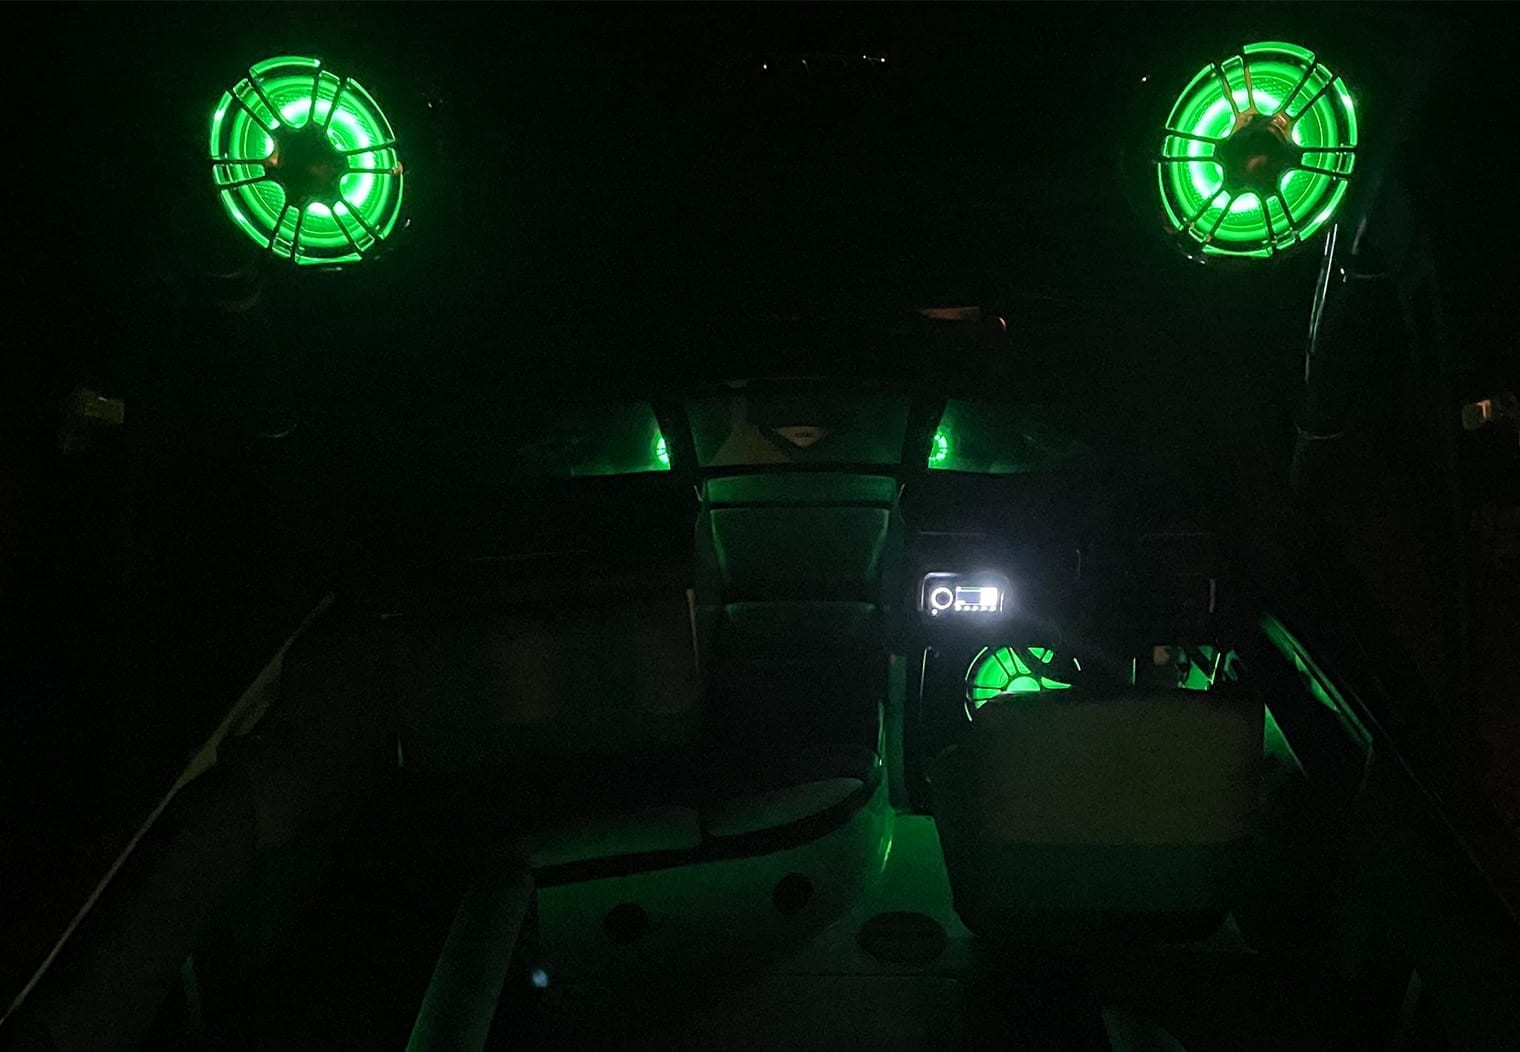
I have to say, with the full setup of interior speakers, subwoofer and tower speakers that had LED integrated, this thing looked amazing at night. The control you have over the colors is unmatched. You can really mess around with this for an hour or two and not get bored. Here's some photos at night time with the LED set to a green color:
LED Lighting Images
Fusion MS-RA770 Head Unit
I'll start this section out by saying that if you're planning on doing a similar setup in your boat to this where you have Fusion speakers, subwoofers and amplifiers, I highly recommend rounding the system off with a new Fusion head unit as well. I'll tell you why shortly.
For this installation, we used Fusion's MS-RA770 touchscreen head unit as the source unit on the boat. The Axis is a good candidate for a head unit like this because the head unit is at the helm. I wouldn't recommend this type of head unit for a boat where the stereo is tucked in the passenger compartment since you won't be able to use the touchscreen feature really. I also recommend you take a deep look at my Fusion MS-RA770 demo and review article. I outline a ton of the benefits to using a Fusion head unit with a fusion system like this but in a nut shell there's a couple of really cool things:
- Zone Control: I really wanted to have independent control over the tower speakers, interiors and subwoofer in a way that I could easily increase or decrease the volume of each at any point in time. The MS-RA770 allows you to independently name and control the output of 4 zones and tune them independently as well. With this zone control it eliminated the typical reason I really like equalizers like the Wet Sounds WS-420BT, especially for boat owners like this one who only wants independent control of the zones and not of an equalizer.
- Fusion-Link App: The Fusion link app is a really powerful tool. It provides full control over the head unit and more. There's a ton of great customization features along with audio tuning. In particular, I mentioned DSP in the amplifiers section. I used customized, renamed zones in combination with Fusion's DSP configuration tool to pre-tune the amps before they were even installed on the boat. Take a look at the article link above for the details but it all but eliminated the need to do in-boat tuning on the water and even told me how to preconfigure the amplifier with a video.
- Connectivity: Fusion has an integrated WiFi streaming capability, including Apple Play. This allows you to play music from further distances than typical Bluetooth and also hook up multiple head units (if you have a large boat with multiple units).
For more cool features check out the review article I linked above of the MS-RA770.
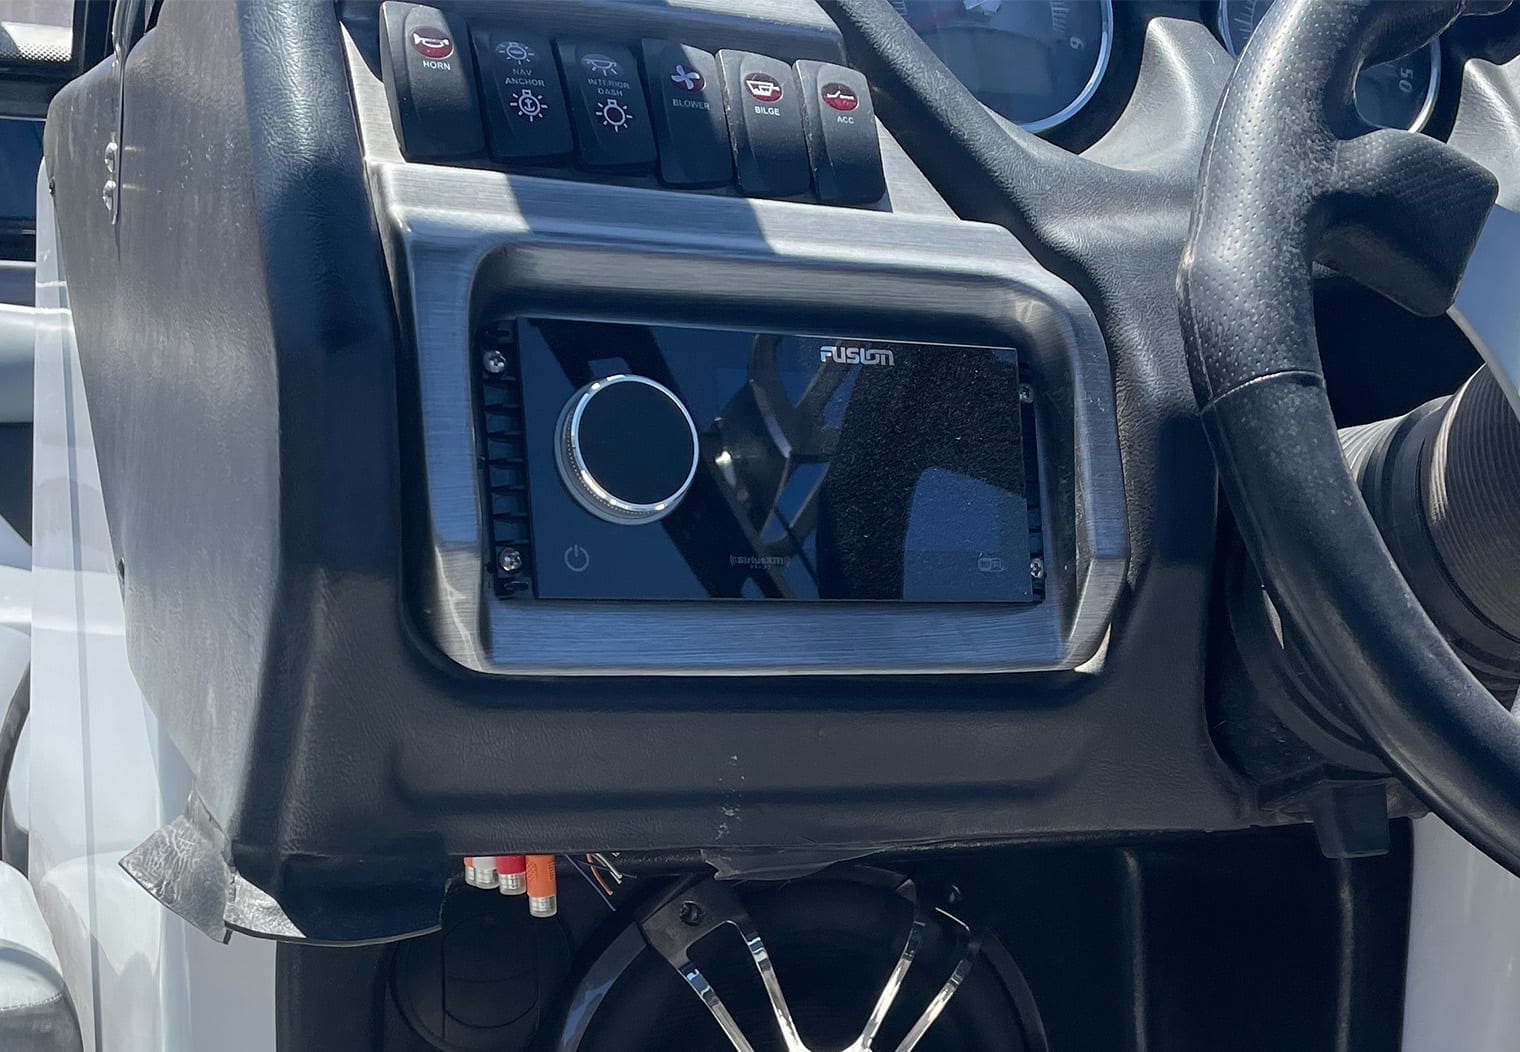
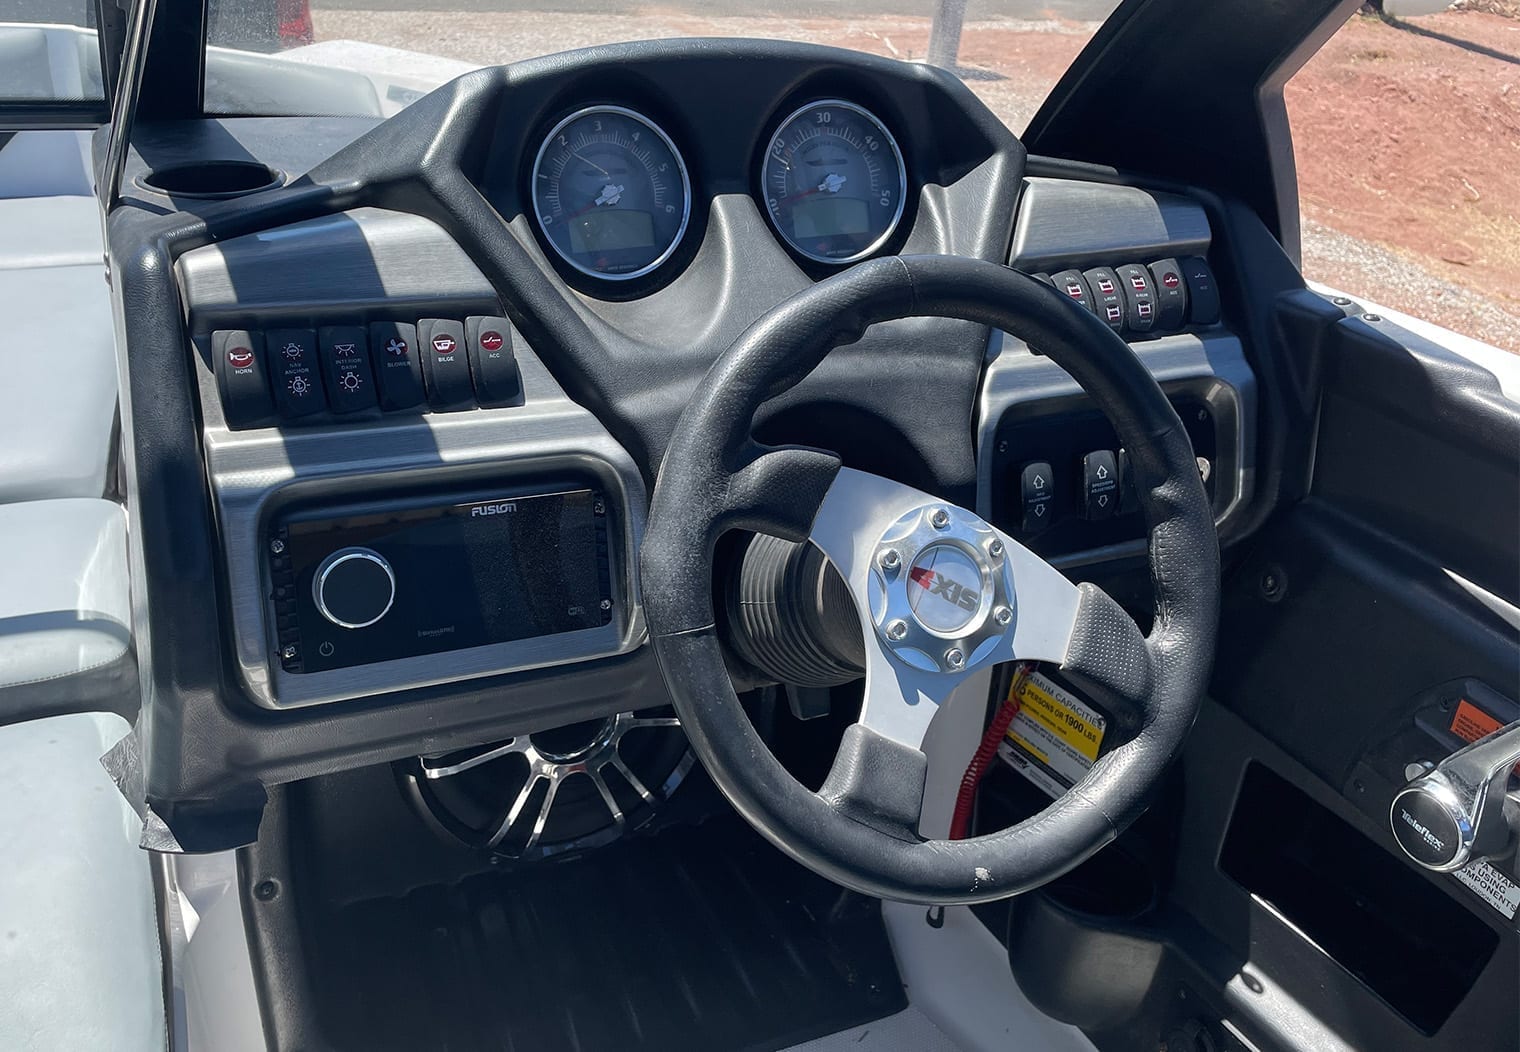
As far as installation goes, it was pretty straight forward. I used the existing power, accessory and ground that was already wired to the old head unit. I ran the RCA signal wire from the unit to the amplifiers and that was pretty much it. It fit right into the existing location that the old head unit was in as well. The final product was really nice and made the entire dash look upgraded!
Conclusion
Before installing this system the only reference I had of Fusion's speakers was the OEM T6.5 tower speakers that came on my 2004 Super Air 210. And to Fusion's credit they were great tower speakers at the time.
I was thoroughly impressed with this system, from the look and design to the features and sound. Fusion really did a great job at matching their products in a way that makes it really beneficial to go for a 100% Fusion system through and through. I would go as far to say that it's a no brainer to get an entire Fusion system versus mismatching speakers, towers, etc from different manufacturers.
I really loved the 8 channel amplifier for this type of wakeboard boat stereo. Combined with the monoblock, it really eliminates an entire amplifier from your boat while maintaining the high-power output. The only thing that was inconvenient about it was the need to have an RCA input for each of the four zone inputs on the amplifier which forced me to split an output from the head unit to make all the zones have signal.
The MS-RA770 was super powerful from a tuning and from a Zone Control perspective. DSP/easy tuning and customizable zones were a must for this installation and Fusion nailed both. And with the Fusion-Link app, you can control every aspect of your stereo (including the zones) directly from your phone.
The speakers looked great and sounded fantastic with the power and DSP configuration. The only thing to note again at the speaker level is related to the tower speaker clamps. They were too small for this Axis A22 but they should fit most other towers. I don't recall seeing another tower with this thick of a diameter bar. The clamps also seemed to find a way to loosen up in chop or while driving. And the LED lighting is really unmatched right now. You can really have any color you want with Fusion's CRGBW feature. The extra wiring work is well worth the look of this new lighting system.
Overall, this came out to be a really powerful system in many, many ways with a ton of functionality. Both the owner of the boat and I were very happy with its performance!

Hey- Wondering how you get 2 ohms resistance at speakers? Are you bridging left and right channels for each zone with no stereo information? If so, how does that setup sound. Thanks for the article. I am planning an install on a 38′ chris craft.
.
Hello. Per the amplifier documentation: “Each channel supports a nominal 4 Ohm speaker load
impedance, and a 2 Ohm minimum speaker load impedance.” There’s no bridging necessary to get a 2 ohm resistance per channel”
You can find the full documentation here: https://assets.fusionentertainment.com/products/downloads/SG-DA8200_Amplifier_Installation_Instructions_EN-US.pdf?mtime=20201020110950&focal=none
Thank you for responding. I must be missing something but don’t you need (2) 4 ohm speakers for the left and right channel to make 2 ohms? Otherwise it’s 4 ohms left channel and 4 ohms right channel.
Sorry, I may have misunderstood your original question. If you have (2) 4 ohm speakers and you wire them in parallel, then yes the output would be 2 ohms. You will need to run (2) 4 ohm speakers in parallel for each zone in order to achieve 2 ohms. I do not run a 2 ohm setup though since the Signature Series 3 speakers that I’m running are all 4 ohms. Each channel has a dedicated 4 ohm speaker.
How is sound quality, have jl 6.5 now with fusion head unit ,really want for lighting and looks. I just dont want to go backwards on sound quality,jl are loud enough .Thank you for your efforts
Which JLs do you currently have? Tough to say if they’ll sound better than your JLs without knowing your full setup. I was impressed by the quality and volume of the signature series 3 speakers though. There are some JL setups that will outperform the setup that went in this boat though.
How much was the system and how long did it take to install?