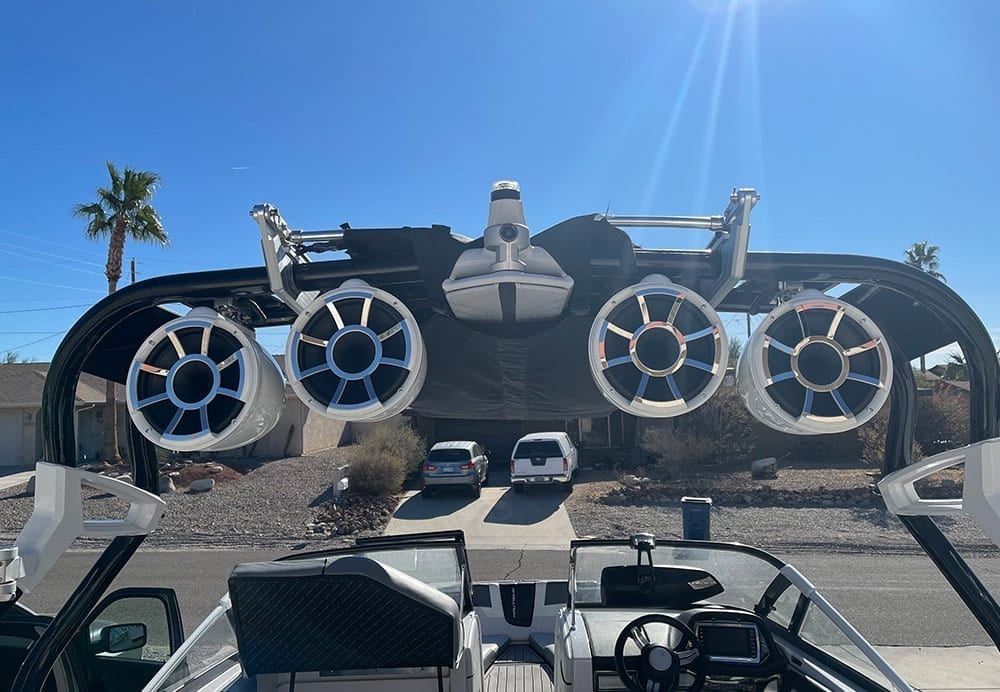
In this article: We'll walk you through our custom stereo upgrade on a 2013 Nautique G23.
In 2013, Nautique introduced yet another game changer in the wakeboarding and wake surfing world – the G series. It combined the best of their wakeboarding technology, newly refined wake surfing technology along with a TON of great new interior tech and enhancements to create a truly next-level boat.
In 2014 I attended the Nautique Regatta in Parker, AZ to get a glimpse of the new boats. I remember my first thought seeing them parked in the parking lot as we drove into the Blue Water Casino – They're MASSIVE. The beam was wider, the hull was deeper, the tower taller – everything about the G series was bigger and better. It was that moment that I set a goal to eventually get my hands on one. It was a bit of irony too, because it was in 2004 that my family and I set our sights on a previous boat of mine – the 2004 Super Air 210 team edition – and decided to purchase one. It was only fitting that this was the event that also led to my most recent purchase/upgrade to a 2013 Nautique G23.
Boat Overview & Existing Stereo
Like I mentioned, the upgrade that I'll be running through in this article is on a 2013 Nautique G23. There were really two big complaints that people had about the G23s when they literally rolled off the lot –
- The hull design of the bow led to some unexpected showers for the folks sitting up there in certain conditions (I can confirm that!). They changed this in 2015.
- The stereo wasn't up to par. As I wrote this I was going to say it was crap because that's what you'll read on planetnautique from perturbed buyers who just spent upwards of $130k+ on a boat and they couldn't hear the towers at 65+ft back like an aftermarket stereo. I'd be pissed too. I didn't buy this boat new though. At the time of purchase my boat was just shy of 7 years old with 170 hours on it and nowhere near the retail price. I also intended on upgrading it – needless to say my opinion of the OEM stereo is quite different than those on the forums – it's decent. Maybe that's because I'm comparing it to the OEM stereo on a brand new 2004 Super Air 210 when we rolled it off the lot 14 years ago. That stereo was crap.
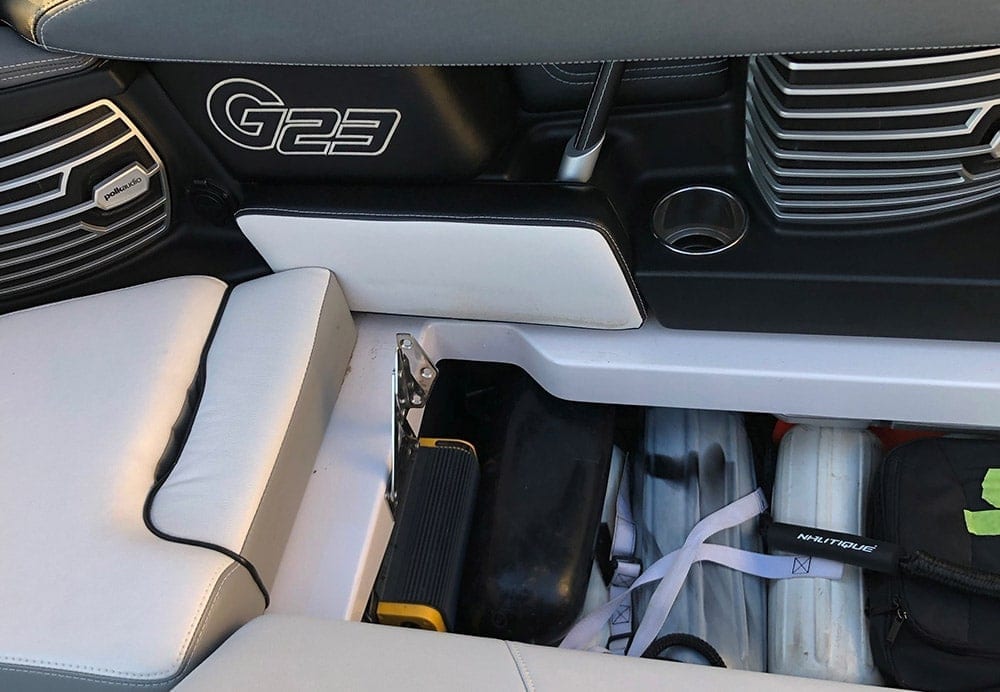
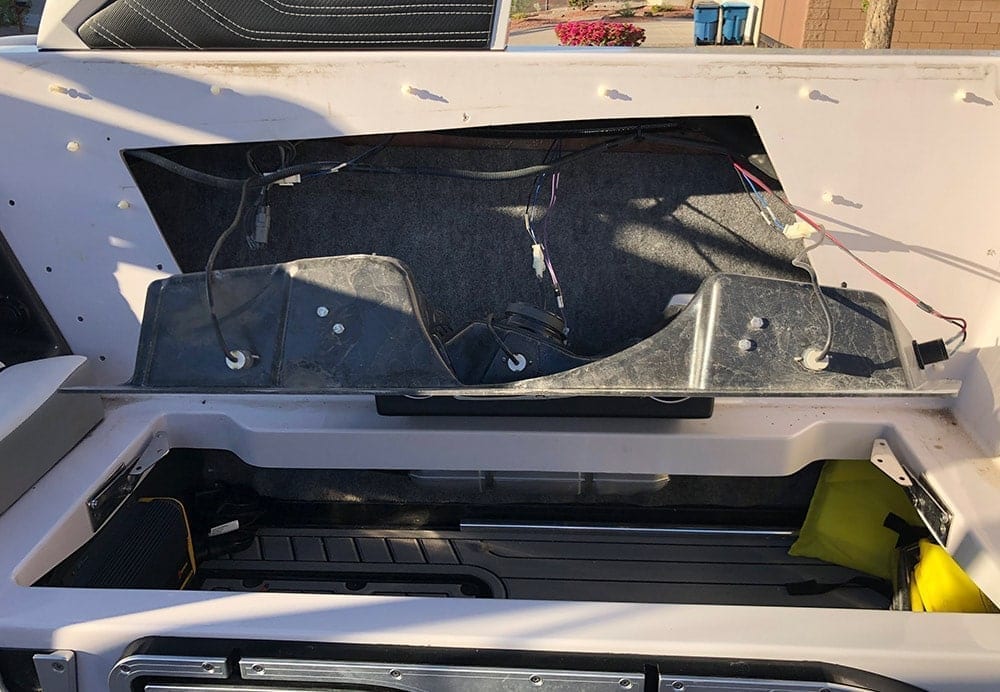
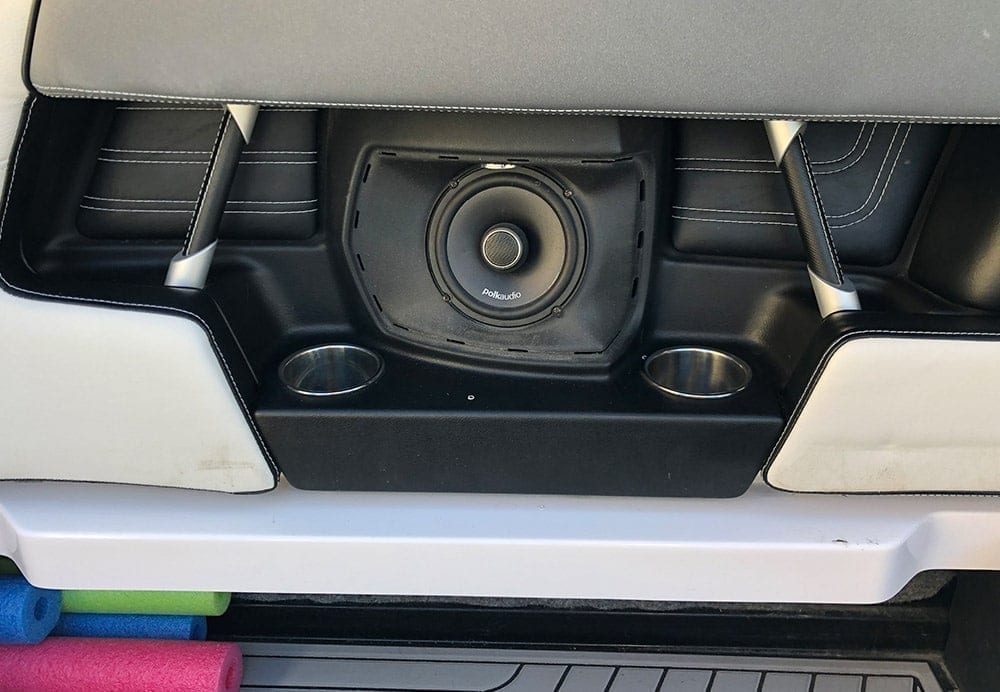
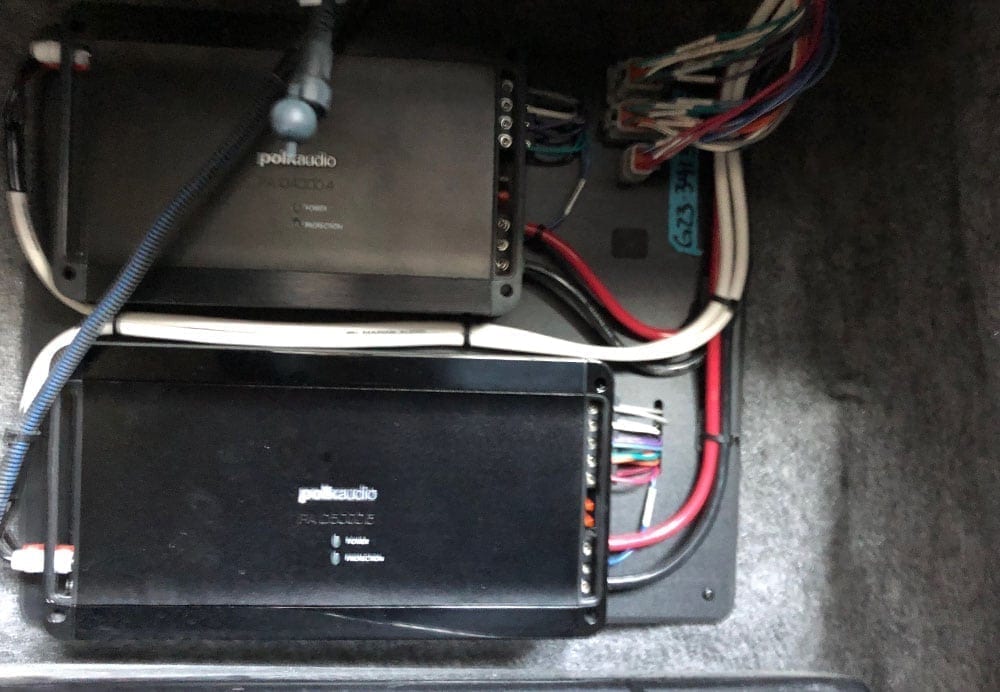
From the factory, my 2013 (and many other 2013 and 2014 G23s) came with Polk amps and interior speakers (6.5 inch). It had a Polk head unit as well that integrated with the Linc system at the helm. On the tower were four Roswell 7.0 HLCD speakers with built-in dome lighting. There's also a 10in Polk sub tucked under the passenger side compartment. My initial thoughts my first time on the water with this boat and it's OEM stereo were:
- Where the hell is the Bluetooth? Seriously, no Bluetooth in the Polk head unit that came with the boat. It has USB and Aux inputs which sufficed for the first season until I decided to upgrade.
- It could use a LOT more bass. This was always my complaint with the OEM sub location on all of these boats including my 2004 Super Air 210. Being tucked in a small compartment completely degrades the subwoofer's performance. For one reason or another they still didn't get that. It also wasn't a vented compartment for the sub. In my 2004 Super Air I decided to pull it out of the compartment. I decided to do a different approach on this boat to keep every bit of space I could (more in the sections below).
- The stereo controls at the helm were tough to use via Linc. In some cases you had to navigate through the user interface in order to get the volume controls to re-appear which was super frustrating when you needed quick volume controls. I all but refused to use them after a while and resulted in just using my phone volume.
- No zone control – I expected that.
- The interiors and towers sounded good but were underpowered and just didn't have the volume at all that I wanted.
- I loved the look of the Roswell towers on there and the dome lights.
All-in-all, upgrading was an absolute no brainer in my opinion and is why it was so common in the younger years of the G. In 2014 or 2015, Nautique partnered with JL Audio and engineered a custom stereo from the factory that brought the stereo up to par with the performance of the boat. Unfortunately my boat proceeded these models.
Goals
In these types of installs and upgrades I always like to define the goals up front. There are INFINITE combinations of products and configurations. At the end of the day the decisions I make on a stereo are from a combination of literally hundreds of minor ones to achieve multiple goals. To give you an idea of some of the driving factors for the configuration(s) I chose for this boat, here were some of my goals:
- Ultimate product quality, performance and volume. Money wasn't really a factor to be honest.
- Perfectly matched system – I wanted my amps to have adequate power to all of the components of my system to get the absolute most out of them. Interestingly enough this was actually one of the big deciding factors between JL and Wet Sounds. I'll get more into that.
- Ease of installation – My boat is in storage about 4 hours away from where I live. Installation had to be planned up front and custom work had to be considered. I wanted to do this in one long weekend without needing a shop, fiberglass work, etc. This was a deciding factor when thinking about 8″ interior speakers or 6.5″. I didn't want much custom work (if any).
- Looks – Obviously this was a huge player. The look of the towers is a preference. I have my opinion. This was also a driver in the decision between JL and Wet Sounds.
- Functionality – I wanted as much control at the helm and not tucked away in the passenger cubby. But I also wanted simplicity when it came to tuning and flexibility. Functionality also extended to the tower speaker decision – how big, placement, etc. I wanted to maintain as much OEM-like functionality and look as possible. Also wanted to limit the amount of space that my stereo took up.
The combination of these goals ultimately helped me make tough decisions when it came to some of the products and led me to the stereo that I decided on. A good read that I'd recommend for those who are just starting their research on there stereo is Crutchfield's What Kind of Marine Audio System is Right for Your Boat? and Building Your Boat's Stereo System.
Wet Sounds or JL Audio?
This is a loaded question. Not to sound too political (because neither were helping to fund or drive the decisions I made for this setup) I think the Wet Sounds vs JL Audio question is going to be dictated by your goals. I had a full list for both with pricing, specs, etc. I ended up with a blend of products but it was my goals that helped me make choices for each type of product (e.g. towers, interiors, etc). I'll state this again though.. Wet Sounds and JL Audio had 0% to do with how I drew up my conclusions on products. They are not sponsoring this. But let me break out my opinion and how I decided between the two for:
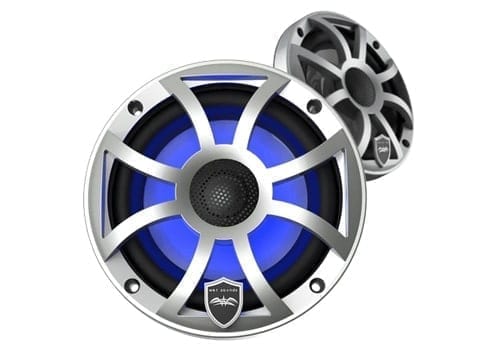
- Tower speakers: This was actually a really tough one. JL Audio has their 8.8s that I've heard in person and sound fantastic. They also have an added dome light that will integrate perfectly with the OEM dome light feature of the G23. I actually loved this feature. They're longer enclosures, and they aren't HLCD. Wet Sounds on the other hand doesn't have an option for the dome light, has an 8″ or 10″ option for the REV series and the casing looks a little more compact in my opinion. Ultimately I went with the Wet Sounds because I liked the look of them, wanted the 10″ speaker to get as much full-range and low frequency coverage and also wanted the volume of the HLCD setup.
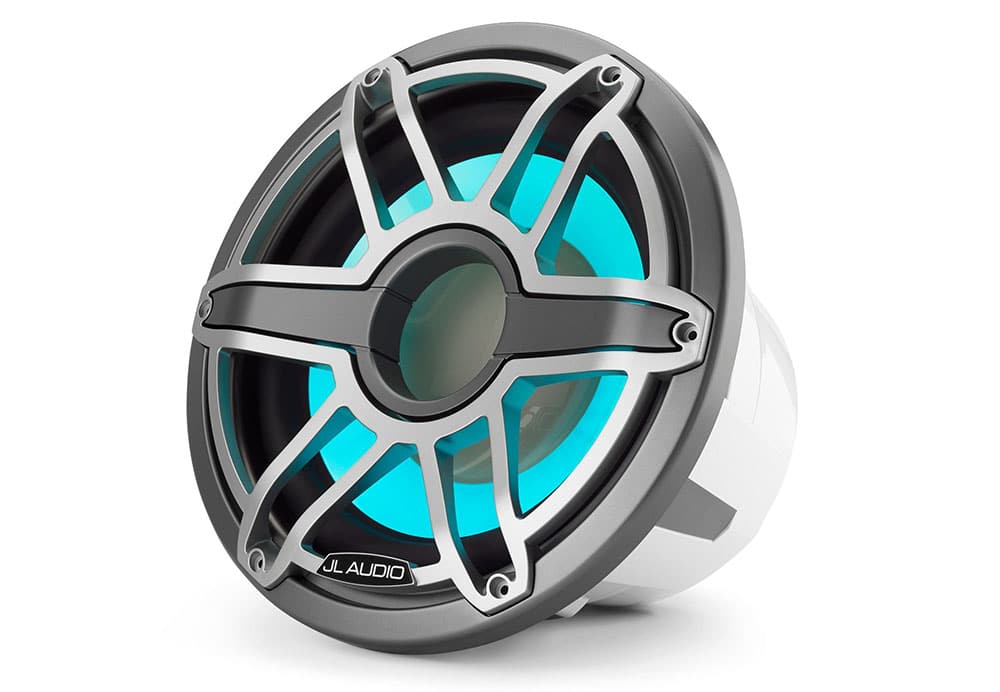
- Interior speakers – The towers were actually a pivotal decision. For the folks with OCD, matching components is actually a driving decision factor. That said, I LOVE the M6 series speakers from JL. I sat in a G23 with all 6 7.7 M6 interiors and it blew my mind. But I decided on 6.5″ speakers because I didn't want the hassle of creating custom pods for 7.7″ speakers. And I know that the 6.5″ REVO from Wet Sounds will have more volume and a higher power handling. The combination of power, volume and looks is why I decided with REVO 6s for the interior.
- Amplifiers – I went all Wet Sounds for the amplifiers as well. I really wanted to try the MVi series amplifiers from JL. These are pretty next-level amplifiers in my opinion. You can read more about them in our article here. But the power ratings just didn't cut it for me. The Wet Sounds amps put out more. And I've had them before so back to ease of install, I'm familiar with Wet Sounds' amps and wanted ample power to match the system.
- Subwoofers – This is where I diverged from Wet Sounds. In the G23, I wanted to keep the existing location for the sub, and also add another one behind the helm in the ‘OEM' location (you can read more about this in the subwoofers section). The OEM location is more of a free-air setup, where the inside of the sub enclosure actually bleeds into the bow of the boat. For this reason, I chose to use a free-air/IB sub. JL, in my opinion, still leads the way with their subs so I went with their M7 Free Air. These things are monsters, you can read more about my first look at the M7-12IB subs here.
Hope my logic here helps bring context the decisions and also will help you make your own decision on which products you're going to go with. There's more to it than just these few bullet points too, but these at least covered some of the high-level driving decisions of mine.
Final Product List
Here's the final list of product that I decided to use for my G23's stereo. While browsing for your own products, I'd recommend Crutchfield's Marine Section. They tend to have the most comprehensive imagery and details on all the products. And their prices are competitive.
Here's my list. Note that all of the product links will take you to Amazon or Crutchfield for pricing and more photos!
- Tower Speakers & Clamps
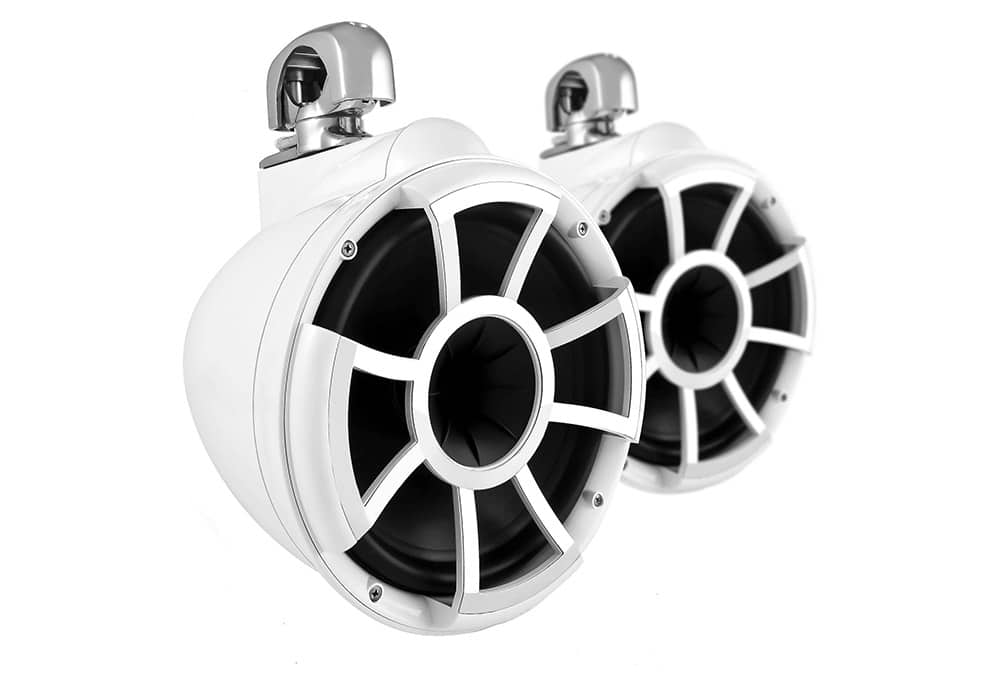
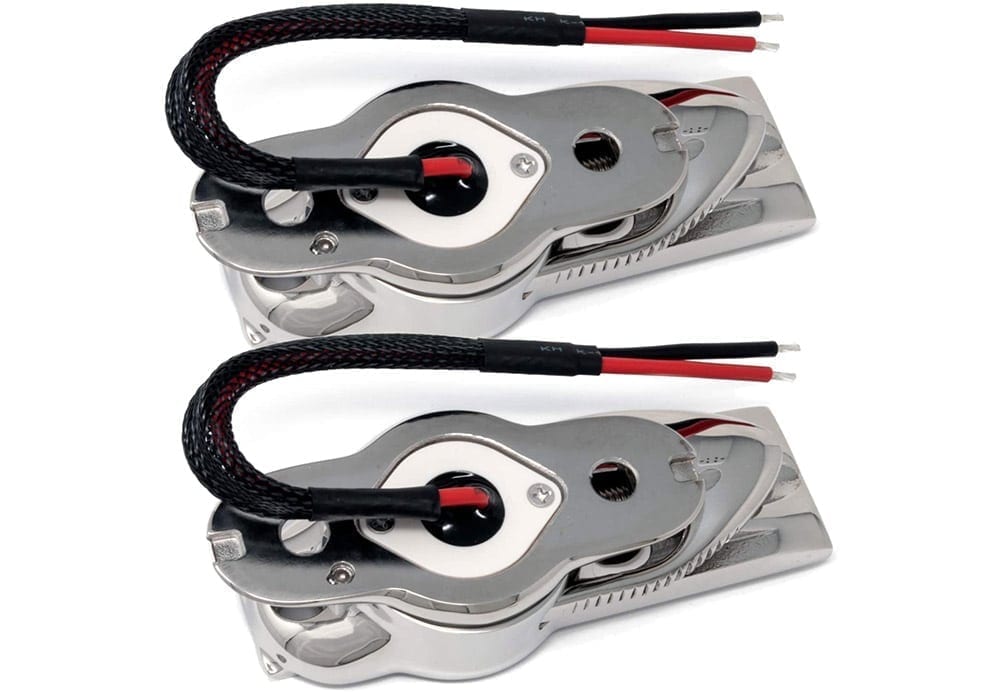
- Wet Sounds REV 10 W-X V2 – Surface mount fixed
- Wet Sounds REV 10 TC3-SXM V2 – Surface mount swivel clamp
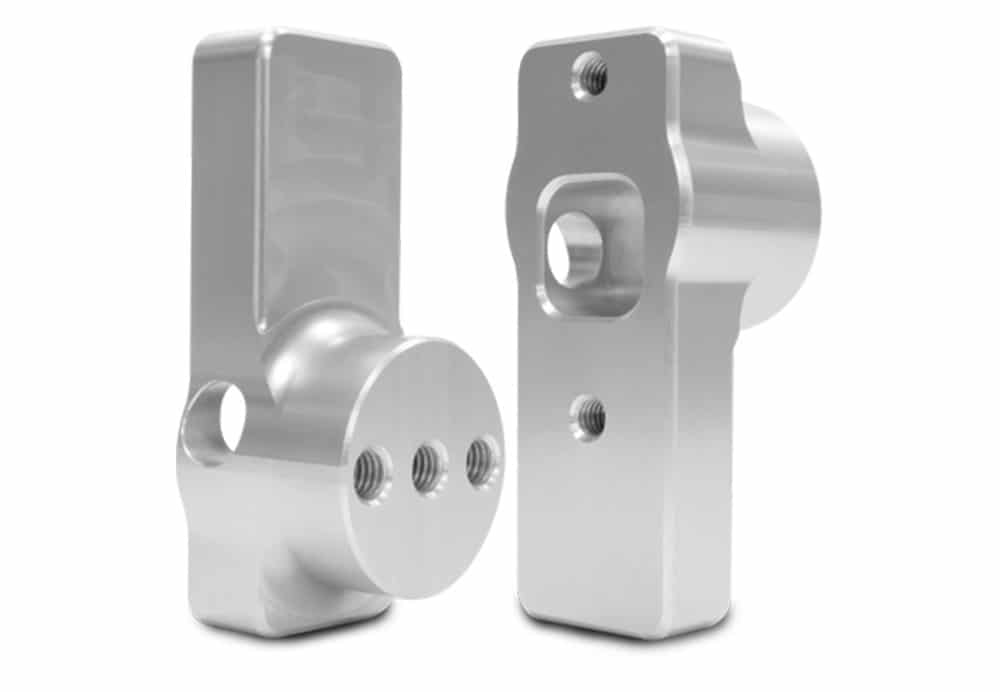
- ADP Nautique FC5-U (x2) – Adapter to the OEM mounts on the tower
- Wet Sounds Suitz 10 (x2)
- Amplifiers
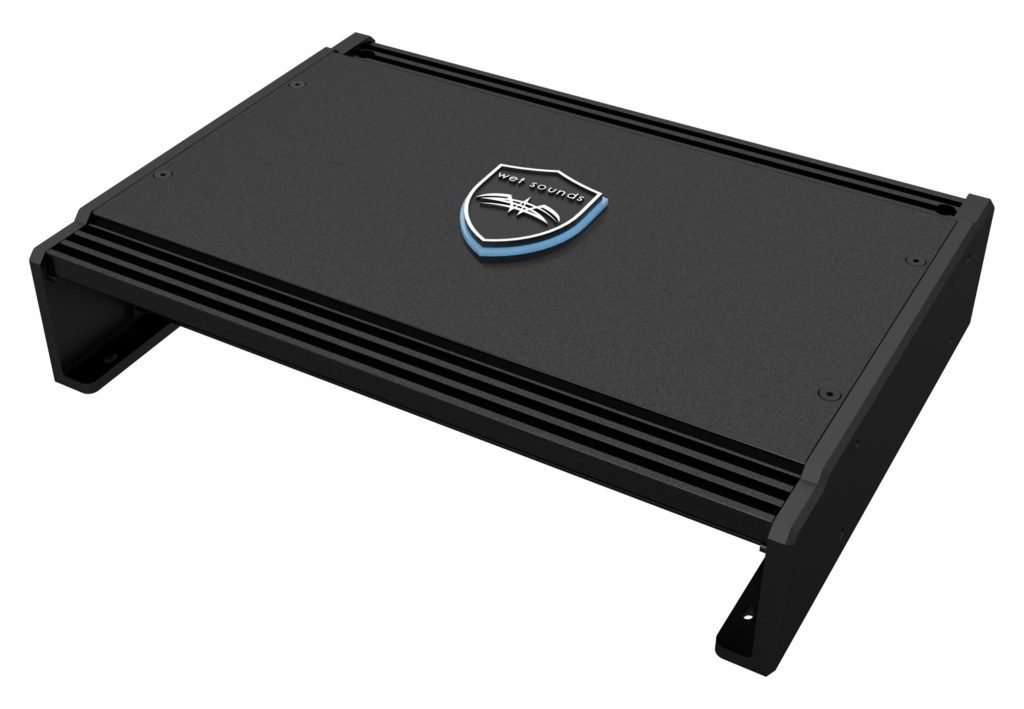
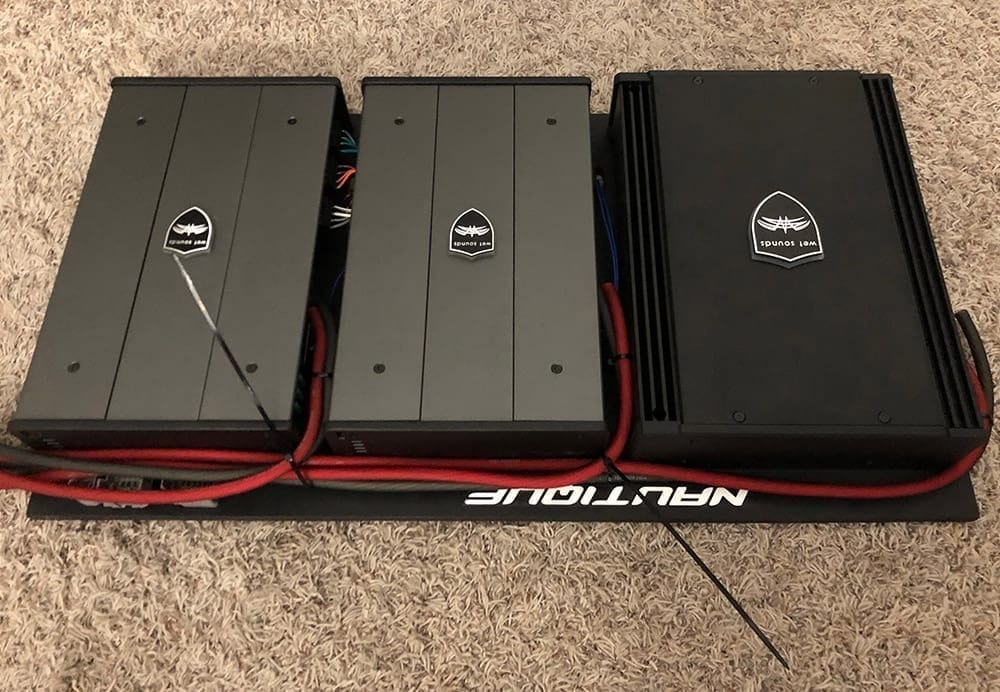
- Wet Sounds Sinister SDX4 – For tower speakers
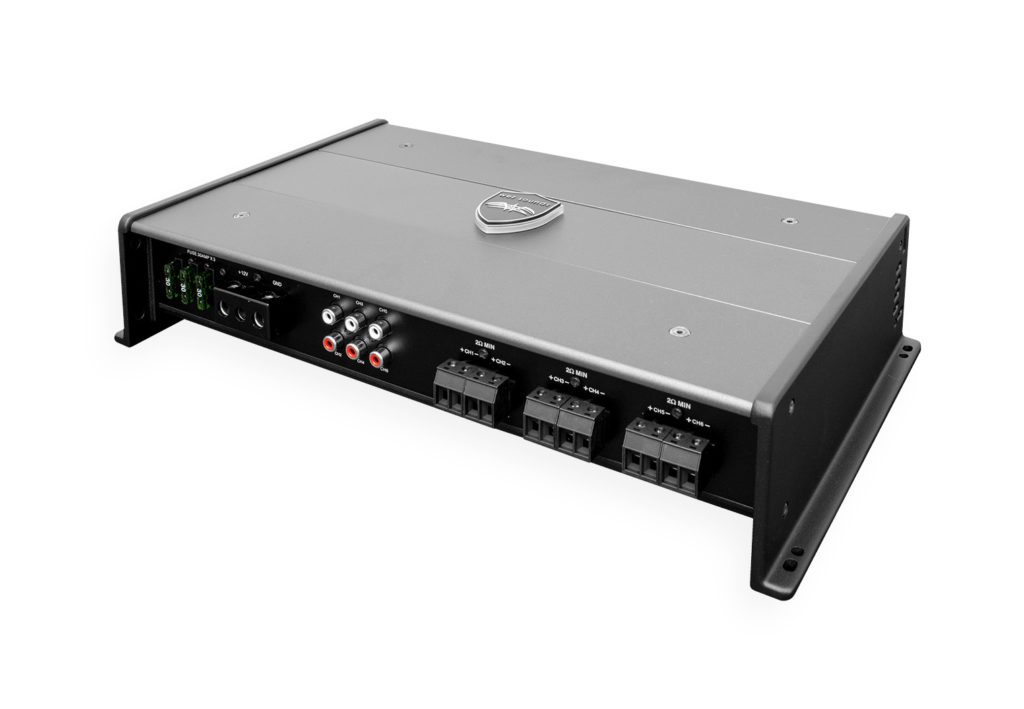
- Wet Sounds SYN-DX6 – For interiors
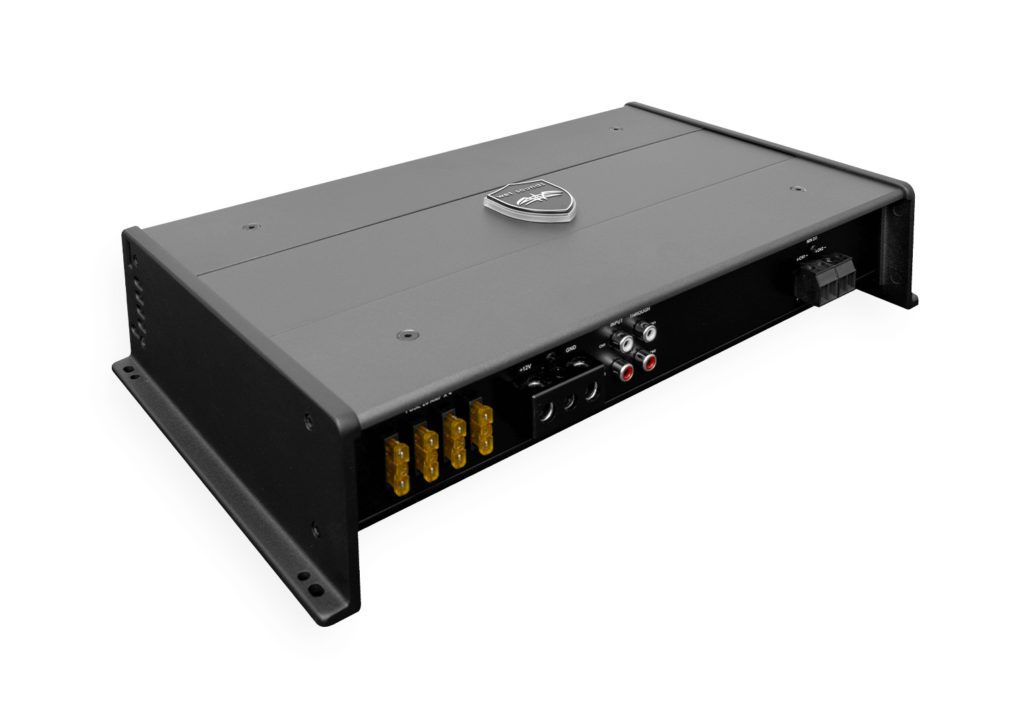
- Wet Sounds SYN-DX2.3 HP – For subs
- Interior/Cabins
- Wet Sounds REVO 6-XSB-SS (x3 pair)
- Subwoofers
- Accessories
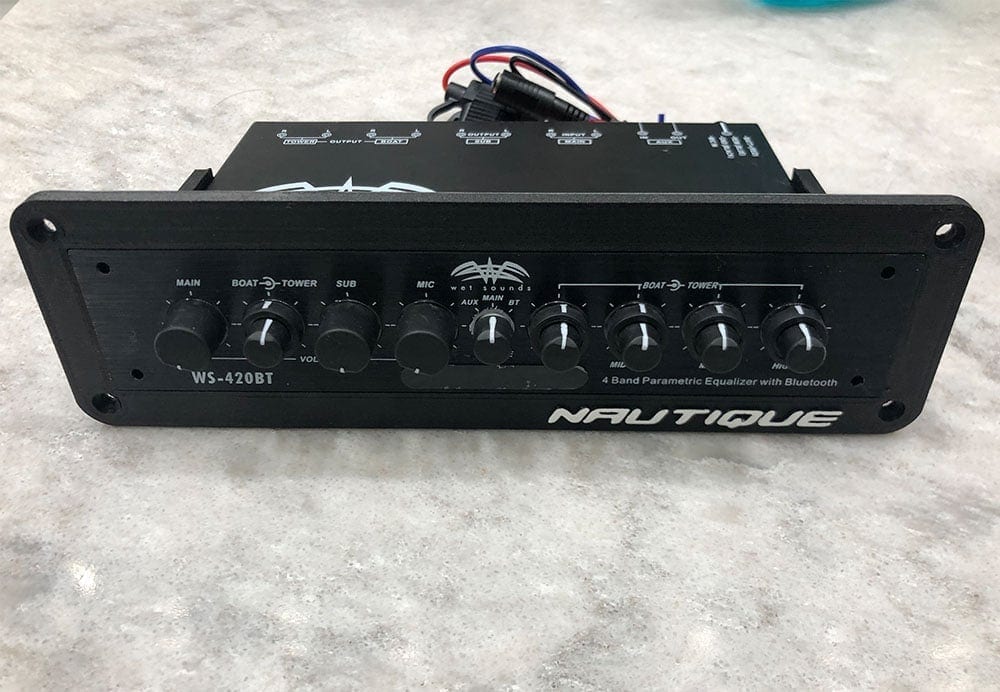
- Wet Sounds WS-420BT – equalizer
- Wet Sounds WS-BT EQ UDM-B – Black flat-mount for WS-420BT
- Wet Sounds WWX-RCA 6ch 23FT – 23ft 6ch RCAs
- Wet Sounds WWX-RCA 2ch 23FT – 23ft 2 ch RCAs
- Wet Sounds WW-4 AMP Kit Rear – Amplifier wire & distribution blocks
- Wet Sounds RF-RGB-MC V2 – LED light control
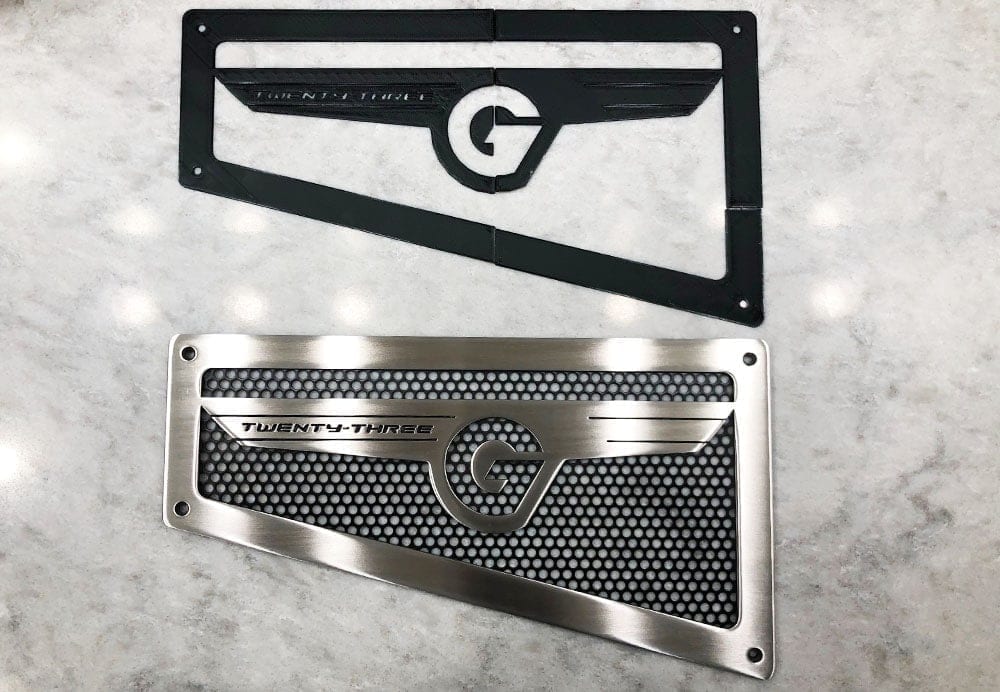
- Denver Waterjet G23 wing Sub Vents (x2)
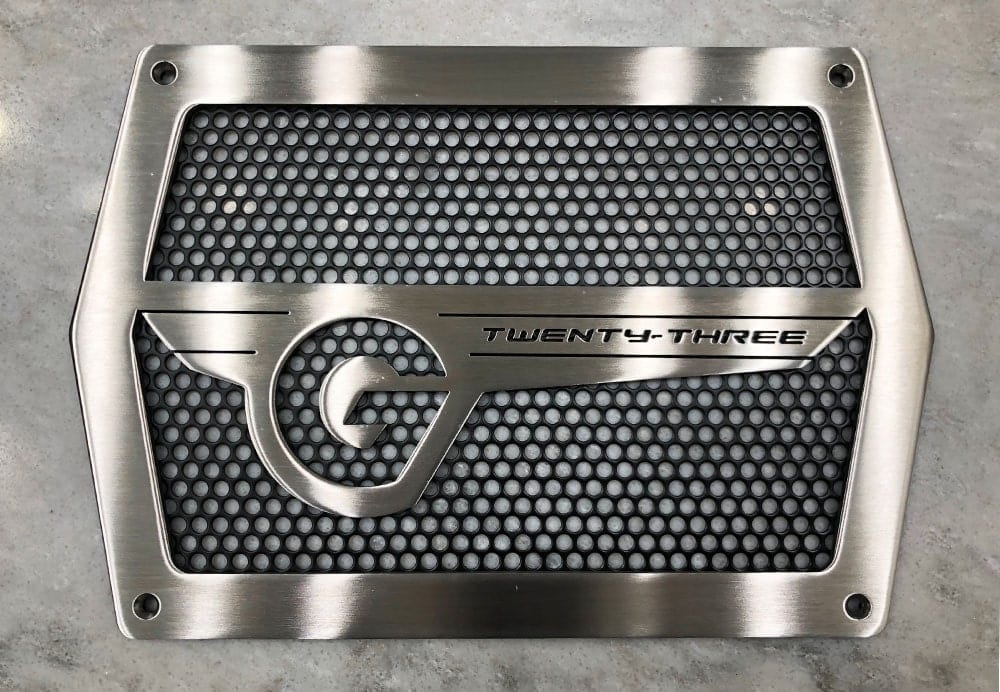
- Denver Waterjet G23 wing custom helm vent
- Starboard XL Black Sheet, 1/2″, 4′ x 8′Accessories
- AmazonBasics 12 Gauge Speaker Wire – To wire the two subwoofers
- Wet Sounds WS-420BT – equalizer
- Misc
- 1/0 Gauge Copper Terminal Connectors – To connect the positive and negative leads to the Blue Sea battery switch. Only needed if your amplifier kits don't already come with terminal connectors on the power and negative wires. The Wet Sounds kit already comes with them but I bought these anyways just in case.
- Ram-Pro 125 Piece Rubber Grommet Eyelet Rings – Rubber rings for the tower speaker wire in case I need to drill new holes and run wire through the holes
- 65 Piece Jig Saw Blade Kit – Because cutting through the fiberglass for the subwoofer vents will BURN through blades
- Cutting Wheel Set for Dremel – Because you always end up using a Dremel for cutting in these types of installation
- Dremel 561 Multibit (x4) – I used my Dremel 4000 to cut the secondary subwoofer hole in the fiberglass using multiple 561 bits.
Scroll through some of the products I used:
Wiring
Speakers & Subwoofers
My wiring plan was to keep it simple. For the speaker wiring, I am plenty content with the condition and quality of the 16 gauge marine-grade speaker wire Nautique used from the factory. Plus, I'm not wiring up RGB lighting so I didn't need to re-wire any of the speakers to support it in the cabin. Same goes for the tower speakers. I re-used all of the OEM speaker wire that was already ran throughout the boat. Even when it came down to the 3 Deutsch Connectors that Nautique used to connect the amplifiers to the speaker wire throughout the boat, I reused them! Take a look at the Amplifier section further in the article to see what I'm talking about.
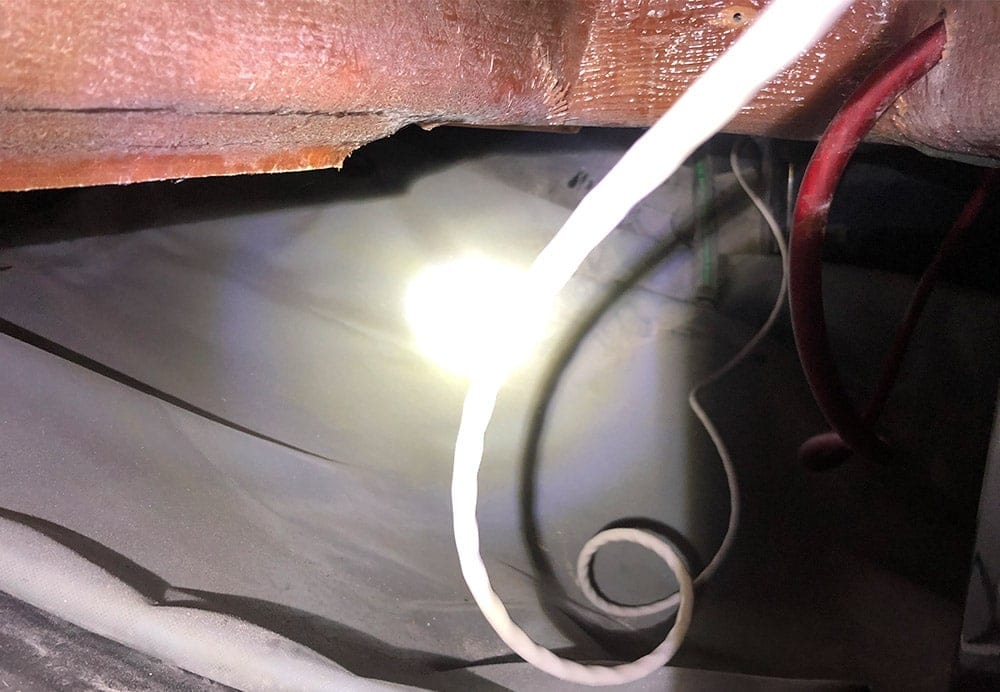
For the subwoofers, I chose to re-run the existing wiring to the subwoofer in the OEM location, and ran the second (new) subwoofer by running the 12 gauge wire directly across underneath the bow area of the boat boat. I used zip tie mounts to tie the wire neatly across the underside of the boat so that it wouldn't sag and move around where the belly ballast bag was. You can see more in the subwoofers section further in the article for more details about the wiring to the amplifiers.
Power
I chose to go with Wet Sound's WW-4 AMP Kit Rear which includes 20′ of both positive and negative 0/1 gauge wire, 20′ of both positive and negative 4 gauge wire, two distribution blocks (one for positive and one for negative), 25′ of remote wire, and an in-line main fuse block. One thing to note while wiring up a more powerful stereo on your G23 – I have read in many forum threads on Planet Nautique that the OEM breakers will not support the Amperage of an upgraded system like this. For this reason I chose to bypass the OEM breakers for the amplifiers and wire power directly to the Blue Sea battery switch. Note that the 2013 G23 did not have an ACR, so wiring to the battery switch is as simple as wiring to a traditional 2 battery Perko switch (for those who are familiar with Perko).
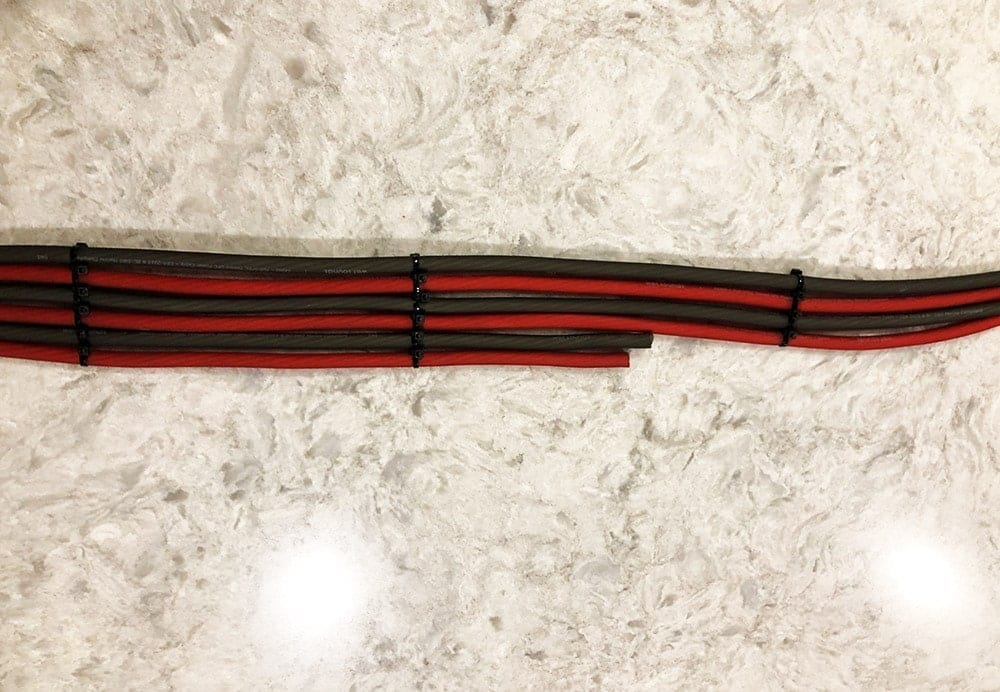
To do this, I ran the positive and negative wire from the 3 amplifiers into the two distribution blocks via 4 gauge wire. I ran the 6 total (3 positive and 3 negative) in parallel alongside the top of the three amplifiers using a flat cable tie method that I came across from CarAudioFabrication (check out their video here). I really like this method of tying cable because it makes them lay flat, is very clean and also will lay somewhat hidden across the top of the three amplifiers. I did this in preparation before heading out to do the install since I already had created the new amplifier rack (see the Amplifiers section below).
In simple terms, you'll take all of your power wire and run a single zip tie around them, leaving enough slack in the zip tie to tie individual zip ties in between each of the wires. I took a few photos of what it looked like along the way.
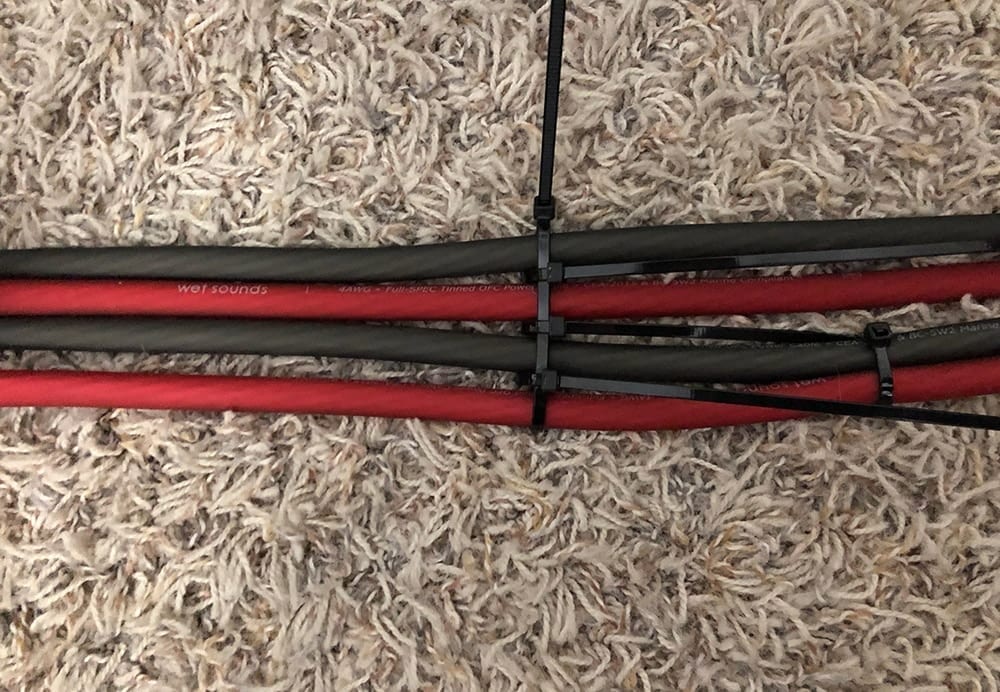
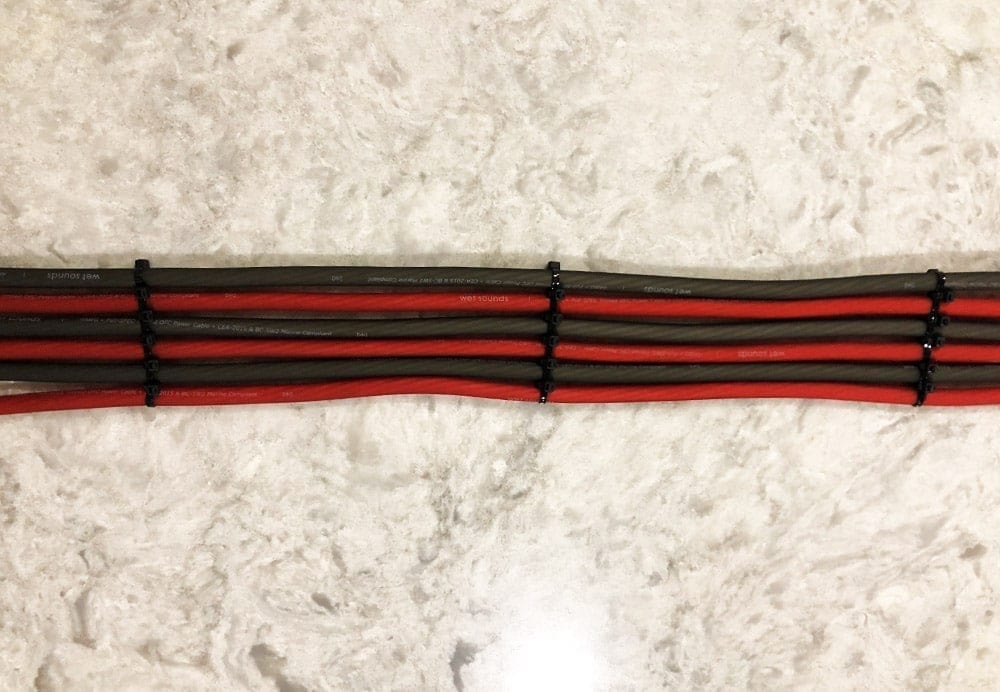
These 6 power wires were ran to the two distribution blocks mounted below and to the right of the amplifier rack and to the right of the subwoofer. With the amplifiers wired to the distribution blocks, I then ran the 0 gauge from the distribution block to the Blue Sea battery switch at the helm via the 0/1 gauge wire with an inline fuse.
On the back of the switch, there are three terminal connectors – one for battery one input, another for battery two input and a third for the output. The output powers the entire boat. I tied the 0 gauge power wire directly to the output. This allowed me to still piggy back off of the original battery switch and be able to separate my stereo from the starting battery or run the stereo off of both batteries if I wanted to while the boat is parked. It will also eliminate the possibility of my stereo overdrawing the OEM 60A breakers.
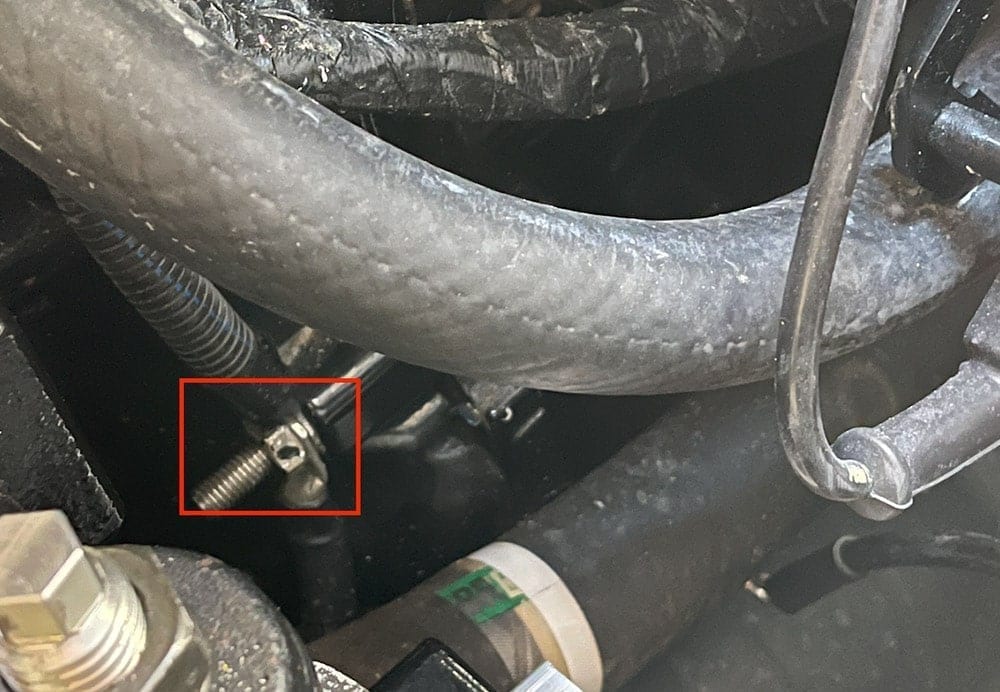
As for the negative, ran all 3 amps to the 2nd distribution wire via 4 gauge wire, then from the distribution block to the same location that the original two 8 gauge negative wire were mounted – directly to the engine block. This also simplified how we ran the wire along the boat. We followed the same path that the original wire was mounted to.
Signal/RCA & WS420BT
For the RCA wires & WS-420 I chose to run a 2ch (Wet Sounds WWX-RCA 2ch 23ft) from the head unit to the WS-420BT input. And then I used a 6ch RCA (Wet Sounds WWX-RCA 6ch 23ft) from each of the outputs on the WS-420BT to each individual amplifier. This includes the interior speaker channel, tower speaker channel and subwoofer channel. At the amplifiers I used each individual channel to power all channels – for example the 6 channel all pull off of the single input that's connected to the interior speaker channel output on the WS-420BT.
In terms of wiring location, I was careful not to wire the power and RCA cables anywhere near each other. So I chose to run the RCAs along the bow of the boat to where I mounted the WS-420BT at the helm instead of underneath the bow where the power was ran. I also ran the RCAs along the bottom of the amplifiers, opposite of where the power wire is located.
For powering the WS-420BT, inside the helm on the back of the fuse panel we tied to the stereo turn-on wire within the fuse panel itself. This was indicated by a red with black wire. We grounded it to the OEM distribution block that was also easily accessible under the helm on the most starboard side of the helm.
Stereo Installation
Let's start talking about the fun stuff. I had a great time with this installation. For the most part, it was straight forward. The interior speakers were direct swaps (although getting to the mounting screws proved to be a challenge). The towers and amplifiers needed a little modification and the subwoofers were a little work. Overall though very pleased with how this installation went.
Head Unit
If you're unsure of the head unit that you want to replace your OEM unit with, I'd recommend checking out Crutchfield's Marine Radio Buying Guide along with our list of Best Marine Head Units. There's a good amount of products to choose from so between those two articles you should get a good sense of what to look for and maybe even what you want.
I decided to keep it simple and hold off on the head unit replacement and add Bluetooth via the Wet Sounds WS-420BT. To be honest the only reason I was considering adding a new head unit to begin with was to enable my passengers to easily connect their own phones to play specific songs when they wanted. They can still do this by plugging their phone into the USB in the cubby. For the rest of the time I knew I'd be controlling it through my own phone directly through the WS-420BT (plus my Apple Watch). Additionally, the boat came with a Polk Audio head unit and I knew that the connectivity between a new Polk Audio head unit and the Nautique Linc system at the helm would work. In the future I may put a Polk head unit in there just because but for now I decided to use the factory Polk that was in there.
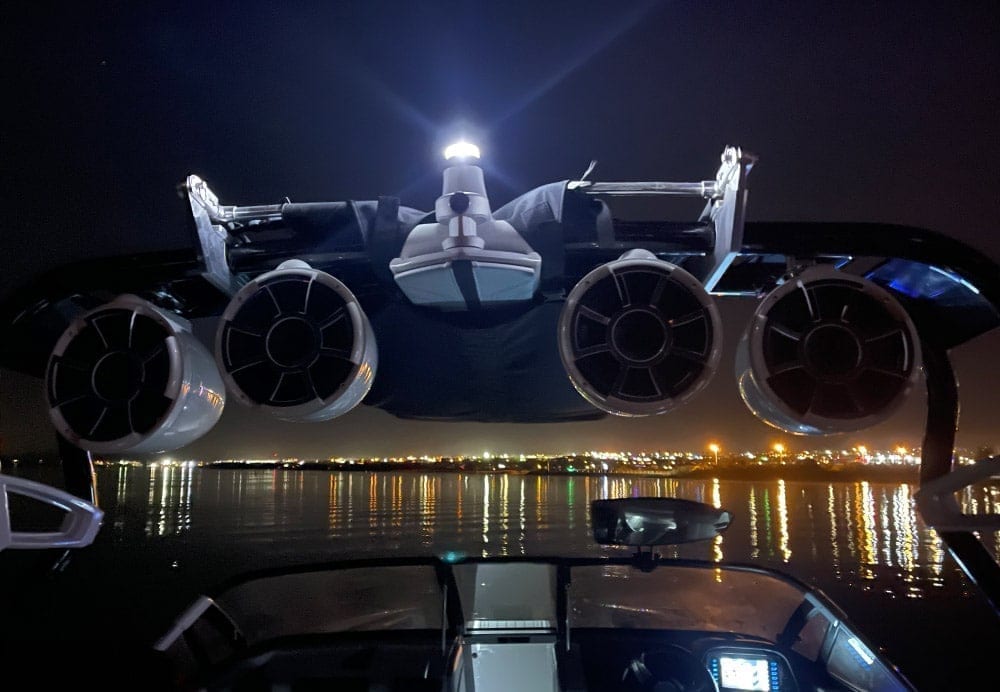
Tower Speakers
The first thing I did was pulled the existing Roswell HLCD speakers off the tower. From the factory, there were four of them, independently wired to the amplifier and connected at the speaker via Deutsch 4-pin connectors. Removing them was relatively simple. Each speaker has 3 allen bolts that screw through the tower into the speaker. A part from having to move around the bimini a bit for the inner two speakers, removal was quick and easy.
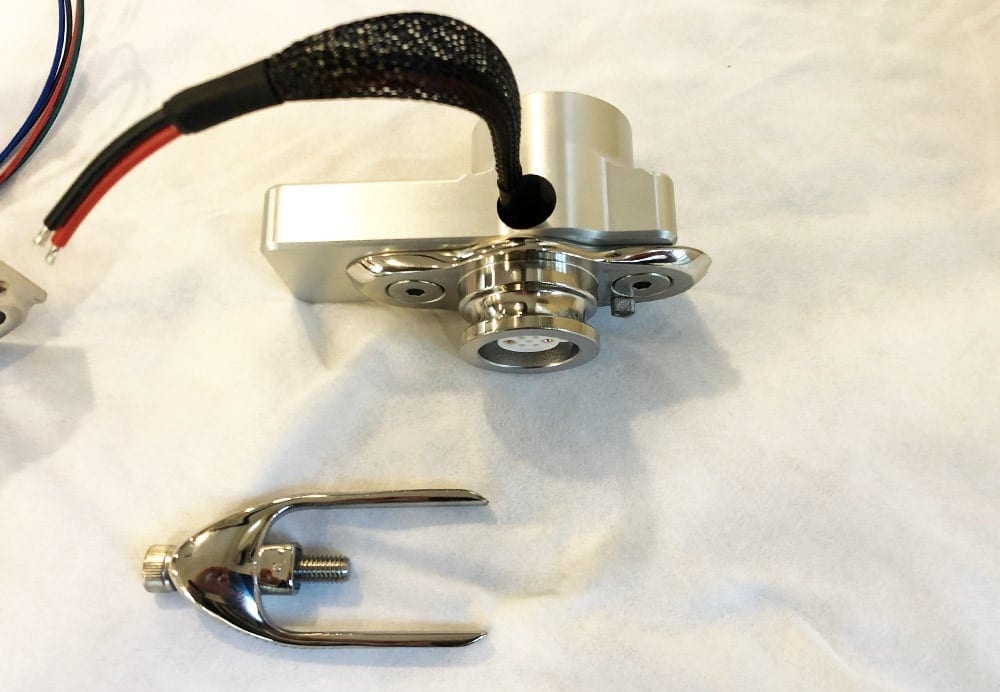
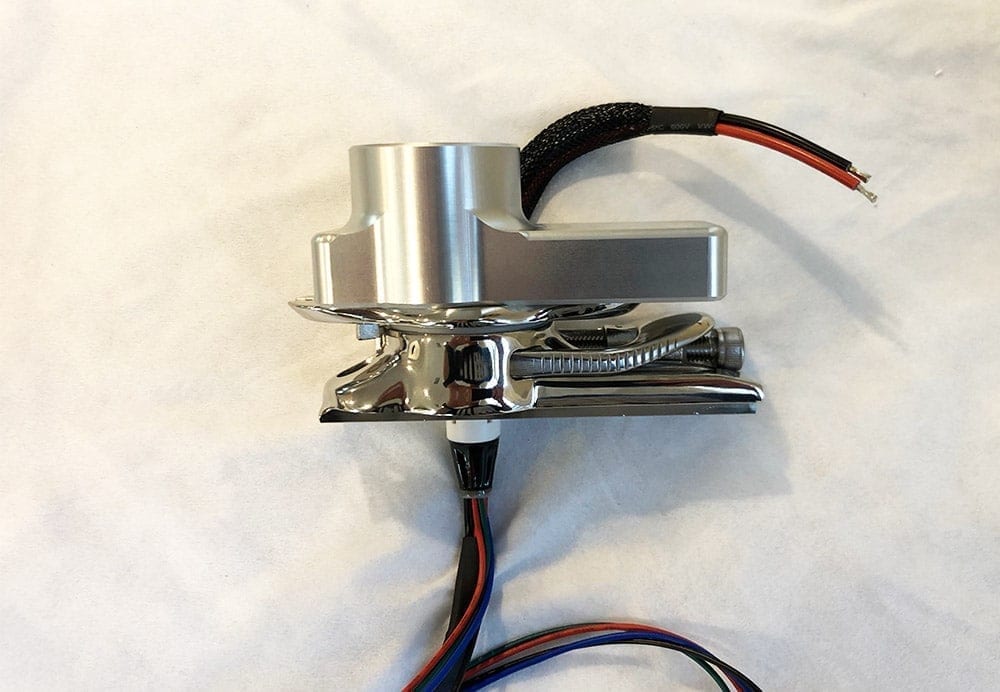
With the old speakers down, I could verify the type of adapter that I needed from Wet Sounds. For the 2013-2015 G23 towers, the Wet Sounds FC5-U tower adapter brackets. These adapters are necessary if you want to install any of Wet Sounds tower speakers to the factory locations on the tower. I chose to mount them in the OEM location so I purchased two pairs. Additionally, I chose one pair of REV 10s with swivel capability via the TC3 Surface Swivel Mounts and the second pair with the X mounts to mount in the fixed position. The reason I chose to have two separate types of clamps was due to the drop height – with the swivels clamps the tower speakers will sit a couple inches lower than the X mounts. Since no one can stand where the outer speakers on the tower sit, the drop height is less of an issue so I chose to place the swiveling speakers in those outer mounts and the fixed mounted speakers in the inner spots where technically someone can bump into them with their head.
Once I received the REV 10s, I prepped them at home for easy installation once I got out to the boat. For the speakers that would have the swivel mounts, I attached the FC5-U to the swivel mount, and then the swivel mount to the top of the speaker, wiring the power and LED (unused) wires into the can of the tower speaker.
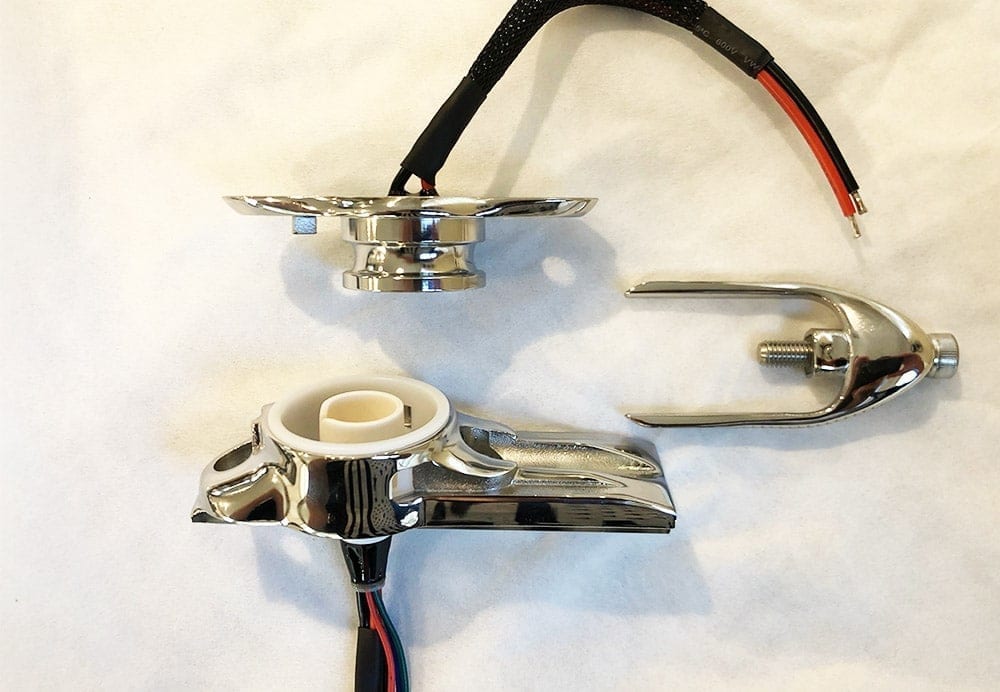
For the speakers with the X Mount that would be fixed to the tower, I attached the X mount directly to the FC5-U adapter and the mount to the speaker.
If you want to read up more about the tower speakers, I put together a REV 10 First Look & Review that walks through the features, unboxing and my personal opinion of them.
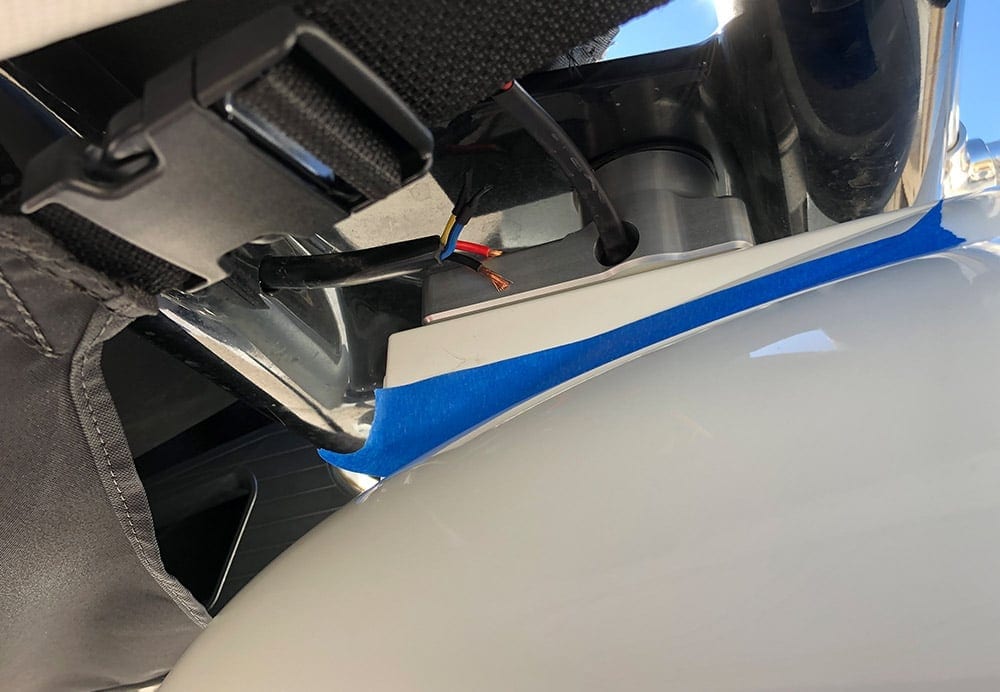
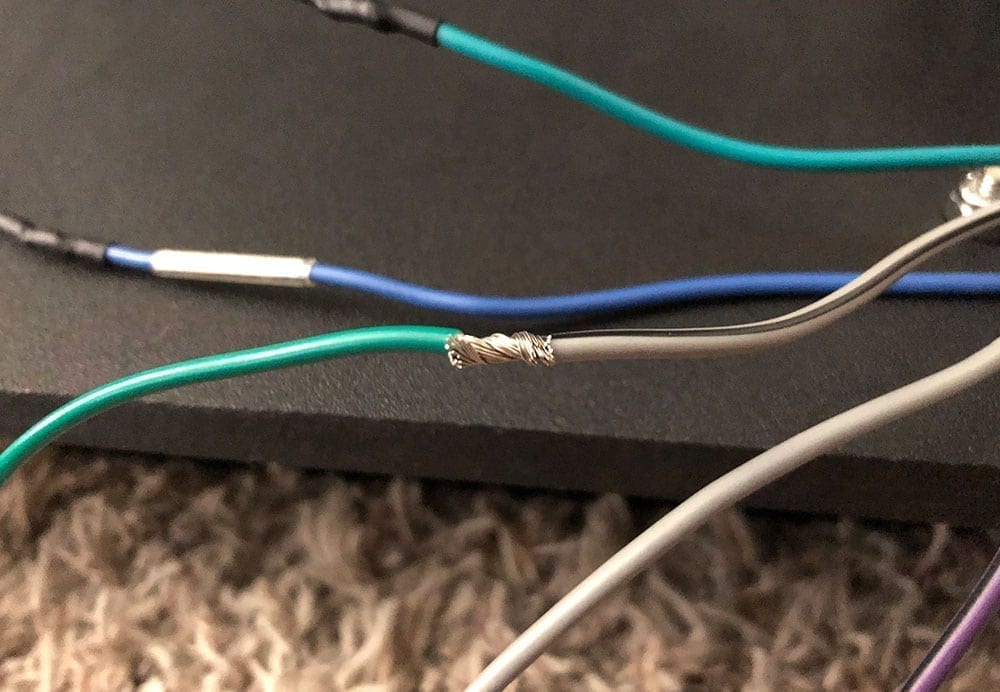
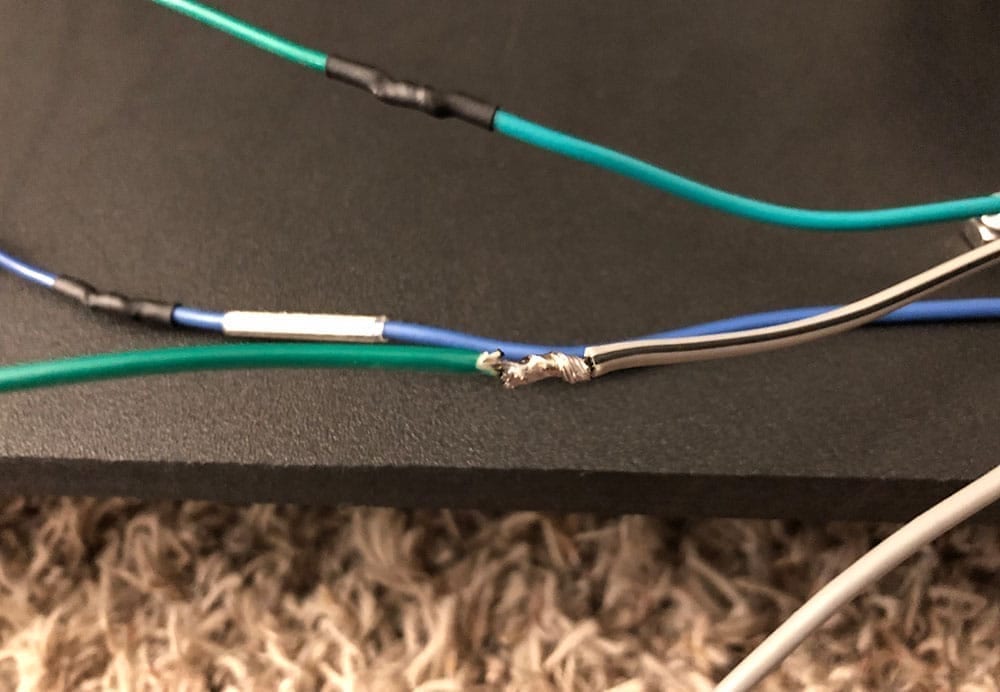
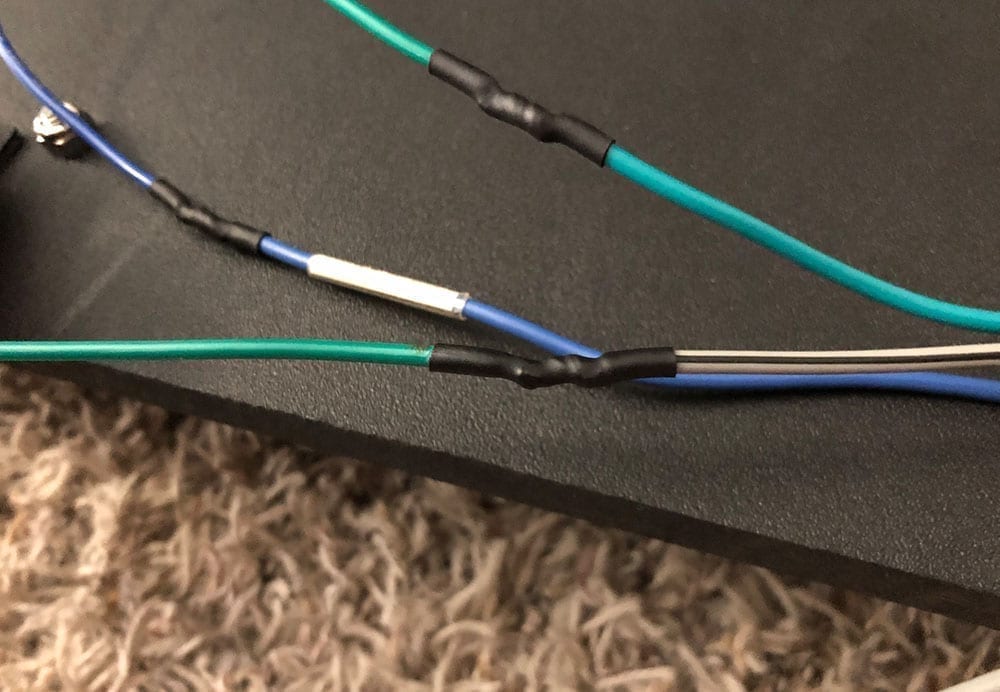
Mounting the speakers was easy – I screwed the three bolts into the top of the FC5-U adapter to mount it to the tower. Then, to wire and install the speakers, I cut the 4-pin Deutsch Connectors. There were 4 wires – overhead light positive and negative (blue and yellow) and speaker positive and negative (red and black). I capped the overhead light wires since I am no longer using them (for now) and soldered the positive and negative leads of the speaker wires together, shrink wrapping them to ensure there wouldn't be any arcing over time. I also ran new wire loom to clean up the look after the speakers were wired. Here's a look at the speakers while we were mounting and wiring them along with the end result!
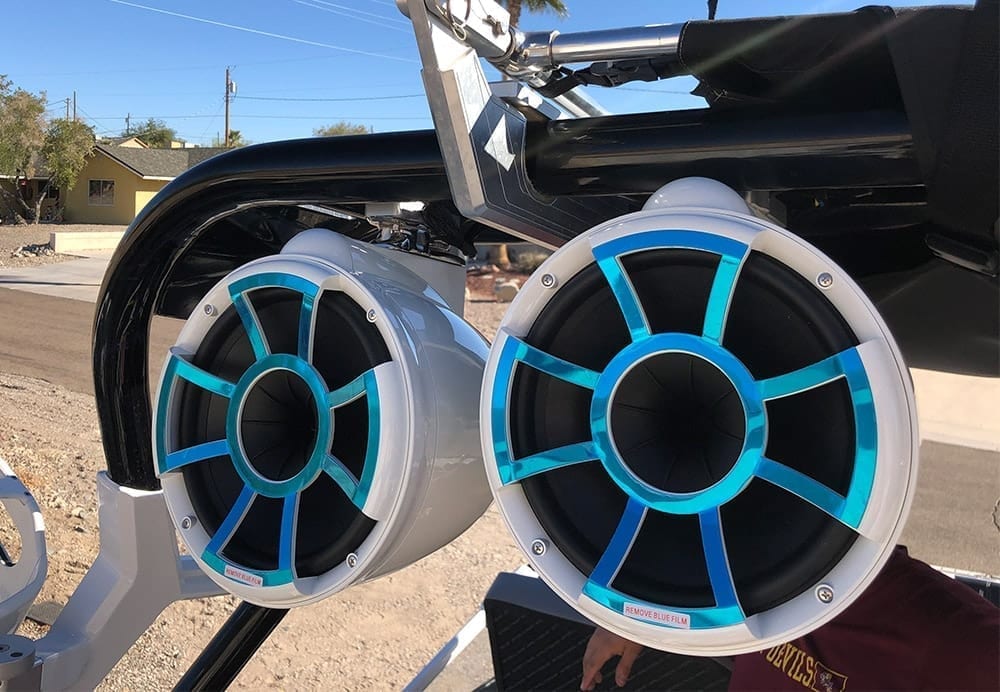

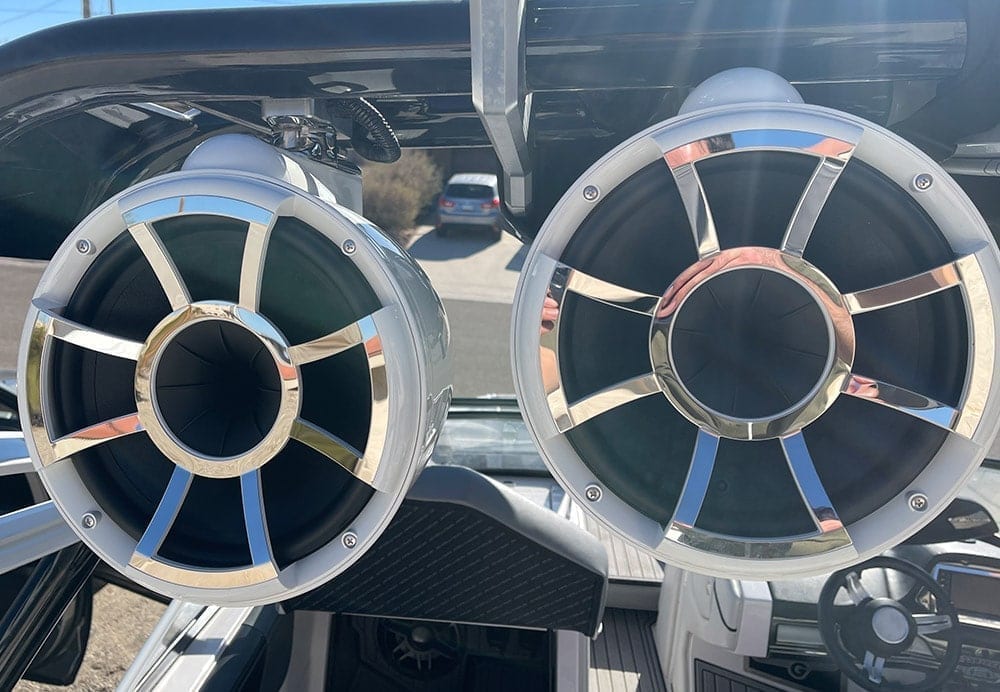
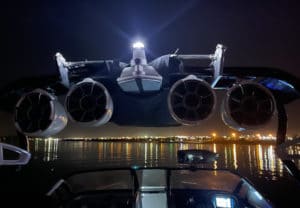
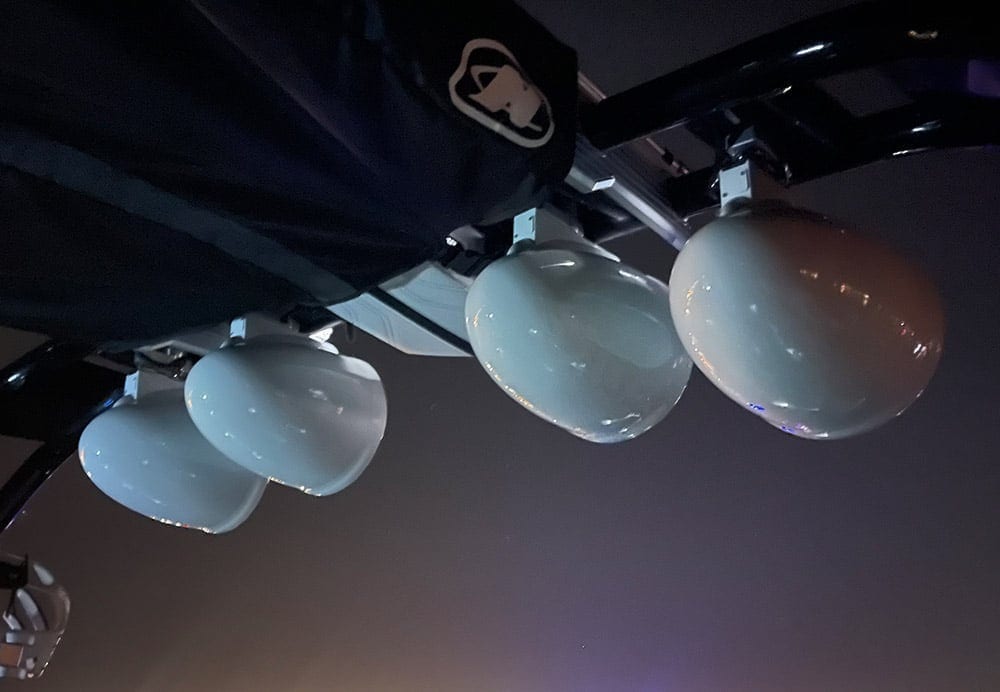
For the folks who have a similar setup and are concerned about head hight with this installation, they DO hang low. Much lower than the OEM Roswells that were on the tower by about 3-4 inches. I'm about 5'11” and although there's still a decent channel to walk through between the center of the speakers, these will become a much more head-banging hazard. If you'd like to limit the head-hazard and the hanging height I'd recommend the REV8s instead. They'll cut an inch or two off of the height. I've also seen a few folks mount the inner tower speaker on the outer side of the tower in between the board rack and the outer speakers to remove the head hazard. In that type of setup you'd need to run wire to the outer part of the tower, drill holes, mount the speaker using a fixed clamp and then flip the board racks upsidedown to fit the REV10s. One day, if I'm bored with this setup I'll consider that.
From a looks perspective though, I absolutely love the REV10s. They're much more proportionate to the size of the tower and the boat than the REV8s and the white/black combo on my boat looked classy and clean.
Cabin/Interior Speakers
The cabin/interior speakers on the G23 are not exactly straight forward to swap. Several interior panels had to be removed including all of the bow and the rear side panels in order to then remove the black panels that the speakers are mounted to and ultimately remove the speaker grills and speakers themselves. The interior panels are held in place by several plastic ‘tree' push clips. If you're going to pull your interior panels I recommend getting at least 75 new clips. Mine were all unusable after removing the panels.
The speaker grills that cover access to the speakers are held in place by several metal tabs that are folded in behind the black panel. To remove the grills you need to have access to the back of the speaker panel and unfold each one and ultimately pull the grill from the panel. Only then can you remove the speaker screws and then re-install the new speakers. This was a pretty time consuming task. Here's a look at what it takes to get access to those panels and remove/replace the speakers.
With access to the speaker screws, removal was simple. So was re-installing the new REVO6 speakers. The new REVOs are definitely more snug than the OEM Polks but they fit in the panel. Since the REVO6 speakers have the grills permanently fixed, it created some space issues between the top of the speaker grill and the back side of the interior light that mounts directly above the speaker. We had to modify the lights above the speaker by removing some of the outer plastic in order to be able to keep them.
Once the speakers were mounted, we re-installed the black panels and the surrounding cushions. It's worth mentioning again to definitely buy at least 75 or more new panel clips. This G23 is a few years older and all of the clips became brittle and broke. Some were stuck in the panel, others were stuck in the hull but no matter what method we tried to remove and reuse the clips, they broke or were unusable. My recommendation would be to replace them all.
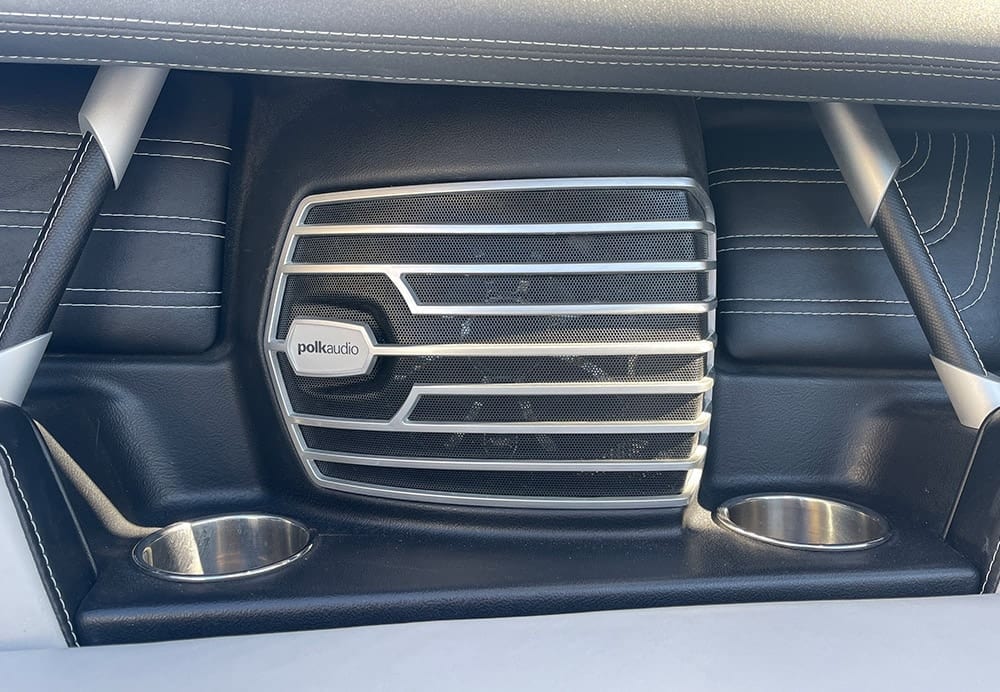
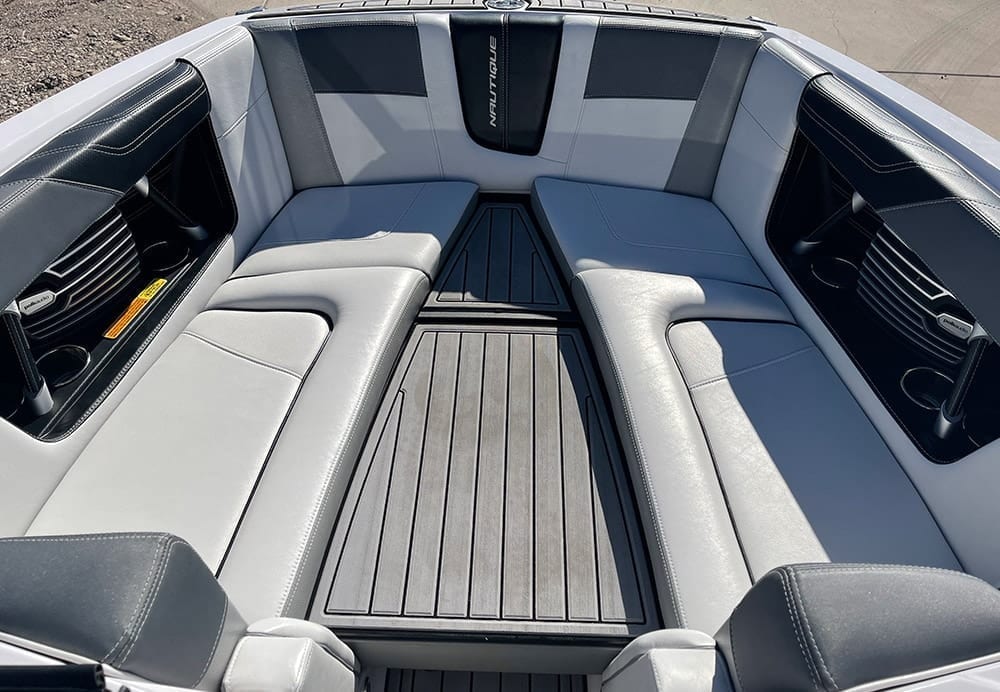
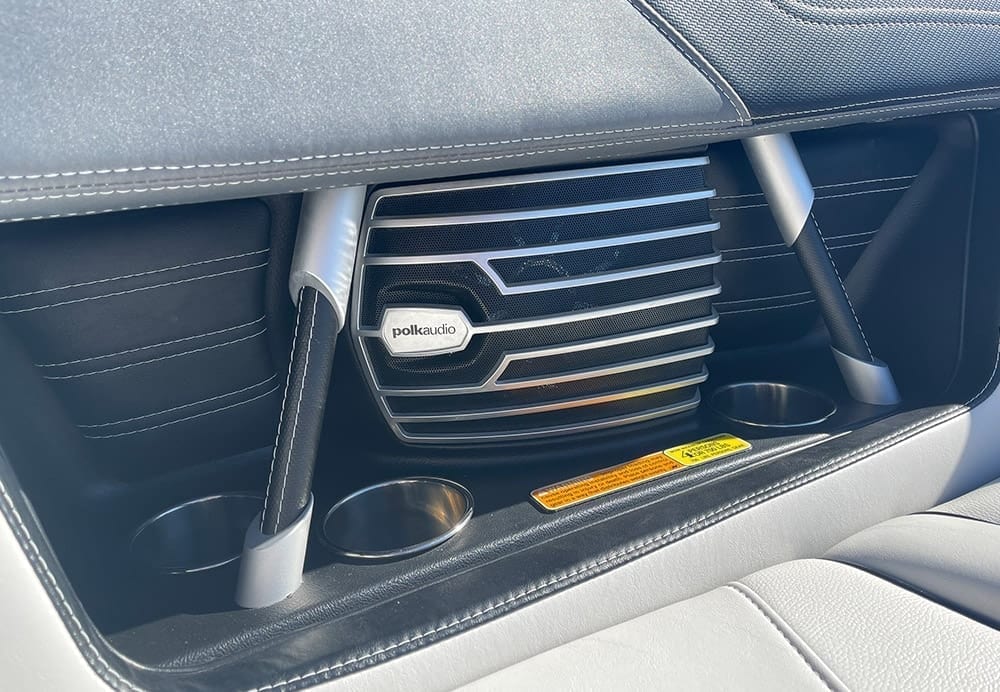
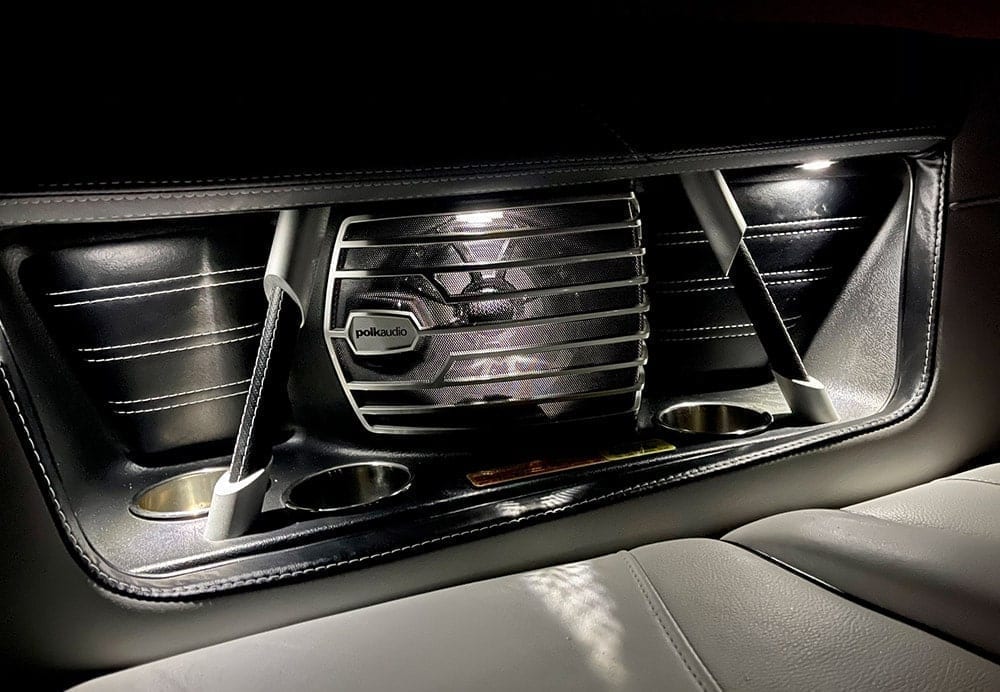
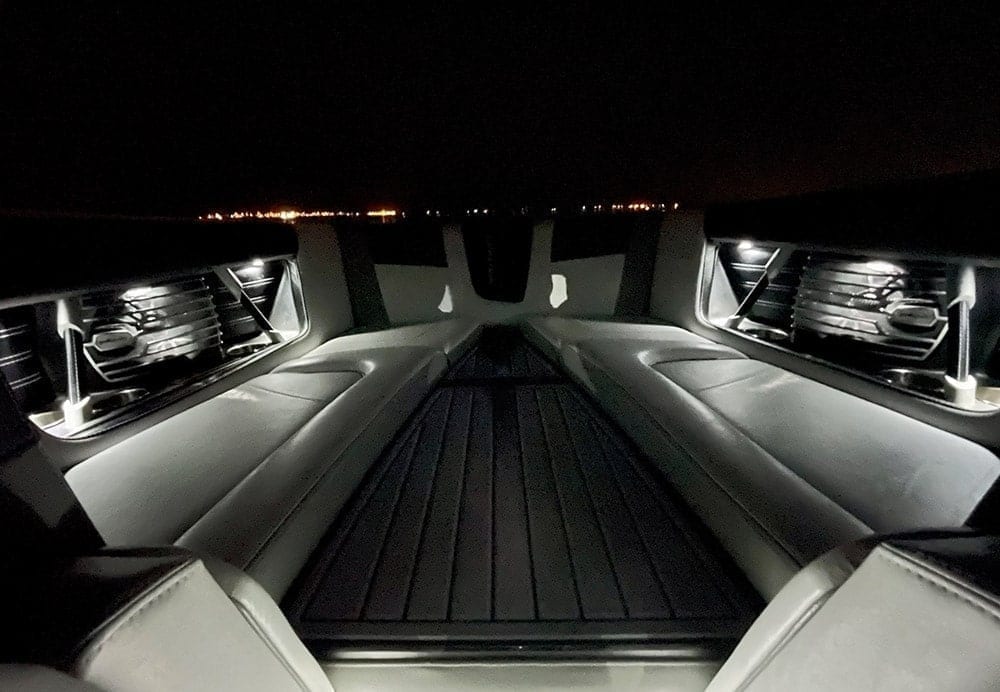
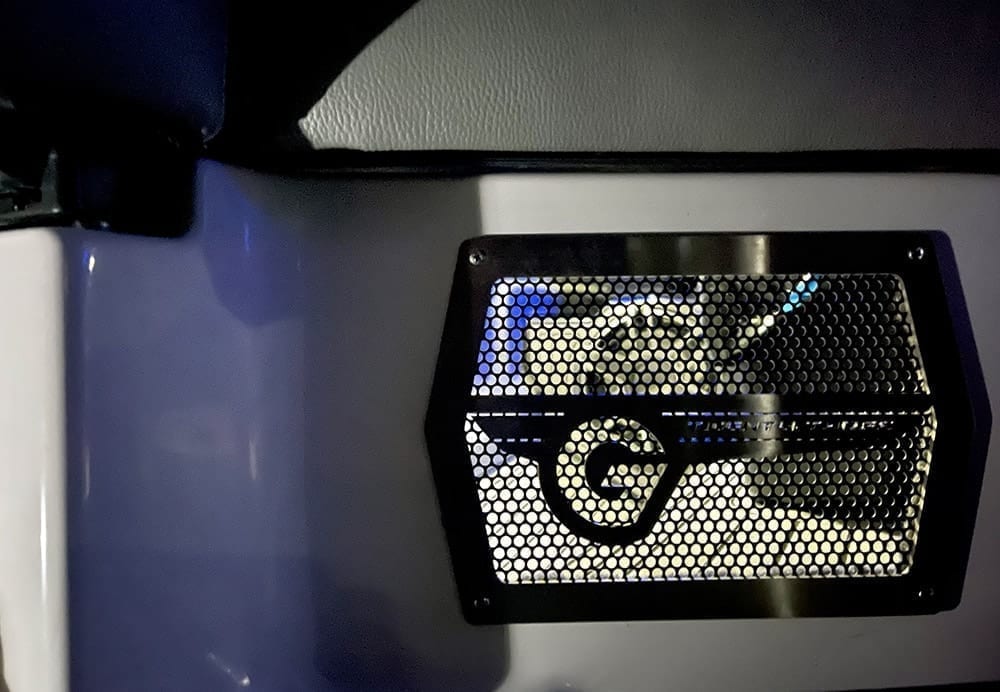
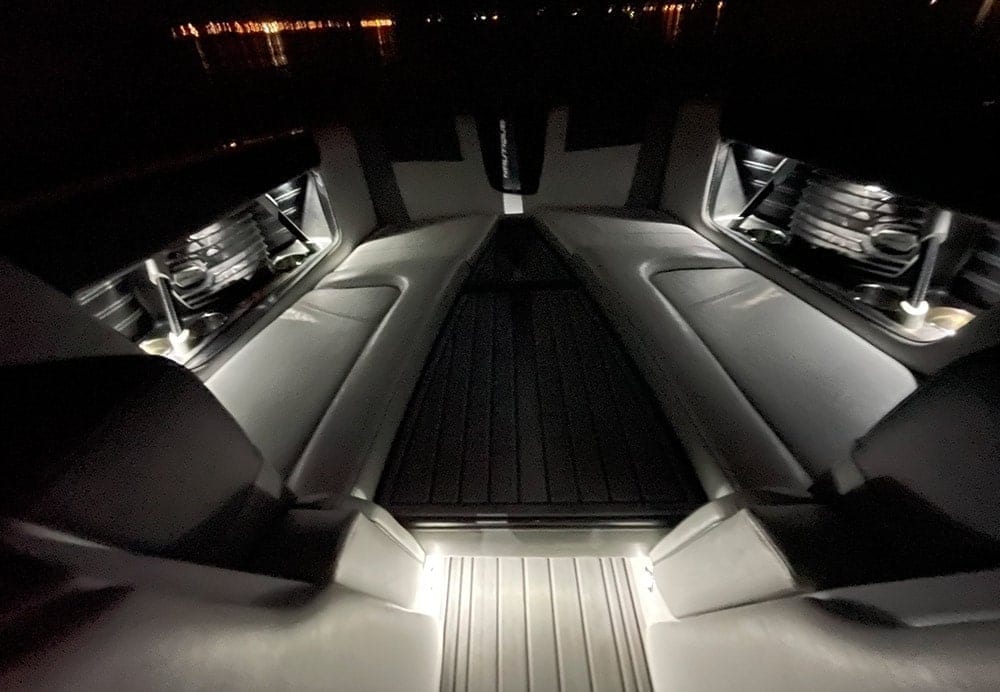
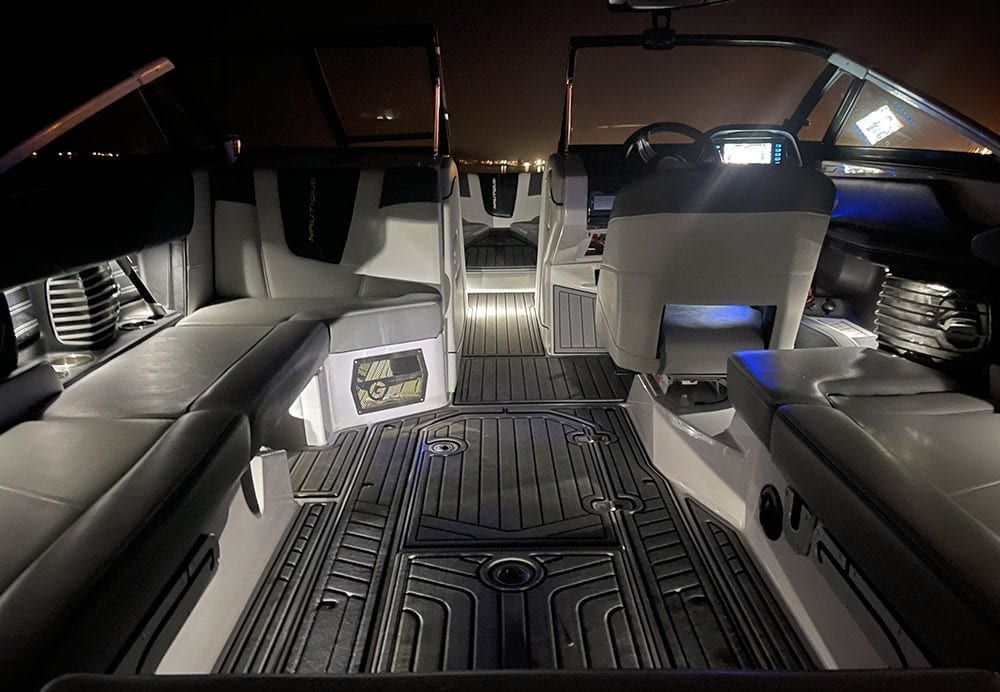
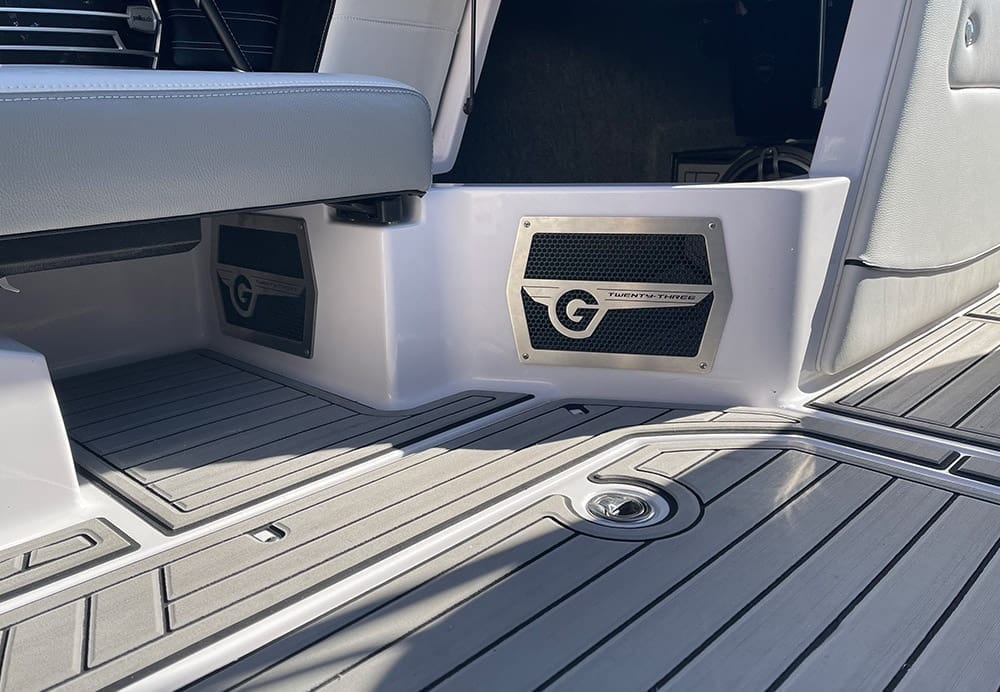
Here's a few photos of what they looked like after the install in the daytime. I was really pleased with the new speakers. During the daytime, they still look relatively OEM with the exception of the chrome accents on the face of the grills that make them stand out a little more than the originals. Note that I'm still working on creating some custom Wet Sounds vinyl stickers to cover the OEM Polk that's on the outside of the grill!
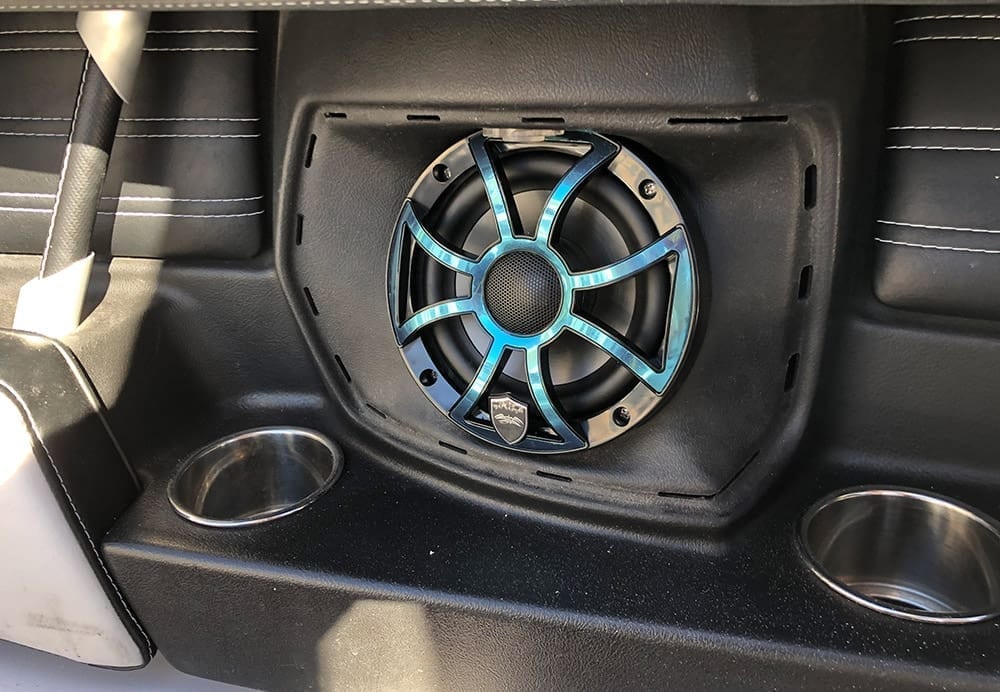
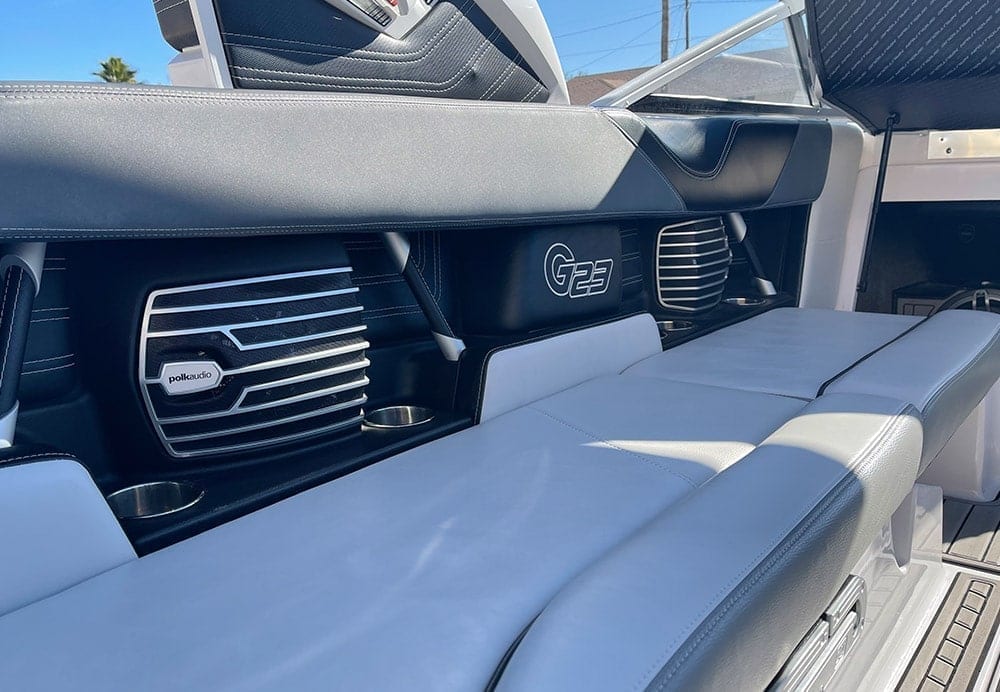
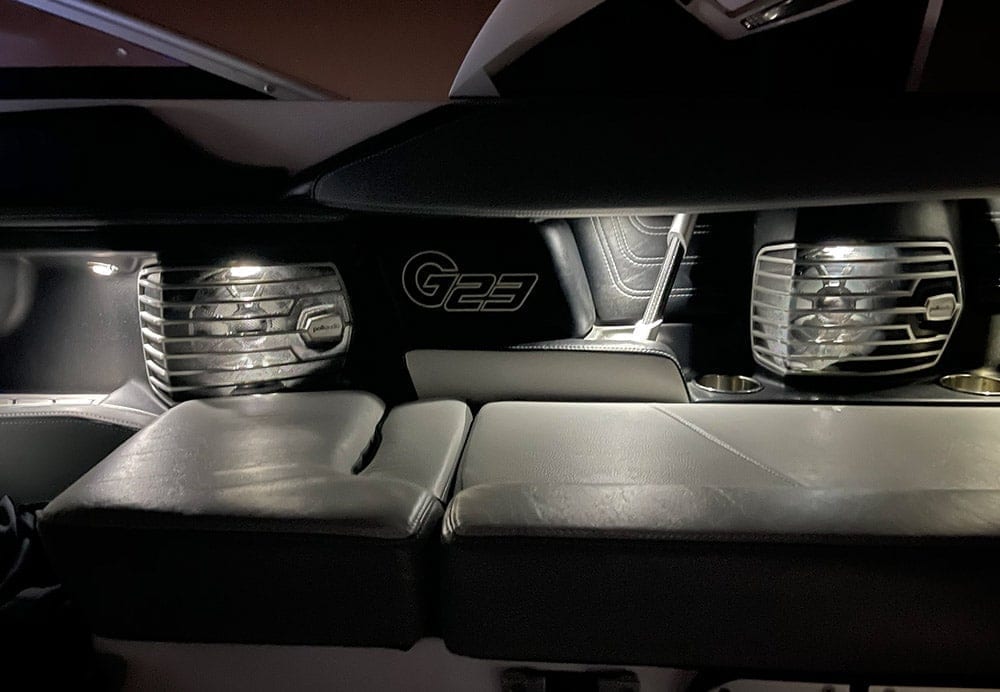
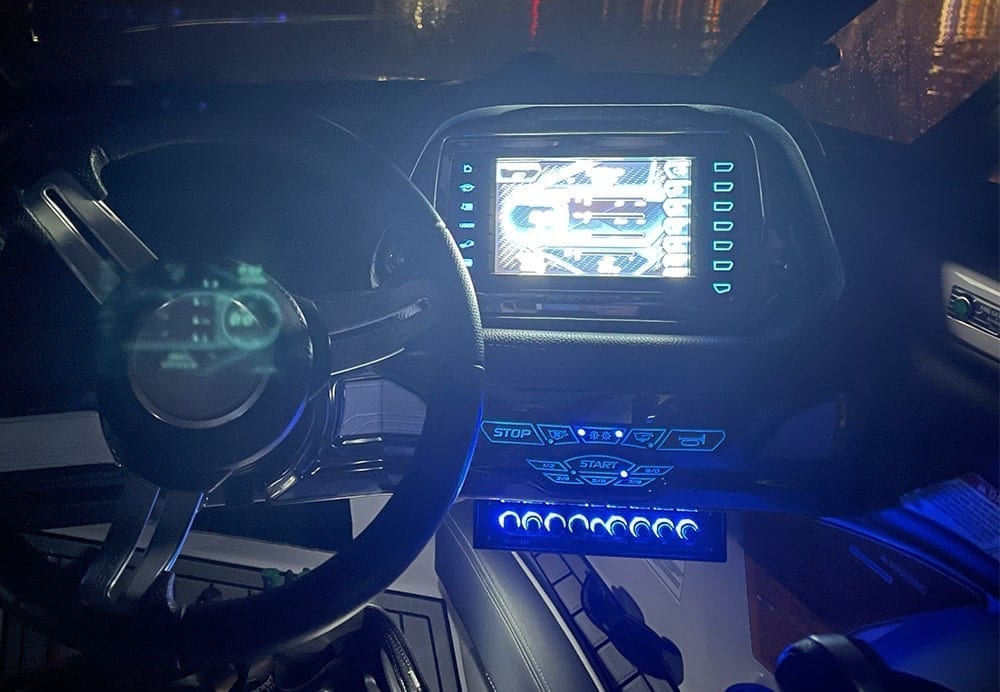
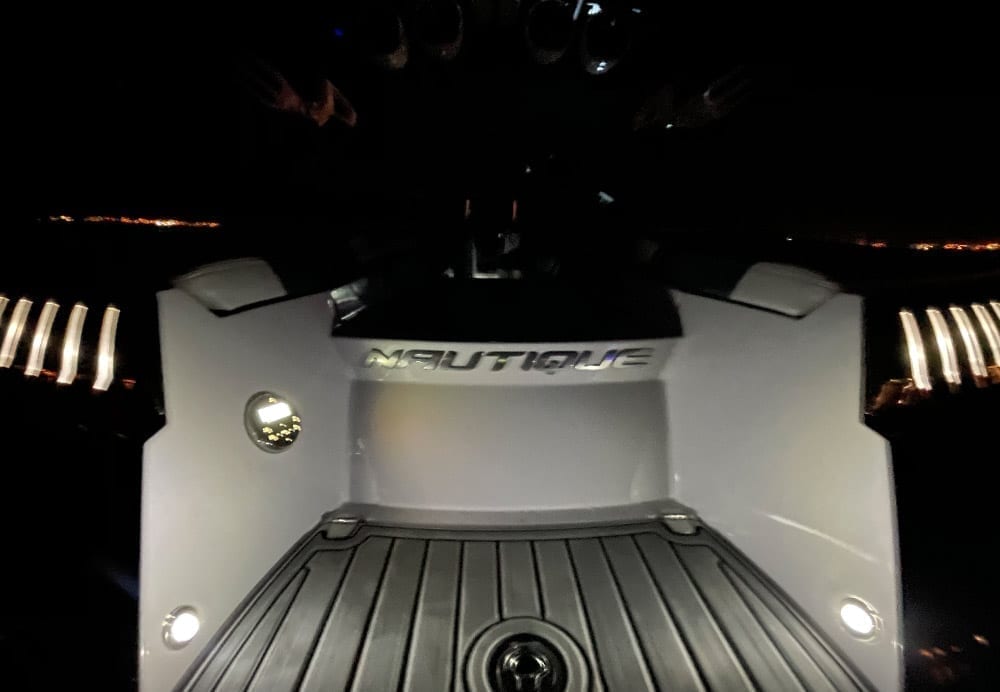
At night, the OEM lighting really made the new speakers pop. In my opinion, led lighting isn't necessary at night with the OEM lighting either. The white light is very attractive and not overpowering and makes the chrome accents and grills of the REVO6 really pop.
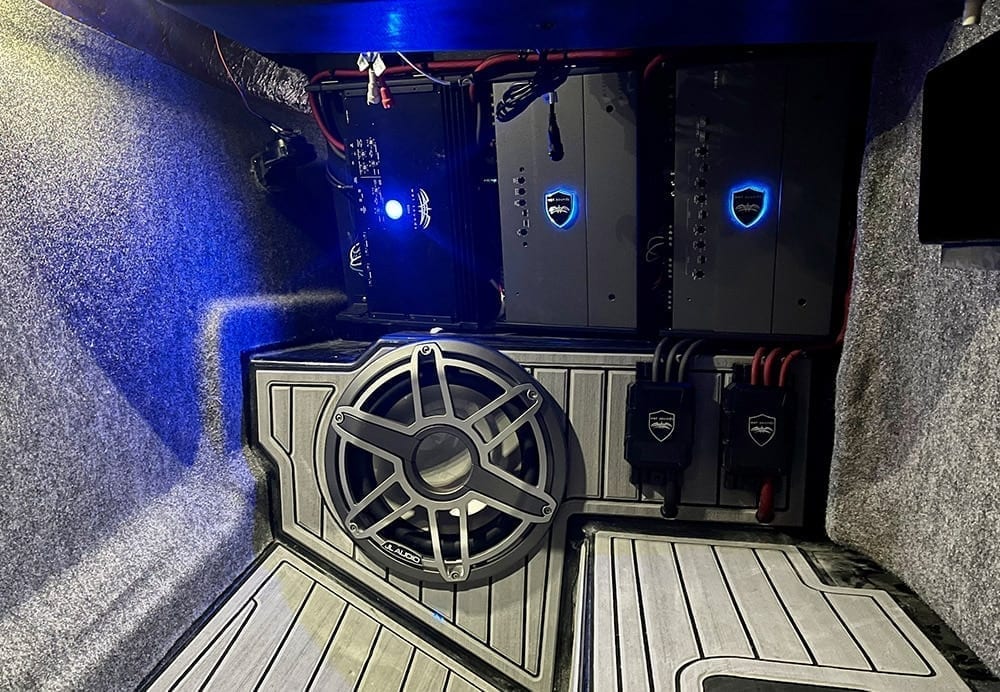
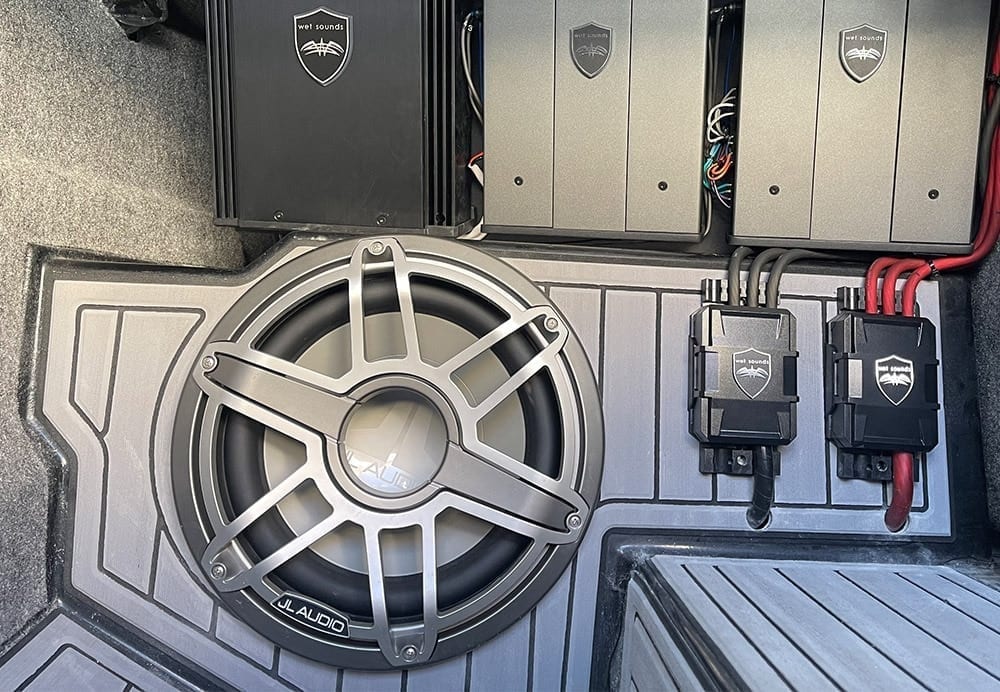
Amplifiers
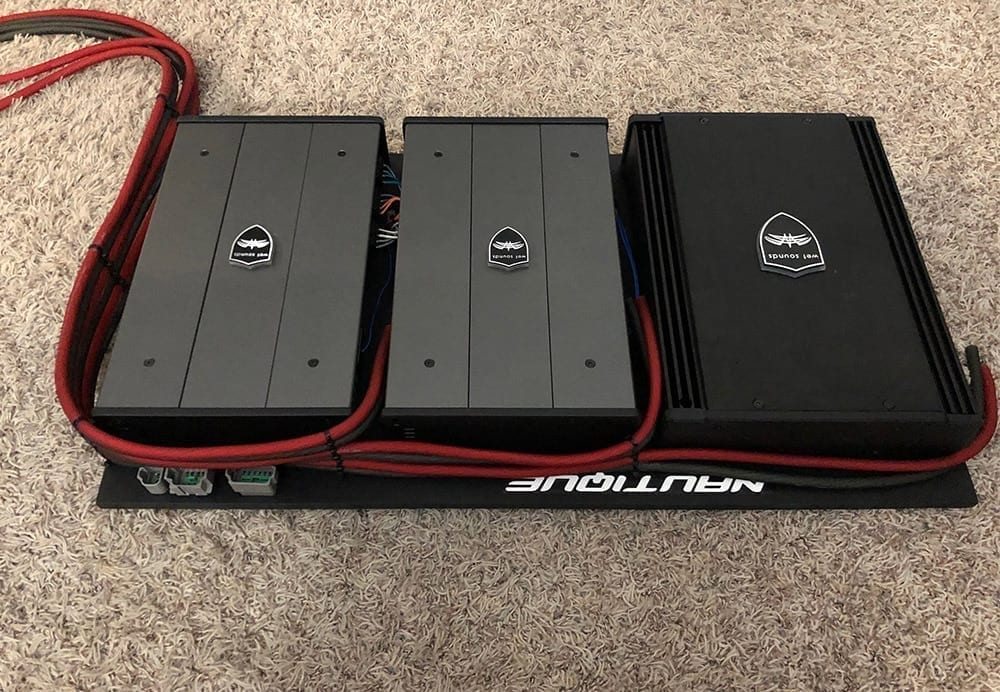
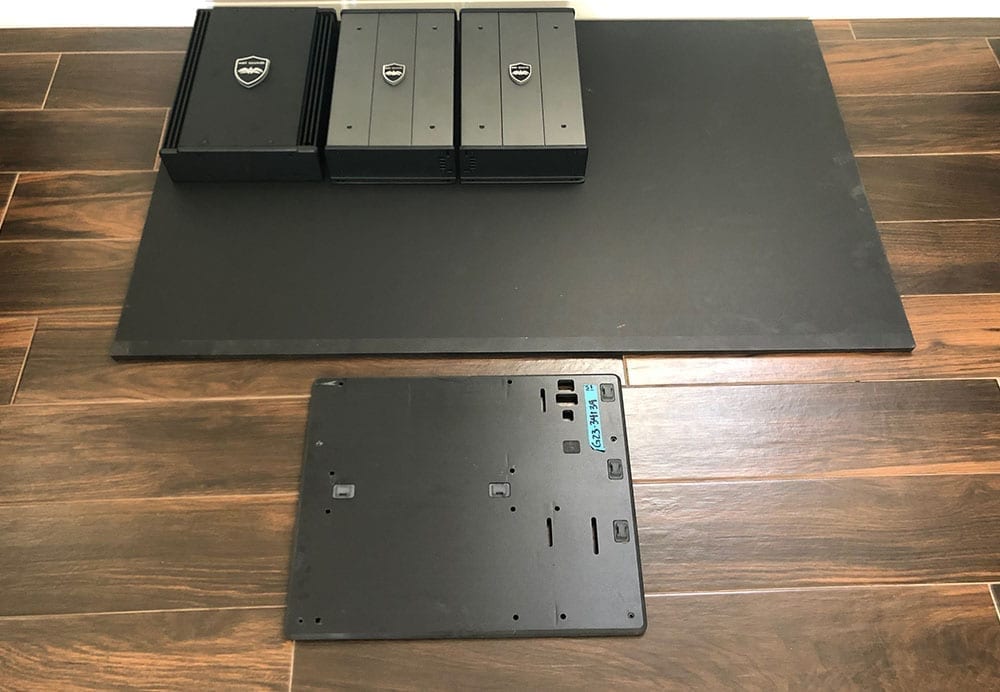
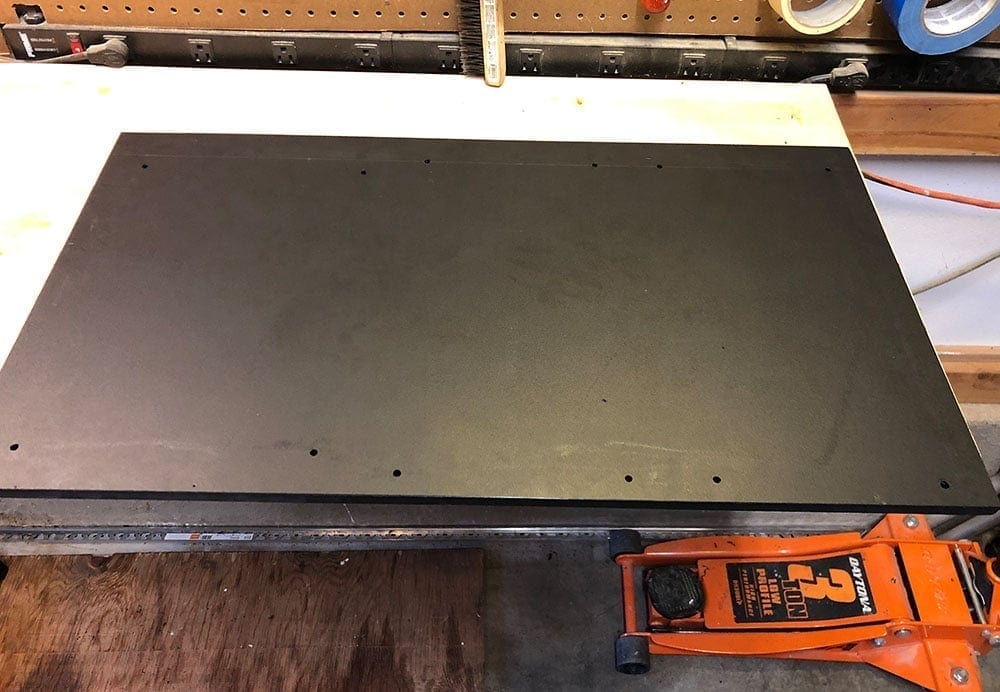
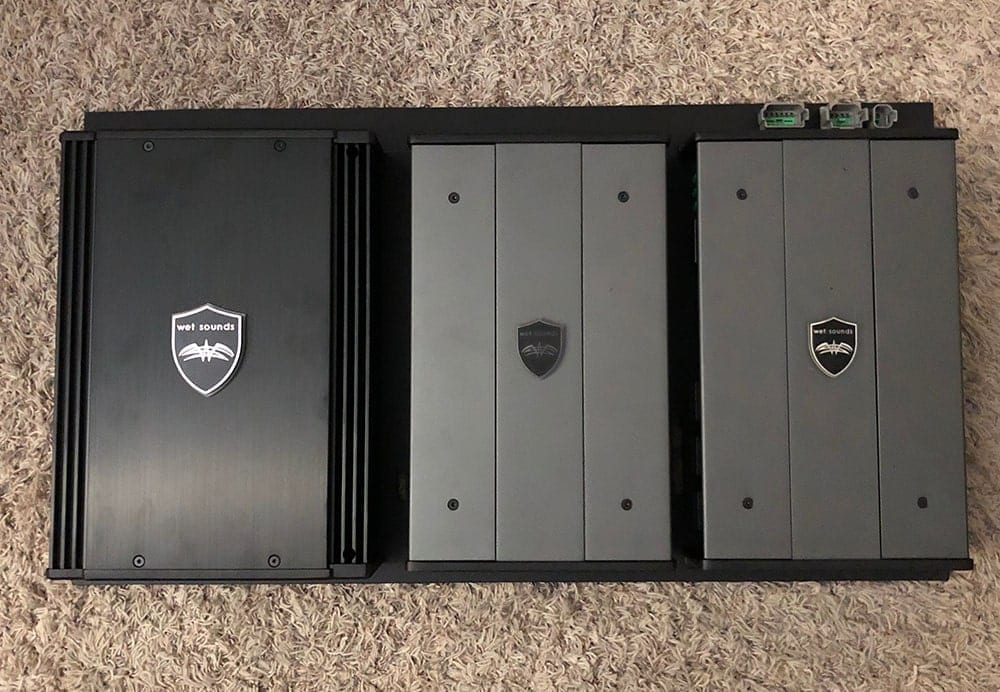
So, I wanted to retain the original mounting location for the amps in the passenger compartment. However, the amp rack that came with the boat only was large enough to fit the two compact Polk Audio amplifiers so I decided to make a custom rack that would mimic the OEM look and material and also utilize the same wiring configuration and Deutsch plugs.
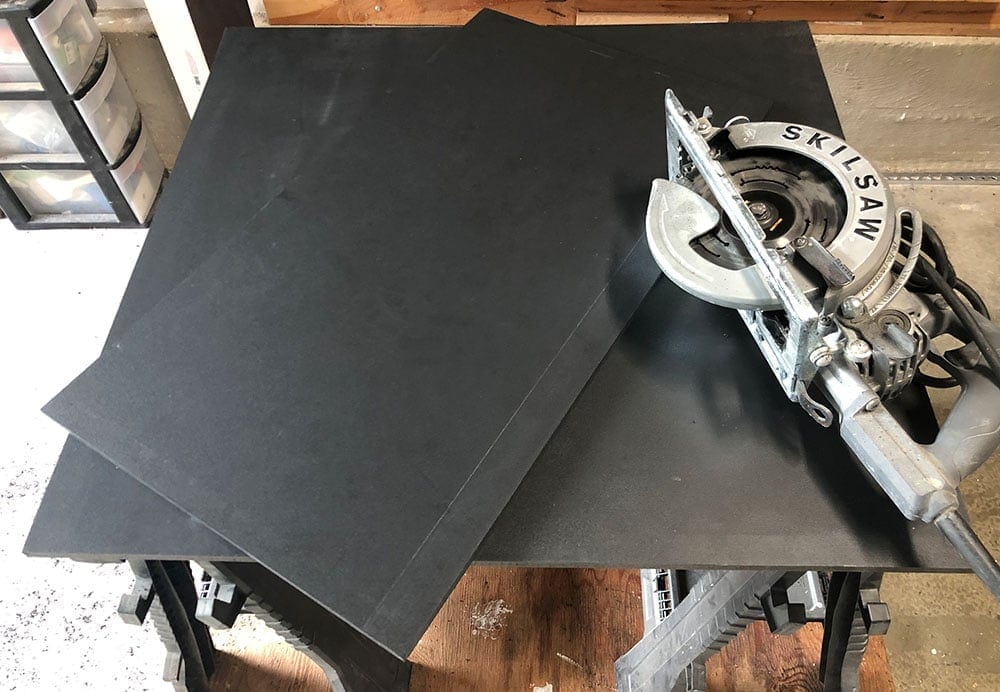
I came across a 4′ x 8′ board of black StarBoard, which is either the exact same material that Nautique used for the original amp rack or is very close to it. I decided to go with this type of board for the rack because it's marine grade, light, durable and strong. It's basically a poly/plastic matte 1/2″ thick black board that'll never corrode or warp from moisture or water. It won't rust either.
I pulled out the old amp rack and unclipped all of the attached wires first and brought the old amps and rack home to begin working on my new custom rack.

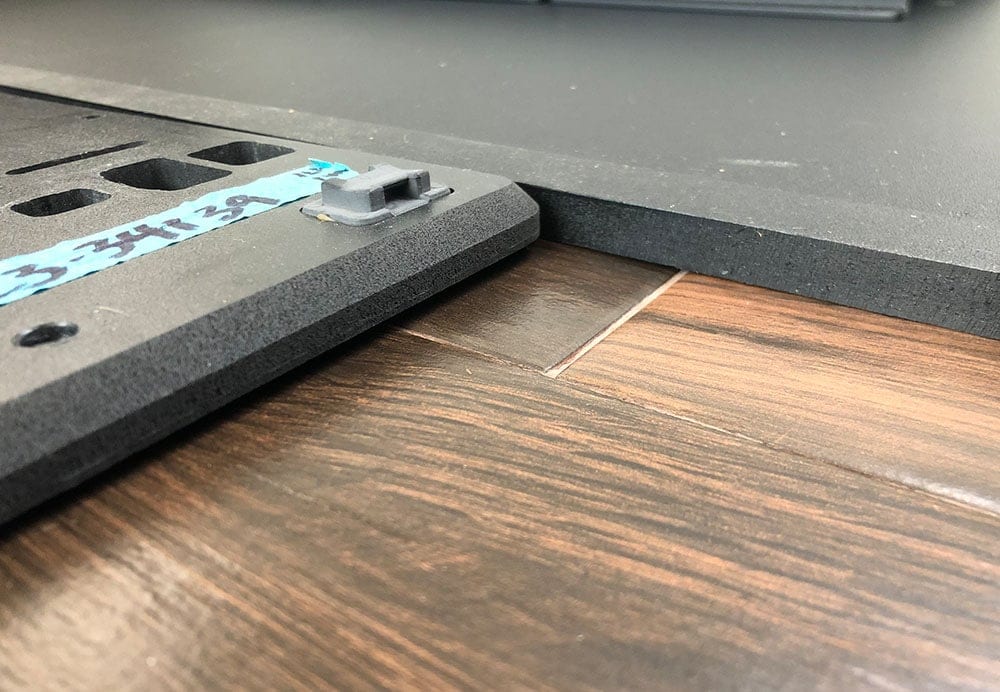
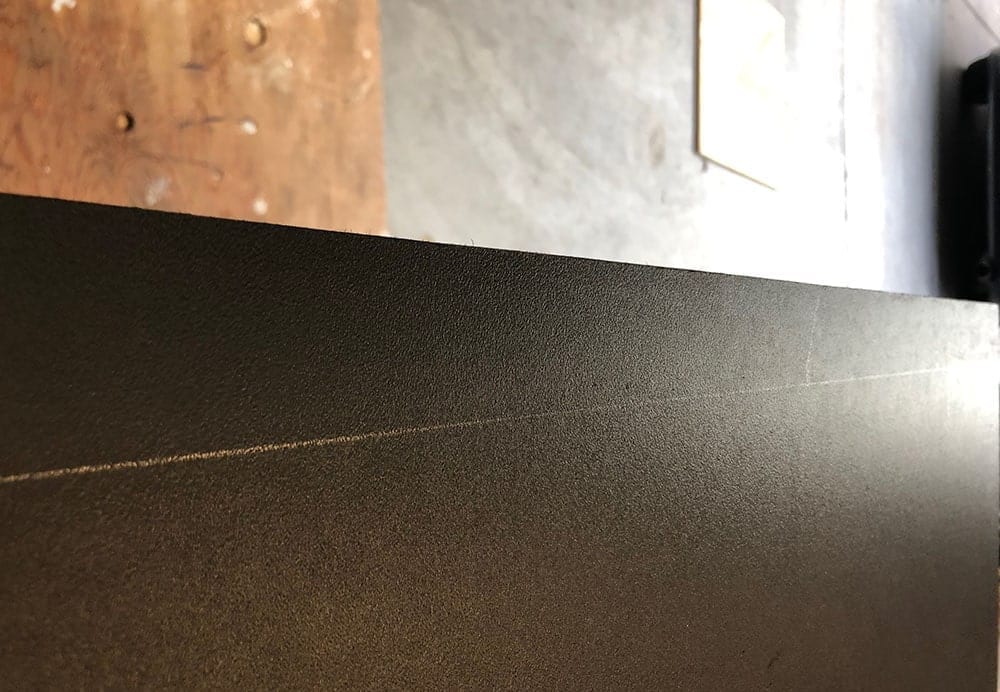
After mocking up the placement of the amps on the new board, I measured and cut the new amp rack to size using a finish blade on a Skill saw, using a level as my guide for the cut. Unfortunately I don't have access to a table saw which would have been ideal. It cut through it like butter but towards the end when the material starts to bind a bit it did start to melt the material a little but the cut ended up perfect.
With the new board cut to size I again mocked the placement of the amps, marked the mounting holes for the three and drilled holes. I chose to use stainless bolts with nylon locking nuts instead of threaded screws to the board. This eliminates the possibility of the screw stripping or pulling out of the board if we hit heavy chop.
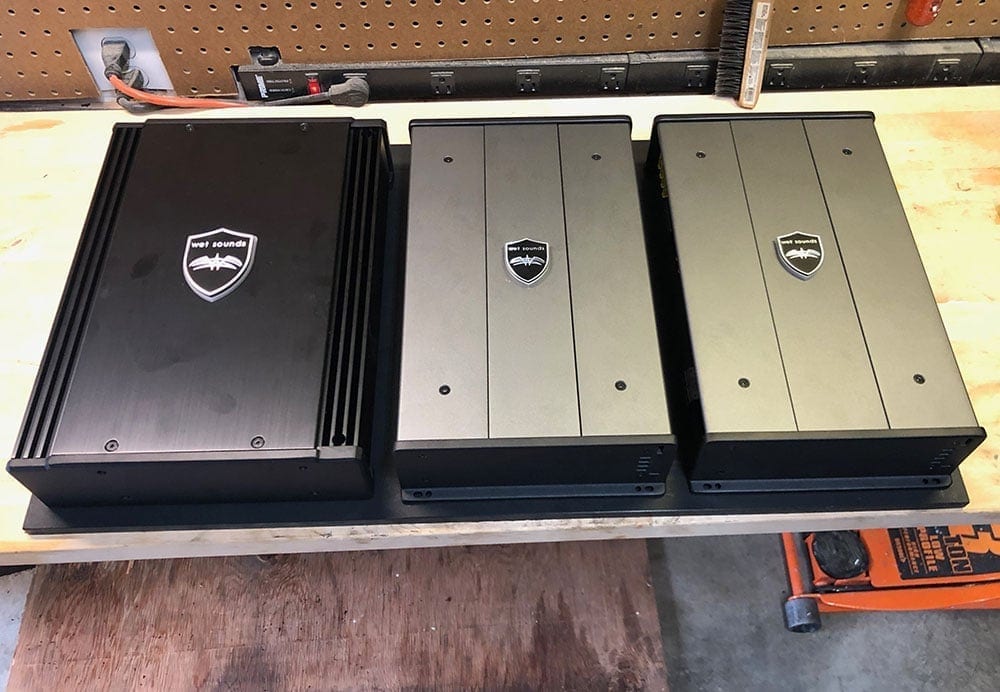
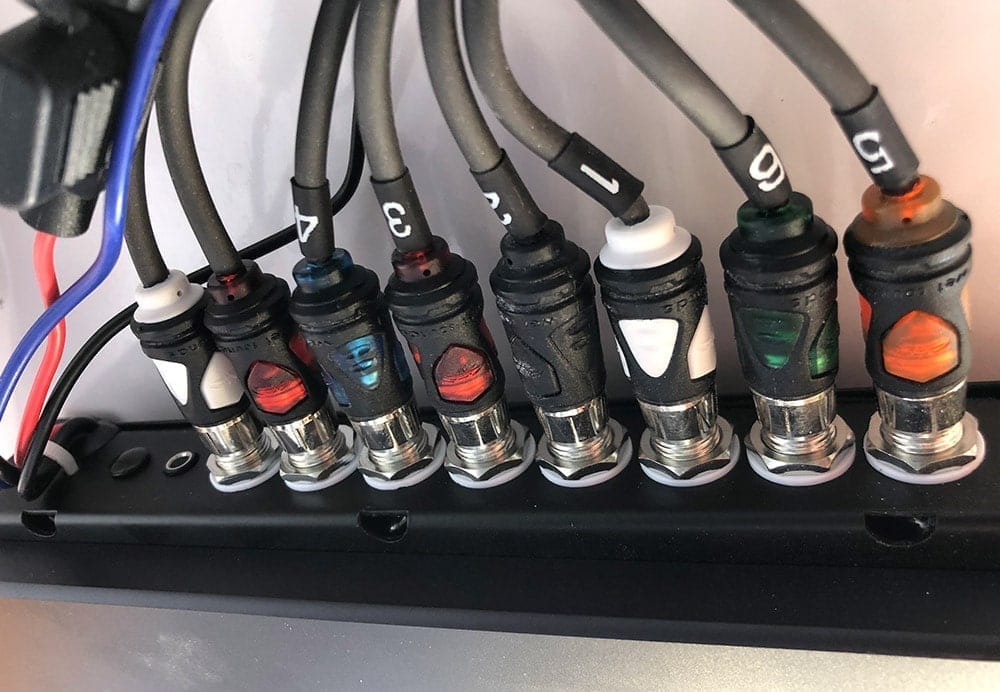
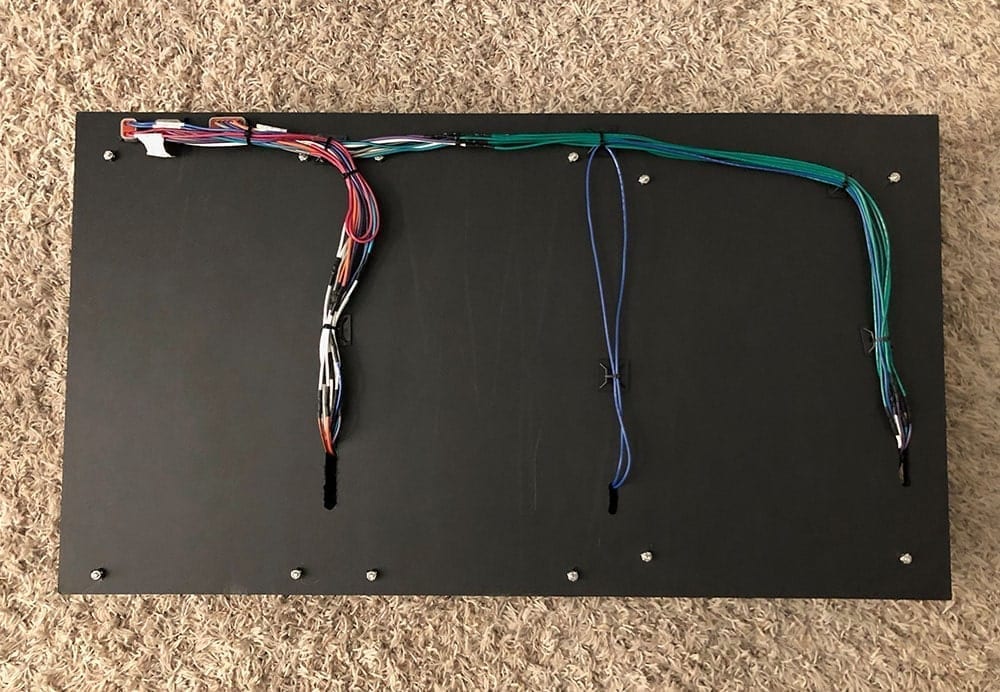
One of the things I actually really liked about the way that Nautique wired the boat was that they used 3 Deutsch clips that were mounted to the board in order to wire the amps. This made it super easy to remove, and since they were in perfect shape and would simplify the installation I decided to use the same setup. Nautique also used 16 gauge wire throughout the boat, including for the tower speakers which was satisfactory for the amount of power and speakers that I was going to run. I didn't plan on re-wiring the tower speakers through the tower either. In my previous 04 Super Air 210 I ran 4 REV 8 towers with the OEM 16 gauge wire with the same SYN-DX4 and had no issues. Although if you chose to re-wire your towers for a setup like this I'd recommend 14 gauge, or even 12. The only wire I won't be re-using is the 16 gauge subwoofer wire that Nautique used. I'll be replacing and re-running 12 gauge wire for the two subs.
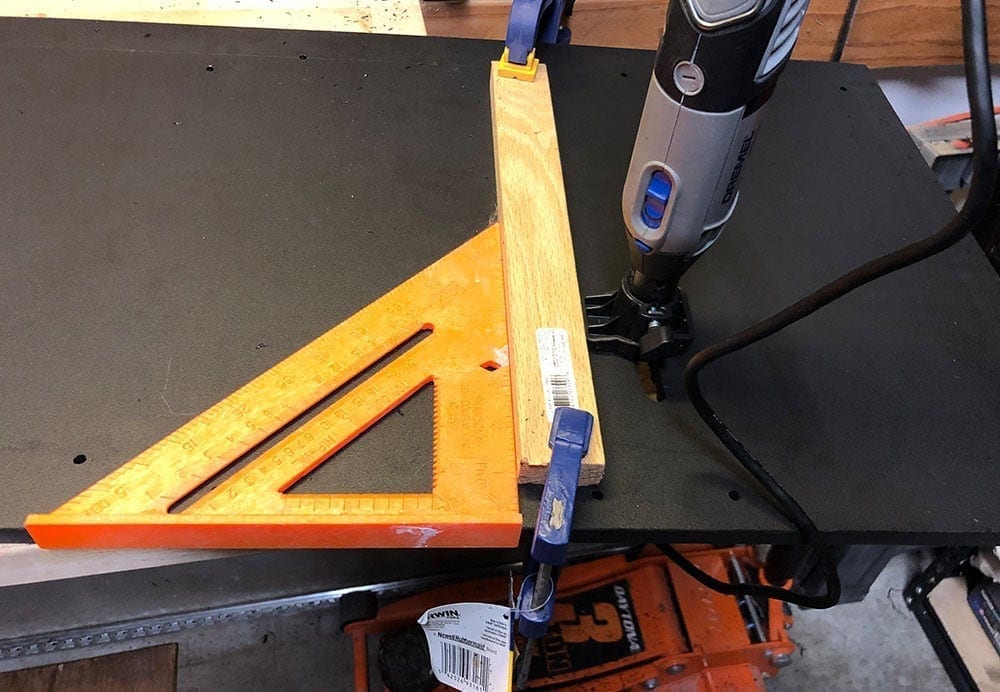
So since I chose to use the same wiring and Deutsch connectors, I used the OEM amp rack as a template to cut out the Deutsch connector holes using my router to route out each connector hole. It worked great and the connectors fit perfect.
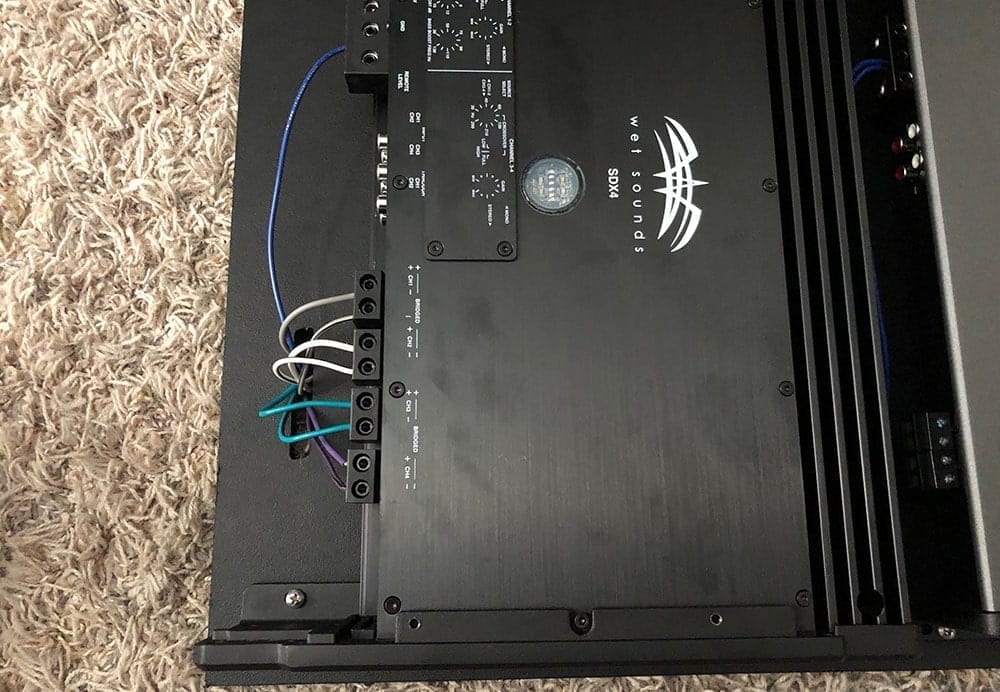
Once those were cut, I also routed out 1/8″ (ish) holes to run all of the speaker wire through from the amplifiers to the back of the board and to the back of the Deutsch connectors to hide as much wire as possible. I strategically placed the power and ground wire on the top of the amp rack for all three amplifiers, and the RCA wire inputs on the bottom so that when I ran power and signal to these amps, the power and signal wires were on opposite sides of the amplifier to prevent any interference. I strongly recommend separating your power and signal wiring (it's standard practice but for those who are DIY folks it's important to call this out). Here's how it looked before wiring it all up.
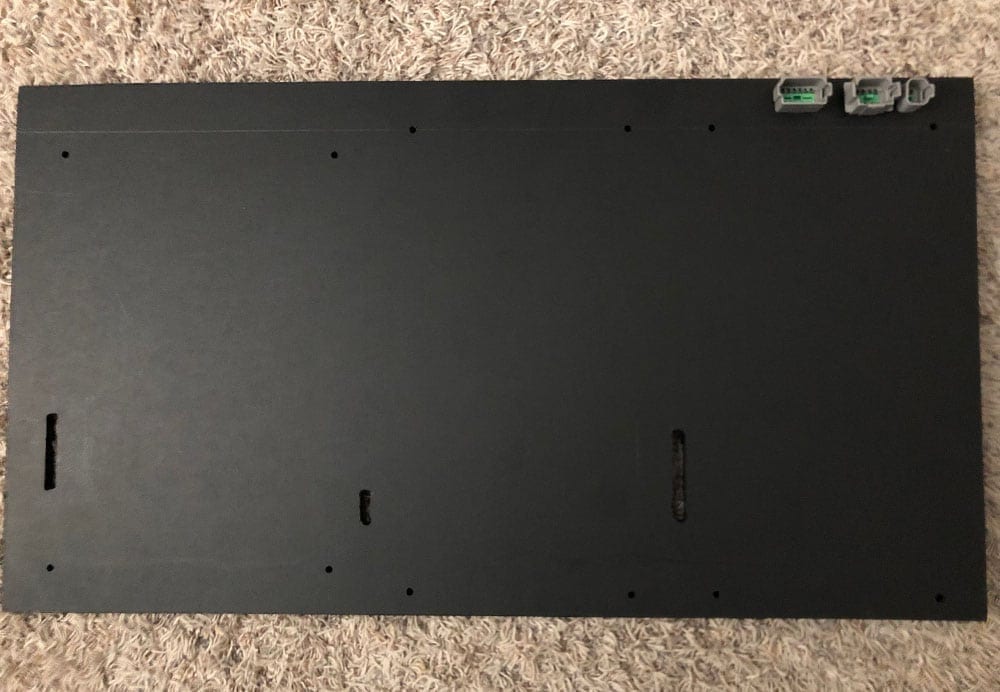
With the custom amp rack complete, I began pre-wiring the amplifiers to the Deutsch connectors. I had taken pictures of the previous wiring and knew which wire powered each speaker. But the OEM Deutsch connectors were only wired for the distances that the old amplifiers were mounted at. In order for me to re-use these connectors I had to extend each wire the distance.
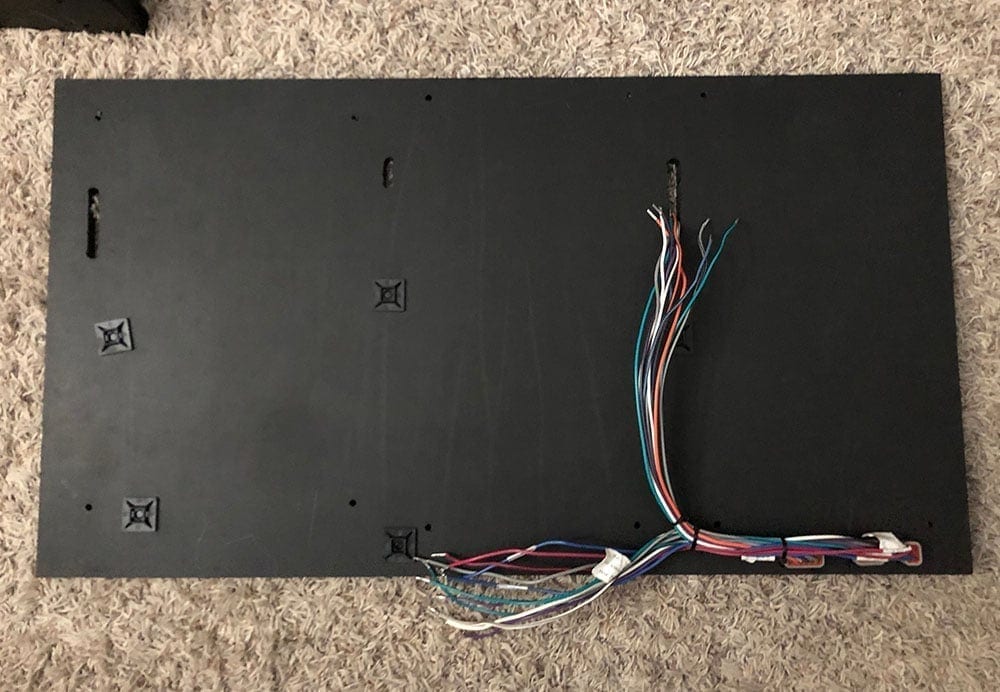
One-by-one I twisted, soldered and shrink wrapped each wire to extend it the exact distance that it would travel to the amplifier channel. Then, I epoxied 6 zip-tie mounts to the back of the board to mount the wiring to the board. The zip-tie mounts were basic plastic mounting points that had double sided tape originally. I removed the double sided tape and used a basic fast-set epoxy to ensure they'd withstand the elements and time. The end product came out pretty clean. And since I did this all from home, all I needed to do was bring it back to the boat and mount it where the original amp rack was located, and wire up the power and signal RCA wire.
Once I was at the boat, all I needed to do was remove the two outer amplifiers, mount the board to the same supports that the OEM amp rack was mounted to and re-mount the two outer amplifiers. With the amplifiers mounted, I wired up the power via the pre-cut power wire I prepared at home and connected the RCAs.
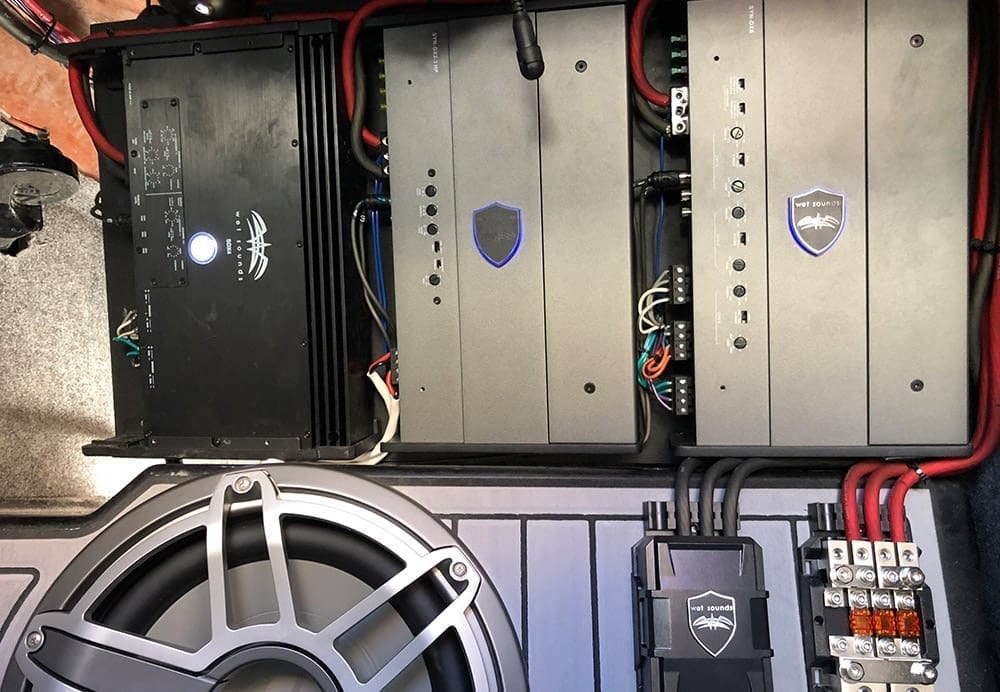
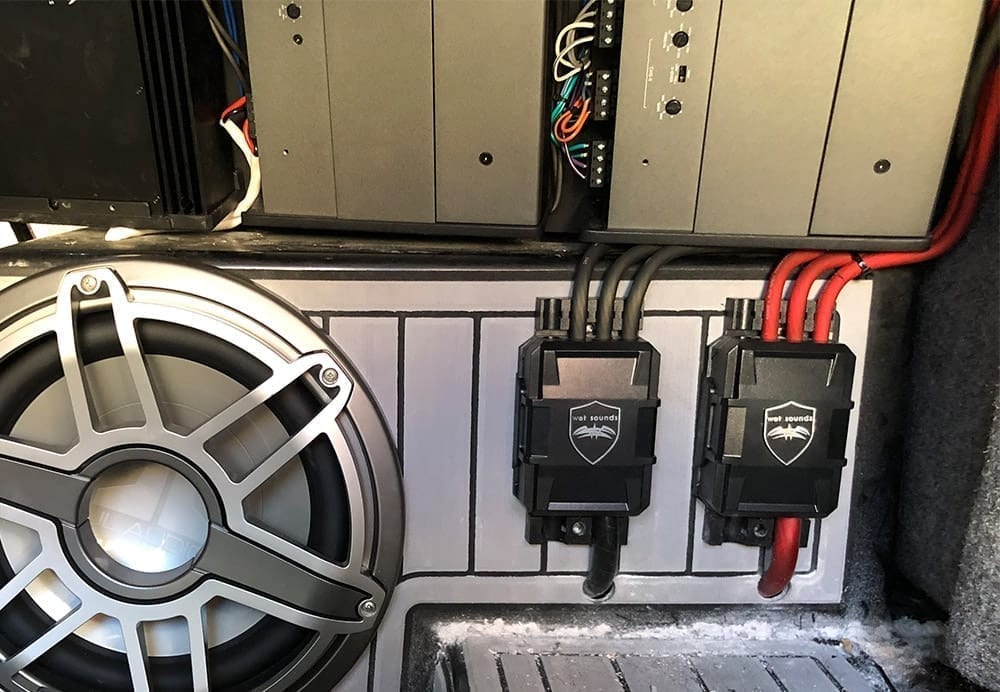
I chose to mount my distribution blocks to the right side of the subwoofer, and run the wire into the hull to create a clean and organized look. I was very pleased with how it came out.
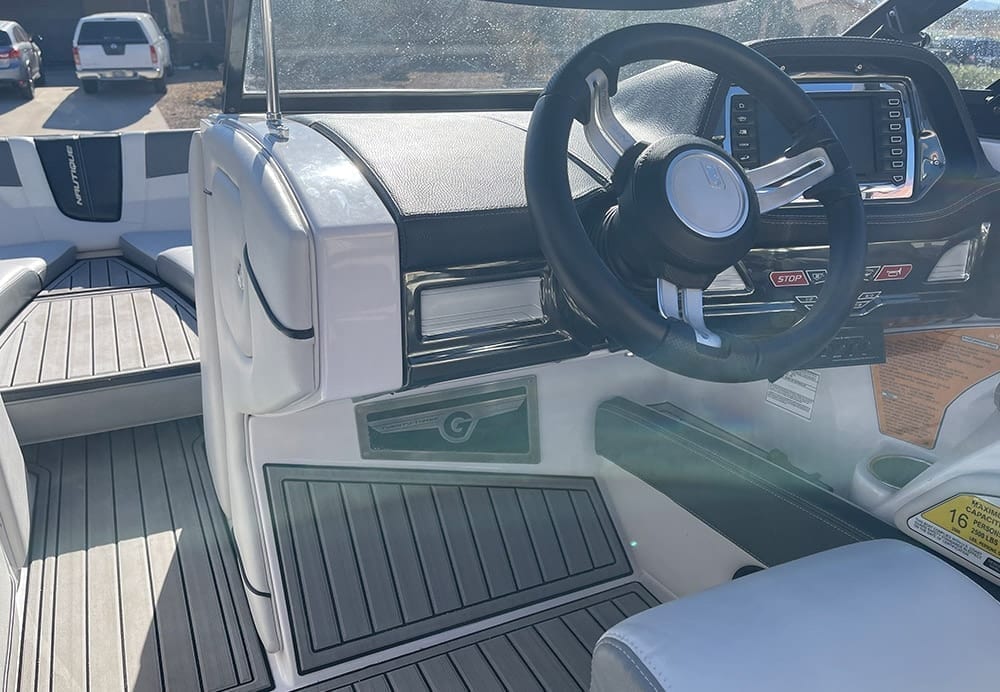
Equalizer
The WS-420BT is a great unit and I recommend it for any boat that has tower speakers and doesn't already have zone control. I did a full first-look review on the WS-420BT if you'd like to read more about it. When it came to placing the WS-420BT, I was a bit torn. I had seen others install the unit in the arm rest area near the throttle, or down below the throttle tucked away, or underneath the dash.
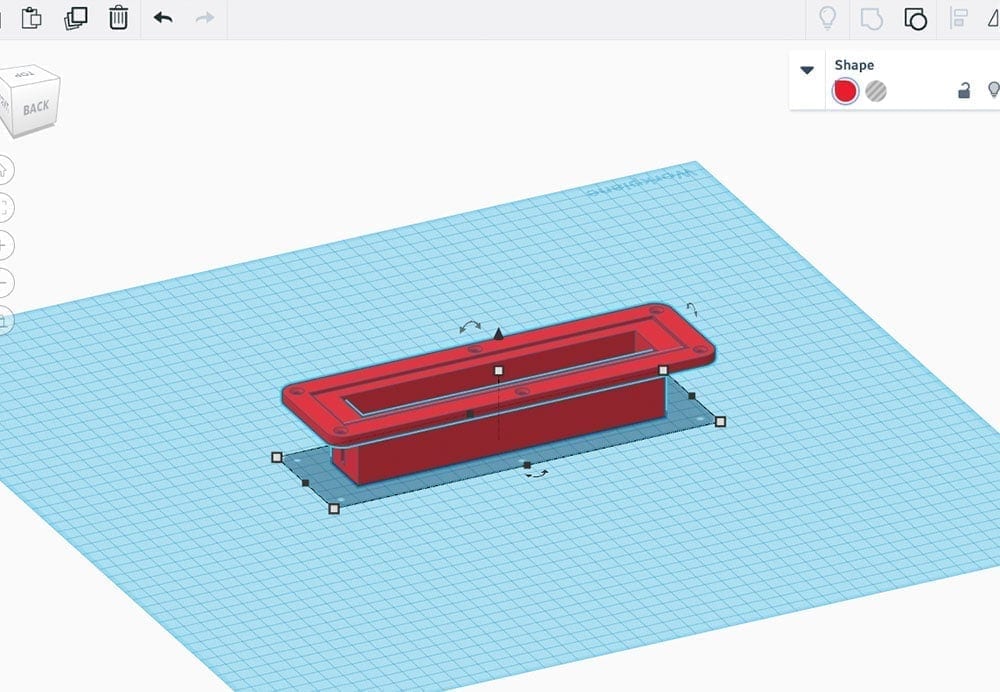
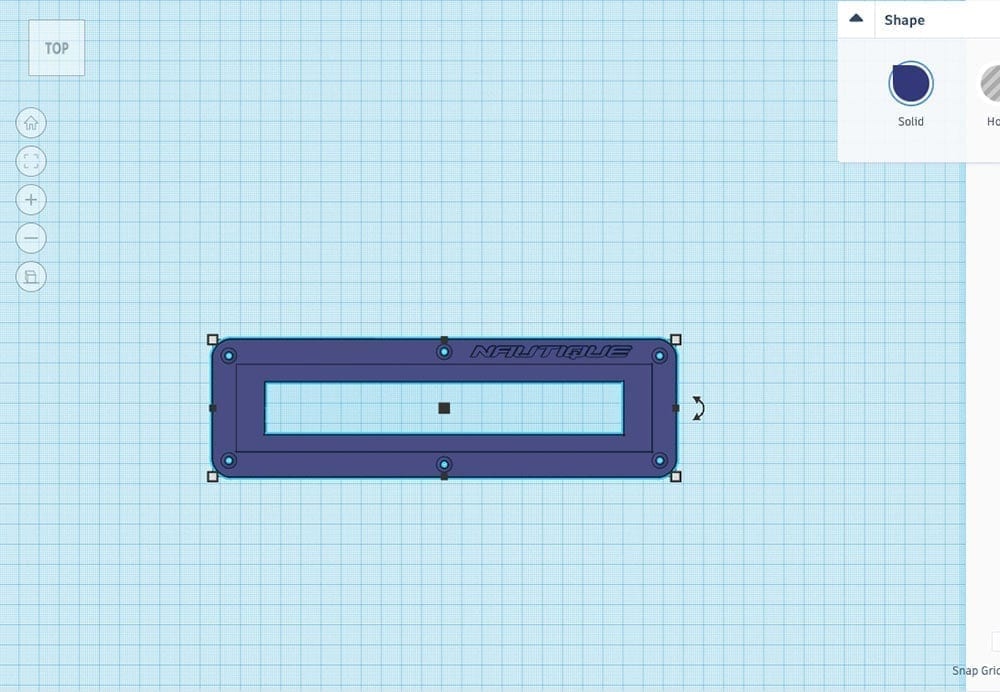
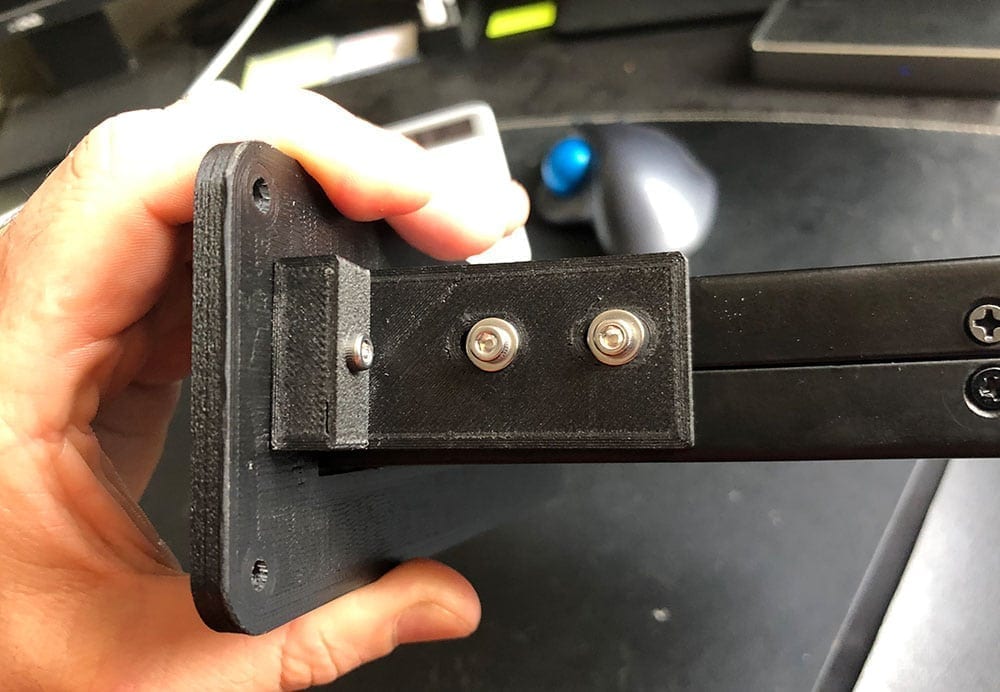
I went back and forth between installing it in the arm rest area near the throttle directly into the vinyl panel or underneath the dash. So to keep my options open, I purchased the undermount unit from Wet Sounds for the underside of the dash and I also built my own custom flat-mount bezel for the vinyl panel because Wet Sounds only makes an undermount for the WS-420BT (at least at the time of this article).
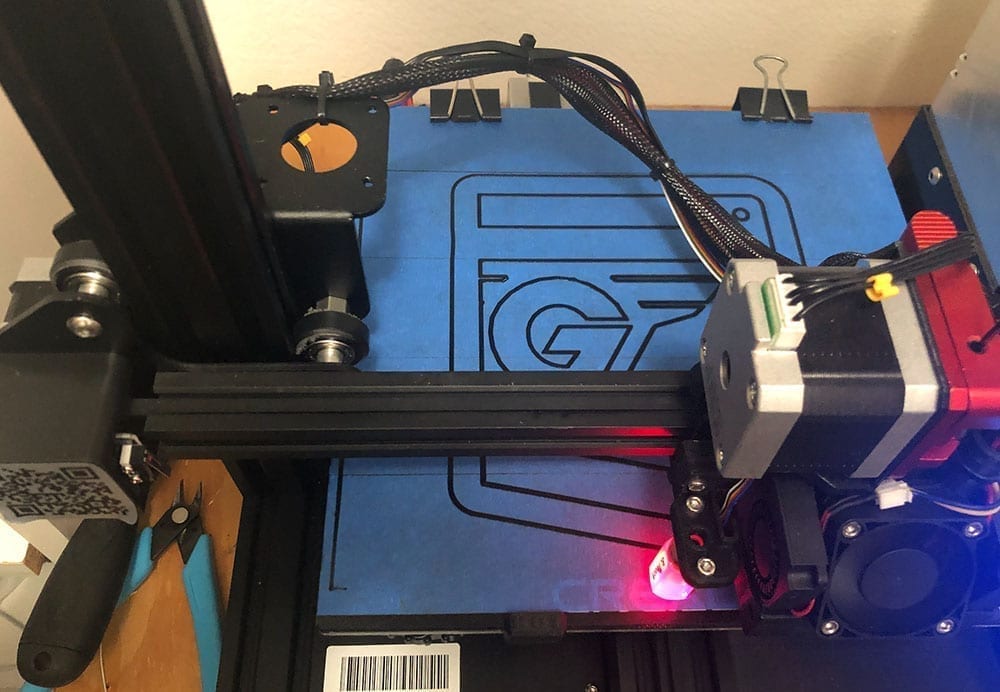
So, using my 3D printer and TinkerCAD again I designed and printed out a custom Nautique bezel to mount the WS-420BT to the vinyl panel using a Polycarbonate Carbon Fiber material. This was another fun project I did from home.
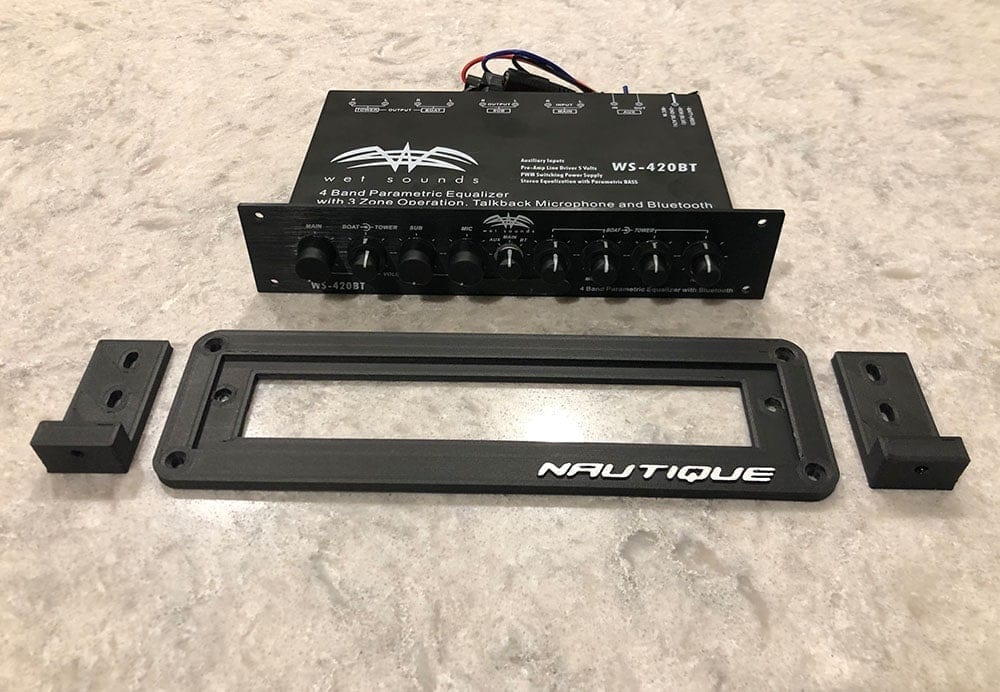
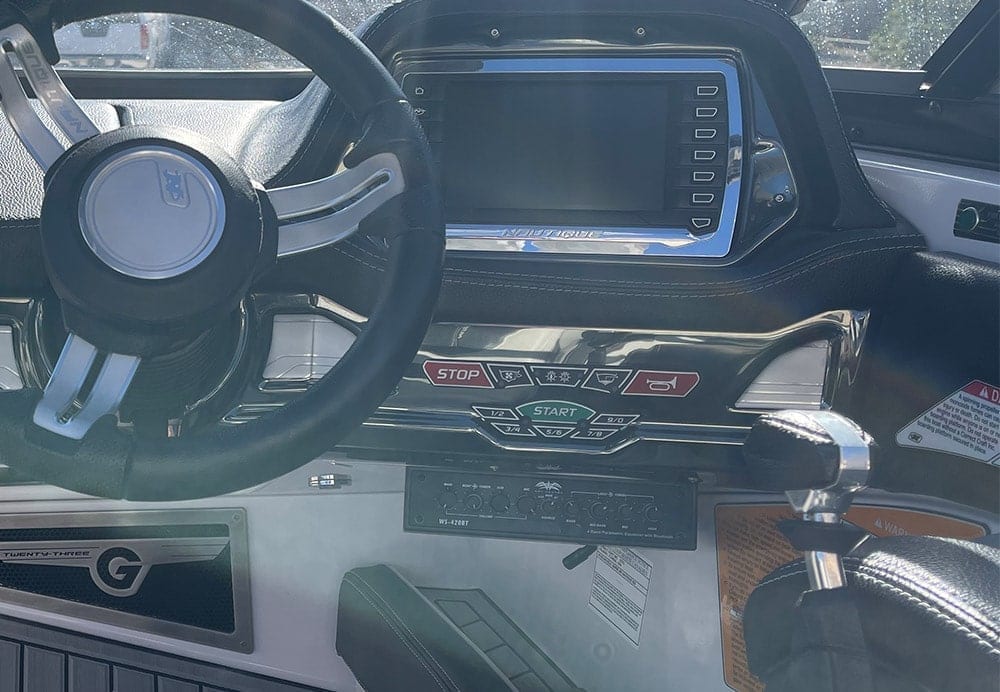
In the end, I decided to undermount it directly below the keypad. For me, it's much more accessible and easy to use than if it were near my elbow or hidden down below the throttle. For those who may not use this unit as their source of ‘truth' for their stereo, side mounting might be a better option. I would have loved to use the custom trim panel I made. But I use this to manage the volume at all times and having quick, easy access was higher priority than using my custom trim panel. Below the keypad IS the most convenient spot for the WS-420BT on a G23.
When it comes to tuning the WS-420BT, it can be intimidating and confusing at first. But it's really simple if you follow the instructions. I'd recommend taking a look through the instructions in the Manual. I also documented it a bit more in the review here. I've installed a few of these now and I pretty much still follow their recommended method to a T.
Subwoofers
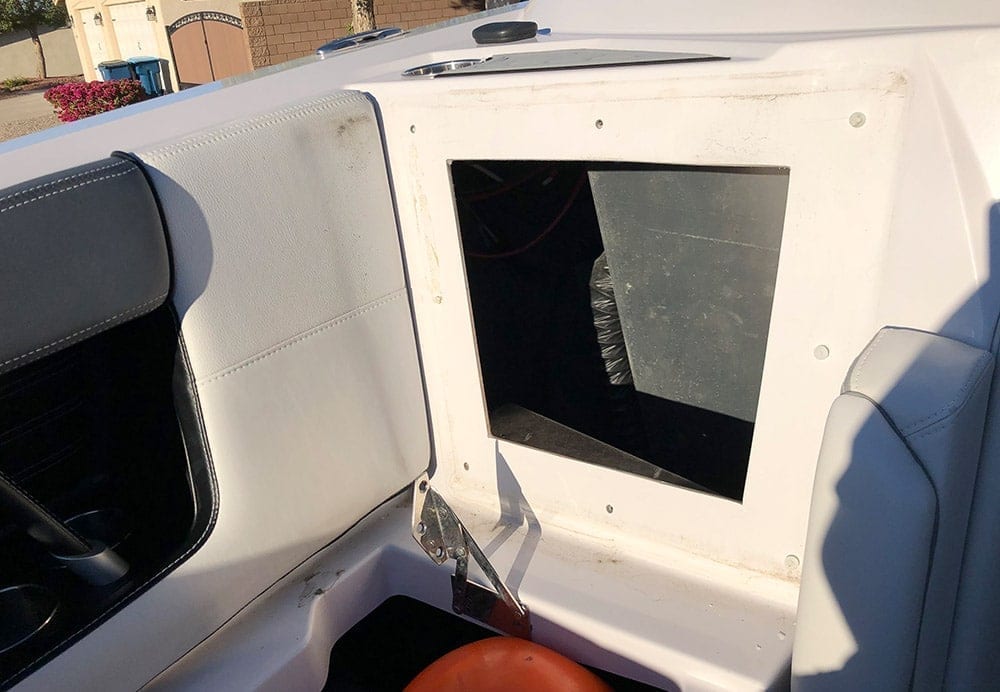
If you recall the OEM setup on my G23, it only came with a single 10″ polk subwoofer located in the port side storage compartment. This was nowhere near enough bass for the setup I was putting in and also didn't offer enough ventilation for the subs. So I went to the drawing board, literally (or should I say CAD).
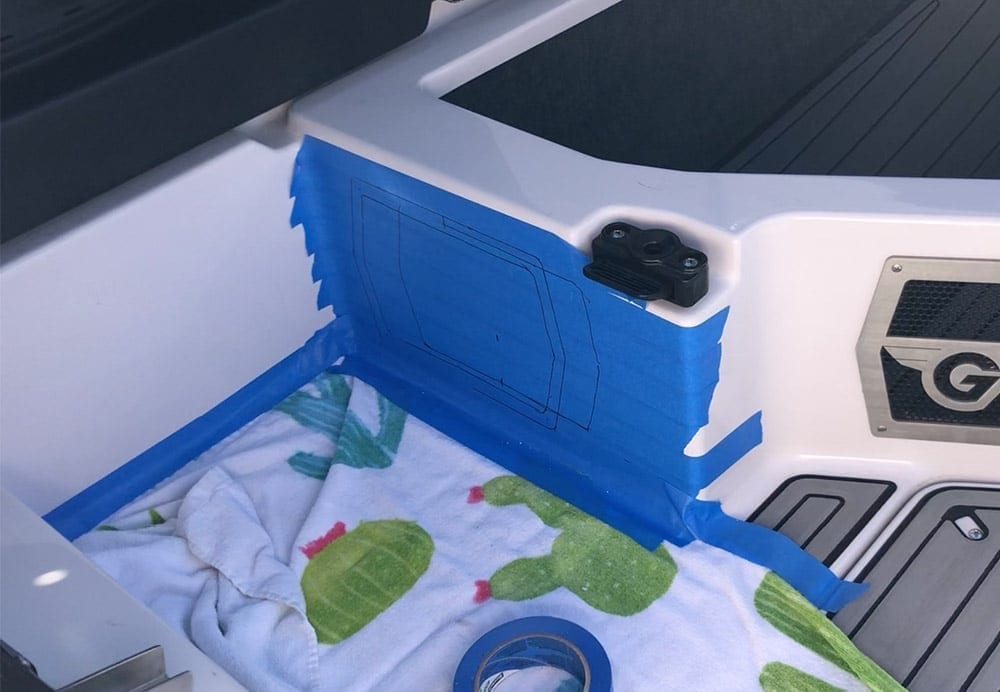
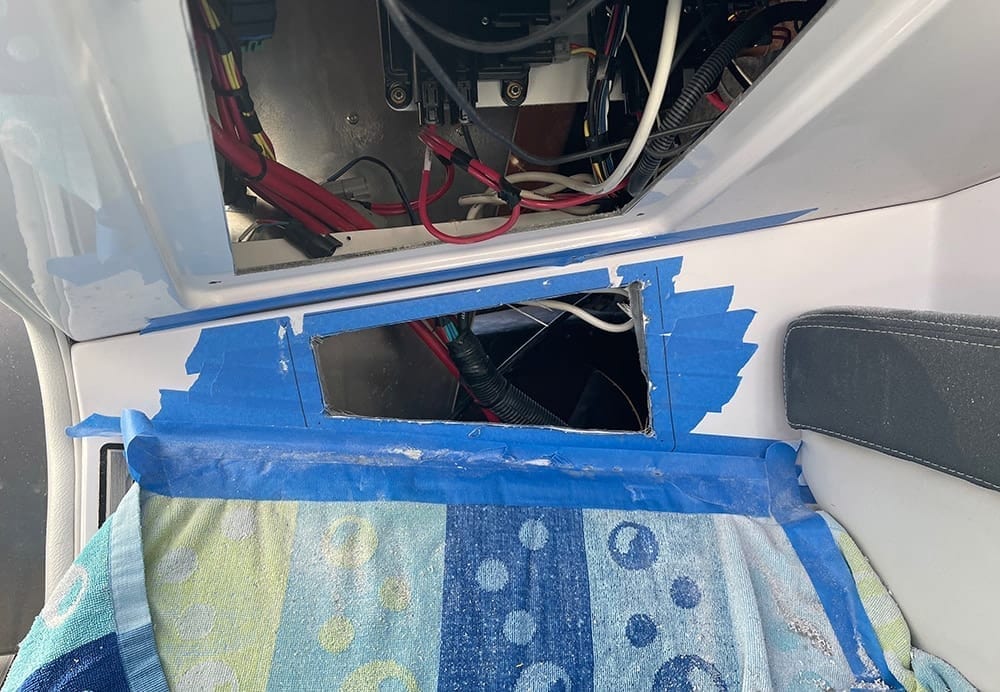
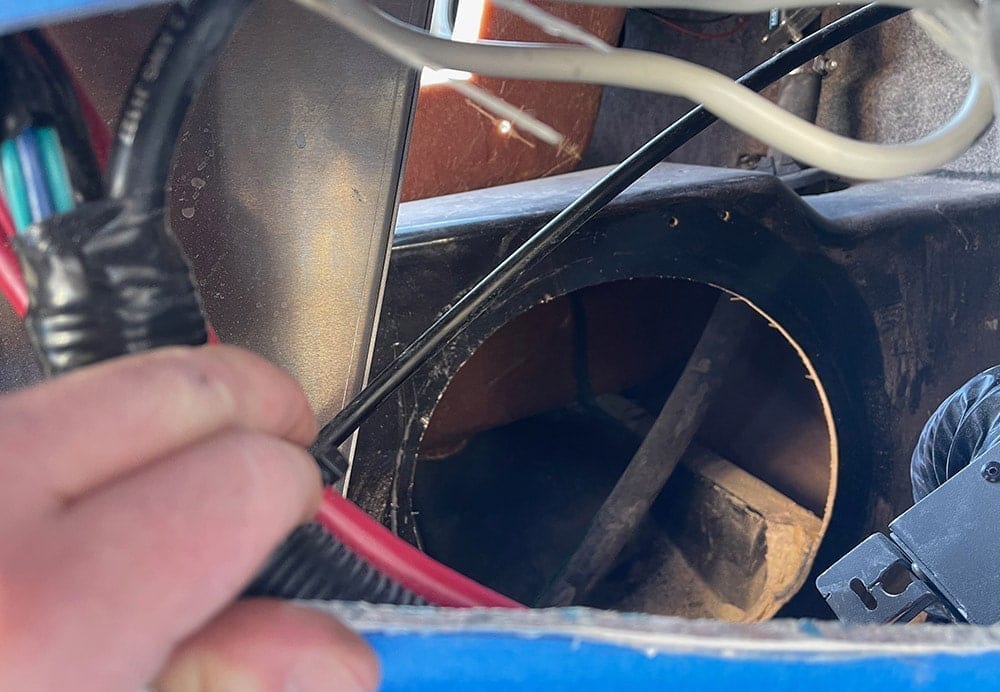
The first thing I looked at was how I could get two 12″ subwoofers into the boat. Come to find out, the OEM location on the port side is actually mirrored on the starboard underneath the helm. After removing a few panels I was able to see this. However, I needed to cut the actual subwoofer hole in the starboard side and wire it. This was one of the most challenging aspects of this installation. Mainly because of the tight quarters of the helm that makes cutting the subwoofer hole out very uncomfortable and time consuming. Even with a high speed router and cutting bit it took time to work around the thick fiberglass.
Using a router, a few cutting blades and the circle cutting attachment I cut a hole that was a little over 12″ in diameter. Per JL, the M7 sub has a 12.0625 mounting hole diameter.
Before you wire (or even choose) your combination of amplifiers and subwoofers, I'd recommend taking a look at Crutchfield's Subwoofer Wiring Diagram article. Within, you'll find an interactive questionaire that will help you choose your amp or subwoofer based on the specs of either one and then ultimately show you a wiring diagram. I tried it myself and it worked great. But it also will confirm any suspicion/uncertainty you might have when going to wire your subwoofers/amps.
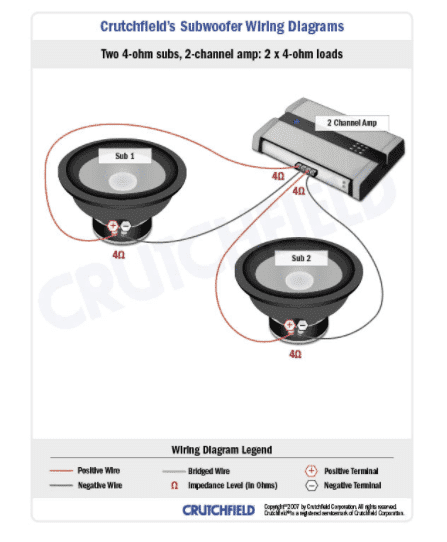
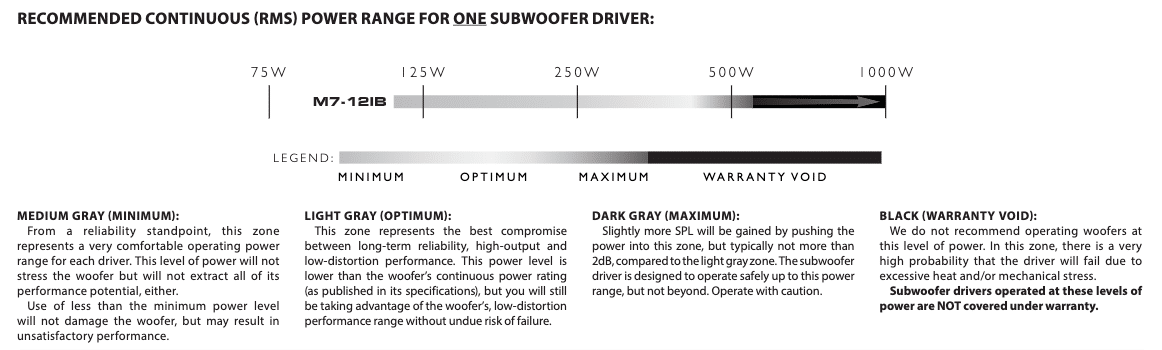
I wired my SYN-DX2.3HP up to both of the subs, one sub per channel (like Crutchfield's wiring recommendation) to give a 4ohm output to the two subs at 300W RMS per subwoofer. According to JL Audio's RMS power range per subwoofer, this would be right within the “optimum” power for these subs. Maybe a hair on the low/safe side. You can see their recommendation here:
I ran 12 gauge wire from the port side (where the amplifiers were) to starboard side of the boat underneath the bow area, using a series of zip tie mounts to hold the wire tight to the fiberglass so that they would not sag into the belly ballast bag.
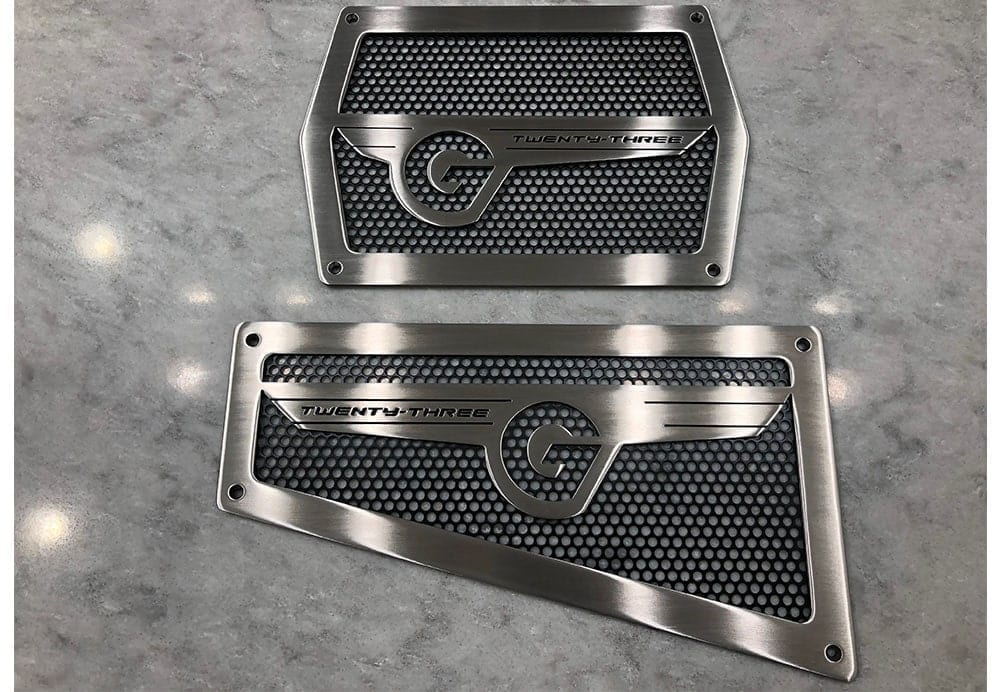
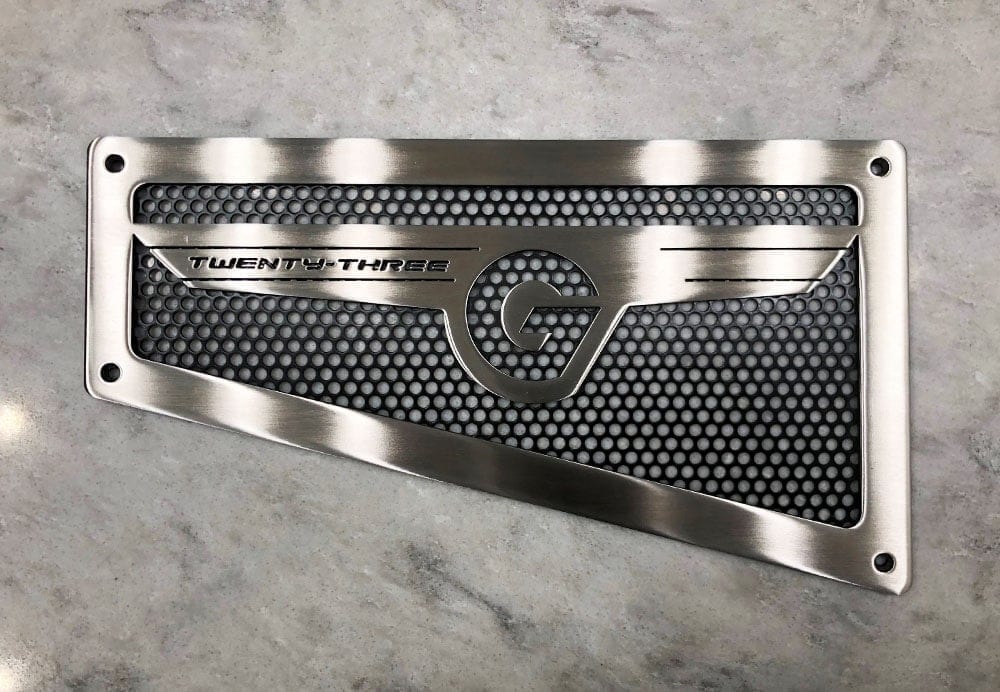
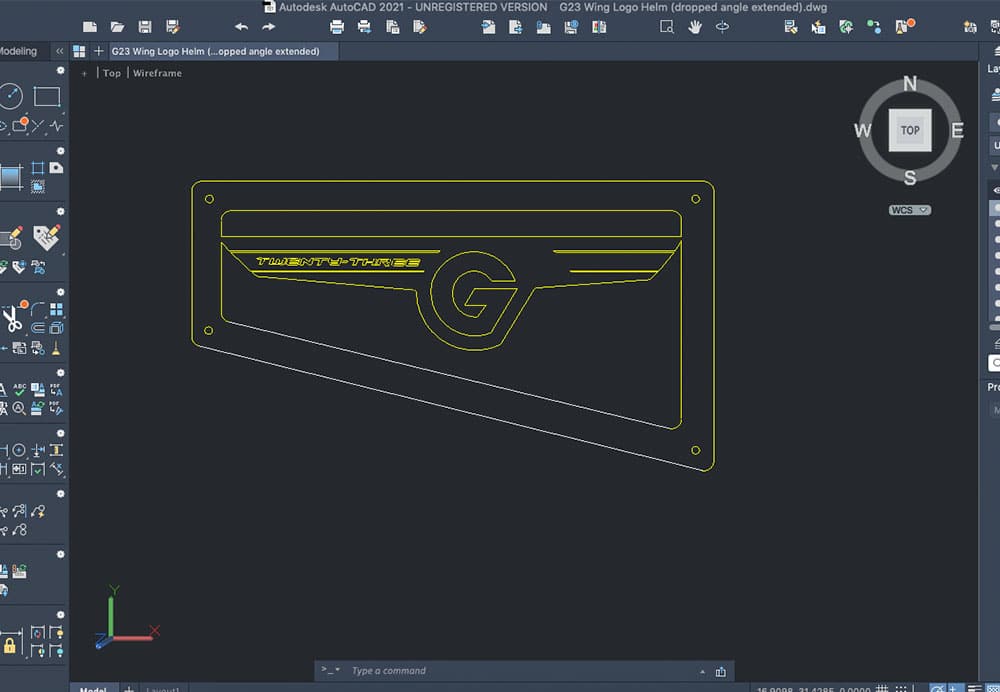
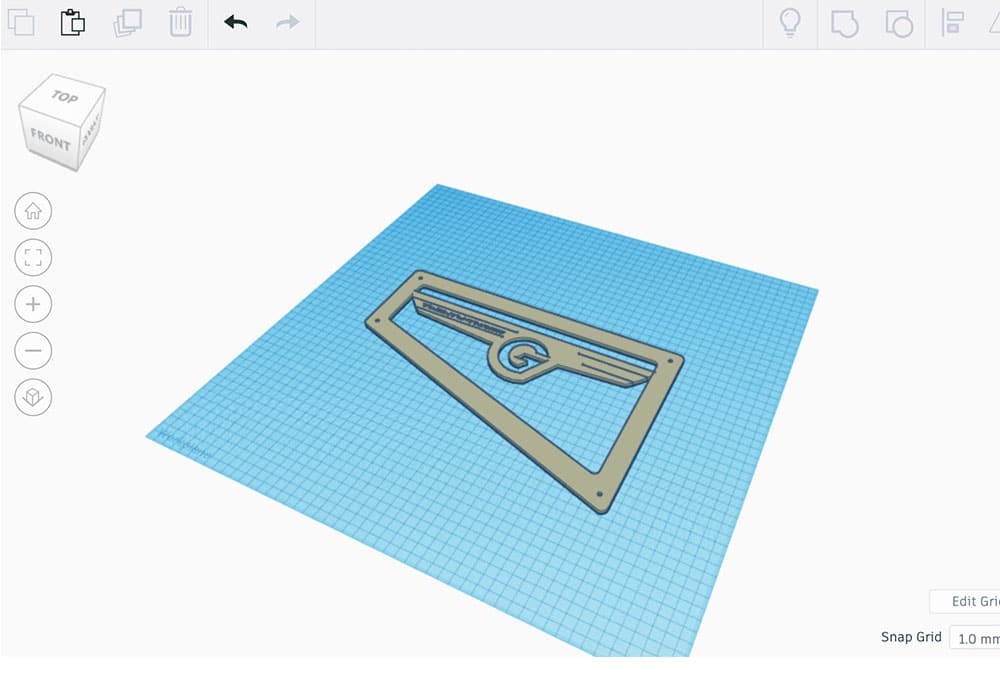
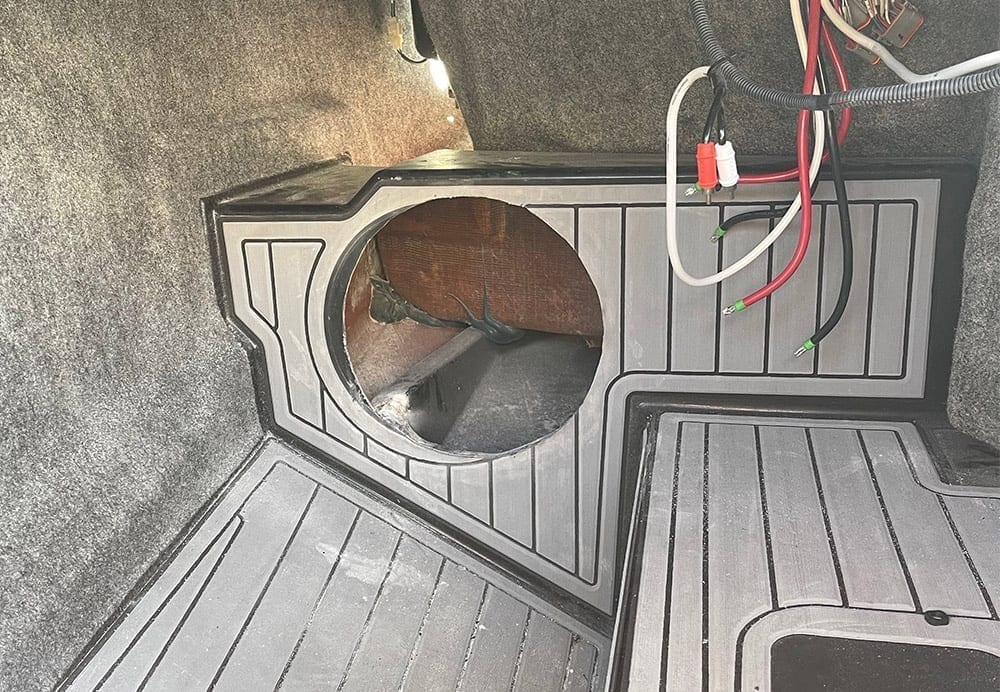
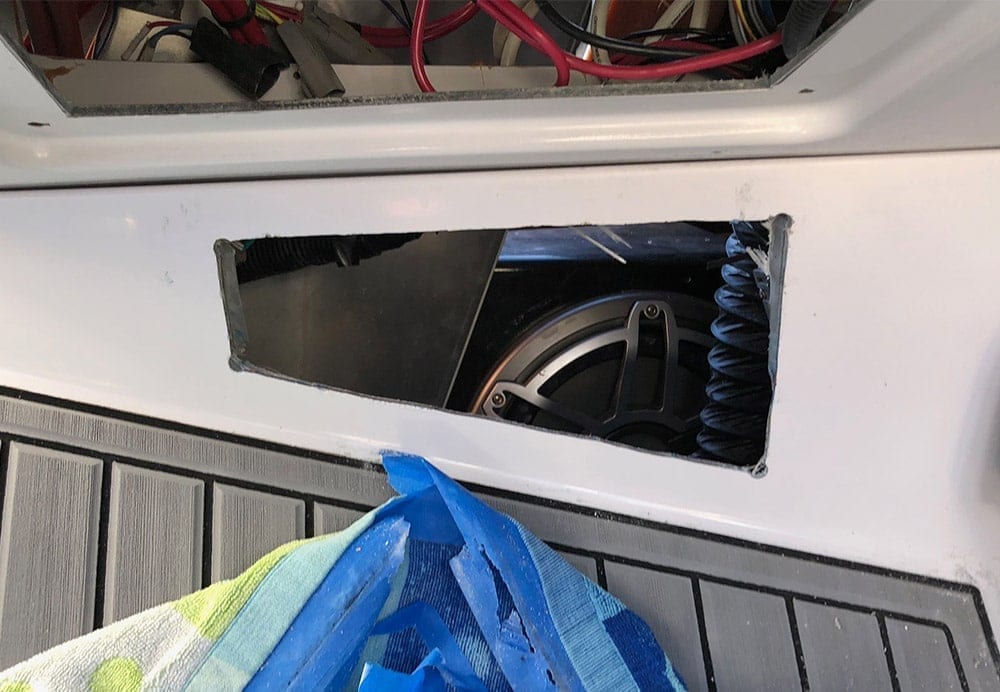
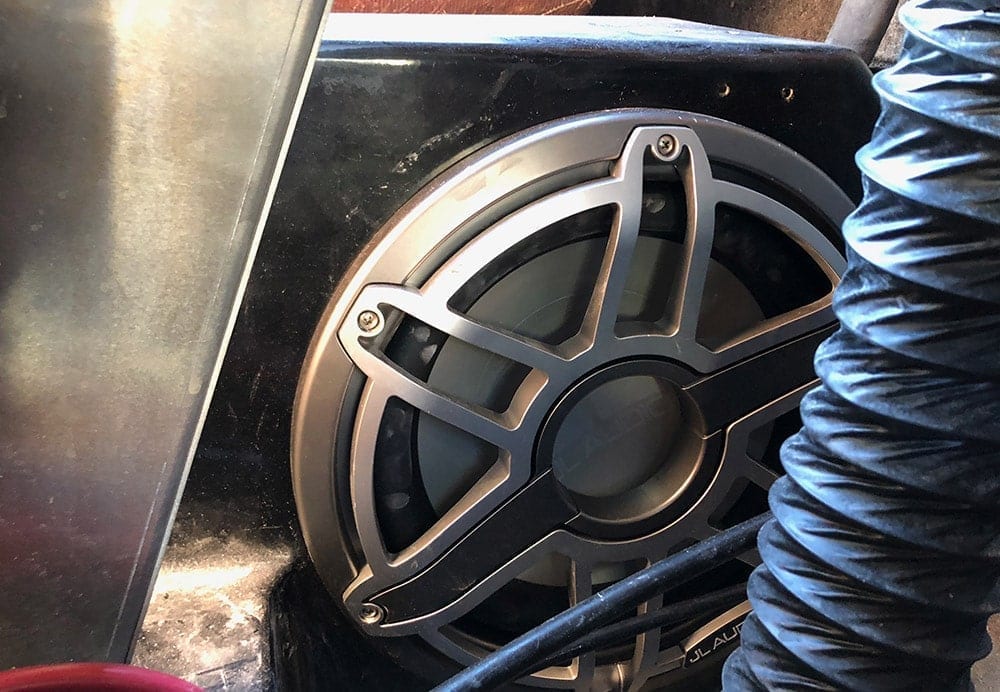
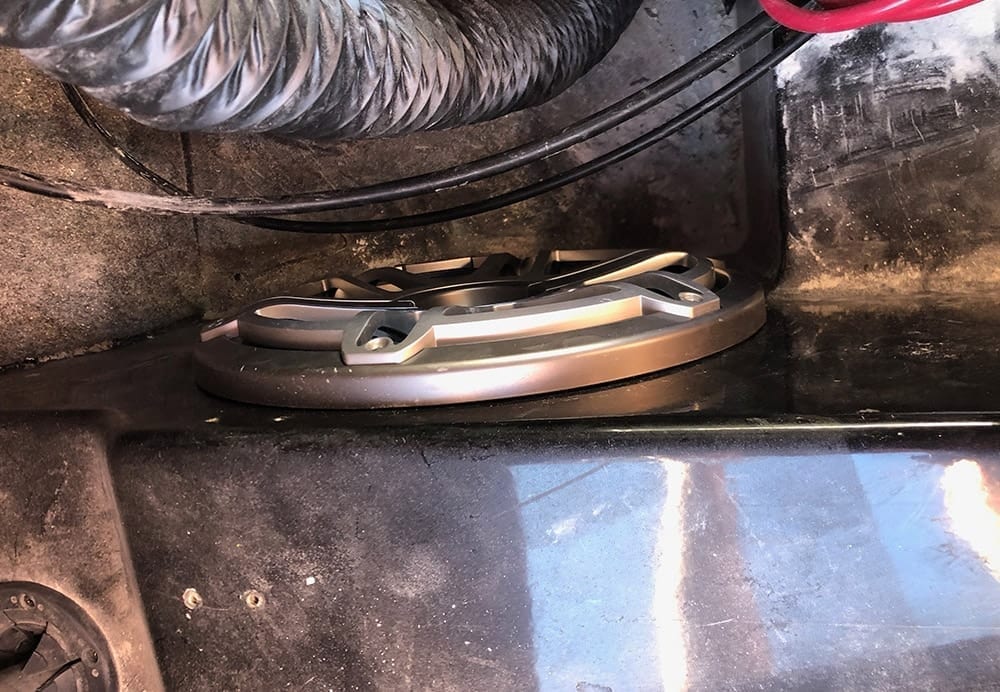
Next was ventilation. Without a vent, in these locations your subs are going to work over time and you'll lose a ton of volume. Too much ventilation and you'll also degrade the performance. The port side was pretty straight forward – I used two of the Denver Waterjet G23 ‘wing' sub vents. But the helm side was a little more custom. I had seen a custom helm sub vent on Facebook and got the information for the shop that made it. They happened to also make the other matching vents that are posted up on nautiqueparts.com. I called up Peyton over at Denver Waterjet who helped me create a custom vent that matched the other vents perfectly (and wasn't too expensive either). He sent me over the design he created and I took the liberty of measuring, tweaking, 3D printing my own (for fitment only) and then sending him back the updated design. It came out GREAT. You can probably reach out directly to him to get the exact same one that I helped to design in this project.
Note on the install of these – you'll need to make large holes in the fiberglass in the interior. Use painter's tape to protect the fiberglass while you cut with your jigsaw. Also, get Several cutting blades. The fiberglass is thick and chews through a blade almost ever 3-4 inches of cutting.
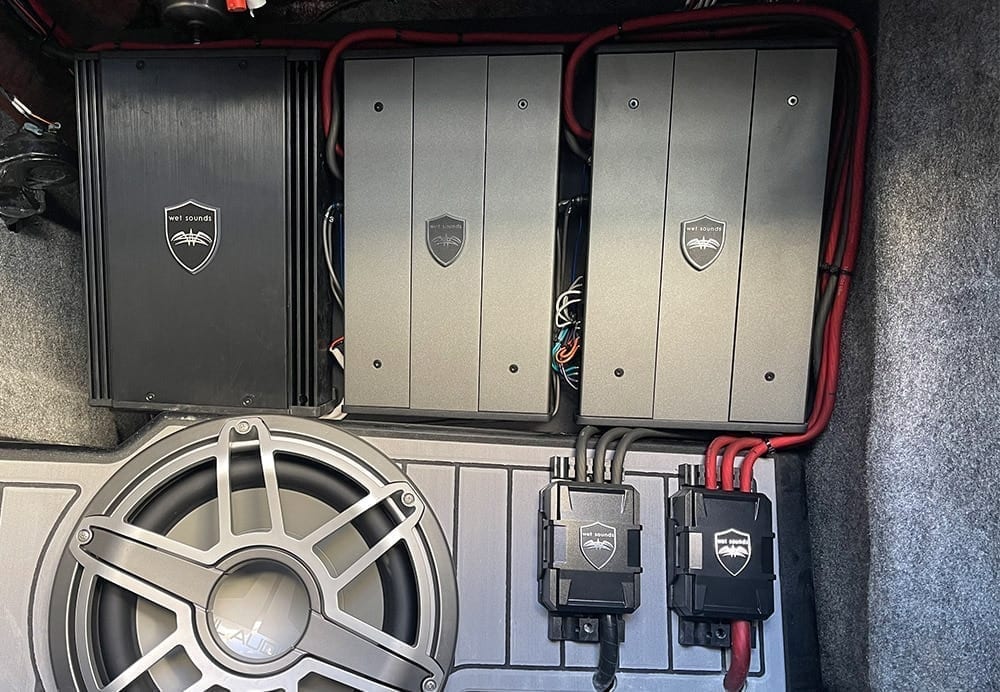
End Results (With Photos)
I was incredibly pleased with the results of this installation. The REVO6 were loud and covered the mids very well. There are many people that would say that the 6.5″ coaxial would underperform given this setup and may be the bottleneck (I would have said that before hearing them). But I'm pleased to say that they're loud, crisp, clear and cover the mid-range very well. Not as well as an 8″ would but I'm very happy with their performance with this system.
The amplifier matching was perfect too. Everything was sufficiently powered with gains never higher than about 75%. 0 distortion and no overheating issues in testing (we pushed these things hard in the middle of the lake for some time). But the summertime heat is where I'll know for sure.
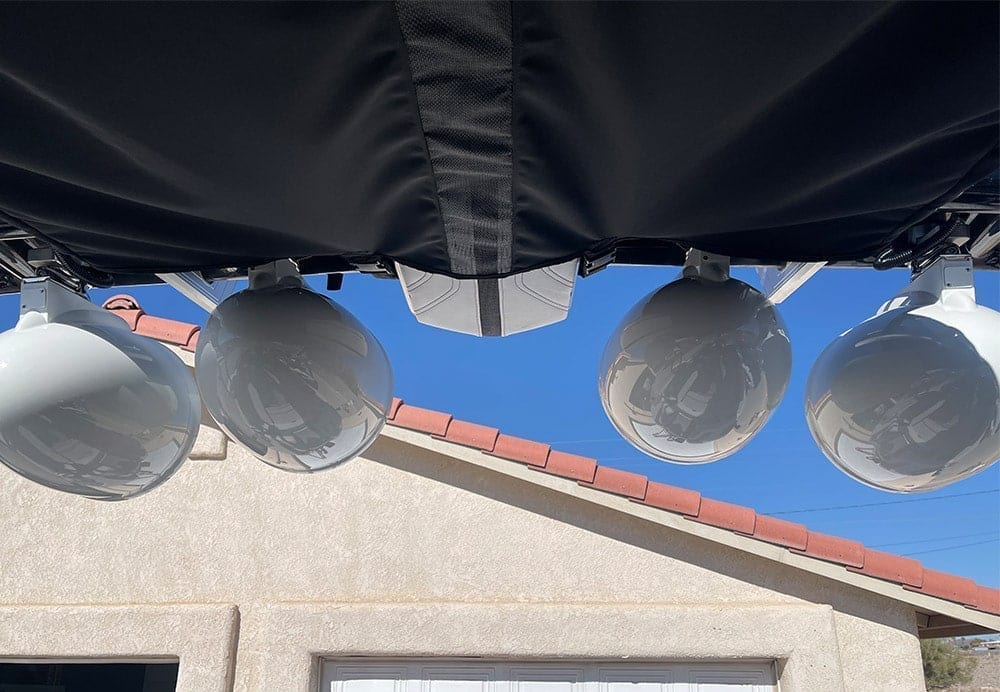
The 4 REV10 towers are more than enough. They're well-powered and don't have the harshness that I was concerned about with the Wet Sounds HLCDs of the past. The 10″ definitely rounds out the sound much more than the 8″ REV 8s too. My only complaint is that they hang low. But they look incredible and are very balanced with the look of the tower and size of the boat.
The WS-420BT is still a must in my opinion. With this type of system it's essential to have full control to prevent damage and to get the most out of the system.
The M7-12IBs have to be my personal favorite for marine subs, especially for this setup. The OEM placement is what I'd recommend to anyone who's looking for a clean, high performance pair of subs and wants to retain as much space in storage on the boat. They performed incredibly well with smooth, loud and clear bass that matched the intensity of the rest of the system. These free-air subs are monsters and a perfect match for a G23.
All in all, we're INCREDIBLY happy with the stock look and the high performance of this stereo. And on that note we also want to give a shoutout to our sponsor, Crutchfield for helping make this happen! You can find all of the products we used in this install in their marine section.
Have comments or questions? We'd love to hear from you in the comments section below!


How many hours did you have for this install?
This was about a 3-4 day install with about 20-25 hours (or more) including the prep work, wiring, etc.
Looking for the driver side sub vent you guys installed.
Hi Scott. I had this vent custom made by Denver Water Jet. They’re the ones who actually make the passenger side too that you see on nautiqueparts.com. You can find their contact info on their website: https://www.denverwaterjet.com/. I would ask for Peyton – he’s the one I worked with and sent over the updated dimensions that I used on my boat. They should still have the dimensions for it.
That looks awesome! Can you tell me if that’s a sealed box for your sub or is there a open space behind your box thanks
Hello. Thank you! On the back side of the subwoofer is shared open space. It’s where the belly/bow ballast bag lives. It’s essentially the entire bow. This was the reason I chose the JL Free Air subs vs a conventional component subwoofer.
How did you wire the SdX4 for the Rev10s? Did you just run one to each channel?
Yes, 1 REV10 per channel on the SDX4
Would you be willing to load the STL for the WS420BT bracket to a sharing site such as dropbox, thingiverse, printables etc?
Hey Adam. Sure, here’s the links in Tinkercad:
– Faceplate: https://www.tinkercad.com/things/23pT9xO8Vu3?sharecode=nGyzL56sJ7mc88QrZqIXFjuEzZB88JxEZqtnK2V0KHo
– Mounts to Faceplate: https://www.tinkercad.com/things/d38eKYLJ4v8?sharecode=24OY7tNCuBDl8nNOvqvg0E4fBSr7ba_S7HEGSP4JRgU
The one concern I have with this printed design was the material. I used the standard PLA, ABS and then a polycarbonate but all of them were pretty susceptible to heat and would warp. If you have a suggestion for that, would love to hear it!
Sorry to bring up an old thread, but would you be willing to send a file via email???
If you click on those URLs in the comment above, there’s a link to “Download for 3D Printing”. You might just need to create an account with TinkerCAD which is pretty straight forward. Here they are just in case:
– Faceplate: https://www.tinkercad.com/things/23pT9xO8Vu3?sharecode=nGyzL56sJ7mc88QrZqIXFjuEzZB88JxEZqtnK2V0KHo
– Mounts to Faceplate: https://www.tinkercad.com/things/d38eKYLJ4v8?sharecode=24OY7tNCuBDl8nNOvqvg0E4fBSr7ba_S7HEGSP4JRgU
I have questions~! Please and thanks.
Kameron, Do you think x2 Hertz Mille Legend ML2500.3 could be fit into a sealed enclosure behind the helm? These subs have an optimum of .88cFt per
About to pull the trigger on four~! I’d hate for them not to fit lol. My boat is a 2013 G25 but i think that area and space should be the same as your boat. Thanks so much!
Hi Chris,
Thanks for the comment. I think it CAN be done… with a significant amount of work. I’m assuming you mean placing a sealed enclosure where I cut and placed the second JL sub. My concern is 1) the only way to get into this area is behind the starboard bow seat and that space is pretty limited so you’d need to consider that when you build your enclosure and 2) there’s a lot of stuff going on down there – wires, cables, the heat exchanger for heat (if your G25 has it). It’s an awkward space and might be tough to get the optimum volume enclosure, while accounting for the sub depth and the odd shape of the hull down there. It’s probably doable if you build the enclosure right and you get around all of these obstacles but to do it right, where the enclosure isn’t going to move around and is shaped to avoid the cables, heat exchanger, wires, and so on seems like a tough task. Unfortunately, I didn’t take exact measurements of that area so I wouldn’t know for sure. Just my take on it though.
My recommendation if you can.. Get some spare tree clips from nautiqueparts and pull the starboard bow back seat off that’s up against the front side of the helm area/windshield and do some measurements to be 100% sure. You’ll probably break a few of those clips that hold the seat in. You might also have to pull the sliding door out to see around it.
Hello Kameron!
Amazing installation, video and information. Thank you very much! I went into my local car stereo place get ideas and have them do a professional install but got big timed by the sales manager.LOL. This is how I started my search finding DIY ideas and came across yours. Being I’m going to do this myself I do have a couple of questions. My boat is a 2019, can I still put another 12 under the dash on starboard side in that boat. I assume so because they offer a 12 with an upgraded package but unfortunitly, mine did not have. Also, it has a stock 10 on port size can I put a M7 12 in place in stock location? Thank you Kameron.
Hey Robert. You definitely should be able to. I think in the newer G23s the underside of the hull is still mirrored because dual 12s is an option from the factory.
And to answer your second question, the stock sub on my boat was a 10″. I had to hone it out to fit the 12″ which was a pain but it worked.
I’m 80% sold on going 8″s in the cabin but I can’t find any info on how to make them fit… I read that it may need a pod or a plate, from your shots it really looks like the 6.5″s are a very tight fit. Any direction you could help me point in to see if it’s worth it? Thanks so much!