In this article: I'll unbox and review Sony's XM-6ES and XM-8ES amplifiers. I'll give you a closeup of the terminals, high and low voltage inputs, outputs and of course the control panel with their crossovers, signal summing and more.
Previously, I unboxed and reviewed two of Sony's Mobile ES car amplifiers in my Sony XS-1ES and XS-5ES Amplifier Unbox & Review. I even installed the 4 channel and monoblock in my three part Ford F-150 custom stereo install. At the time, there were three amplifiers a part of the lineup (1ch, 4ch and 5ch) but even since Oct 2022, Sony's lineup of Mobile ES products has continued to grow. In May of 2023, Sony announced two additional amplifiers that really rounded out what was already a solid lineup of amplifiers – a 6 channel and an 8 channel.
At first glance I was happy about the addition but it wasn't until I started reading about the specs and got my hands on them to take a look at their features in person that I really got excited about how much these two amplifiers really added to Sony's lineup. Particularly for high-performance, high-power and complex systems.
So in this review I'll walk through some of the key specs, benefits and features of these two new amplifiers and give you my opinion along the way. I'll unbox them with tons of photos so you know exactly what you're getting into if you decide to purchase one of these amps. I'll also be referencing back to some of the features in my Mobile ES Amplifier review because the amplifiers DO share a lot of similar functionality. For example signal summing.
Let's dive in!
Sony XM-6ES & XM-8ES Unboxing
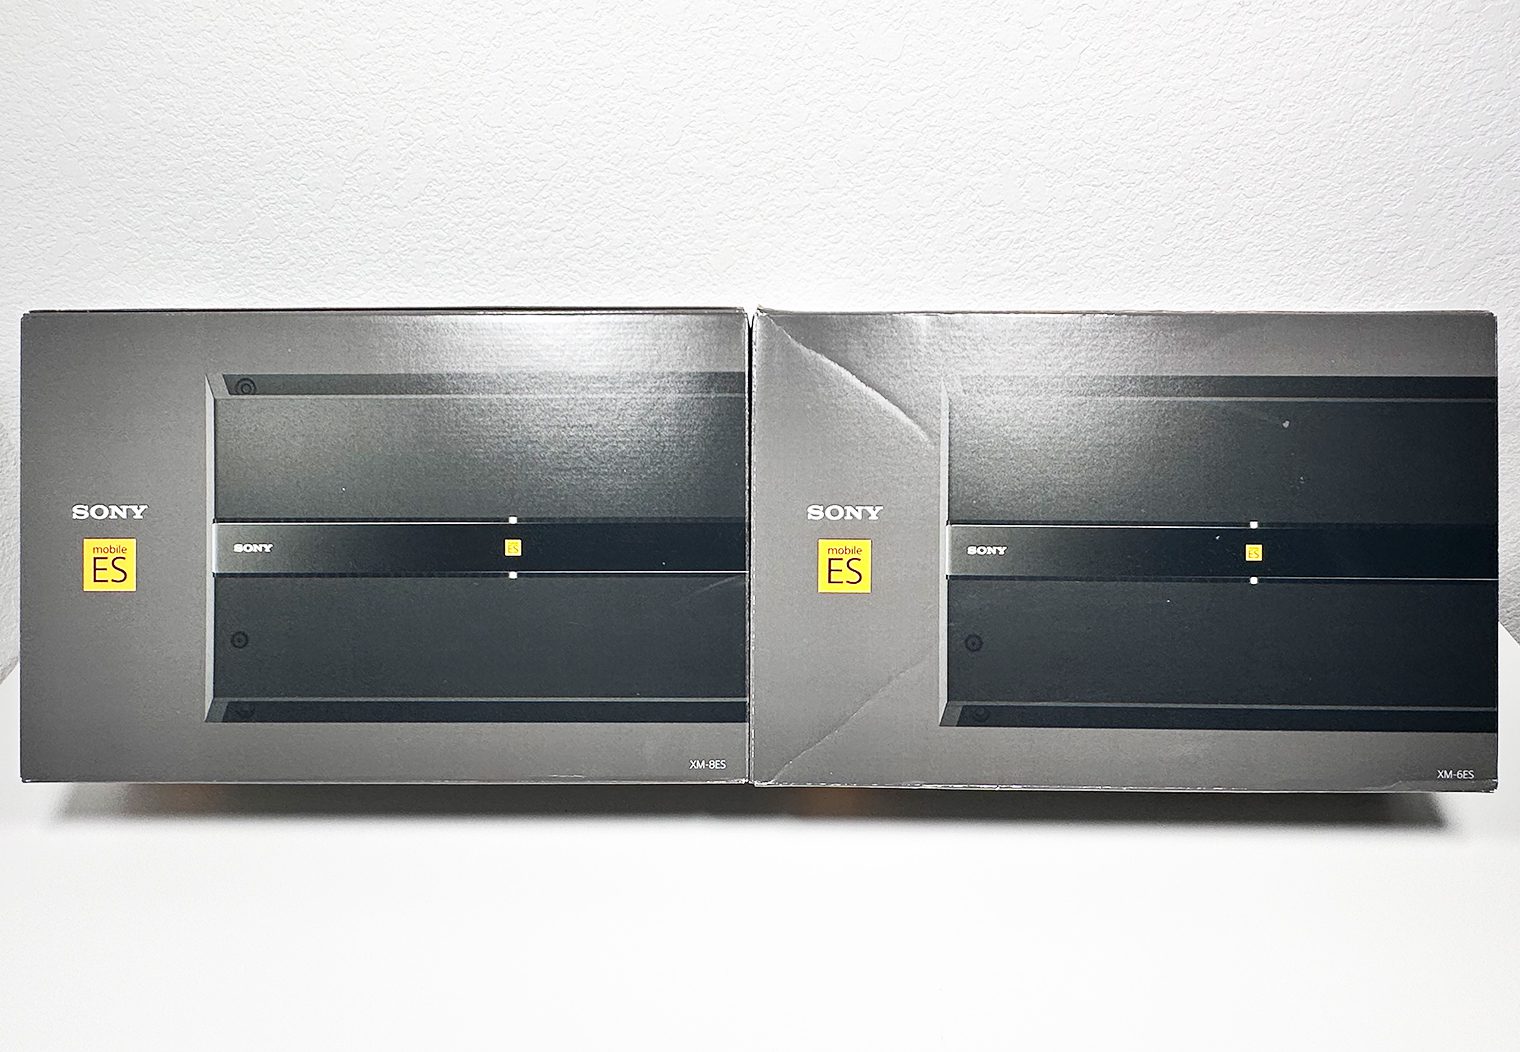
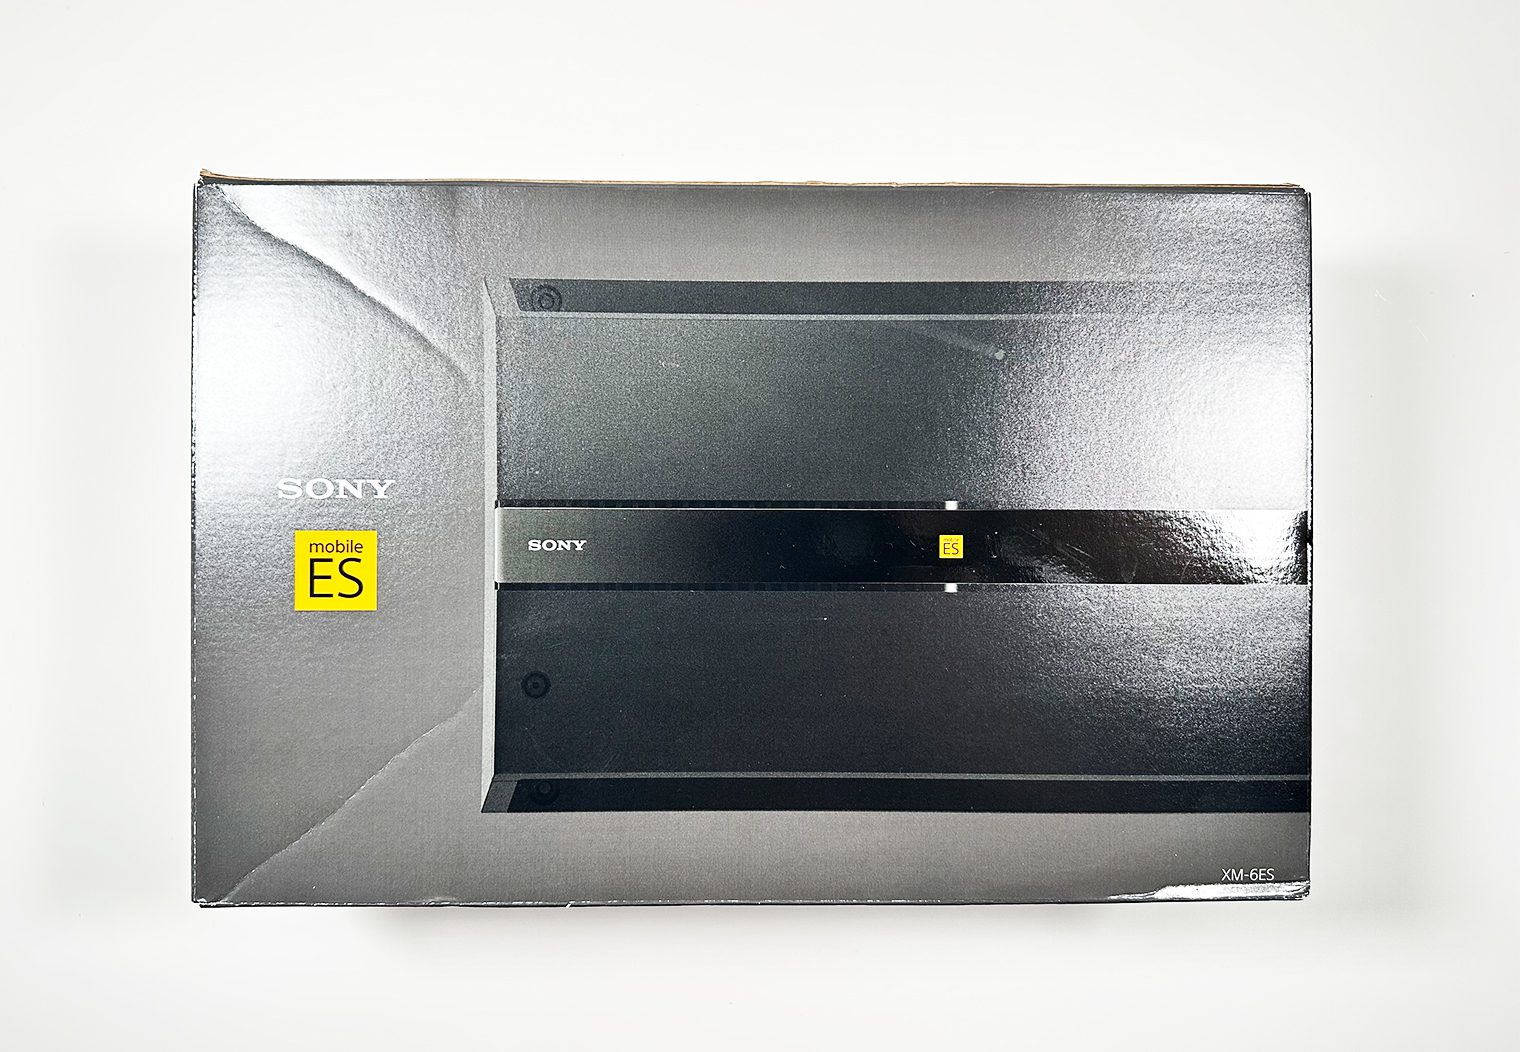
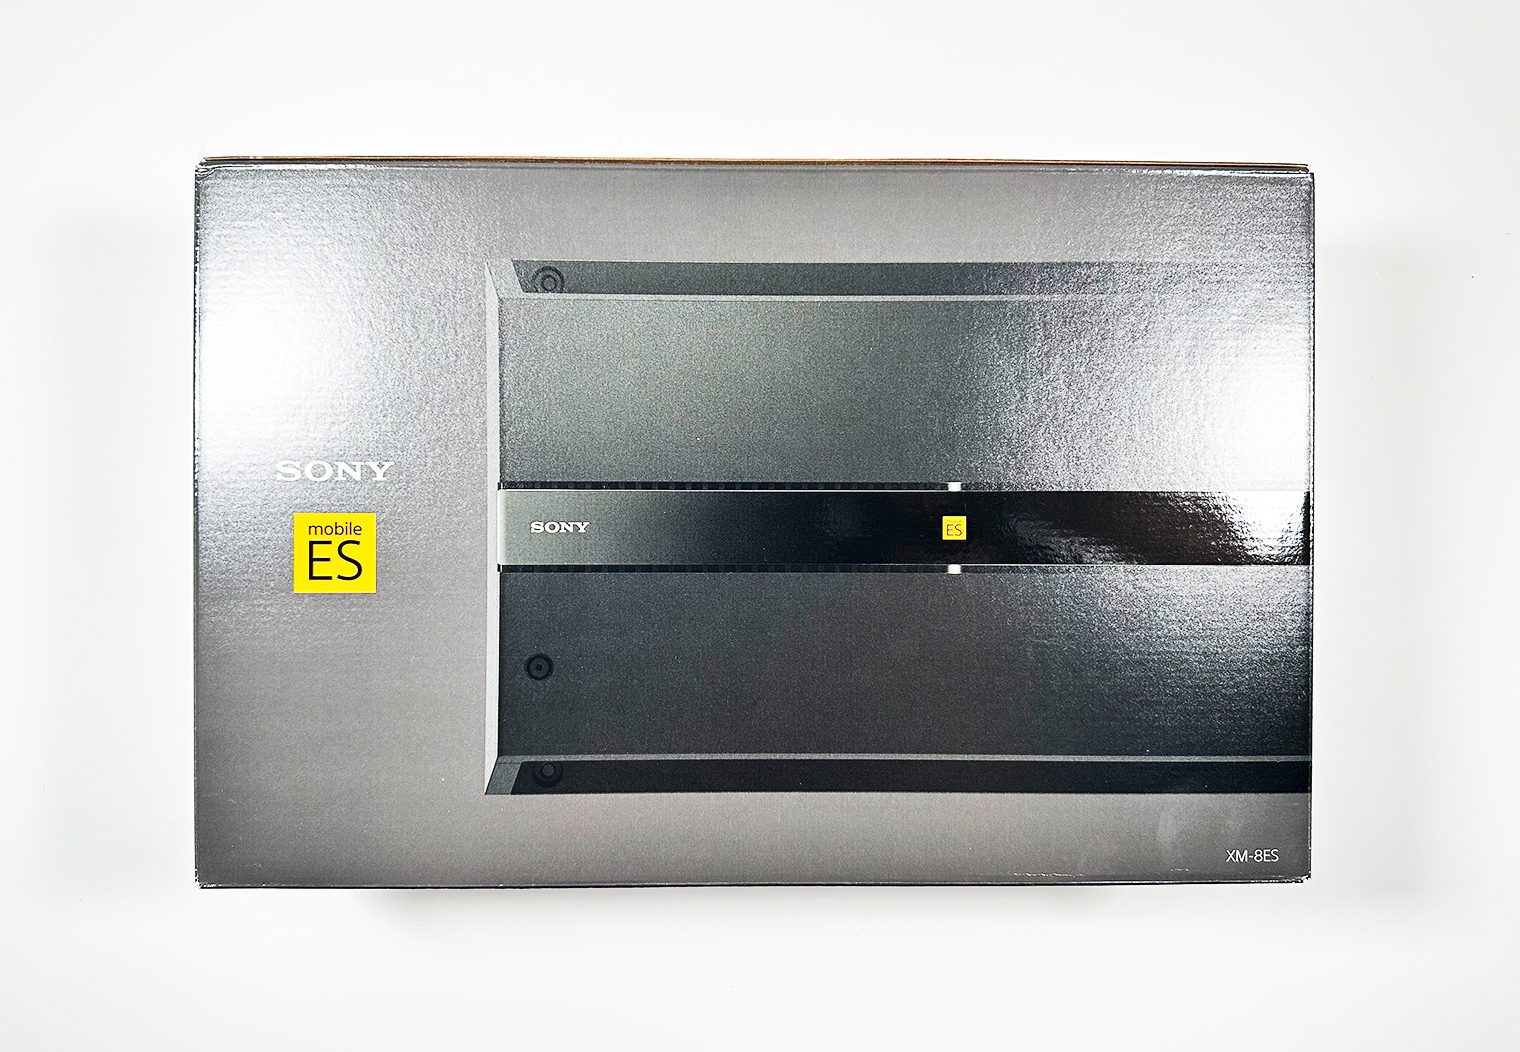
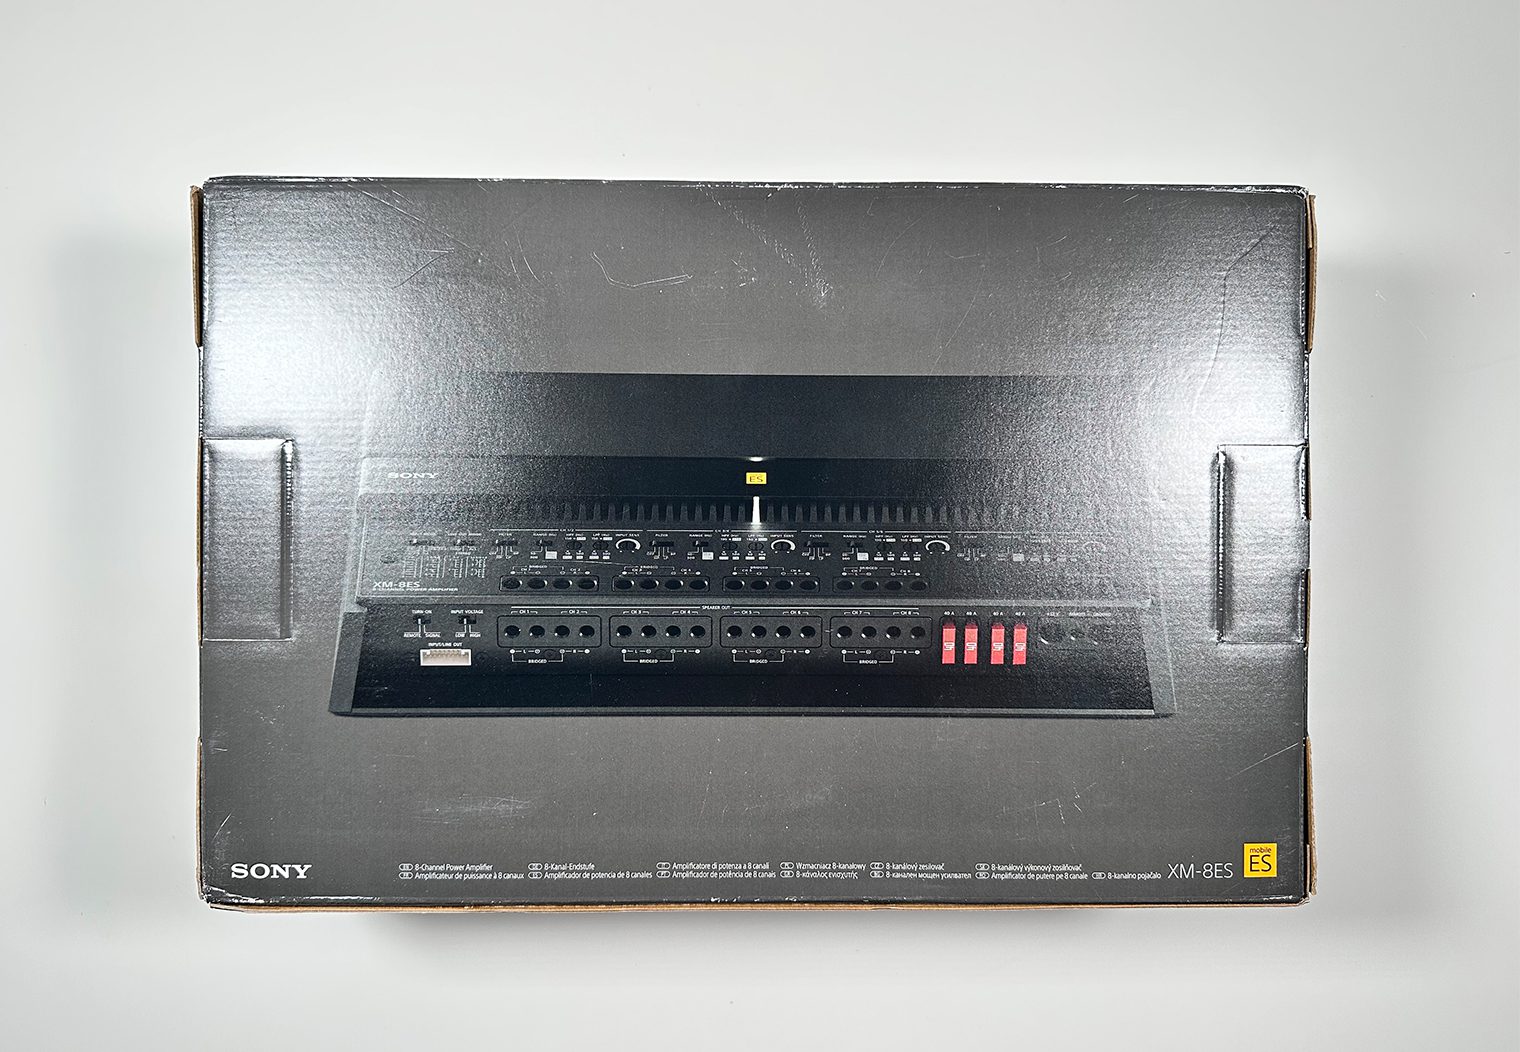
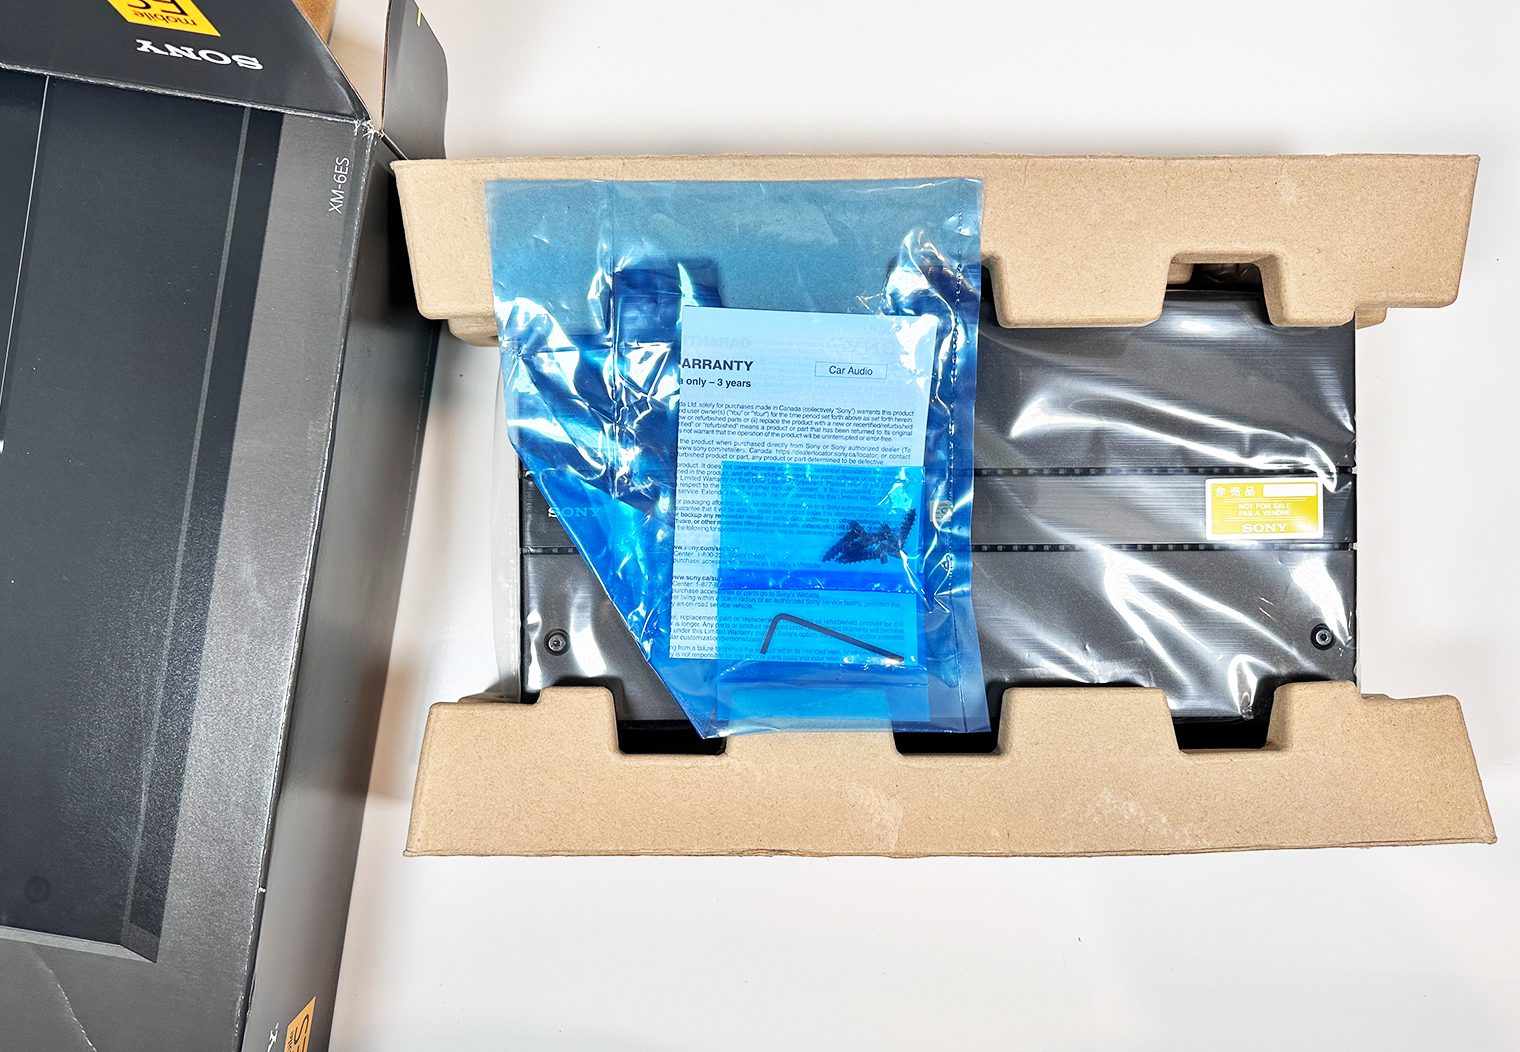
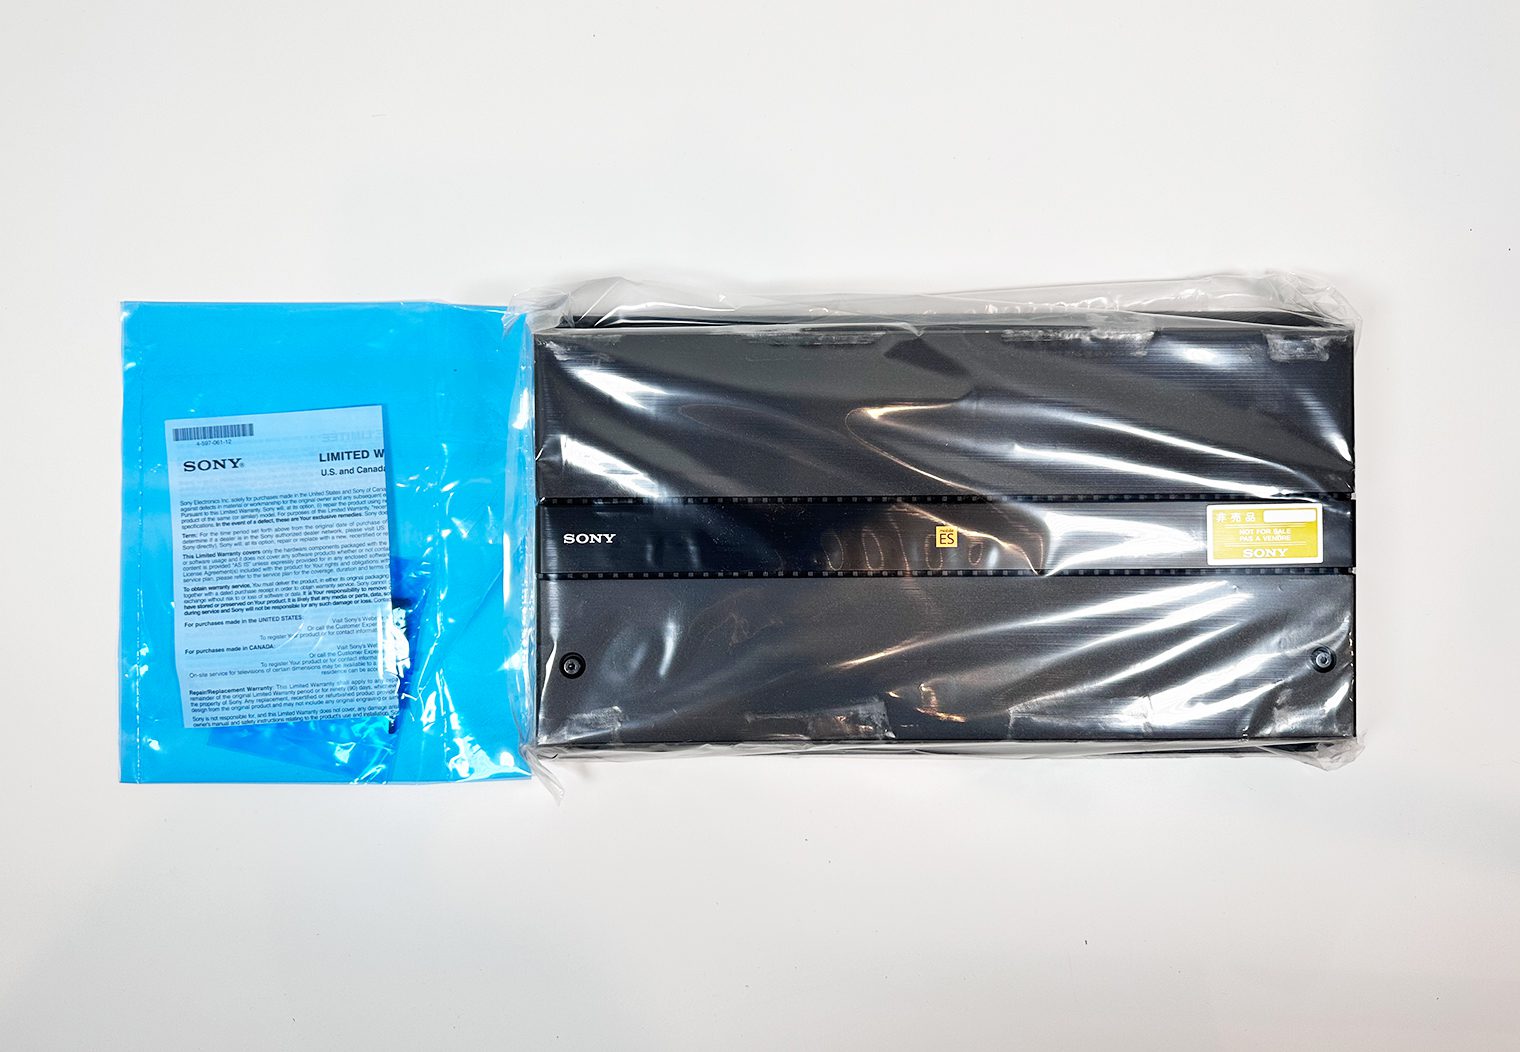
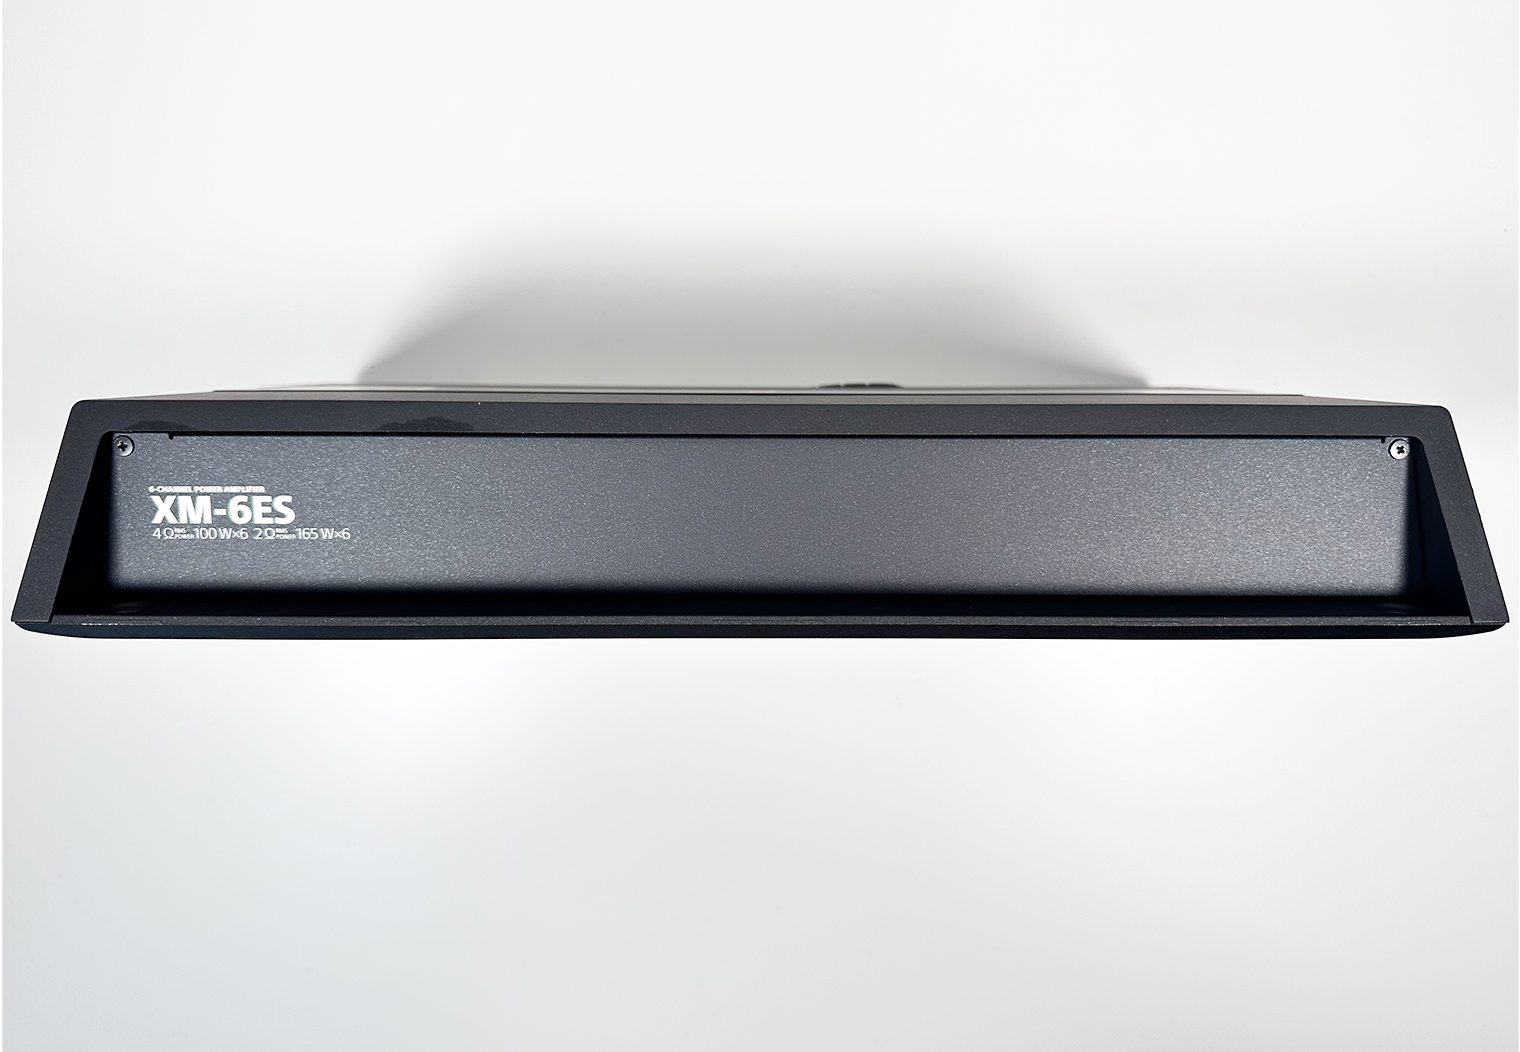
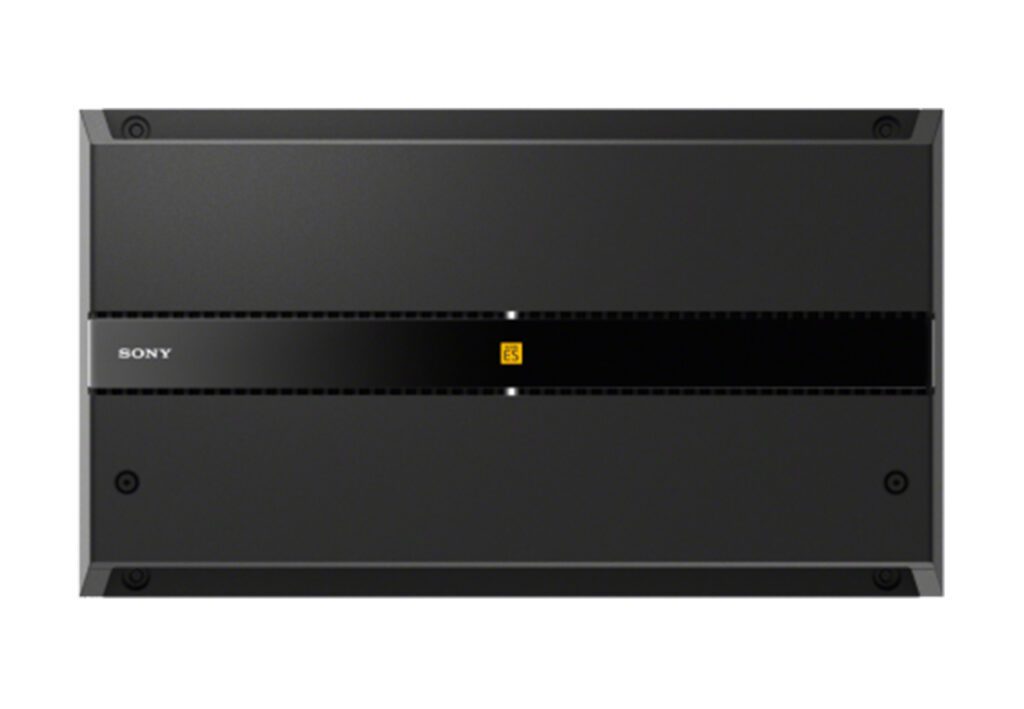
Sony keeps it simple and sleek with the packaging and the look of their Mobile ES amps. I'm a fan of the look – the edgy and sharp lines of these amps combined with the black textured chassis really make for a great looking set of amps. I unboxed the 6 channel amplifier to show the process and everything that came in the box.


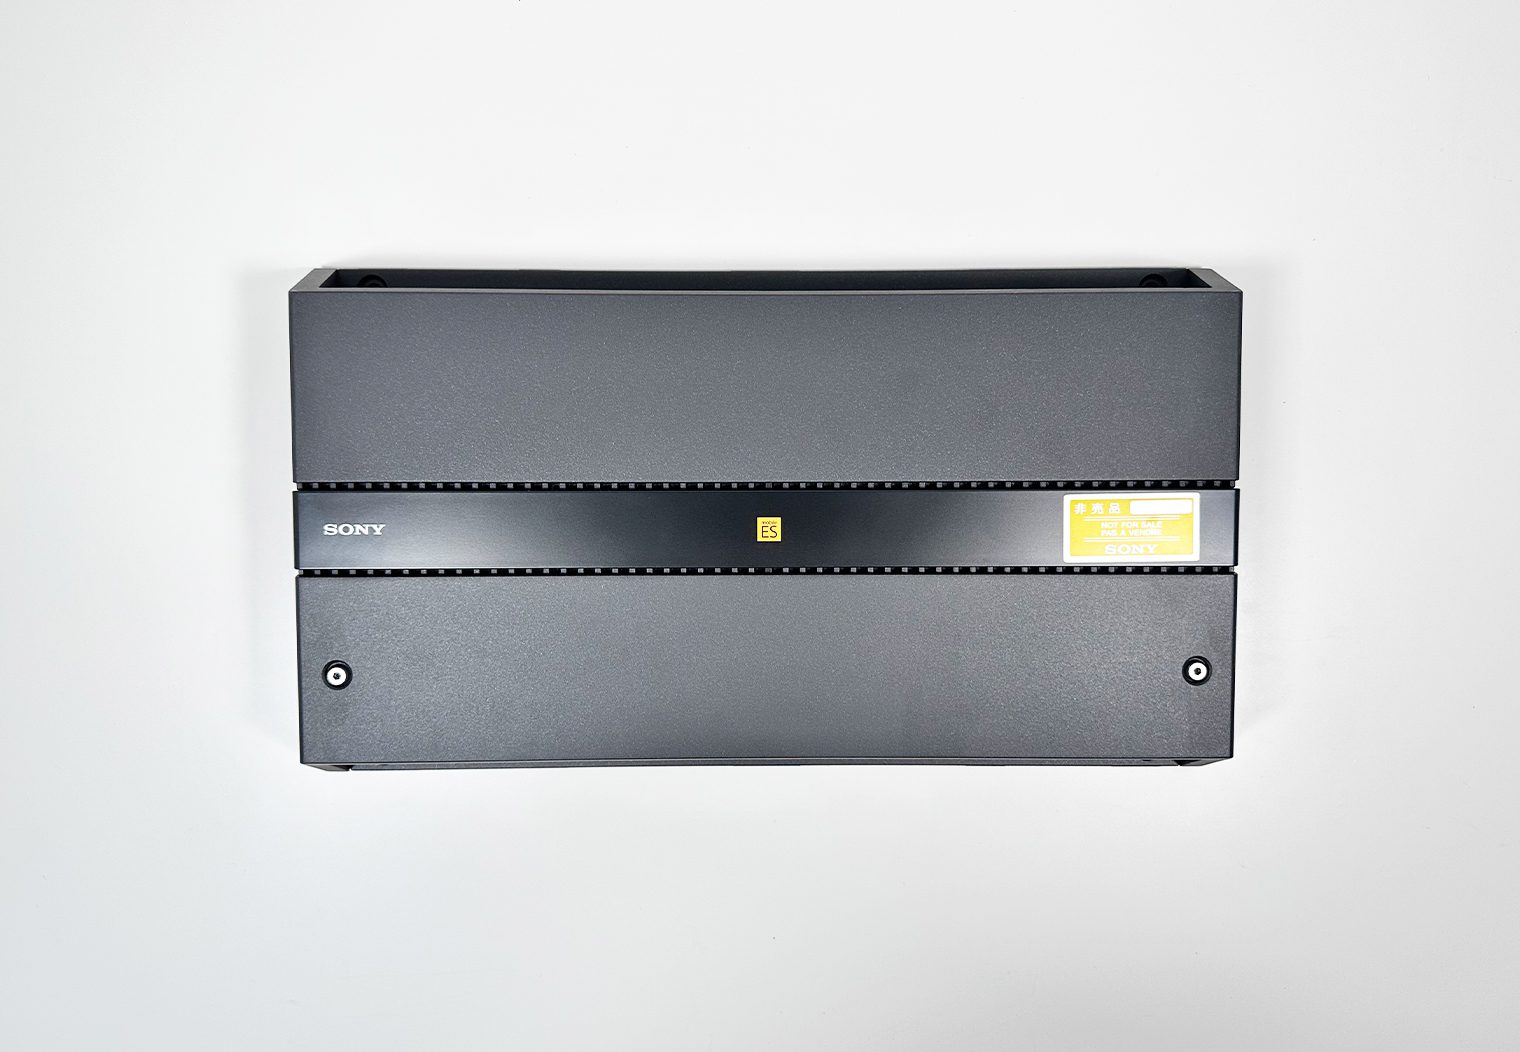
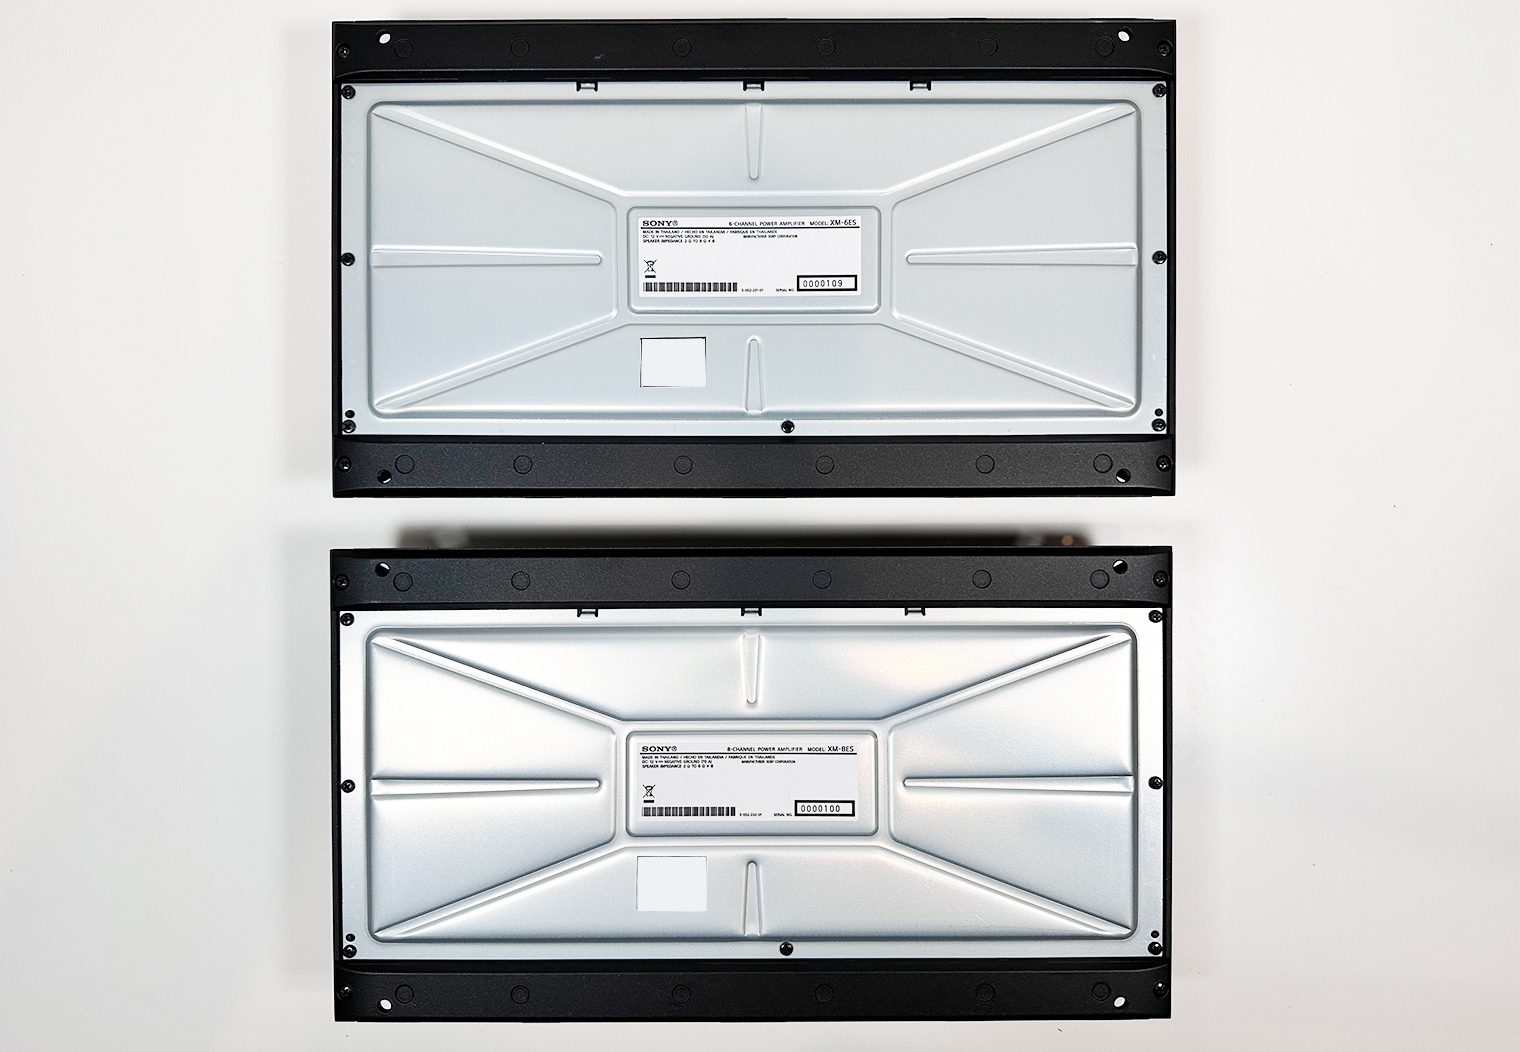
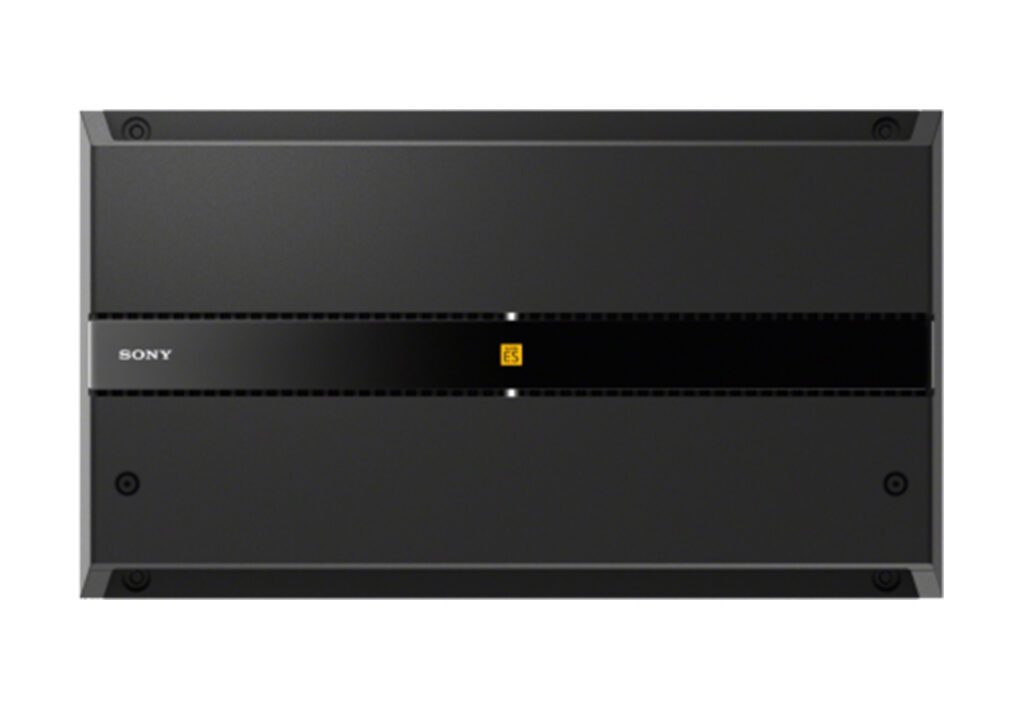
Both the XM-6ES and XM-8ES amplifiers are Class D and leverage the same chassis so they share the same dimensions – 15 in × 2 3/8 in × 8 1/2 in (w/h/d). They're pretty compact all things considered, especially when you consider the 8 channel. These'll fit well behind or under seats.
XM-6ES

XM-8ES
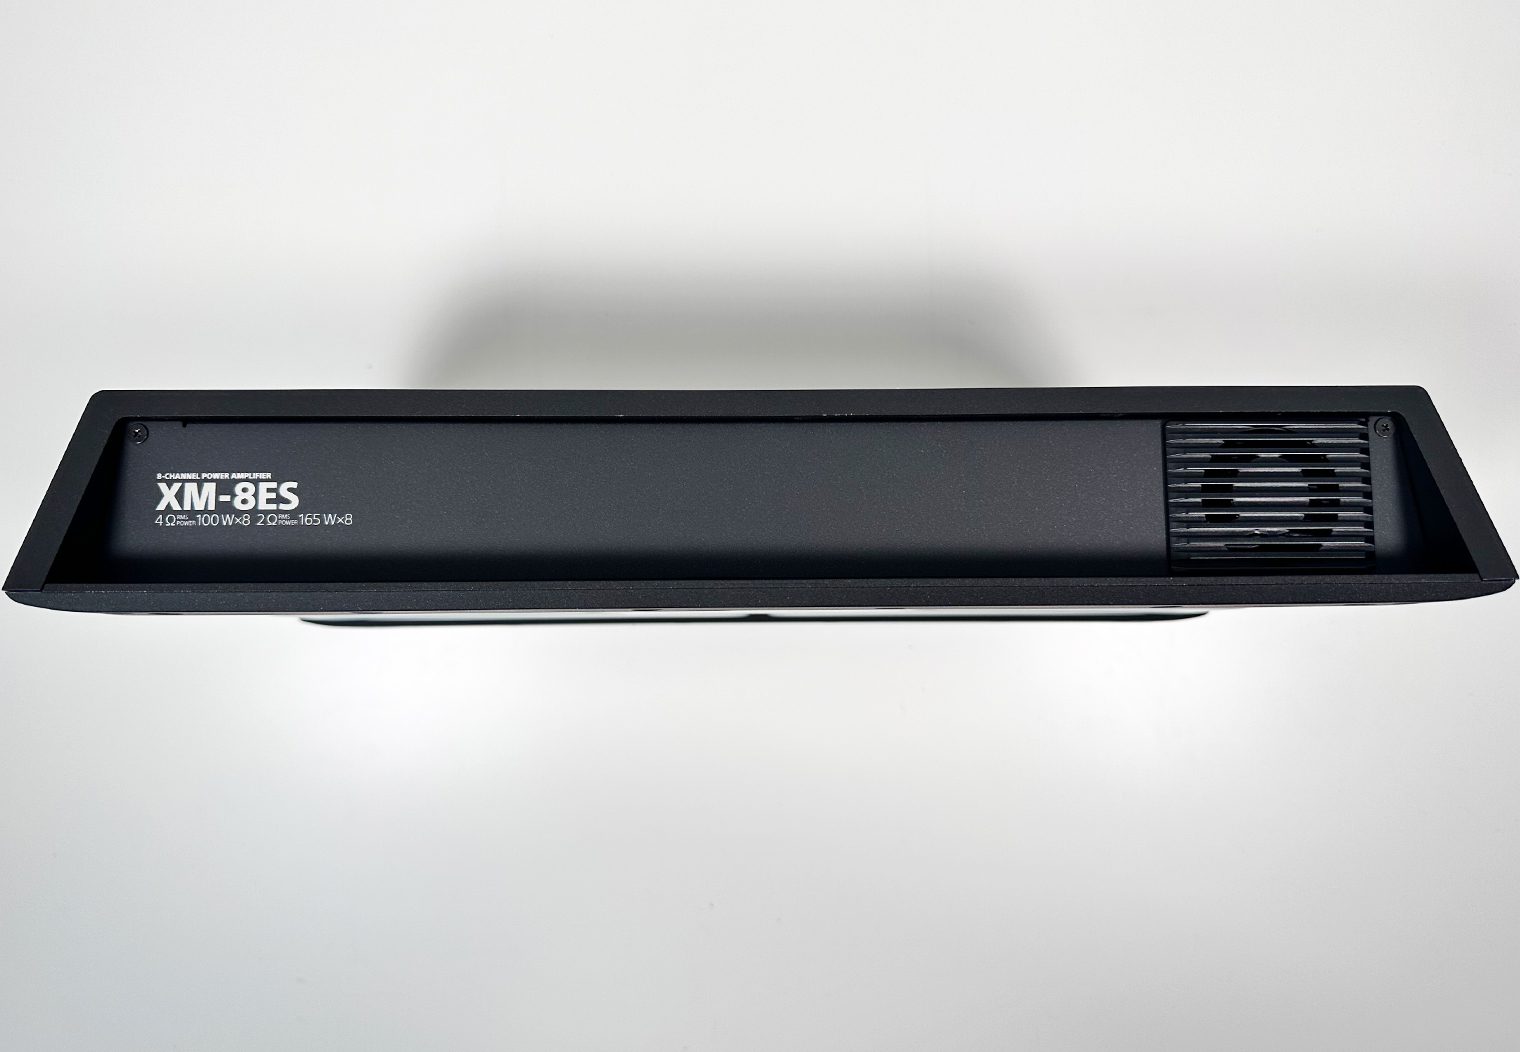
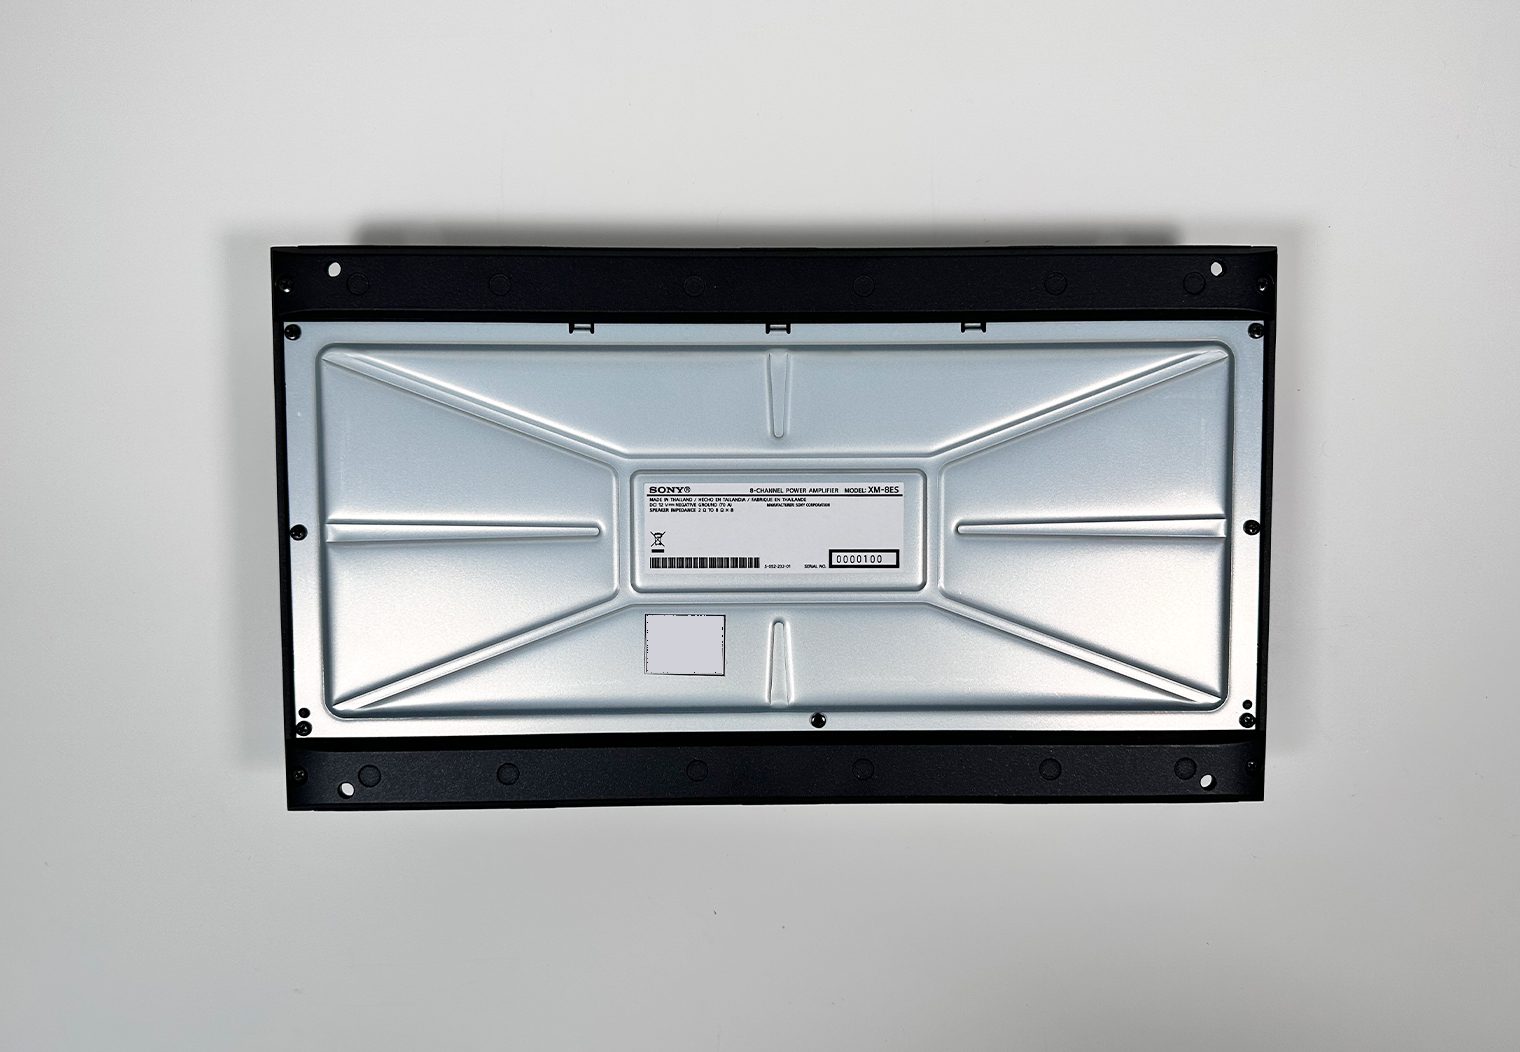

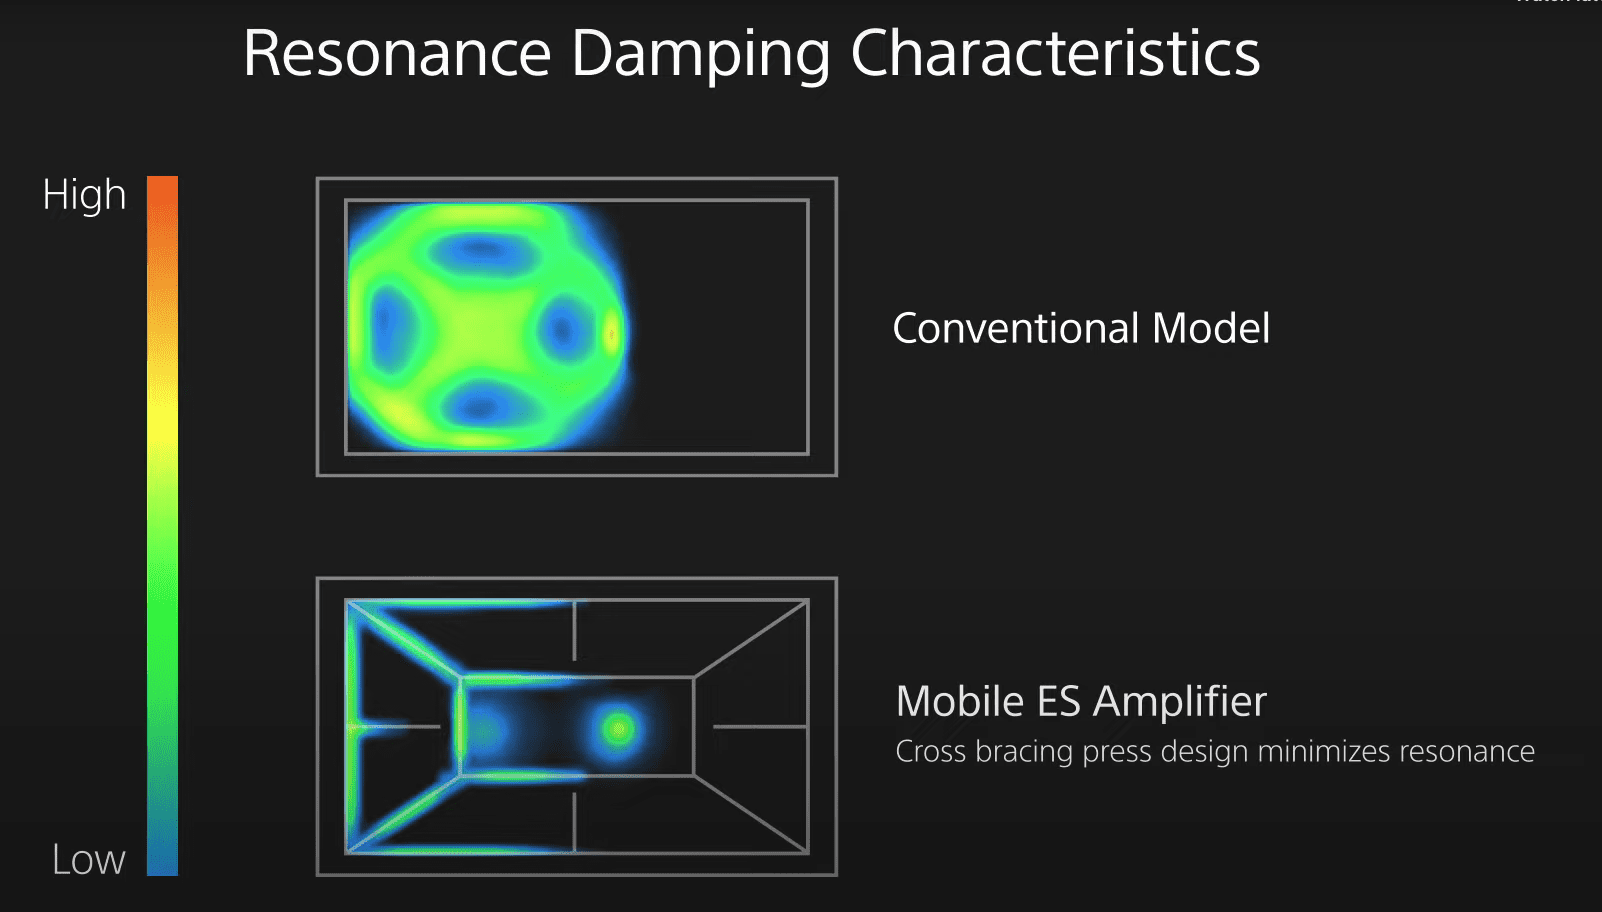
All of the amplifiers in Sony's Mobile ES lineup leverage an aluminum case, coated in a textured black paint. Aluminum is pretty much the standard now for car amplifiers and offers great heat dissipation and is lighter than steel. One thing that Sony does call out about their chassis is the 1.2mm thick bottom plate. The bottom plate thickness helps with resonance dampening. I received some feedback from the Sony team about this because I wasn't entirely sure how this impacts the amplifier. According to them, the bottom plate doesn't necessarily affect the performance, it helps “prevent unwanted radiated noise from being absorbed into the amplifier for a cleaner sound”.
What's In the Box

- 6ch or 8ch Mobile ES amplifier
- Warranty sheet
- (4) mounting screws
- (1) control panel allen wrench
- (1) RCA 8ch input harness (XM-8ES Only)
XM-6ES & XM-8ES Core Features & Specs
General Specifications
XM-6ES
- 100W x 6 (330W x 3 bridged) RMS output power at 4 ohms
- 165W x 6 RMS output power at 2 ohms
XM-8ES
- 100W x 8 (330W x 4 bridged) RMS output power at 4 ohms
- 165W x 8 RMS output power at 2 ohms
When you get into the higher channel amplifiers, your options for powering you system grow substantially, especially with bridging options. You can see in the specs above that both amplifiers share the same power output with the key difference between them being the two additional channels that the XM-8ES has.
But what's cool about these higher channel amplifiers is that you have a number of combinations at your disposal to power a system. So to put this into perspective, if you’re interested in the broader lineup of products and, let’s say, want to power a set of Sony's XS-163ES 3-way 6 1/2” speakers, you’ll be in good shape powering 6 of them no problem (with the 6ch). The 163ES handles 90 watts per speaker at 4 ohms. Or, another example is their 6x9s the 692ES which handle 110 watts RMS. So both amps are a great choice for all powering any and all of the Mobile ES lineup of speakers. As they should be.
But you could also get more creative too. You can bridge two channels at a time to output a total of 330 RMS watts at four ohms. You could power one of the Mobile ES 4 ohm subs with one of these channels if you wanted to. Although it might just be a bit underpowered since the 124ES 12” sub is rated for 400 watts RMS at 4 ohms. Still a good option though.
And with the 8 channel option, you could choose to power a 6.1 setup, 4.2 setup, 2.3 or just use it as a 4-subwoofer amplifier since it has low pass filters on each of the channel outputs. All via the bridging capability. (Obviously you’d need to check the specs of the speakers or subs you’re running because 330 watts might not be ideal for some of the high power 12in subs but it could do well with some 10” or slim 12” options out there).
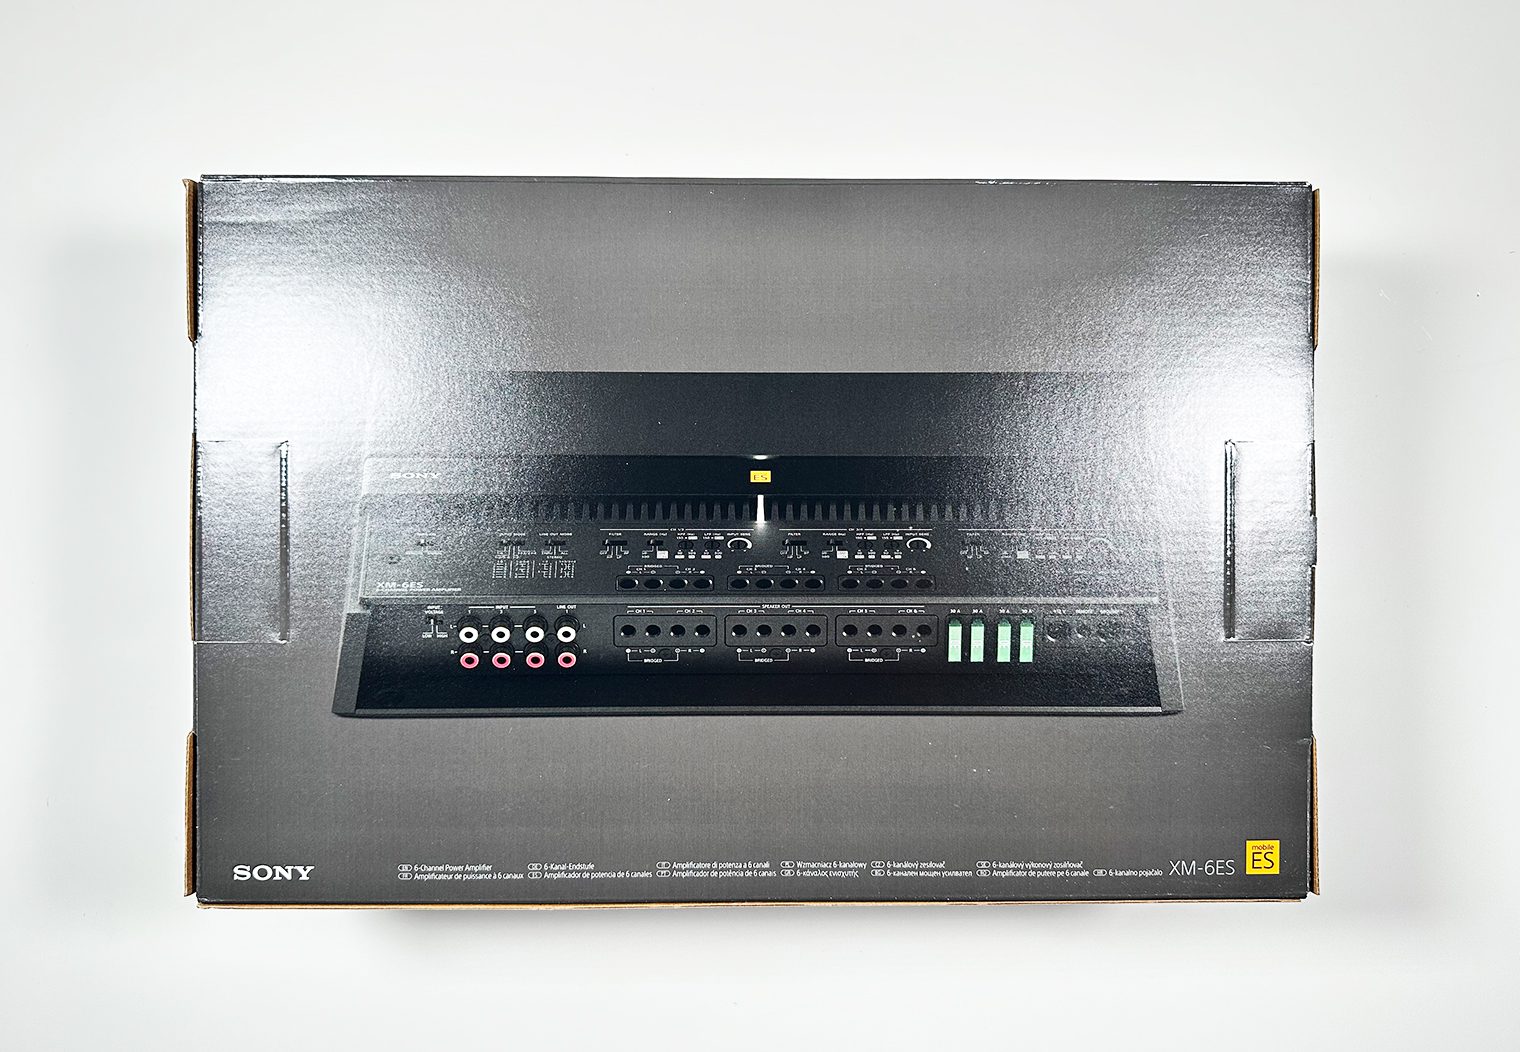
Control Panel
On the top side of these two amps, you'll find two allen screws that hold on a protective aluminum panel. Underneath is where you'll find the controls and configurations to set up the amps. And although these amps don't have a built-in DSP or software that will allow you to tune them via an app like their XM-GS6DSP that we reviewed would, they still give you a wide variety of options to help integrate into a factory system or tune an aftermarket one.
What I like about the control panel on all of the Mobile ES amplifiers is that everything is very well organized and labeled. There are a lot of configurations but it's logically placed making it easy to navigate and it doesn't take much time to find your bearings or understand what you're looking at. That said, these probably wouldn't be my recommended choice for a first-time DIYer who's looking to install and tune their own stereo without a little bit of professional help or in-depth research.
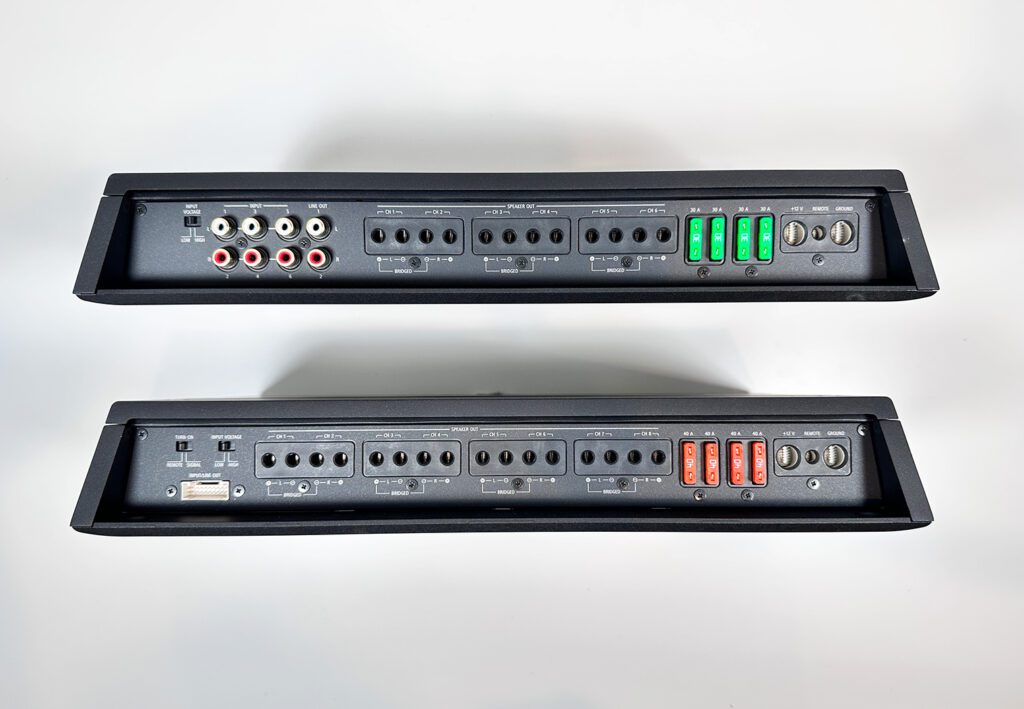
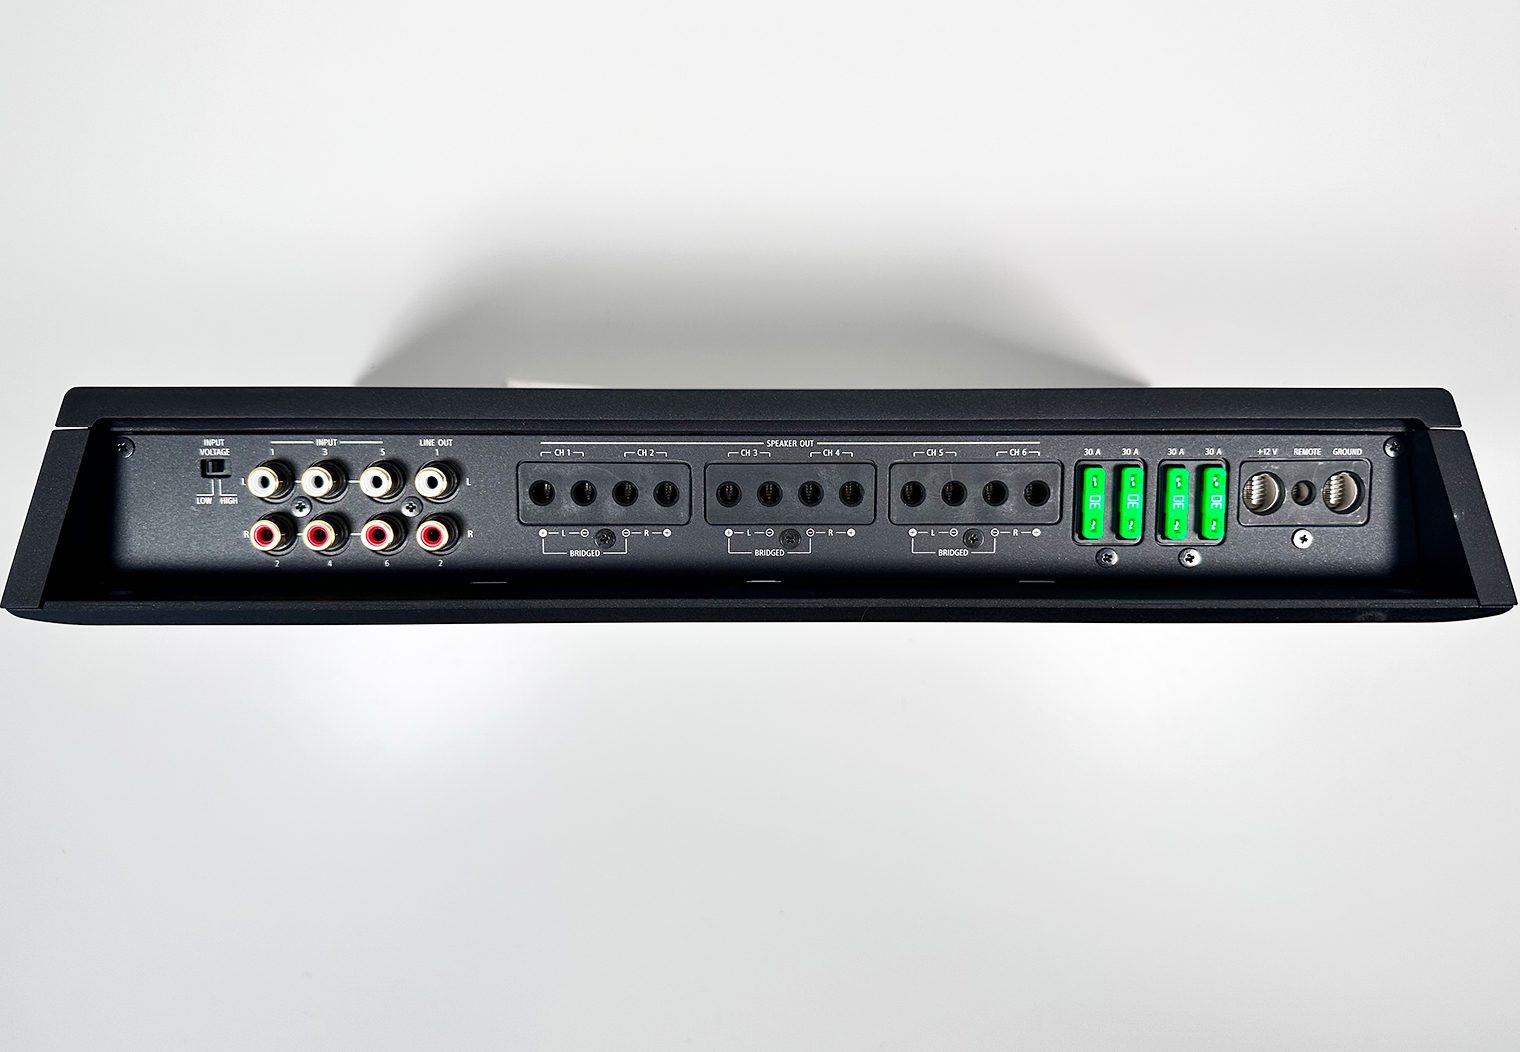
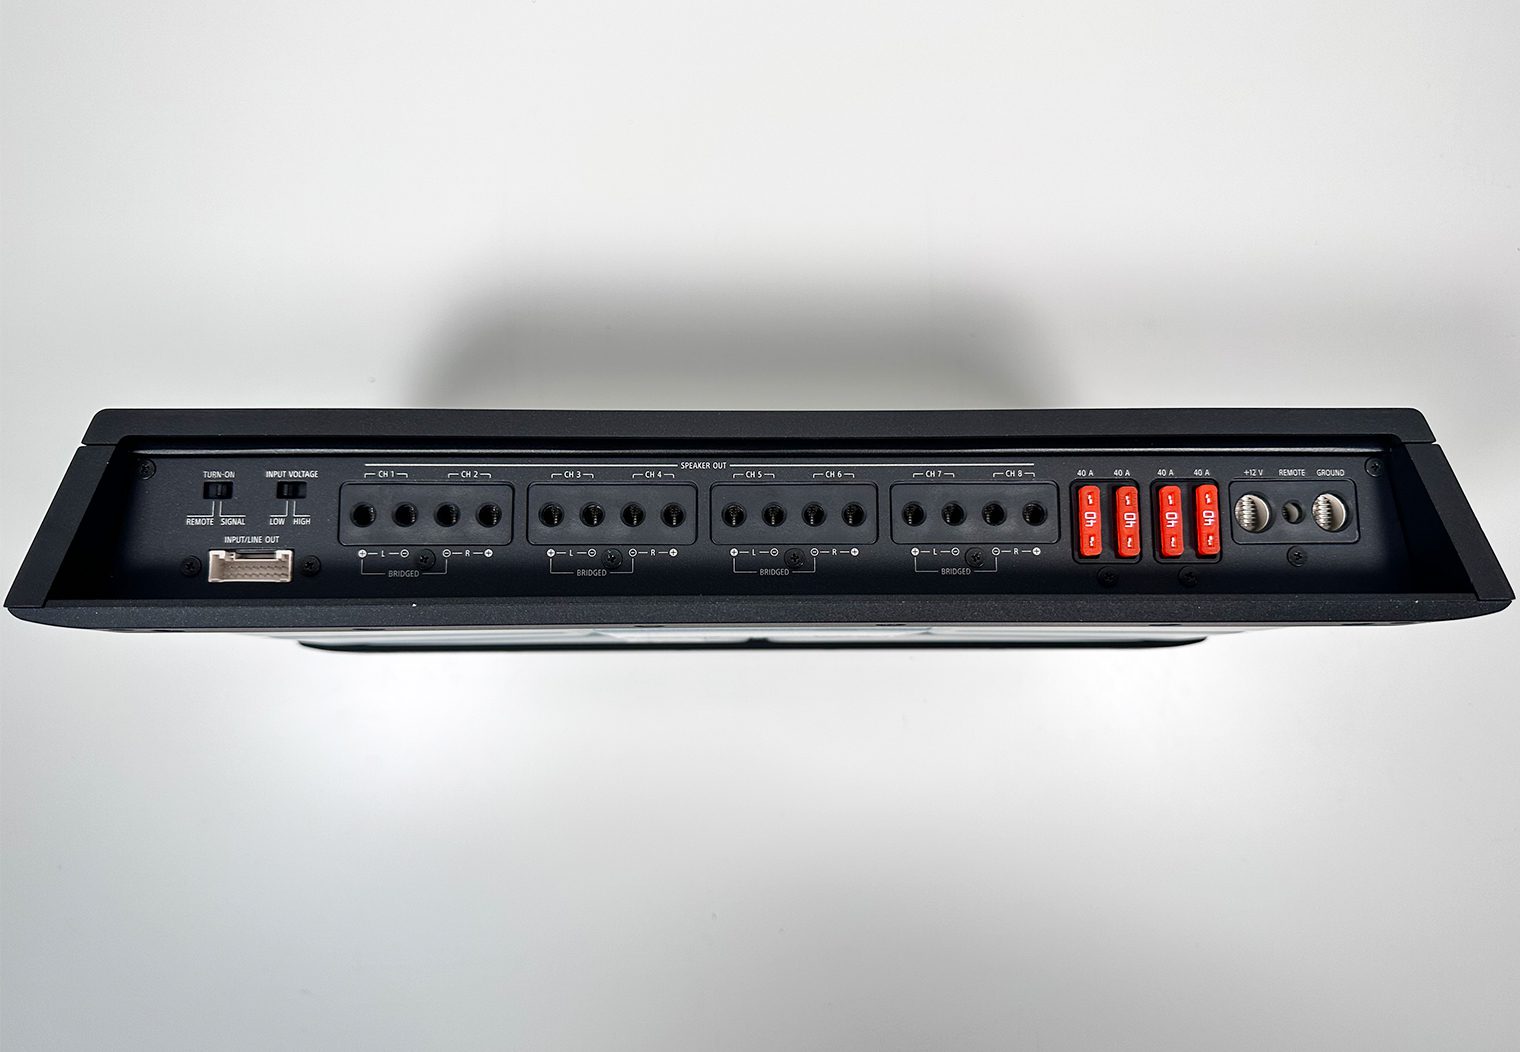
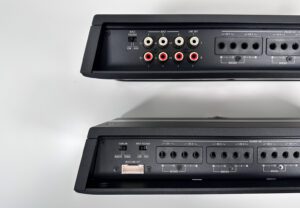
The big difference between the 8ES and 6ES control panels that can be seen in the image above is in the input RCA design. On the 6 channel (5ch, 4ch and monoblocks as well), Sony uses the traditional RCA input design – directly on the panel. With the 8ch design, they use a separate harness that you plug into the bottom left hand side of the panel. This harness houses all 8 RCA channel inputs along with the line out RCAs.

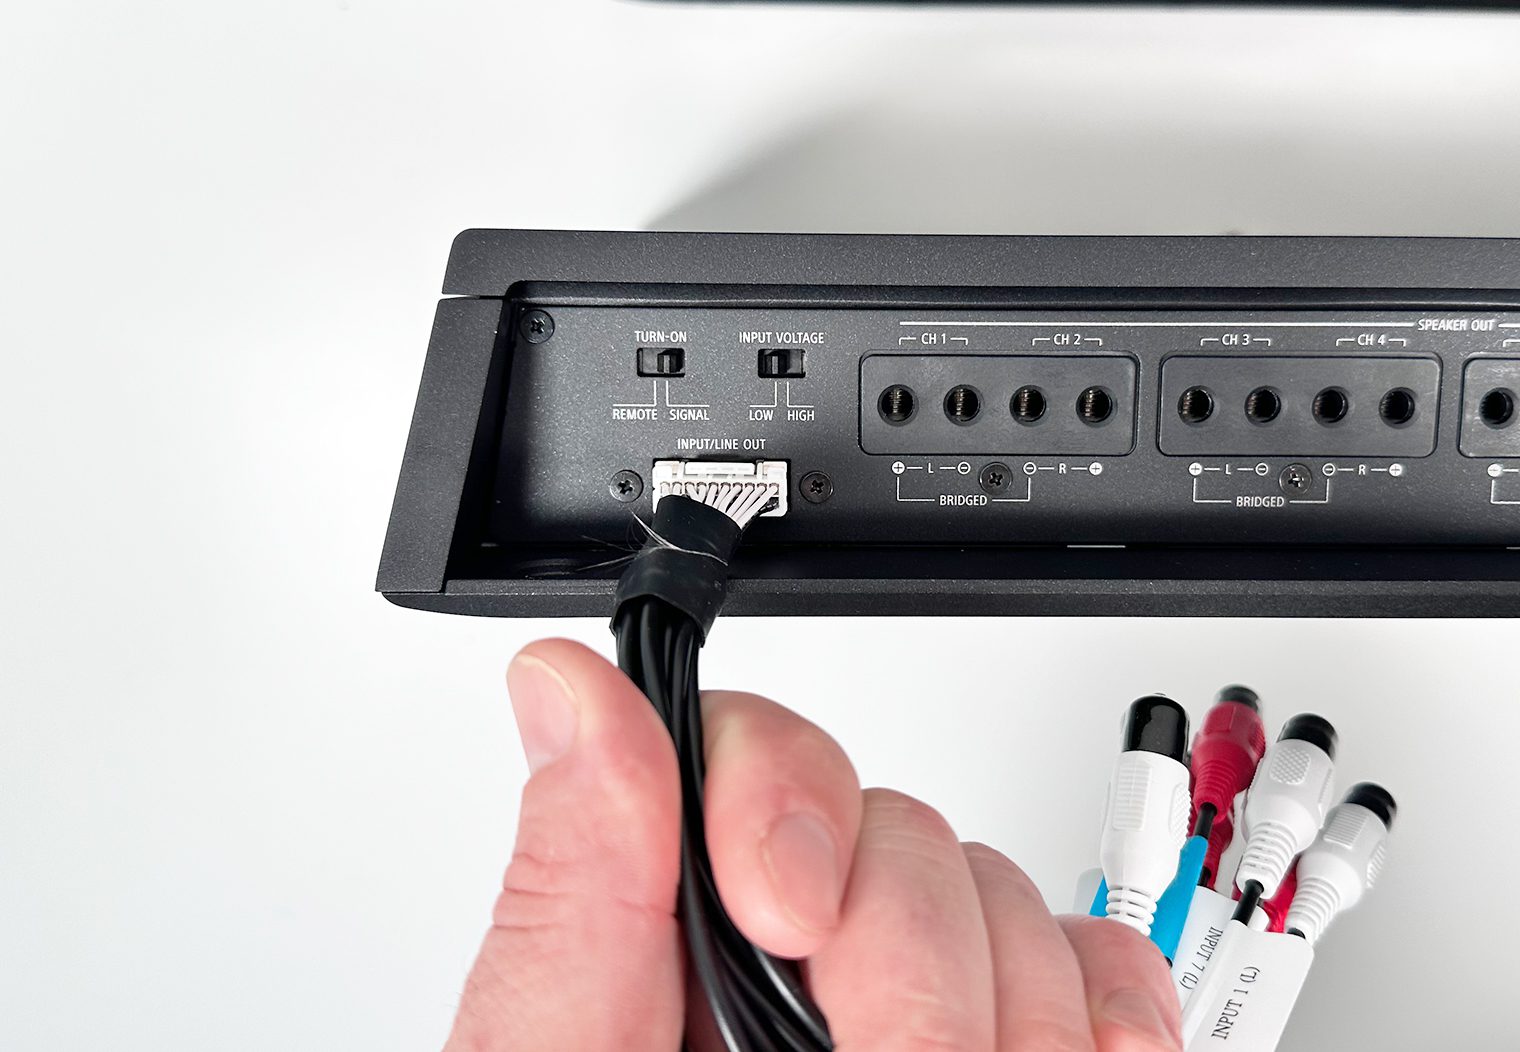
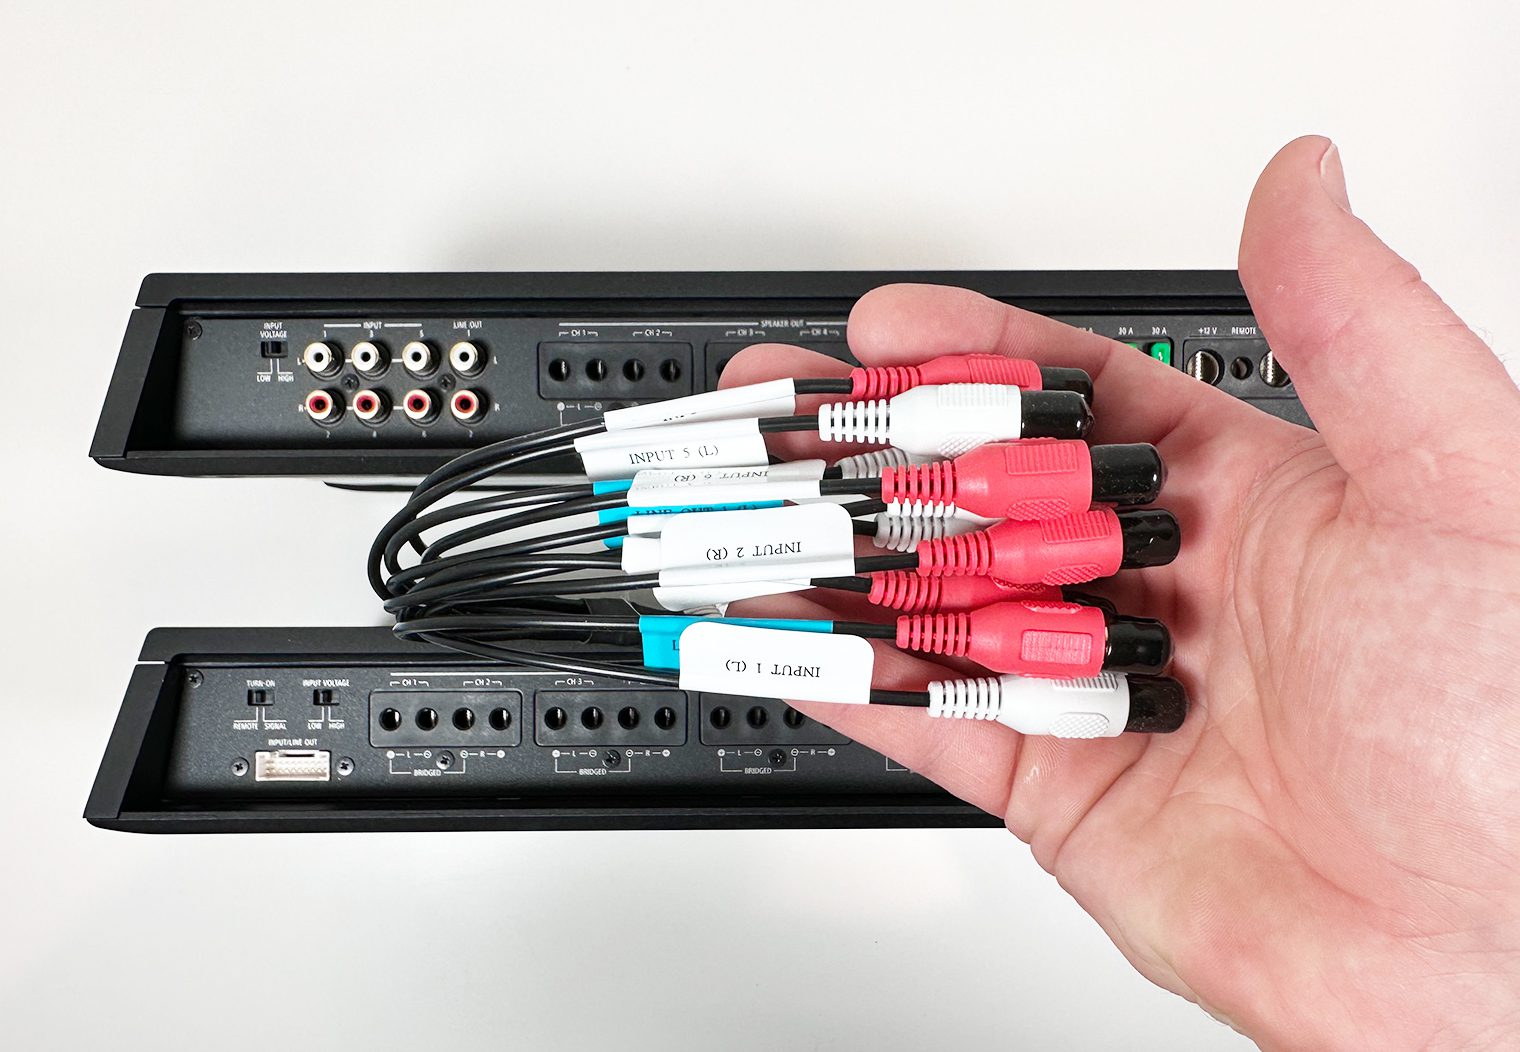
You can imagine 8 different RCA inputs and how much space they take up on the amplifier if Sony placed them in the same location as the 6 channel. So what Sony did with the 8 channel amp is added an input harness that will take all of the 8 RCA channel inputs from your signal source like your head unit or DSP and removed them from the amp itself. They simply wouldn’t fit without making the amp larger. My assumption is that Sony chose to keep the 8ch amp on the same chassis for production efficiency and to keep the amplifier compact. The amp would have had to be larger on a larger chassis without the input harness.
Outputs & Summing Configurations
Whether you have a dedicated input for each of the 6 or 8 channels, are limited to using a stereo input with only 2 RCAs, or want to pass a signal from one amplifier to another and daisy chain the signal – the Mobile ES amps were designed to be flexible and give installers a variety of options for finding and wiring signal to the amps. This is one of the things that stood out to me when I was looking at the manuals and controls.
Input Voltage
Starting with the input/output panel on the 8ch amp, you can choose either a low voltage or high voltage signal input to tell your amp what type of signal to expect. A low voltage signal is what would come out of the back of an aftermarket head unit, signal processor or DSP in the form of RCAs. It's known as a pre-amp signal, and low voltage is typically between 2v and 5v. Preferably 5v. The amplifiers are capable of handling .03v – 8v in the low voltage input setting.
Or, you could use a high voltage signal input. In other words, use your existing speaker wire for signal if you wanted to retain the factory head unit without incorporating a signal processor. The important thing to note is that you’d likely need an RCA adapter for the high voltage signal. You can’t simply plug in your speaker wire into the amplifier like some other amps. RCA adapters are a small added step, but it’s nice to have the option to have either a high or low voltage signal input. The amps are rated to handle 3v – 18v rms in the high voltage input setting.
Remote Turn On
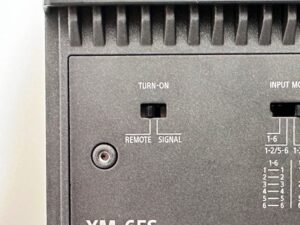
Sony also provides you with an amp turn on selector to help simplify the search and wiring for an amp turn-on wire. The “REMOTE” selection will tell the amp to use 12v power as its ‘switch', and the “SIGNAL” selection will use the speaker signal to tell it when to turn on and off. The “REMOTE” option is standard, but having a “SIGNAL” selection could simplify your wiring in case you can’t, or don’t want to, run a 12v amp turn-on signal wire to the amplifier. Simply select the “SIGNAL” option to tell the amplifier to turn on when it senses audio in the input signal. Note that the SIGNAL sense option only works while the input voltage setting is set to HIGH.
Input Modes, Summing & Line Outputs
One of the key components to these amplifiers that give them the flexibility needed to integrate well with factory systems is the input modes and signal summing. It's what helps streamline installation and maximize the ways in which you can leverage signal inputs. I think Sony did a good job at organizing them and labeling them to simplify setup, considering the limited space on the amps. They also detail them out very well on the manuals. Use the manuals as your source of truth.
To better visualize the various input and line output combinations in the manual, I created a quick image that shows you the modes along with the terminal panel on the amplifier. I labeled the different components too so that you can reference them when I get into detail. You can always scroll back up to this photo if it gets out of frame to better understand how the inputs will power the outputs.

*Note that this concept applies to the 4ch, 5ch, 6ch and 8ch amplifiers. The only difference is the number of outputs that the signal inputs will apply to*
Input Modes
Let's start by diving into the “Input Modes” first. There are four different options that you can select from on these amplifiers. I'll continue to use the 6 channel for reference here. There are some slight differences between the two amps but the concept is generally the same.
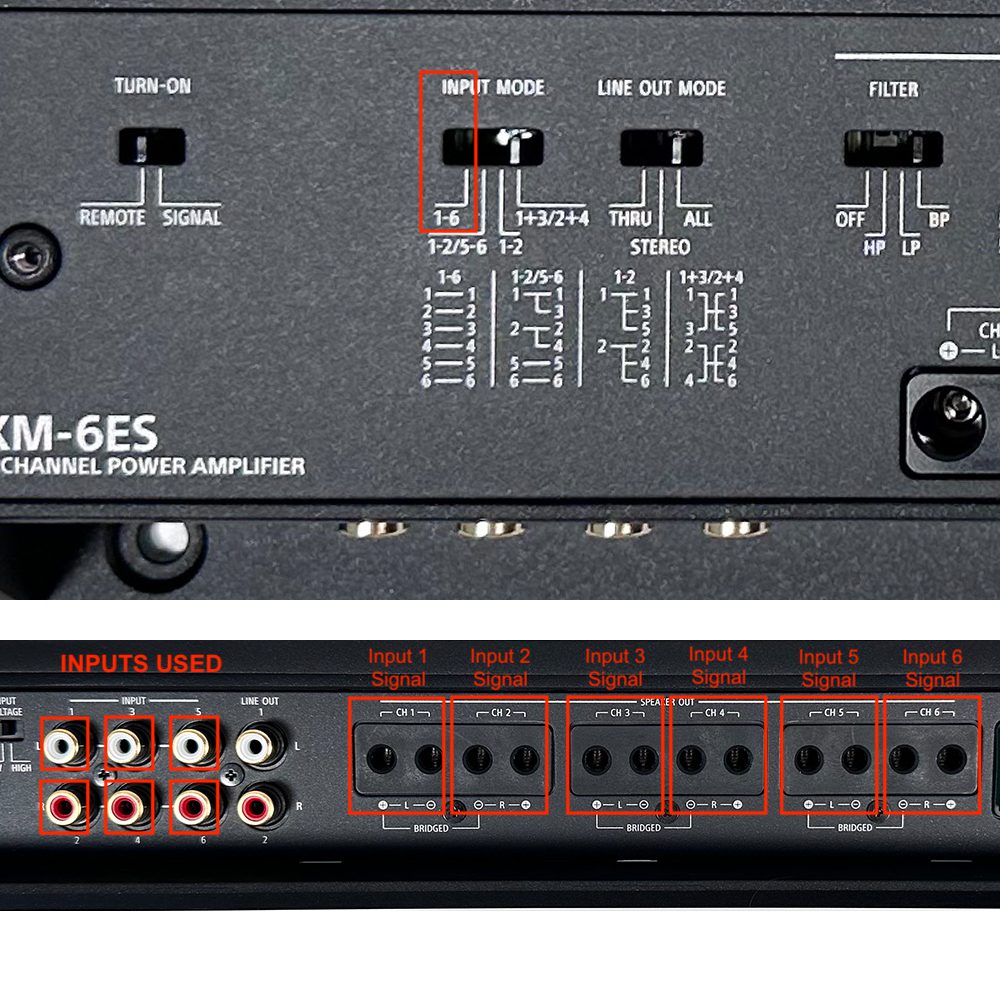
First, you have “1-6” on the left (“1-8” on the 8ch), which means the amplifier will use all six of the RCA channel inputs in the terminal panel. Input 1 will amplify the signal to channel 1, input 2 will be amplified to channel 2 and so on (reference the labels above if you're not sure the difference between input and channel).
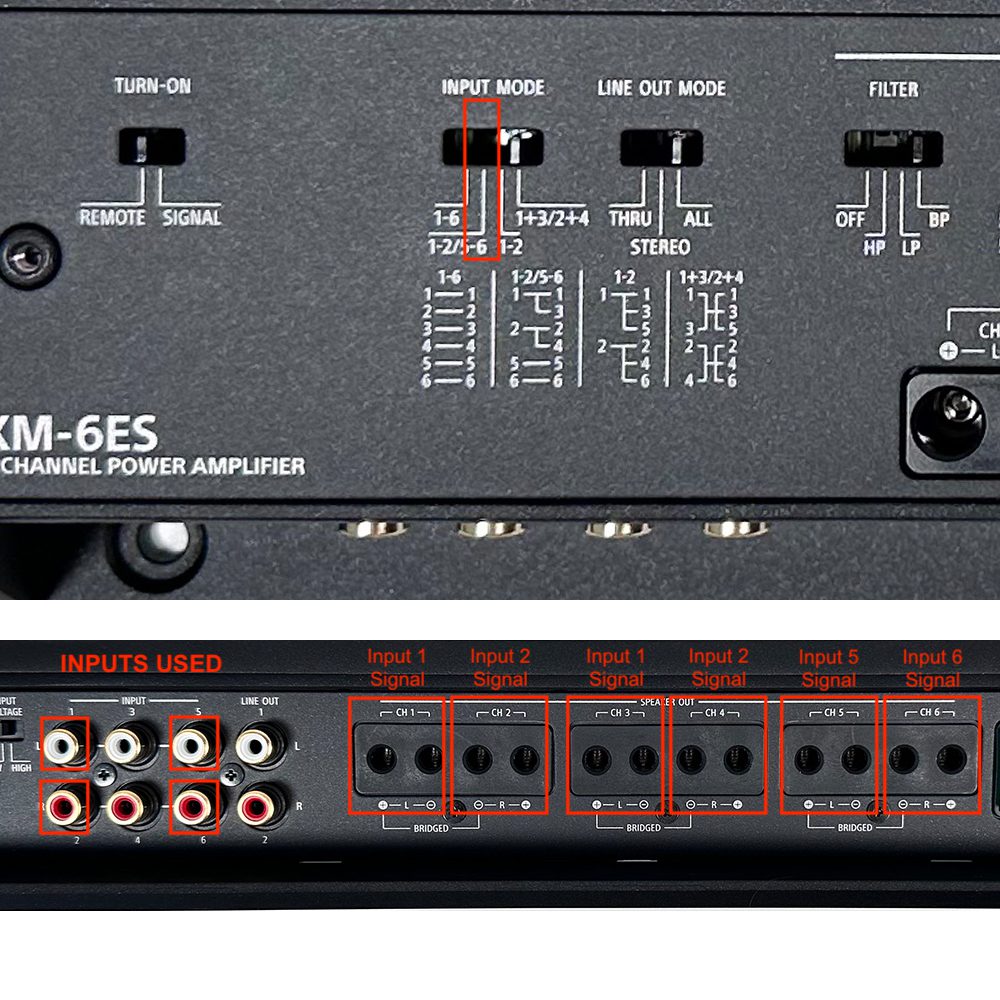
The Input Mode “1-2/5-6” will pull signal from the RCA input 1 and amplify that signal to 1 and 3, it will take input 2 and use it to amplify outputs 2 and 4, and then 5 for output 5 and 6 for output 6. The only difference on the 8ch is that inputs 5 and 6 would apply to 5, 7 and 6, 8.
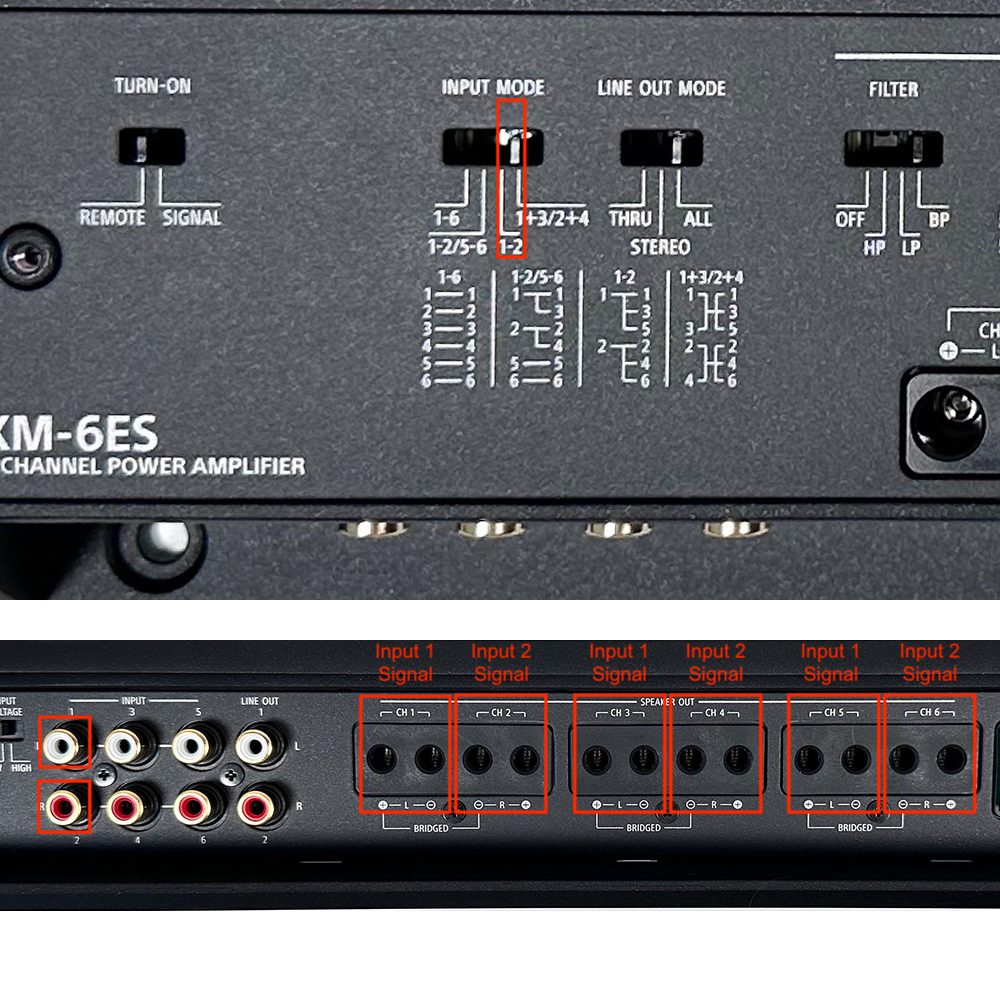
“1-2” will take the signal from input 1 and amplify it to channels 1, 3 and 5 then take the signal 2 input and amplify it to channels 2, 4 and 6. It's essentially taking a stereo input (left and right) and multiplying/extending it to the appropriate left and right channel outputs on the amp. You only need input 1 and 2 in order to amplify all six channel outputs. On the 8ch amplifier the only difference is that input 1 would also output to ch 7 and input 2 would output to ch 8 in addition to the others mentioned.
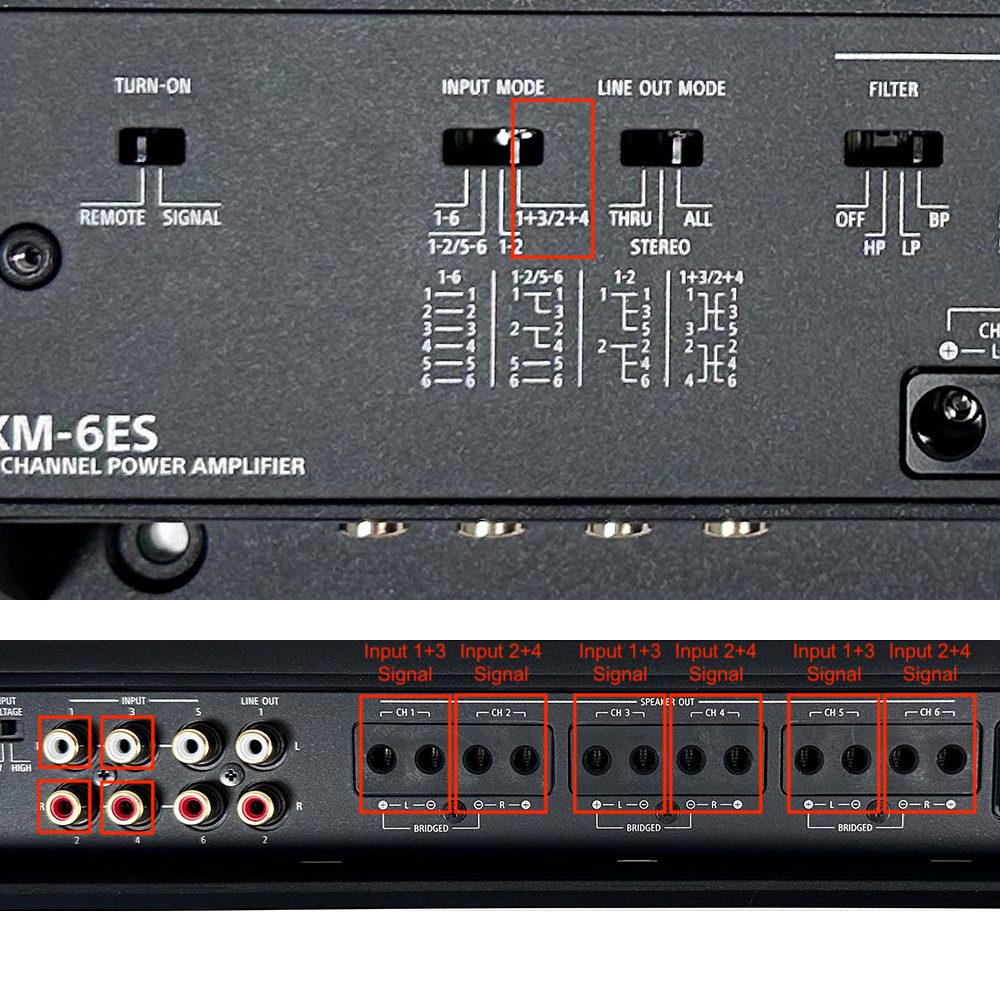
Then, there’s the last selection – “1+3/2+4”. This is the most interesting of the bunch because it’ll sum/combine the frequencies from inputs 1 and 3, and amplify the combined frequency for channel outputs 1, 3 and 5. And it’ll do the same for 2, 4 and 6. And the only difference with the 8ch is that the summed inputs will be applied to channels 7 and 8 as well. Check out the photo to better understand what I mean. Let’s talk about why you might need this though.
Let’s say you have a 3 ½ inch speaker, like one of the dash speakers in the new Broncos, and then a 5 1/4 inch in the Bronco's kick panel. Your goal is to replace these two speakers with a 6 ½ inch component system with a 6 1/2″ driver in the kick panel and a 1″ tweeter in the dash. For this use case, you’ll probably want to use the high voltage selection on the amplifier, and take the 3 ½ inch signal along with the signal from the 5 ¼ inch speaker and combine them for use for your 6 ½ inch component. So this option will sum the frequencies and then you can utilize the filters downstream to box them based on the specs of your speaker choice. The possibilities are really endless.
Line Output Modes
To the right of the Input Mode, you'll find the “LINE OUT MODE”. This setting will enable you to pass the input signal through to another amplifier. This could greatly simplify the amount of signal wire that you have to run throughout the vehicle, and also prevent the dreaded scenario of splitting signal wires. It's worth noting that your selection on the Input Mode does not impact the Line Output signal. The line out signal is also not affected by the filters you configure either in the crossovers section.
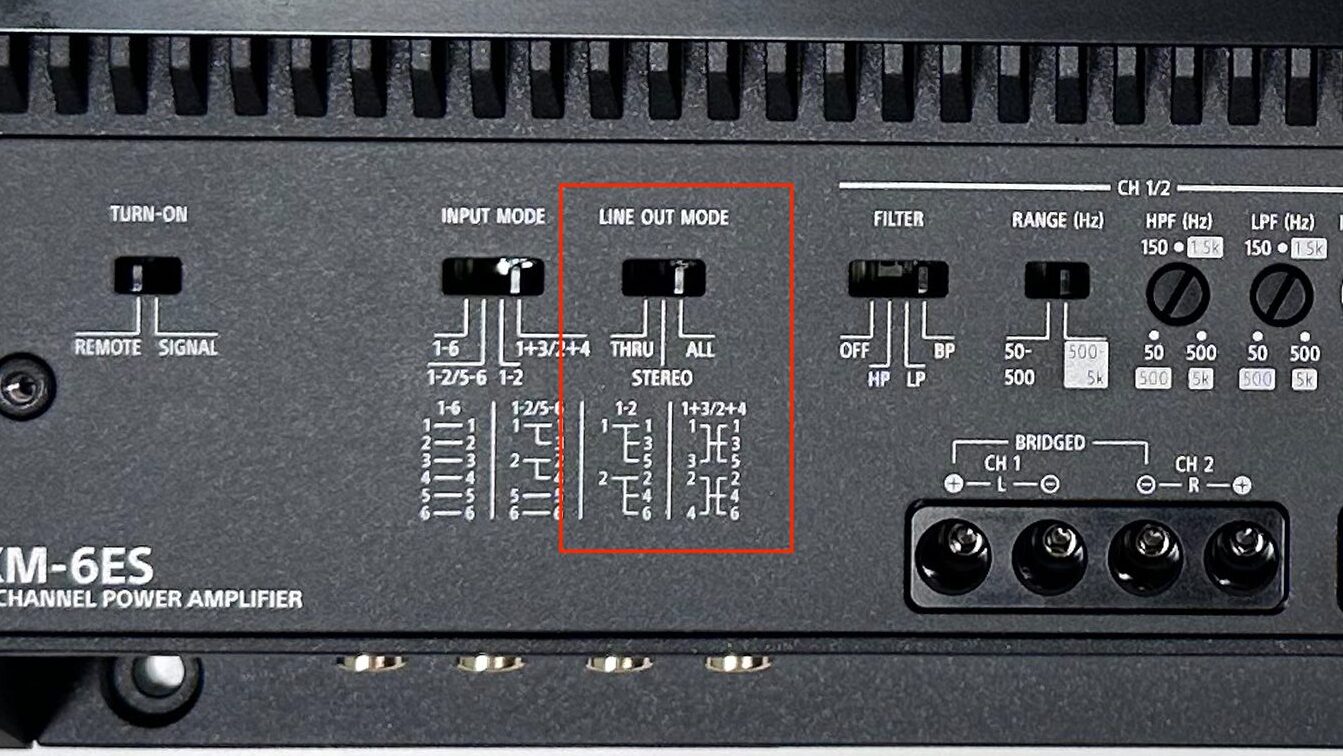
There are three Line Out Mode options:
- “THRU”, which takes the input 1 and 2 and passes it through untouched.
- “STEREO” which will SUM the frequencies from inputs 1 and 3 along with inputs 2 and 4 and then pass them through.
- And finally “ALL”, which will take the sum of ALL inputs (1-4) and pass them through both line out 1 and 2 equally.
I really like this summing feature because it gives you the ability to tweak or modify the signal that you're going to pass to the next amplifier. If you wanted to pass a signal onto another 4 channel, you’d probably use either the THRU or STEREO (assuming you were powering similar speakers). Or, if you just wanted to pass a summed mono output to another monoblock amp, or potentially a DSP or something to modify the signal, you could also do that. Very flexible.
Signal Filters & Ranges
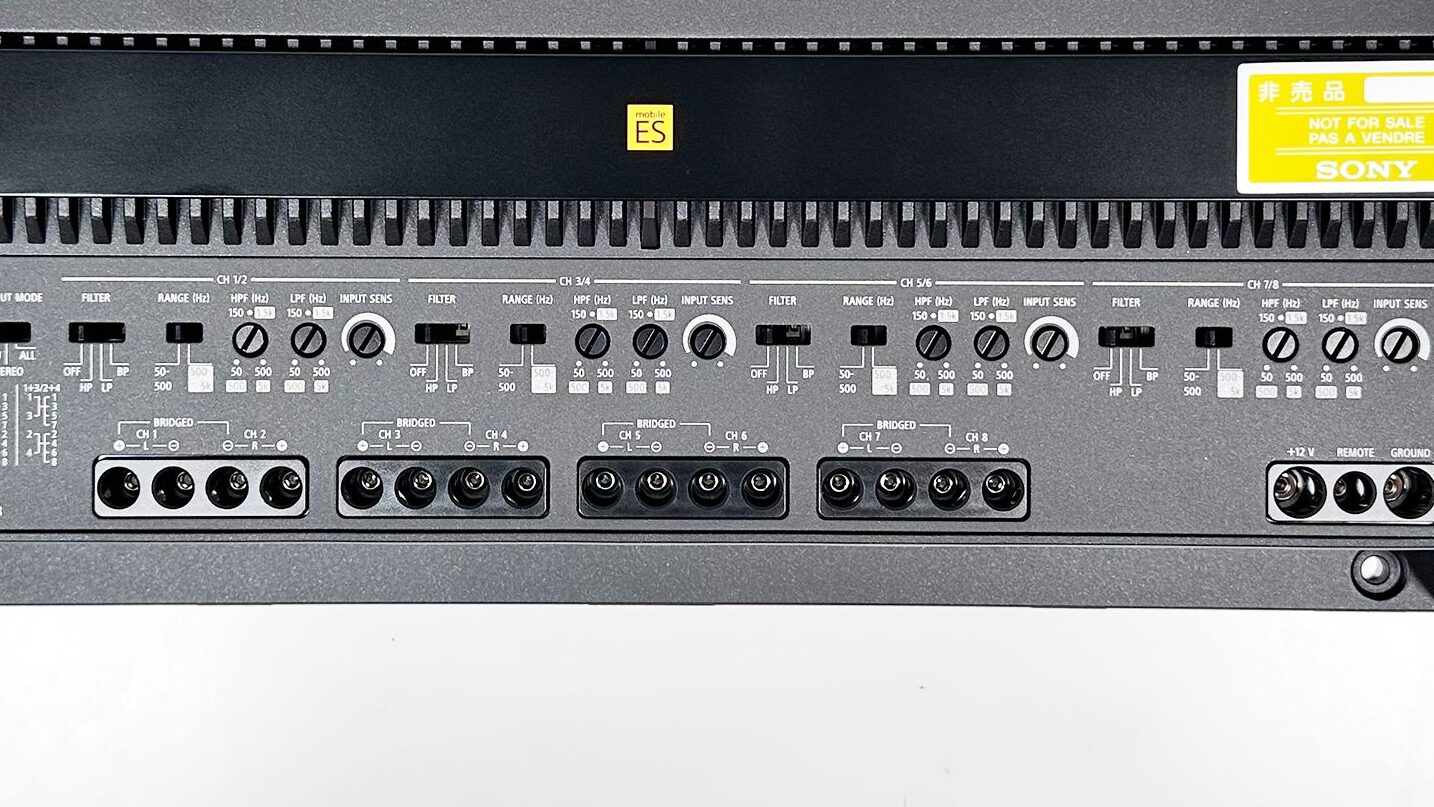
Filters/crossovers and frequency ranges are pretty common across all amplifiers. However not all amplifier crossovers are created equal. So in this section I'll try to keep it high level enough and call out the key differences that make the Mobile ES amplifiers better than lower tier amplifiers.
For those who might not be familiar amplifier crossovers, don't be alarmed. These crossover sections on the amplifier are duplicates – one crossover section for each of the output group on the amplifier (e.g. ch 1/2 applies to the ch 1 and ch 2 outputs).
Going from left to right, the first selection is the “FILTER”. Filters are standard on amplifiers. Depending on what type of speaker you’re powering (and whether or not you're using an in-line DSP), you’ll either select “OFF”, “HP” or “LP”. OFF, HP and LP are all common so I won't go into too much detail. “BP”, or Band pass, isn’t as common though as the rest and is worth calling out. This option will basically fix the output to the high and low frequency cutoffs you set on the amplifier. It’s kinda like selecting “OFF” but lets you set a frequency floor and frequency ceiling at the same time and gives you a little more control around the frequencies.
To the right of the Filter is “Range”. Range is is also pretty cool (and a less common) feature in my opinion because it gives you control over the output frequency floor and the ceiling frequencies in the form of two ranges. If you look below the range toggle, you can see “50 – 500 hz” (left) and “500 – 5k hz” (right). This will lock HPF and LPF controls into that range. “50 – 500 hz” will be used mainly for subwoofers while the “500 – 5k hz” will be used for your full range speakers, mid range or tweeters.
Depending on which range you select, the HPF and LPF control knobs will operate within that range of frequencies and allow you to tune within that range. If you look closely, the ranges are either highlighted with a white background or not. This indicates the frequency range that you you'll tune the HPF and LPF within depending on your selection.
Other Features
There are a couple other quick features worth noting on these amplifiers. Most importantly, Sony calls out some of the internal components like the types of inductors and OFC wires that are used, along with a power supply block and DC converter that’s designed to minimize interference. These are of course important and good to see in a high quality amplifier because feedback, buzzing or other interference can be a huge drag. They don’t call out any specific features that will eliminate interference from, let’s say, a less than ideal ground or inconsistent voltage across your system. You still need to do your due diligence on that front during your installation and wiring.
They also feature some nice hardware, like hex screws for the terminals which are common in higher-end amplifiers and nice to see.
Wrapping Up
I've been a fan of the Mobile ES lineup of amps for some time now. Over the past year and a half, I've used them in my personal vehicle along with other cars and have been very happy with their performance thus far. I think the 6ch and 8ch options are excellent choices for integrated, factory systems – this seems to be one of the key focuses of the Sony engineering and product teams. Features like high and low voltage input options, input modes and signal summing are prime examples of this. Not to mention the fact that they added an 8ch option to their lineup.
With the addition of a 6ch and an 8ch, Sony is adding a TON of flexibility for installers to use these amps for complex systems without filling a trunk full with amps. Particularly some of the upgraded factory systems that have 8, 10, 12 or more speakers in the vehicle – these are great options for those types of systems. Or, you could use a DSP or signal processor to tailor your input signals and use the amp like a traditional aftermarket system too – the choice is yours. And these amps have plenty of power to meet your needs.
Interested in purchasing a Mobile ES amp? Click on an amplifier to see the full product specs page.
- type: Monoblock
- power handling (RMS):
- 600W x 1 @ 4 ohms
- 1,000W x 1 @ 2 ohms
- Frequency Response: 10-500 hz

- type: 4-channel
- power handling (RMS):
- 100W x 4 @ 4 ohms
- 165W x 4 @ 2 ohms
- Frequency Response: 10-40k hz
- type: 5-channel
- power handling (RMS):
- 100 W x4, 450 W x1 @ 4 ohms
- 165 W x4, 750 W x1 @ 2 ohms
- Frequency Response: 10 hz–40k Hz / 10–500 hz
- type: 6-channel
- power handling (RMS):
- 100 W x6 @ 4 ohms
- 165 W x6 @ 2 ohms
- 330W x3 @ 4 ohms (bridged
- Frequency Response: 10 hz–40k Hz / 10–500 hz
- type: 6-channel
- power handling (RMS):
- 100 W x8 @ 4 ohms
- 165 W x8 @ 2 ohms
- 330W x4 @ 4 ohms (bridged
- Frequency Response: 10 hz–40k Hz / 10–500 hz
