In this article: This article is part 1 of a multi-part series documenting a custom stereo installation on a 2021 Ford F-150. In this article, I'll walk you through the planning steps and how I decided on the speakers, amplifiers, subwoofers and various other accessories in order to complete this installation.
There are a few reasons why you're probably interested in upgrading your F-150's stereo. You might want to add some bass with a shallow car subwoofer and monoblock amp, add some volume with some speakers and amplifiers, or replace a blown speaker. Before you start looking for products, or even go into your local installer's shop, you should always put together a plan. Or at least know what your goals are for the system.
This is part 1 of my 2021 Ford F-150 stereo upgrade, where I'll walk through some of the key steps I took when planning my truck's upgrade before purchasing product and installing it. Planning involves lots of research, especially for new vehicles that haven't been on the market long. So in this article, I'll give an overview of some of the core details and decisions that guided me towards the right products for this setup.
If you're interested in seeing a list of all of the products, check out my 2021 Ford F-150 Stereo Build Sheet.
Check out all related articles to this F-150 Custom Stereo

About My F-150
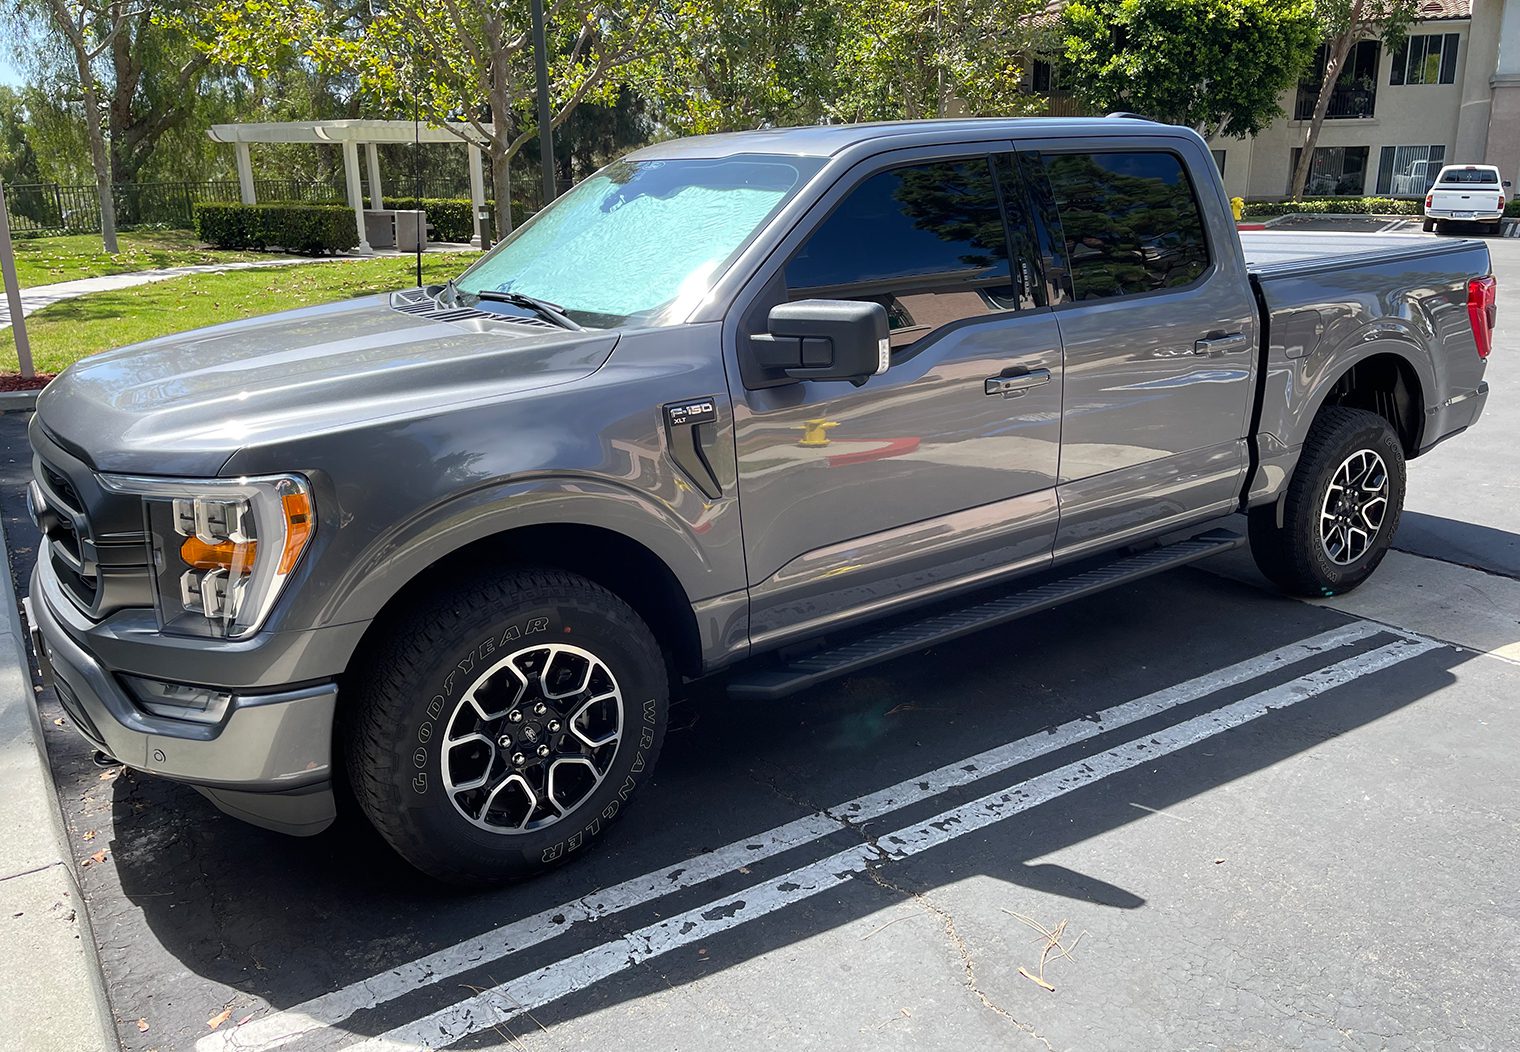
The truck that I'm using for this installation is a 2021 Ford F-150 XLT FX4. It has the 302A tech package which means it has things like the 12″ touchscreen, 8″ instrument cluster screen, power and heated front seats, remote start and tailgate release, push start and LED exterior ‘zone' lighting. Among other features. It has a 7 speaker system (not the Bang & Olufsen system) which includes a four door panel speakers, two a-pillar tweeters and a mid-range in the center of the dash. It doesn't have an included subwoofer.
Stereo Goals & Considerations
Let me start this article series by stating my goals for this stereo. This is the first thing I outline in any of my documented builds because it dictates the choices of products that I make, how I plan the install, how much custom work I do and how much money I'm ultimately going to spend. So here's a list of my goals and considerations.
- First of all, I wanted a full stereo upgrade while retaining the 12″ touchscreen and all of the core features, controls and functionality that are built into the factory head unit. Therefore, this will include speakers, subwoofers, amplifiers and any accessories that are necessary for the build.
- In terms of speaker quality, I wanted high-performance products. So no entry level products.
- High-performance stereo products come at a cost, so my budget for this stereo is around $2,500-$3,000. Since I'm going to be doing the installation, wiring and etc I think this is more than do-able.
- I wanted everything to look and feel like a factory stereo. No custom A-pillars for a 3-way speaker setup, no holes in my door panels or dash or amplifiers tucked under my driver seats. Everything must be out of sight or look like it's designed to be there.
- In terms of sound, I want a well-rounded system with plenty of mid-range and mid-bass. No harsh highs and no overkill on bass. One 12″ subwoofer is enough for me for the purpose of this build.
- I want most of this to be as DIY as possible. I don't have my own shop, nor do I have all of the tools required for a competitive, custom system. I also didn't want to spend weeks on this stereo considering I have a full time job! Easier said than done though for people like me, so we'll see how much time/work I end up putting into this one.
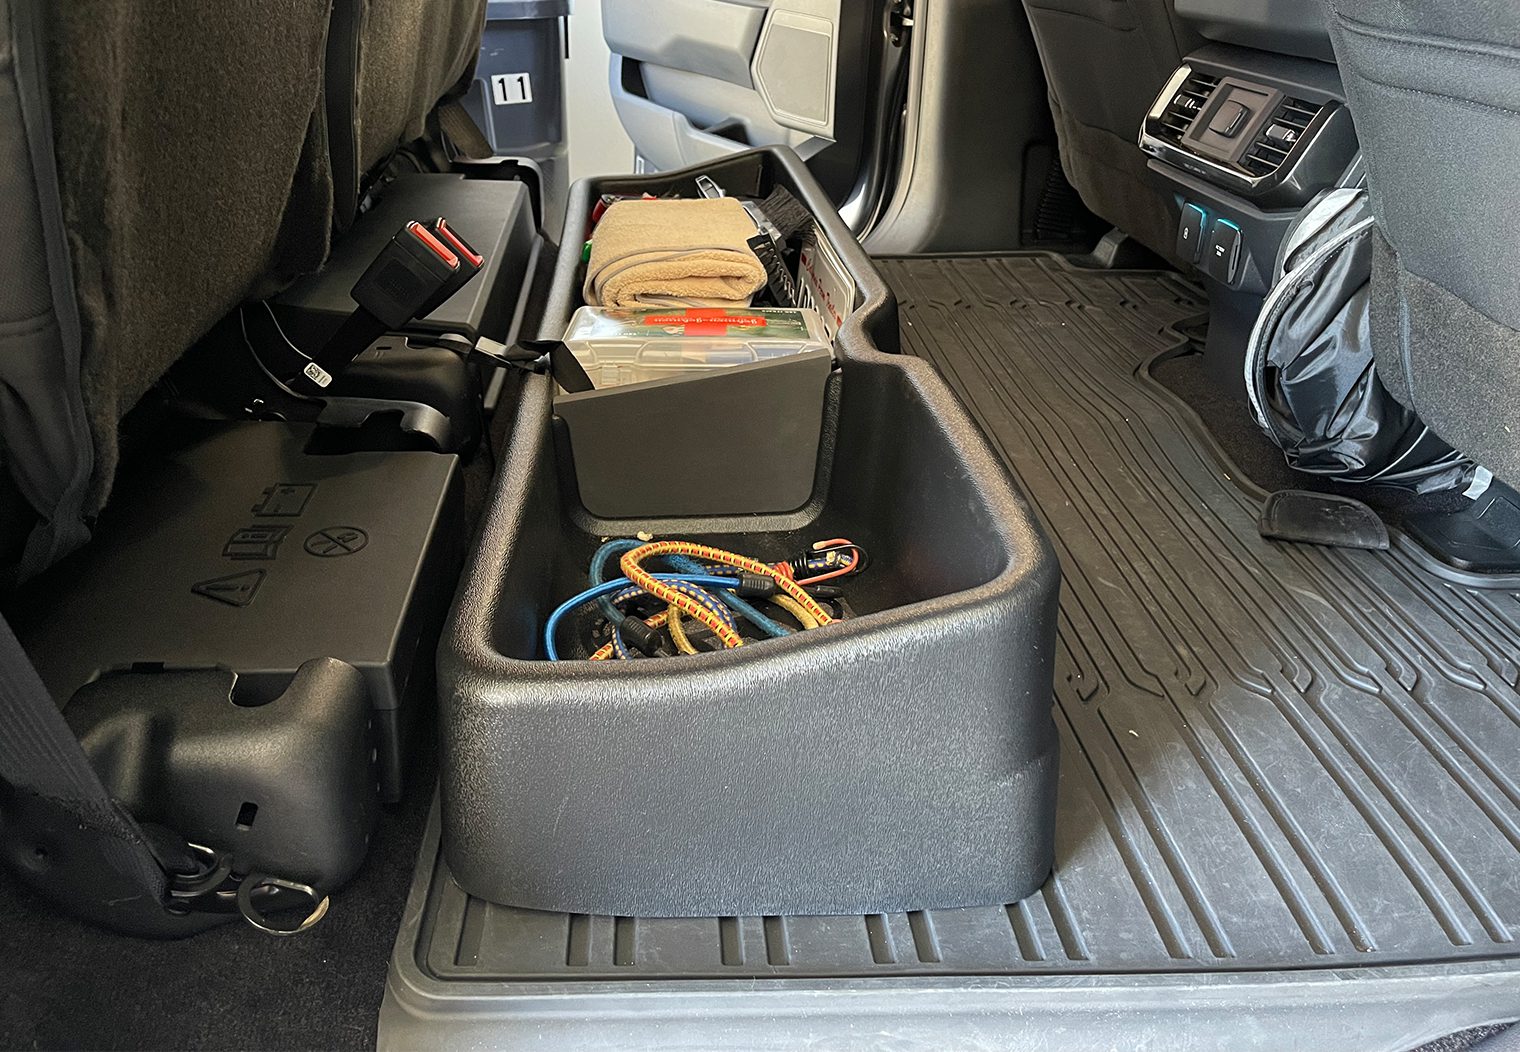
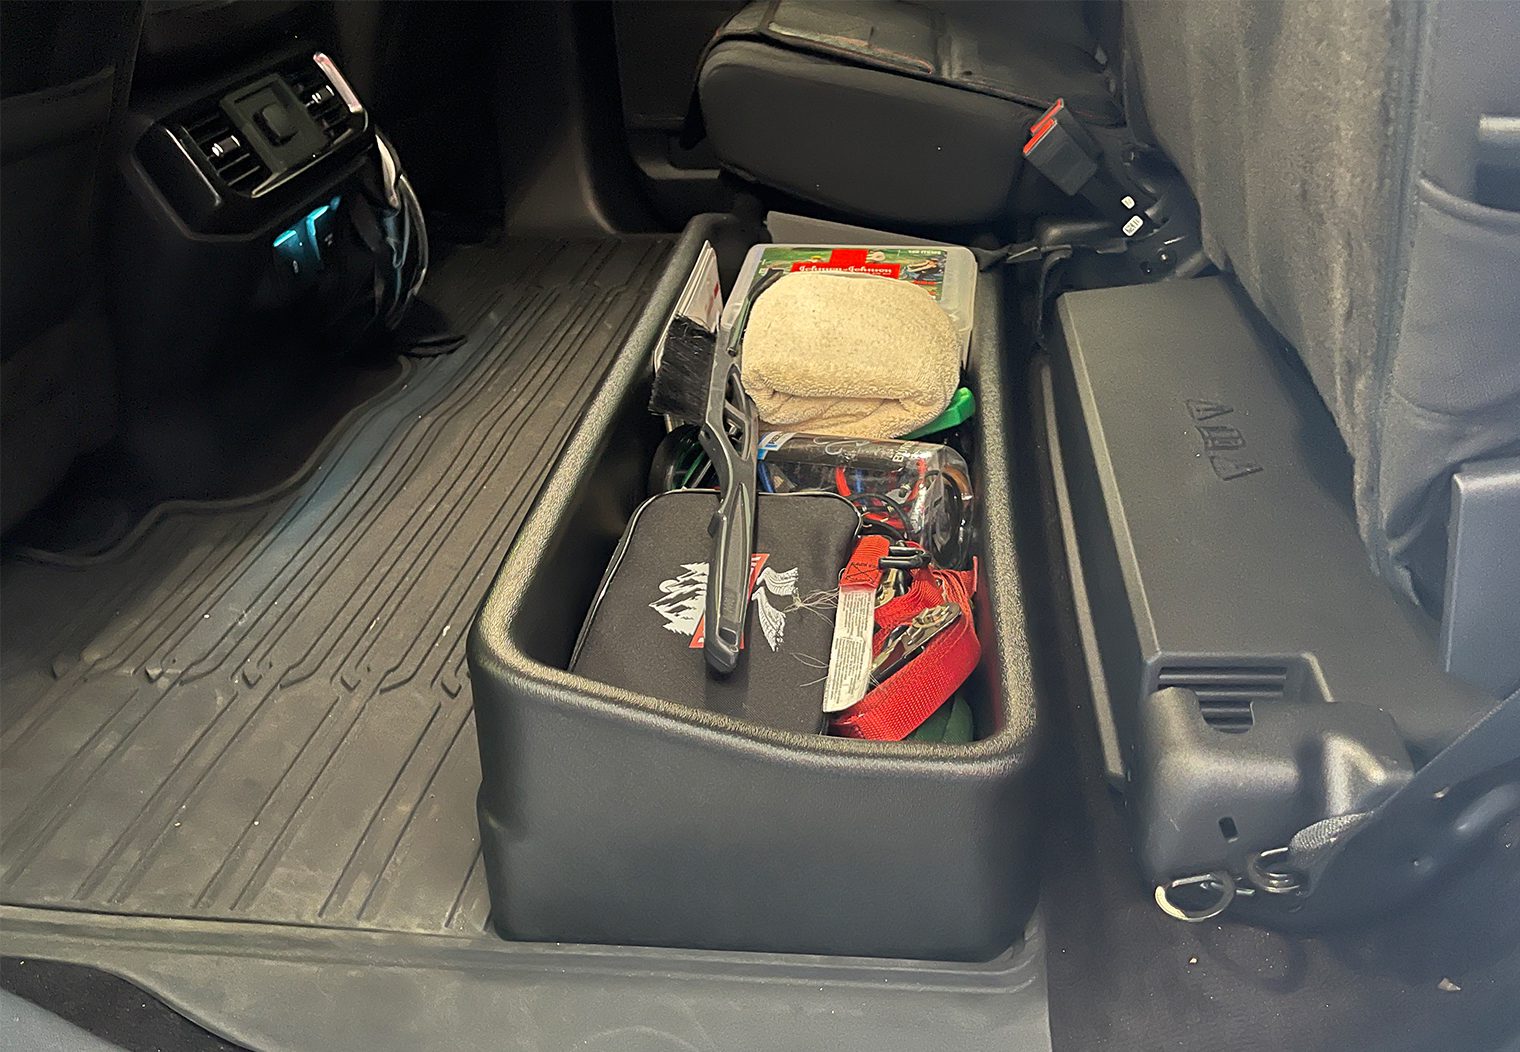
- I wanted to retain some extra storage underneath the rear bench seats. I've always had a ton of junk to store in the truck – from rags, jump starters, tie downs and etc. Storage was a must. Also another reason why I only want to do a single subwoofer.
- Limiting the amount of wiring is important as well. Leveraging as much as the factory speaker wiring as possible without cutting the factory harness was important.
There you have it. So when you read through the rest of this install series, know that there are a thousand different ways you can choose and install a stereo but these are the core (high level) goals and considerations that are driving my decisions. You should document your own or at least make a mental note of what you're wanting to do.
Product Selection & List
So now that I have my goals defined, let the research begin. I needed to find speaker sizes, measure the subwoofer and amplifier locations, figure out the wiring and signal configuration and etc. So let's start out with the basics – speaker sizes.
2021-2022 F-150 Speaker Sizes
First things first – what size speakers are in the truck so that I know which ones to purchase and whether or not I need speaker adapters. I always find Crutchfield's “Outfit My Car” feature super helpful when I'm trying to find the details about any car. Based on their specs, here's what's in the truck from front to rear:
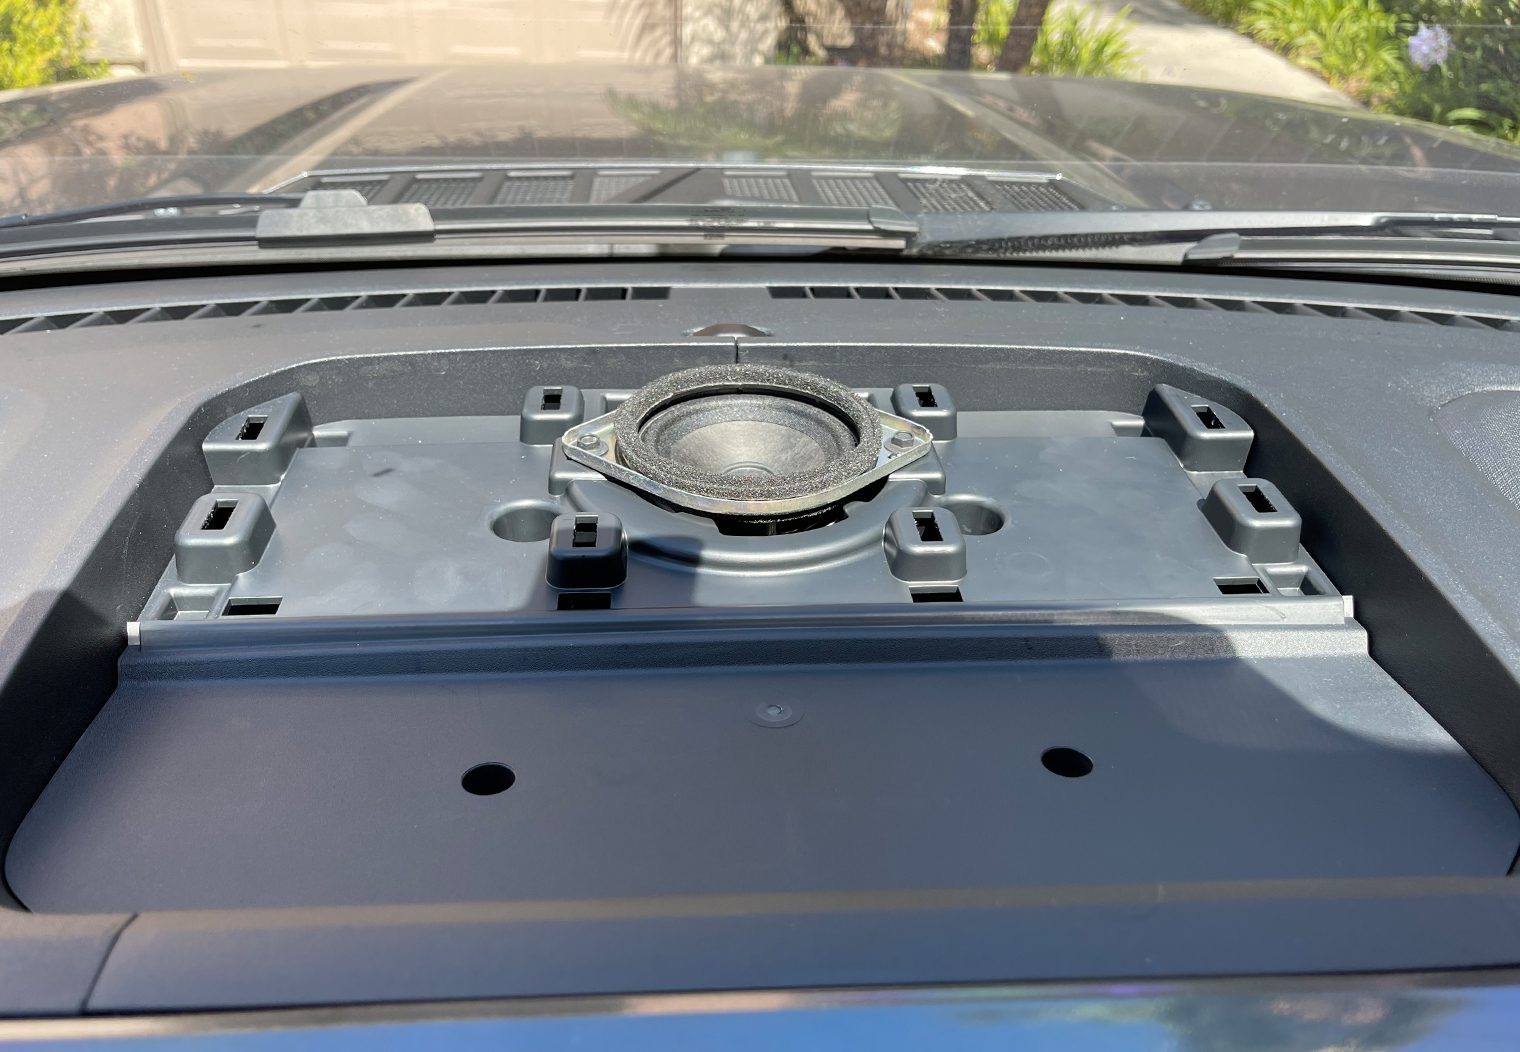
- Center Dash Midrange: 3.5″
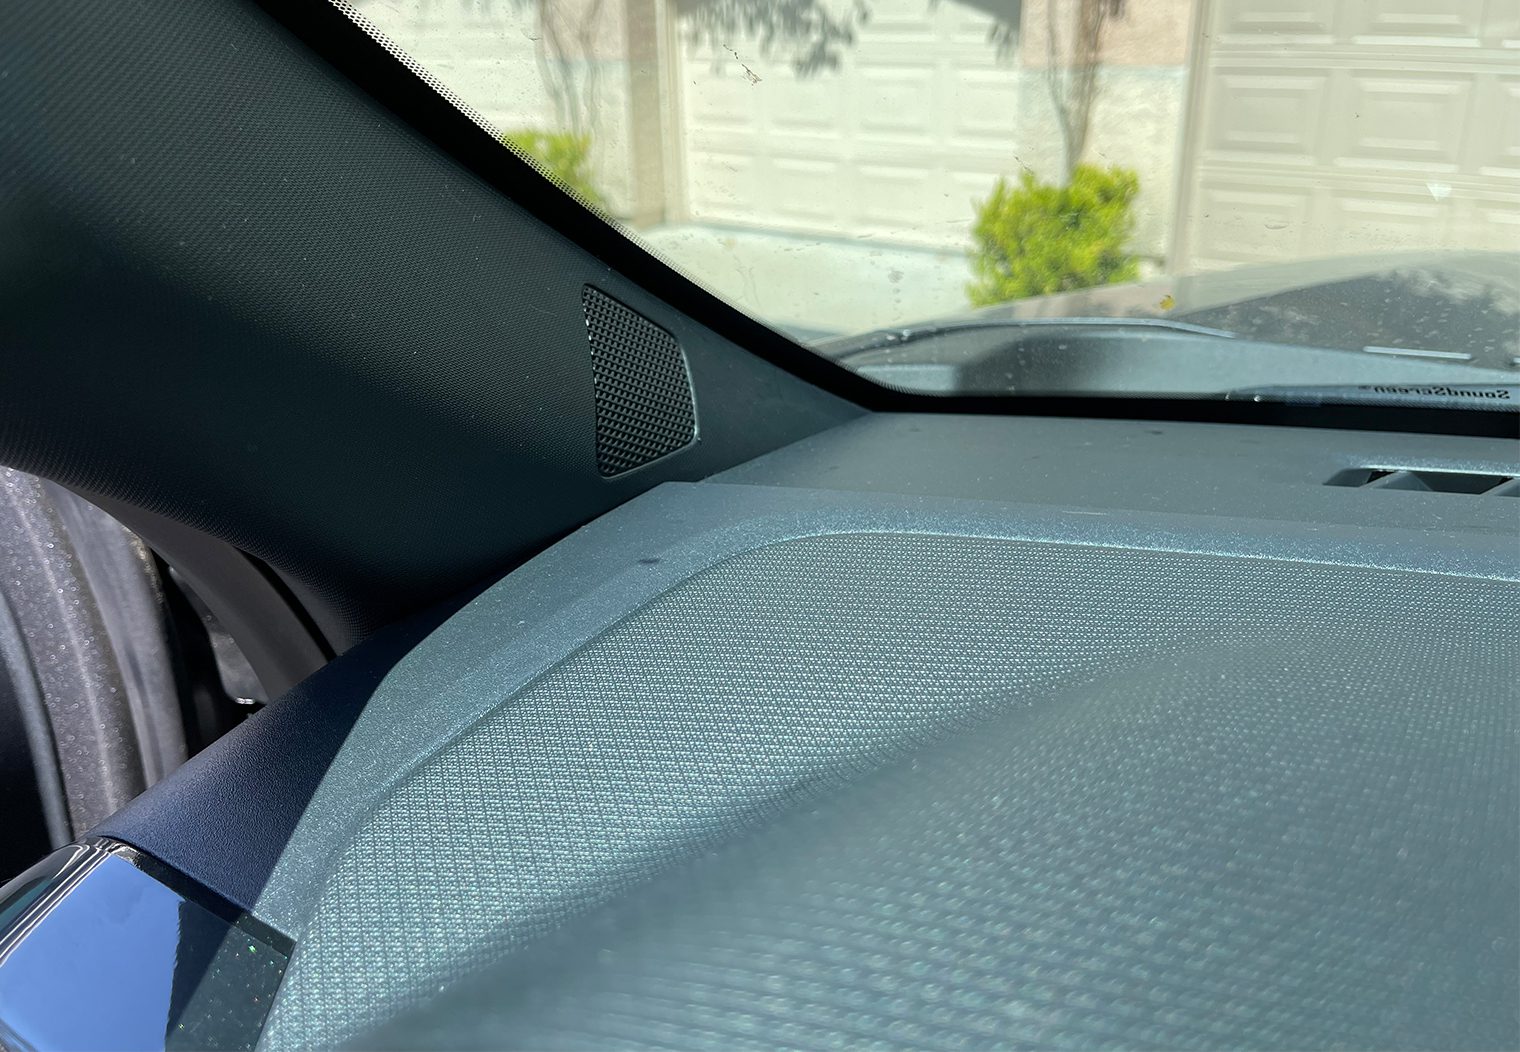
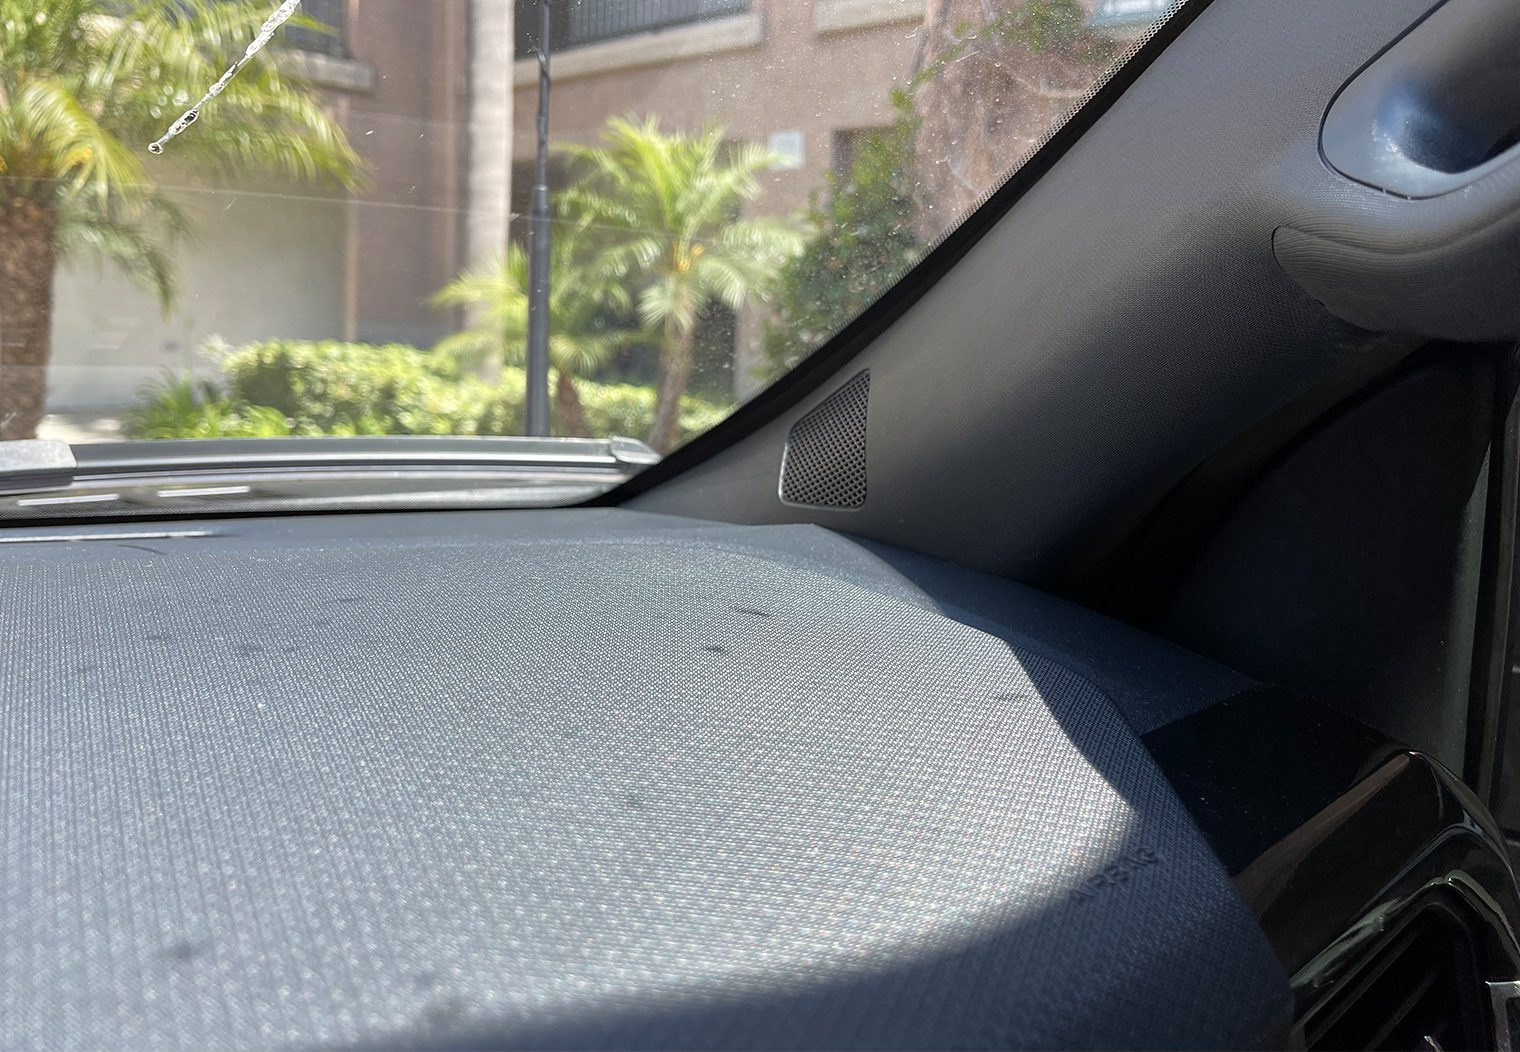
- A-pillar tweeters: 1″
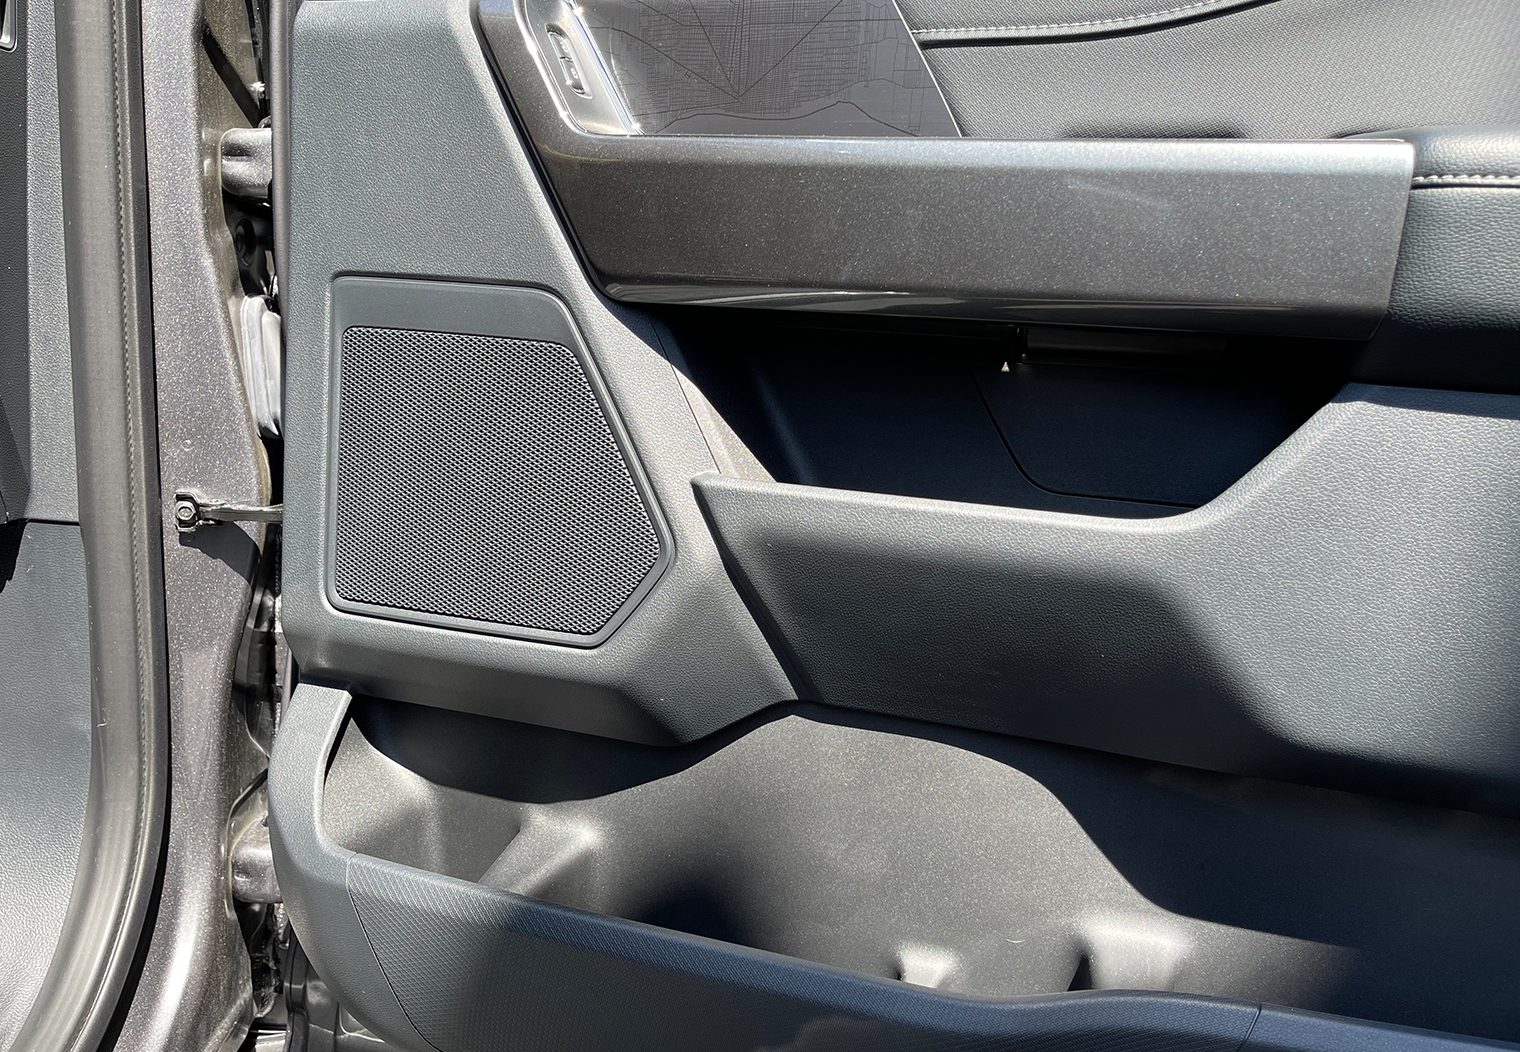
- Front door panels: 6×9″
- Rear door panels: 6.5″ coaxial
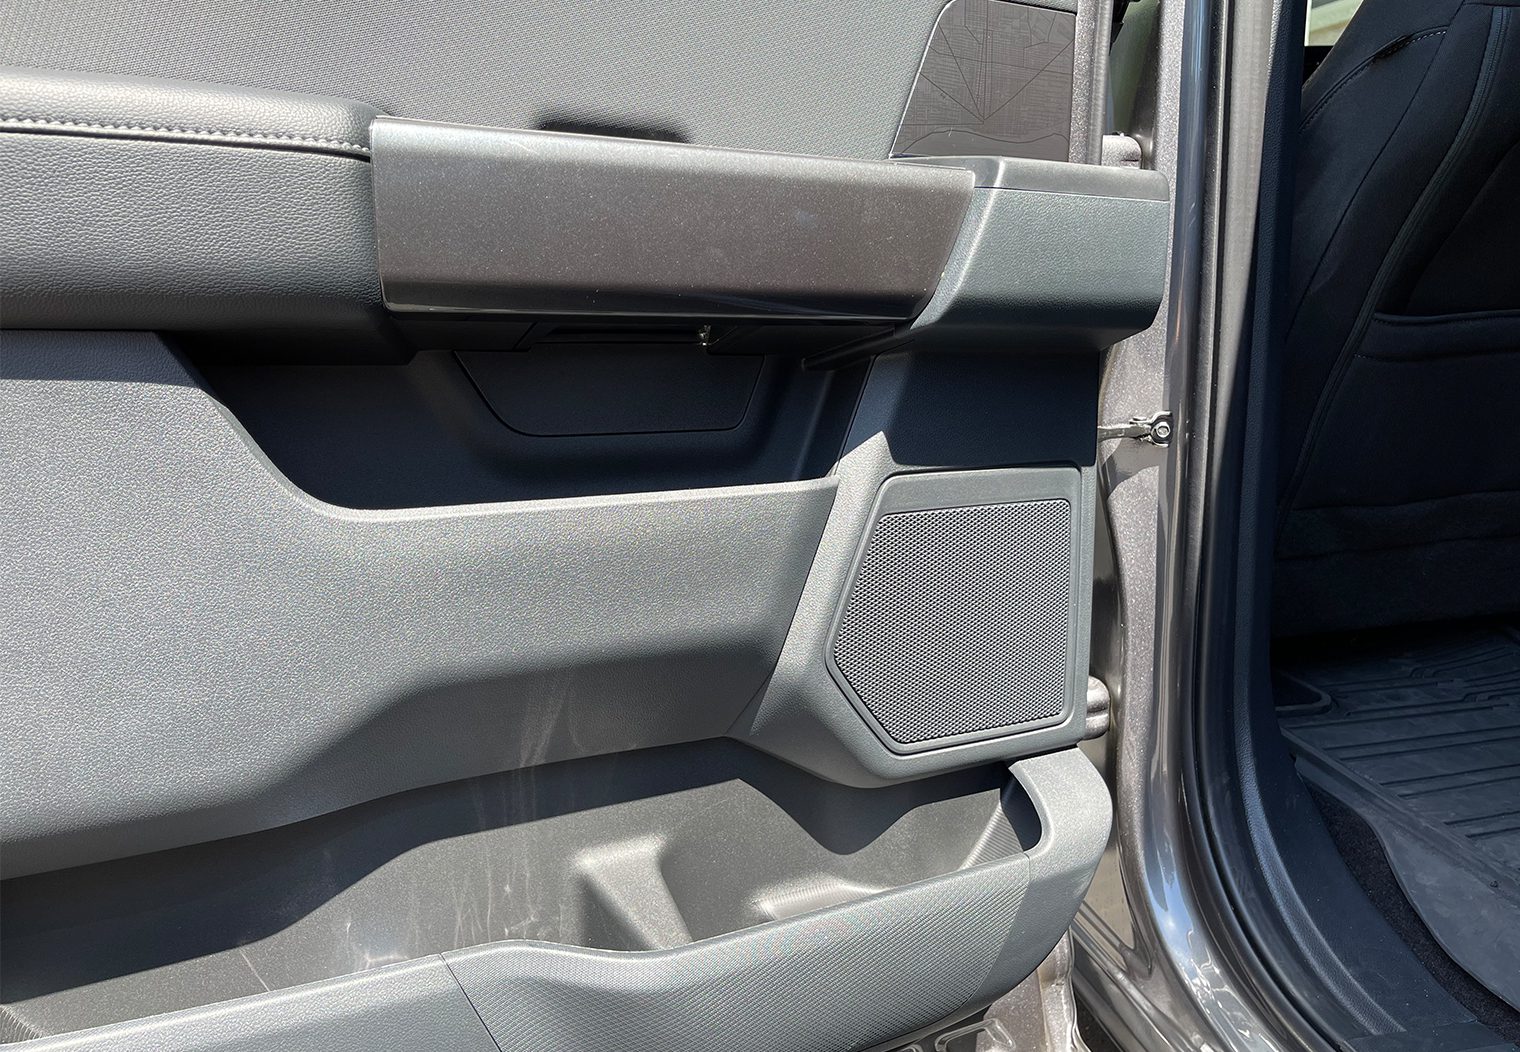
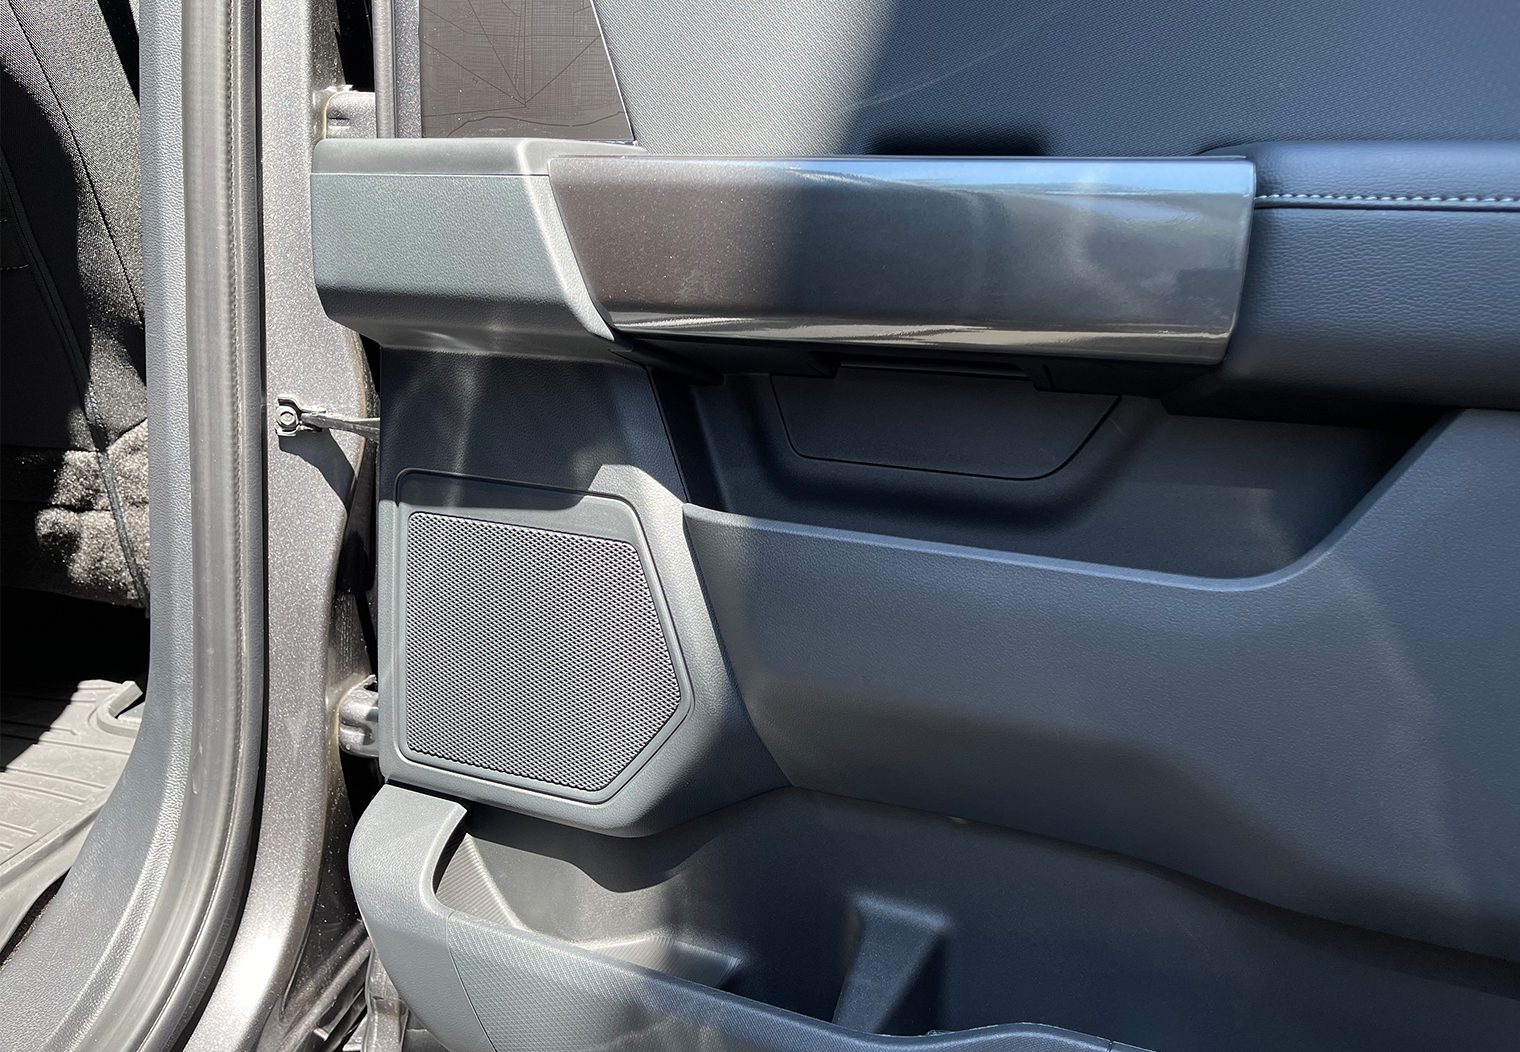
Dash, A-Pillars and Door Panels
So I tossed back and forth the idea of using either a three-way 6.5″ component speaker or a component 6×9″ speaker for the fronts. 6.5″ are the standard for performance systems and applications like this and typically the best all-around performing size. They're the most versatile and are always a safe choice. A three-way system like Sony's new XS-163ES would be a unique choice, but a 6×9″ would be the best DIY solution and might cary more mid-bass than the 6.5″. Some of the manufacturers I considered: Sony, Focal, JL Audio, Infinity and Hertz. You can always browse through Crutchfield's Speaker Shop after entering in your vehicle's information to narrow down your own choices. I always like to look through their reviews and ratings if I'm not familiar with a product or undecided (or just need a refresh on some of the specs).
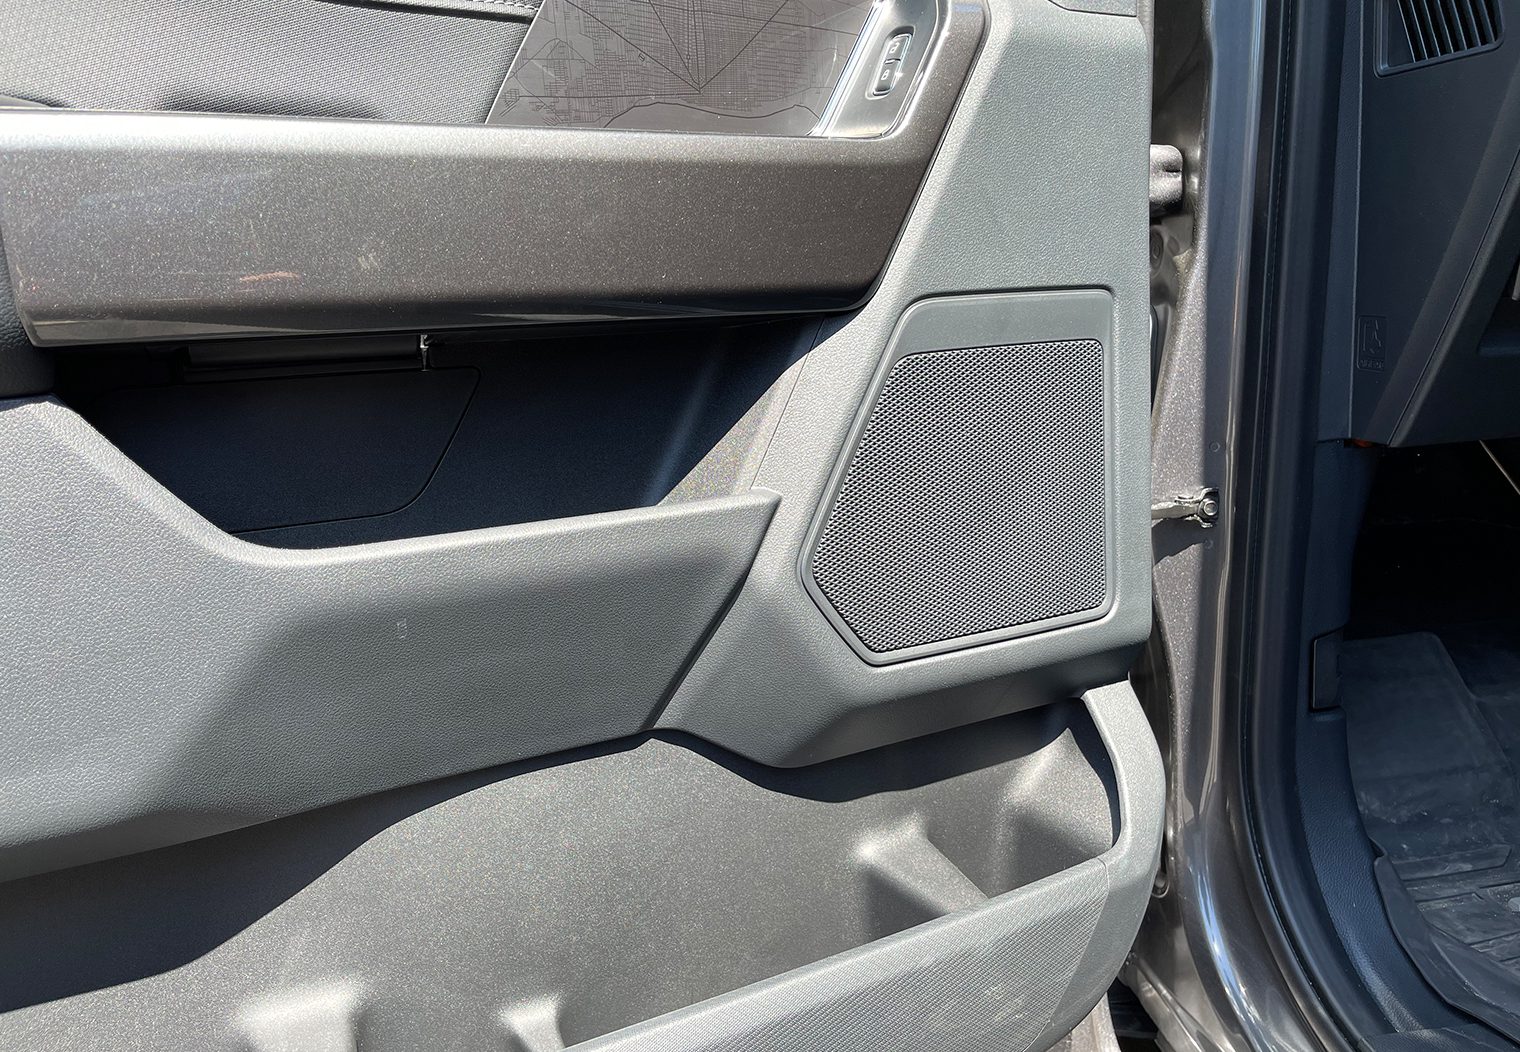
Here's a few photos of the front door panels, A-pillar and center dash midrange to show you what I'm working with.
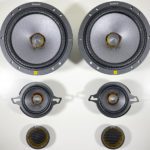
One could argue what speaker is the best for days. In the end, my choice was the XS-163ES. Mainly because I wanted to leverage the included 3.5″ midrange speakers to mount in the existing central dash position that currently houses a 3.5″ midrange. But it's also one of the best value 3-way 6.5″ component systems on the market and I was impressed with the performance of their Mobile ES lineup when I installed them in a VW MK7.5 GTI last year so I knew they would sound great.
My plan was to custom 3D print a dual 3.5″ midrange mounting plate for the existing location on the center dash that will house the 3.5″ speakers that come with the XS-163ES. This'll help with setting the soundstage, and by designing my own mounting plate it should limit the amount of custom work to the truck. Ideally, I won't drill or cut into any of the dash components during this process. I'll cover this in more detail in part two of this series.
Rear Door Panels
I figured I'd keep the rears simple. Maybe this was a little selfish. But, since the rear door panels don't have a cutout for a tweeter and I don't prefer putting a 1″ hole in the panel, I'm going with a coaxial design. To match the fronts, I'll be going with Sony's XS-160ES 2-way 6.5″ coaxials.
Subwoofer Selection
Next decision I needed to make was the subwoofer. Measurements are the key thing here. My goal was to build a custom enclosure and storage unit below the rear bench seat. I'll place a single subwoofer on the passenger side, where the single chair lifts up and then I'll leverage the remaining space below the center and driver bench for storage.
I will be using a 3D modeling tool, SketchUp, to design a subwoofer enclosure that would fit underneath the bench seat. But it will also provide me with a better understanding of what my exact measurements would look like and what sub I could fit. My concern was depth.
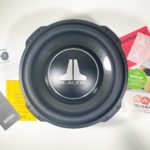
After a few measurements, I knew that the maximum mounting depth that I could fit comfortably underneath the bench with the enclosure design I wanted was between 3 3/4″ and 4 7/16″ depending on the diameter of the subwoofer's motor (you'll see why this matters when you look at the slanted subwoofer enclosure design in part two of this series). I also calculated that I could fit a subwoofer with up to a 14″ outer diameter in the position that I wanted under the seat. This ruled out my first choice for Sony's XS-W124ES 12″ subwoofer. Too deep. I needed an ultra-shallow subwoofer. My first choice for a slim sub was the JL Audio 12TW3-4. With a mounting depth of just 3.5″, I knew I wouldn't have to worry about a thing. I also knew that these were among the best performing shallow subs on the market so it's a safe choice that'll keep up with my speaker choices.
Amplifier Selection
Now that I had my speakers and subwoofer choices made, I could back into what I needed for power. I always recommend speaker choice before amplifier choice, especially for DIYers. It also will ensure that you don't overspend on an amplifier with too much power. I recommend matching the amp specs to your speaker specs if you can.
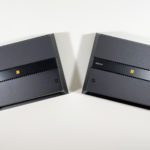
So since I already had made a choice to use Sony Mobile ES speakers, my first thought was to leverage their newly released Mobile ES amplifiers. Looking at the outputs mainly, I knew that the XM-4ES 4-channel or XM-5ES 5-channel amps would match exceptionally well to the speakers (they're practically designed to power them). But what about powering the subwoofer?
The 12TW3-4 has an RMS rating of 400W, so either I could go with the XM-5ES to power the entire system with it's extra 1 x 750W @ 2-ohm dedicated subwoofer channel, or go with the XM-1ES monoblock with a whopping 1000W RMS @ 2-ohms. I ended up choosing a combination of the XM-4ES to power the four door panel speakers along with subwoofer, and the XM-1ES to power the subwoofer. This would also leave me some extra power if I wanted to install a second 12″ subwoofer in the future via the monoblock.
One of the added benefits to the Sony Mobile ES amplifiers is that they're also compact. Roughly 2 1/2″ tall. I plan to install these amplifiers on an amplifier rack behind the rear seats, so depth was a consideration. With a 2 1/2″ depth, I knew I wouldn't have to worry so much about the amplifiers touching the back of the rear seats. If you're interested in reading more about the Mobile ES amps, check out our unbox and first-look review of the Mobile ES amplifiers.
Amplifier Rack
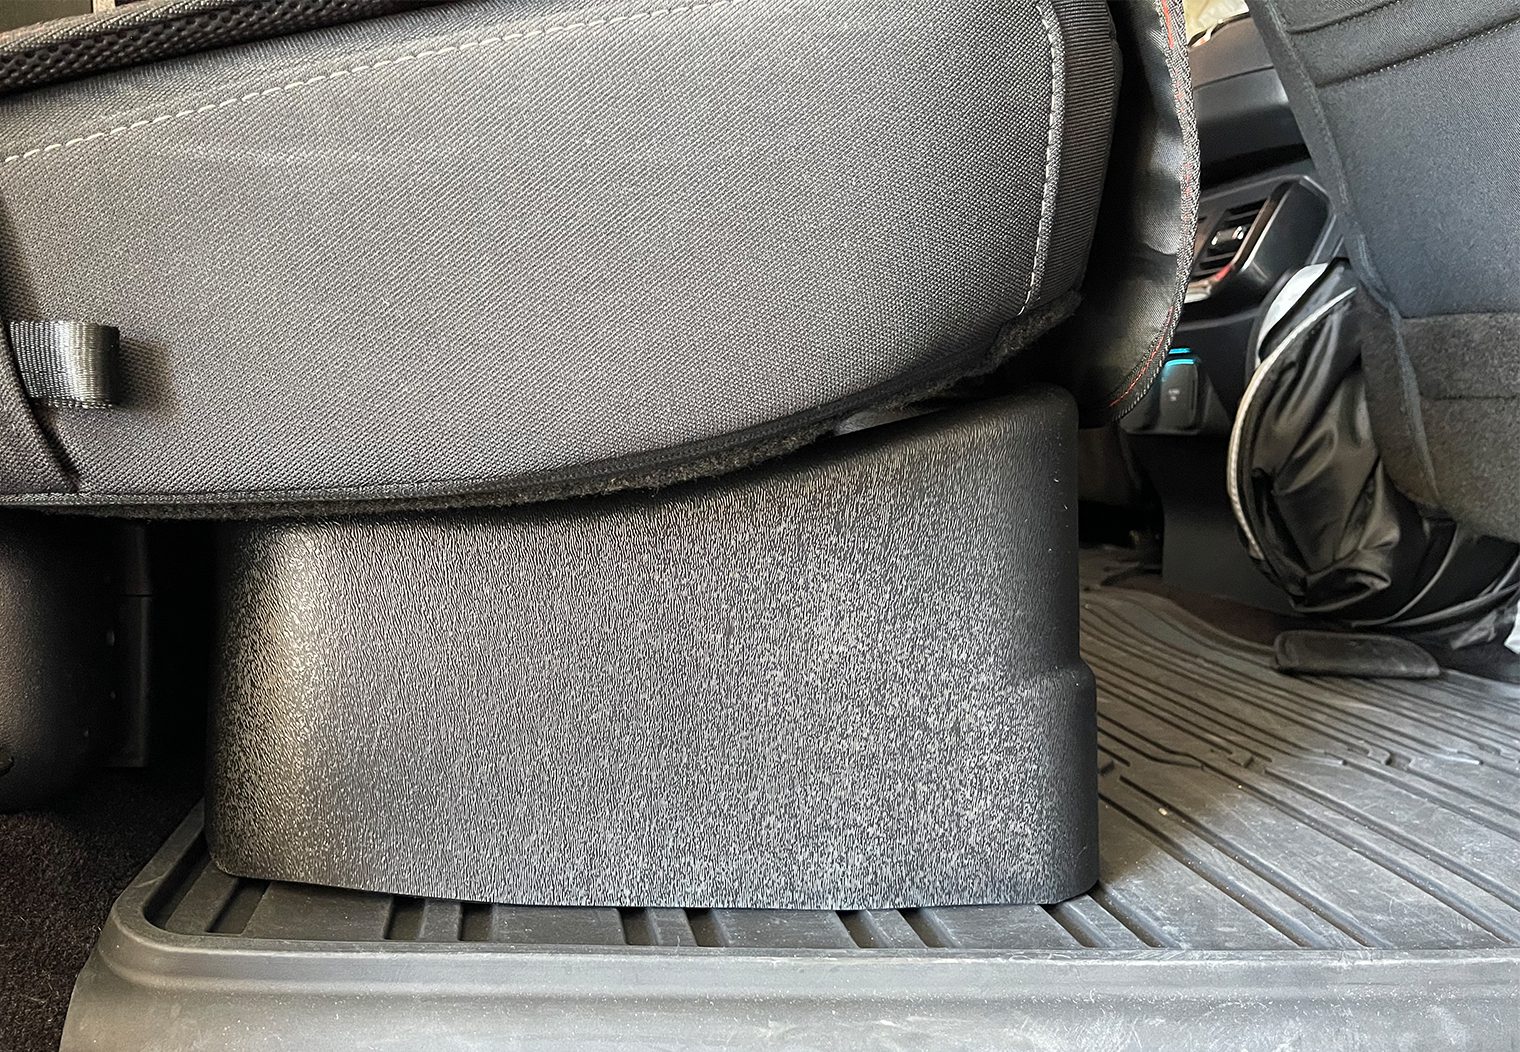
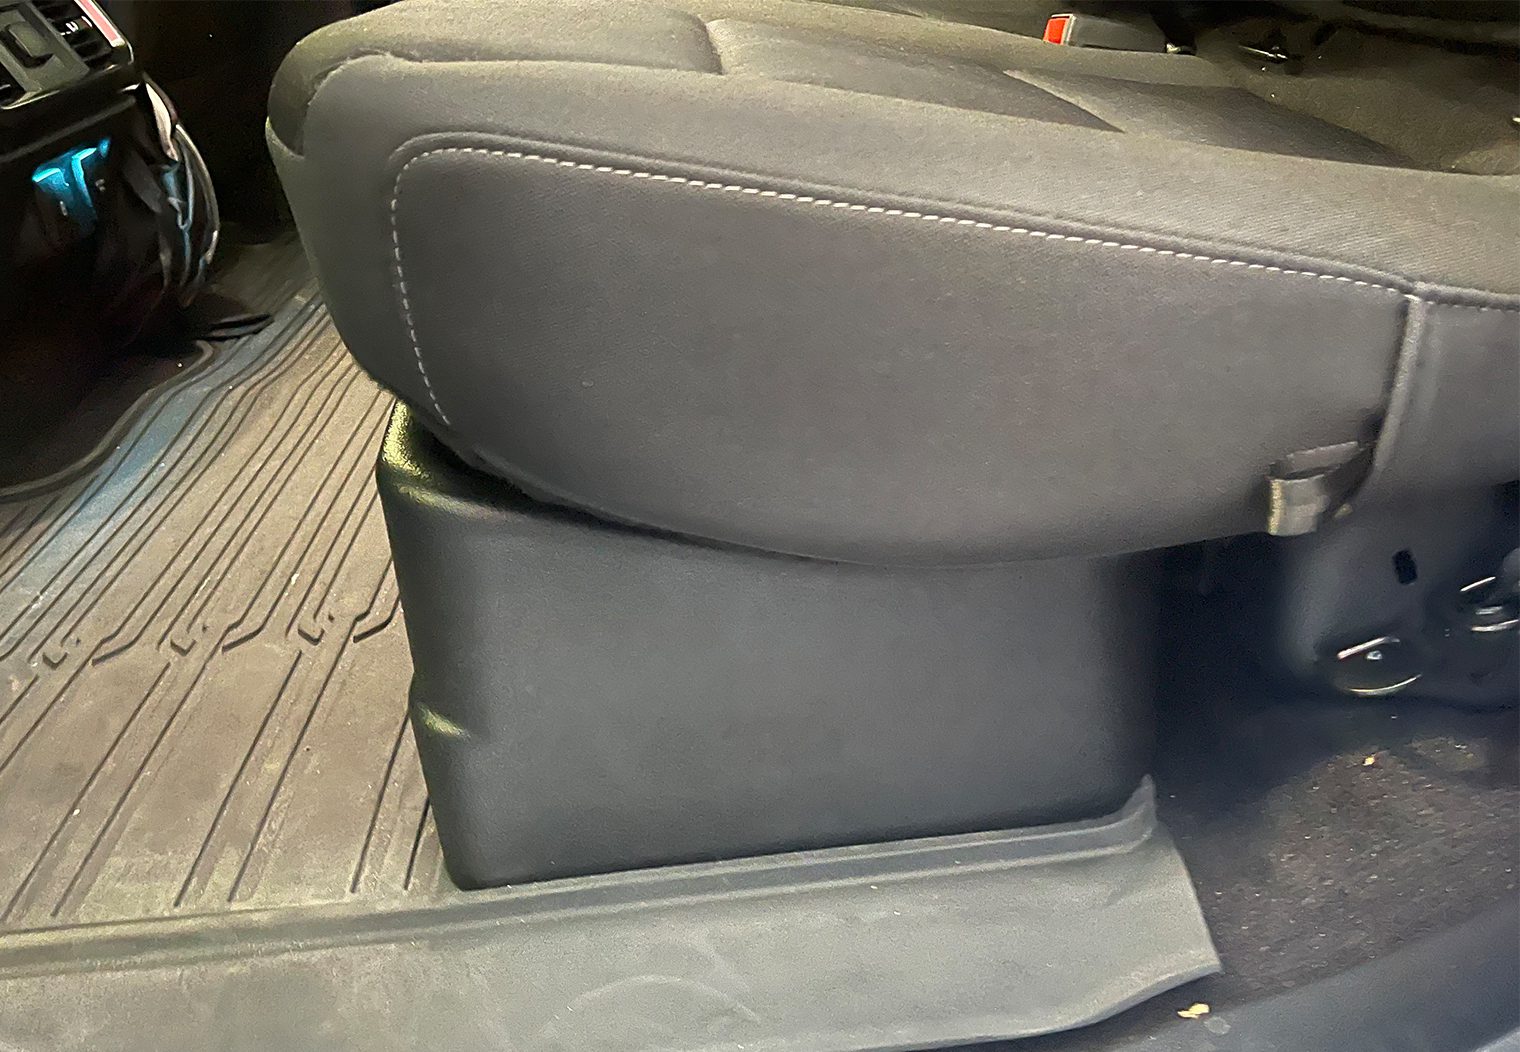
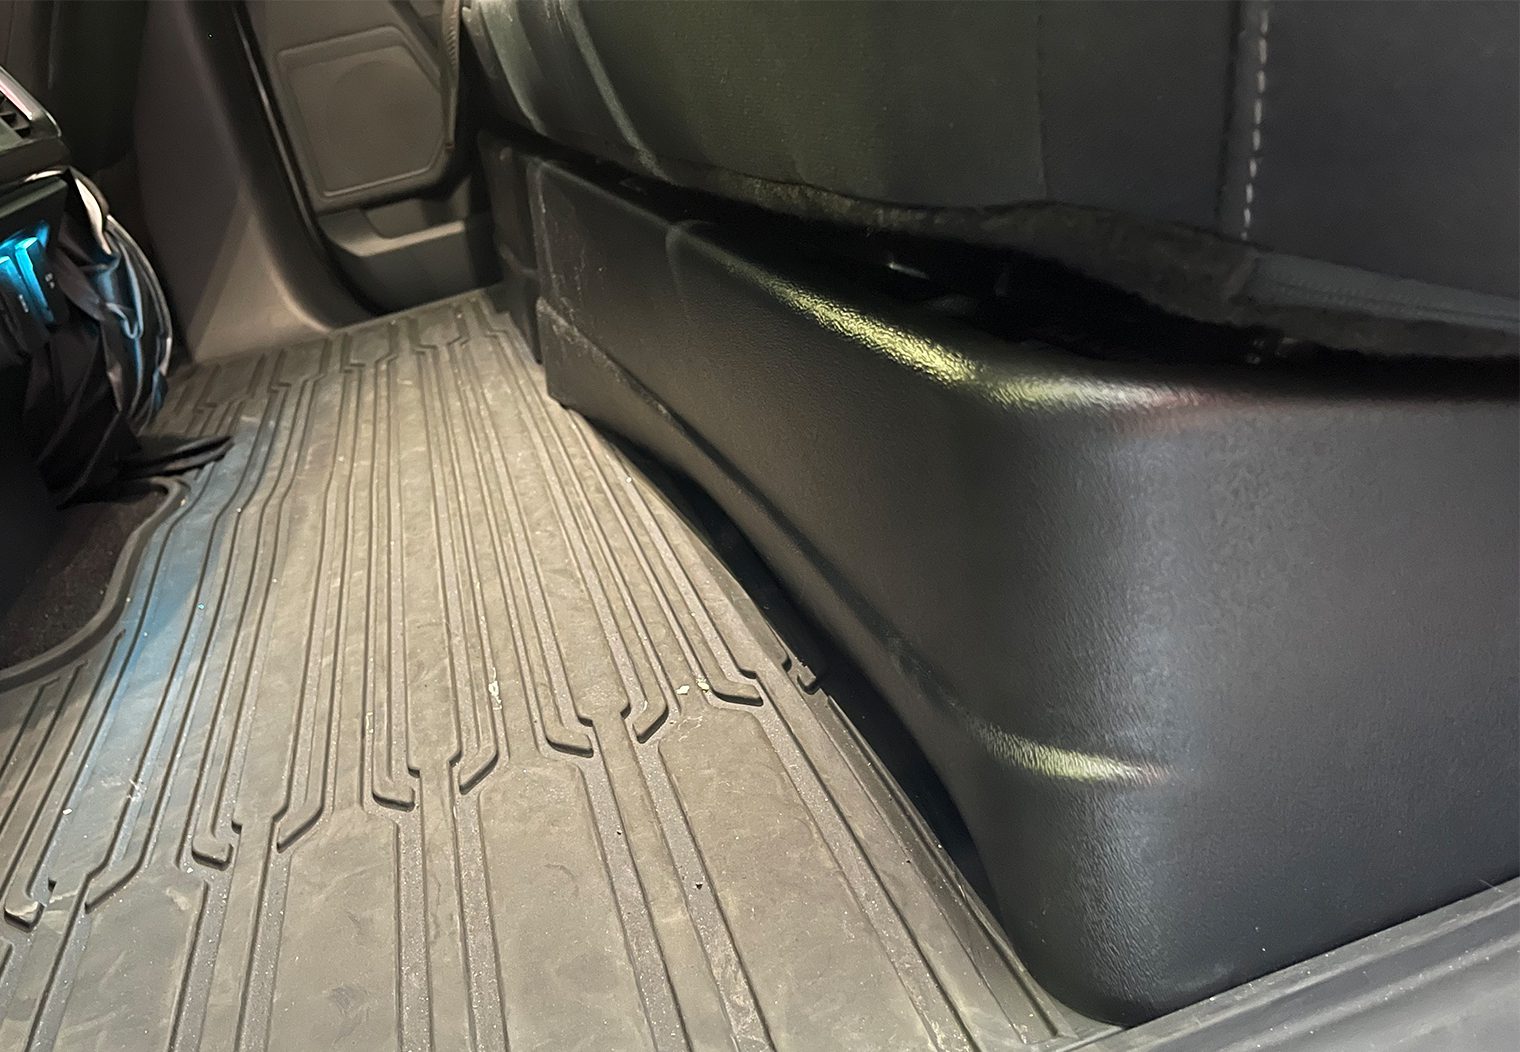
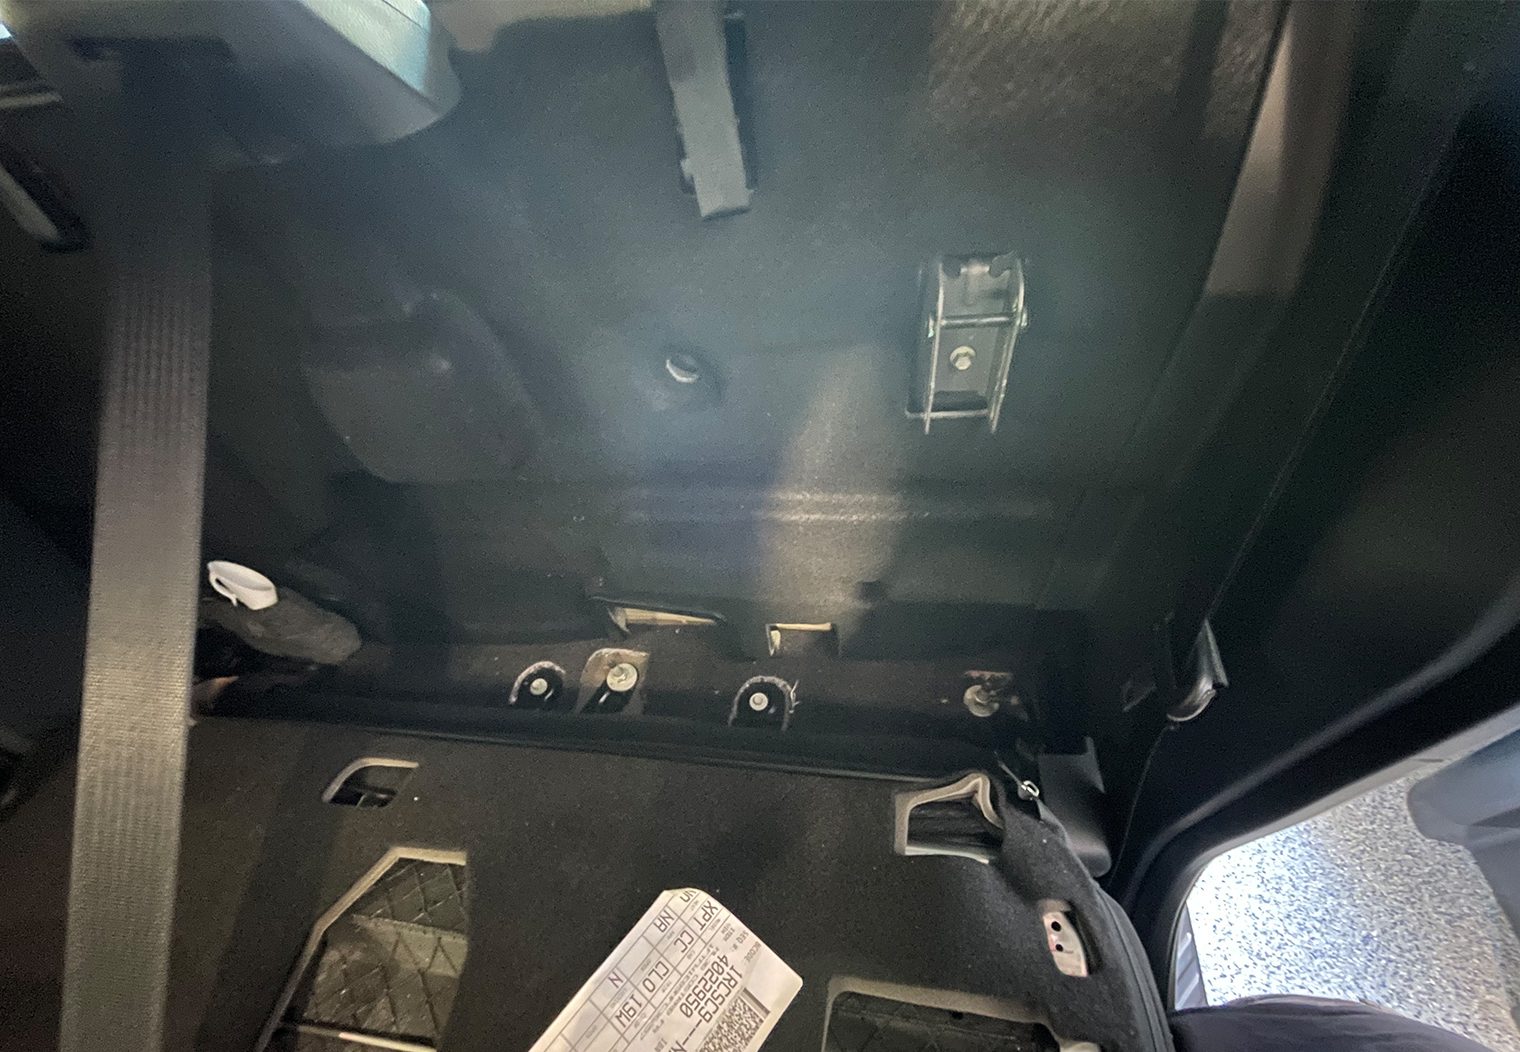
With my amplifiers chosen it was time to think about where I'd mount them. I wanted them to be accessible but out of sight. Under the seats was not an option. Behind the rear bench seats along the back side of the cab is a very common placement for amp racks on these trucks so I took to the measuring tape to confirm.
The back seats fold forward on the truck so it was pretty easy to get a visual and measure things like the depth and overall size of the amplifier rack.
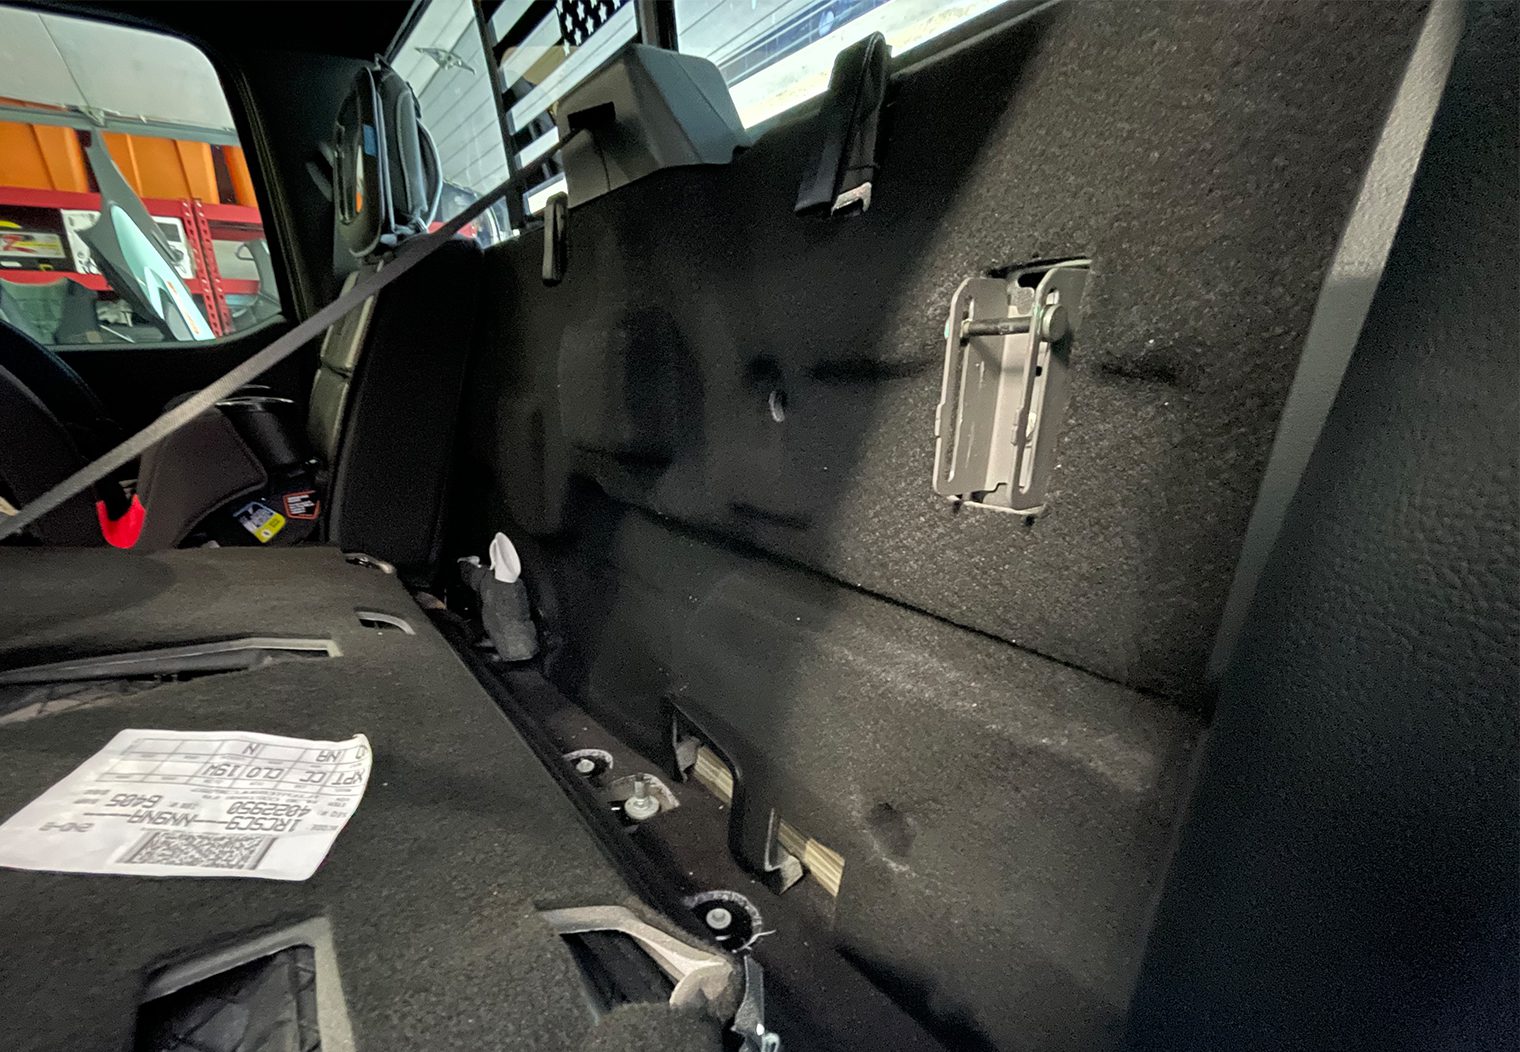
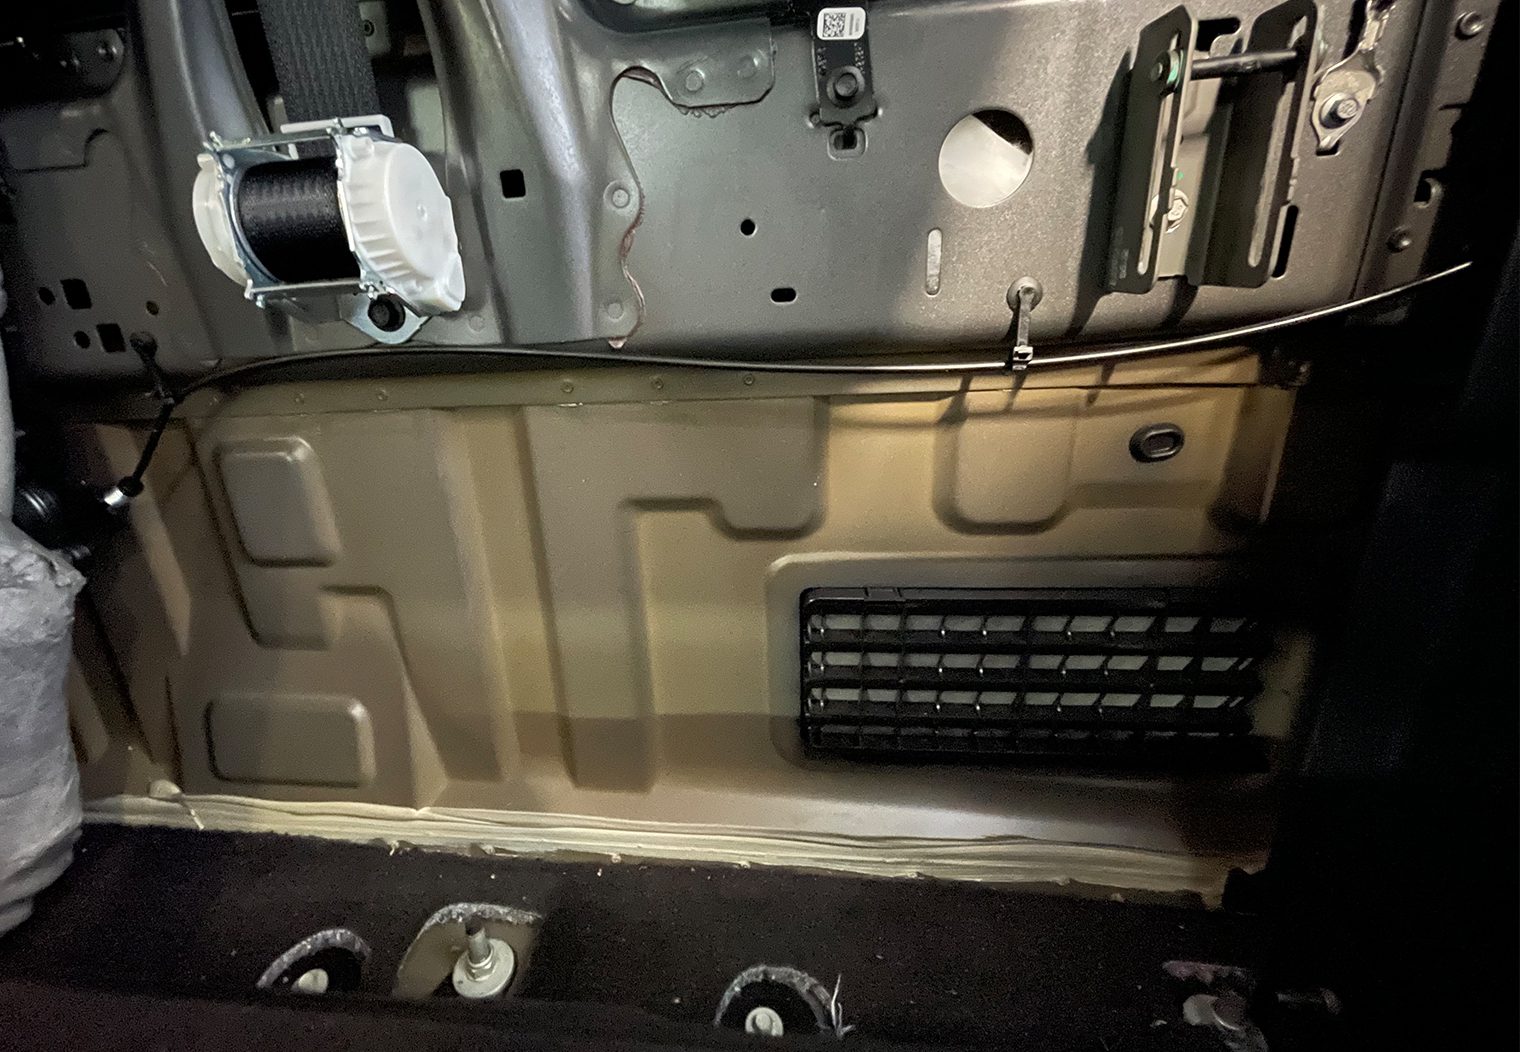
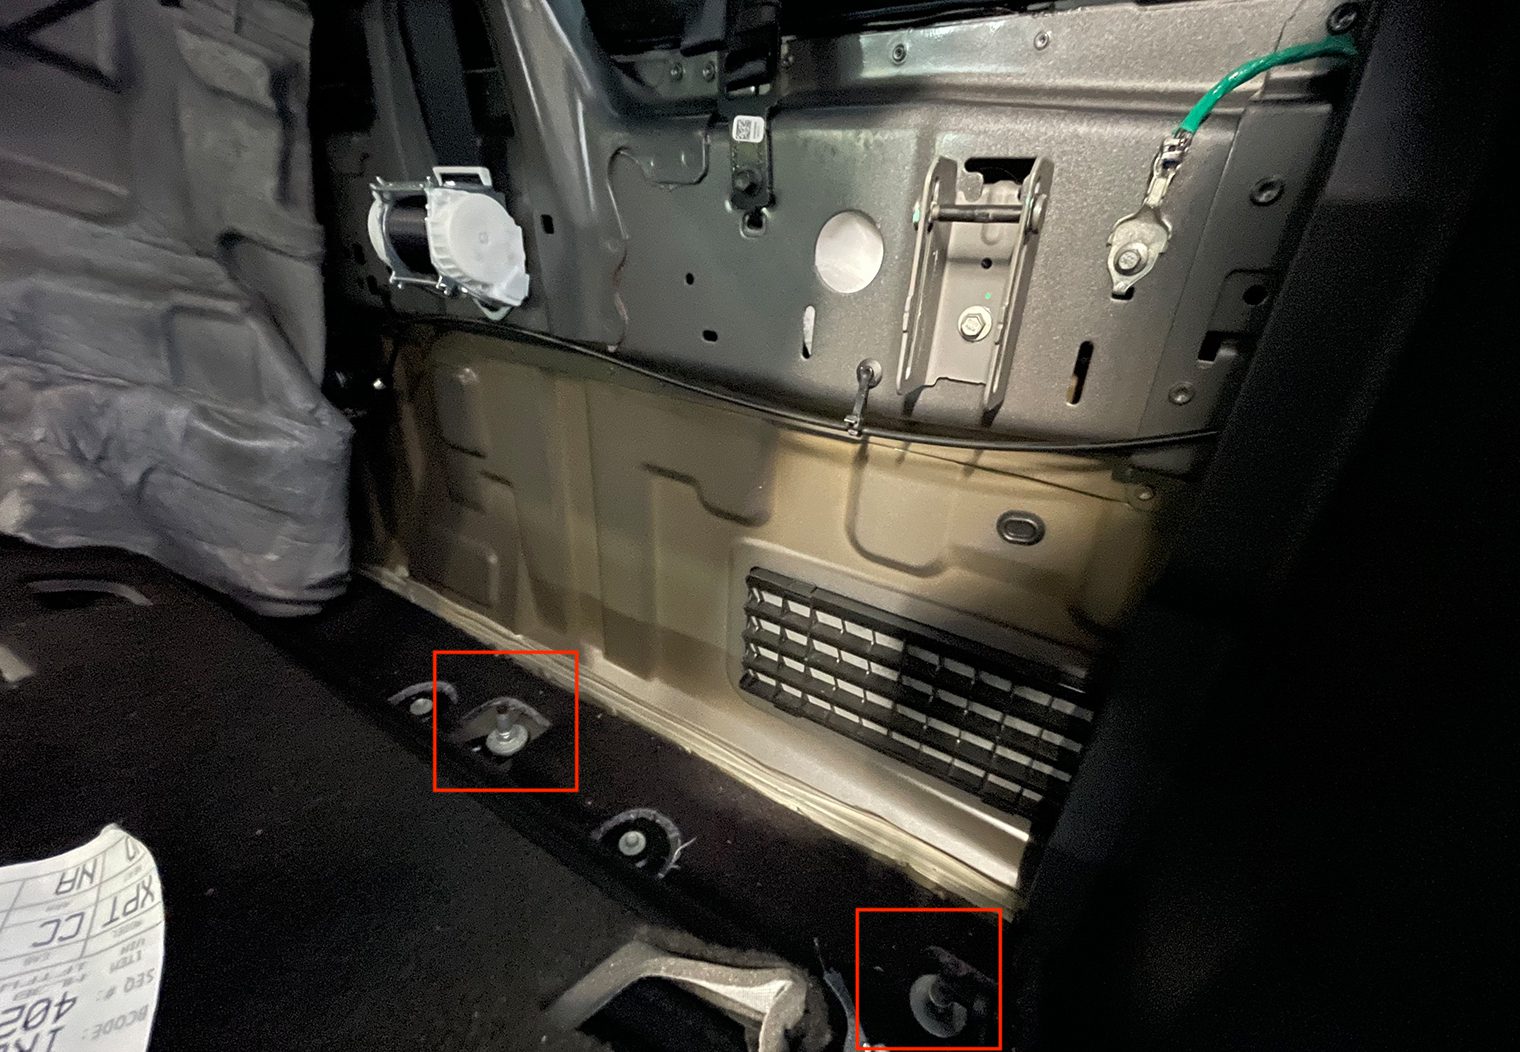
I was able to confirm depth, length, width and height all matched well with the amplifiers I was going to place behind the seat. This will be the location for the amp rack! My amp rack will be roughly 25″ x 15″, so I went to Amazon to find the HPFE (Starboard). I also needed custom L-brackets to fit the location and size around the factory seat hardware and bolts. I found a manufacturer who could create custom sized brackets just for this use case. Here's the measurements in case you're interested in doing the same!
- A: 75mm
- L: 40mm
- H: 55mm
- X: 20mm
- T: 5mm
- B: 76mm
- Y: 10mm
- V: 20mm
- S: 40mm
- W: 25mm
- Hole 1: 10mm
- Hole 2: 7mm
The custom L-brackets were a little pricy but worth the cost for the perfect fit!
If you don't want to make your own amp rack like me, I also came across a company in Tenessee while researching online that makes a pre-built amp rack just for the F-150 and thought.. why not? Back to the DIY theme here.. It's pretty cool and worth the price tag considering how pricy Starboard is and how much work it takes to build one if you don't have a shop or the tools. Check it out: https://soundsgoodstereo.com/collections/2021-2022-ford-f-150/products/2015-ford-f-series-custom-made-amplifier-rack-plate.
DSP & Tuning Products for Audio Signal
In order to add aftermarket amplifiers you need clean audio signal from your existing system. This is what your amplifiers will use to provide power/signal to your aftermarket speakers. This is a product of preference, like many other items in this article but I found an article that puts signal processing into lamens terms and helps describe why it's important. I'd recommend reading it if you're not familiar with DSPs, signal processors and so on: What are Factory Sound Processors?
If you reference back to my goals, I wanted to limit the amount of custom wiring, wire tapping and so on. That is particularly important when trying to identify all of the speaker signal wire (since I'm not replacing the OEM head unit) and wiring them back to the amplifiers.
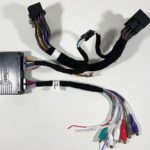
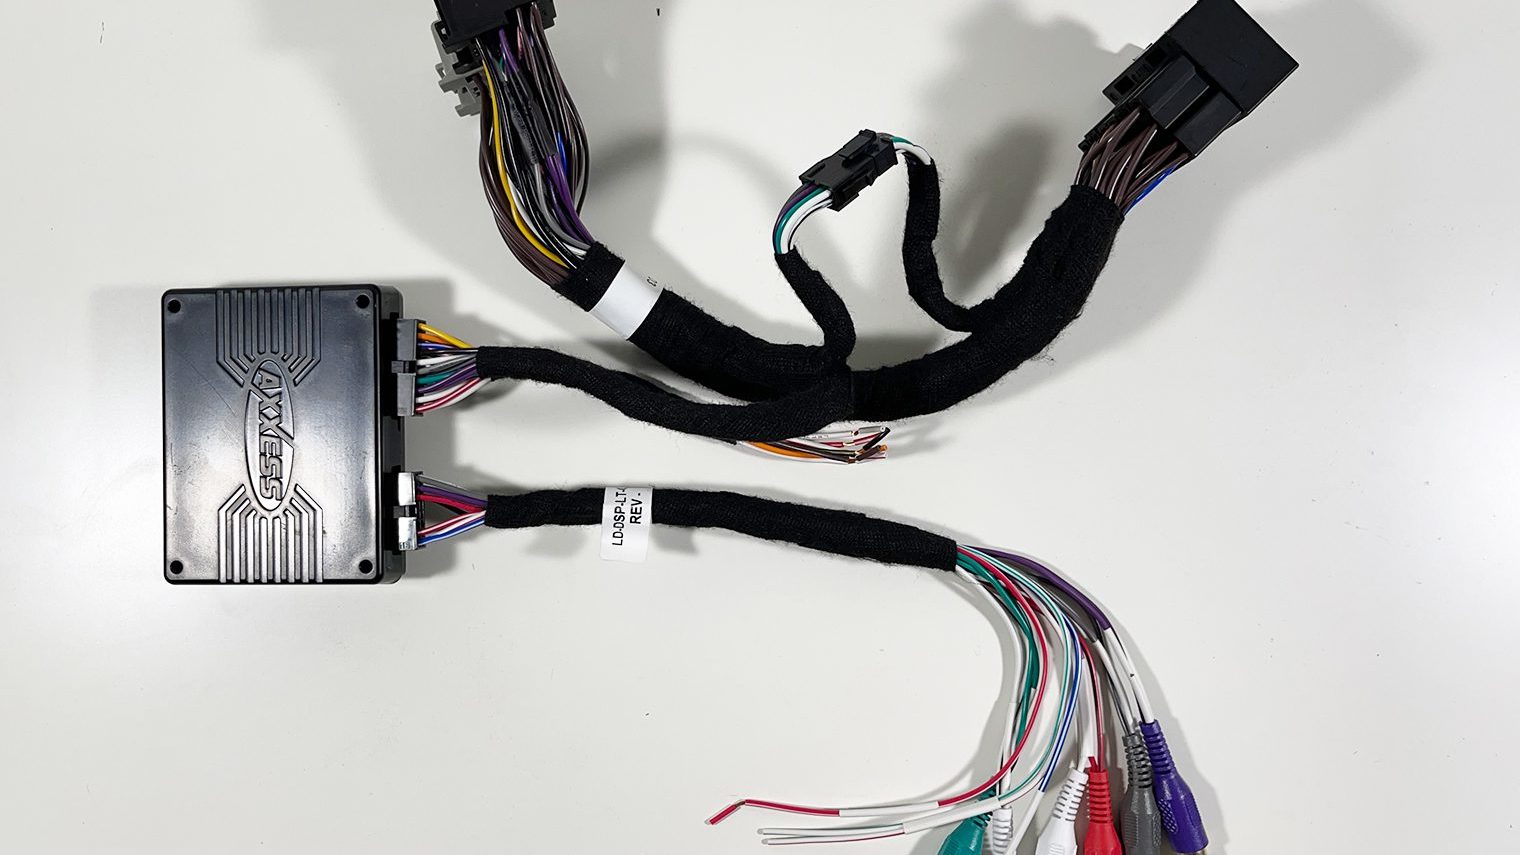
I've used products like AudioControl's LCQ1 and LC2i and I know they have a variety of advanced DSP and tuning products that would work very well for this installation. If you're looking for a more advanced setup I'd recommend their products even. But, for me, I chose the Axxess DSP Processor – the AXDSPX-FD3. Here's why.
- This Axxess DSP Processor comes with a T-harness that simply connects into your existing wire harness behind the OEM head unit. You don't even need to remove the head unit to wire it up. It also has a plug that you can use built into the T-Harness that will allow you to easily tap back into the factory speaker wire to send power back to your speakers without tapping into the harness once.
- The DSP Processor module features a ton of awesome features that allow you to assign inputs/outputs, set the crossovers and even adjust a 31 band graphic EQ on your phone or tablet and then save it to the unit wirelessly. This was especially important because I plan to use an RTA to tune the system.
You can read up more about the AXDSPX in my writeup and review of the AXDSPL. Note that the review is actually on the ‘Lite' version. I ended up using the ‘X' because of its added outputs and 31 band EQ.
Programming the OEM EQ
Most of the new vehicles have a built-in EQ that's tailored to the factory system. This is an added layer of noise to your signal and can complicate the tuning process so ideally I would be able to turn off the factory EQ or turn it to a ‘flat' setting.
The newer Fords have a programming tool available called FORScan, and after a little bit of research I was able to pinpoint exactly what was required to turn the factory head unit's EQ to flat settings so that I could layer in my own EQ settings via the AXDSPX with ease and without adding any unwanted feedback or noise trying to over-compensate for a factory EQ setting. I recommend taking a look at these two documents to learn more about FORScan and what it's capable of doing. I'll get more in-depth about what I did in FORScan in part three of this series when I go to tune the new system (thanks @Livinitup!).
Wiring & Accessories
Next were the various accessories. Identifying and documenting all of the small accessories that are needed in order to complete an installation like this can be a daunting task if you don't own a shop with an excess of things like speaker wire, sound deadening, speaker soundproofing foam/tape, distribution blocks, wire ferrules and so on. So in this section, I'll walk you through some of the key things that I would recommend for any build like this on an F-150.
Adapters

Sticking to the DIY approach, there's a couple adapters that I chose for this installation to simplify the install, save some time and make everything look good and fit well.
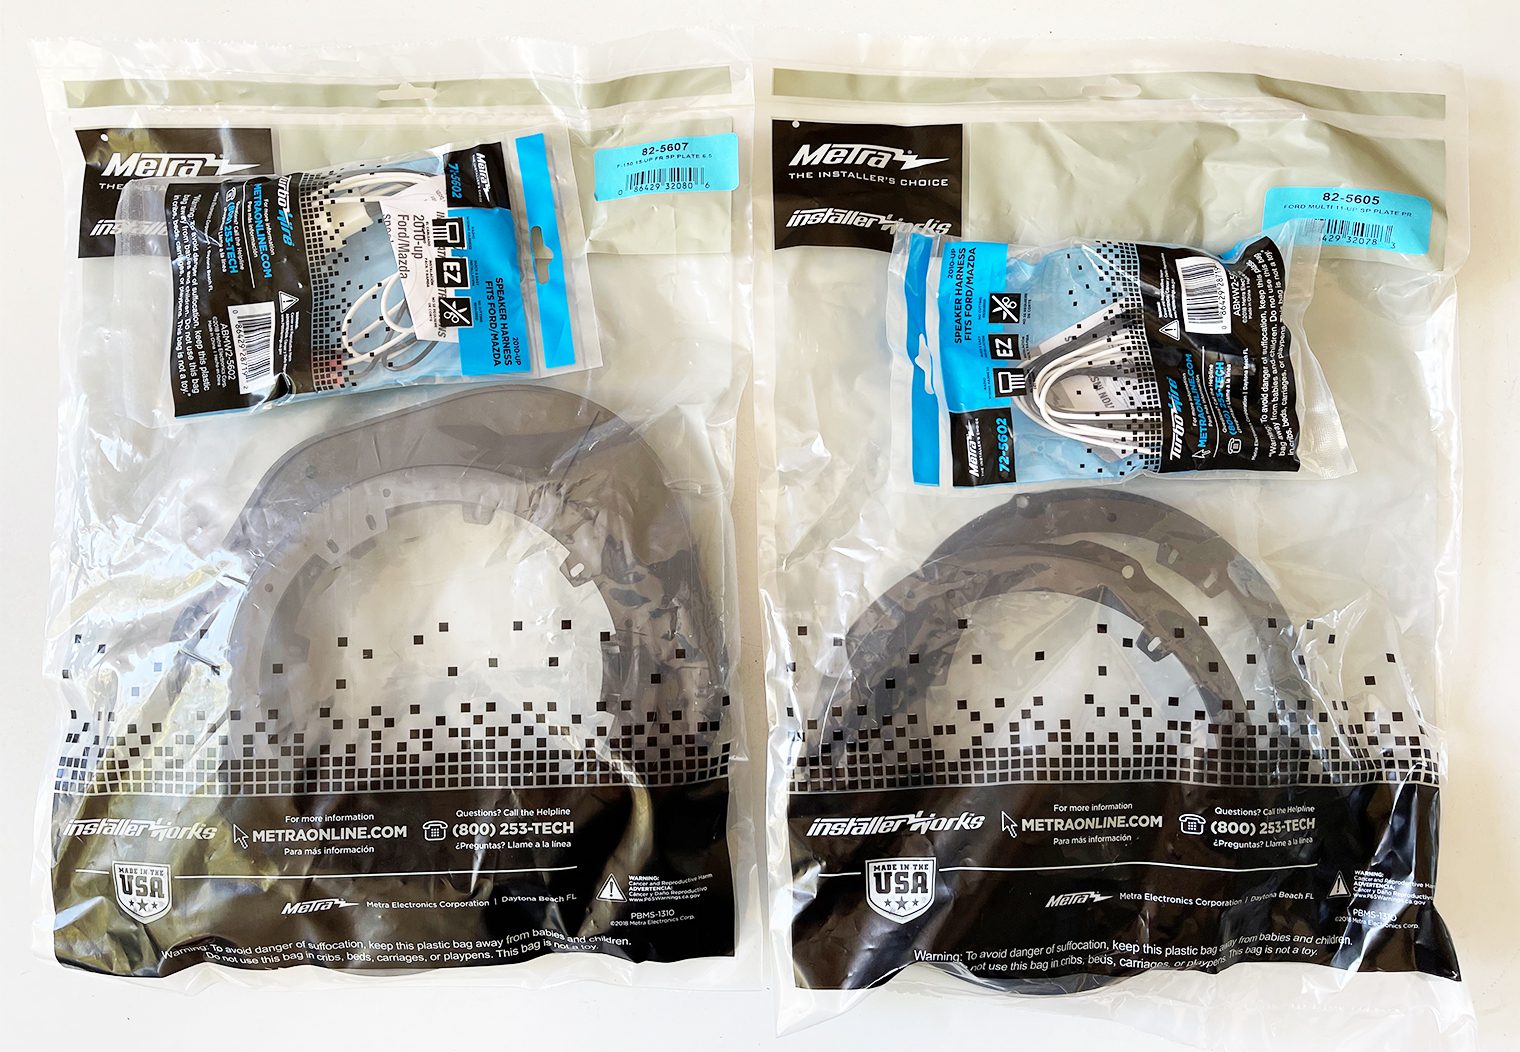
- Speaker Adapters – Since I am going with 6 1/2″ speakers all around I needed aftermarket adapter plates for the front (in particular) and the rear. The fronts are 6×9 to 6.5″ adapters and the rear basically just adapts the OEM mounting to an aftermarket 6.5″. I used Metra's 82-5607 for the front adapters and 82-5606 for the rear 6.5″ adapter plates.
- Speaker Wire Plugs – I also recommend using Metra's 72-5602 speaker plug adapters that'll adapt the Ford speaker plugs to aftermarket positive and negative clips for the speaker.
Power & Wiring
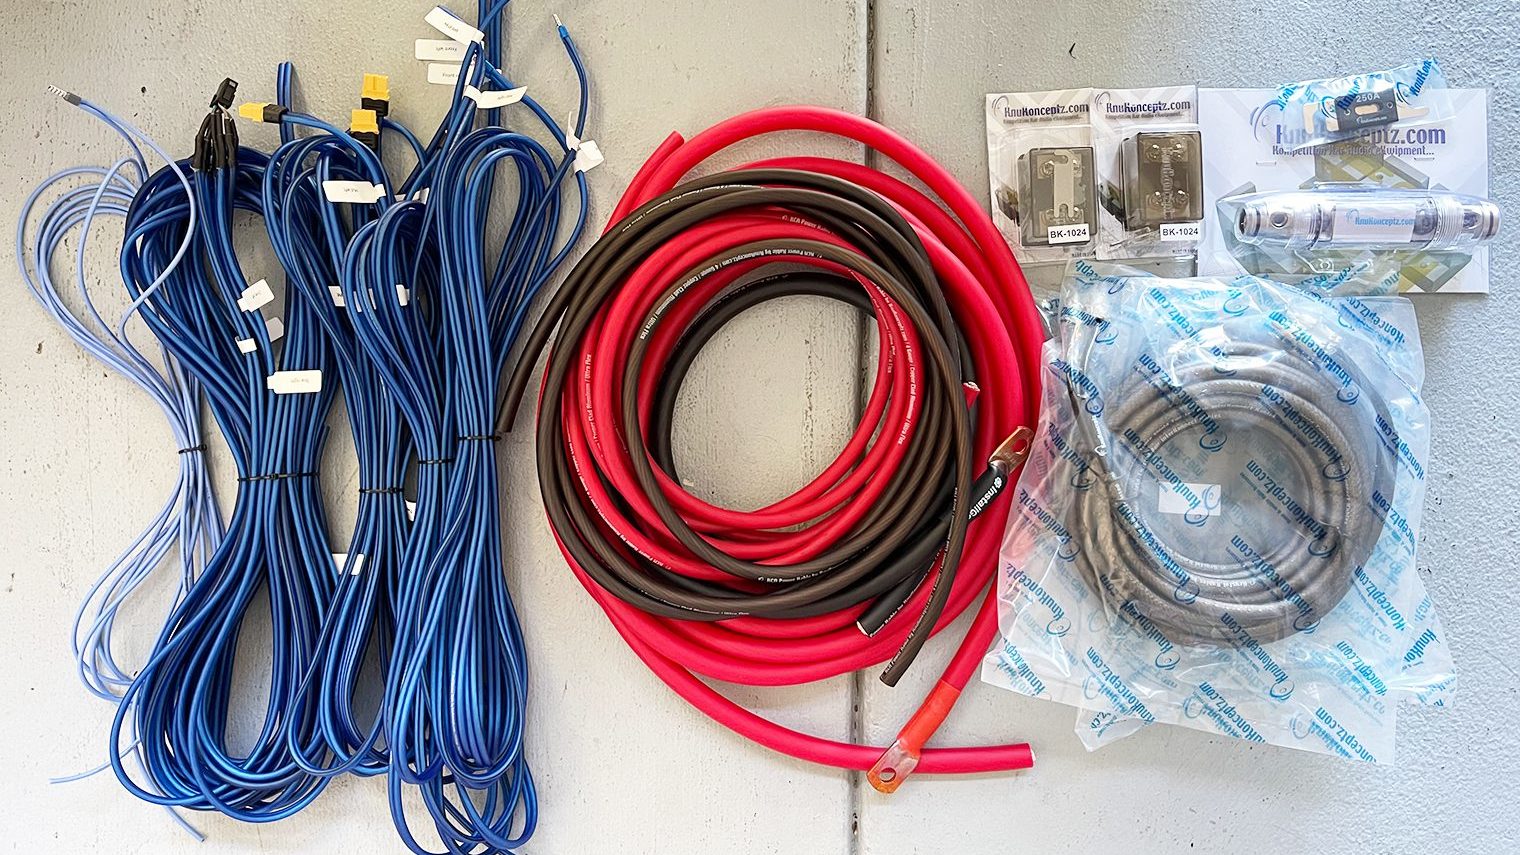
I decided to use KnuKonceptz for all of my wiring needs. This company is really dedicated to doing one thing – wiring – and they do it very well. I really like some of their products, like their battery terminals, distribution blocks and of course speaker/power wire.
Power & Ground
I chose to use their 0/1 AWG Kolossus Fleks for the power wire for the main power and ground. The run from the battery, in particular, is a long one so having too much wire is better than not enough:
- Positive: 20 ft. I plan to run power from the rear all the way to the front of the vehicle where the battery is in the engine bay (obviously).
- Negative: 3 ft. I plan to ground the amplifiers directly to the panel behind the back seat.
I also chose some of their 4 AWG to go from the distribution block to the amplifiers themselves. That equated to about 10 ft of both positive and negative wire. All of this can be found on the buildsheet.
Distro Blocks
Since I'm running multiple amplifiers, I also needed distribution blocks. I'm only powering two amplifiers, so KnuKonceptz 2-way 1/0 to 4 gauge fuse distribution blocks (BK-1024) would work perfect. And I also needed an in-line fuse for the long run between the distribution blocks and the battery. So I chose KnuKonceptz In-Line 0 Gauge ANL Fuse Holder with a 250A fuse.
I'll need to build a custom mount for this fuse holder for the engine bay. Stay tuned for part two for more information about how I'll go about 3D printing this custom fuse holder/bracket.
Speaker Wire
For speaker wire, I decided on KnuKonceptz 14 AWG Kord Ultra Flex. I'll be running 6 runs from the back of the truck to the dash to connect into the OEM harness and power my midranges, I went with 110ft which should be more than enough.
Signal/RCAs
I will need to run signal for 6 channels:
- Front (2)
- Rear (2)
- Subwoofer (2)
So I'll need three sets of RCAs. RCAs are incredibly important because they carry your clean signal. Poor quality RCAs can lead to feedback or unwanted interference. I decided on KnuKonceptz Krystal RCA cables. In particular, one set of 6M long 4 channel RCAs and one set of 6M long 2 channel RCAs.
Deadening
Sound deadening can have a huge impact on high-performance stereos. Reducing unwanted resonance makes an audible difference. I think there's a few areas that should be focused on when dampening this truck:
- Door panels. This is a no brainer. There's a few key points on the door panel that you should consider always add deadening to reduce resonance.
- Rear cab wall: This is where the amp rack will mount to, and will be in close proximity to the subwoofer. Not only that, it's a good place to reduce road noise. Adding deadening to this rear panel will help out with vibrations from the sub though mainly.
- Floor panel: This is debatable but I plan to throw some deadening on the floor surrounding the subwoofer. Mainly across the rear portion of the floor panel under the rear bench seat.
I'm going to go with SoundShield's slim for the door panels and regular SoundShield for the rear and floor panel. See the build sheet for quantities and links.
While I was looking at the same stereo shop who made the custom Amplifier Rack (Sounds Good Stereo), I also came across a set of access block off plates for the door panels that looked intriguing. If you look behind the door panels on the truck there's a large access section that's covered with a very thin transparent plastic film. This is a weak point for unwanted noise and resonance. By closing off this access area with a rigid block off plate it will help to further deaden the door panel but also have a significant impact on mid-bass. So in the spirit of deadening, I thought it was an interesting product to point out here and one that I will definitely be purchasing: https://soundsgoodstereo.com/products/2021-2022-ford-f-150-custom-made-door-access-block-off-plates. I have yet to use a plate like this so I'm curious how it'll make a difference.
Accessories
This is a broad category of things that I would recommend having on hand to make your system better and easier to install.
- Foam soundproofing tape
- Foam speaker baffles
- Wire ferrules
- Heat shrink tubing
- XT60H bullet connector plugs
Wrapping Up
As you can see, there's a lot of planning to go into a stereo of this caliber. The planning and research phase typically takes me between 8-10 hours for new vehicles that I'm not familiar with. It's such an important step though to a well rounded system. From setting your goals, deciding on your products to researching necessary programming and thinking through all of the random accessories that'll make a build go smoothly without a hitch. Putting in the time up front will save me so much headache and time down the line.
