In this article: We'll unbox and review all of the key features of Sony's XM-GS6DSP 6/5 channel amplifier and provide our honest opinion of its features and performance.
Amplifiers used to be pretty straight forward. Hardly enough features and cool things to really write an entire article about them. You had your input which was typically a 2-5v preamp input in the form of RCAs, your gains and crossovers and then your speaker outputs. 10 years ago the biggest difference between amplifiers was the class, channels, power draw and power output.
The use cases for amplification in a car were also pretty straight forward. You'd swap a head unit for an aftermarket one with preamp outputs, upgrade your speakers and maybe throw in a sub or two that were powered by an aftermarket amplifier. Or in many cases, multiple amplifiers.
But as car manufacturers continue to integrate the features, controls and settings of the vehicle directly into OEM head unit, I think it has started to force us to change the way we (audio enthusiasts) upgrade our stereos to high(er) performance, audiophile accepted systems. So as the car industry evolves, it's products like Sony's XM-GS6DSP that allows us audiophiles (and sometimes DIYers) to get the sound quality that we want in our car without completely blowing out the OEM head unit and system and losing all of the OEM features of the car. At least, this was the use case we chose the XM-GS6DSP for in our recent custom stereo install in an MK7.5 GTI.
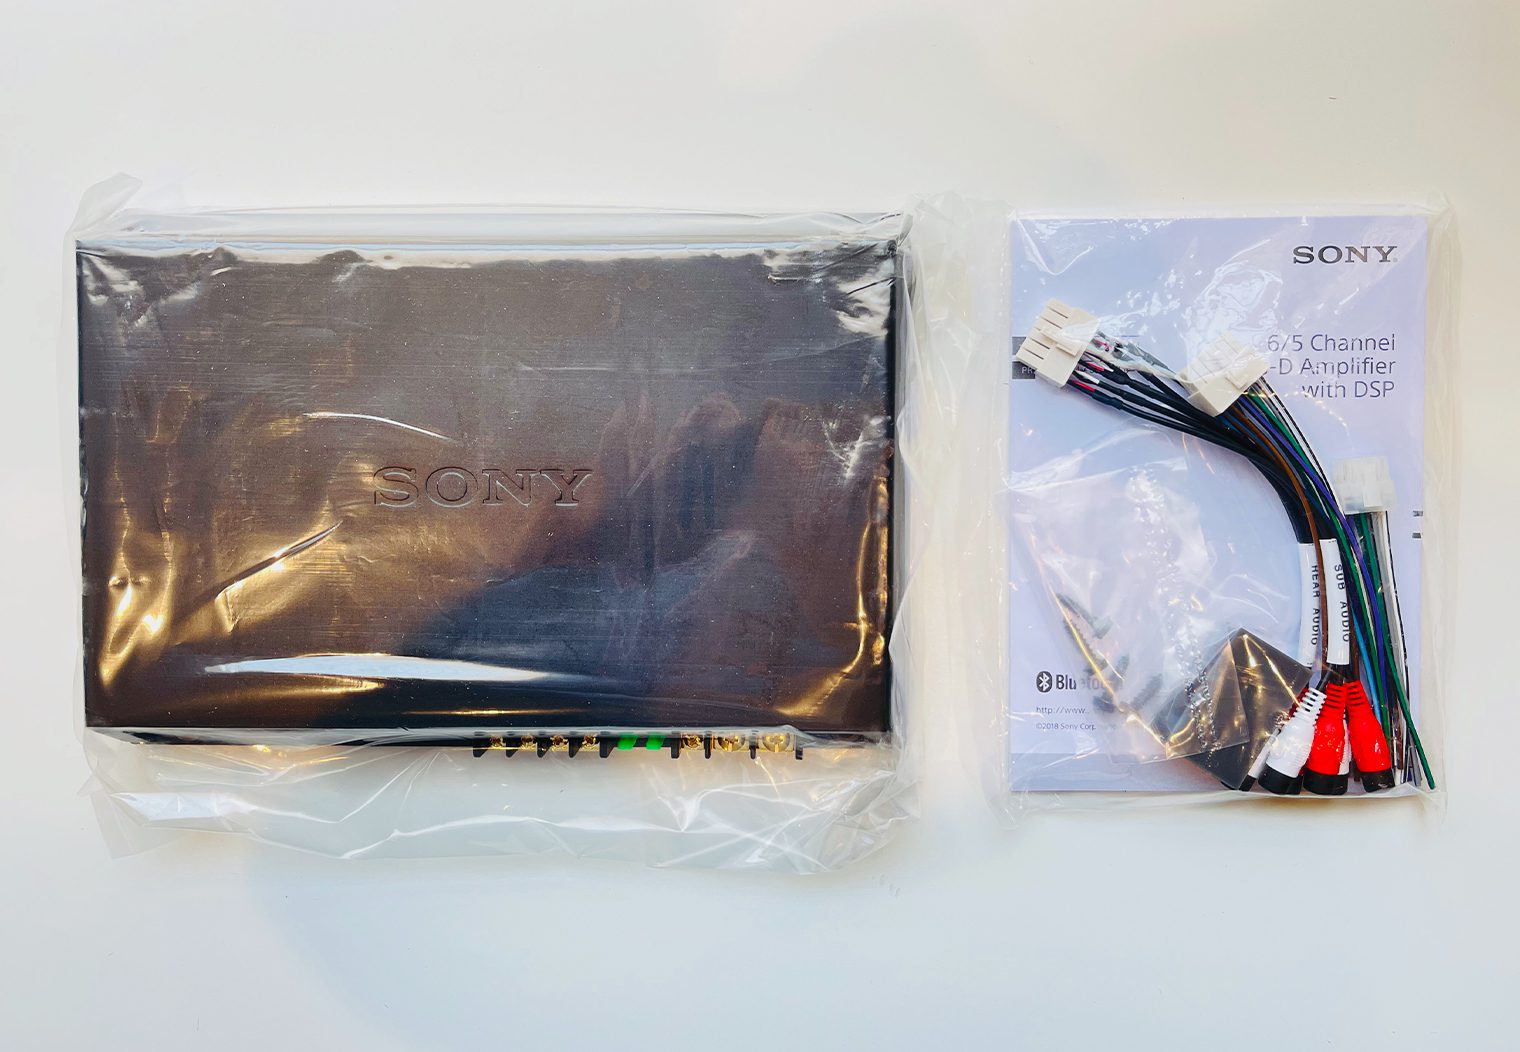
So in this article, I'll unbox a brand new XM-GS6DSP class D amplifier with detail and outline all of its core features. At the end of this review, you should have the information that you need to decide whether this is the best car amplifier for your application.
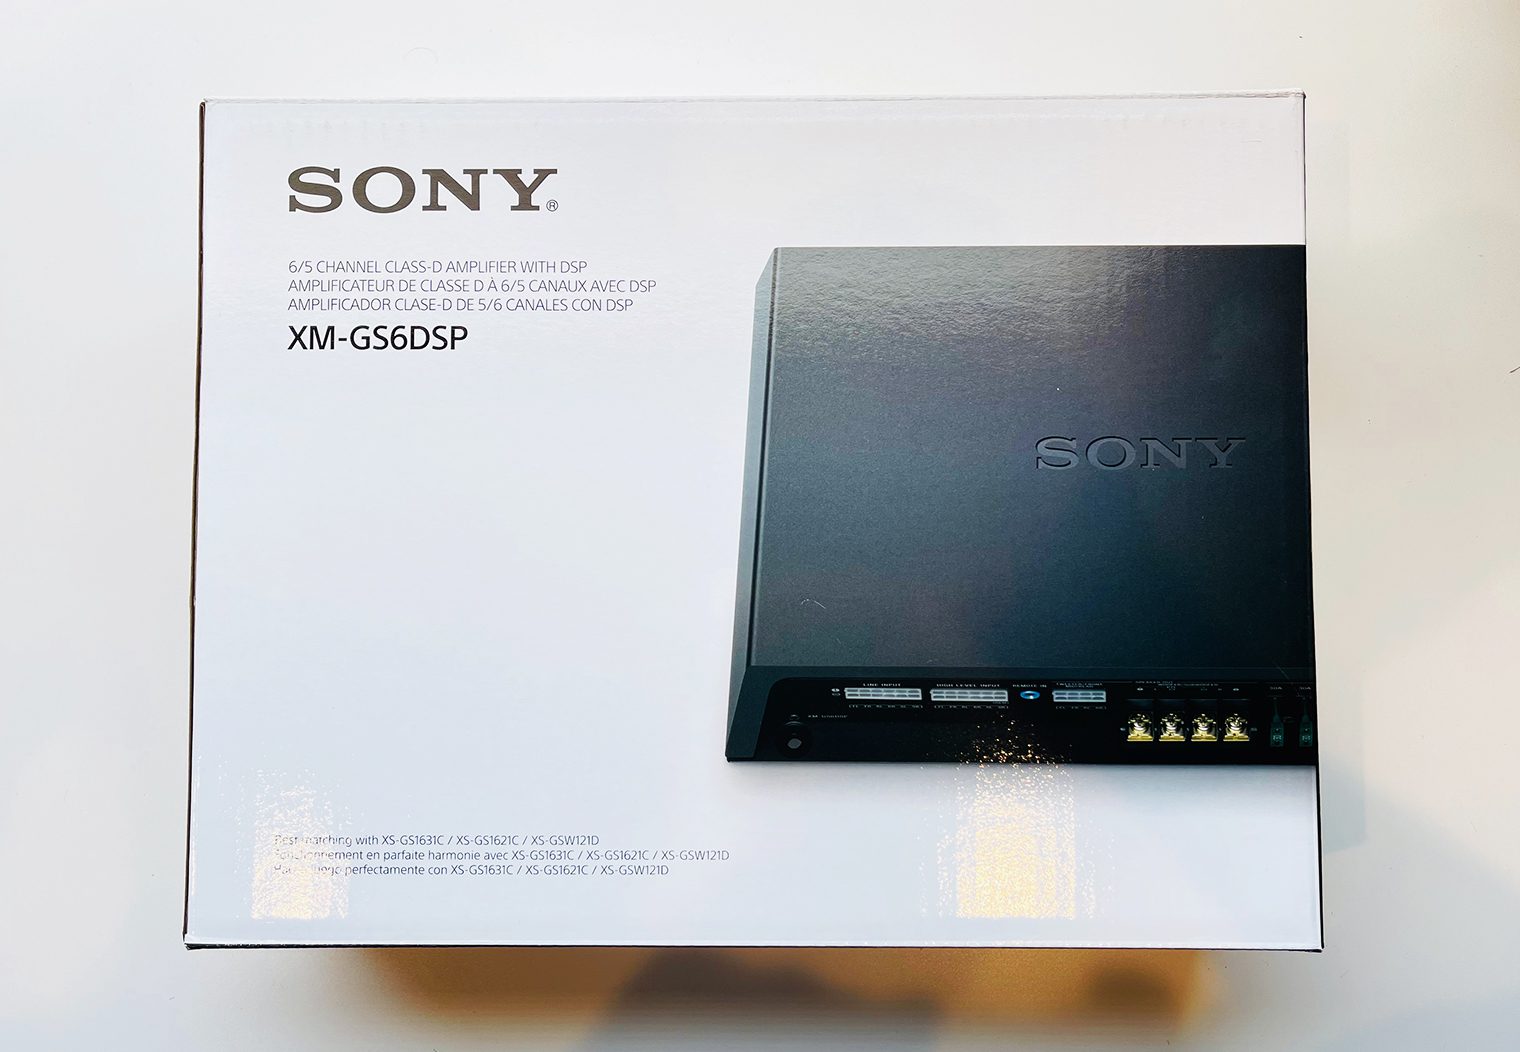
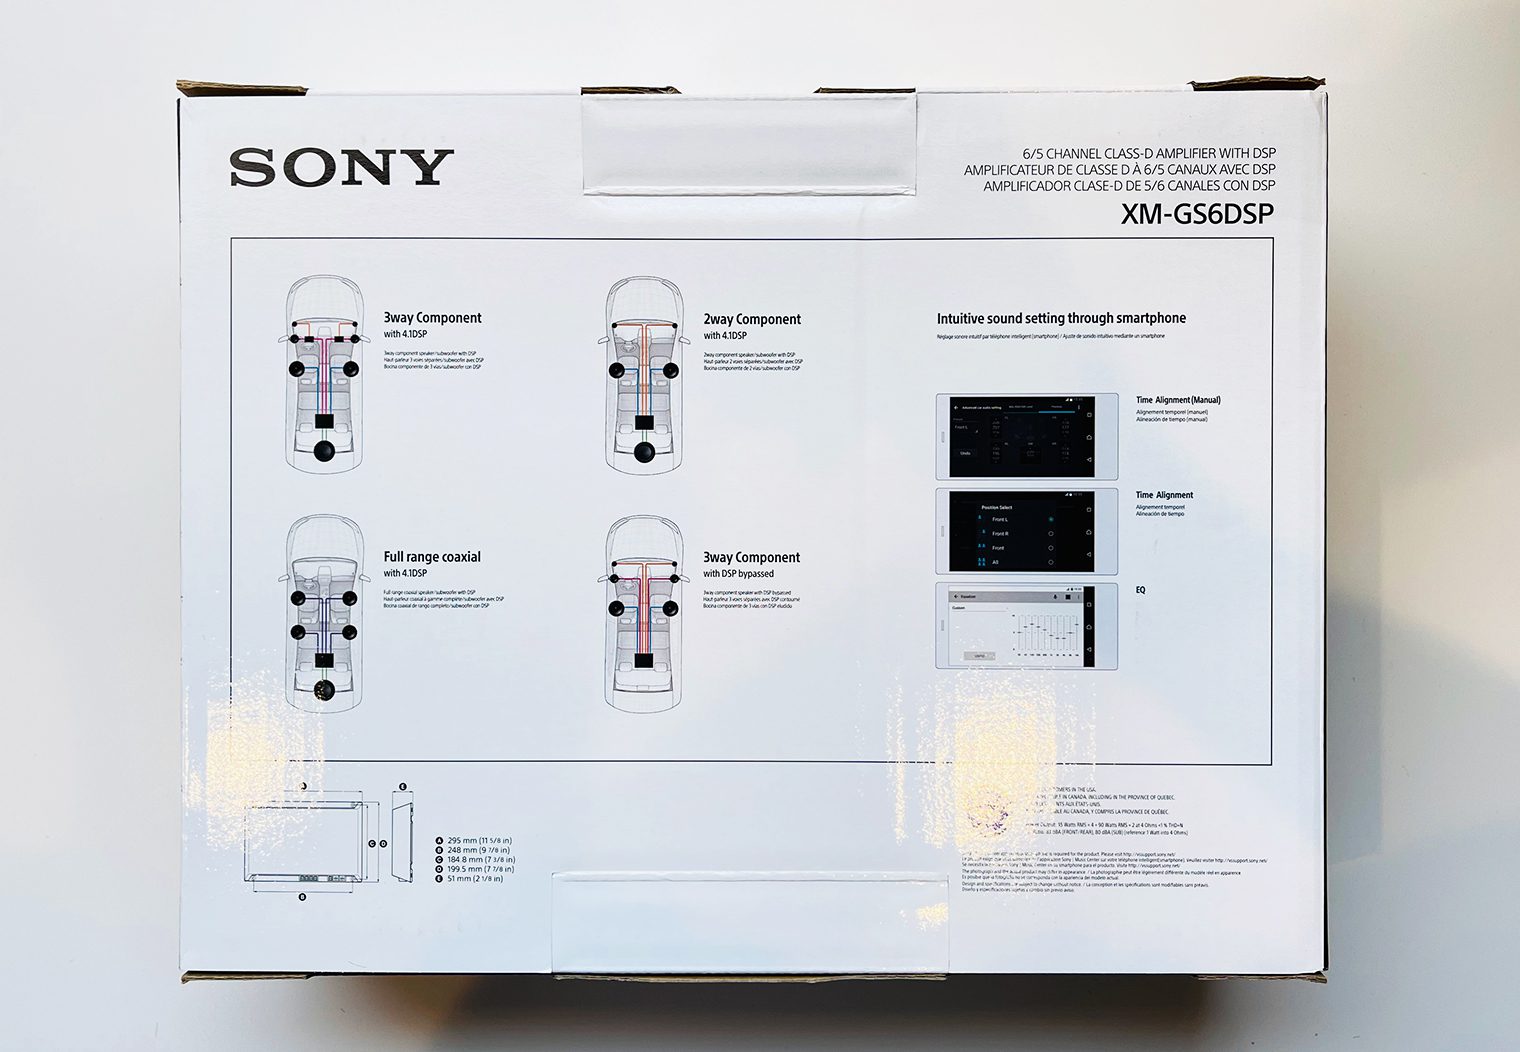
Sony does a good job and making their products look and feel good when you open them up. There's details about the amplifier on the front of the box, some use cases along with wiring configurations on the back. You get an idea about what's inside the box on the XM-GS6DSP just by looking at the packaging.
Unboxing, Overview and First Impression
What's In the Box
Inside the box, you'll find:
- XM-GS5DSP amplifier
- Two 30A ATO fuses (installed)
- Harnesses:
- 8″ Line input harness
- 7″ High level input harness
- 5″ Tweeter/Front/Mid/Rear output harness
- Terminal cap
- Four Self-tapping screws (length 3/4″)
- Operating Instructions
- Warranty
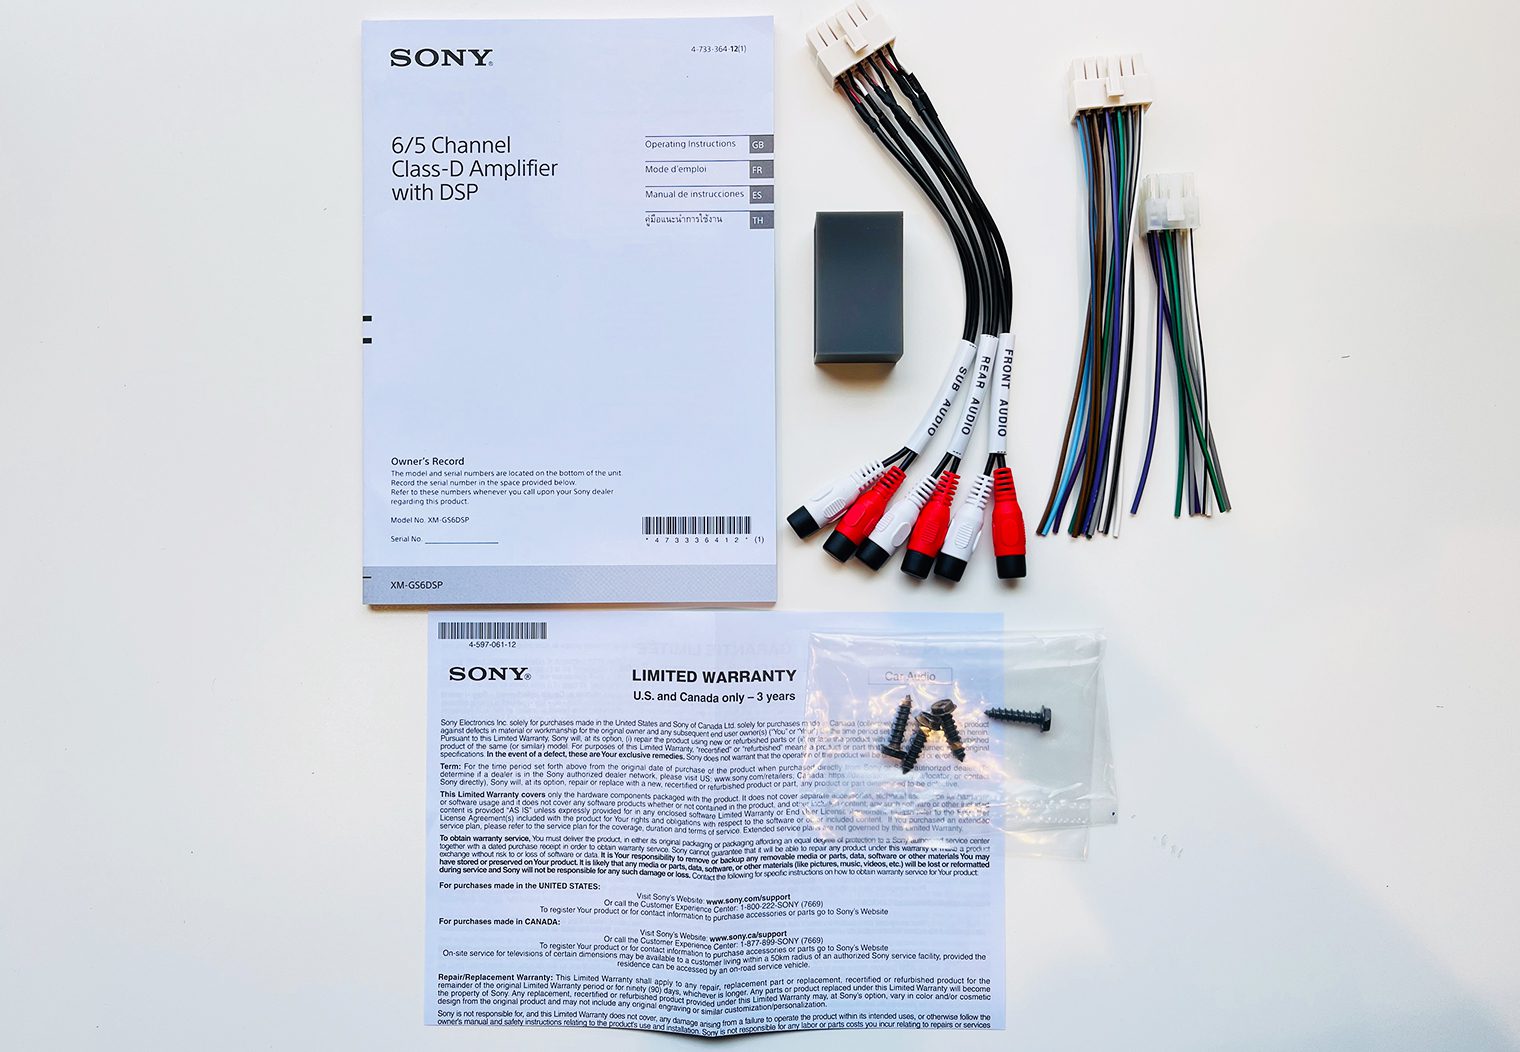
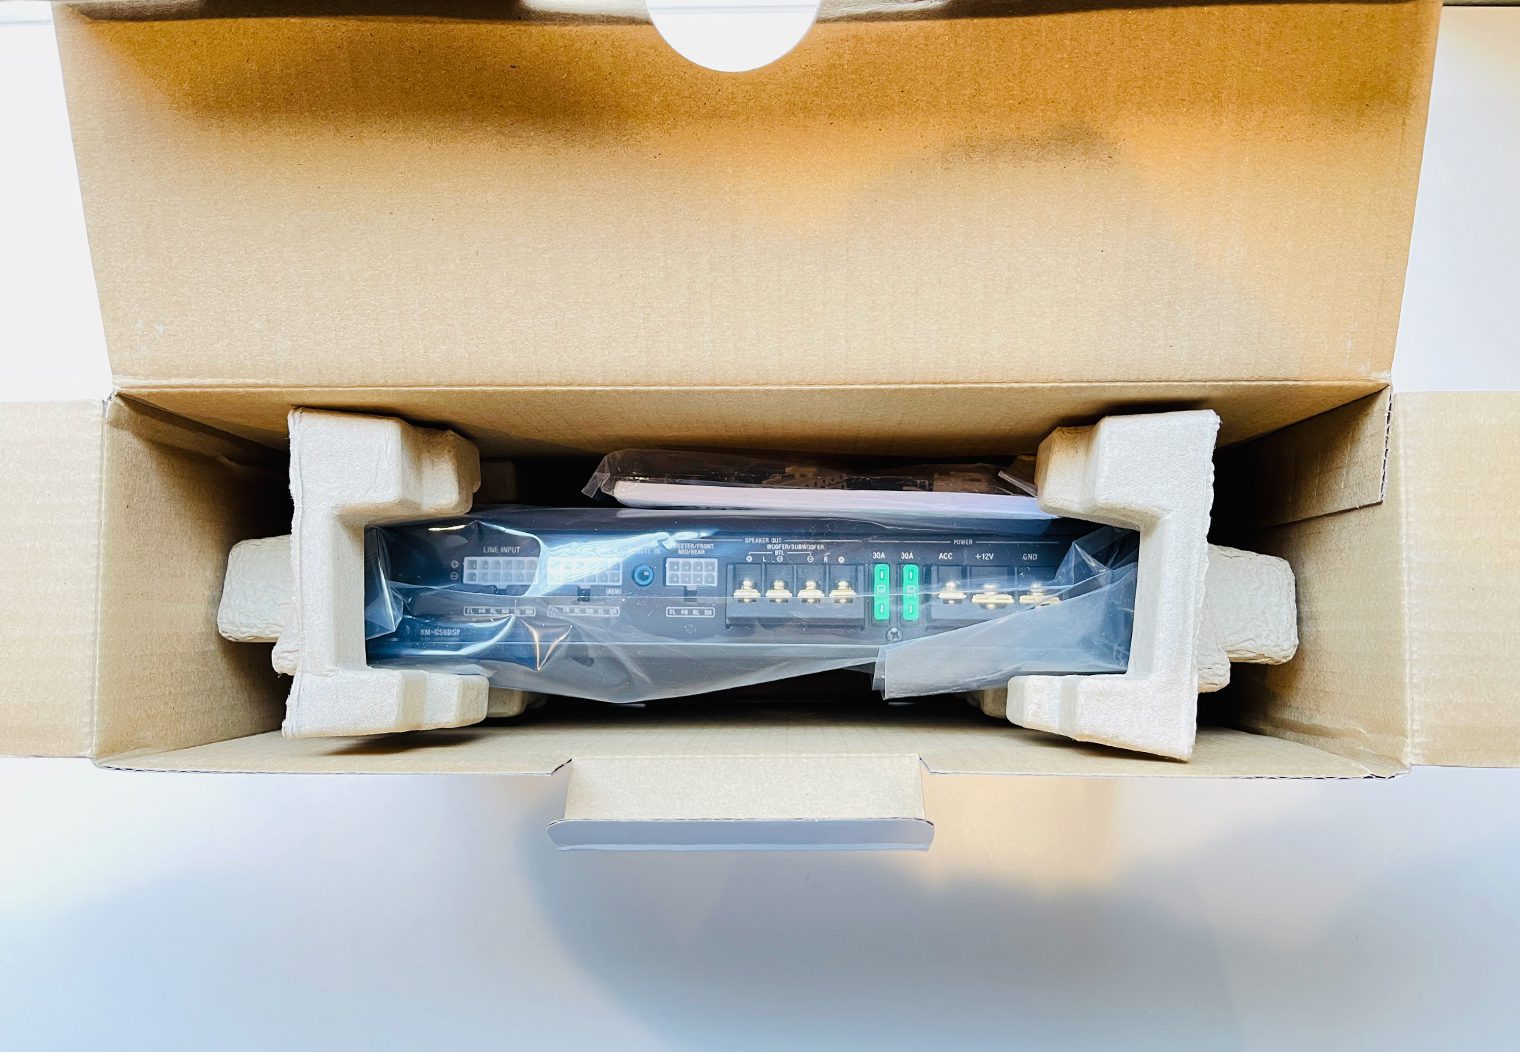
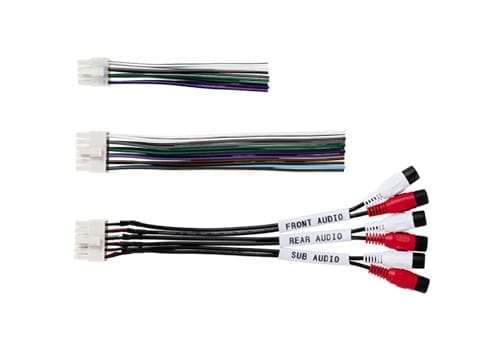
When you open up the box and pull everything out, you'll notice a number of wire harnesses. Instead of having the input terminals and RCAs directly on the amplifier, Sony uses multiple harnesses that you can wire up before physically installing the amplifier. You have:
- A line input harness which has a group of RCAs for Front, Rear and Subwoofer inputs
- The high level input harness for using an amplified input instead of the line input. This is for those who want to use the existing speaker wire/signal instead of RCAs.
- The output harness which goes directly to your speakers
I like the idea, it simplifies the install a little bit. It also makes the wiring a little cleaner when all said and done. The only thing I would mention is that I would have liked to see a little thicker wire gauge for the outputs. I'm sure the Sony engineers didn't underestimate the output and that the gauge is what it needs to be, but I think for some folks who might use this amp in larger vehicles like a suburban (for example) with longer distances between the amplifier and the speakers, a larger gauge wire would help with the long runs from the trunk area to the speakers.
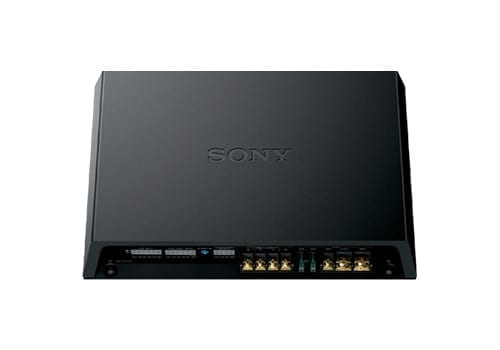
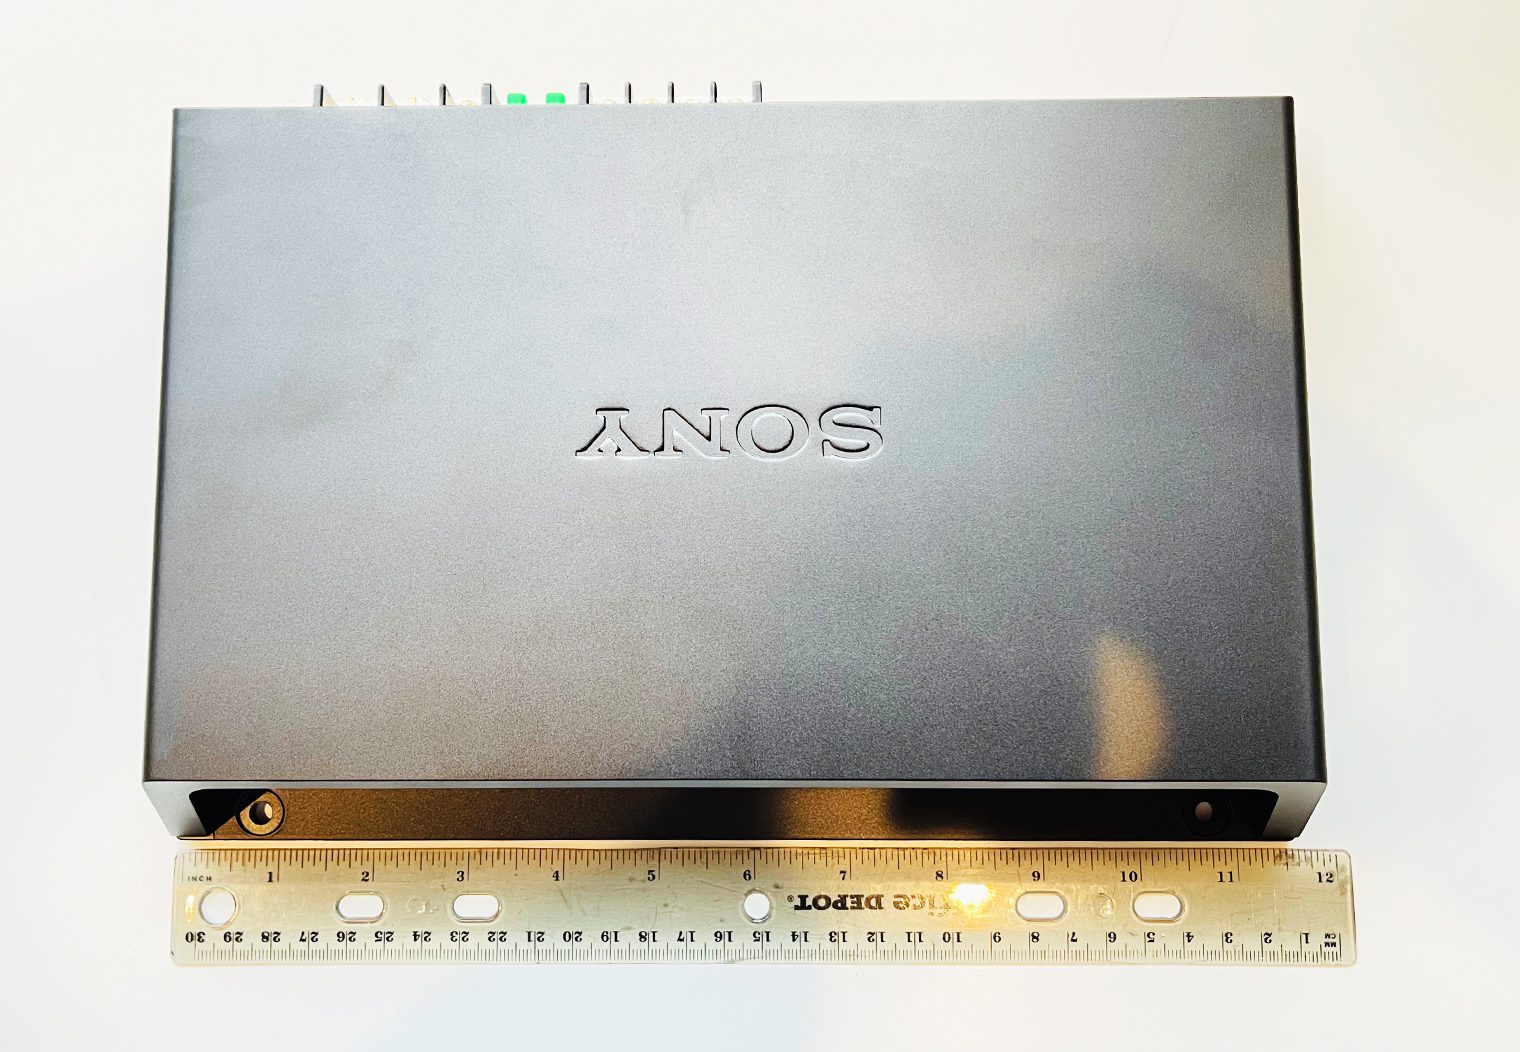
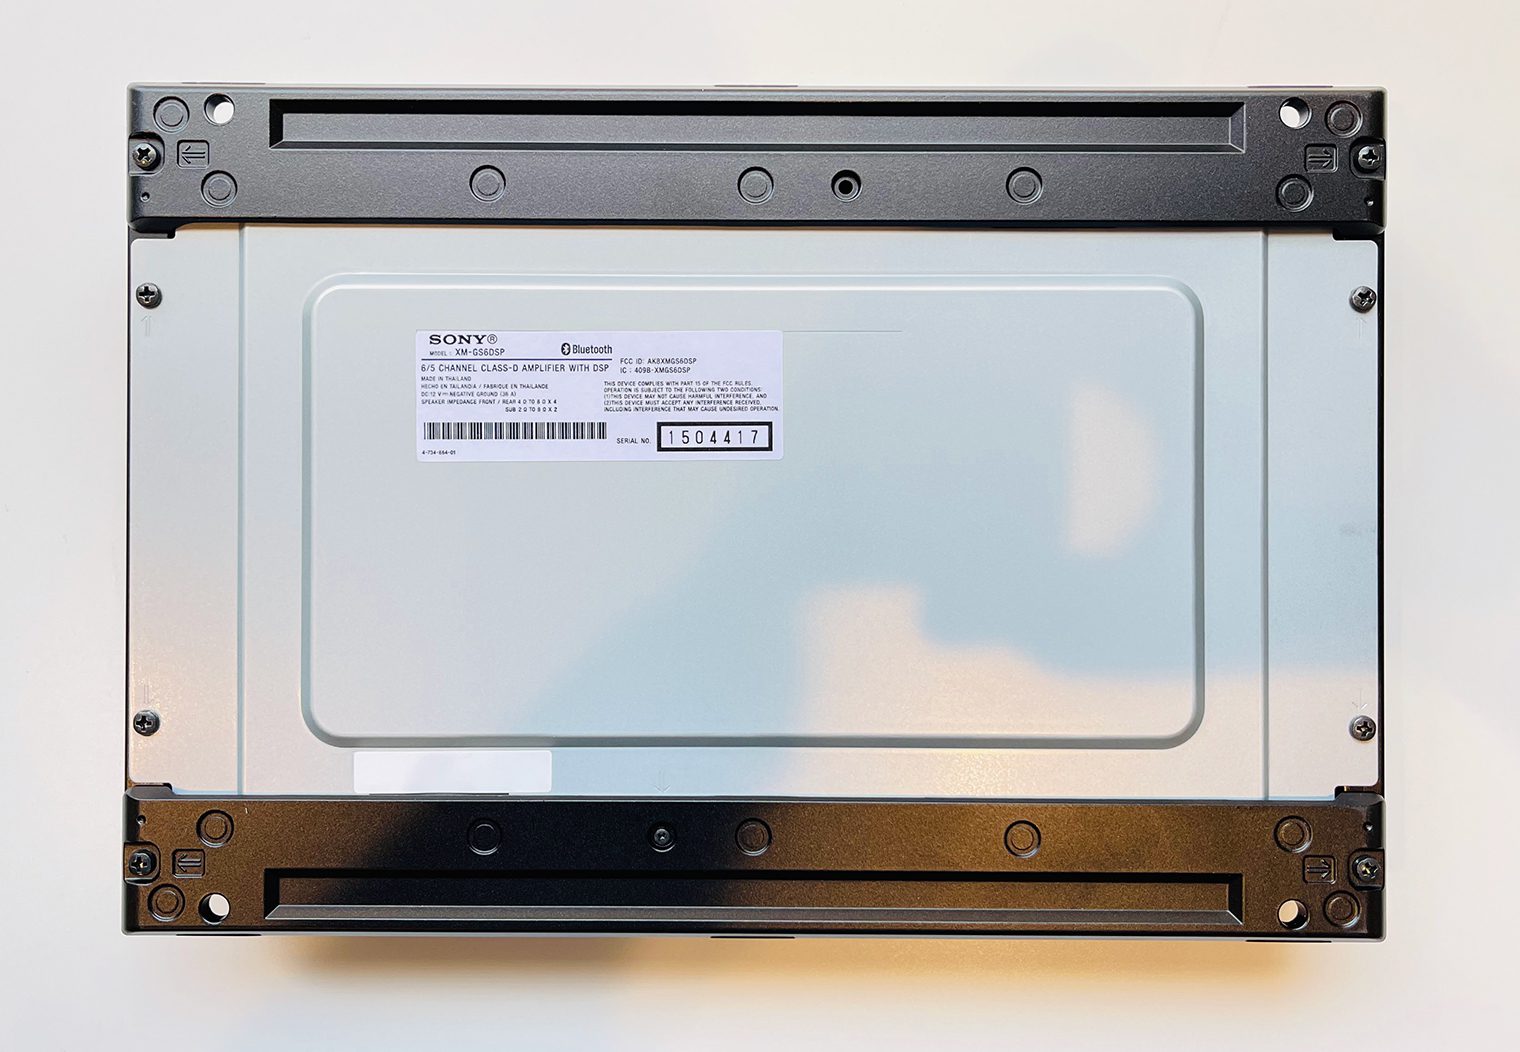
Looking at the amplifier itself, it looks and feels like a durable amp. The satin/flat black textured surface also looks really good and clean. It's pretty light, and it's really compact for how much power this thing puts out. It measures 11.61 in x 2.17 in x 7.85 in, which will easily fit underneath most seats. It's pretty incredible what an 12 in x 8 in amplifier can do for you now – power an entire system including a subwoofer from underneath your driver or passenger seat!
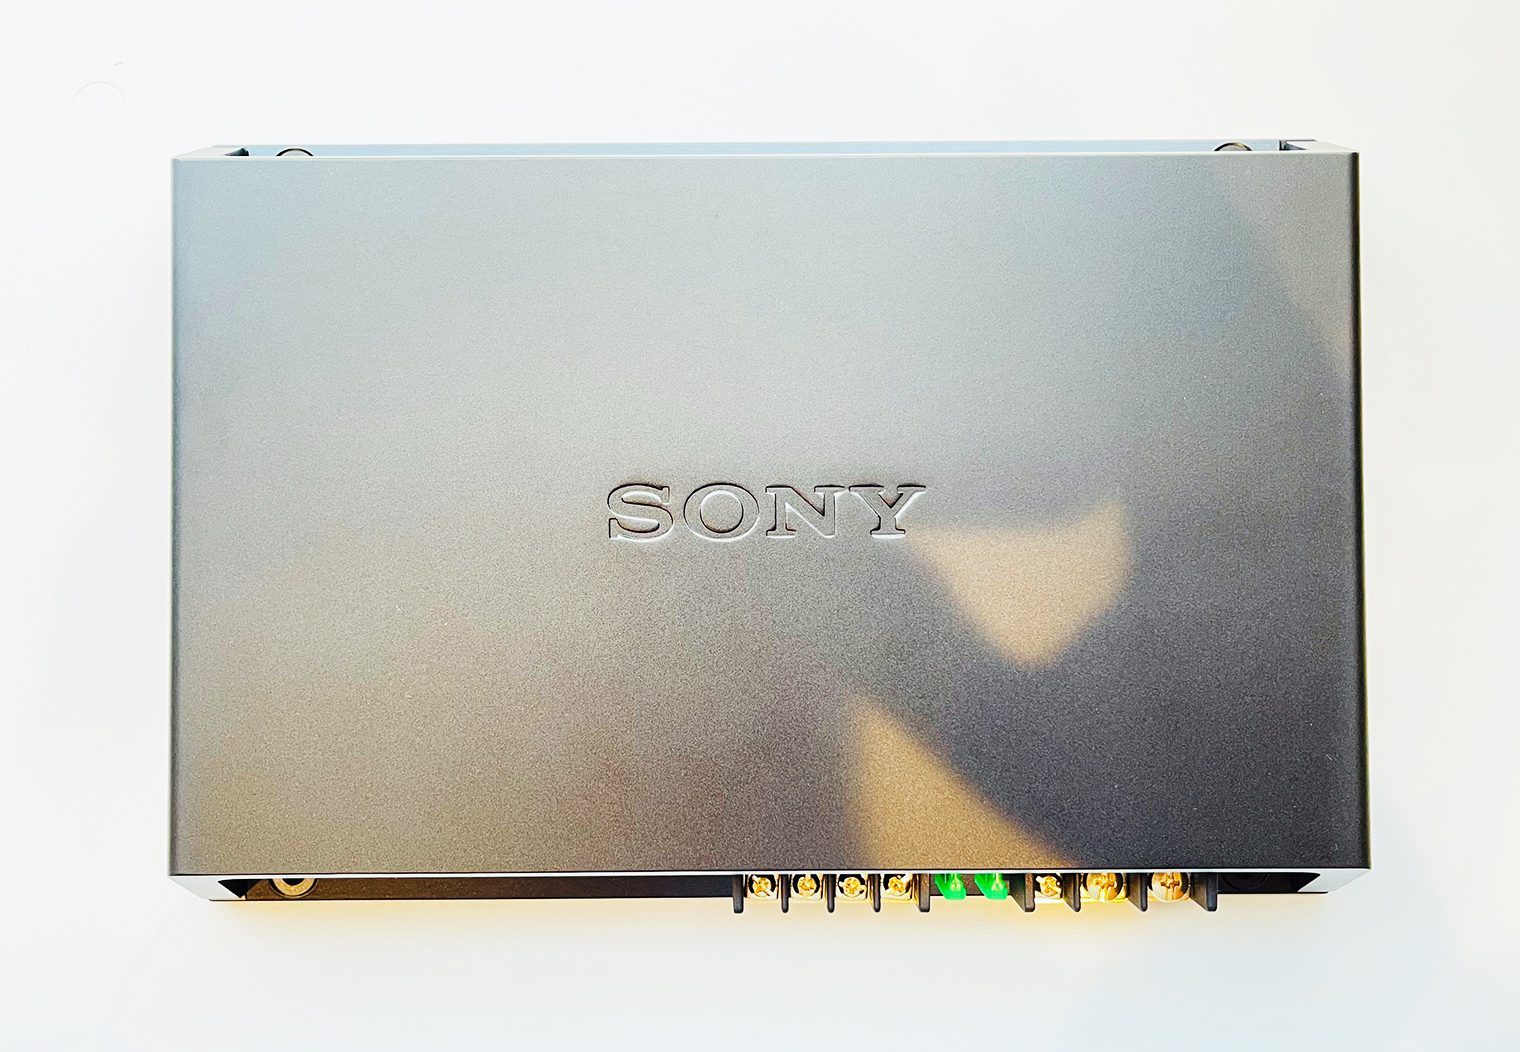
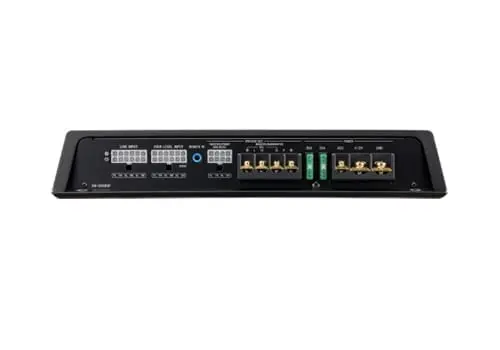
On the bottom side of the amplifier you have all of your inputs and outputs, which are pretty condensed and clean since Sony uses harnesses. This is also one of the benefits of using harness plugs like they do – you can condense the width of the amplifier. The only traditional output on this amplifier that you need to screw the speaker wire into is the subwoofer 5/6 channel. The one thing I didn't necessarily like about the harness design is the plugs themselves. They're adequate and will definitely do the job but aren't the sturdiest of plugs and have a little give/wiggle.
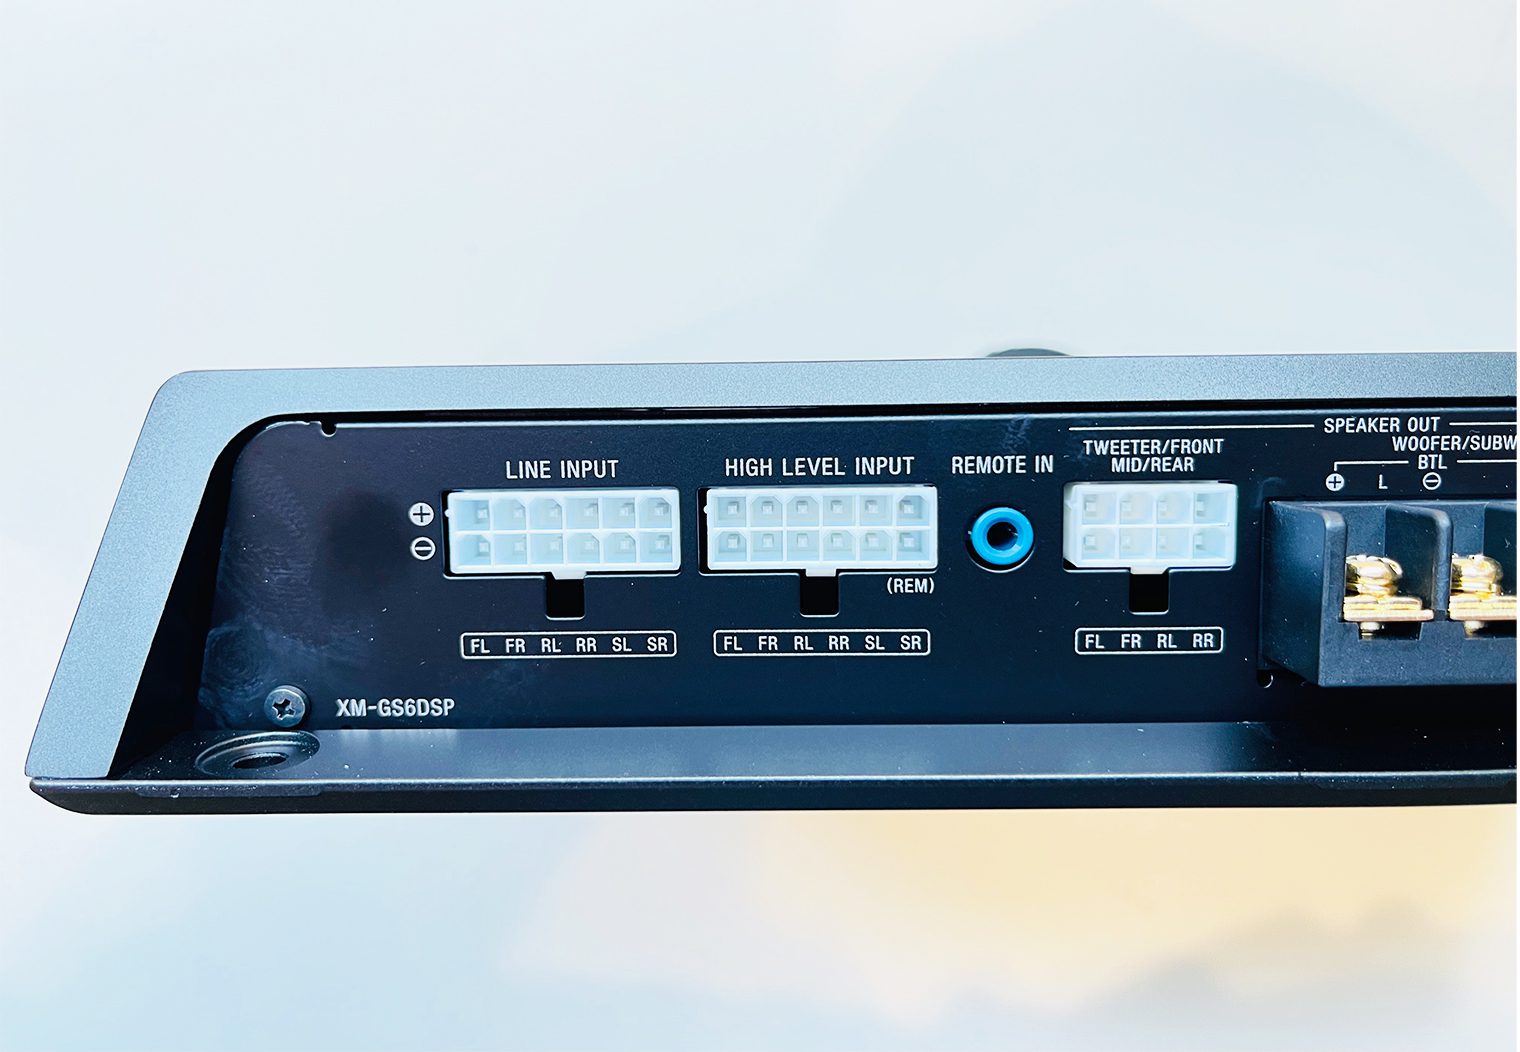
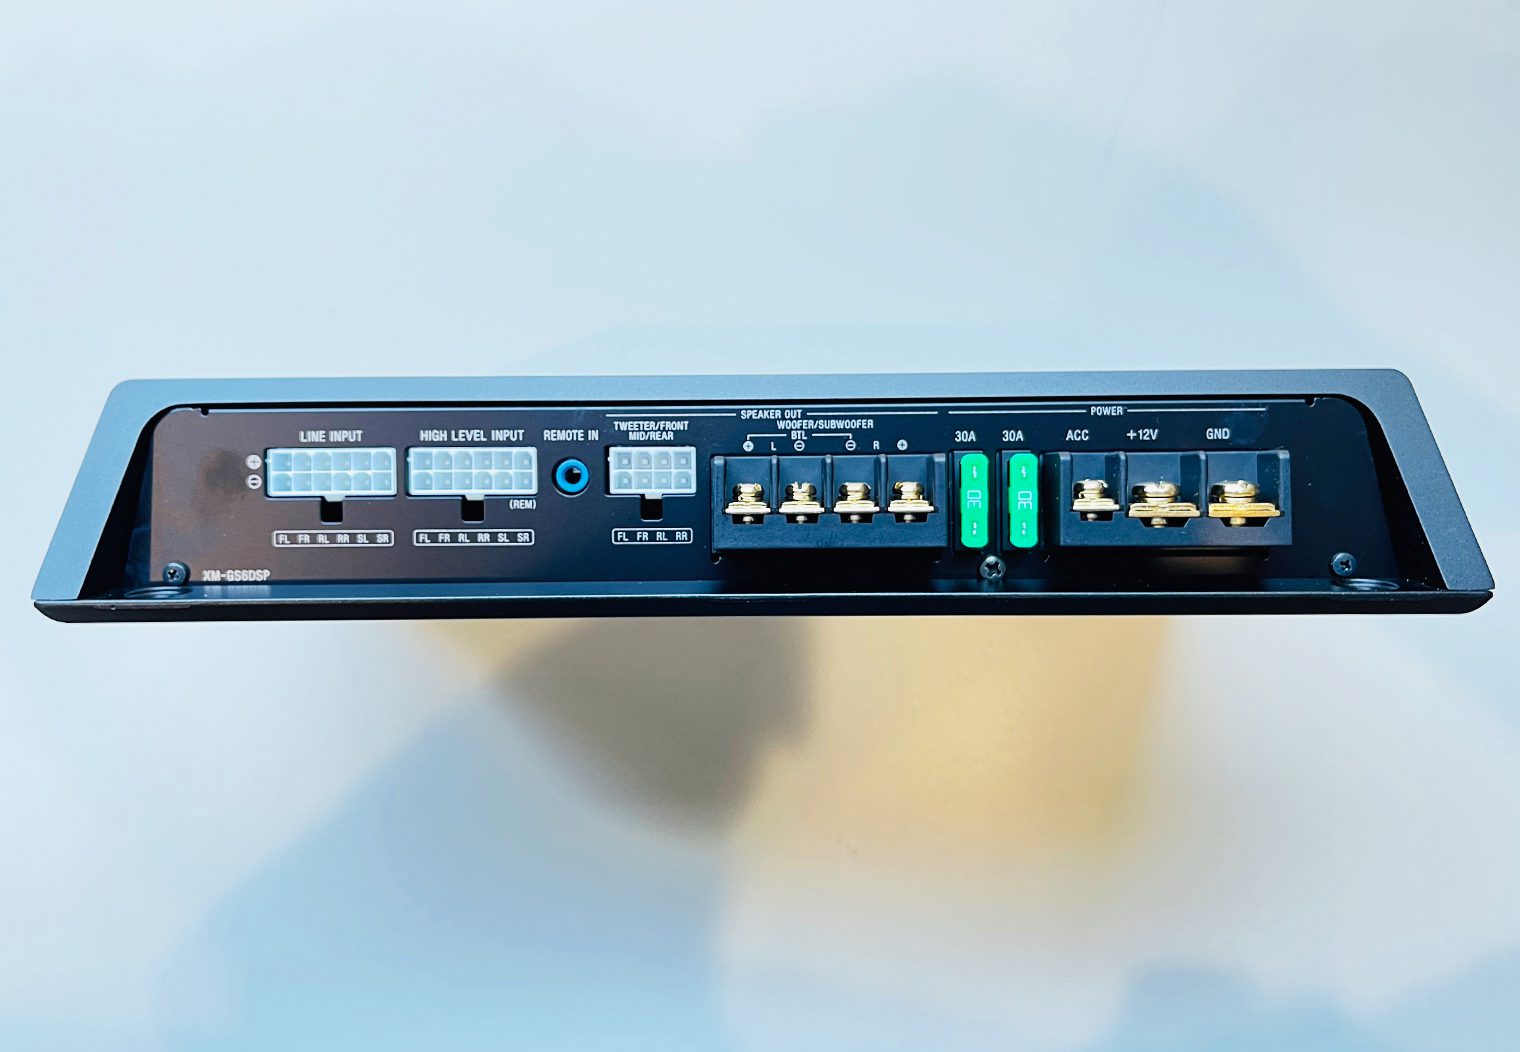
In the pictures you can really see how much room the harnesses save though and how much it actually simplifies the wiring when you go to install the amplifier. A nice little feature add is the labels below the harnesses so that you don't have to pull the manual out to know what each wire is.
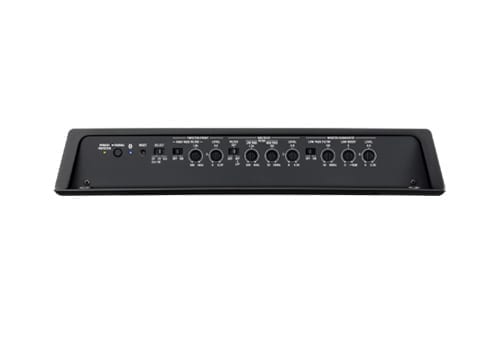
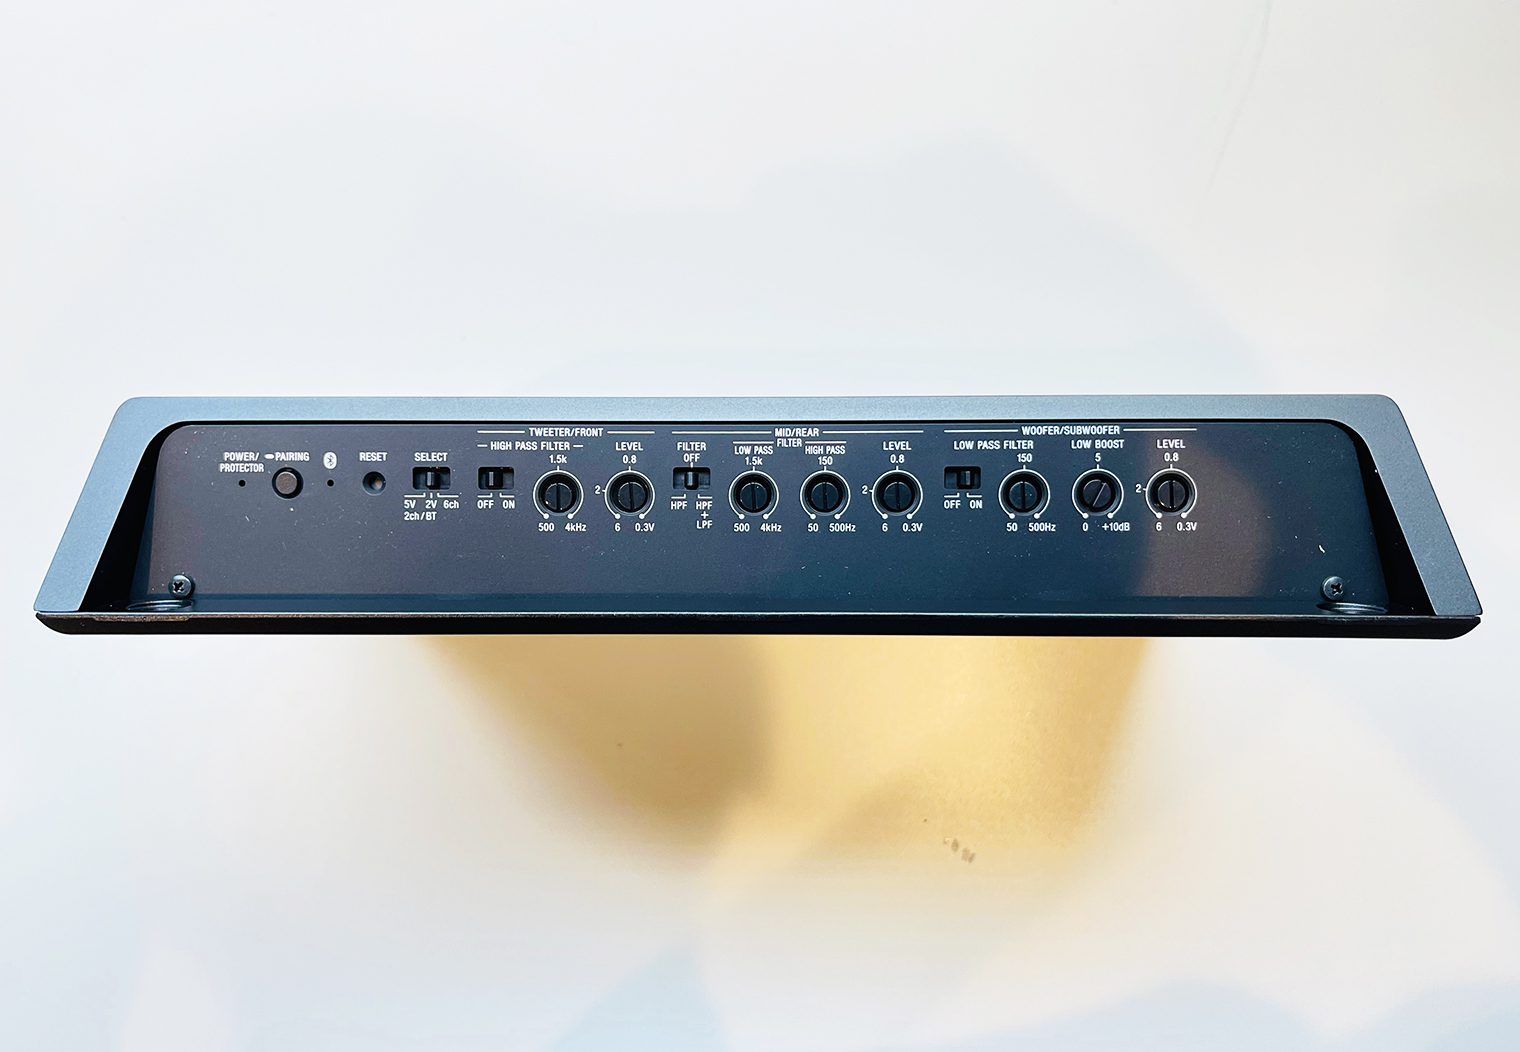
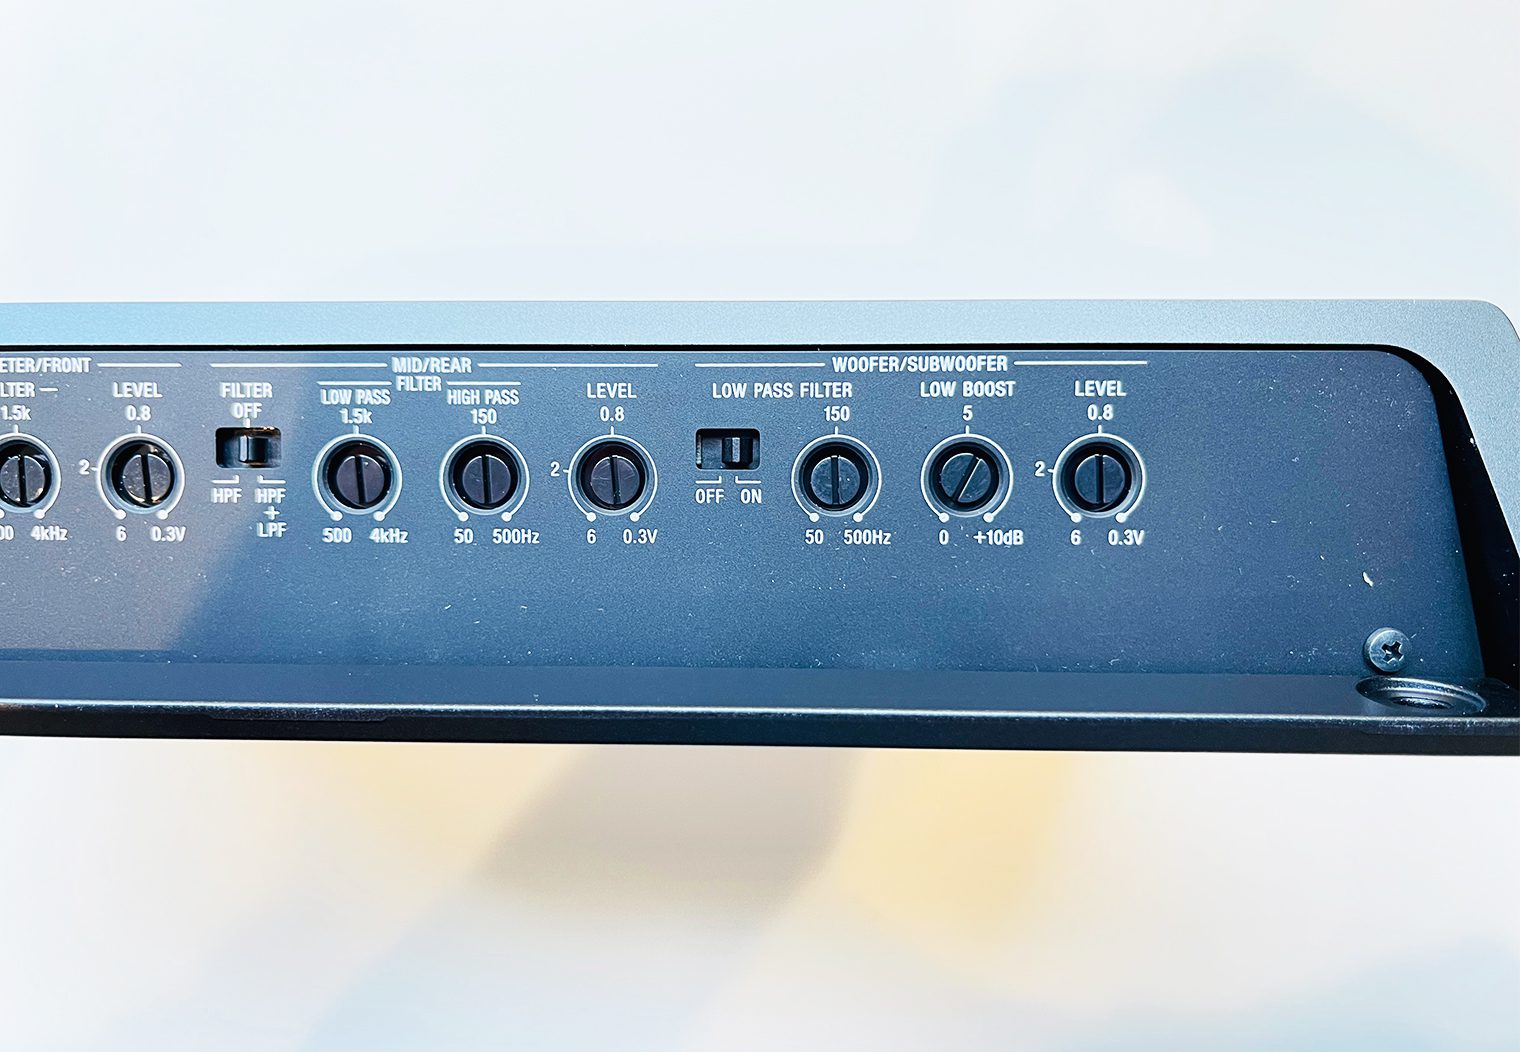
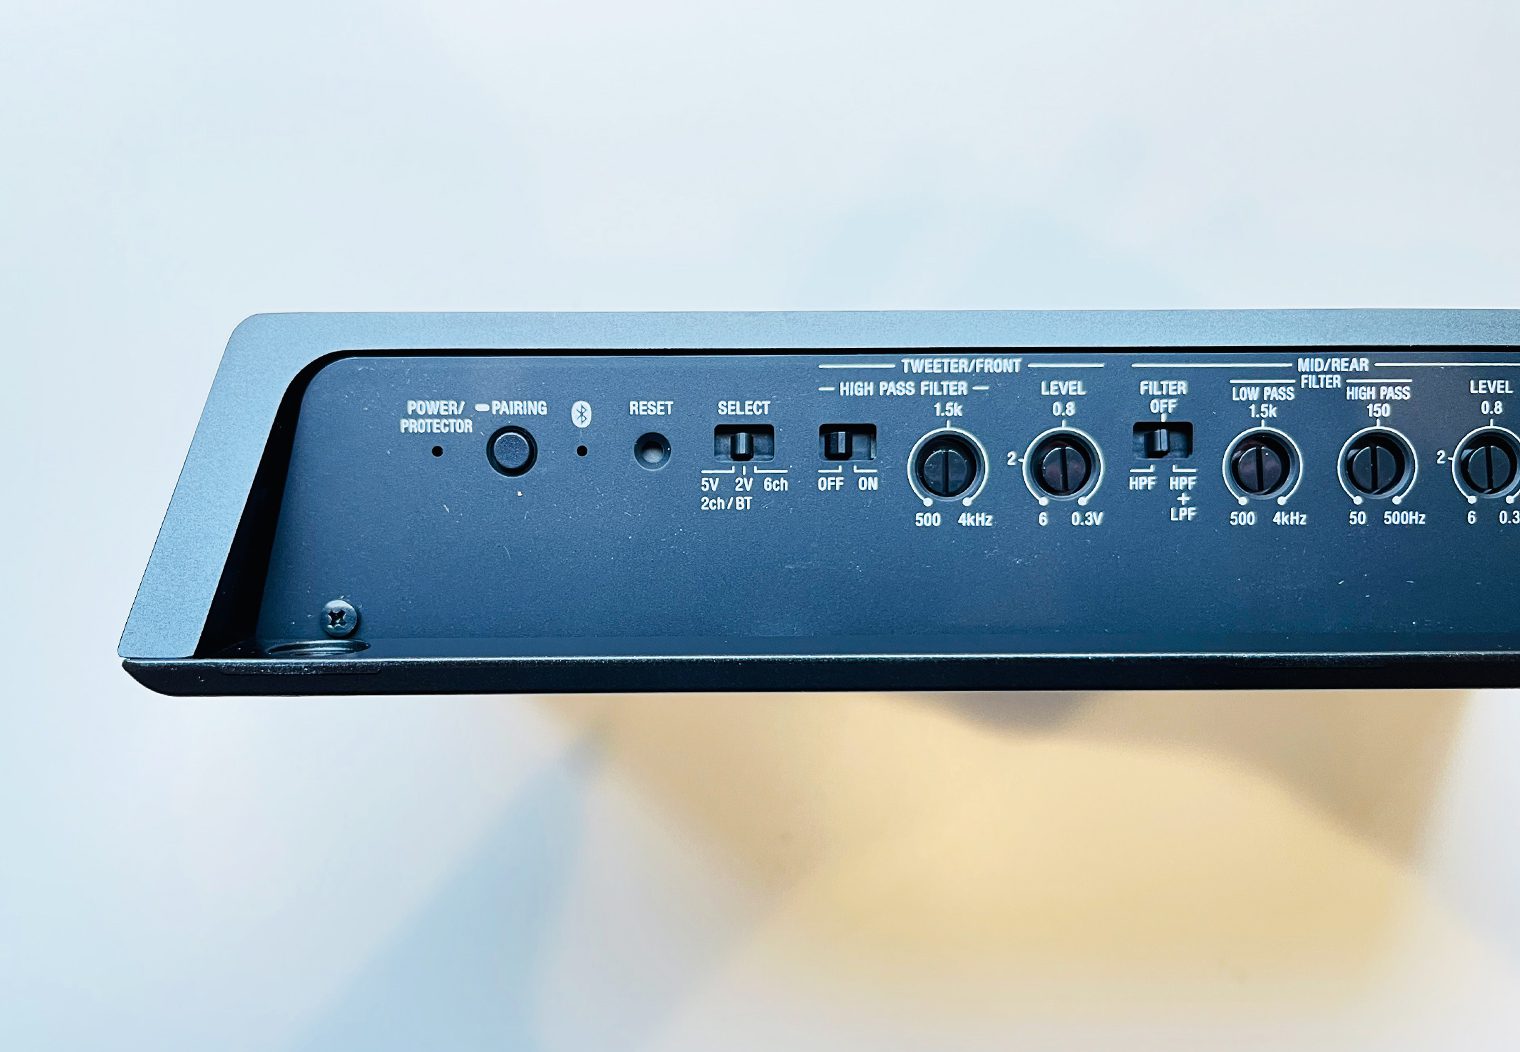
On the flipside you have all of the controls for the amplifier. At first glance it might look like a lot, but that's because you have a 6/5 channel amplifier and Sony gives you control of each channel with crossovers, gains and more. Not too much to call out here specifically, but worth noting the “SELECT” option where you chose whether it's a 5V, 2chan input, 2V input or 6chan input. I'll get into more detail a little later about this.
Key Features and Configurations
Now for the fun stuff. Amplifiers are becoming more than just a power source, and the XM-GS6DSP is a good example of that. They're integrating new features to help simplify an installation (e.g. high level inputs) and also expanding on the versatility and tuning with DSP functionality to provide more control over your music than ever before. The XM-GS6DSP has a LOT of great features that make it a great amplifier for a broad number of use cases. Let's dive in.
Input/Output Configurations
Amplifier configurations used to really only be specific to outputs. For example, using a 6 channel amplifier to power 4 speakers and a bridged sub. What's unique about the XM-GS6DSP is that you can have a variety of input configurations and outputs as well.
I strongly recommend reading the amplifier manual for the different configurations here because it can be a little confusing at times. The manual will outline the combination of inputs and outputs that are possible. It's pretty comprehensive.
Signal Inputs
On the input side, you can chose to use high level inputs where you tap into your existing car's speaker signal as the input for the amplifier. This is great for cars that have head units that are deeply integrated with the vehicle configurations and settings and where an aftermarket head unit isn't an option. If you do have an aftermarket head with RCA outputs, you can also choose to use the 5V/2V line input via the RCA inputs.
Where the Input configurations start to expand is with the input “SELECTOR”. This selector allows you to choose to use a single channel input (like ‘front') as the source for all 6 channel outputs, or the 6 channel input where you have a dedicated input for front, rear and subwoofer. So if you're limited to just a single left and right signal, you can still have all 6 channel output signals. Or, you can have independent control of each channel too if you need.
You can also chose between a 2V or a 5V line input signal. This makes the amplifier a little more compatible with the head units that output a ~2V signal. It allows it to maintain the quality and the volume output as if it was a higher voltage input.
The one major thing here to note is that if you want to have a 6 channel input and independent control over each channel, you'll need to chose the ‘6ch' option in the input selector. This option will completely remove the DSP and Bluetooth functionality of the amplifier (I'll get into the DSP feature a little later). This is pretty unfortunate and I learned this the hard way. The use case that might resonate with you is subwoofer control. We wanted a subwoofer control knob so that we could dynamically adjust the subwoofer volume from the driver seat without opening up an app on our phone. Since the amplifier does not come with a subwoofer volume knob, we needed to separate the subwoofer signal and use the 6ch input option which eliminated the DSP and Bluetooth functionality (which we also needed). The solution was using the line input with an AudioControl LCQ-1. You can read more in our GTI Stereo Writeup.
Output
Once you configure your input, tuning aside, the output is a little less complicated. You can basically chose a four-channel + two-channel output or a four-channel + one-channel output configuration. Simplified, you either bridge the subwoofer output or you don't. Bridging the 5th/6th channel is the difference that determines if it's a 5ch or 6ch amplifier. But you could use the 5 and 6 channel for additional speakers too if you wanted to.
Bluetooth/Aux
Here's something that you don't see on every amplifier – Bluetooth and Aux inputs. For those who are looking to build a headless car stereo, this may be the amplifier for you.
If you choose the 5V or 2V input ‘SELECTOR' option, you will also have the ability to connect directly to the amplifier via Bluetooth on your phone. Combined with the Sony Music Center app, you can stream audio directly to your amplifier without ever hooking it up to a head unit. I tested this out, and to be honest it's probably the cleanest and best sounding signal you can have for the amplifier. Refer to the manual for instructions on pairing your phone, but for me it was straight forward and easy. It's like hooking up to your Sonos at home and playing music from your phone.
And if you want to use something a little more simplistic for an input source, you can also plug an AUX input directly into the amplifier via the headphone jack on the side of the amplifier.
Bluetooth, AUX, 2V, 5V or high level inputs – you can really use any source of signal for this amplifier!
Specs
- 6-channel class D car amplifier with digital signal processing
- Tweeter/front & mid/rear channel outputs:
- 45 watts RMS x 4 at 4 ohms
- non-bridgeable
- Woofer/subwoofer channel output:
- 90 watts RMS x 2 at 4 ohms (175 watts RMS x 2 at 2 ohms)
- 350 watts RMS x 1 bridged at 4 ohms (600 watts RMS x 1 bridged at 2 ohms)
- CTA-2006 compliant
- Crossovers:
- tweeter/front channel: variable high-pass filter (500-4000 Hz)
- mid/rear channel: variable low-pass filter (50-500 Hz), bandpass adds variable low-pass filter (500-4000 Hz)
- woofer/subwoofer channel: variable low-pass filter (50-500 Hz), variable bass boost (0-10 dB)
- Digital signal processing (DSP) control via Sony Music Center app on your Bluetooth device
- controls include 10-band EQ, time alignment, speaker level, fade
- Bluetooth streaming from your compatible device
- Preamp and speaker-level inputs
- Fuse rating: 30A x 2
- Power wiring and hardware not included with amplifier
- 8-gauge power and ground leads recommended
- Dimensions: 11-5/8″W x 2-3/16″H x 7-7/8″D
DSP & App Functionality
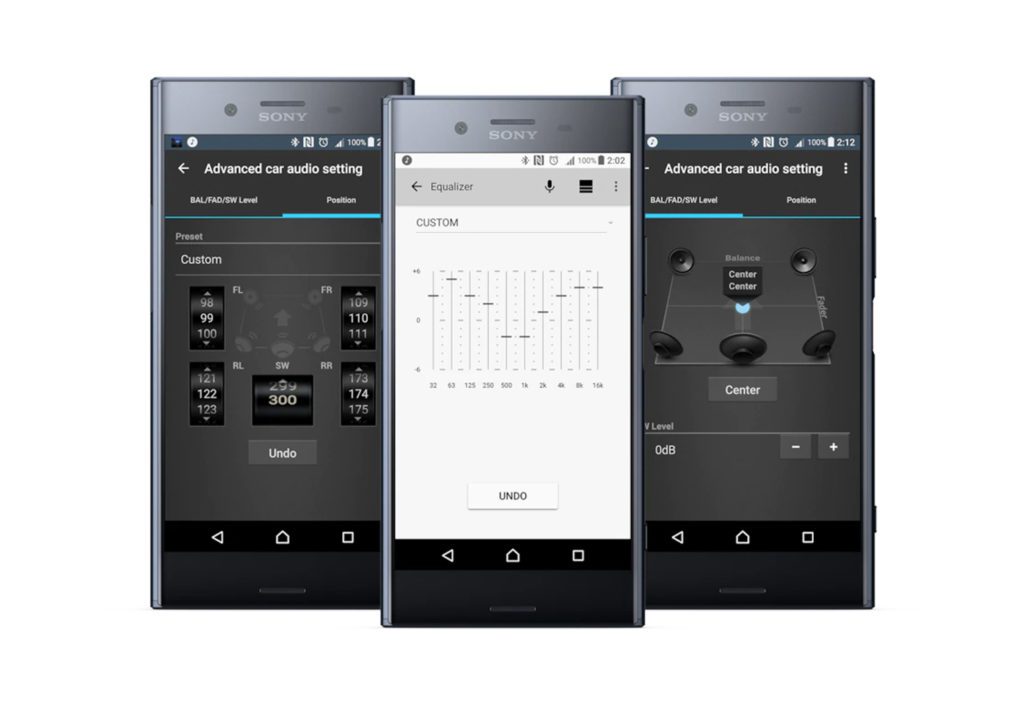
DSP is a recent feature that manufacturers are adding directly to their amplifiers so that installers can have greater control over the amplifier signal and output. JL Audio also is doing this with their VXi Amplifiers. This is especially helpful for cases where the OEM head unit needs to stay in the car. With the DSP feature, you can simply connect to the amp via Bluetooth, open up the Sony Music Center app and control the amplifier sound via a 10-band graphic equalizer on your phone.
So, for example, many of you may run into a scenario where your highs are too bright/harsh. It sounds like your tweeters are screaming at you. Well, with the DSP feature, you can adjust the level of the high frequencies to counter the bright highs in the input signal and normalize your output. This is more a feature for an installer, or whoever is tuning the system but it's a very nice feature to have and eliminates the need for an independent equalizer or DSP in many cases.
I mentioned this in the section above, but it's worth calling out again that DSP functionality is NOT available in the 6ch configuration where you have separate input signals for front, rear and subwoofer. This was unfortunate for us in our configuration because we wanted a separate signal for the subwoofer channel to have control via a subwoofer level knob. The only way to do this was to select the 6ch config on the amp. So we had to install the LCQ-1 that I mentioned earlier in order to have both an equalizer and subwoofer control, and we couldn't leverage the amp's DSP functionality.
There's a few other nice features within the app that provide more control too:
- Subwoofer level control
- Balance & Fade
- Speaker timing & delay for tuning speakers to a central position or seat
The app also allows you to play music directly from your phone to the amplifier via your music streaming app of choice, no head unit required. It's Bluetooth, combined with this app, that make the XM-GS6DSP amplifier really a stand alone unit. No head unit required. I really think this is the new way of the future with amplifiers – direct connectivity via Bluetooth with high level inputs – and can really unlock an amp's potential without the need for dedicated components like Equalizers, DSPs, high input converters and so on. Although, in an installation like ours a dedicated EQ and high level input converter was still needed.
Final Thoughts
After unboxing the XM-GS6DSP, reviewing all of the features in the manual, inspecting the amplifier inputs, outputs and so on, I'm really impressed with it. This is an incredible bang for your buck, with some really new and innovative features that I think you'll start to see set the tone for amplifiers in the future. It's incredibly compact – it can fit underneath the driver's seat. But packs so much power it can handle an entire 9-speaker system like we did in our MK7.5 GTI with ease (4 tweeters, 4 woofers, 1 subwoofer). That's a single amplifier that can pump up to 630Watts RMS @ 4ohms. From under your seat..
What's so great about this amplifier too is how universal it is. It really feels like it's designed for both traditional stereo upgrades with aftermarket head units, along with the new age vehicles with heavily integrated OEM head units. This is really the perfect amplifier for 95% (or more) of full vehicle stereo upgrades.
