In this article: We'll walk you through everything you need to know about car deadening and how to install it in your car, including the doors, trunk, floor and roof!
- Types of Sound Deadener Materials – Which is Best?
- What is the Best Sound Deadening Brand?
- Where Do You Apply Sound Deadening Installation?
- Sound Deadening Installation Materials Needed
- Car Floor Sound Deadening Installation
- Car Door Sound Deadening Installation
- Car Trunk Sound Deadening Installation
- Car Rear Deck Sound Deadening Installation
- Car Firewall Sound Deadening Installation
- Car Roof Sound Deadening Installation
- Final Thoughts
There’s nothing more disappointing than setting up a sophisticated car audio system only to find out that it sounds terrible once you start driving. Road noise quickly zaps performance from your audio system, causing your ears to cringe at the unruly sound. Whether the highs start getting muddy, the bass disappears or the volume drops, you can find some help through sound deadening installation.
We will look at the best sound deadening materials to use, where to install the noise insulation and how to apply it effectively. Once you are finished, you should be able to enjoy your favorite tunes undistorted during your next commute.
Types of Sound Deadener Materials – Which is Best?
As you search through sound dampening equipment, you will find a variety of materials. So, how do you know which one to choose for your vehicle? Each noise deadener has its own purpose, so it’s important you understand what you are looking at before making your choice.
Here’s a quick comparison of the deadening materials you can choose from.
Insulation
Sound deadening insulation is made up of fibers. It is available as a thick panel that absorbs all of the noise. Additionally, these materials will insulate your vehicle from heat because they are reflective. We recommend the use of insulation panels for your doors and roof.
Mats
Sound deadening mats are meant to soundproof your car panels. You will find them used most often in the doors and on the floor. Because mats are bulky, they are great for floor use. With the right mat in place, you can expect less vibration and a reduction in resonance.
Sprays
There are some areas of your vehicle where it might not be feasible to use mats or other insulation. In these cases, a spray might be best. Sprays penetrate tight, compact areas with ease. They are also great to use if you don’t want to add extra weight.
Foams
You can choose foam insulation as a sheet or through a spray. It’s lightweight and often used in doors. If you choose a sheet, you would lay it over a panel to absorb vibrations. The sprays come in a compressor can that are simple to apply.
What is the Best Sound Deadening Brand?
When the time comes to buy materials for your sound deadening installation, you have several factors to consider. Before choosing your product, consider these aspects:
- Budget
- Surface area to be covered
- Type of product
- Effectiveness
Ask yourself how much you are willing to spend for the perfect-sounding system. If you have an unlimited budget, we recommend going with Dynamat. There’s no question that it’s the best sound deadening option on the market. Plus, it’s simple to apply.
If you are operating on a budget and aren’t concerned with idyllic sound, you might prefer Noico sheets instead. You can spend about the same as with Dynamat, but you will cover double the area.
Sound Deadening Installation Materials Needed
Before you start insulating your vehicle, set aside several hours for the task. While you won’t require special skills to complete the job, you want to make sure you can complete the sound deadening without interruption.
Also, you will want to have some high-quality tools on hand.
- Chosen deadening material
- Automotive body tape – $8
- Roller – $9
- Door panel clips (vehicle specific)
- Screwdriver set – $14
- Panel pry tools – $6
- Pruning shears – $9
- Work gloves – $13
- Cleaning rags – $14
- Specially-formulated cleaner (wax/grease remover) – $14
- Weather-strip adhesive – $13
- Utility knife – $7
Car Floor Sound Deadening Installation
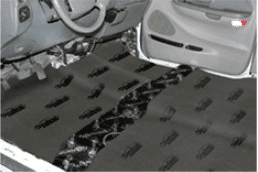
Some people start with the floor to reduce noise and heat. Here are the steps needed to install sound deadening installation to your vehicle’s floor.
- Remove the carpet. If it is glued, this might require a few extra minutes. Otherwise, you should be able to easily remove the clips holding it in place.
- Clean the floor completely. Vacuum up all of the crumbs.
- Apply the deadener according to the directions. If you are using mats, you can easily cut these to fit around your seats. Press the mat firmly down with your roller.
- Re-install the carpet.
Car Door Sound Deadening Installation
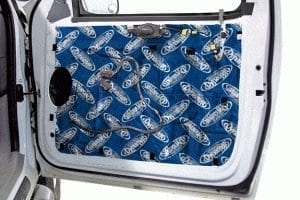
Doors should be a major focus if you want to reduce road noise inside the cabin. Here are the steps to take when installing sound deadening to the doors.
- Remove the door panels. You might have to remove components that are hiding screws. Don’t apply too much force. It’s also good to take pictures, so you know where everything should be returned.
- Clean the door with rubbing alcohol and a rag.
- Cut your deadening material to size and apply it. Start with the innermost sections located around the holes. If you are using a self-adhesive material, you need to roll it in place. Otherwise, you must apply some glue.
- Return the door panel back to its original location and secure it in place.
Car Trunk Sound Deadening Installation
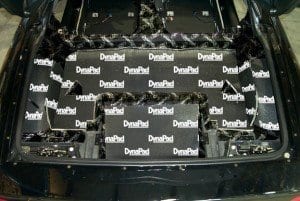
If you have a flat, large trunk, you are likely experiencing some road noise in your cabin. Thankfully, these steps to install sound deadening to the car trunk will help.
- Remove everything from the trunk.
- Take out the carpet or fabric.
- Clean out all of the dirt and wipe the surface down.
- Apply your sound deadening material.
- Put the carpet or fabric back in place.
Car Rear Deck Sound Deadening Installation
Your rear deck might have speakers, making it more prone to mechanical rattling or vibrations. If you soundproof the area with these instructions, the sound quality will be far greater.
- Remove the rear deck fabric.
- Clean the surface with rubbing alcohol.
- Cut your material to fit and apply it.
- Replace the fabric.
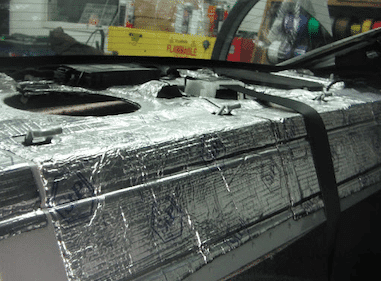
Car Hood & Firewall Sound Deadening Installation
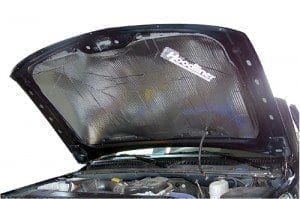
The area behind the dashboard is the firewall. This section of the car receives vibrations and noise from the engine compartment. It’s also an area that deals with a lot of heat. Following these steps to install sound deadening materials to your firewall should help.
- Remove the power cables from your car battery.
- Dismantle your dashboard. Work around all of the gadgets and wiring.
- Remove the glove compartment.
- Remove the stereo faceplate. Unhook your car stereo.
- Take pictures of where everything goes to ensure it finds its correct home.
- Clean the firewall.
- Apply your deadening material. Remember to cut holes for the wiring.
- Put all of the pieces back where they belong and plug everything back in.
Car Roof Sound Deadening Installation
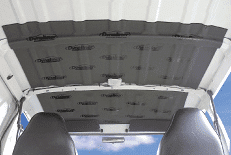
The roof in your vehicle allows in lots of wind noise. It’s also a spot that permits heat to enter. Follow these steps to install sound deadening to the car roof.
- Remove the headliner.
- Clean the roof with alcohol.
- Apply your materials. You might prefer to use a fiberglass mat here to alleviate trouble with heat. It’s also best to put a thick layer on the roof.
- Put the headliner back in place.
Final Thoughts
While it does take a little effort to install sound deadening equipment in your vehicle, the results will be far worth your time. Pick a high-quality material and take your time during the installation to ensure the sound is its best. Not only will you reduce vibration and heat, but you will create the perfect environment to enjoy your favorite songs.
