In this article: We'll walk through how to install a double-din head unit in the dash of a 2002 – 2008 Dodge Ram 1500.
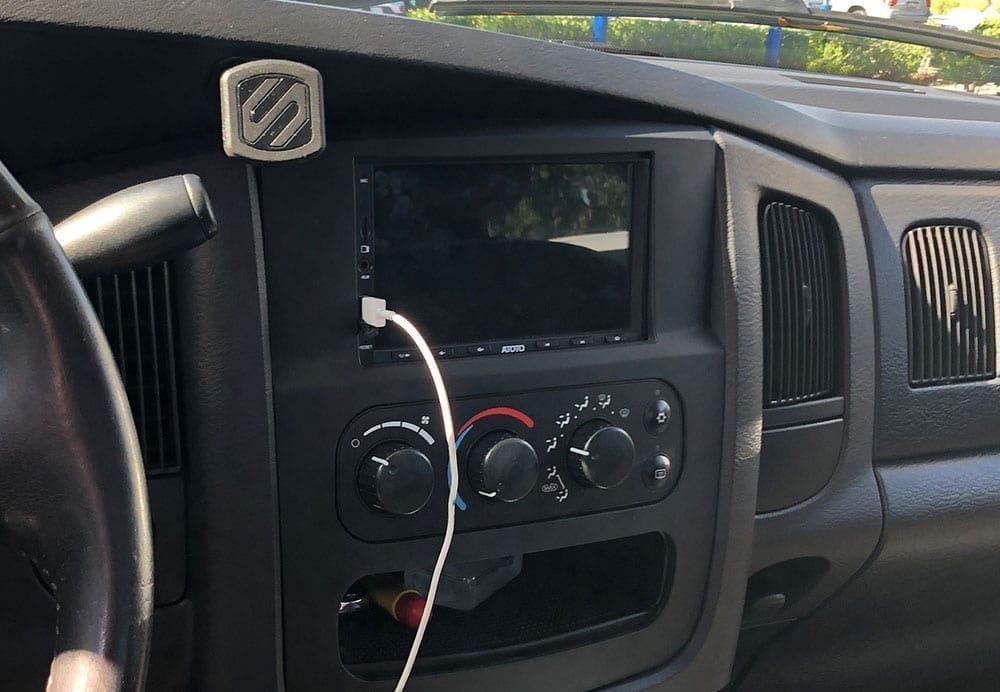
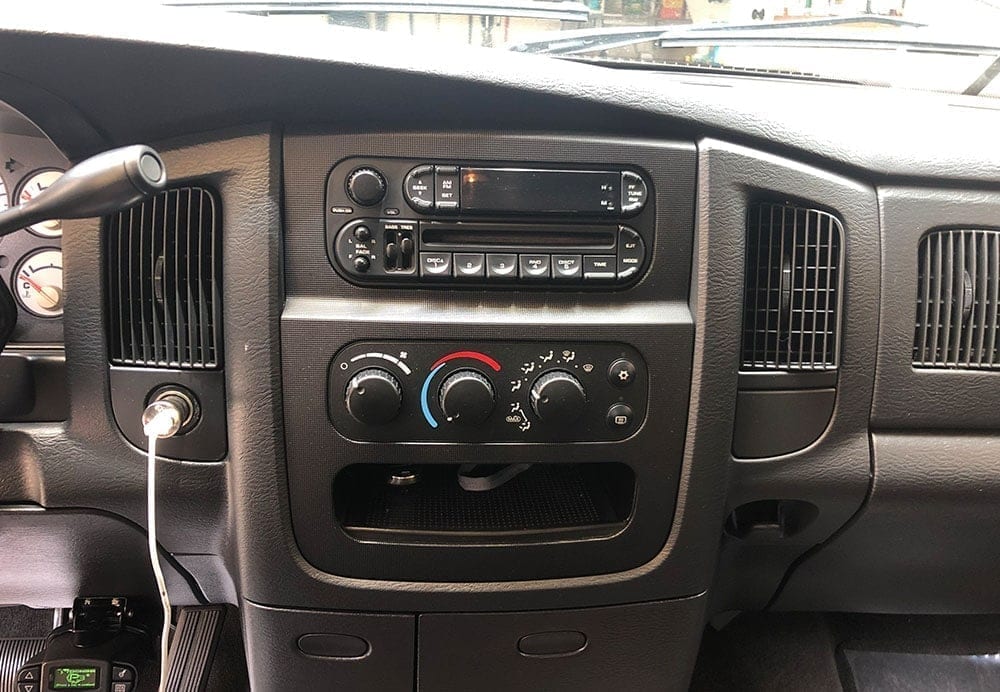
The other day, I was calling around for a fan clutch for my Ram 1500 and was reminded by a local parts store rep that an ‘old' Dodge truck might be misinterpreted as a pre-70s classic (I referred to it as an ‘older' Dodge truck). But even though my 02 isn't a classic, it's definitely old enough to warrant an upgraded head unit. Especially if the only thing that's in the dash is the original radio and CD player.
In the past 18 years, think of all of the advancements that have come to vehicles and their entertainment systems – gps navigation, touchscreens, Apple CarPlay/Android Auto head units.. The list goes on. And for someone like me who's testing and installing all of the latest audio and multimedia tech in cars and reviewing it for readers such as yourself, you can imagine why this was the FIRST thing I thought about when I recently picked up this truck. Simultaneously, I also replaced the front 6×9 speakers and did a full writeup!
The thing I love most about early-mid 2000s cars is that they really feel like the era of aftermarket audio and multimedia upgrades. They're easy to work on, have terrible OEM stereos – they're the perfect candidate for an upgraded sound system and head unit.
Before I get into the how-to though, might be good to preface this with the fact that this truck was purchased purely to tow and to move large equipment. It's driven about 3k miles/yr and I was looking for a budget head unit because the truck in itself was a ‘budget truck'. I chose to install an Android head unit because I liked the PUMPKIN Android Head Unit so much that we did a review on earlier this year.
In this article, I'll walk you through the steps to install a double din head unit in a 2002-2008 Dodge Ram 1500's dash. As always, please feel free to comment and ask questions at the bottom!
How to Install a Double Din Head Unit in a 2002-2008 Dodge Ram 1500
First things first – let's walk through the parts and tools that you'll need to do the install in your truck. Note that the head unit can be any double-din head unit but I'll provide links to all of the products and parts that we used during the installation.
Parts, Products & Tools
- ATOTO A6Y2710SB Double Din Head Unit – $80
- Double Din Bezel & Wire Harness Adapter – $30
- Screwdriver Set – $15
- Soldering Iron – $20
- Solder – $8
- Heat Shrink – $8
- Wood Burning Kit With Flat-Tip – $23 (You'll need a flat tip to your solder iron or a wood burner to weld the new Double Din Bezel to your OEM dash)
- Wire Cutters – $8
- Wire Strippers – $6
- Drill & Drill Bits – $110
Once you have all your parts and tools, you're ready to start diving into the installation. It's worth noting that in an installation like this, where the OEM dash trim is fit for a 1.5 din unit and you're adding in the double din bezel, it requires some ‘plastic welding'. If you have the right tools – in my case a wood burning kit with a flat tip – it was actually super easy.
That said, let's dive right in!
Step 1: Disconnect Your Battery
Whenever you're working on electrical in your vehicle it's great practice to always disconnect the negative terminal from your battery. I know it's common sense for many people but we always like to call it out in our How To's. Pop the hood and you'll find the battery on the drivers side. Disconnect the black (-) lead from the battery.
Step 2: Removing Dash Bezel
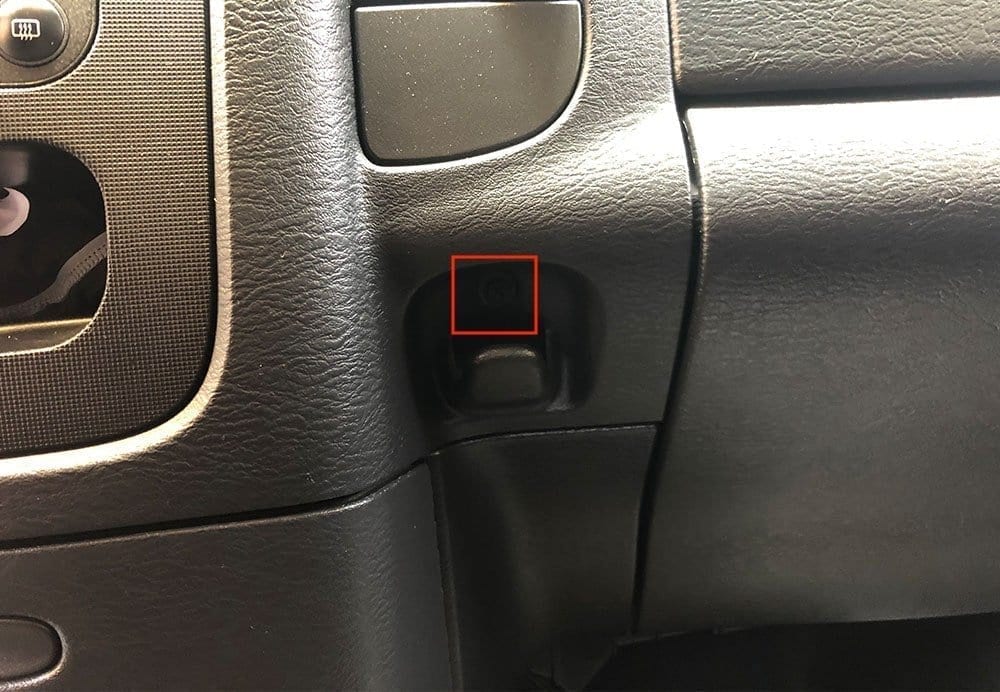
With your battery disconnected, you can start to remove the dash bezel that surrounds your OEM head unit. It also houses two vents, climate control unit, a 12V charging port and a cubby so be gentle. Note that the head unit will not come out along with the bezel though. This large piece of plastic only surrounds it.
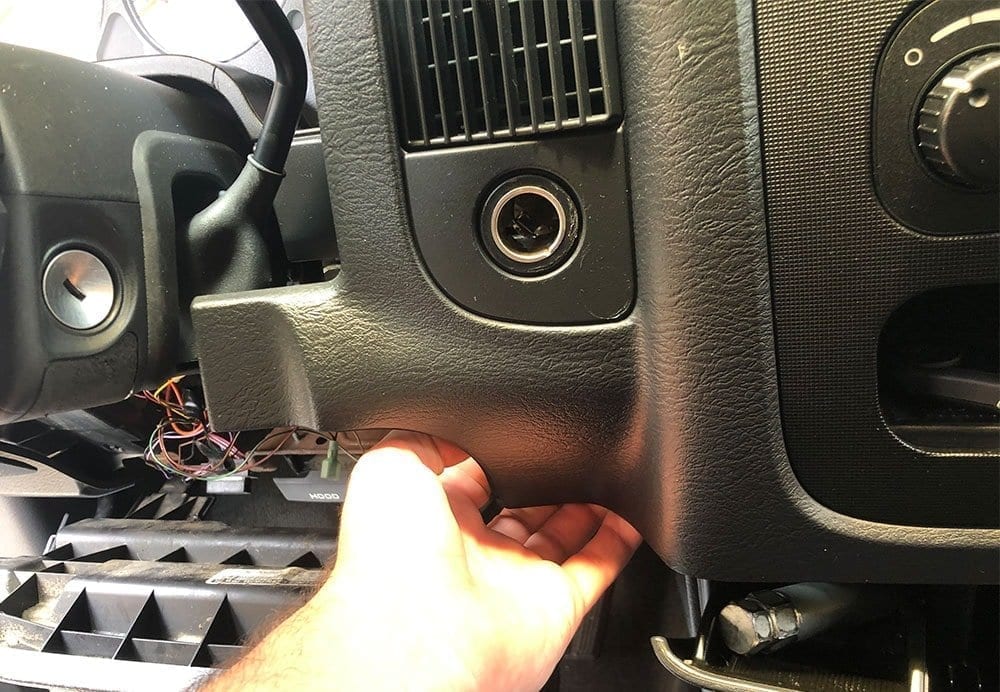
First, remove the philips screw that's behind the coin holder on the bottom right hand side of the bezel. Next, pull the driver side panel under the steering wheel downward to unclip it. To do this, pull on the top side of the panel downwards directly below the steering wheel. It should unclip and hang while you remove the rest of the bezel. It will also open up an area on the bottom left side of the bezel for you to grab behind and pull outwards. Start here.
With that corner pulled, work your way to the bottom right hand side. You shouldn't need any pry tools and the bezel should simply ‘pop' out as you go along. Continue to work your way to the top of the bezel until the entire unit is loose.
With the bezel loose, you'll then need to remove four wire harnesses from the back of the bezel that lead to things like the 12v charger, climate control, etc. Once all of the harnesses are removed you'll be able to pull the bezel out and set it aside.
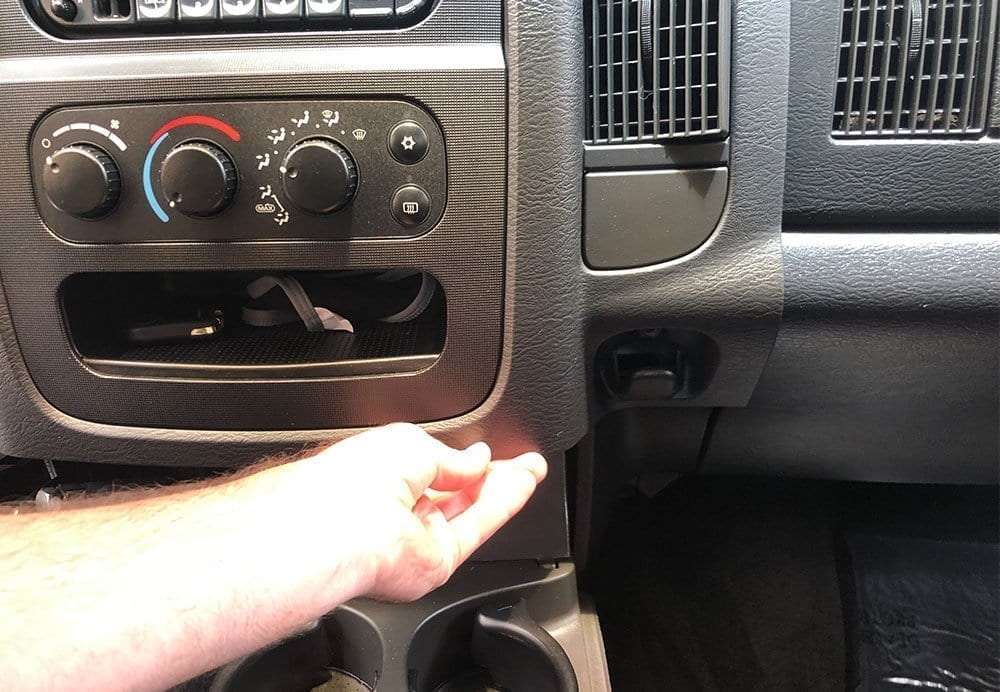
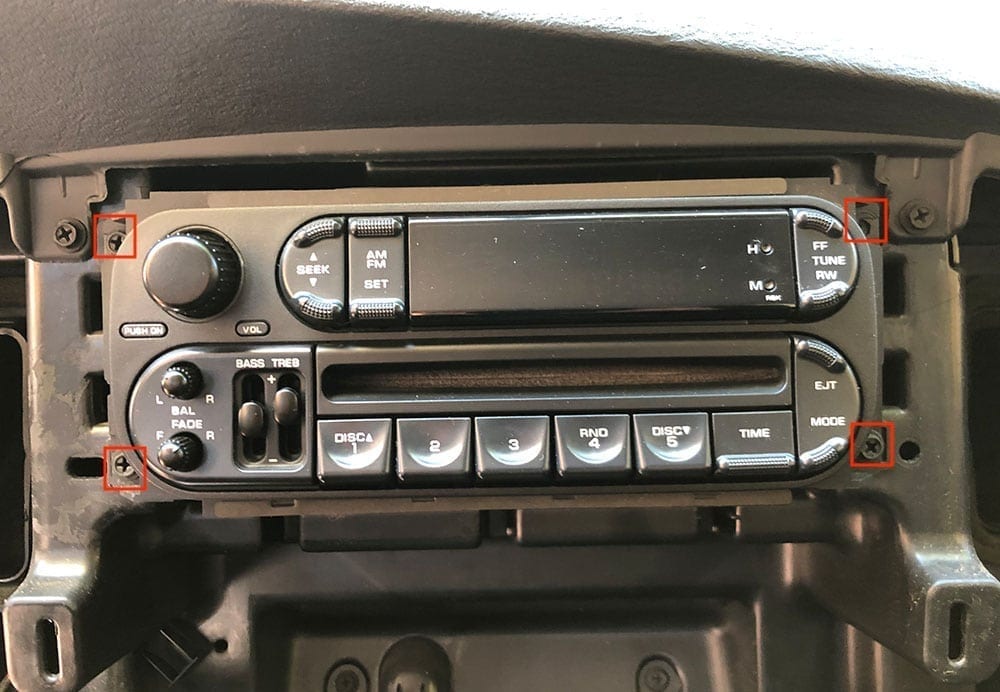
Step 3: Removing Old Head Unit
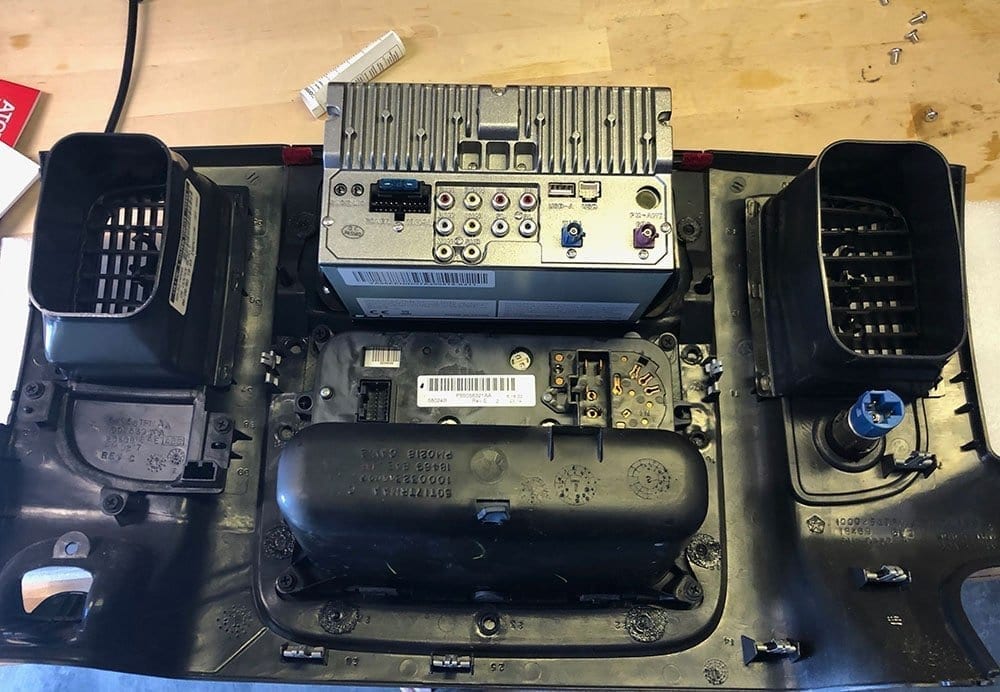
After you're removed the bezel, removing the actual head unit is straight forward. There's four phillips screws holding it in. Remove all four and pull the unit out. On the back of the unit there are two wire harnesses to remove from the unit. Unclip them and pull the old head unit out.
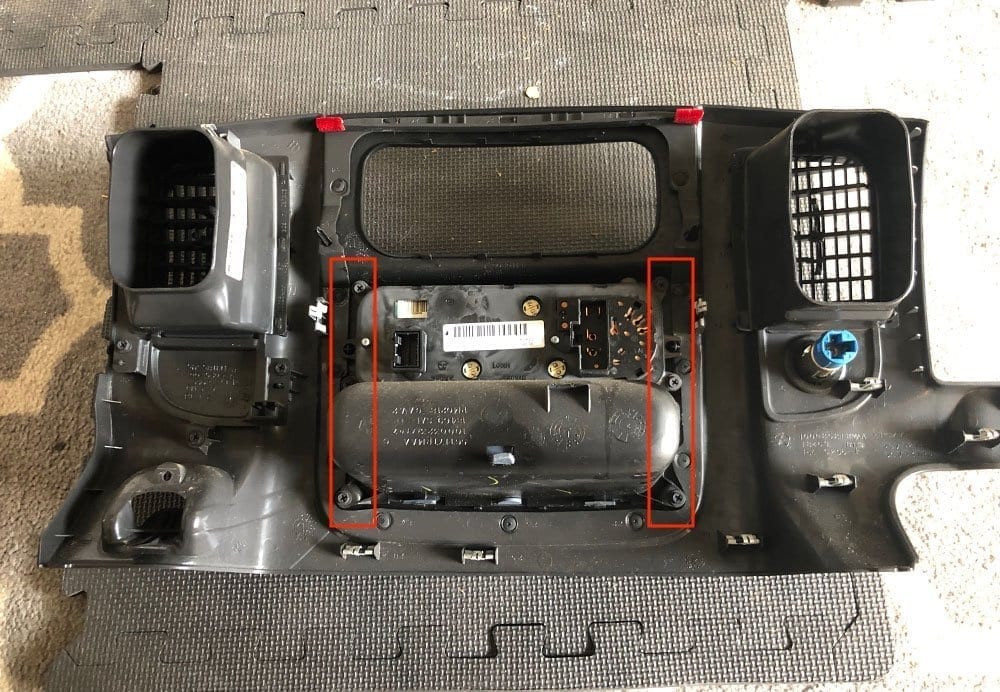
Step 4: Prepping Your Old Bezel for New Trim
In order to install your new trim on your existing bezel, you'll need to remove all of the components and the trim itself. To do this, start by removing the climate control and the cubby by unscrewing the screws that hold it to the bezel. Remove them and set them aside.
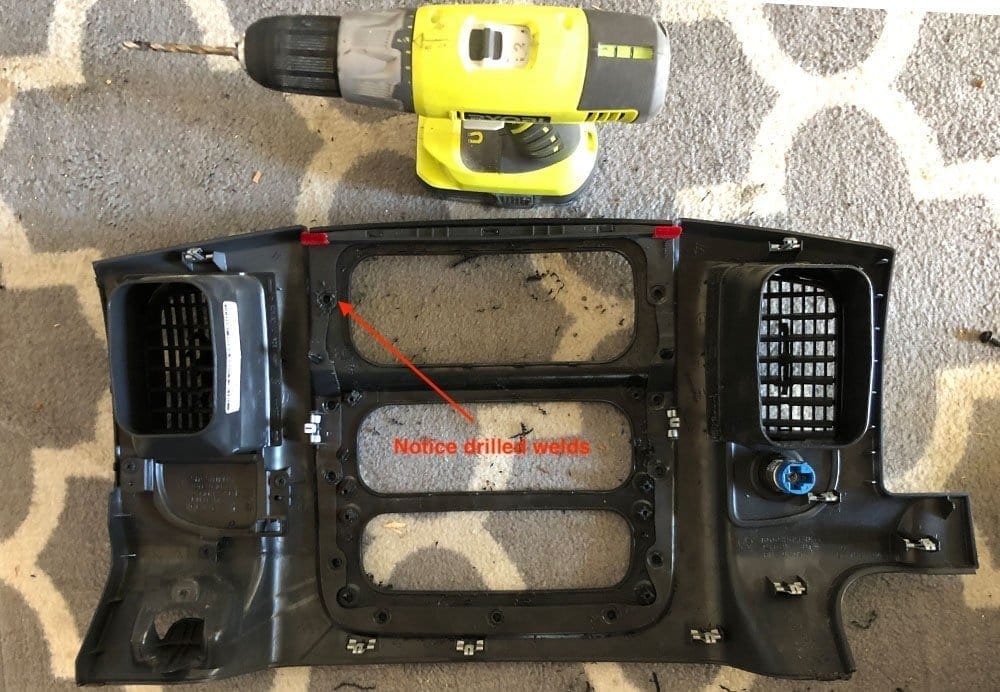
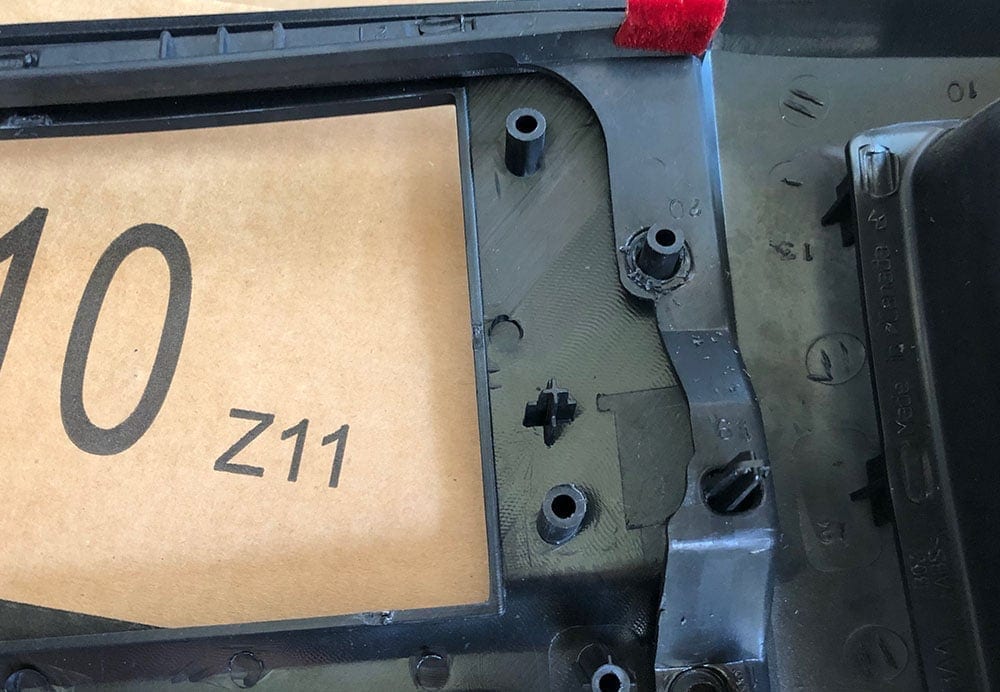
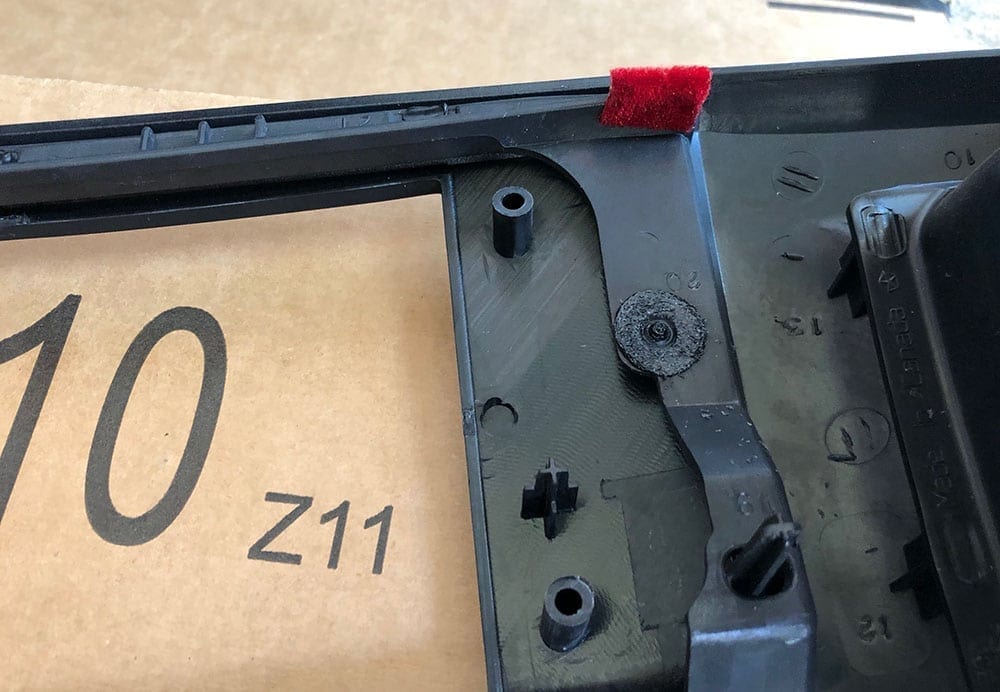
Then, you'll need to separate the trim from the bezel. This is where it starts to get tricky. I say tricky because most head units just have direct dash kit swaps – remove the old bezel and put the new one in with the new head unit. In this 02 Dodge Ram 1500, you need to separate the trim from the bezel and then weld your new trim on.
To do this, take your drill and drill bit and drill out the center of all of the welds on the back of the bezel. There's 11 welds total. They're similar to a rivet, where you drill out the center to break them off. NOTE – don't force these welds off. If you pull on them they'll likely break the bezel and leave you with a broken piece of plastic that you can't weld your new trim to.
Step 5: Welding Your New Trim to Your Bezel
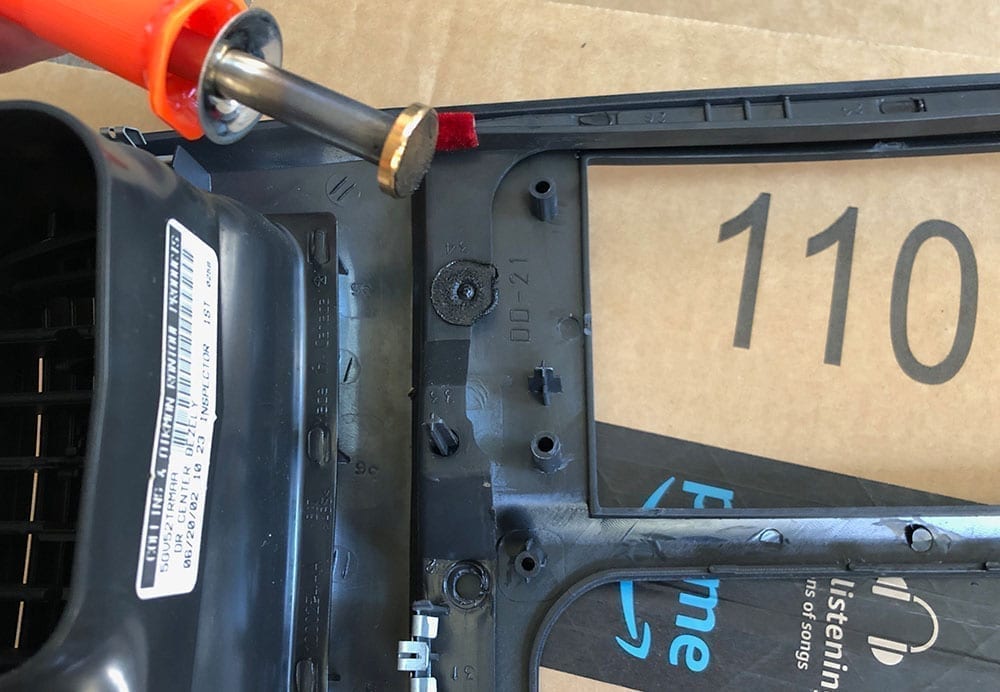
In this step, you'll need a tool to weld the new trim piece to your old Bezel. In my case, I had a wood burner laying around that had a flat-surfaced tip. The wood burner looks just like a solder iron (in fact I thought it was when I first bought it). But any hot, flat surface will work.
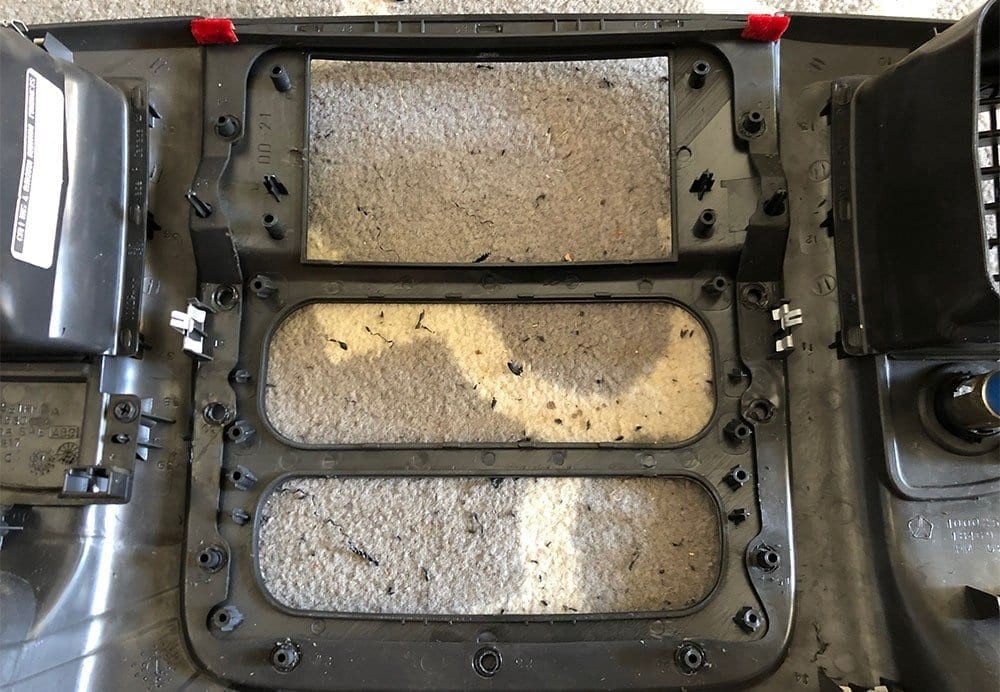
Essentially what you're going to do in this step is place the new double din trim that you purchased onto your bezel. There are plastic posts that will fit into the holes where you drilled out the previous trim welds. Once the new trim is in place, push the trim piece tight to the bezel and use your heated wood burner (or other hot object) to melt the plastic pole all the way down until it's flat with the bezel. Hold the trim/bezel for 30 seconds while the plastic cools for each weld. Do this to all 11 of the plastic poles that are on your new trim.


Step 6: Prepping and Installing Your New Head Unit
Your new trim is welded to your bezel, your old head unit is out of the truck, and your new head unit is out of the box ready to install. But first, you need to prep the head unit (wiring mainly), and ready your new bezel for the new head unit.
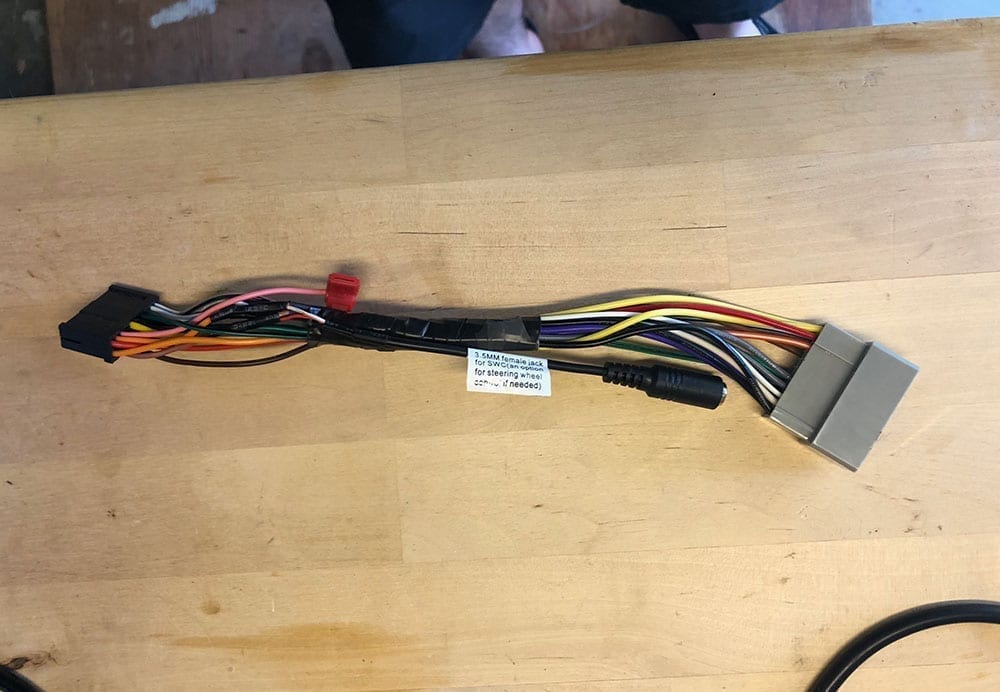
Starting with the head unit prep, you'll need to wire your aftermarket head unit's harness to the OEM harness adapter that came with your bezel (if you chose to purchase the one in the link above). You can either do this wiring after steps 1-4, before them, or in parallel if you want. The reason it's step 5 here is so that you can ensure that the head unit will fit in the dash properly before you waste your time wiring it all together. If you're positive that it's a fit and are confident then you can do this part whenever you'd like.
To properly wire your head unit you can either use the soldering method (my preferred way) or crimps and a crimping tool to connect each wire together (faster way but may also lead to shorting wires if a mistake is made).
Start by stripping the end of any wire that is not already stripped using a wire stripper. Strip back about a quarter inch. If you'd like, you can also cut an inch or two off of the new aftermarket wire harness then strip each wire so that you don't have excess wire behind your unit when you install it. Using your head unit's wire diagram and definitions, match up each wire to the corresponding wire on your OEM harness that came with the bezel. Each wire on the OEM harness adapter has a label directly on the wire. One-by-one, twist the exposed wire together and solder them together. I also use shrink wrap to cover each exposed wire after soldering.
Note that on the OEM harness, there are two negatives (black) and two constants (yellow). I wired one negative wire to the negative wire on the aftermarket harness, then wired the other negative wire to the parking break just in case the head unit has a parking protection that prevents certain features from being used when not in park. One of the yellow constants I snipped and shrink wrapped (unused). Any other wires that don't match up, cut them and use shrink wrap or electrical tape to ensure they will not come into contact with anything. Also note that for my truck, I don't have steering wheel controls (not sure if any do to be honest in this year) and the “key 1” and “key 1” wires are unused because of that. The end result should look something like this:
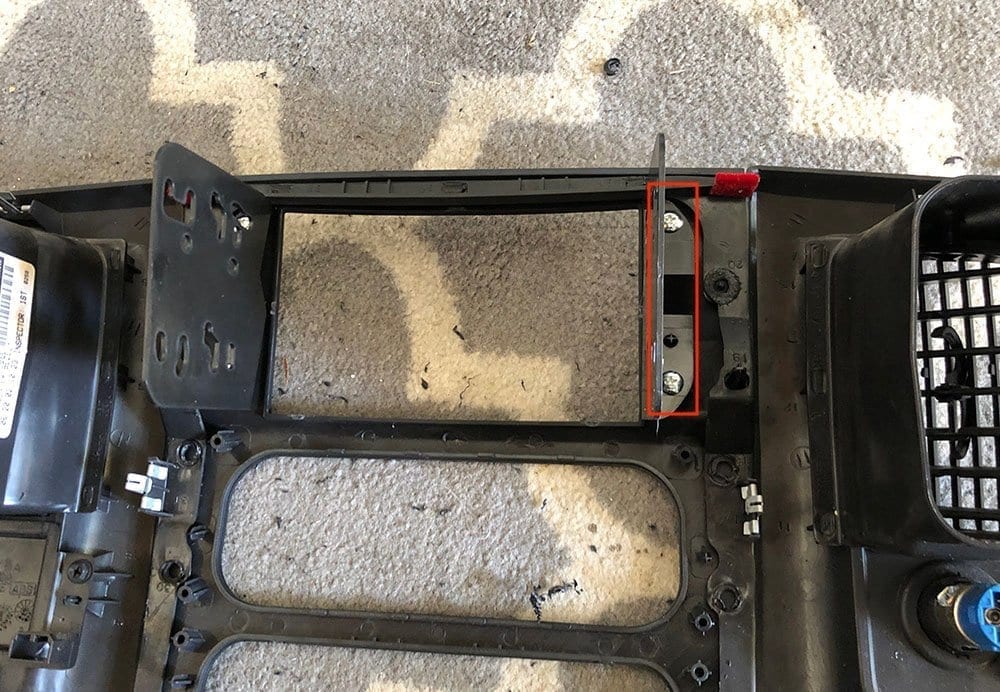
With your wiring all done you can now fit the brackets onto your new bezel and mount the head unit. Using the two double din mounts that came with your welded bezel, screw the two mounts into the bezel using the provided screws. Fit your new head unit into the opening and push it all the way forward to sit flush in the dash and mount the head unit in place to the brackets that you installed. Voila! Your head unit should now be mounted and installed to your new trim.
It's worth noting that screwing the new head unit to the brackets was a little challenging with the vents to the left and right of the back of the head unit. Here's what these steps look like:

You're now ready to install the head unit back into the dash of your Dodge Ram 1500. With your head unit mounted to your new bezel/trim, take the unit and test the fitment of the head unit in the dash before you wire it back up. In my case, I had to trim some of the underlying plastic support deep in the dash to make the head unit fit well. You'll likely do this if you choose to install an Android head unit.
Once you've confirmed it fits, connect your newly soldered (or crimped) wire harness to the truck's harness and to the back of the unit, connect your antennae adapter that came with the bezel as well, and then connect all of the harnesses you removed then you first pulled your bezel out. Turn your truck on to check all of your wiring and that your climate control works. If all is well, push the bezel back into place, ensuring all the clips are connected and then screw the philips screw back in behind the coin holder to fix your bezel in permanently.
Thanks for reading! Please feel free to comment in the comments below and we'll try to answer any questions!