In this article: We'll walk you through how to replace you front door speakers in a 2002-2008 Dodge Ram 1500 step by step with images, instructions and more!
- Project Difficulty: Easy
- Project Time: 3 hours
- Cost: ~$260 (depending on speaker cost and tools)
I recently found a great deal on an older Dodge Ram 1500, a 2002 with ~100k miles. It's in great shape inside and out but the stereo hadn't been touched. There was a terrible rattle from within the passenger side door and the sound quality was horrible. I could tell that the speakers were blown or that the cone/surround had separated from the casing.
I had a pair of brand new Kicker PS69s laying around, and it just so happens that the front door panel speakers on a 2002-2008 Dodge Ram 1500 are 6x9s so I decided to make a Saturday DIY project out of it. If you're looking to upgrade your Ram's door speakers and are unsure of the 6×9 speaker you'd like to purchase for your Dodge, check out our list of best 6×9 speakers.
The first thing I'll say about trucks from this era (mid 2000s) is that I miss working on them. It's such a treat when a door panel comes off with five screws and no clips. Simply pull up on the panel and it's out. And the speakers are a direct swap with almost no work/modification needed.
In this article I'll walk through the steps to remove the door panels and speakers, wire the new ones with the OEM speaker clips and re-install it. Enjoy!
How to Replace 2002-2008 Dodge Ram Speakers: Step by Step
Parts & Tools Needed:
In order to complete this installation, I'd recommend the following tools and products:
- 6x9in Speakers – $200
- We used the Kicker PS694, but we'd recommend any of the 6x9s on our list here.
- Phillips/Flathead Screwdrivers – $15
- T30 Torx Bit – $5
- Solder Iron – $20
- Solder – $8
- Wire Cutters – $9
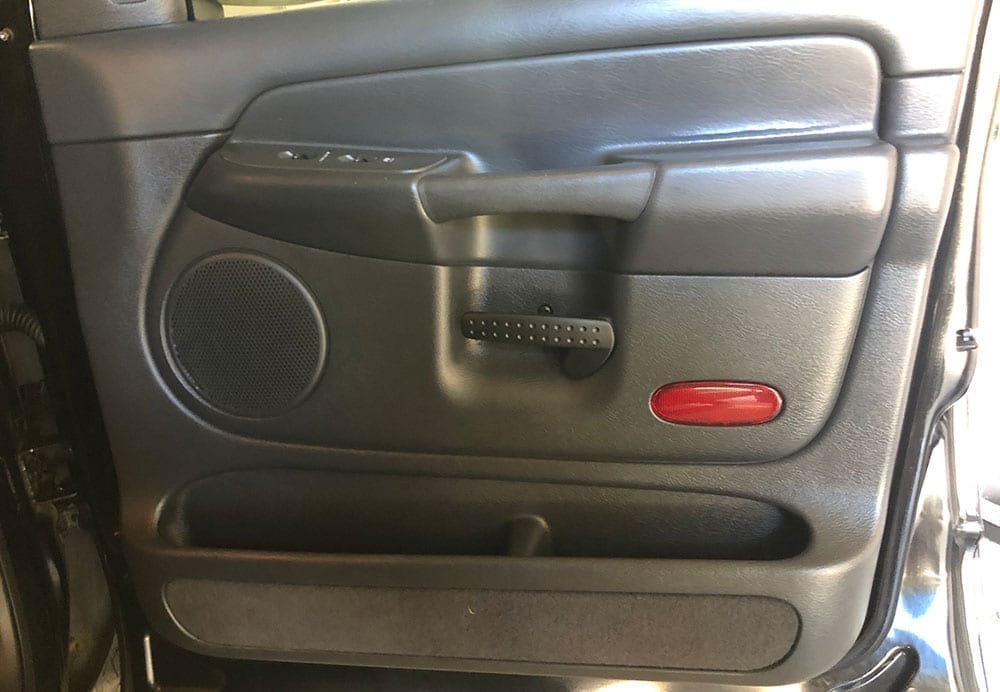
Step 1: Removing the Door Panel
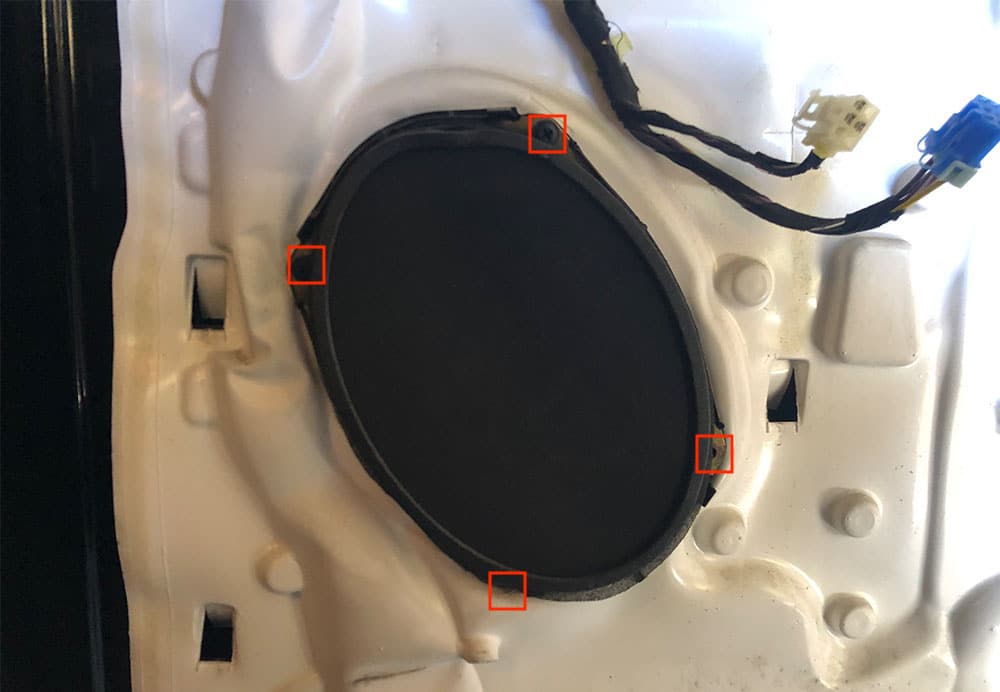
First step in the process is to remove the door panel of your Dodge Ram 1500 to gain access to the speakers behind. The process is very simple. There's a total of 5 screws you'll need to remove – 4 phillips and 1 T30 Torx.
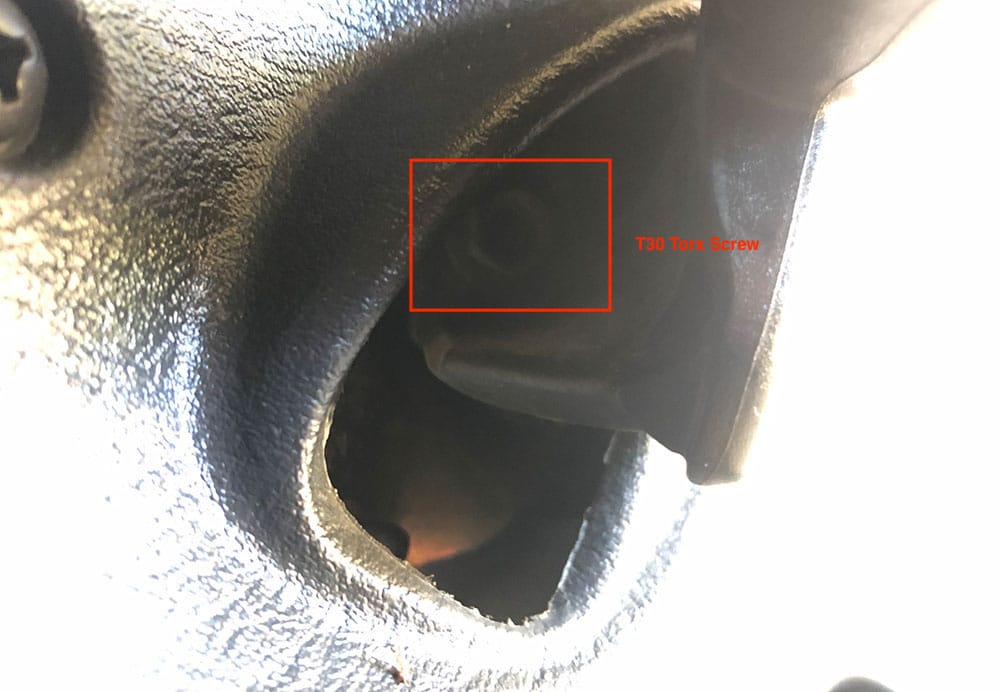
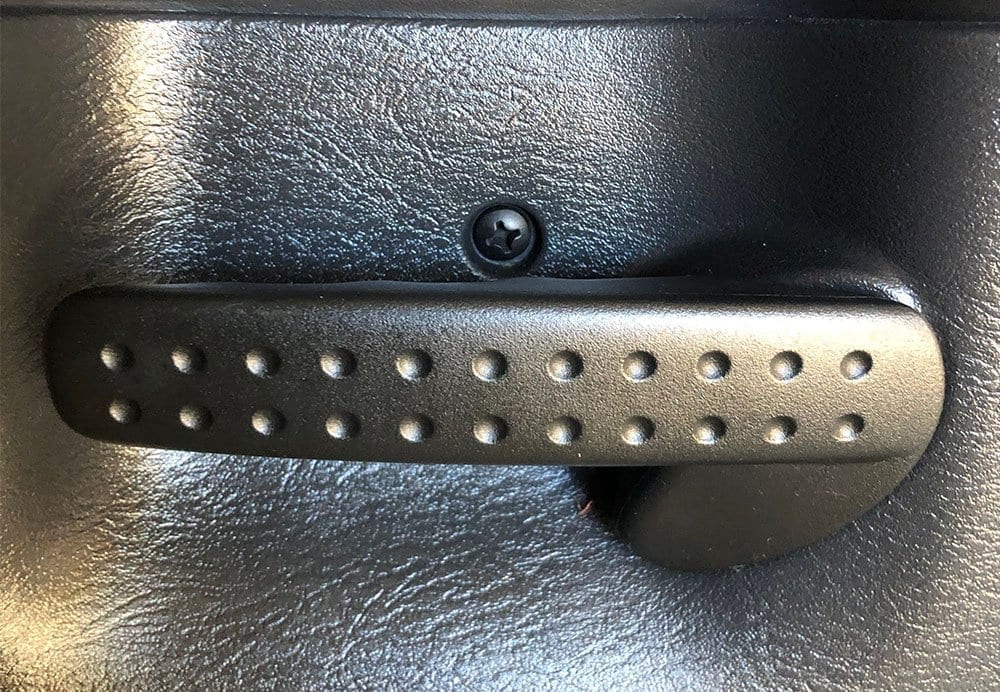
Starting with the door handle, use a T30 Torx bit to remove the screw that holds your handle to the latch mechanism. It's located below the handle deep in the door.
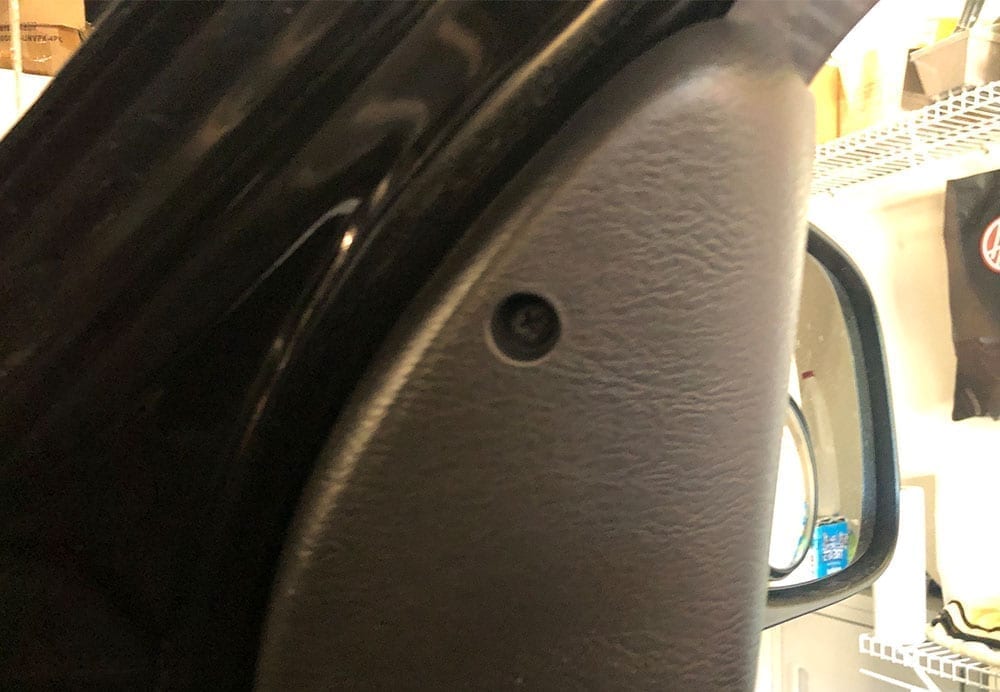
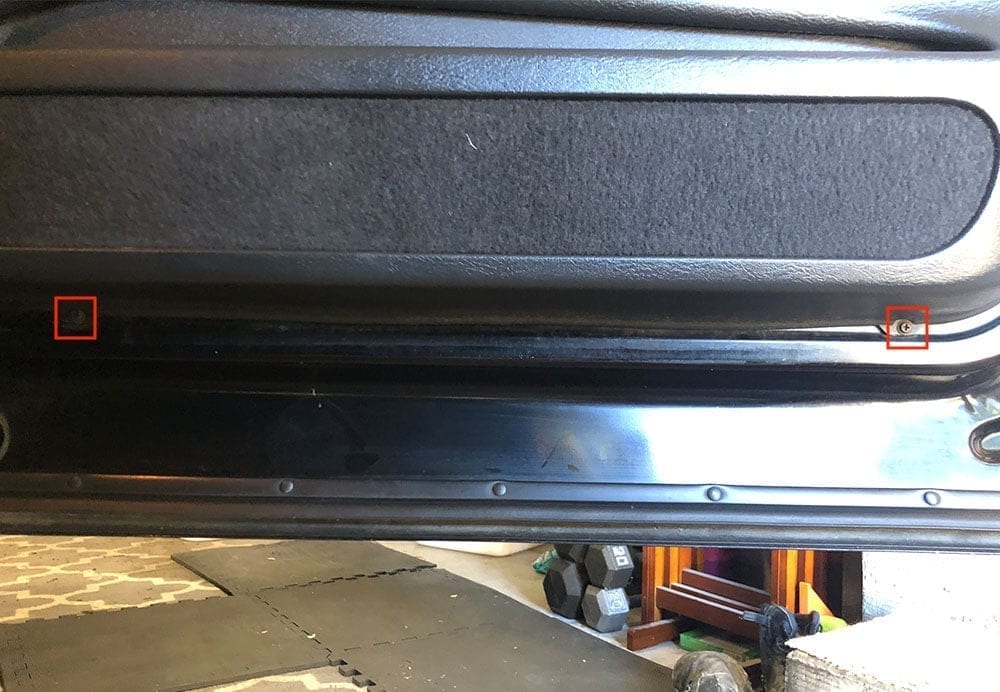
Next, remove all four phillips screws on the panel. From top to bottom, there's one on the very top left hand side of the panel near the window, one behind where your door handle was, and two on the very bottom of the panel.
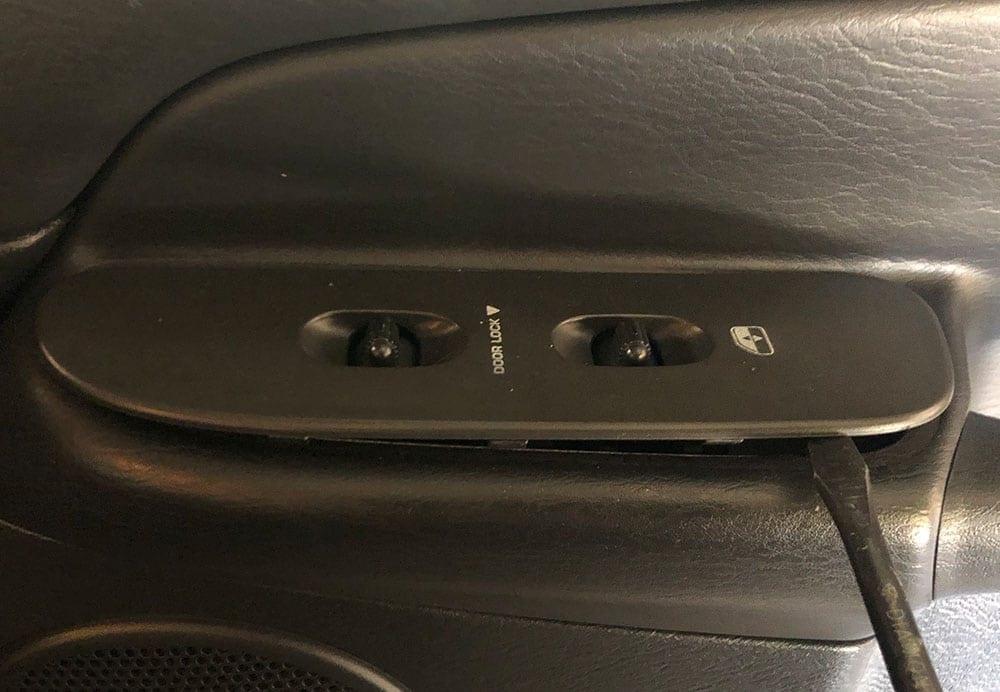
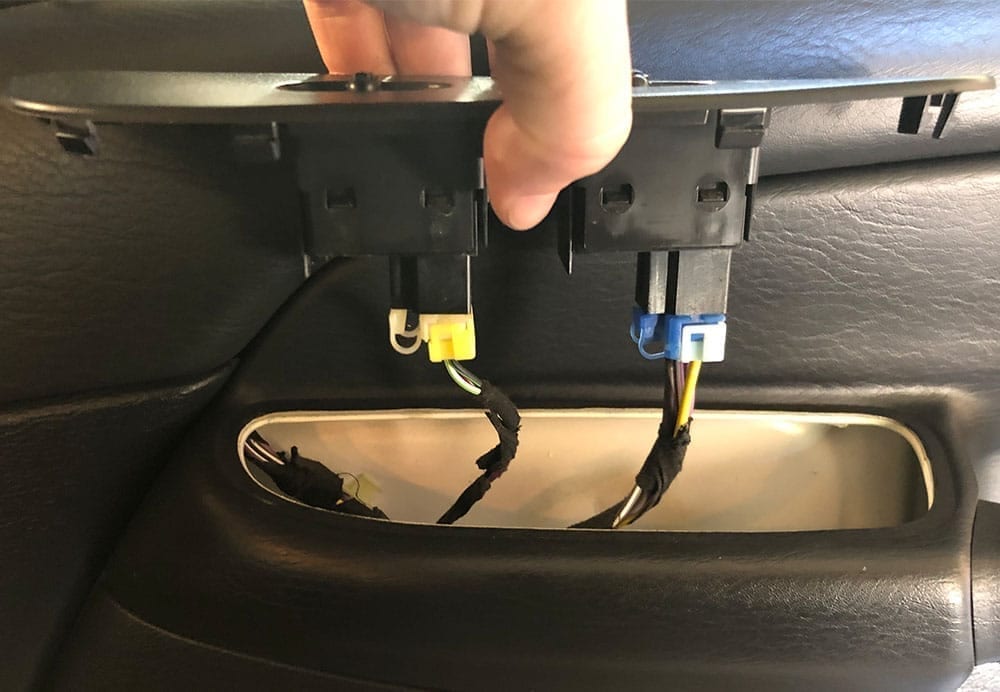
Lastly, you'll need to remove the window and lock control panel on the panel along with the wiring clips that are connected to it. Using a wedge or a flathead screwdriver, carefully pry the panel upwards. If you're using a sharp tool I would recommend using your hand/finger in between the tool and the edge of the door to prevent damaging the door panel itself. Once the panel has popped off, remove the two wire harness clips from the bottom and set it aside.
Now that you've removed all four screws, your door handle and your control panel you're ready to remove the panel. It's worth noting that there are no door ‘clips'. They're slide-in retainers. Do not pull your panel outwards as you could break these retainers. Instead, simply slide the entire panel upwards to remove it and it will come right out.
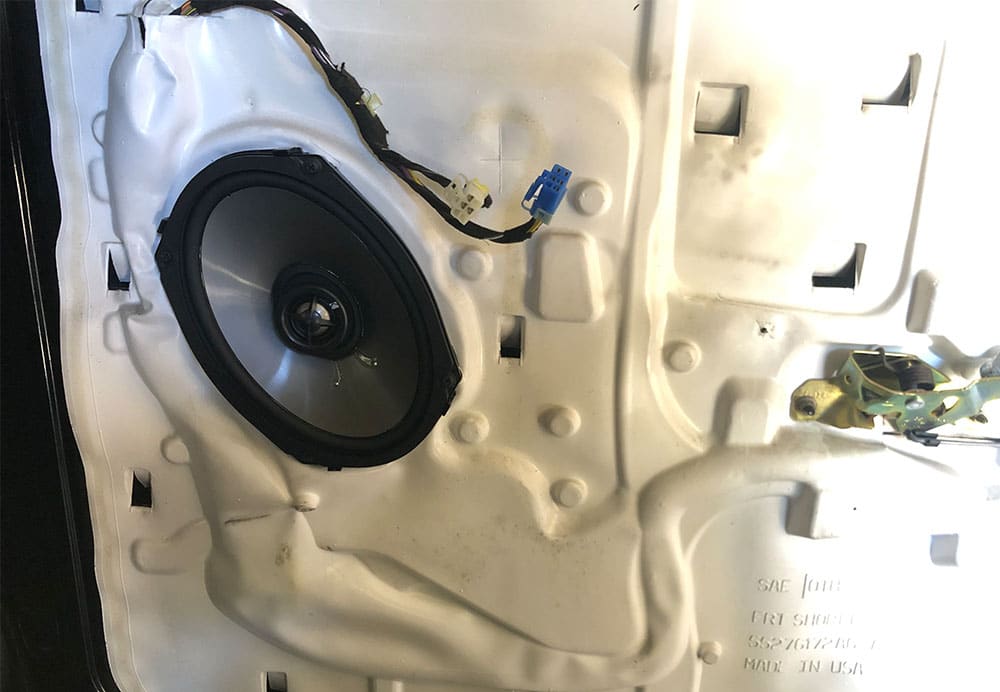
Step 2: Removing the Old Speakers
With your door panel off, removal of the old speakers is really simple. There's a total of four phillips screws that hold the speaker to the door panel. Remove these screws and carefully pull your speaker out far enough to access the wire clip.
Remove the clip from the speaker and then remove your speaker from the panel entirely.
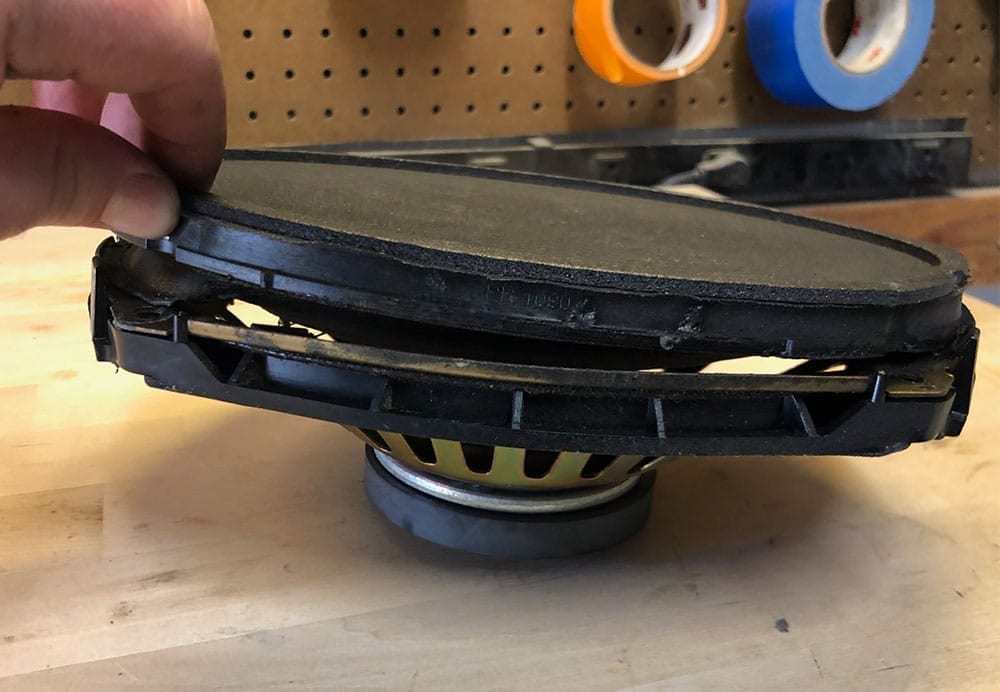
Step 3: Prepping Your New 6×9 Speakers
Now that you have your speakers out of the car, you can start to remove the components you'll want to use for your new speakers. There's several ways to do this and you don't necessarily have to follow my method. I chose to re-use the OEM spacer in between the OEM speaker and door panel, along with the OEM clip so that I can easily clip the old speaker back up into the factory harness so this section will walk through this method.
Repurposing the Factory Speaker Spacer (optional)
You don't always need to reuse the spacer, but I chose to because the fitment and seal to the door was still good on the spacer and in the case that you have a deeper 6×9 speaker it will prevent it from hitting any of the components deep in the door. It will keep it in the factory position with the factory seal. However, in most cases, your new 6×9 speakers will have a foam seal around the speaker that will seal it to the door and you don't need to reuse this spacer.
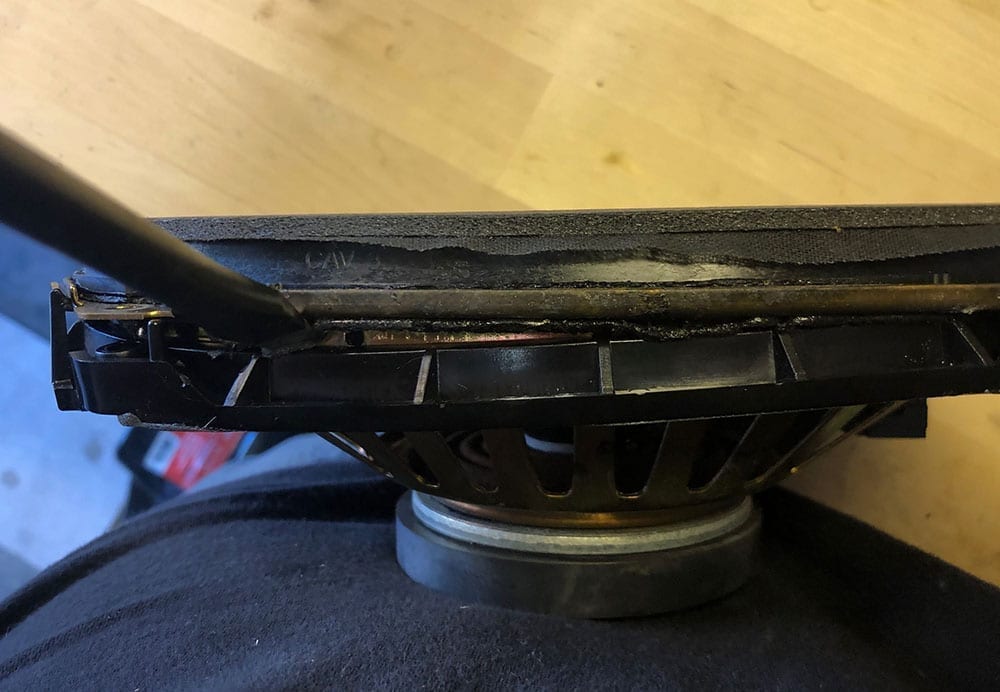
To remove the old spacer, take a wedge or flathead screwdriver and wedge it in between the speaker and the spacer. There's a seal around the edge of the spacer along with four clips that you'll have to maneuver to get the spacer removed. I recommend starting to pry closest to one of these clips and working your way around clip-by-clip.
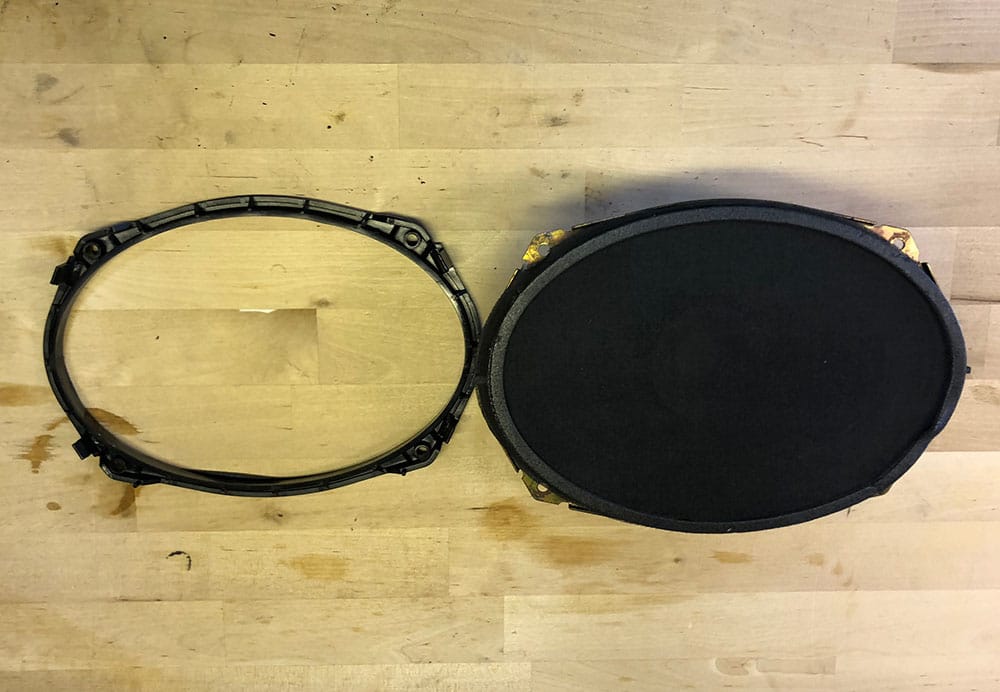
Once your spacer has been removed you can place it back on the new speaker simply by clipping it onto the new speaker's frame.

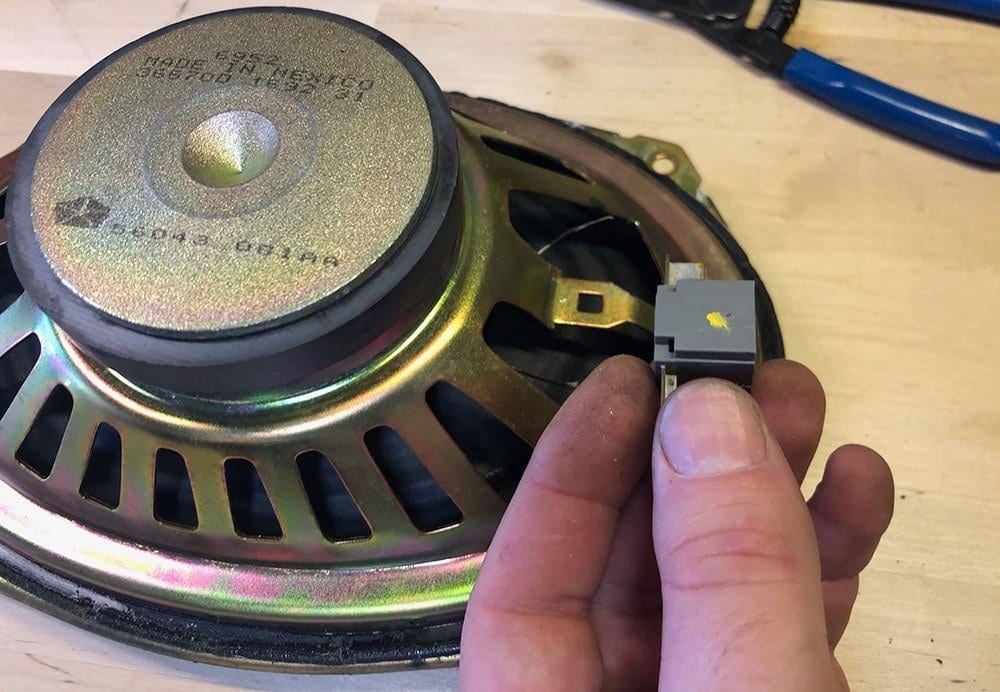
Using the Old Wire Harness Clip on the New Speaker
I would highly recommend this approach to wire your new set of speakers. If you don't use the OEM speaker's female wire harness clip you're going to create more work for yourself cutting the old male end out from the door, crimping on new leads and connecting them to the speaker, etc. The concept here is to remove the old clip and solder it onto the new speaker so that you can simply re-connect the new speakers to the car like it was an OEM one.
To do this, take a pair of dikes and cut the two wires on your old speaker that go from the female clip to the cone of your speaker. Then, use a flathead screwdriver to wedge the clip off of the old speaker's casing.
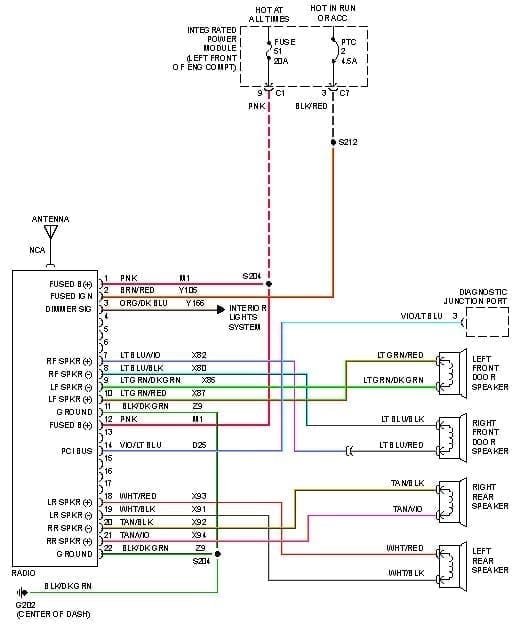
With the clip removed, mark which side is positive and negative by taking the clip back to the car and finding out which side is the positive lead. In my 2002 Dodge Ram 1500, positive on the passenger side was light blue/red and on the driver side it was light green/red. In the gallery below is a wire diagram of all the speaker wire colors for my truck.
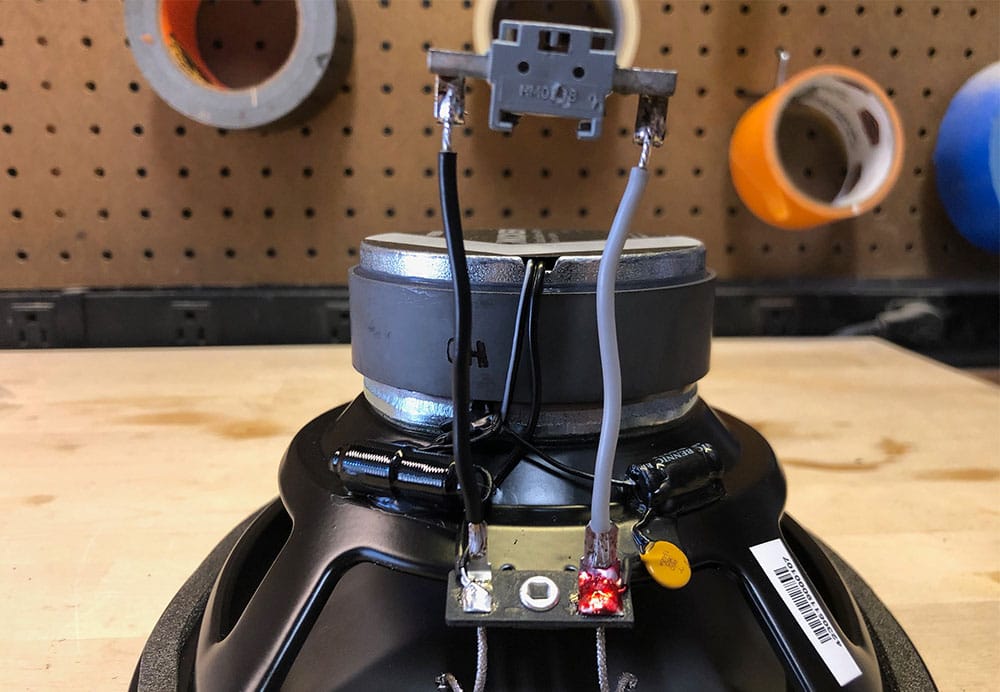
Once you've marked which side of the female clip is positive and negative, take two short (~2inch) wires and solder them from the clip to the terminals of your new speakers to permanently fix the clip to the new speakers.
Step 4: Reinstalling Your New 6×9 Speakers
Now for the easy part – reinstalling your speakers and putting your door back together. Take your new speaker and reconnect the male speaker wire clip to your modified female clip and place the speaker back onto the door aligned with the screws. Screw your speaker back onto the door panel. Ensure that the speaker is fully sealed to the door panel and that it doesn't shake or rattle.
I would highly recommend turning your radio on and testing your new speakers out once the speakers are installed, prior to installing your door panels again. This way, if there's an issue with wiring or mounting you'll spot it before the door panels are back on the door!
Once the speaker is installed and tested, follow the instructions in Step 1 (reversed) to reinstall your door panel.