In this article: We'll review how to replace or upgrade the front door and rear door speakers on a 2009 – 2018 Ram 1500 with images, instructions and more.
Time Needed: 3hrs 30min
Difficulty: Easy
Ram's 4th gen 1500 stereo was decent at the time. Where the 3rd generation had a pair of 6x9s in the front and 6.5″ coaxials in the rear, the 4th gen came with a 6 speaker system. This 6 speaker system is comprised of two pairs of 6×9 inch speakers in the front and rear doors along with a pair of 3 1/2″ inch speakers in the dash.
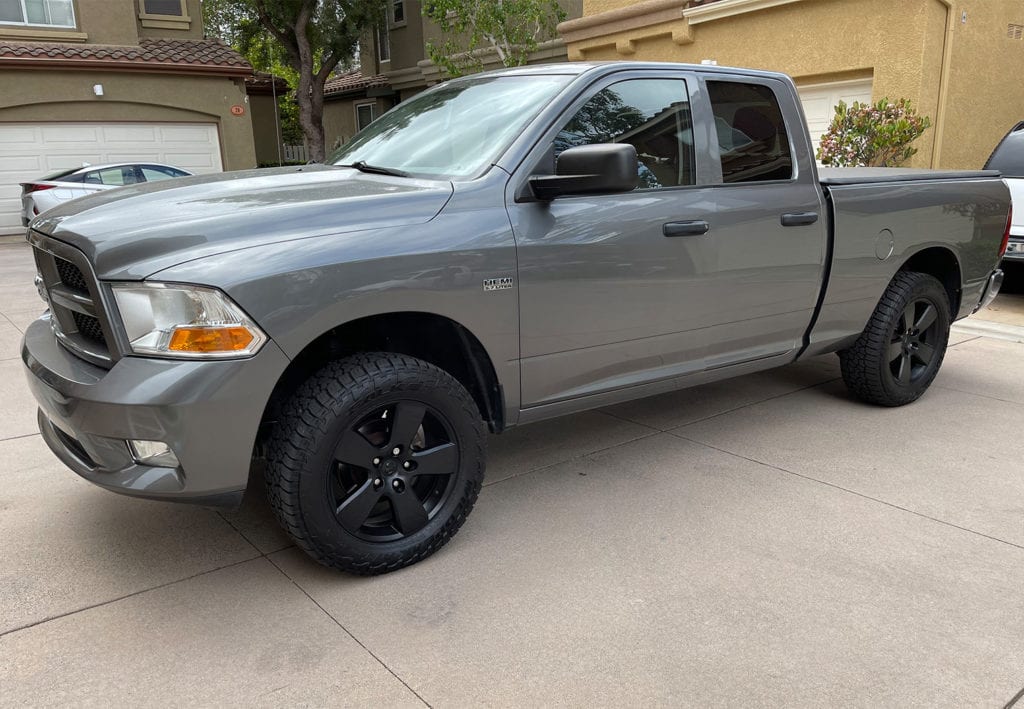
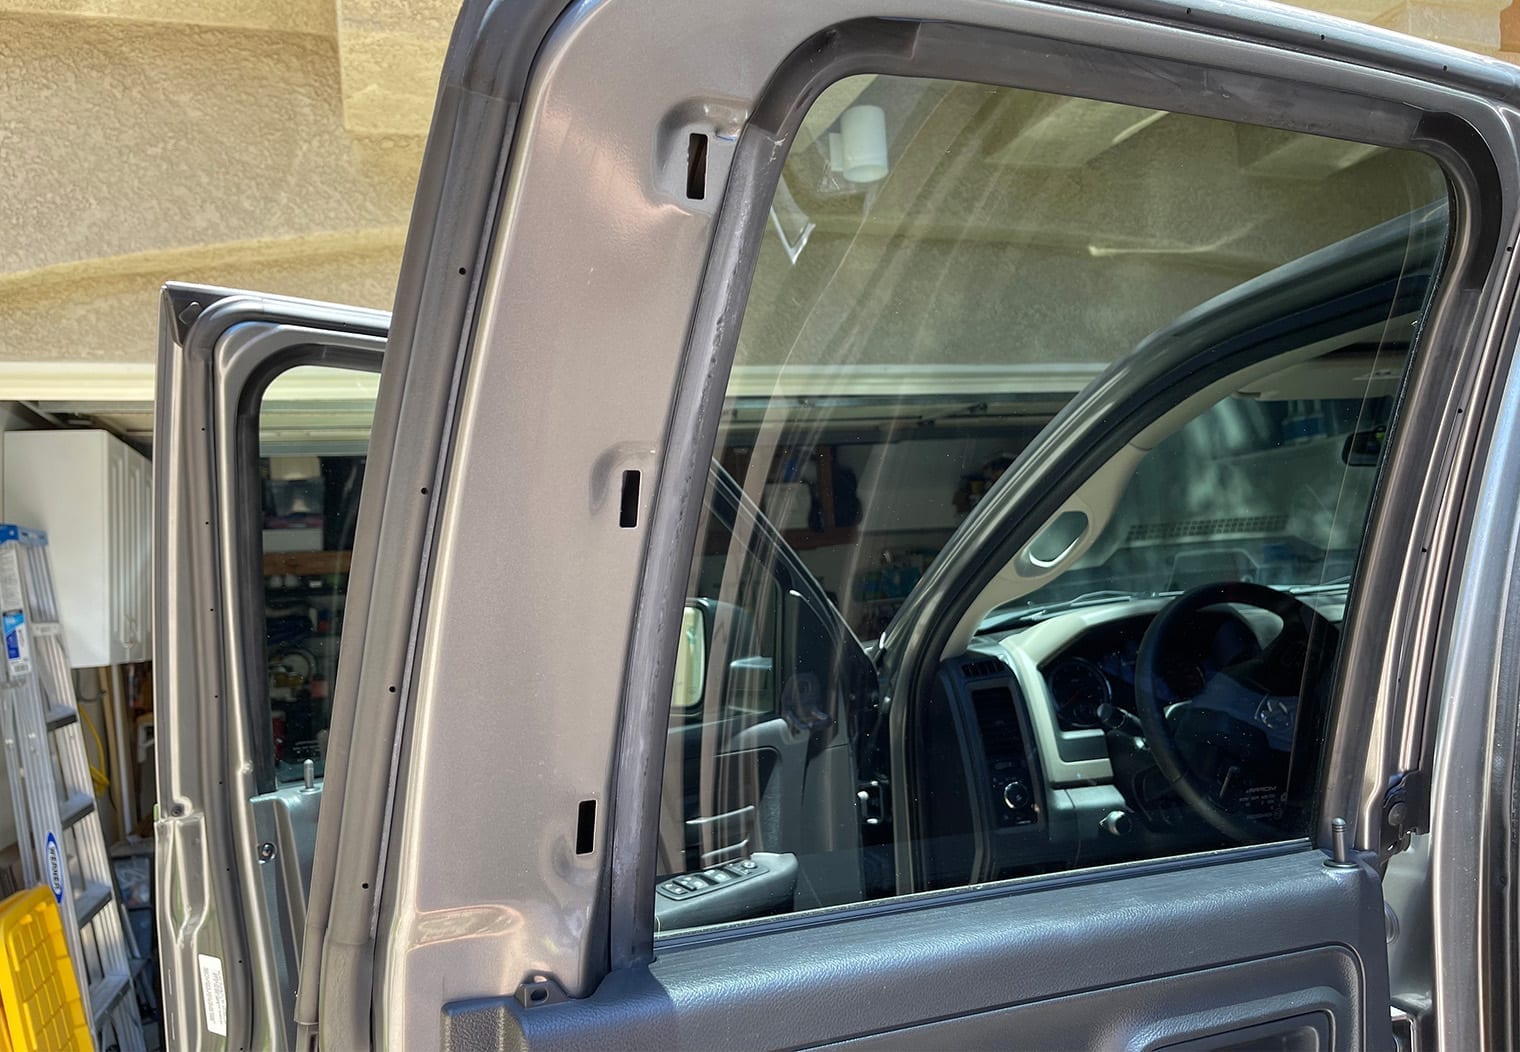
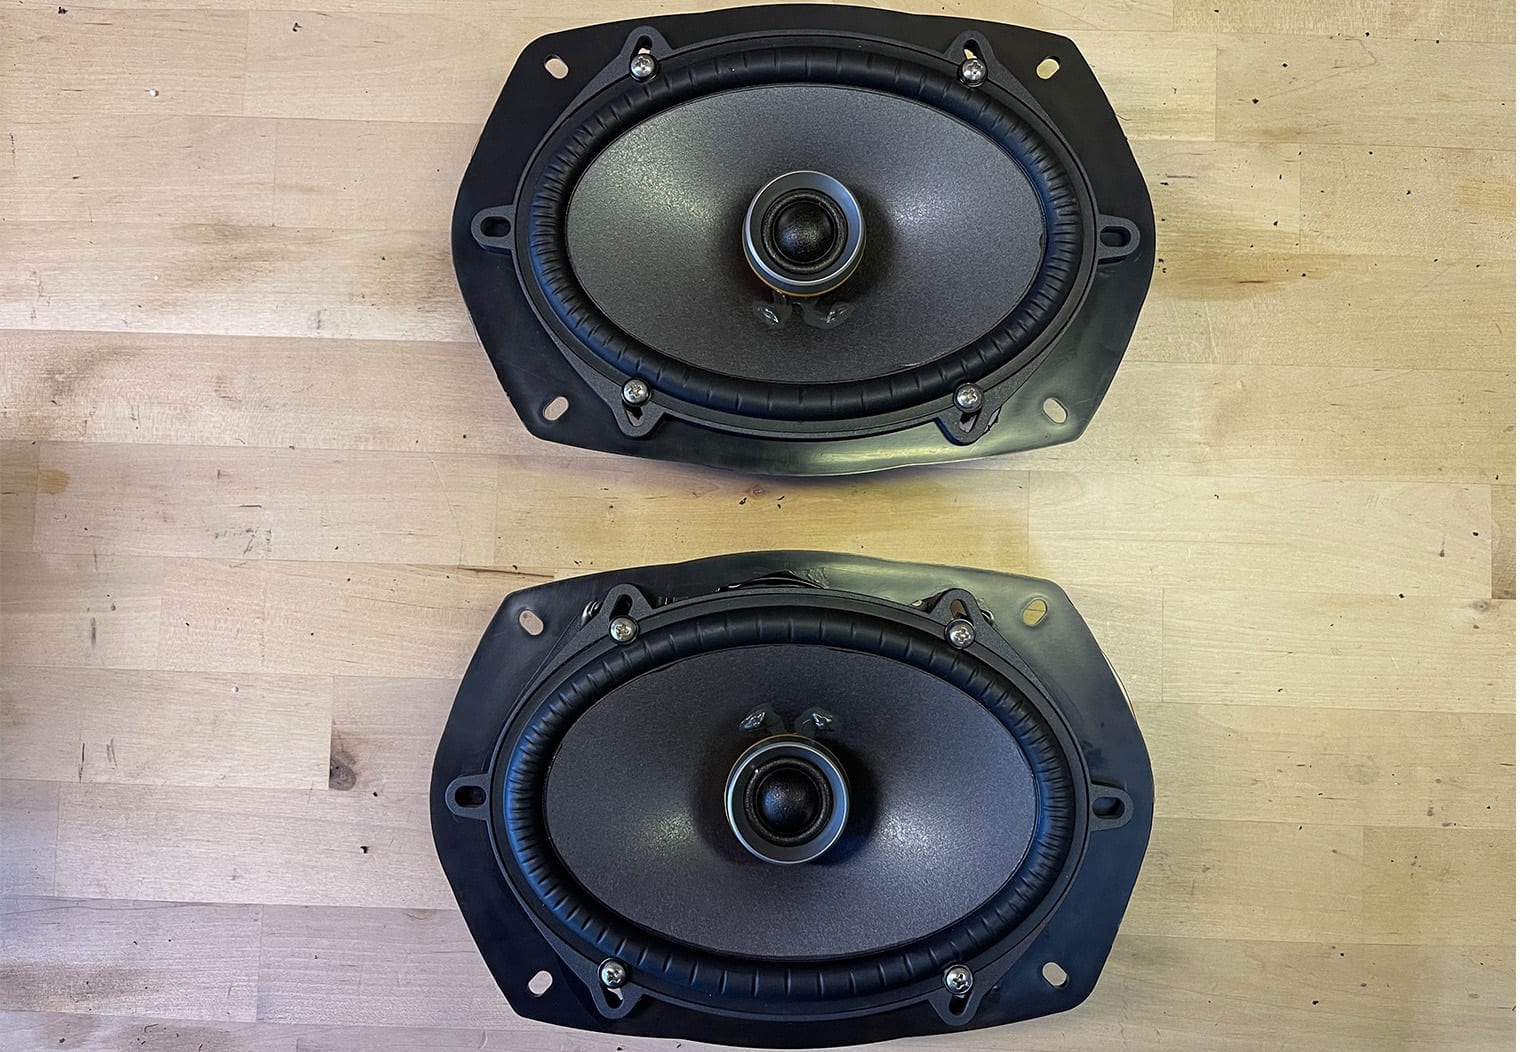
In today's article, I'll be upgrading the front and rear door speakers in a 2012 4th gen Ram 1500 Express Quad Cab. I already upgraded the stereo, and installed a powered subwoofer under the seat which made it a great candidate for a good pair of speakers. I'll be using Sony's new lineup of Mobile ES speakers for the upgrade. Here's a look at the truck.
Whether your speaker are blown or you just want a solid upgrade for more volume and clarity, the installation process is the same. By the end of the article you should have everything you need to know how to install upgraded or replacement speakers in the door panels of your Ram.
Parts & Tools Required
Tools:
- Philips & flathead screwdriver
- T-20 Torx bit or screwdriver
- 5mm socket & ratchet
- Plastic panel pry tool
- Plastic clip pry tool
- Drywall knife
- Solder Iron & Solder (check step 3 to see if you need)
Parts:
- 6×9″ speakers (2 pairs if you're doing front and rear)
- Metra 72-6514 (optional depending on step 3)
- Speaker wire (check step 3 to see if you need)
How to Replace the Front Door Speakers
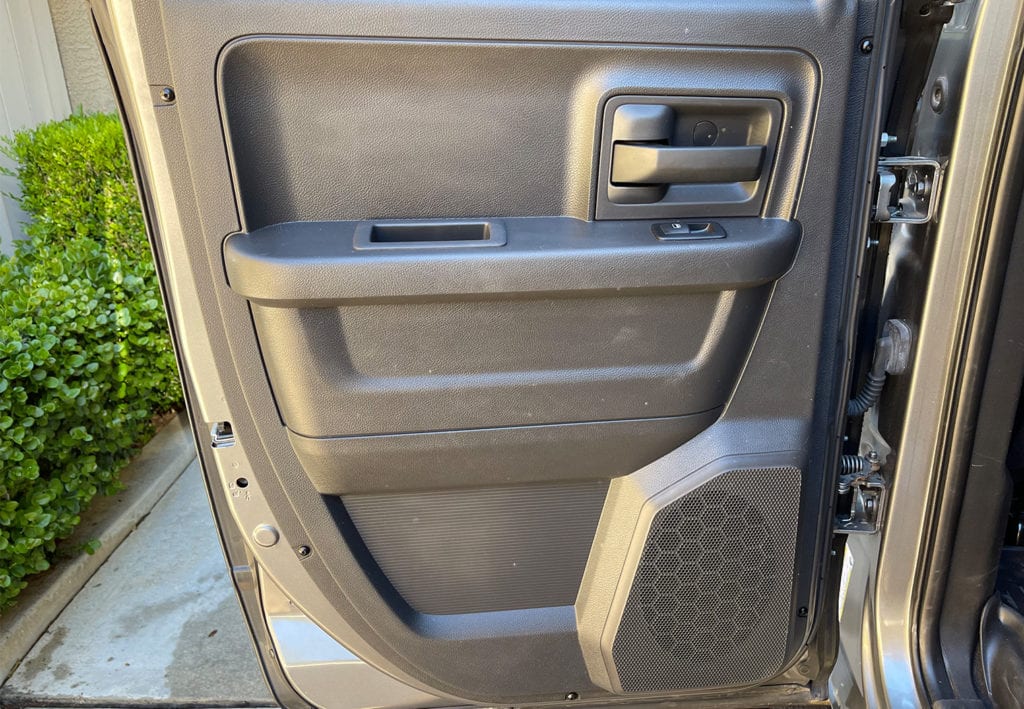
The first place I started on this truck was the front door speakers. In order to access the speakers you'll need to remove the door panel first. It's pretty straight forward and quick.
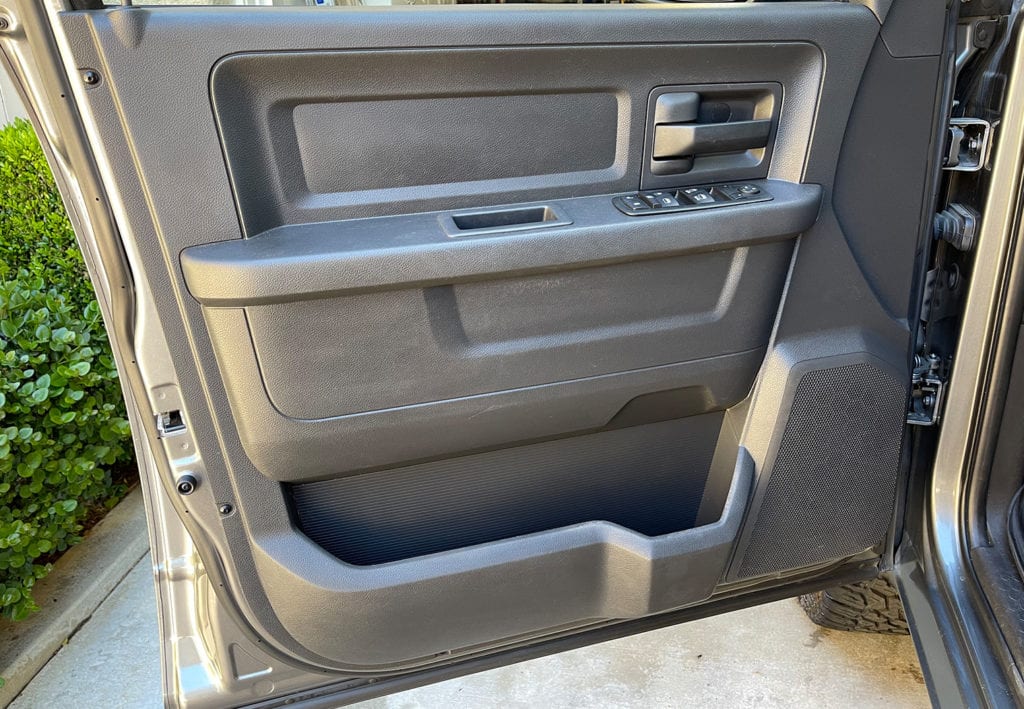
Step 1: Remove the Door Panel
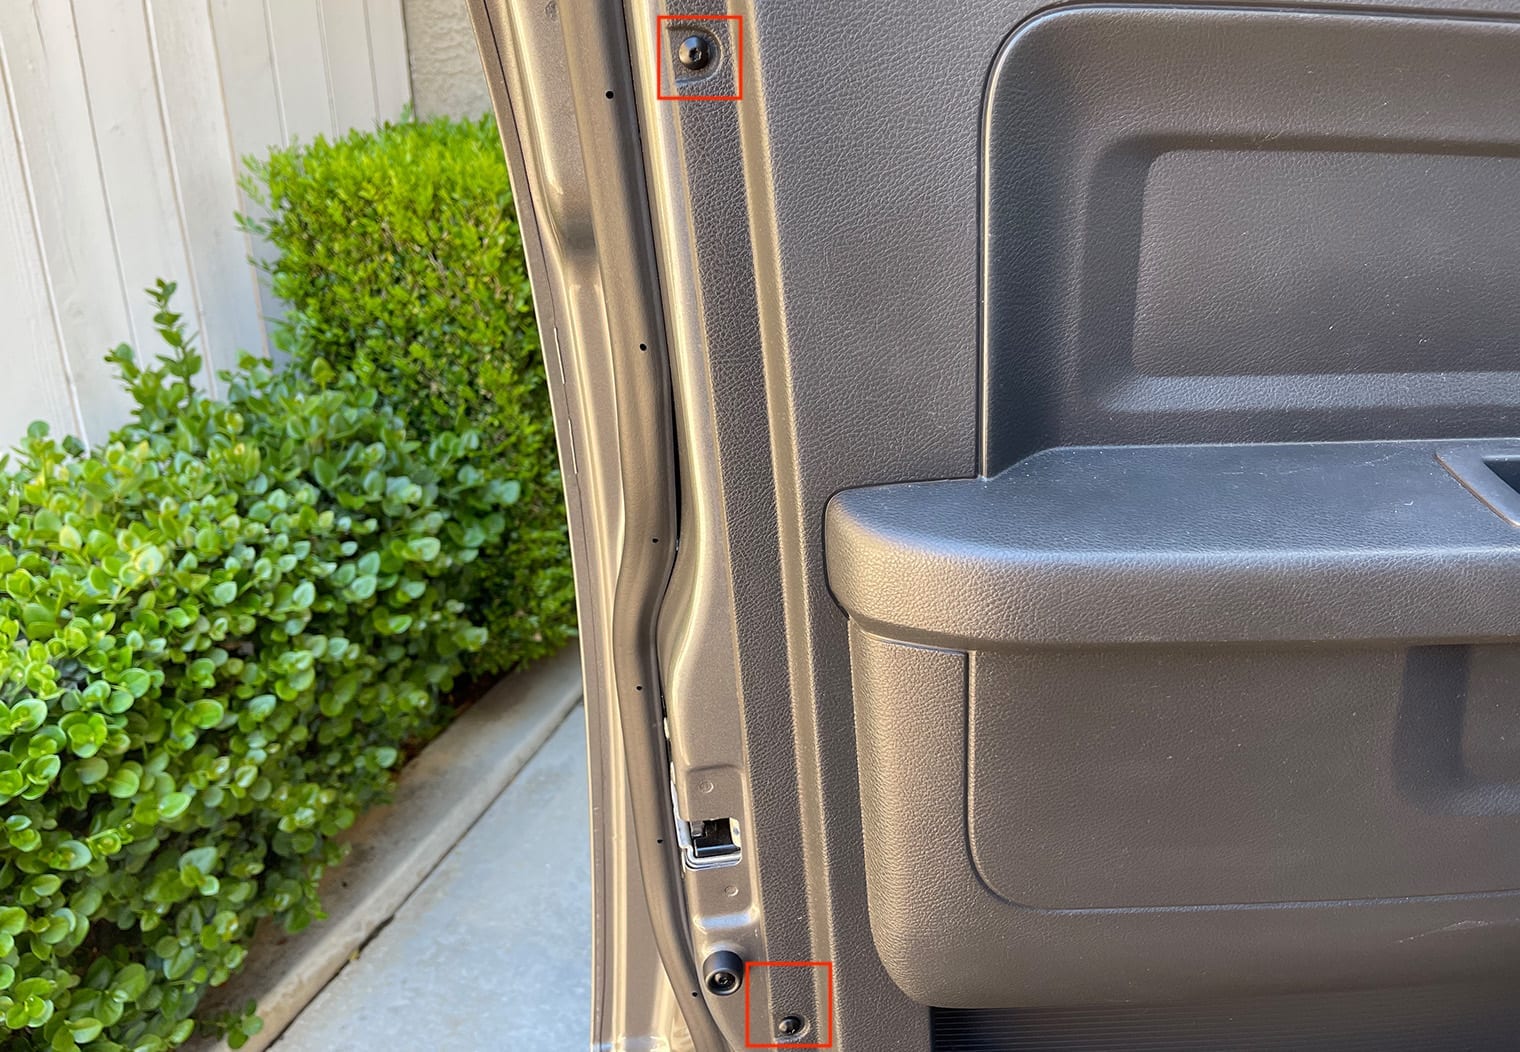
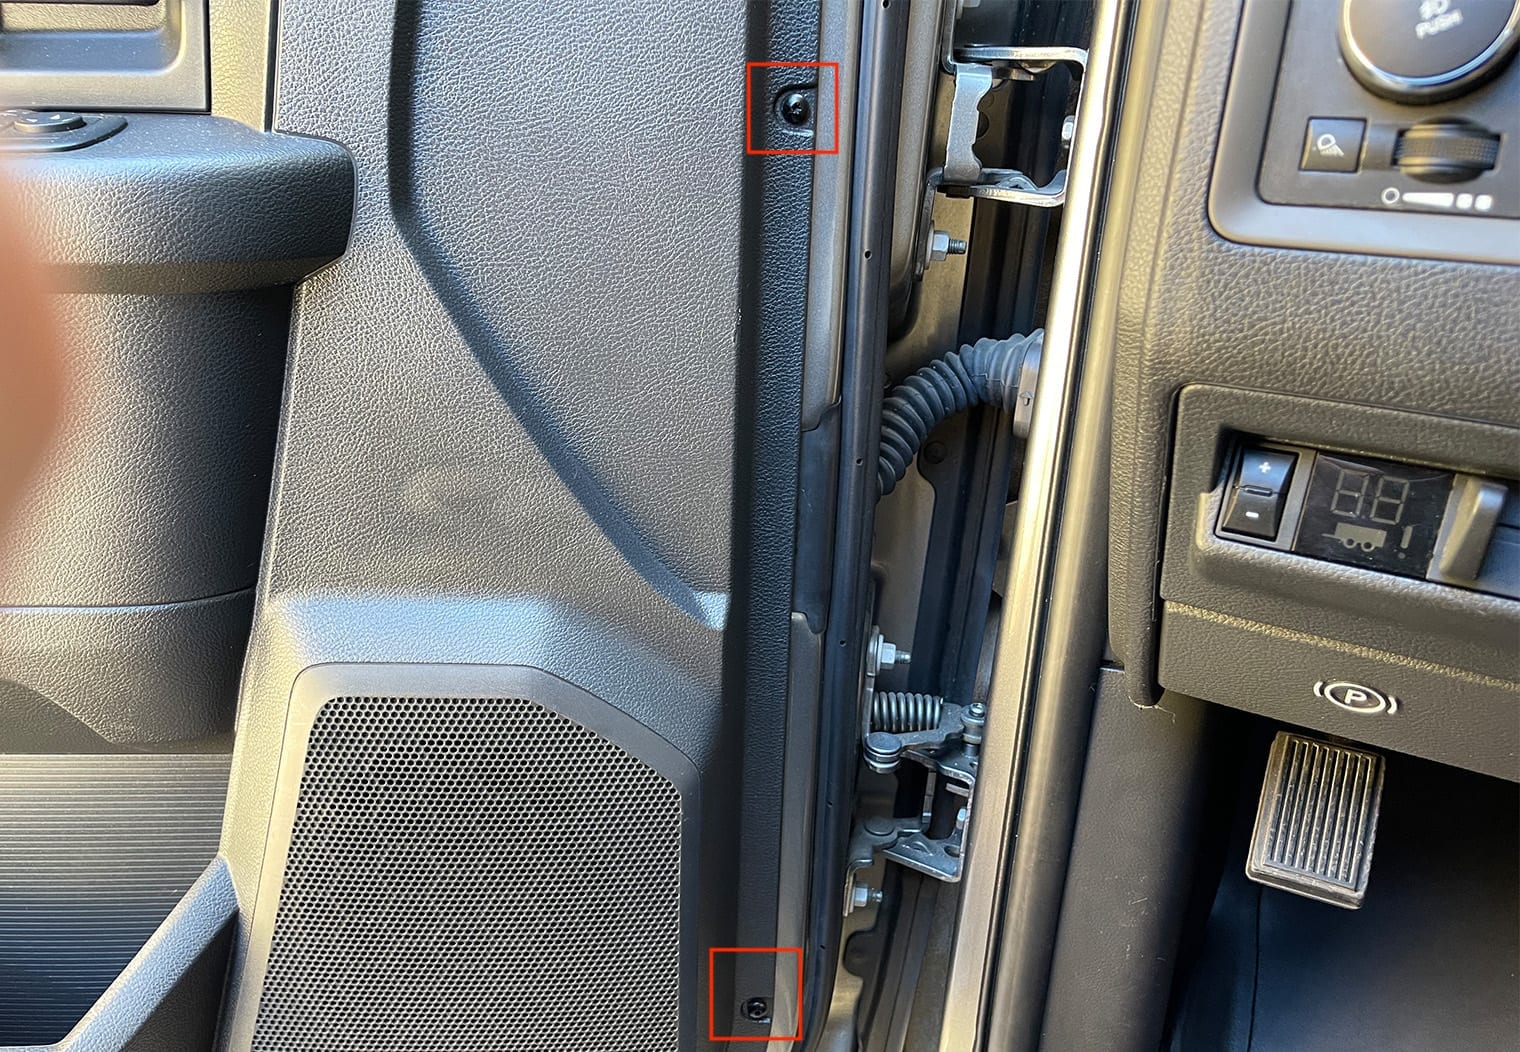
The front door panels have a total 6 screw clips that you'll need a T-20 torx bit to unscrew and then pull out. There's two on the left, two on the bottom and two on the right. Remove all of these clips and place them in a safe spot.

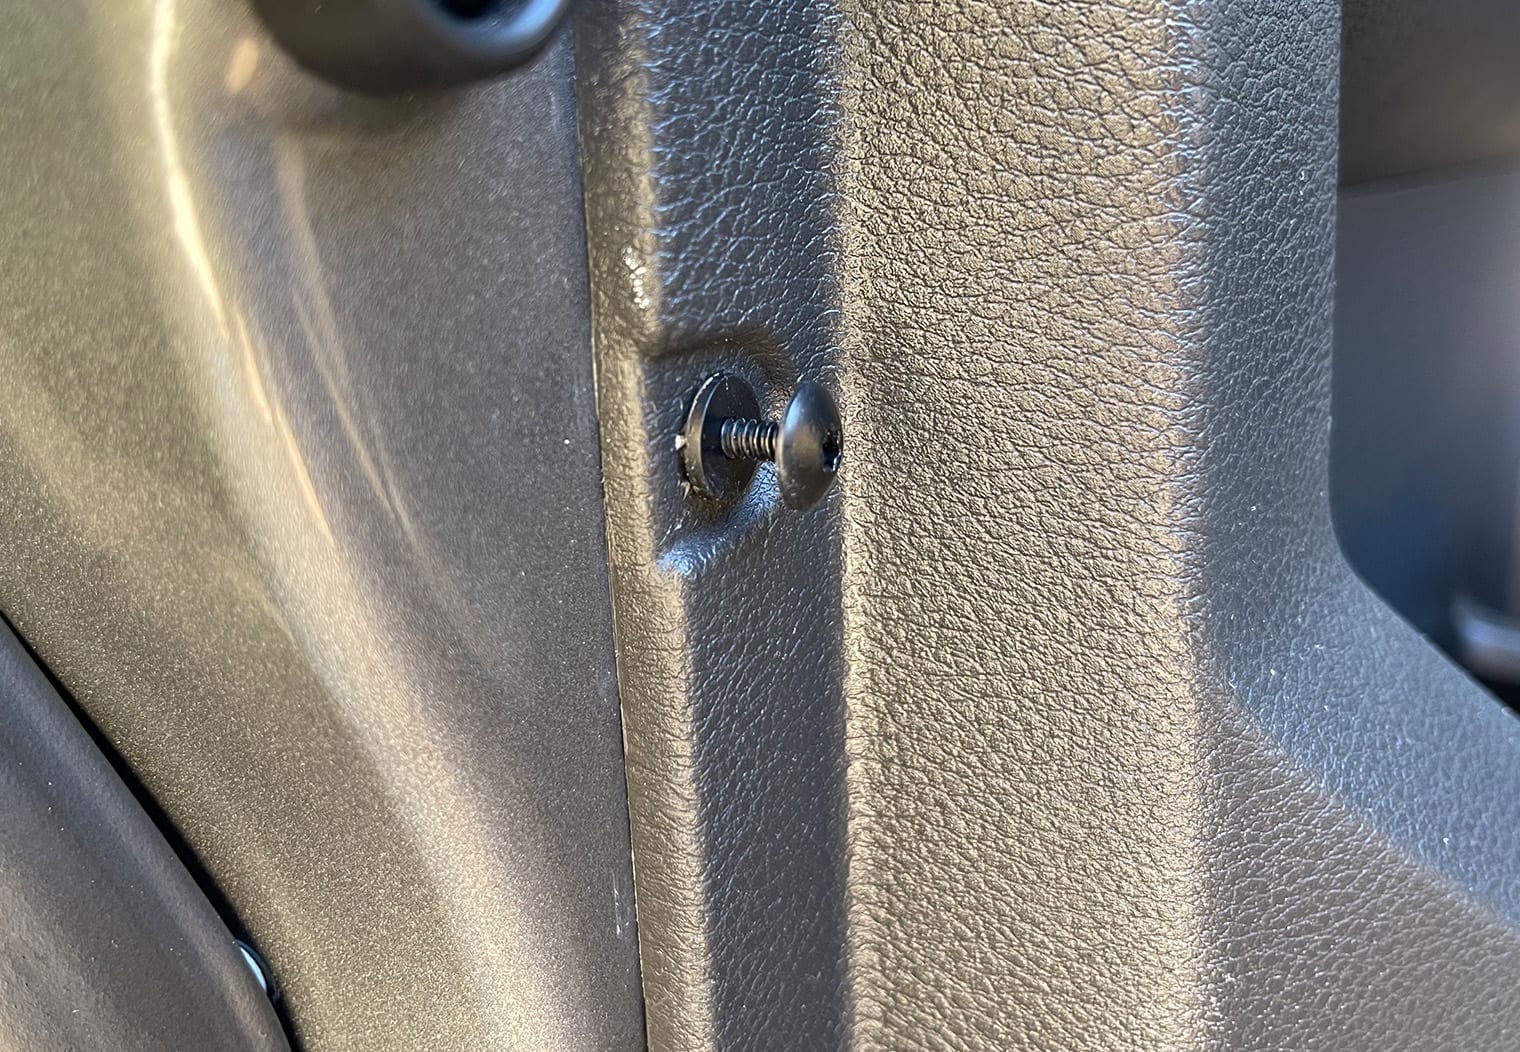
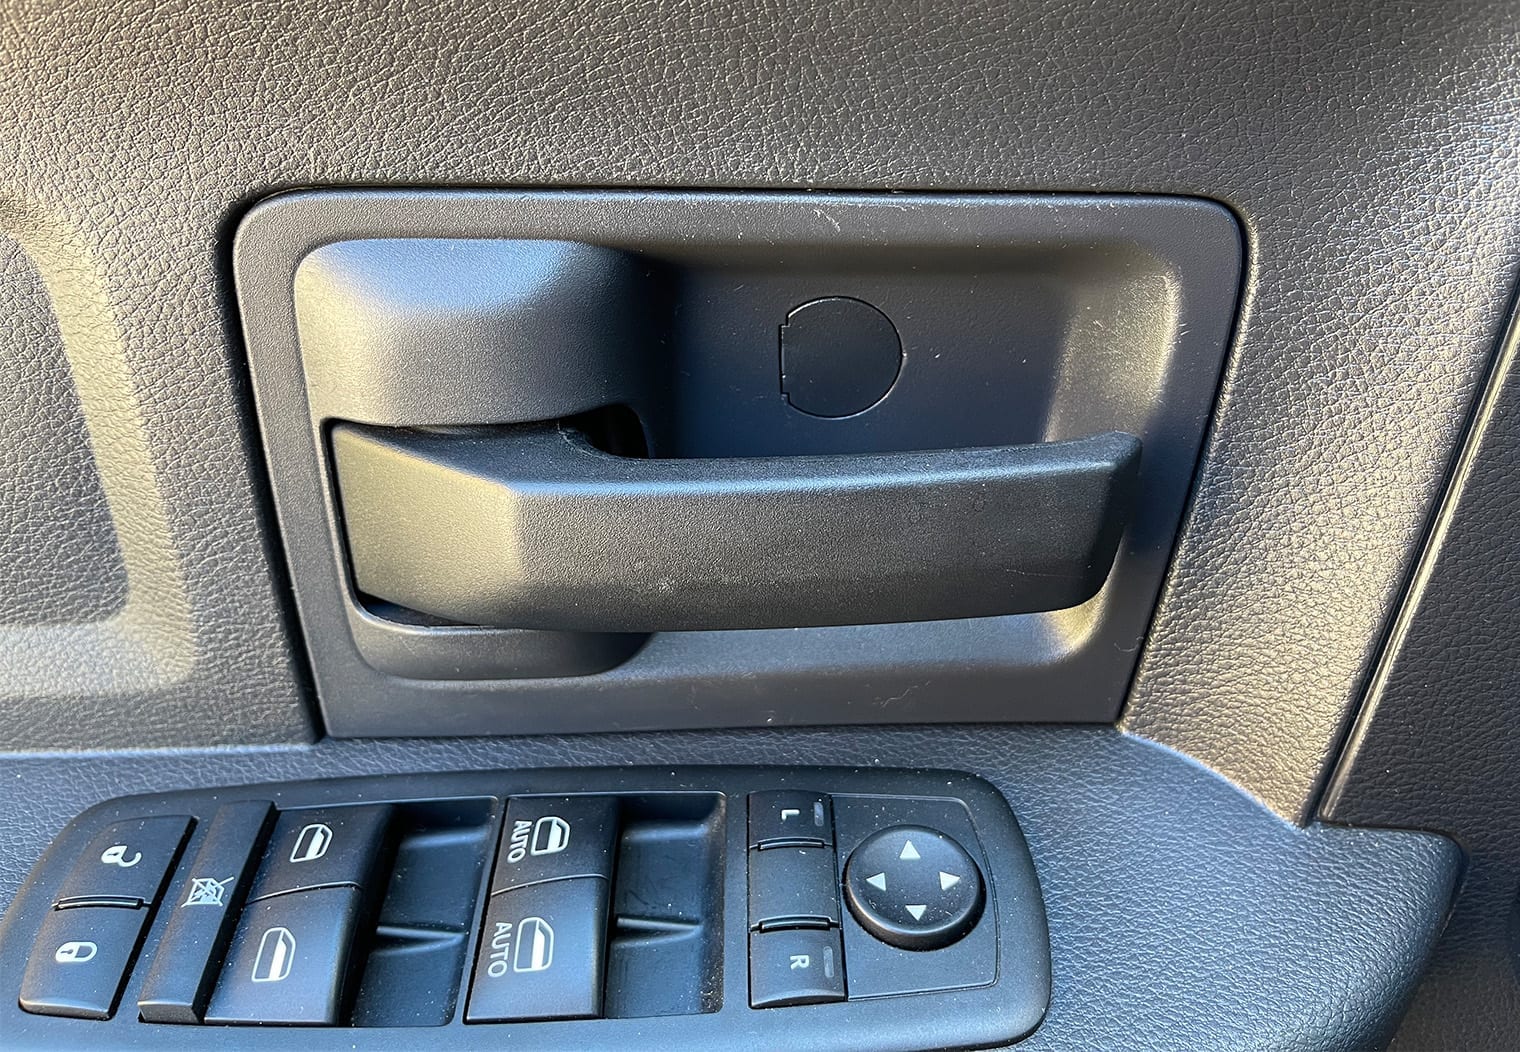
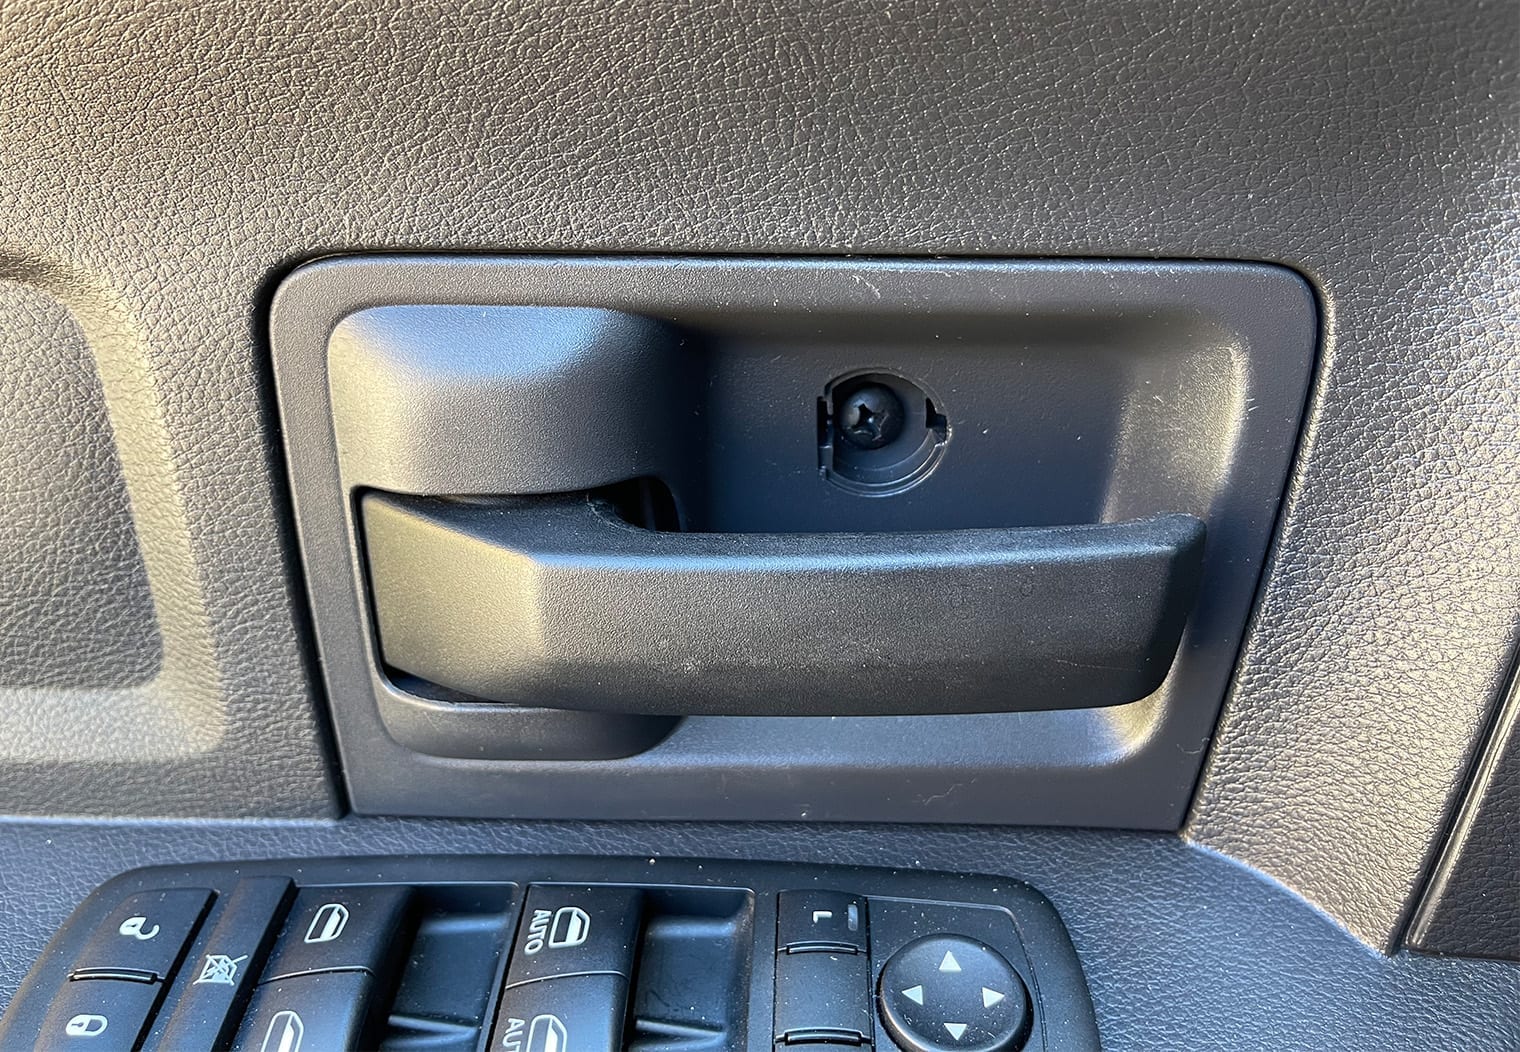
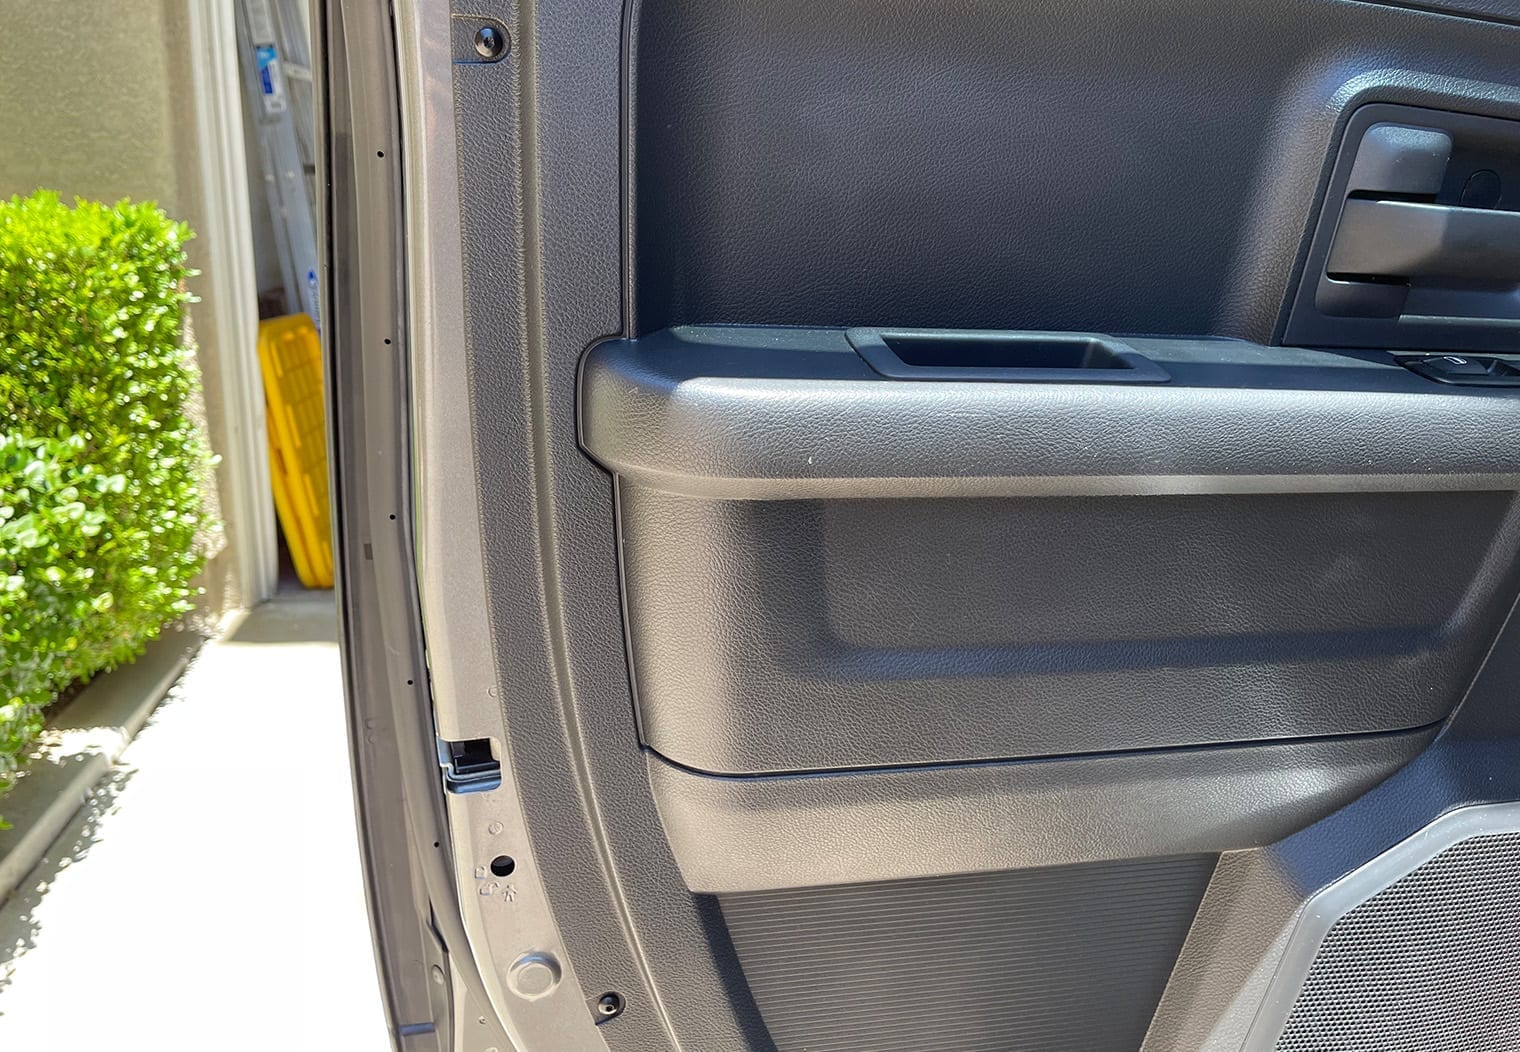
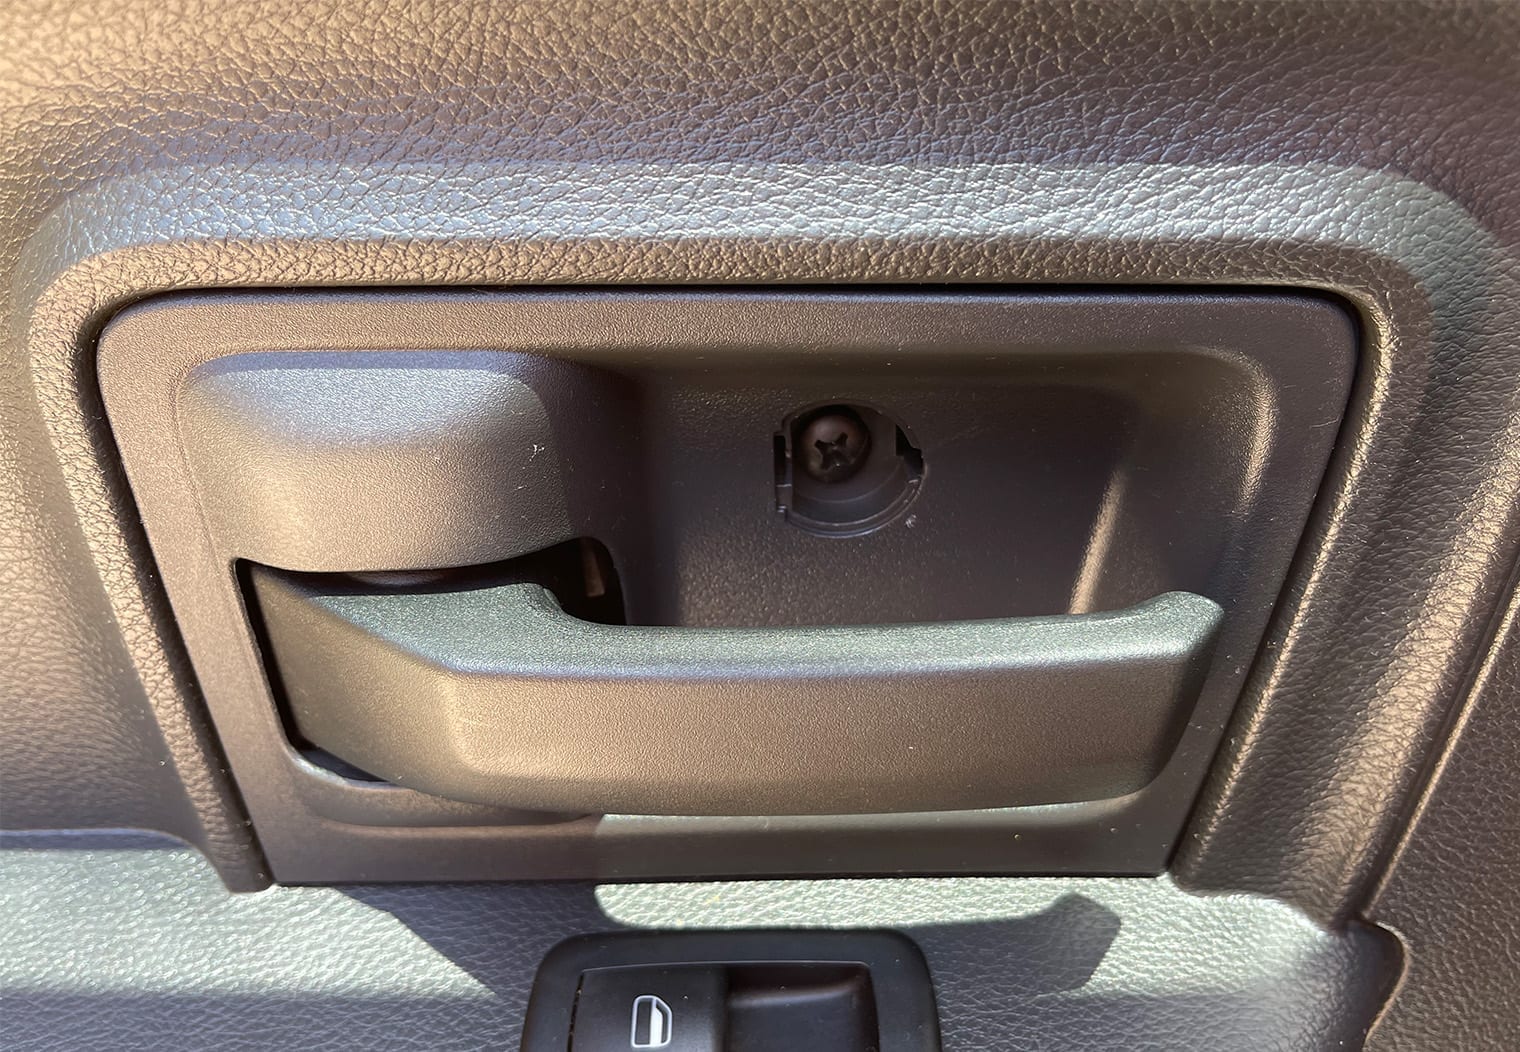
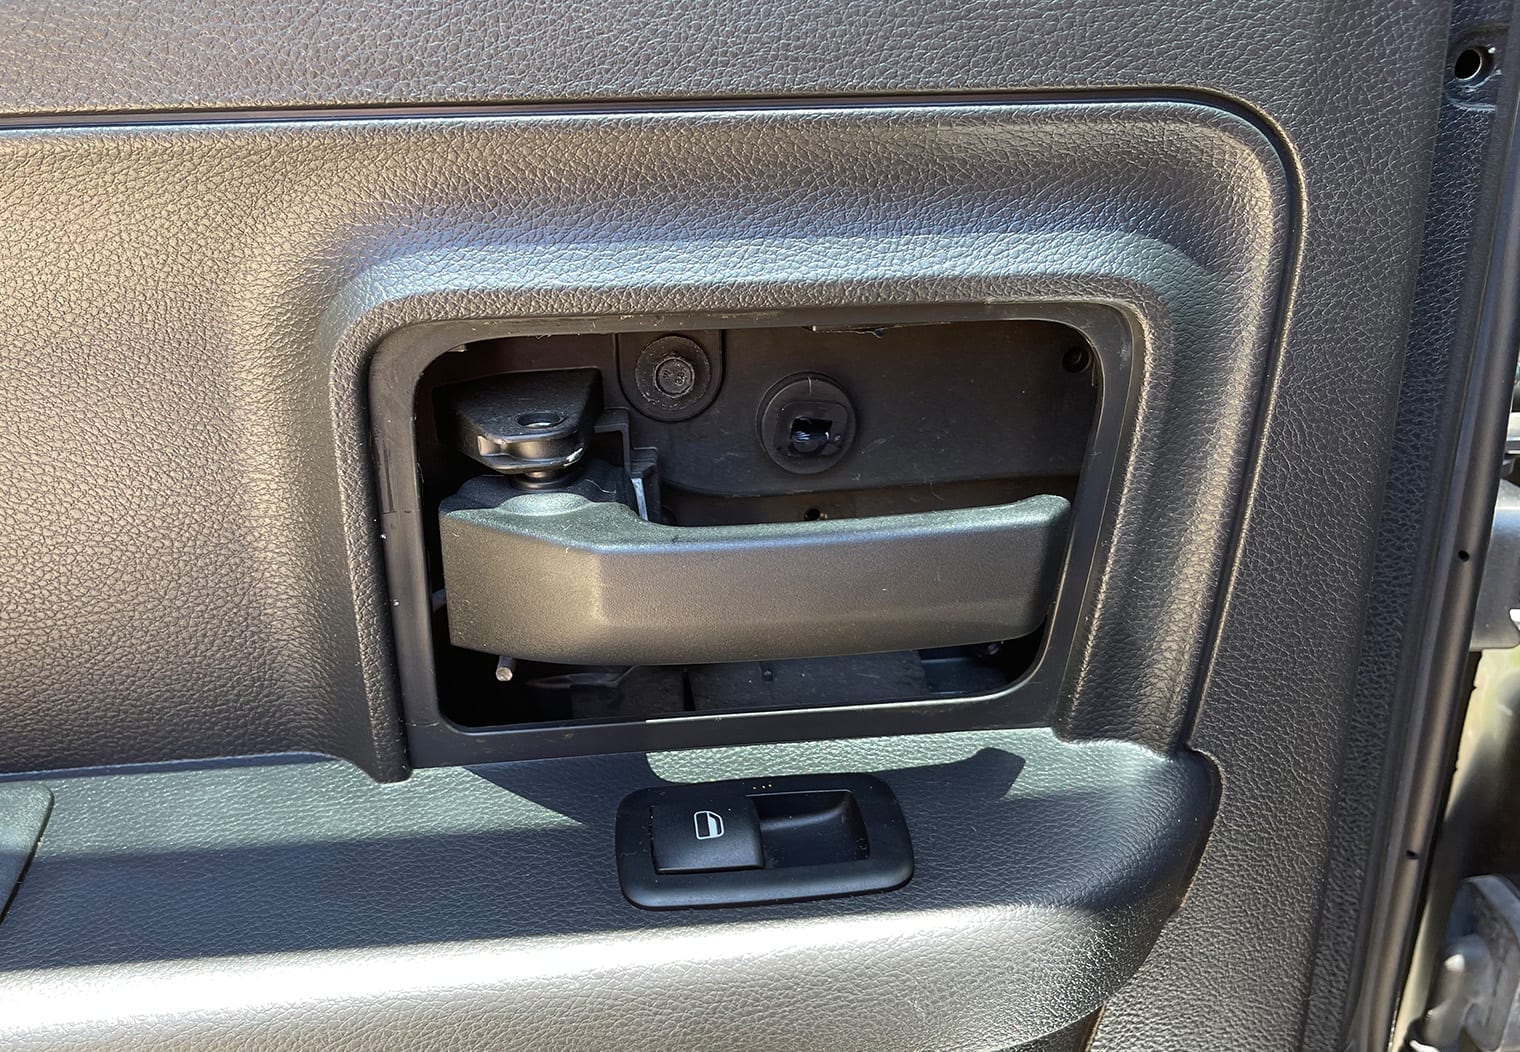
Next, you'll need to remove the single phillips screw that's located behind the handle. Using a small flathead remove the screw cover located directly behind the handle and using a large phillips screw driver, remove the screw. Once you remove the screw, pull the small panel that surrounds the handle off.
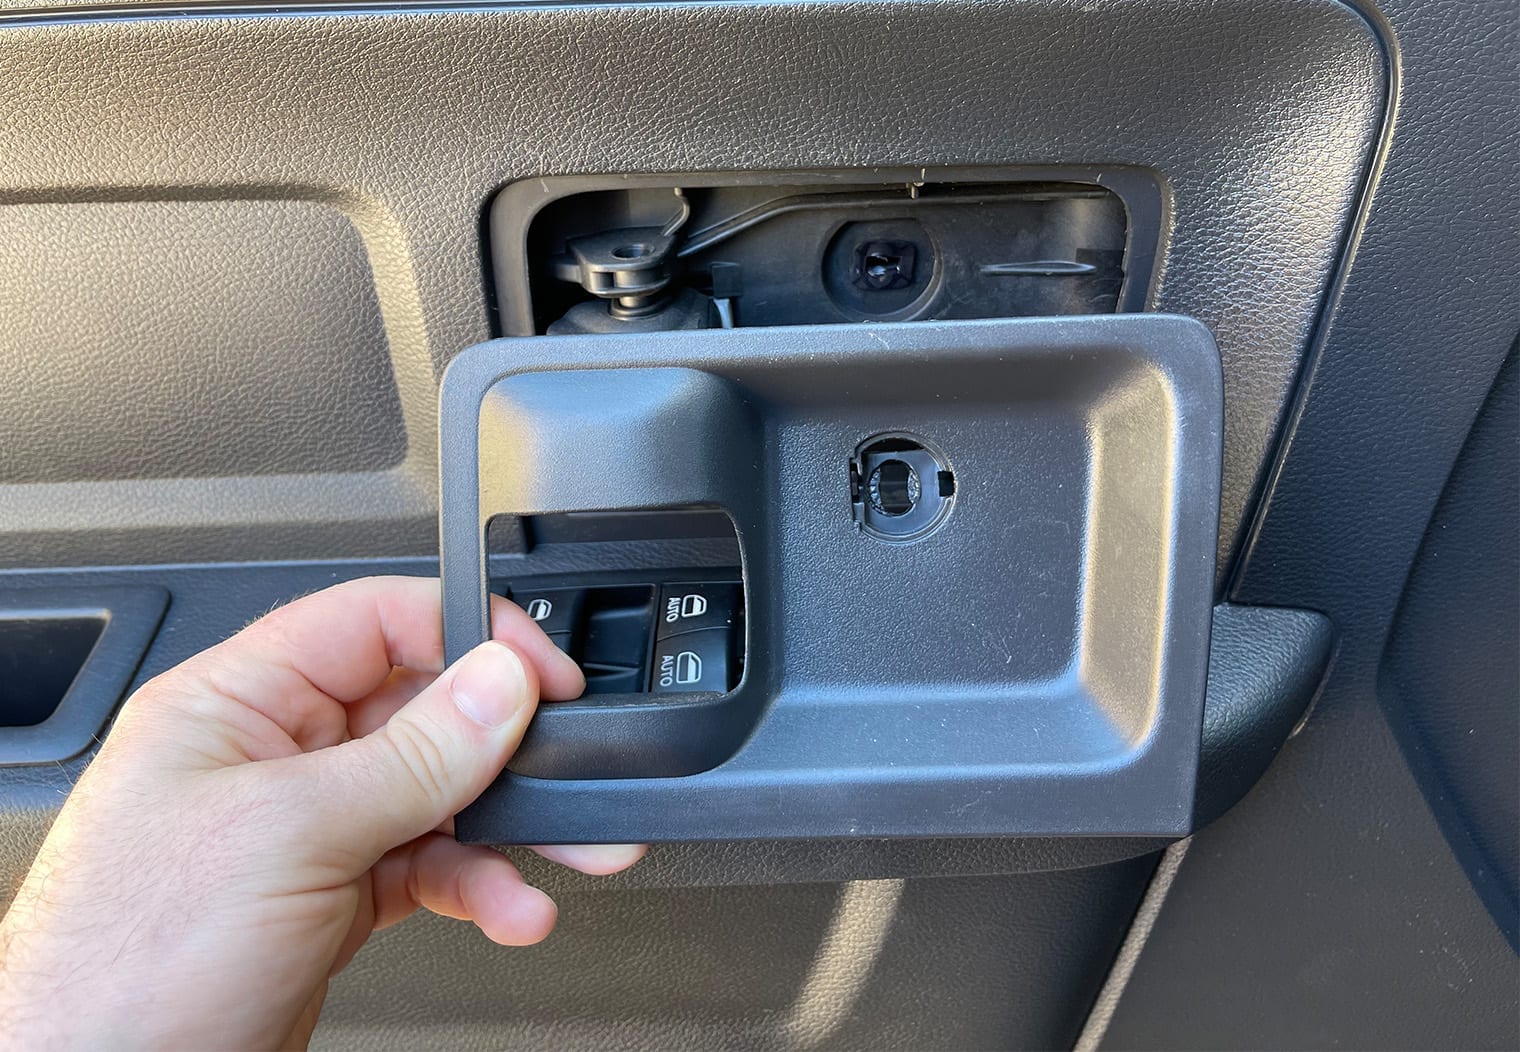
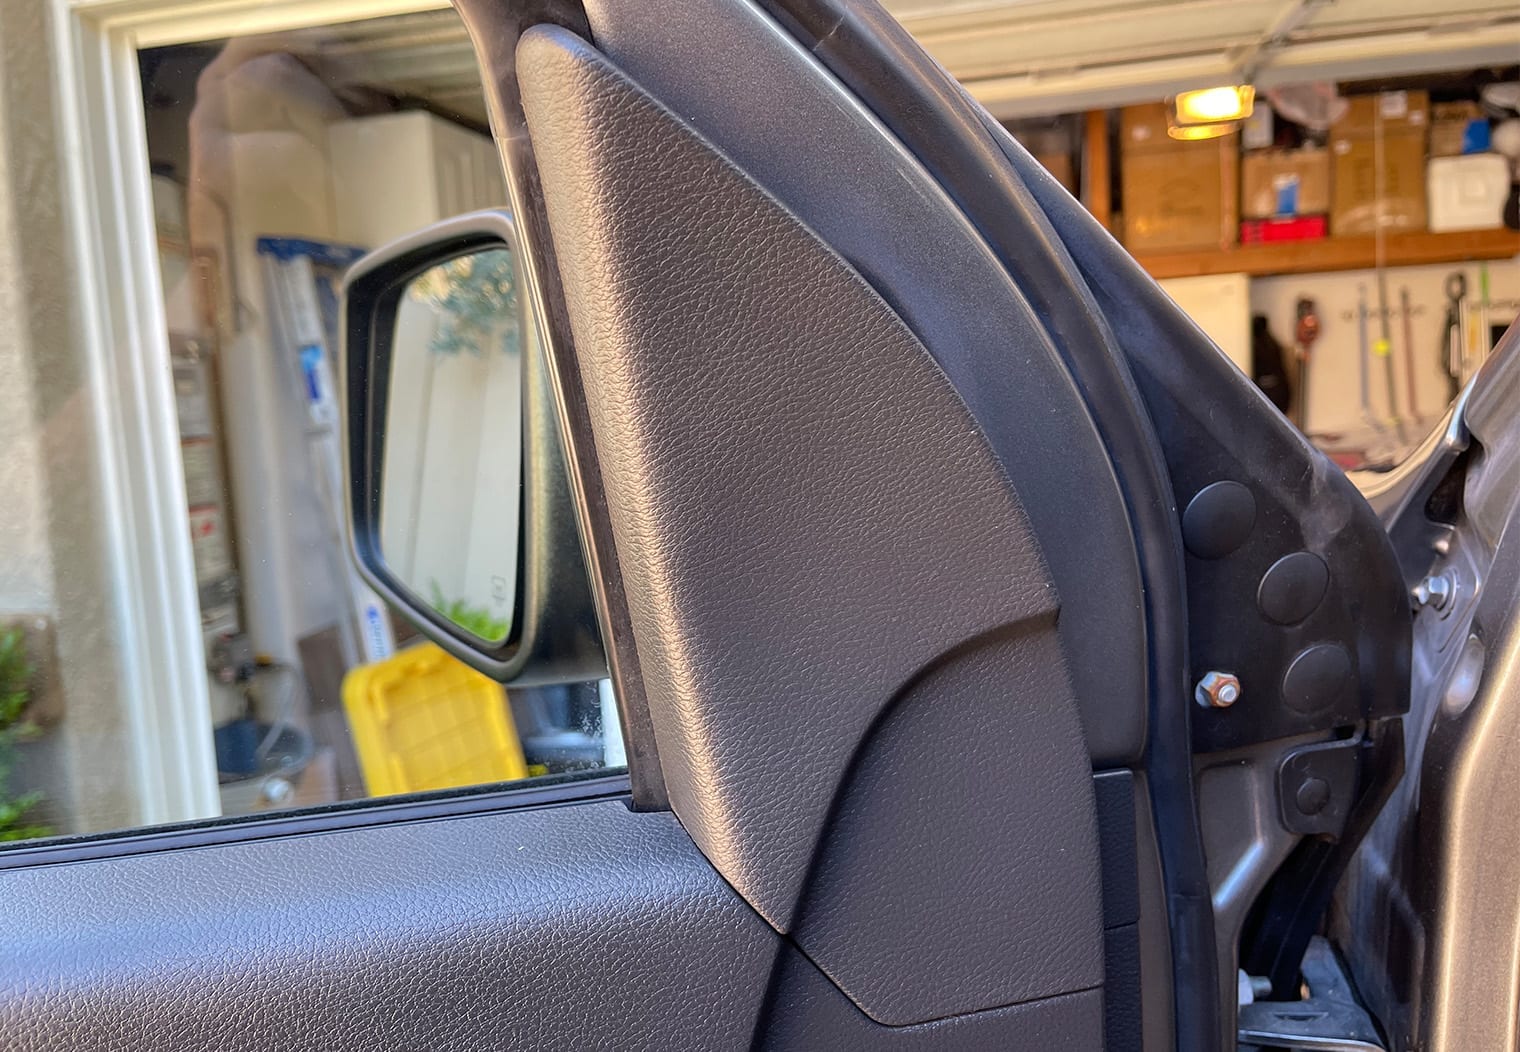
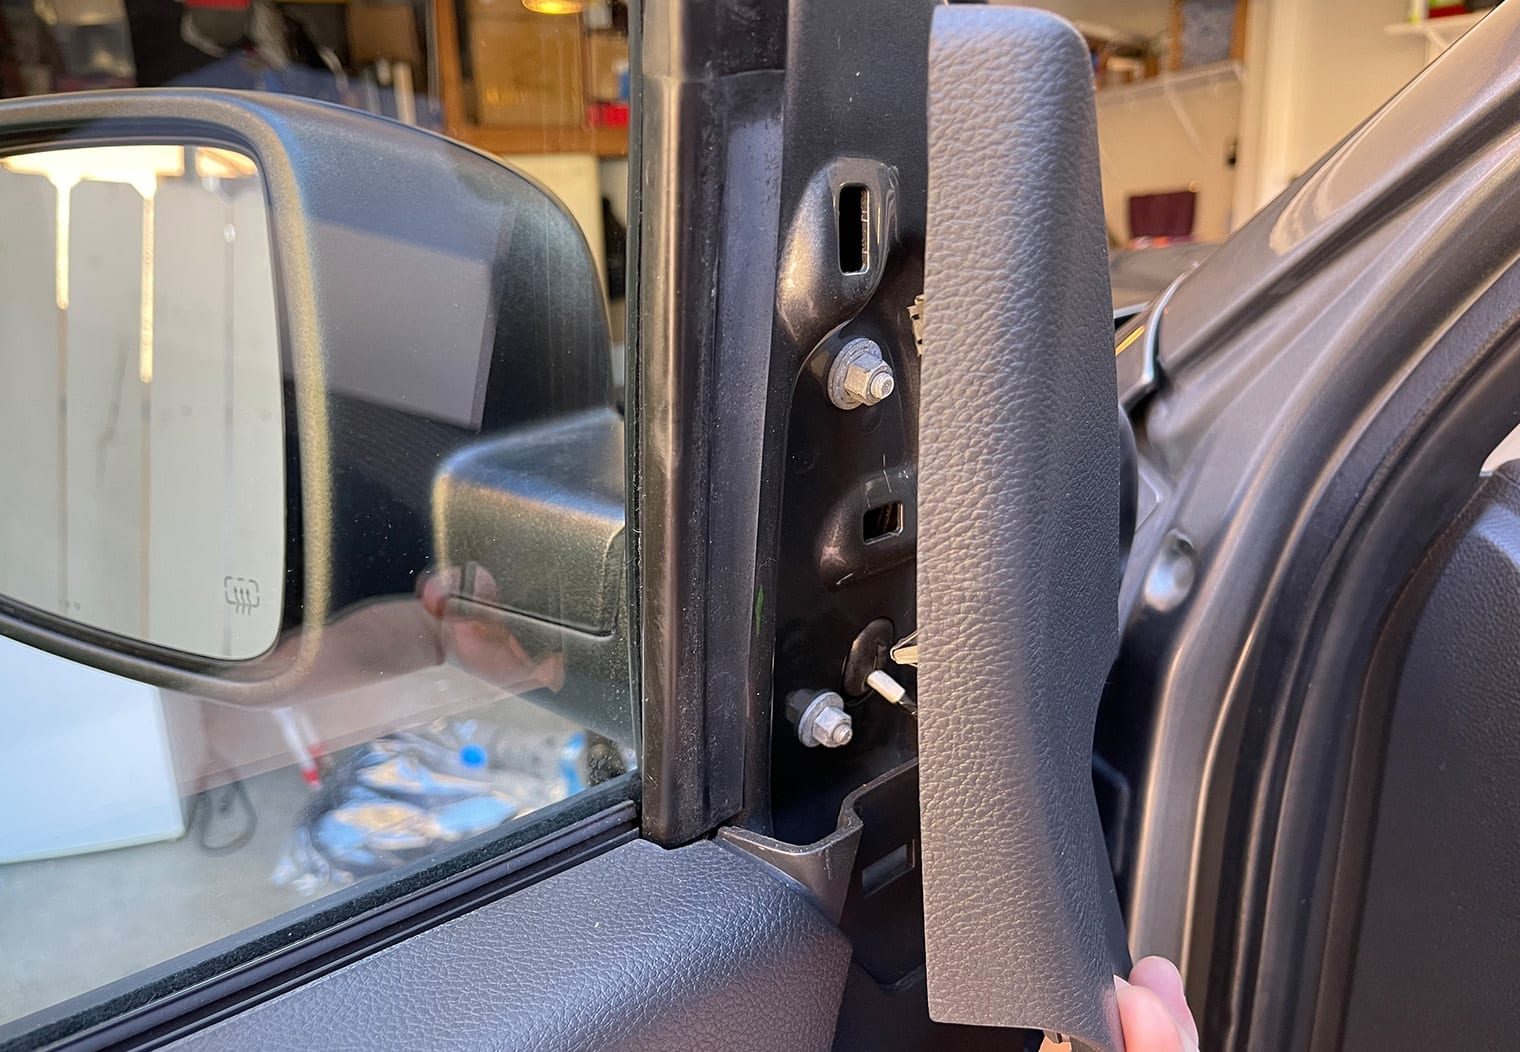
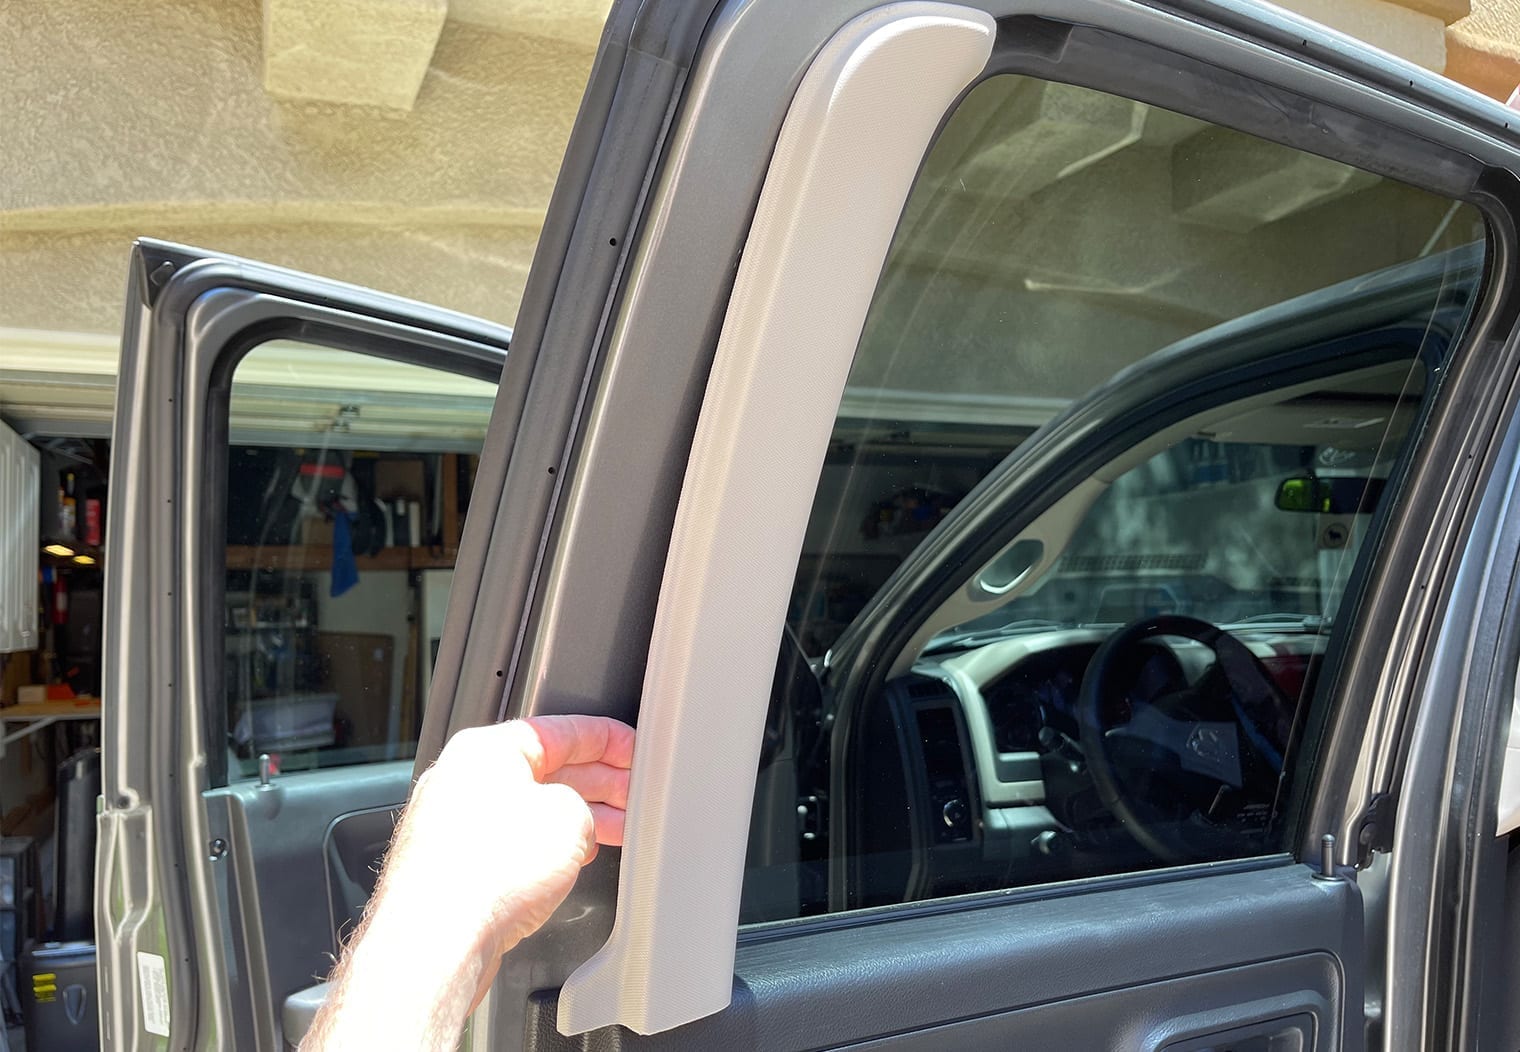
With all of the screws removed from the panel now, you'll need to unclip the trim piece at the upper, inner part of the door. Do this by pulling outwards on the top side of this panel and the entire panel will easily come removed.
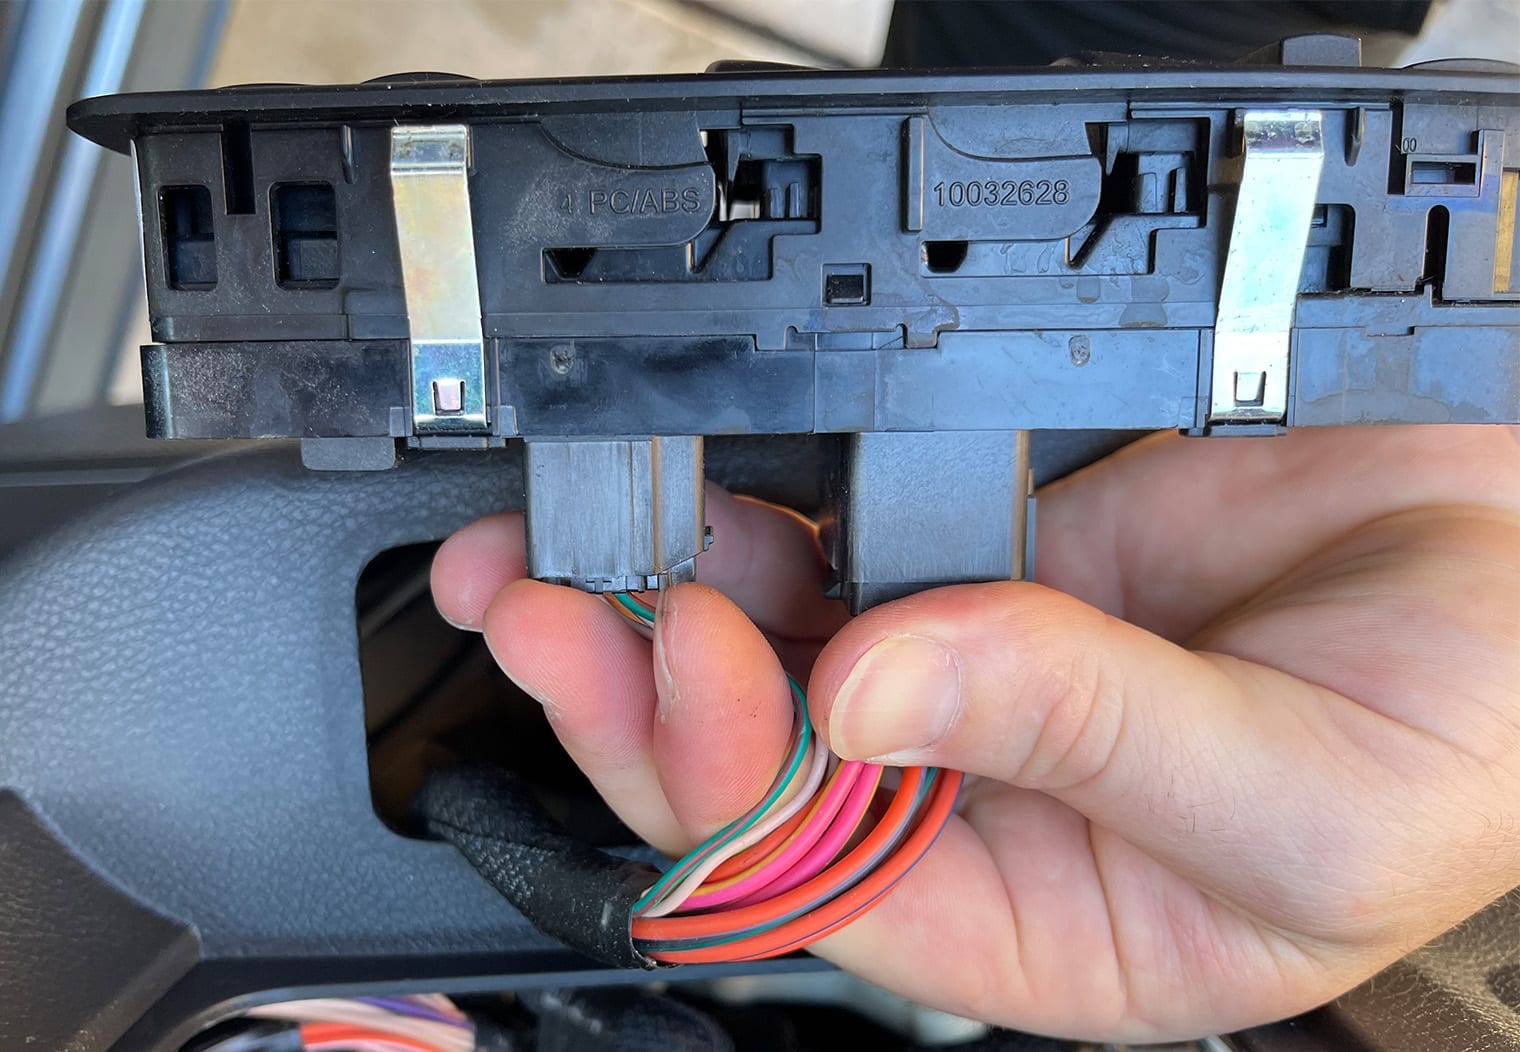
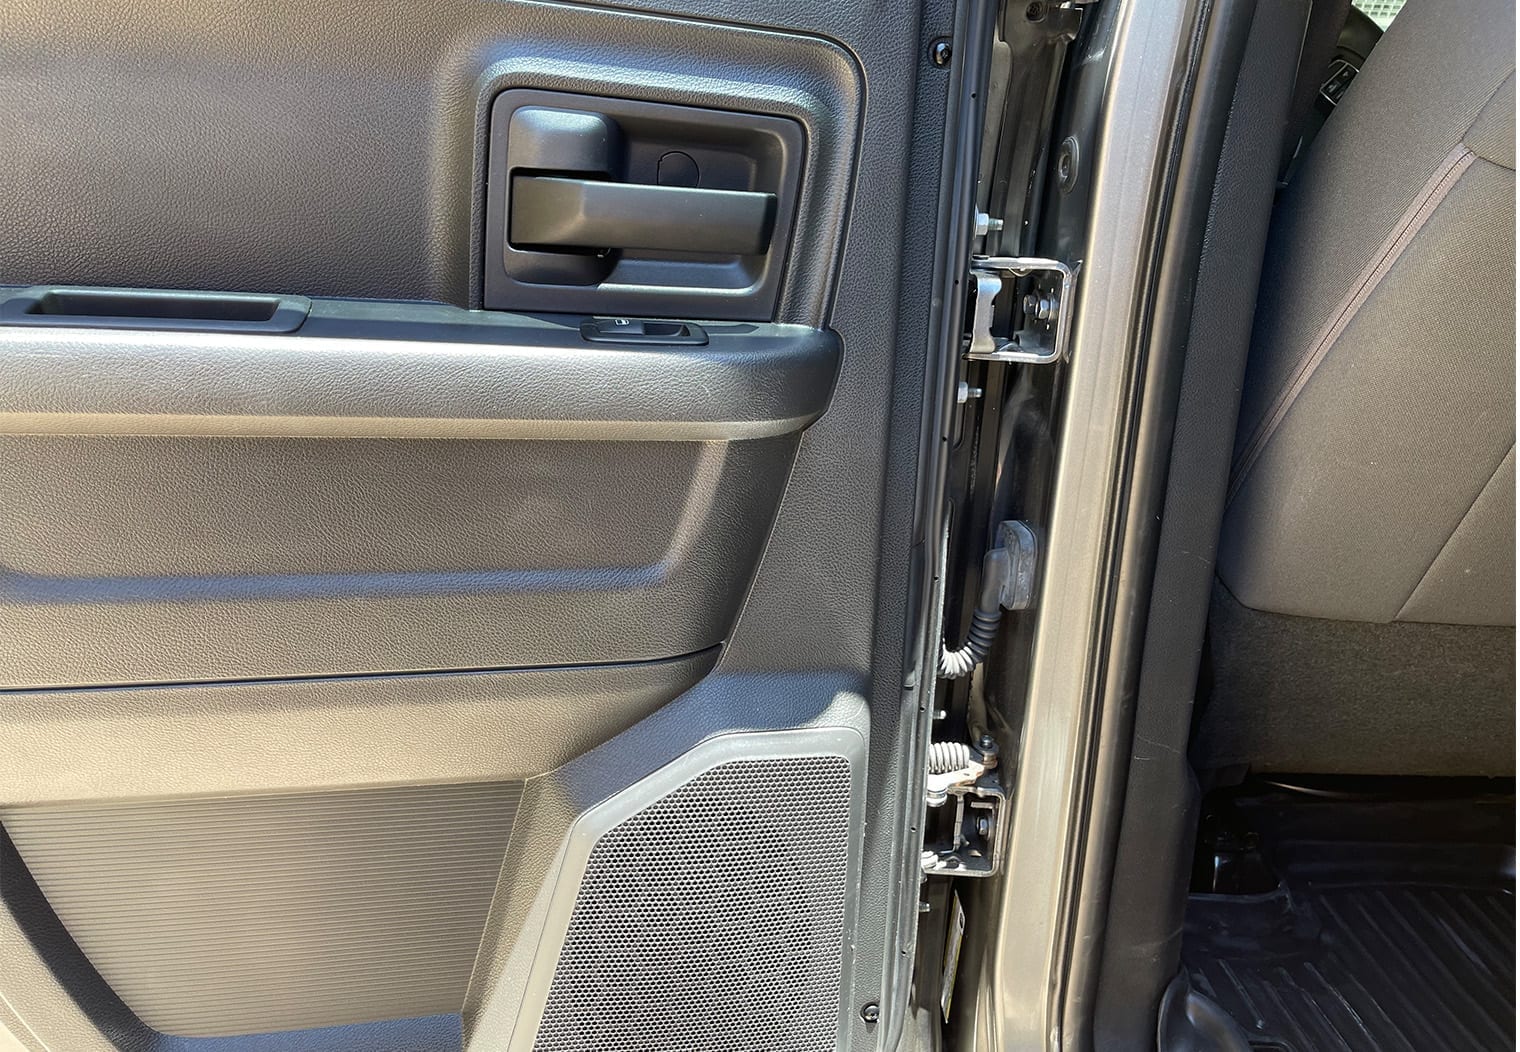
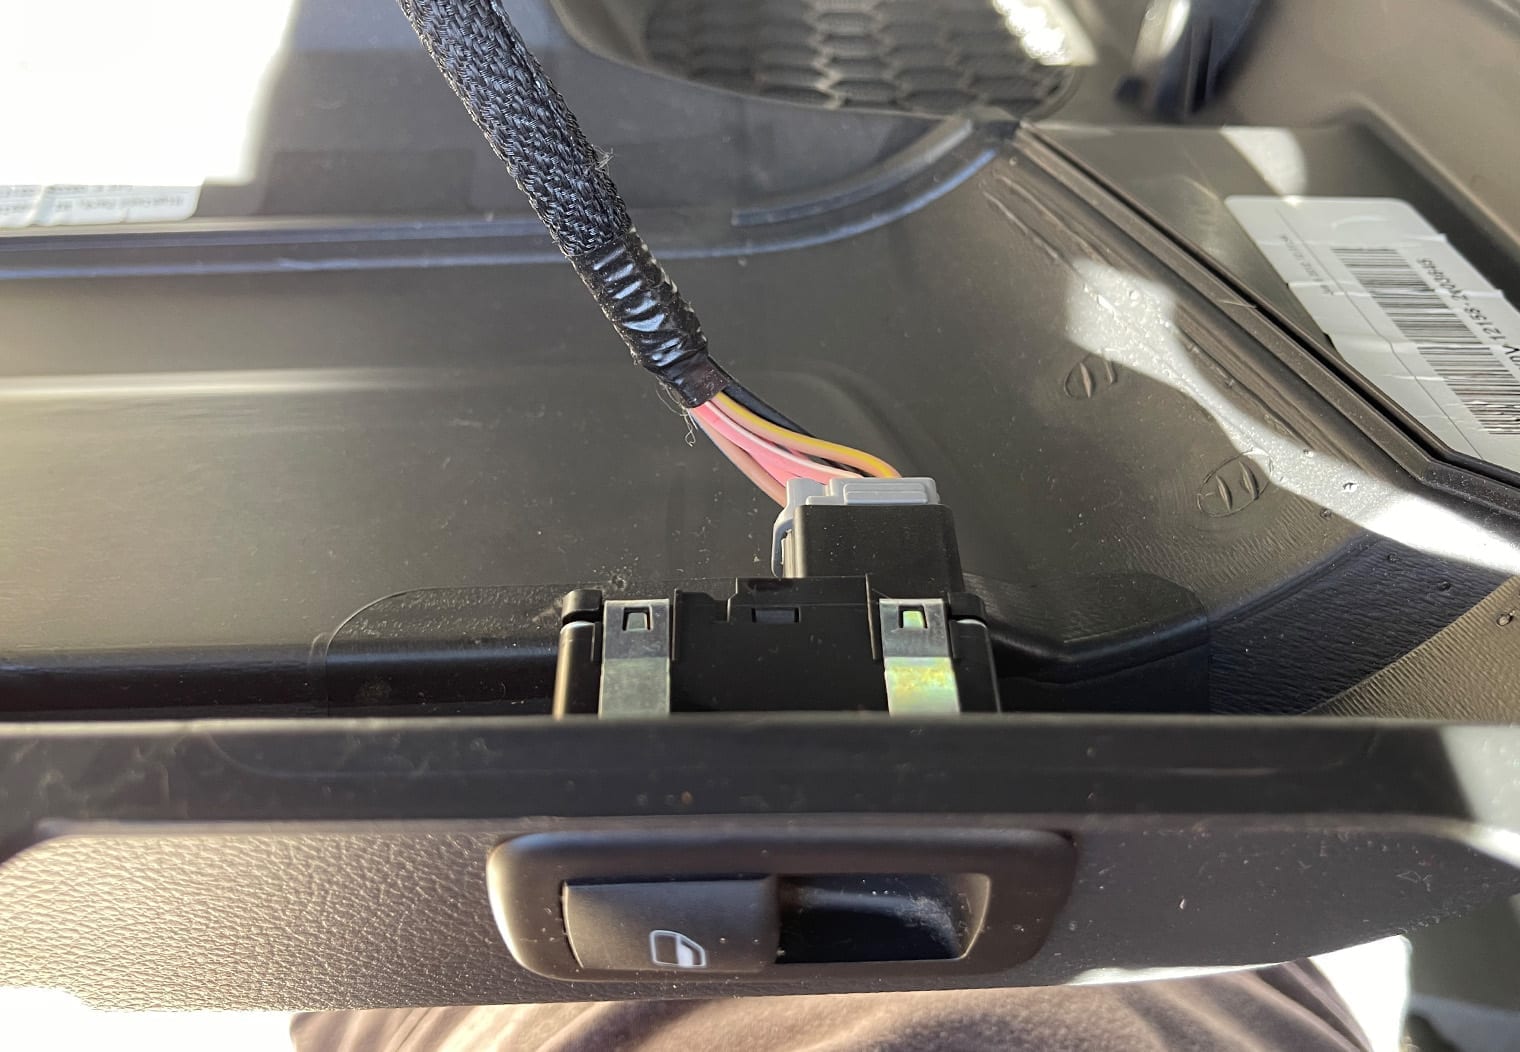
Now, you can either begin to remove the door panel at this step or you can remove the window/lock control panel and unplug it first. I removed the door panel first and then unclipped the control panel on the door but it's your choice.
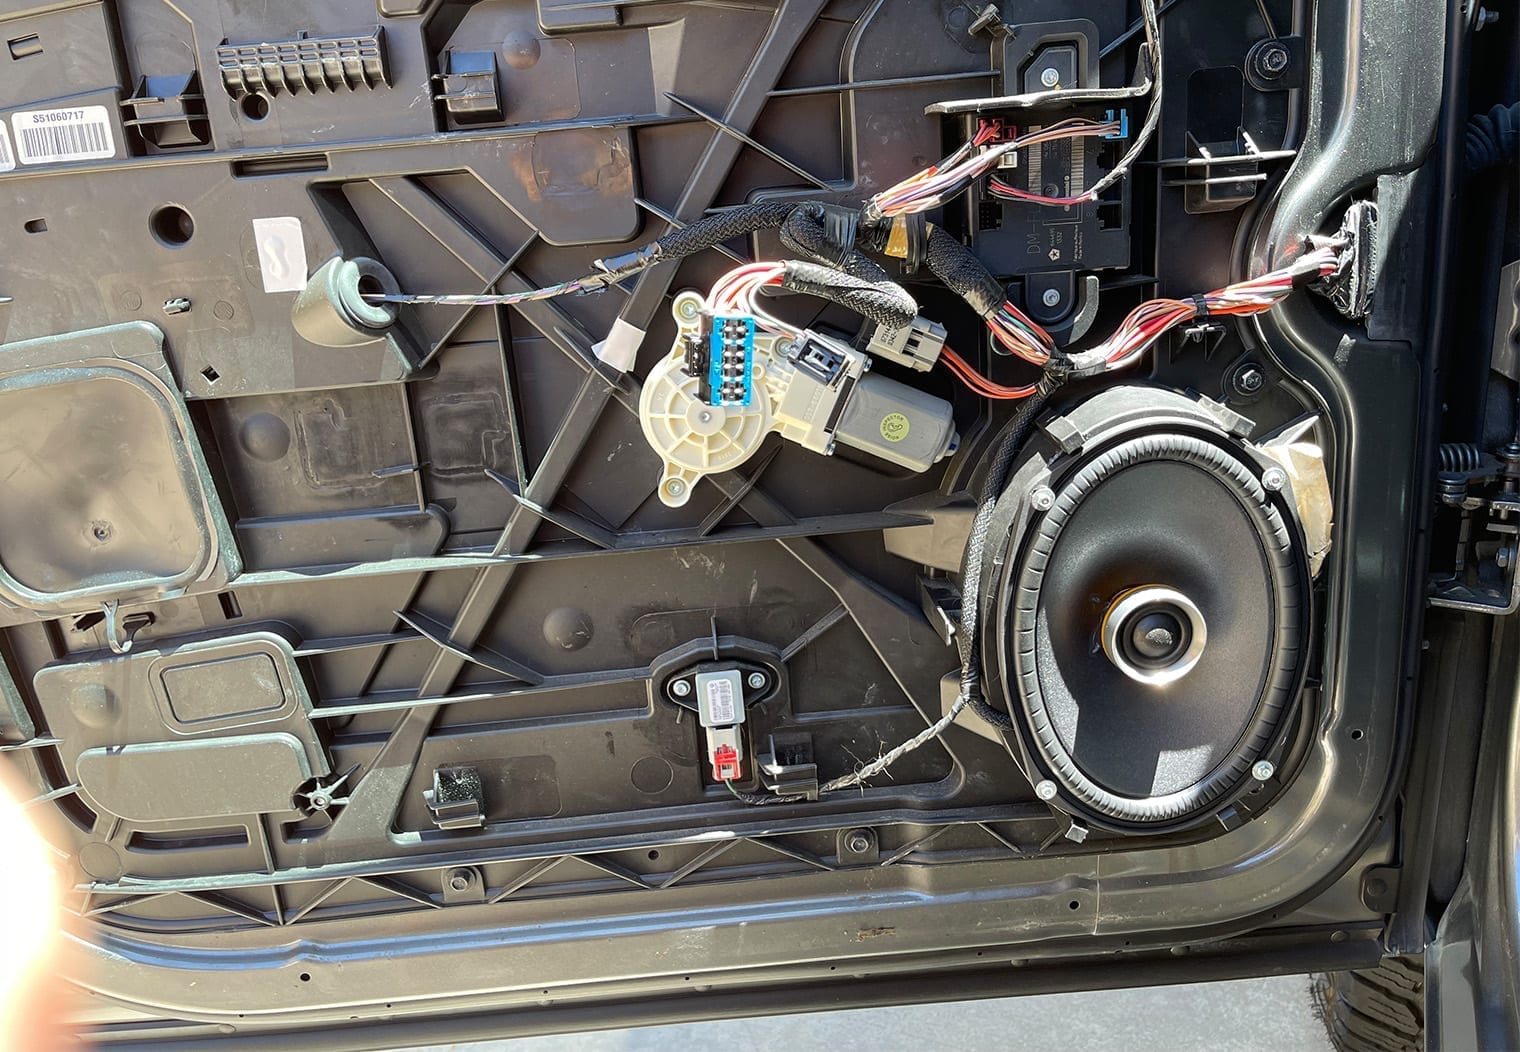
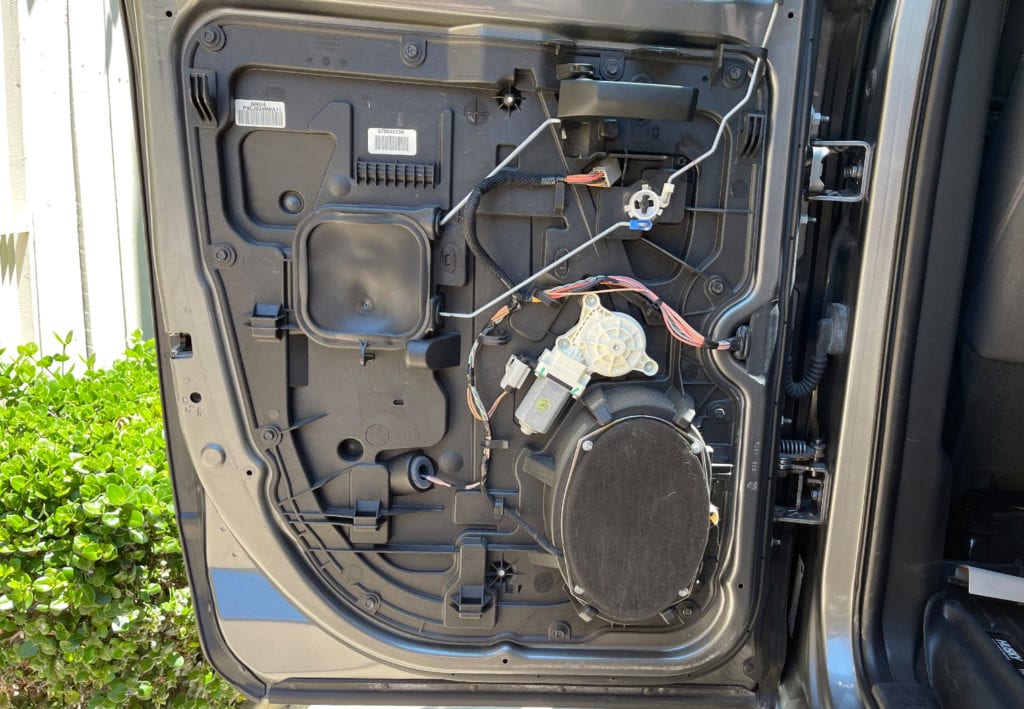
To remove the door panel at this point, just lift upwards on the panel and then outwards. Again, I unclipped the control panel afterwards so the photos below show this. But you could also use your pry tool to unclip the window control panel, unplug it, and then remove the door panel.
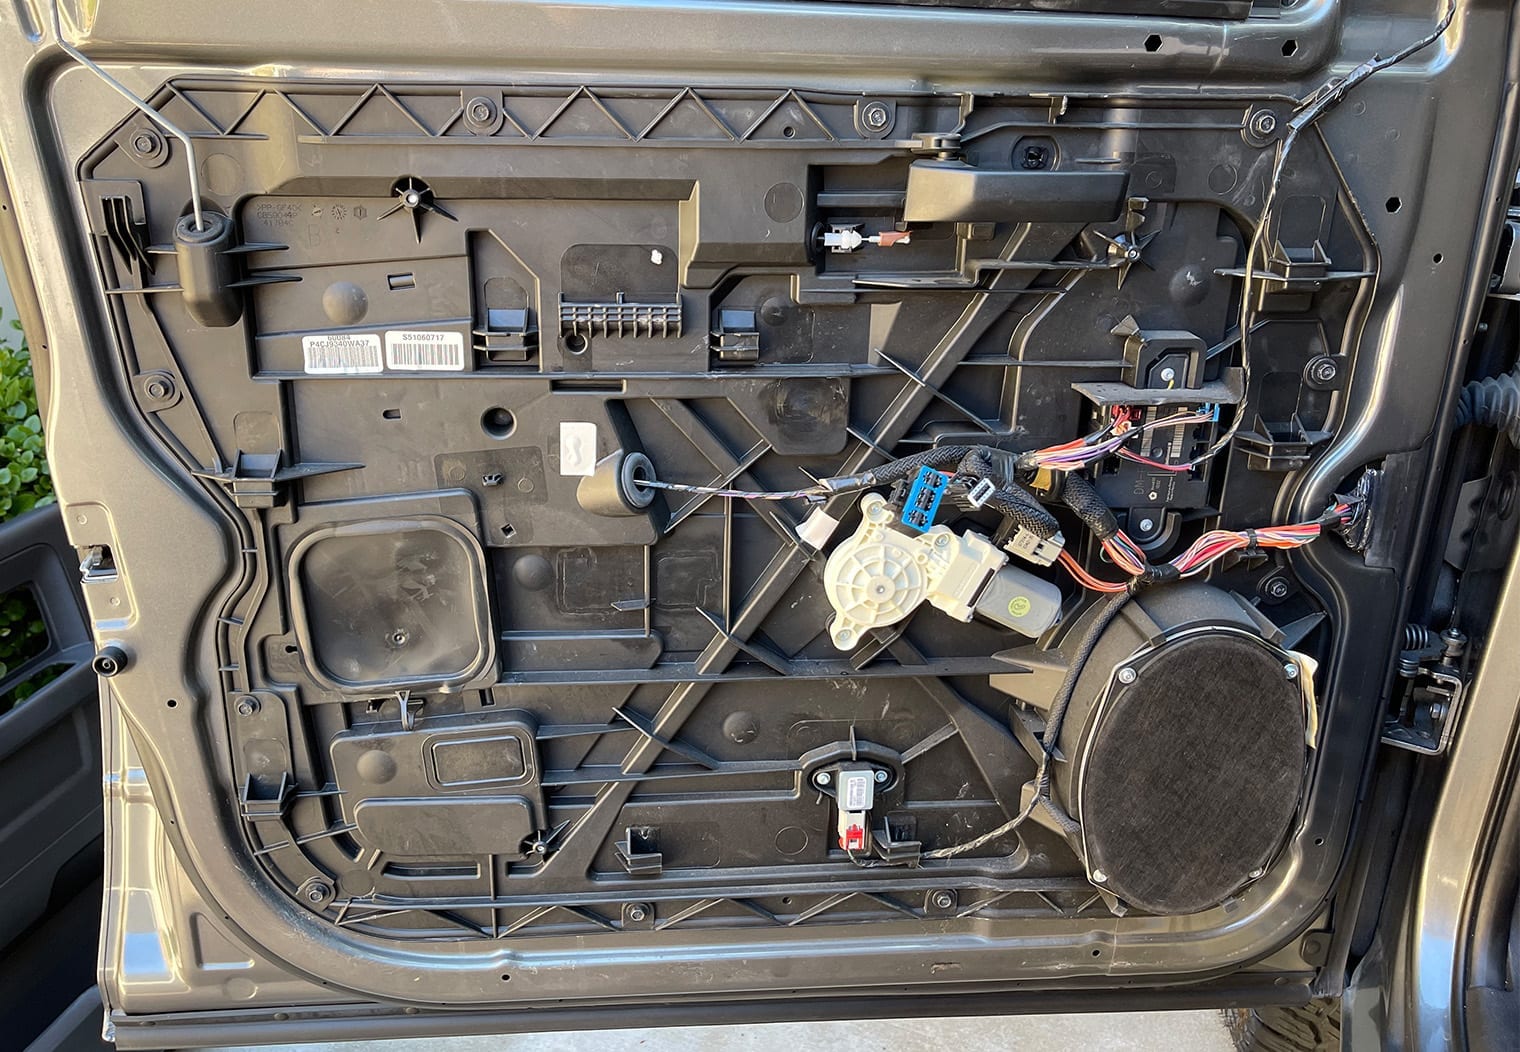
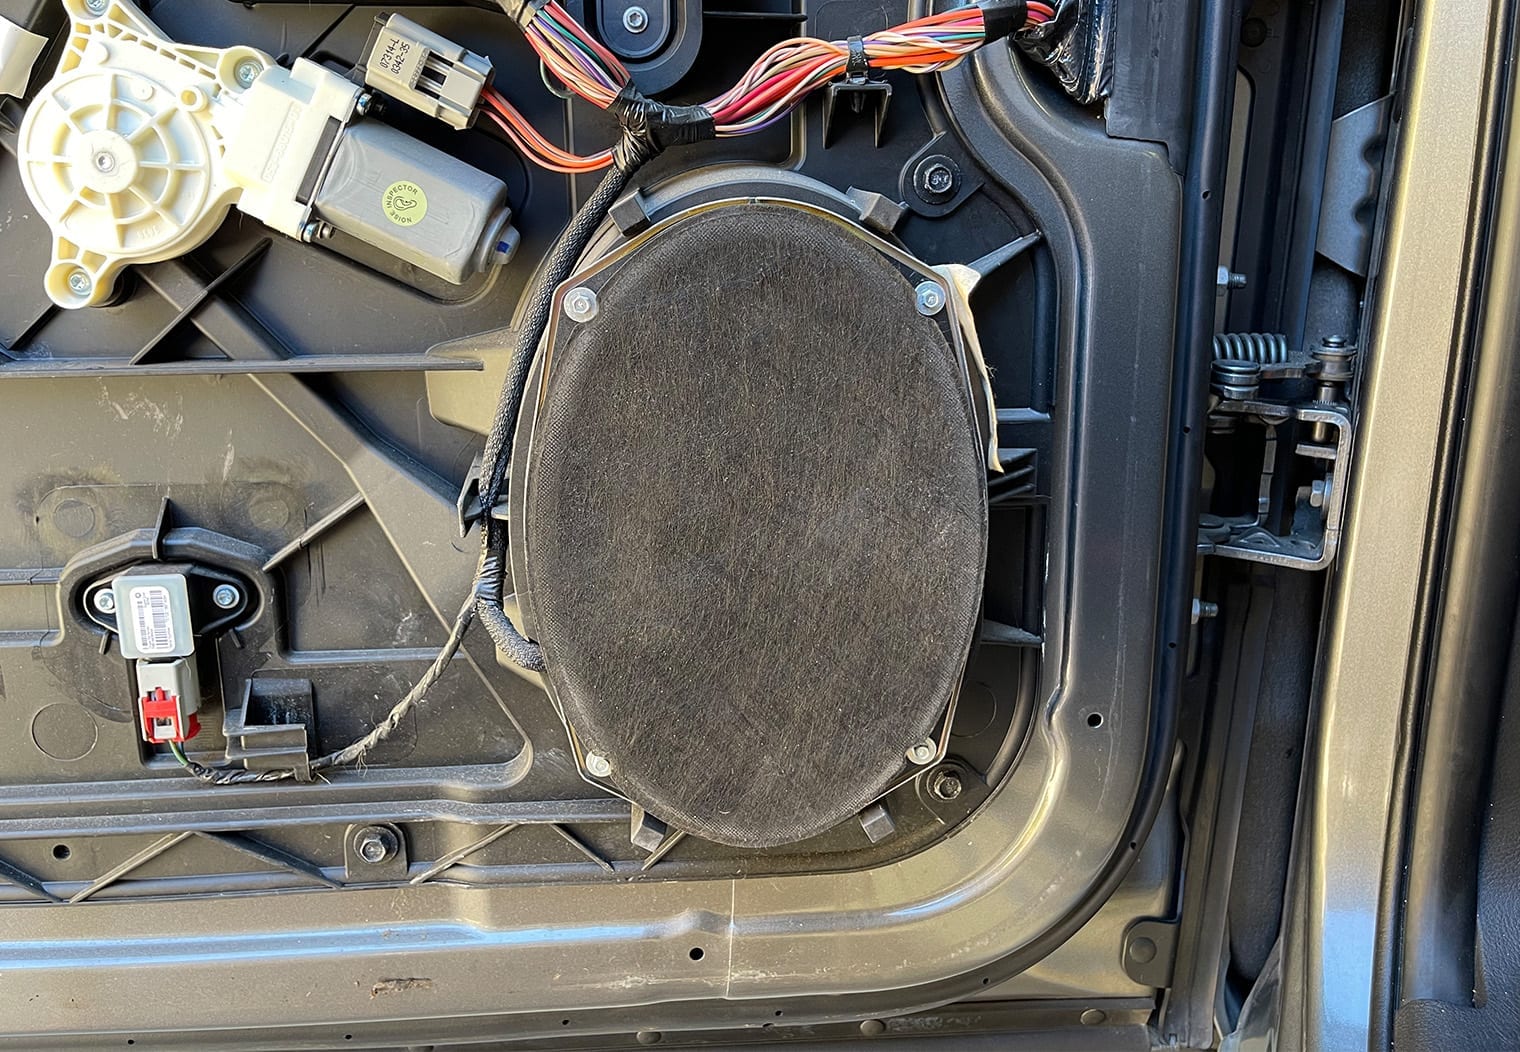
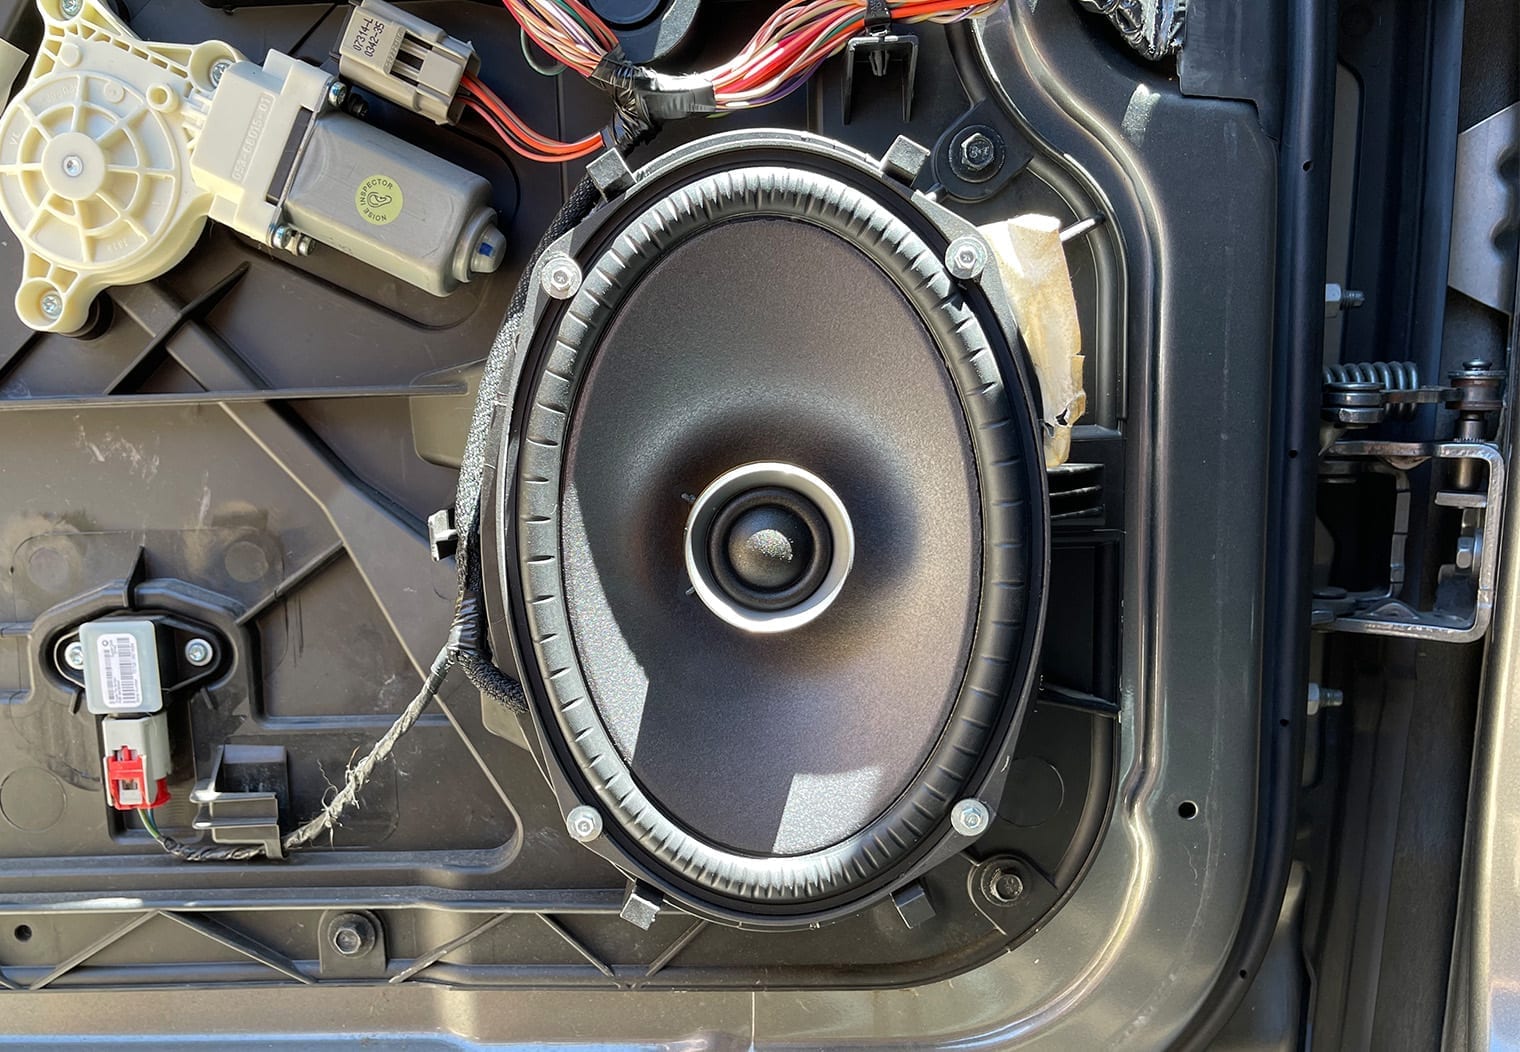
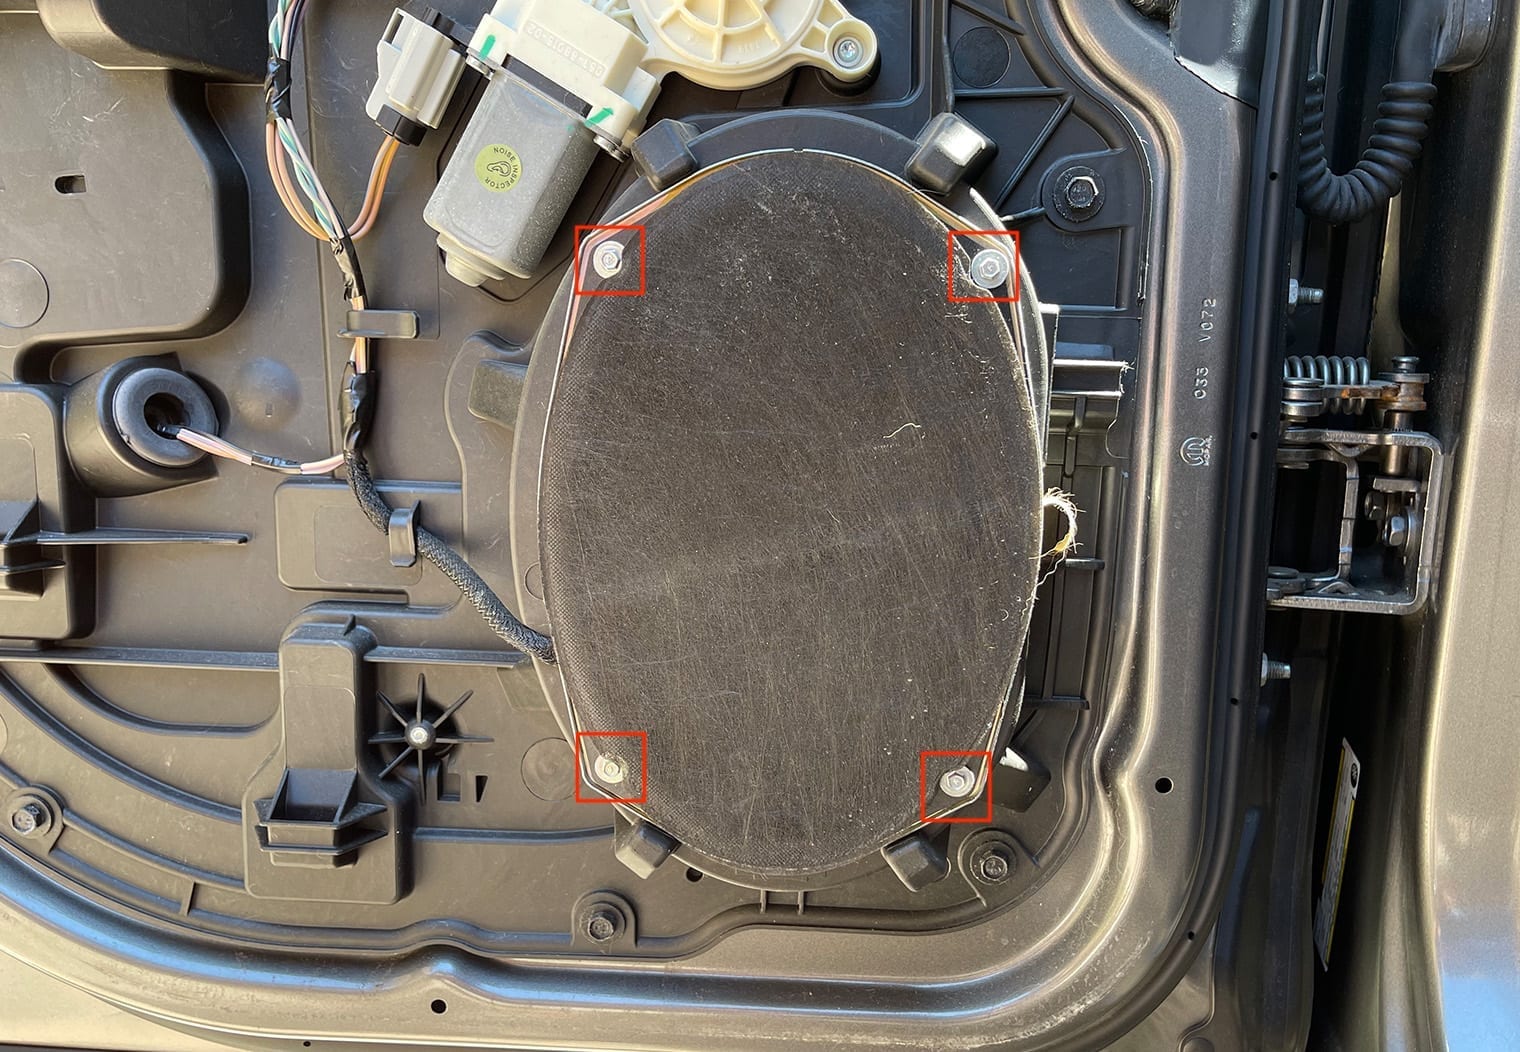
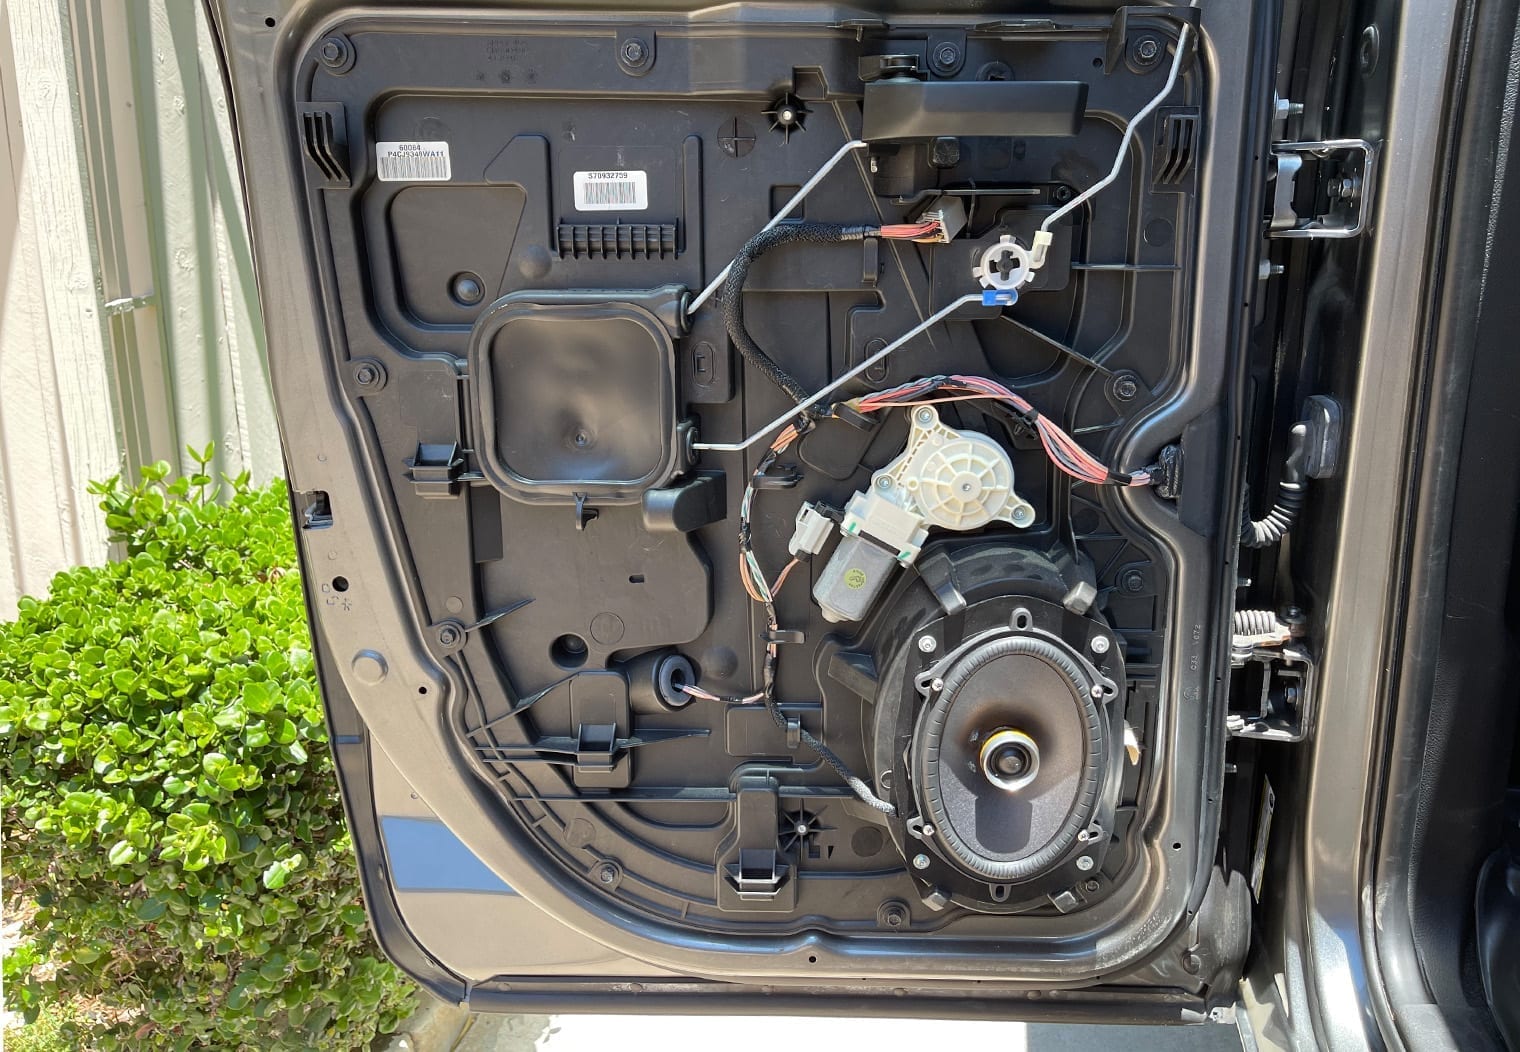
Step 2: Remove the Speaker
This is the easiest part of this process. The door speaker is held in place with 4 screws. I used a 5mm socket to remove the screws (even though it's likely a standard size). Remove the screws, then the speaker will easily come out. Unplug the speaker and remove it completely from the vehicle.
Step 3: Prepping New Speakers
This step is optional and could be done in a few different ways. Personally, I always like to re-use the existing speaker clips to create an adapter for the new speakers. If you also want to save $15 bucks, this is a good way to do so. The alternative is to purchase Metra's 77-6514 (one set per pair of speakers). If you choose to go with the Metra adapters, you will not need speaker wire, a solder iron or solder listed in the Parts & Tools section and can skip ahead to Step 4.
Either way, whether you build your own like I did or purchase them, the adapters will allow the new speakers to be plug and play. You don't have to worry about soldering the speaker in place on the door or otherwise wiring up the new speaker with limited space on the door.
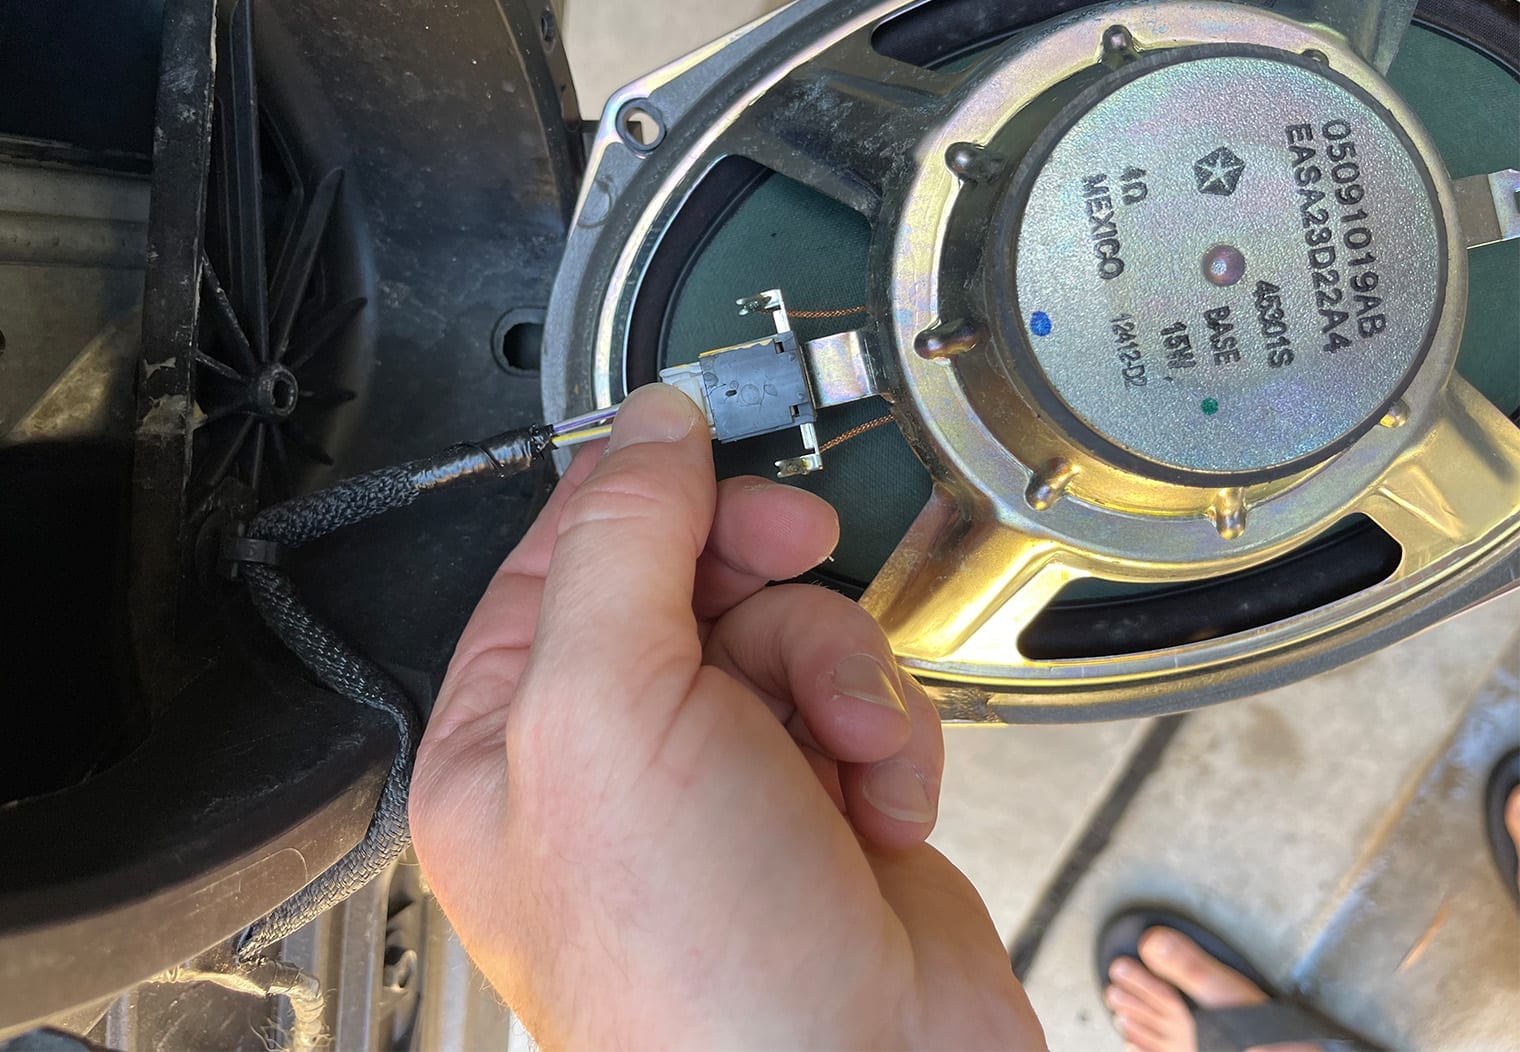
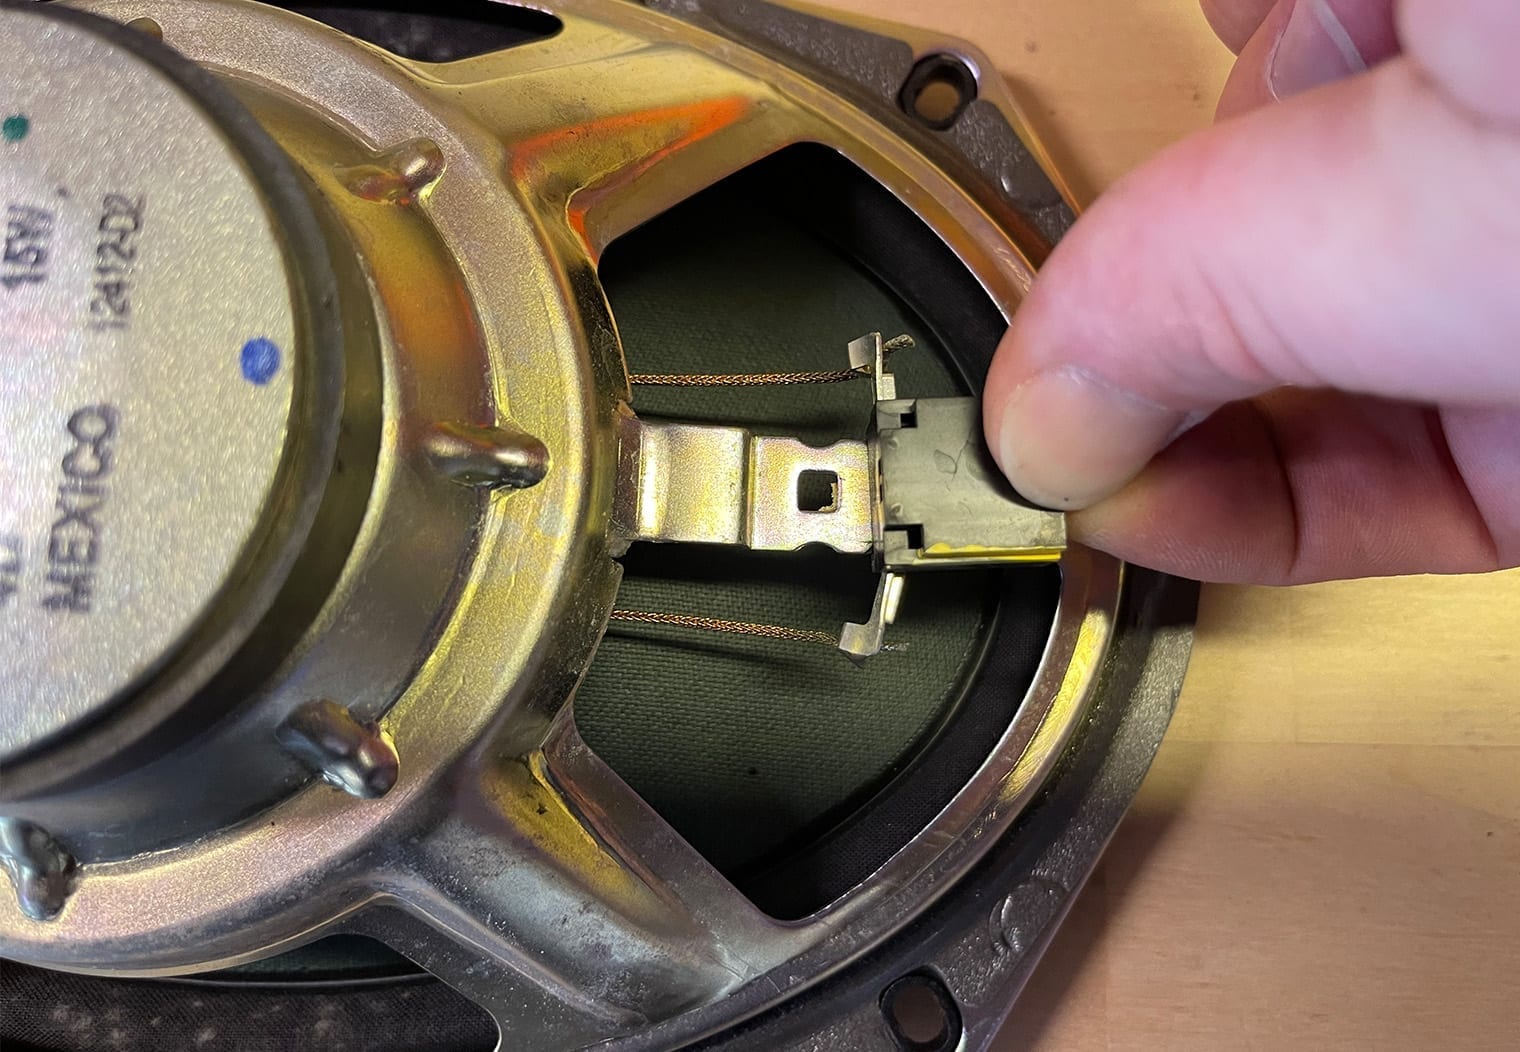
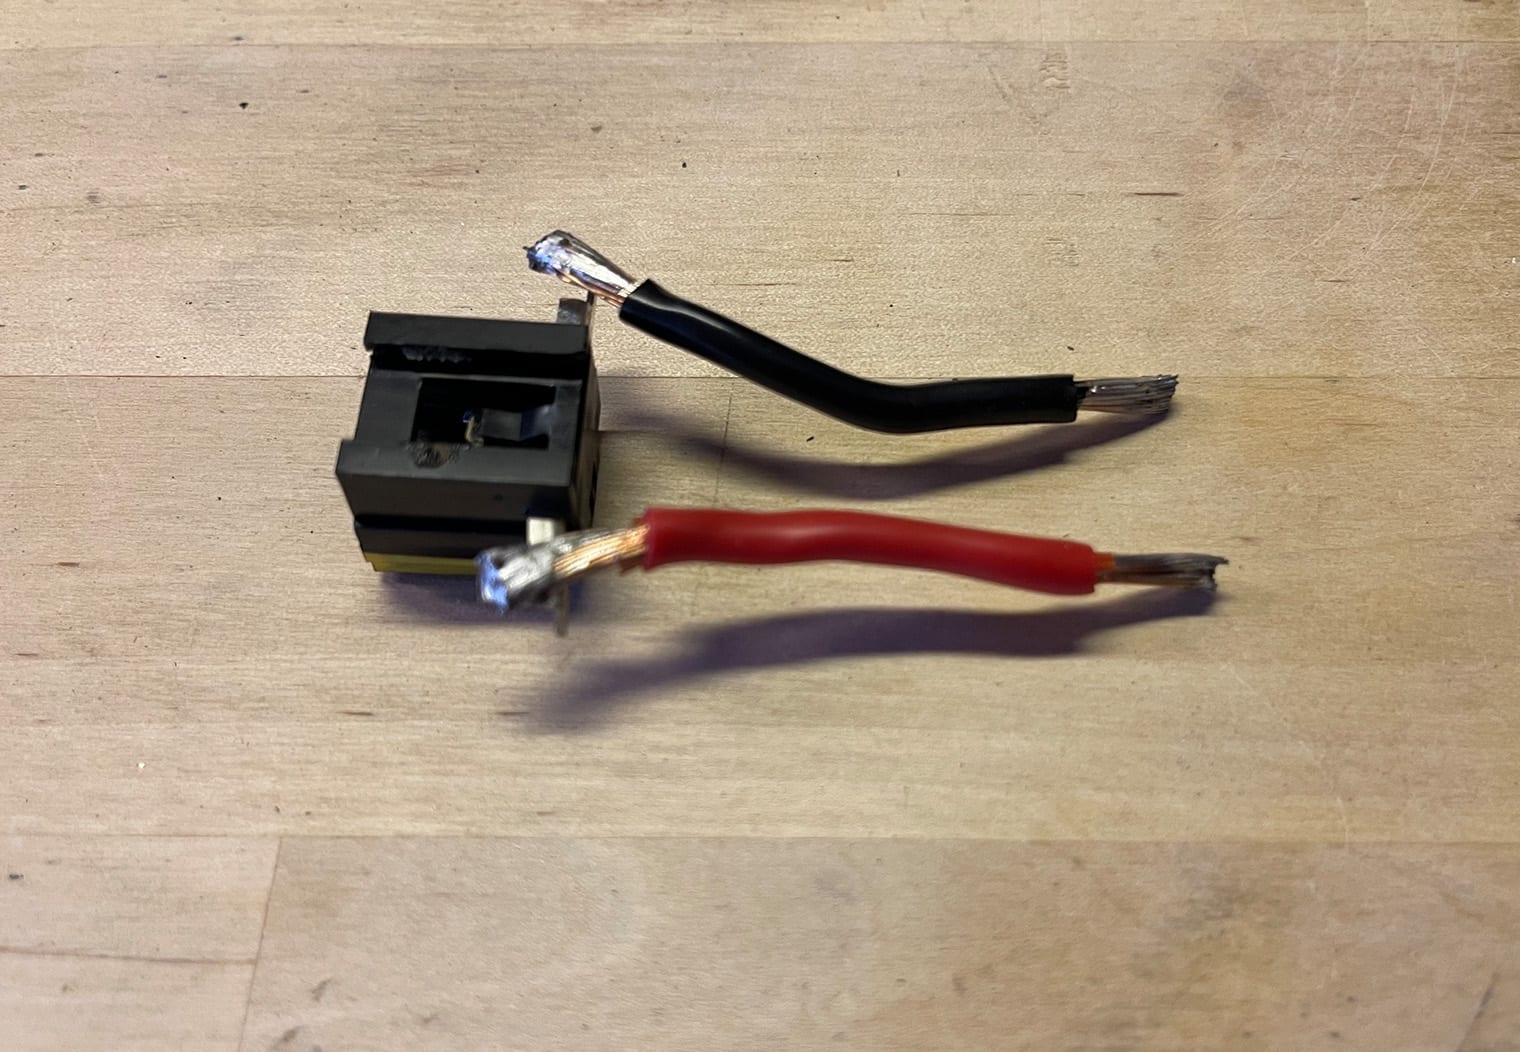
To create your adapters, the first thing you'll need to do is snip the wires on the back side of the plug that's on your speaker (not in your door!), and then use a flathead screwdriver to unclip the plug from the frame of the speaker.
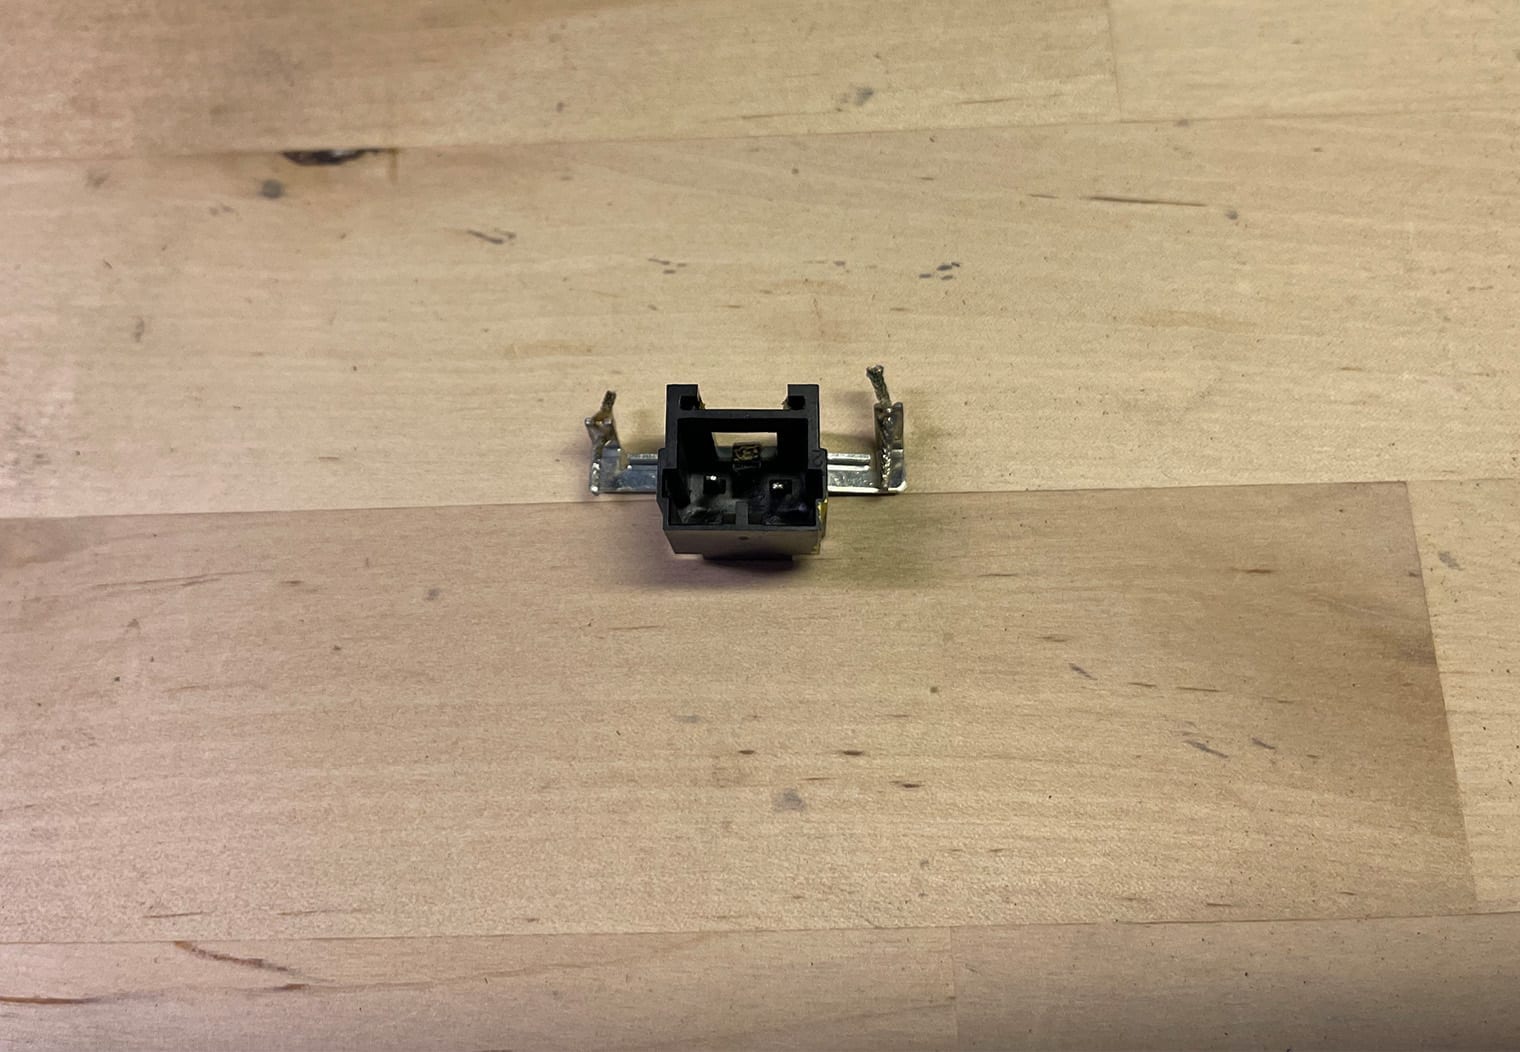
With your plug removed, you now need to figure out which side of the plug is positive and which side is negative so that you know how to wire it to your new speaker. To do this, take your removed plug back to your door panel and plug it in. Then, use the following wire colors to identify which side of the plug is positive and which side is negative:
- Front Left Speaker Wire (+): Gray/Violet
- Front Left Speaker Wire (-): Gray/Yellow
- Front Right Speaker Wire (+): Dark Green/Violet
- Front Right Speaker Wire (-): Dark Green/Yellow
Mark the side that's positive so that you can wire it properly to your new speaker. In my case, the plug was actually already marked on the positive side via a yellow marker. Yours may or may not be. With your plug marked, you can now begin to prep and wire the plug to your new speaker.
To do this, use a solder iron to remove the old speaker wire and tin the plug with some new solder. Then, using a 2-3″ wire, solder positive and negative wires to the plug.

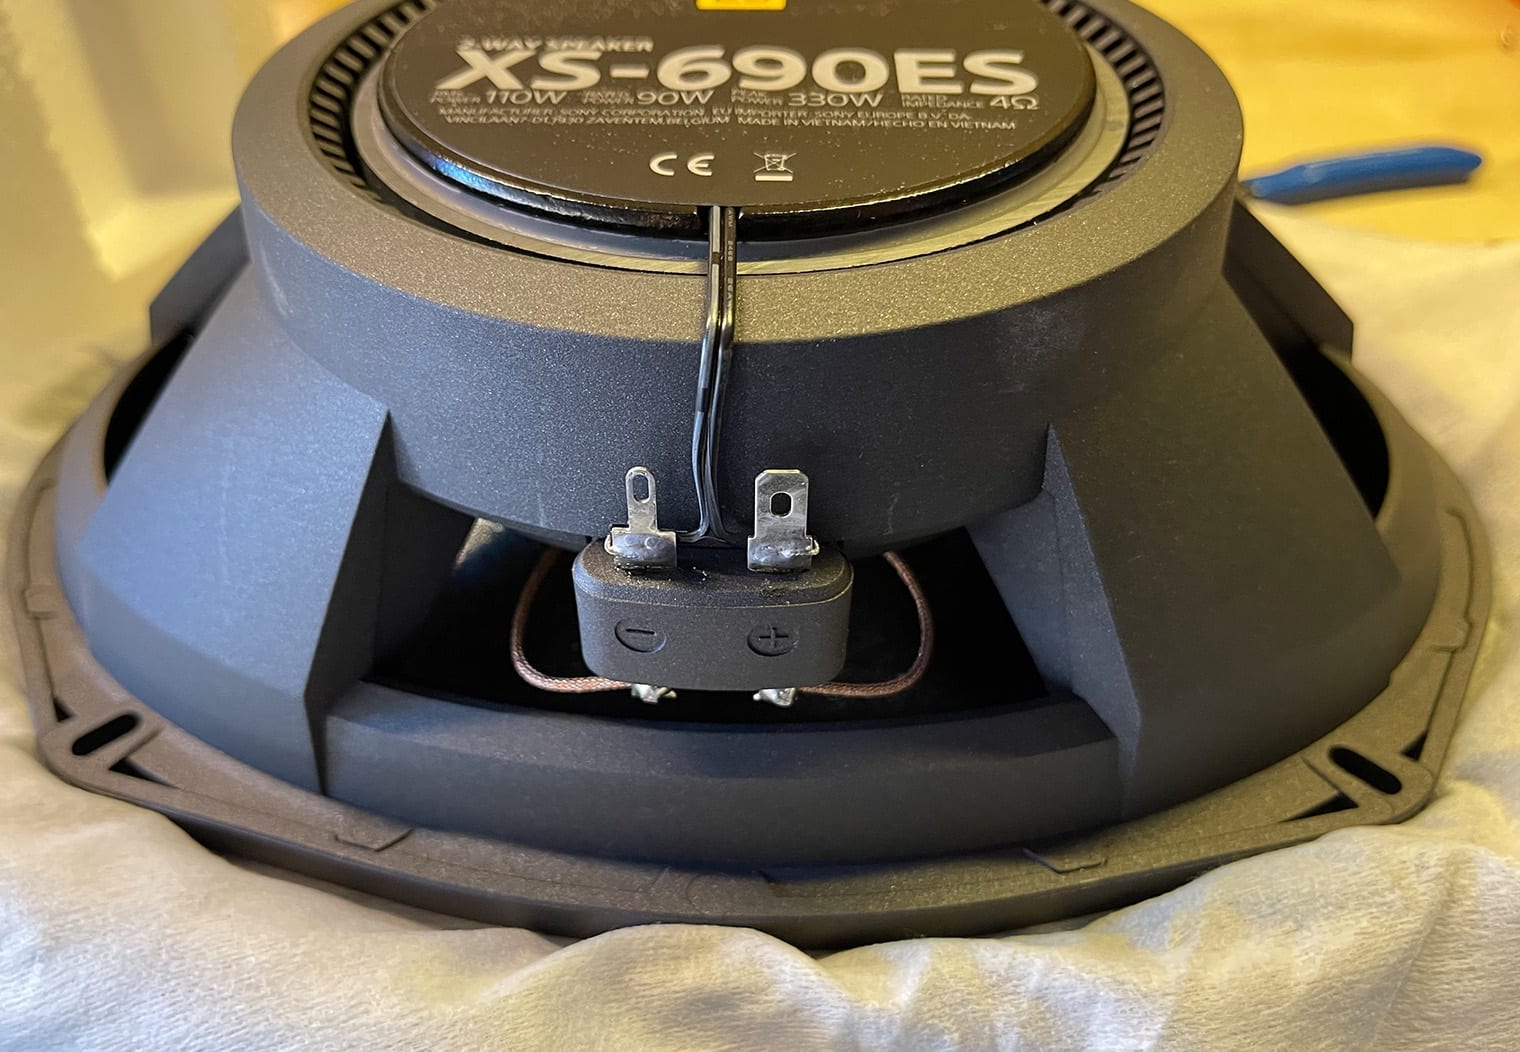
After you have prepped your speaker plug, you'll now attach it to your speaker terminals. I did this by soldering it directly to the terminal leads of the Sony speaker I was using.
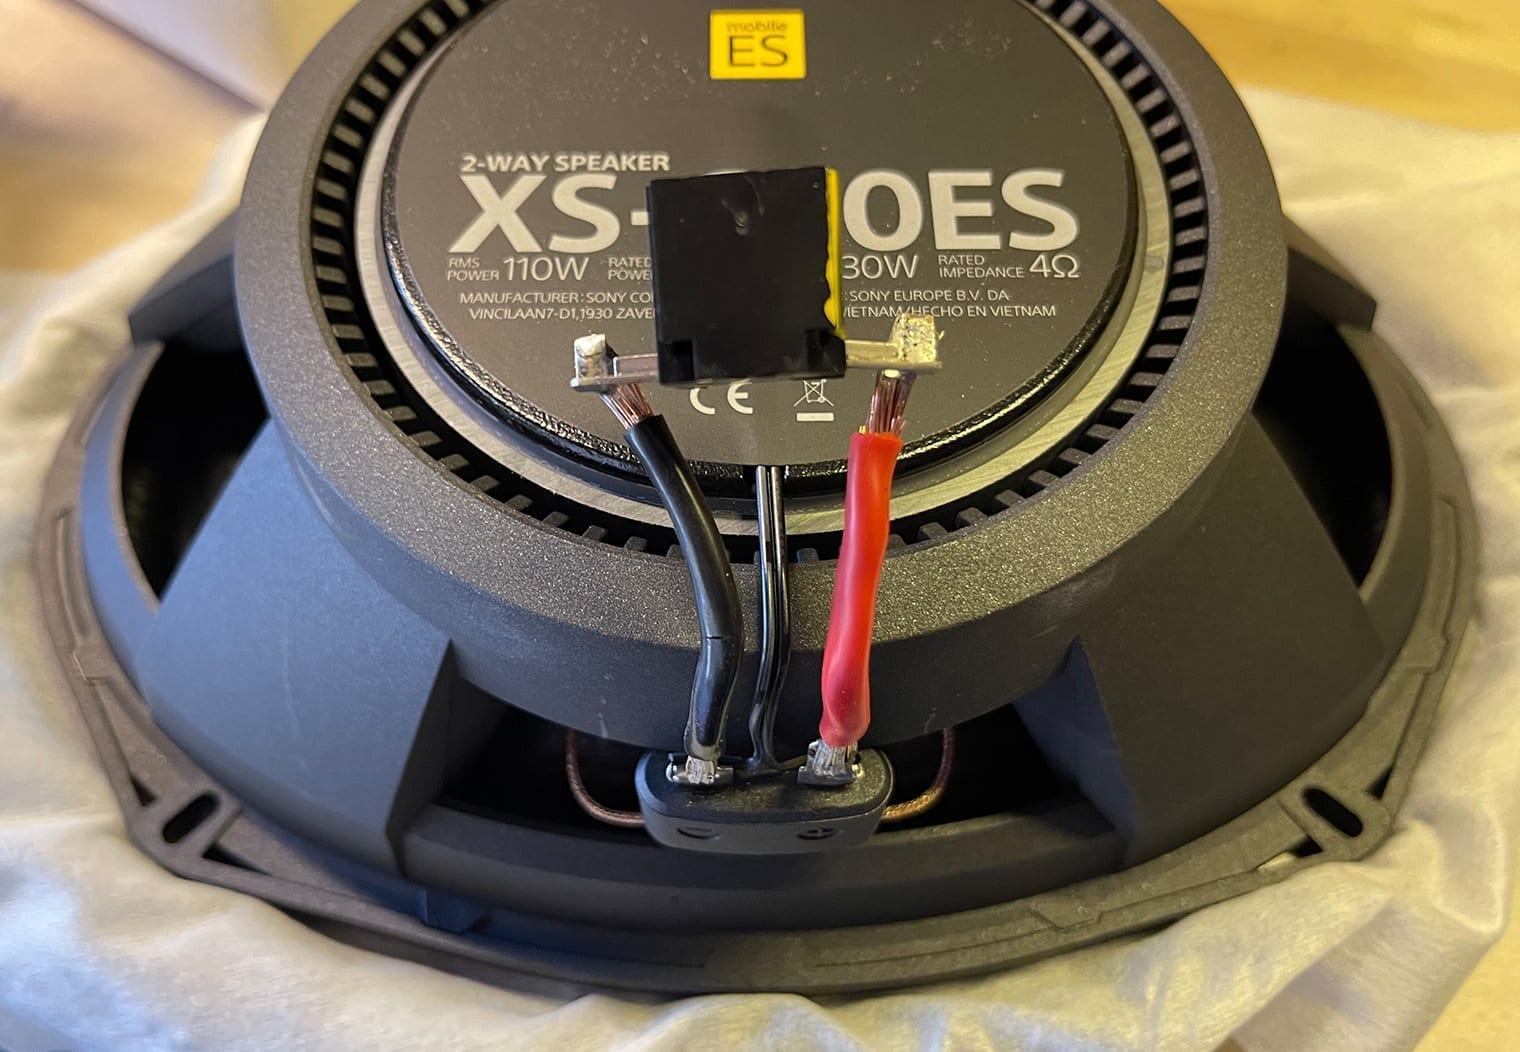
You'll want to do this to all of the speakers you're installing at once probably to make the most out of your time.
Step 4: Install the New Speakers
With your speakers prepped, the installation is as simple as the removal for most speakers. You'll simply plug in your new speaker, and screw it back in.
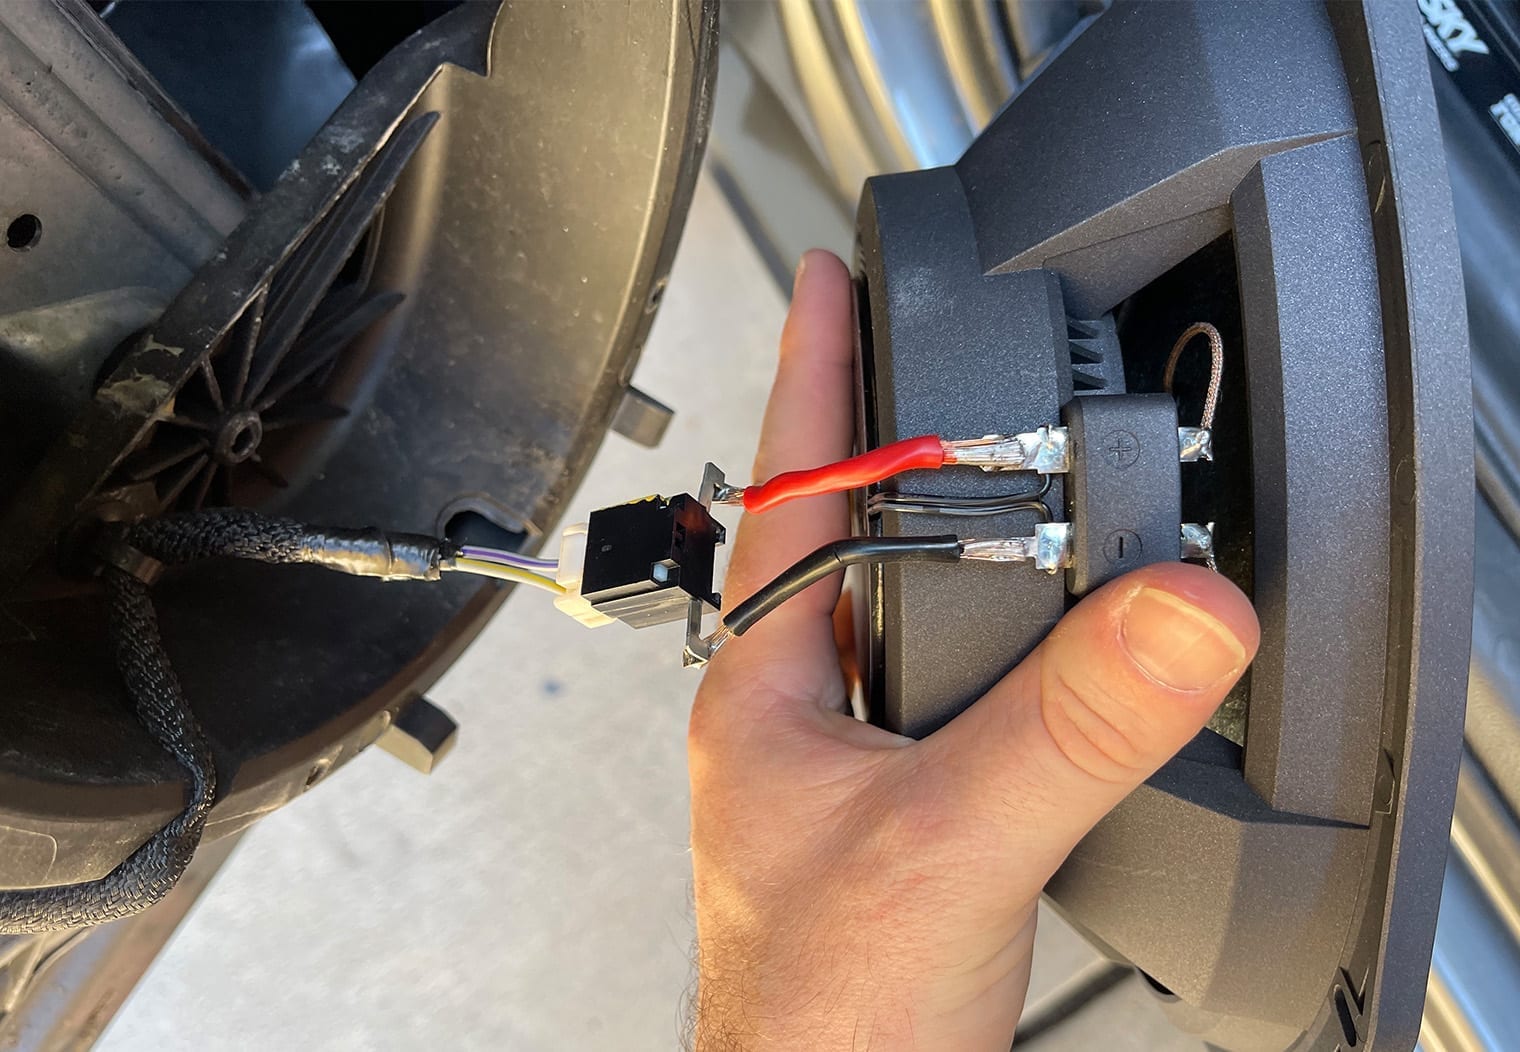
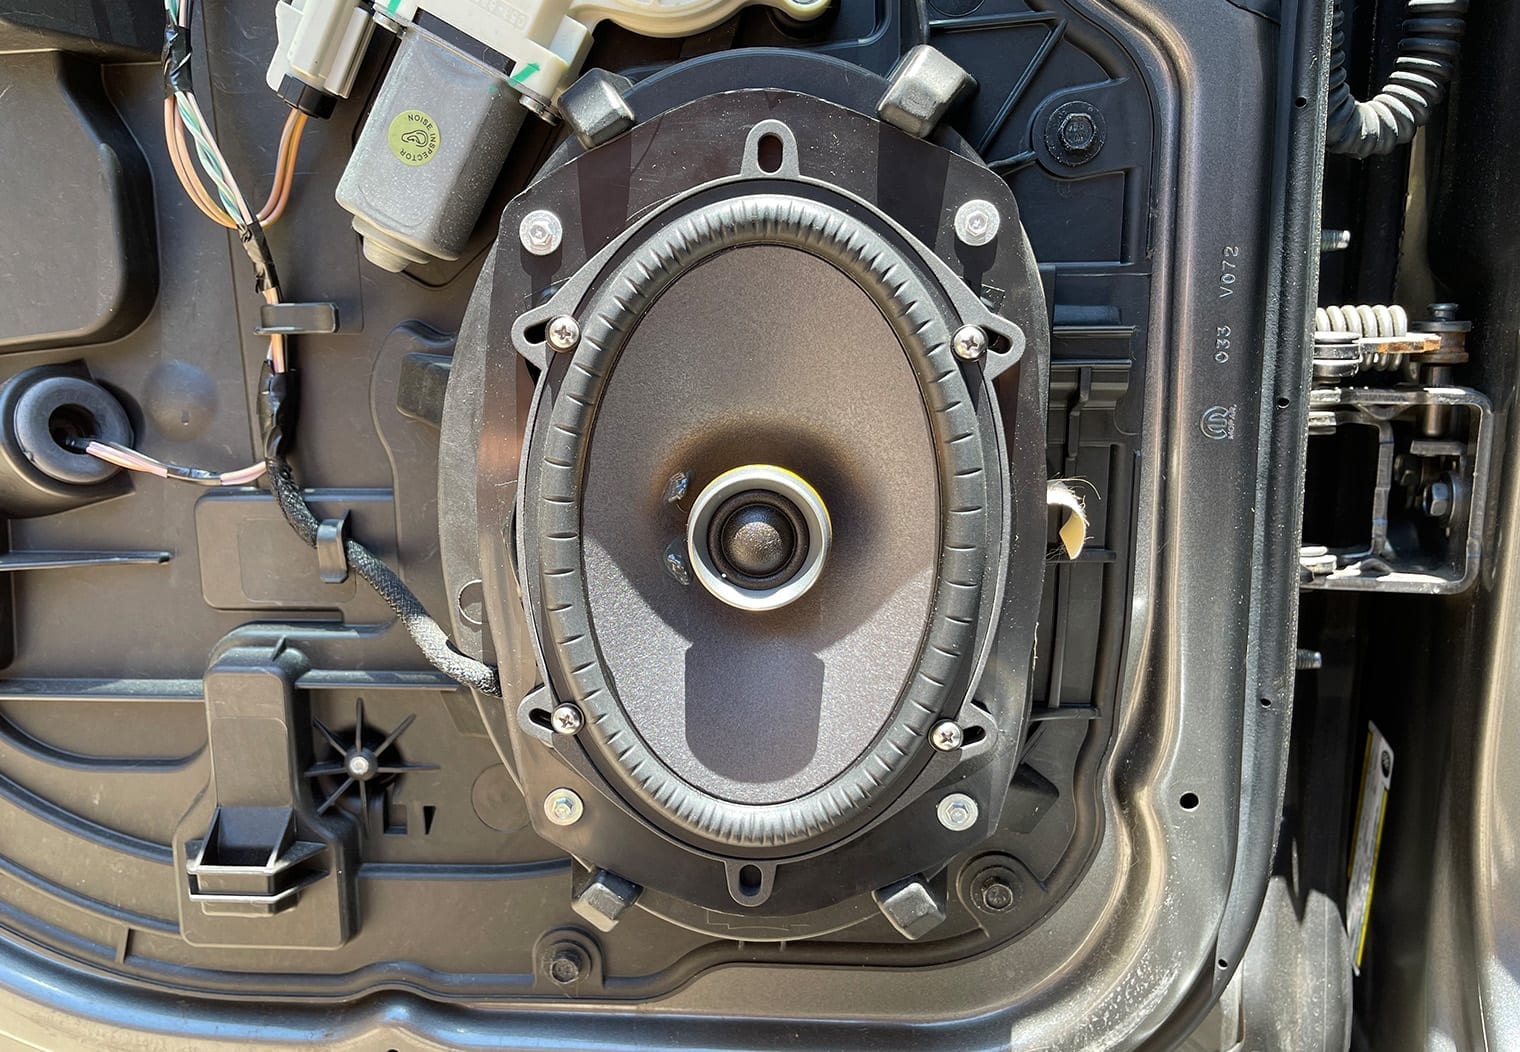
However, if you DO decide to install the Sony XS-690ES 6x9s that I chose to install, you will need to modify the door panel mount in order to fit around the five-beam casing. This isn't typical, however these speakers aren't like every speaker and have a larger frame than most.
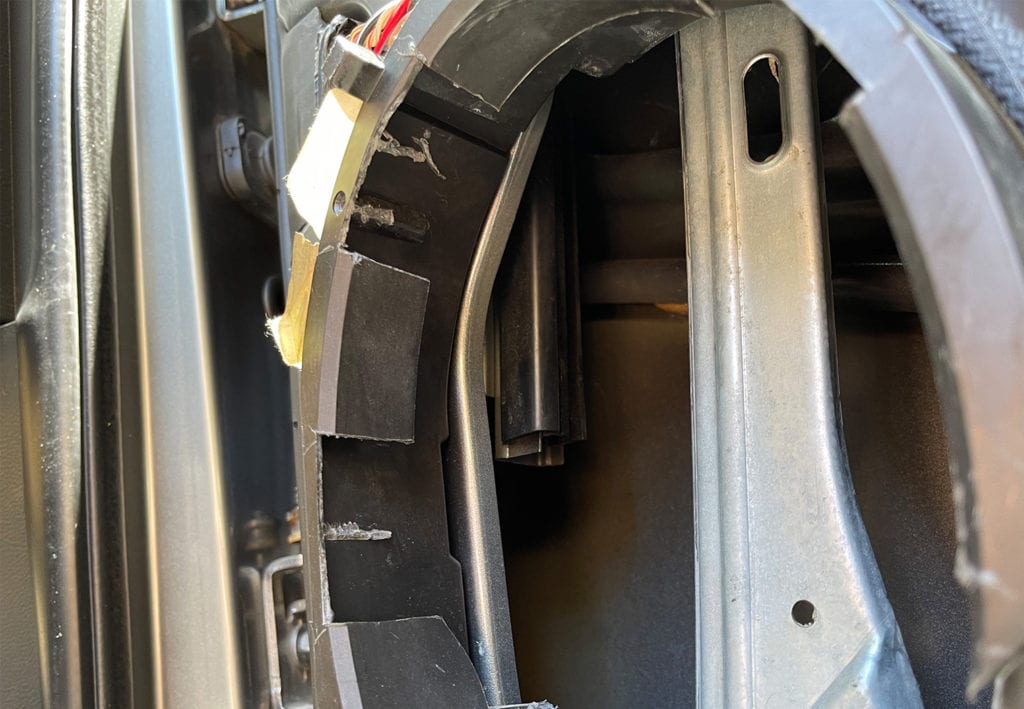
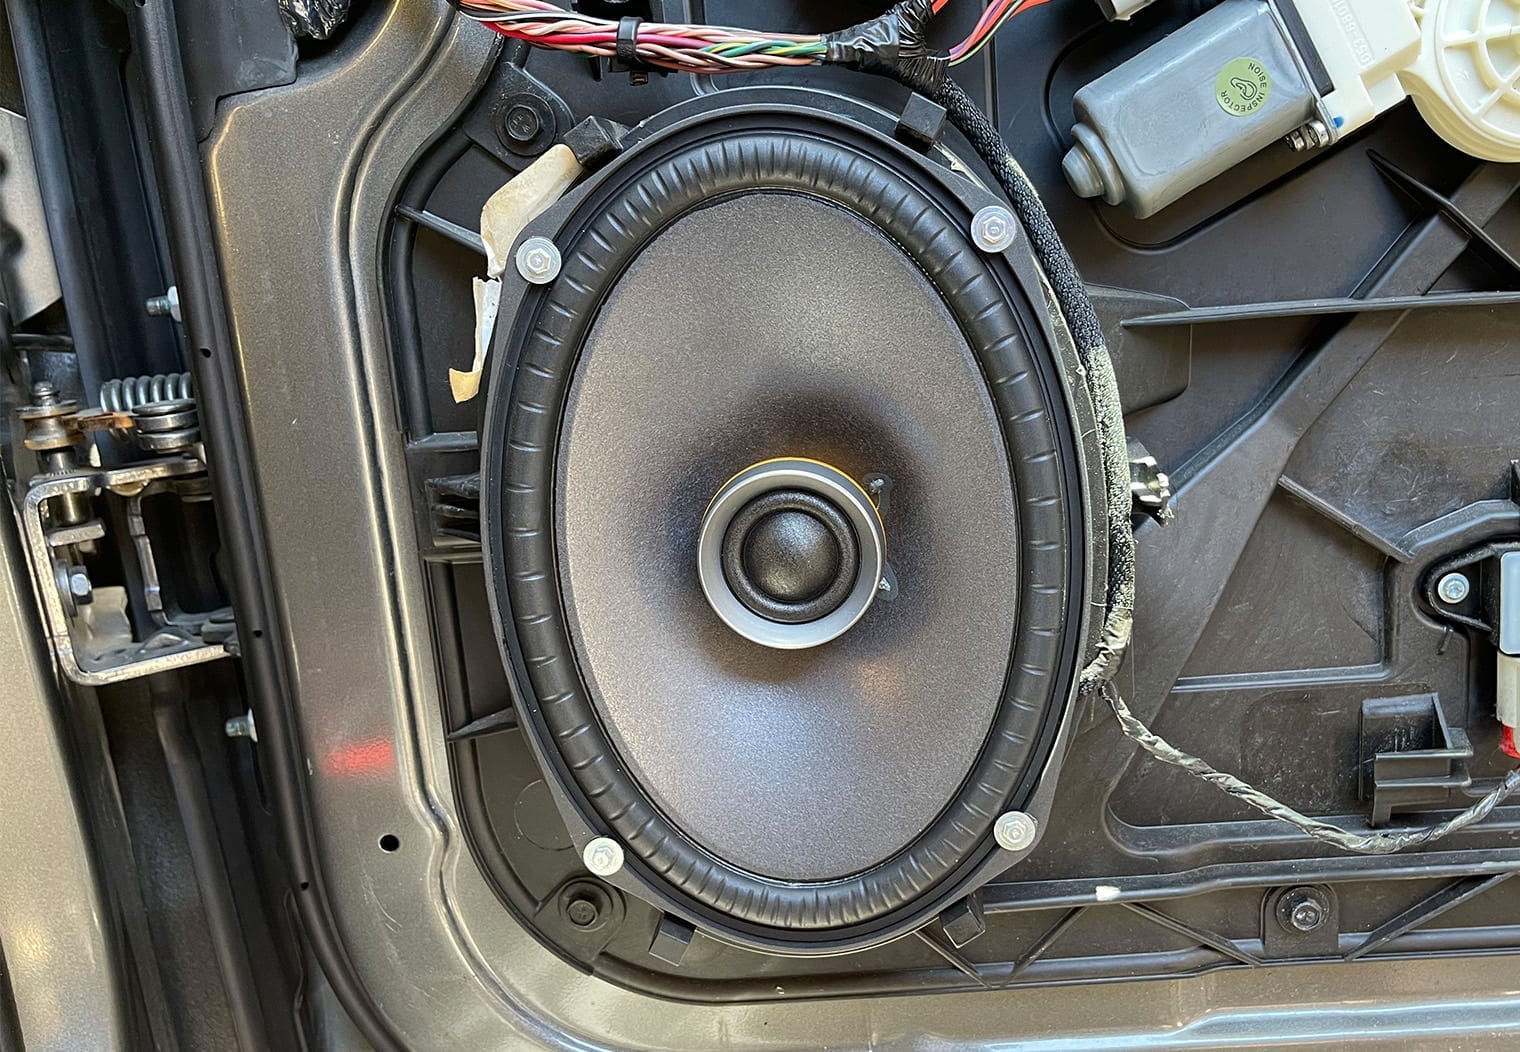
If you don't want to go through this process, you can take a look at some speaker alternatives listed on our best 6×9 speaker buying guide. Most speakers will not have a deep and wide frame like these Sonys and should just slide right in. The end product should look something like this!

Step 5: Re-Install Door Panel
With your speakers installed, turn on your stereo first to test out the sound of your speakers and ensure that everything is working as expected. If everything sounds good, re-install the door panels in the reverse order as described in step 1.
How to Replace the Rear Door Speakers
The process for changing out the rear door speakers is nearly identical to the fronts that I walked through above. The only difference is really the door panel but the process is the exact same. I'll go through the rear doors here with a little more brevity than I did the fronts.
Step 1: Remove the Door Panel
On the rear doors of this quad cab there were 5 torx screw clips (vs the 6 in the front door panel). Remove these 5 clips using a T-20 torx bit and a clip puller or prying tool.
With these clips removed, locate and remove the phillips screw that's behind the door handle. Remove the cover first to expose the screw using a small flathead then remove the screw. With the screw removed, you'll then remove the trim piece that surrounds the handle.
Next, remove and unplug the window control. You can do this either now or after you lift the door panel off the door. It's up to you.
Finally, remove the trim piece that's above the panel on the outer edge of the door by simply pulling on it. It will unclip and remove relatively easily. Set it aside in a safe spot.
At this point, you can remove the door panel. Do this by simply lifting upwards and outwards on the door panel and it should lift right off. There should not be any additional clips or screws holding the panel to the door. This will expose the speaker and underlying door components.
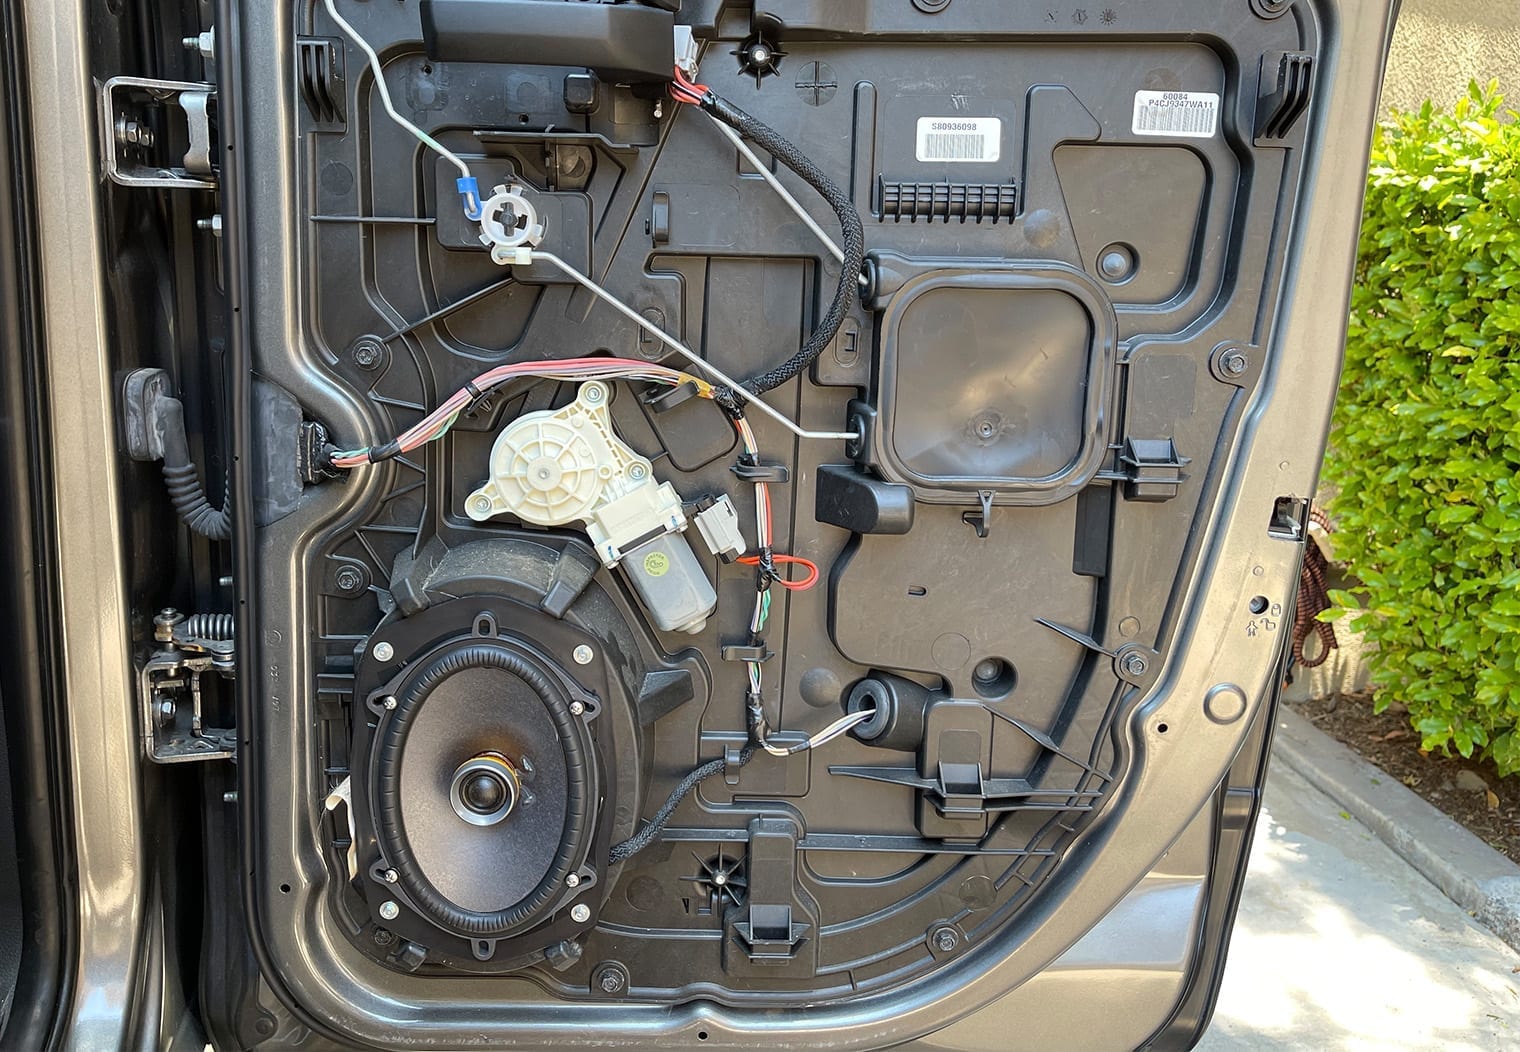
Step 2: Remove the Speaker
Like the front door speakers, the rear door speakers are 6x9s and held into place by four screws. I used a 5mm socket to remove the screws. Once the screws are removed you can begin to remove the speaker from the door panel and unplug it from the harness.
Step 3: Prepping New Speakers
Please follow the steps in Step 3 of the Front Door Speakers. The only difference will be the wiring colors you'll use to match the positive and negative side of your OEM plug to your new speaker terminals (if you choose to wire them yourself). If you are using Metra's 77-6514, then you can simply connect the adapters to the speaker terminals on your new speakers and proceed to step 4.
For reference, the speaker colors on the rear doors are as follows:
- Rear Left Speaker Wire (+): Gray/Dark Green
- Rear Left Speaker Wire (-): Gray/Light Green
- Rear Right Speaker Wire (+): Dark Green/Gray
- Rear Right Speaker Wire (-): Dark Green/Light Green
Step 4: Install the New Speakers
With your new speakers prepped with their plug, you can now simply plug them into the OEM harness and screw the new speakers back in. In the images below, I actually used Sony's 6×8 speakers instead of 6x9s using a speaker adapter plate to mount them. If your installing 6x9s you'll simply screw them directly into the OEM mounting position.
If you decide to install the Sony XS-690ES 6x9s in the rear, just like I mentioned while installing them in the front door panels above, you'll have to alter the OEM mounting in order to fit the five-beam structure into the OEM mounting position by cutting out slots for the beams. This won't be necessary for most other 6×9 inch speakers.
And if, for some reason, you want to use a 6×8 you'll need cut out the adapter plate and mount the 6×8 speaker to the plate. Then, you can install the speaker in the 6×9 location. My recommendation would be to just purchase a 6×9 if you haven't already. But, if you have 6x8s handy like I did, here's what the added step looks like.
First, cut out the adapter plate to fit the 6×8 speaker. Then use the rear mounting plate that your speaker came with to mount the speaker to the plate. These adapter plates will adapt a 6×9 to a 6×8, 5×7 or a 6.5″ speaker so you need to cut it out to fit a 6×8 specifically.
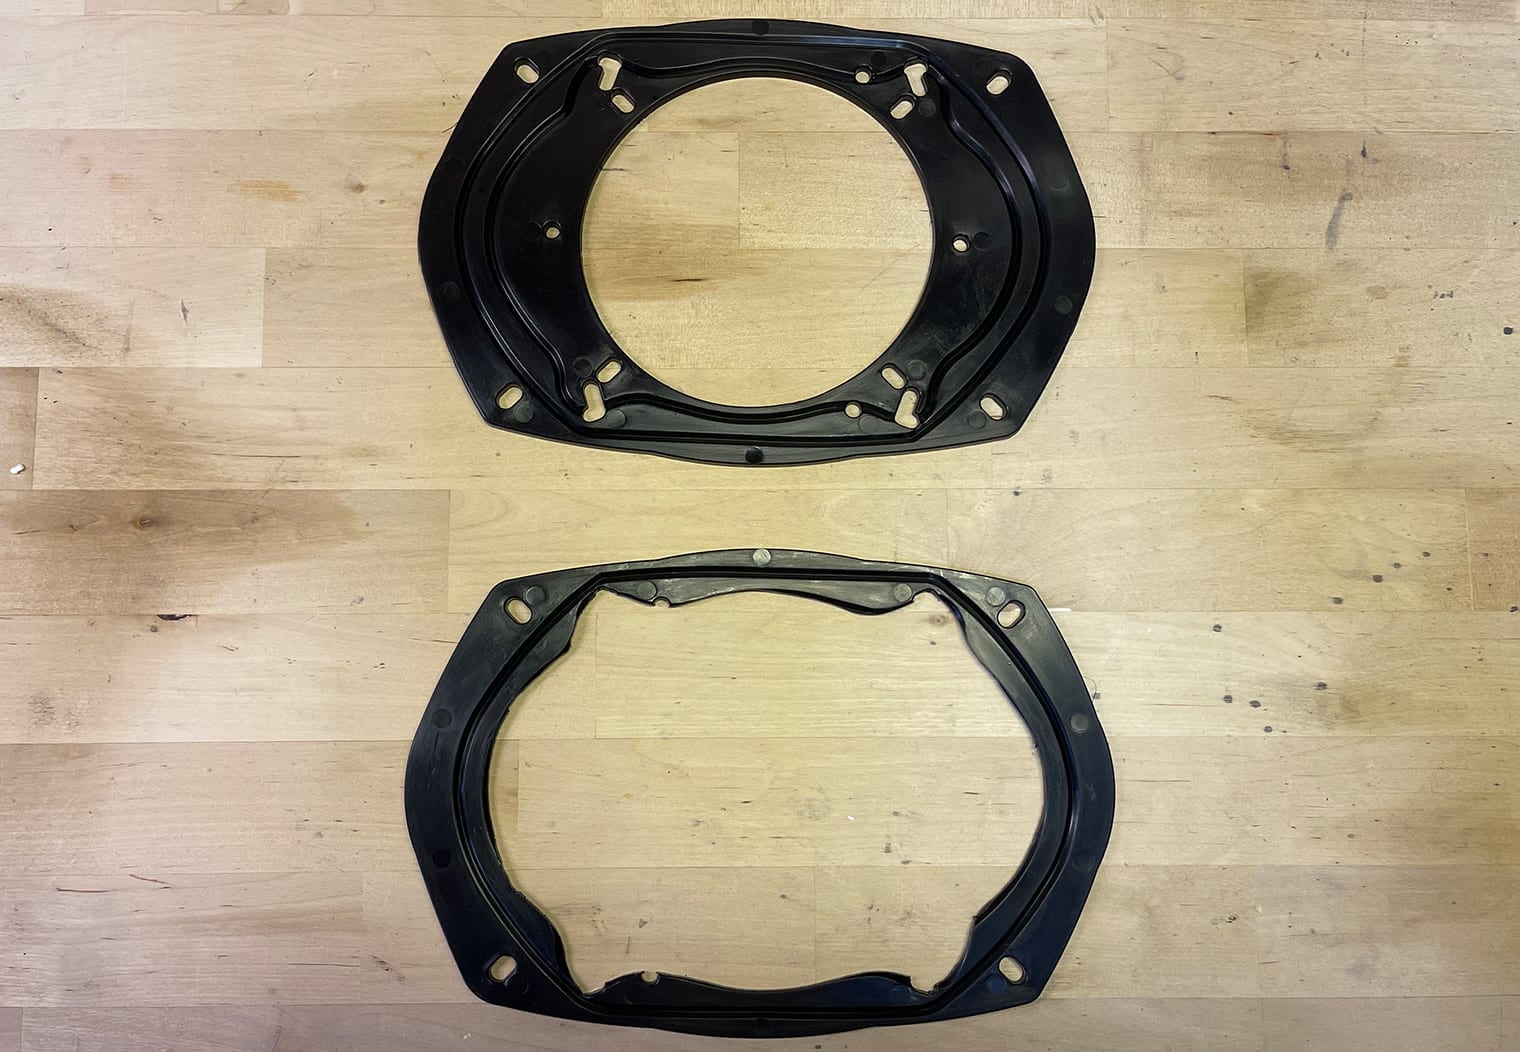
Once that step is completed, you can just mount the 6×8 and its adapter straight to the 6×9 opening. Again, if you're installing a 6×9 in the rear you can disregard the adapter plates and this added step. Here's the end result.
Step 5: Re-Install Door Panel
With your speakers installed in the rear door panels, turn on your stereo first to test out the sound of your speakers and ensure that everything is working as expected. If everything sounds good, re-install the door panels in the reverse order as described in step 1.
Conclusion
Overall, this installation was pretty straight forward and easy to do. The hardest part was fitting these high performance Sony speakers into the OEM mounting location since the frame of the speakers is wider than the OEM 6×9 speakers. An alternative to cutting out the OEM mounts like I did would be to try a set of 6×9 inch mounting spacers. I didn't try this but it's pretty common and might resolve the frame width problems a bit. Without this modification, it would have cut out an hour or so of my time. The installation, in general, is a perfect DIY for a Saturday and should be doable for even a novice.
After the speakers were installed, wow what a difference. Significantly cleaner, louder, fuller sound than the OEM speakers. I was really surprised with the volume and sound quality with just the head unit power from Sony's XAV-AX8100 too. This wasn't an amplified system and I don't think I really want to amplify it after hearing it. Combined with Sony's XS-AW8 that I previously installed under the driver seat, this is a really great setup that's ideal for a DIYer!
