In this article: We'll walk you through the steps to install a Sony XS-AW8 powered subwoofer in your 2009 to 2018 RAM 1500 including wiring, mounting and more.
Most of the 4th gen Ram 1500s from the factory came with two 6×9 speakers in the front and two 6.5″ speakers in the rear. And although the 6x9s might put out a little bass, you may be looking for ways to add some more to your stereo.
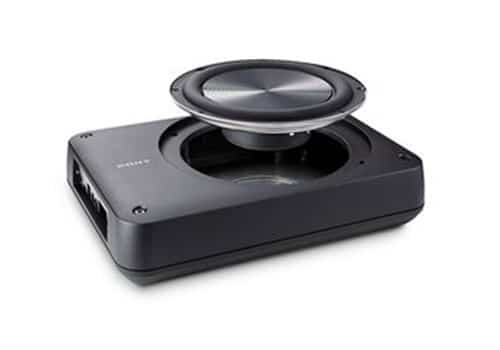
This How To will cover the installation of a powered subwoofer in your 2009 – 2018 Ram 1500. There's a dozen reasons why a powered subwoofer may be a good choice for your truck and why a normal subwoofer just isn't. Sometimes you may not want a bulky subwoofer enclosure in your truck. You may not want to take up the space under your rear seats, or you might just not want to spend the money on a custom enclosure. Powered subwoofers, like the one we're installing in our Ram, ultimately will boost the bass in your truck without sacrificing storage space under your rear seats. They're relatively easy to install (compared to an independent subwoofer and amplifier setup), and they're also cost effective. These were the biggest drivers that led us to install the Sony XS-AW8 in our truck. We also did a full writeup and review of the Sony XS-AW8 Subwoofer here if you want to read more.
How to Install a Sony XS-AW8 Powered Subwoofer In a Ram 1500
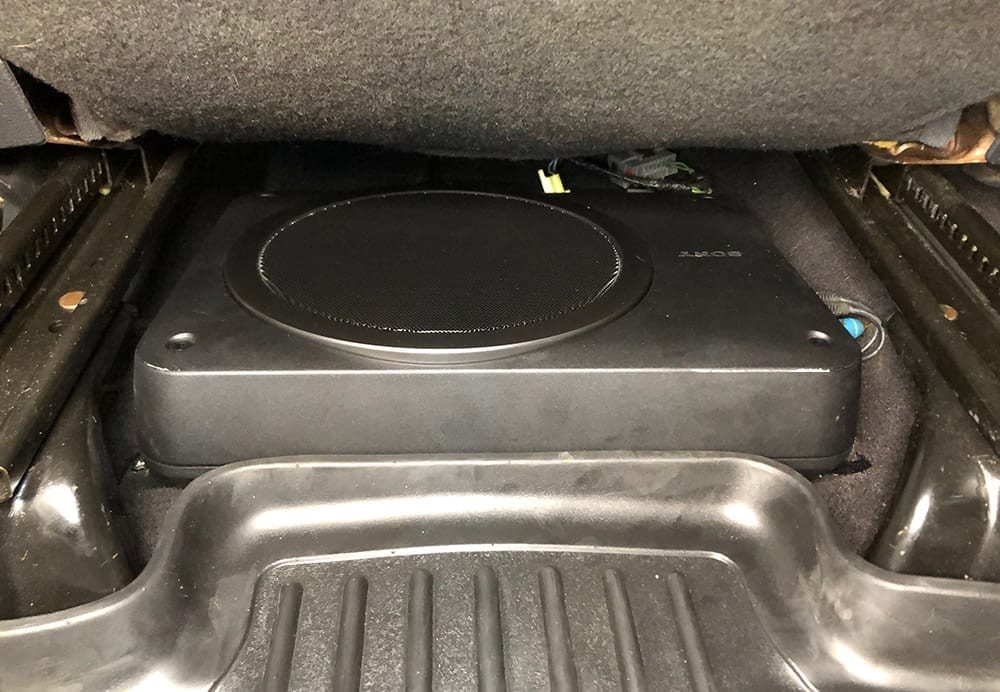
Let's dive right into the steps we took to install our XS-AW8 subwoofer. We chose to install the subwoofer underneath the drivers seat. This allowed us to maintain all of the storage underneath the rear bench seat.
Note that in this how to, we chose to use an aftermarket head unit as the source for the subwoofer signal via RCA cables to the back of the head unit. IF you do not have a an aftermarket head unit and do not plan on getting one, you can use Sony's High Level input instead.
All in all, this was a pretty straight forward installation. It took about three hours total to complete. The most time-consuming part to this installation is running wire.
Step 1: Disconnect Your Battery
The first step to any project that involves wiring in your vehicle is to disconnect the battery. This will prevent you from blowing fuses or damaging electrical components. It's simple – pop your hood and on the driver side of the truck you'll find the battery. Disconnect the negative terminal from the battery and you're done!


Step 2: Driver Side Seat Removal
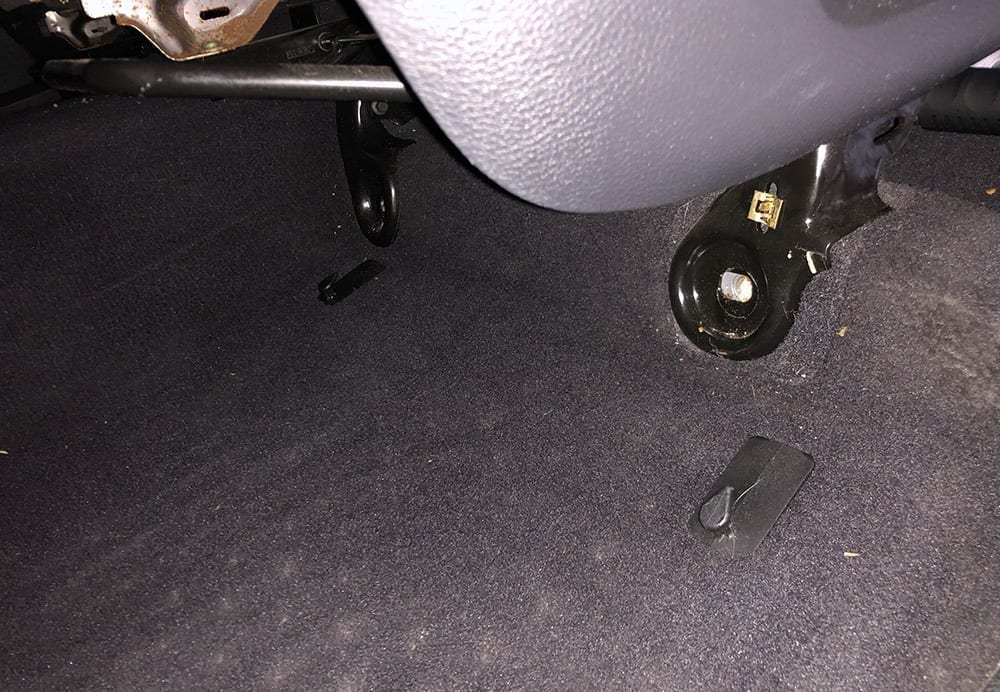
With your battery disconnected you can now start your work on the inside of the truck. We're installing this subwoofer underneath the driver seat (instead of the passenger) because the spare tire kit is typically mounted below the passenger side seat. The only way to wire and mount the subwoofer below the driver's seat is to remove the seat first. To remove it, first clear out all the items underneath it.
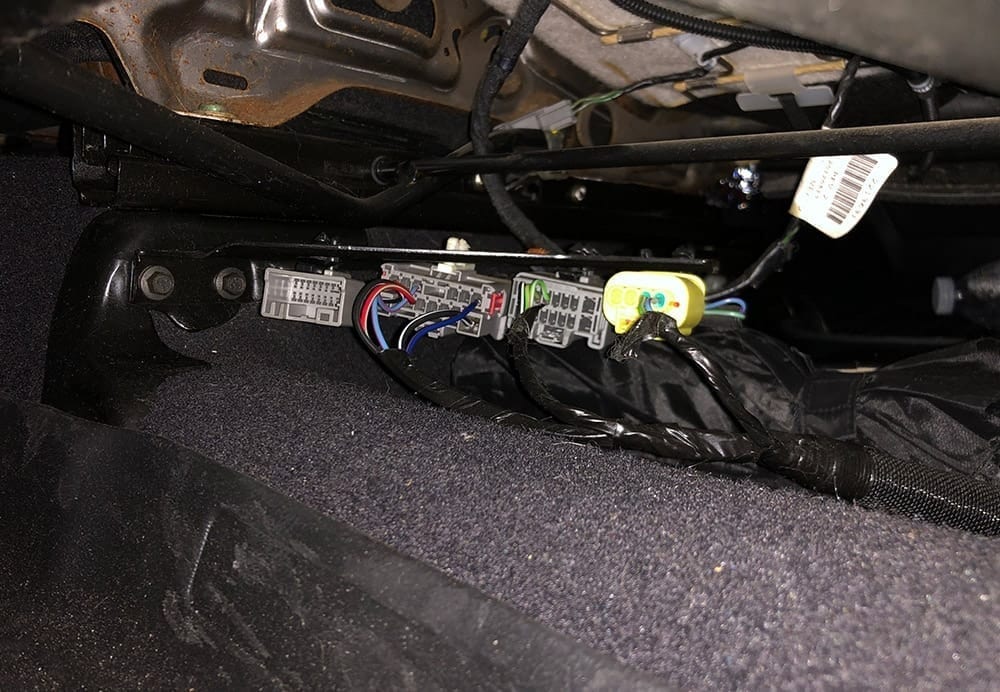
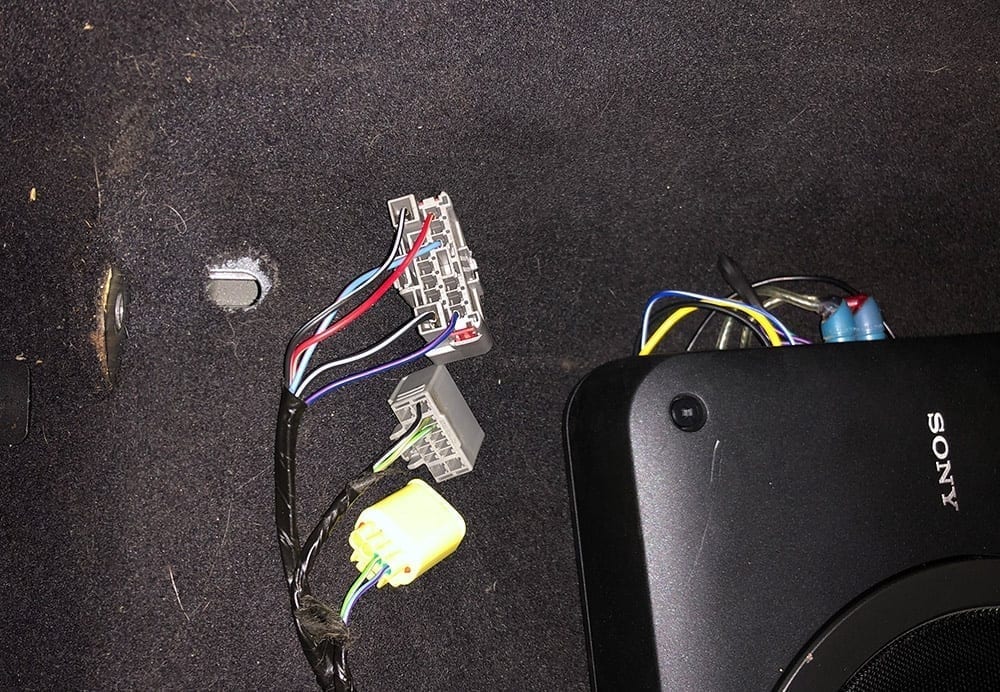
On the front side of the seat below the forward/back adjustment bar you'll find a series of wire harnesses. On ours there was only three in use. Some may have up to five harnesses. Disconnect all of the harnesses so that there are no wires or harnesses attached to the seat. This will allow you to fully remove the seat once you've unbolted it.
Next, unbolt the seat via four bolts that mount it to the truck floor. There's two in front and two in the back. You may need to adjust the seat so that you can access all four bolts. Once the bolts are removed, tilt the seat all the way forward and maneuver it out of the driver door. Be careful not to nick the plastic panels with the metal mounting of the seat on its way out!
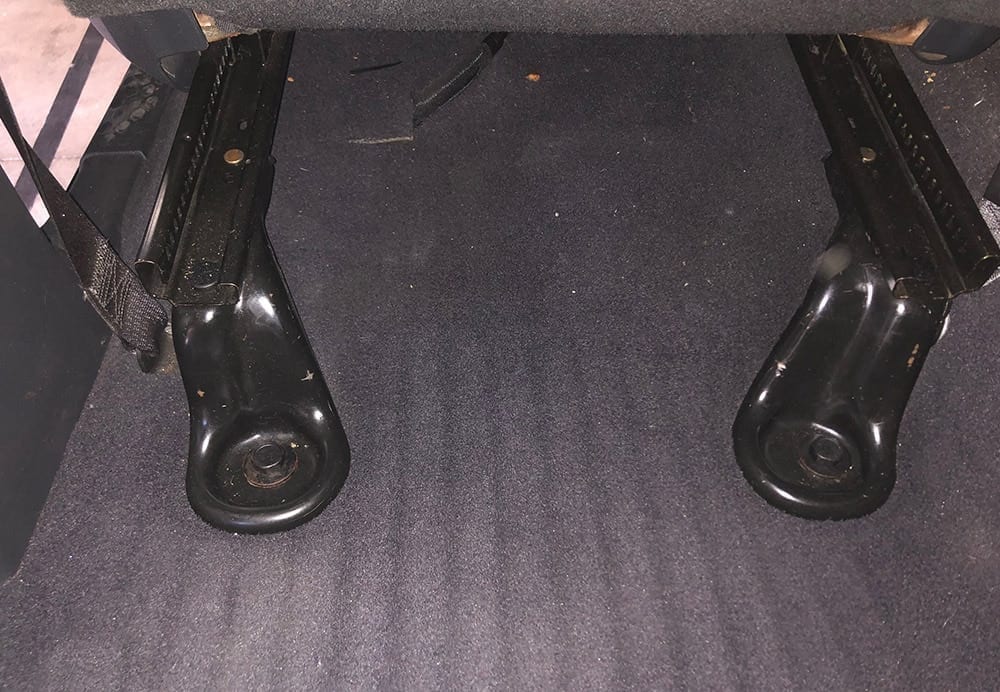
With the seat removed, you now have access to the area that you'll mount and wire your XS-AW8 to.
Step 3: Getting Signal for Your Subwoofer
There are two ways to get signal to your subwoofer:
- Connection with OEM Audio that doesn't have an RCA pre-out: If you don't have an aftermarket head unit in your car, you're likely going to use this setup. In addition to the three wires above, there are also four additional wires that will tap into your vehicle's left and right speakers. You can go directly to the speaker in the panel or you can find the speaker wire somewhere in the harness. This method was designed to work with OEM speakers so that you don't need to buy any other parts to make it work. Back in the day, this would include a high-low converter that would need to be wired to your car's speaker to transfer it into an RCA, which would then need to be ran to the amplifier. Those days are gone with the XS-AW8.
- Connection with a head unit with a RCA pre-out: If you do have an aftermarket head unit, odds are you have a dedicated RCA pre-out specifically designed for the subwoofer. In this case, you'll need to purchase an RCA cable and run it from your head unit directly to the subwoofer amplifier panel. The benefit to this type of installation is that your head unit will likely also have dedicated controls for the subwoofer which will make it easy to tune and make it sound exactly how you want it to without touching the amplifier panel. For this connection type, you also will not use the additional four wires in the harness that I described in #1. In my case, I snipped the four wires, capped them and then used an RCA that I ran to the back of my head unit.
We noted this before, but we have an aftermarket head unit installed in our Ram 1500. This gives us access to a subwoofer signal ‘pre-amp' output on the back of the head unit so that we do not have to find individual speaker signal inputs. Because of this, we're going to be using option #2.
If you do not have an aftermarket head unit and don't plan on getting one, the XS-AW8 has you covered. Simply use the purple and green wires in the harness to tap into the rear two speakers in your truck. You can tap into them in behind the panel that's on the pillar between the front and rear doors. You'll need to look up your specific year for the wire colors.
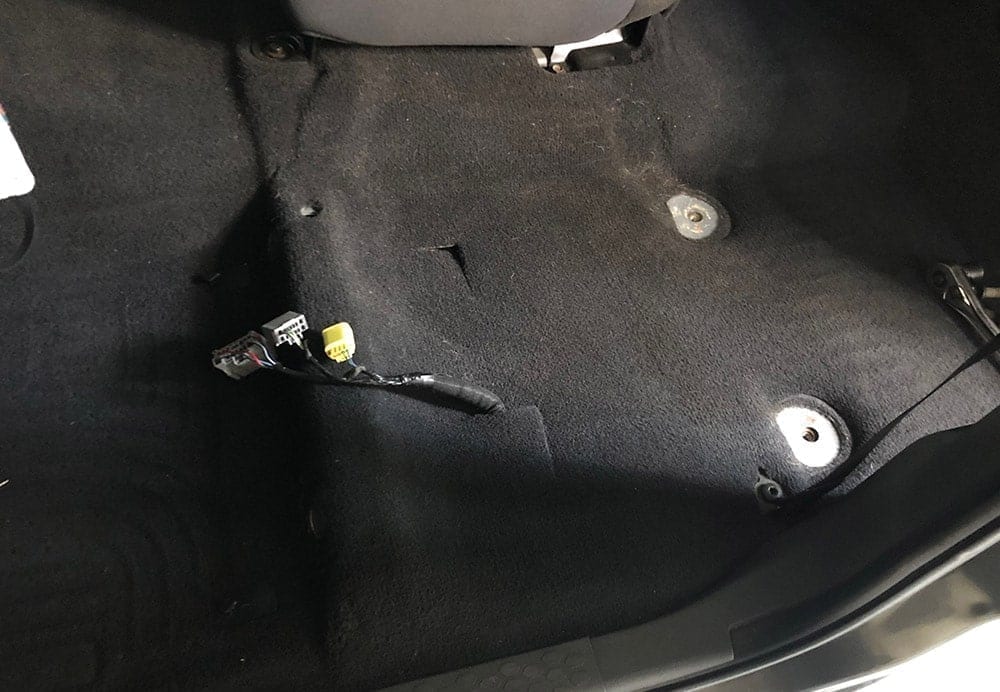
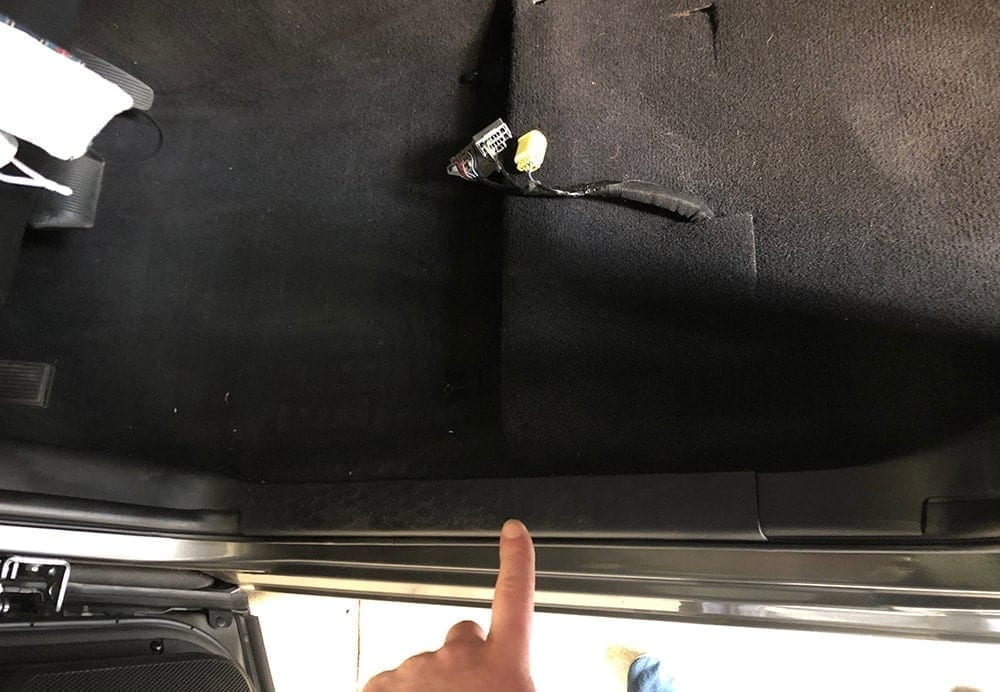
In order to get access to the subwoofer pre-amp outputs on the back of your head unit you'll need to remove the head unit first. To do this remove two torx screws on the top of the panel that surrounds the head unit. These screws can be found below a rubber pad that's directly above the head unit. With these two screws removed you can easily pull the entire panel that surrounds of the head unit off. There are a series of clips holding it so give it a good pull from the top and it should come unclipped.
With the panel removed and set to the side you should now see four bolts holding your head unit in place. Remove these four bolts and pull your head unit out enough to gain access to the back side of it. You'll need this access at a later step.
Step 4: Remove Trim Along Door
The final step before you begin to wire and install your subwoofer is to unclip the trim panels that run alongside the bottom of the driver door and along the kick panel to the left side of the driver's foot. This will give you access to the wiring below the trim, where you'll run your new subwoofer wire. It will also give you access to a good ground where you'll run your ground wire to.
Simply lift up on the trim that follows your door and pull the trim piece out, clip by clip. There are no screws that hold this trim piece in.
Step 5: Wiring Your Subwoofer
With your seat and trim removed, you have access to begin wiring the harness that comes with the XS-AW8 under the carpet, and with the head unit removed you'll be able to easily wire and plug in your signal wire RCA to the back of the head unit.
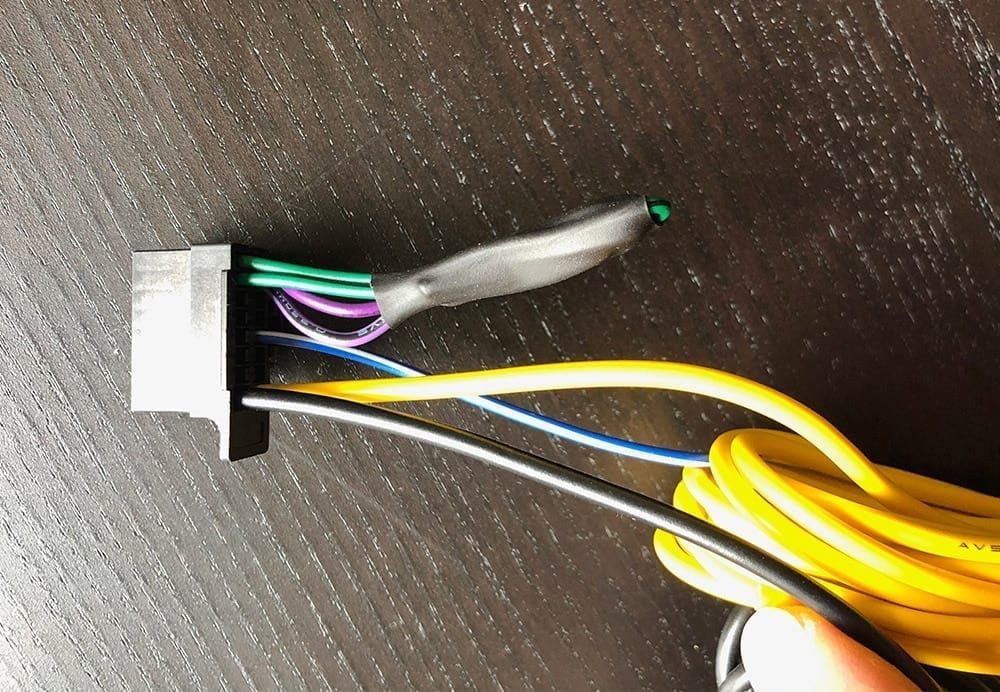
There are 5 key things to wire:
- Constant Power (Yellow)
- Ground (Black)
- Amp Turn On (Blue/White)
- RCA (color depends on what you purchase separately)
- Subwoofer Volume (Volume knob and wire)
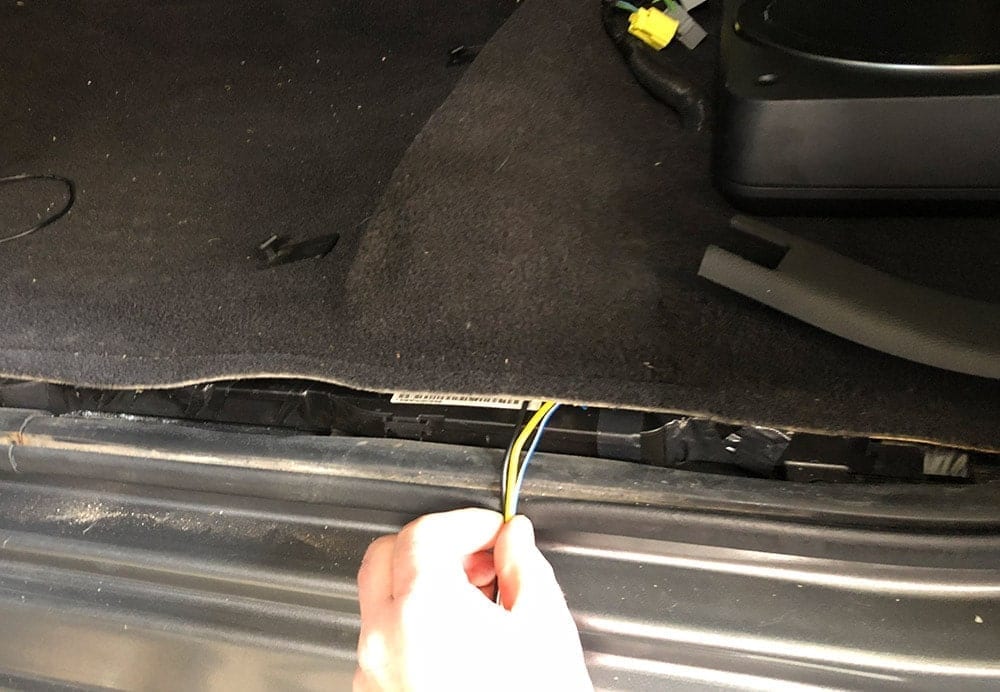
We chose to run power, ground and volume wire alongside the existing wire harnesses that extend to the connectors under the seat, and ran the RCA and amp turn on wire separately along the floor to behind the dash. We also cut a slit in the carpet to easily run your signal wire and wire harness directly to the area that the subwoofer will be wired and mounted. This will eliminate excess wire. Note, you'll want to place your subwoofer roughly in the location you want it first to measure home much wire you'll need.
Power, Ground and Subwoofer Volume:
We ran the constant power (yellow), ground (black) and the subwoofer volume wire alongside the door panel below the trim piece that you've removed in the previous step. The remaining four purple and green wire were cut and tied since we did not use the high power input as the signal to our sub.
Run the yellow, black and volume wire alongside the door panel all the way until it reaches the front side of the driver door, zip tying them frequently to the existing harness that runs along the bottom side of the door well. Once you reach the front of the door, this is where the three wires will go their separate ways.
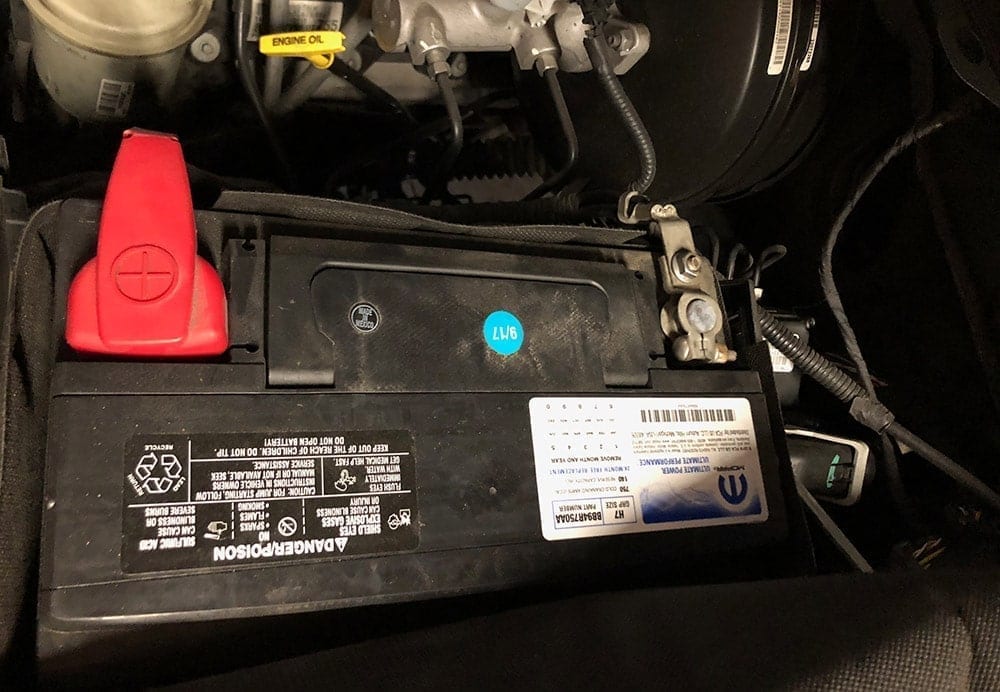
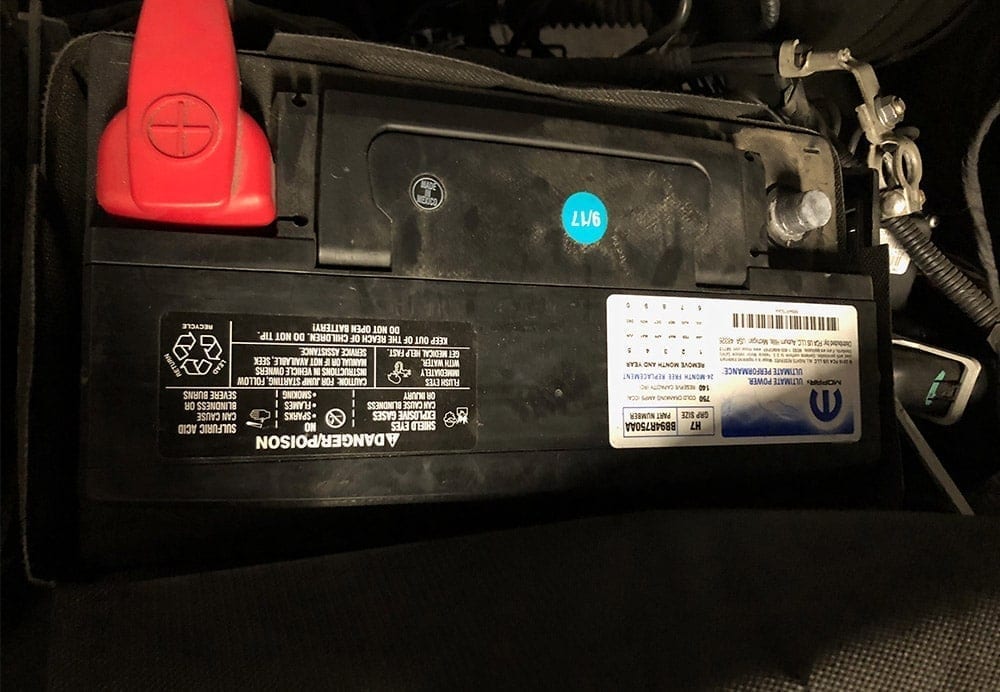
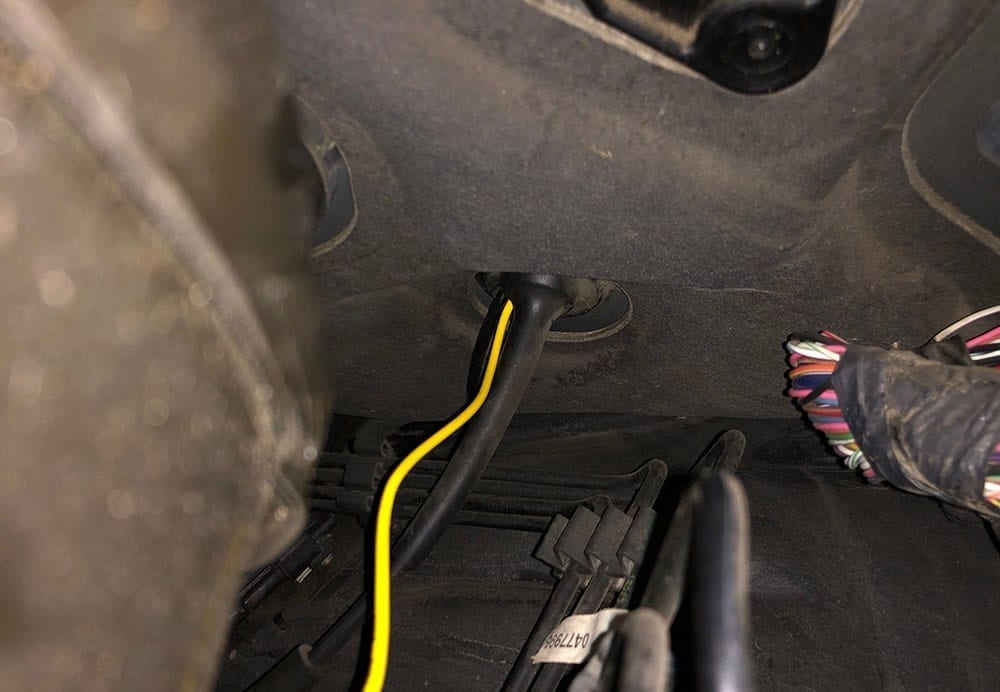
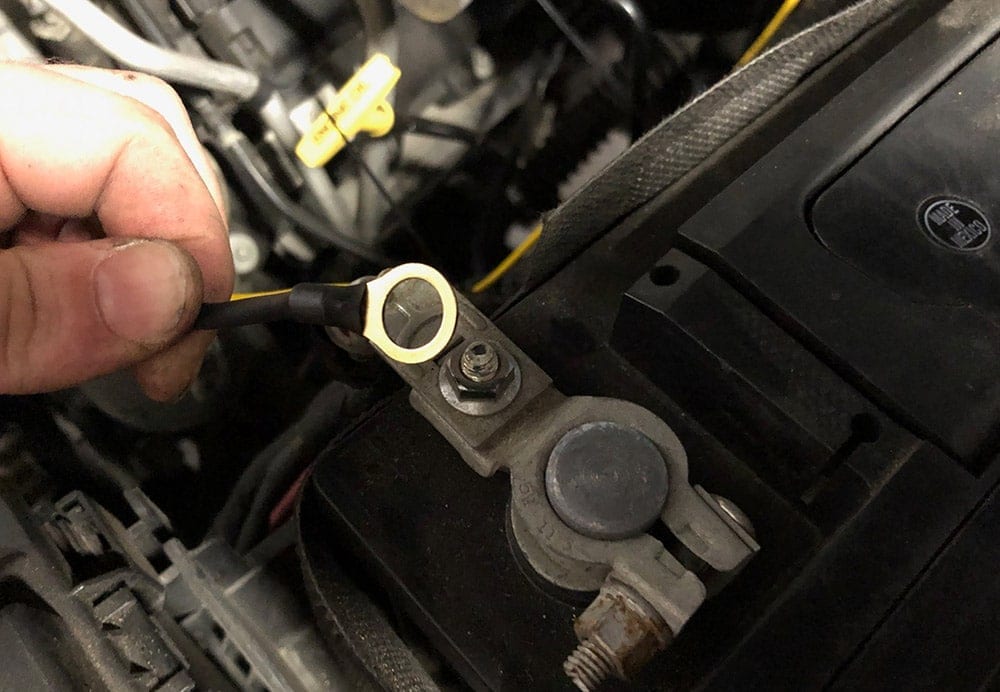
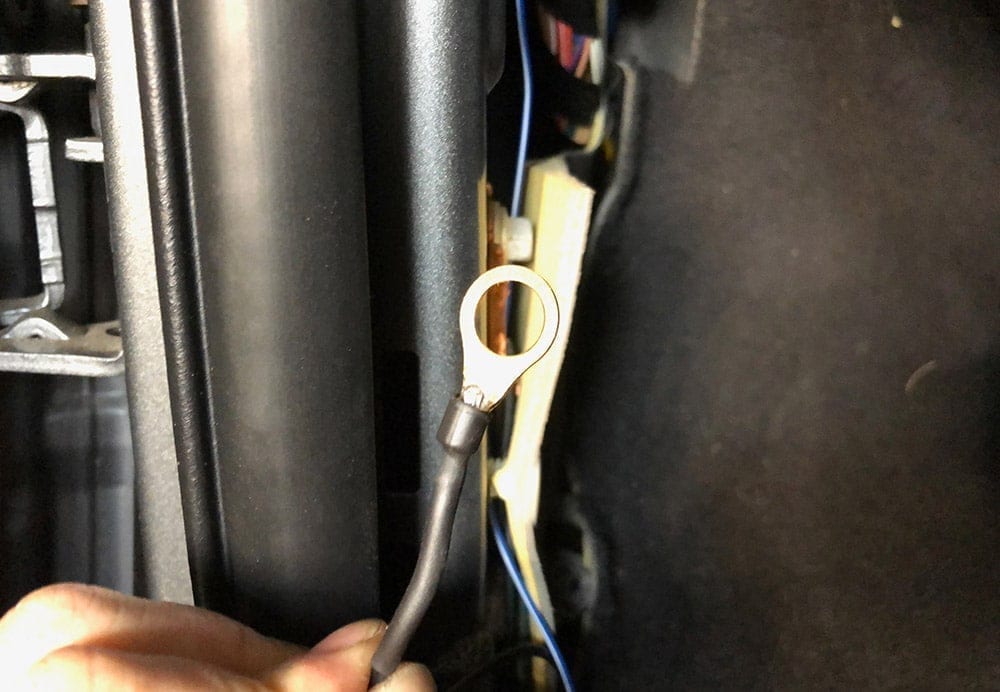
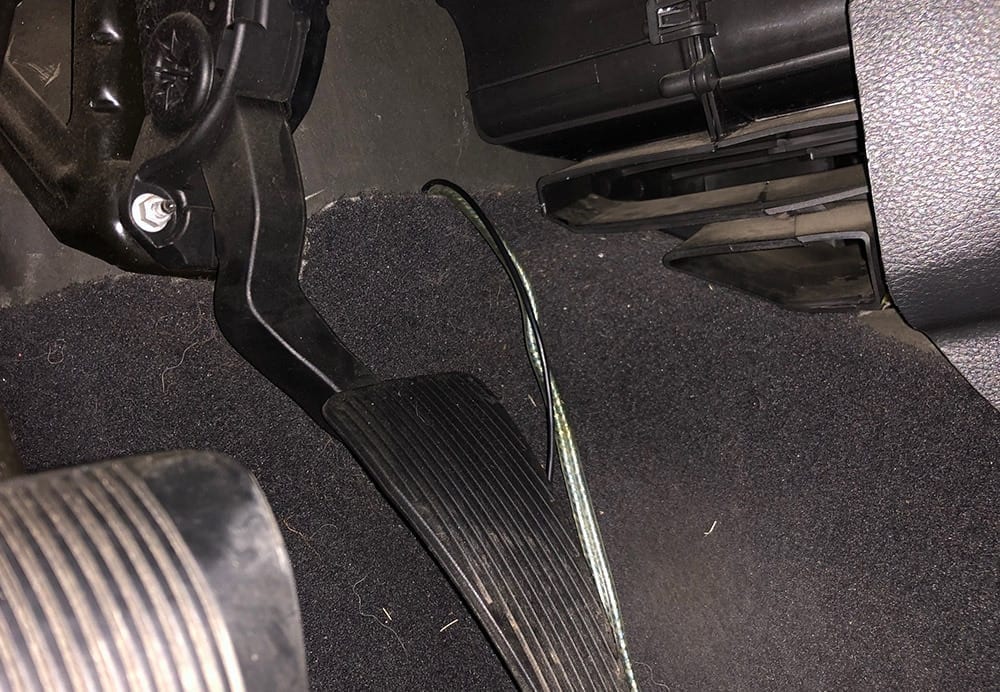
With the yellow wire – continue to run it up and through the firewall behind the brake pedal. Once it's through the firewall, you'll find an existing bundle of wire that runs along side the engine bay and ultimately to your battery's positive terminal. Using a series of zip ties, follow the existing bundle of wire all the way to the battery terminal. With the yellow wire zip tied where you want it, cut the wire at the distance needed to reach the bolt that holds the power wire to the battery terminal. We used a ring terminal to solder to the end of the power wire, and ultimately connect to the bolt that's on the battery terminal.
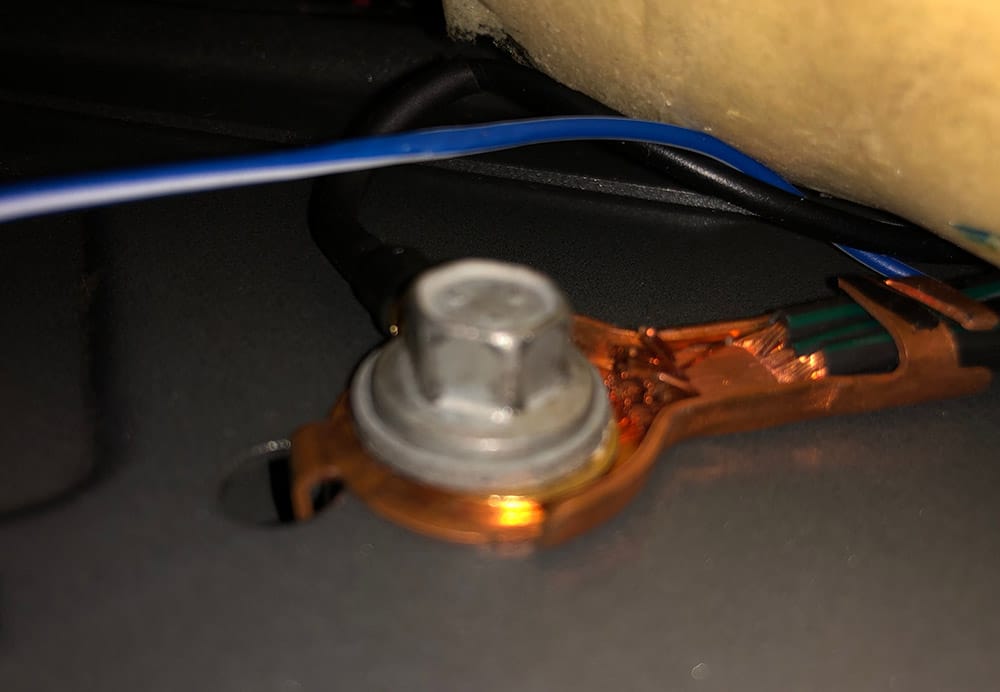
With the black wire – run it to an existing ground bolt that's on left side of the body before the firewall (see images below). We zip tied it along the existing ground wires and then cut it to length where the bolt is. Similar to the power wire, we used a ring terminal that would allow us to bolt the subwoofer ground to the body easily.
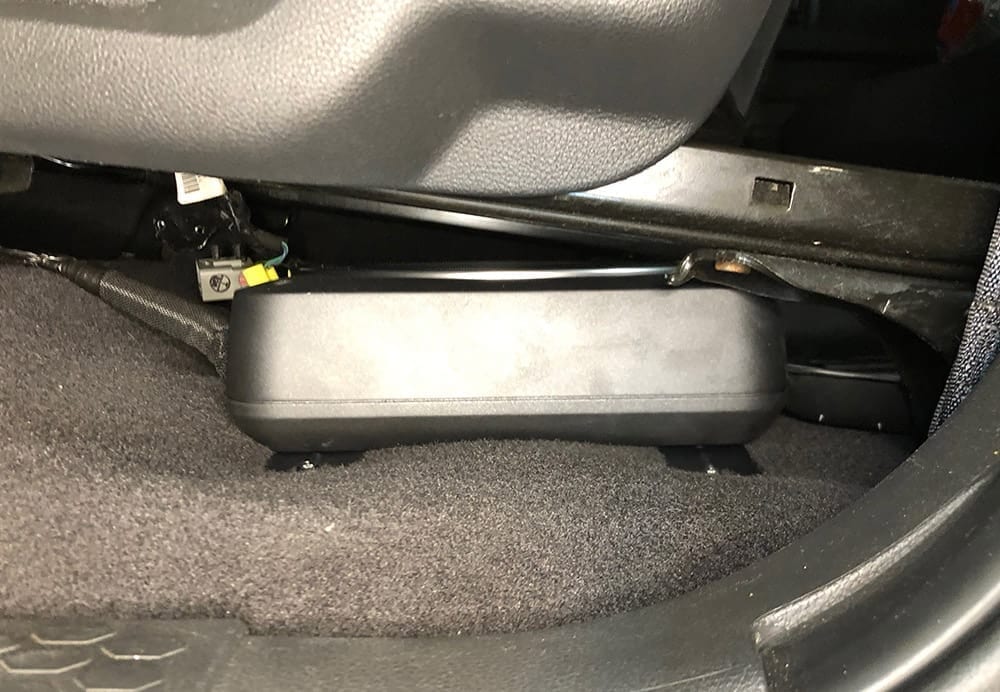
With the volume knob, we mounted it below and to the left side of the steering wheel. To mount it in this position, run the wire up the left panel behind the driver dash where your ground wire went. Then, run it inward toward the steering wheel, where you'll run it out of the gap between the steering wheel column and the plastic panel.

Signal and Amp Turn On:
The remaining wires to run after you've completed your power, ground and volume are the amp turn on (blue with white) and the signal RCA (your own provided RCA wire). Since these two wires will be running up to the head unit, we ran these separately along the floor where it rises in the center along the transmission to the backside of the dash. It's also good practice to separate your power and signal wire as best as you can to prevent interference.
From behind the dash, we pulled the wire through to the back of the head unit. The RCA wire will go in the ‘sub' output while the blue/white wire will go to a matching blue/white amp turn on from the back side of your aftermarket head unit.
If you are using an OEM head unit, you'll only be running the blue/white wire to an accessory wire on your truck. The RCAs are only if you're using the head unit for the subwoofer signal. Typically you can use the 12v charging port or the cigarette lighter for the signal wire.
Step 6: Test Fitting & Installing
With your wiring completed it's time to test fit your subwoofer. The XS-AW8 comes with four mounting brackets that you'll mount to the underside of the sub. These brackets will be used to bolt the enclosure to the floor of your truck. Place the subwoofer on the floor and attach all wiring to it, ensuring you have enough length for where it will be placed.
With the subwoofer on the floor still, put your driver's seat back in the truck on top of the subwoofer to ensure that it's in the correct spot, making adjustments to the position as needed. Mark where your subwoofer will go and remove the seat again.
With your subwoofer in position where it will be mounted, pre-drill the four mounting holes using a 3/32 or 1/16 drill bit. Then bolt it in using the provided screws.
At this point, your subwoofer should be wired and installed.
Step 7: Testing, Re-installing Trim & Head Unit
Before you re-install your trim, head unit and seat, test out your subwoofer! Turn on your radio and ensure that the subwoofer functions and turns on, and that your volume knob works as expected. Aftermarket head units typically have an independent volume control for the subwoofer in the settings so you should be able to adjust to your liking.
Once you've tested and confirmed everything is working, reinstall your trim along the bottom side of the door well, bolt your head unit back up and put the head unit bezel/trim back in place.
Finally, re-install your seat. Here's a couple photos of the end result!
Thanks for reading! Be sure to post a comment if you liked this How To or have questions about the installation!

Dear Sir,
First i want to thank you for such clear information regarding this Sony underseat subwoofer and i purchased this after reading your blog.
I jus now installed Sony xs aw8 in my Kia seltos in india. Installer took yellow wire directly from subwoofer to battery without using any fuse . Once I turn on the key before starting vehicle subwoofer will on .
My question is whether if I Play music without starting ignition of Eng is there chance it affects battery life or drains battery immediately? How long I can play music ?
Hello. Thanks for your comment. As long as the blue/white amp turn on wire is wired correctly to an accessory, that turns on when you start the vehicle, the yellow wire should be directly to the battery. However, you should add a fuse in between the subwoofer and battery inline on the yellow wire.