In this article: I’ll unbox the Cobra SC 400D dash camera, detail the features and functions, then install the camera and test how well it works in a variety of real-world situations.
Dash cameras do more than just capture images of accidents these days. Many of the cameras on the market feature a variety of driver safety functions, use GPS to give the driver posted speed limits and track your route, and have Bluetooth and Wi-Fi connections to make it simple to look at saved video files.
Of course, capturing the action is still the most important reason to install a dash cam in your vehicle. Only a few years ago, you were stuck with image quality that’s a lot like those horrible, grainy images you see on the evening news from convenience store cameras. Today, camera resolution is significantly better, with many devices offering ultra-high resolution images and smooth, seamless video that captures an amazing level of detail.
The Cobra SC 400D is a good example of a dashboard camera that offers high resolution images. It has a ton of driver safety features too that make it a great competitor to the best dash cameras on the market today. In this review, I’ll break down the various features of the SC 400D, and then I will install the camera and put it to the test so you can see how well it performs.


Unboxing & First Impressions
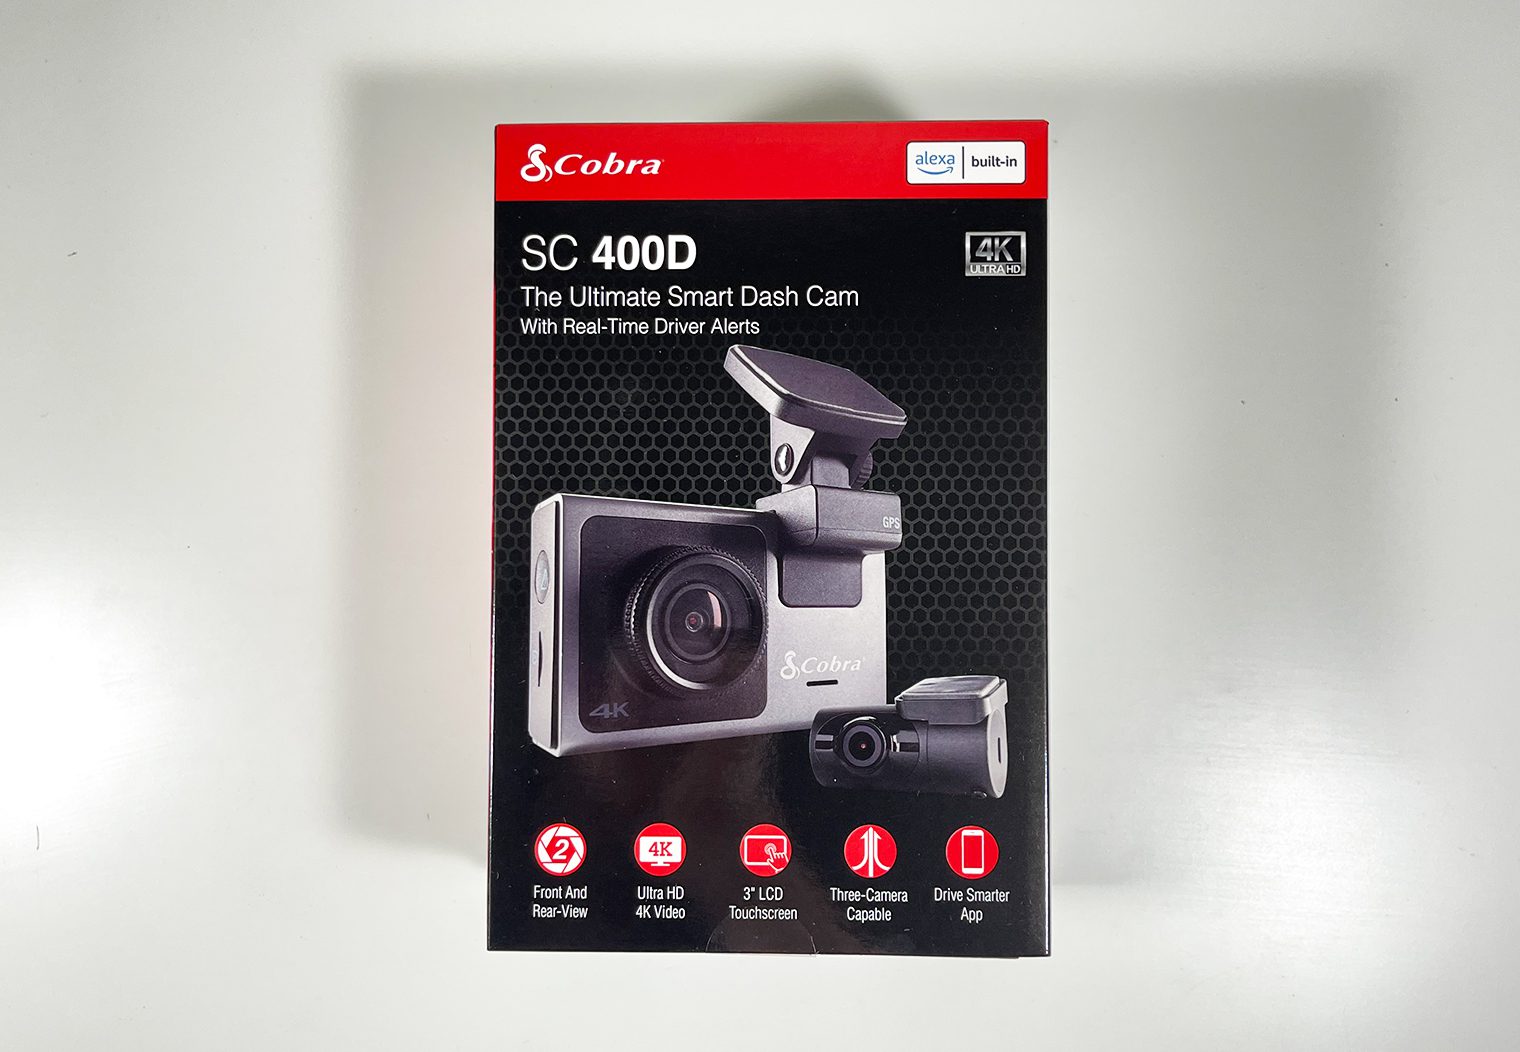
The overall packaging of the Cobra SC 400D shows a high level of attention to ensuring the camera arrives in your hands without damage. The external box has a nice feel and features graphics that highlight the various features available and gives you a pretty good idea what the camera will look like and how it will function.
You’ll find lots of details on the packaging, which is something that I look for when unboxing any product for the first time. These details are what set your expectations for how the product will suit your needs. In this case, you can easily see that this is a two-cam package that offers a front and rear camera. The front camera captures 4k video while the rear is HD. In fact, the packaging offers a pretty comprehensive details of the features of the camera.
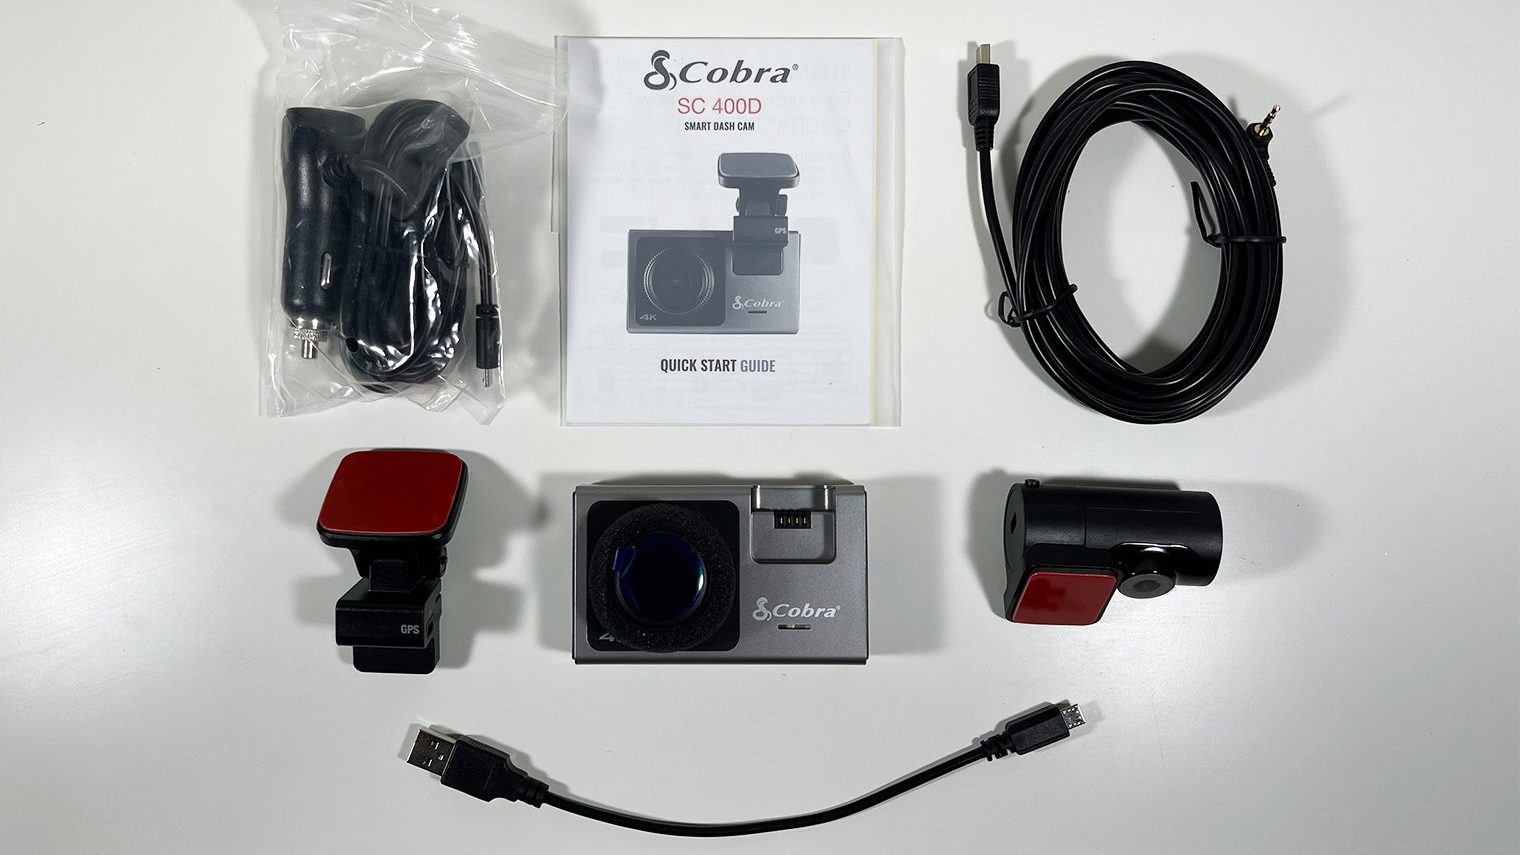
The outer packaging is a sleeve that slides off to reveal the inner box. A simple cardboard flap covers the contents and adds a layer of impact and scuff protection to prevent damage during shipping. Under the flap, the front and rear cameras are nestled in a soft foam cradle. Both cameras are also wrapped in plastic bags and have additional lens protection stickers.
Beneath the cameras, you’ll find the included cables and the instruction booklet. Cobra also includes a data cable to make downloading video files easier.

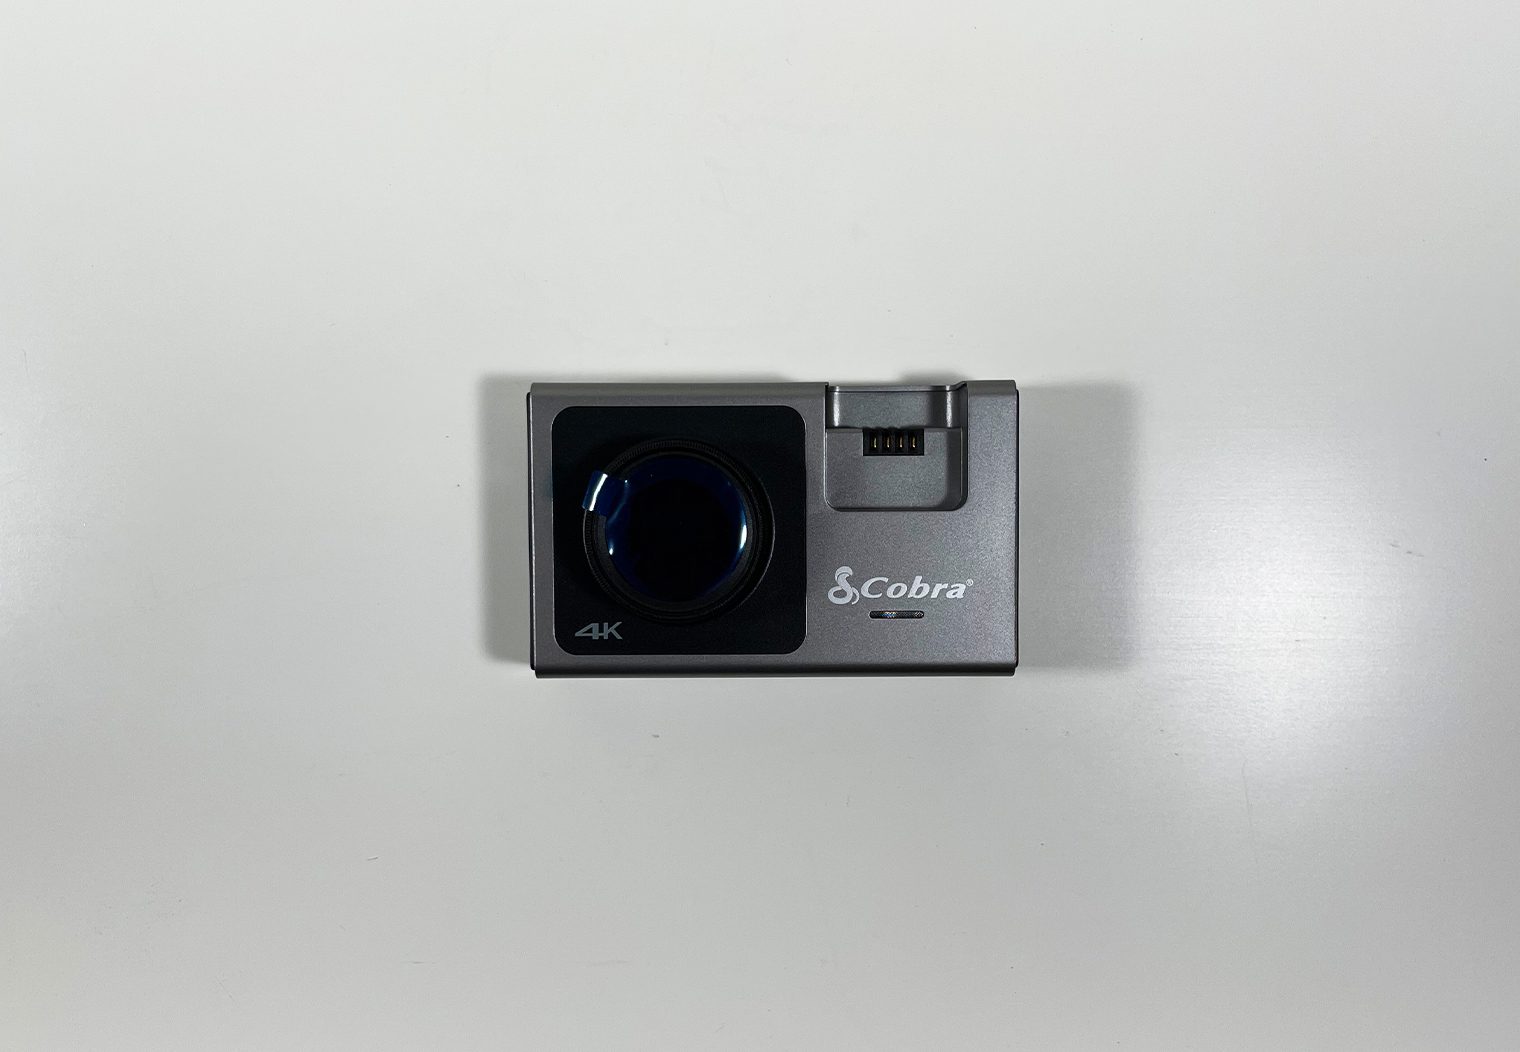
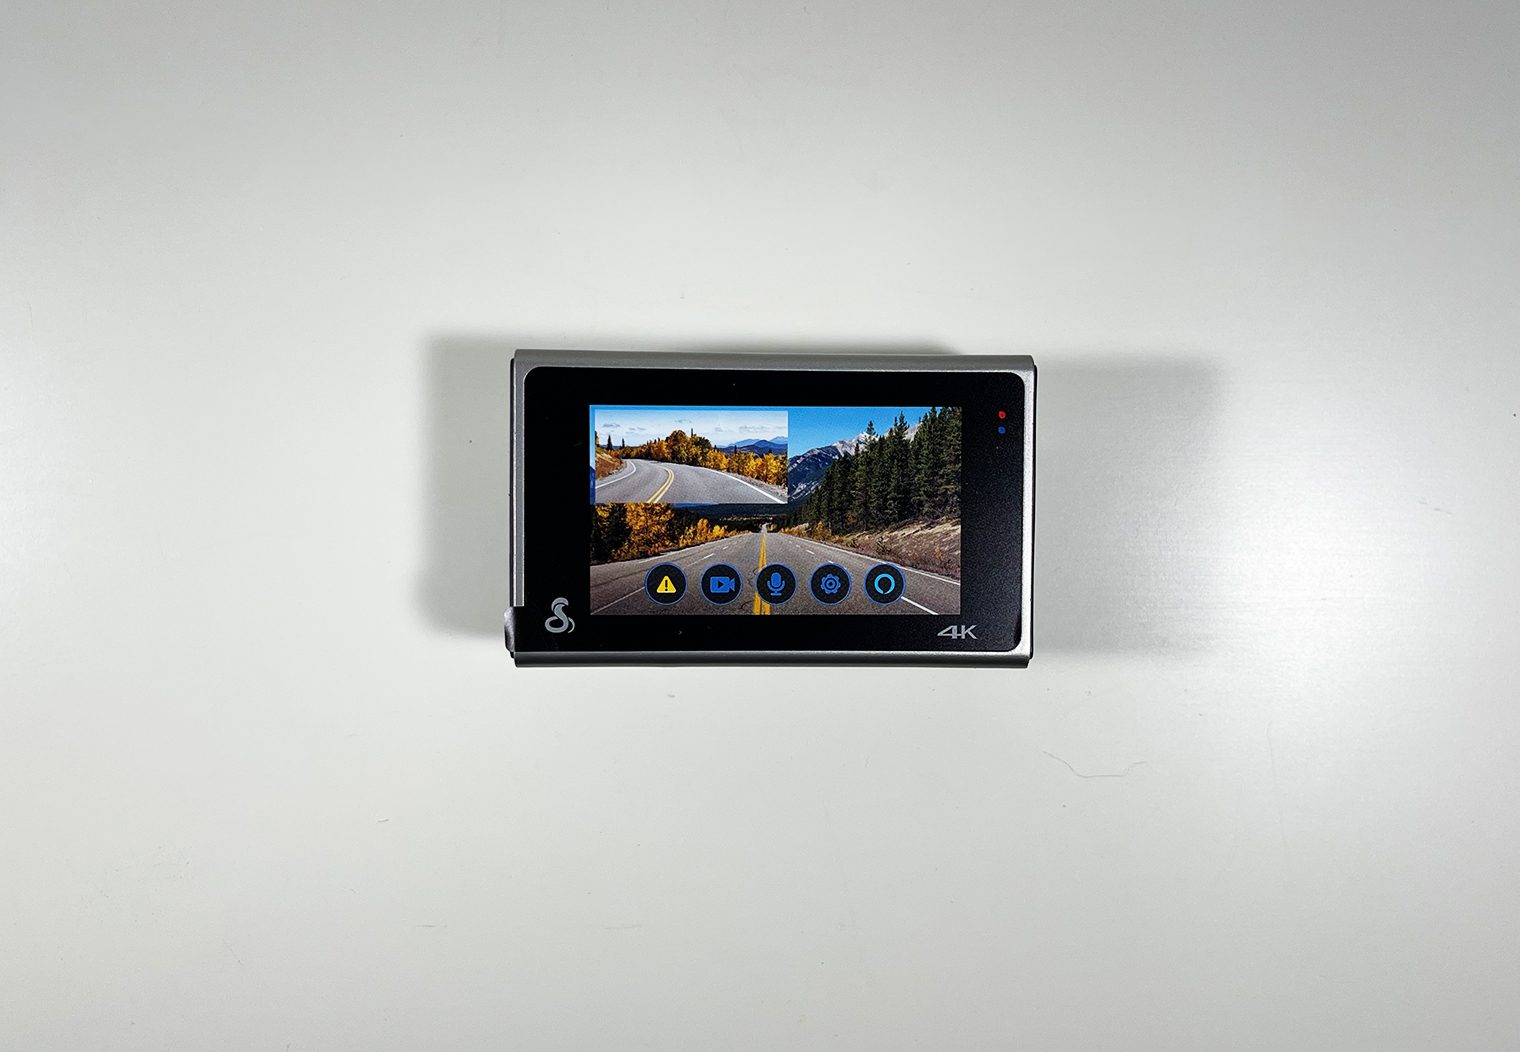
My first impression of the cameras are that they appear high quality. The fit and finish is excellent, and both the front and rear cameras have a solid, sturdy feel. The front camera includes a three-inch touchscreen that you can use use for directly accessing settings, viewing files, and various other functions. The buttons are large and easy to access/use.
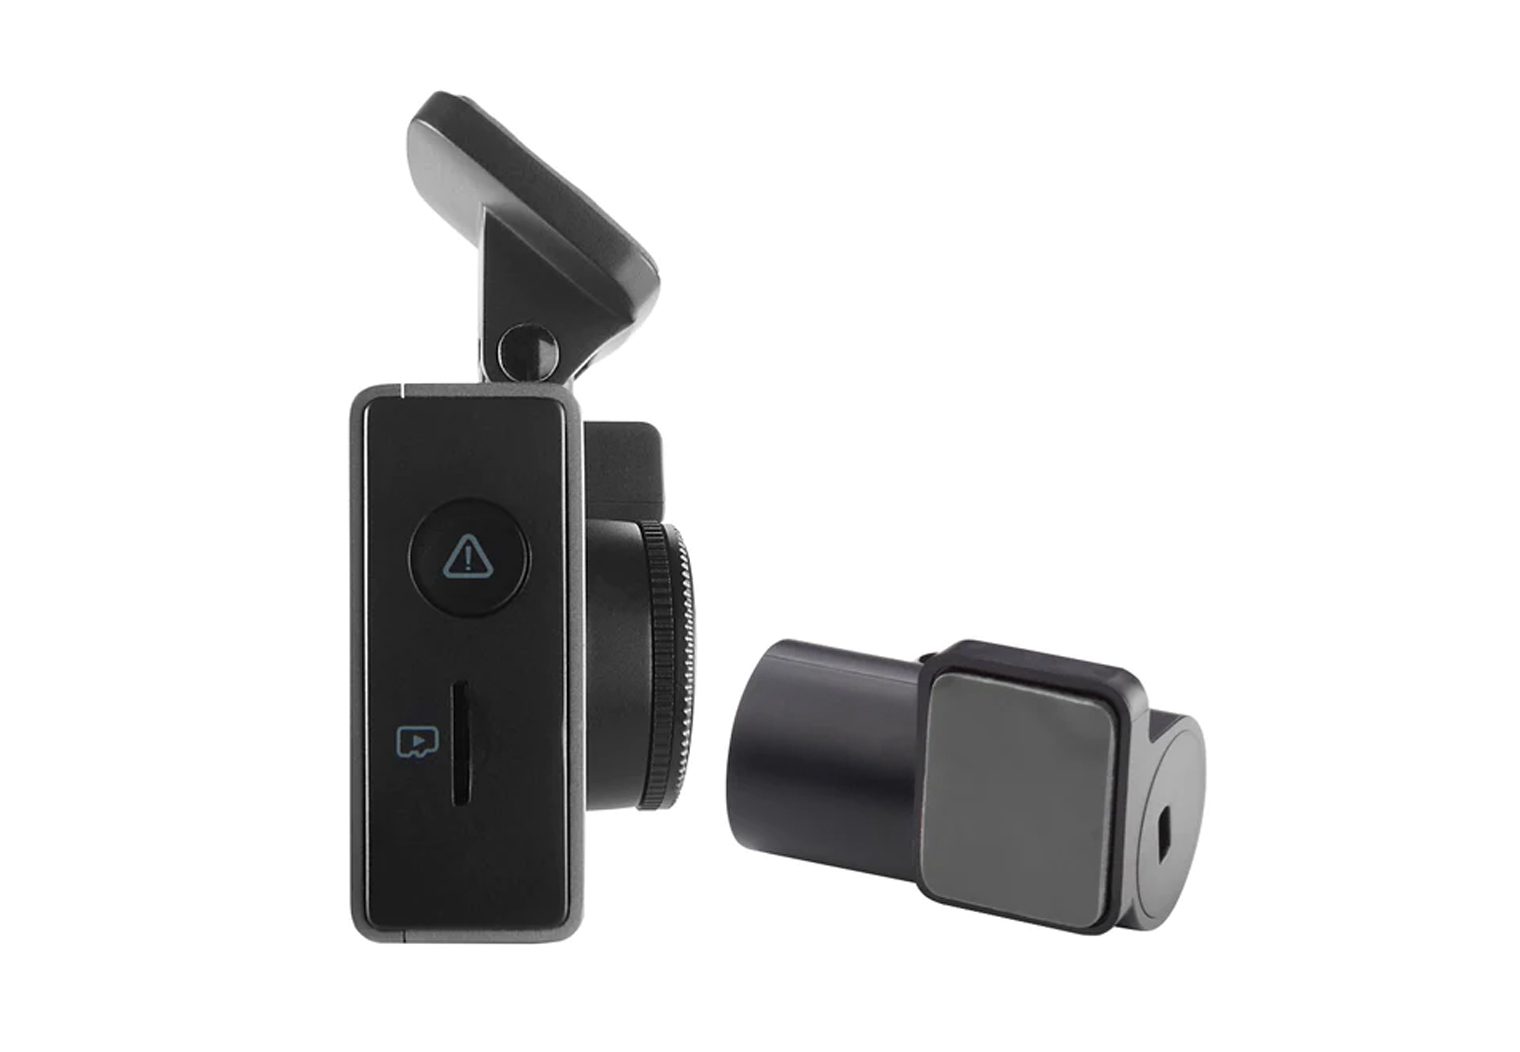
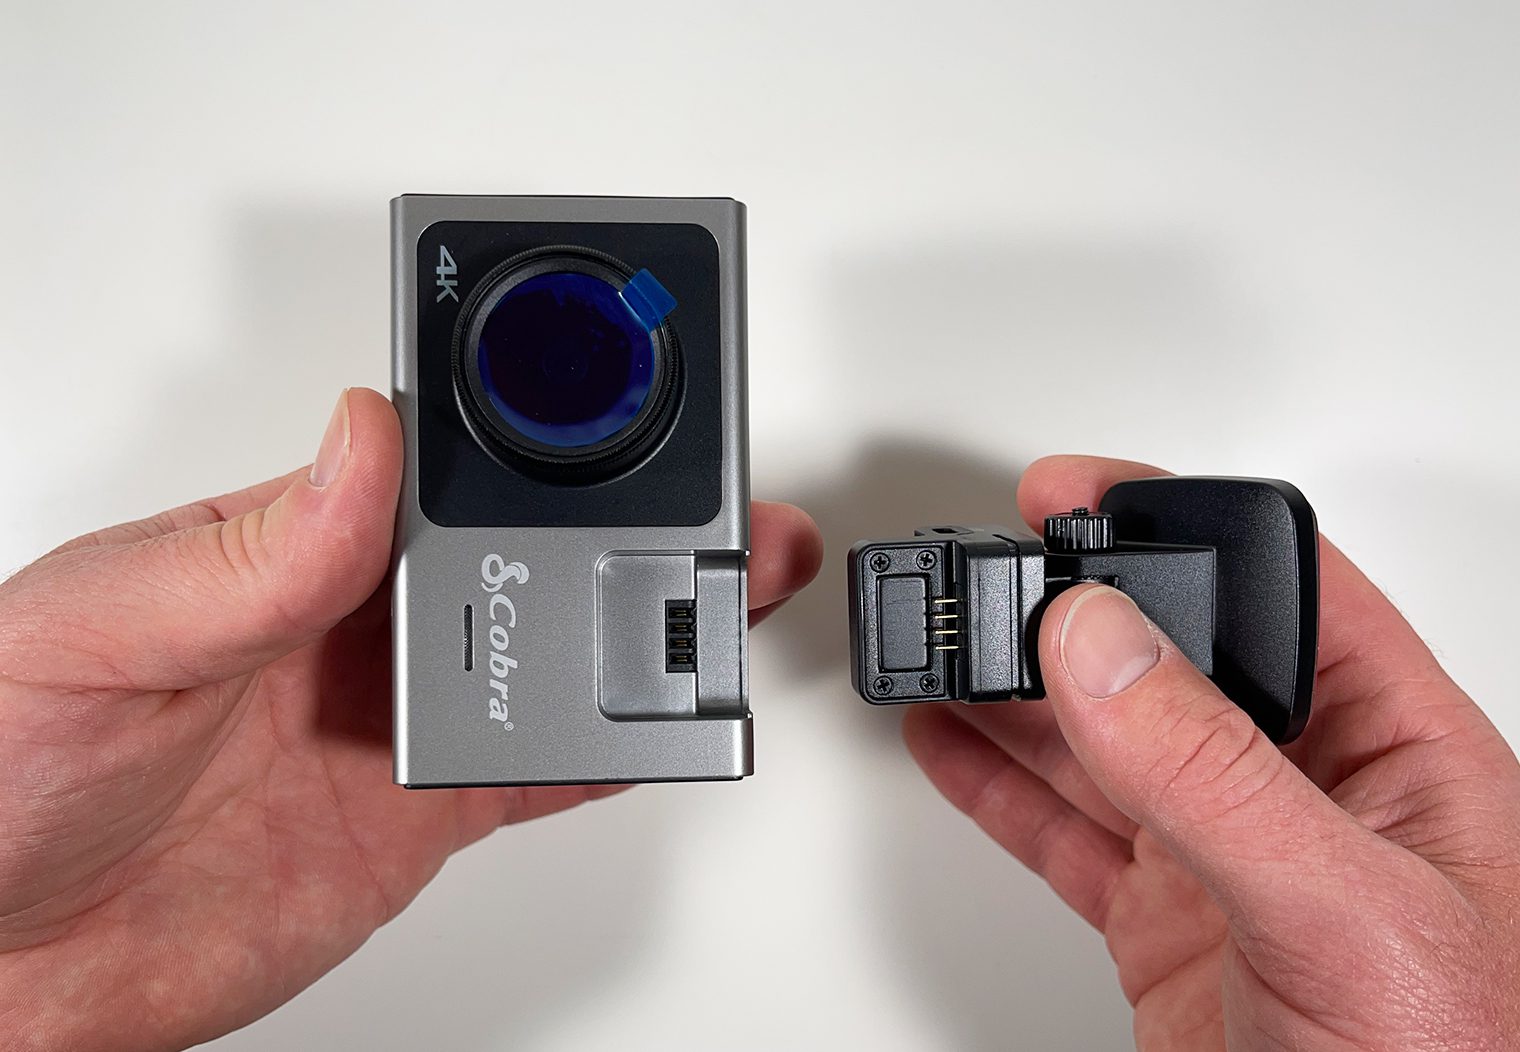
One of the things that I like about this camera in comparison with some others that I’ve reviewed is the front camera mount. Cobra uses a magnetic mount that allows the camera to easily be removed from the vehicle, making it a snap -literally- to prevent the camera from being stolen.

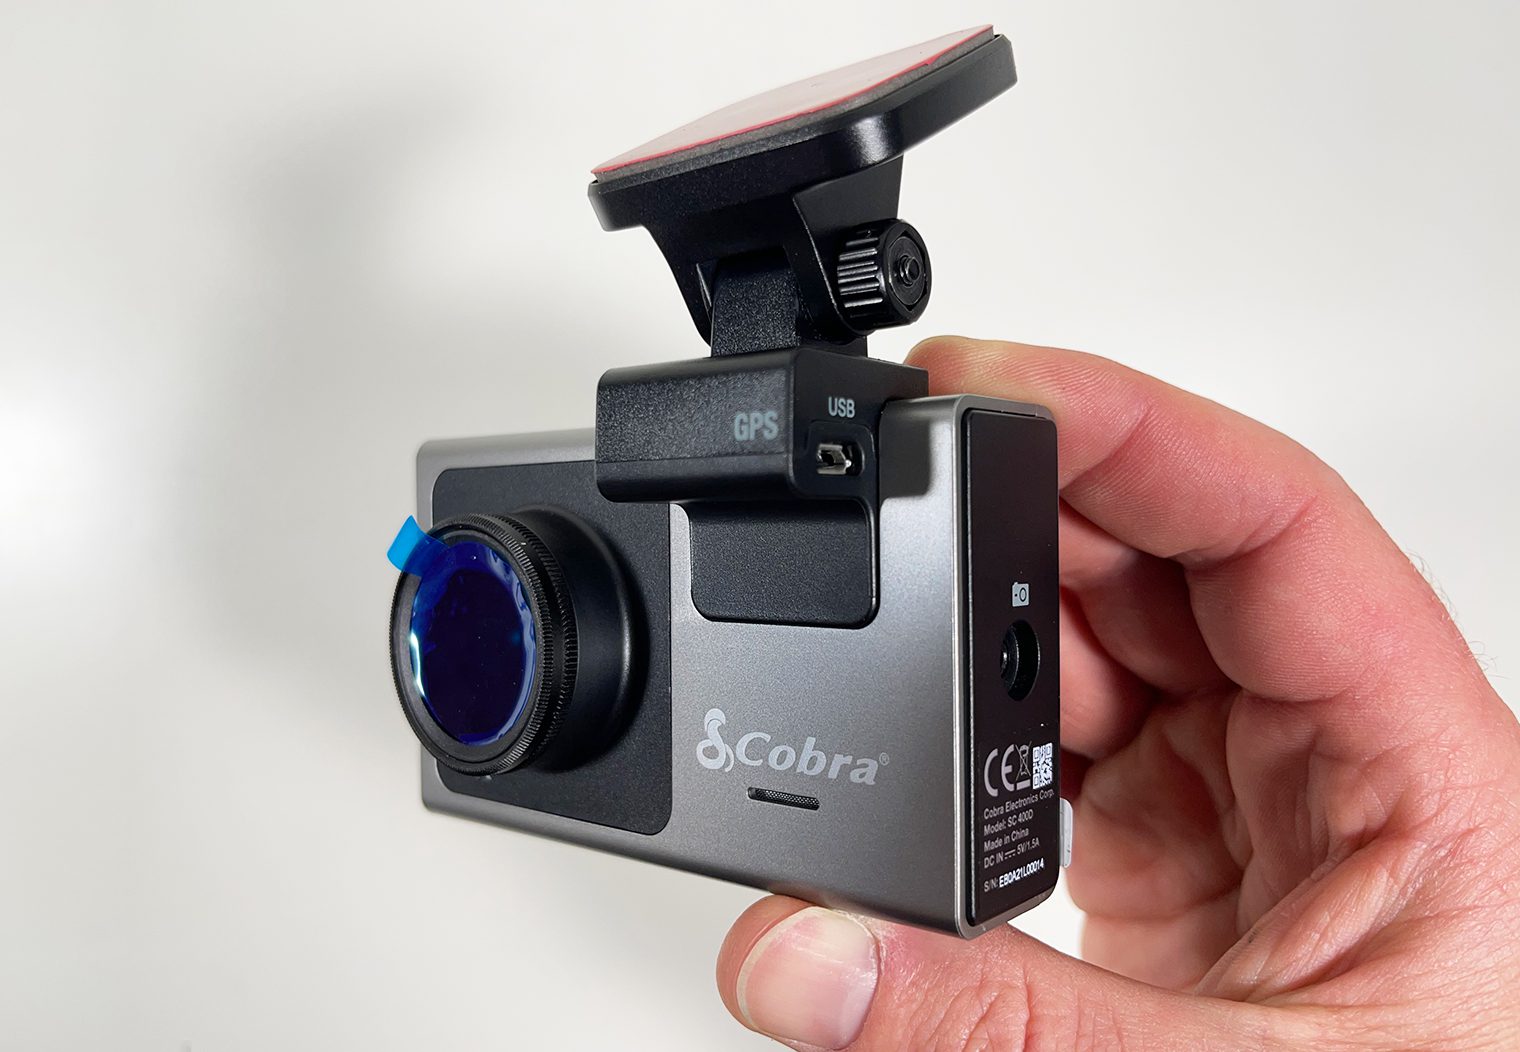
The front camera has a built-in polarizing lens feature too. I think this is an awesome feature to include simply because managing glare is one of the biggest challenges of any lens mounted behind a windshield. Finally, the cables look like they are made from quality materials. It is also noticeably easy to identify each cables' purpose and installation location.
What's in the Box
This is a complete list of everything included with the Cobra SC 400D
- Front Camera w/ MicroSD Card Installed
- Rear Camera
- Front Camera Magnetic Mount
- 12v Power Cable
- Rear Camera Cable
- USB Cable
- Instruction Booklet
Front Camera Details
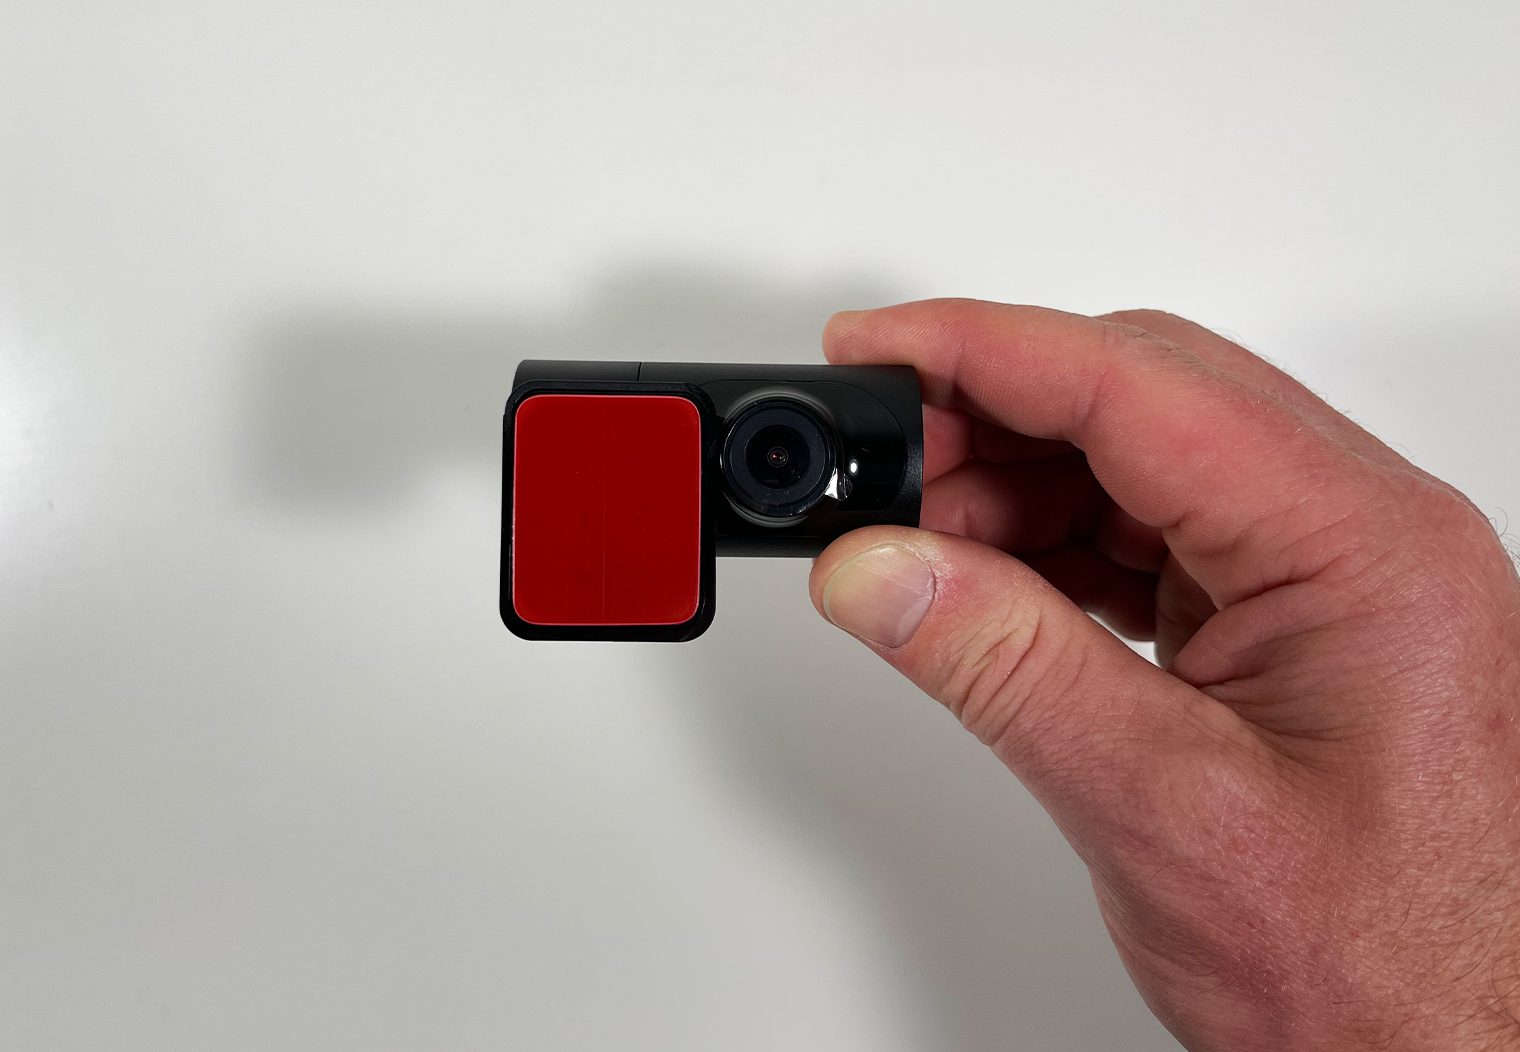
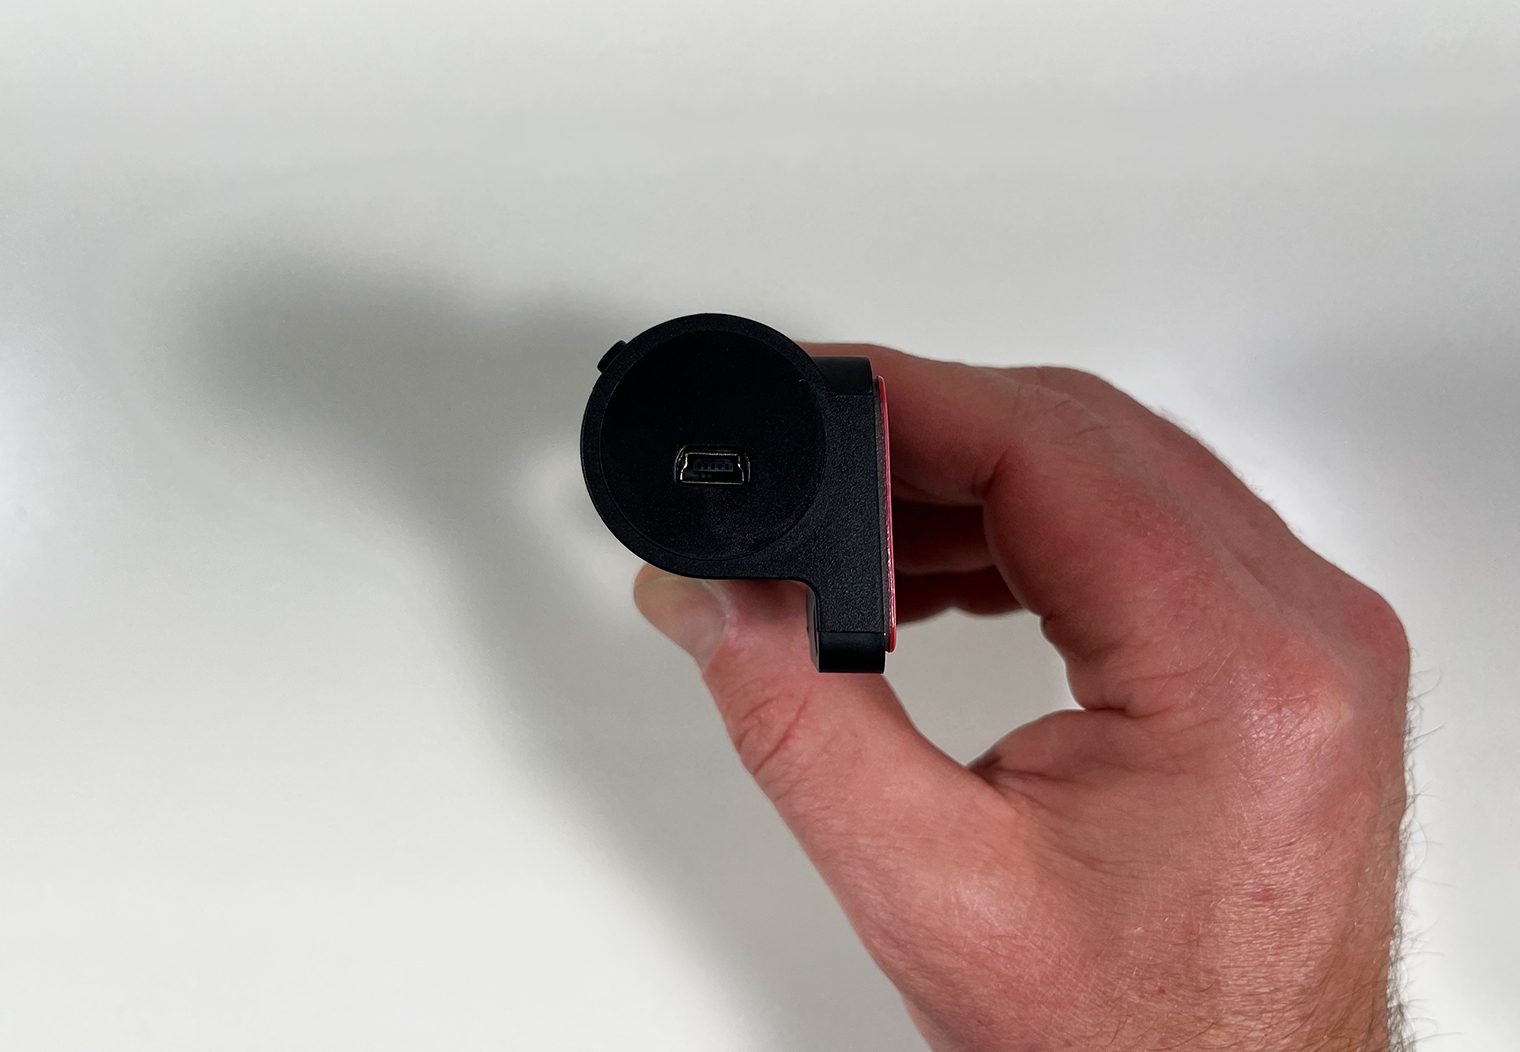
The front dash camera looks a lot like a digital camera you’d take on vacation with you. It features an offset lens and a three-inch touch screen on the back. The physical buttons are fairly simple. I'd highly recommend taking a look through the manual to better understand what they do and when to use them when you first set the camera up. Input ports are similarly simple to understand, but understanding what each of them do and how to use them will help you use this camera to its full potential.
Let's walk through the various buttons and ports that are located throughout the camera.
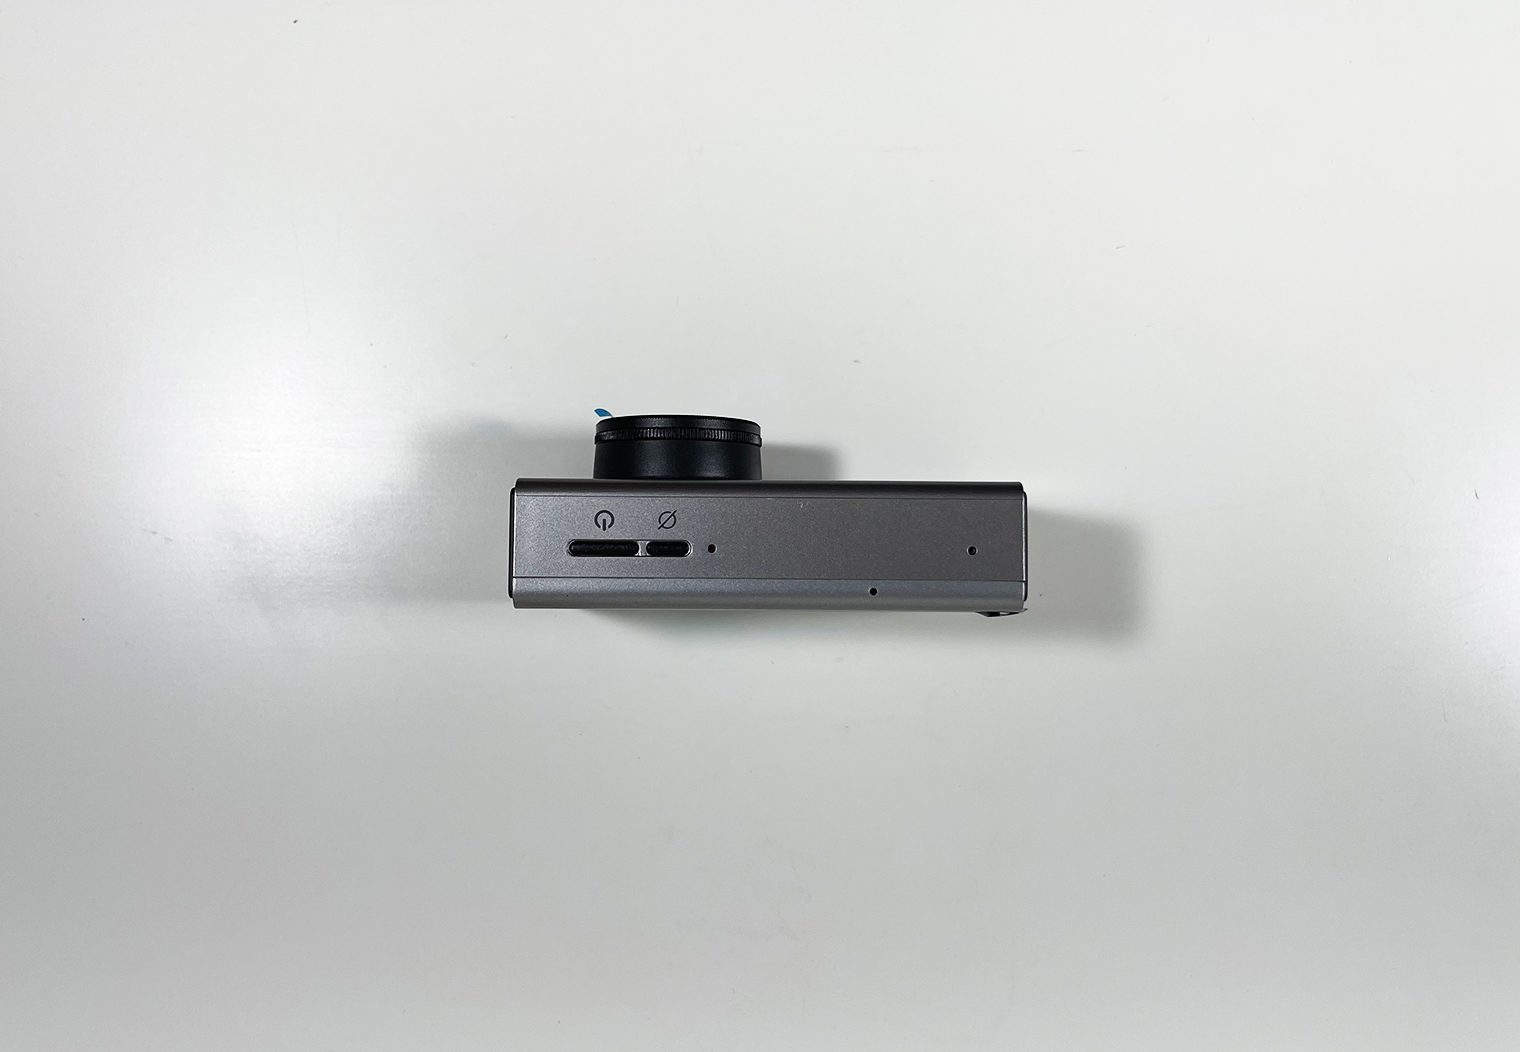
- Bottom of the camera
- Power: This button is pretty standard and recognizable. Its function is simple – turn the camera on and off.
- Amazon Alexa mute: Indicated by a circle with a slash through it. If you'd like to mute Alexa after using it or accidentally triggering it, use this button
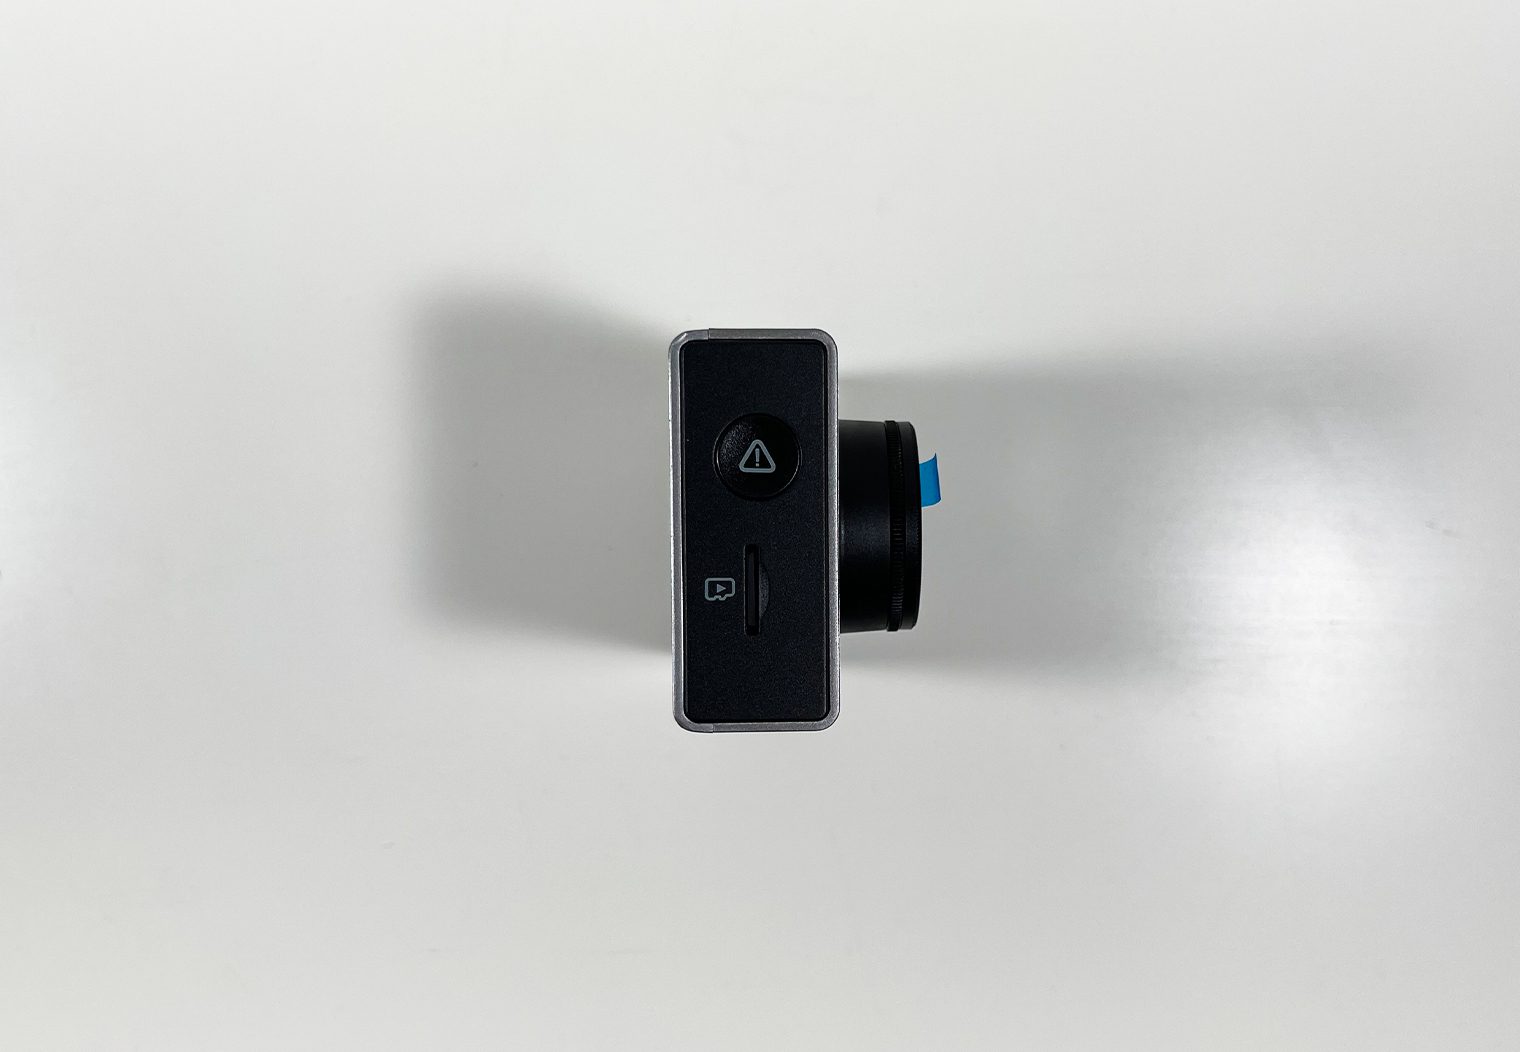
- Right side of the camera
- MicroSD card slot: This is the where your memory card will go.
- Lock video/emergency recording: Button indicated with a triangle and exclamation point warning logo. This will lock video content into the files instead of placing it in a recording loop that can be overridden. This can also be triggered automatically if the camera experiences significant Gs.
- Left side of the camera
- Video input: If you'd like to use a cabin view camera alongside the SC 400D, you can plug the FV-CV1 camera directly into this port to enable a cabin view.
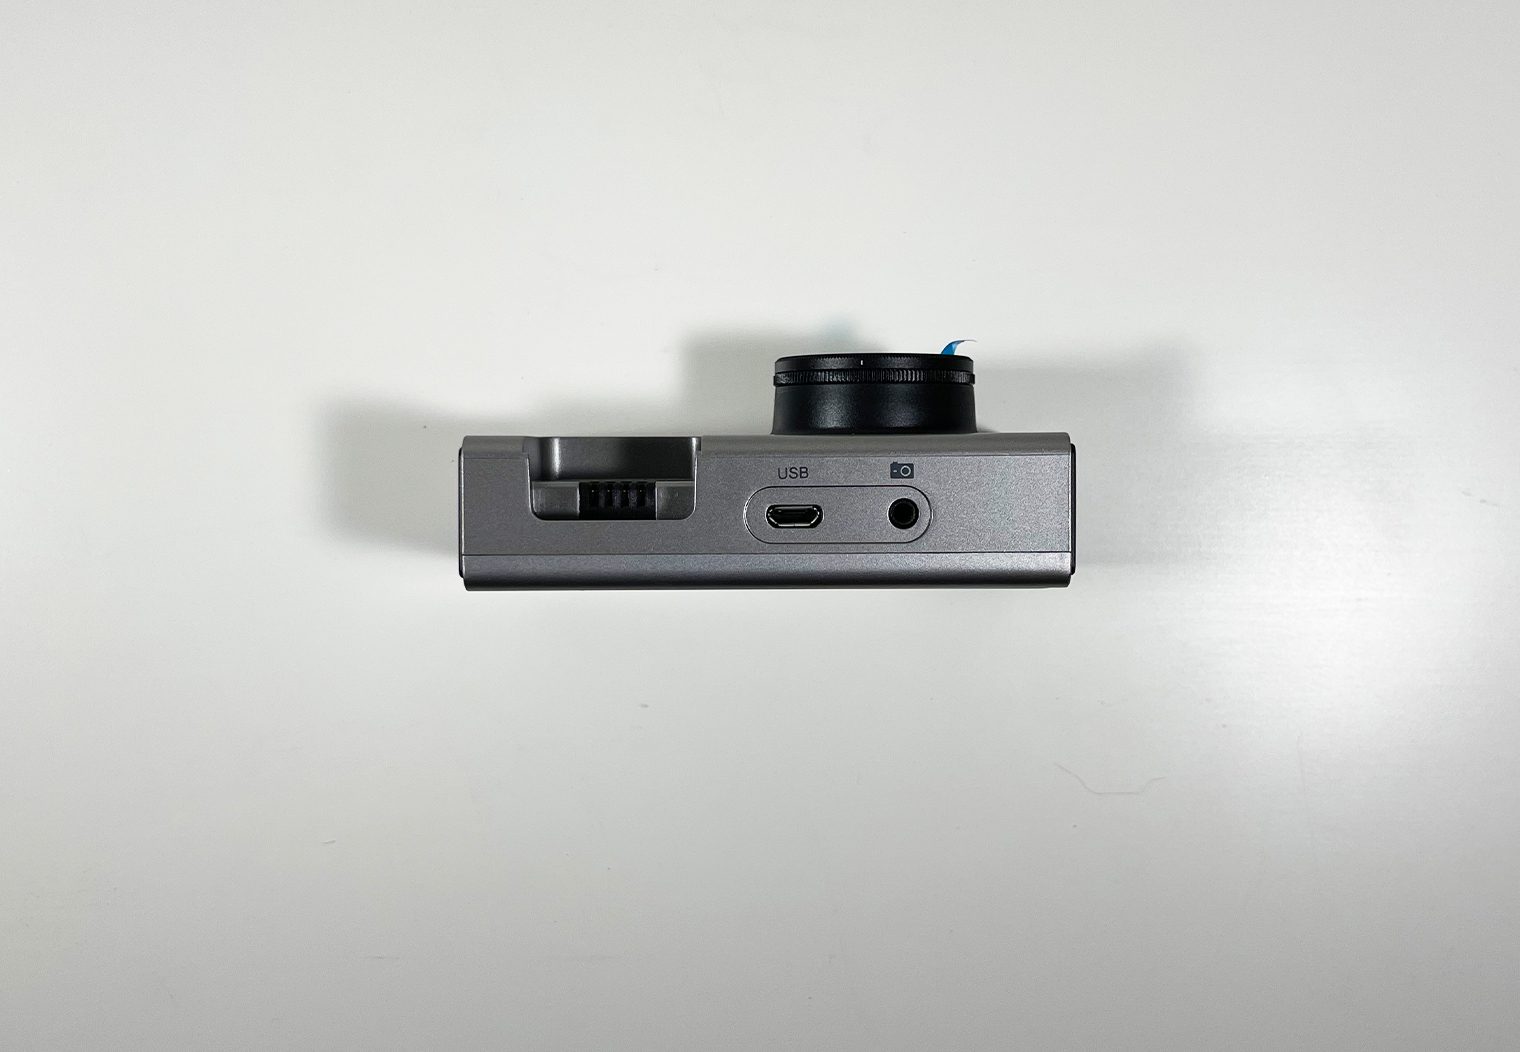
- Top of the camera
- Video input: If you want an external or rear camera (in this case I used a rear camera), you can use this port to plug in the FV-RV1 rear camera or FV-EV1 external camera to add to the number of views you have in and around the vehicle.
- Micro USB Port: This can be used to connect to your computer and access the files on your MicroSD card.
- Side of magnetic mount
- Micro USB Port: This port is the required power port for the camera(s).
Rear Camera Details
The rear camera is pretty straight forward. It’s a cylindrical design that rotates about 270-degrees in its housing. There is a rear camera cable port on one side. The camera doesn’t remove from the housing which is pretty typical of rear camera designs.

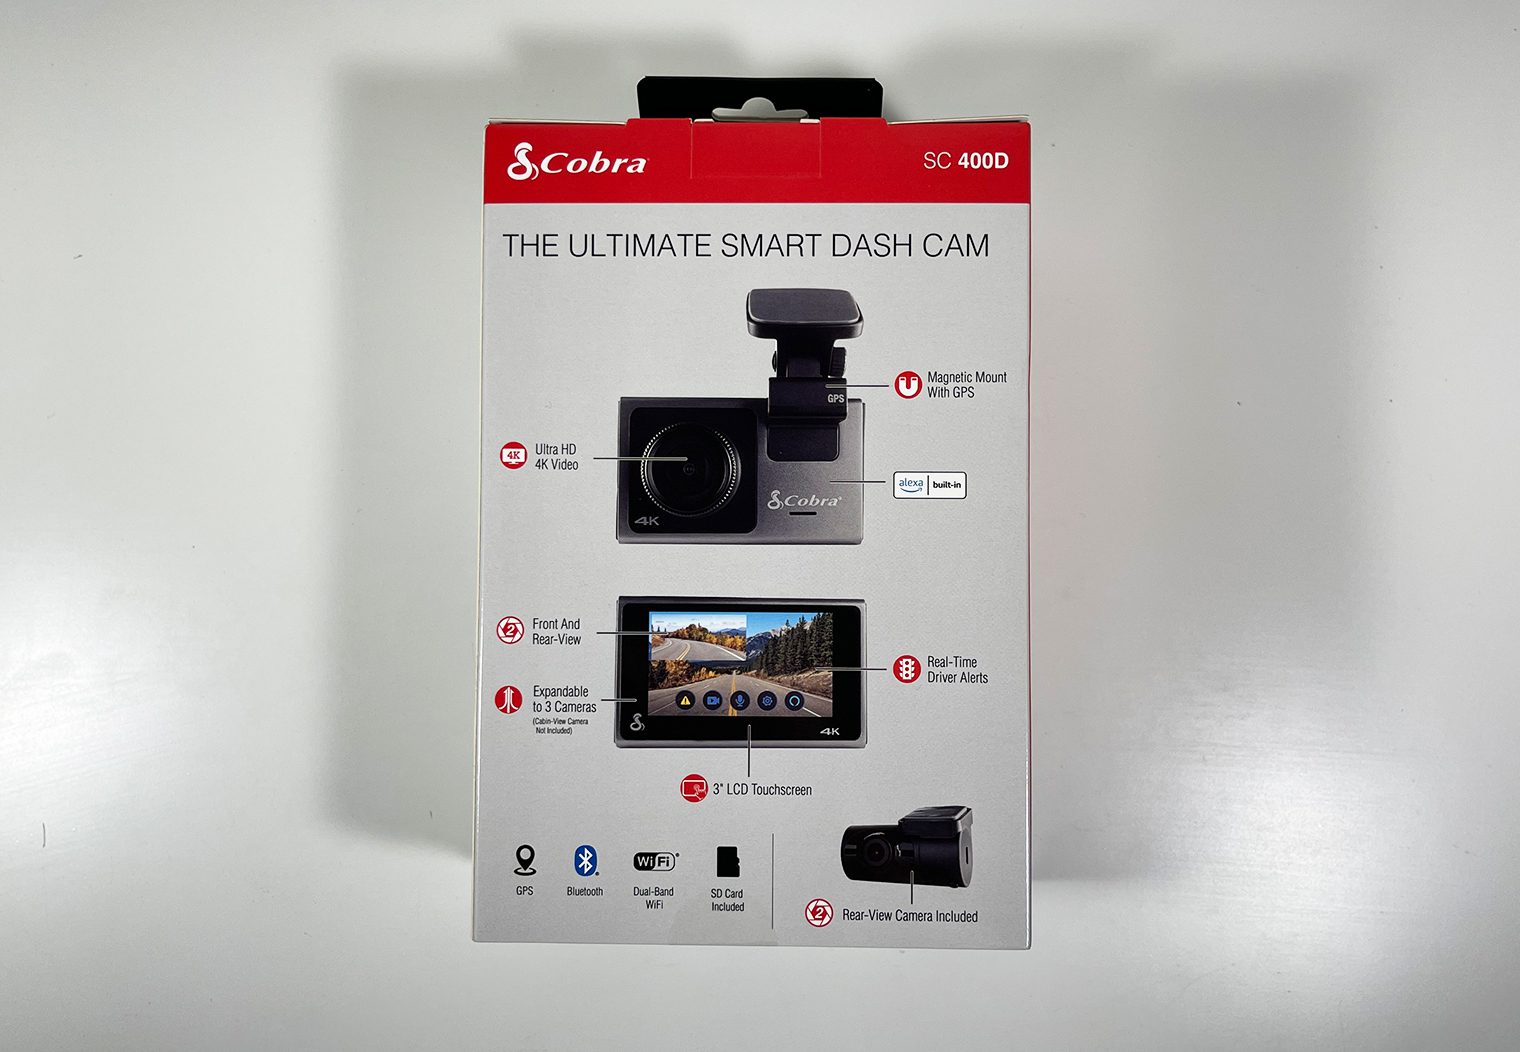
Cobra SC 400D Key Features
Here are some of the key features of the Cobra SC 400D so you’ll know what the capabilities of this package are.
- Front & Rear Cameras
- 4K UHD Video
- Magnetic Mount with Built-in GPS
- Bluetooth & Dual-Band Wi-Fi
- MicroSD Card Included
- 3” LCD Touchscreen
- Real-time Driver Alerts
- Amazon Alexa Built-in
- Cloud Compatibility
- Emergency Mayday Notification
- Multi-Camera Management
Feature Walkthrough and Preliminary Testing
The Cobra SC 400D has a ton of useful and powerful features. For one, it connects to Cobra's Drive Smarter app where almost all of the features can be accessed and control. The app is a free download and is available for Android and iOS users.
In this section, I'll go into more detail about some of the key functionality, hook it up to power and open up the app. Typically, I hook up a camera and test it prior to a formal installation. This dummy install lets me check the camera to make sure it works correctly before going through the hassle of installation
Multiple Camera Management System
Earlier in the article, I touched on the various expansion ports and video inputs. Using the two video inputs on the side and top of the camera, you can connect up to two additional compatible cameras that will enable a full view of front, rear and interior of the car. This is great for a comprehensive view of your car and can really help to get every angle.
The SC 400D comes with the rear camera, which uses one of the ports by default, but you can purchase a third camera separately if you're looking for the additional view.

Positioning the Front Camera
I’m a big fan of discrete electronics. I don’t care for the undercover DEA look with cameras and cell phone mounts scattered all over the inside of the windshield, so when I install a dash cam, I am always trying to get the device located to provide the best viewing angle while being as unobtrusive as possible.
Mounting the SC 400D was pretty straight forward. Apart from some challenges with my vehicle's enormous rear view mirror, the camera mounted incredibly easily. The small, removable magnetic mount made it simple to pick a spot and stick it to the windshield. It's worth noting that Cobra does use an adhesive mount, which means it's pretty much permanent once you place it. It's not a suction cup mount that can be pulled off and moved with ease.
The recommended position for this camera is below the rear view mirror. It hangs about 2.5 – 3 inches from the top of the mount, so depending on the size of your windshield you'll likely need to evaluate exactly where this can be mounted without impeding your view. In my case, positioning it below the rear view mirror wasn't ideal, so I placed it to the side. This gave me the camera view I wanted without impeding my vision on the windshield.
I ran the power wire through the headliner, down to the side of the rear view mirror for a clean finish. And finally, after it was wired and mounted I adjusted the angle via the adjustable mount.


Adjusting the CPL Filter

Cobra’s SC 400D has a unique built-in CPL filter – or circular polarizing lens. The purpose of a CPL filter is to reduce and remove unwanted glare to improve image quality. With the camera installed, you’ll set the instruction booklet on the dash and slowly rotate the ring on the front of the lens until the glare is gone. This worked remarkably well when I was setting it up, although I'm curious how well it will work over time in different conditions and if it will require me to adjust it frequently.
Positioning the Rear Camera
The rear camera was even more straight forward than the front camera. It rotates about 270 degrees, which makes it ideal for all angles of your rear view window. Depending on the setup of your vehicle, where your rear brake light housing is and so on, you simply determine the location that's best and use the adhesive mount to place it on the rear window. Similar to the front camera, this is an adhesive mount so you really only get one (maybe two) good tries at it.
On my vehicle, the third brake light housing is a substantial chunk of plastic that sits right in the spot where the rear camera would best mount – Go figure. I chose to place the camera on the driver's side of the brake light which caused a slight loss of the viewing angle on the passenger side of the vehicle but overall gave me a great view of the rear.
Alexa, Alerts and Parking Mode
One of the unique features of the Cobra SC 400D is its built-in Amazon Alexa. There's a variety of voice commands that you can use to control the camera just by saying “Alexa”. Here's a list of the commands from the manual to give you an idea of what you can use Alexa for.

What's nice about the Alexa feature is that it keeps your eyes on the road instead of fumbling with the touchscreen or your phone to enable/disable a simple feature that's easy. You also don't have to click on the emergency/lock video button if you wanted to enable that feature, you simply tell the camera to “Lock Video”.
The SC-400D also provides real-time alerts using the GPS that’s built-in. I thought this was unique as well and kind of serves as a dual purpose – a camera combined with some of the GPS nav features (I thought of the alerts Waze gives you). Since Cobra also manufactures radar detectors, I think what they've done here is combined their database of red-light and speed cameras, police location and other radar alerts with this camera via the Drive app. So by setting this camera up, you now have access to all of the self and logged alerts that someone who, for example, purchased the ESCORT MAX360 does via the app. Obviously the camera is not a radar detector but you get some of the benefits which is nice!
The camera features a parking mode too, which is automatically enabled when the vehicle is shut off in order to prevent the camera from draining your battery if you leave your car parked for an extended period of time. This is a pretty critical feature, but also common among higher end dash cameras. The camera will enter parking mode after 5 minutes, which puts it into a ‘sleep'. If nearby motion is detected or G-Sensor detects an impact it will instantly wake up and start saving one minute clips.
On the battery-draining note, to further protect your battery if you know you're going to park your vehicle for an extended period of time, is in an area with a lot of motion or movement that will prevent it from sleeping, or just have an old battery that doesn't keep a charge well – there's an added layer of protection. You can use the “Auto Surveillance Shutoff” to prevent unnecessary recording and also even set a time limit on the Parking Mode.
Drive Smarter App
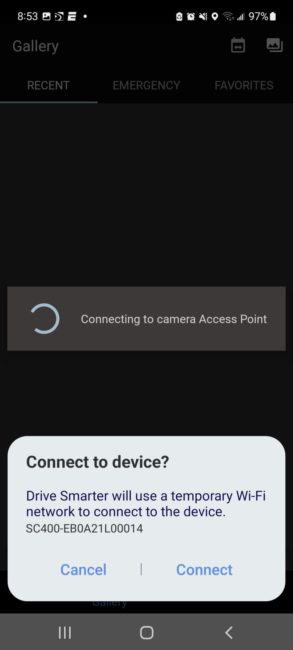
The app that Cobra uses for this camera is called Drive Smarter. The initial setup is easy. You’ll register your email address with the app, create a login and password, and then the app will search for the camera. It took no more than a few seconds for the app and camera to connect. You can set up a profile for the vehicle at the same time.
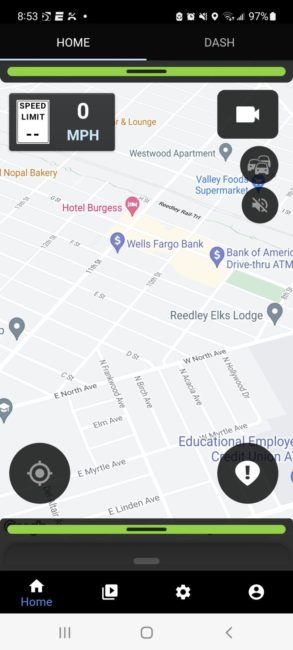
The main home page of the app is pretty slick. When connected to the camera, it opens with a GPS map showing your location. A bar along the bottom of the screen offers menu selections including home, gallery, settings, and account details. An icon on the top provides access to saved video files.

Viewing and Downloading Files
You can use the 3″ LCD touchscreen on the camera to access and view your video files directly. However, the best way to access video files on the Cobra SC 400D is through the app on your mobile device. From the home page, there is an icon at the upper-right corner that looks like a video camera. Selecting this icon will automatically start a connection with the camera. No need to have the camera powered on or be too close to it for a connection to start.
Once the camera connects, you’ll have options for the types of video files you can view. Each file is listed with the date and time and shows a thumbnail image to give you an idea of where you were when the video was taken.
Video files are listed as front-rear, but there is no way to switch between the two. Clips are one minute in length. Once you’ve selected a video file, you’ll have the option to save it, download it, or delete the video to free up space on the MicroSD card.
File Organization
The video files are listed under the Gallery tab and include front and rear images. I liked how they were differentiated automatically so that you can easily sift through video from one camera or another.
There are separate tabs for incident files and favorites. Most cameras I’ve tested register all sorts of things as “incidents,” even just driving down California’s cratered roads. What was nice about the SC 400D was that there weren't as many false positive incidents. It did very well at identifying a bumpy road or other road conditions that might put some Gs on the camera.
Incidents can be found in the Emergency tab, where you'll find any videos that were saved after the emergency/lock video feature was activated (via the button or in an accident). And on the top right, you can find all of the videos that you have favorited.
How the Images Look
The SC 400D has a high resolution camera that's capable of recording in 4K. There are three available resolution settings:
- 2160P 4K: 3840 x 2160 @ 30 fps
- 1600P QHD: 2560 x 1440 @ 30fps
- 1080P full HD: 1920 x 1080 @ 30fps
Obviously the different settings will have a different impact on the size of your video and how long your rolling video will be available before it's overwritten by the next cycle of video.
I have to say, the front camera images are very clear and have a high level of detail. I think that was to be expected with the high resolution. There was some evidence of fishbowling, particularly on video files showing traffic moving across the image from left to right or vice versa. Here's a few screenshots from my phone.
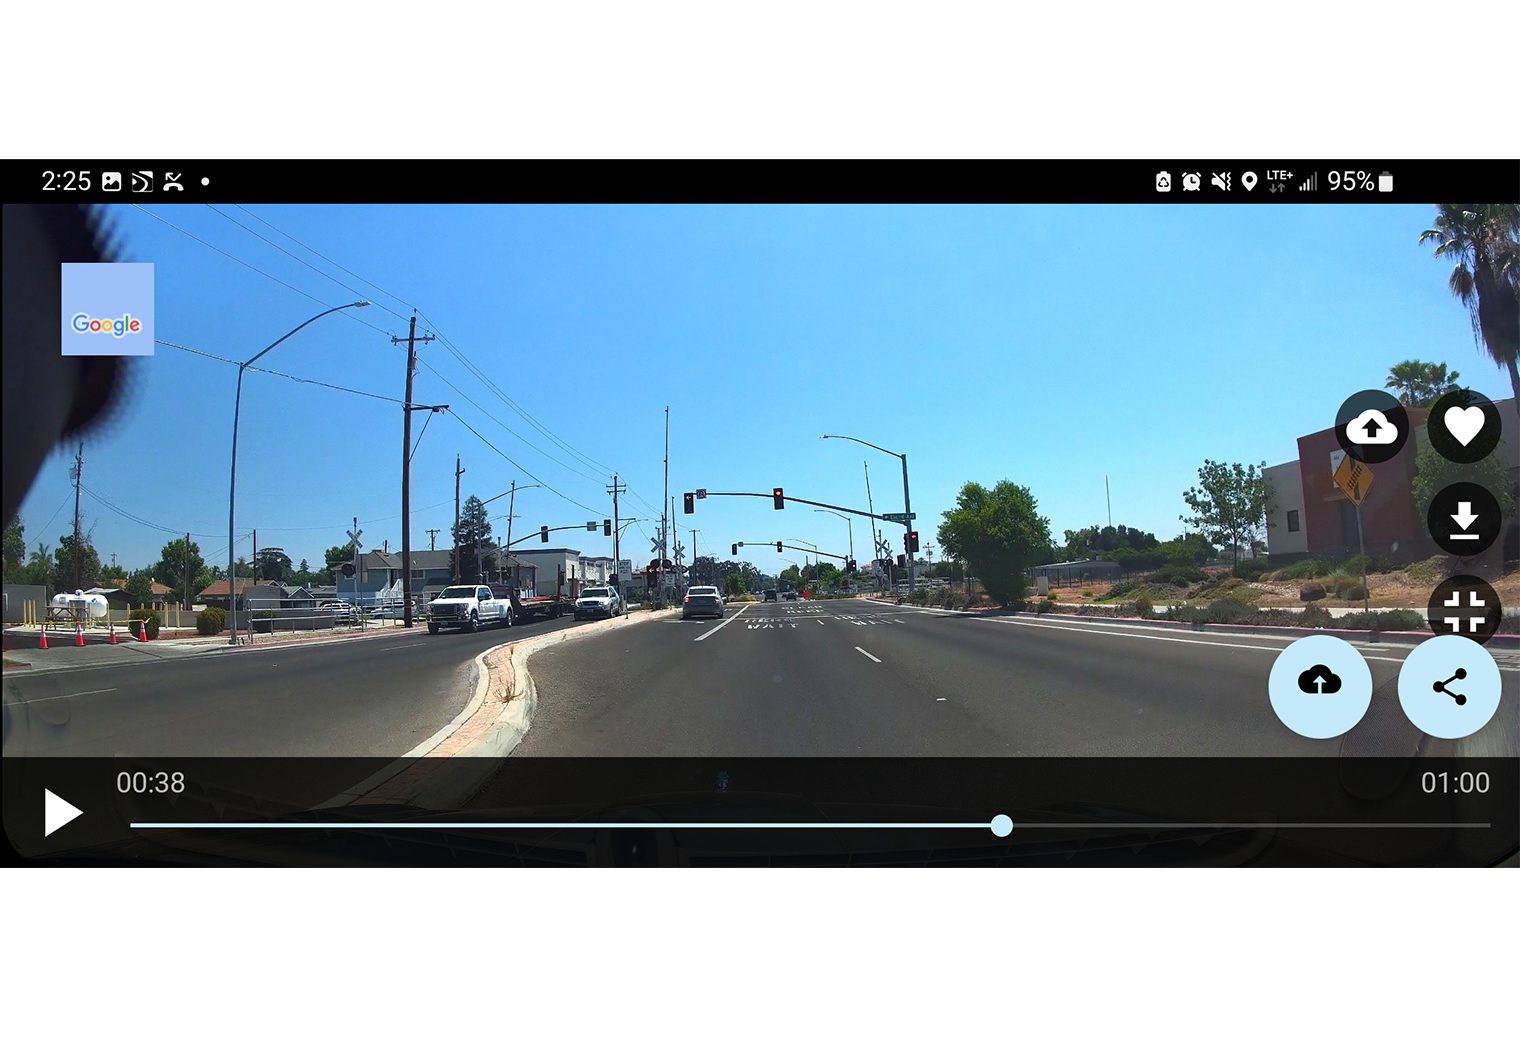
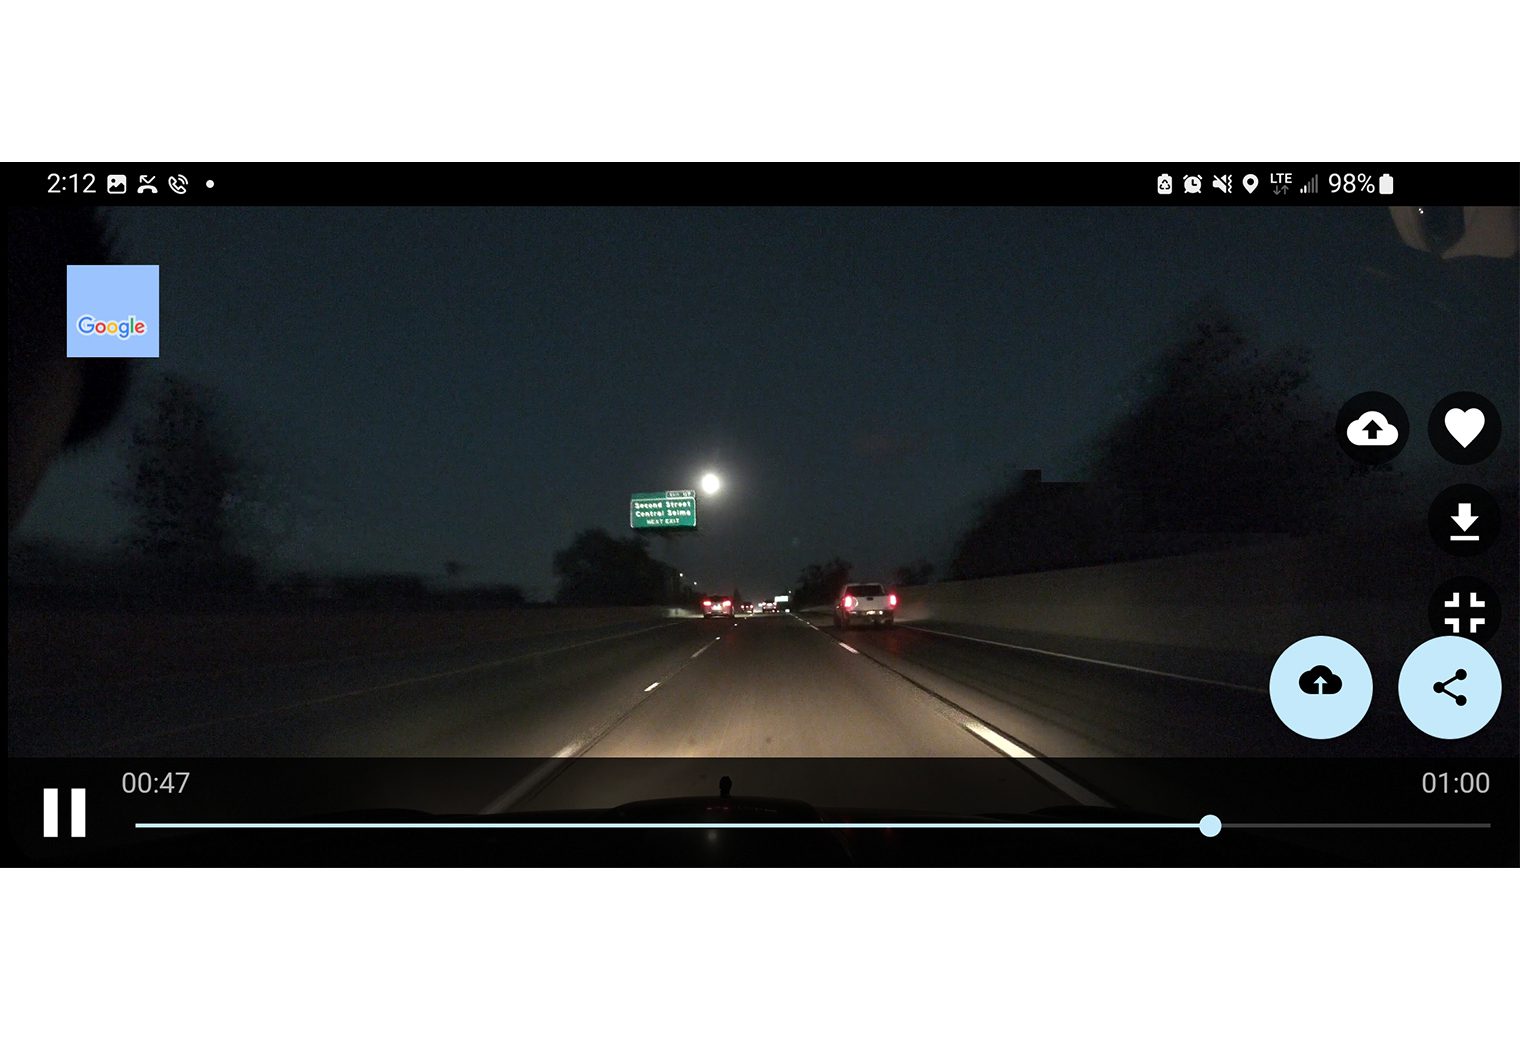
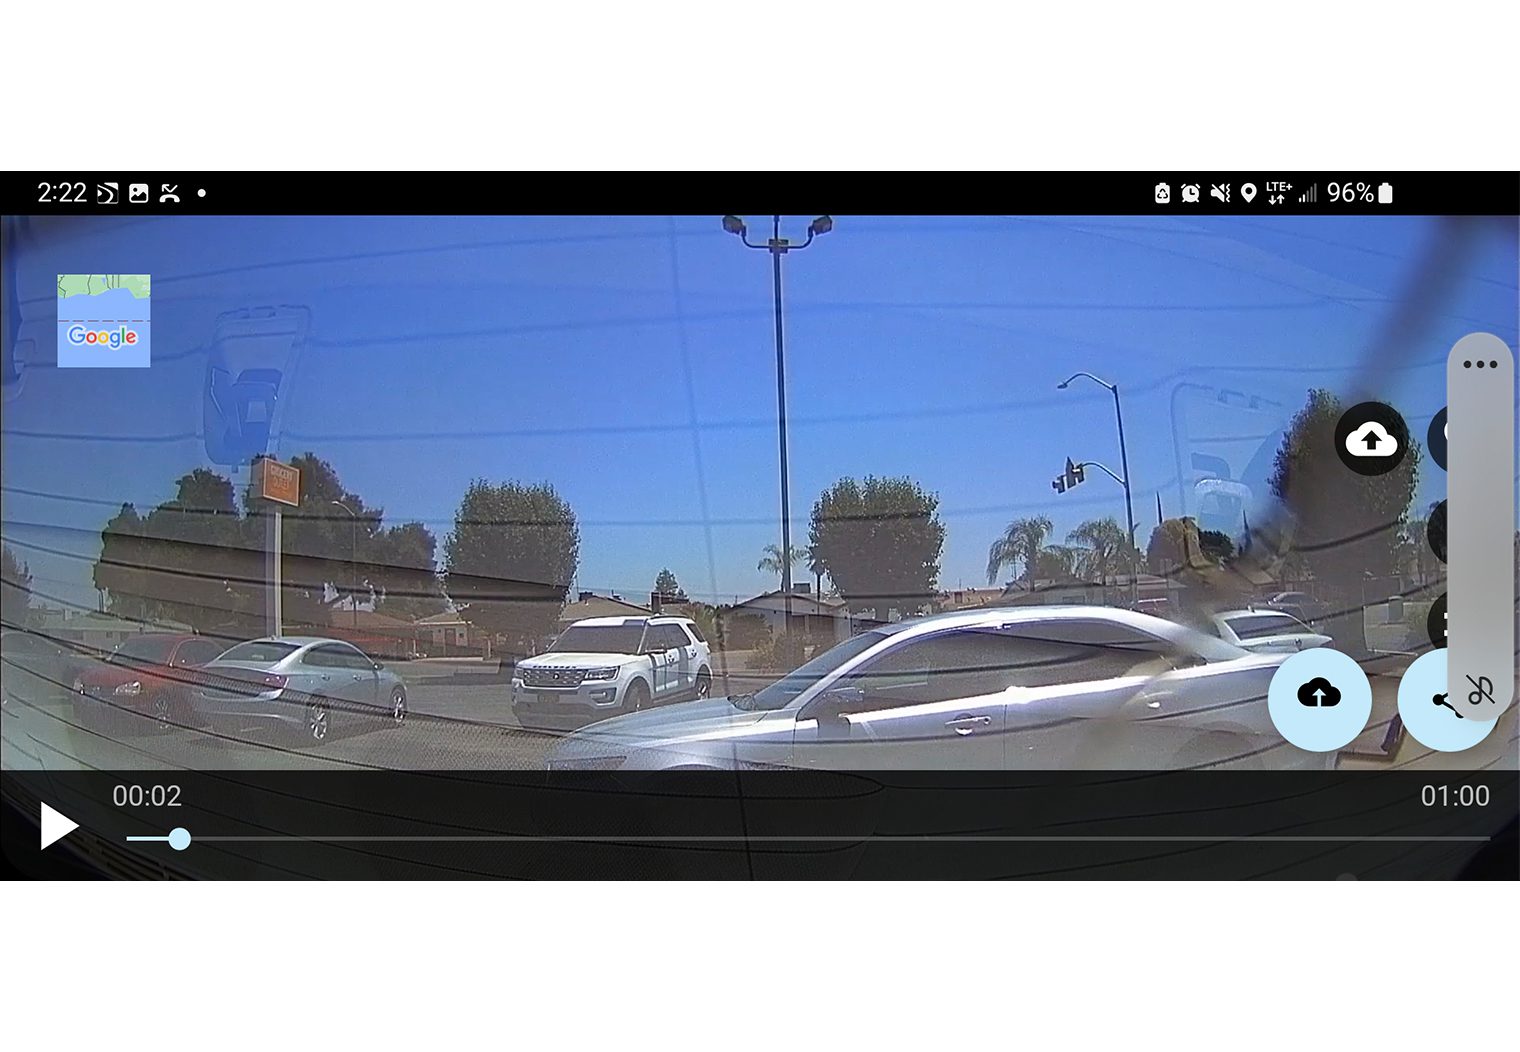
Rear image quality was pretty clear as well. In the manual, it states that it's ‘HD' however I couldn't find any resolution details. In my vehicle, the rear camera picked up a bit of the rear defroster lines a little bit and some glare off the back window, making certain angles and times of the day a bit difficult to see. Other than that, the images look good and have plenty of enough resolution to capture a detailed image in the rear.

Wrapping Up
I’ve installed quite a few dash cameras and I’ve picked up a few things along the way. One of the things I’ve learned is that some people like certain designs of dash cams better than other designs. I prefer small, discrete, unobtrusive devices that don’t make a lot of noise. But even though Cobra’s SC 400D had some of the added features like touchscreens, voice commands and controls, the design was still pretty compact and overall I enjoyed a lot of the extras that made the camera unique. Great example – the various video inputs on the sides and top of the camera that enable you to hook in up to two additional cameras on top of the front dash cam.
For me, the design of the camera and mount meant that it needed to be positioned so that it doesn’t interfere with my vision with the rear view mirror. I don’t think that this is going to be a common issue with most of the modern cars, and once I found a good location for it on my windshield it worked flawlessly. The adhesive mounts were a breeze for both the front and rear cameras.
Image quality is quite good, one of the best I've tested actually. And the built-in CPL feature is a really handy feature to reduce glare. The app is nice-looking with a very user-friendly interface, and enabled some additional features like police, red light camera and speed camera alerts that you don't traditionally see on dash board cameras. Some of the features such as the emergency notifications weren’t tested – thankfully – but there is no reason to believe they won’t work just as well as the regular camera images.
