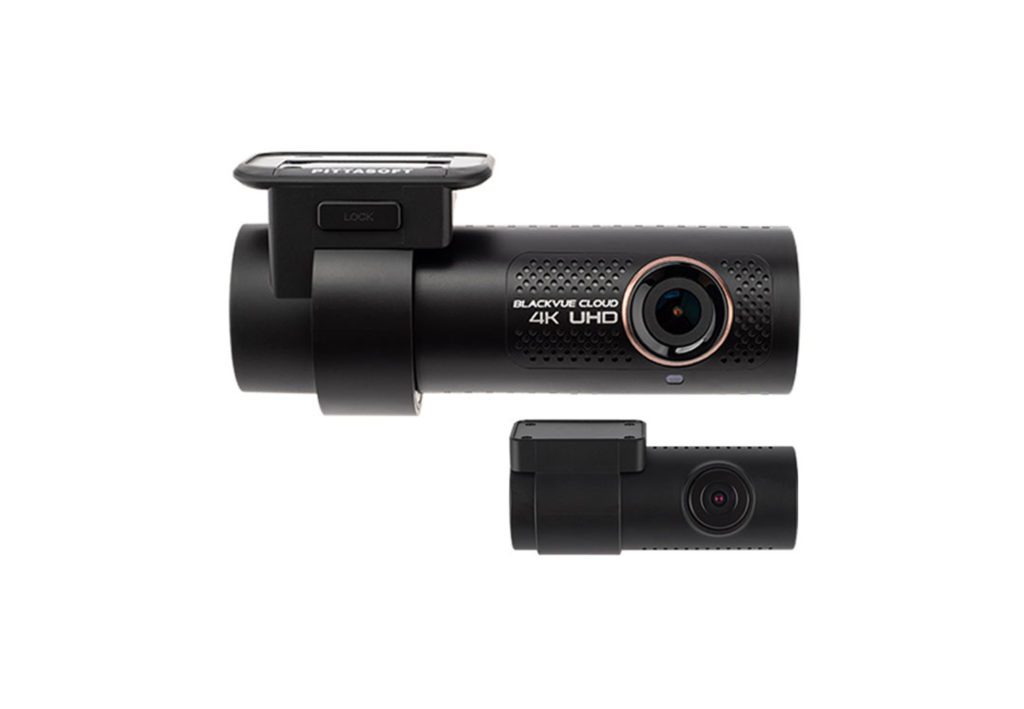
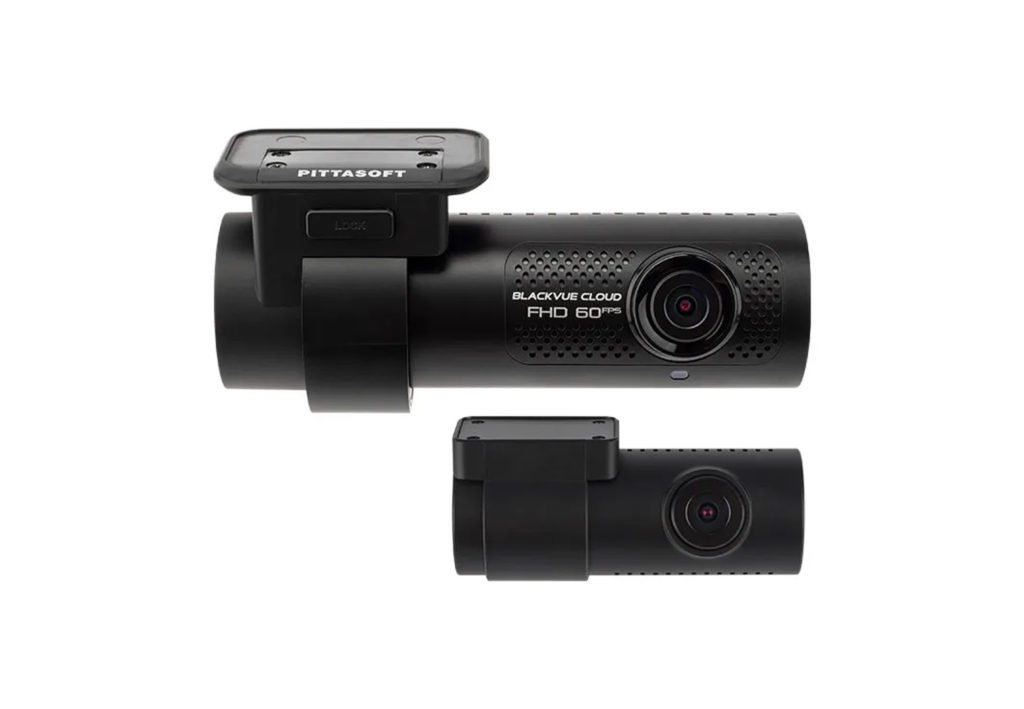
In This Article: We will install two of the top dash cameras from BlackVue -the DR900X Plus and the DR750X Plus. These cameras have identical features and appearances save for one important difference: the DR900X Plus features 4k Ultra High-Definition recording while the DR750X Plus provides up to 2k Full HD. The DR750X Plus is available as a 2-channel or 3-channel system.
BlackVue DR900X Plus & DR750X Plus Quick Review
We did a comprehensive look at the features and specifications of these two cameras, so we aren’t going to get too deep into specifications in this article. These two dash camera systems use a cylindrical front-facing camera and a matching rear camera. We also took a look at the newest package from BlackVue, the DR750X Plus-3ch that includes an interior camera with infrared lights to capture details at night.
We are going to install both the DR900X Plus and the DR750X Plus and put them through some real-world tests so that we can give you a fair, honest, side-by-side evaluation of how they perform.
Installation Steps
Installing a dash camera is one of the easiest ways you can add security to your vehicle. The process of installing the camera systems is straight-forward and shouldn’t take very long. Over the years, we’ve found that there are ways to simplify the installation and keep everything looking good at the same time.
The Test Mule
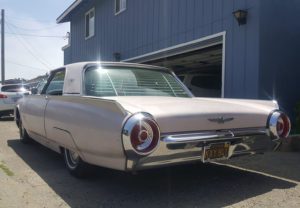
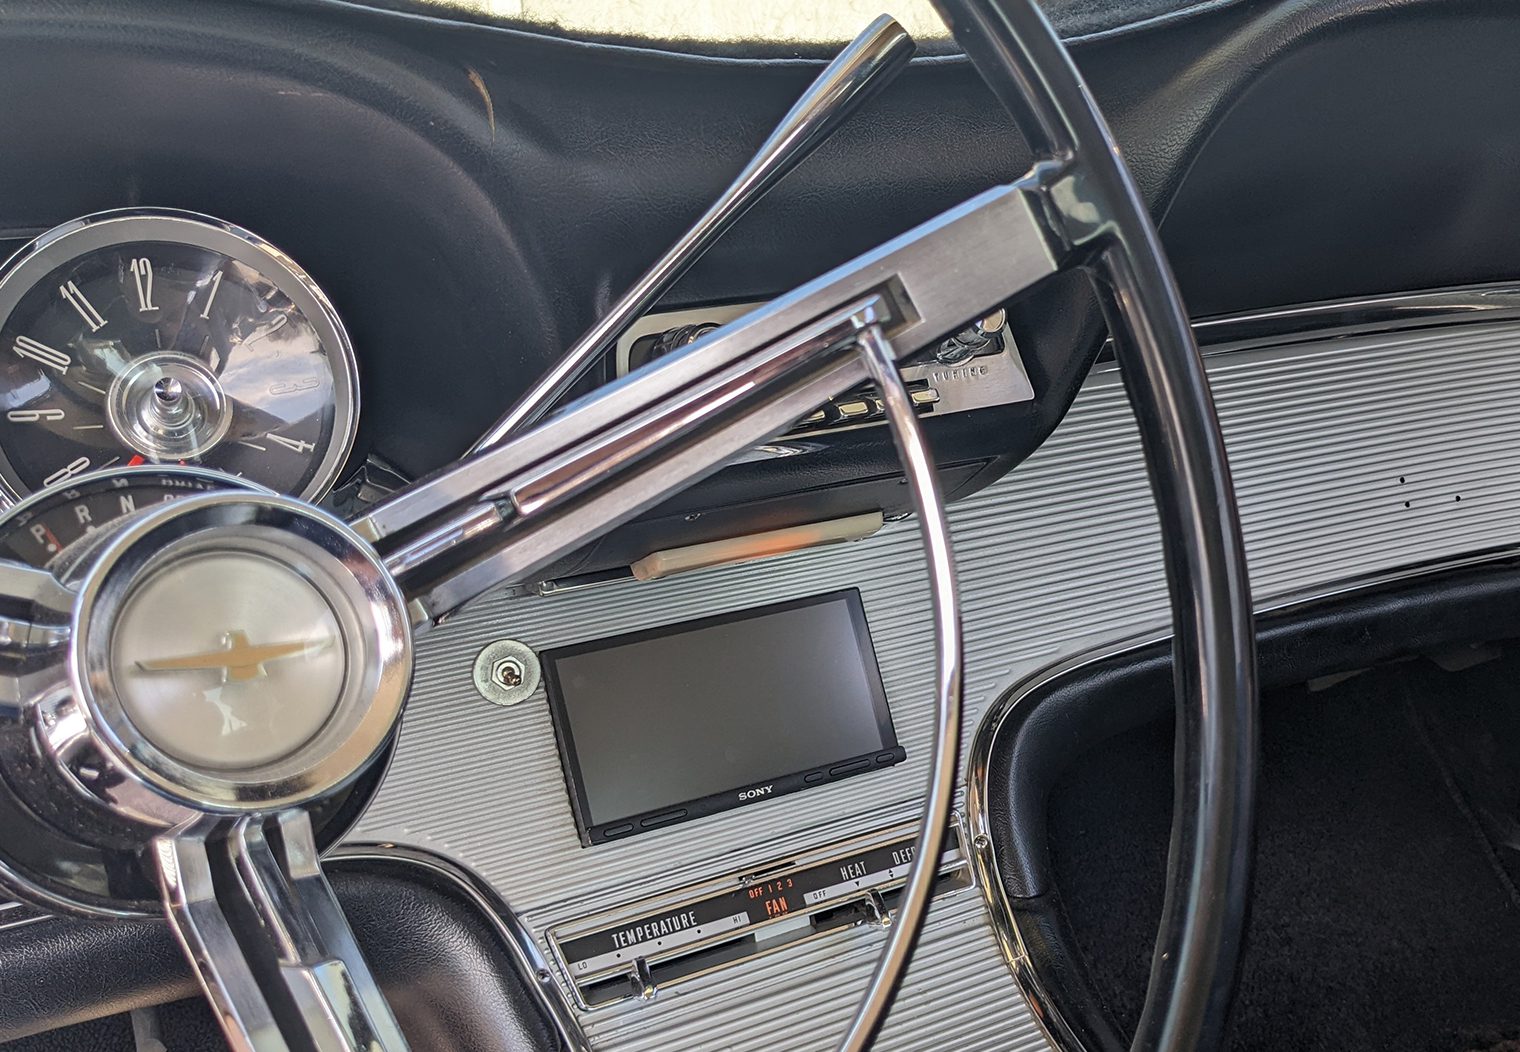
Today, we will be installing the DR900X Plus and the DR750X Plus in a 1962 Ford Thunderbird. You may remember this vehicle from last year that received a touchscreen head unit upgrade along with a rear-view backup camera and a new set of upgraded dash speakers. In its day, this was a futuristic car both in design and in options. It has power windows, power brakes, and power steering standard. Power seats were even an option, though the original buyer did not select them on this vehicle.
One of the goals of the installation of any component on this vehicle is to make the modifications in such a way so that the originality of the car isn’t disturbed. The idea is that -should someone down the line choose to do so- any changes can be removed without leaving holes in the metal, damage to the interior panels, or any other evidence that anything had ever been changed. Fortunately, a dash camera is an easy-to-install upgrade that doesn’t require modifying the vehicle.
Installation: Step One – Getting Organized
The first thing that you should do after opening the camera and checking to make sure that all of the parts are included is to take a look at where the best spot in the vehicle to mount the camera will be. The front-facing camera is intended to be mounted near or behind the rearview mirror. Many vehicles will have tinting in this region that can impact the video clarity and quality, particularly at night. You’ll get better results mounting the camera below the tint, but don’t mount it so low that it is distracting or intrusive to your view.
Start by thoroughly cleaning the interior of your window glass. A splash of alcohol on a clean rag will remove grease, tar, and other contaminants and leave the windshield and rear window ready for mounting. Use caution when cleaning tinted glass as some product, including alcohol, can damage tinting film.
Once you have a fair idea of the location for mounting the camera, you’ll want to do a “dummy” install so that you can make sure the angles are the best before mounting the camera. We can tell you from personal experience that you want to get the mounting right the first time. The adhesive tape on the camera mount is not forgiving of placement errors and is very difficult to remove once it adheres to the glass.
Installation: Step Two – Install MicroSD and Cables
For the dummy installation, we are simply going to start the camera and hold it in place while it operates so that we can tell how the image looks. Before you plug anything in, remove the MicroSD card that is included with the camera from its packaging. A secondary bonus is that we will be able to check the functionality of the camera prior to installation so if there is a problem, we can troubleshoot without having to undo everything.
Insert the MicroSD Card


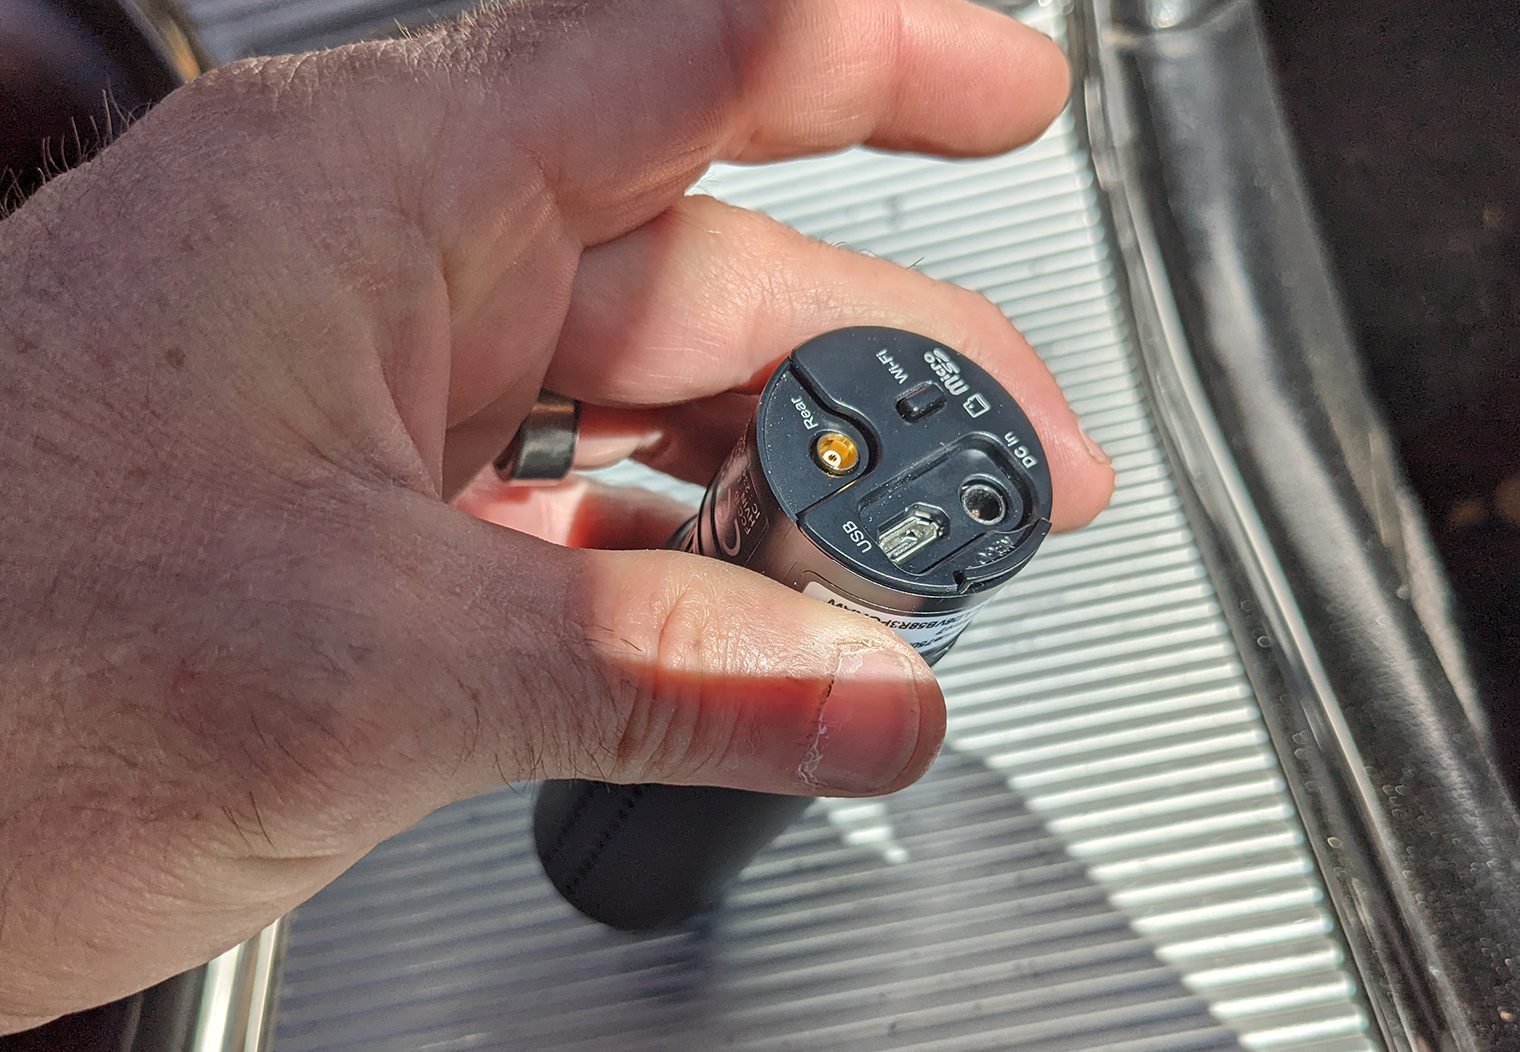
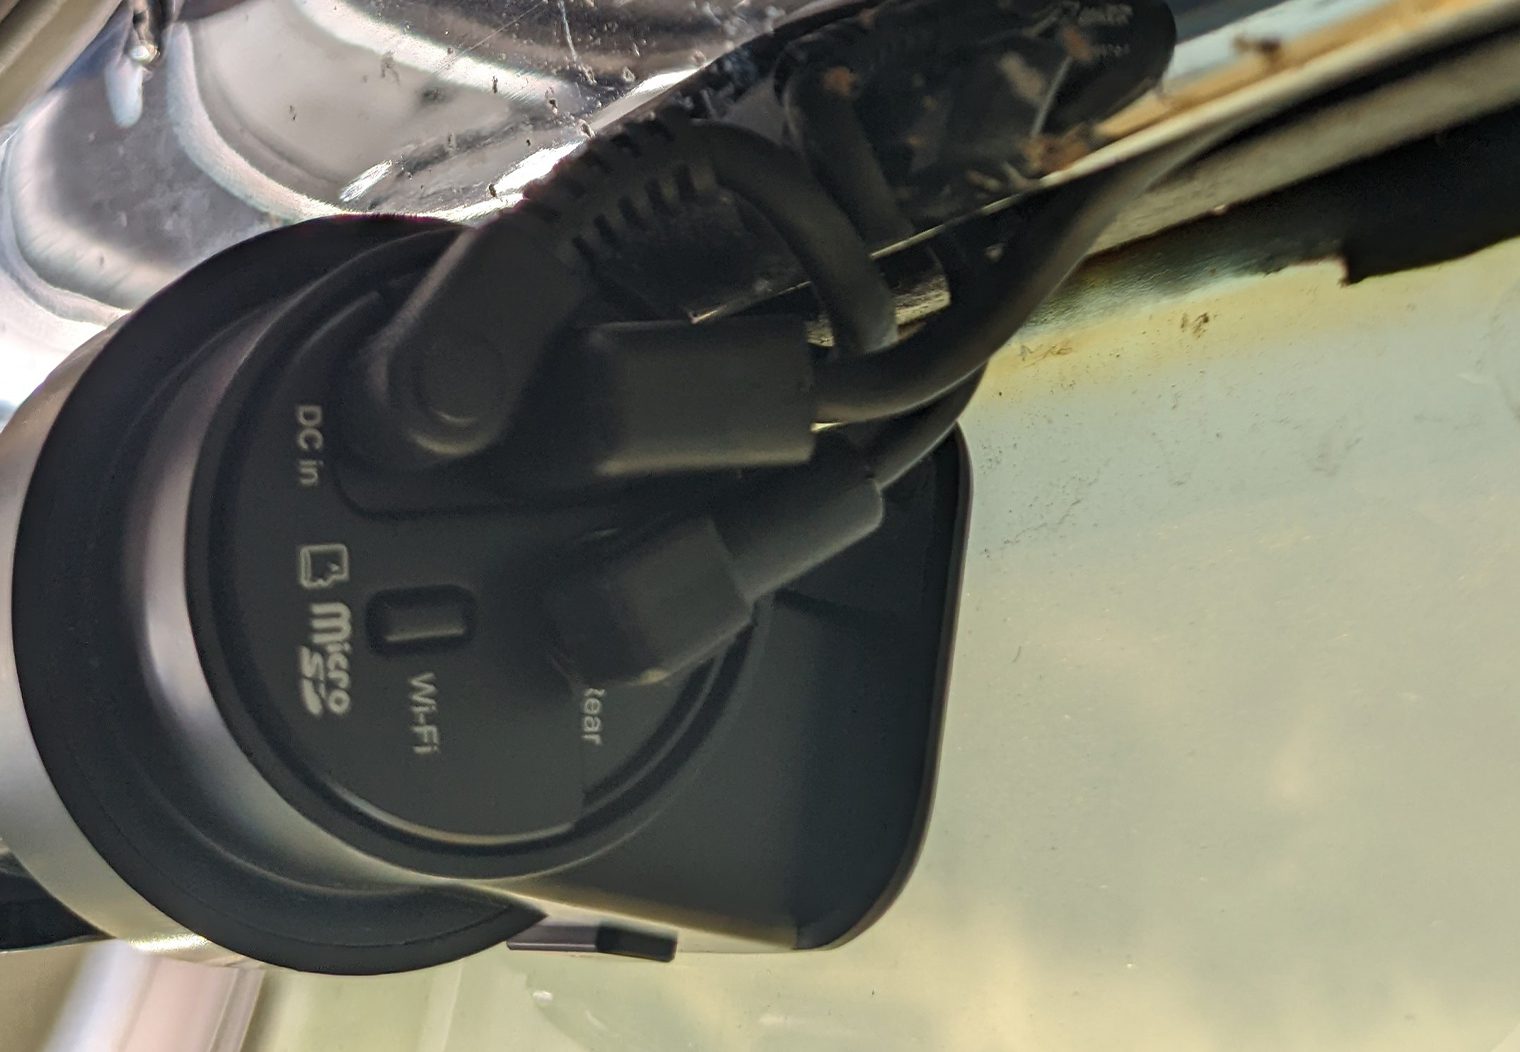
The card inserts under a cover on the side of the camera where the power and rear camera cables connect. Be gentle when handling the card. Don’t force the card into the slot. It should slide in straight and with little resistance if you have it facing the correct direction. Make sure the card locks in place. A long fingernail or a small screwdriver can help to get it all the way into position.
Connect the Power and Rear Camera
For the dummy install, we will use the included 12v power cable that connects to the 12 ACC socket, formerly known as the cigarette lighter, or in the case of this Thunderbird, the cigar lighter. This is the easiest way to get power before we wire anything in permanently.
You’ll also want to unravel the rear camera cable. If you are installing this system in a large vehicle like an SUV or a van, make sure the cable is long enough before beginning the installation.
A tip we use to check cable lengths before installation is to use small pieces of masking tape to hold the cable in the position where it will mount. That way, we know approximately how much cable we have to work with and we can adjust the cable easily without having to remove anything beforehand.
Installation: Step Three – Dummy Install
Once the installation is completed, we will give you a full run-down on the setup process and the various settings that you’ll want to change to get the most out of the camera. For this test, you’ll want to do just enough to find out if you are going to be happy with the mounting location you’ve chosen.
Downloading the App and Connecting
The primary method of accessing video files will be through the BlackVue app, available on the Google Play Store or the Apple App Store. Download the app and open it on your device. Start your vehicle and connect the power cable to the ACC port, then to the camera. Also connect the rear view camera cable.
The app will offer you options to Connect to the Cloud, Connect to the Camera, or Download Videos. Select the Connect to Camera option. The app will seek a connection to the camera through the built-in Wi-Fi using a temporary network. You will need to be less than 30-feet from the camera in order for the Wi-Fi to work. Select connect to continue.
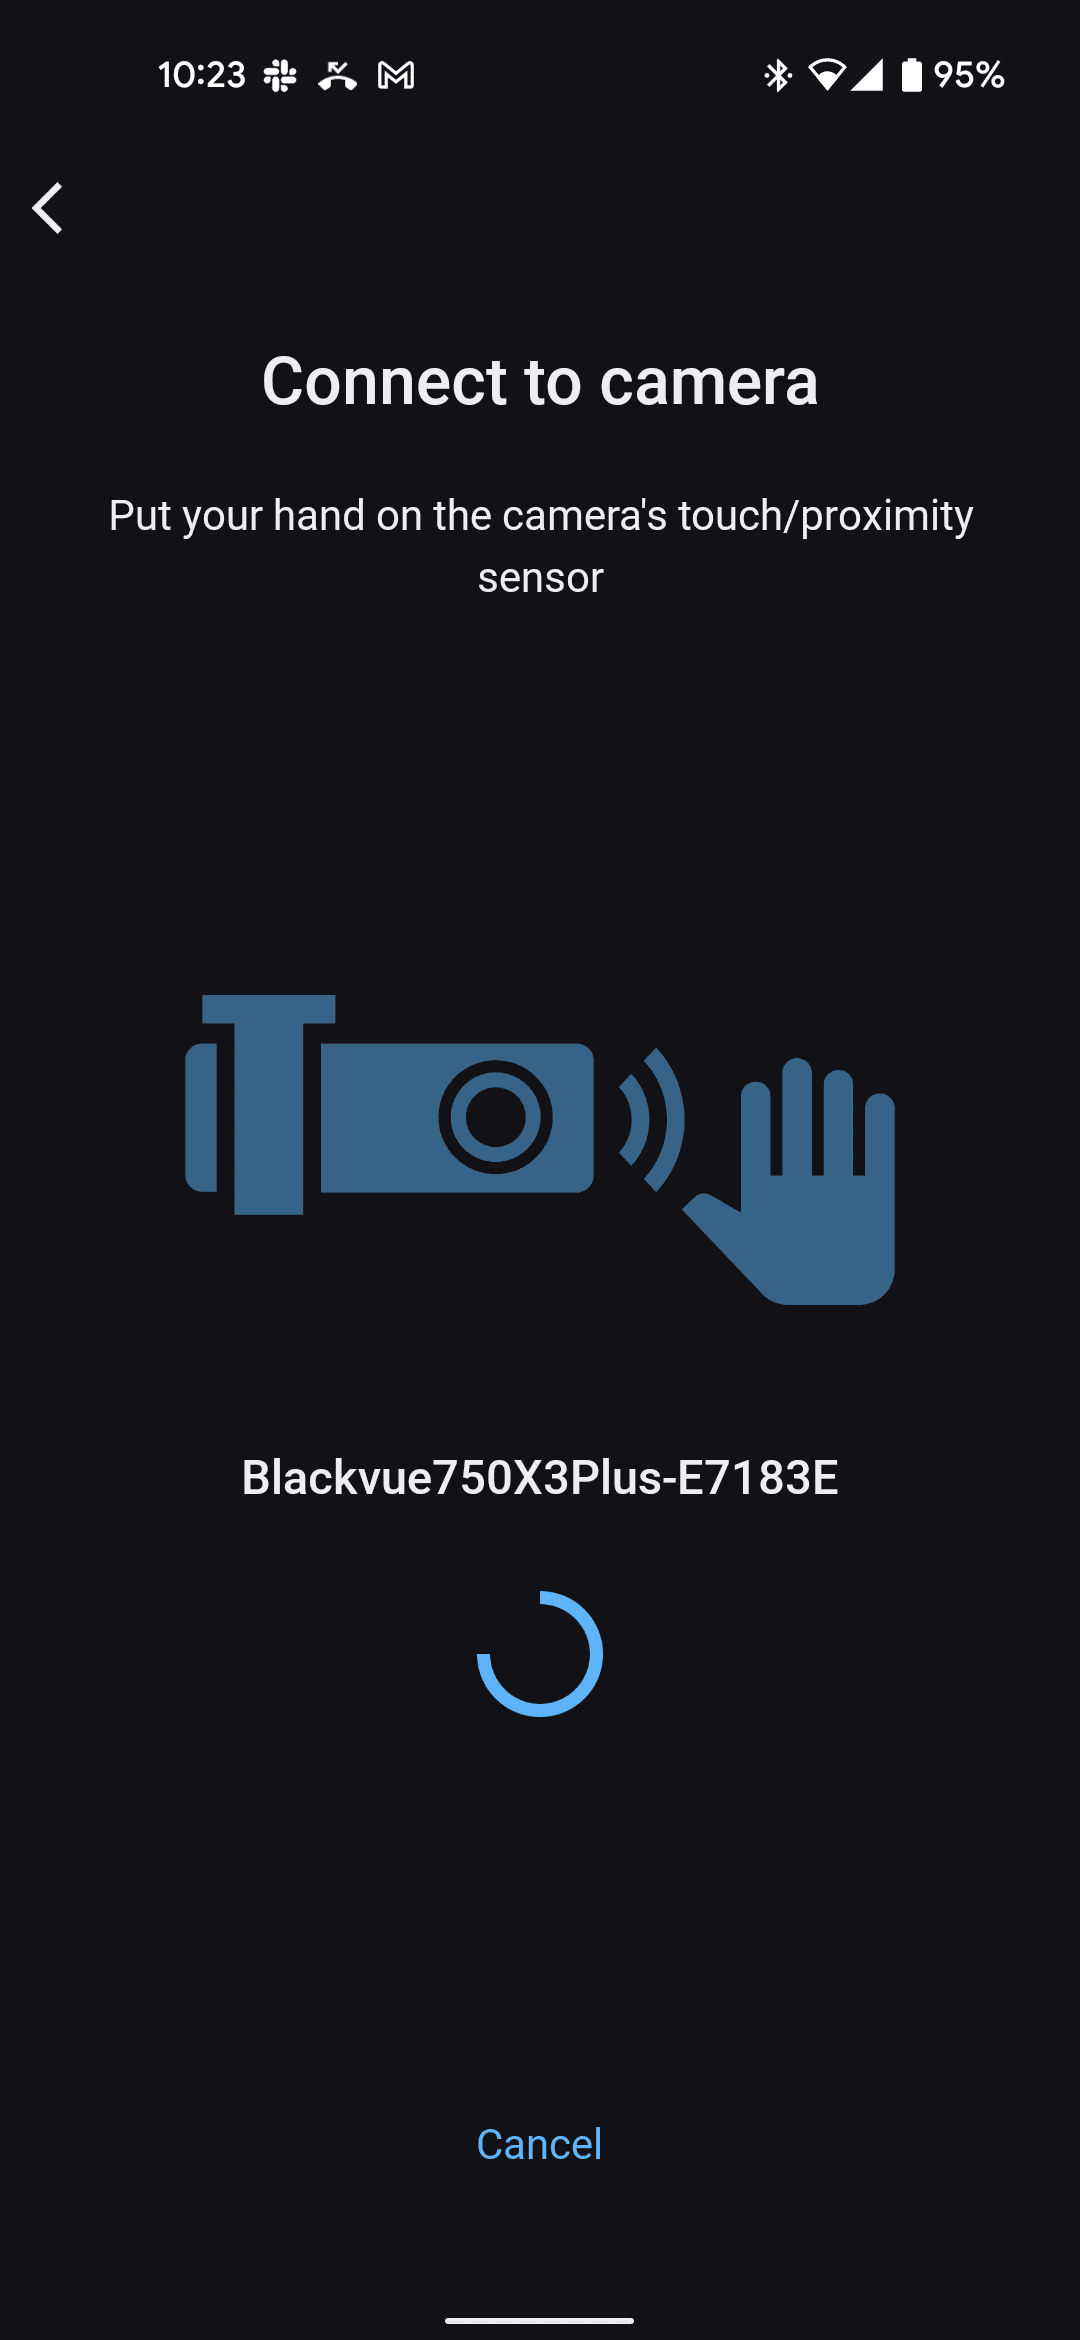

The first time that you connect to the camera, you’ll be prompted to put your hand on the proximity sensor. The sensor is located on the driver’s side of the camera. This step verifies that the camera is physically and digitally present.
A ‘Connection Successful” notification will pop up when the camera connects. The next screen will list the detected cameras. Select the camera you are installing.
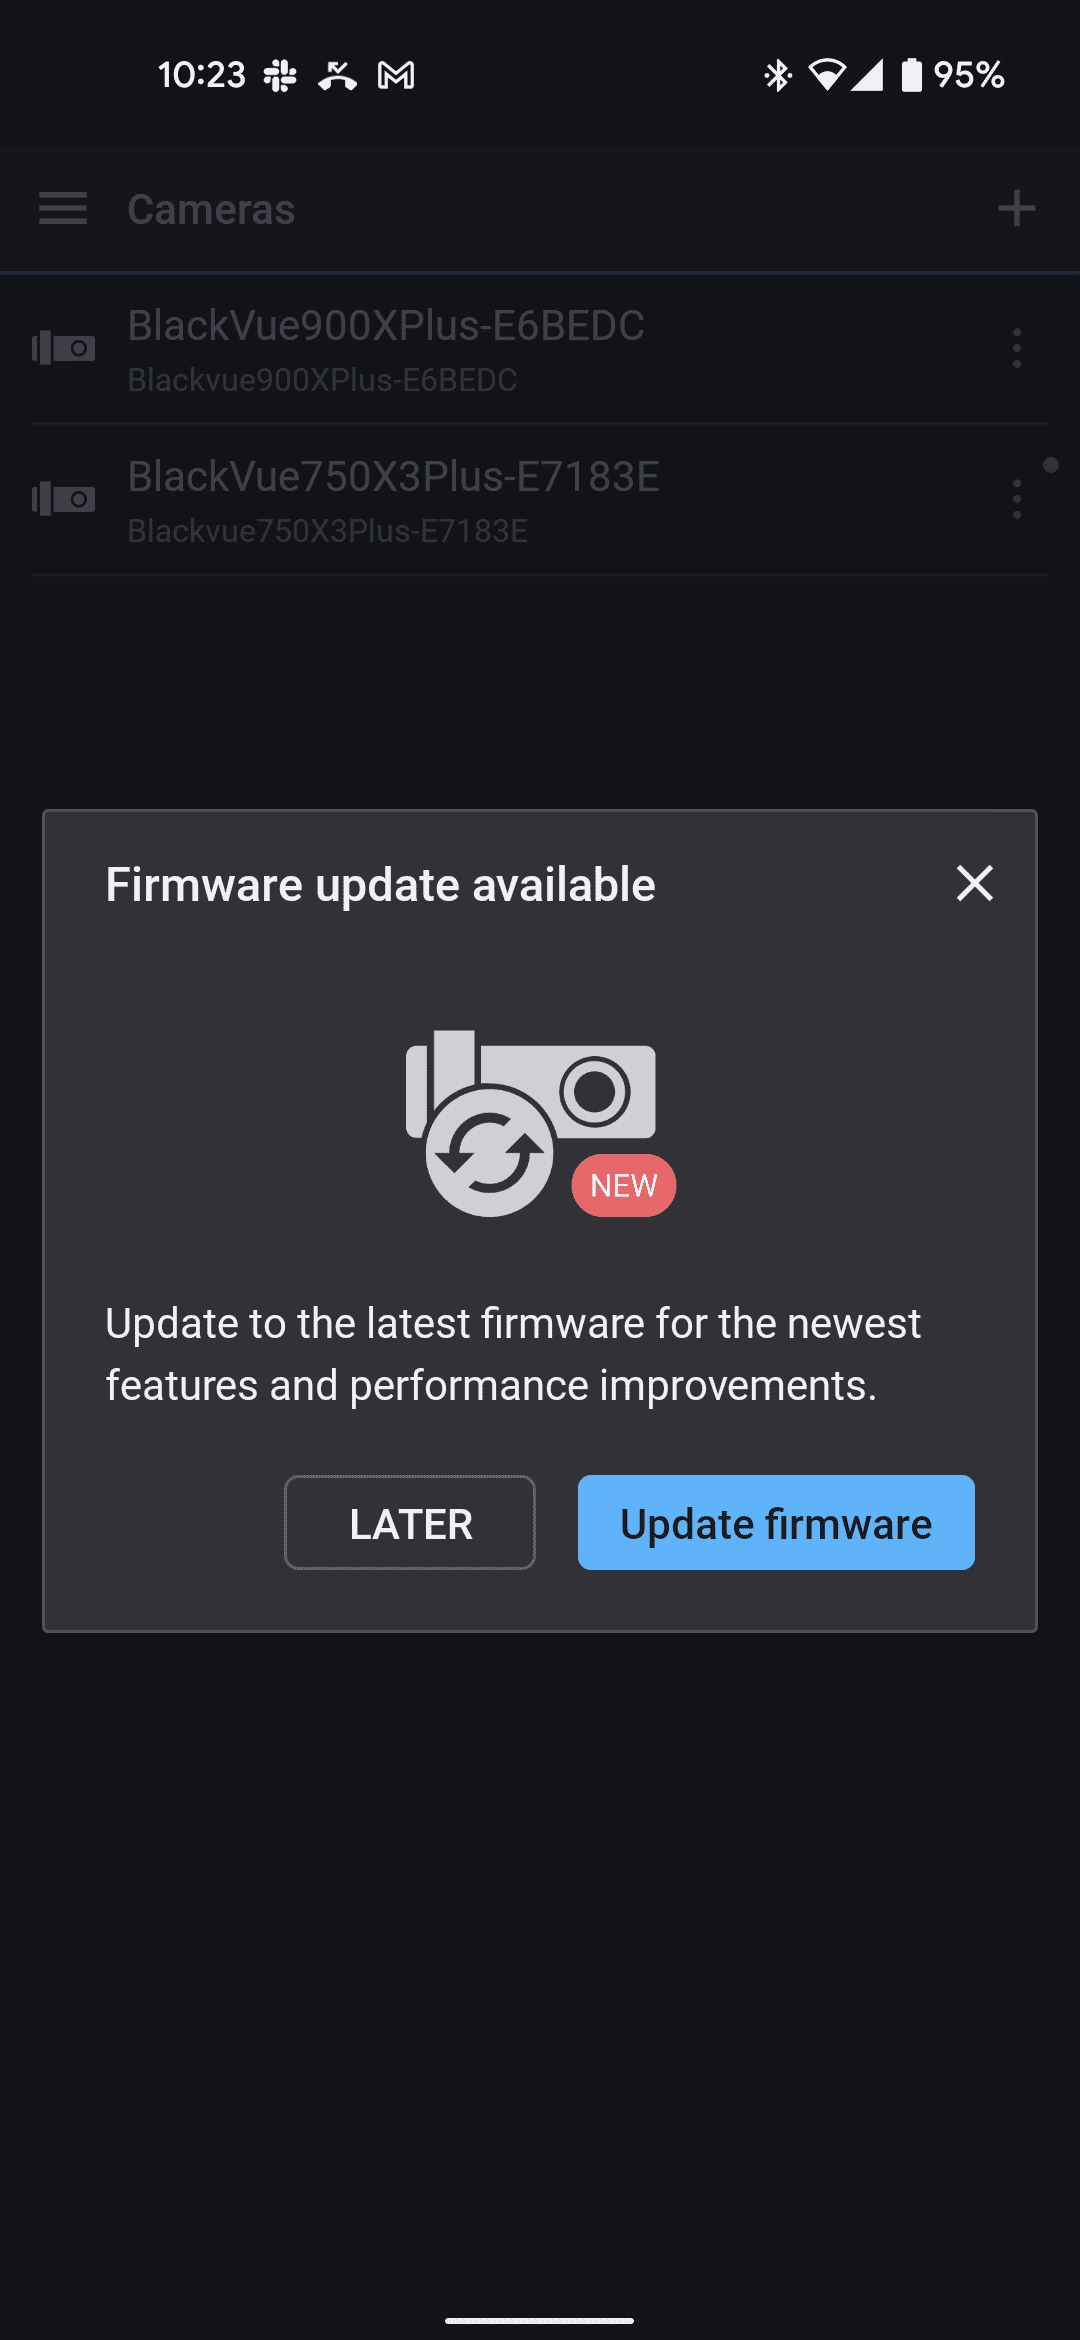
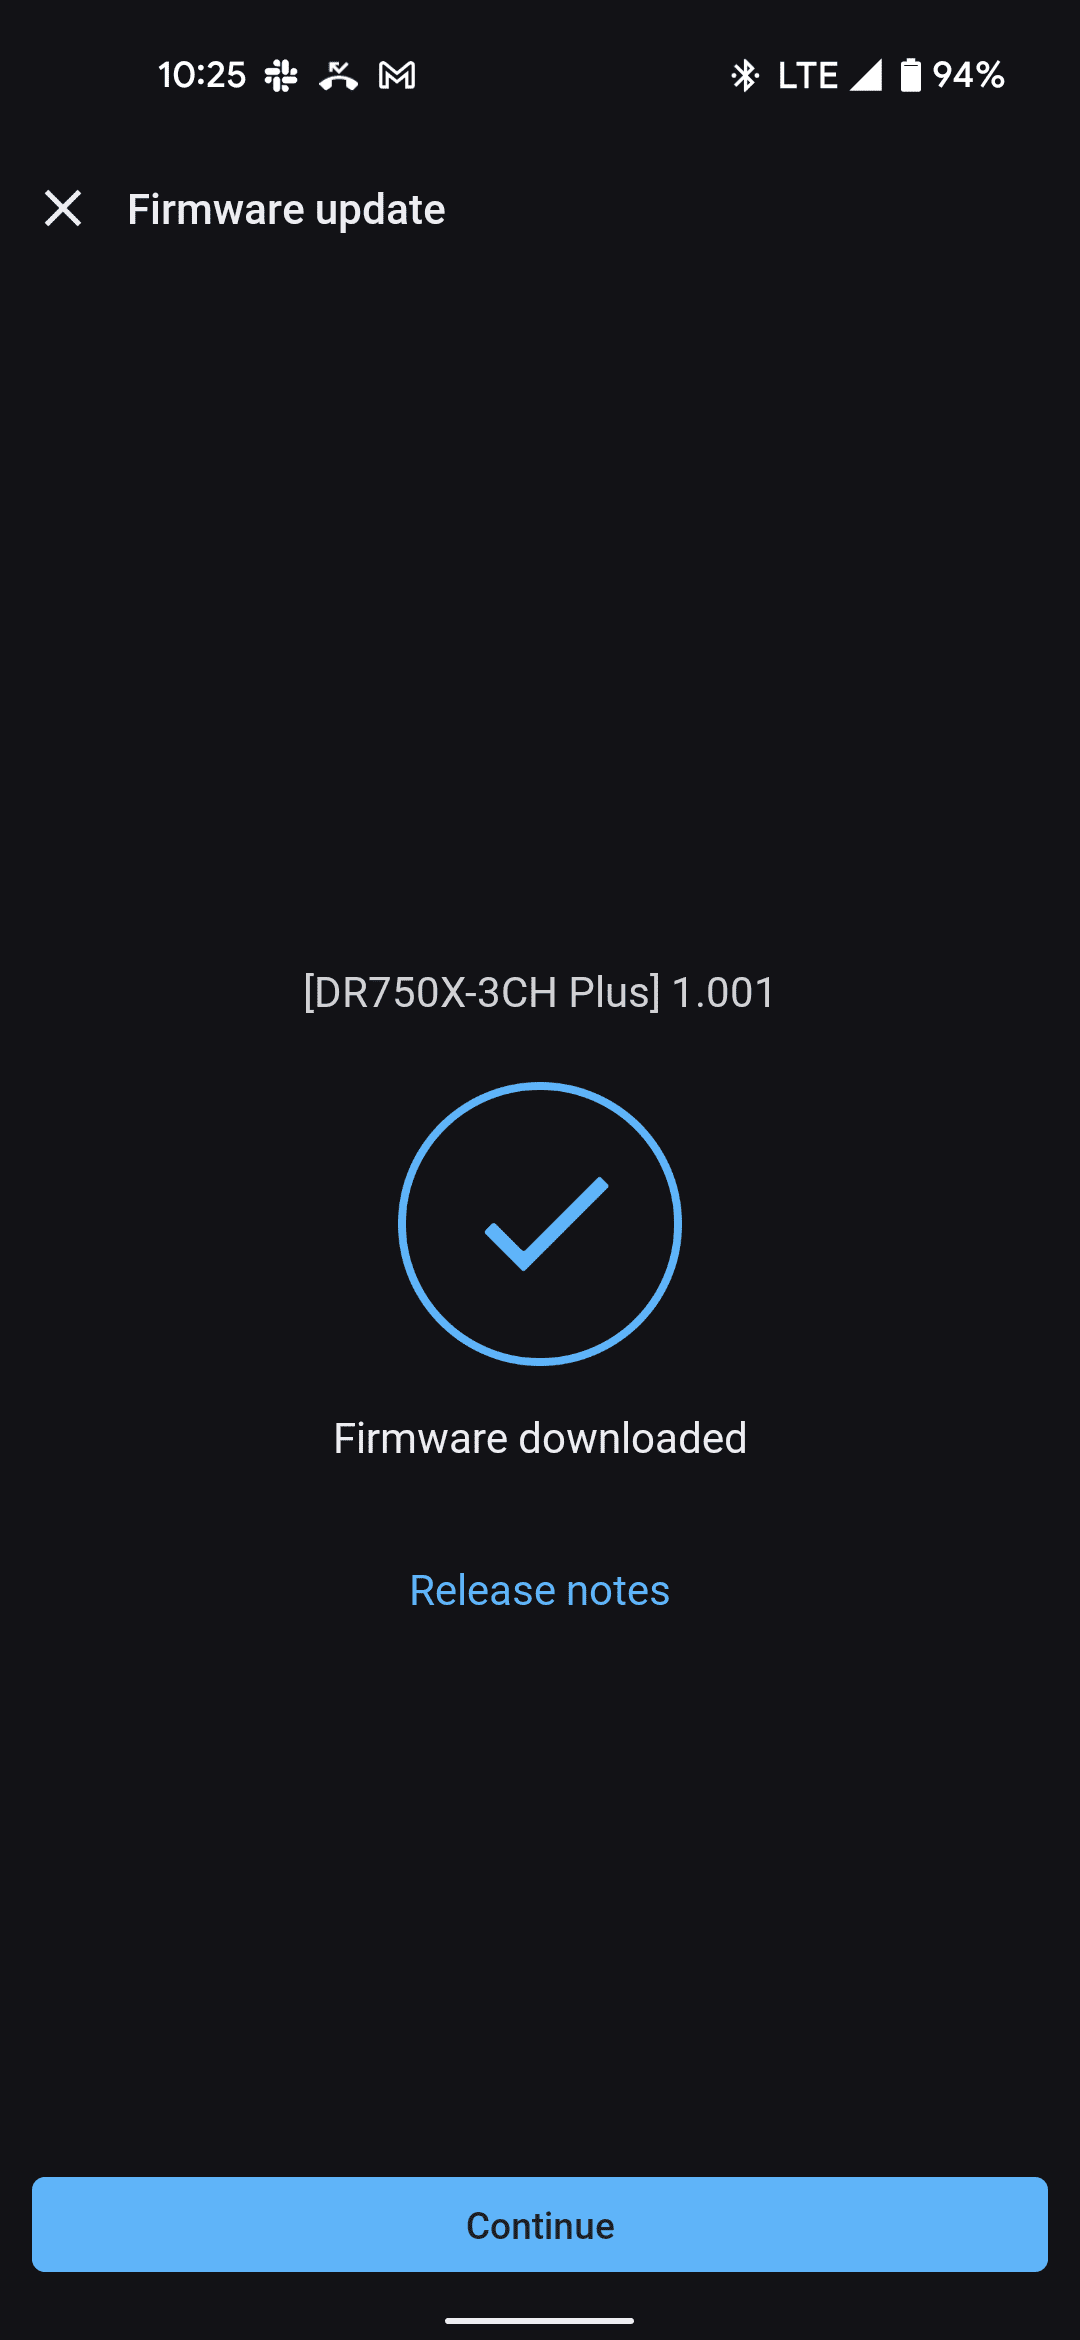
The camera will then inform you that a firmware update is available. We recommend performing the update prior to finishing the installation, but you will also have the option to update later if you choose to do so. The firmware will download and the camera will restart.
You’ll then be asked to connect to the camera. Select connect to bring up the main selection options. Select the camera you are installing from the list and it will display the options available. On the bottom of the screen, select Live View to bring up the camera images.
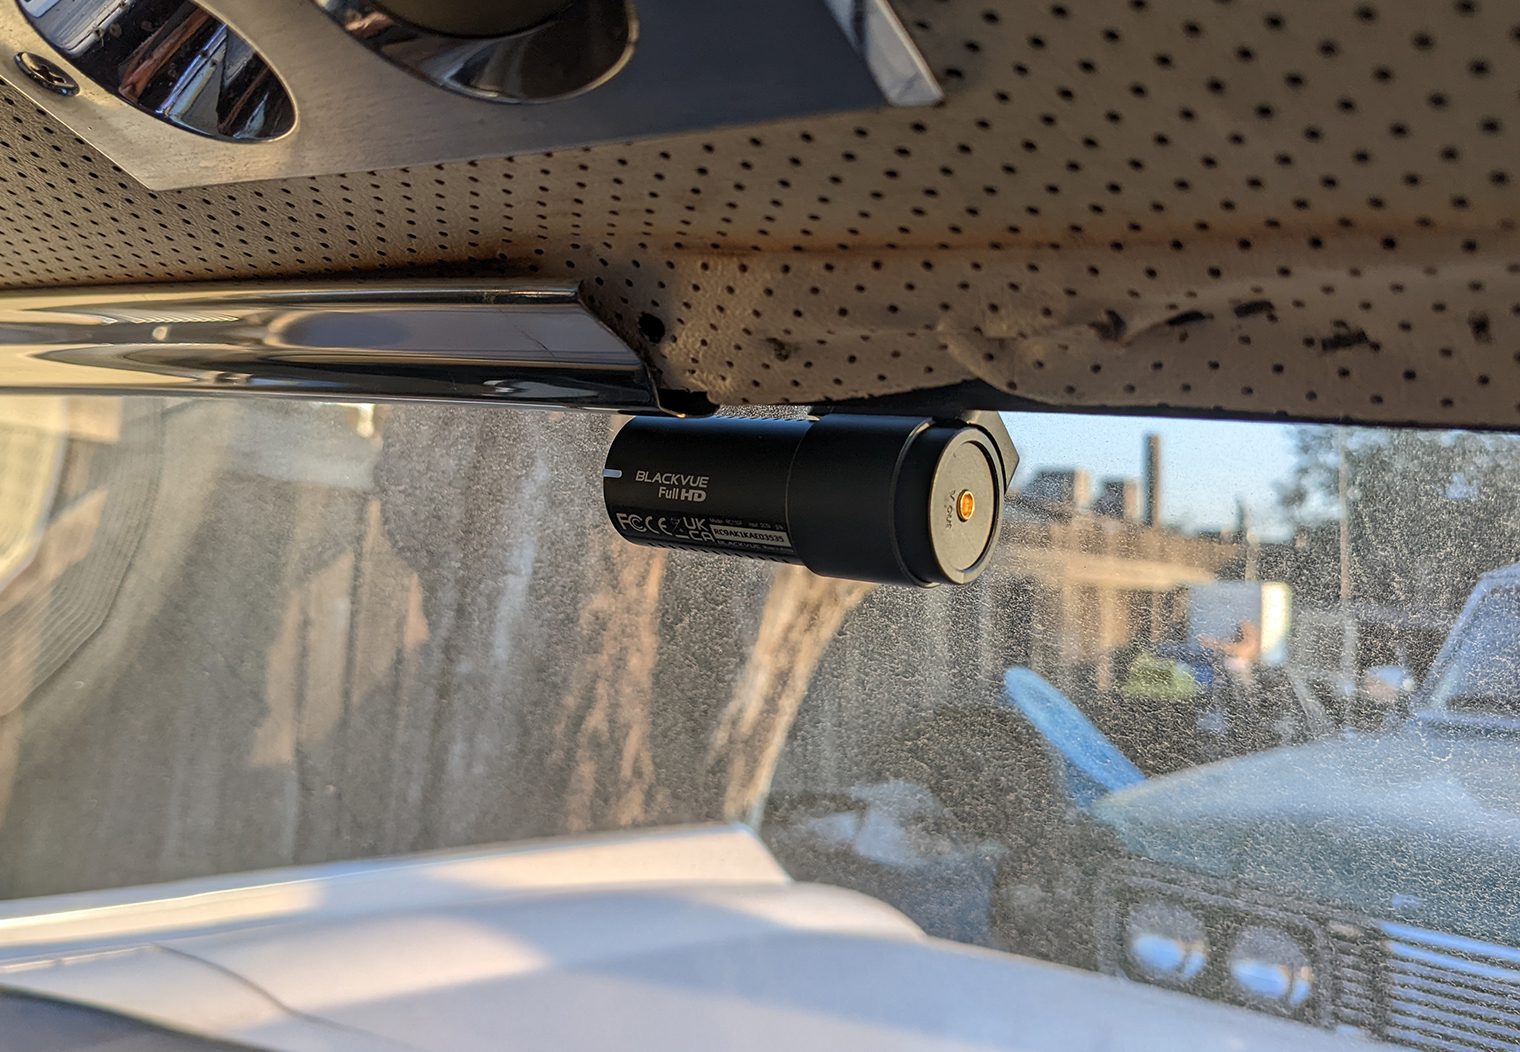
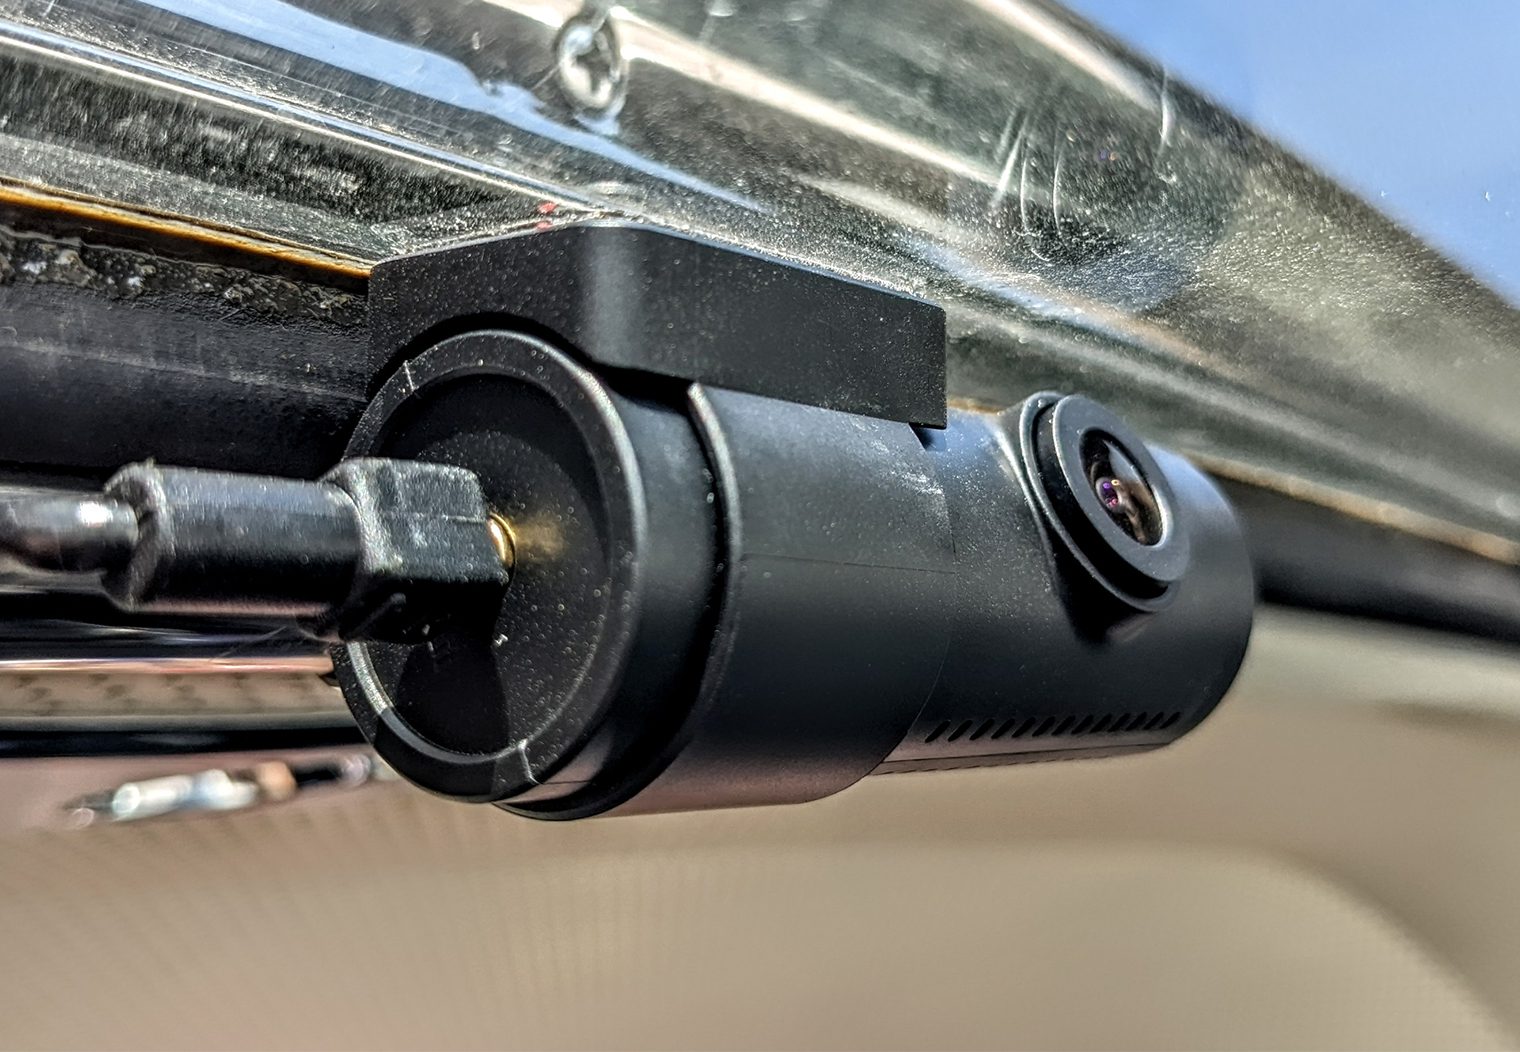
Now, you can hold the camera in place and see the image on your screen. Move the camera around until you find the best location. Most of the time, the higher up the windshield you are able to mount the camera, the less intrusive it will be and the better range of vision you’ll have.
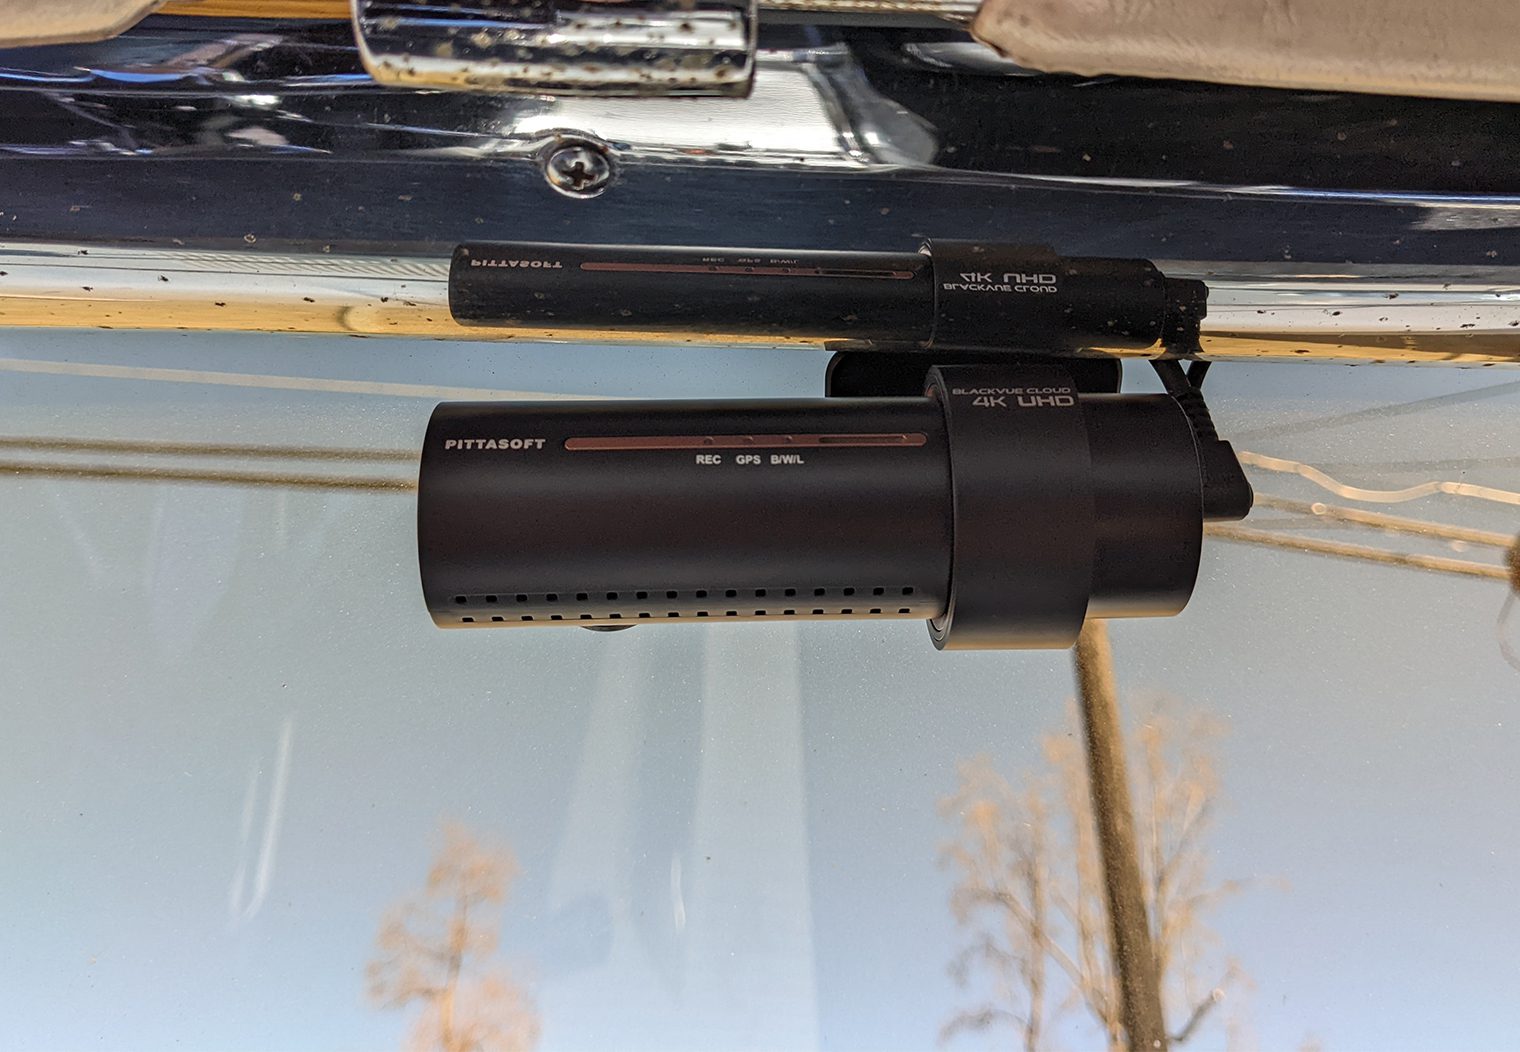
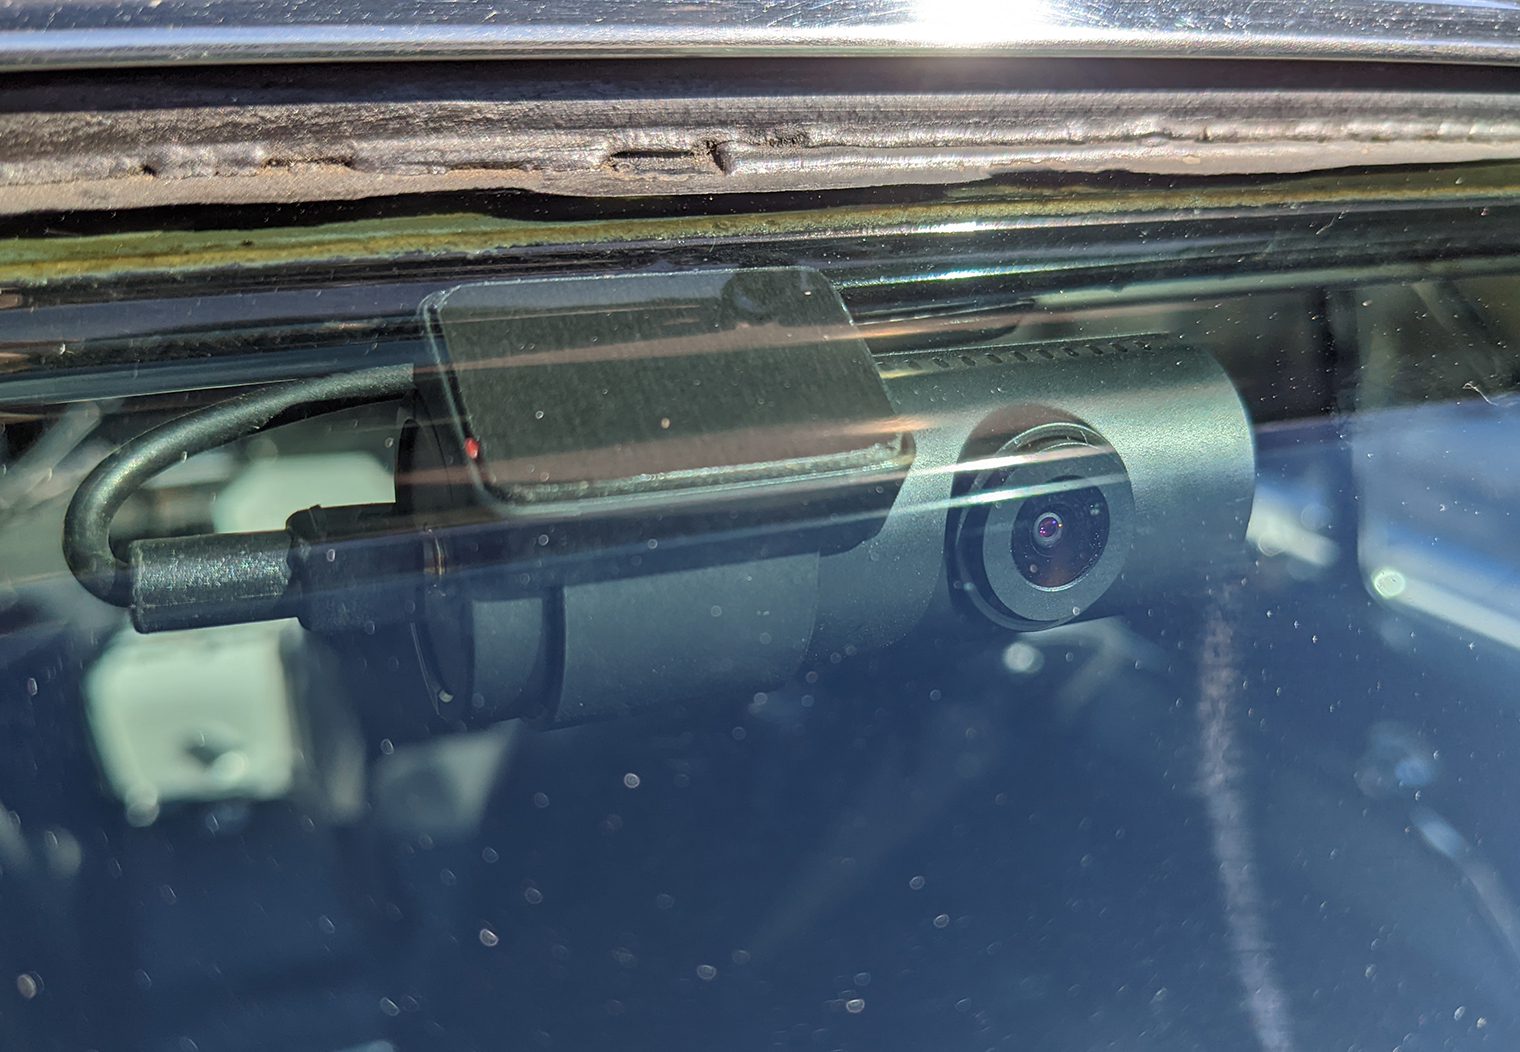
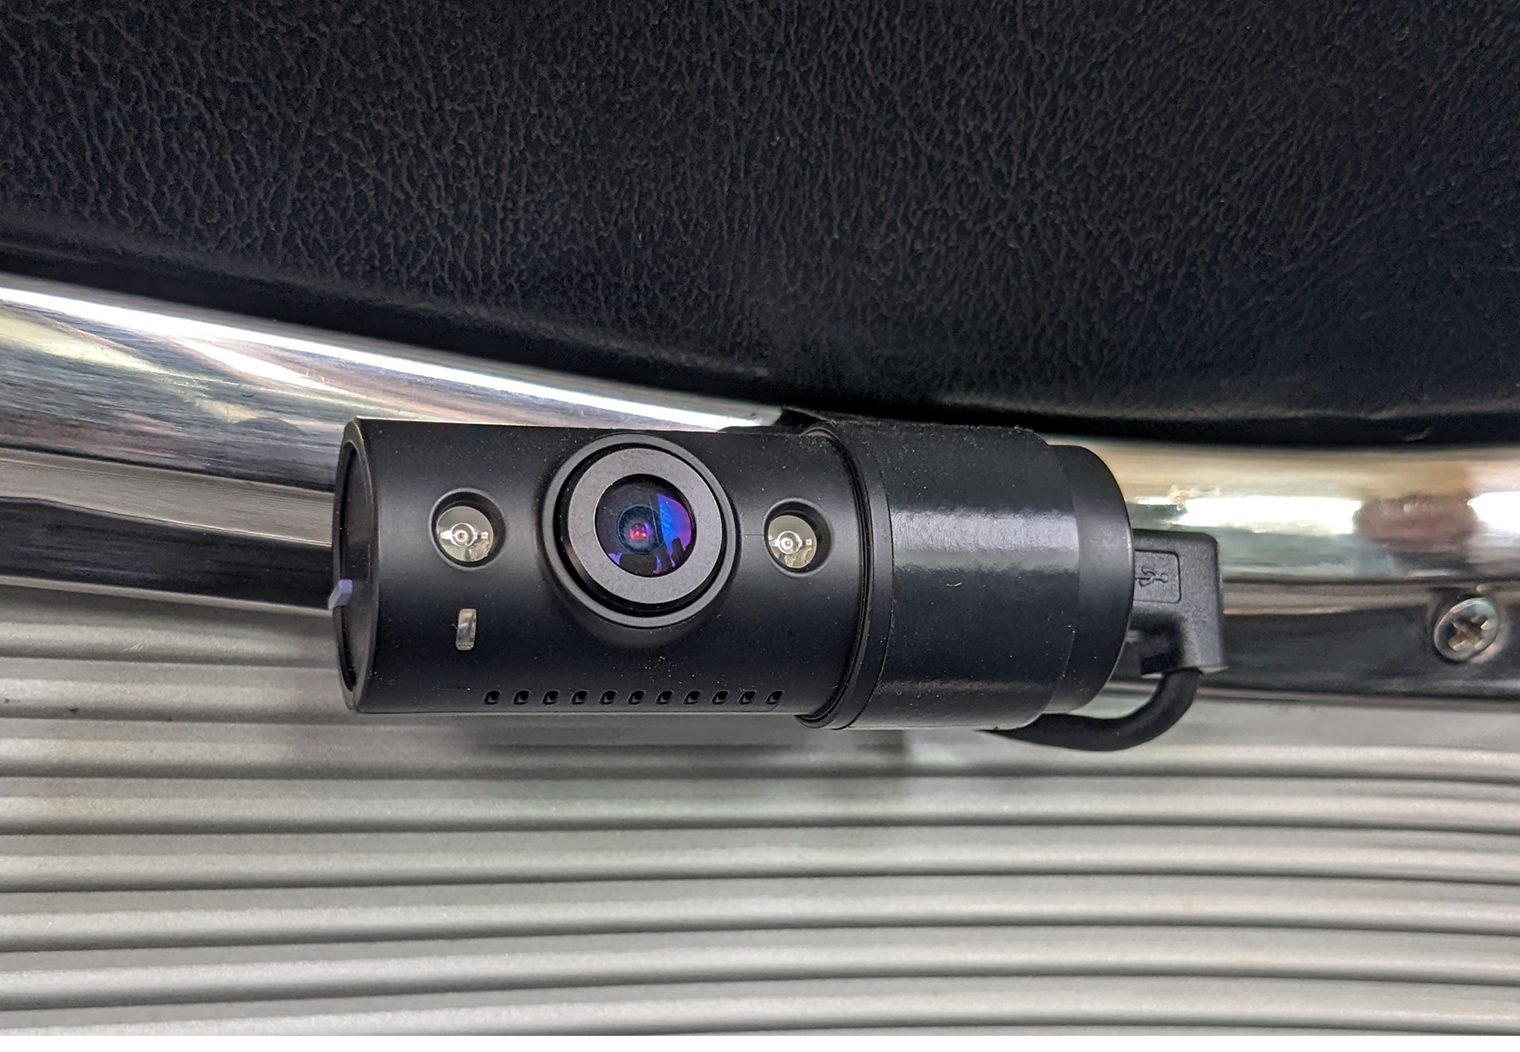
The design of the BlackVue cameras puts the lens off to one side of the body. We wanted the lens as close to the center of the windshield as possible which puts the bulk of the camera body off to the passenger side of the vehicle. The lens rotates in the mount to optimize the viewing angle. You will want to place the camera somewhere that it won’t interfere with the rearview mirror, sun visors, or other accessories you have mounted like a radar detector.
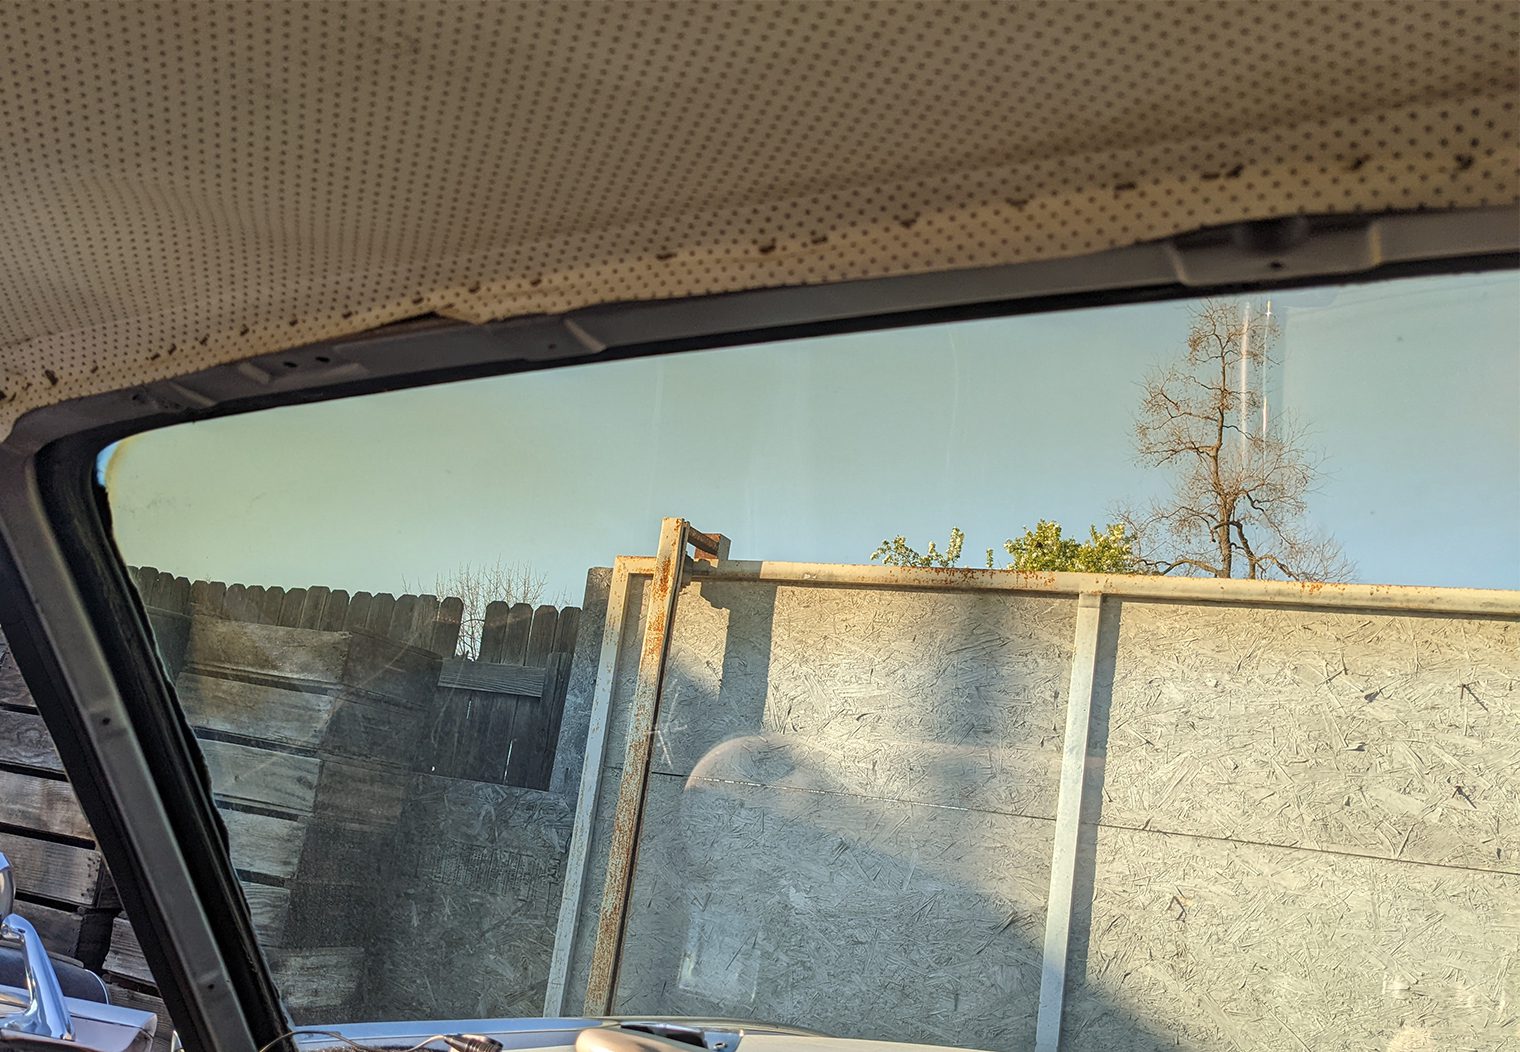
Do the same process with the rear-facing camera. We wanted the camera as high up and as close to the center, just as we did with the front. Once we decided the best possible location, it was time to properly install the cameras.
Installation: Step Four – Mounting Cameras and Running the Cables
Amusingly, the most challenging aspect we had with the installation was removing the protective tape from the 3M mounting pads. A pull-tab would have made removal easier.
Carefully press the mount against the glass and hold it in place for a second to make sure the adhesive fixes solidly. You only get one shot at this, so make sure you are happy with the tilt of the mount before you press it in place. Do the same with the rear camera.
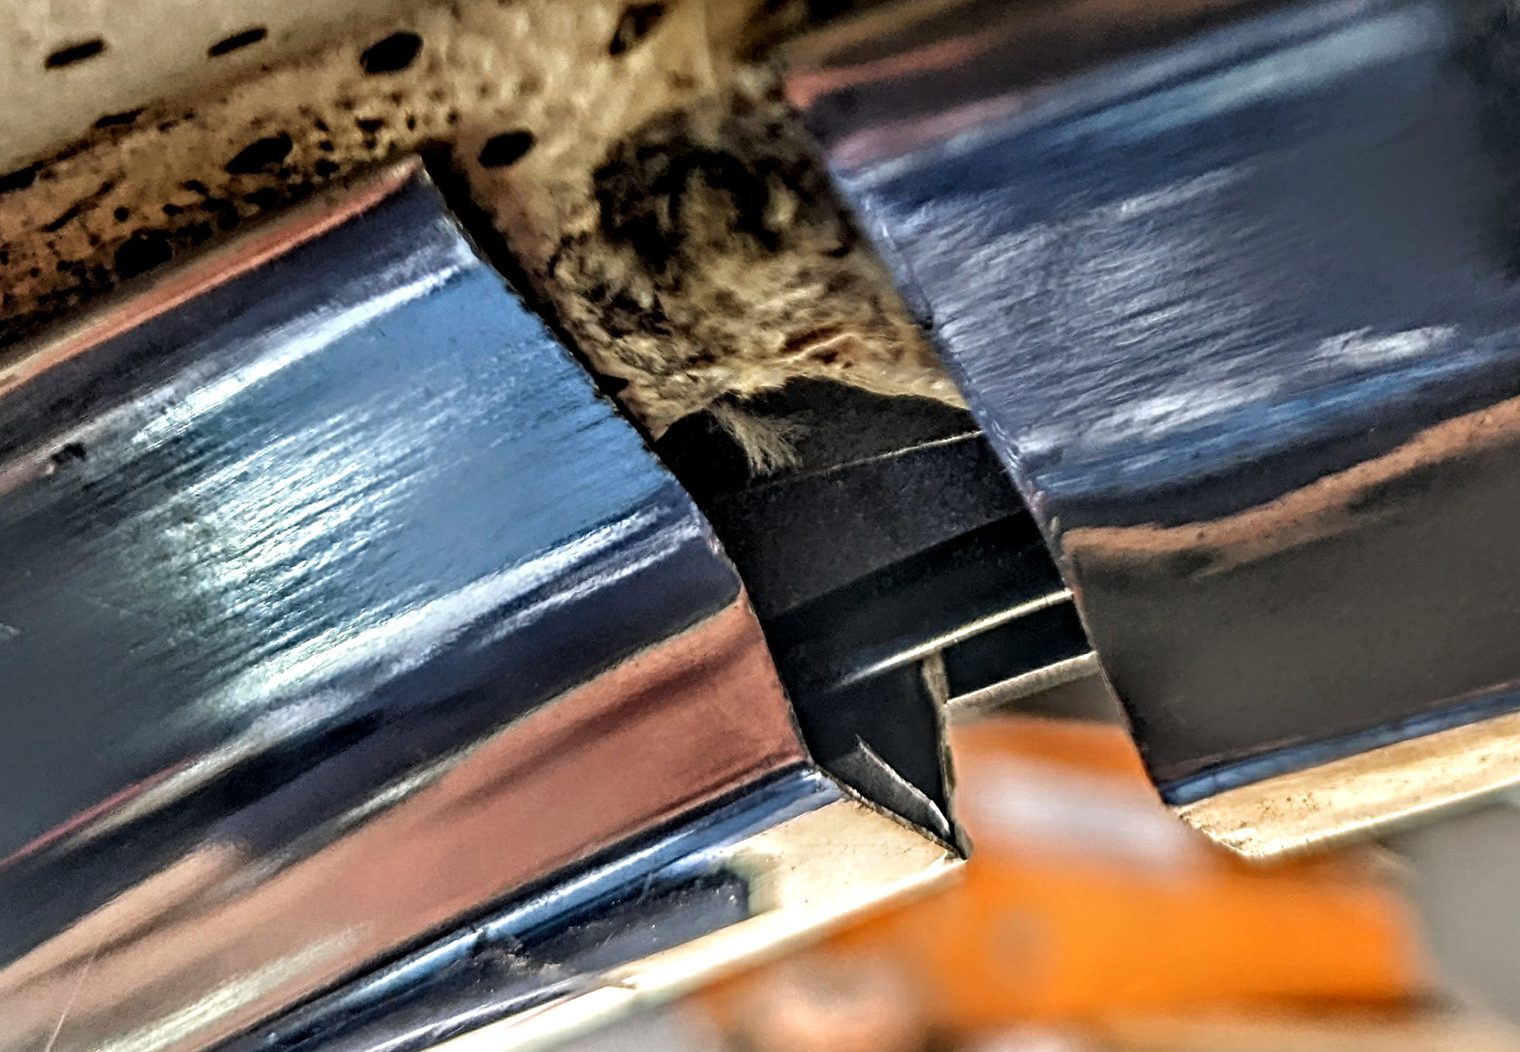
We start with the rear camera cable and work toward the front of the car. Many modern cars use plastic trim that clips in place. BlackVue includes a trim spoon that is very useful for gently prying the trim away from the headliner enough to ease the cable into the gap.
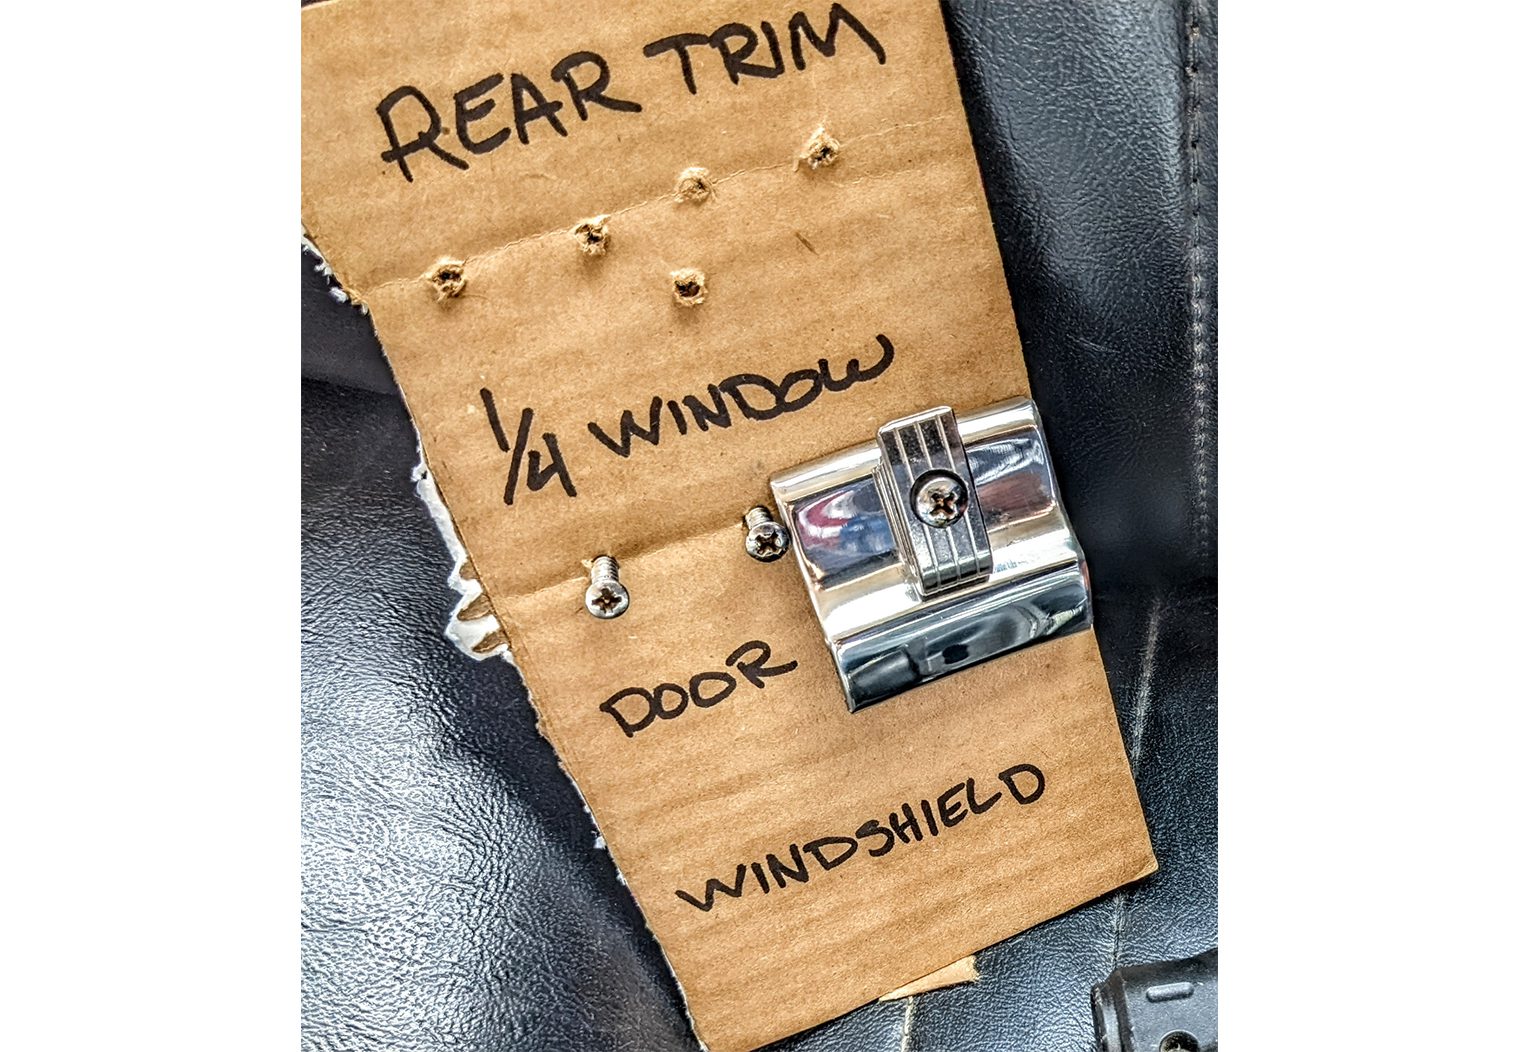
The Thunderbird we are installing the cameras in has polished stainless steel trim running around the back glass, along the B pillar, and over the door opening. It connects to matching polished trim that surrounds the windshield which also incorporates the sun visor brackets. A handful of stainless screws hold everything in place, so it took just a few minutes to remove the trim. A budget trick we use for keeping things organized is to use a piece of cardboard to stick the trim screws into with labels indicating where they go.
The rear camera cable routed easily through the trim. Once we reached the front of the door opening, we got the hardwiring kit ready to install.
Hardwiring Kit Installation
The hardwiring kit is designed to connect to the fuse panel in your vehicle. A good-quality wiring diagram is a good place to start before running the cable. The method we use is to make the power connections, then feed the plug end of the cable up through the dash to connect to the camera. It’s easier to do it this way than trying to force the three wires and the two inline fuse assemblies through everything.

You want to identify two fuses in your vehicle; one which has power when the key is off and another that only has power when the car is switched on.
Common hot fuses for modern cars include interior lights and often the ACC port. Switched power can go to fuses like the heater or radio fuse. BlackVue recommends that you connect the switched battery cable to the hazard light fuse to use the battery saver feature.
Test the fuse with a voltage meter to ensure that both of your chosen fuses get over 12 volts of power at the appropriate time. You’ll have best results using a fuse rated between 10 amps and 30 amps.
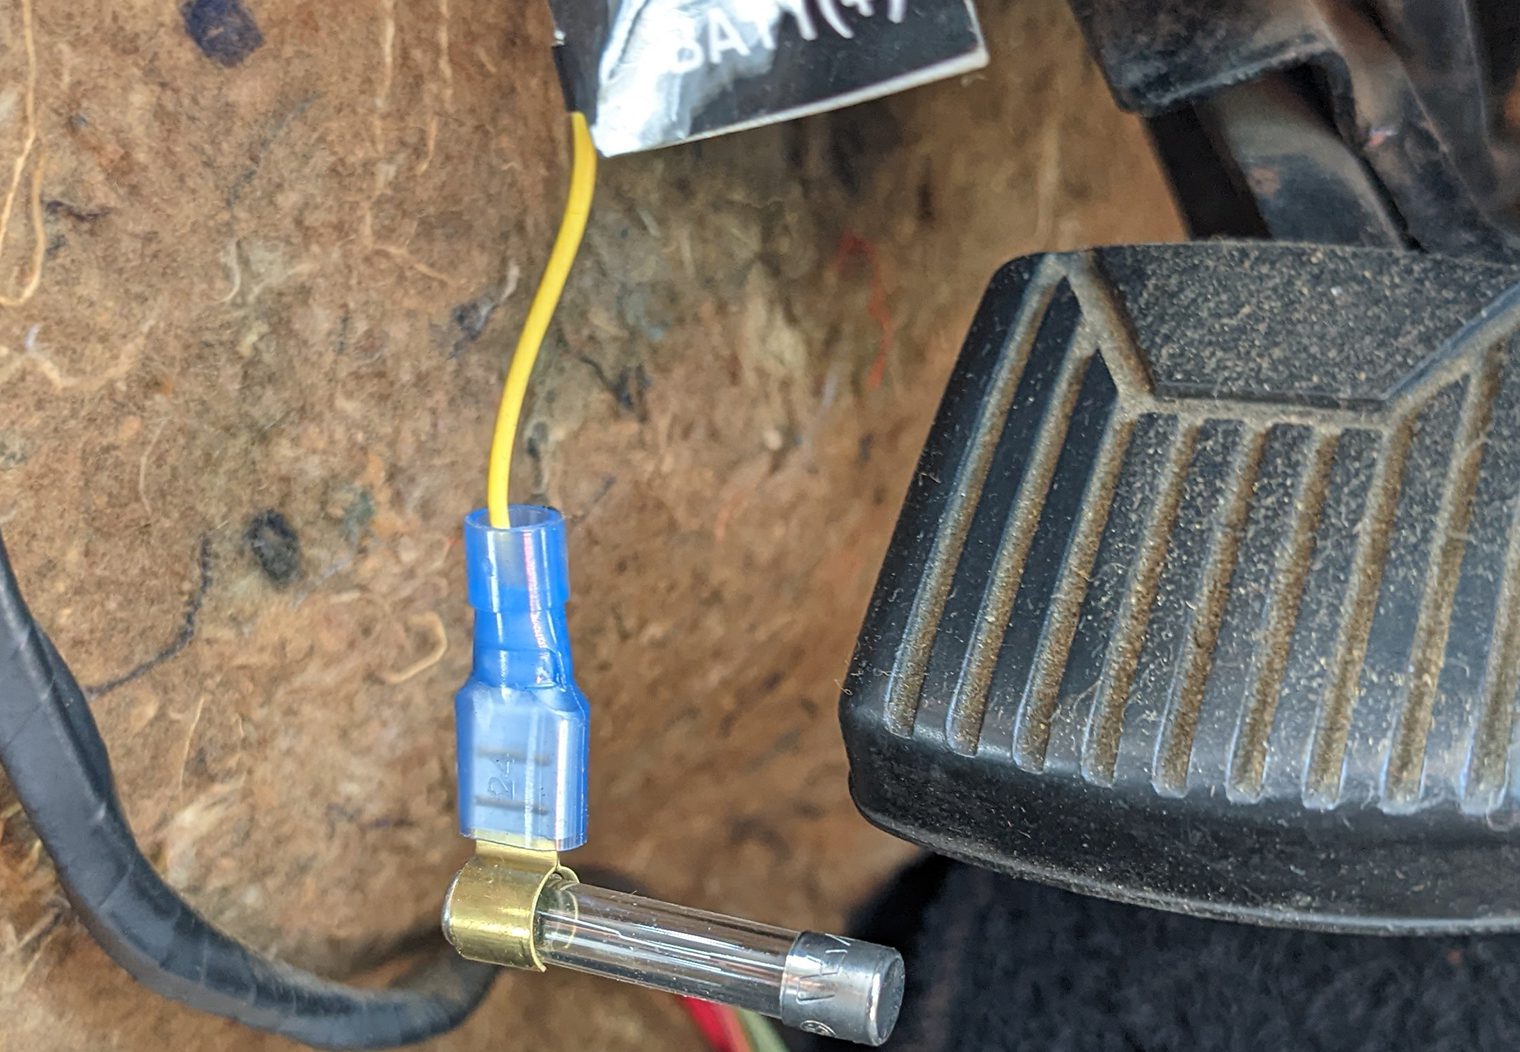
To simplify our installation and prevent the need to tap into existing wiring, we are using fuse taps. A fuse tap is simply a metal connector that attaches to the fuse and includes a place to connect the wiring. Fuse taps are available for both ATP-type fuses and the old style glass tube fuses, like we find in the Thunderbird.
The included hardwiring kit is straight-forward and has clear and easy to understand labels. It has three wires; yellow (BATT+), red (ACC+), and black (Ground). BlackVue does not recommend modifying the hardwire cable, either by shortening it or by making any alterations to it.
Among the many things you’ll find different between classic cars like this Thunderbird and modern vehicles, accessories like hazard flashers were not common in 1962 and weren’t mandated until 1968. We elected to tap the windshield washer fuse and the cigar lighter fuse after testing for the correct voltage.
The fuse taps slip over the ends of the tube-style fuses and the assembly simply presses into place. The taps included crimp-on connectors to make the attachment to the wires. We attached the ground cable to a pre-existing ground screw behind the kick panel trim panel.
DR750X Plus 3-Channel Interior Camera Installation
THe DR750X-3ch package includes an interior camera that utilizes IR diodes to capture clear images at night. The camera is intended to mount on the windshield near the front-facing camera. For our installation, we wanted the camera to capture the occupants inside the vehicle, but also cover the driver and passenger side windows. This way, the image capture will include people walking up to the side of the vehicle such as car thieves or law enforcement.
Because of the desire to capture the sides, we found that the best mounting location was actually on the passenger side of the dash rather than the windshield. Optimal placement for capturing the range of images we wanted would have been somewhere on the dash itself, but the included cable would not have been long enough to hide from view so the dash face was chosen as a compromise.
Installation: Step Five – Tucking the Wires and Final Connections
After feeding the hardwiring power cable through the dash, we removed the polished trim around the front windshield and brought the cable up to the point where the rear camera cable exited from the door trim. Next, we fed just enough cable along the top of the windshield trim to connect to the front-facing camera. We added several small pieces of electrical tape to hold the rear cable and power cable together.
The path we used left only a small amount of leftover cable running from the rear camera to the front. We were able to put a couple turns in the excess and tuck it into the windshield trim. The excess from the hardwiring kit simply got rolled up and secured with electrical tape to keep it organized. Everything fits nicely behind the driver’s side kick panel trim in the Thunderbird.
Any time that you remove trim panels to run wiring, take care to ensure that the clips or screws don’t inadvertently pierce wiring when you put it back together. Make sure the power cable connector and the rear camera connector are firmly pressed into place at the camera.
Conclusion
Installing the DR900X Plus or DR750X Plus cameras is a fairly simple process. We found that the included cables were excellent for our purpose, though the hardwire cable probably didn’t need to be as long as it was. Setup was straight-forward and worked perfectly on both cameras with no interruptions or errors. The key to successfully installing these cameras is to take your time and have everything organized before you start. That way, you aren’t wasting time looking for the cable or having to undue part of your installation because you skipped something simple, like ensuring that you don’t have too much or too little cable to make your connections.