In this article: This article is part 3 of a multi-part series documenting a custom stereo installation on a 2021 Ford F-150. In this article, I'll walk you through the steps I took to install all of the system components in the truck including the speakers, deadening, amp rack and subwoofer enclosure. I'll also review how I tuned the system, set gains and so on.
In part 1 and 2 of this multi-series stereo install, I went through the details of planning out my system and preparing all of the components for installation. In part 1, I detailed out all of the various decisions and research I did in order to decide on the products and ultimately purchase everything that I needed to make this installation happen. You can find a list of all of the parts that I used throughout this build on my 2021 F-150 Stereo Buildsheet.
In part 2, I walked through all of the preparation I did before heading down to the truck to install all of the components. This included wiring prep, building the amplifier rack, cutting and building the subwoofer enclosure and more. All of this work has already been completed prior to this article.
If you haven't already read these articles, I recommend doing so! They are what set the context to this article.
Check out all related articles to this F-150 Custom Stereo

In this third and final part to the series, I take all of my prepped components down to the truck and install them. I'll walk through the process I took and detail out any nuances I discovered along the way. And after all of the components were installed, I'll touch on how I decided to tune this high performance system with a few niche tools!
Before I dive in though, I want to give a shout out to one of the build sponsors, Crutchfield. I personally purchased a number of products from their Online Store, but also used their vehicle fitment guide to figure out things like speaker sizes, wire harnesses, and even browse through things like subwoofers. If you're planning your system for your F-150, Crutchfield is a great start. Their experts are available for questions on chat or on the phone. And they always back their products up with a 60 day return policy and free lifetime tech support on the product you purchase!

Wiring Up the Truck
Running Speaker & Signal Wire
In part 2, I rough cut all of my speaker and power wire and labeled them appropriately based on how I planned to run the wire, where I expected my crossovers and amplifiers to be installed, and which side of the truck I planned on running power and ground for the amplifiers. This helped save a lot of time because I didn't need to make any decisions on the fly, but it also allowed me to confirm I had enough speaker and power wire to run the distances I wanted. This is especially important for people like me who don't have a shop filled with excess wire and other components.
As a reminder, here's generally where all of the components were to be installed and where they were to be wired (e.g. left vs right side of vehicle).

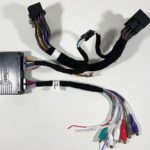
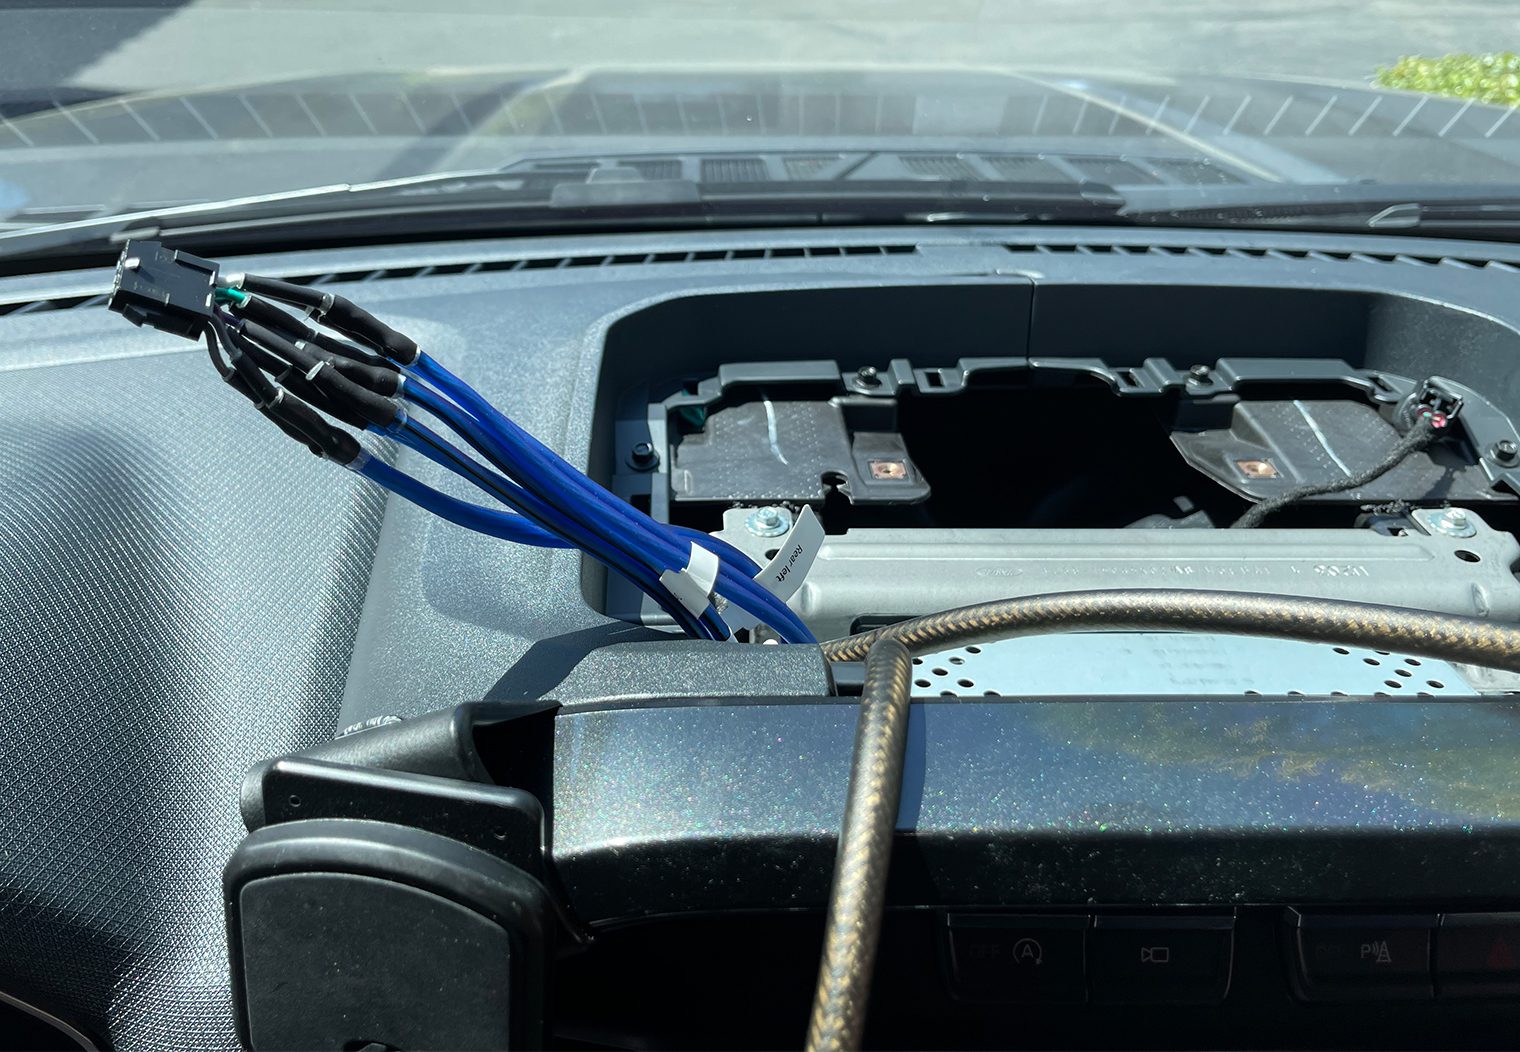
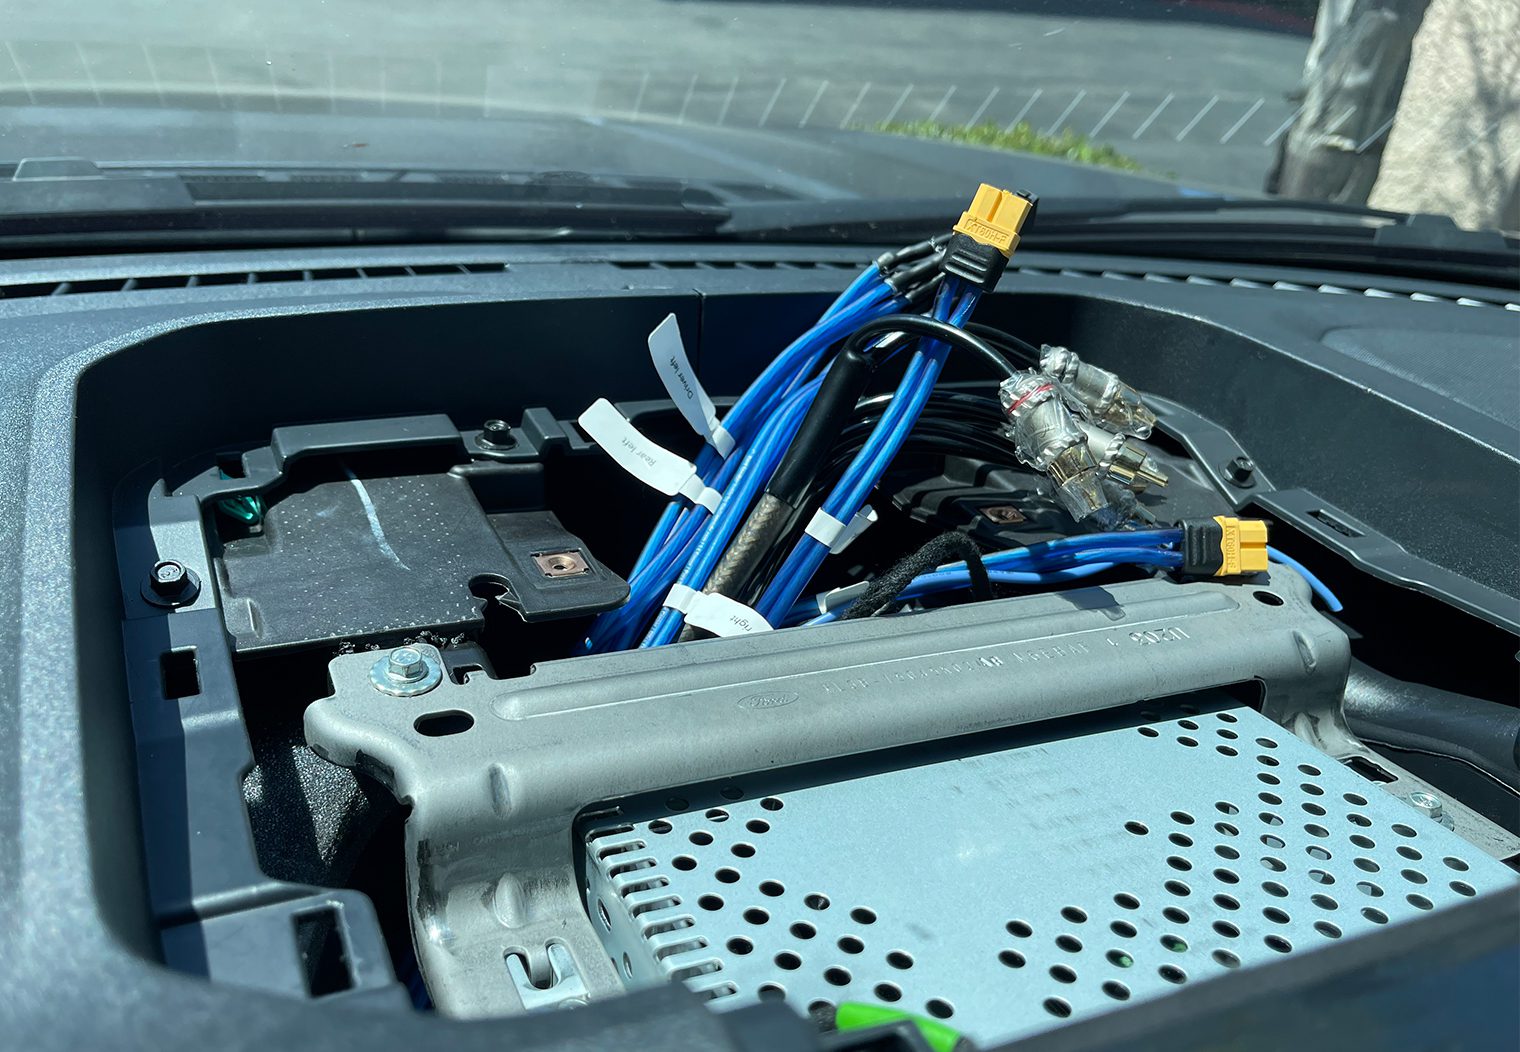
One thing worth noting in this diagram, however, is that the amplified FL, FR, RL, RR signals from the amps in the rear were wired back to the dash behind the head unit, where I tapped back into the factory wire harness via the Axxess AXDSP-X's included T-Harness.
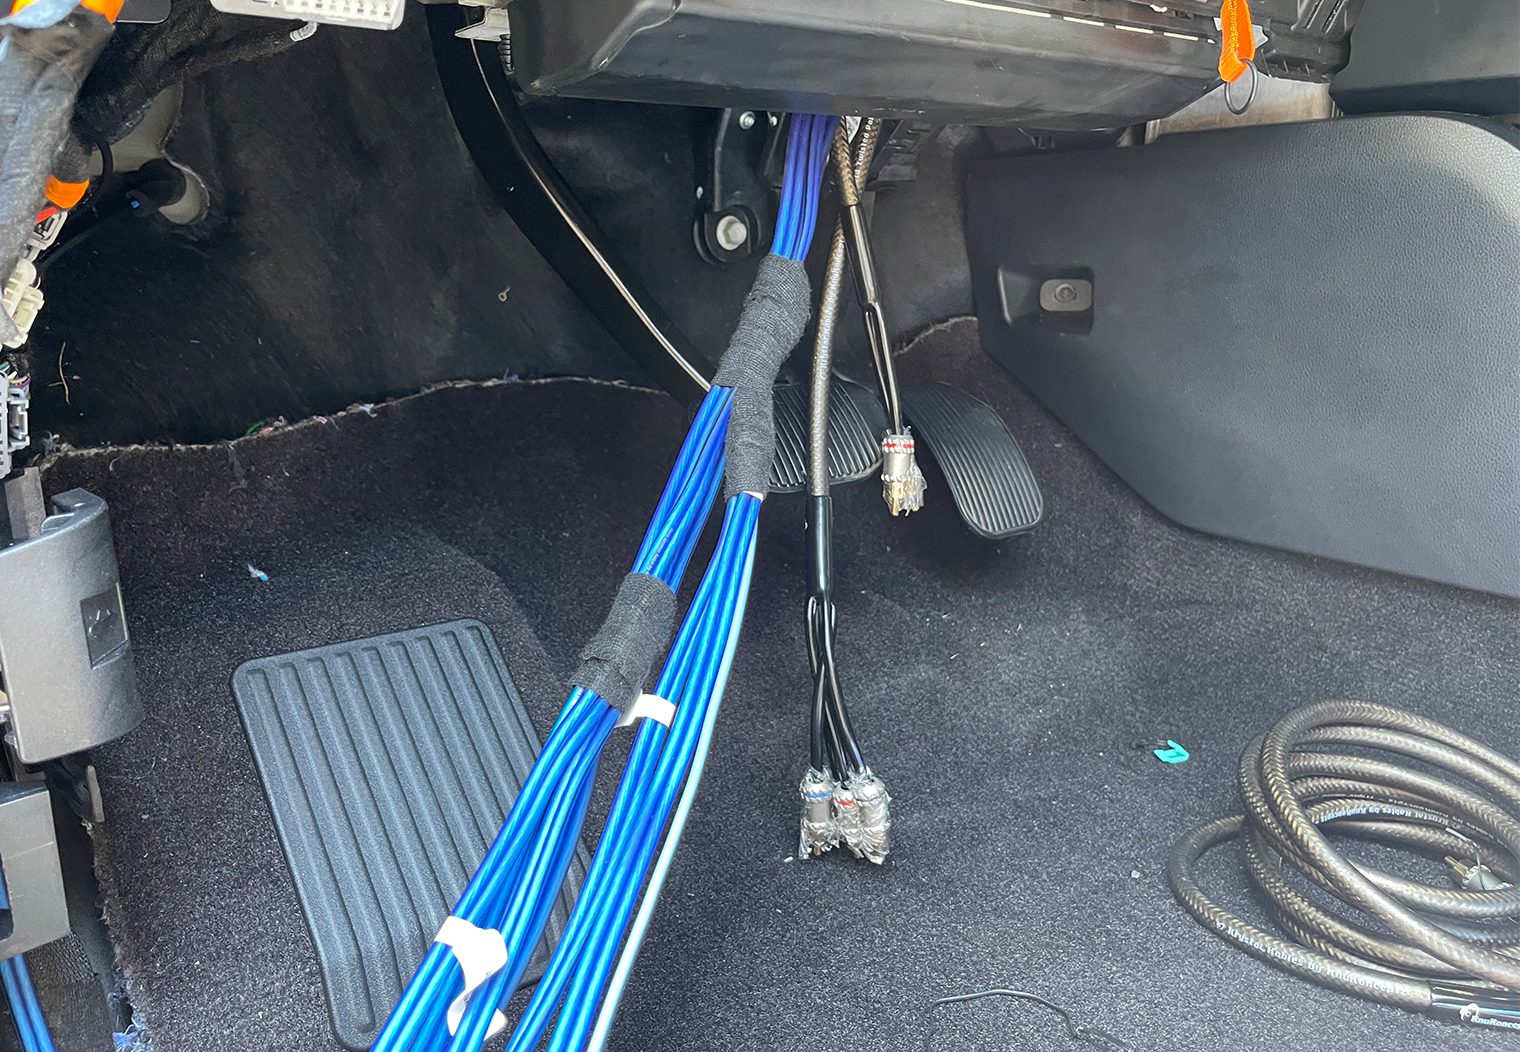
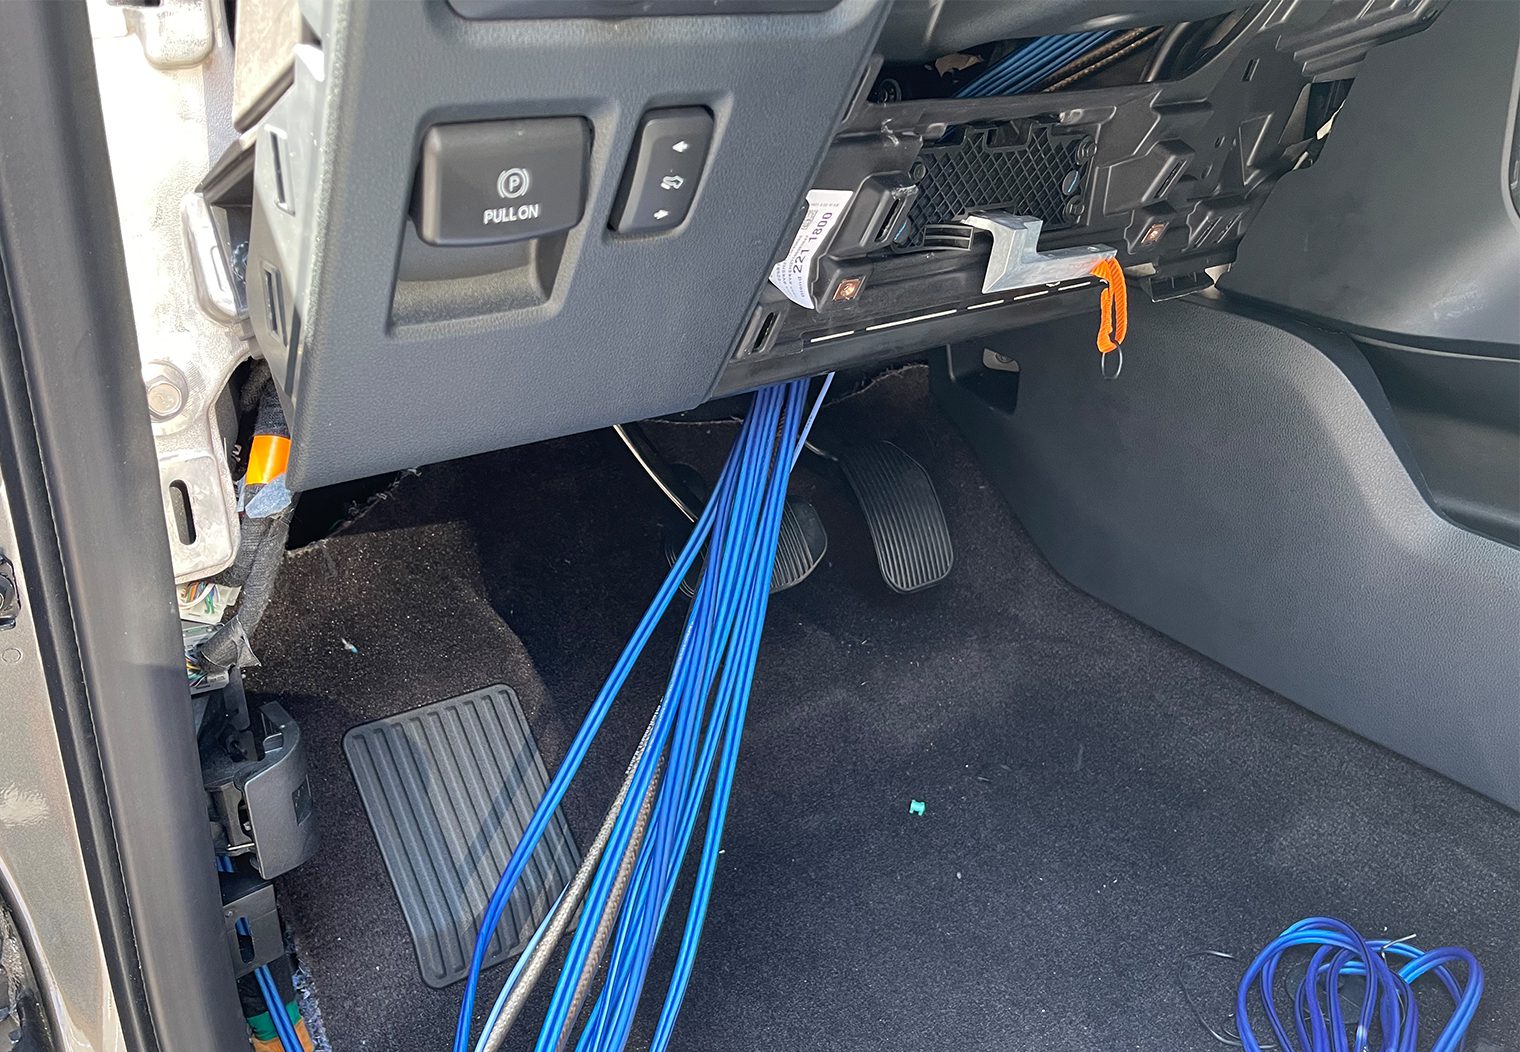
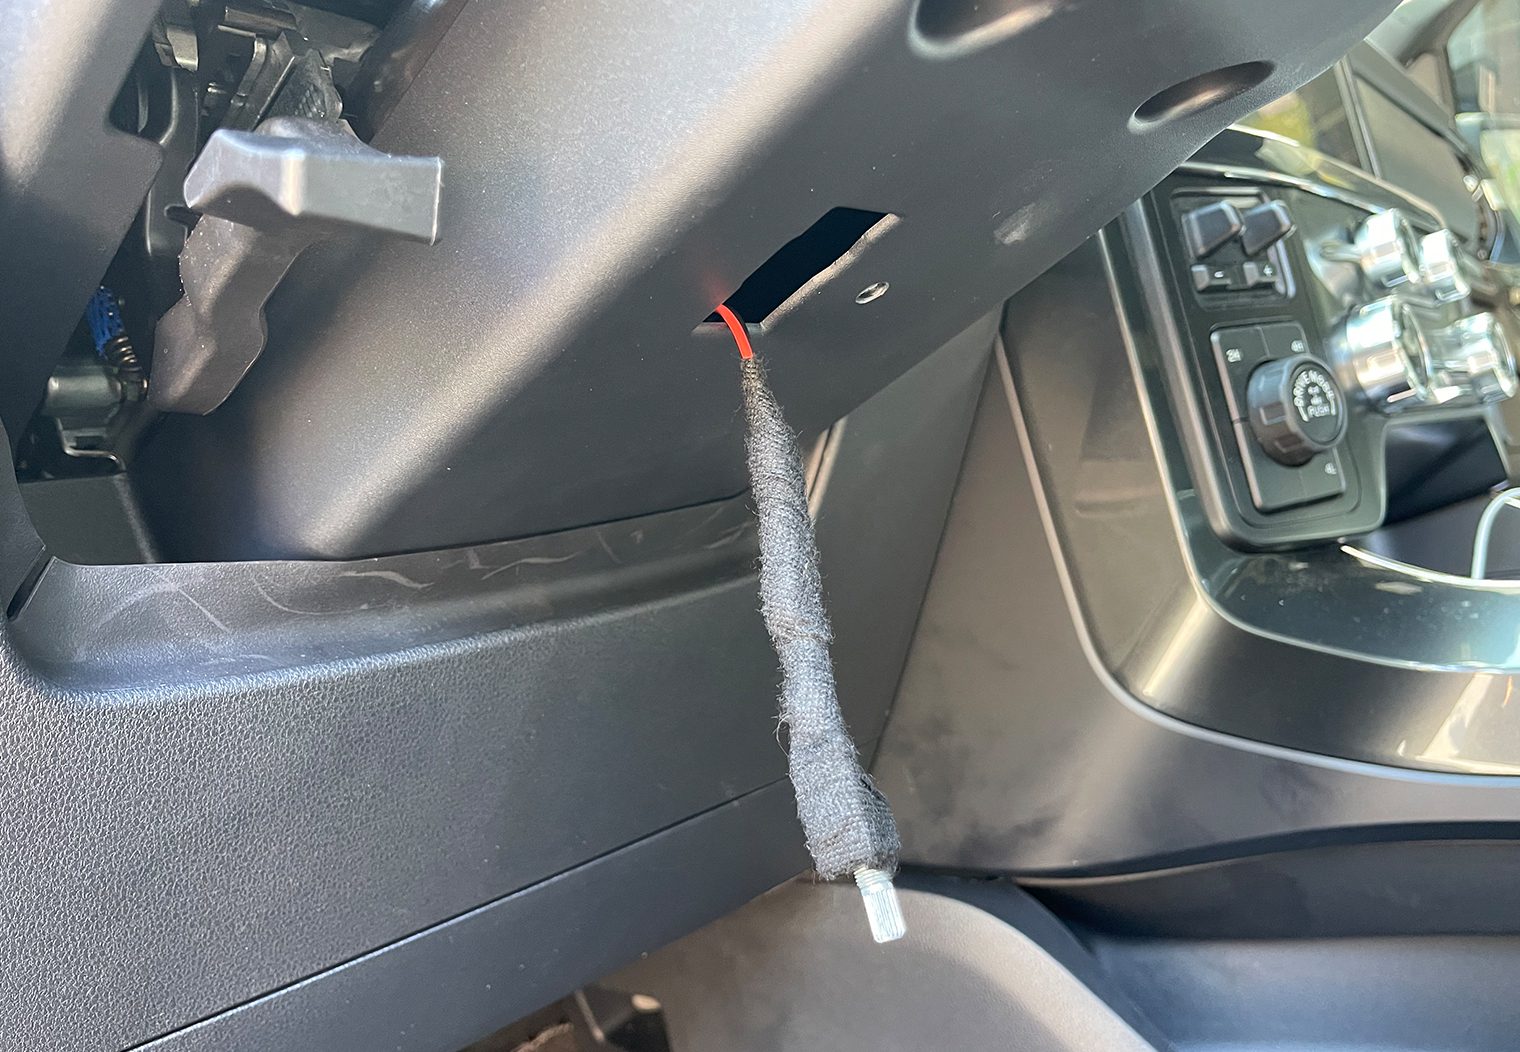
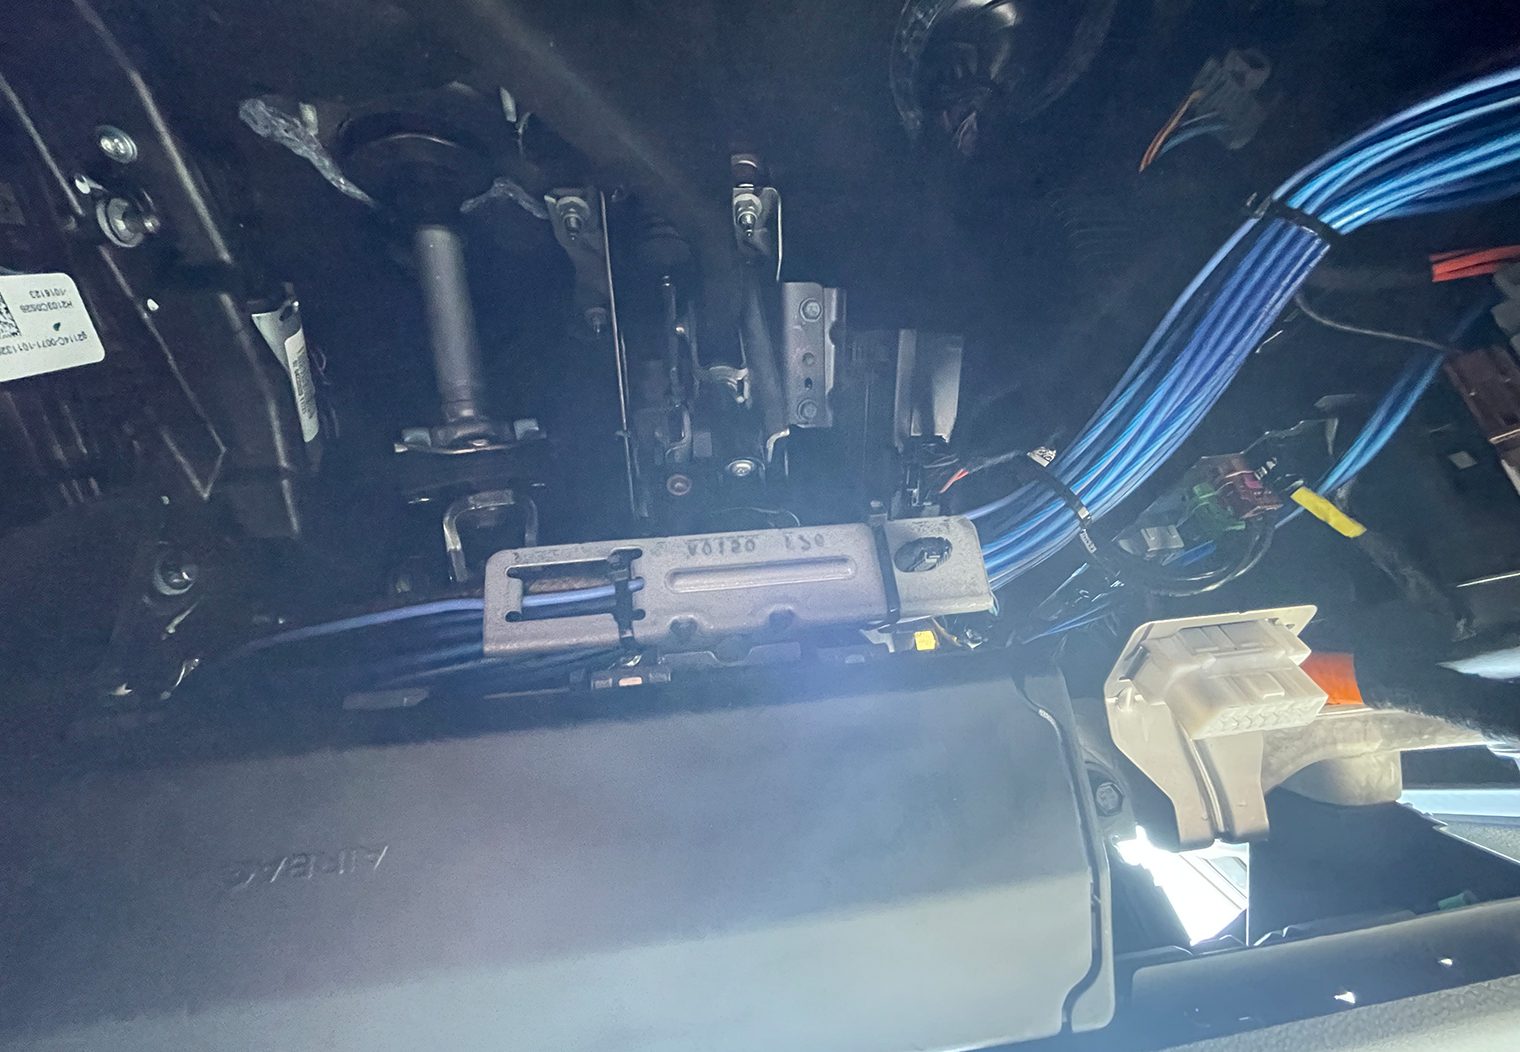
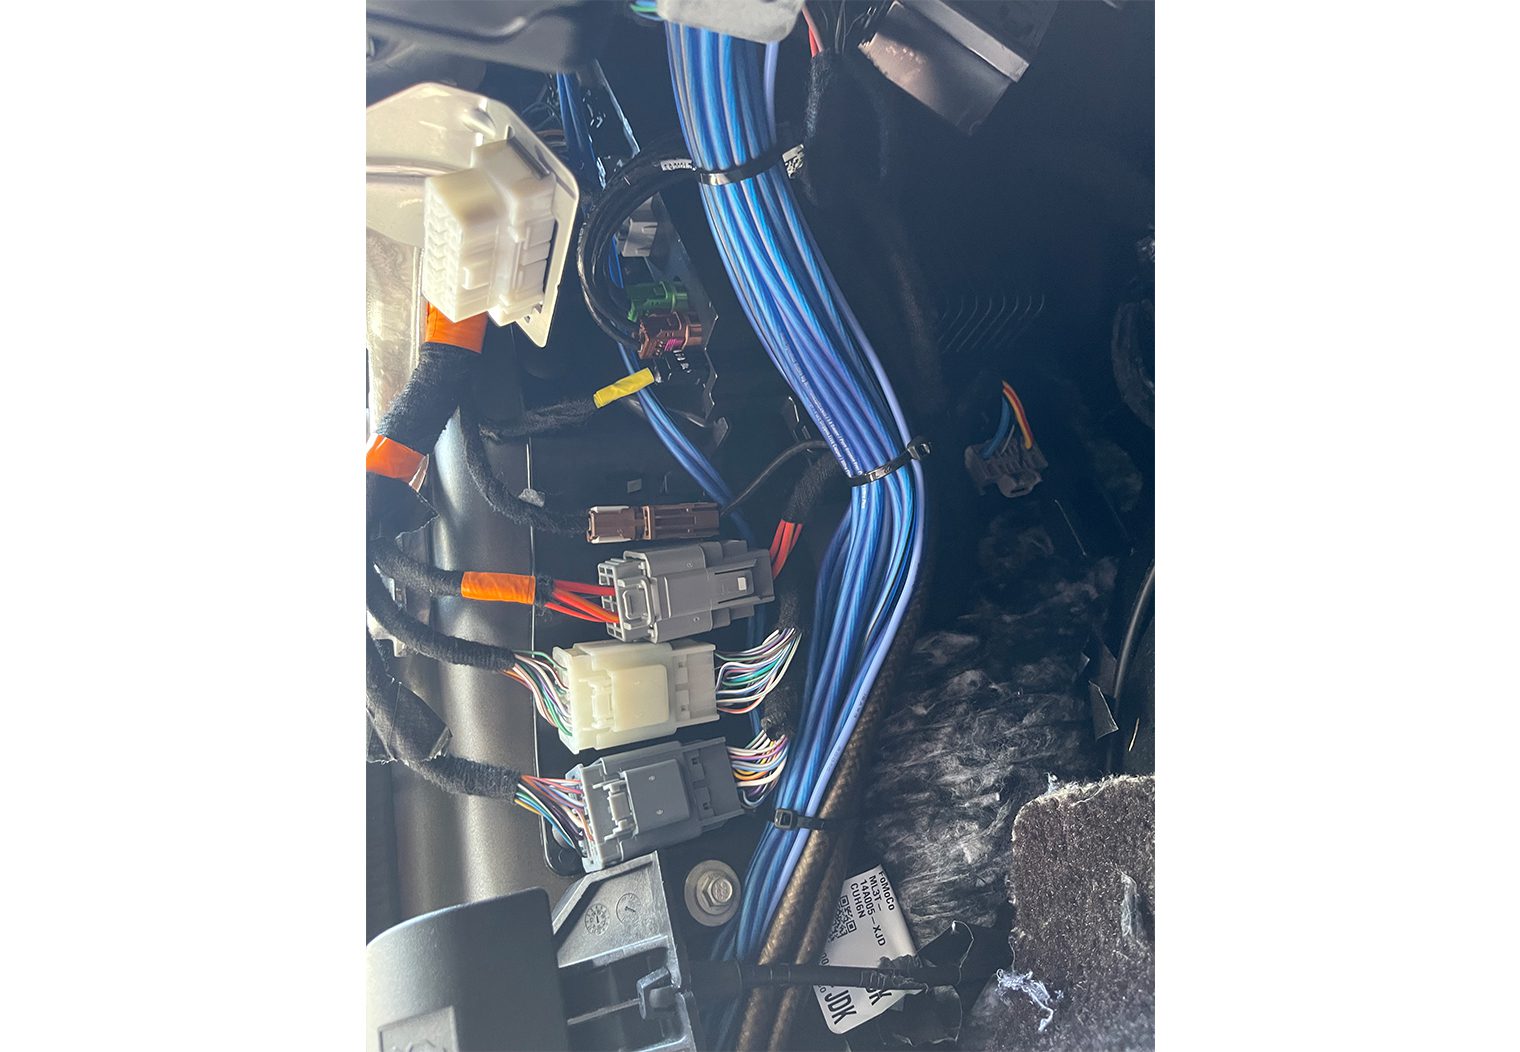
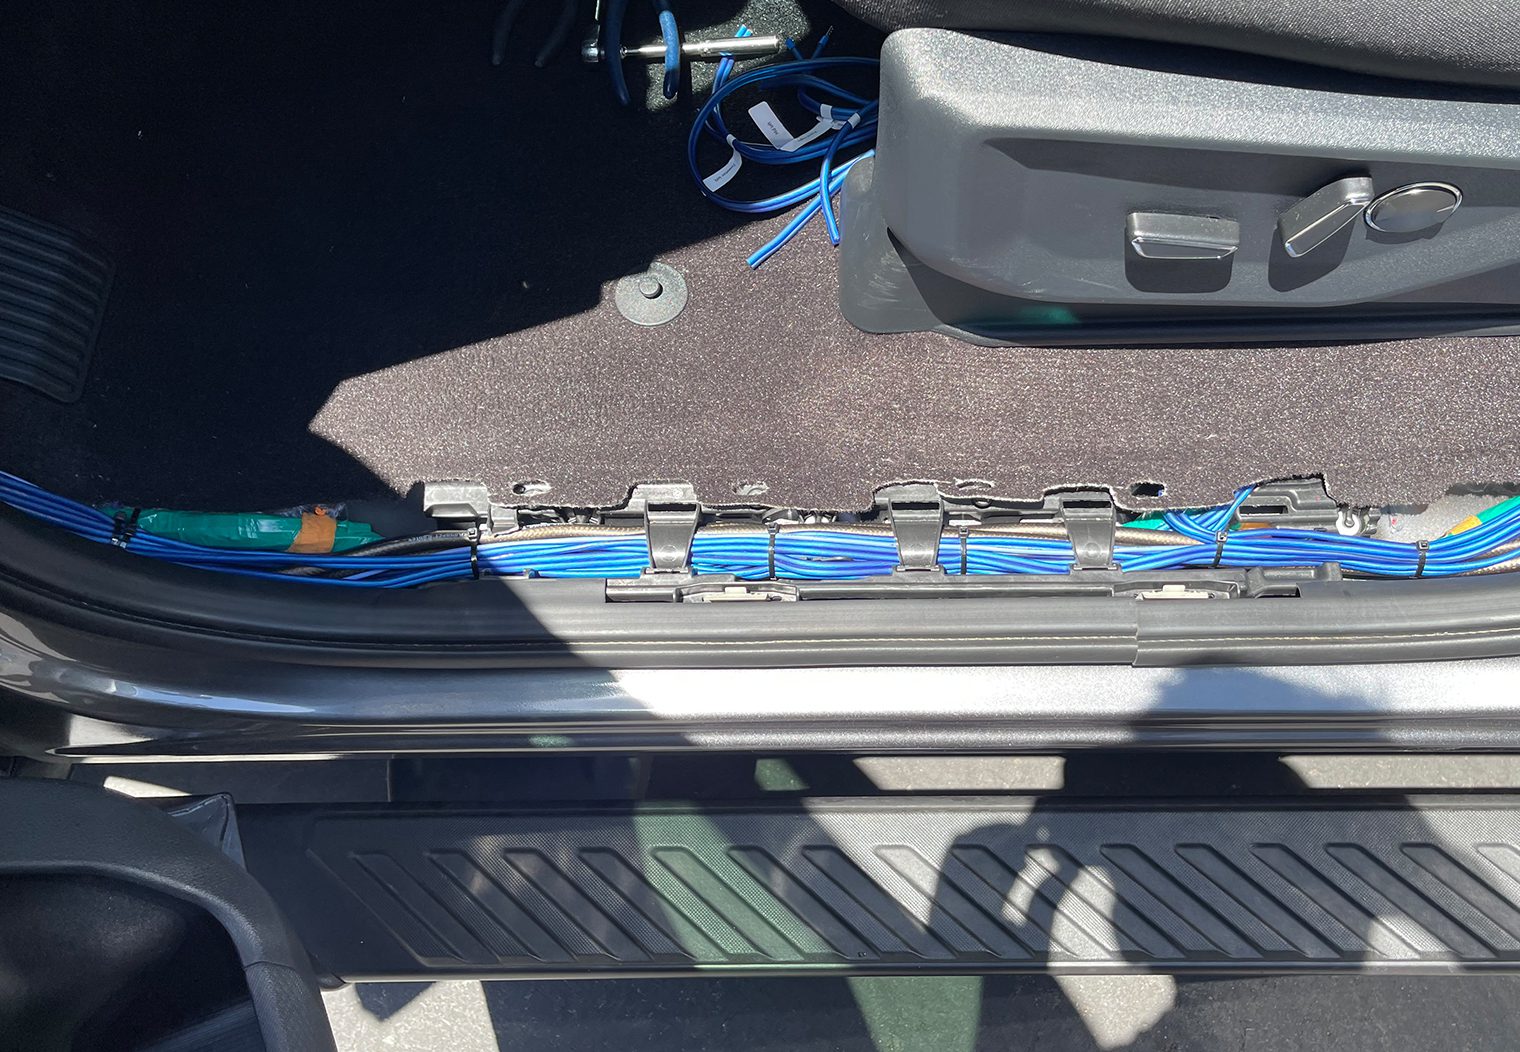
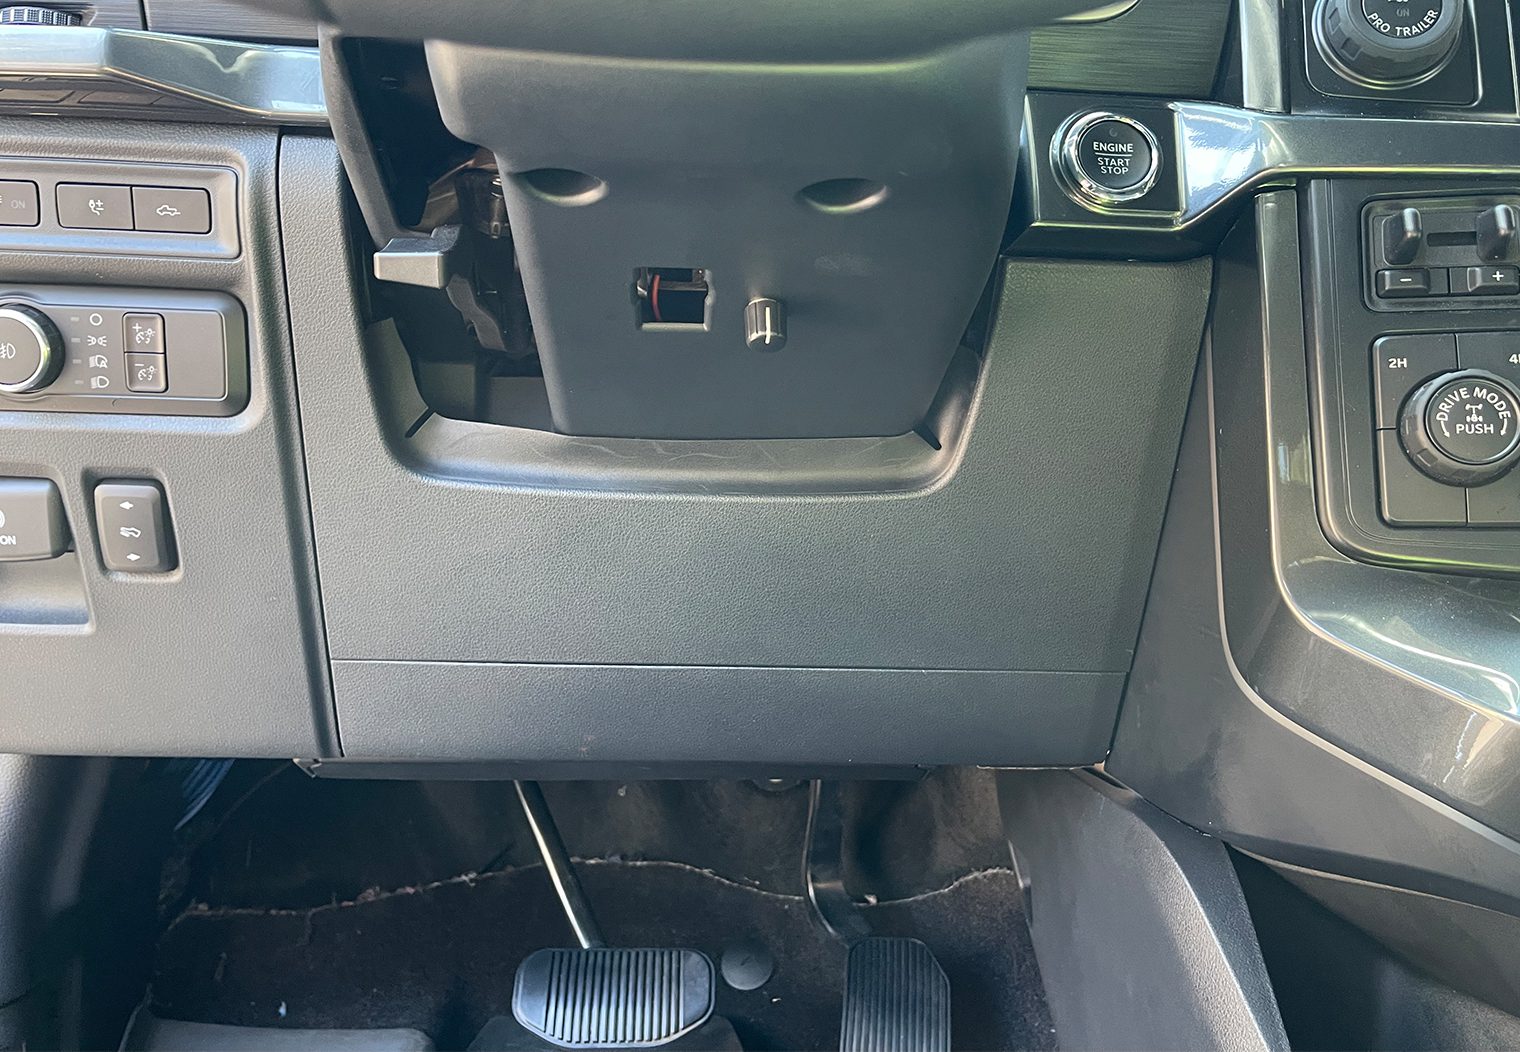
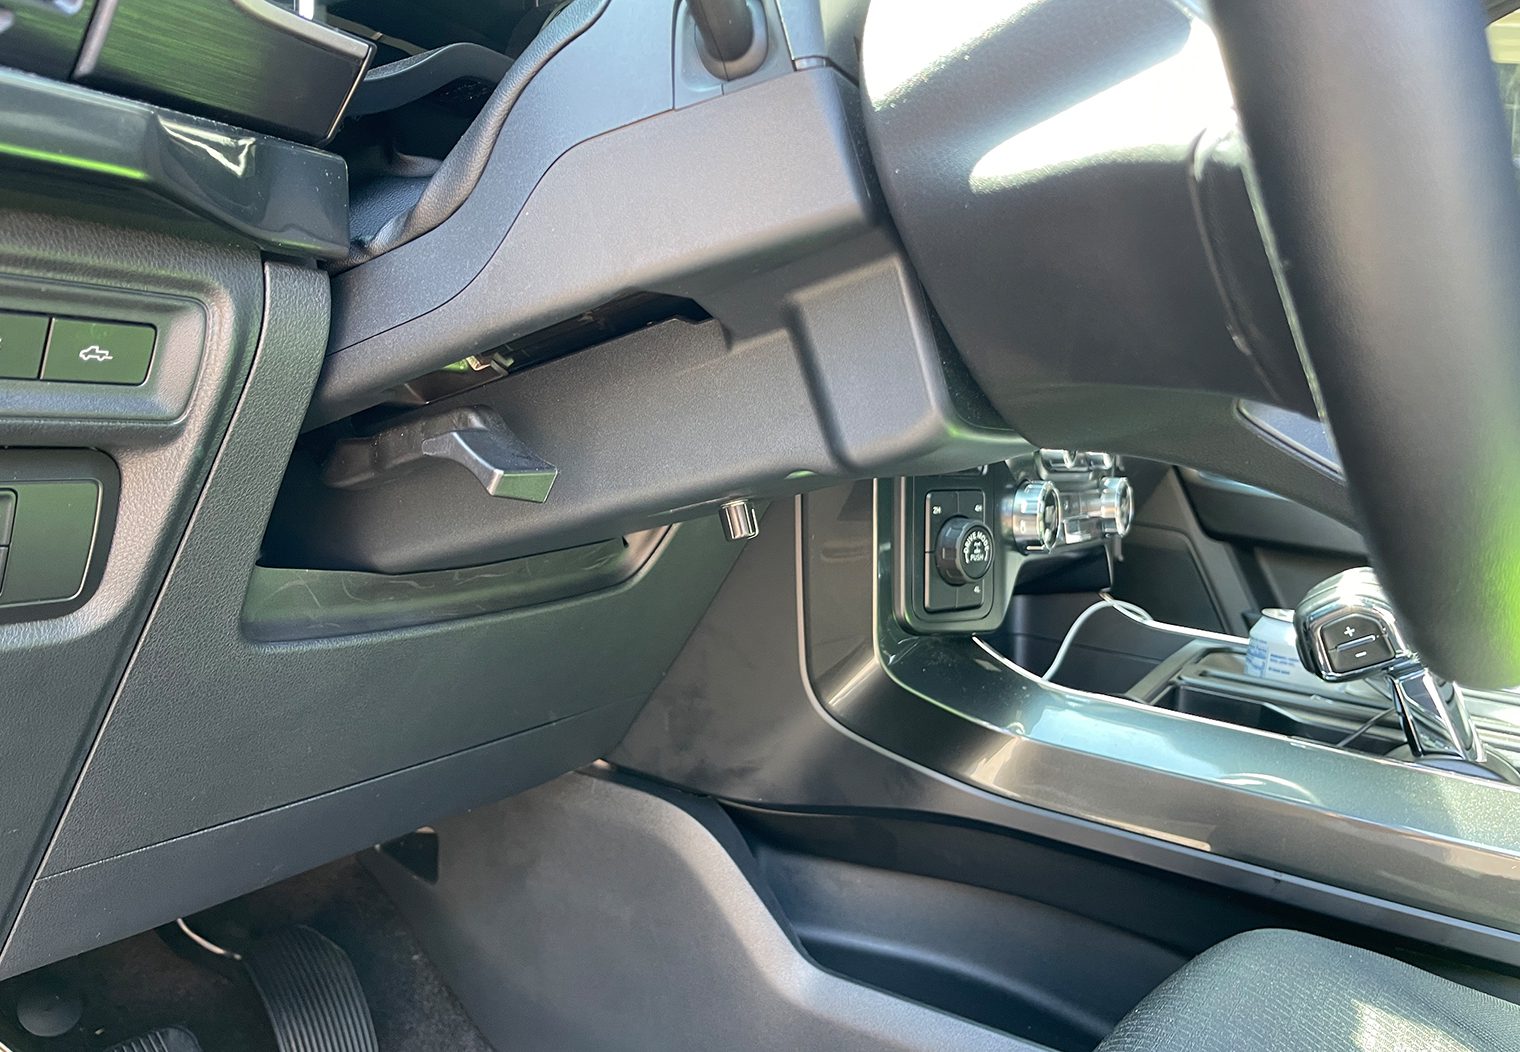
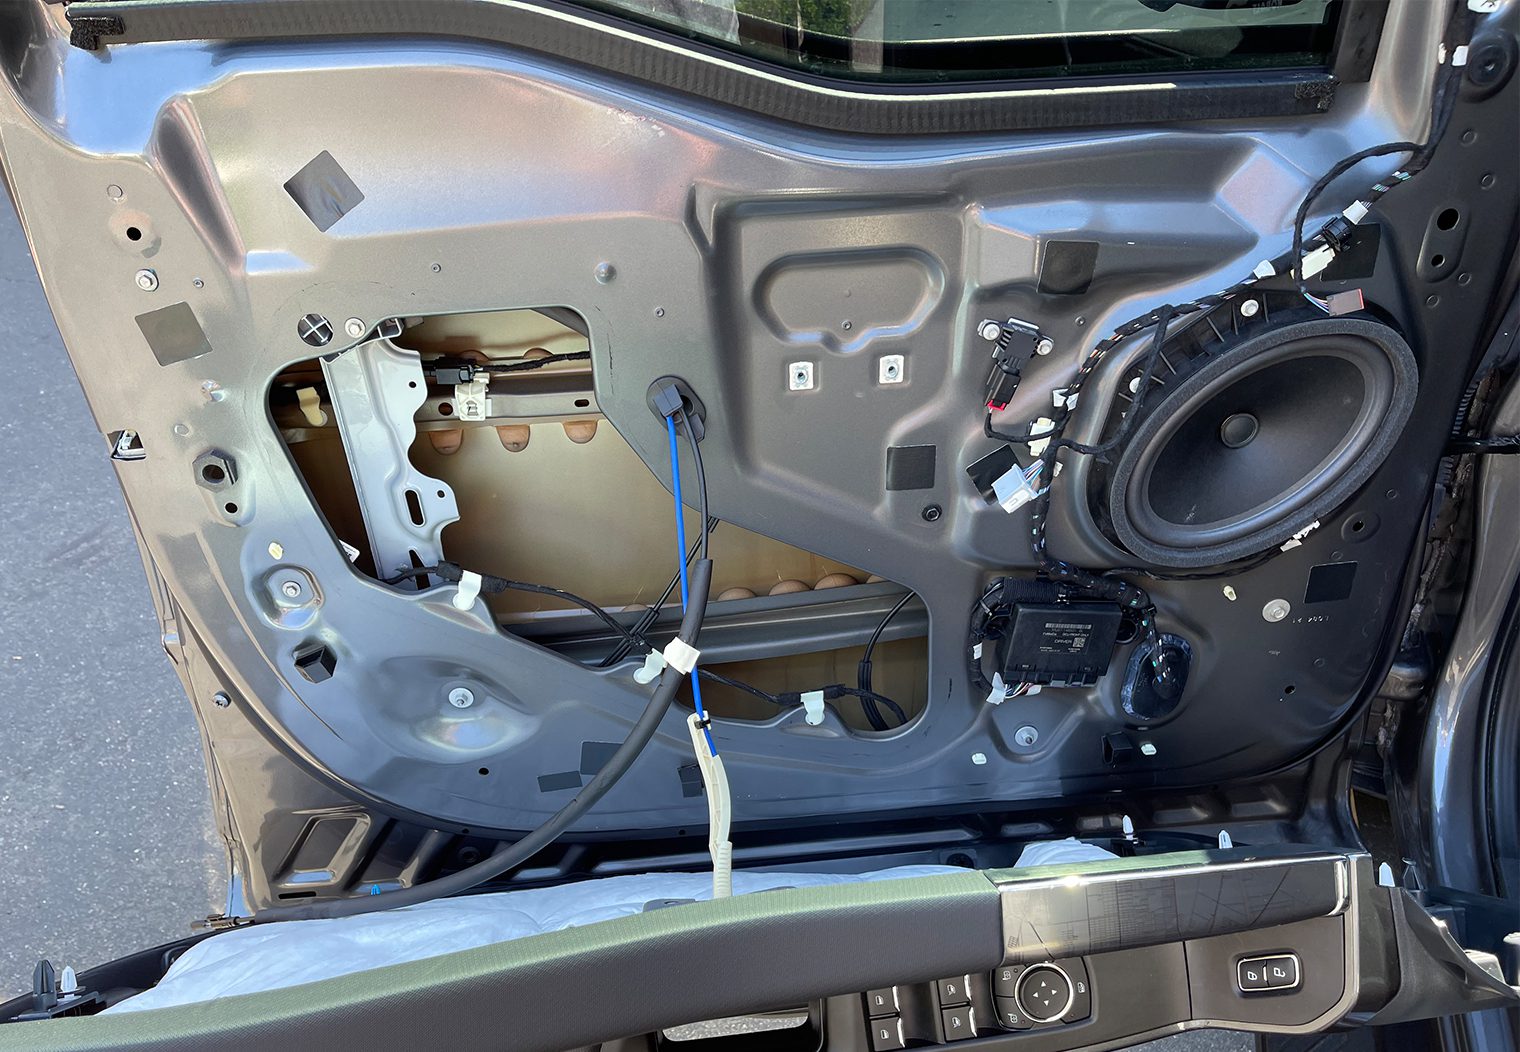
The first thing I set out to do with the truck was get all of the groundwork wiring ran so that I could install the amplifier racks. Starting with the center dash, I ran all of the required wires up and through to the center dash below the factory midrange speaker. This required a total of 7 speaker wires to be ran up and through the dash along with two separate sets of RCAs (4-ch and 2-ch). This was one of the most challenging parts of the wiring because there were so many thick wires. I also ran the remote wire to the amps, and an additional wire for the AXDSPX's subwoofer control knob to the steering column. I was able to neatly zip tie the bundle and secure it above the driver's feet under the dash and then along the driver kick panel out of sight.
All of the RCA and speaker output wires were then ran along the channel between the floor board and the door frame where they fit very nicely.
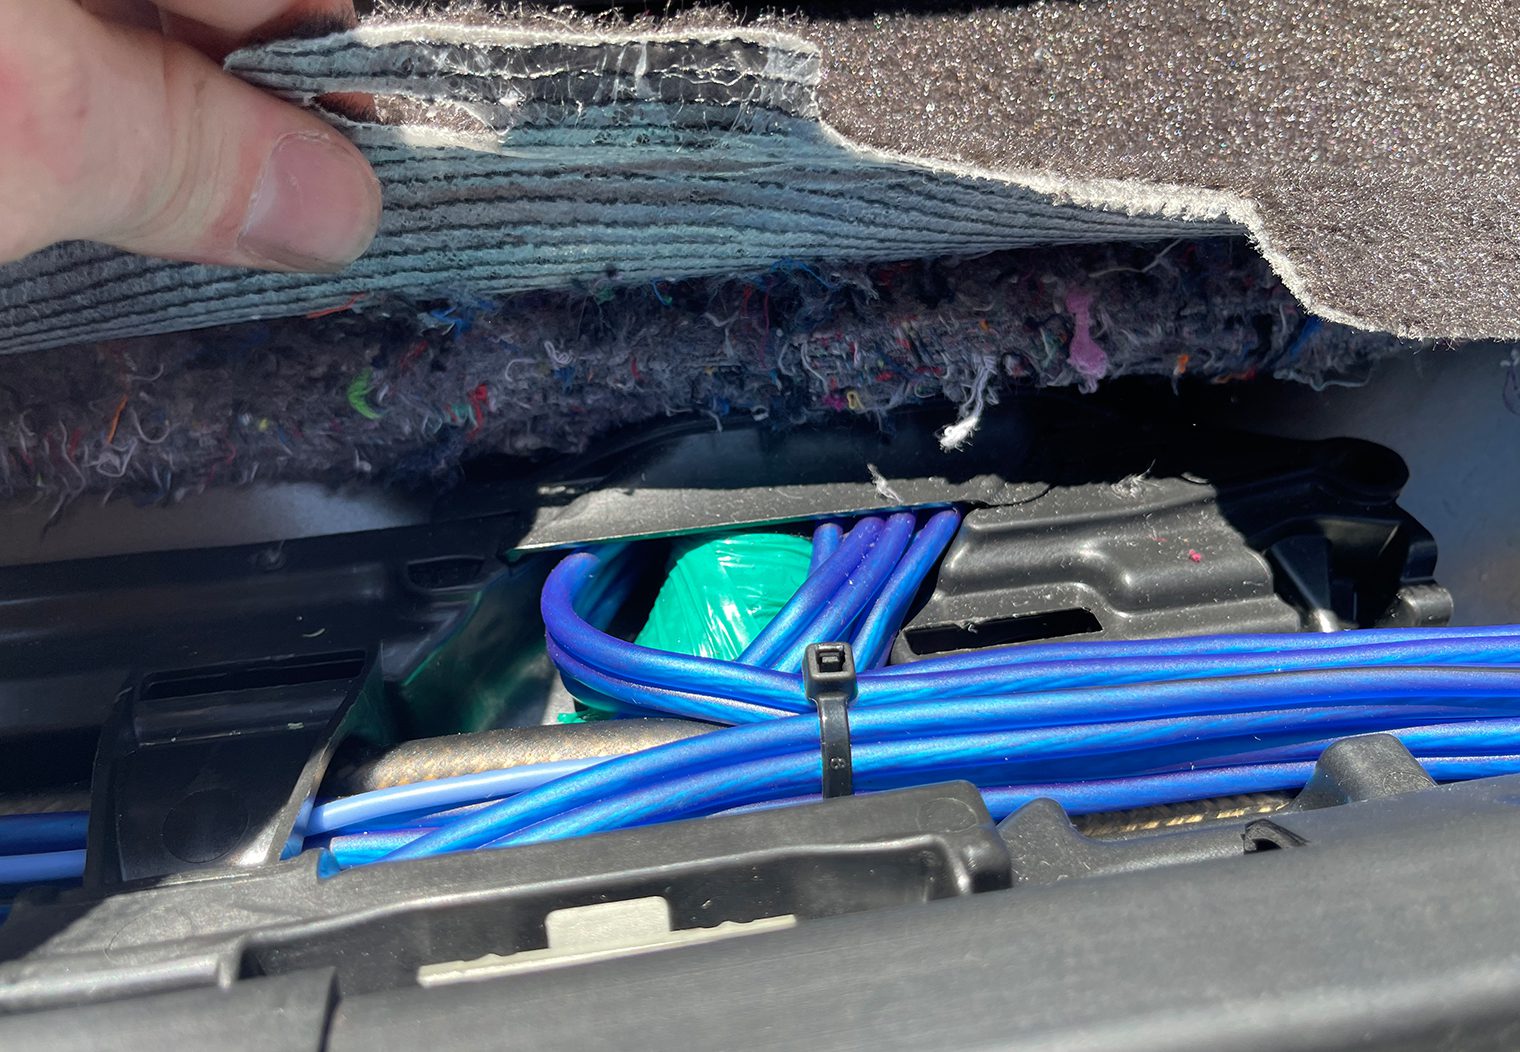
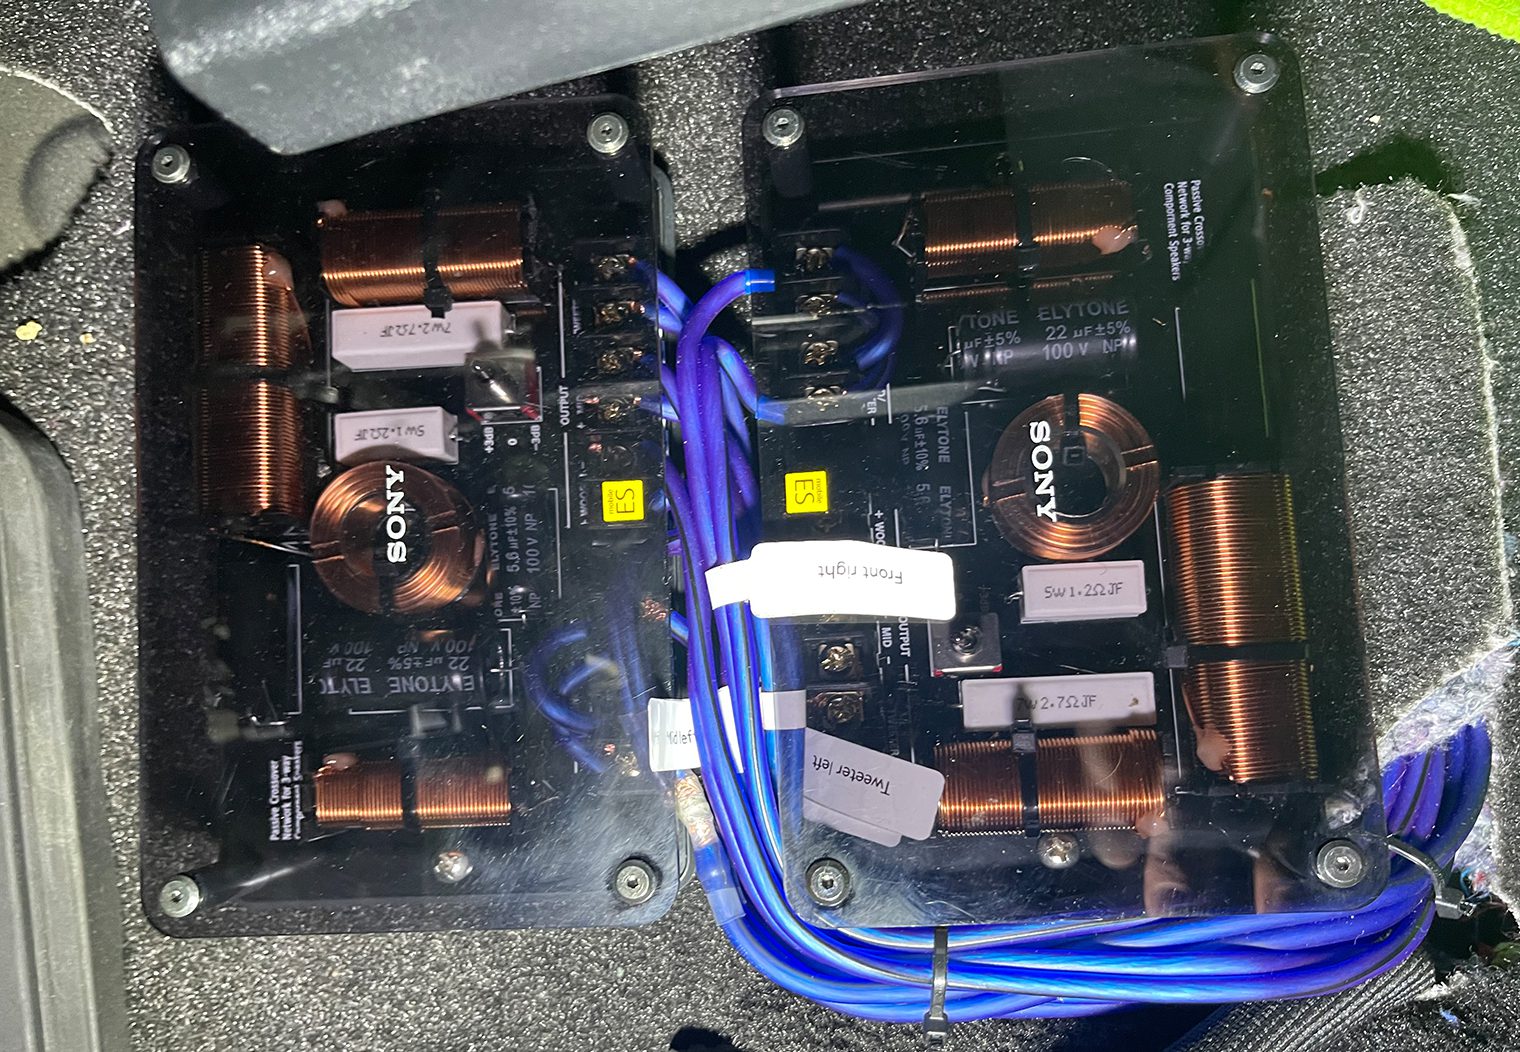
I split off the various wires that all connected to the front 3-way speakers' crossovers that I installed underneath the driver's seat. I chose under the seat because:
- It was the closest location that I could find that would fit both crossovers while simplifying and shortening the required amount of wire.
- They fit perfectly underneath the frame of the seat. Even when the seat was all the way lowered, no clearance issues.
- They're very well hidden under there. The only way you'd notice is if you're vacuuming under the seats.
- There was a pre-existing channel for wire that made it easy for me to wire from the door frame area to the exact area I chose to install the crossovers.
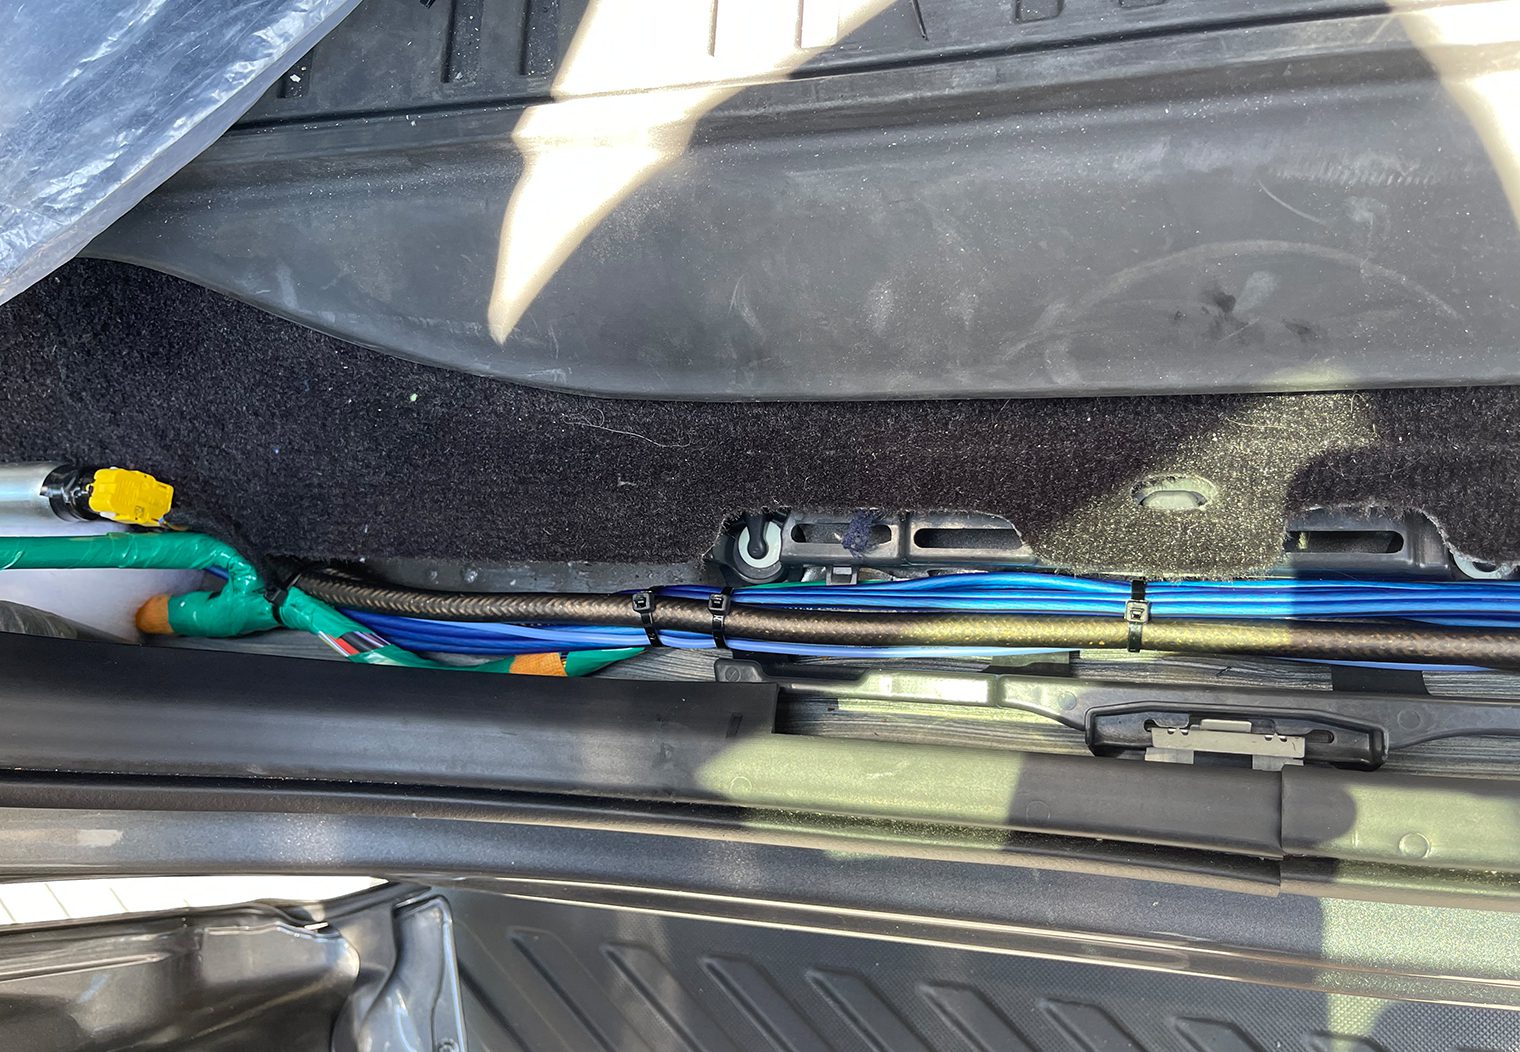
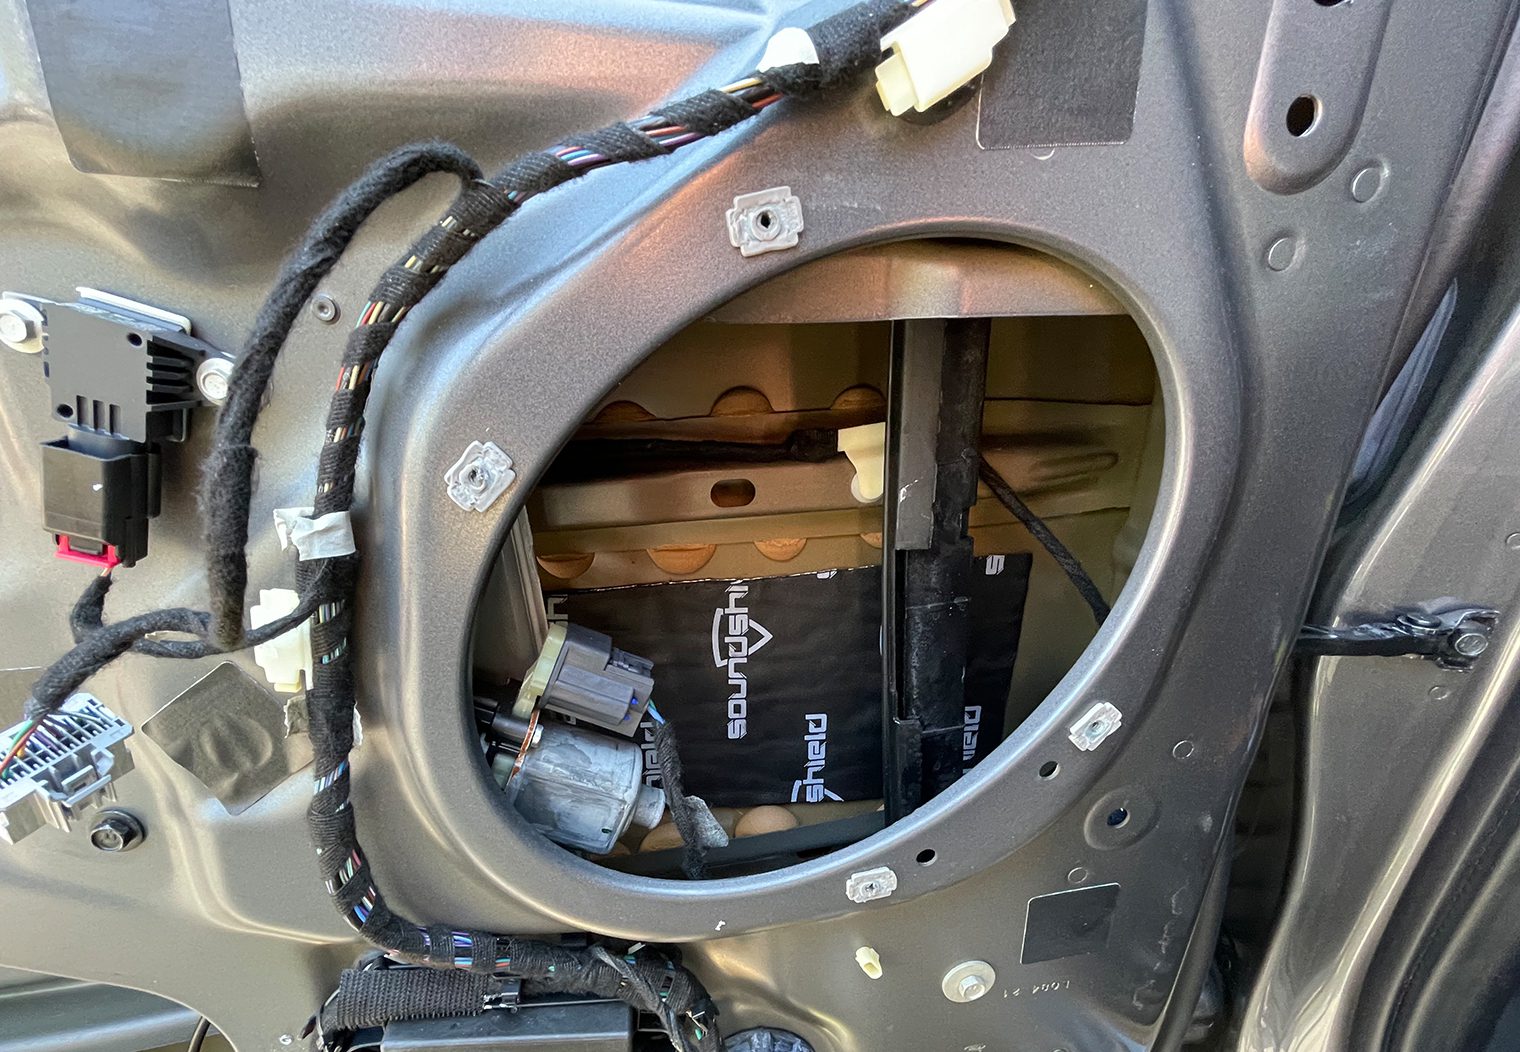
Moving from the front of the truck to the rear, I ran the remaining speaker and RCA signal wire along the driver side of the truck to where I planned to install my amplifier racks. No issues with any clearances or anything along the way. It was almost like Ford expected bulky wiring to be ran along the doors. I simply pulled off the trim along the floor and rear side trim panel and wired everything directly through to where the amps were to be placed. Very straight forward.
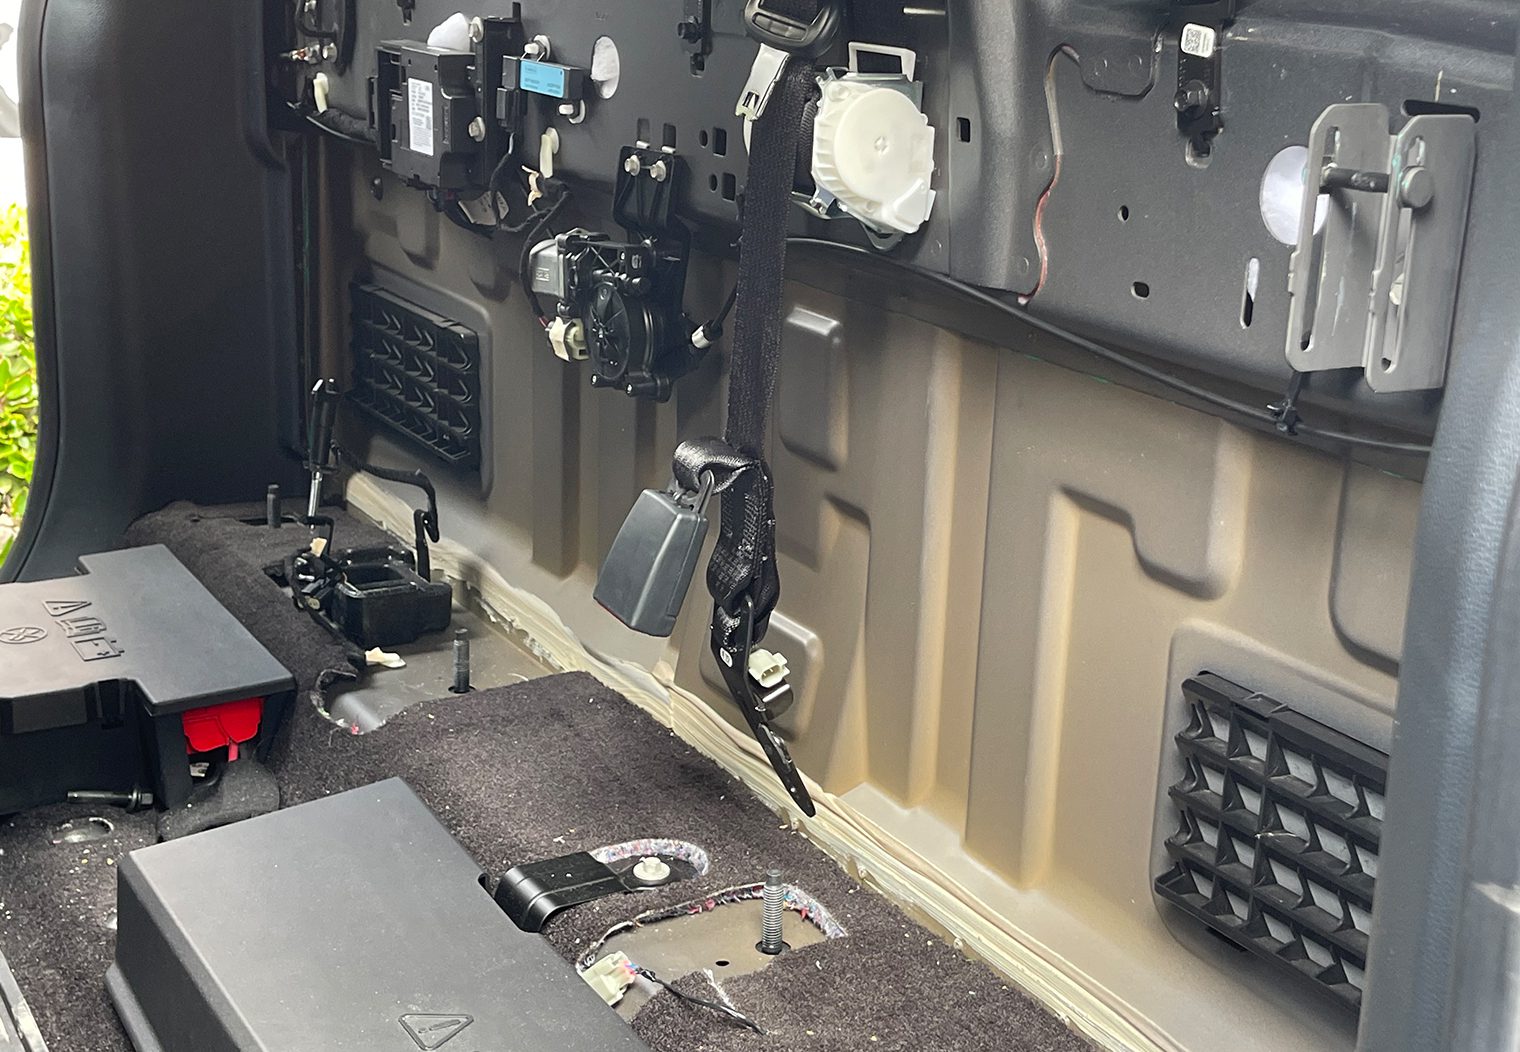
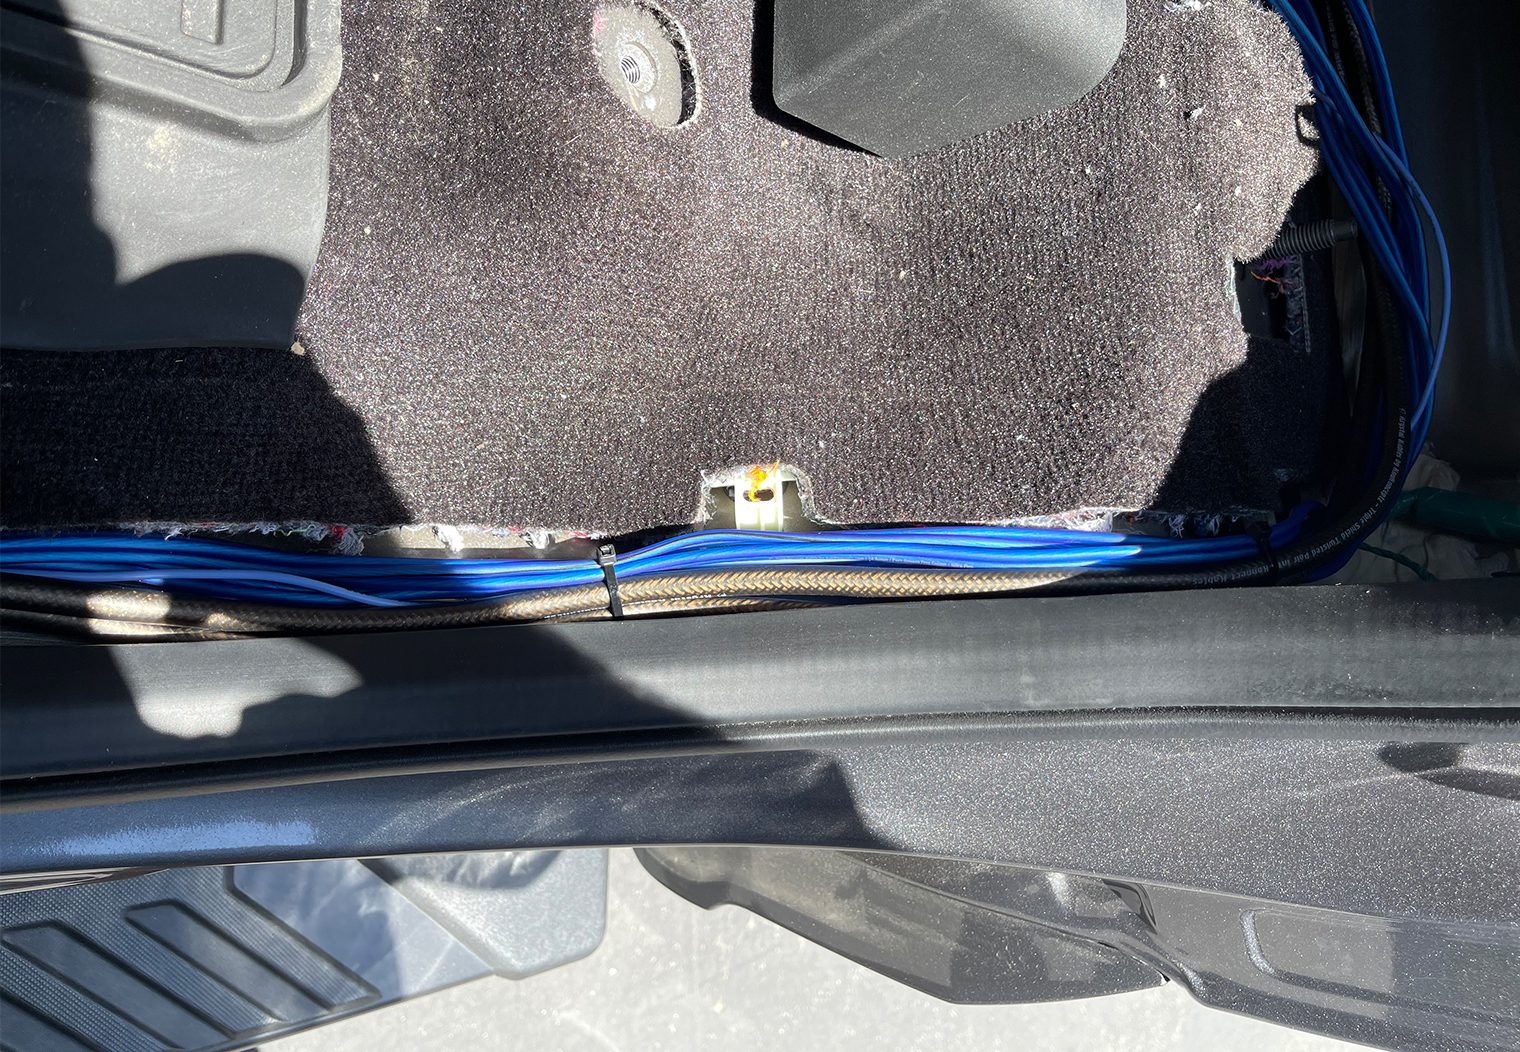
The final product was seamless. You wouldn't know there were 8-10 wires added alongside the existing harness in the door areas. The truck had plenty of room for the added wire and the trim panels fit back without any clearance issues.
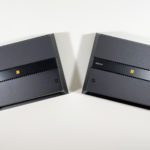
Installing the Amplifier Rack
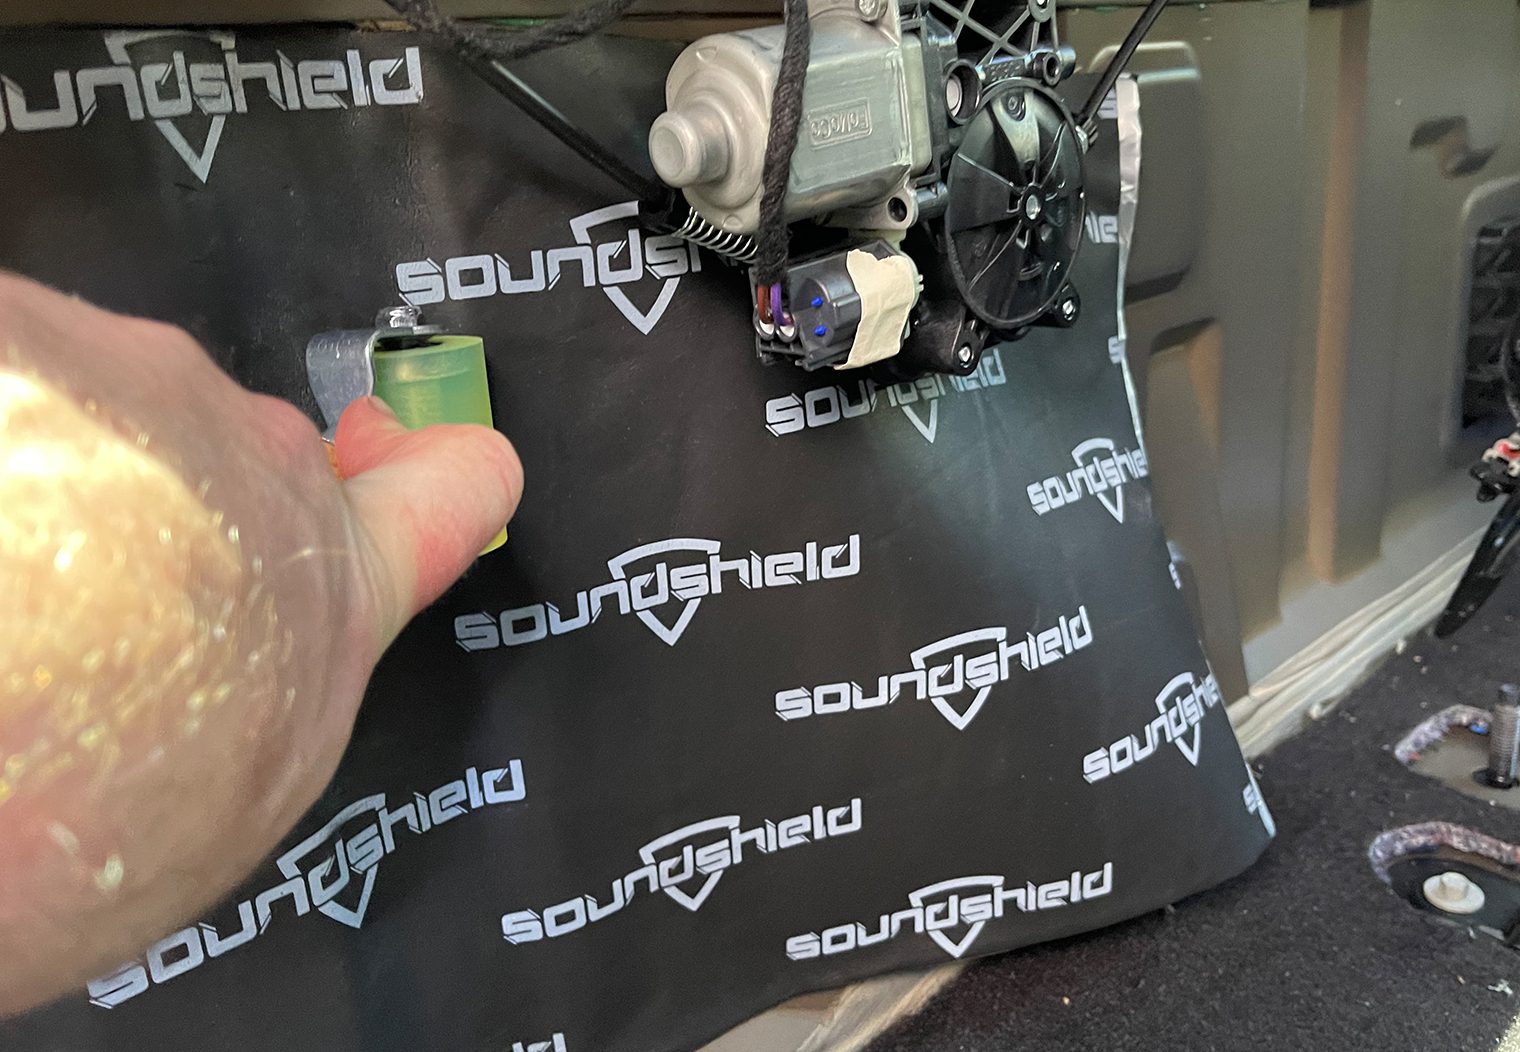
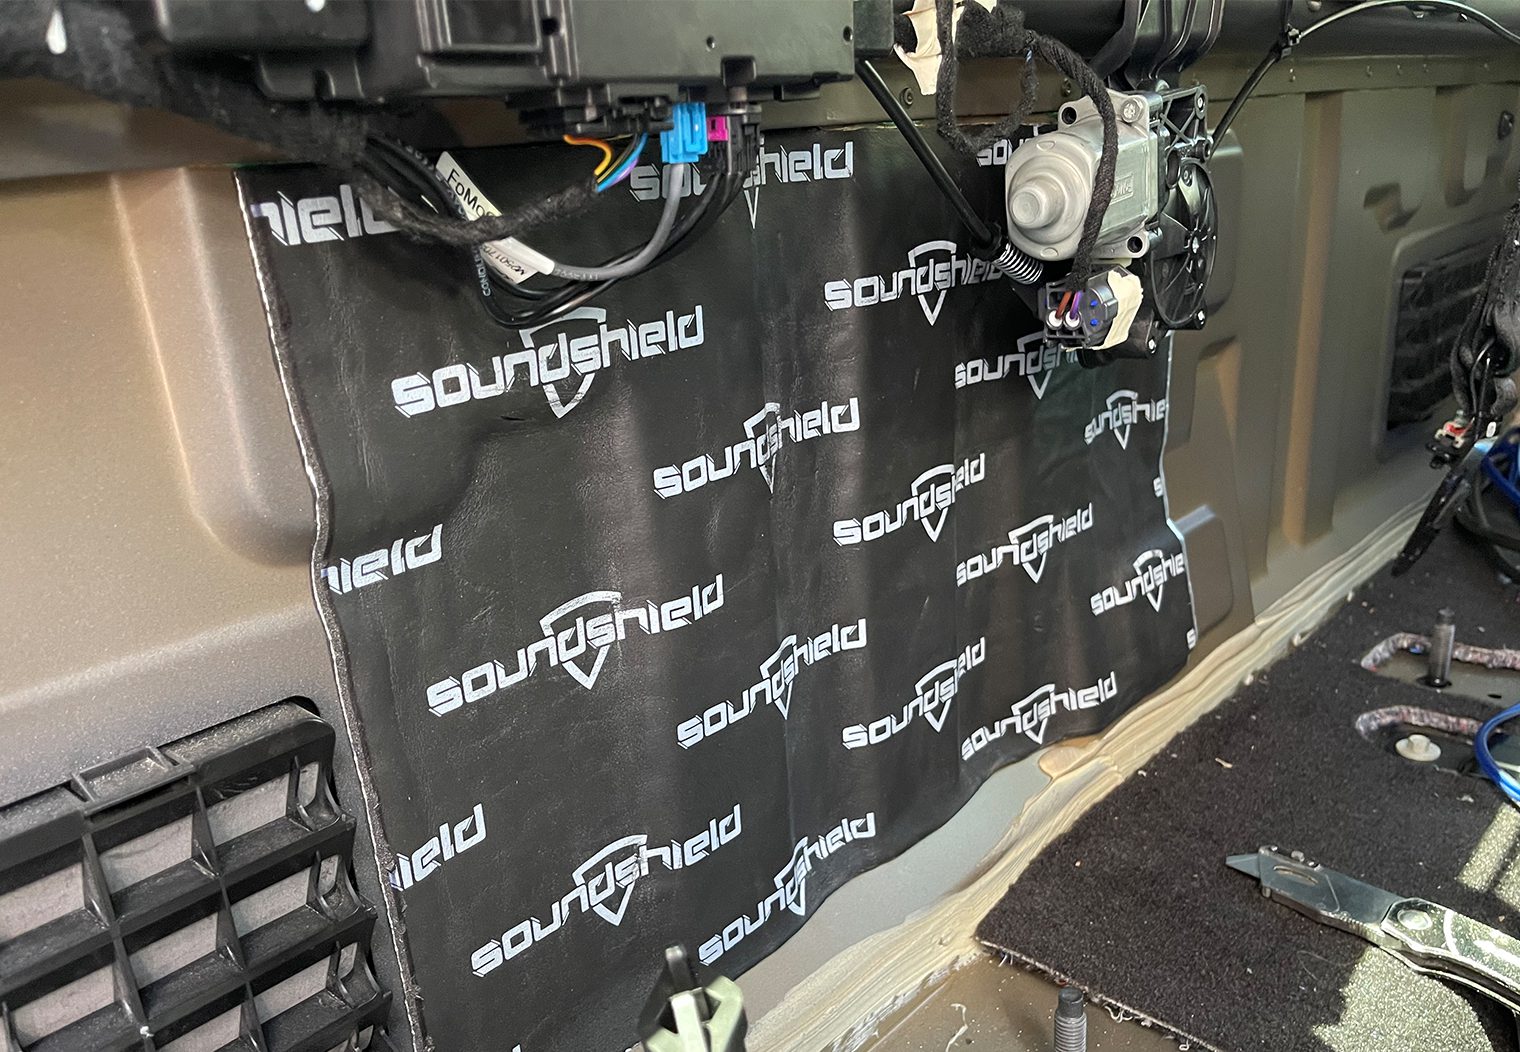
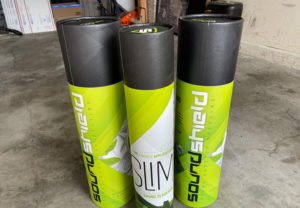
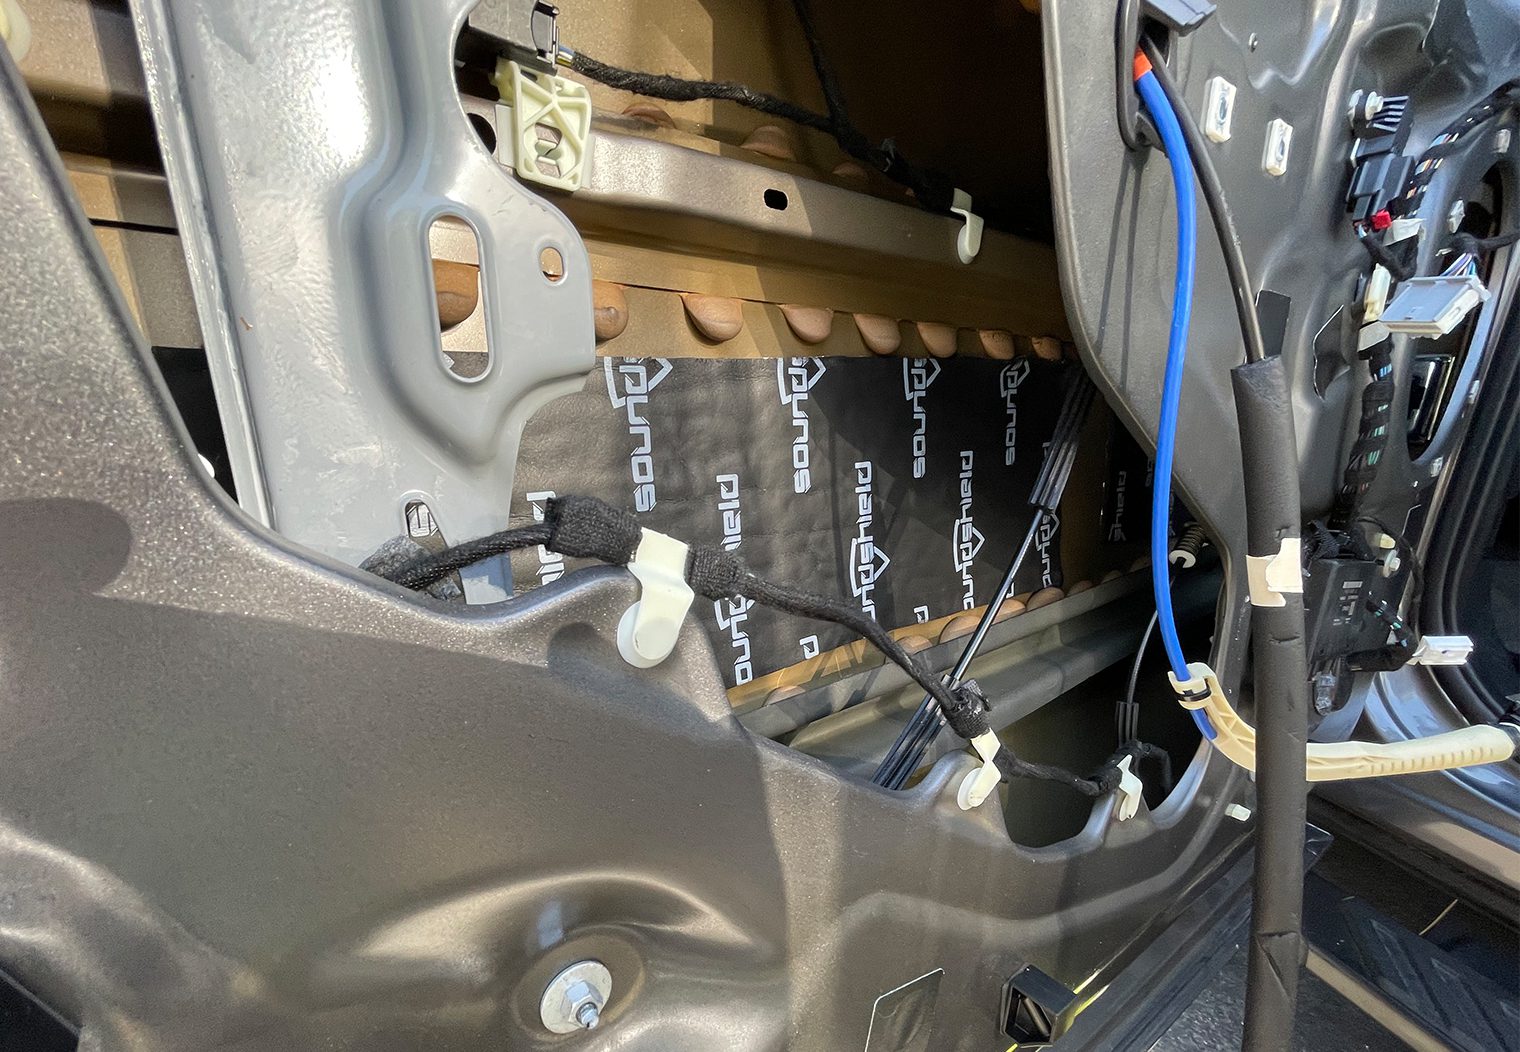
Prior to installing the amp rack and wrapping up the final wire measurements/cuts, I chose to deaden the rear panel a little bit. This would limit some of the resonance and vibrations that might come from the subwoofer that was going to be installed under the rear seat. I used SoundShield to deaden a large portion of the rear cab wall.
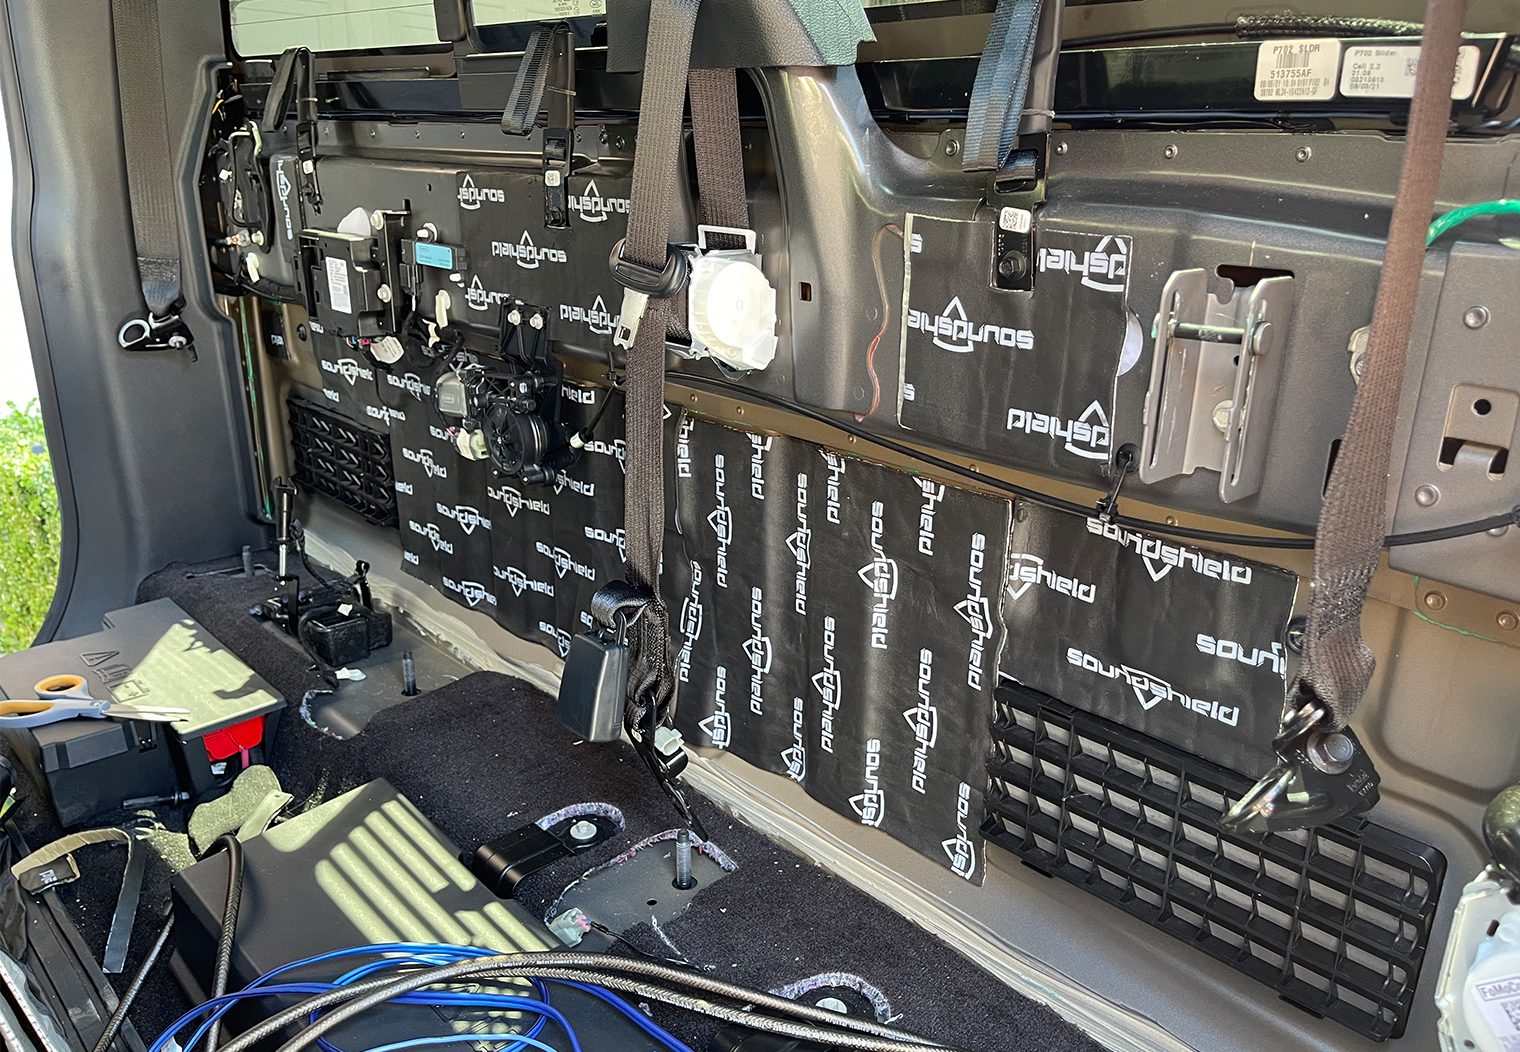
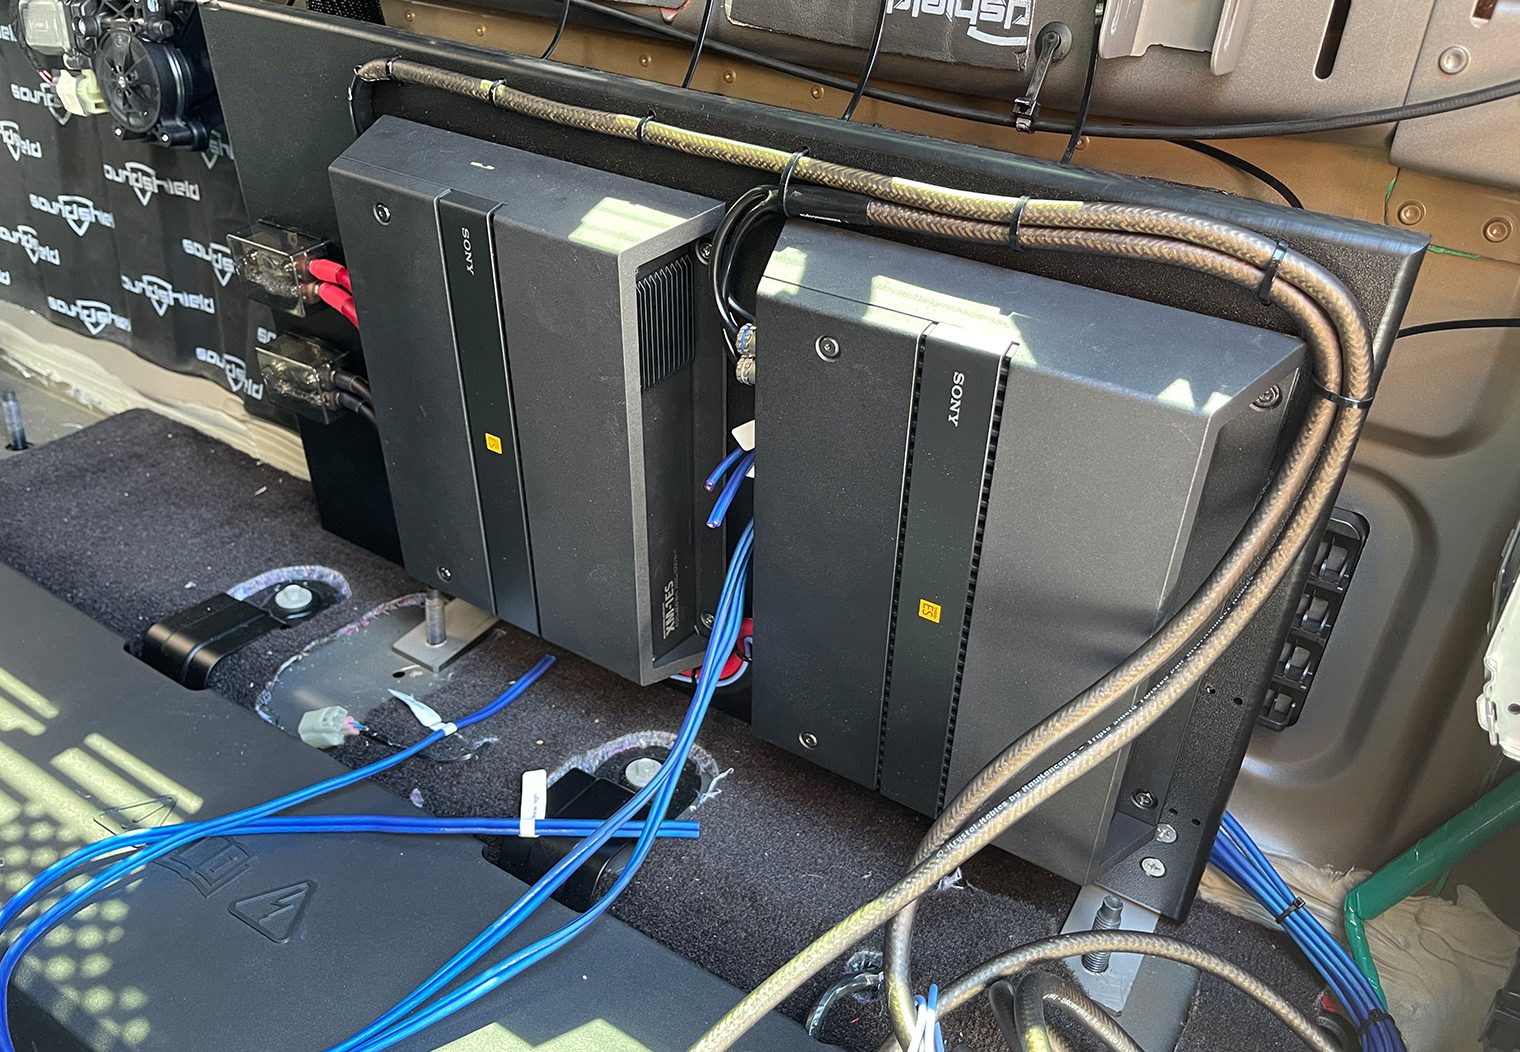
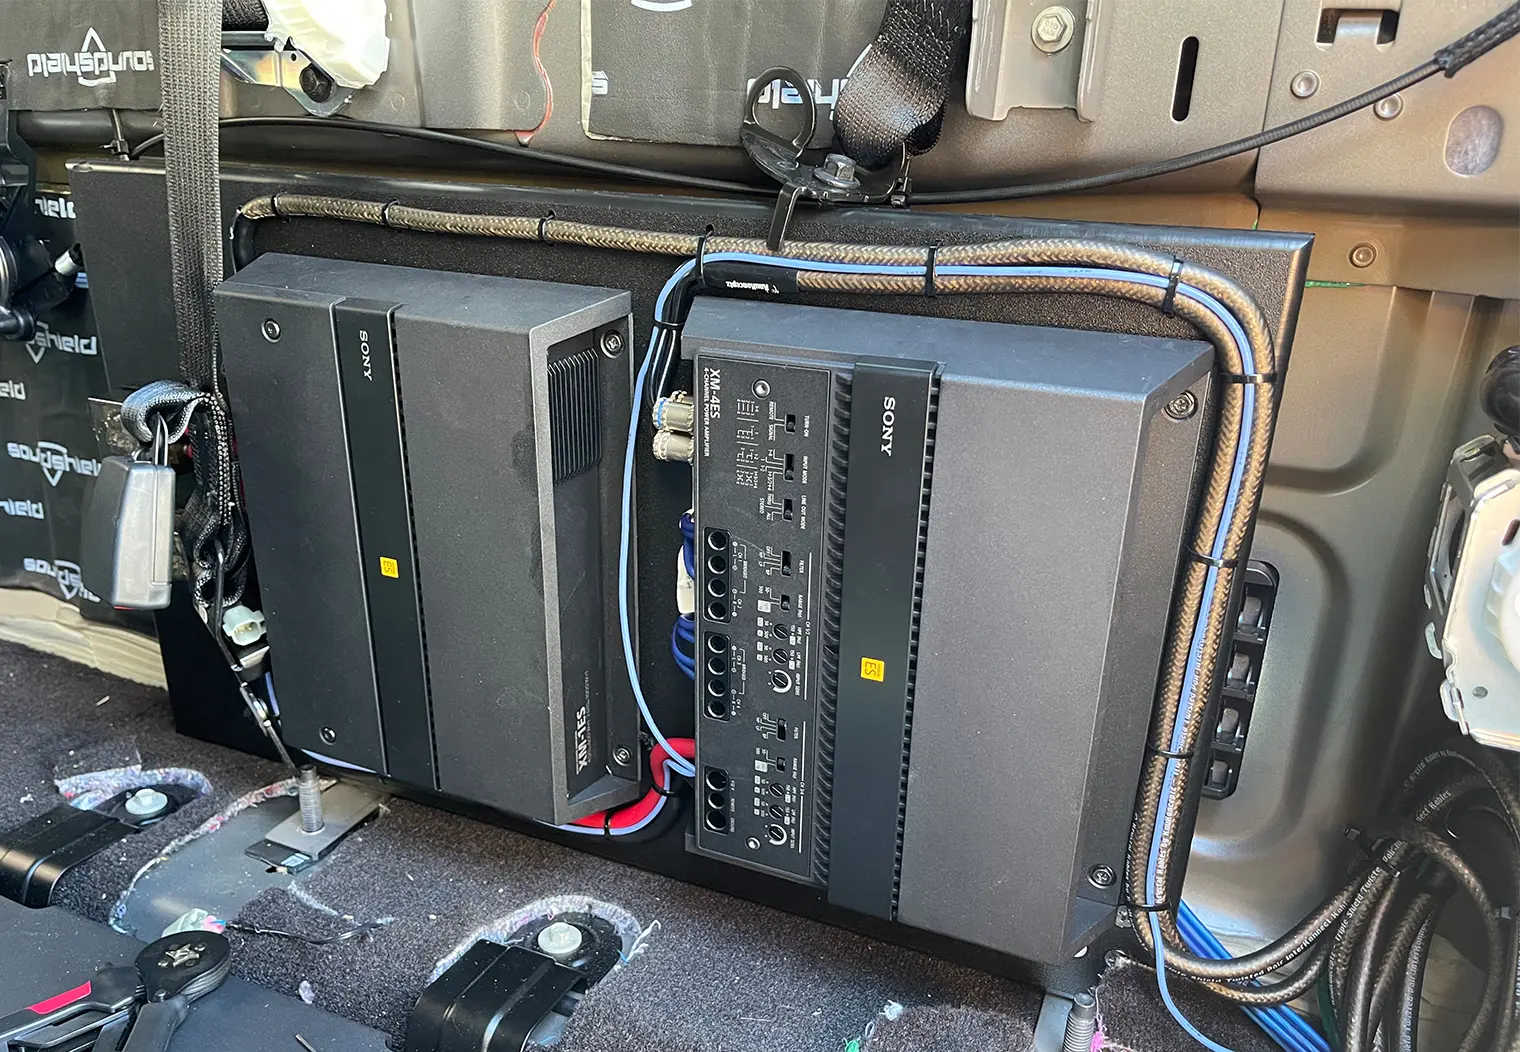
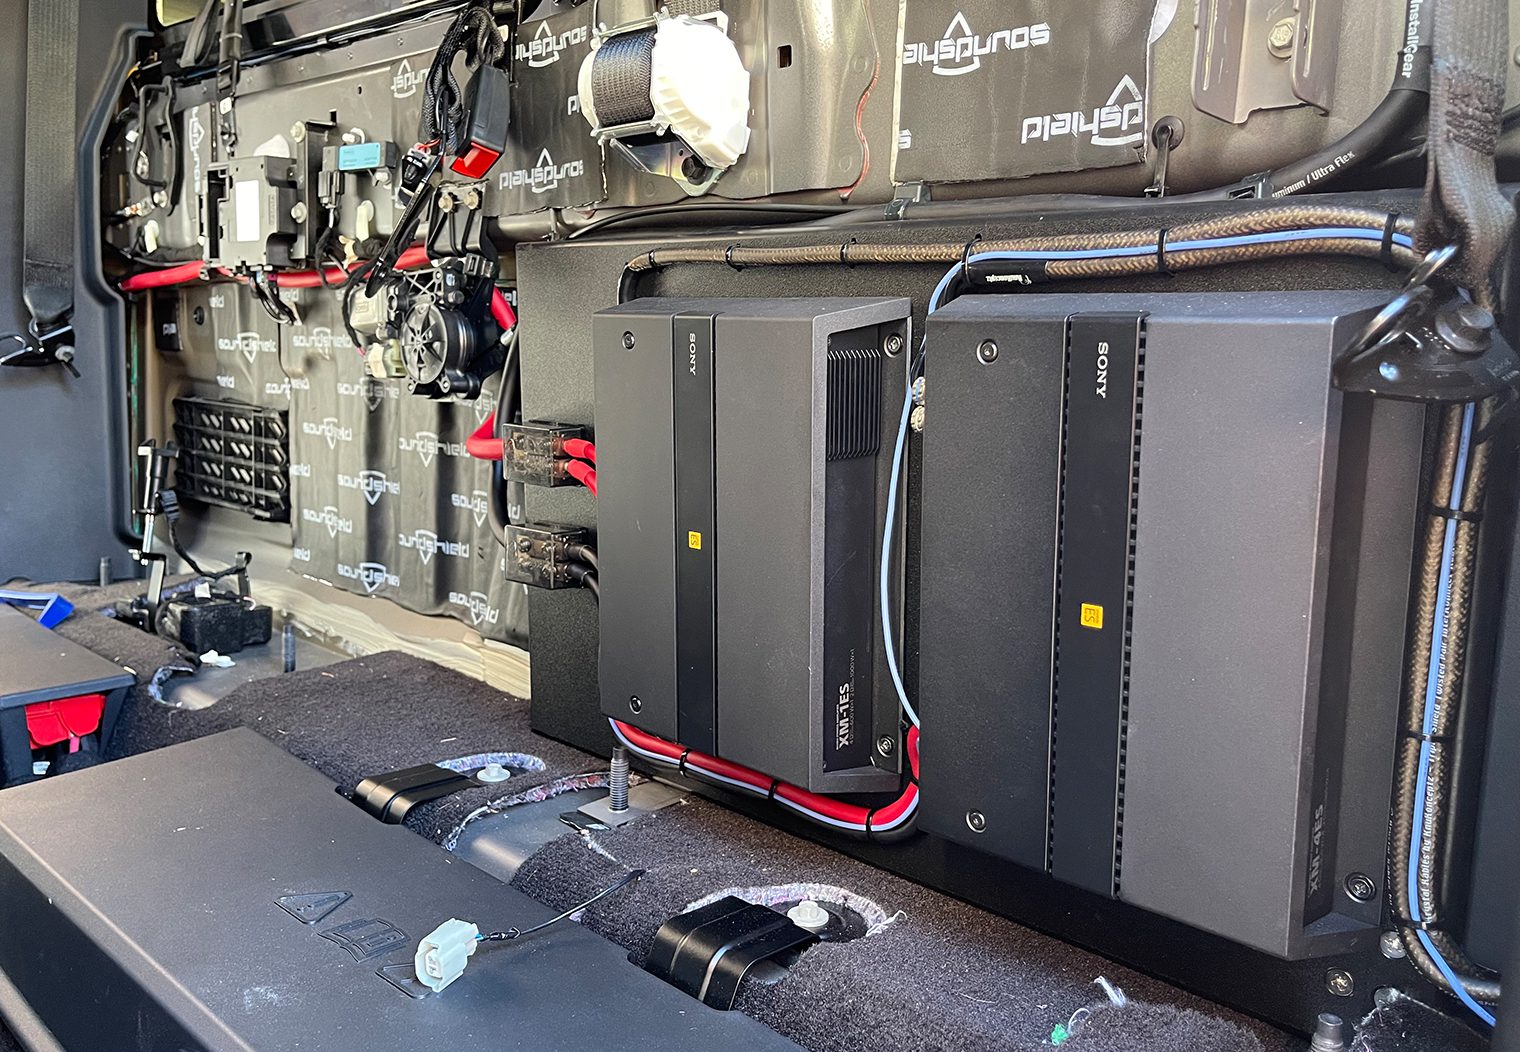
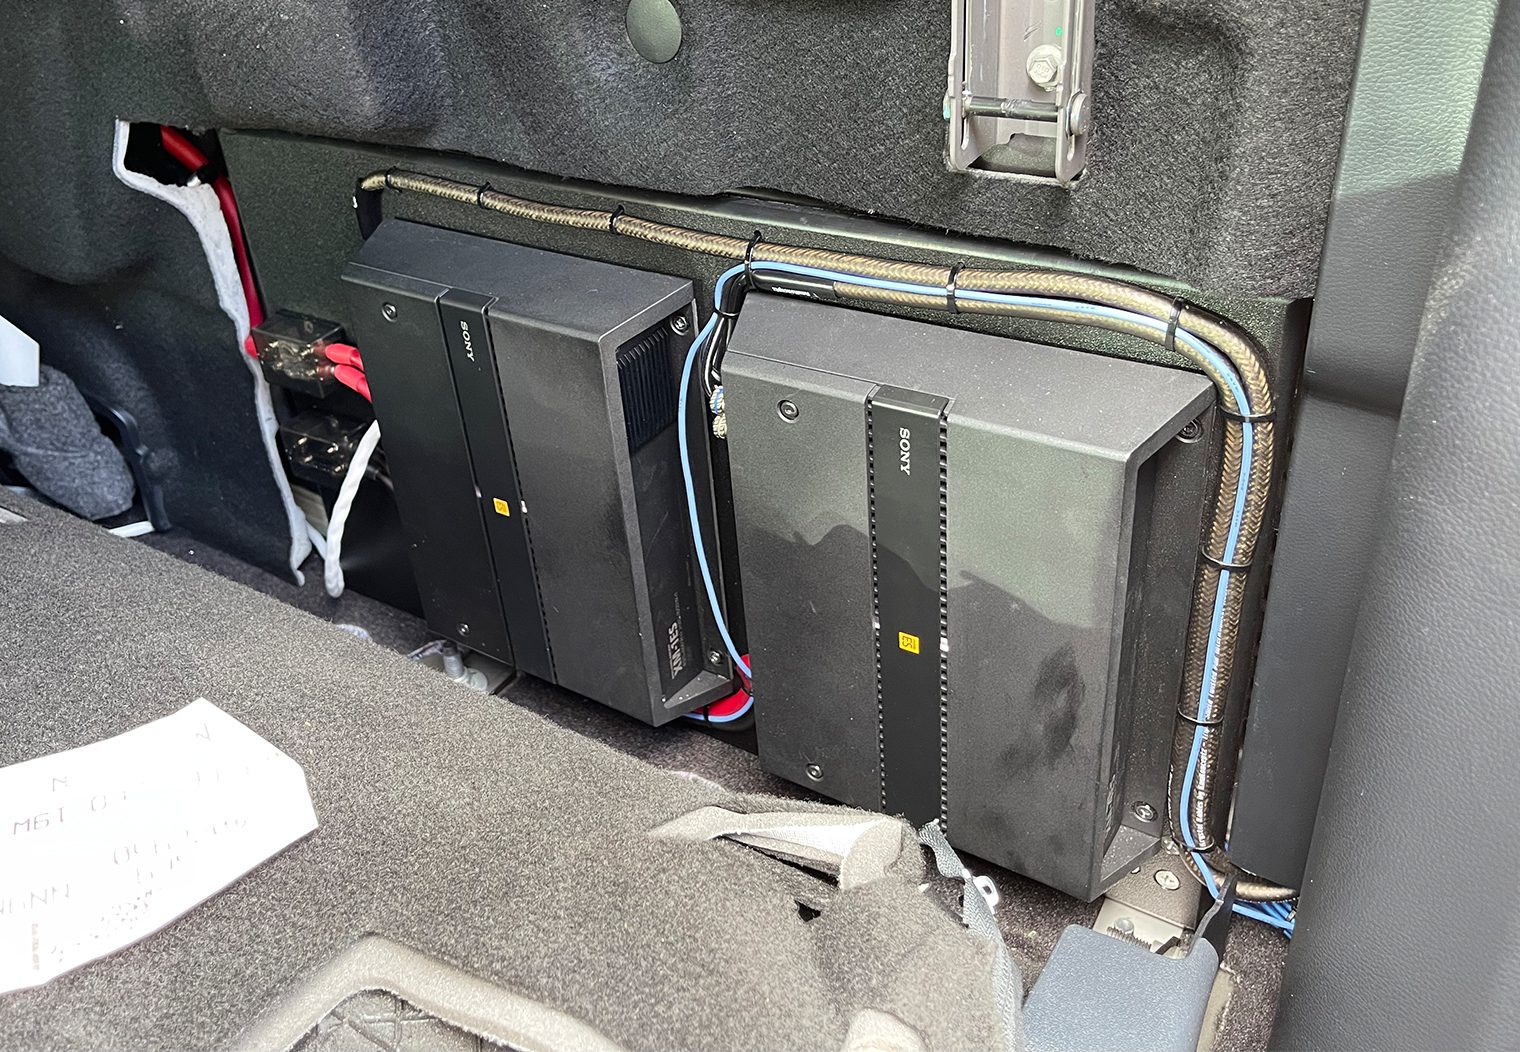
Once deadening was in, I temporarily installed the amplifier rack. This allowed me to do final measurements for all of the speaker output wire and also tuck away any excess RCA wire after securing it along the outer edge of amplifier rack (via zip ties).
Running Amplifier Power & Ground
Now that my amplifiers were installed and I knew exactly where the distribution blocks were going to be located, I could start to run the power and ground wires. I chose to run the power along the passenger side, away from all of the signal wire. This was actually a relatively straight forward task. In part 2 of this series, I had already prepped the power wire with some wire loom and high temperature, exterior automotive tape to prepare it for installation along the frame of the truck – along the frame of the truck. I ran the wire through the floor of the cab, down to the truck's frame and then back up to the engine bay.

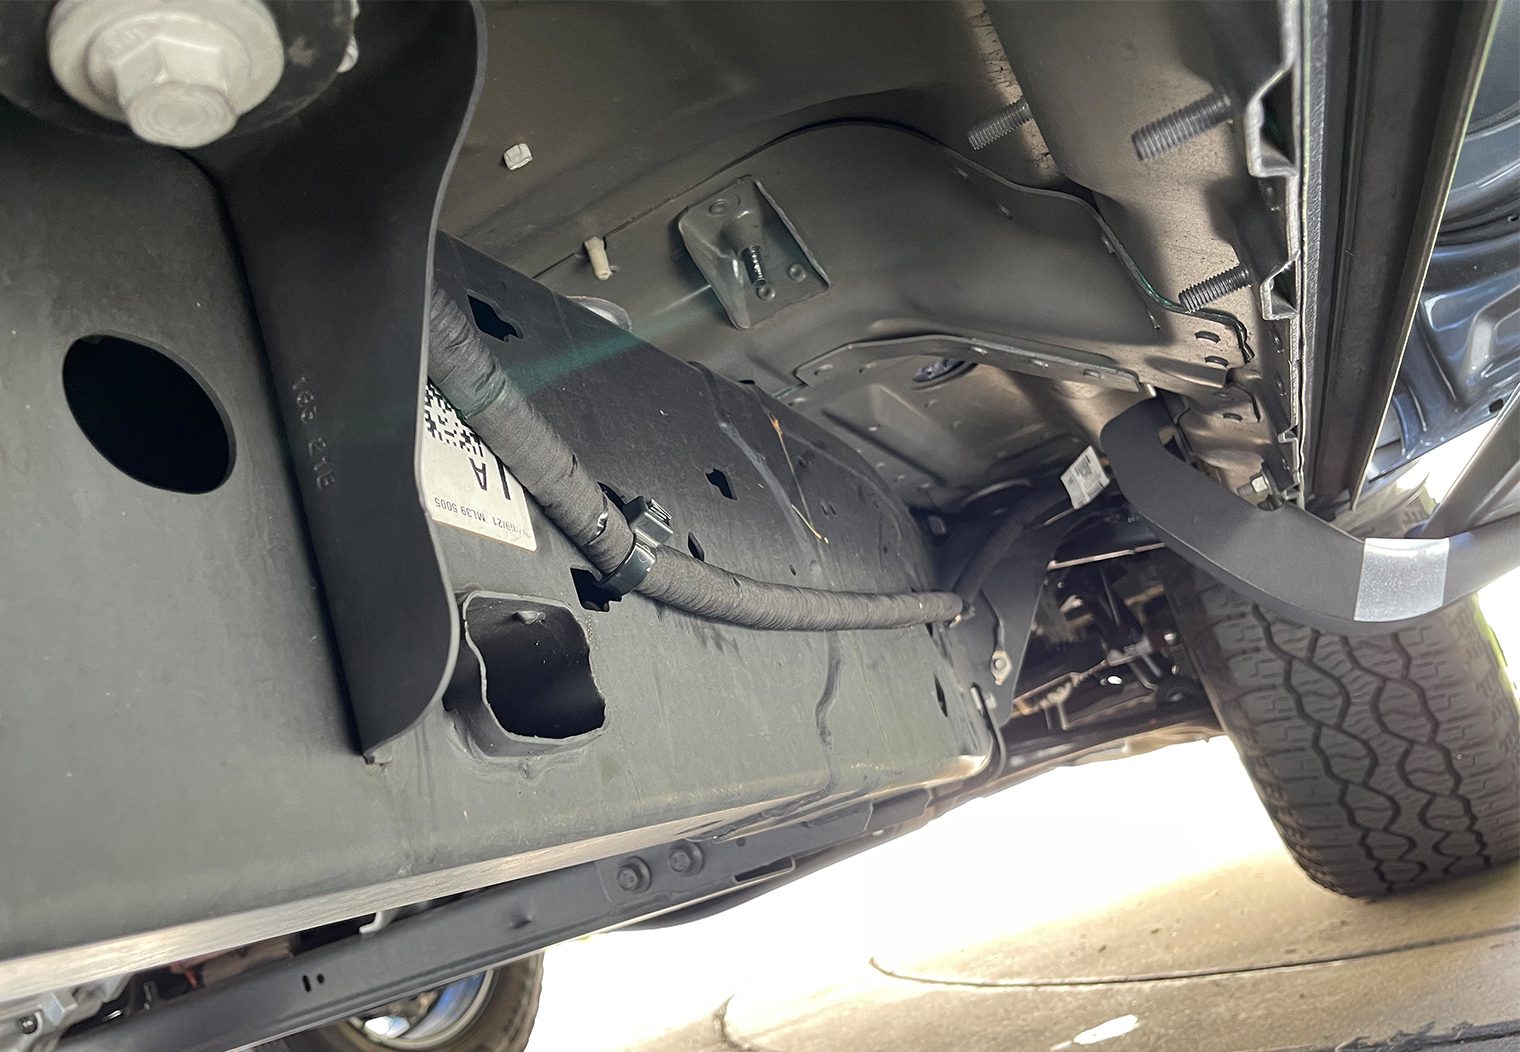
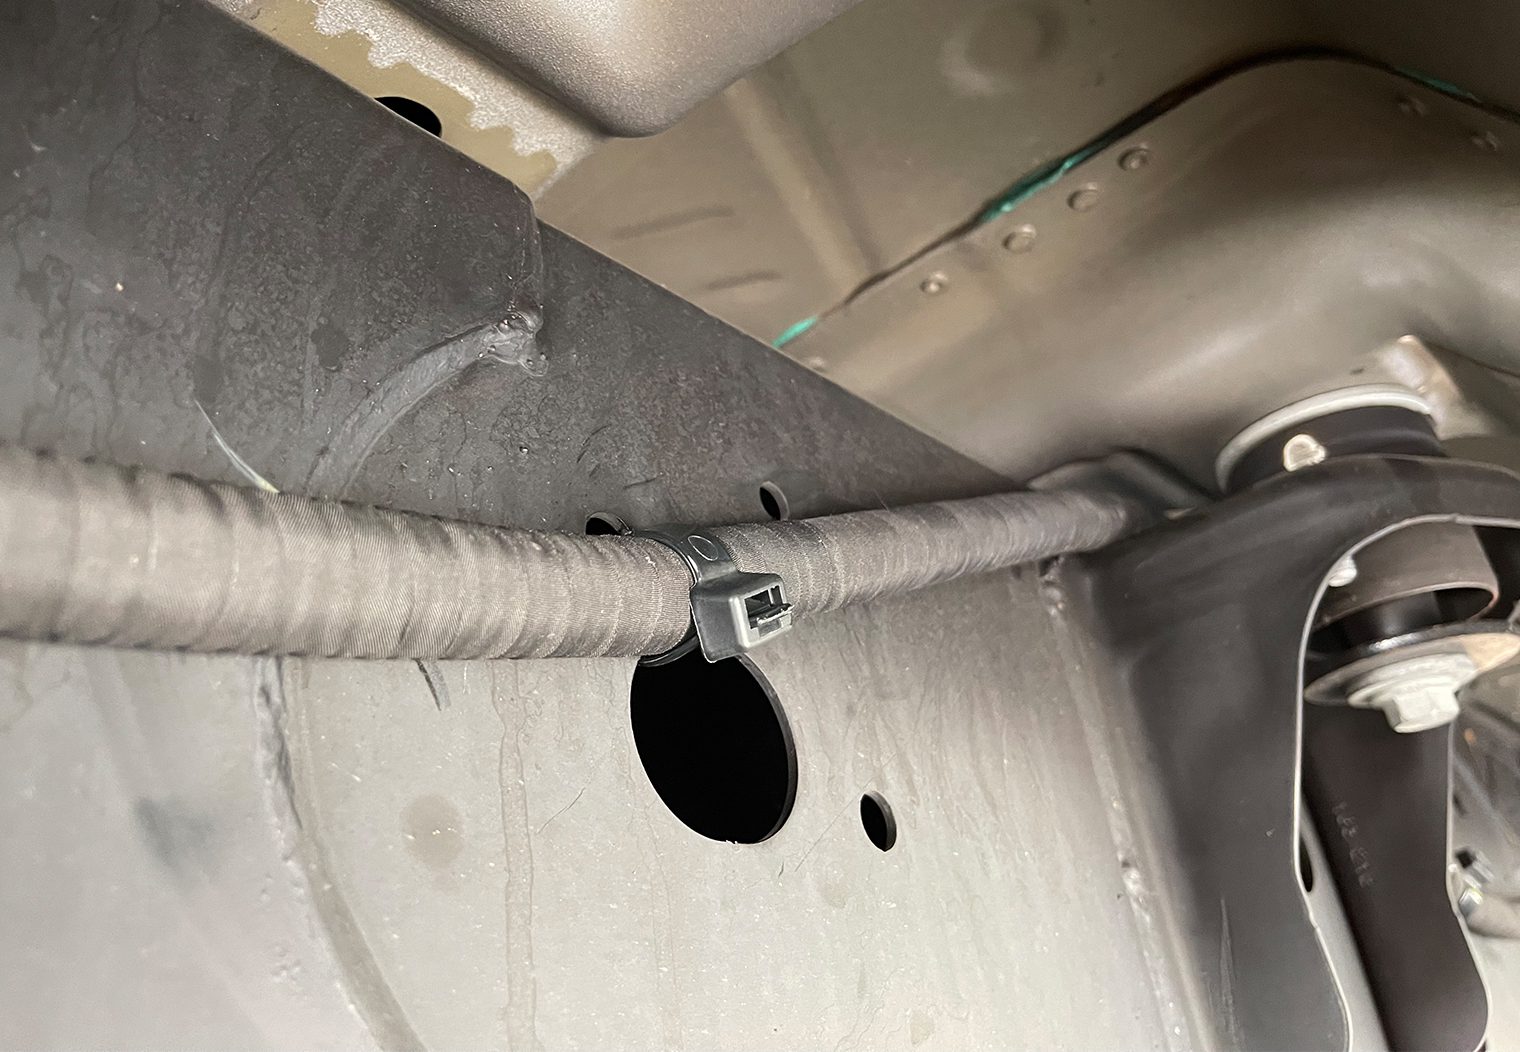
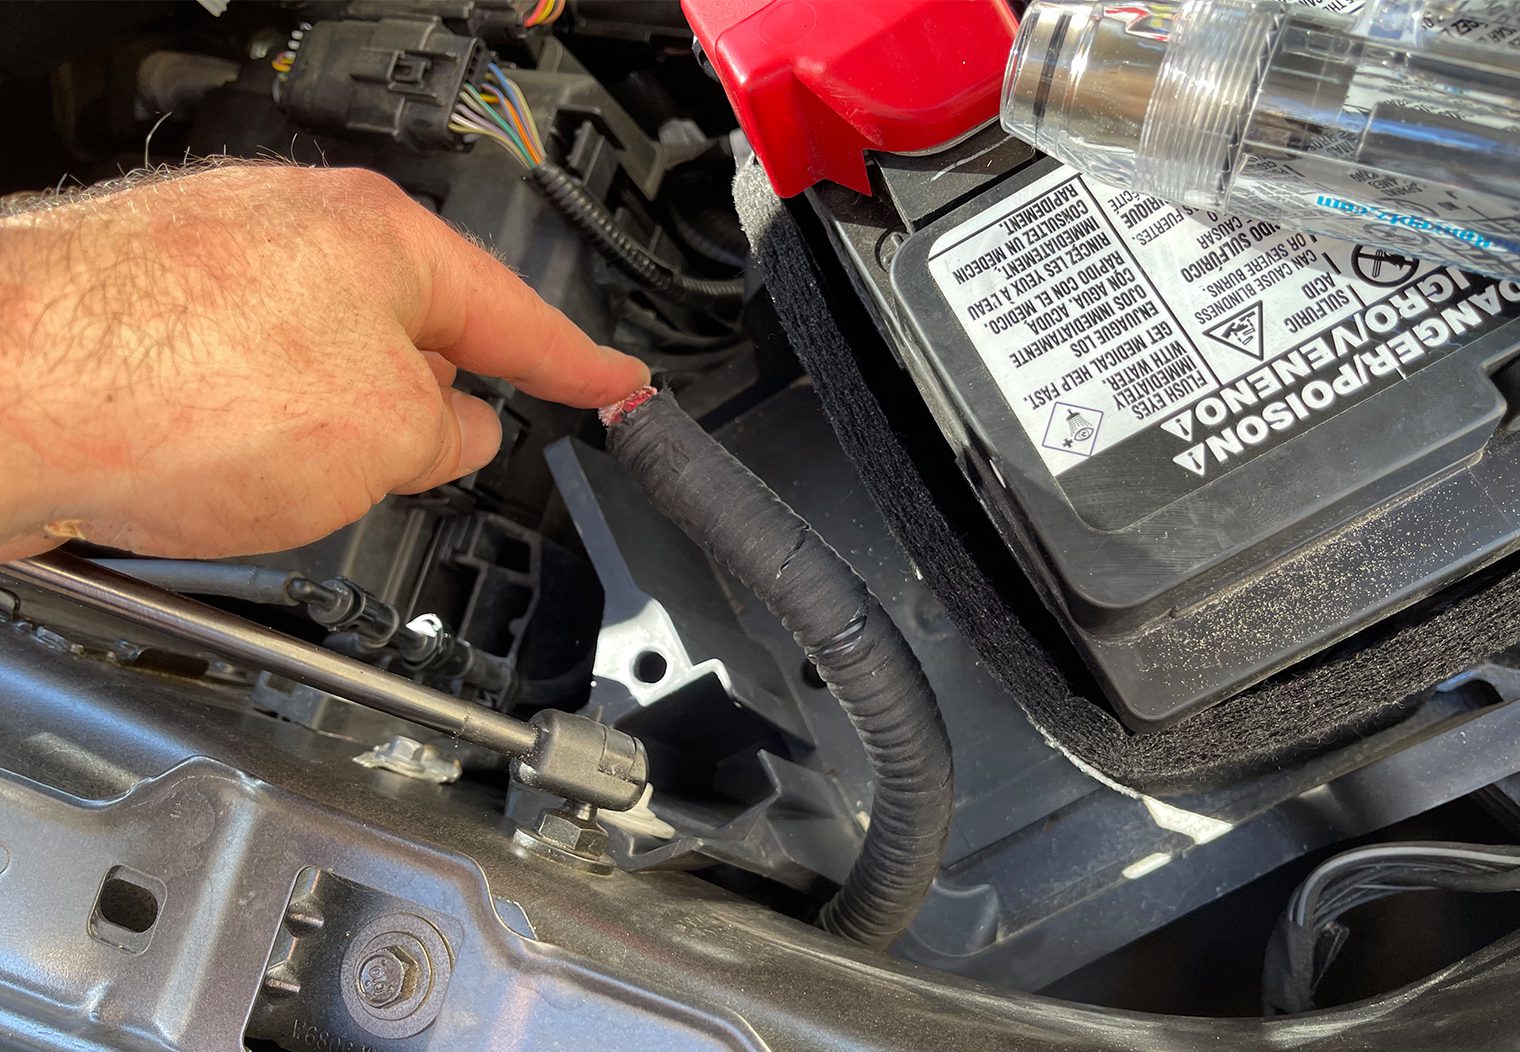
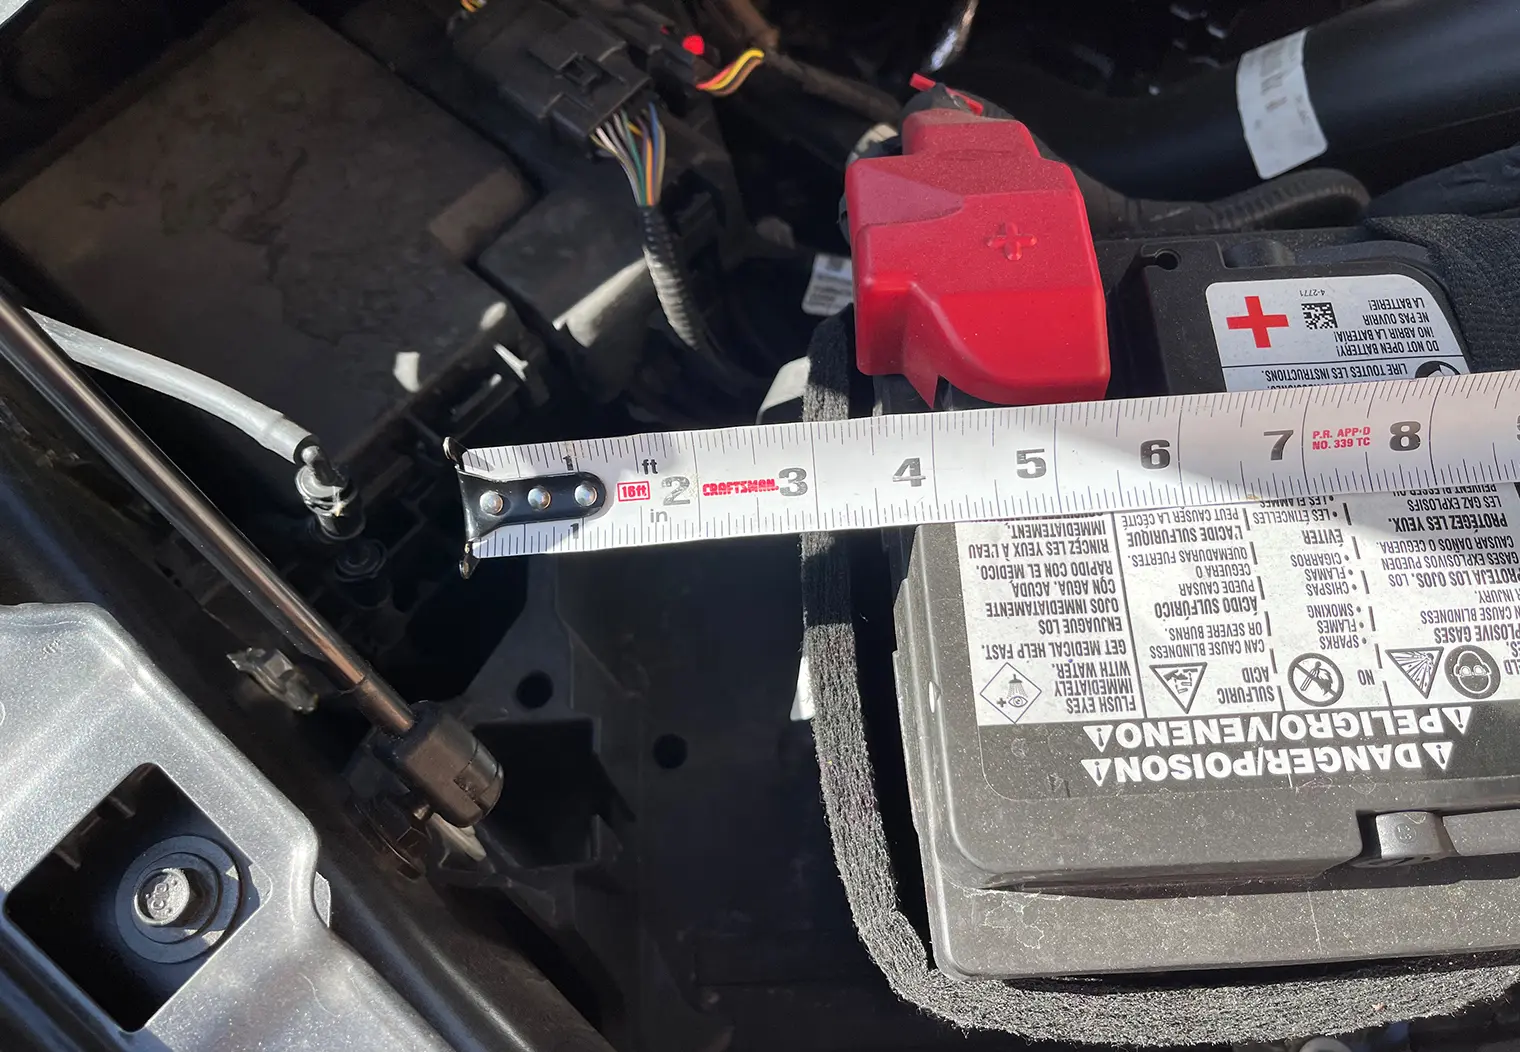
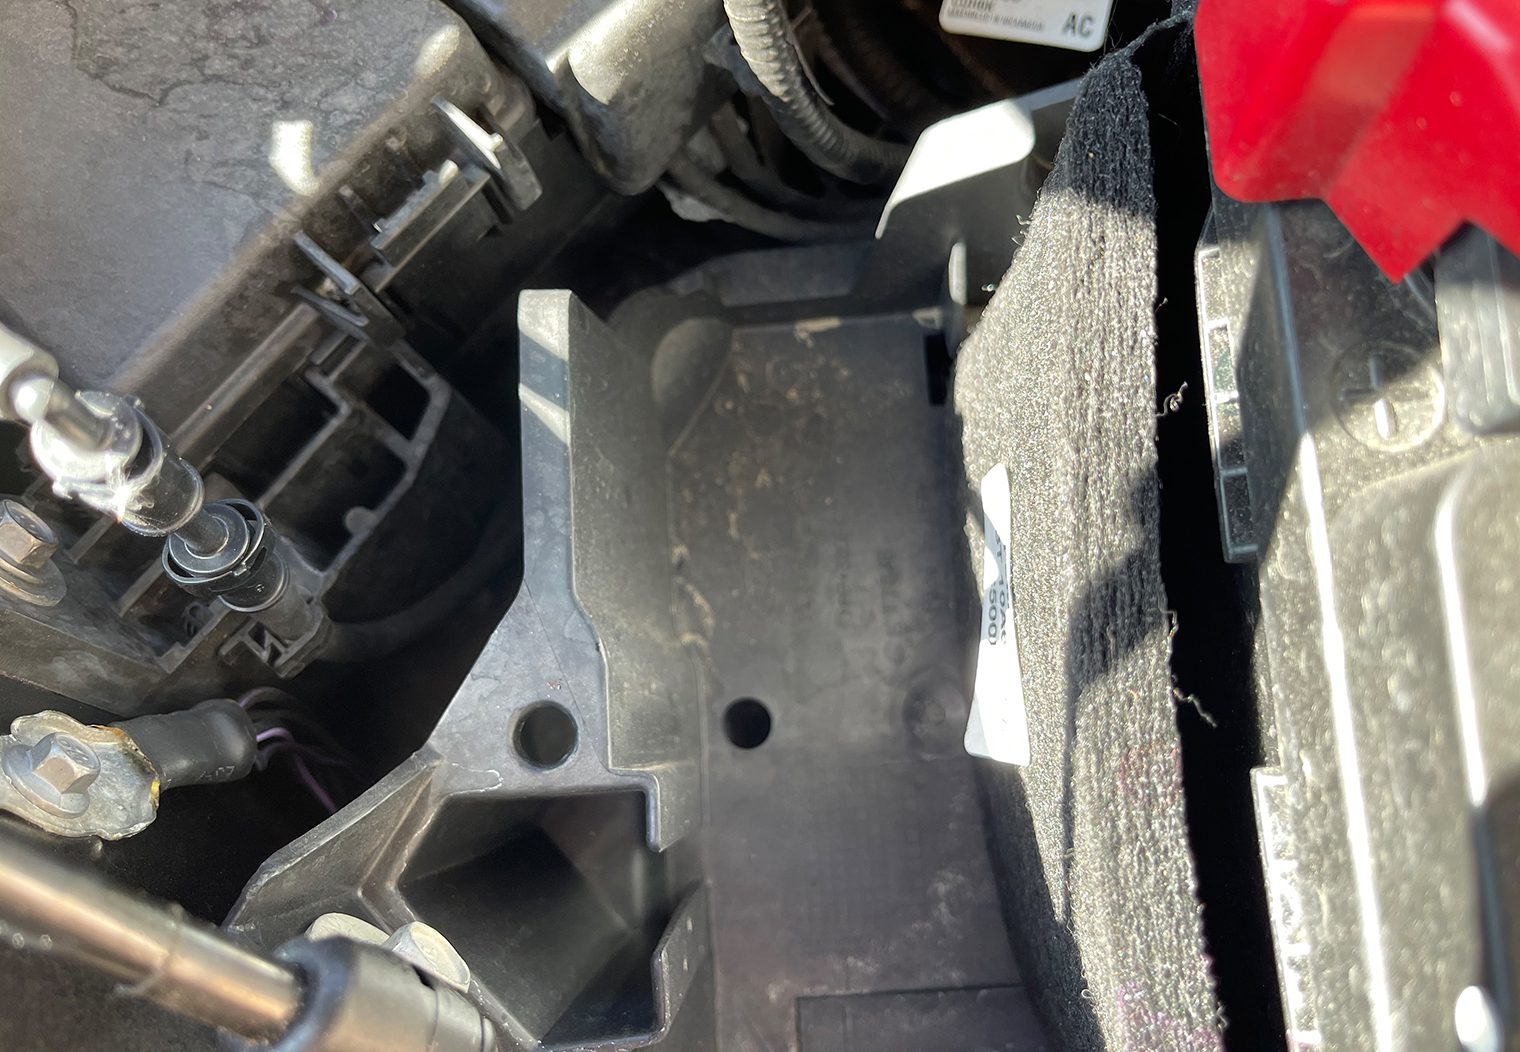
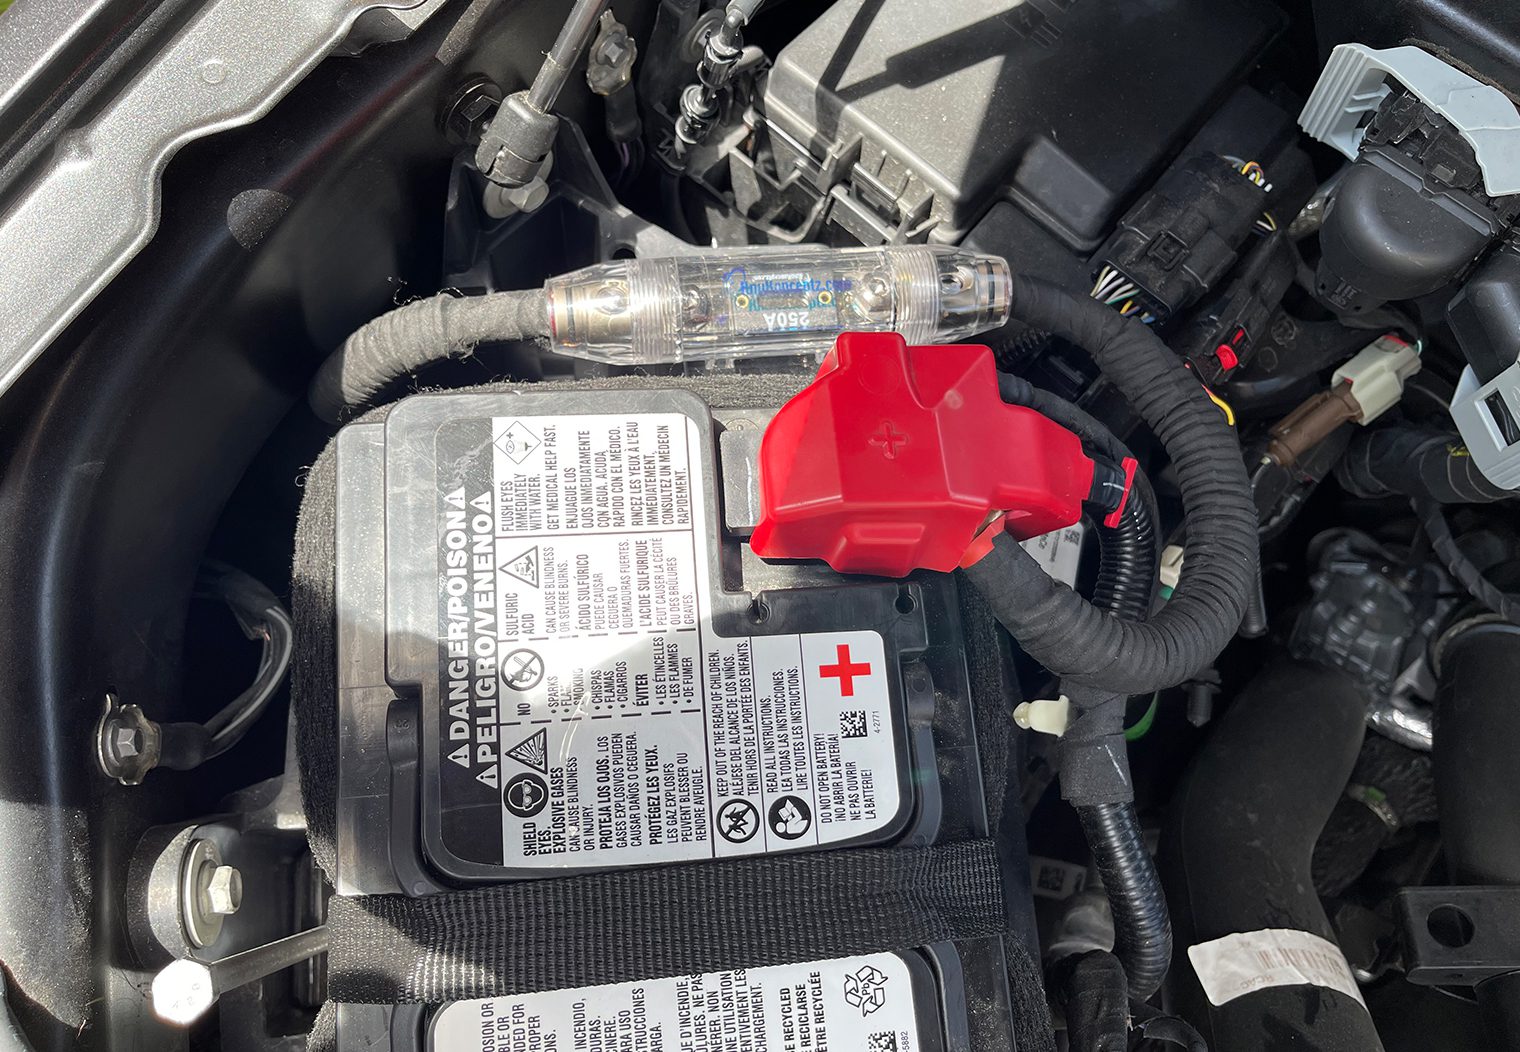
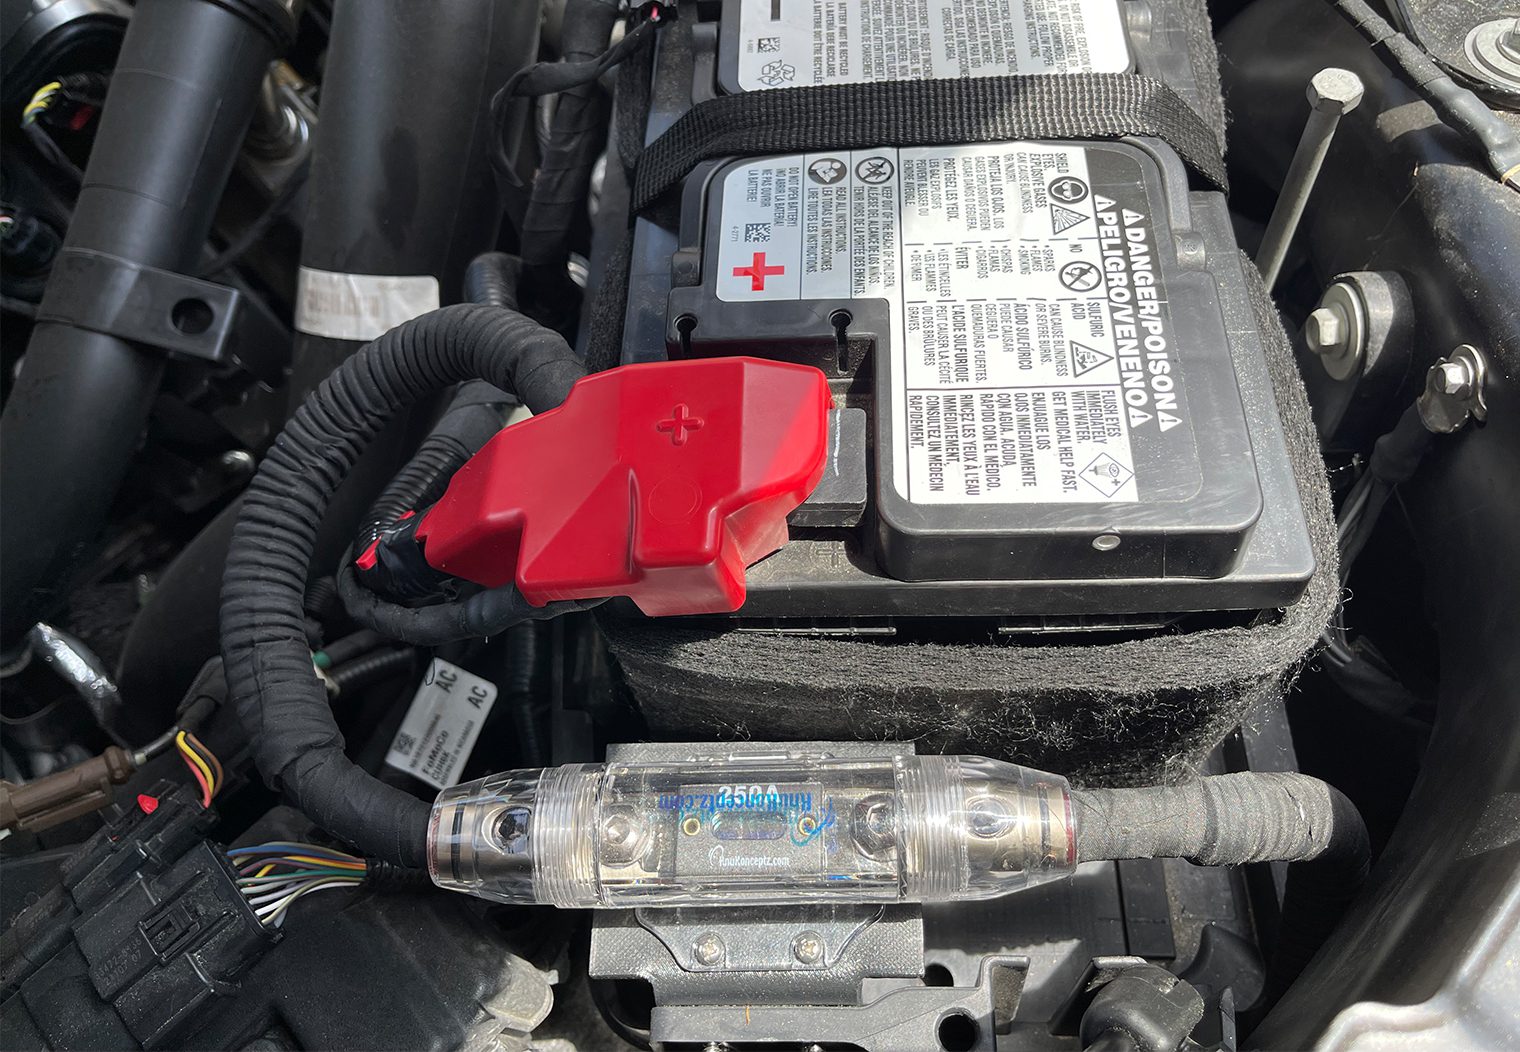
On the far rear passenger side of the cab under the carpet, there's a grommet that allowed me to run the power wire straight down to the underside of the vehicle. From there, I tied it to the frame using heavy duty zip ties (rated at 250lb per!). Once I was near the front of the frame, I ran the wire up and along the inner side of the front passenger wheel well and up through to the engine bay, where I planned to install the custom fuse holder mount that I also created in part 2. I used my custom fuse holder bracket to mount up to the outer-edge of the battery box and ran the power wire to the factory battery terminal.
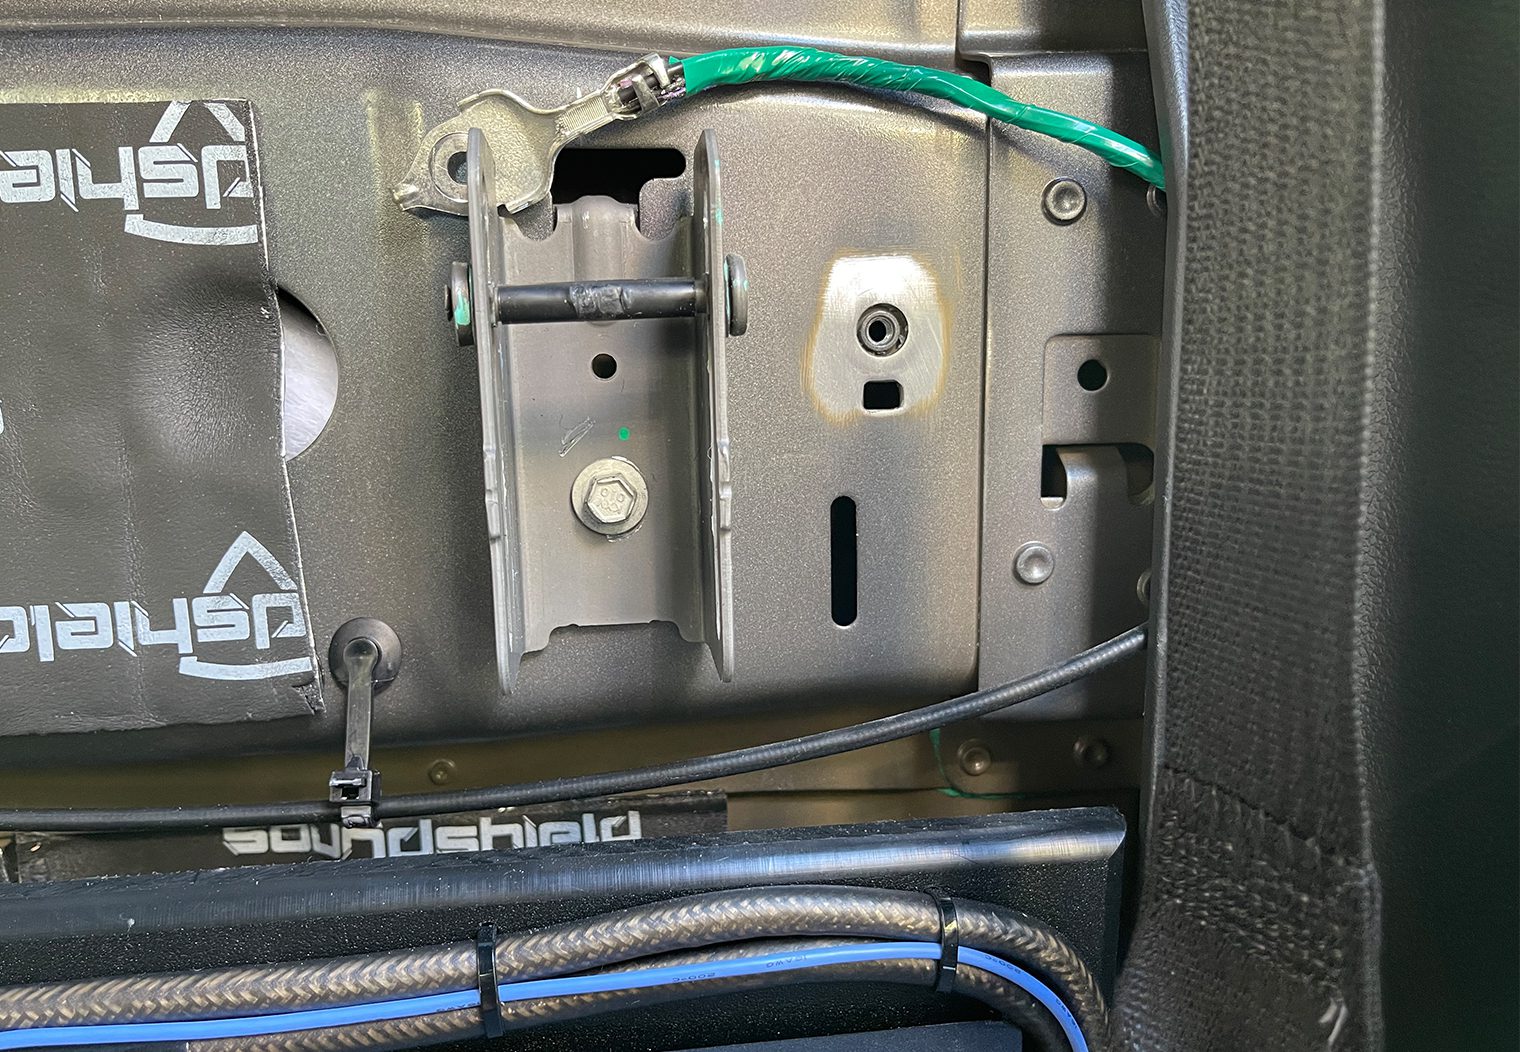
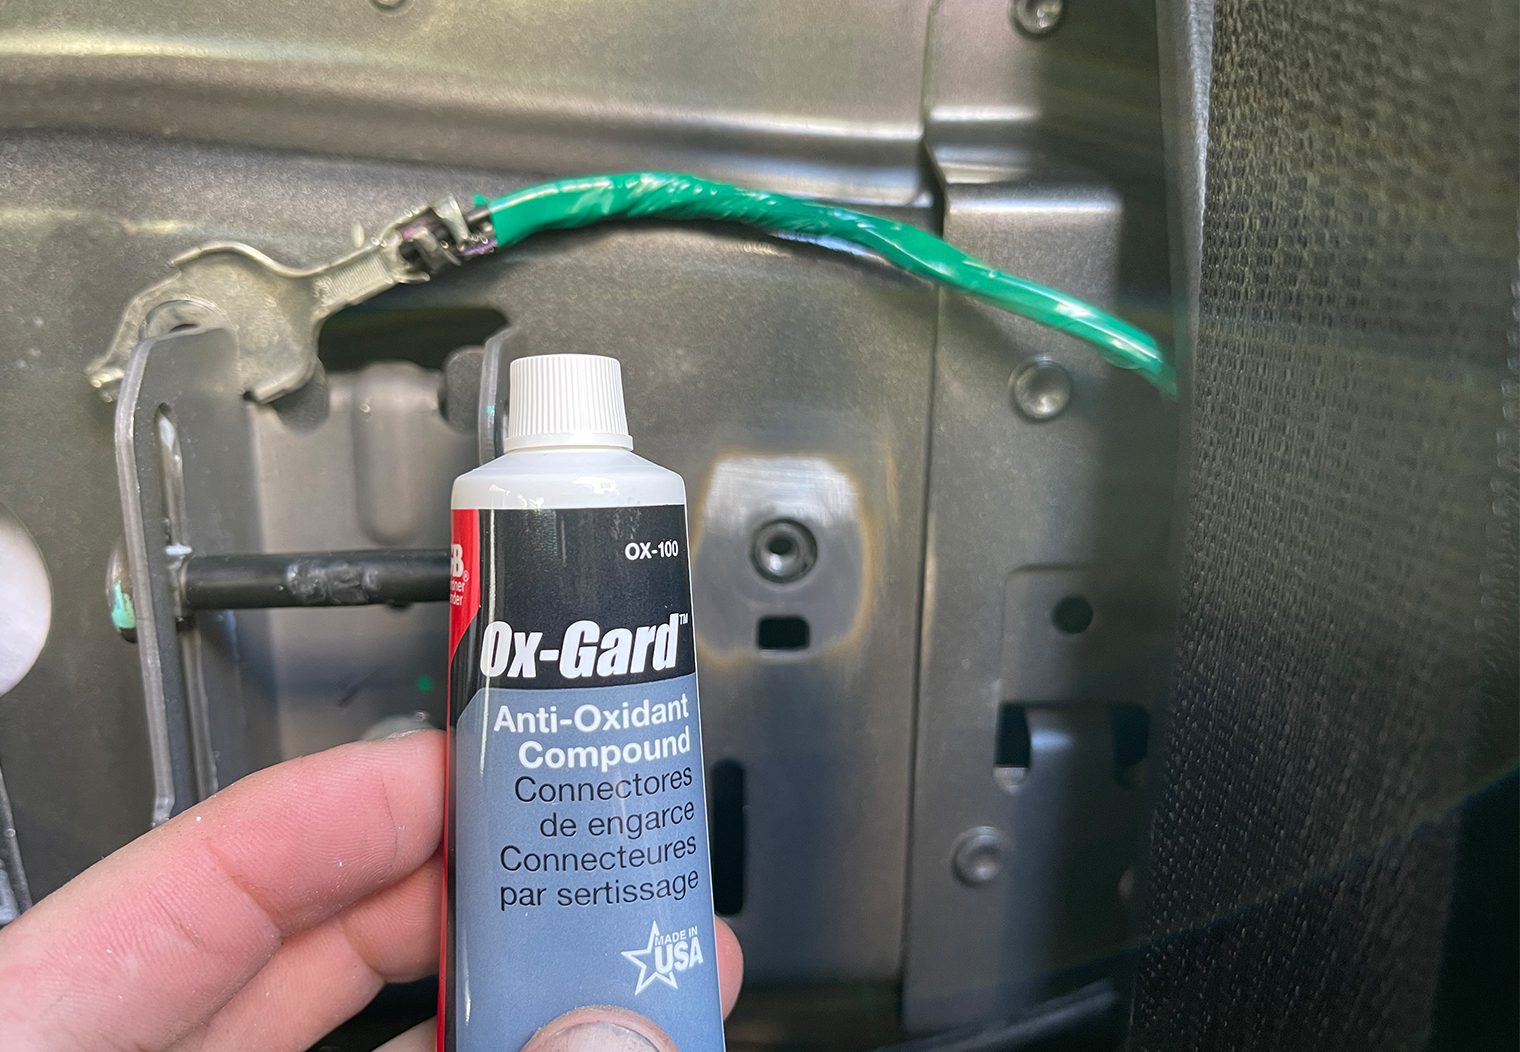
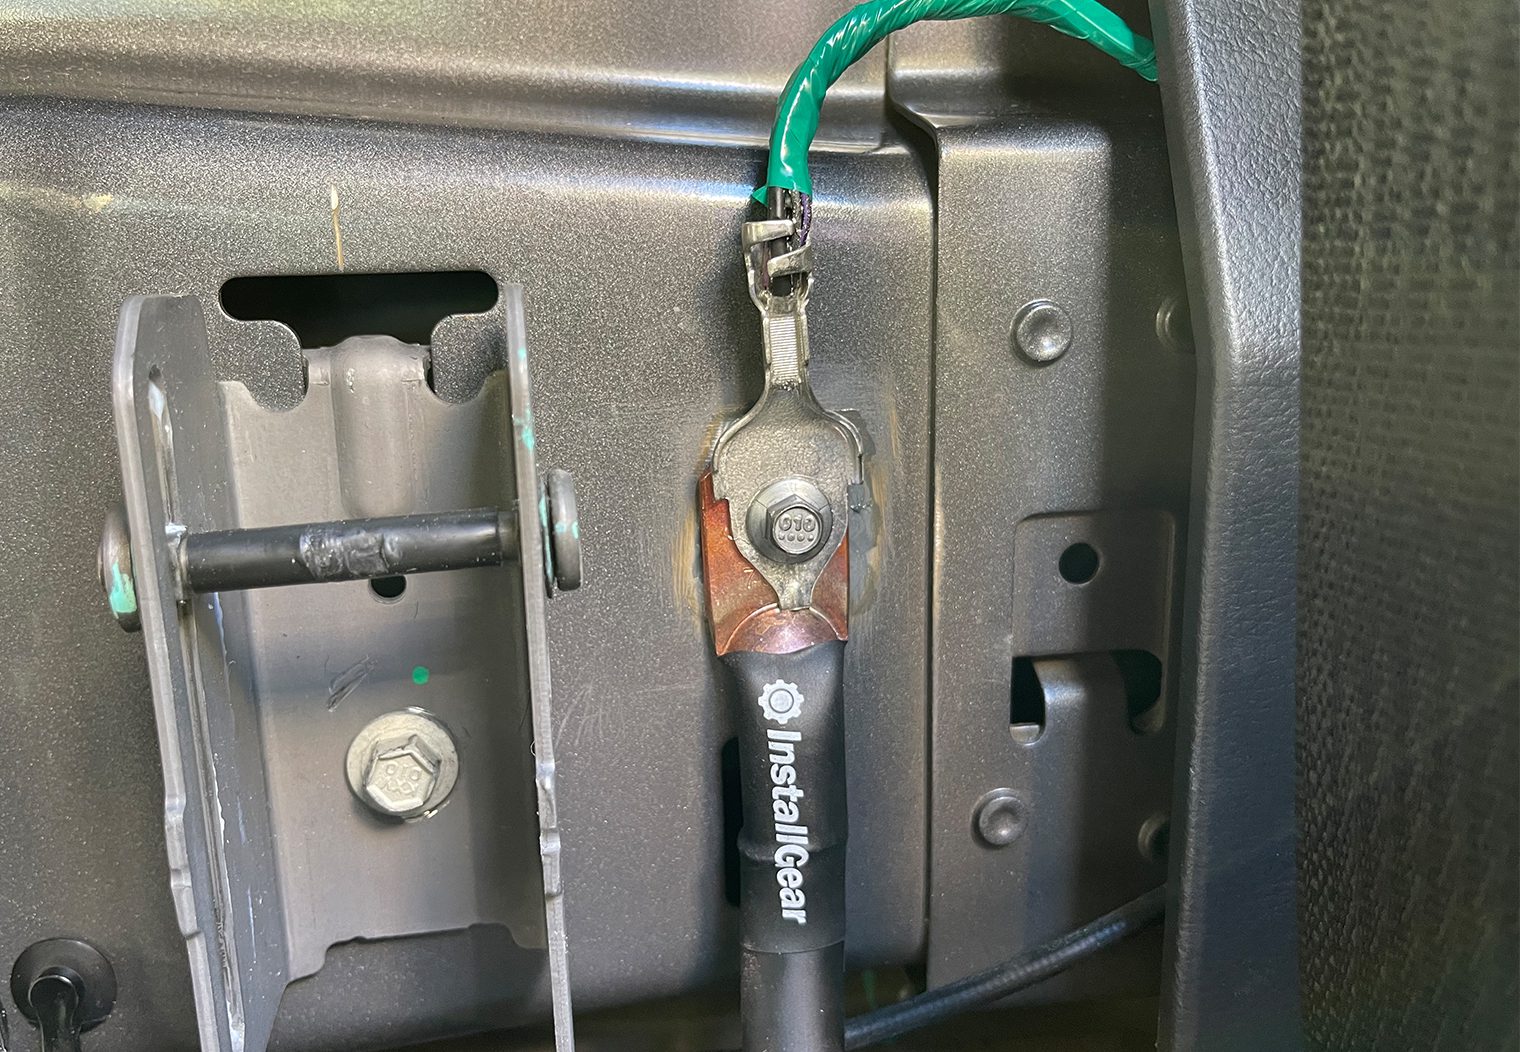
For the amplifier ground, I chose an existing ground bolt that was on the driver side of the cab rear wall. I've read opinions about whether or not the aluminum cab is a great source for a ground, but I also have seen some very specific testing done from reputable sources that verified that this can be used a a reliable ground source. It was also conveniently located right above my amplifiers.
I used sandpaper to remove any paint for a clean connection and then also some antioxidant compound for the connection between my copper ground terminal and the aluminum surface of the cab to ensure there wouldn't be any corrosion between the two metals.
In total, wiring this system took me close to 8 hours, including the prep-work and custom 3D printed components like the fuse mount. Properly preparing and securing the wiring for these types of systems, along with the separation between power and signal is pretty critical and worth the extra work. I was pleased with how it came out – no rattles, bulging panels or hanging wire. The next thing to tackle after wiring was the speaker installation. Here's the end result before I cut and re-installed the rear wall carpet.
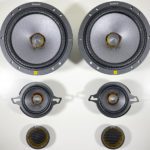
Installing the Speakers
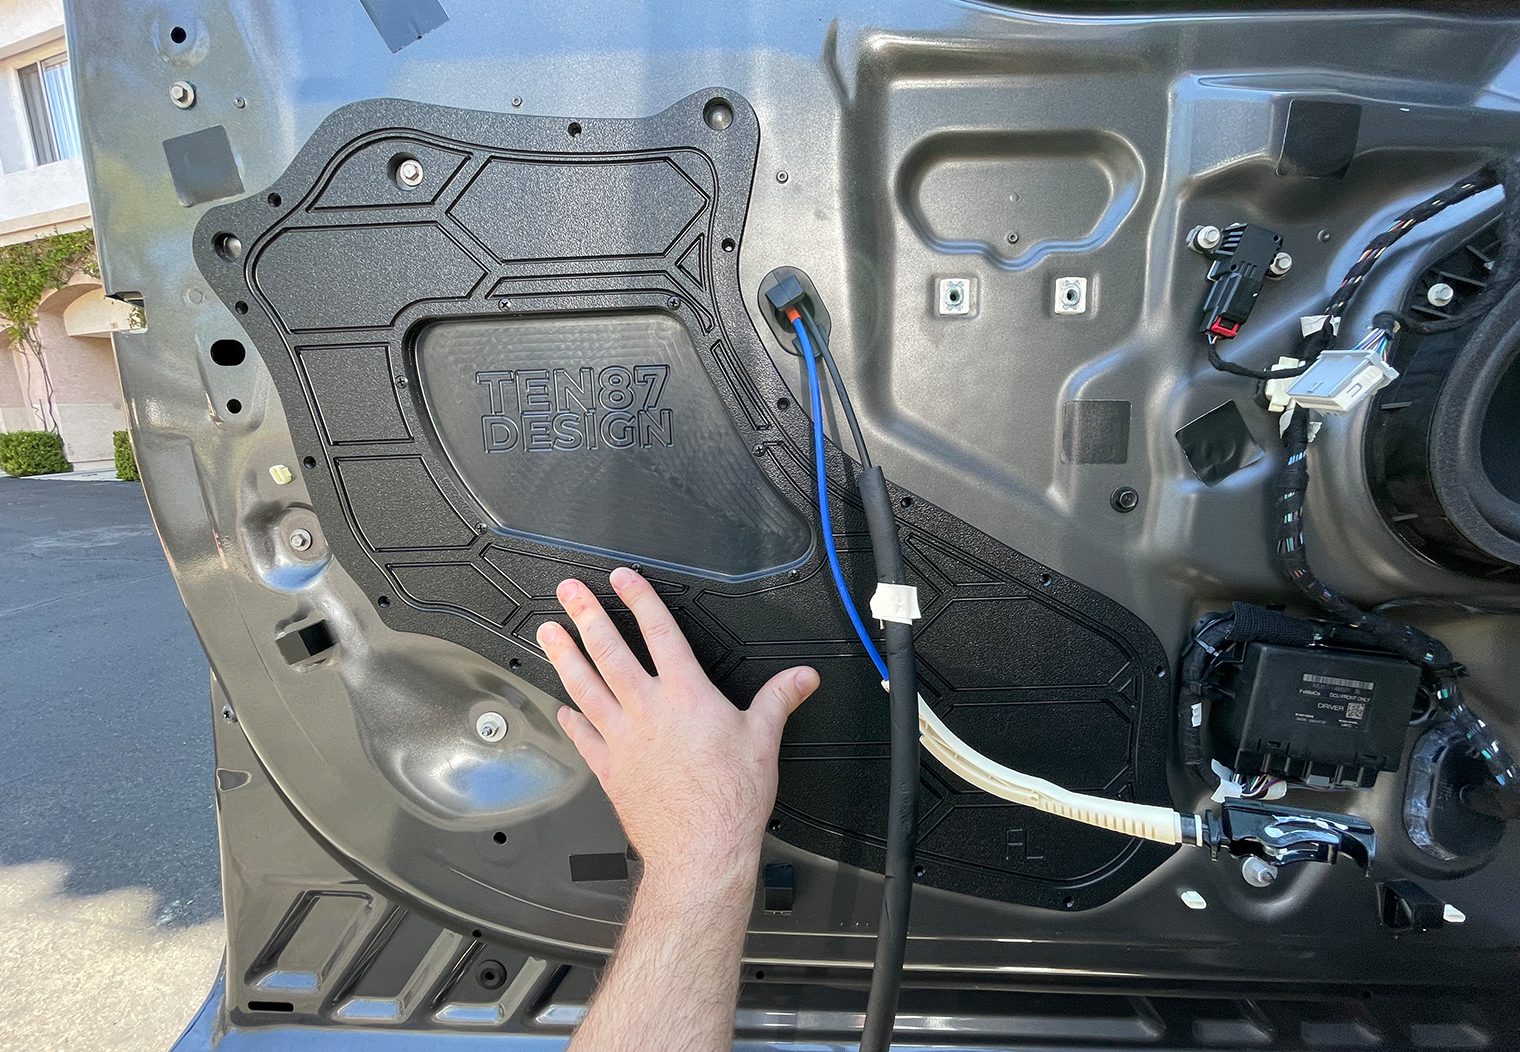
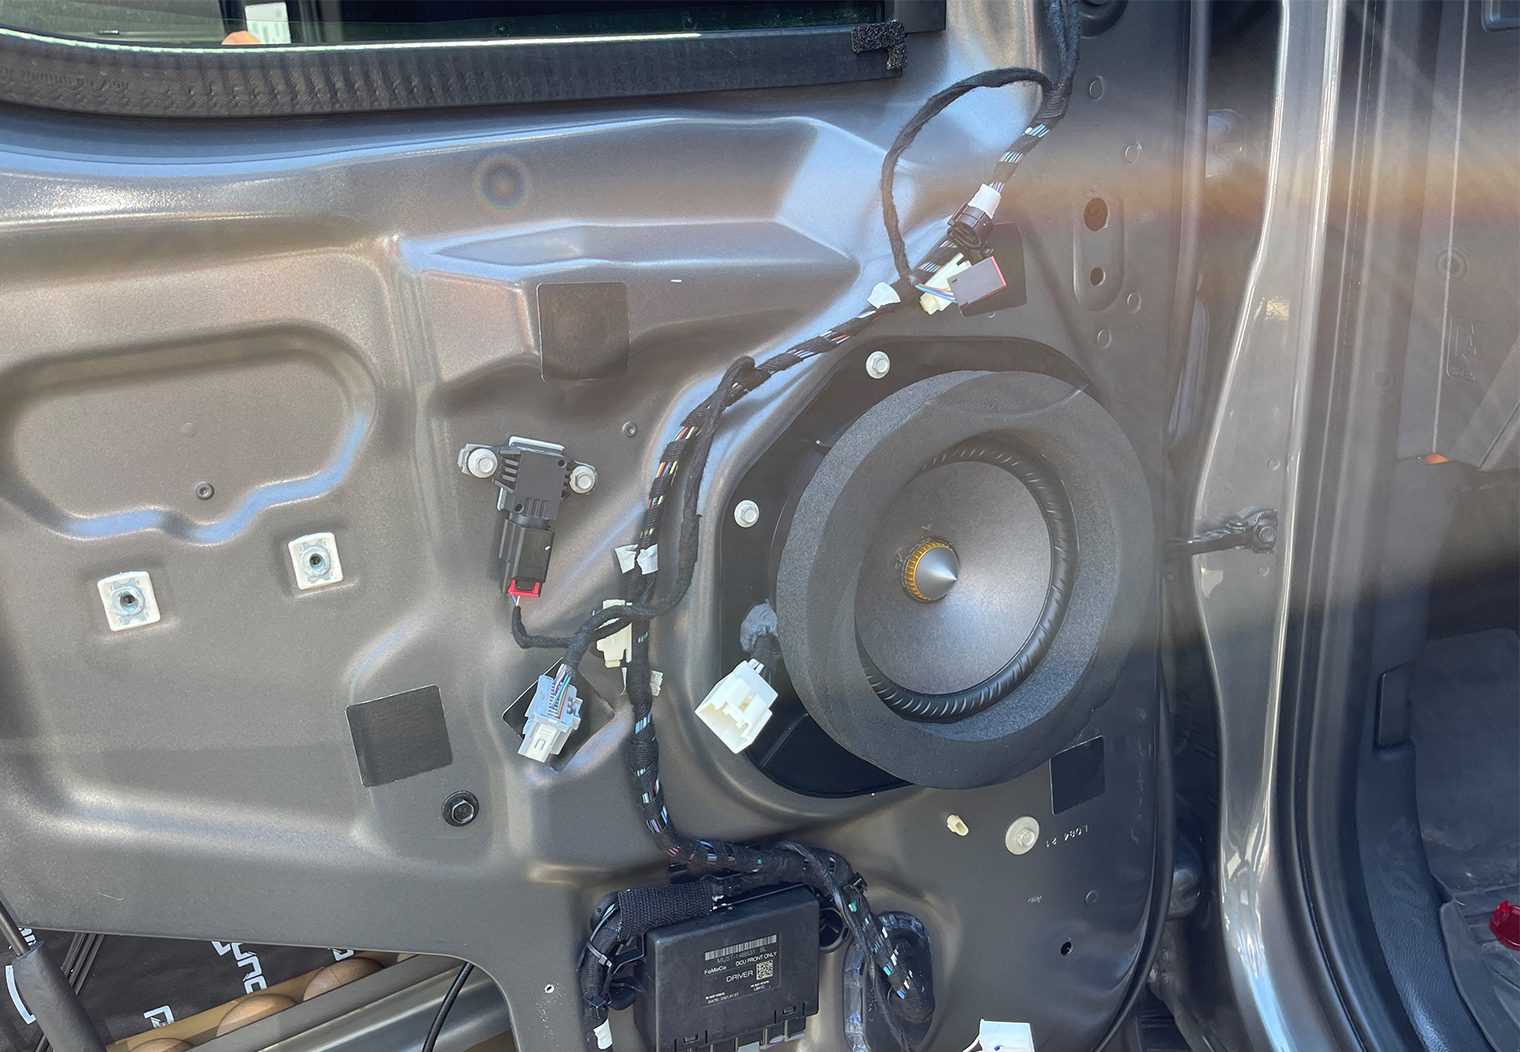
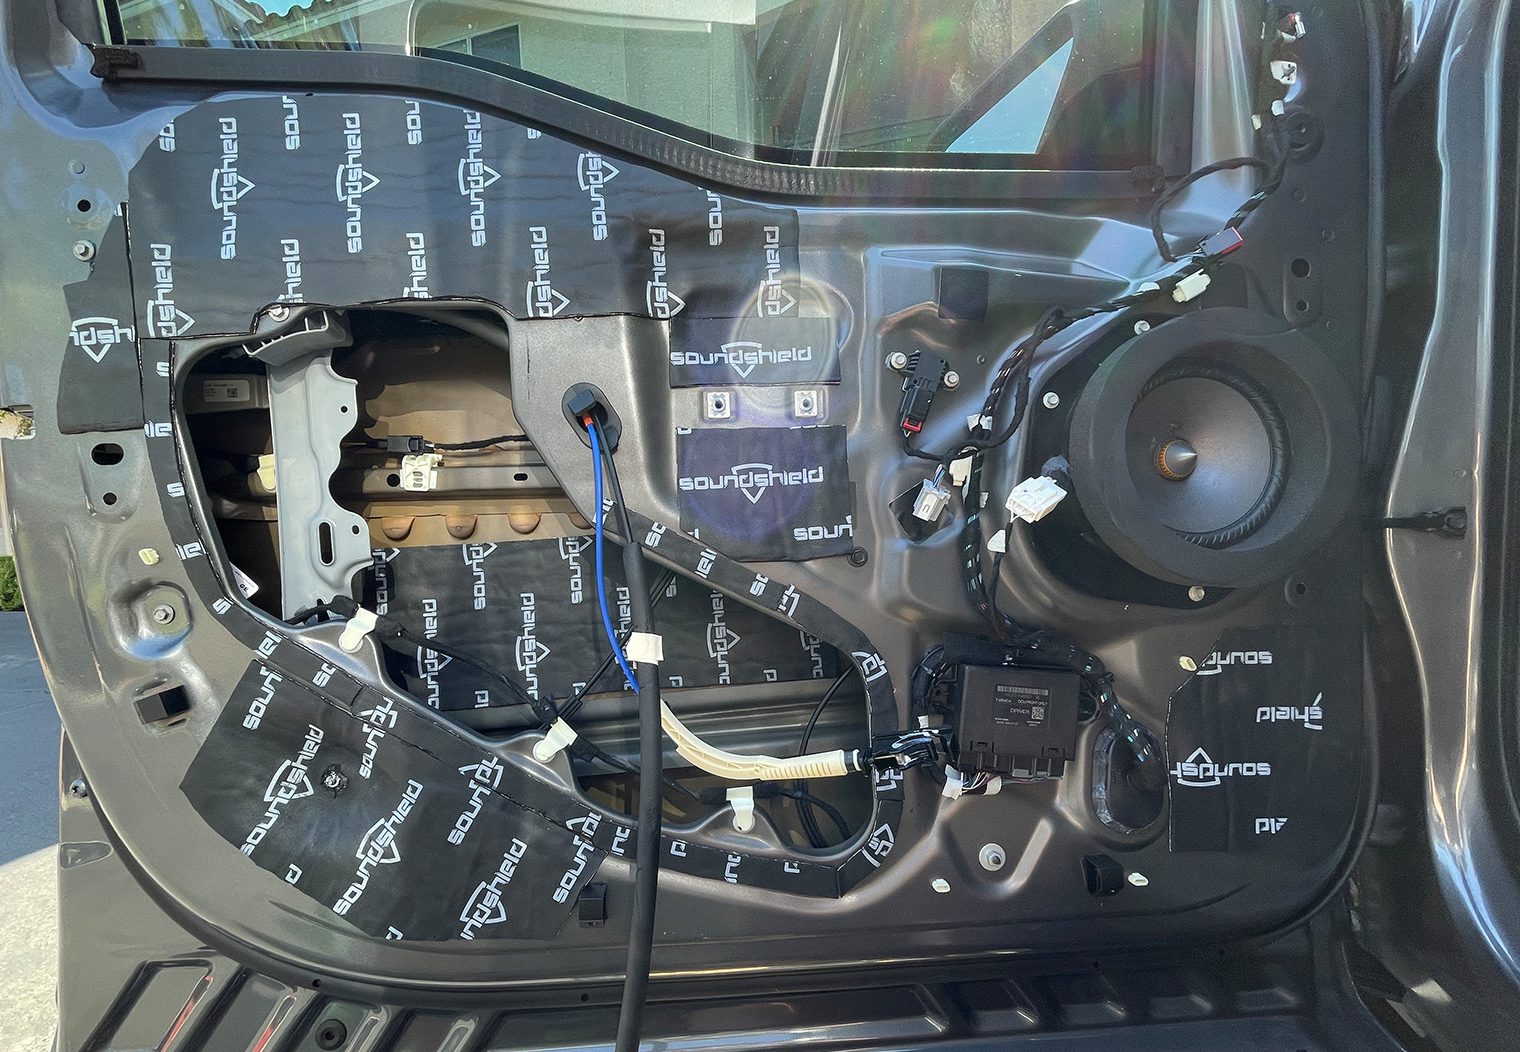
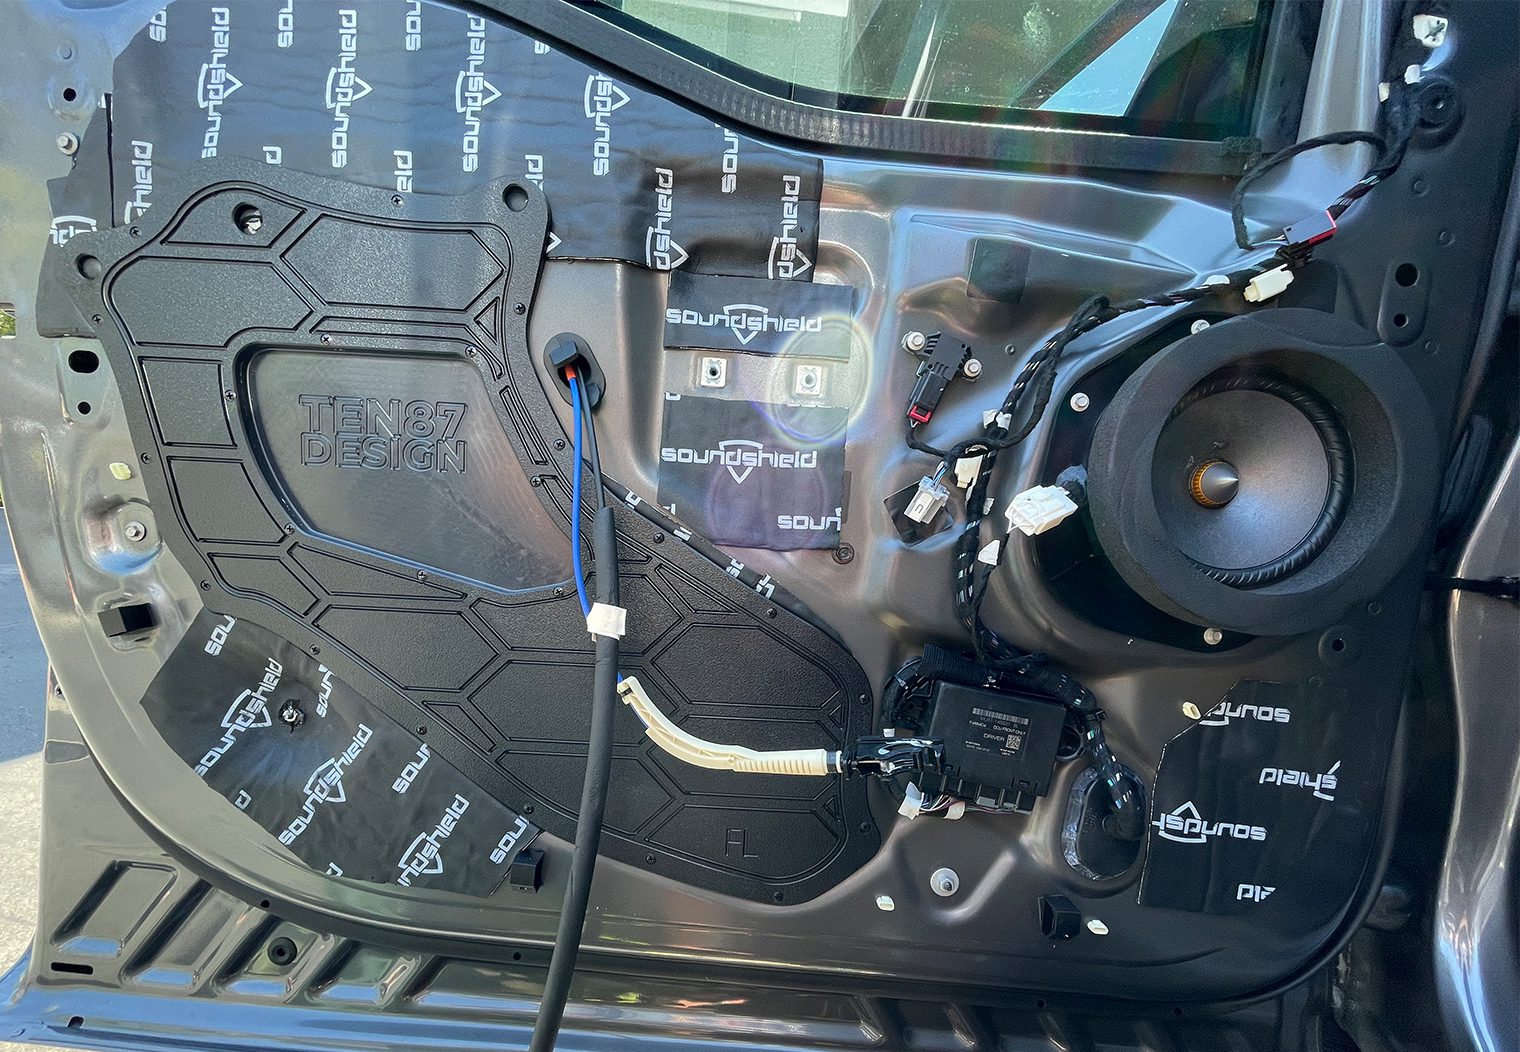
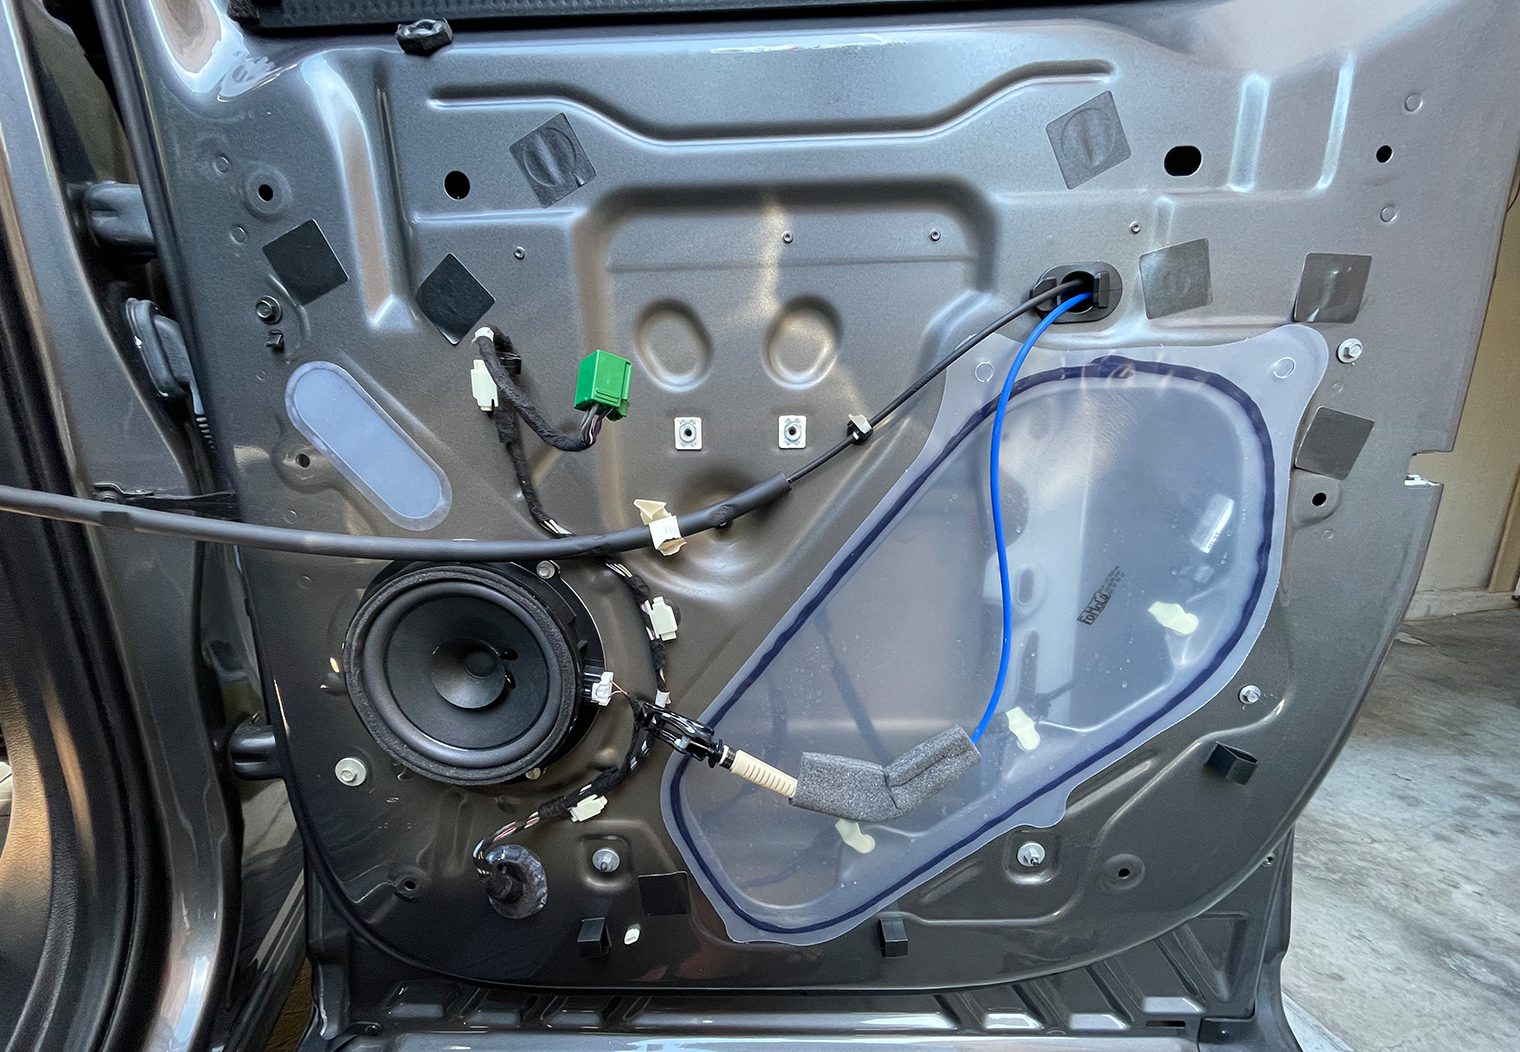
In part 2 of this installation, I pre-mounted and pre-wired all of the speakers so that I could pretty much just drop them in. So when I went to install them, I simply needed to screw them on and plug them in. The time consuming part here was deadening the doors and installing the door sound plates that I had purchased. Each door took about a half hour to do. I pulled the panel, marked where the sound plates would be mounted, deadened the door then installed the speaker.
Deadening the Doors
When I deadened the doors, I chose not to do a comprehensive covering of the inner panel. Mainly because of the aftermarket sound panels that provided a ton of rigidity to the door, and naturally deadened it as well. I would say I went with about a 65%-75% approach which, in my opinion, I'll see probably 85%-95% of the deadening benefits. It also saved me a ton of time doing it this way.
That said, I've heard a lot of great things about SoundSkins precut dampening kit. And if you want the full panel covered and are willing to pay the ~20% markup for the templates I would absolutely recommend these. They'll also save you a lot of time.
Here's the steps I took to deaden the doors and prep them for speaker mounting:
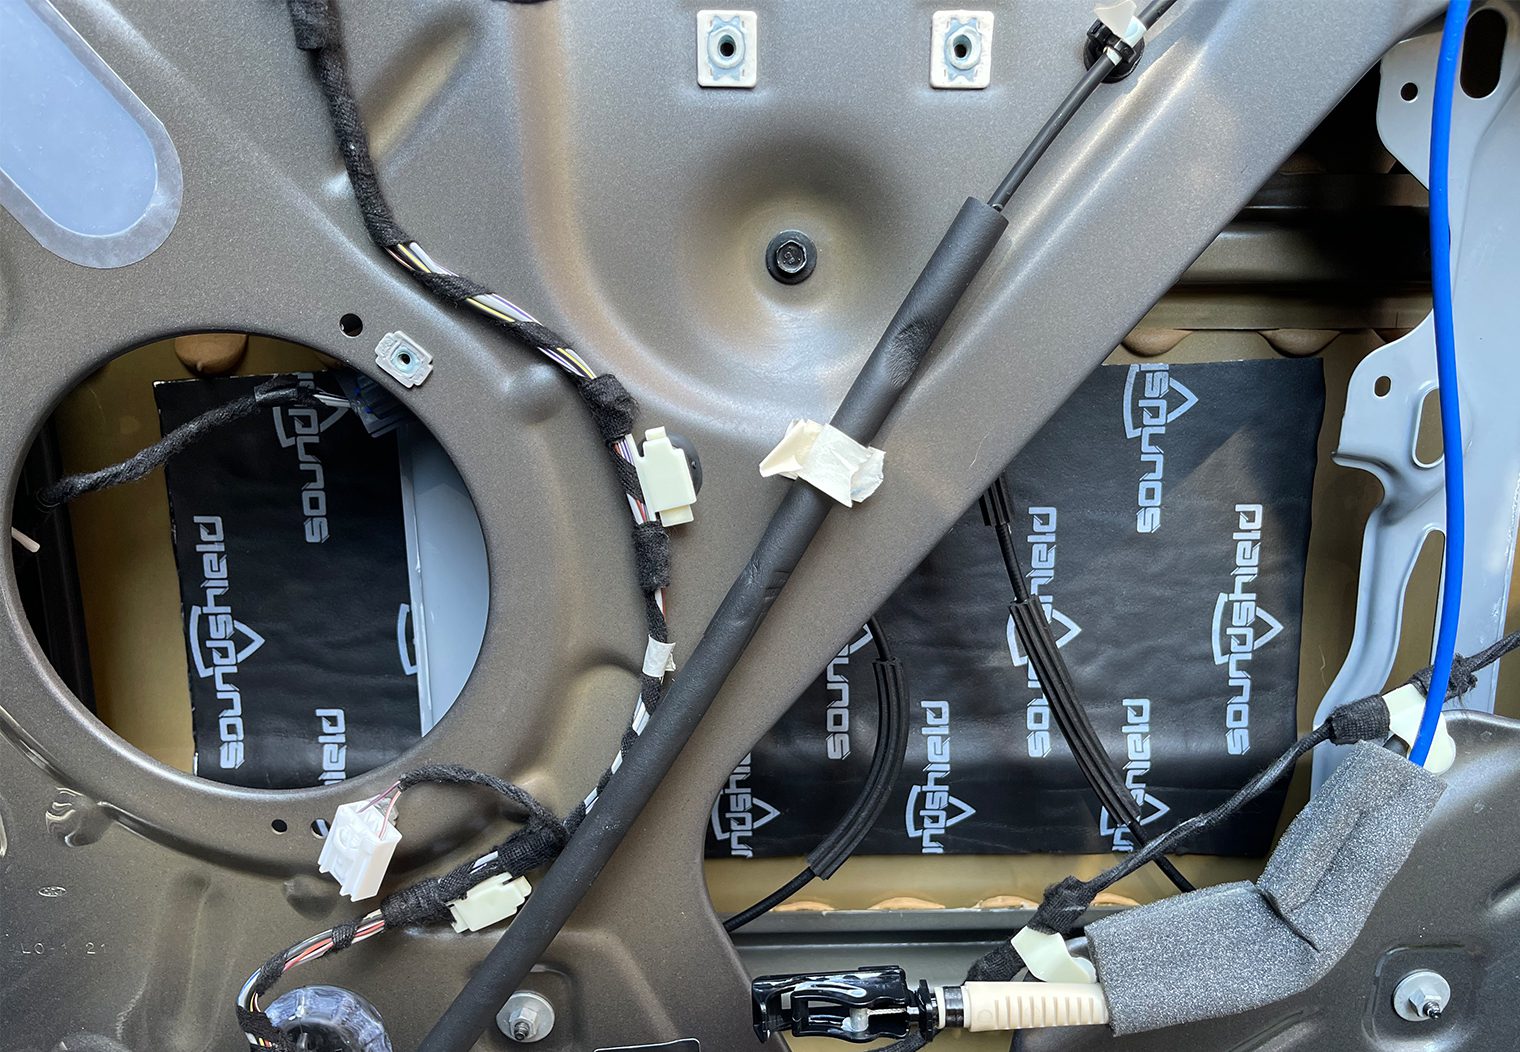
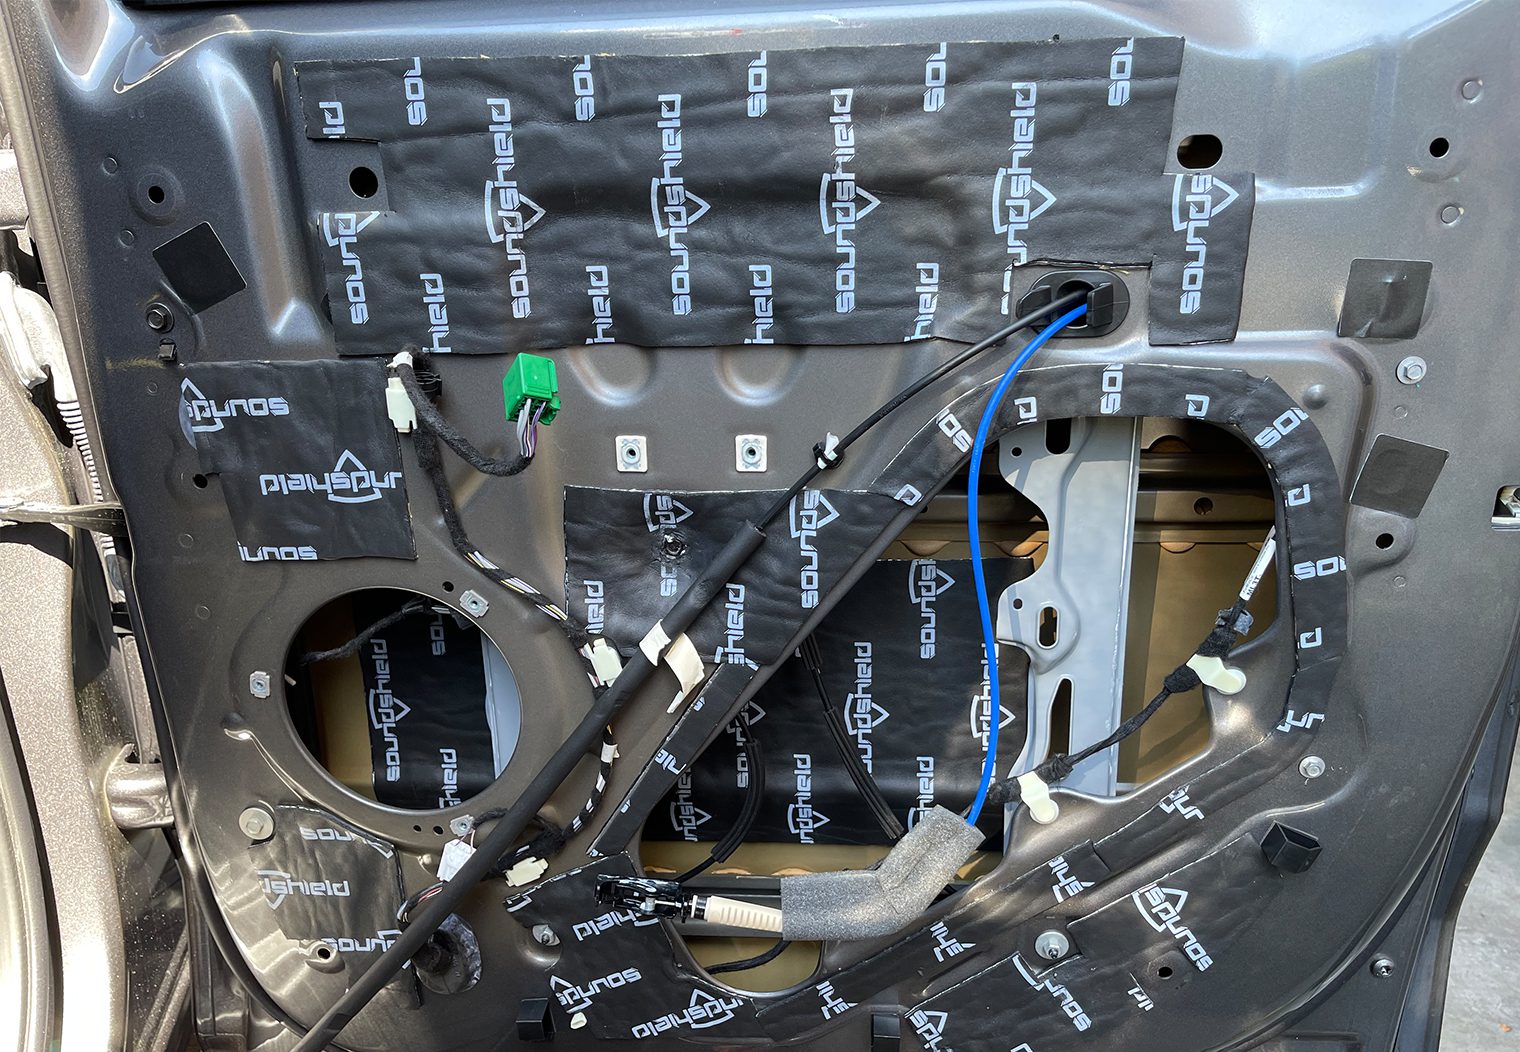
- Place the sound panel onto the door where it would be positioned.
- Drill two holes on either side of the panel and place the panel to the side.
- Deaden the door with SoundShield. I would recommend deadening between the outer facing panel of the door and the panel in which the speaker is mounted too.
- After the deadening was completed, I used the two holes I drilled previously to secure the panel and then drilled out the remaining holes for the rest of the mounting screws.
Surprisingly this process was relatively quick. I'm documenting it because these sound panels don't come with any instructions!
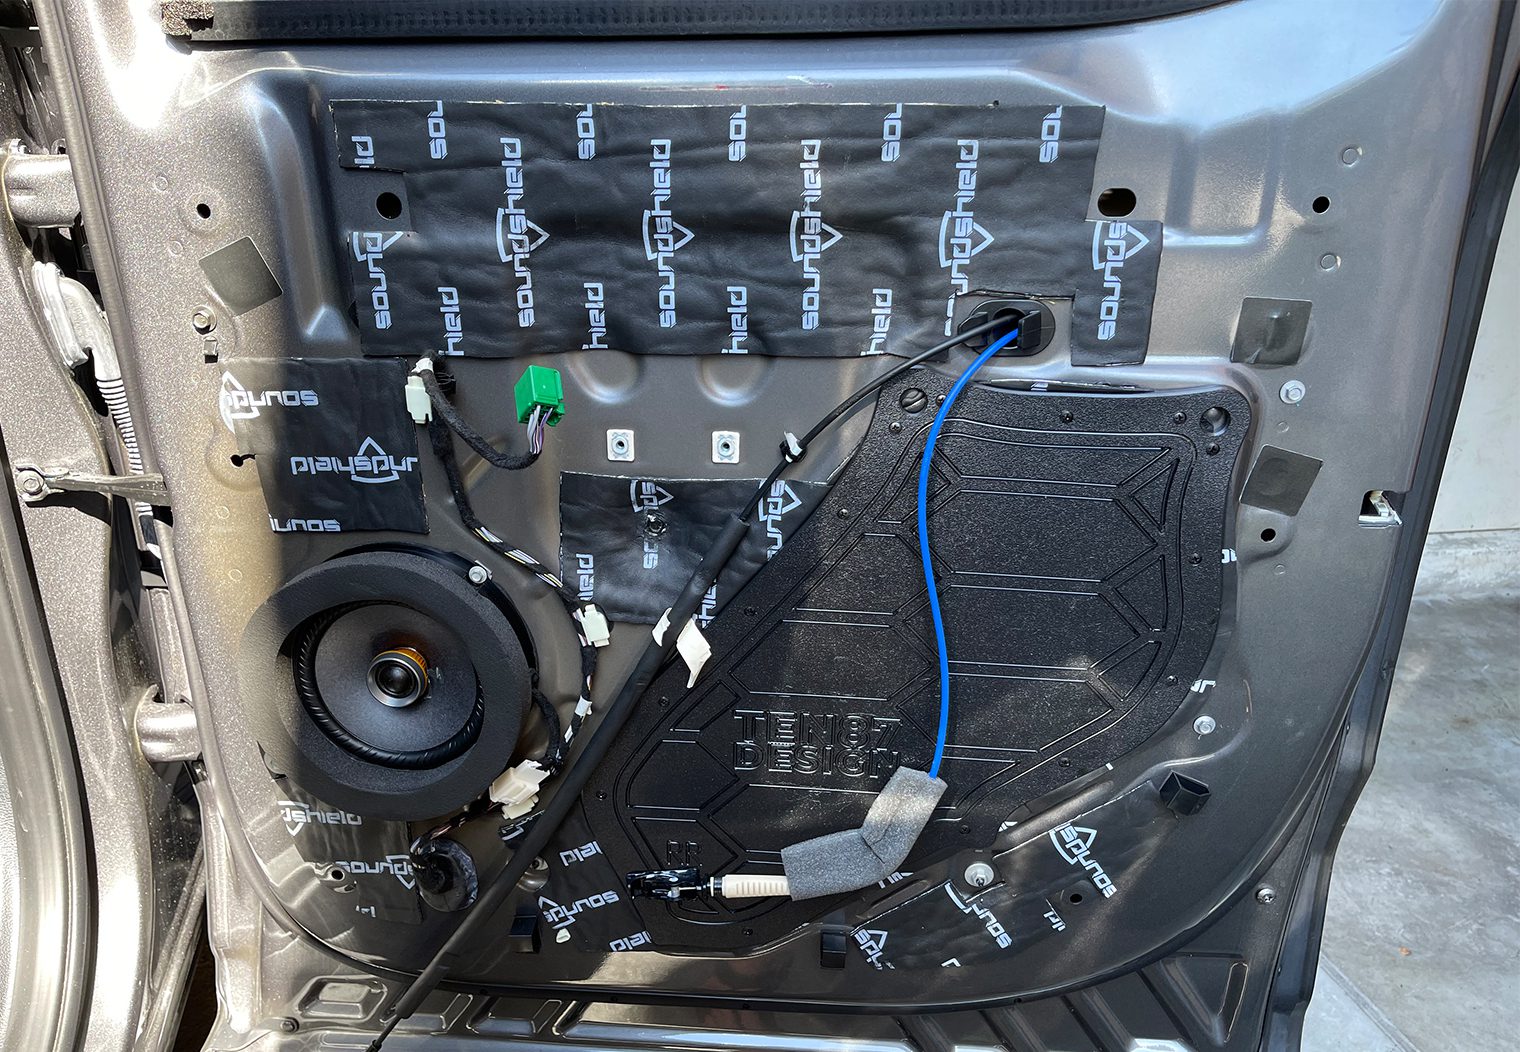
Mounting the Speakers
After the deadening was completed and the sound panels were installed, I mounted my speakers. Since they were already pre-mounted and prewired using Metra's adapter plates and OEM adapting speaker plugs, this was a 5 minute task. And finally, I re-installed the inner door panels.
The door panels were noticeably deadened after this process. I used the knock/bang method at first but the real test was a quick drive on the freeway. There was an audible difference in how quiet the truck was between the deadened door panels and the rear wall of the cab. And from a sound perspective, a definite improvement in the mid-bass could be heard. I'll get more into that in the tuning section though.
Front Doors
Rear Doors
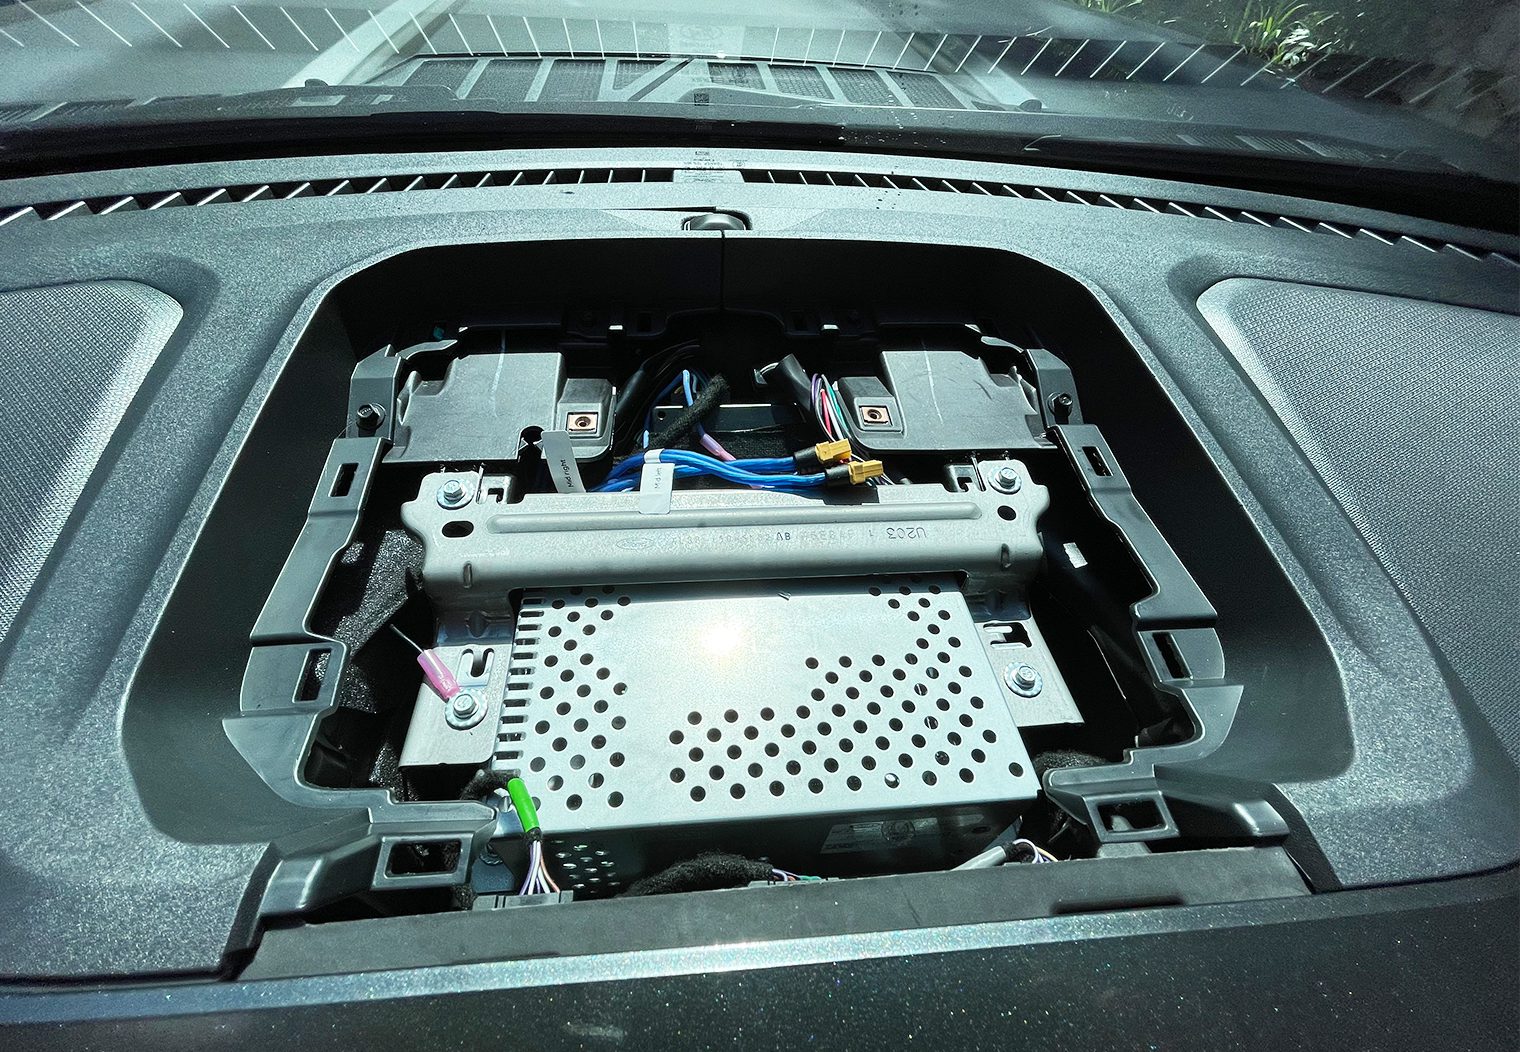
Center Dash Speakers
It was only after the wiring was fully wrapped up that I was able to install the center dash speakers. The AXDSPL, along with all of the RCA connections and wires fit snug underneath the center dash speaker mounting plate. I had already mounted the mid-range speakers to the custom plate I made in part 2, so all I needed to do was plug the speakers in, screw the mounting plate to the factory location and then place the final grille on top.
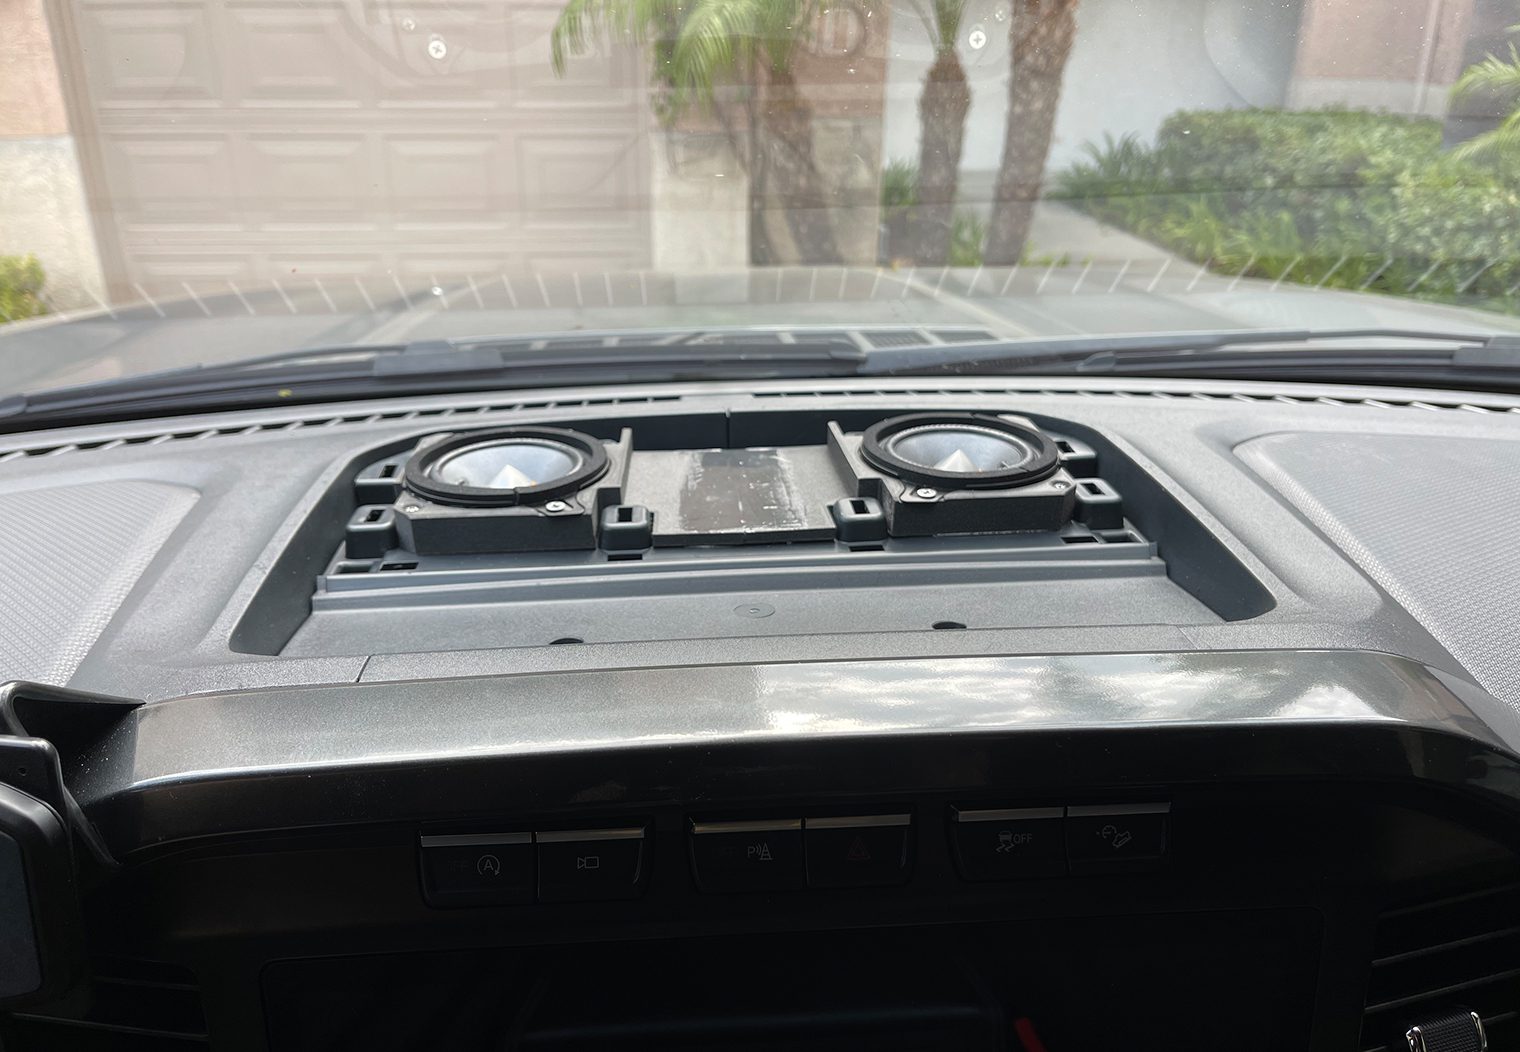
I was really pleased with the end result of the custom plate I printed. It allowed me to place two mid-range speakers in where one (or none if I chose a 2-way system) would have been. Keeping this truck as OEM looking as possible was my goal and this really helps to do that. All while recognizing the benefits of a traditional 3-way system.
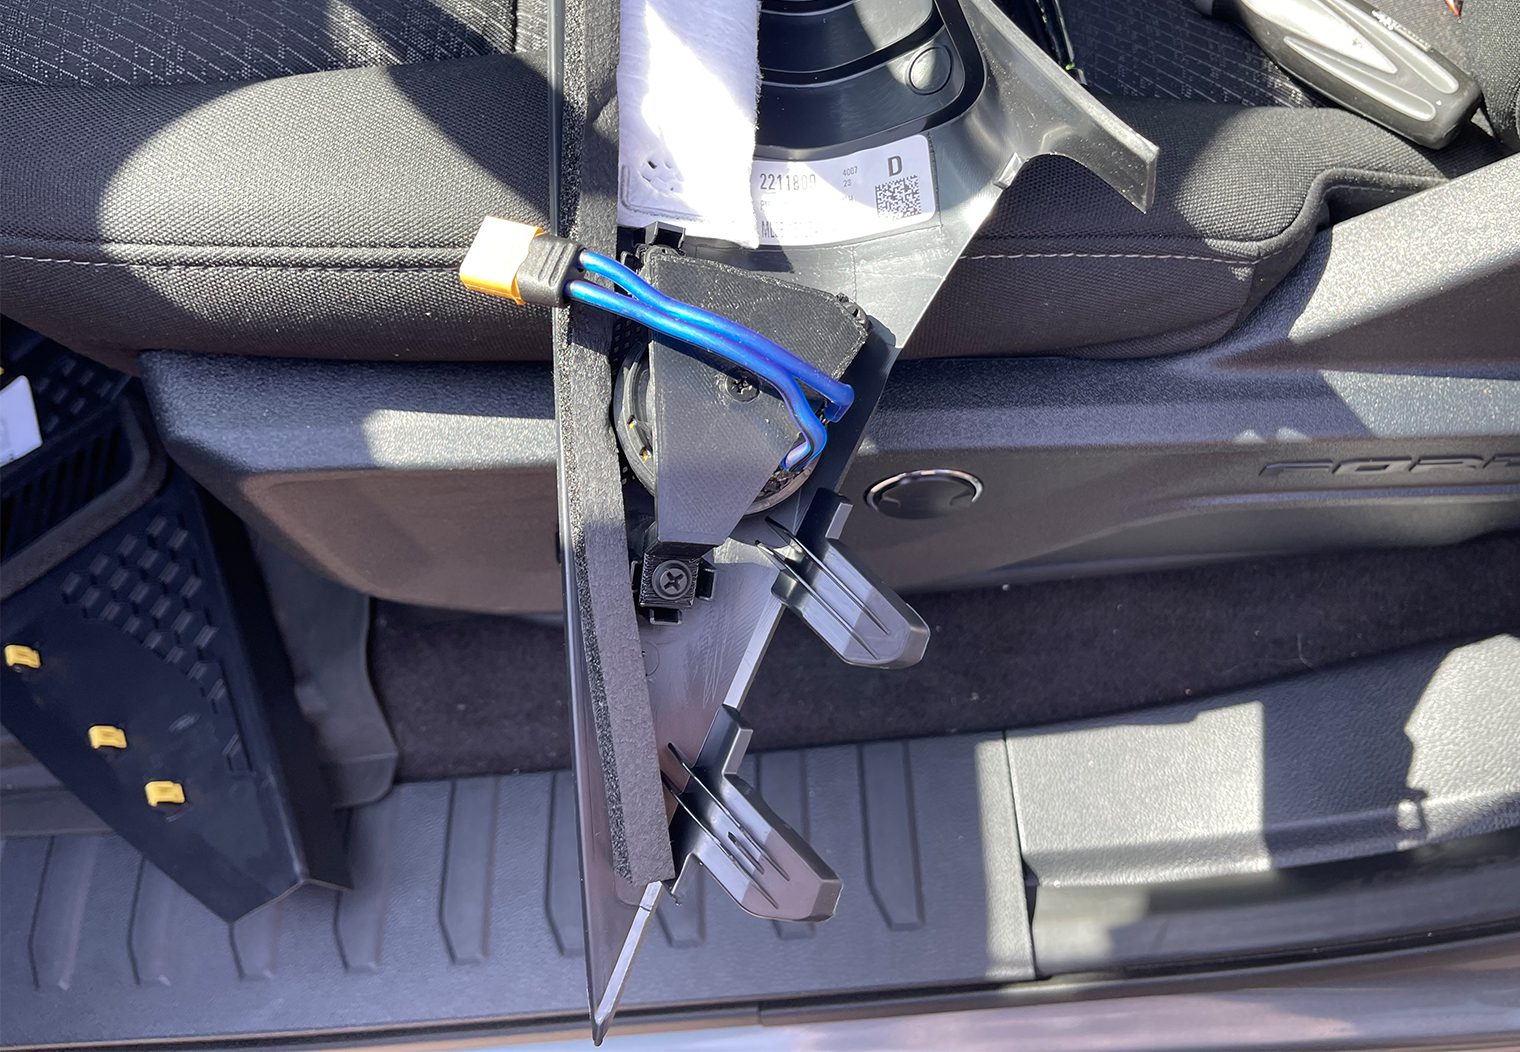
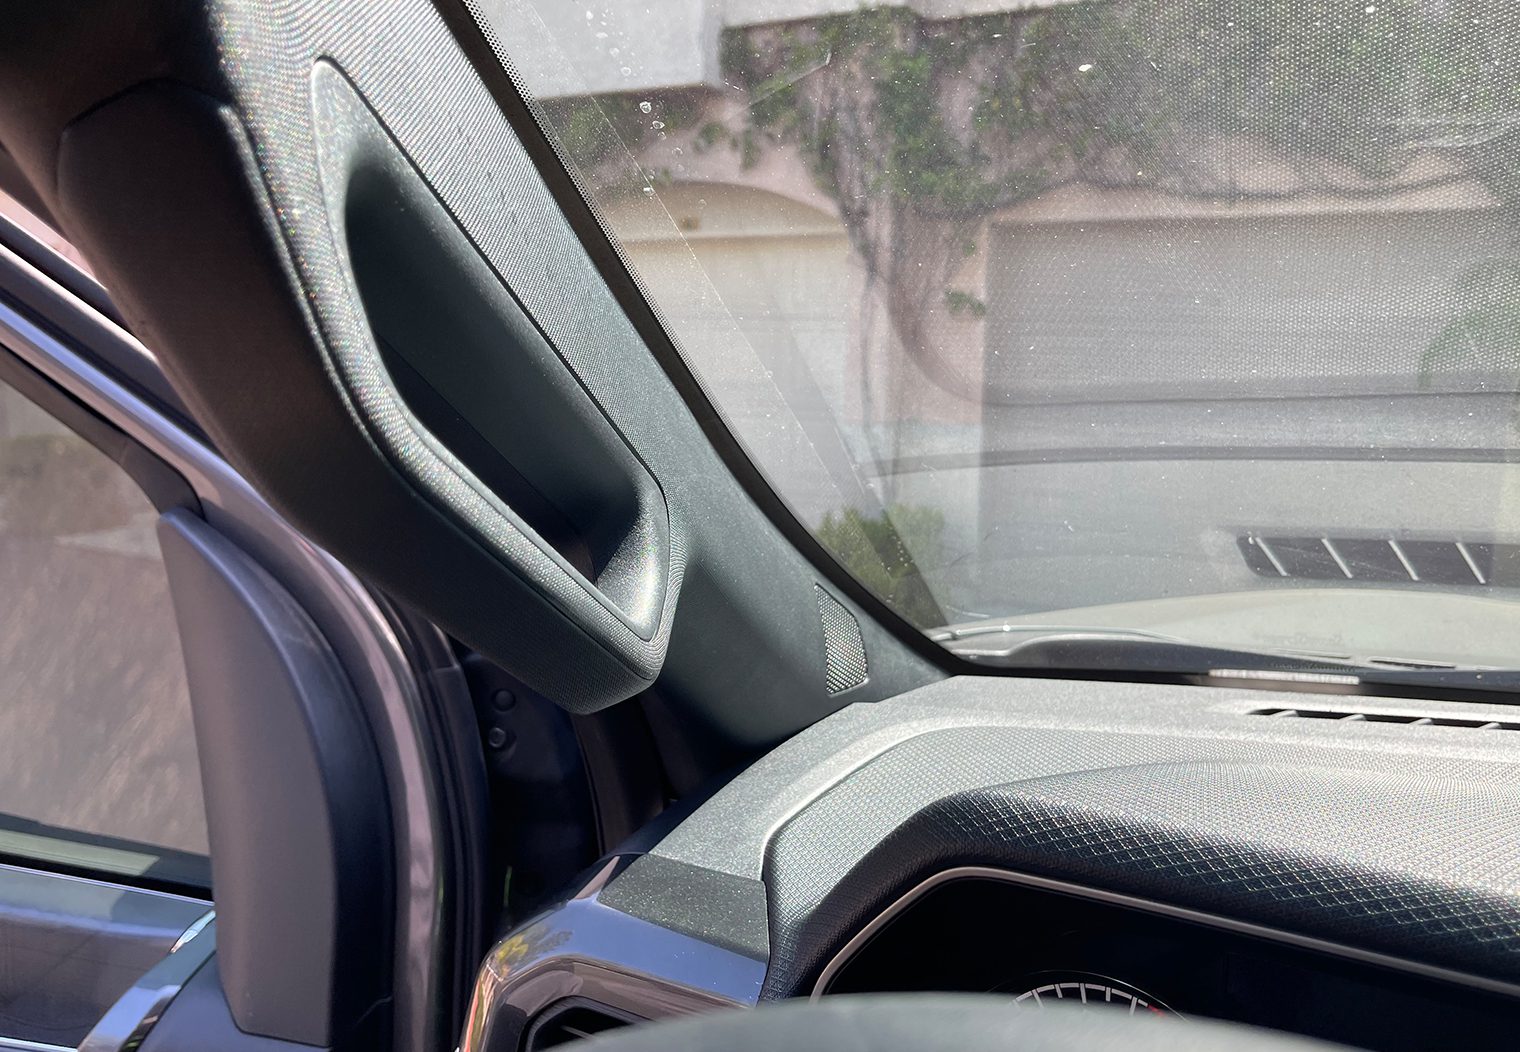
Installing the New Tweeters
Similar to the other speakers, my tweeters were prepped and mounted using the custom 3D printed adapter that I prepared in part 2. I had already pre-ran the wiring earlier to the general tweeter location as well. All I needed to now do was pull off the A-pillars, replace the old tweeters, and plug in the new ones. This process was a breeze and took me no more than 10 minutes for both. Perfect fit!
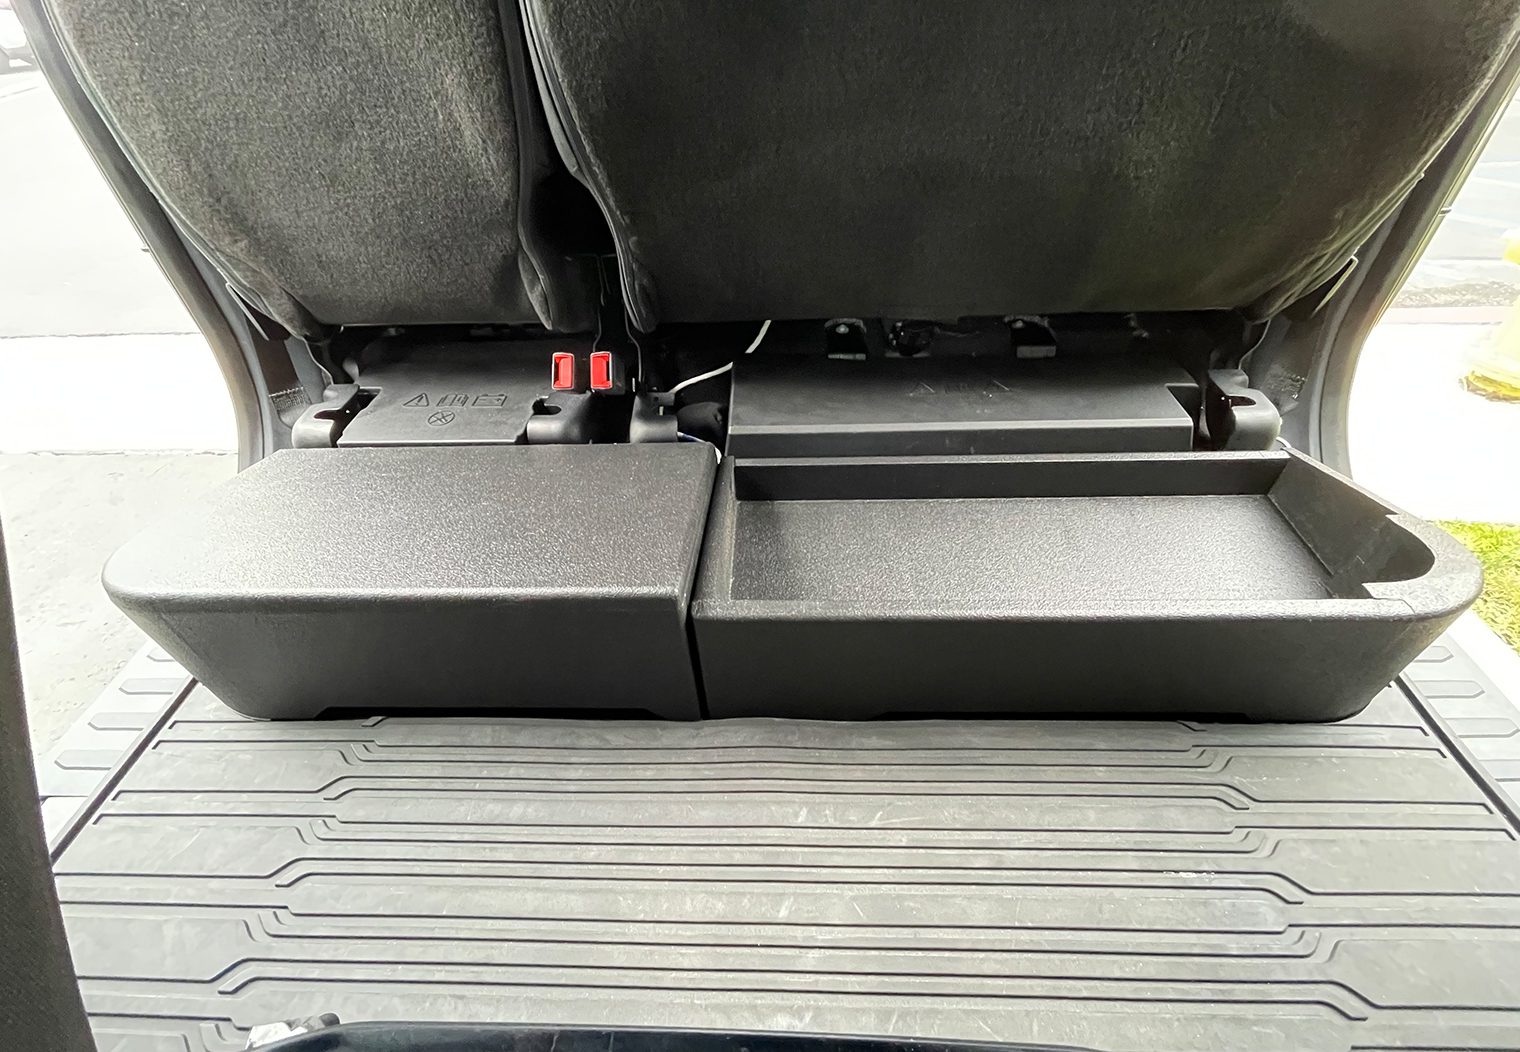
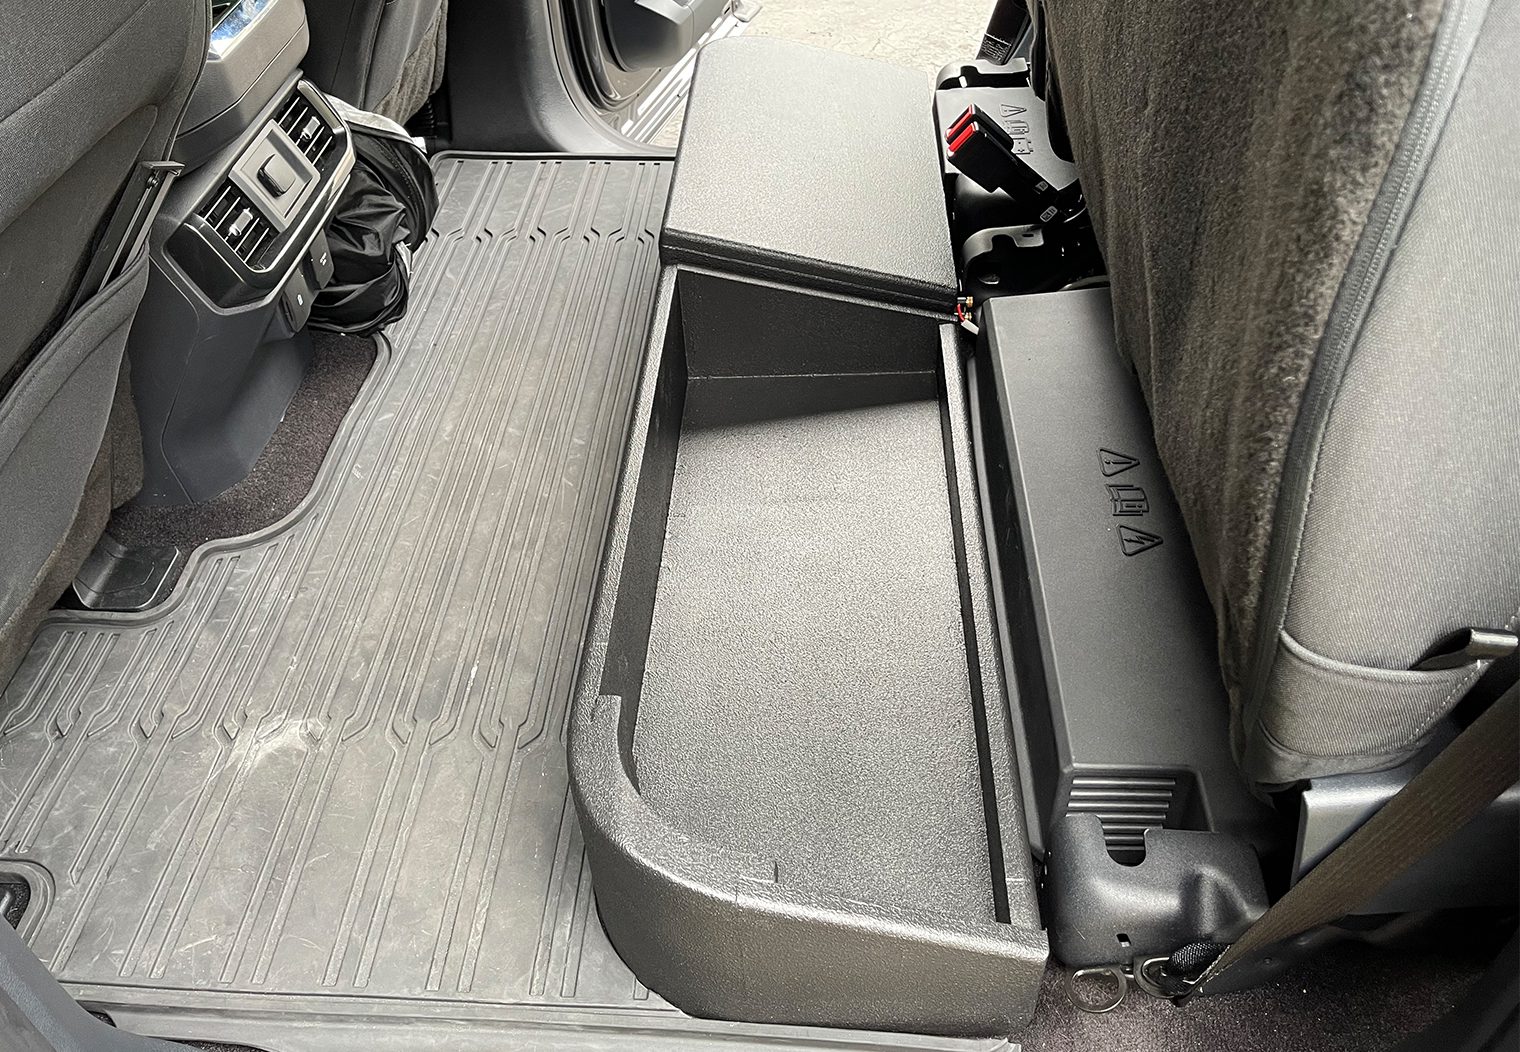
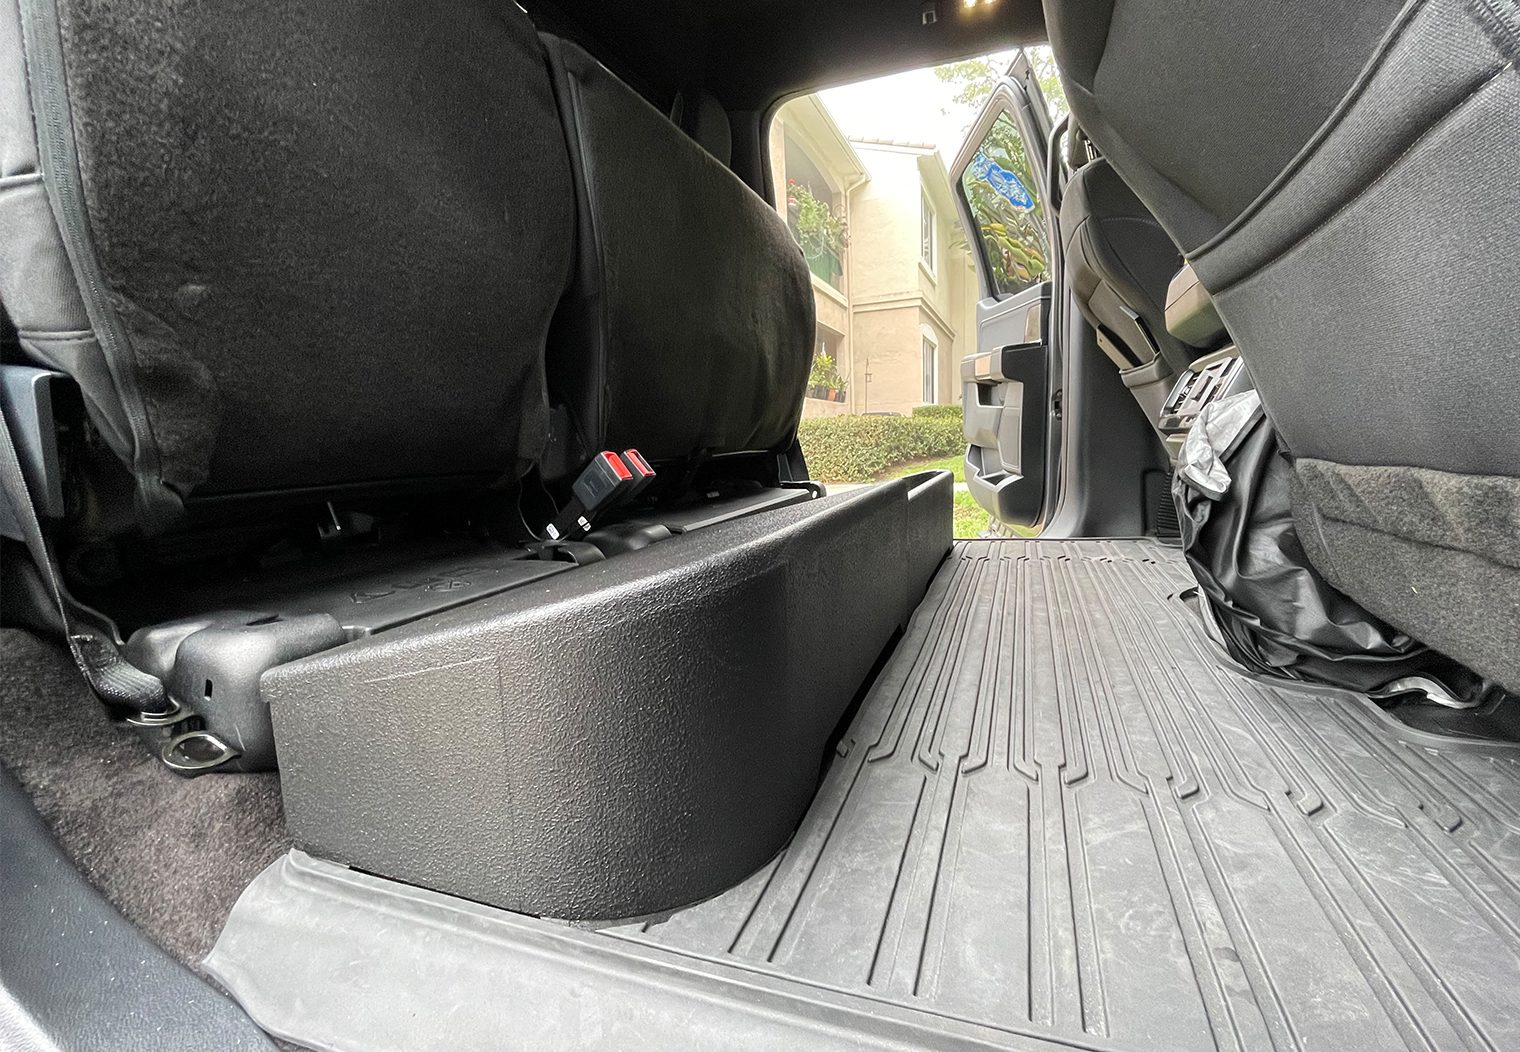
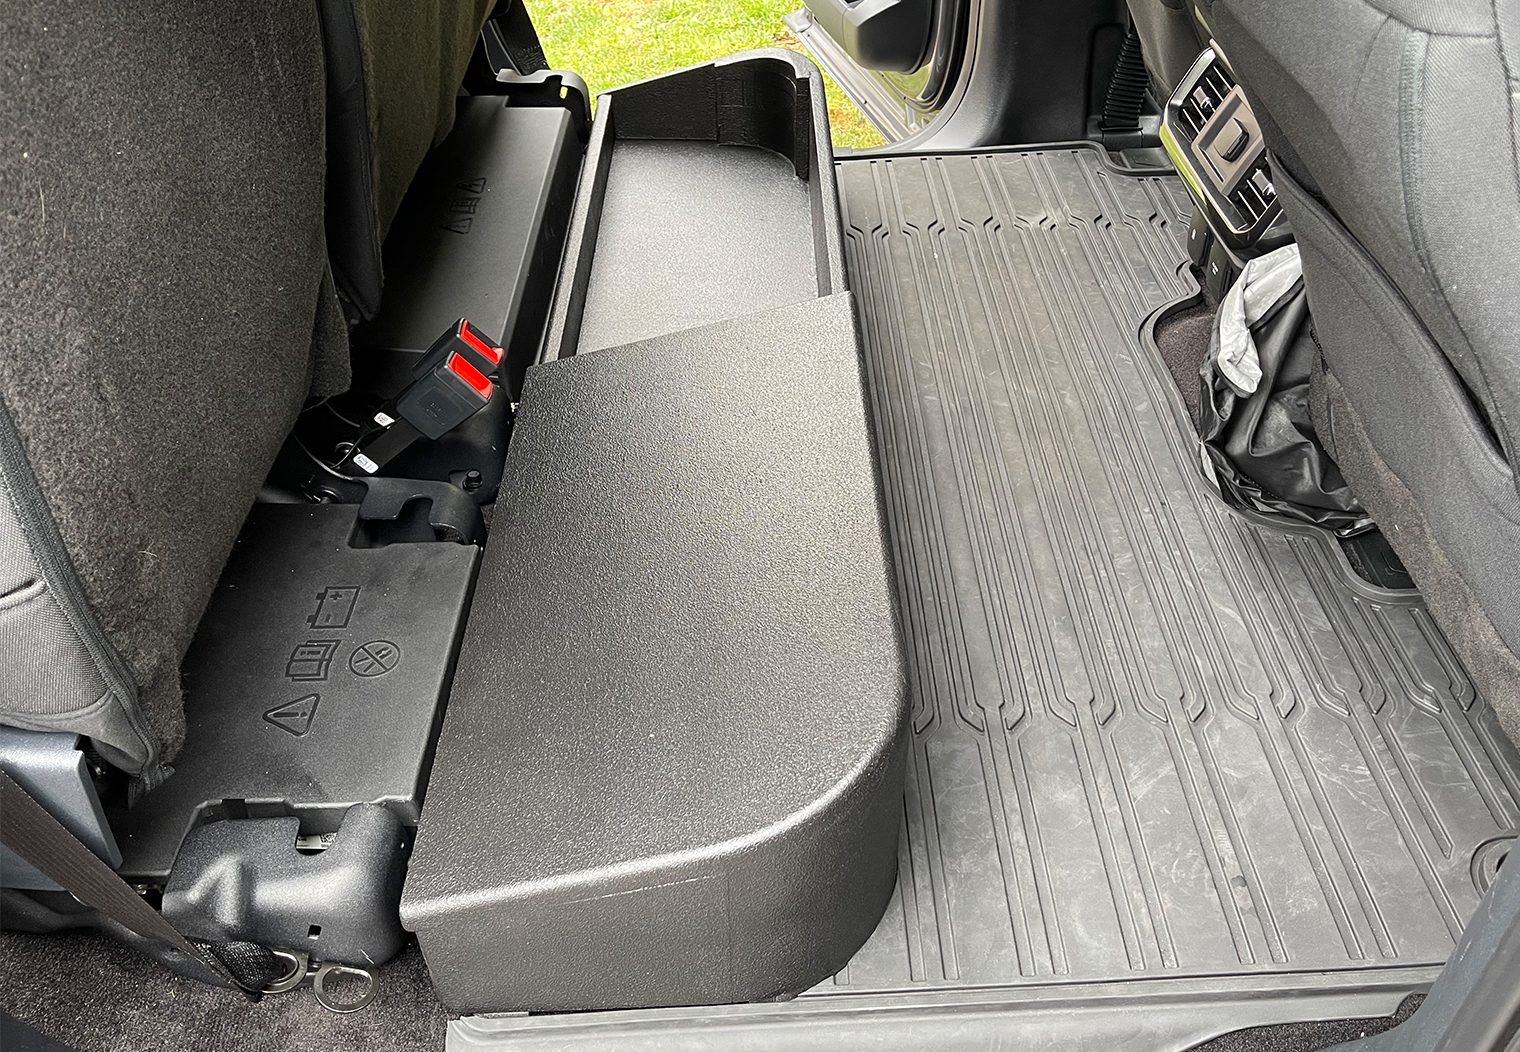
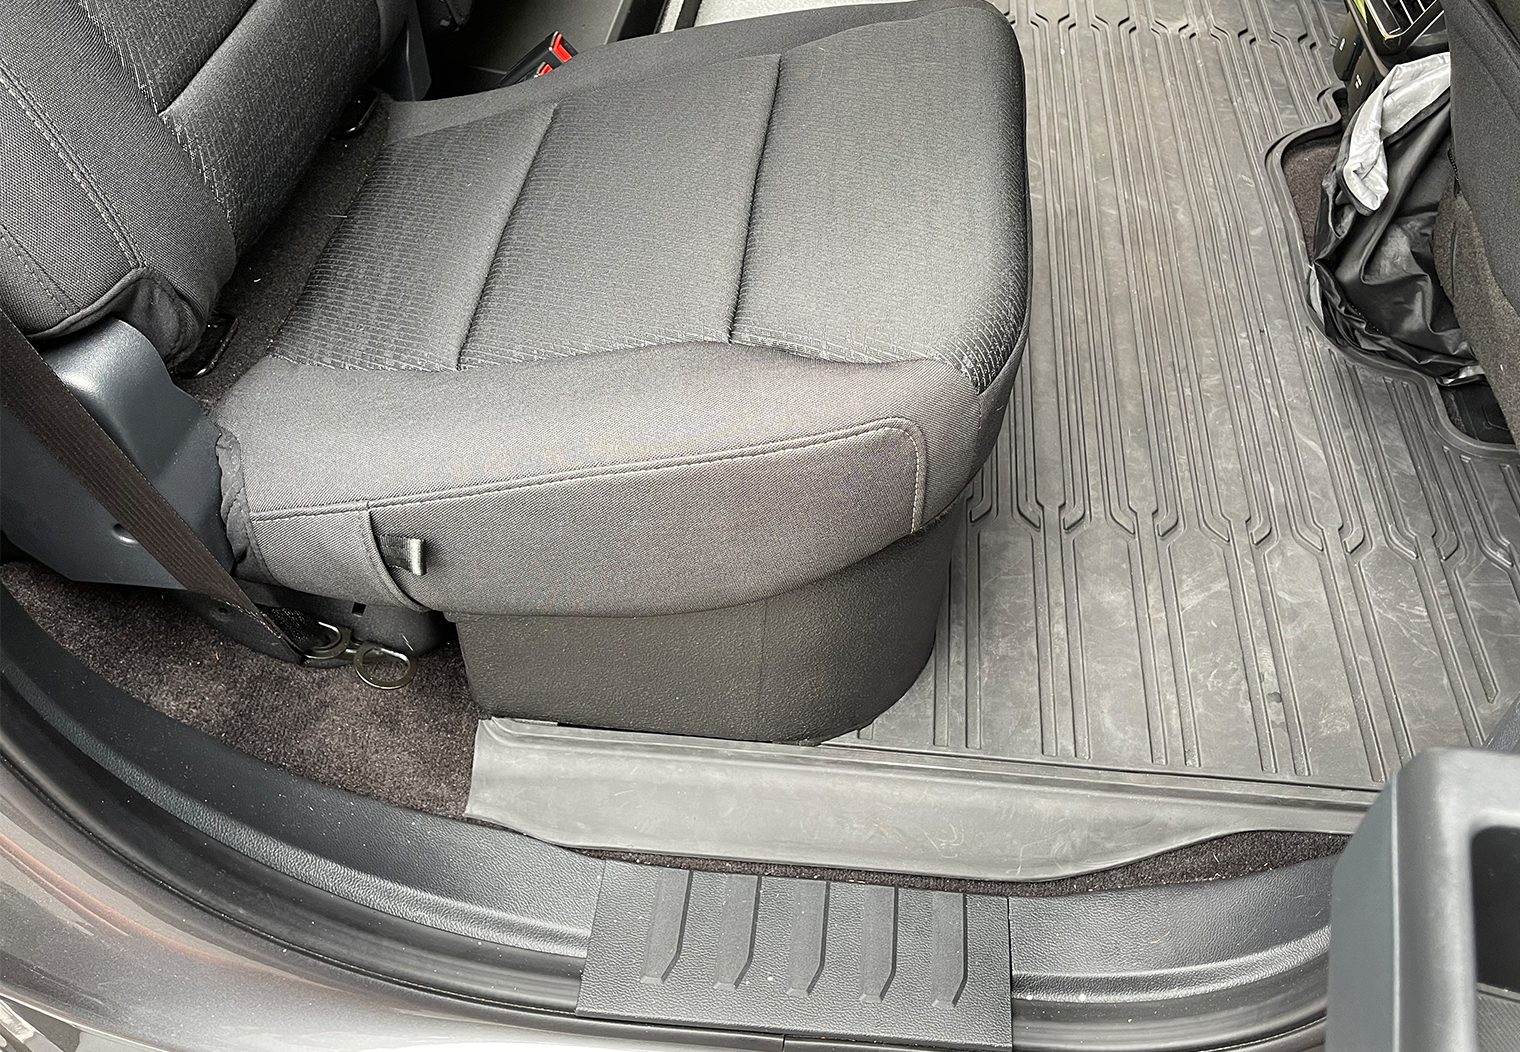
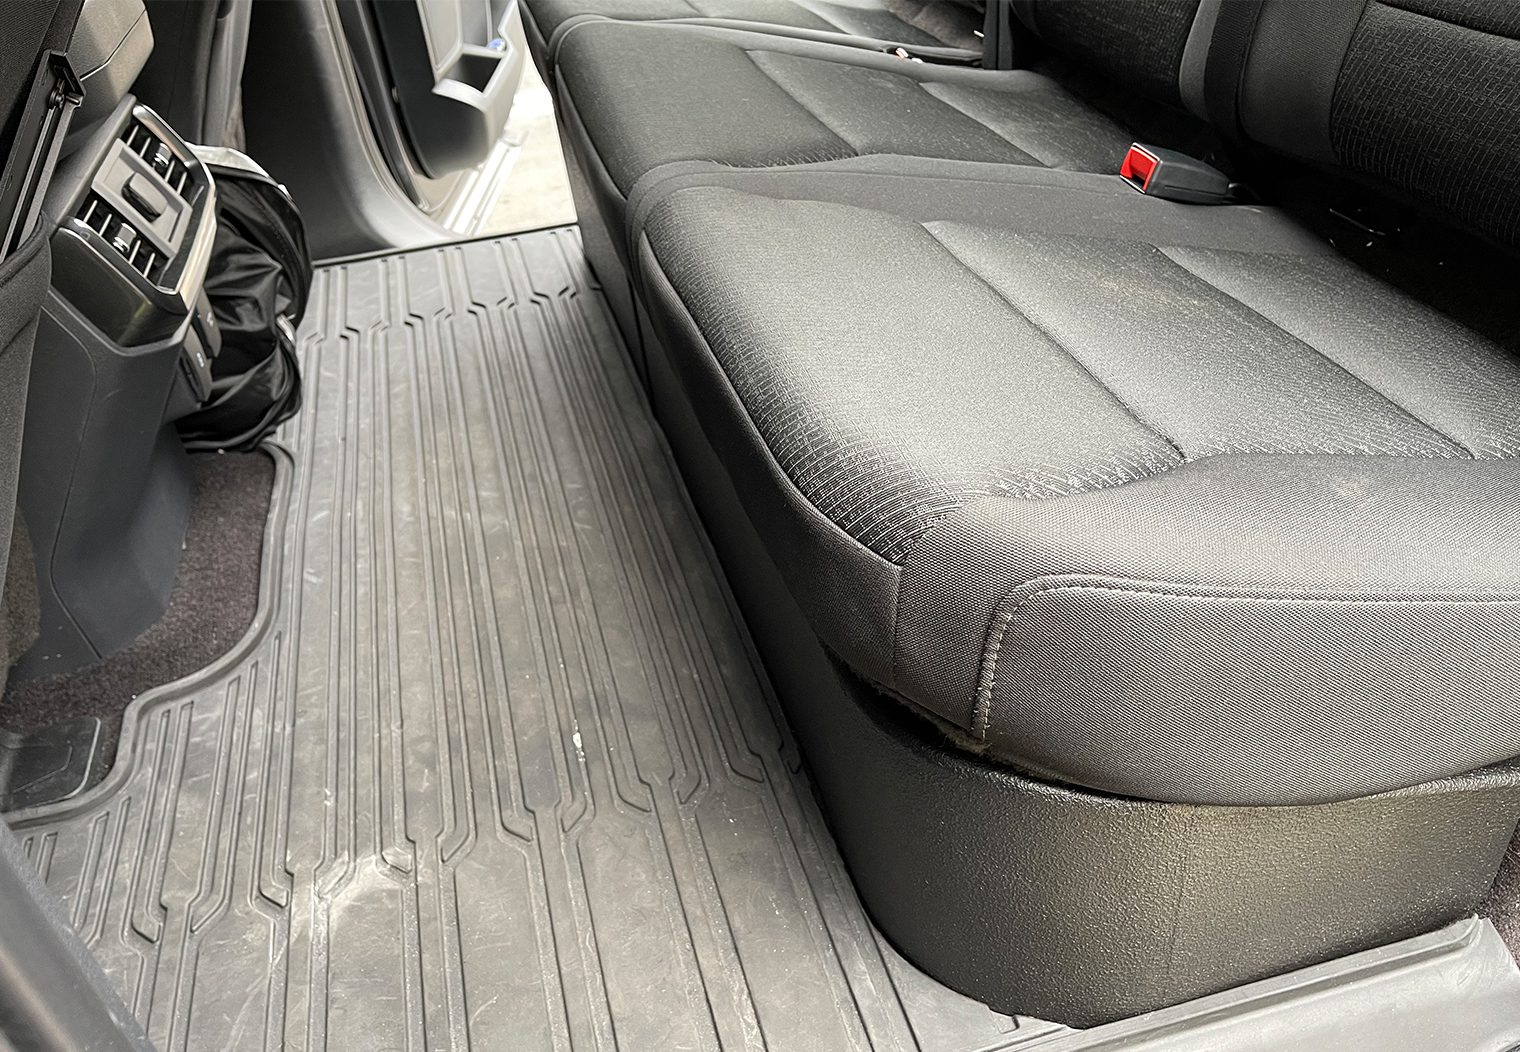
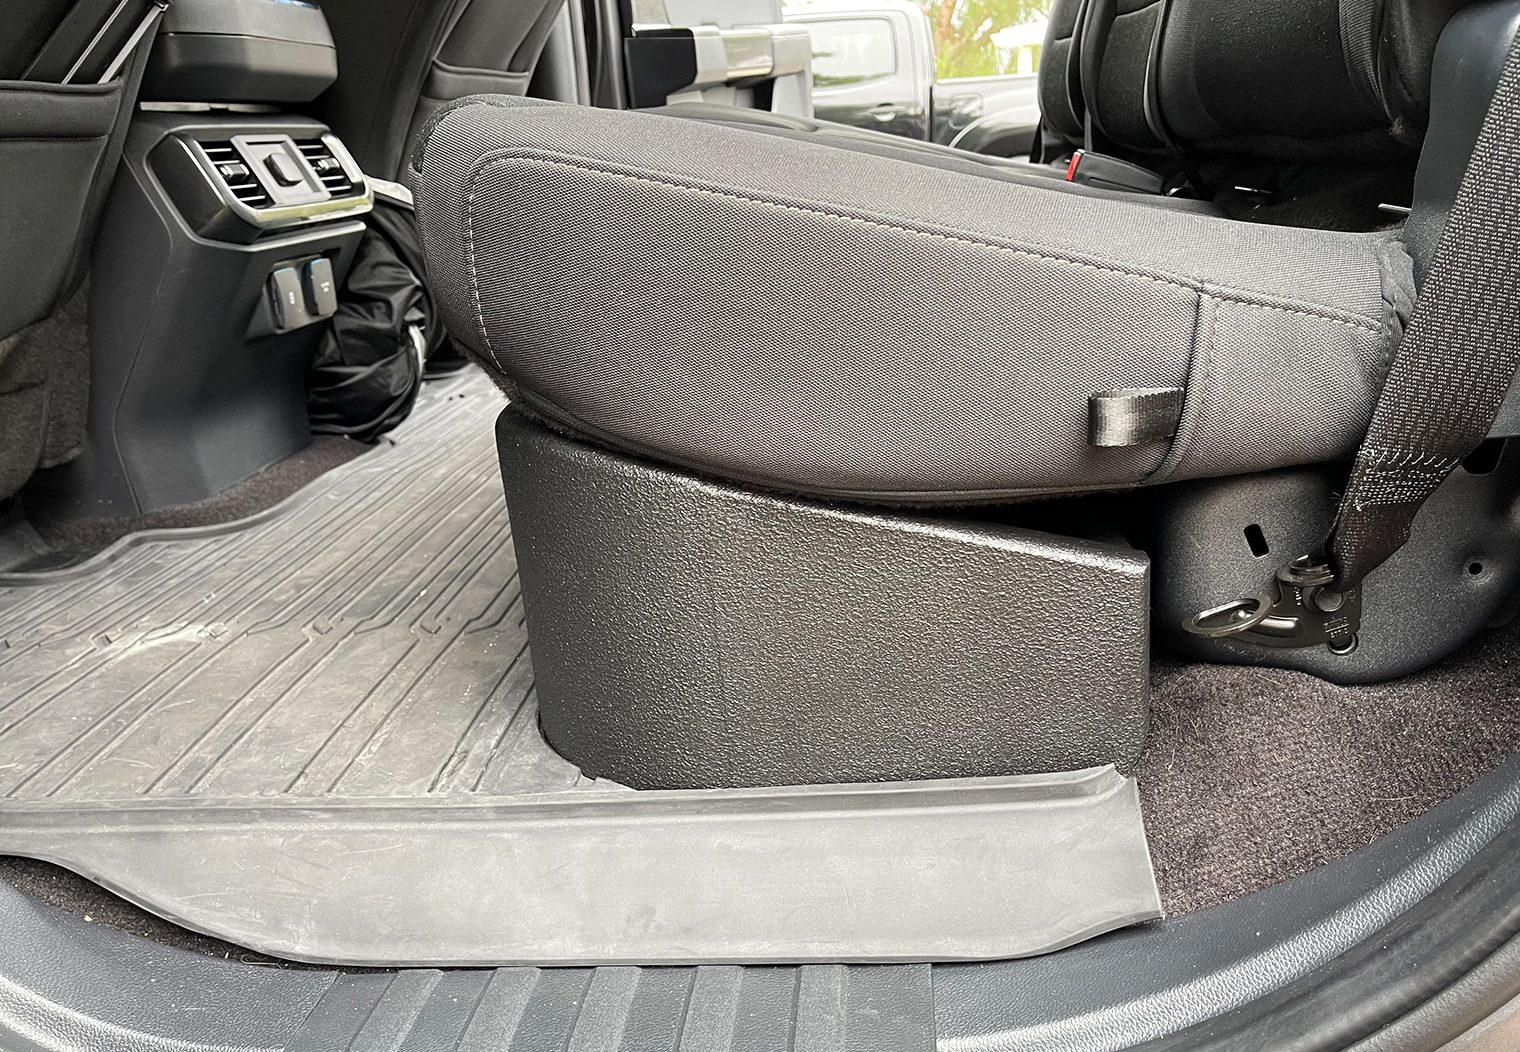
Subwoofer Installation
The subwoofer was pretty easy to install as well, since I had already assembled and painted it. All I needed to do was drop it under the back seat and wire it to the amplifier. But after testing it out for the first time, I decided to cut the shape of the enclosure into the weather mat in the rear to drop it lower and make it fit even better (the mat had some lips on the rear that made the enclosure sit on a tilt).
Tuning the System
Now for the FUN stuff. Powering up the stereo for the first time and tuning it! With everything installed in the truck, I could now start to run through my standard checks – interference, grounds, voltage, etc etc – and then start to move on to tuning.
Setting the Factory EQ Flat via FORScan
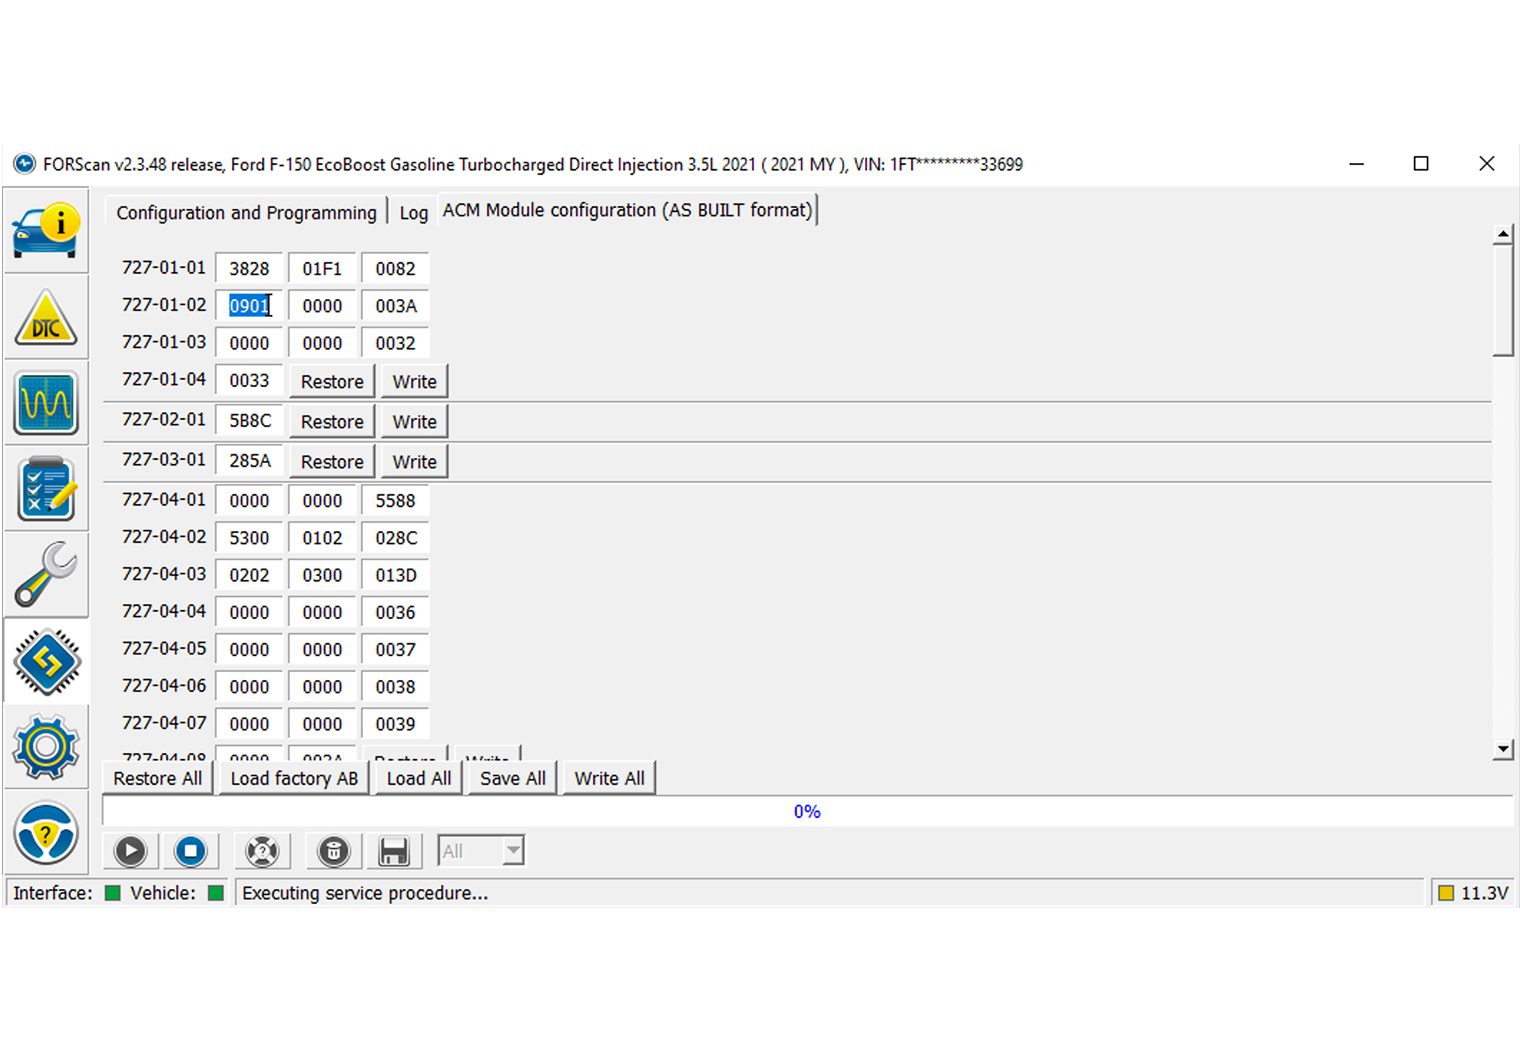
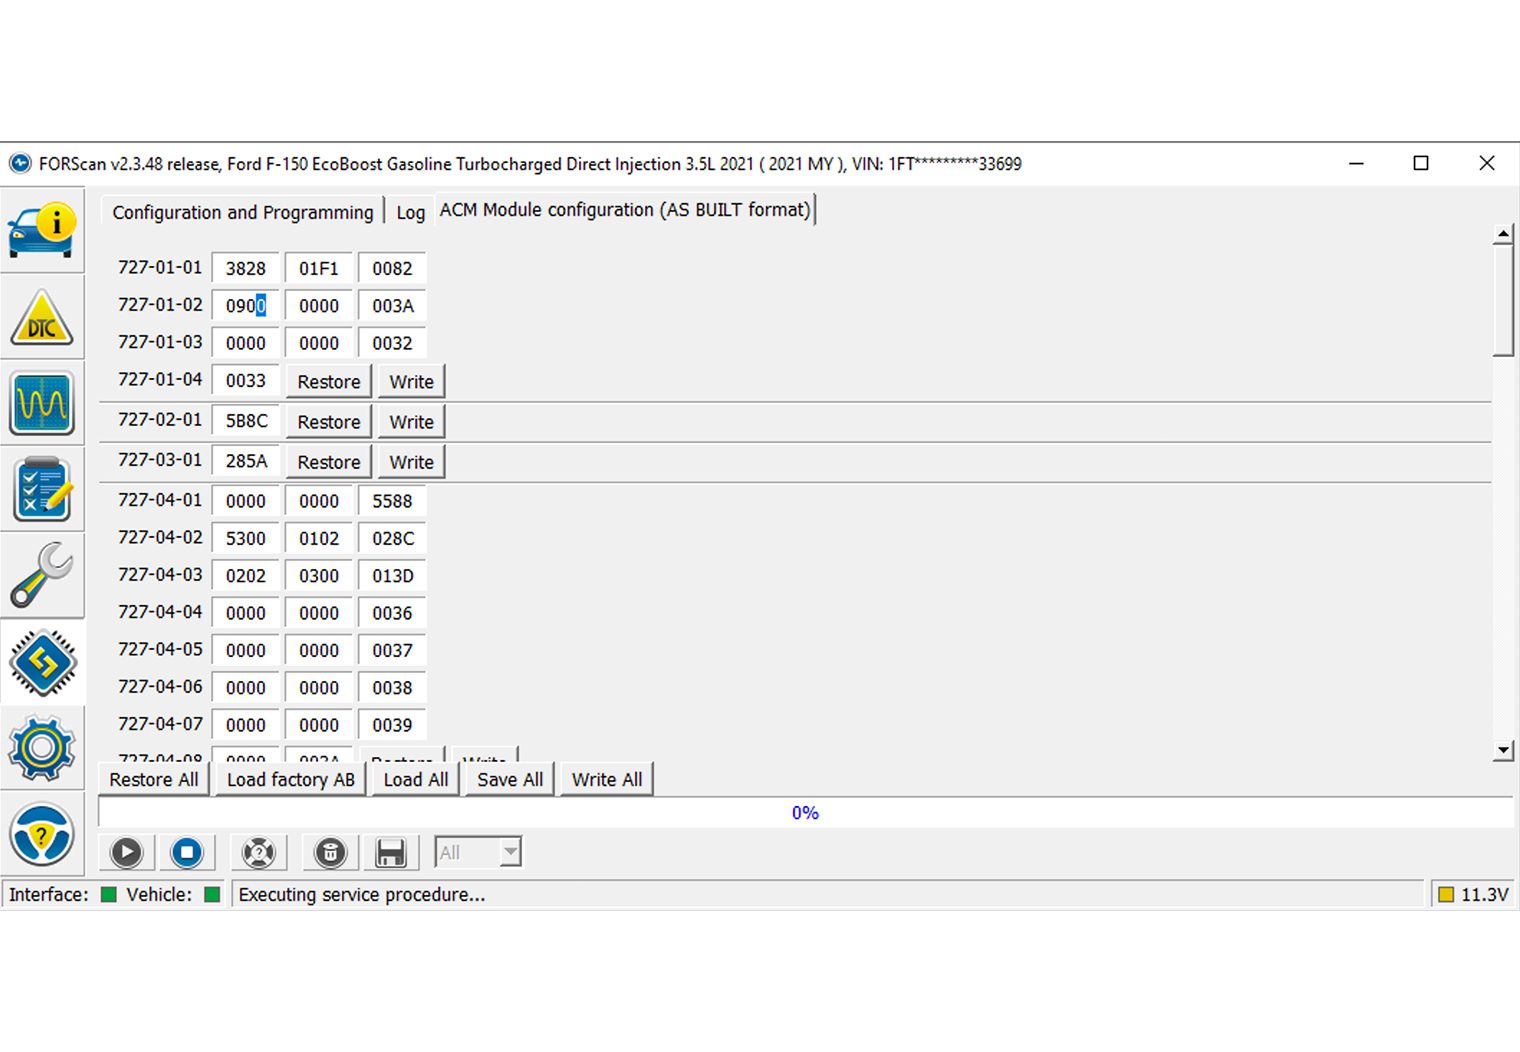
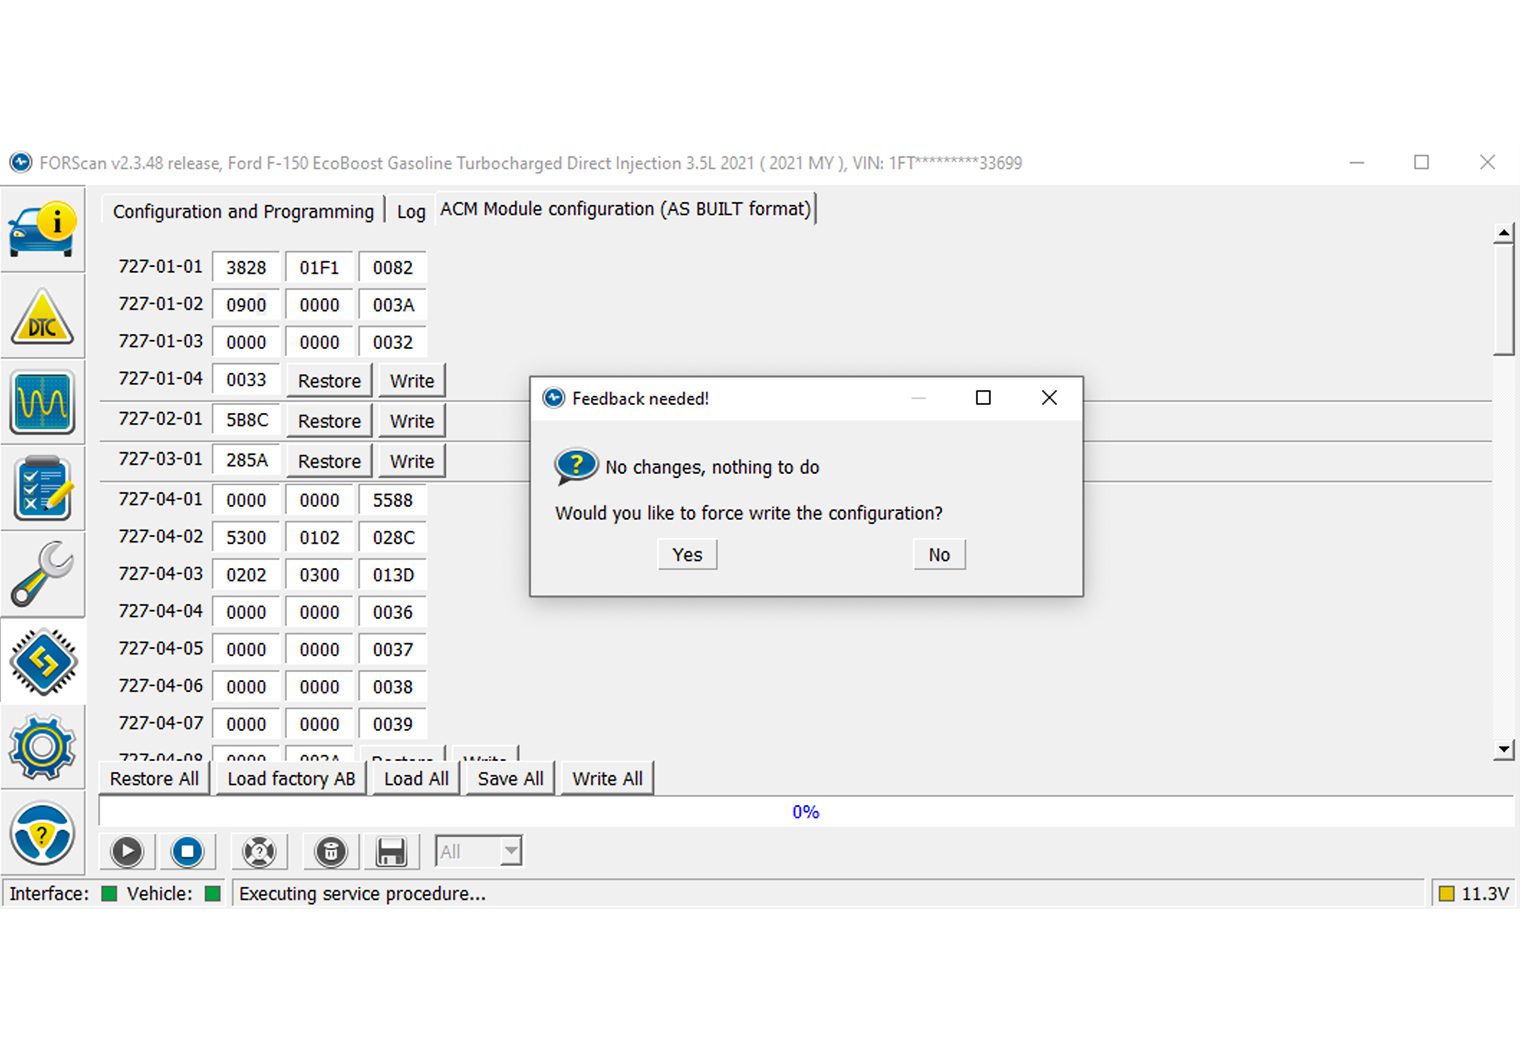
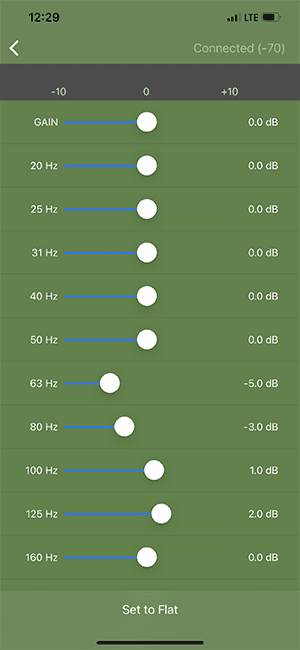
But before before turning up the volume, setting gains and tuning, I had to zero out the factory EQ. All of these trucks come pre-set from the factory with an equalizer configuration that's tuned (if you want to call it that) for the system that's in the truck. As soon as you upgrade to new speakers, amplifiers, subwoofers and so on, this factory eq setting becomes irrelevant. And in my case, since I have an aftermarket DSP via the Axxess AXDSPX, I needed a flat EQ that I could then modify during the tuning process.
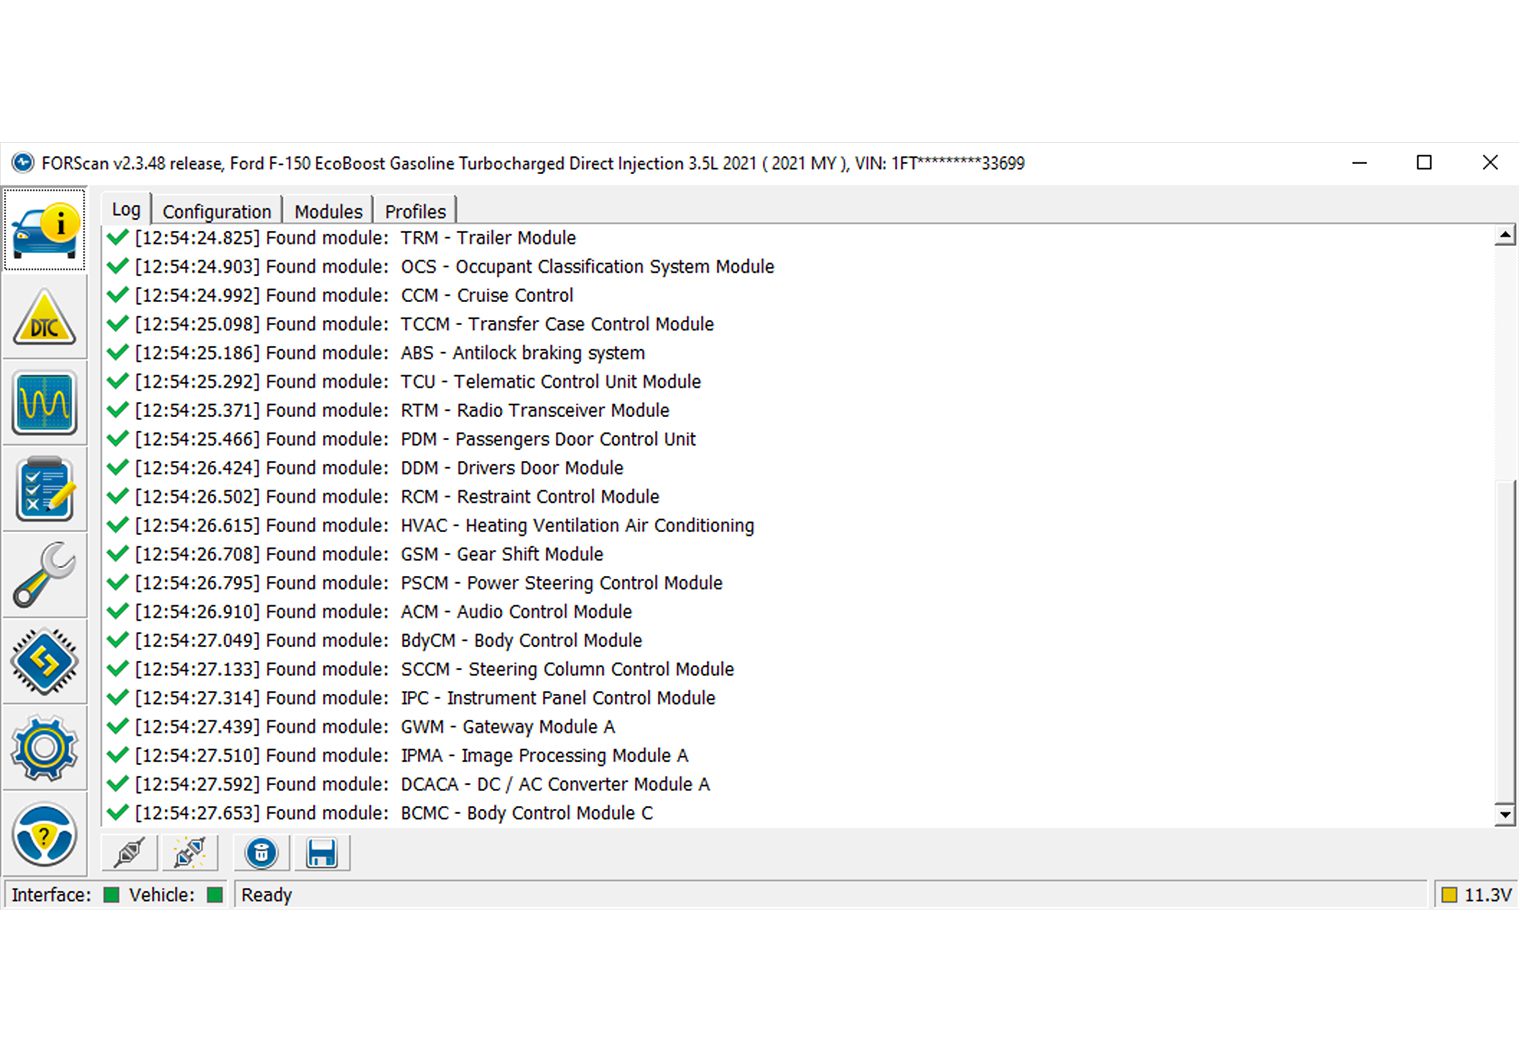
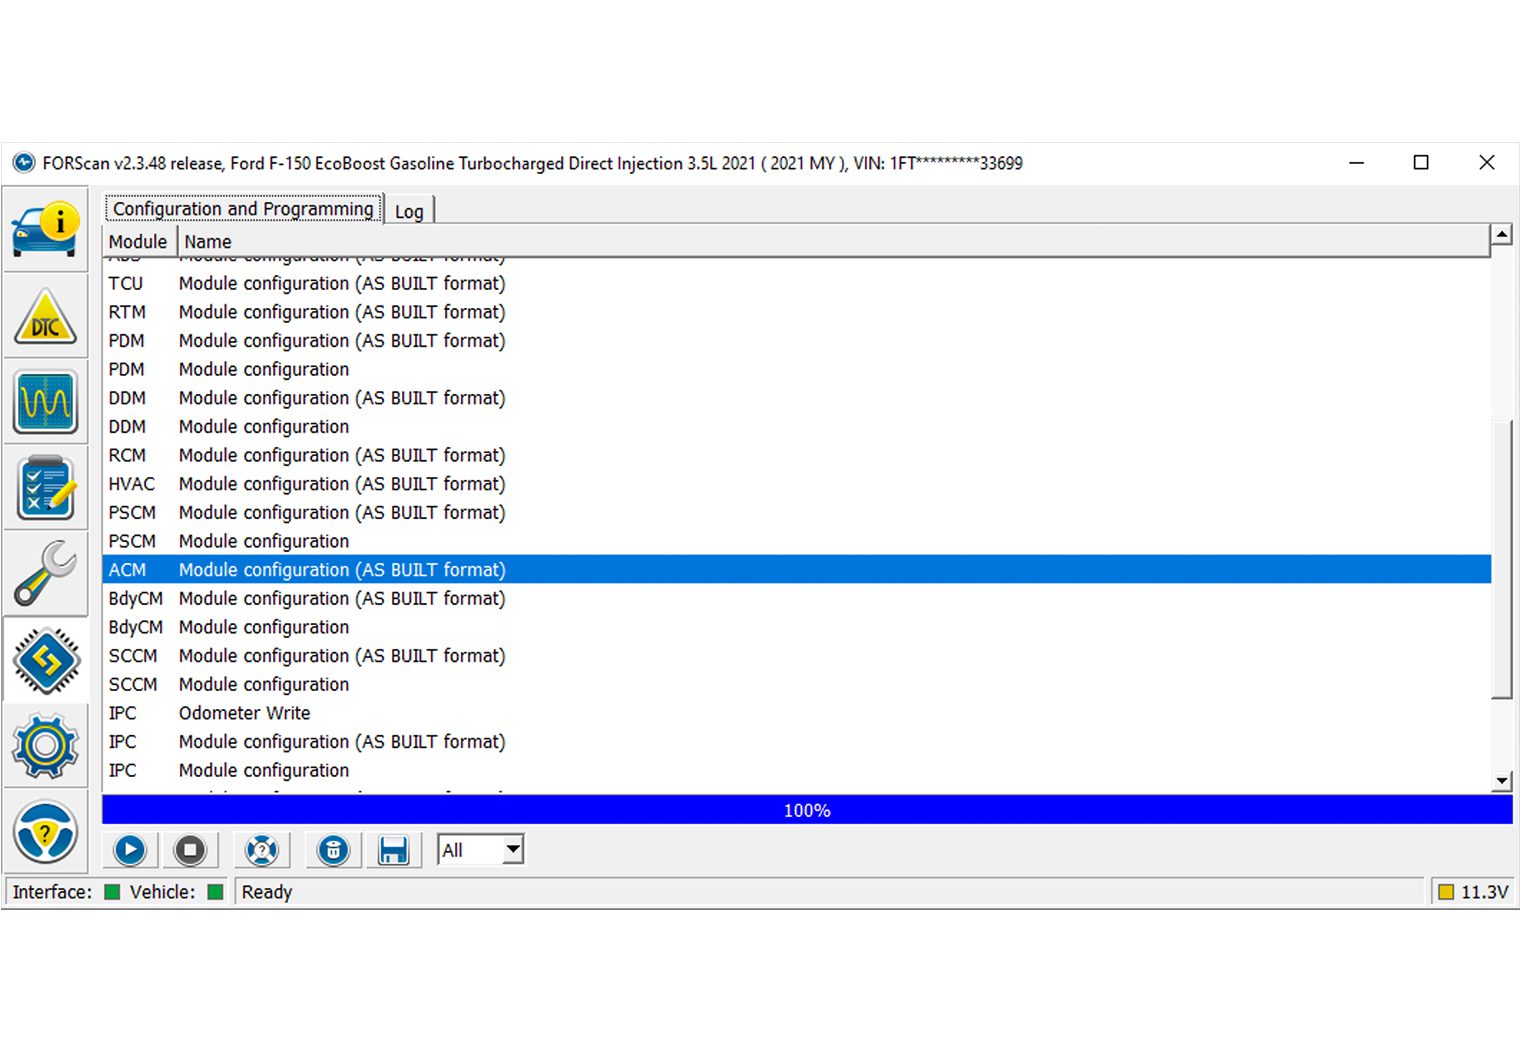
To do this, I purchased an OBDII ELMConfig tool to plug in to my laptop and then downloaded FORScan for your computer. It's only compatible for a Windows device. If you plan to do this yourself, my recommendation is that you take a look at the FORScan Tutorial first, then plug it in to start making your adjustments. There's also a FORScan spreadsheet for the 2021+ F-150 that will tell you all of the settings and configs. I specifically used the “ACM 727” tab >> EQ Selection (EQS). Here's what the process looked like for me:
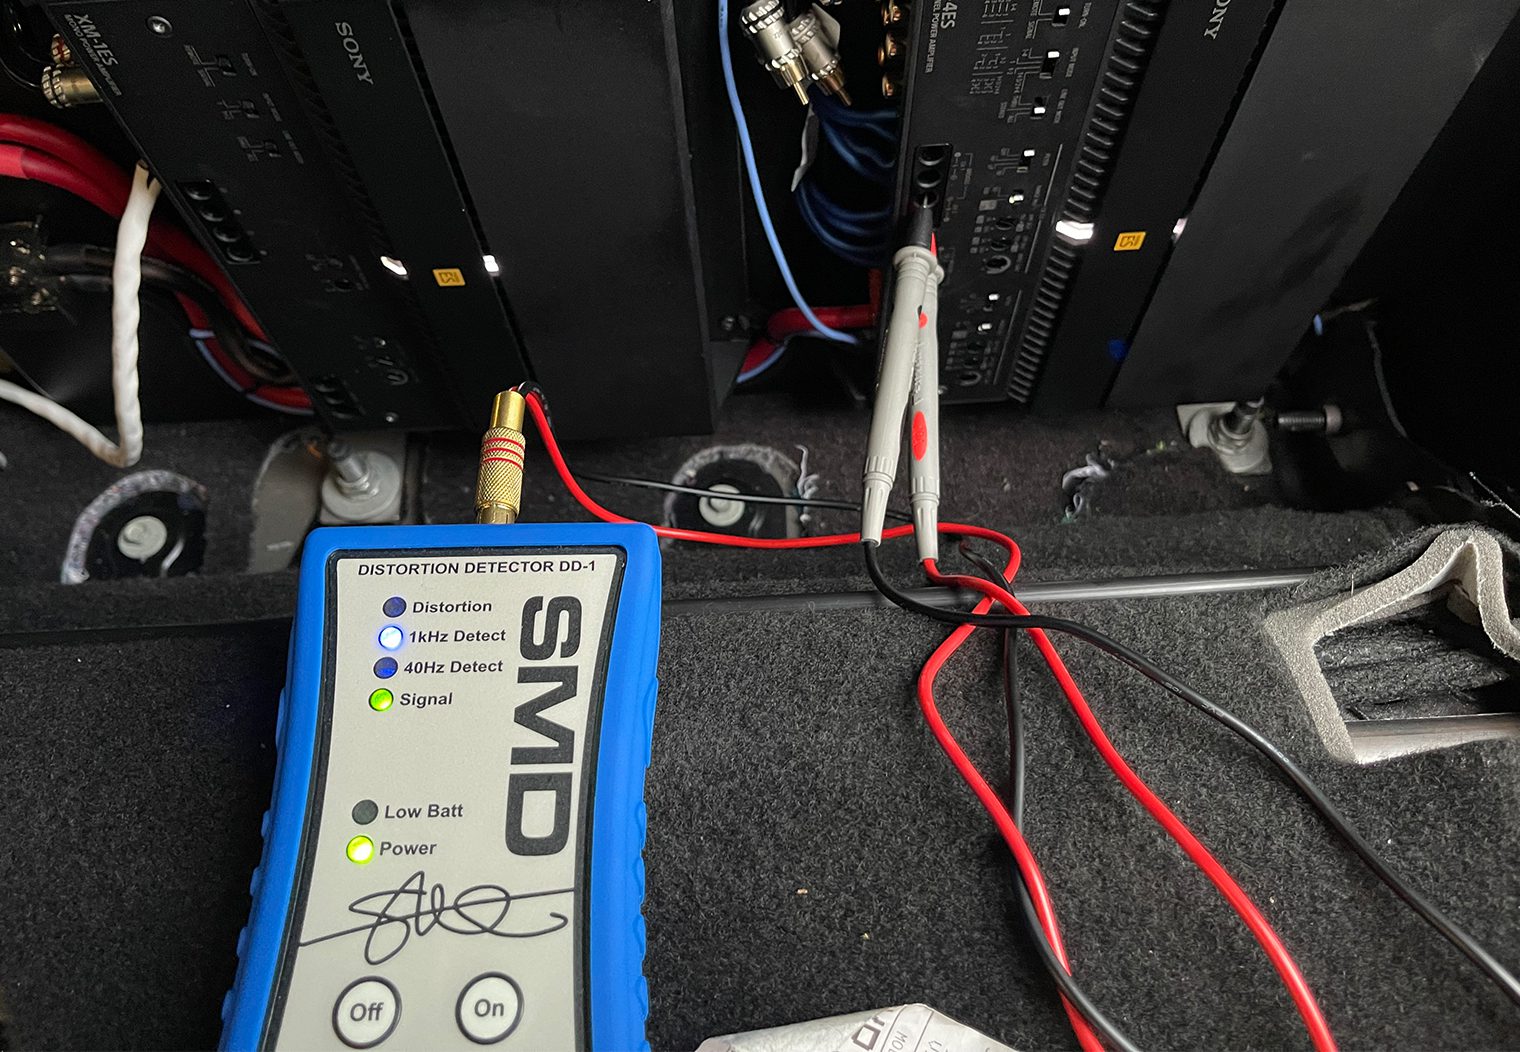
Setting Gains with SMD DD-1 Distortion Detector
Although there's plenty of ways to set the gains without this expensive tool, this has to be one of the quickest and easiest ways to do so with accuracy. I used the SMD DD-1 distortion detector to first check the gains from the head unit. I did this at the back of the truck where the amp signal RCAs were using a 1k hz signal for my 4 channel amplifier. Surprisingly the signal was good up to about level 28 (out of 30). I backed it down to about 26 though. I was surprised that the DD-1 didn't register any distortion in the signal at that high level output from the OEM head unit.
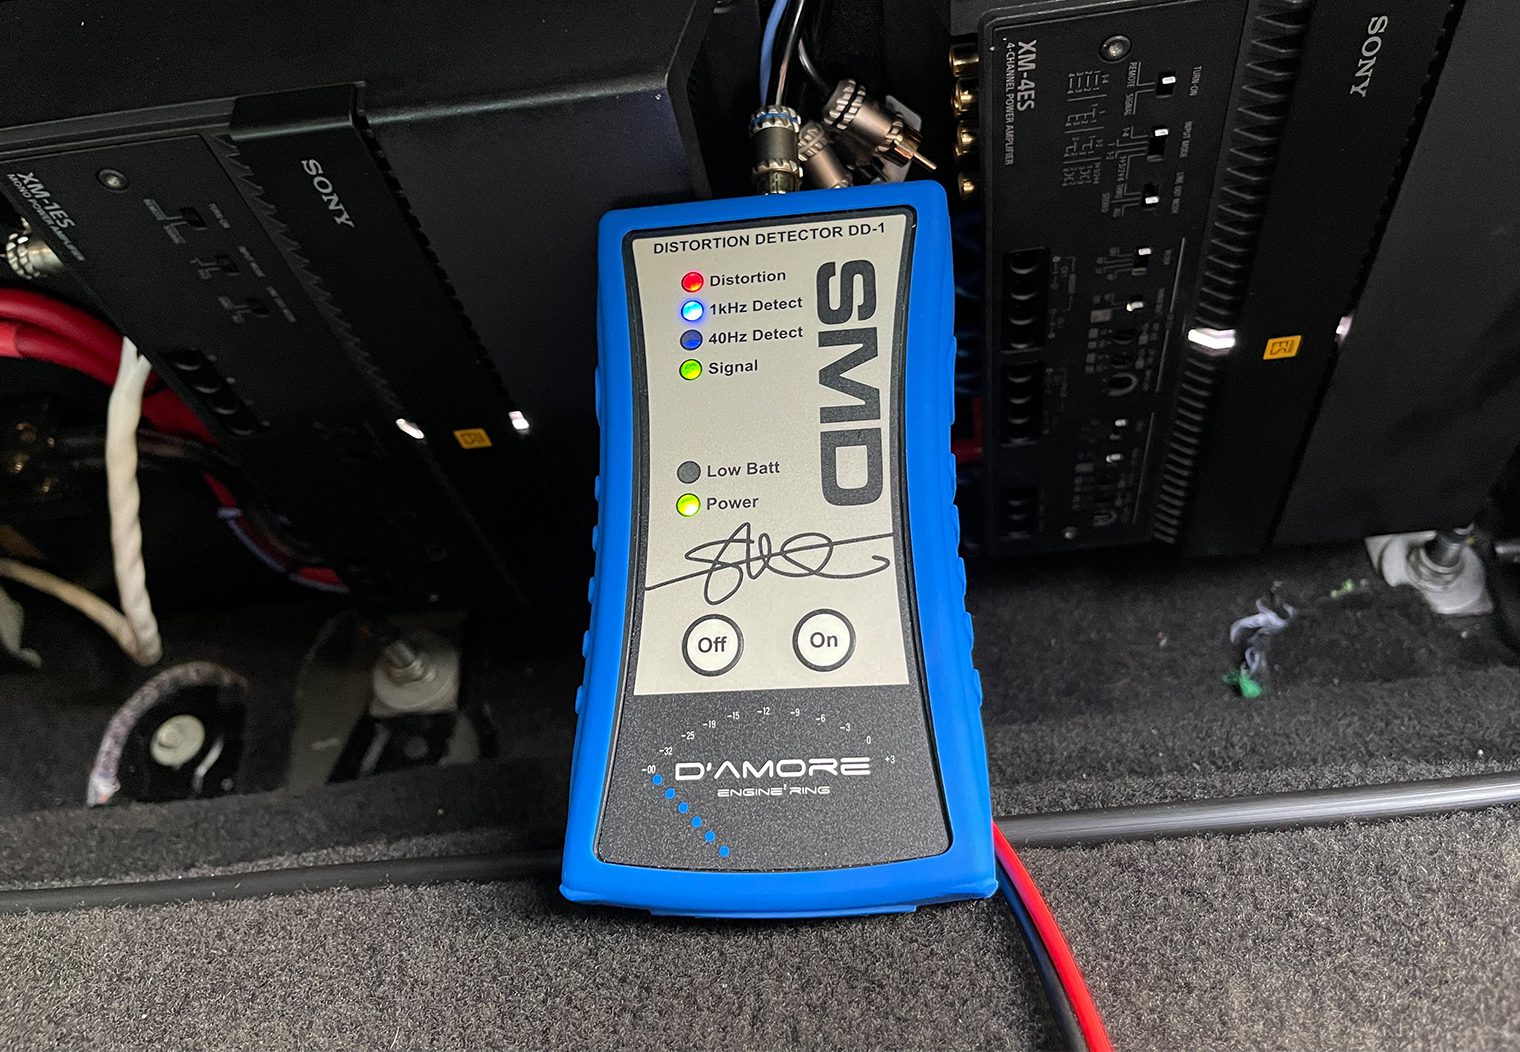
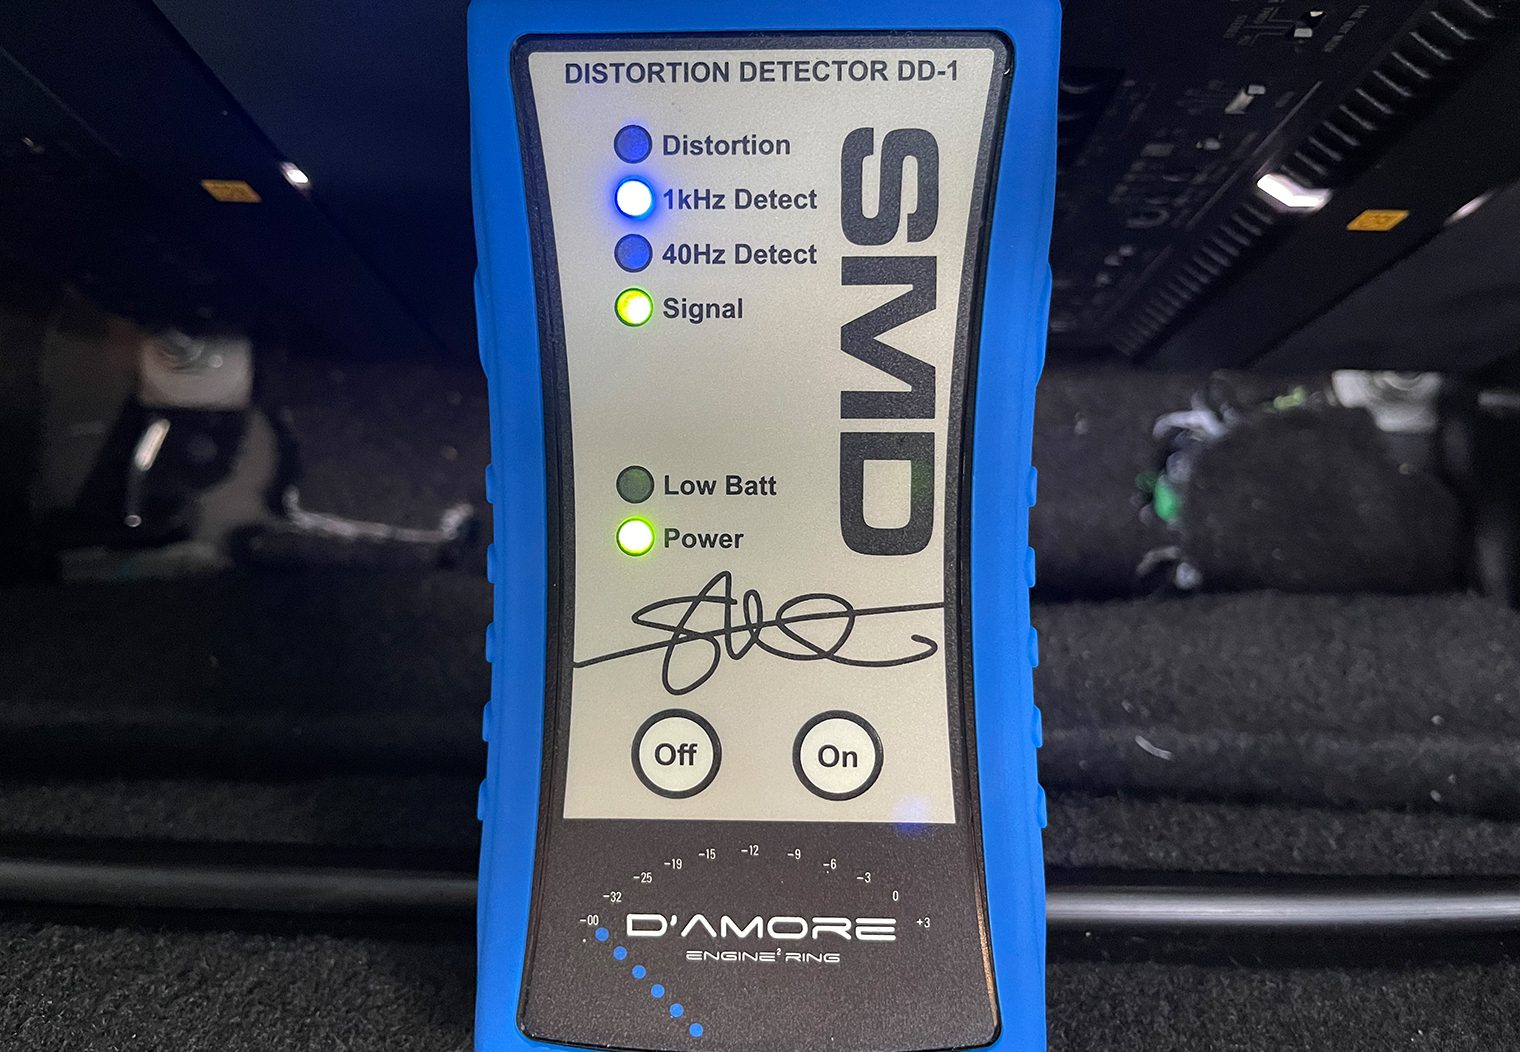
Then, I did the same with a 40 hz signal for the monoblock amplifier. This took about 10-15 minutes to get right. What was nice about this process is that I could turn off the signal via the AXDSPX so that only one channel at a time was at high volume. This prevented signal from making it to the speakers while I set gains.
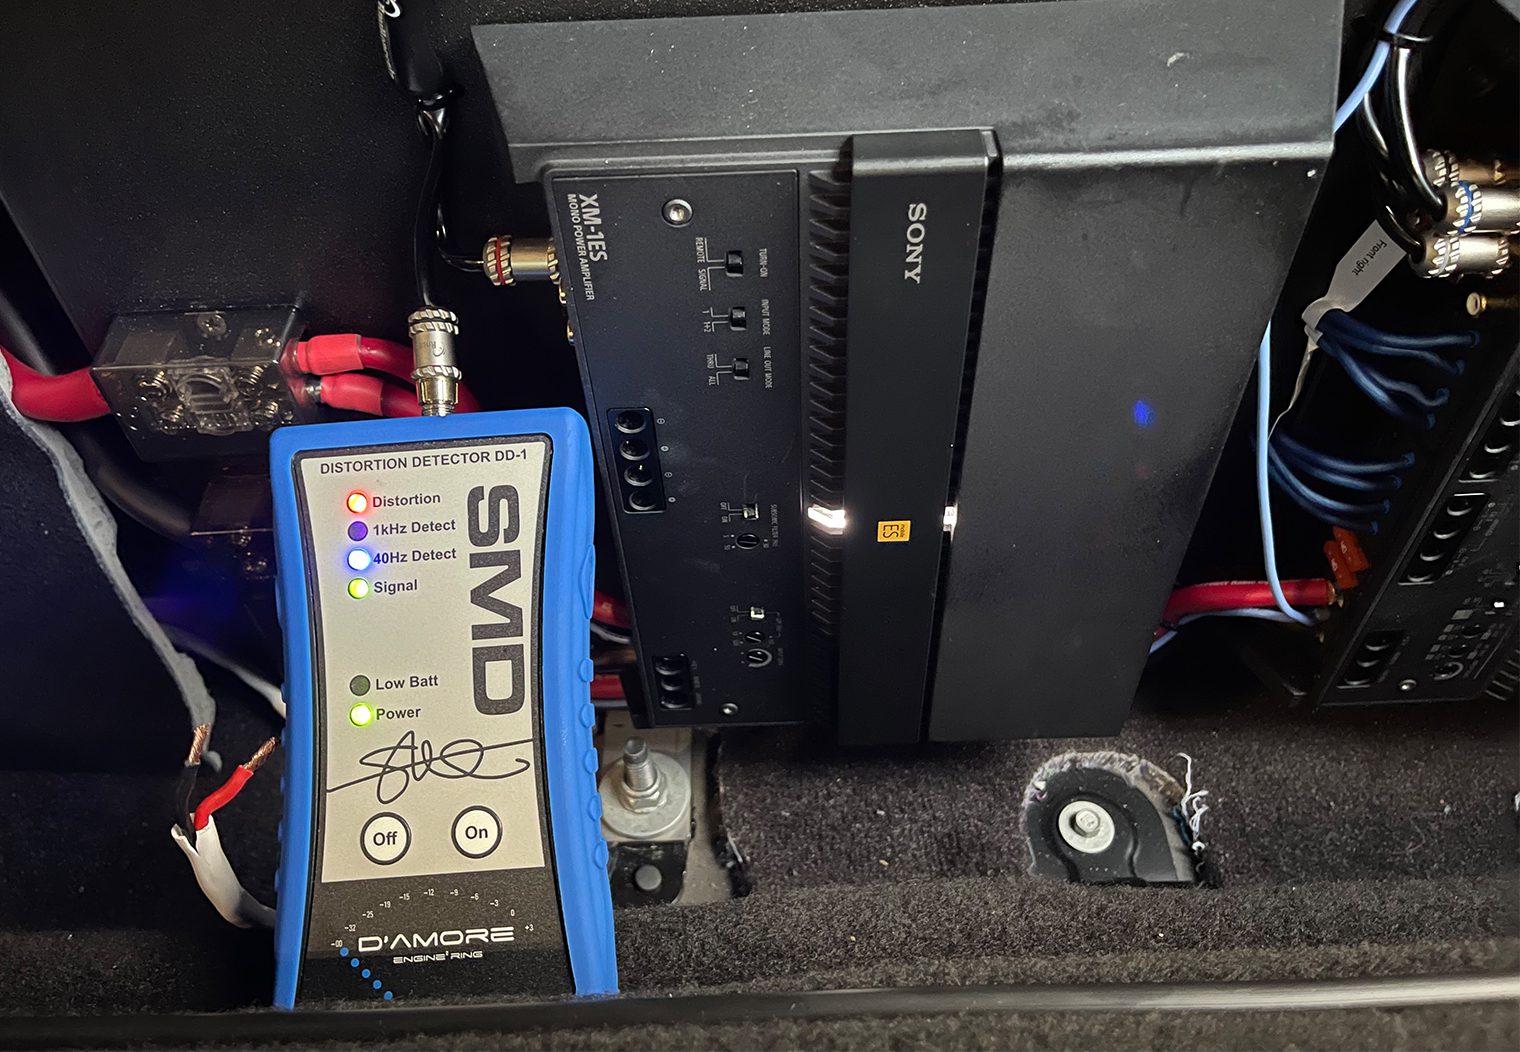
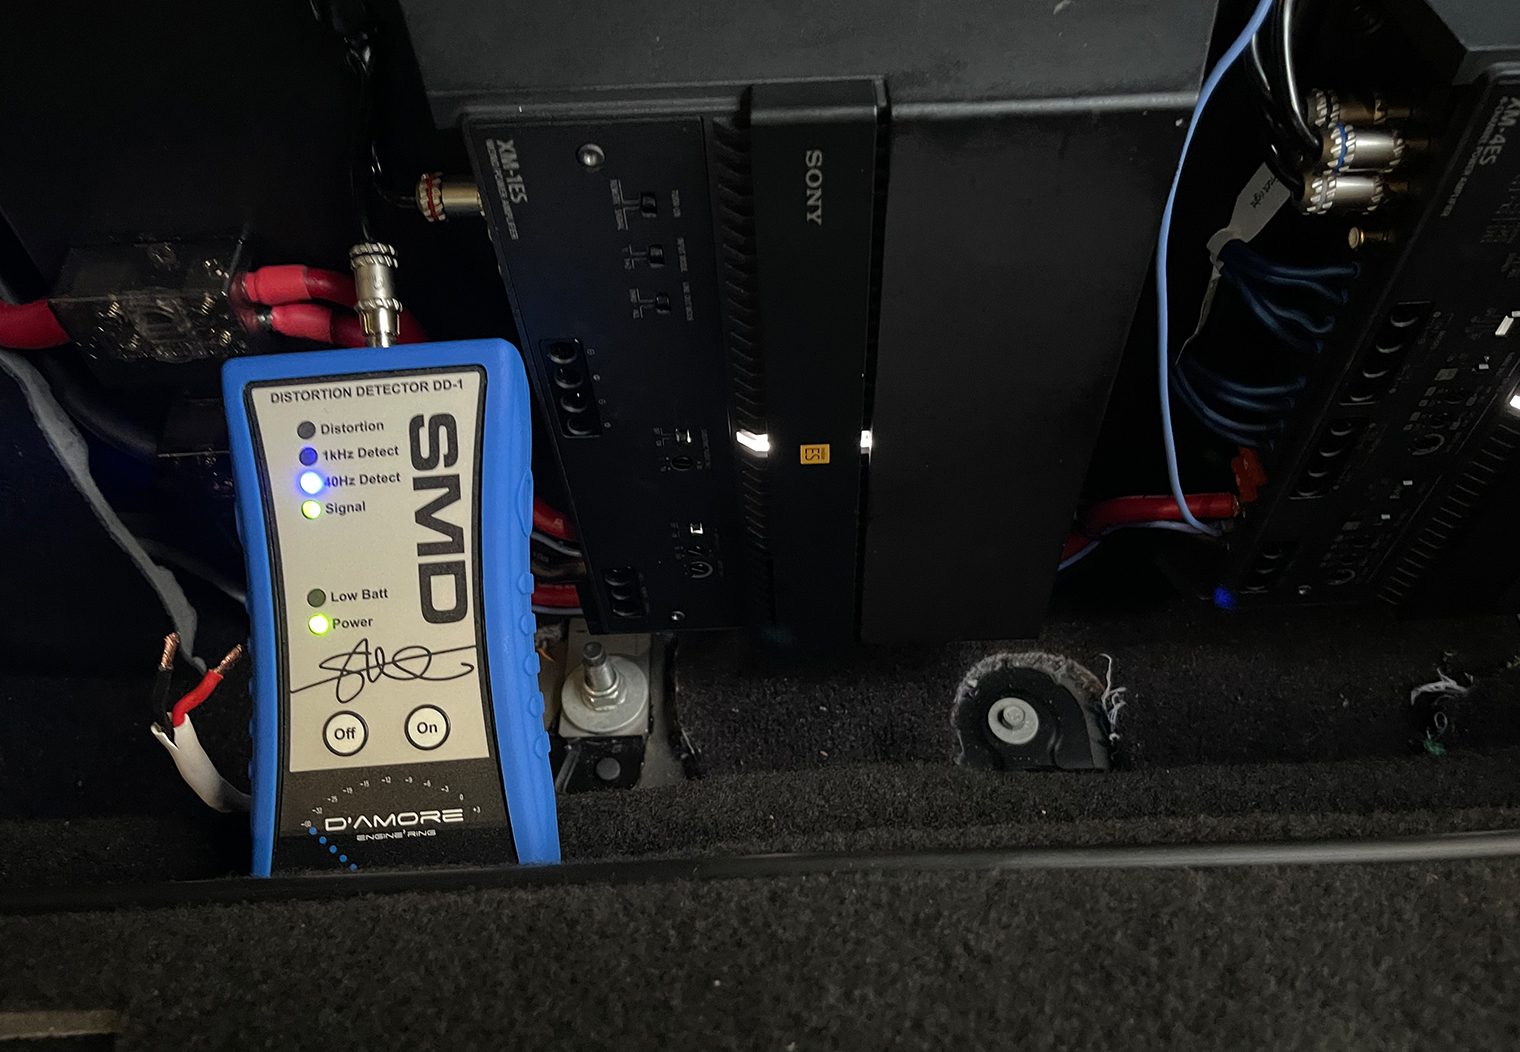
After I set the volume levels for the factory head unit and ensured that the signal to the amps had no distortion, I could then use the DD-1 to check the amp outputs and set the gains to the right levels using the distortion indicator on the DD-1. I used the same signals for the respective amplifiers – 1k hz and 40 hz.
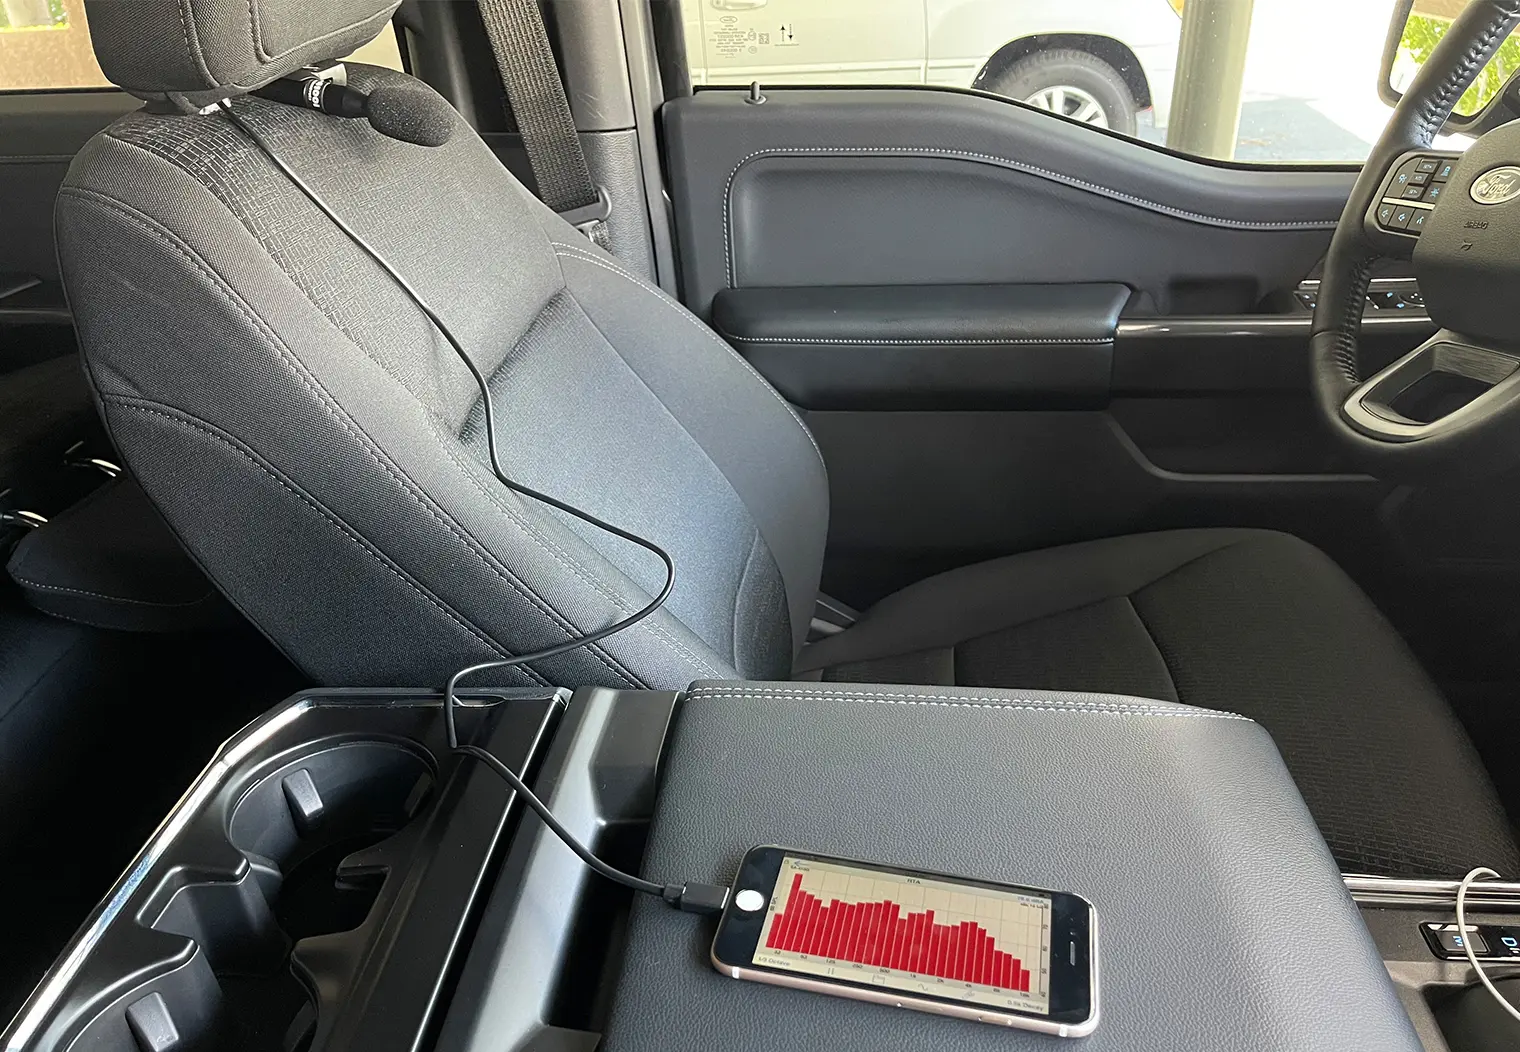
Tuning with the AudioControl SA-4100i RCA Mic & Axxess AXDSPX
After the gains were set, I could finally start to turn up the volume a bit and get a sense of how the system sounded. My first impression was, wow, mid-bass. I think that the combination of the sound panels and deadening in the doors really helped these speakers maximize their mid-bass output. To the point where I knew out of the gate that I would have to tune down the mid-bass or compensate by increasing the highs.
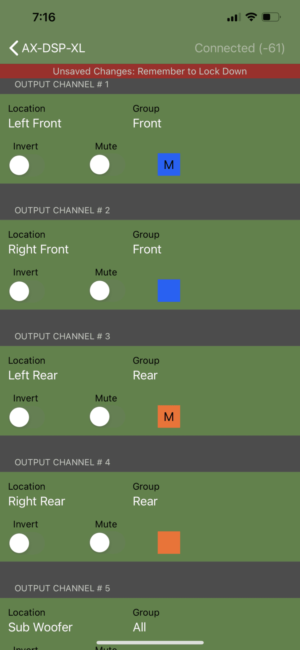
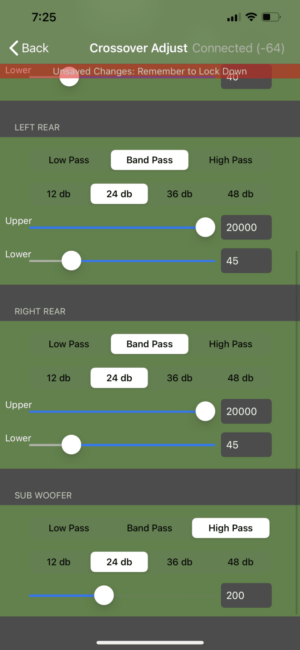
The first thing I did was set up the AXDSPX. I recommend taking a look at my review of the AXDSPL to get a sense of what this looks like if you're interested. I setup the inputs and outputs, set the crossover thresholds, etc directly from the app.
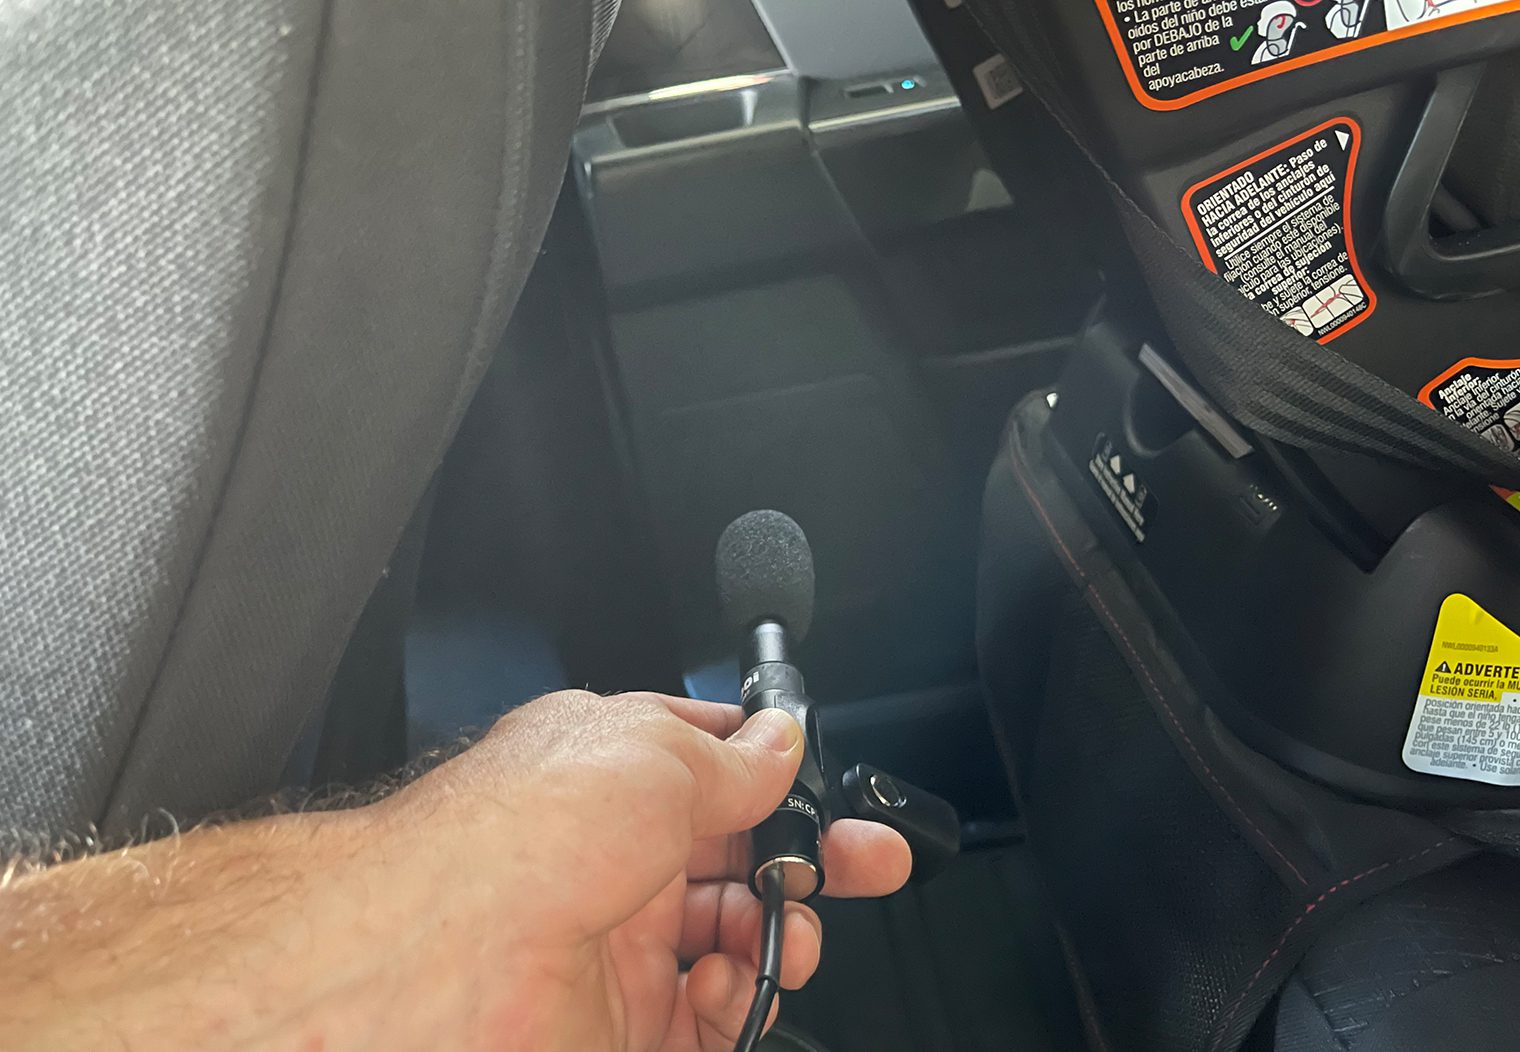
Once the bulk of the initial configurations were set and loaded on to the AXDSPX, I could then use the AudioControl SA-4100i microphone in combination with the AudioControl MobileTools app and AXDSPX app and begin to tune the system.
I would recommend taking a look at Crutchfield's detailed article about sound curves and Jeff's ideal sound curve for a vehicle. Although my images below might not reflect this sound curve initially, it was what I targeted when tuning the system as a whole.
To tune, I actually used a Pink Noise generator from the KickerU app as my signal. Speaker by speaker, I used the AXDSPX to mute every other channel except for the one I was tuning, and used the RTA mic and software to identify peaks and troughs in the output. Then, I'd go into the AXDSPX equalizer and adjust the appropriate frequency band.

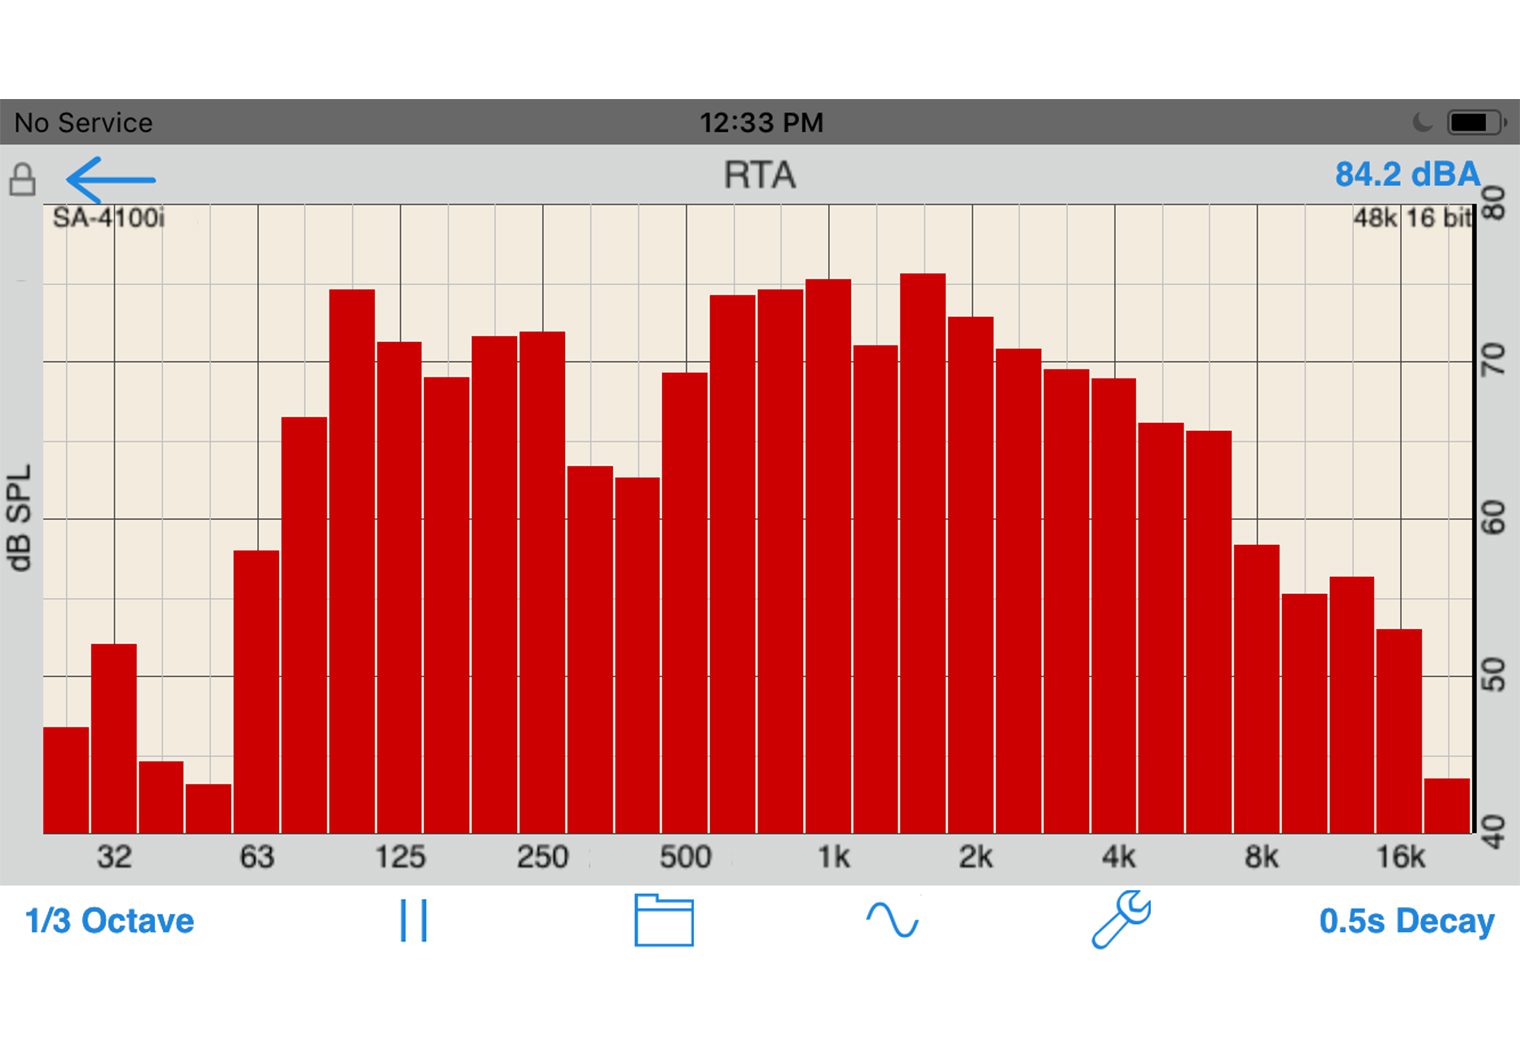
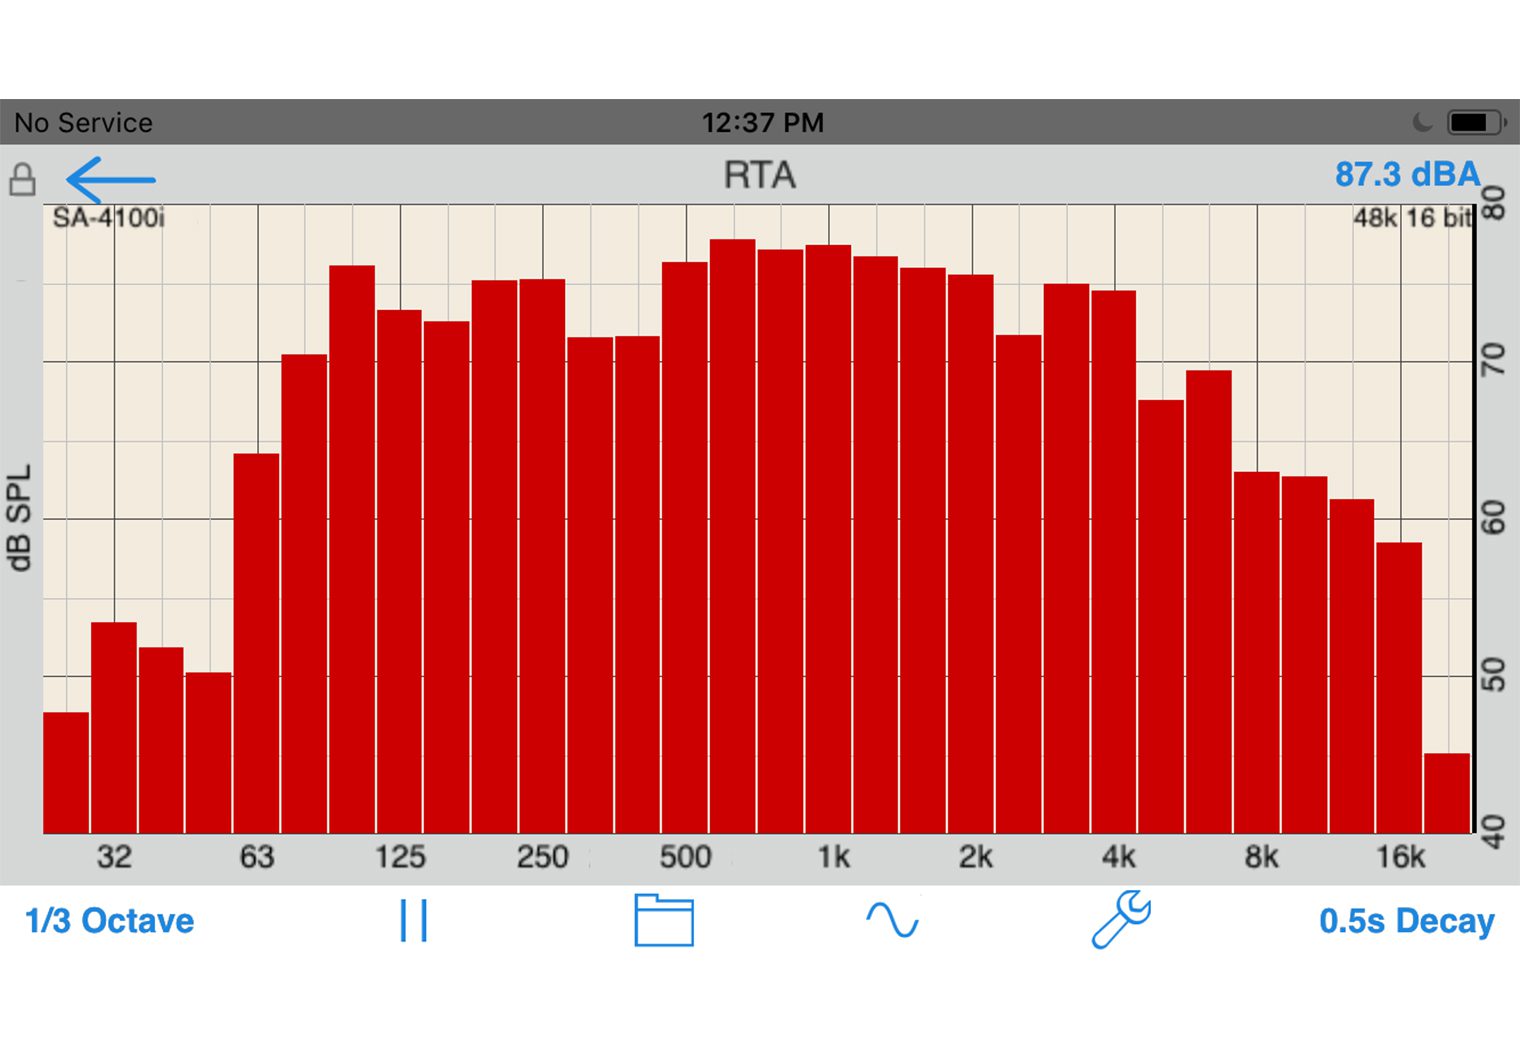
Once I had individually tuned each speaker, including the subwoofer, I then turned on all of the channels and placed the microphone around ear height on the driver's seat to see where there were pitfalls or peaks in any frequencies. I tuned each speaker again to level out the output a bit more.

I think there's 100 different ways to tune a system like this. If you're a professional, I'd love to hear your comments! This felt like it got me about 80% of the way there. After listening to a few country, pop, acoustic songs I personally felt like the mids were too strong so I went back in and lowered some of the mid-range frequencies to level it out. Maybe it was a preference. But this tuning process allowed me to:
- Set the gains properly to prevent clipping
- Ensure that the crossovers were set properly and optimize each speaker/channel output
- Prevent distortion at high volumes
- Identify and level out some of the spikes and troughs in each speaker's output and adjust accordingly via the EQ
Overall I was really happy with this tuning process. I mentioned this early on in the install article regarding the mid-bass and the sound panels – I noticeably had to counter the mid-bass in this install to level it out with the mids and highs. I've installed similar Sony speakers on a vehicle without as much dampening and was overwhelmed by the mids and highs. I think this is a testament to what dampening and panels like this can do in a vehicle.
Wrapping Up
I had an awesome time with this system. Learned some new things and used some new tools too. All in all I probably had 50-60 hours into this install (not counting the time it took to do the writeups!). Much of that was dumped into the subwoofer enclosure.
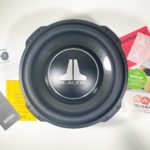
I'm really pleased with the sound quality of the Sony MobileES speakers in here, amplified by the Mobile ES mono and 4 channel amplifiers. And the 12TW3-D4, I think, was the best choice given the space and the fact that I wanted to save some room for storage under the rear seat.
Clear, rounded, LOUD is how I would describe this system. I wouldn't consider it a slamming system though with only a single 12. I would probably want to double up or go with a dual 10″ setup to get some more bass out of this kind of system, but that's a bit flashy/over the top for me.
If you liked this writeup, share your thoughts! Would love to hear what you think. And of course, share it with others!

This series comes at a perfect time as I’m going to attempt to swap out my factory system in my 2018 150 with something new. I’m not sure I will go as high end as you but I will definitely put in the work. Any chance you are willing to share the 3d printing schematics?
Hello! Happy to, but these will likely only fit on a 2021+. The A-Pillar tweeter mounting location is different and the dash is too.
You may need to sign up for Tinkercad to view these, but here’s the files:
Fuse holder: https://www.tinkercad.com/things/2qp4GP6Y93J?sharecode=xeRR0gE93CGQG0GIQI1EaG9PFj4I6bGSGhhPgoUdqeo
Center Dash (right): https://www.tinkercad.com/things/6q8Dd42jrNQ?sharecode=cQVECo7WYm0uZ4TviVs6V21CM3ISq26jPpsMkoC49TI
Center Dash (left): https://www.tinkercad.com/things/9oG3dV8Z6C0?sharecode=VjY_wwyusYSBZuD0PybhEBqm41AYTOL_XpRg7zagpKs
Tweeter Mount (left): https://www.tinkercad.com/things/9QRWW7GDFB1?sharecode=GBjjBGJprWSOc1Ljc69zbCHR27imf9ap_V1TDPaWIkI
Tweeter Mount (right): https://www.tinkercad.com/things/2ATpsEjhPHt?sharecode=O3P91GTTzm_P2yLi5PwBR3_EU0wxH3D31eMrgRUKbRU
Much appreciated
Love it! I bought a plug and play style, but the one thing I am not sure how to do is mount my bass knob. 2022 f150 lariat SCREW. I don’t know if I’d know how to mount it under the steering wheel so i was thinking about making putting it in that shelf thing on the side of the center console? It looks like there is a screw underneath that maybe will help me take it out and maybe i can install it there? great read. you are skilled and i wish i was.
I begun my project today, started replacing left front door speaker now there is no sound on the left channel, put factory speaker back and no sound still. May it be a fuse?