In this article: I'll walk through how to use Axxess's AXDSPL DSP & Line Output converter to upgrade your car's stereo without replacing the factory head unit or losing key features. I'll hook the AXDSPL up to power and demo it's features on my iPhone too!
In most modern vehicle trim packages today, the factory head unit does a lot more than just control your car's stereo. Climate control, heated seats, vehicle data, and many other features are frequently intertwined with the OEM systems, making the installation process for things like car speaker upgrades and subwoofer additions a little.. different.
That was certainly the case for me when I went to the drawing board for a custom stereo in my 2021 Ford F-150, and I'm sure it applies to so many more vehicles out there today.
So, how does one add a subwoofer to a stereo without replacing their factory head unit to get a clean amplifier signal? Similarly, how can you upgrade an entire system with new speakers amplifiers and subwoofers while retaining all of the factory functionality and benefits that the OEM head unit comes with? Well, thankfully Metra's Axxess AXDSPL DSP processor and line output converter allows you to do just that, with limited wire tapping, soldering, etc. With the AXDSPL, you can upgrade your entire stereo with high performance products while retaining the factory look and functionality of your car's dash and head unit.
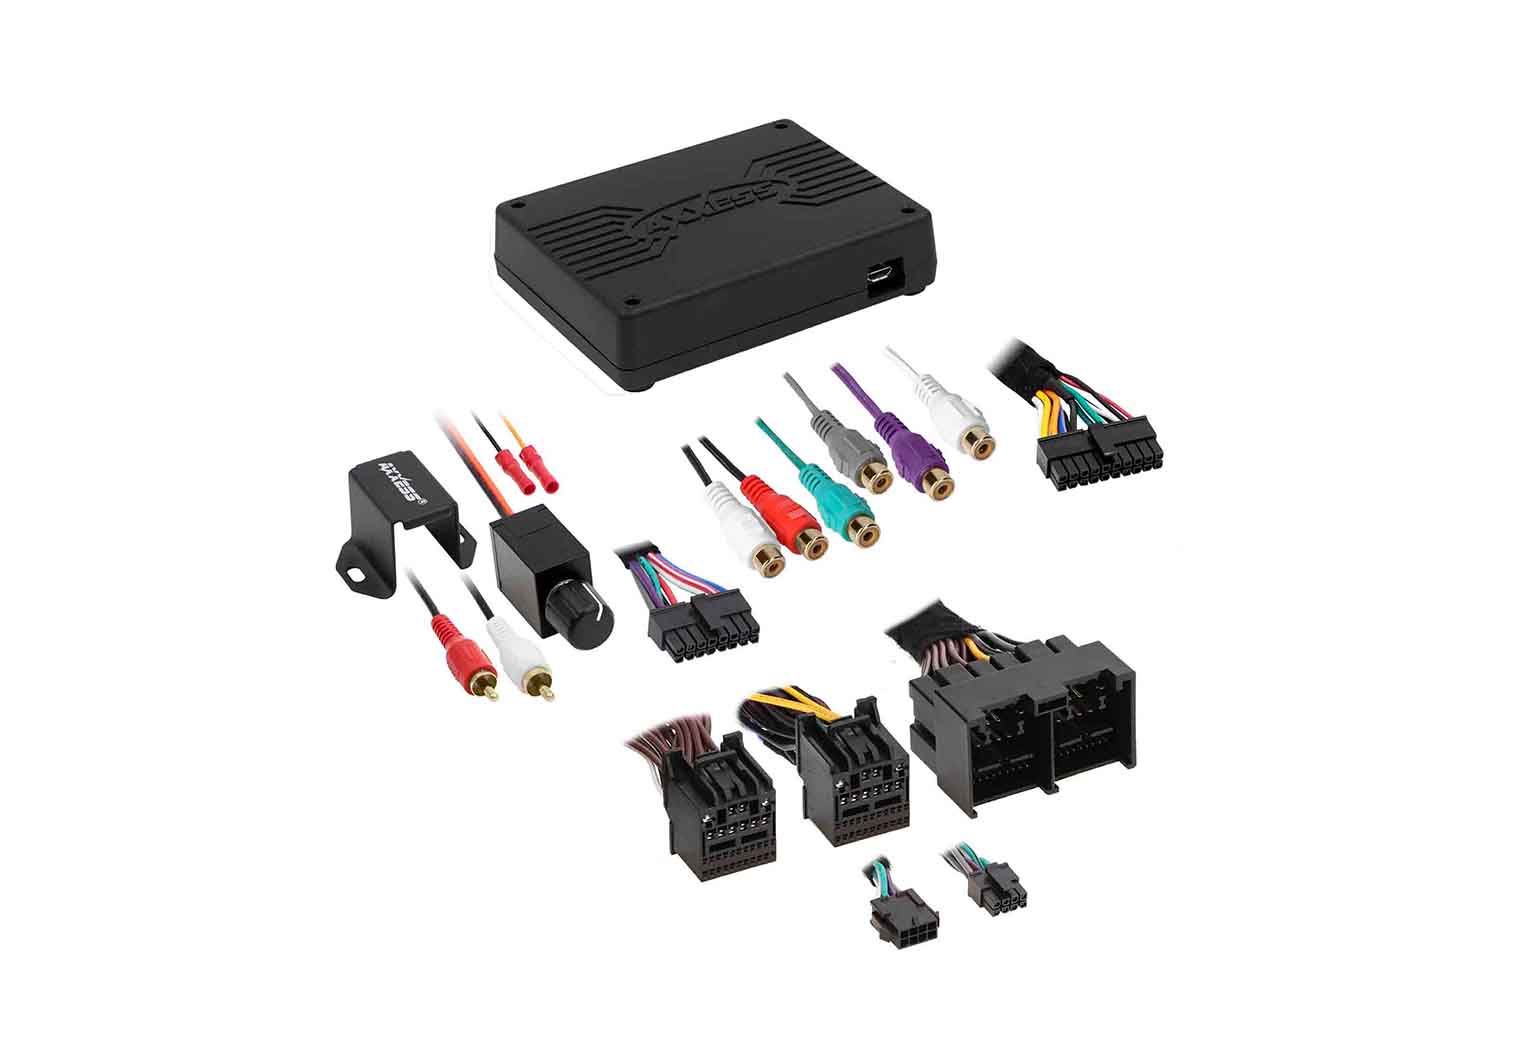
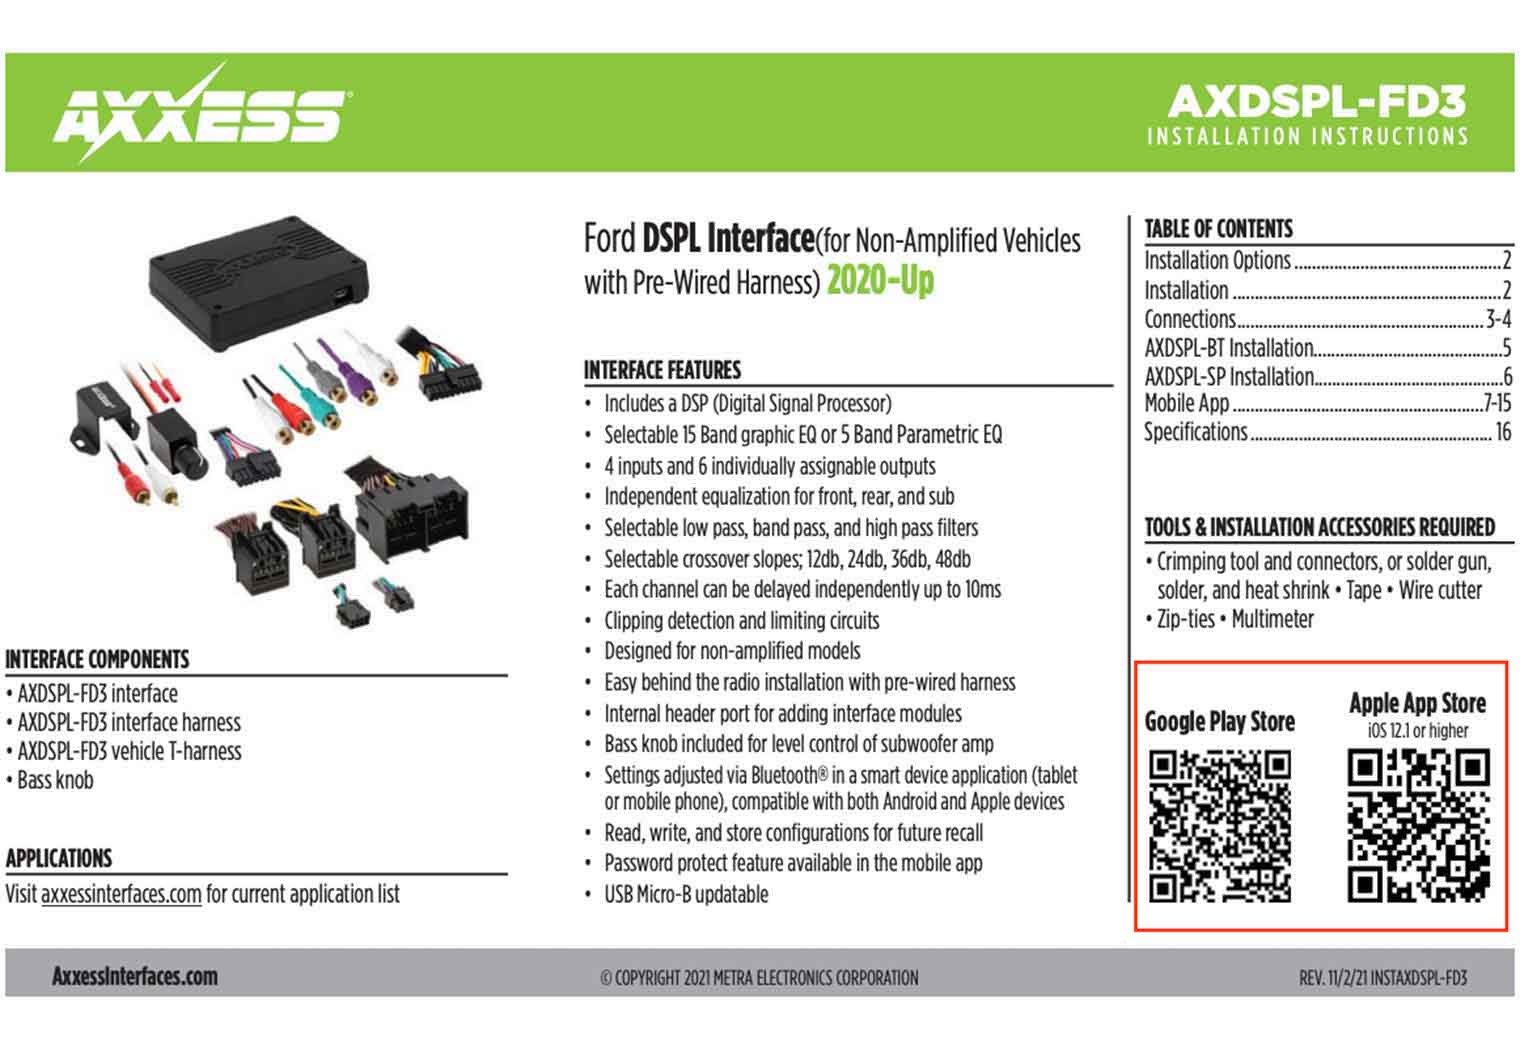
What's in the Box
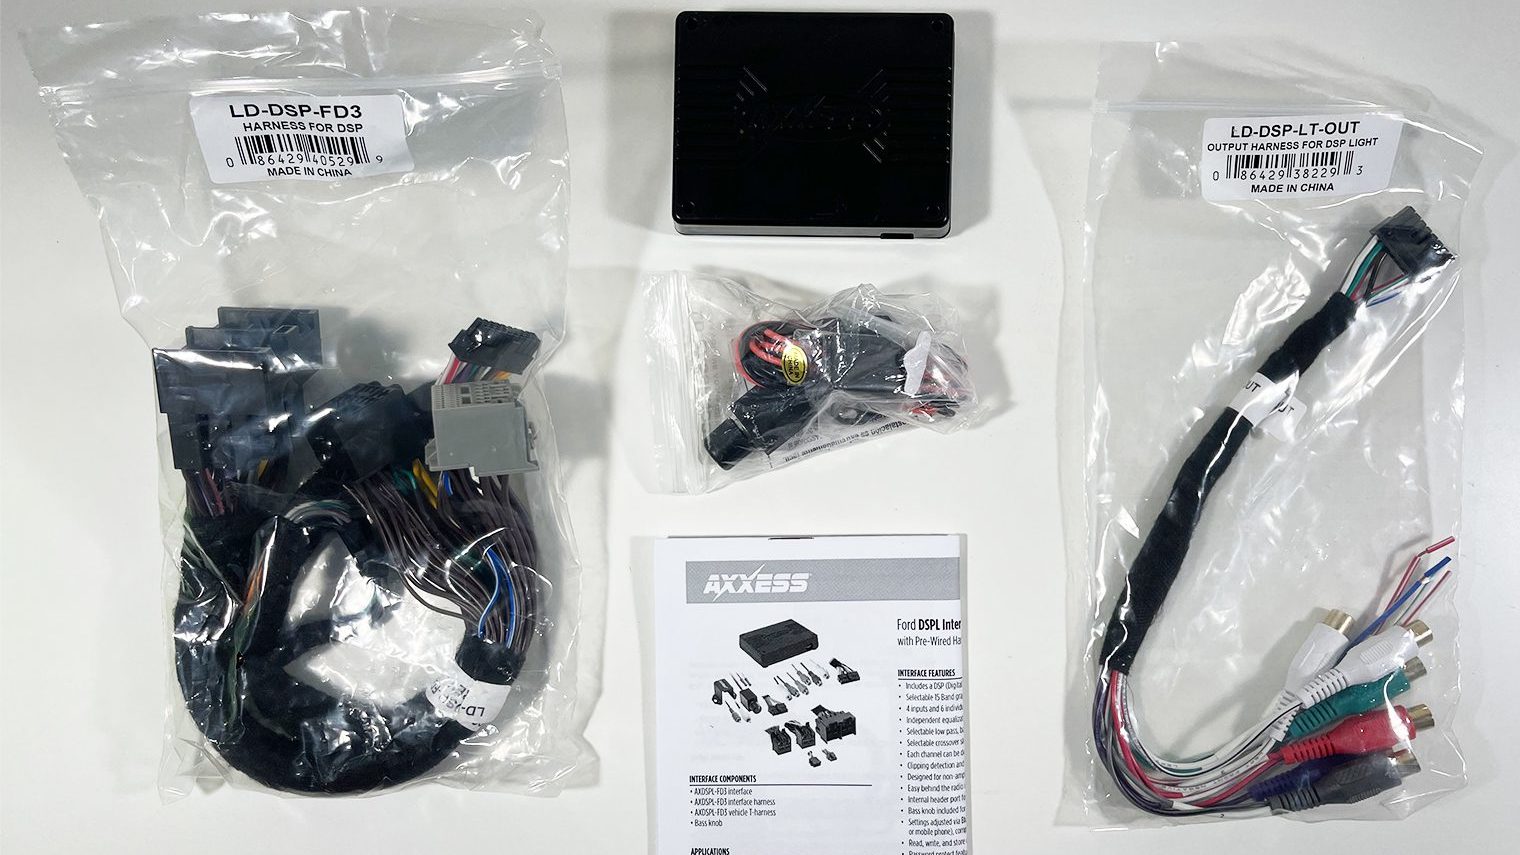
- AXDSPL interface
- AXDSPL interface harness (output)
- AXDSPL vehicle-specific T harness
- Bass knob with mounting hardware
- Installation instructions/manual
How it Works
The AXDSPL is designed to take signal from your vehicle's existing head unit, process and configure it (via an integrated mobile app for your phone), and output it in a compatible format for aftermarket amplifiers. It's meant to be plug and play (for the most part), allowing you to integrate it directly into the factory wire harness that's behind your car's existing head unit. I planned on using this for my 2021 Ford F-150, but the beauty of this product is that it's universal. Navigate over to Metra's Website to type in your vehicle information and see if there's a compatible one for your car.
The bulk of the AXDSPL is wiring. Here's how it all works (image taken from the manual):
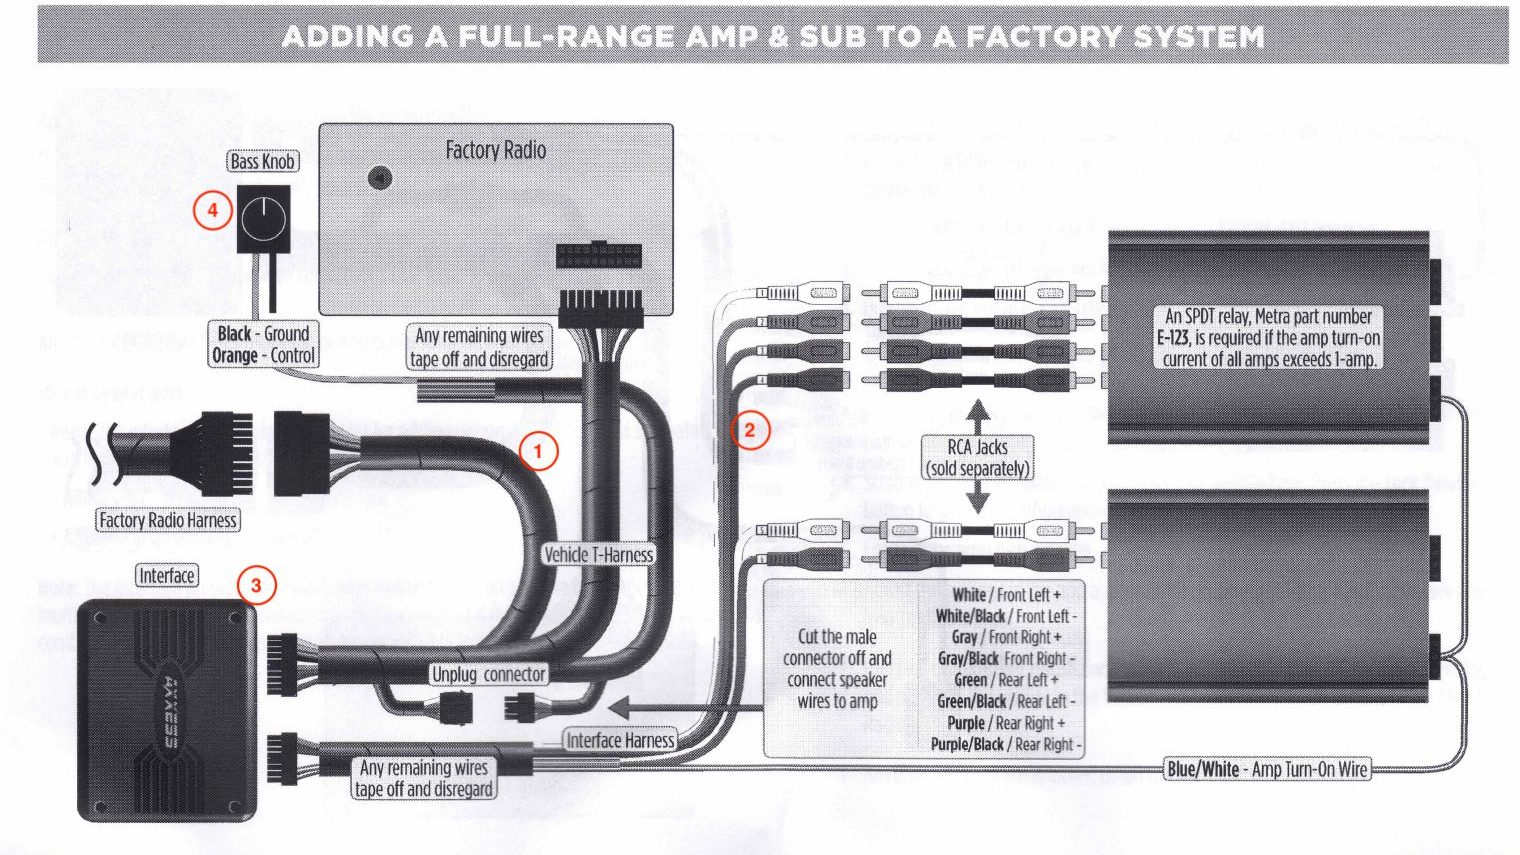
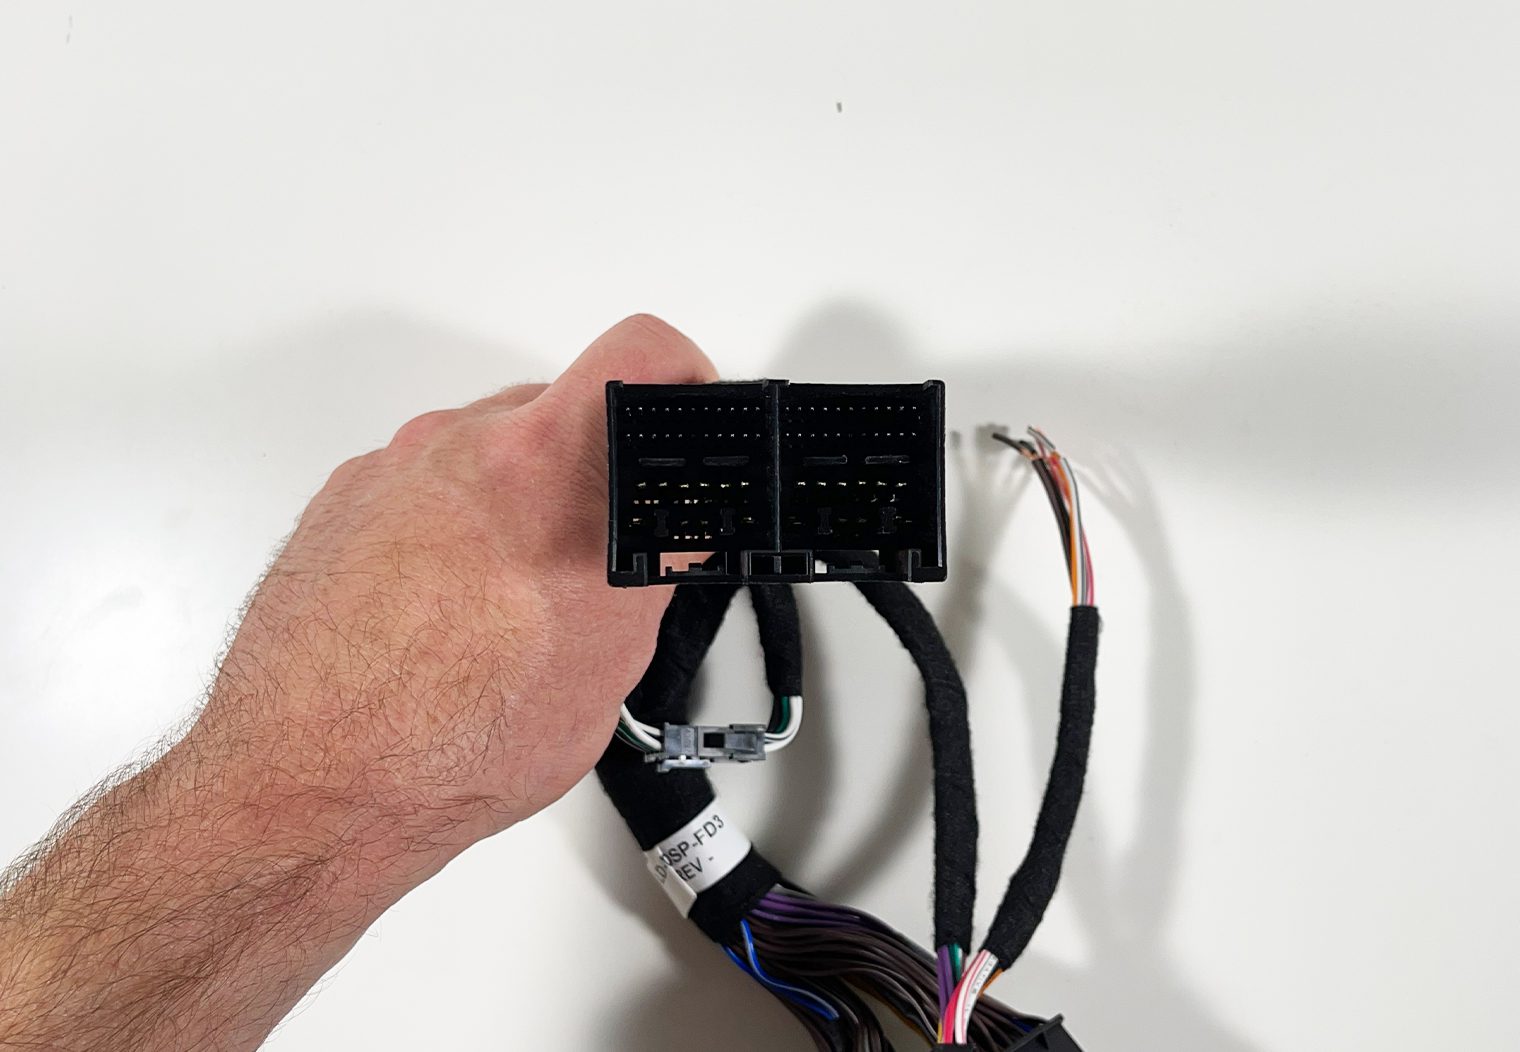
On the left hand side of the image above, indicated with a #1 there's a main vehicle adapting wire harness. This is what differs from vehicle to vehicle. My harness has male and female connectors that are designed to fit in my Ford F-150. This would look a little different if I were to purchase the Honda Accord version of the product but the concept is the same.
The main harness will sit in between your factory wire harness and the factory head unit. You'll unplug the back of your head unit and plug them into the female side of the harness. Then, you'll plug the male side of the T harness back into the factory head unit. This harness is mainly responsible for:
- Gathering power and ground connections to turn the DSP on and off.
- Collecting signal from your OEM head unit and passing that into the DSP for processing and tuning.
- Passing a high-voltage speaker signal to either your amplifiers (if you needed a high voltage speaker signal for a comprehensive speaker replacement) or back through to your OEM speakers if you're only adding a subwoofer.
Once you've plugged this harness into your factory harness, that's really all you need to do in order to gather all the inputs and power for the DSP.

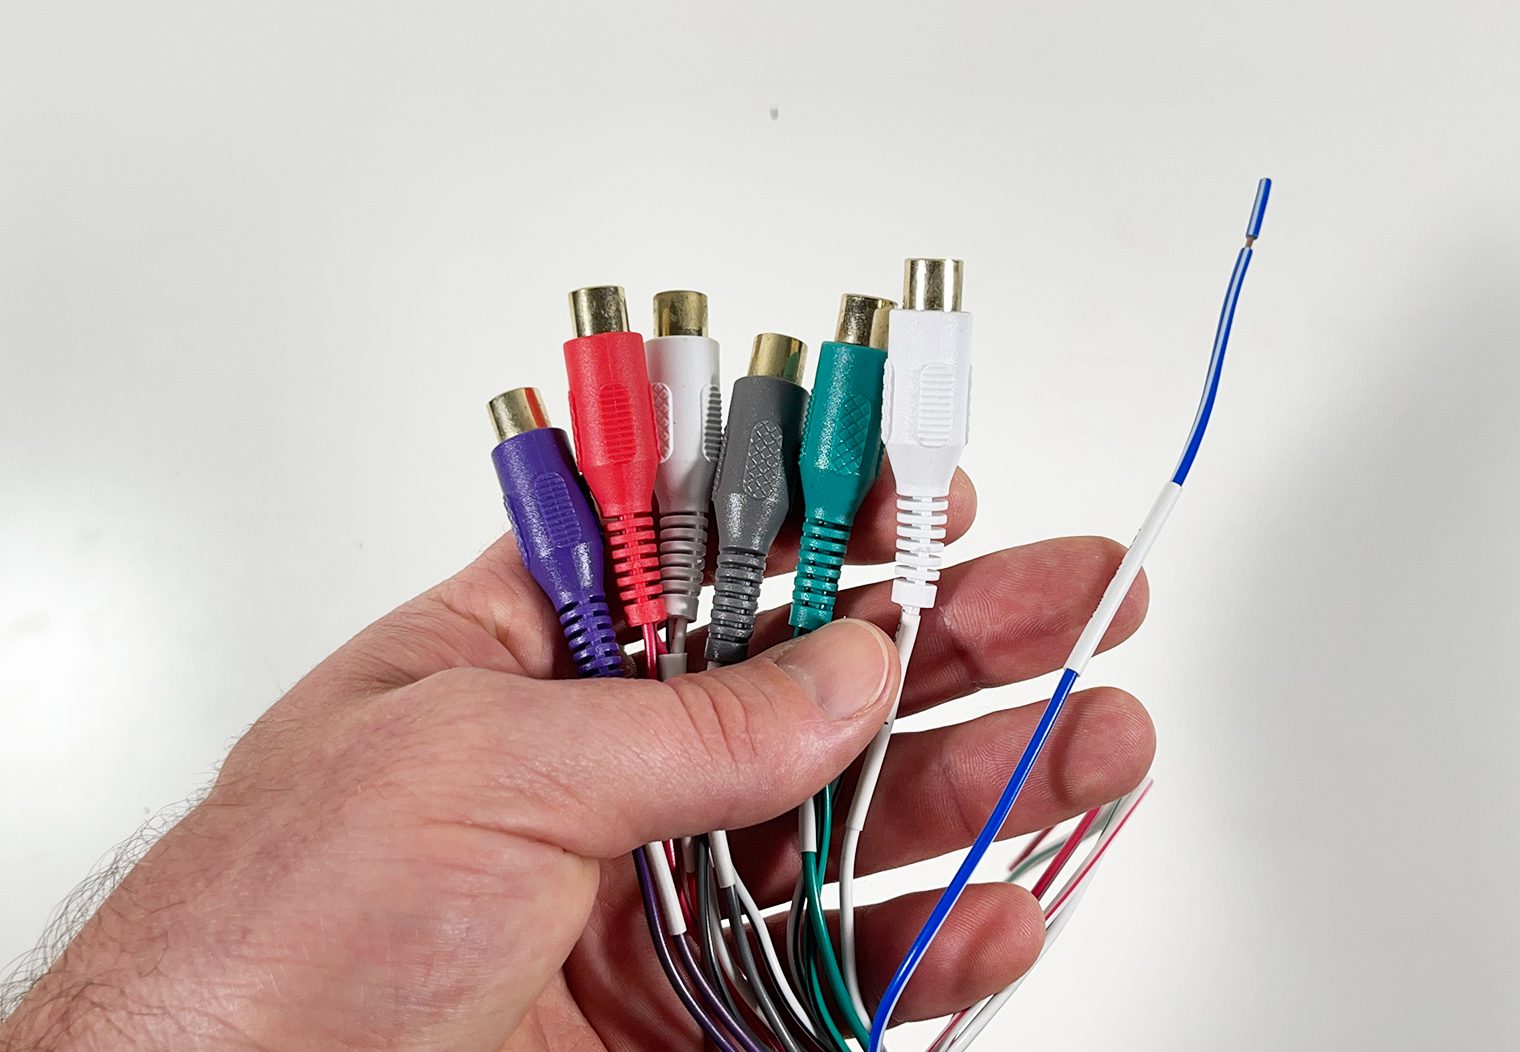
On the right of the image at the top of this section, indicated with the #2, you have the output harness. This is responsible for taking the processed speaker signal from the DSP and outputting them to your aftermarket amplifiers in the form of RCAs. Note you'll need male to male RCA adapters in order to plug them directly into your amplifier. It also houses your amp turn-on signal in the form of a blue wire in the harness. This is responsible for telling your amplifiers when to turn on and off with the stereo. You can configure when this happens in the app.
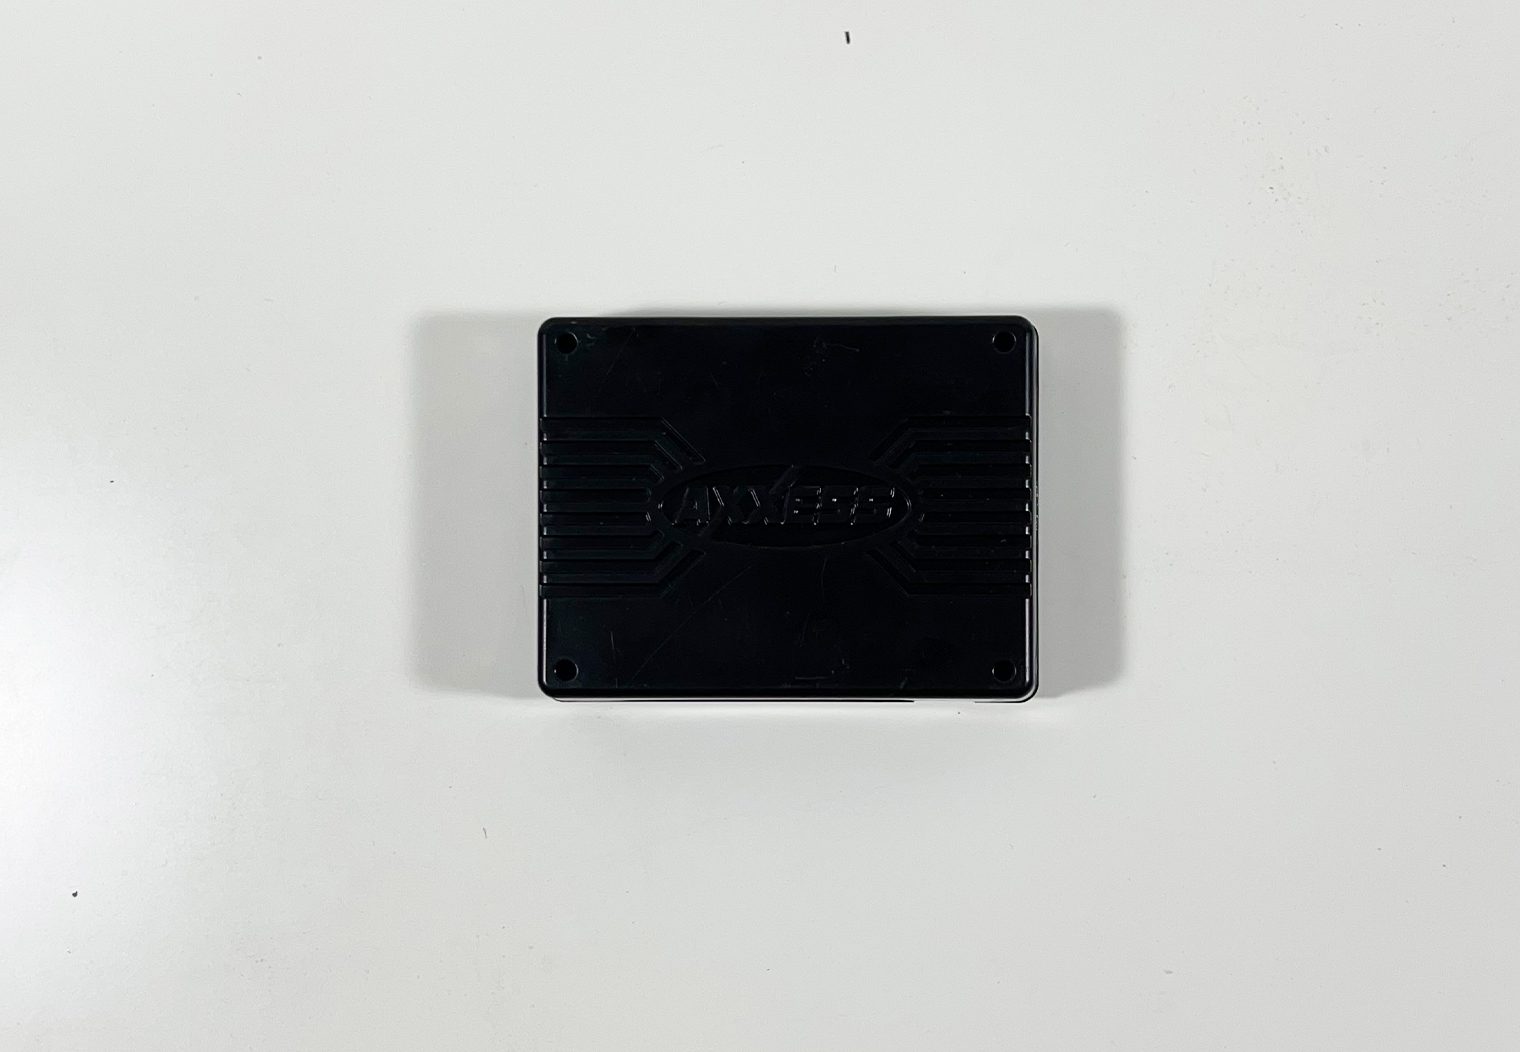
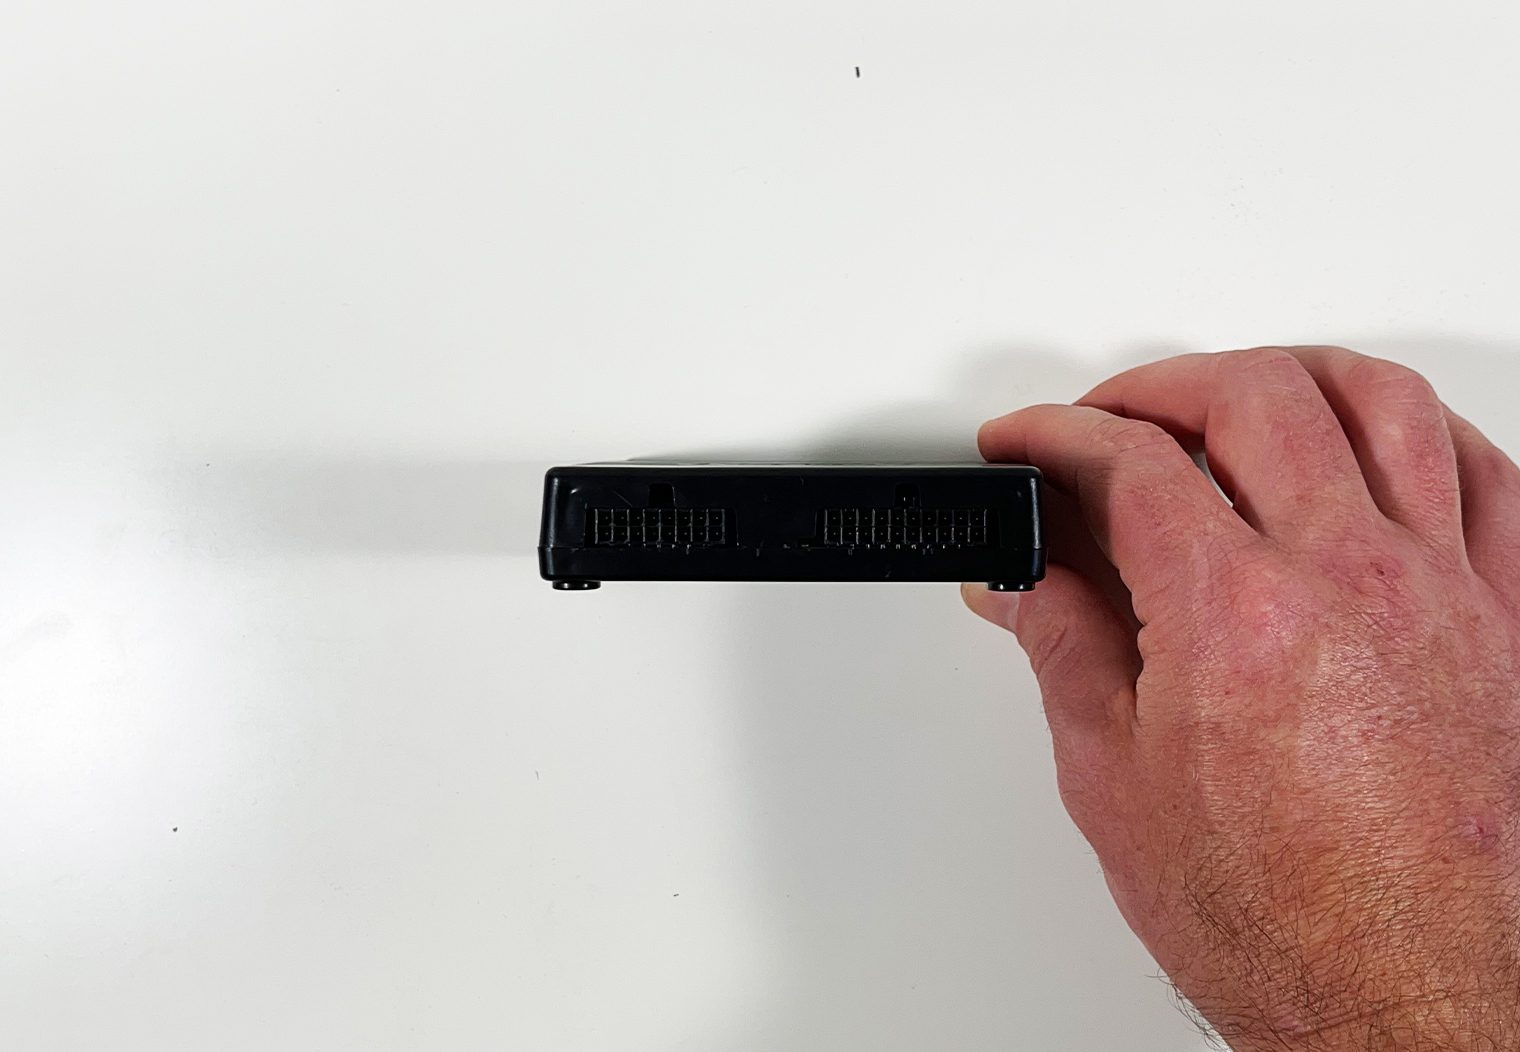
In the center of it all is the brains, or the black DSP module, indicated with the #3 in the image. This is where the magic happens. The main vehicle harness and the output harness plug directly into the back of the module. Pretty straight forward. It also has a USB plug (that I'll be using in this review to show you the app) that allows you to hook it up to your phone and pre-configure it even before it's installed in your vehicle.
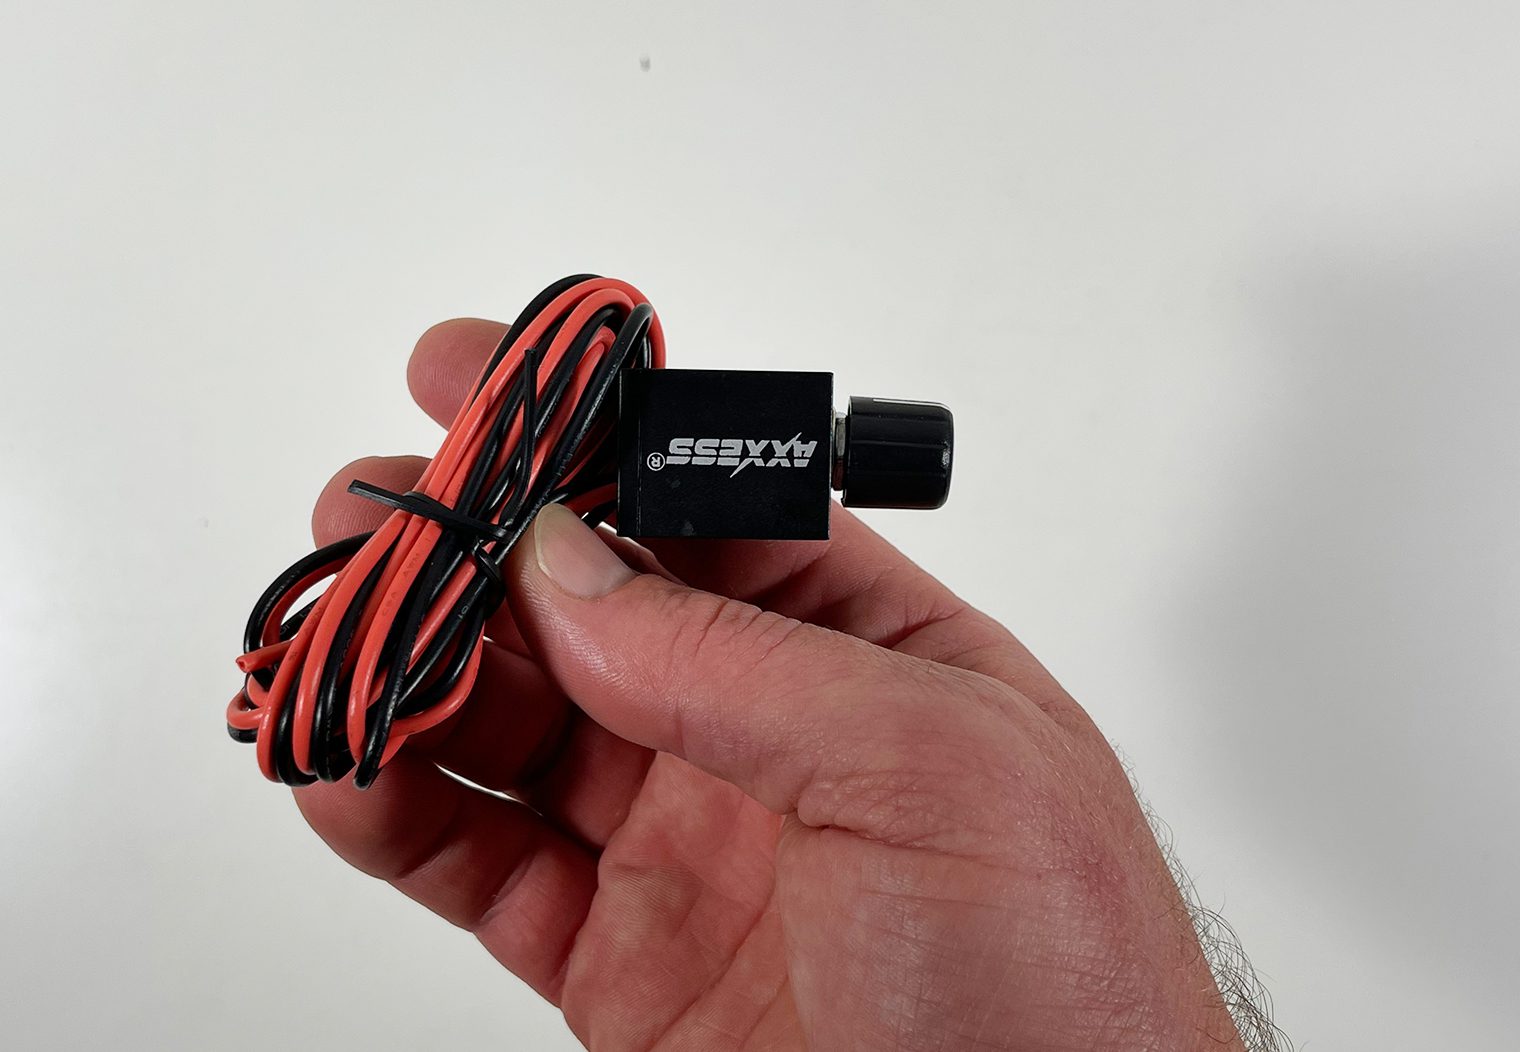
Finally, Axxess provides you with a subwoofer volume control knob, indicated with the #4, that ties back into the main vehicle harness. Wiring is simple – it's two wires. You can take this and mount it wherever is convenient in your vehicle and have full control over your subwoofer's volume at any time.

Mobile App Controls & Configuration
I've used a few alternative signal output converters and DSP Processors, most notably AudioControl and, for example, their LC6i or LC8i. A product like this, along with many other versions of an in-line DSP processor can likely do exactly what the Axxess AXDSPL does and more (from a tuning perspective). But I don't think everyone is looking for that level of granularity when it comes to processing and configuring a signal. And they normally require a lot more wiring to install unless there's an adapting wire harness for your vehicle.
What I liked about the AXDSPL is that:
- The vehicle specific T harness is obviously one of the key components of the product and greatly simplifies wiring and installation.
- Setup, configuration and tuning is controlled directly from an app. And, it's relatively lightweight when it comes to tuning – not too much granularity but enough to assemble and tune a high-output system. Maybe not competitive necessarily but definitely will work for 95% of the audiophiles who are looking for more out of their car's system.
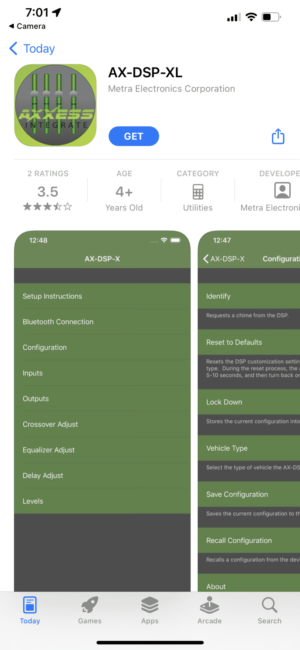
So I went ahead and installed the AX-DSP-XL mobile app on my iPhone, and used the USB power input to access the configurations and settings in the app. I was able to do this without even installing it in the vehicle. In this section, I'll walk through the interface and what it's capable of doing.
Installation & Initial Setup
I do want to preface this section with a few notes from my experience downloading and installing the software for this unit. First of all, the Axxess team recommends using an Android over an iPhone. I used an iPhone and it worked fine, but the interface functions better on an Android and I've been told that the interface might be more buggy on Apple right now. This may only be temporary.
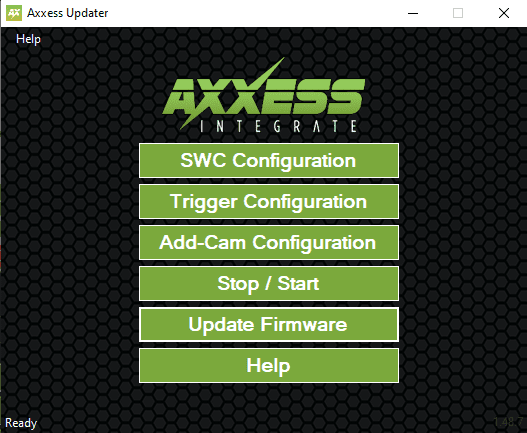
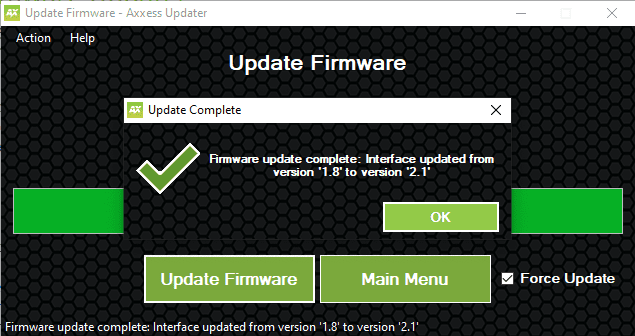
Also, before you install the app I would recommend updating the software on the DSP module by navigating to Axxess's site and downloading the software updater: https://axxessinterfaces.com/resources/updater-software. By updating the firmware first, you'll ensure that the most recent configurations and vehicles are loaded onto your DSP before you even connect to it. To do this, download the Axxess Integrate tool from their site (above), open it up and click the “Update Firmware”. Select “Force Update” and then hit the “Update Firmware” button. THEN, connect your DSP via USB to your computer and it will update automatically.
App Installation
The first thing to do is download the application from the app store. On the included instructions there's a QR code that will take you to the appropriate app in the App store.
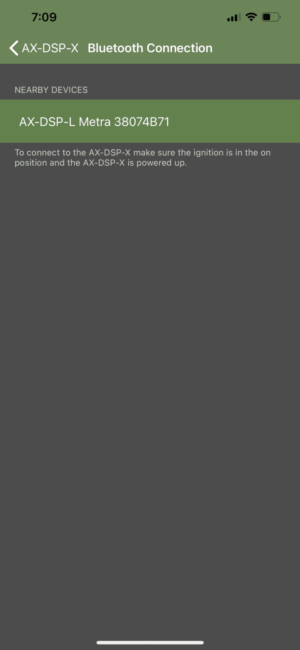
Connecting was very quick and easy. The AXDSPL uses Bluetooth to connect directly through your phone. Simply enable Bluetooth and connect to the unit.

Once you've connected to the device, a menu of options appears within the app. Let's talk about a few of the key configurations and features.
Audio Configurations
This is where the fun starts with this unit. There's a ton of great features that allow you to configure the output signal of the DSP. You can either pre-configure it prior to installing it based on the specs of the speakers and subwoofer(s) you're installing or do it on the fly after you've installed everything. Or, you can do both.
Outputs
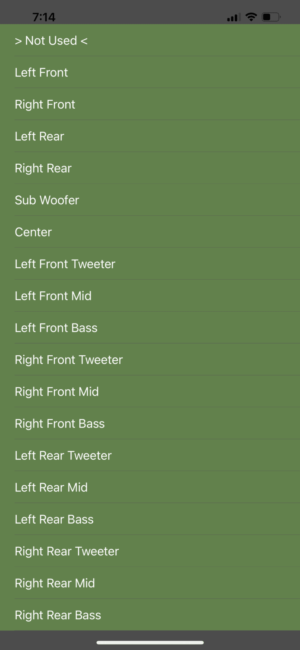
The AXDSPL allows you to configure the signal outputs based on how you're going to be using them. You can assign an output to a speaker, for example “Output Channel #1” on the module can be assigned to “Right Front”, which tells the unit that the channel will be powering a speaker on the right hand side and in the front of the vehicle. You could assign an output to a Subwoofer as well. What's really cool about this is that you can change this on the fly too.
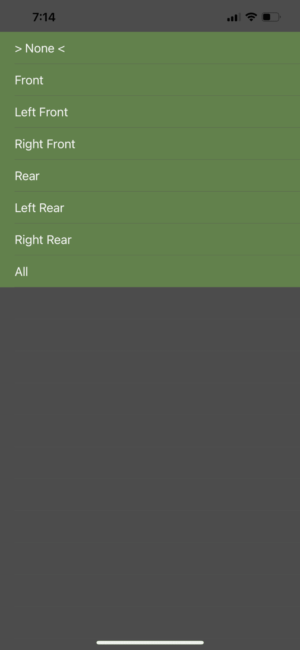
You can also group multiple out channels in the case that you're going to be using two output channels for one area. For example if you used Output Channel #1 for a “Right Front Mid” and Output Channel #2 for a “Right Front Tweeter”, you could group the two into one “Right Front” group. This will tell the DSP where the output is positioned so that it can then control things like Fader, Balancer but also enable you to configure Delay (I'll dive into this in more detail further in the article). Here's a look at the configuration I setup initially:
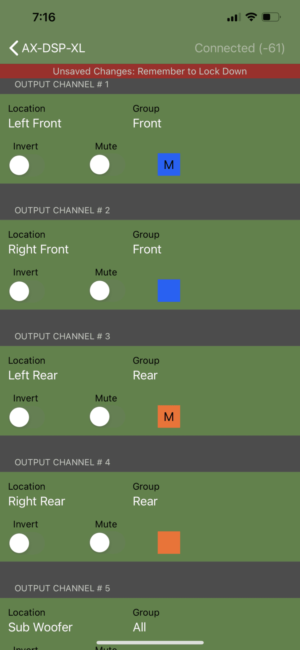
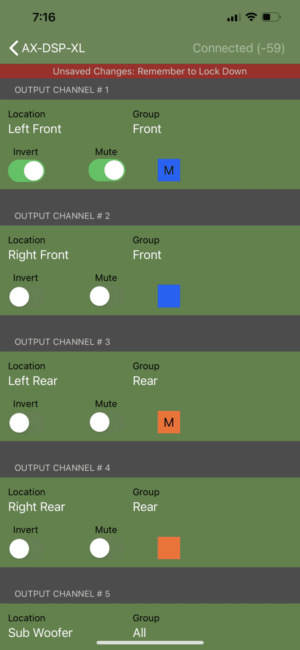
You can also see in the first, and the final picture within the carousel above the option to “Invert” the output phase of a channel, or “Mute” the channel entirely if you didn't want any sound to come from the channel. Inverting is a great option to have in case you accidentally flipped the leads on a speaker. I always like to double check the polarity of the speakers through the installation but accidents do happen.
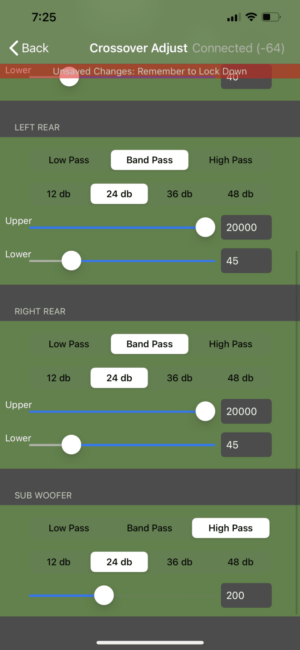
Crossover Adjust
This was a feature I was excited to see as well. I'm not particularly inclined to manually adjusting various control knobs and switches directly on an amplifier. Or, have to tear out my back seat in the case that I needed to make an adjustment on the fly after an initial tune. Having the crossover adjustments directly in the amp will allow you to adjust it via your phone and set the amplifier crossovers to “Full”. The only thing you'll need to adjust on the amps is the gain.
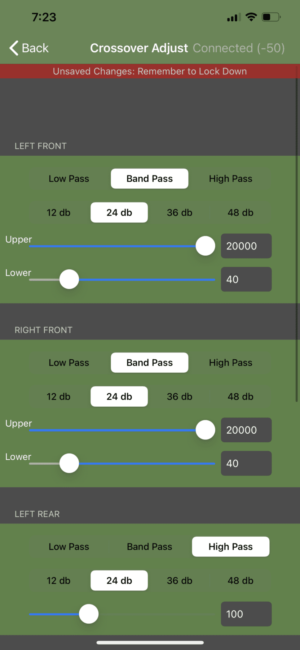
In the Crossover Adjust settings, you can configure each output channel with the following:
- A High pass, Low pass or Band pass selection.
- Slope. I recommend using the pre-selected 24 db slope for most installations in a car, truck or van.
- Depending on whether you selected High, Low or Band pass, you'll be able to select the upper, lower or both thresholds for frequencies based on the specs of your speakers, subwoofers and your system as a whole.
The interface is pretty straight forward. Tap to select an option, drag a bar for the frequency ranges or type the exact frequency into the channel setting. Here's what it looks like:
Depending on your setup, you'll need to configure each channel to fall within the specs of the products that the channel will be sending signal to. I would recommend taking a look at JL Audio's Setting Crossovers article to get a high-level understanding.
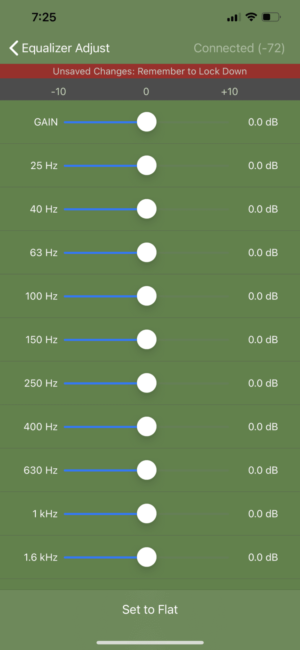
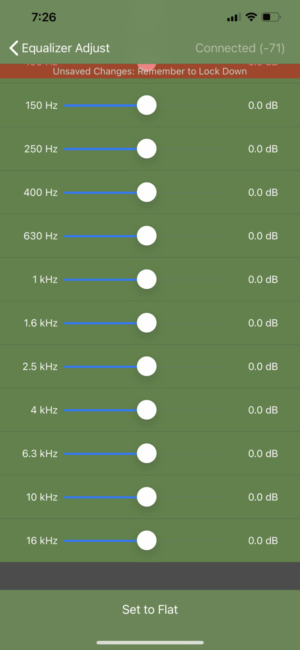
15 Band Equalizer
Similar to the Crossover Adjust, the AXDSPL will allow you to adjust each channel's signal with a 15 band equalizer to ensure a crisp and natural output. 15 band equalizer gives you a decent amount of control over your sound without really needing to hook up an RTA to tune it. I would recommend using an RTA (Real Time Analyzer) and RTA microphone though to configure this section if you're able to (like the AudioControl SA-4140i), or letting your local professional installer tune it. By using an RTA, you can adjust each channel output at a time to the exact profile you like with a high degree of accuracy and precision. This feature also eliminates any need for any other in-line DSP or EQ.

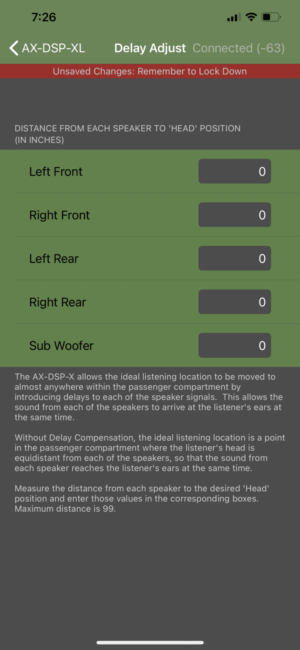
Time Delay
The last audio-related feature in the App is time delay. You can use the time delay to set the center image point in your vehicle. Typically this is set to the driver, or sometimes in between the driver and the passenger. You'll measure the distance from each speaker/channel to your central point and enter it in this screen. Note in the screenshot below that each channel matches the output channel configuration that I made early on in the process and earlier in the “Outputs” section of this article.
Other Notable Configurations
There are a few other features that are worth noting in the app:
- Chime level: In the Chime Level settings, you can either increase or decrease the volume of your door or seat belt chime. Chime will come from the front left channel.
- Amp turn on: Amp turn on will allow you to select between using:
- Signal Sense: Turning on amplifiers when an audio signal is sensed.
- Always On: Keeping the amplifiers on as long as the vehicle/head unit is turned on.
- Turn on Delay: Delaying the amplifier turn on to avoid pops.
Difference Between the L “Lite” and X
Some of you may have been researching this DSP from Axxess and wondered what the difference is between the AXDSPL and the AXDSP-X. Let me cover the key things that differ between the two:
- Equalizer: The ‘L' has a 15 band equalizer while the ‘X' has a 31 band.
- Outputs: The ‘L' has 4 inputs and 6 individually assigned outputs while the ‘X' has 6 inputs, 10 individually assignable outputs.
With the exception of these few differences, the products are the same. The ‘X' version definitely has more flexibility for an advance, high-performance stereo though. You can slice and dice your input/output configurations in more ways on the ‘X' than you can on the ‘L'. And you can also very precisely tune on the ‘X' via its 31 band EQ vs the 15 band EQ on the ‘L'
If I were to recommend a product for the DIYer, I'd go with the ‘L'. If you're looking to really get the most out of your aftermarket stereo and plan doing things like bi-amping or separating out signal your highs, mids and mid-bass (e.g. a 3-way component speaker) or hooking up an RTA and doing some in-depth tuning I would recommend the ‘X'.
Conclusion
I think that the Axxess AXDSPL is really an ideal choice for DIY audiophiles looking for a simplified way to either add a subwoofer to their existing vehicle (although there are more cost effective ways), and those who are looking to do a complete overhaul/upgrade of all of the components while maintaining the factory head unit (like me).
The vehicle specific T harness that's included in the kit makes installation very easy with minimal wiring, which I loved. And, the App interface allows you to essentially handle all of the tuning of your amplifiers directly from your mobile phone (except initial amplifier gains). I loved the output, crossover and EQ controls within the app and found them very easy to use and functional. Although I thought that the app interface could use a little UX facelift in some areas on the iPhone and I wish that Android wasn't Axxess's recommended device. But the app covered all of the controls and features I needed including chime level, which I know can be a super annoying byproduct issue to adding an aftermarket system to vehicles.
The included instructions manual was very helpful with clear diagrams and use cases that will be a good reference during the installation too.
All-in-all, this was the ideal solution for the full stereo upgrade I'll be working on for my 2021 Ford F-150 and I think would be a great solution for almost anyone looking to amplify their system, add speakers or subwoofers without replacing their factory head unit.

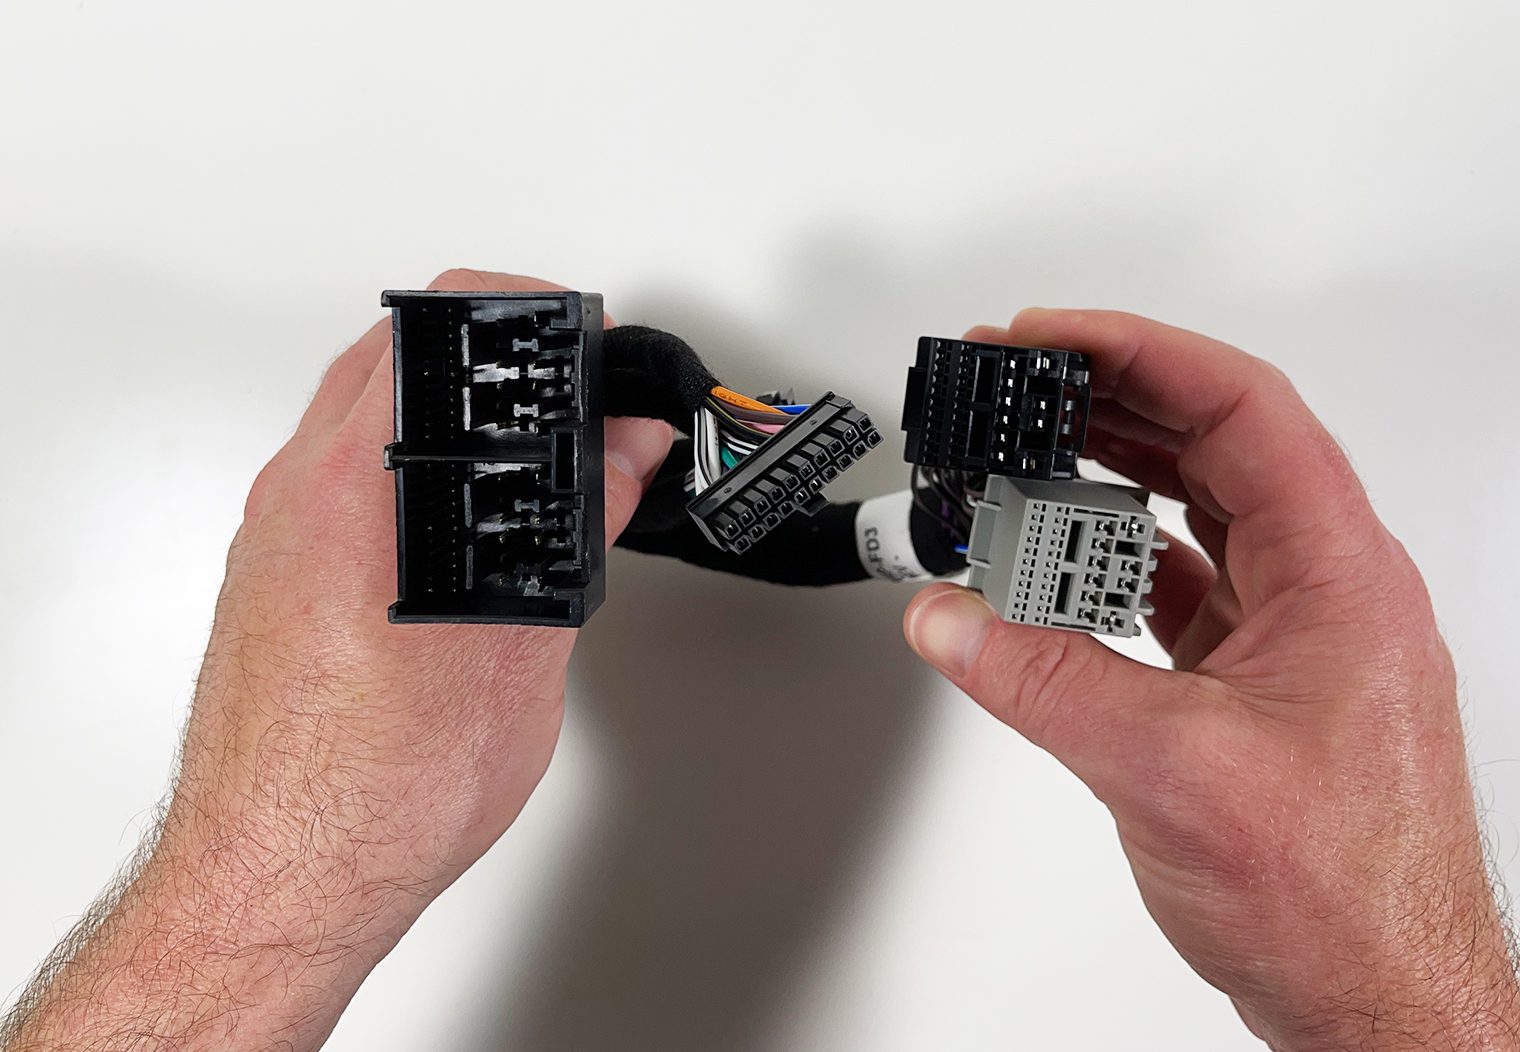
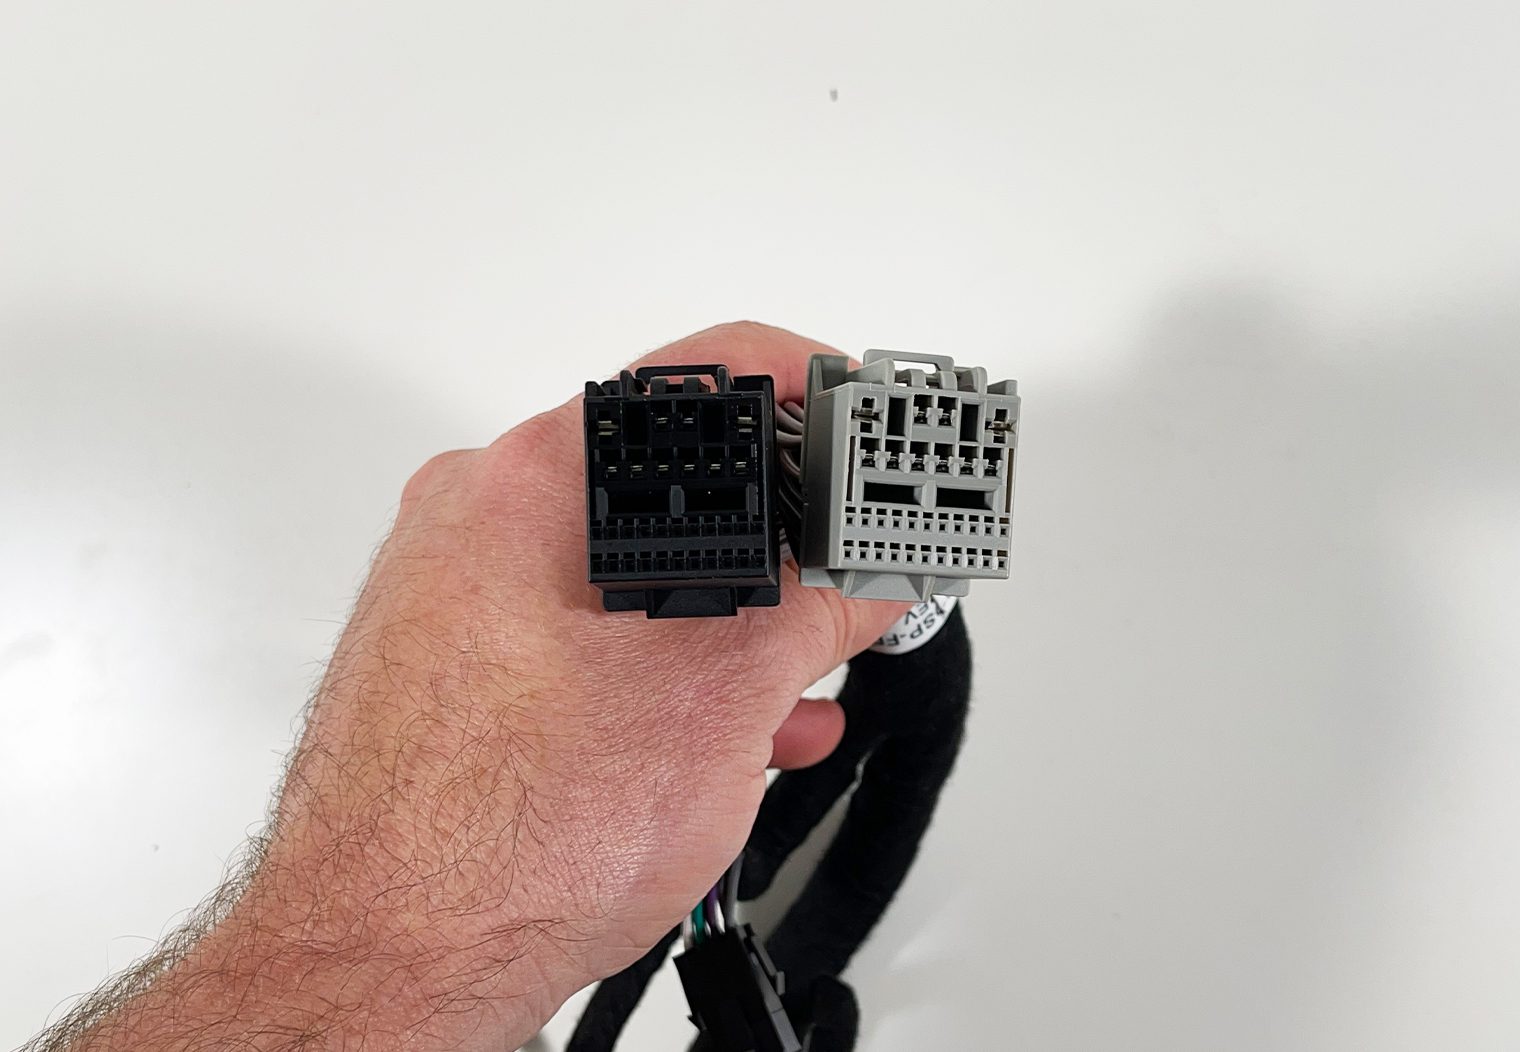
Can you tell me which way the factory make plugs plug into the new harness I’m unsure which way to plug the black and gray into it? Nothing is specified.
Hi Kendall. From what I recall, they only fit into one spot