In this article: We'll walk through how to upgrade your Ram 1500's old OEM headlights and install bright new aftermarket HID headlights.
Time required: 2 hours
Difficulty: Easy
Is it me or are new car's headlights looking whiter and whiter as time goes on? It used to only be on luxury brands like Audi, BMW and Mercedes that you'd find HID headlights from the factory. But manufacturers finally got smart and started to put HID headlights in their vehicles from the factory (or comparable headlights).
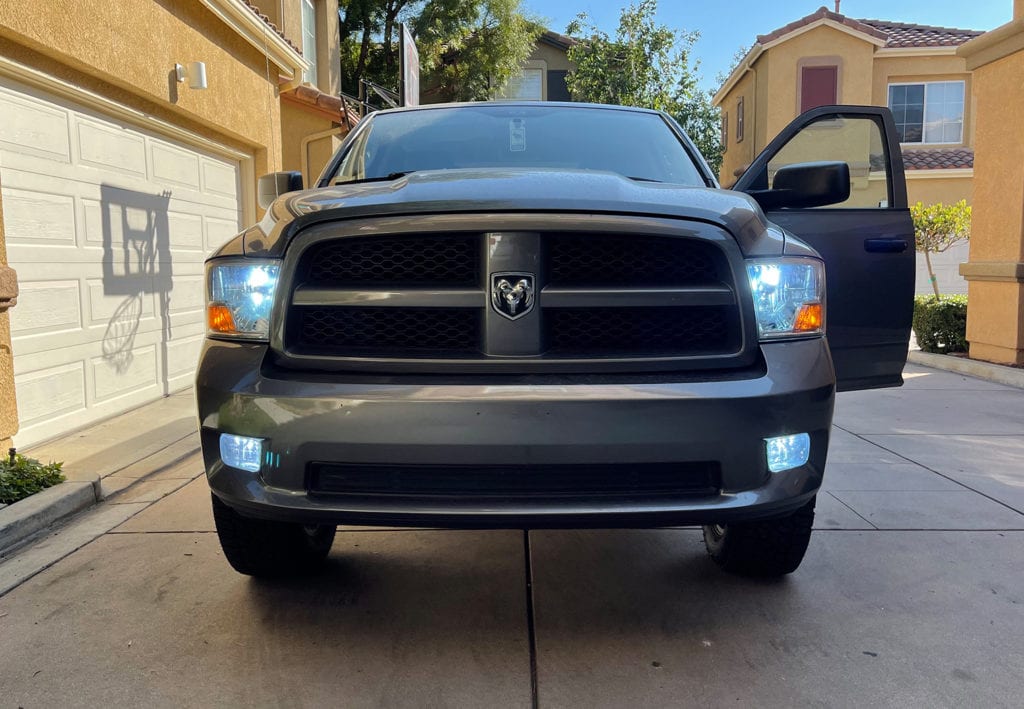
Looking at the headlights on my 2012 Ram compared to even a newer 2018 model made my truck look old and outdated at night. So I decided to upgrade them using one of our recommended best hid headlights, specifically Xentec's 9006 (HB4). In this article, I'll walk you through the steps to upgrade your OEM headlights with new HID headlights.
Parts & Tools
- Xentec H13 9006 (HB4) HID headlights – $49.99
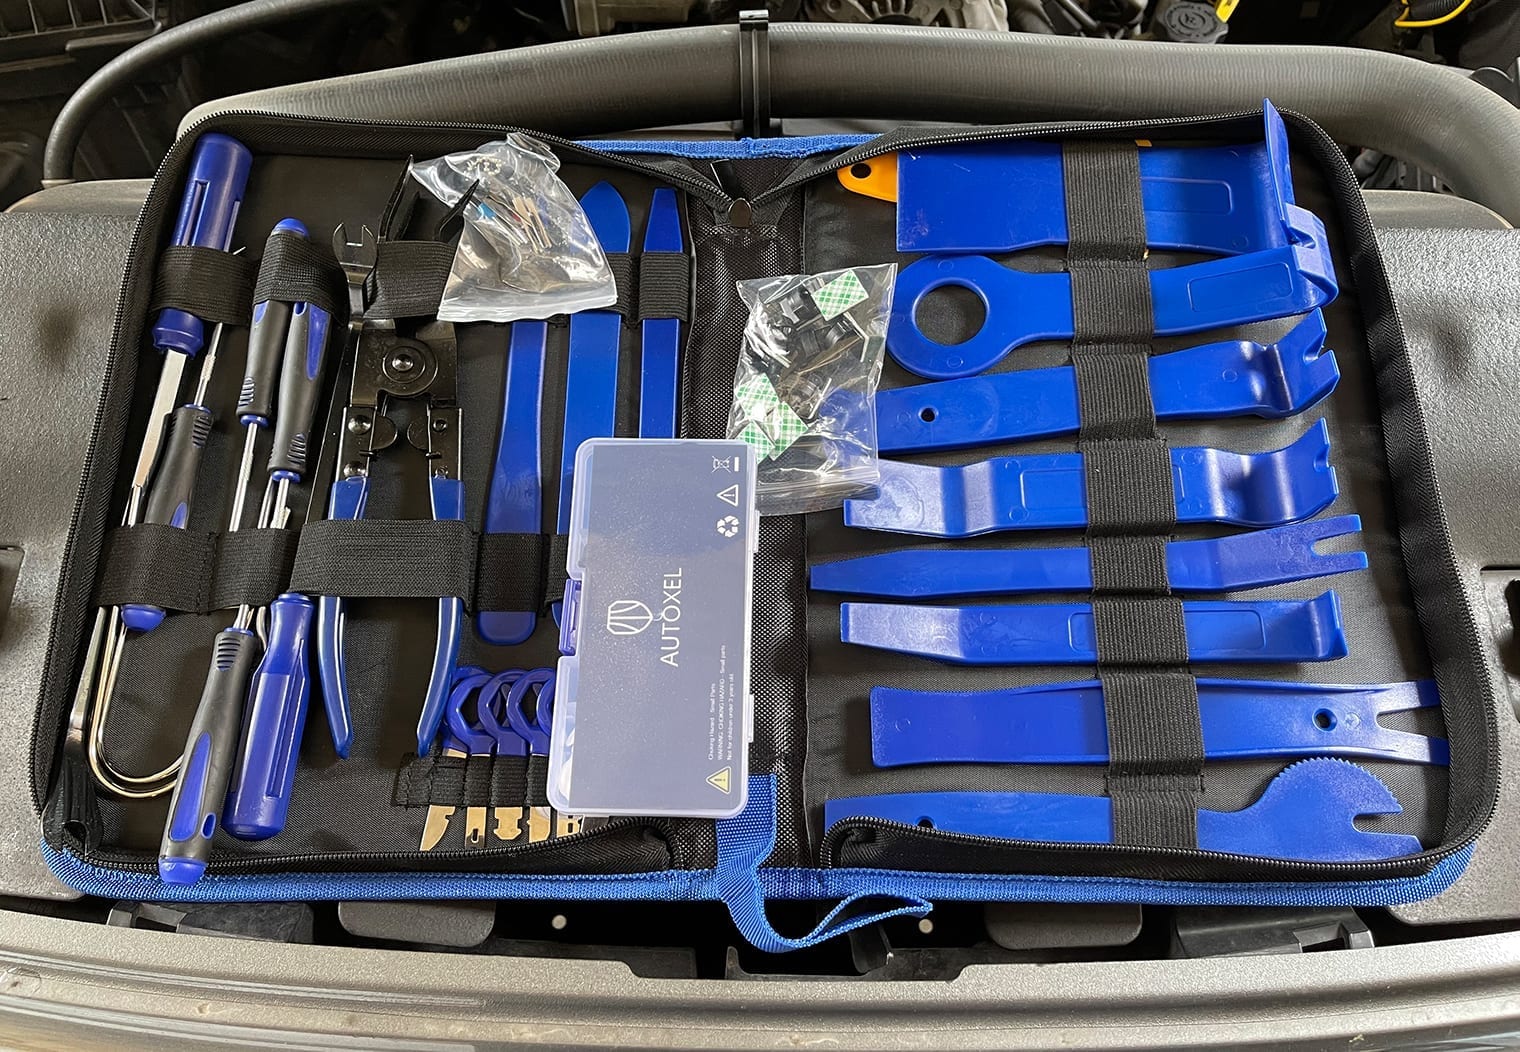
- Autoxel Trim Removal Kit trim and clip removal tools – $26.99
- Drill & Drillbits
- Screwdriver
- Ratchet and sockets
The HID Headlights We Chose
We decided to use Xentec's H13 9006 (HB4) for this installation. We chose a 6500k color which is the highest I think I would go because it gets a little too blue for me. In general, it's a great value HID conversion kit for the price – not too expensive but also not too fancy. One thing you'll have to note with this headlight when you install it in this truck is the wiring length. Be sure to run the wires first and make sure you have enough length before you mount the ballasts.
Overall, I really liked these headlights. I didn't want to spend an arm and a leg for them. I highly recommend them if they're in your price range but if you want something a little higher quality that don't need to warm up or flicker when turning on these may not be the option for you.
Step 1: Remove the Headlights
HID headlights come with what's called a ballast. The ballast is responsible for regulating voltage and power to your headlights. Additionally, with most H13 HID headlights you'll need to also wire a separate 12V power to your battery in order for the high beams to function properly. It's because of these two reasons why you'll want to remove your entire headlights to replace the bulbs and to wire in the new ballasts and 12V power.
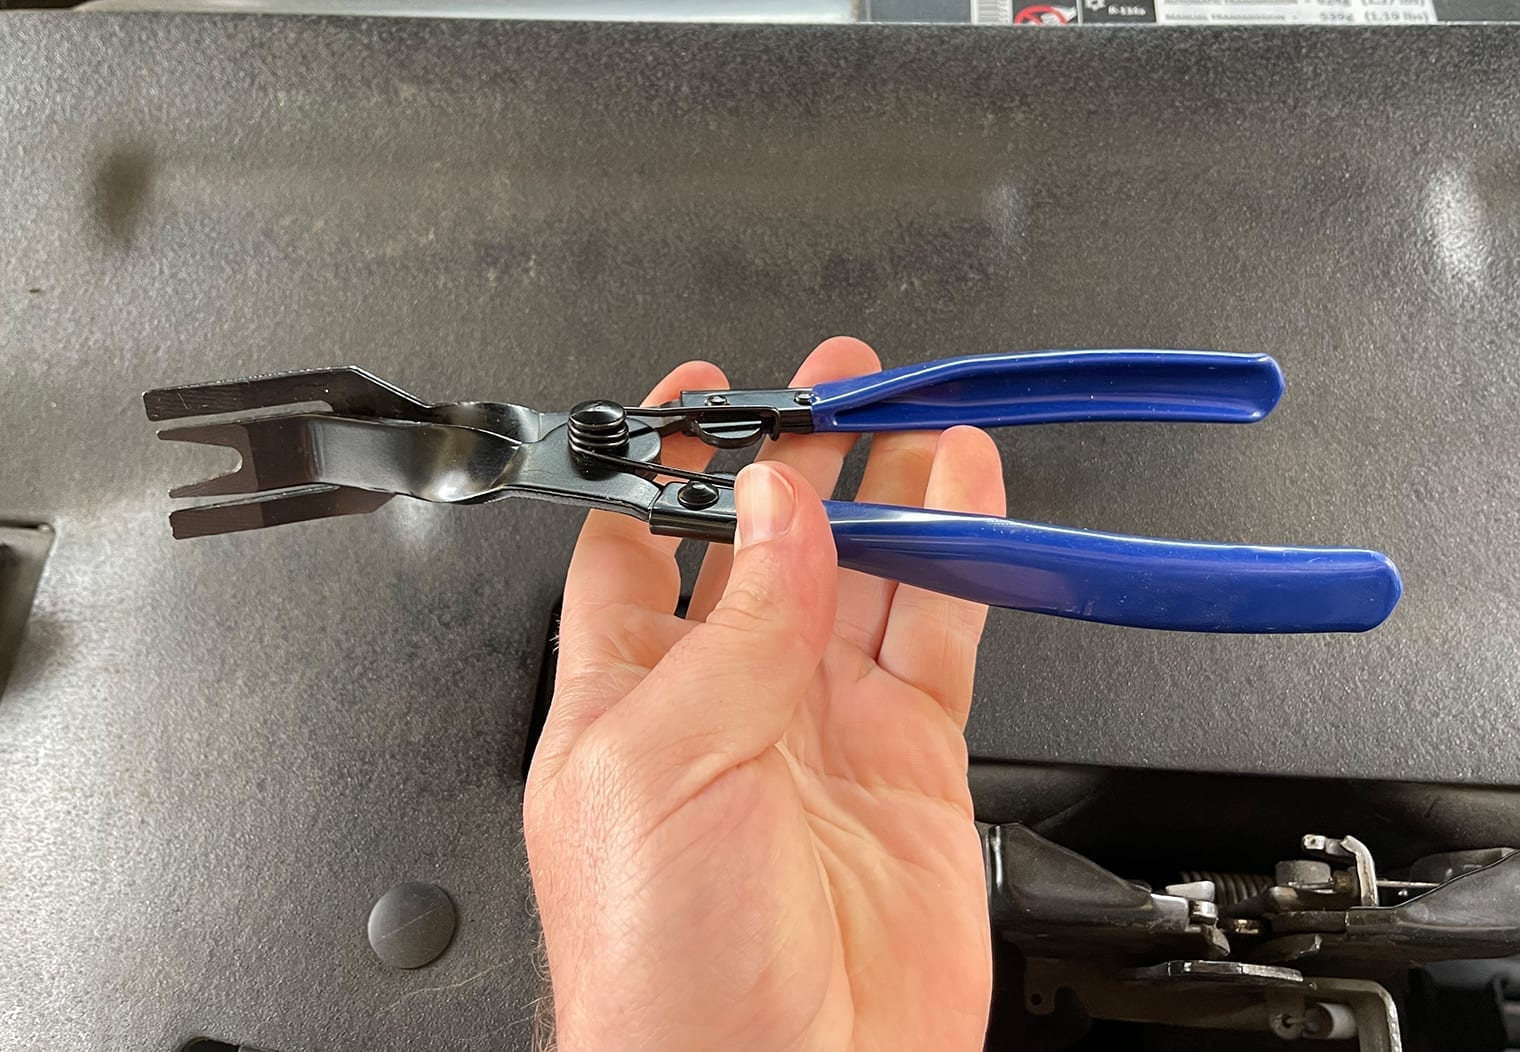
To do this, start by opening up your hood to gain access to the engine bay. Using a trim removal tool to pull the clips out, remove the plastic liner that sits on top of your radiator and grill to expose two bolts that hold your grille in place.

Once you removed the liner and these two bolts, pull your grille from the bottom – there are three clips that hold the bottom of the grille onto the front of your truck in addition to the bolts.
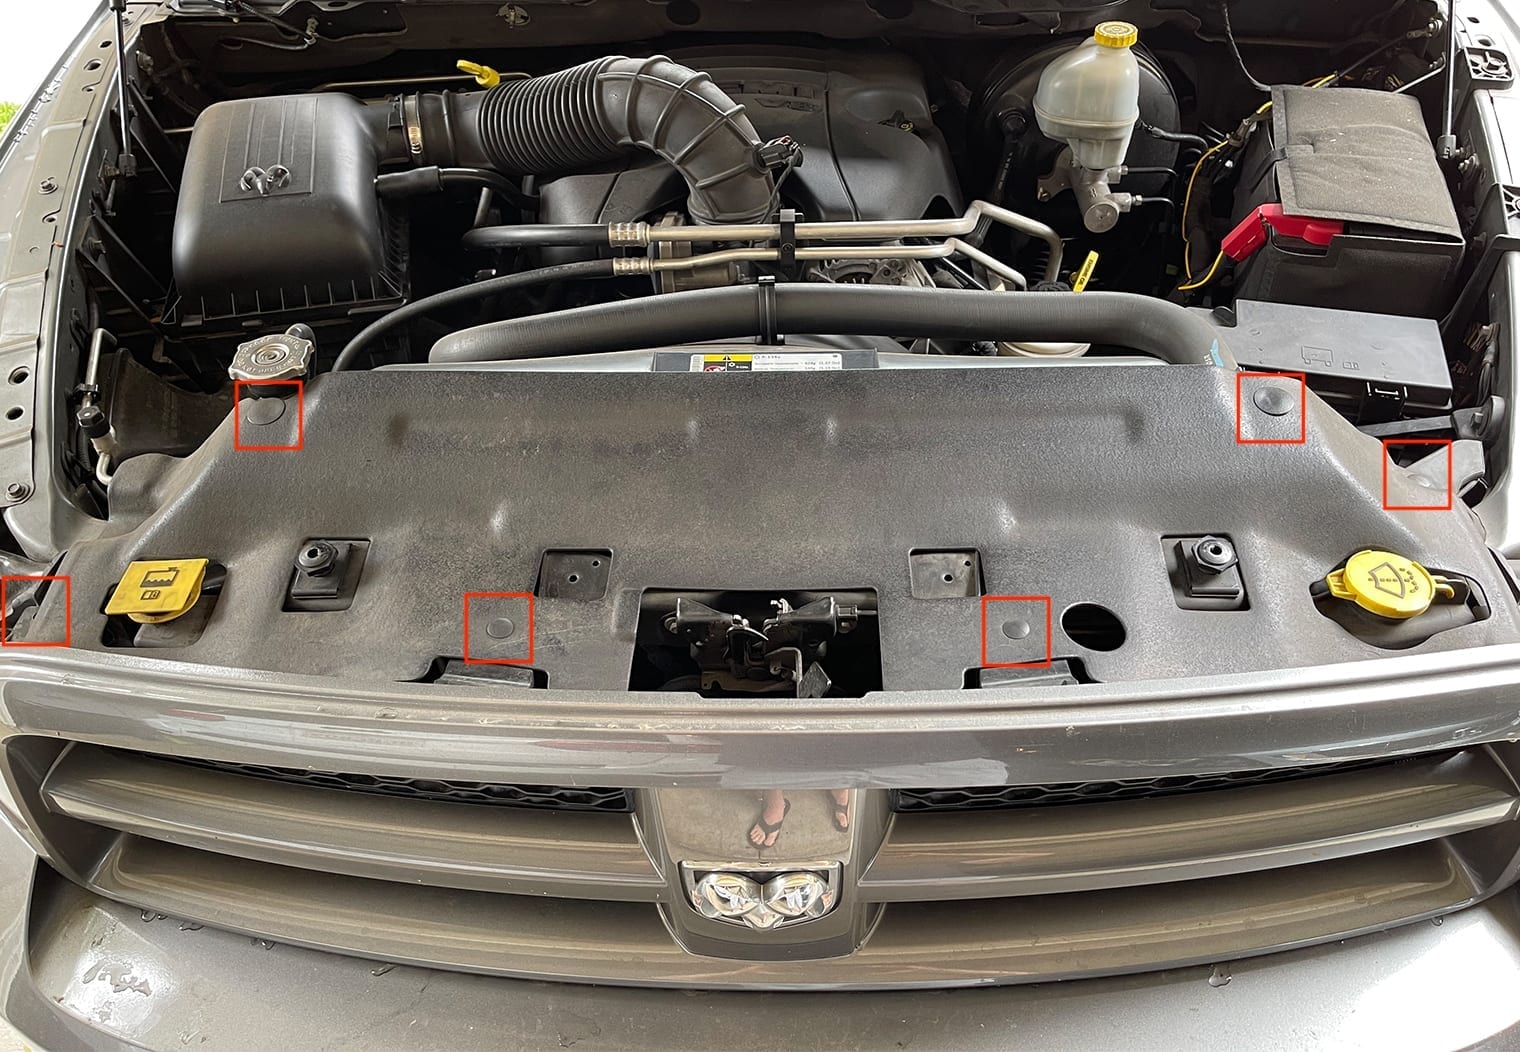
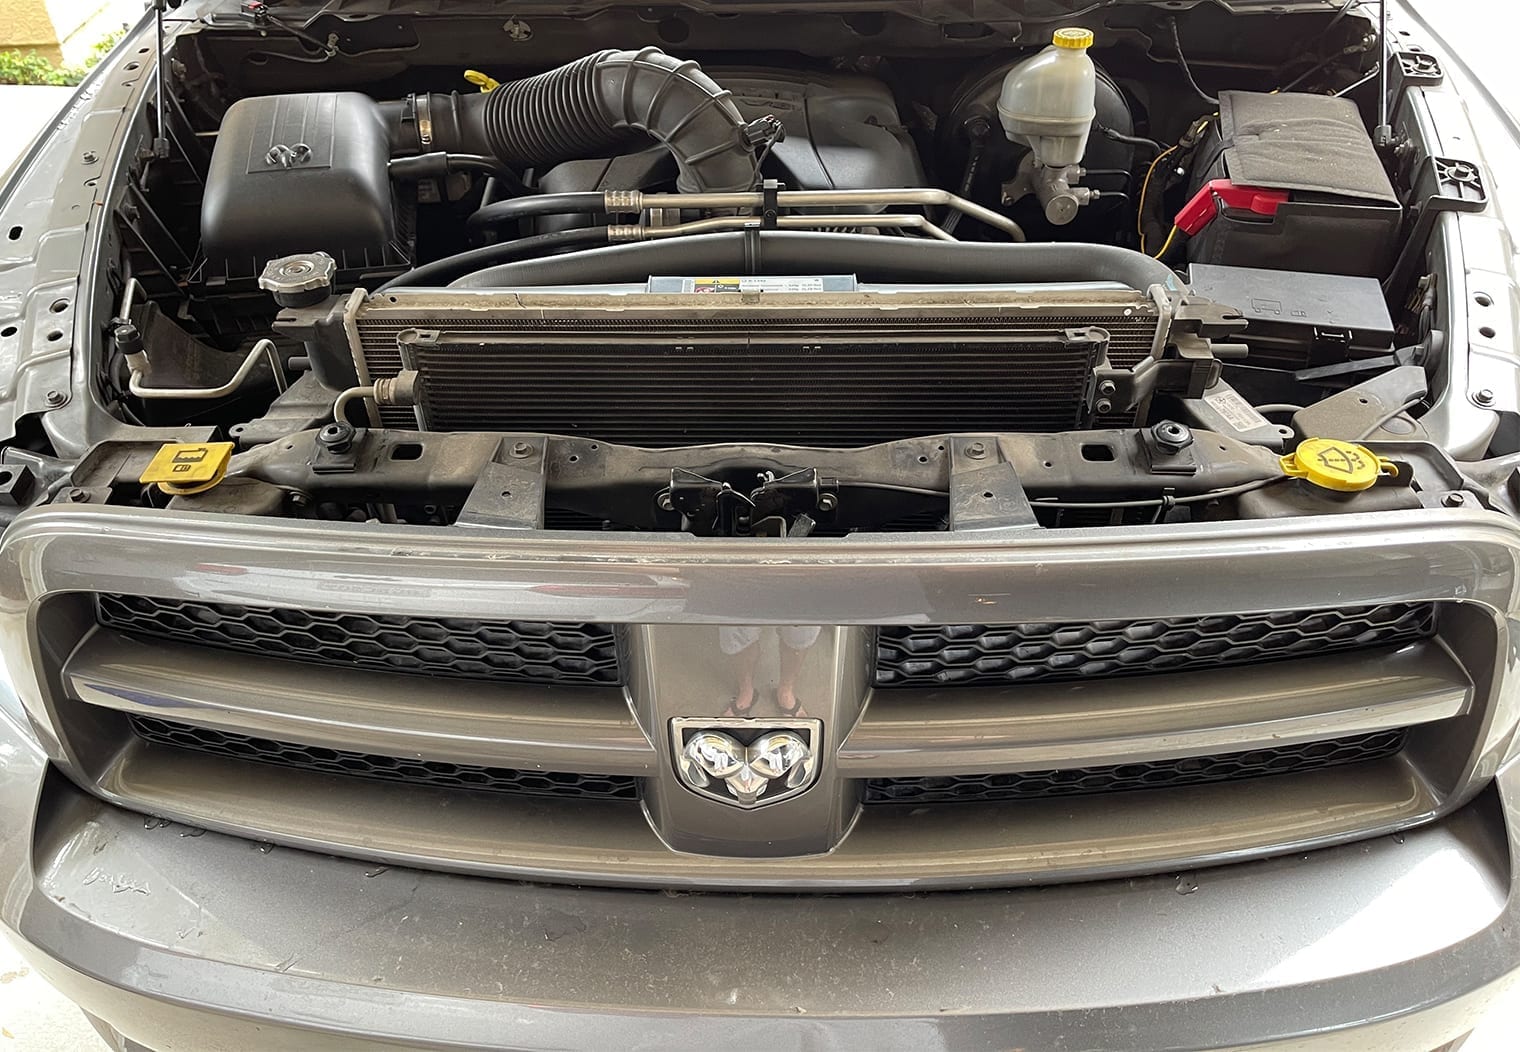
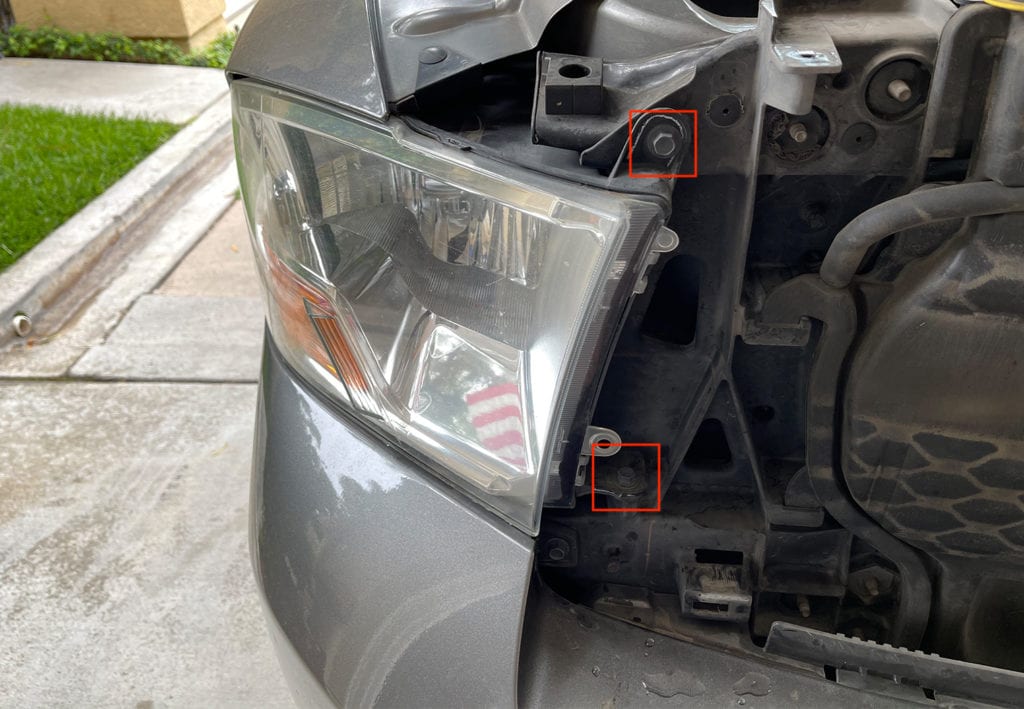
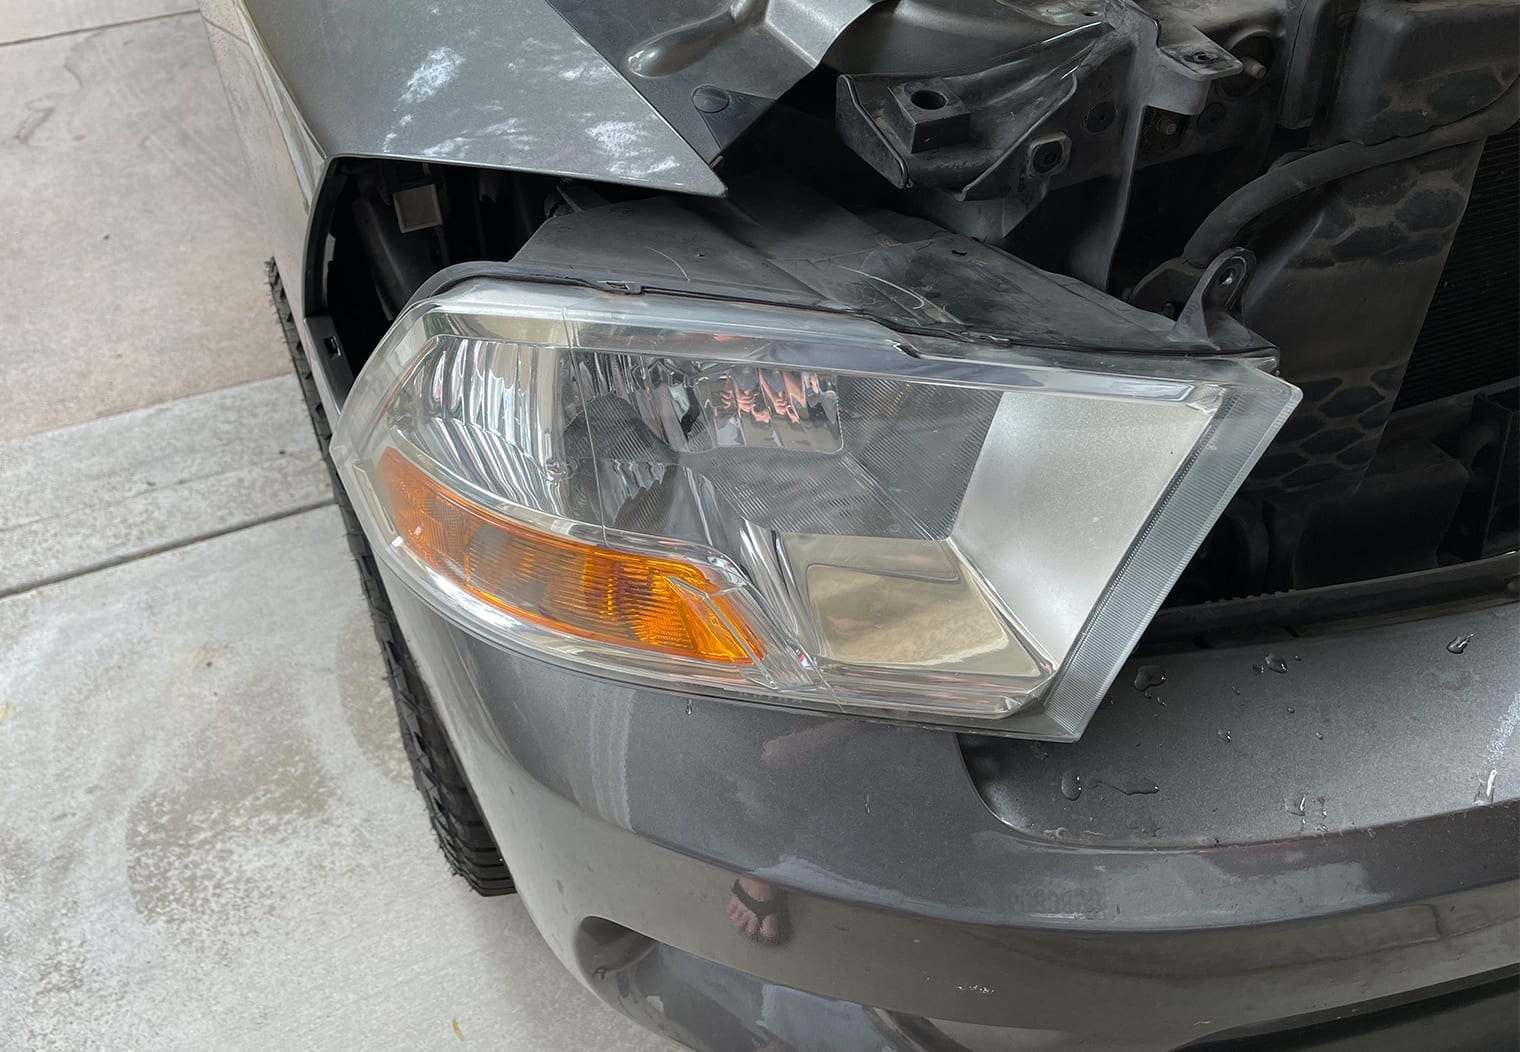
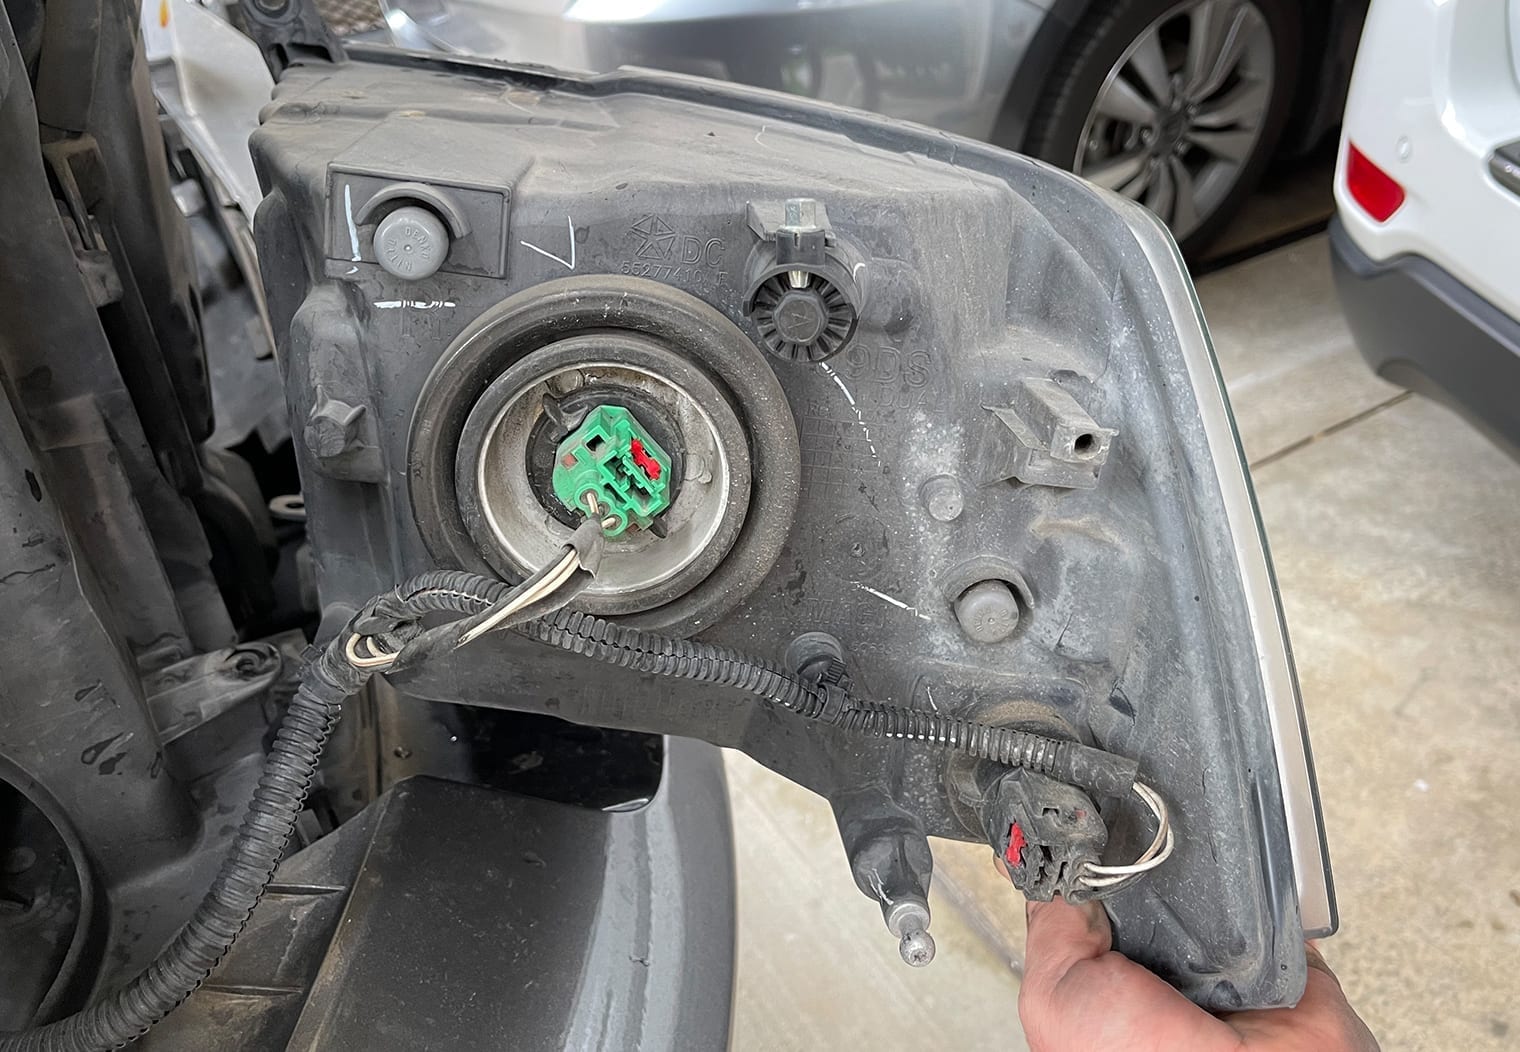
With your grille removed you can access the two bolts that hold the headlights into place (see image carousel above). Remove the bolts that hold the headlights into place and set them aside.
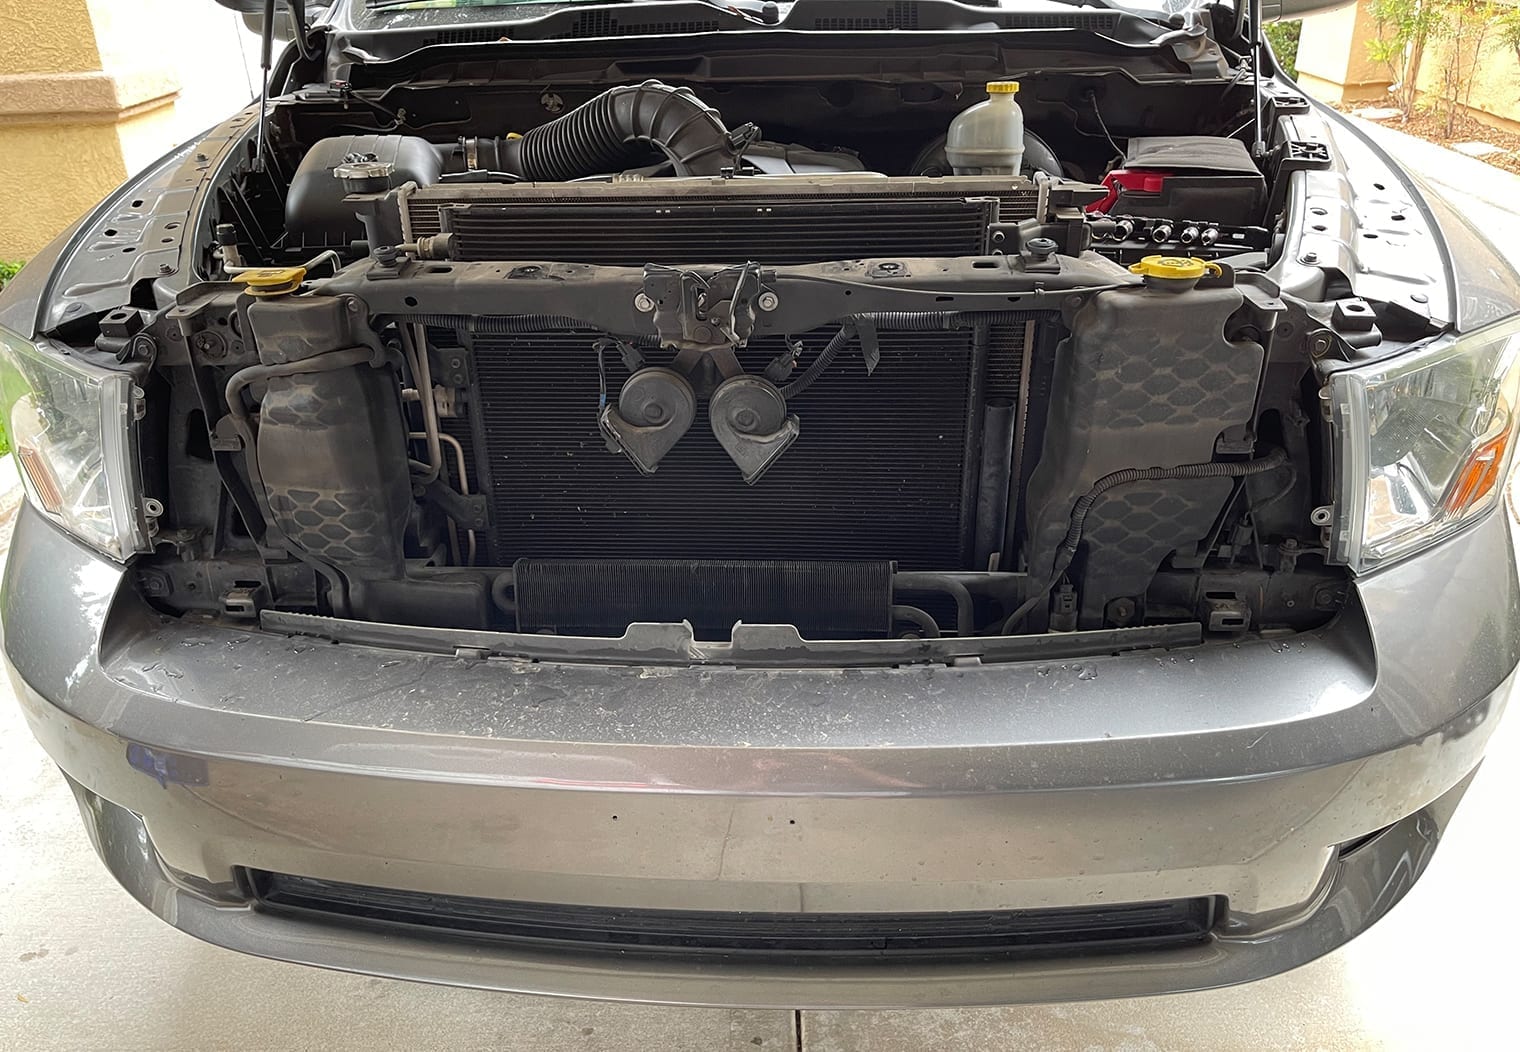
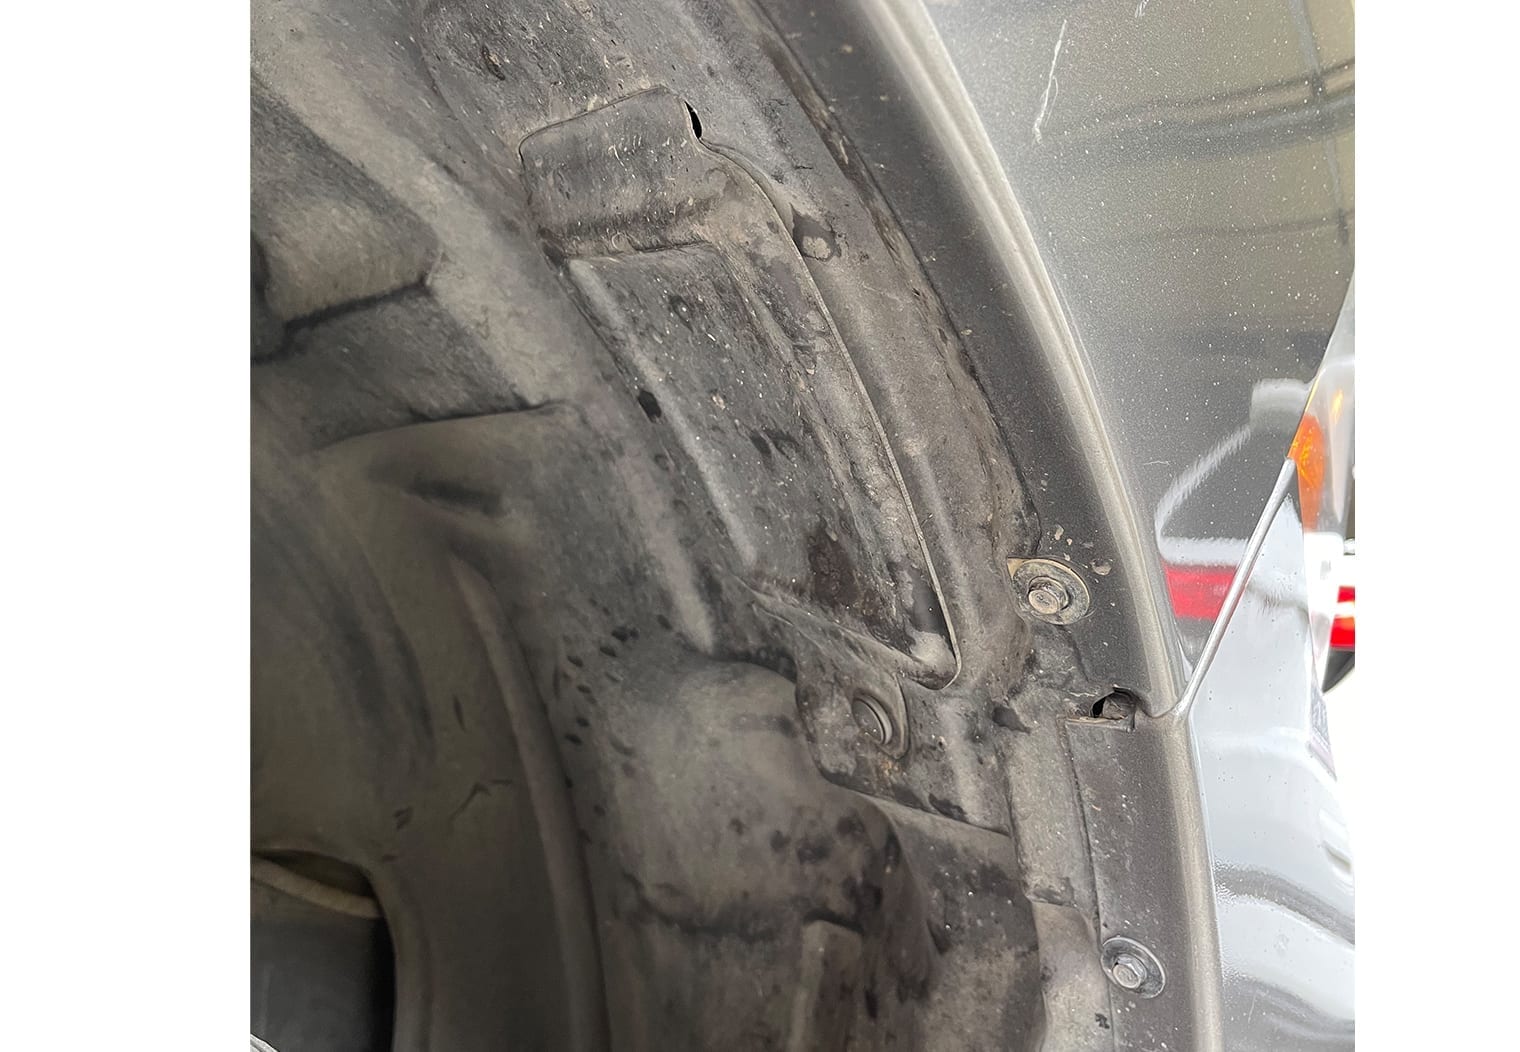
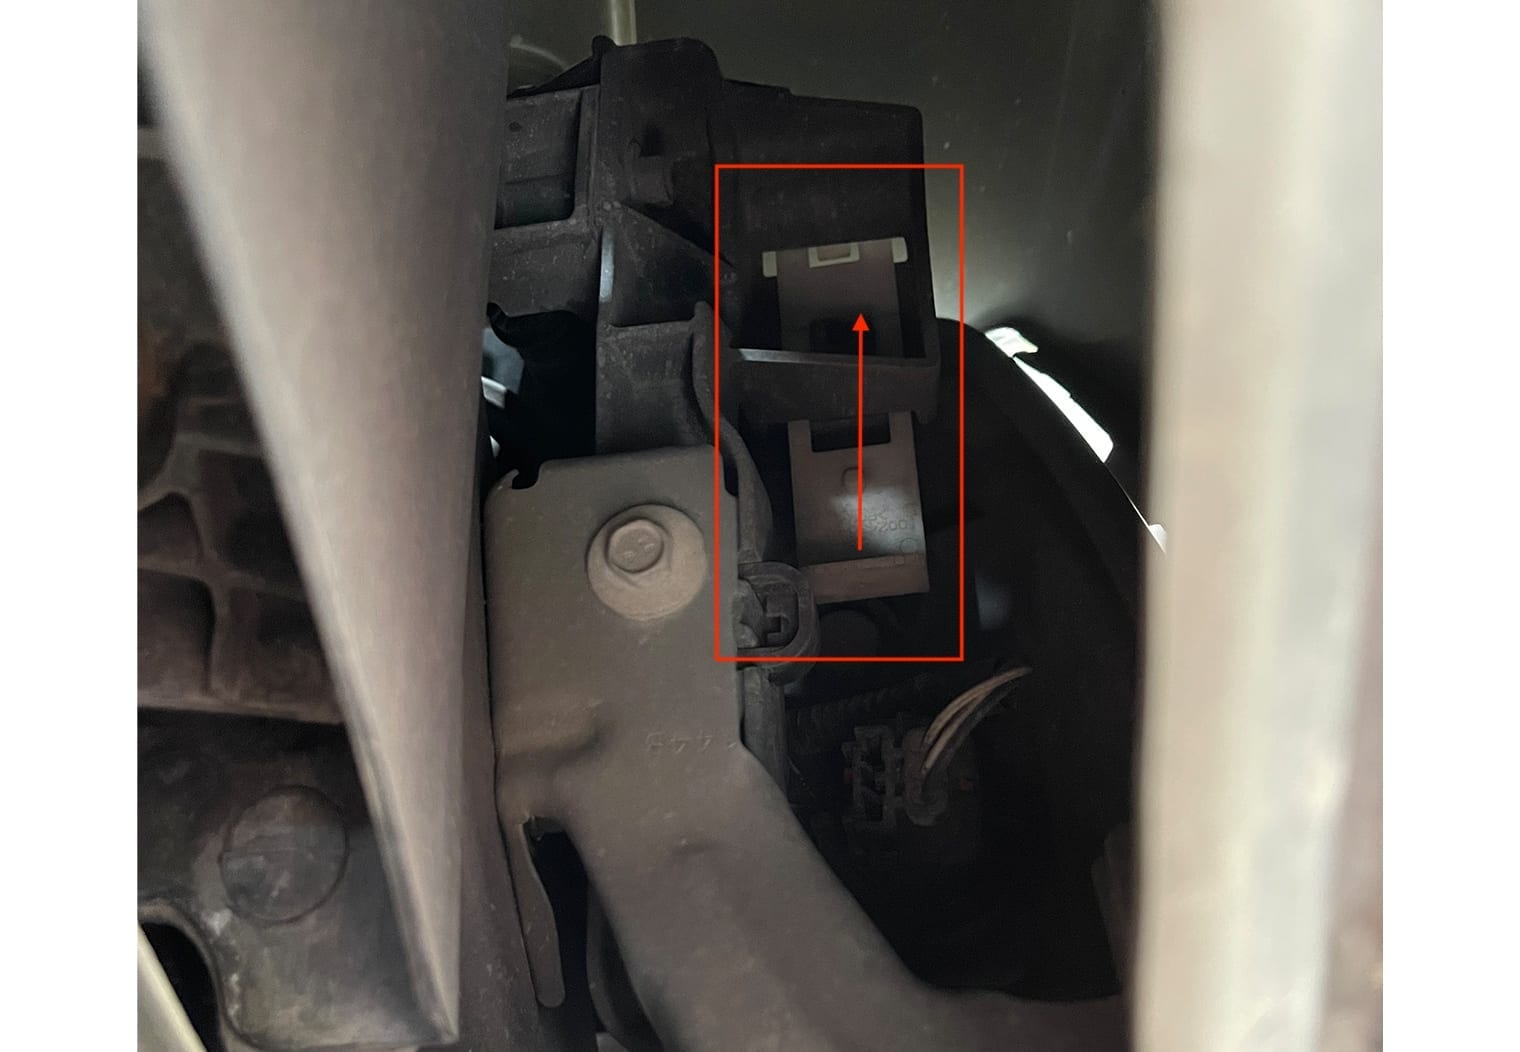
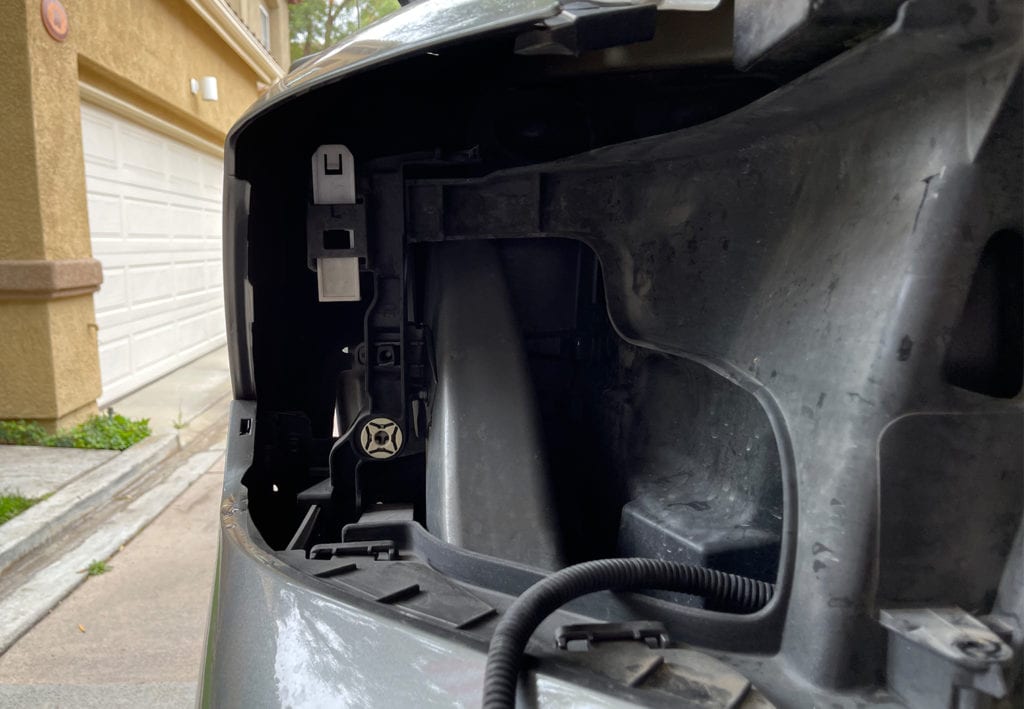
After you've removed the two screws and set them aside, move on to your wheel well. On the front side of the wheel well, you'll find a panel with a single clip holding it in place. Using your trim removal tool, remove the clip and then remove the protective panel. Once this panel is remove you can access a sliding retainer that holds the back side of the headlight in place. Push the retainer all the way upwards to unclip the headlight. Once this is done, you can pull the headlight from the truck. Set the headlights aside. We'll come back to those later.
Step 2: Wire Your New HID Headlights and Ballast
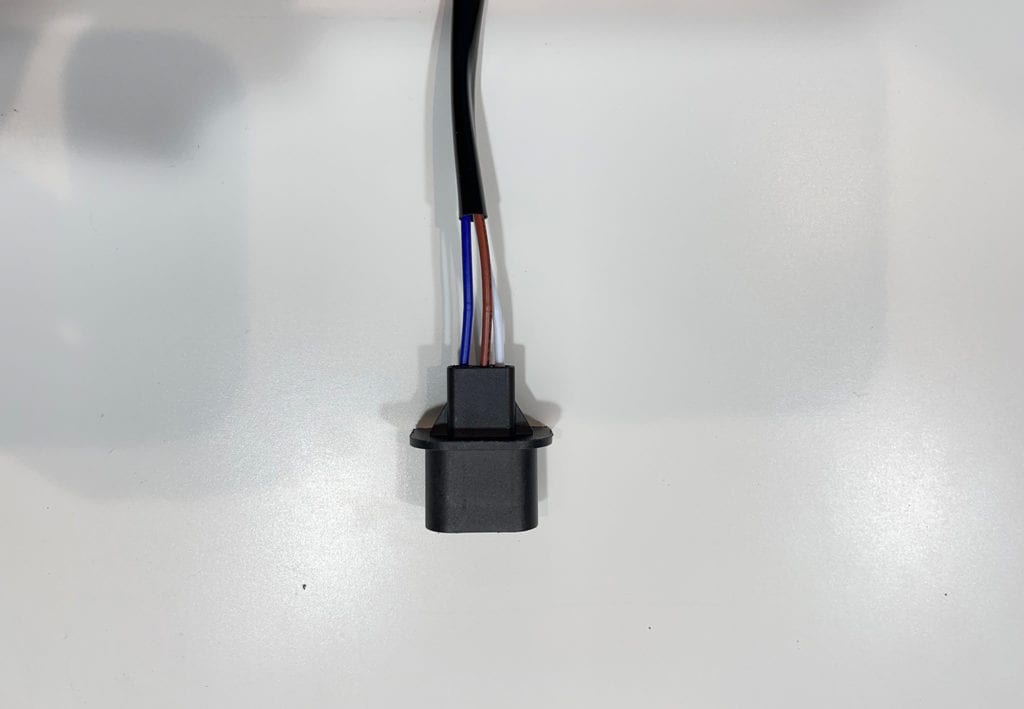
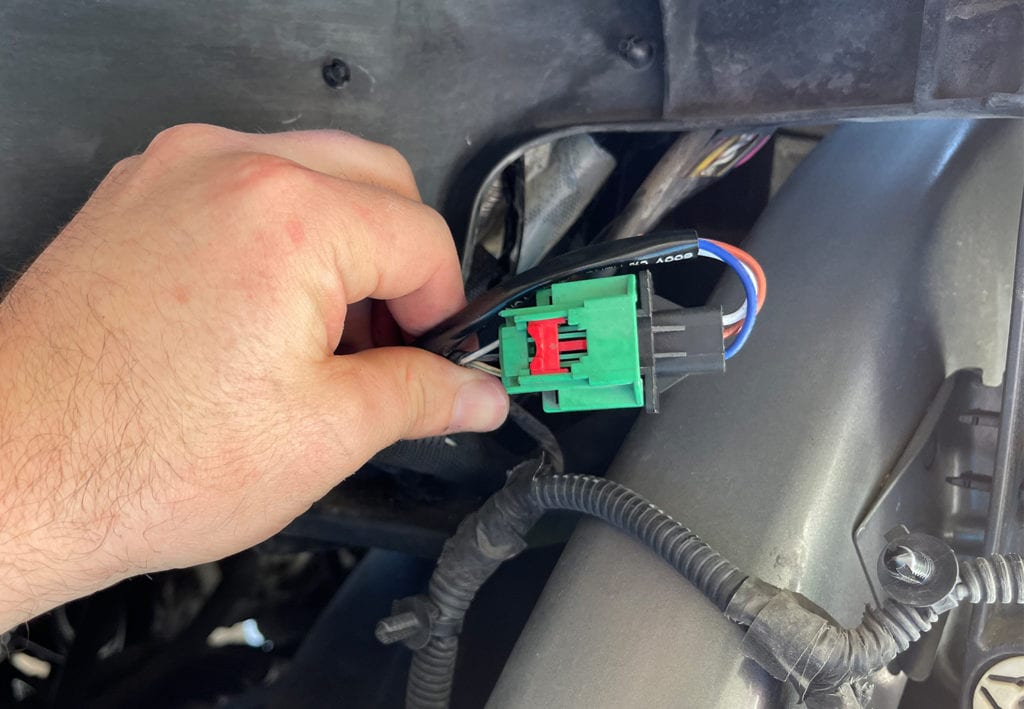
Now that you've remove the panel in the engine bay and the headlights you can access the wiring, battery and areas you need to run your new HID wiring and mount your HID ballasts. With the Xentecs, they come out of the box almost ready to go. You just need to put the correct wires in place on the harness plug. If you chose another HID, you may not need to do this. Insert your harness wires into the harness plug as follows, ensuring that each have clipped in and won't come out:
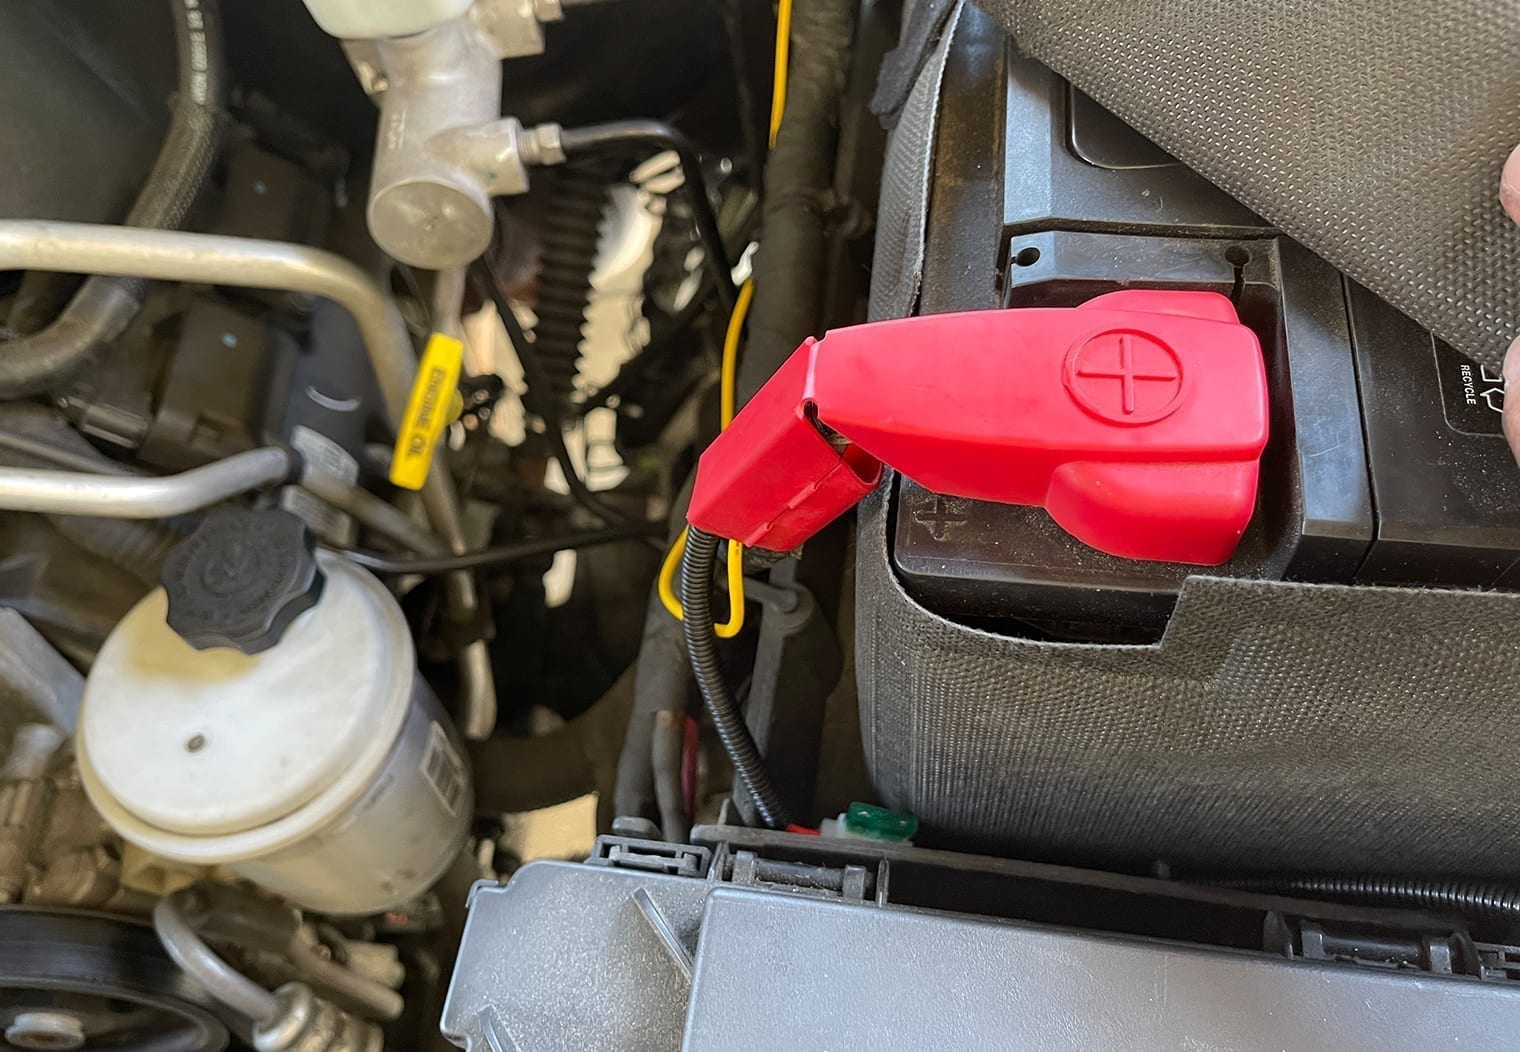
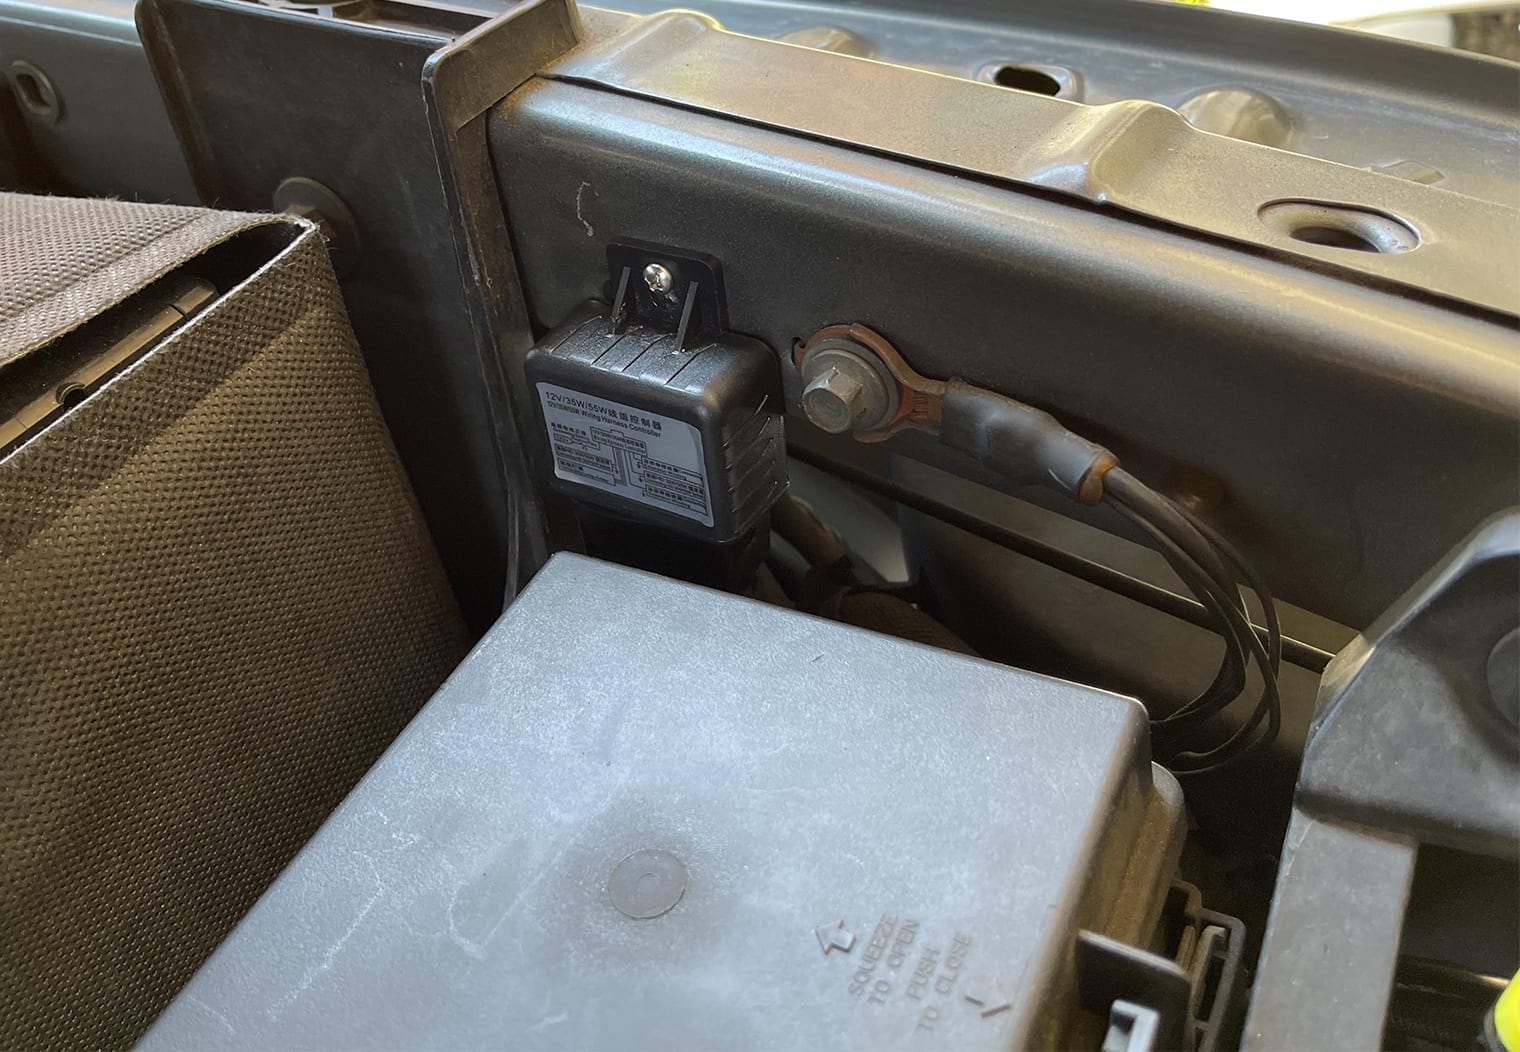
Once your HID wire harness is ready you can start to install it into your truck. The first thing to do is measure out where your ballasts need to go on both sides so that you can mount them in a place that gives you enough slack in the wire to plug your headlights back in. This is a CRITICAL step. Just because the wires look long enough doesn't mean they are. Find the positive side of the battery and start there. Located the ground that's just in front of the battery and temporarily place your harness in position to be wired. Be sure to check the placement of your ballasts and ensure that the wires will reach the battery, the ground, both ballasts and most importantly your headlights.
Once you've ran your wire and tested the distances you can begin to install the harness. Start with the positive and ground wiring. You can mount the positive 12V power directly to the terminal using the existing bolt located on the terminal itself.
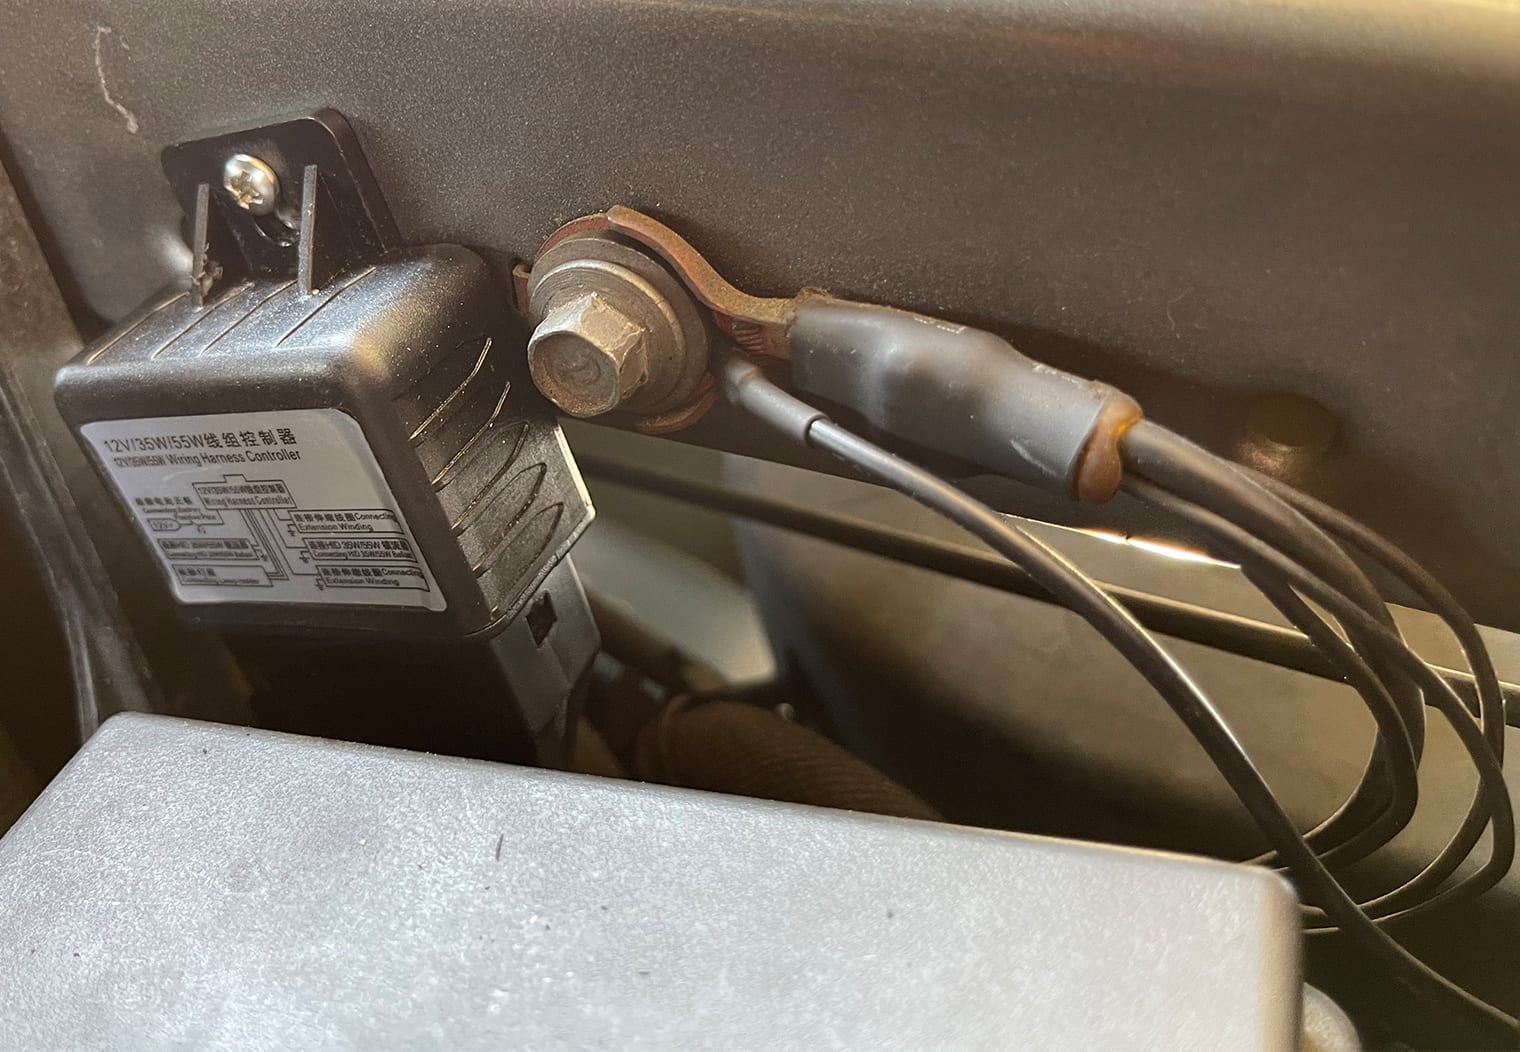
Then, you can mount the “Wiring Harness Controller” in front of the battery and use the existing ground bolt to ground the black wire of your harness out. See the images below

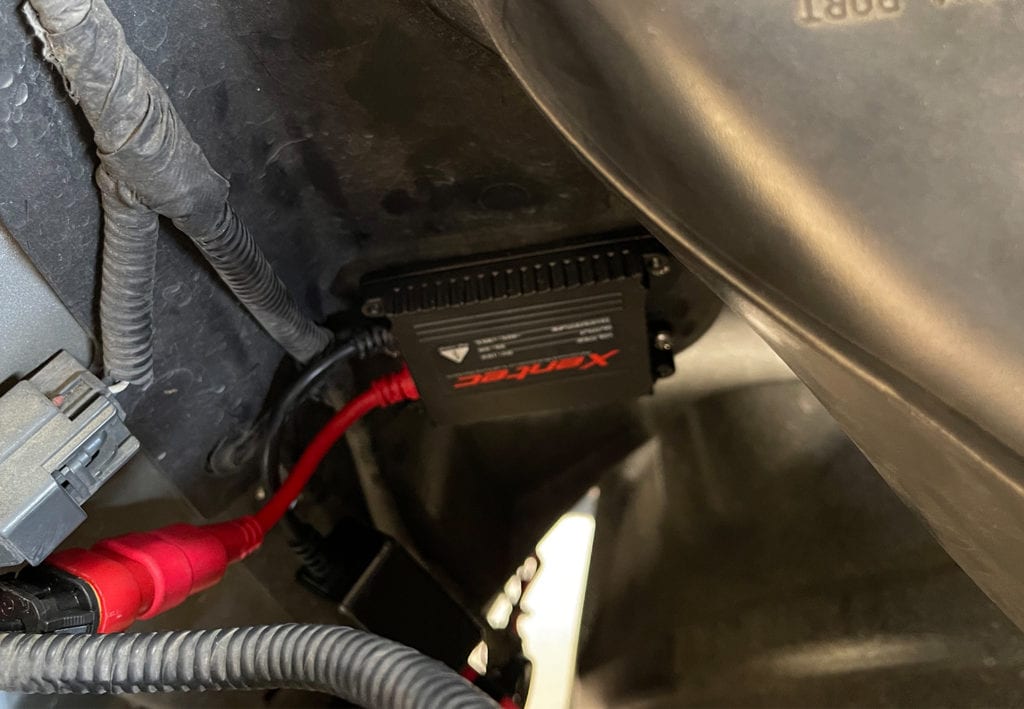
With your positive and ground wires bolted and your Wiring Harness Controller mounted, mount your ballasts in the location you decided on earlier while measuring out the harness. I mounted the driver side ballast on the fan shroud to the left side of the headlight (looking from the front) and then mounted the passenger side ballast to the intake plastic that runs to the bumper area. This may differ depending on your wiring length and HID light you choose. I would recommend mounting these in an area that won't get exposed to water but also have enough room to breathe since they get hot.
Once your ballasts are mounted, start to plug in the harness to the existing OEM headlight harness and the ballast. Then, use zip ties to secure your wire harness in place. I ran the harness alongside the front of the radiator and zip tied it to the existing OEM harness that went from one side of the front to the other.
Step 3: Replace the Headlight Bulbs
With your HID ballasts mounted and your wire harness zip tied into place, your plugs should be in position for your headlights to plug back in with your new HID bulbs. But first, you'll need to swap the OEM bulbs out of the headlights and replace them with the new ones.
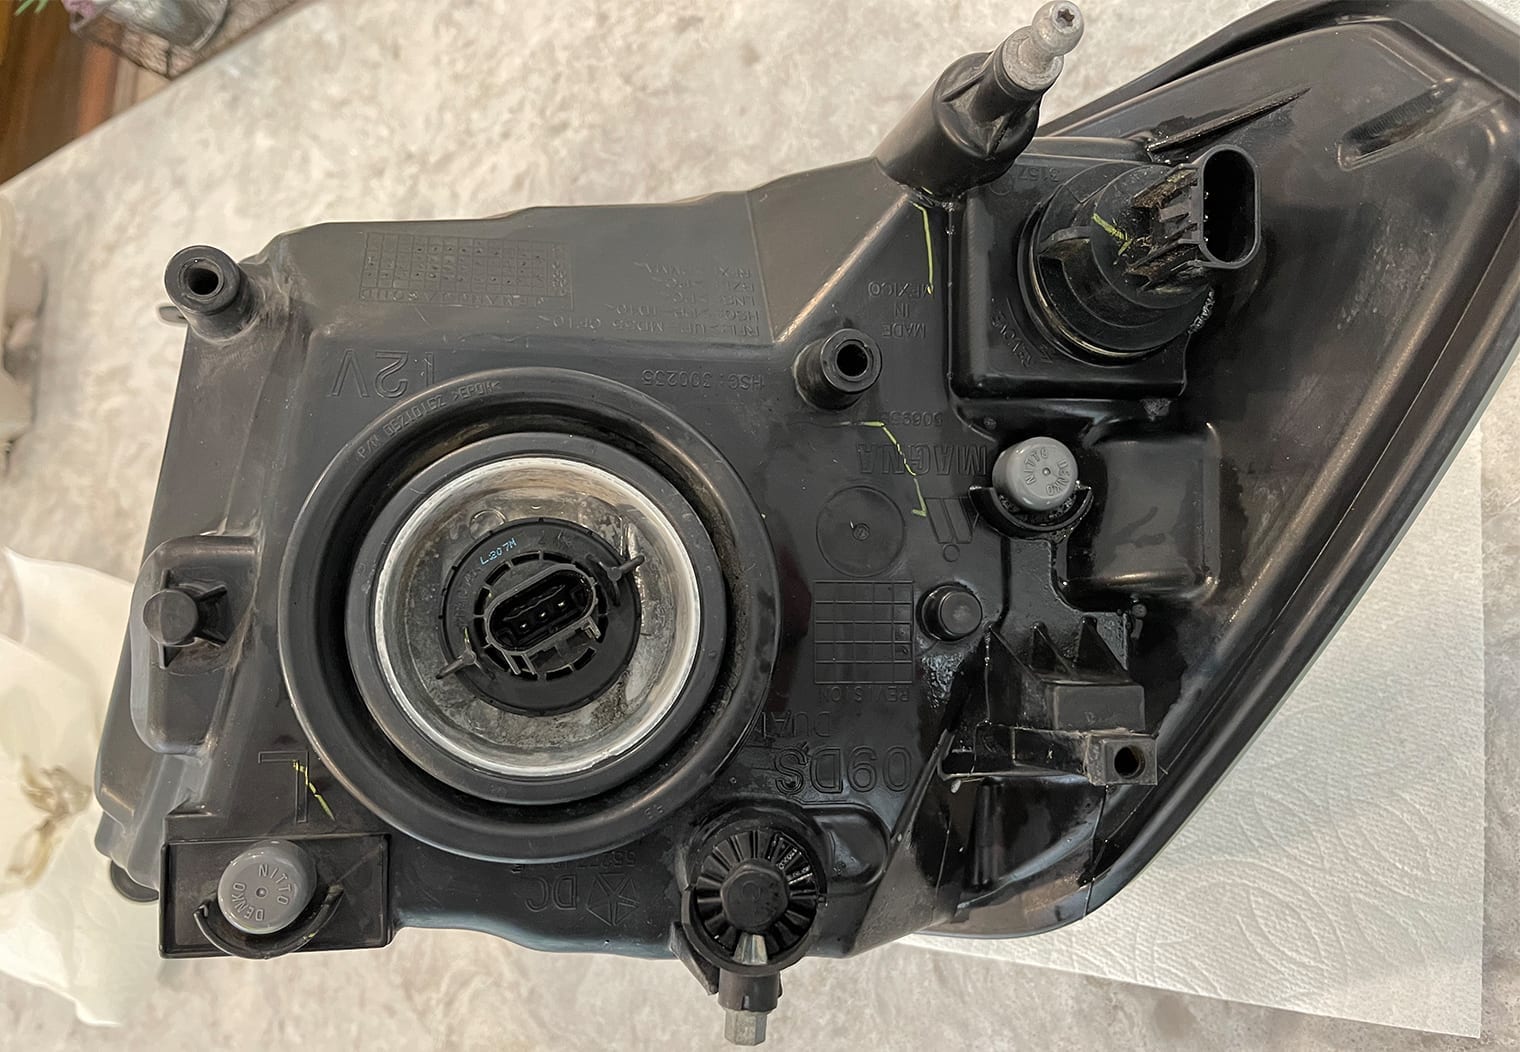
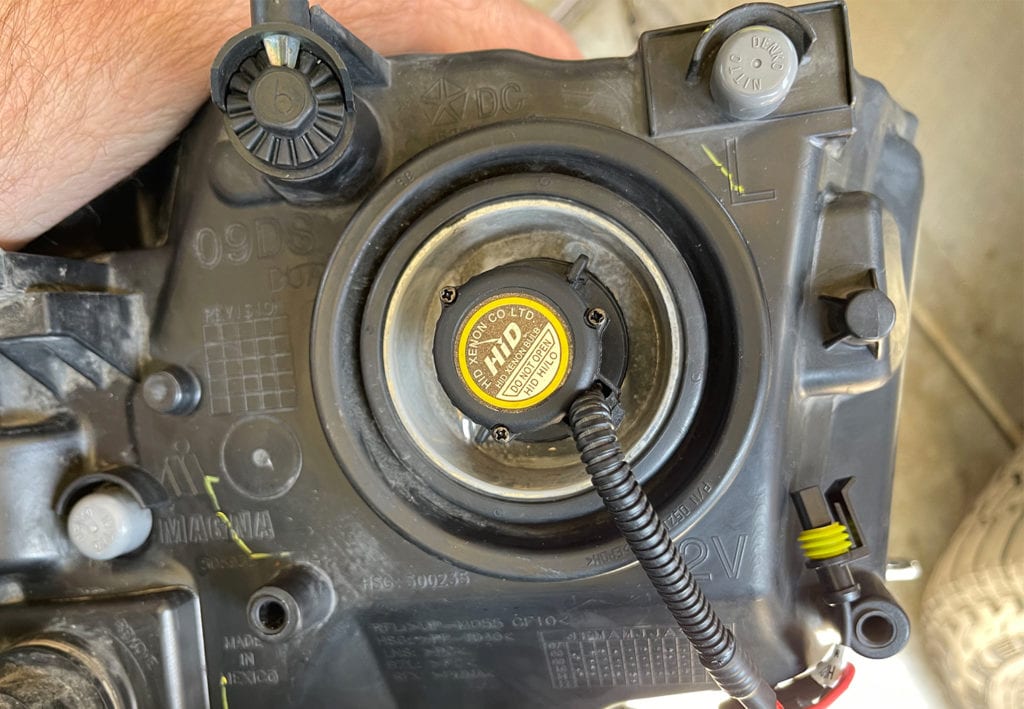
Grab the headlights (that you pulled out in step 1) and locate the bulbs on the back side of the headlight. By twisting counter clockwise about a 1/4 turn you should be able to pull the old bulb out.
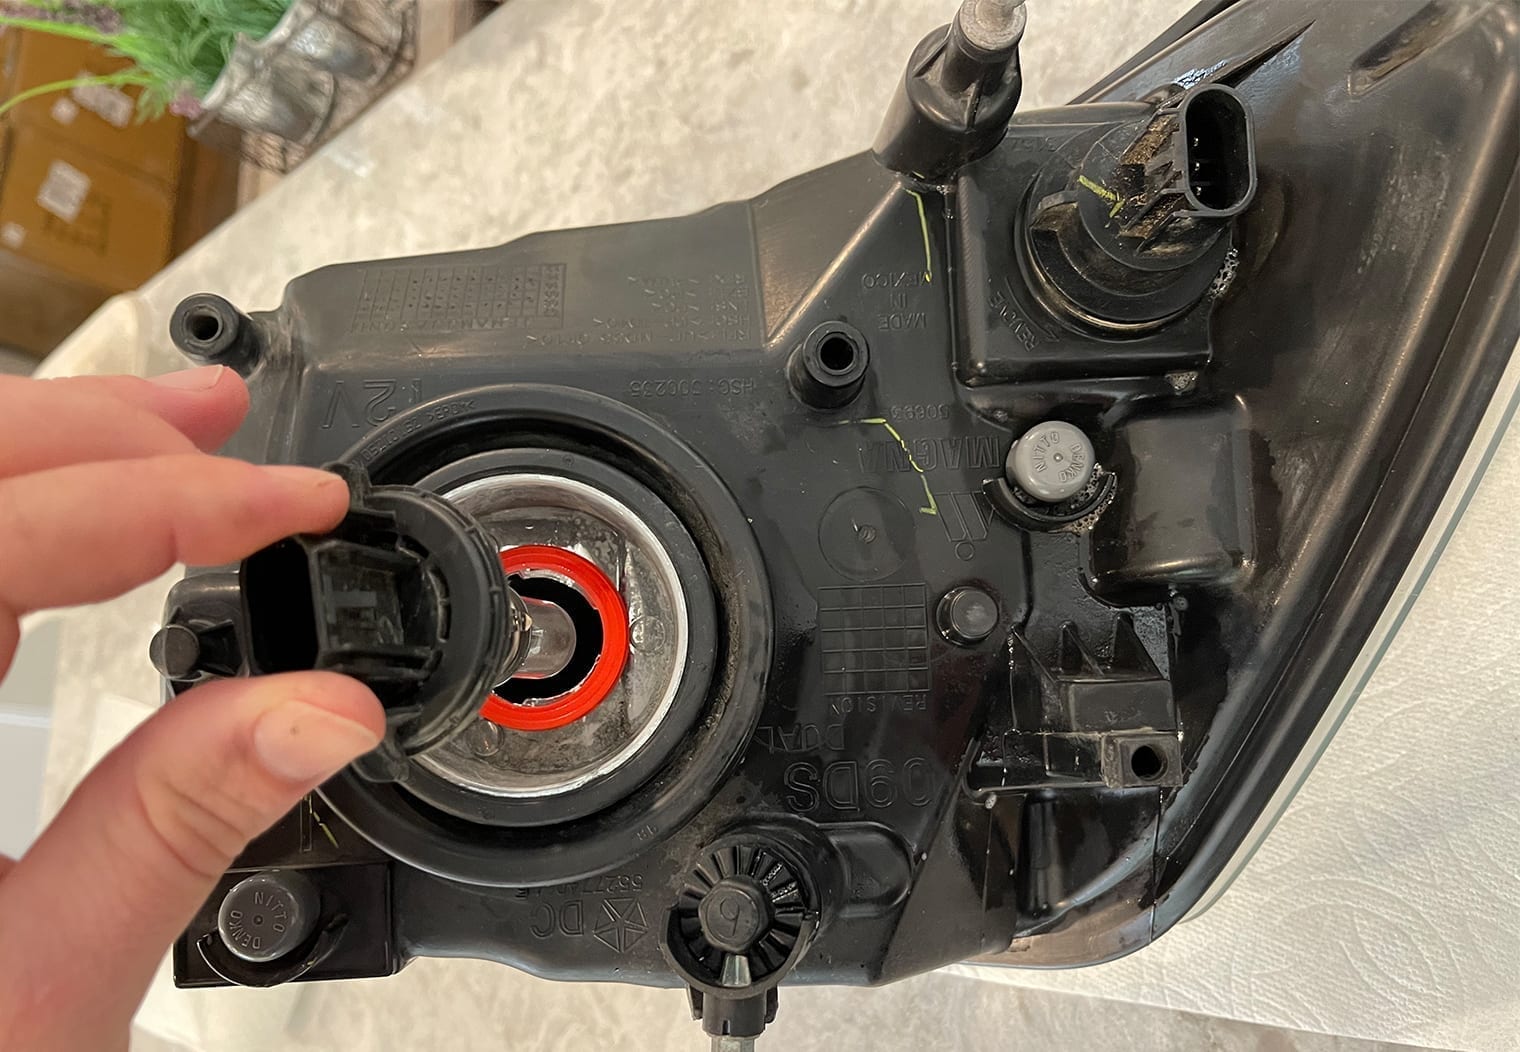
Once you've removed the old bulb, ensure that the OEM bulb's seals aren't stuck on the back of the headlight. The new HIDs should have seals already built into the bulb to seal up between the bulb and the headlight so that no moisture gets in. Then, to install your new bulb, simply align the slots on your bulb to the corresponding size on the headlight and twist it clockwise about 1/4 to 1/2 turn to lock the bulb in place.
Once you've don this for both headlights you're ready to mount your headlights again!
Step 4: Re-mounting Your Headlights
Ensure that all of the headlight wires are plugged back in and place both of your headlights in position before you screw them in. Turn your truck on and test out your new headlights to ensure that both the headlights turn on and that the high beams work too. If all works well, proceed to mount the headlights back up using the two bolts. Then, clip the retaining clip on the back side of the headlight under the wheel well and re-install the protective panel. Install your grille and then place the cover back on top and mount it with the panel clips you pulled before.
At this point, your new HIDs are installed and should be working!
OPTIONAL – Step 0 & 5: Aligning Your Ram 1500's Headlights
This is an optional step but I'd recommend it. It also assumes that your headlights are in the correct position before you upgrade your OEM headlights.
At dusk or night time before installing your HIDs, park your truck facing your garage or a wall about 6 – 10 feet away. Turn your headlights on and take a look at the position of the lights on the wall. Using a piece of masking tape (or any tape), mark the top side of your headlights on the wall. Then, mark where your front tire is to mark your distance from the wall. You'll use this as a frame of reference after you install your headlights.
Once you've installed your new HIDs, come back to this same wall at the same distance and using the two outer most holes in your engine bay closest to the side of the fender well, loosen or tighten the headlight alignment bolt to raise or lower the position to match where your existing marked spots are on your garage or wall. This will ensure that you're not blinding oncoming or passing traffic. I learned this the hard way on hwy 40 when almost every trucker on the road flashed me as I passed them.
Here's a good video help you understand where to look for adjusting and how high to adjust them (if you didn't mark your headlights before upgrading:
The end result!