In this article: We'll walk you step-by-step how to change the front motor mount on your 2008 – 2012 Honda Accord, with details and photos!
Changing motor mounts on your vehicle can be a timely and pricey task if you bring it in to your local car repair shop or mechanic. In many cases, they're tucked deep in the engine bay or in the subframe/crossmember of your vehicle, making it really challenging and daunting to replace yourself.
Luckily, Honda made it relatively easy to access the main front motor mount and replacing it is really only a 1-2 hour job if you have the right tools! In this How To, I'll walk you through the steps to remove, replace and reinstall your Honda's front motor mount assembly with pictures, parts and tools used along the way.
What Is a Motor Mount?
Motor mounts (also known as engine mounts) are what secure the engine to your vehicles frame or subframe. Believe it or not, engines vibrate a lot when they're running. Engine mounts are designed to absorb vibrations from the engine so that you don't feel the motor, while handling the twisting power that the motor creates when you step on the gas.
They're typically made from a combination of steel or aluminum and rigid rubber compounds. Without them, your car would feel like a massage chair, with all of the components of your interior vibrating and rattling.
Symptoms of a Bad Motor Mount
Thankfully, most of the time a faulty or broken motor mount is easy to diagnose and doesn't cause too much damage to the rest of your vehicle. Normally, it happens slowly over time and isn't an abrupt change in the way your car handles or performs. Here's a few symptoms to look for when diagnosing a bad motor mount:
- Loud, metal on metal noises from the engine bay. These will typically happen when you press on the gas and let off and sound more like a clunk.
- Stronger than normal vibrations while you are driving or at a stop sign. In the case of my Honda, while I was at a stop sign, the steering wheel and interior of the car began to vibrate more than normal. It worsened when I put the A/C on too.
- Movement of the engine when you step on the gas. If you have a friend look at the engine while you rev it, you'll see movement in the motor in the form of a twisting motion.
Cost to Change a Motor Mount On a Honda Accord
Since motor mounts are deep in your car's engine bay, most of the time your vehicle needs to be placed on a jack to access the underside of your car. Parts need to be removed just to get access to the mounts, then your engine needs to be lifted out of the way to remove and replace the mounts. Replacing motor mounts isn't always expensive, but most of the time it's not a cheap fix. Engine mounts range from $25 to $200 bucks at parts stores, depending on your model and labor can be between 2 and 6 hours.
In terms of how much it costs to change a motor mount on a 2009 Honda Accord like mine, I was quoted $1000 by a local mechanic for both parts and labor to replace the front motor mount and about $1900 to change all of the motor mounts. For many of us, this is a hefty cost, especially for an older vehicle. This is why I decided to do it myself!
Doing it yourself will save you hundreds of dollars. In total, the replacement cost me only $151 dollars. I had all the tools I needed though so I didn't need to purchase anything except for parts.
Parts & Tools Needed to Replace a Motor Mount on a Honda Accord
Parts Needed:
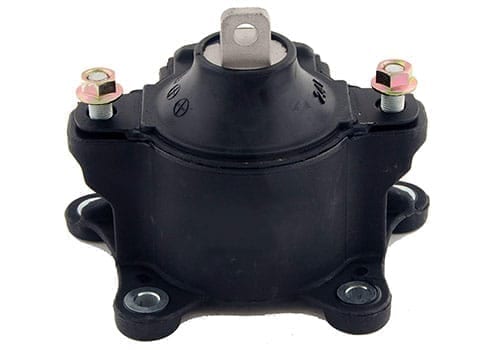
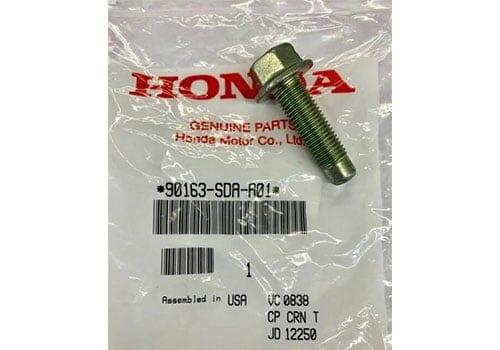
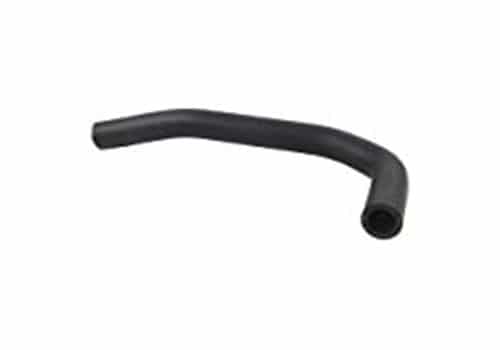
To change the front motor mount on a 2008 – 2012 Honda Accord with the 2.4L four cylinder motor, you only need three parts. I would recommend buying OEM equipment anytime you purchase something like a motor mount. Here's the three parts with their part numbers and what they look like. Click on one to be taken to an Amazon page to purchase it.
I would also recommend purchasing a set of new retainer clips that hold on the plastic panels that you're going to be pulling off. Odds are they are old, dried out and will break when you remove them. I purchased a set on amazon for cheap. You can find them here for less than 10 bucks: EZYKOO Universal Plastic Fender Clips.
Tools Needed:
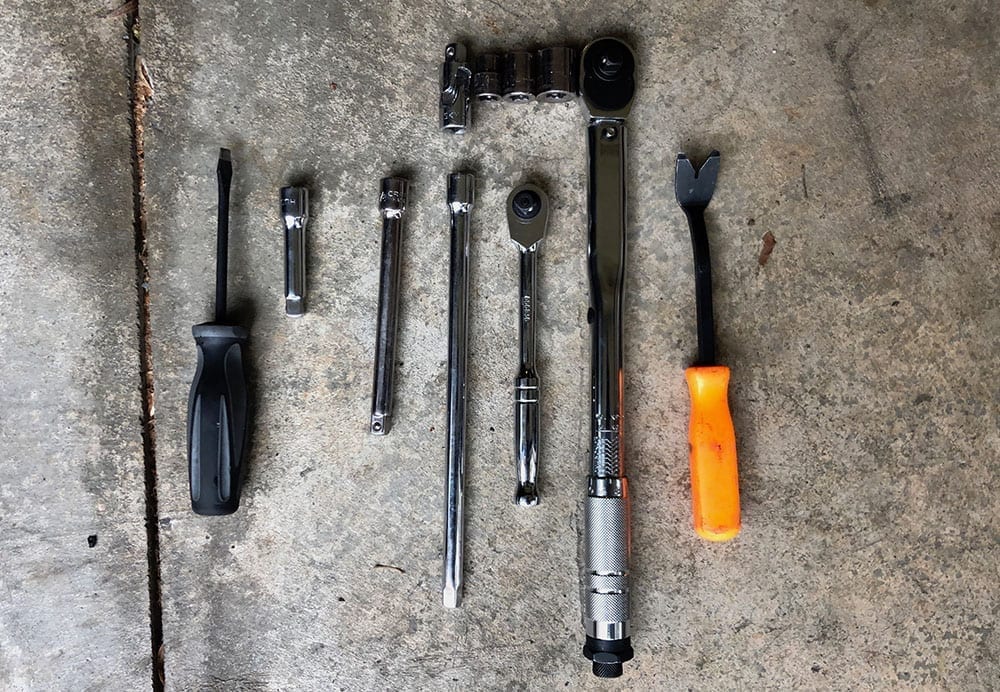
In terms of tools, you'll need the following (from left to right in the image). Click on the tool to be taken to an amazon page with the tool that I would recommend if you don't already have it.
- Flathead Screwdriver
- 1/2″ Extension Set
- 3″ extension
- 5″ extension
- 10″ extension
- Universal Joint (above the 10″ extension in image)
- 1/2″ Long Handle Ratchet (Mine isn't a long handle but it would have been helpful for more leverage to break the tight motor mount bolts loose)
- 1/2″ Torque Wrench – Read more about How to Use a Torque Wrench and our list of Best Torque Wrenches.
- Automotive Clip Puller
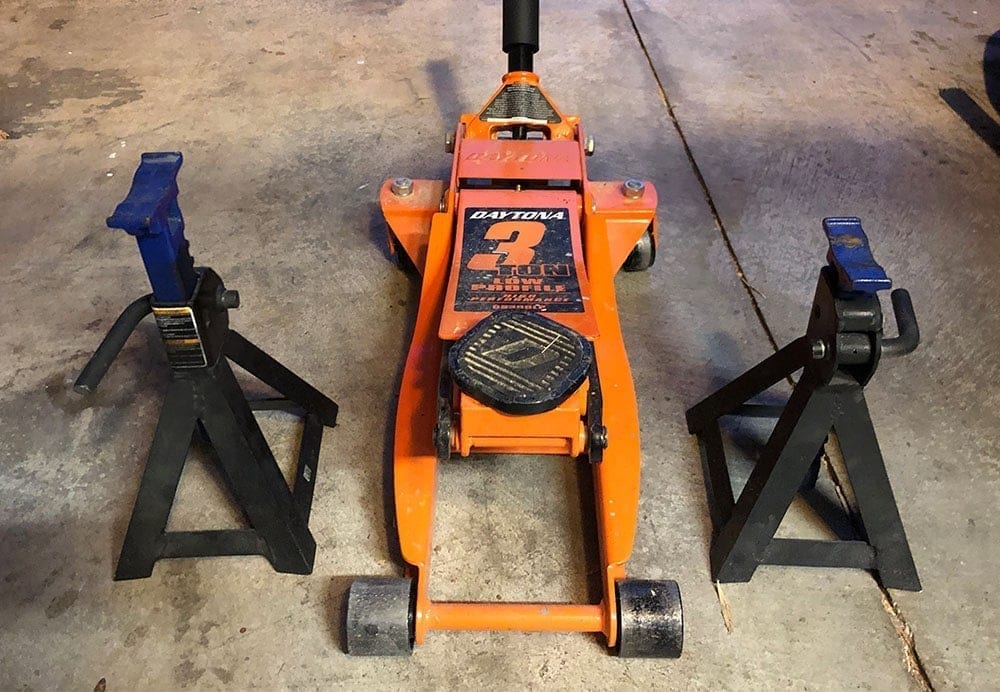
In addition to the tools, you'll also need a car Jack and Jack Stands if you want to do this in your garage:
- Low Profile Floor Jack (Low Profile is recommended to fit under your front bumper when jacking the car up).
- Jack Stands
Once you have all of the parts and tools that are needed to change your Honda Accord's front motor mount, you're ready to start!
Steps to Change a 2008 – 2012 Honda Accord Motor Mount
Let's dive right into it. If you purchased a set of replacement retainer clips, pulling panels off should be a breeze. If you don't have extra clips, take your time because they crack and break very easily.
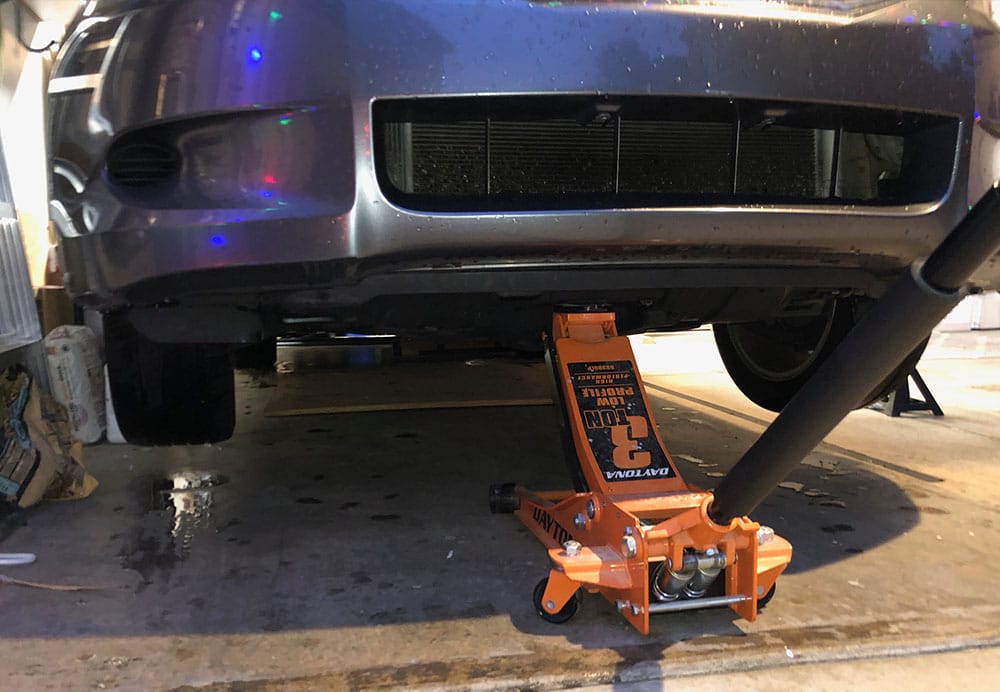
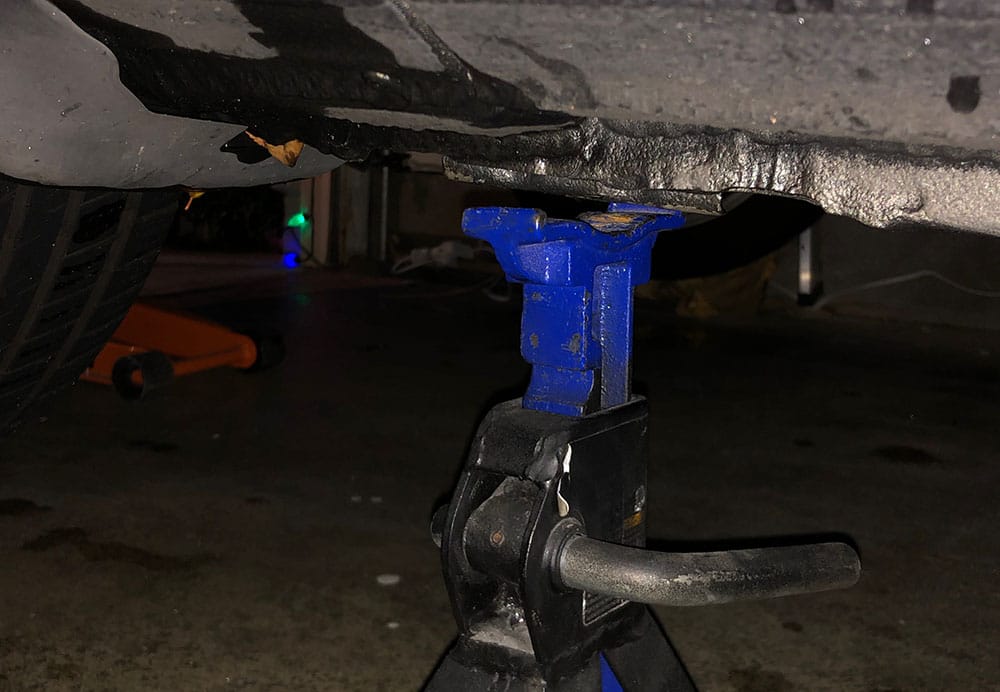
Step 1: Jacking Up Your Honda
Place your low profile jack underneath the front of your Honda. Underneath your car you'll see a circular lift point. Place the jack at the center of this lift point and begin to jack the front of the vehicle upwards.
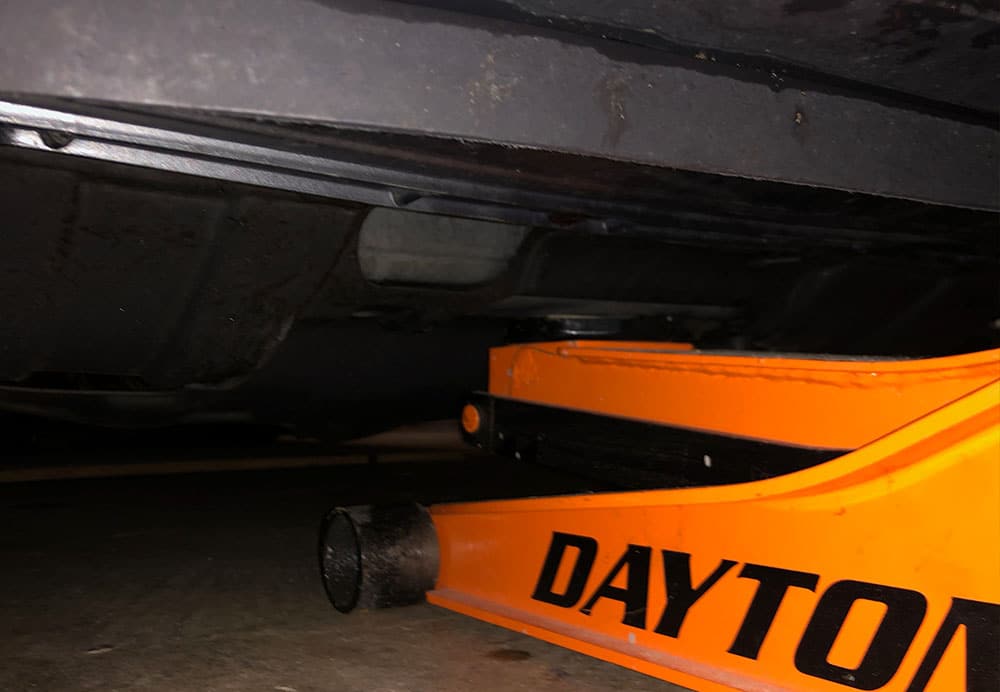
Lower your car back down on to the two jack stands you've placed on either side of the car and remove the jack stand. You can also leave the jack stand in its place for extra safety.
Step 2: Removing Panels
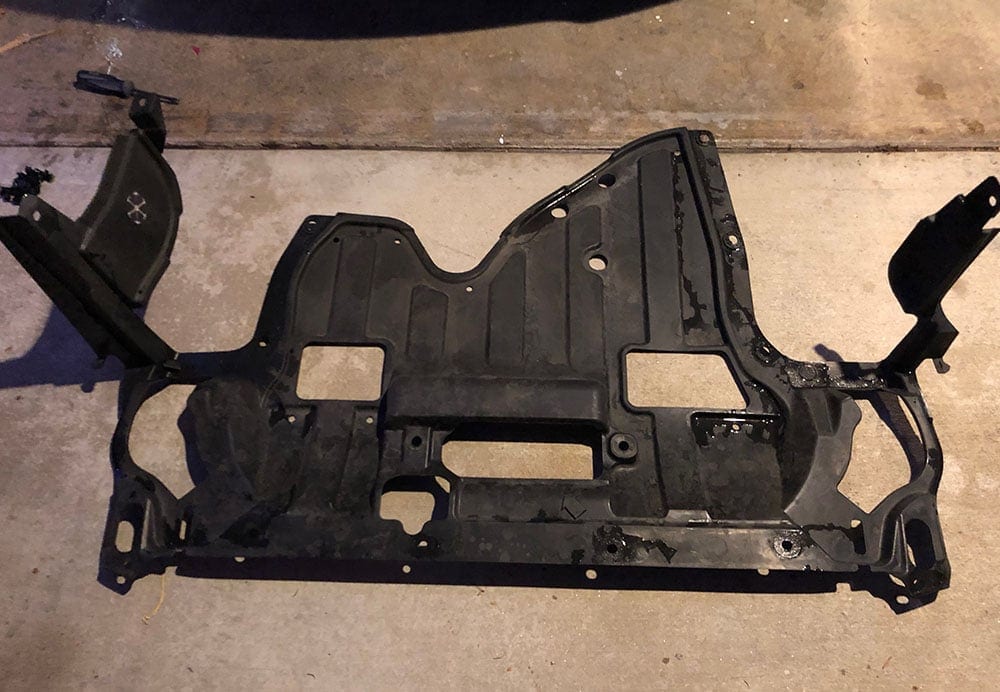
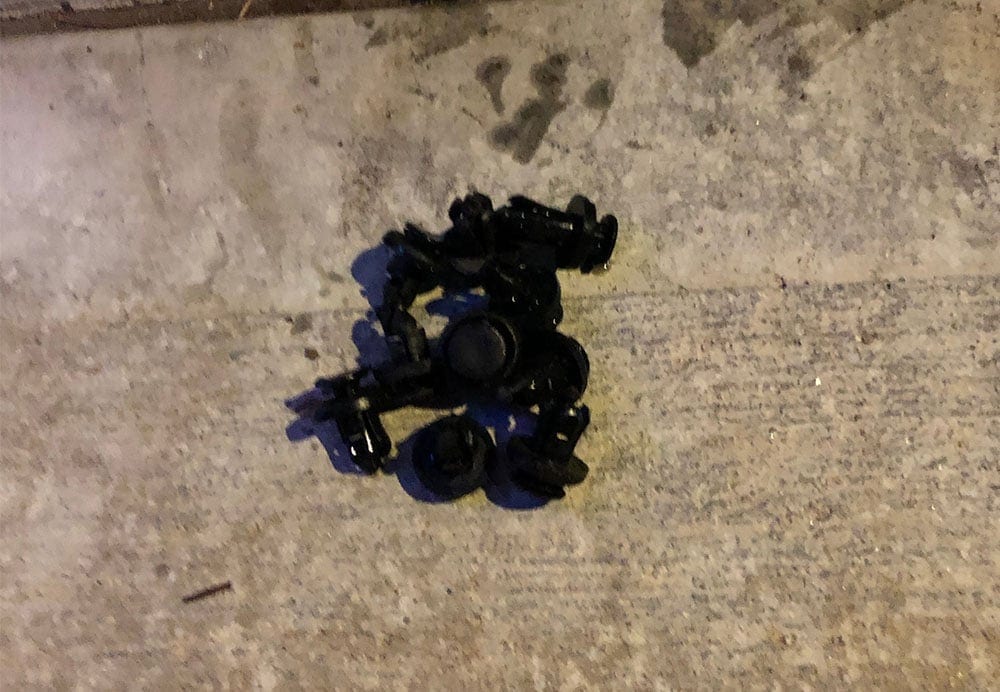
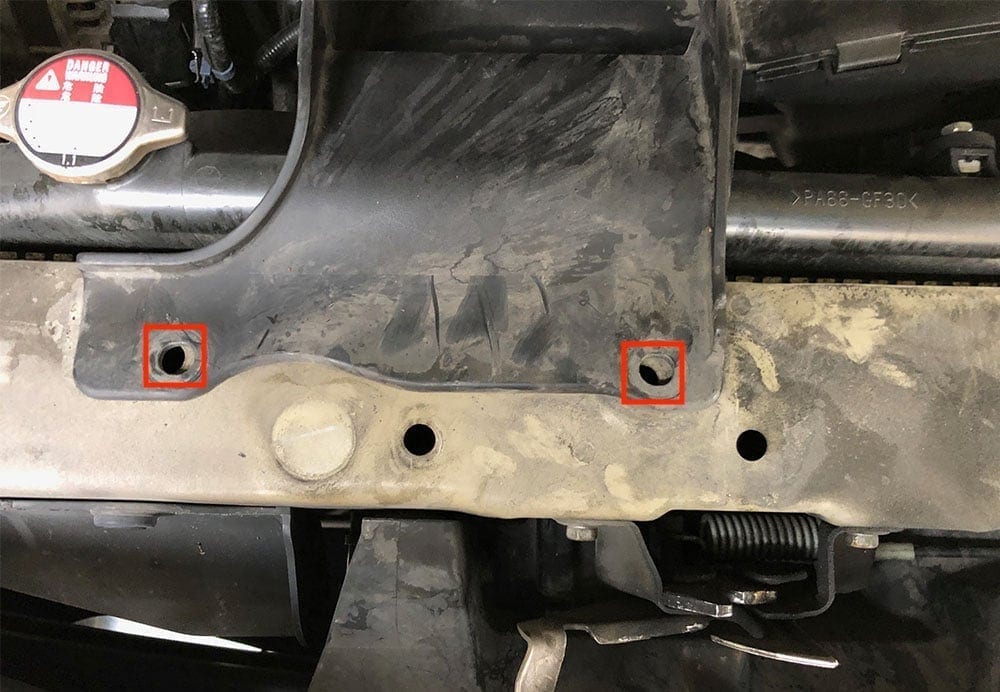
Now that your car is up on stands, you can begin to crawl under and remove the skid panel that's blocking the underside of the engine bay along with access to the underside of the motor mount. Crawl under your car (ensure that your jack stands and vehicle are on flat ground and that they are sturdy first) and begin to unclip all of the panel clips. These are the clips that you should have purchased beforehand in case they break on you. I had a hand full of them break while I was pulling them.
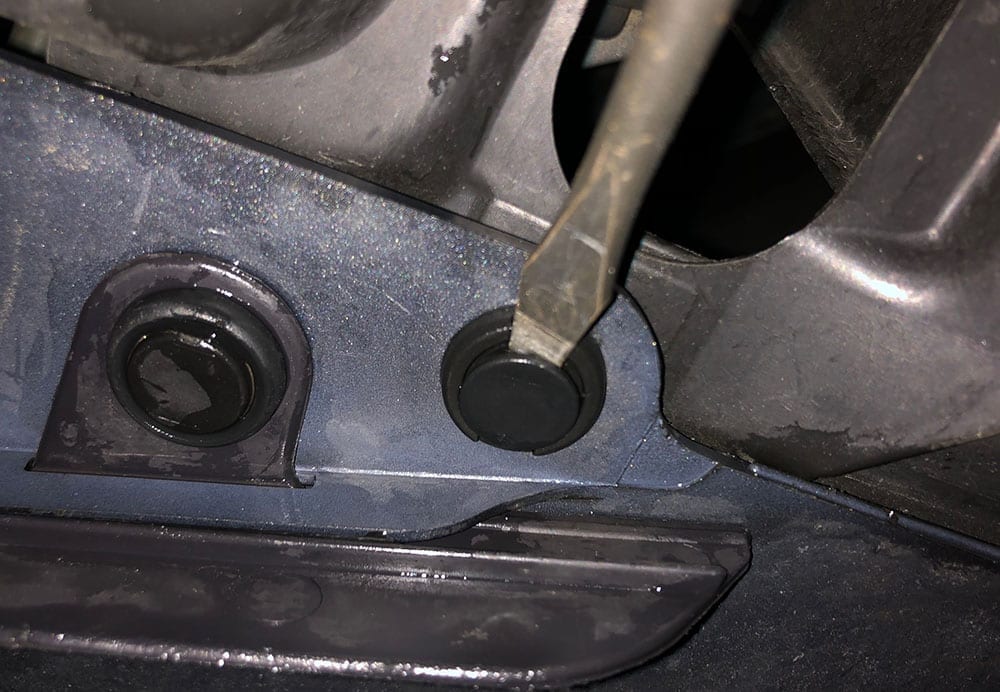
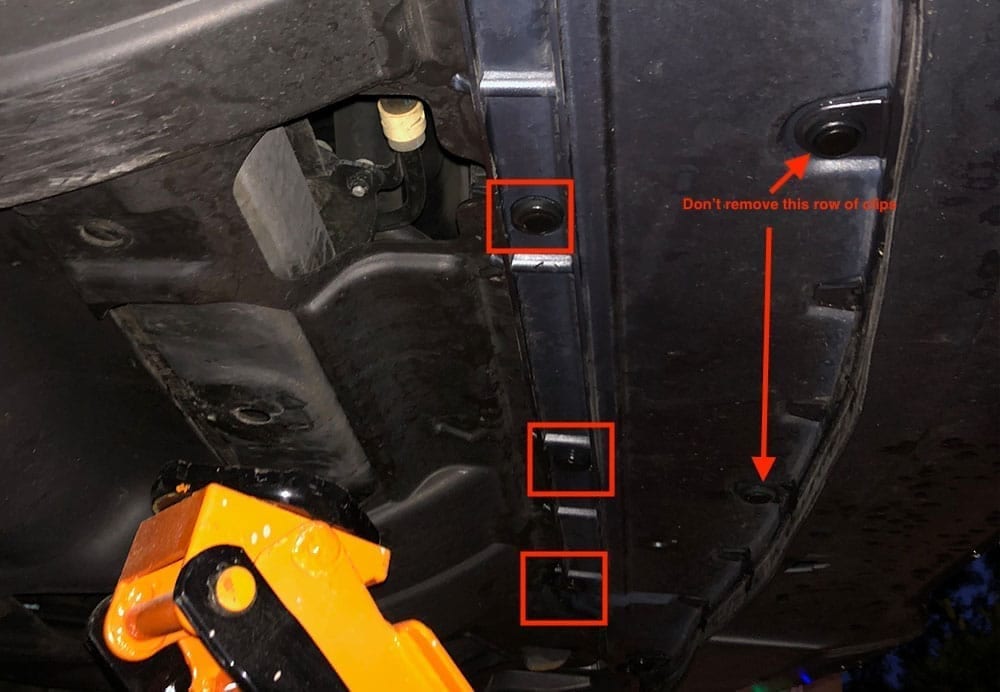
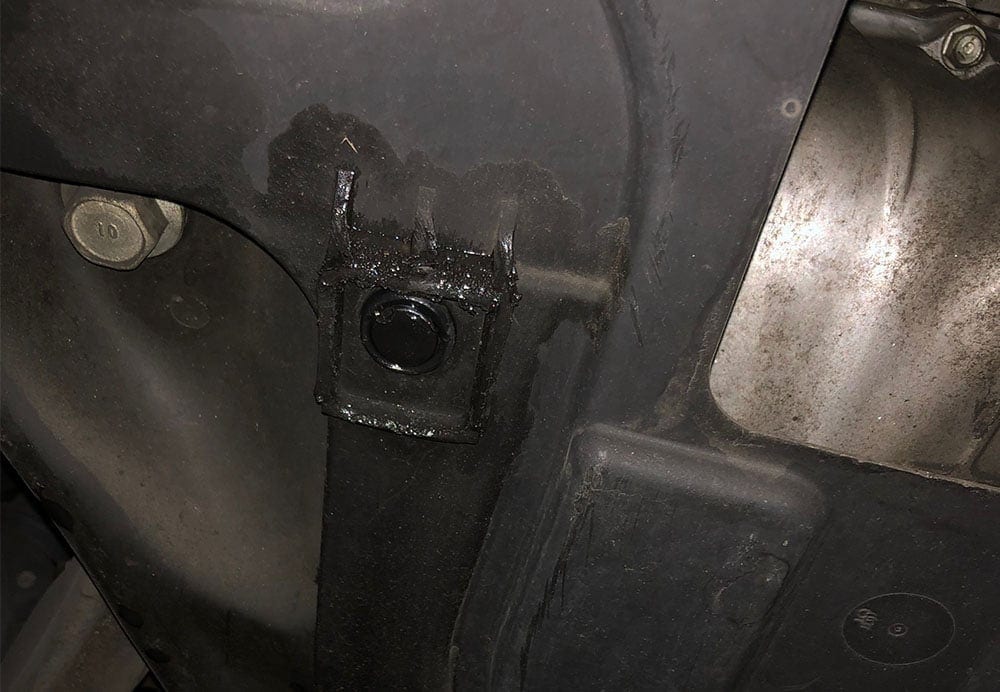
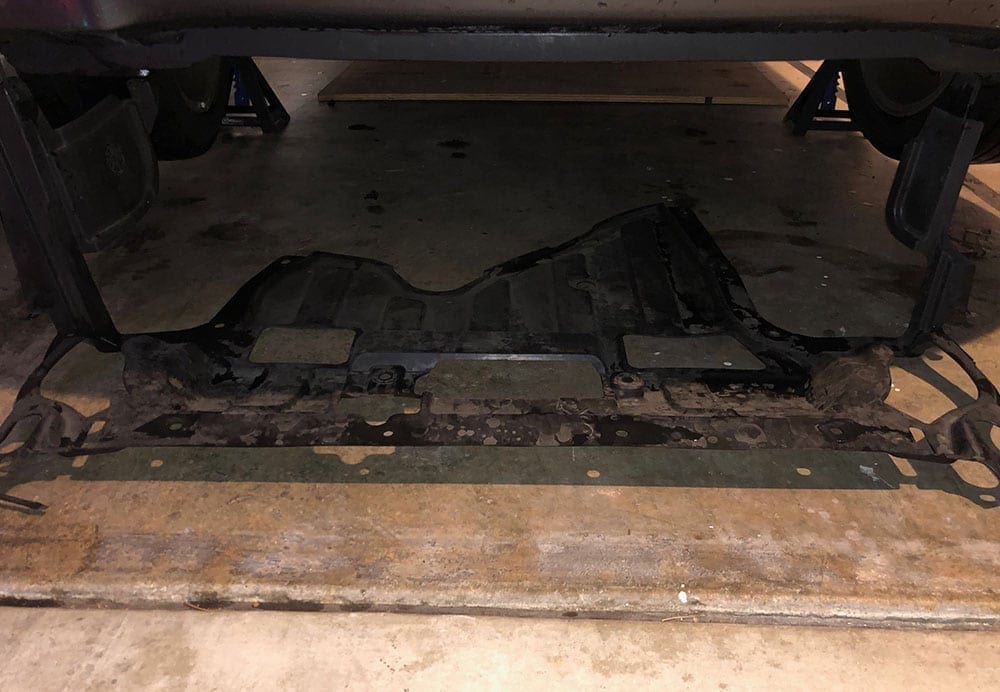
In the last two pictures above, you'll notice that on the skid panel there's a portion of the panel that extends up into the left and right fender wells of the car. On the passenger side, there's two clips to remove inside the wheel well, and on the driver side, there's one clip. You must remove these clips in order to pull the panel completely out.
Pull the clips out and then pull the panel from the wheel well. Then, pull the entire skid panel away from the bumper and remove it from the car.
Once you've removed the skid panel from underneath the car, you can begin removing the front portion of the plastic panel in the engine bay.
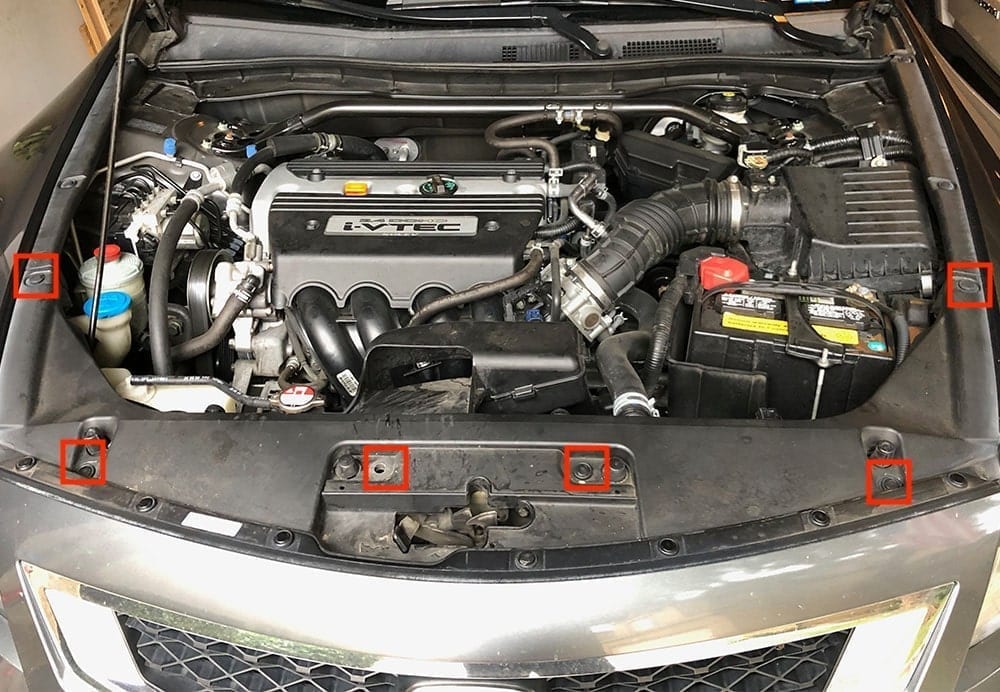
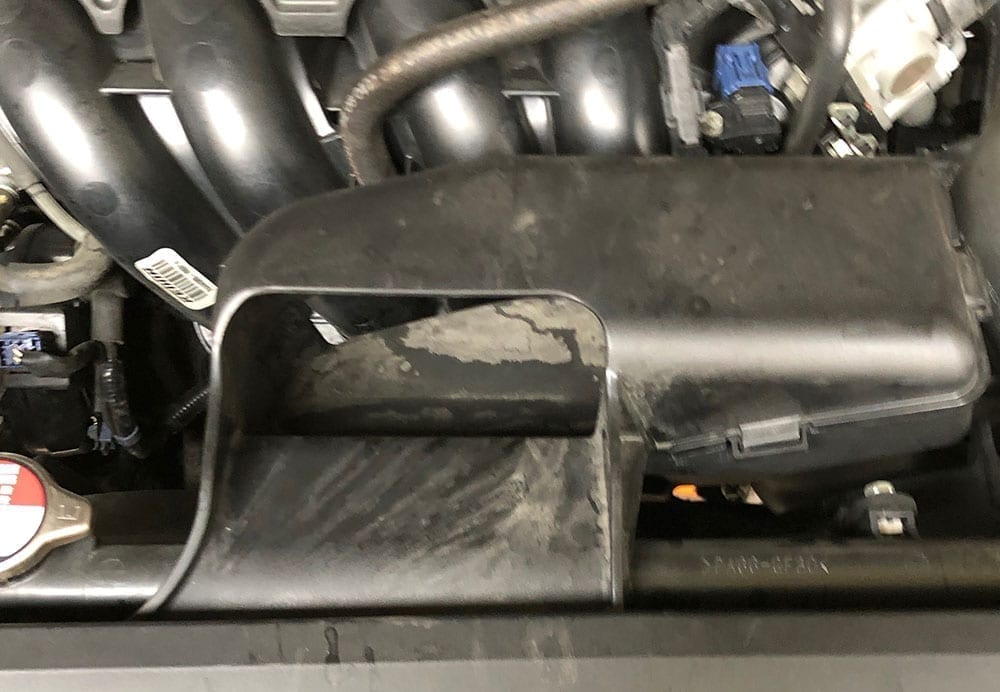
Step 3: Removing Air Intake Piping
Now that the panels are removed, you have full access to the top and bottom area in the front-side of the engine bay. The next step is to remove the air intake piping (not the box) so that you can have enough room to pull the motor mount out of the car to replace it.
First, remove the two clips at the front of the intake to pull the top of the intake area off the tubing. The inlet disconnects easily from the tubing.
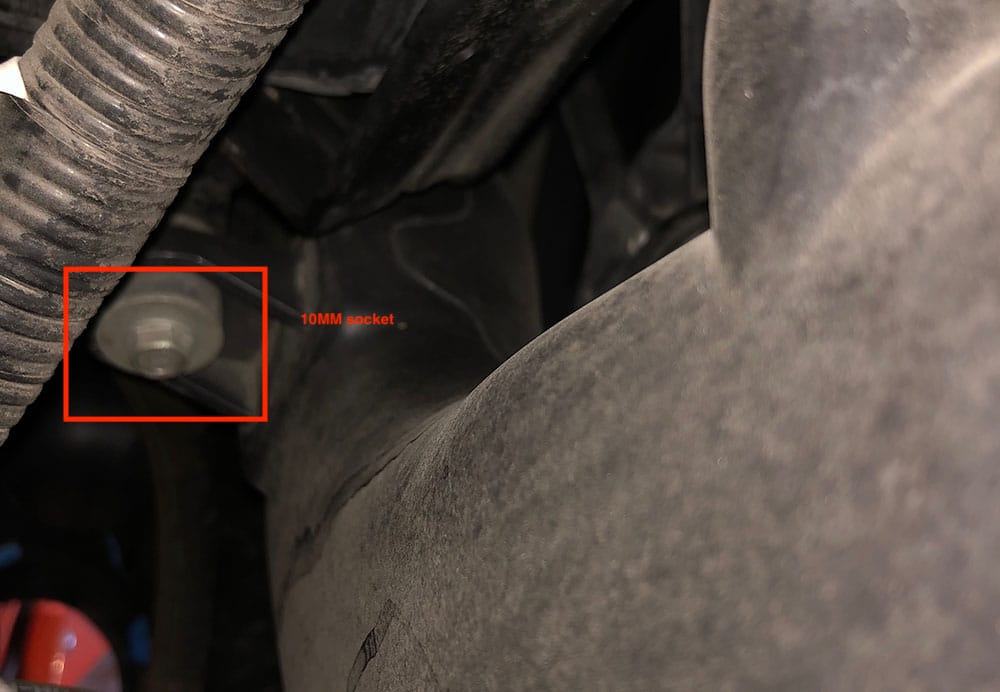
Once you've pulled the two clips and have removed the top portion of the intake, work your way down to the bolt on the intake tubing. There's a bolt just below the side of the battery. Remove this 10MM bolt and then remove the tubing from the engine bay.
Note that you'll likely need to reach underneath the driver side fender well to disconnect the tubing and assist the tube out. It's a tight fit but it will pull out from the engine bay.

Step 4: Removing the Motor Mount
Your car is now jacked up, panels are removed and the intake is also removed to give you ample space in the engine bay to pull the motor mount out once you've removed all of the bolts. The next step is to begin removing the bolts and nuts on your motor mount in order to pull it out.
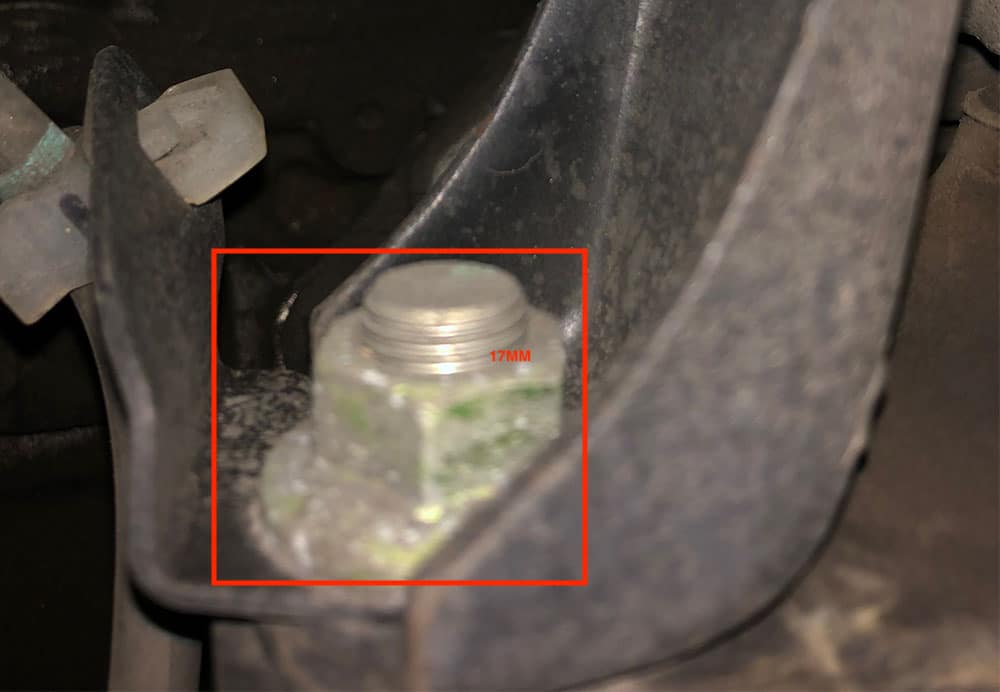
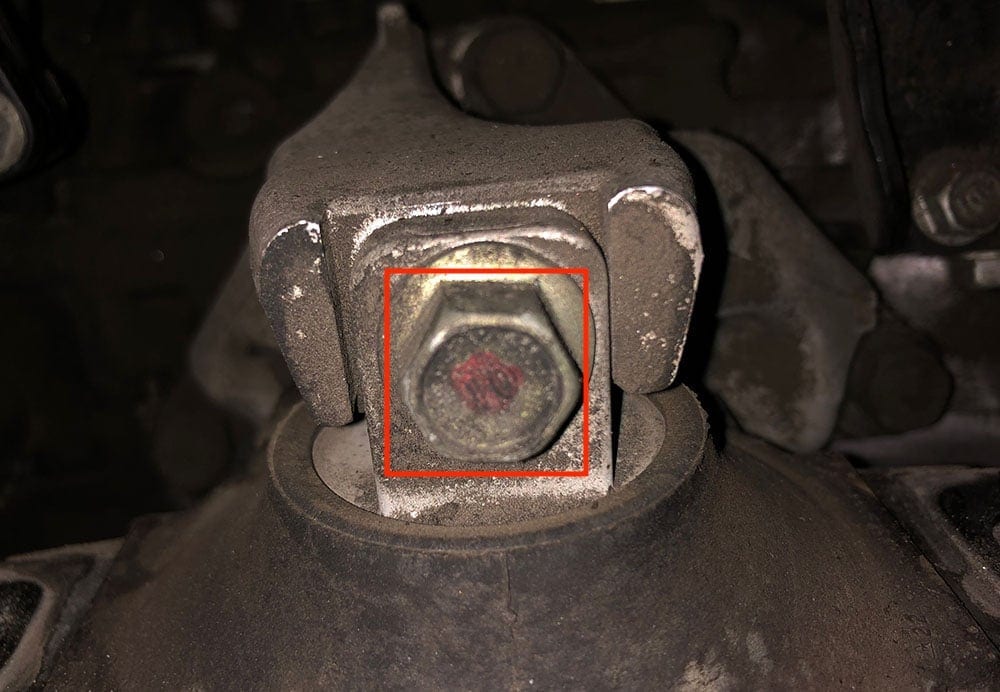
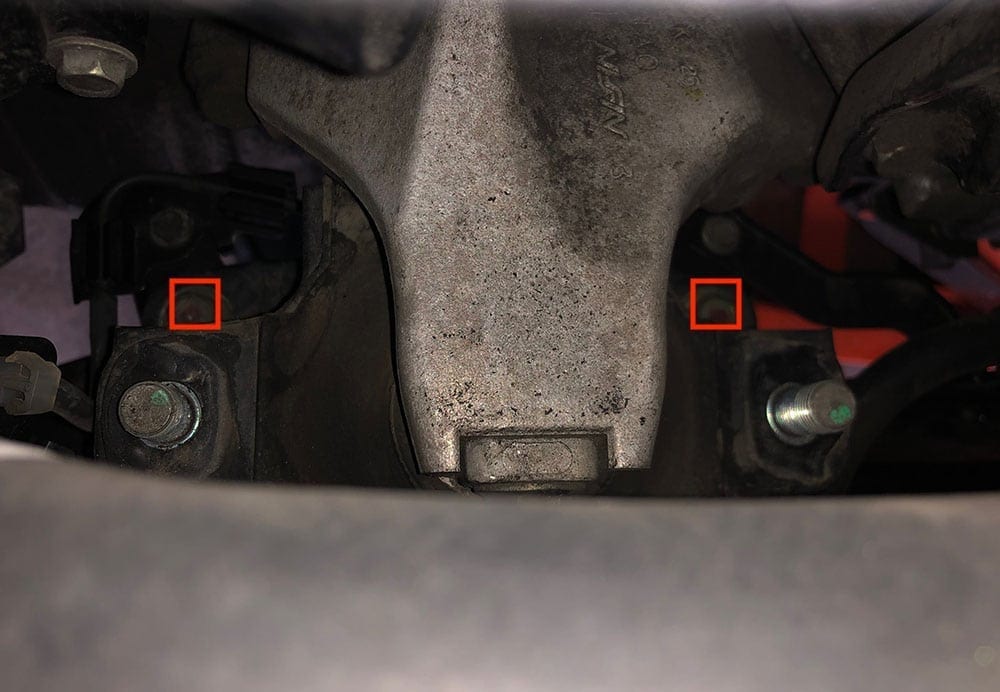
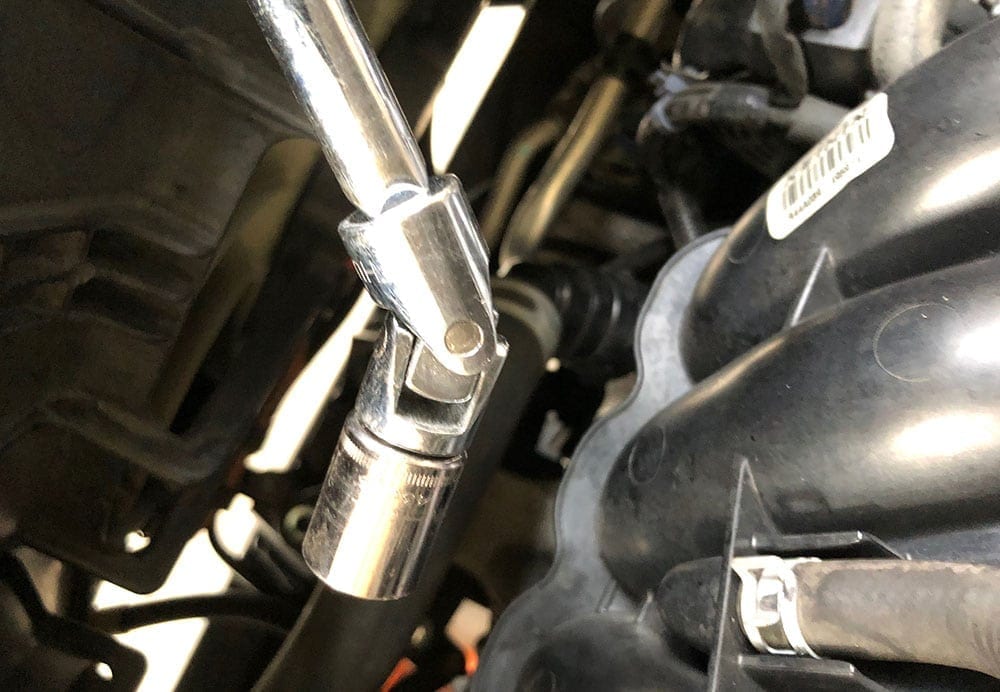
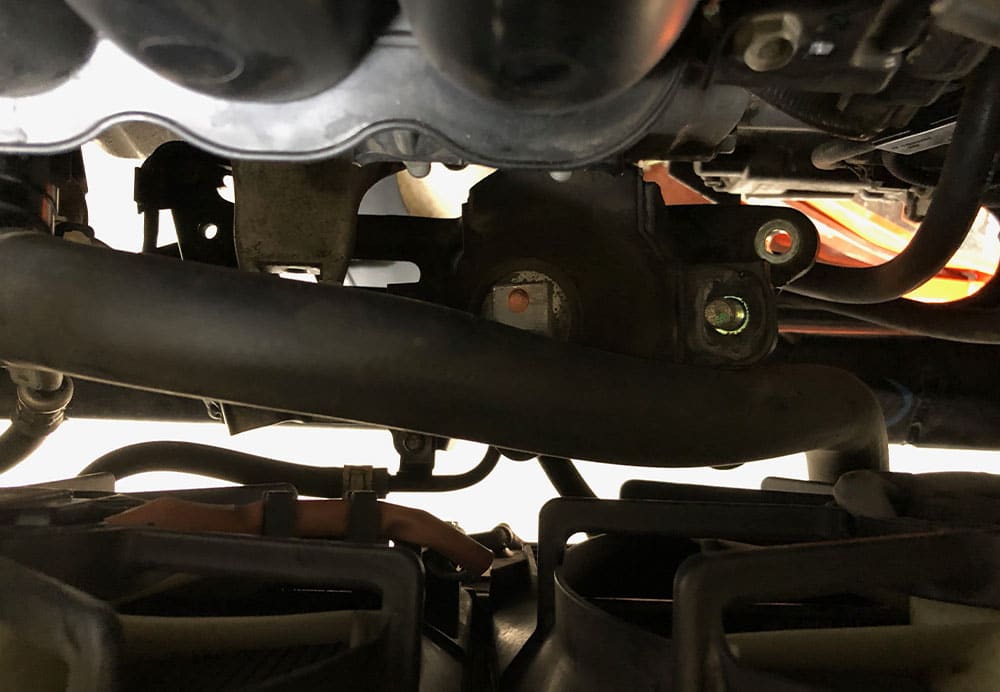
Now that the bracket is removed, work your way down to the four 14MM bolts that hold your motor mount to the subframe of the car. You'll want to attach all of your extensions once again to your ratchet. Also, at the bottom of the extensions you'll want to use the universal joint in order to reach the two rear bolts of the mount. The rear left bolt is the hardest but with the universal joint you should be able to reach in and loosen all of them up without any issue. Again, make sure that the socket has a solid grip of the bolt before loosening. These were the tightest bolts in this project for me.
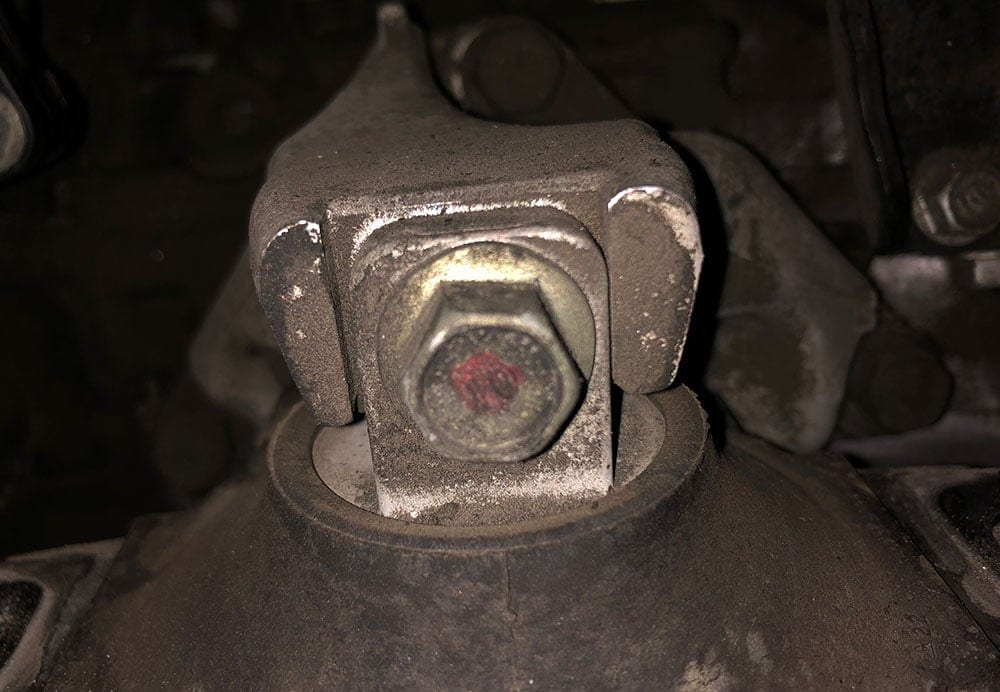
Once you've removed the four bolts, move on to the final bolt that holds the mount to the engine block. This is a 14MM bolt as well located on the top-front side of the motor mount. See images.

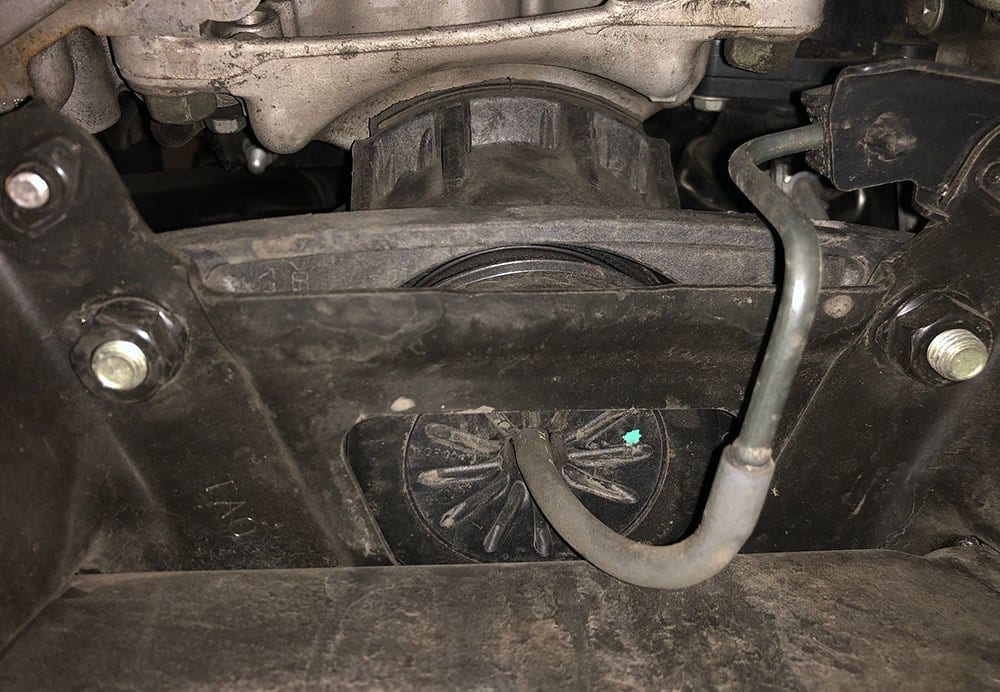
Now, go back underneath your car and locate the bottom of the motor mount. Remove the hose from the motor mount and the hose line before you begin to pull the motor mount out.
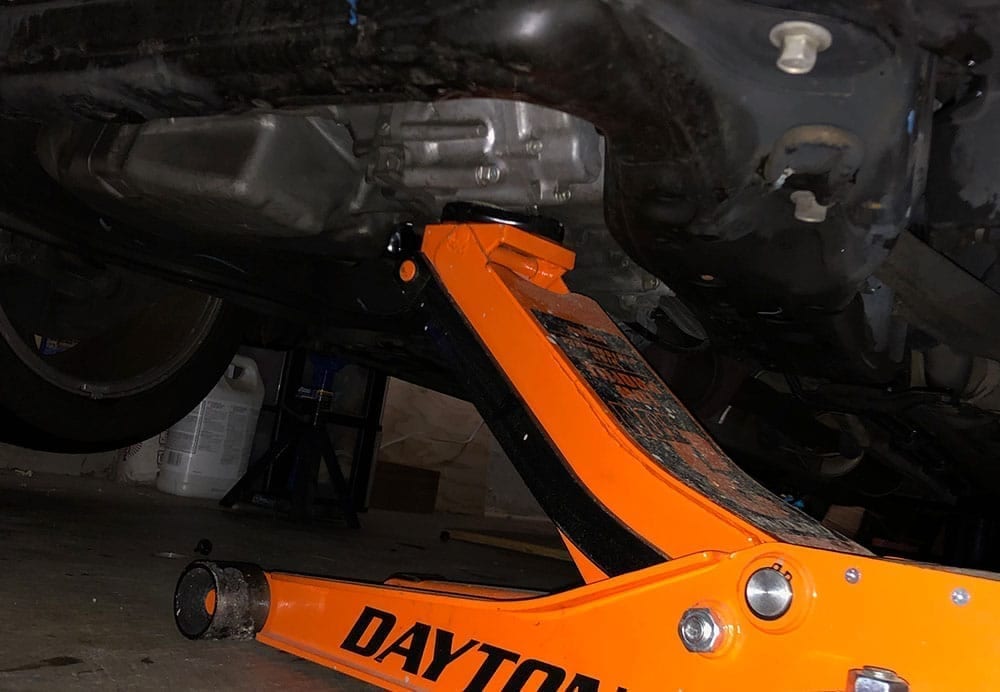
After all of your motor mount bolts and vacuum line are removed, place your jack underneath the car and position it on the front side of the motor. Begin to jack the motor upwards enough to give your motor mount enough room to be pulled out from under the motor. DO NOT OVER JACK YOUR MOTOR. Raising your motor too far can damage the other mounts. Only lift the motor high enough to remove the front motor mount from underneath the motor.
Once you've jacked the motor up enough to remove the motor mount, begin to inch it to the right and pull it out between the battery and the engine block. It's a tight squeeze and you may have to put pressure on the wire harness next to the battery but it will come out.

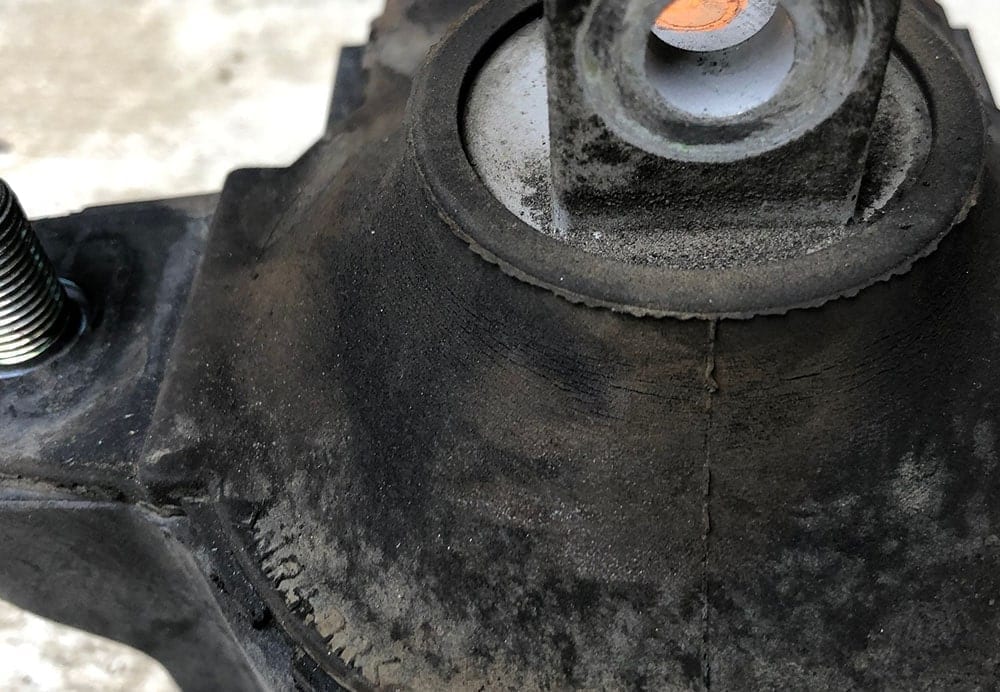
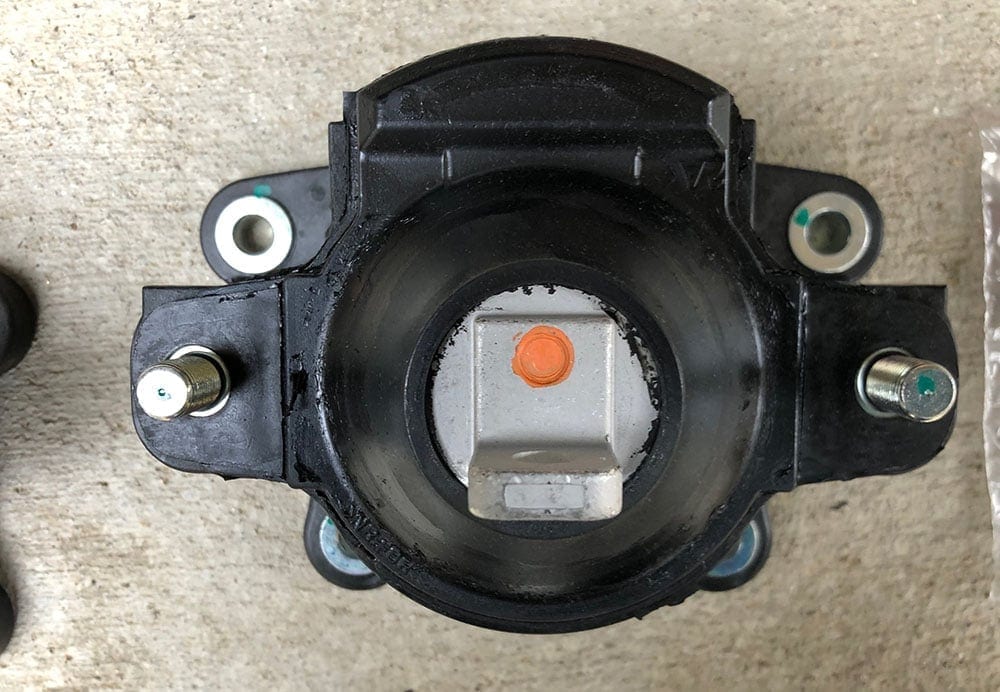
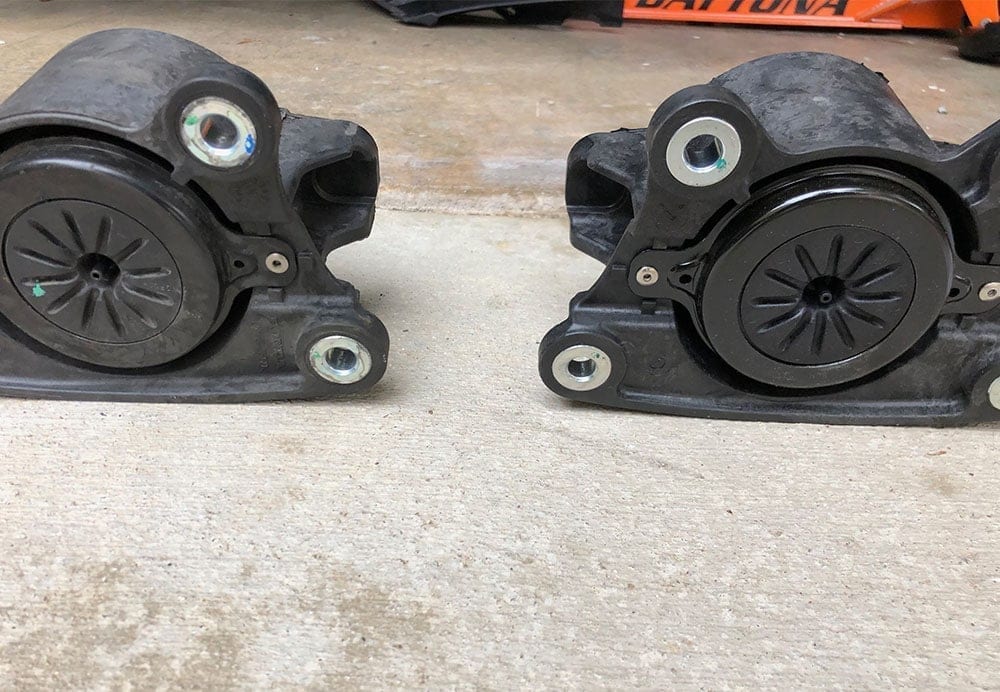
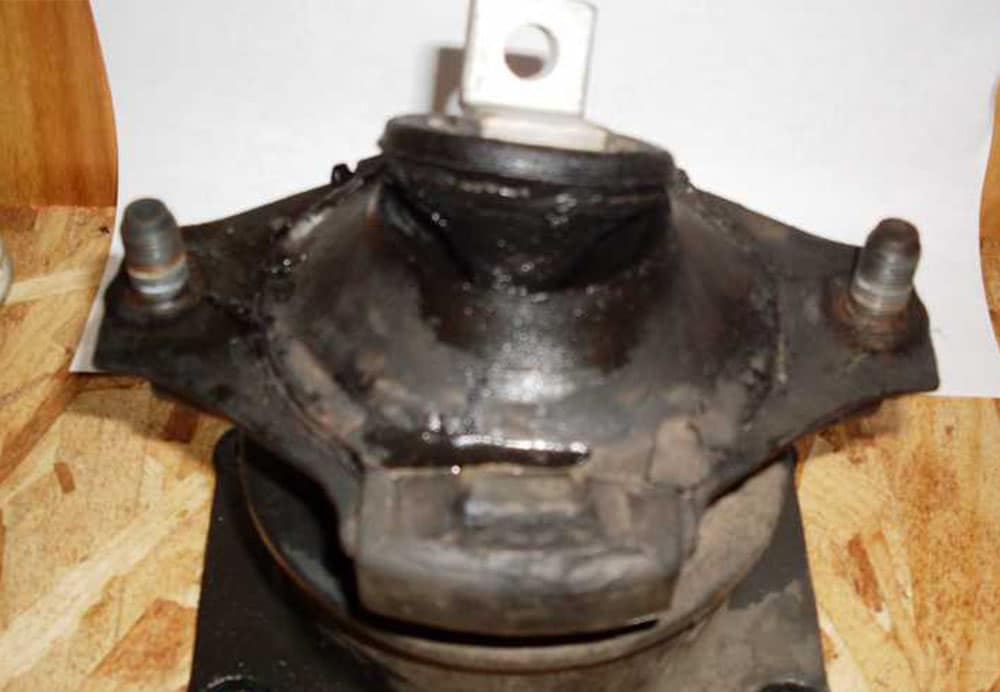
Congrats! You successfully removed your Honda's front motor mount assembly. Now, you can take it out and compare with your new motor mount to see how bad it was. In my case, mine was worn and slightly cracked but not broken all the way through. Here's a few comparison pics of mine, along with a separate, broken one.
Step 5: Re-installing
Reinstalling is really as simple as reversing the steps above. When you re-install your mount, this is where you will utilize your torque wrench to ensure that you've torqued the bolts and nuts to the manufacturer specifications. It's also worth nothing that you should ALWAYS tighten every bolt by hand for the first few threads in order to prevent cross-threading. This is especially crucial when you re-insert and tighten the top motor mount bolt that screws to the aluminum block. Tighten the screws by hand for at least three turns before you use your ratchet. This will ensure that the screw won't cross thread.
I would recommend the following procedure for tightening the bolts:
- Place the motor mount in it's position and insert all 4 mounting bolts and tighten by hand.
- Insert the top motor mount bolt and tighten by hand.
- Lower your jack from underneath the motor.
- Tighten all 5 bolts to 40 ft/lbs using your torque wrench.
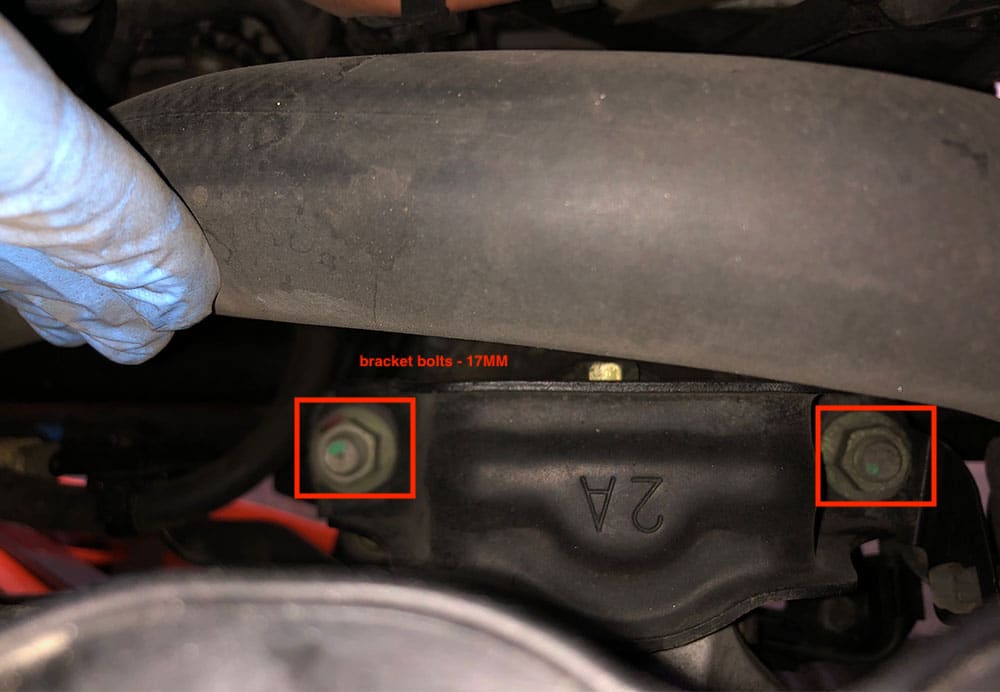
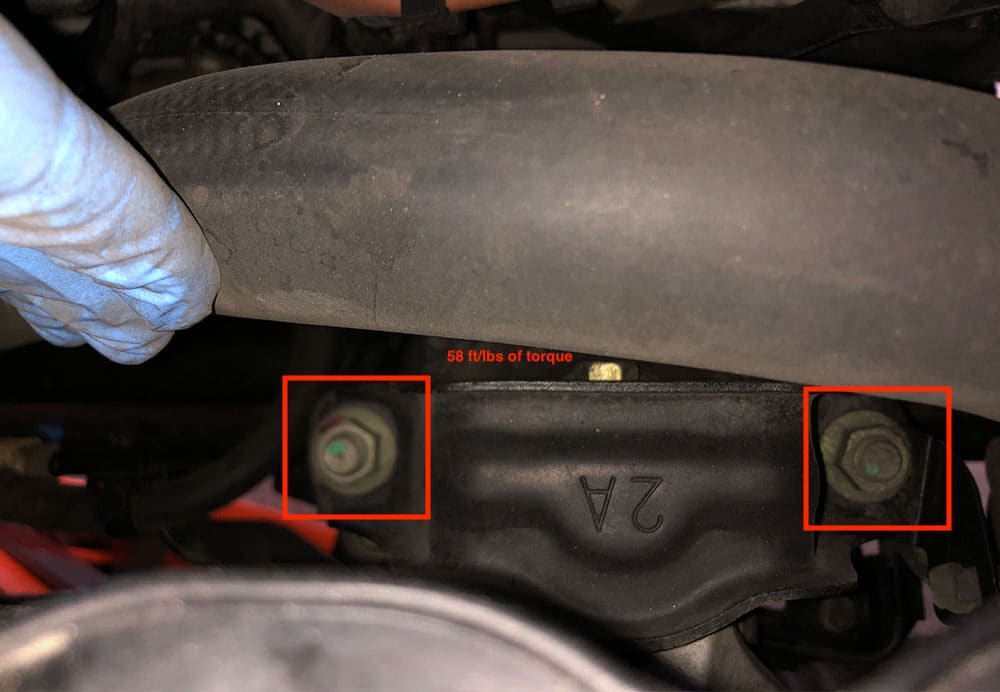
- Place and tighten your motor mount bracket and nuts and torque to 58 ft/lbs.
Torque specs –
- Motor Mount Bolt Torque Specs (4 bolts) – 40 ft/lb
- Motor Mount to Block Torque Specs (1 bolt) – 40 ft/lb
- Motor Mount Bracket Torque Specs (2 nuts) – 58 ft/lb