In this article: We'll walk you through the steps required to replace a faulty door actuator on a 2008 – 2012 Honda Accord.
Project Difficulty: Easy
Estimated Time: 1.5hrs (or less)
The driver side door actuator on my 2009 Honda Accord started to make some noise about 6 months ago when locking and unlocking. It was particularly noticeable when the doors were shut and the car started to roll in drive – the automatic locking. Sounded a bit like a moan (for a lack of a better term).
Finally, about two weeks ago it stopped responding to locking and unlocking intermittently. I noticed that every time that I pulled away from a stop light it would try to lock – stop light after stop light. I realized that the driver side door wasn't locking and that the autolocking feature just kept trying to lock it every time the car started rolling. That was my queue to replace it.
In this article, I'll walk you through the steps to remove your door panel and replace your Honda's door actuator. It's quite simple actually. Remember: for good practice and safe keeping, please remember to unplug the negative side of your vehicle's battery prior to any electrical work to prevent popped fuses or electrical damage to your car!
Parts Required
There's really only one part (or two if you're doing two doors):
- Driver side actuator for 2008-2012 Honda Accord – $37
- Passenger side actuator for 2008-2012 Honda Accord – $32
Tools Required
This project was pretty straight forward and simple and only required a few tools:
- Phillips screwdriver
- Flathead screwdriver
- 10mm wrench or socket & ratchet
- Plastic pry tool
- Super glue
- Duct tape
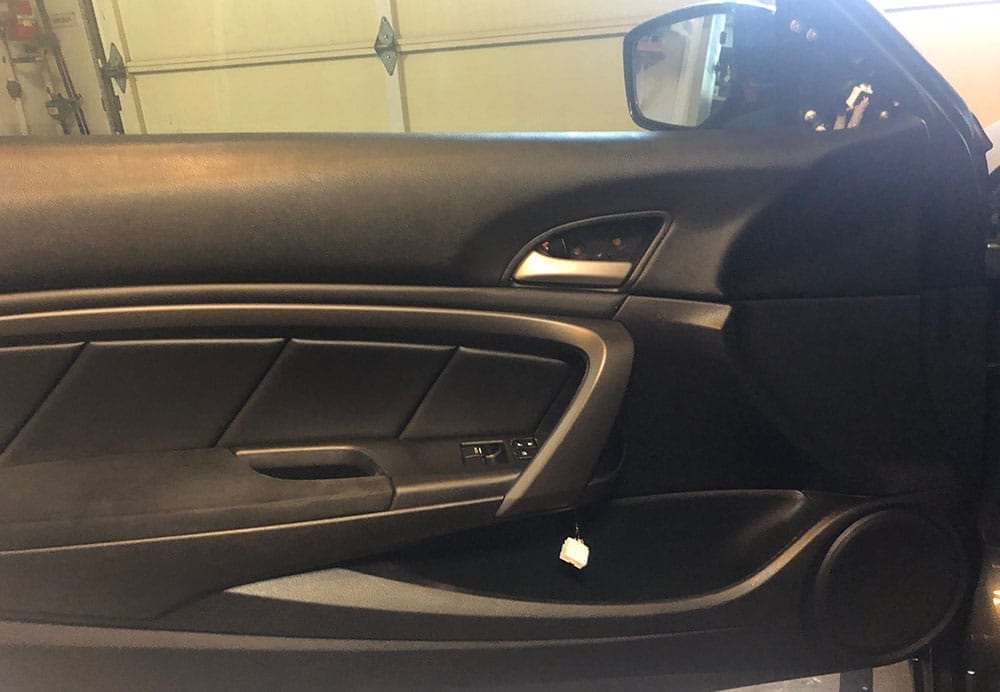
Step 1: Removing Your Door Panel
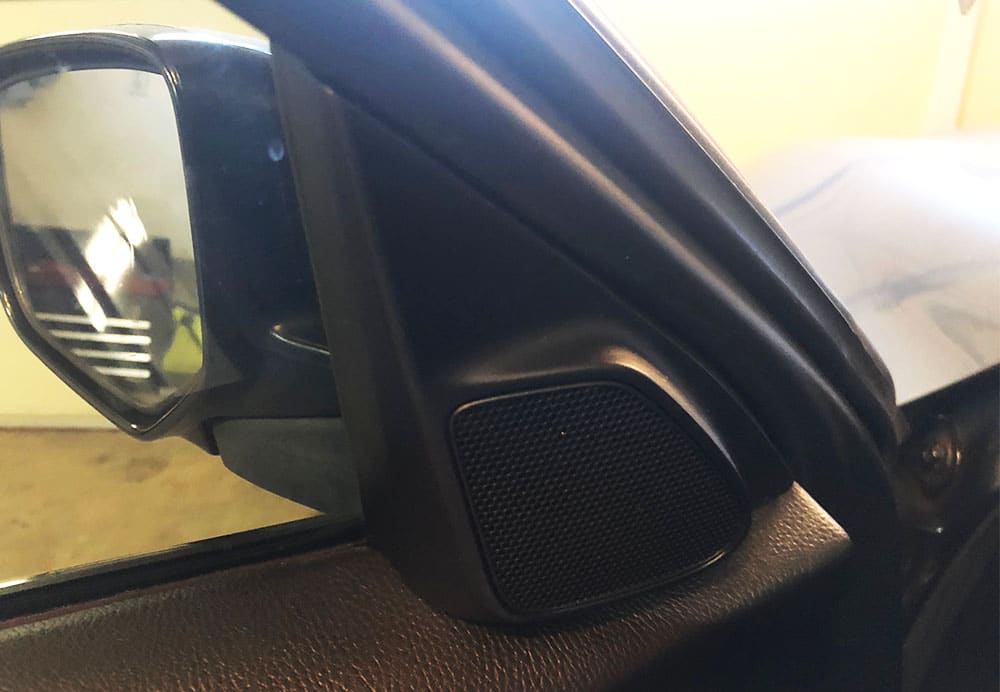
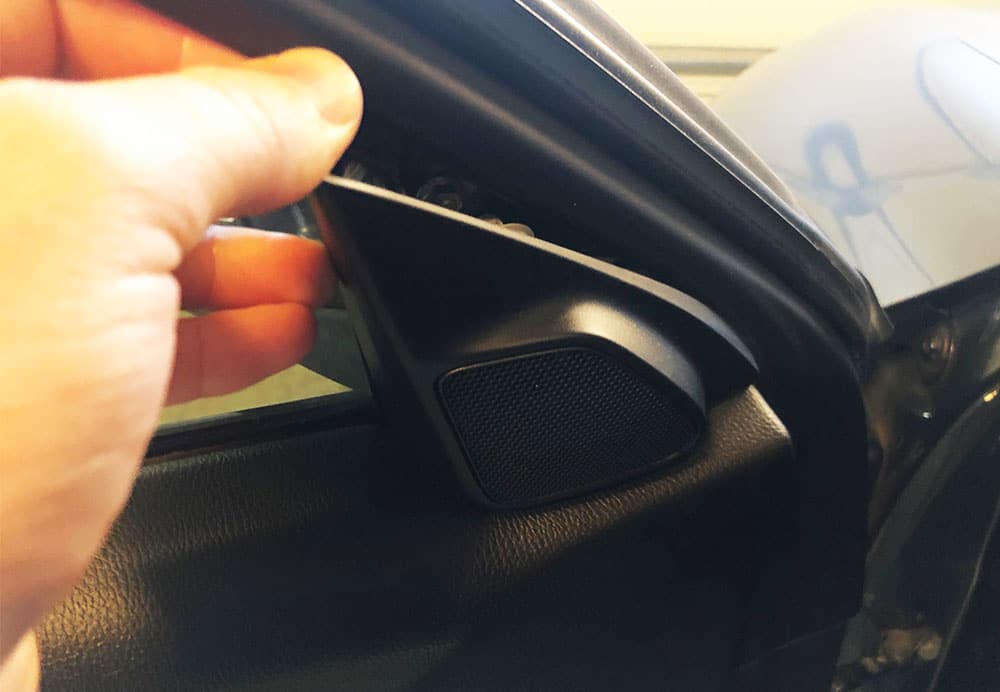
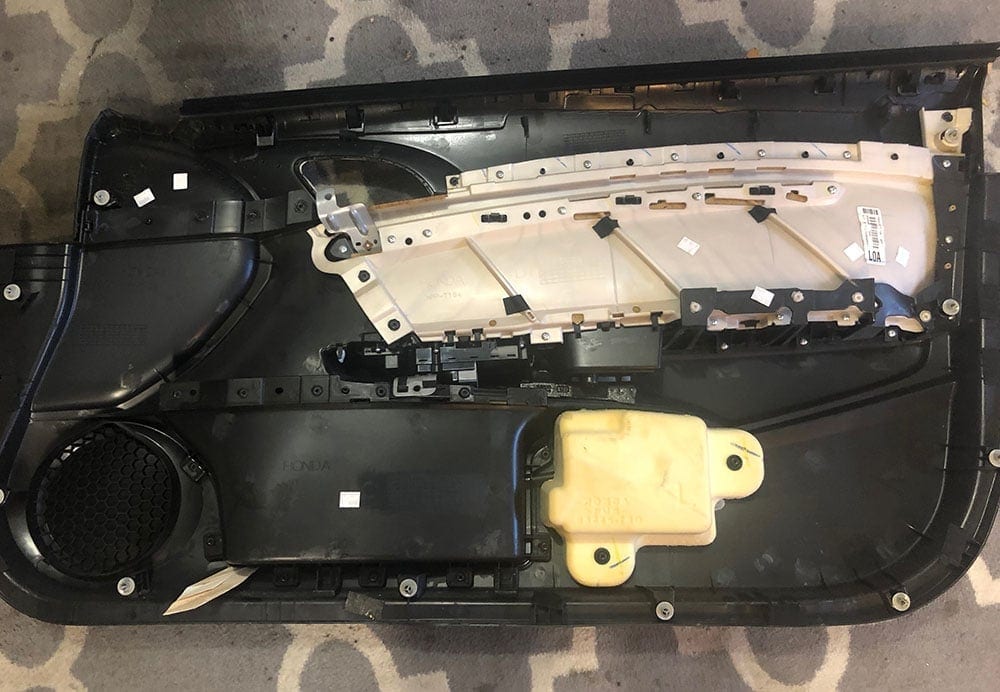
The first thing you need to do is remove your door panel screws and unclip and remove your Accord's door panels. To do this, start with the tweeter on the top side of the door. Place your fingers in between the window and the tweeter panel and gently pull. There is a single clip behind it so it'll unclip with relative ease. Once unclipped, remove the single tweeter plug and place the tweeter aside.
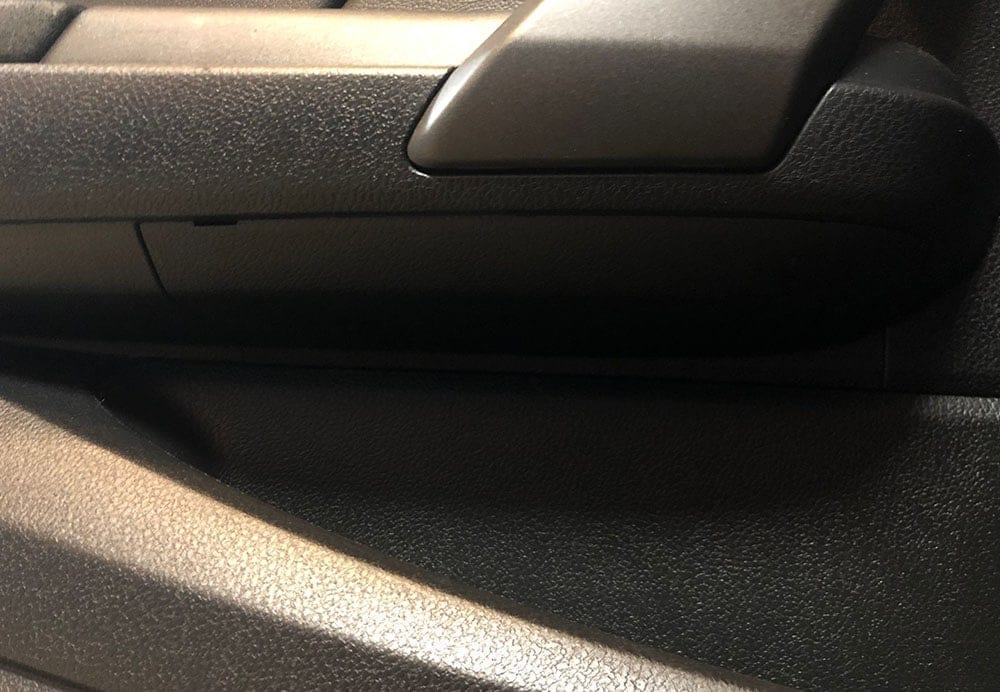
With your tweeter removed, move down to the door handle. Behind the door handle there is a trim cover that covers three screws. On the top of the plastic cover you'll notice a small clip. Use a small flathead screwdriver to push the clip in and pull the panel off to expose the three door screws. Unscrew all three screws and place them to the side for when you re-install the door.
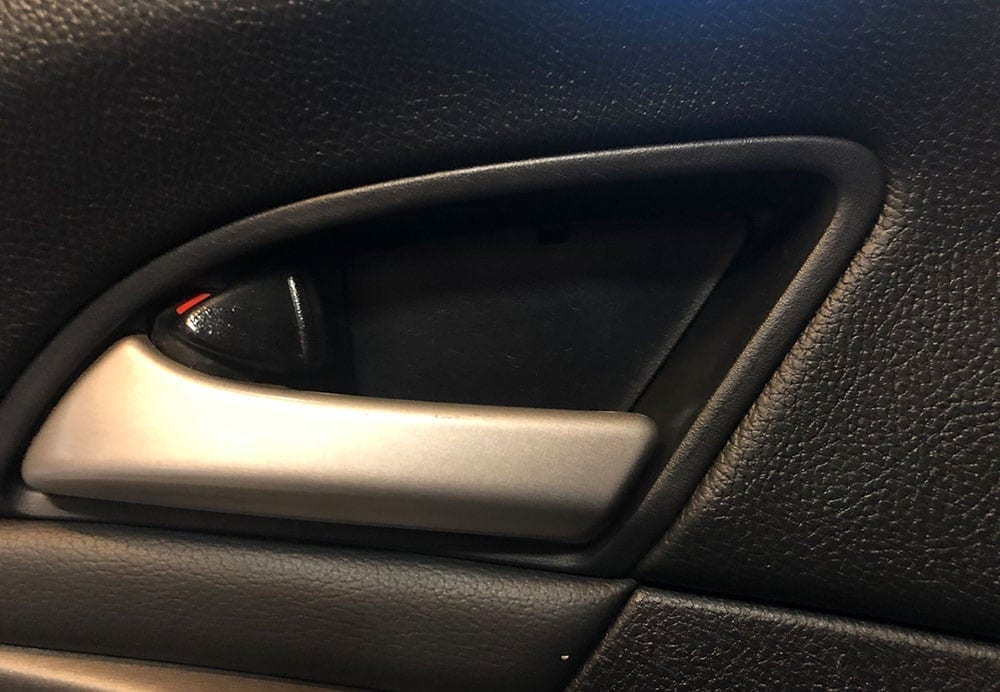
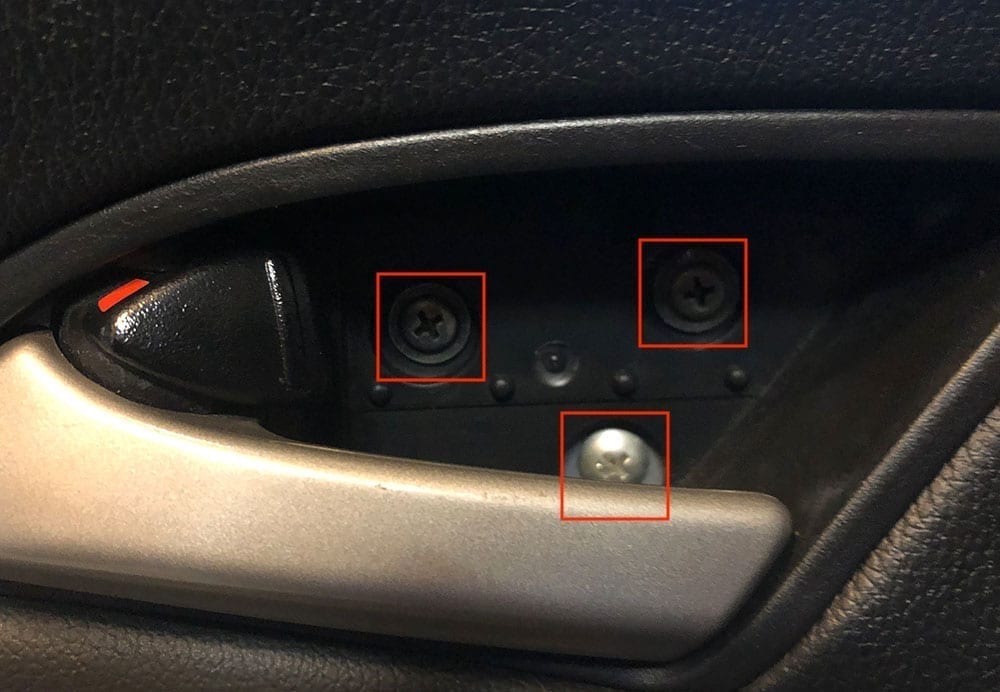
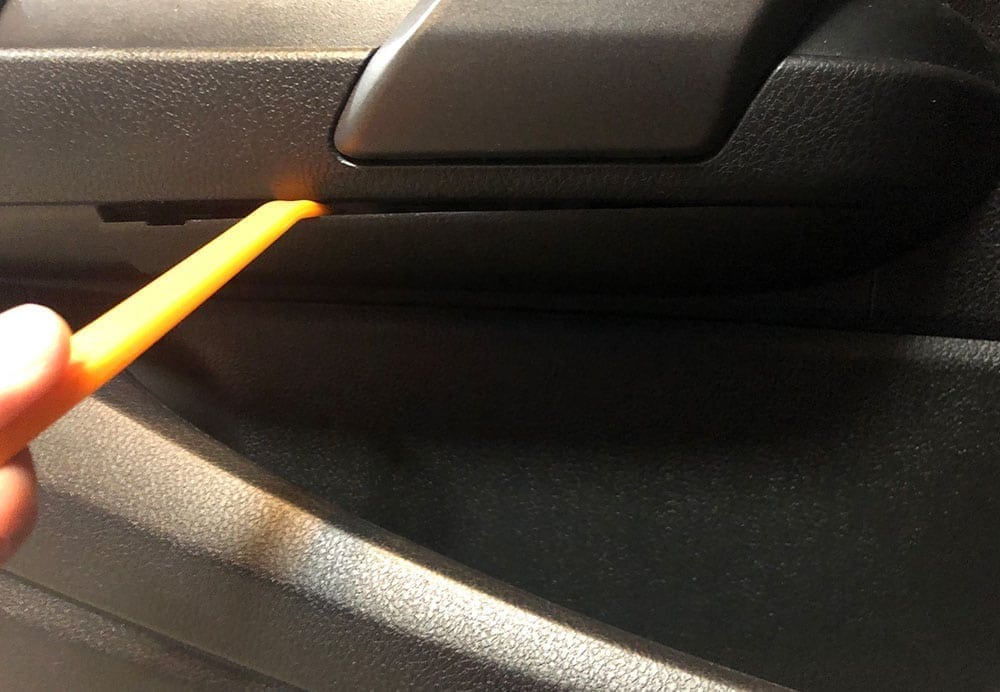
On the door armrest and handle, there is another screw to remove. The screw is under a rubber-like cover that's placed at the bottom of the door handle area. Use a flathead to wedge between the corner and lift the cover out to gain access to the screw underneath. Then, unscrew this single door panel screw.
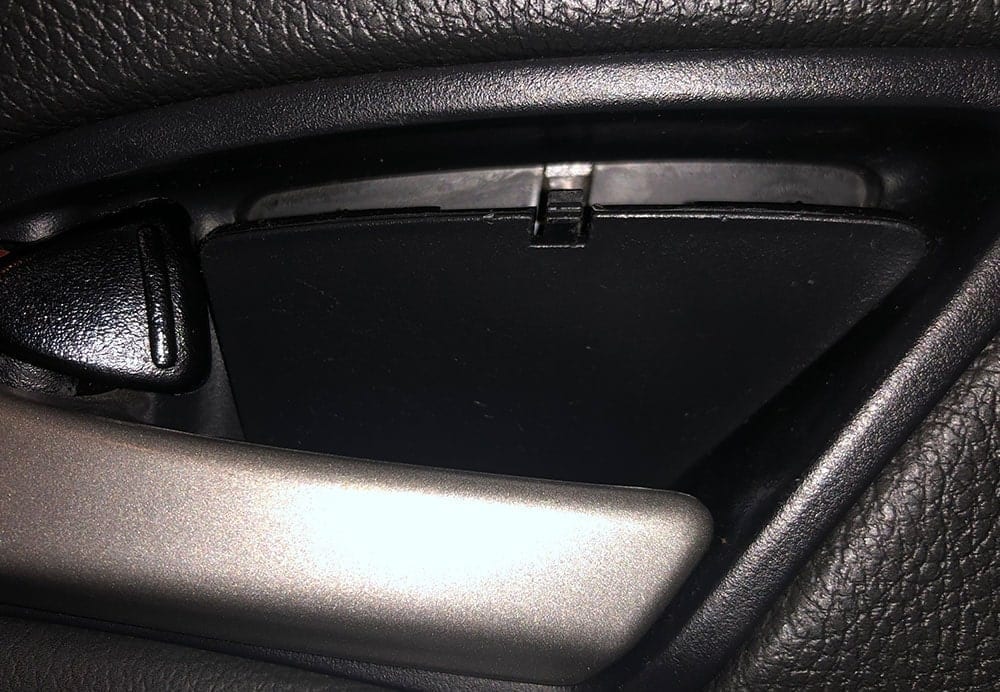
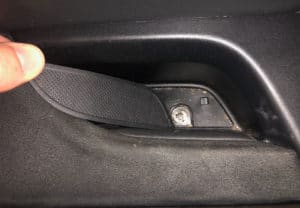
The last screw you'll need to remove is behind a panel on the under-side of the door handle. Using a wedge tool, pry the panel downwards to remove and gain access to the screw behind it. Unscrew the final screw and set aside. Then, unclip the white and grey plugs from the door panel and push them behind the panel into the door. This will allow your door to move freely when you pull the panel from the door.
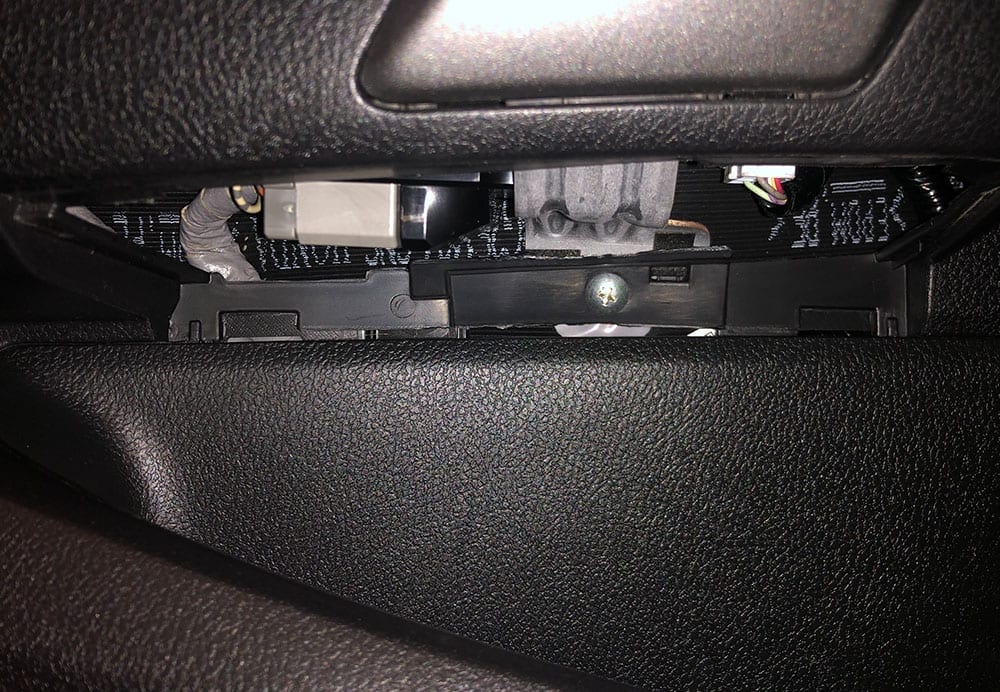
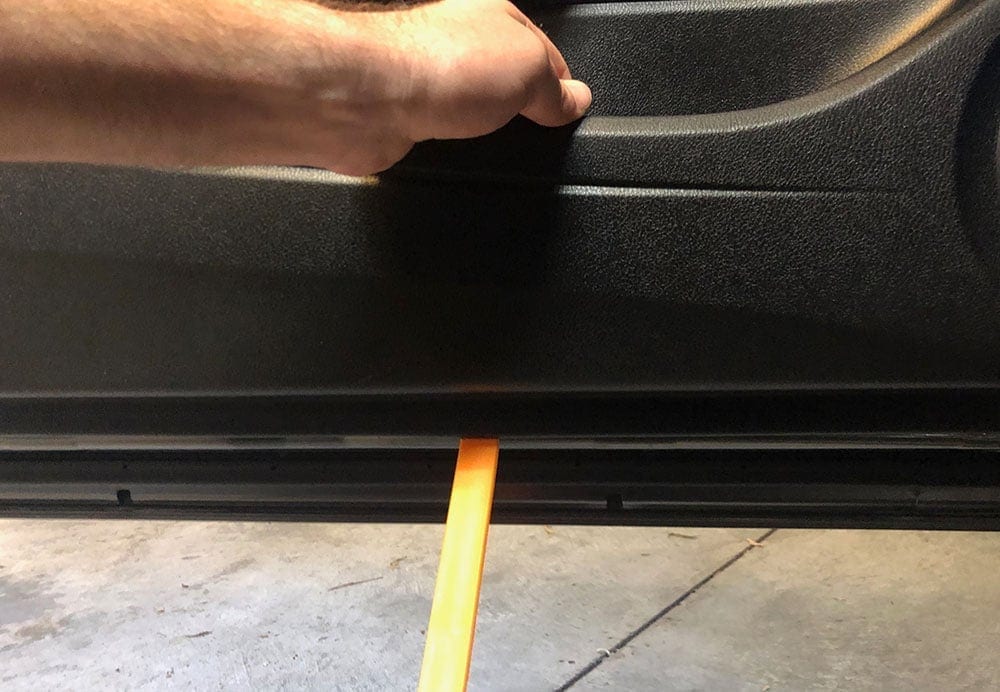
With all your screws, tweeter and switch plugs removed you're ready to pry the panel free and remove it from your door. To do this, wedge a large pry tool on the bottom side of the panel. If you don't have a pry tool large enough there's actually a space that your fingers will fit in along the bottom side of the panel.
Pulling from the very bottom side of the panel and from the cubby area, pull the door panel outwards away from the door to unclip all of the bottom door clips. Typically this will be a loud and abrupt ‘POP' and the bottom side of the panel will break free. There are clips along side the entire bottom of the panel and one or two on the side.
Once all of the clips are free, lift upwards on your door panel to remove it. Once it's lifted away from the door the last piece you'll need to pull free from the panel is the handle. There's a few plastic clips on the back side of the handle that you'll just need to lift upwards to break the handle free and detach it from the door panel.
Place it on a rug or towel to prevent any scratching of the surface.
Step 2: Removing Your Broken Door Actuator
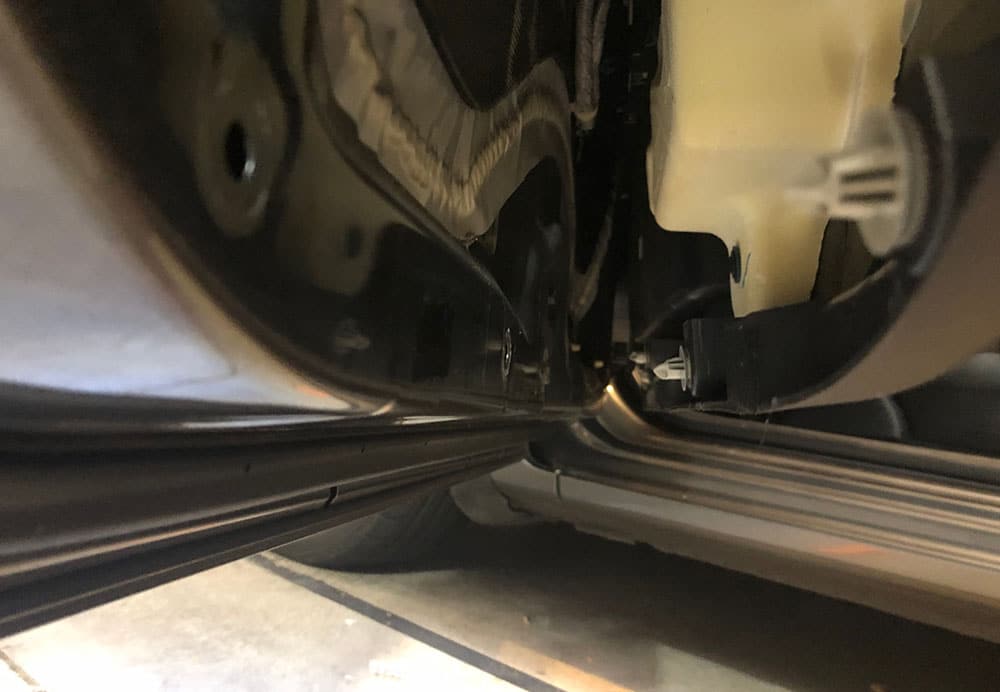
With your door panel removed, you now will be able to gain access to the back side of the door and ultimately the actuator. To begin, you'll need to get behind the damping material that covers the opening of the door panel so that you can reach and access the cable and actuator rod. You can do this by running a razor blade along the adhesive that holds the damping material to the door and peel the material back a foot or two – enough to reach the actuator. In my case I cut a sizable slit in the center to try to limit the damage to the damping.
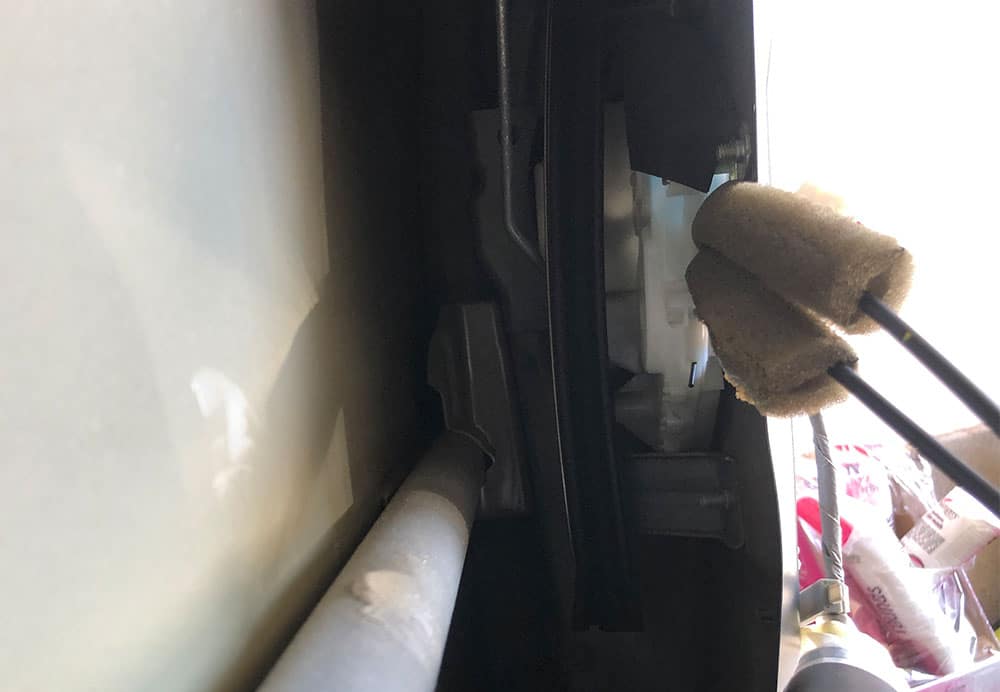
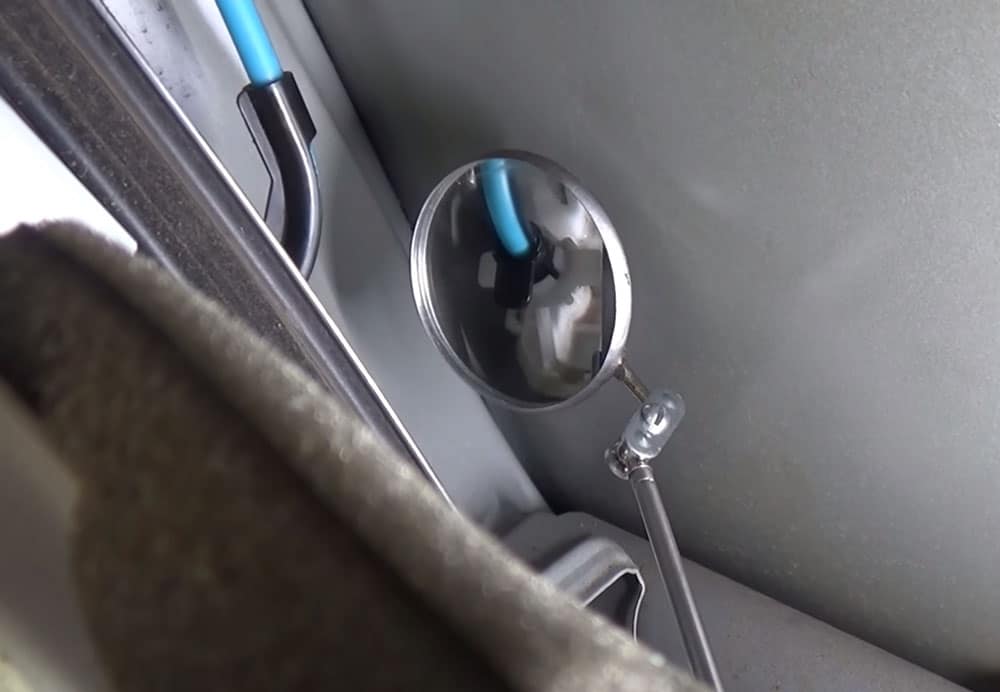
Next, you'll need to unclip the door latch cable that runs along the door and into the back side of the actuator. Once unclipped you can either feed the cables and latch through the damping material or you can leave it hanging for now until you remove the actuator.
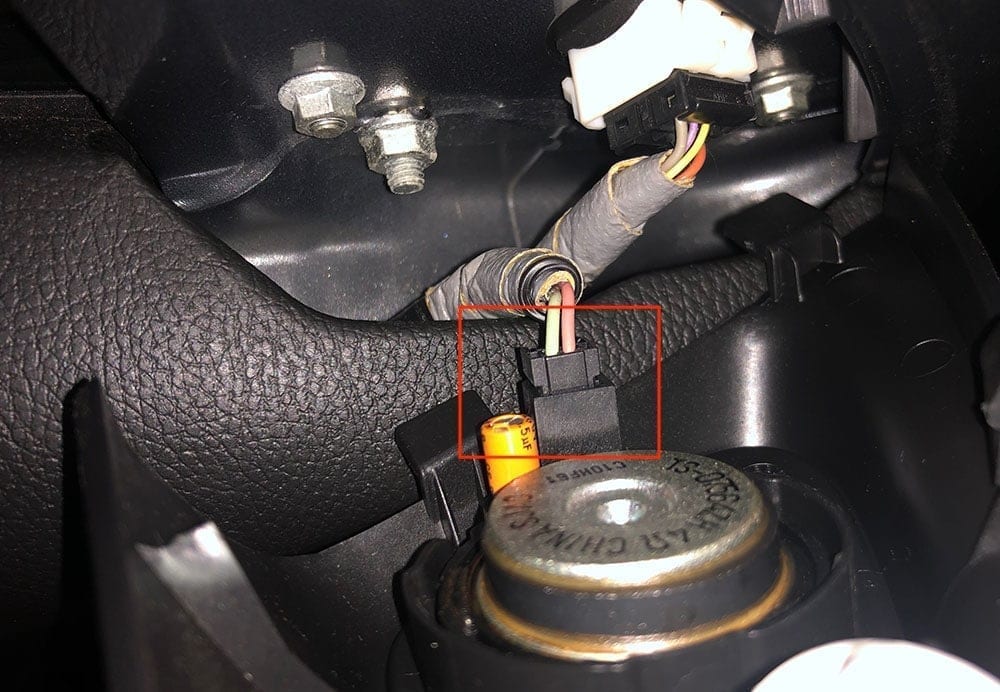
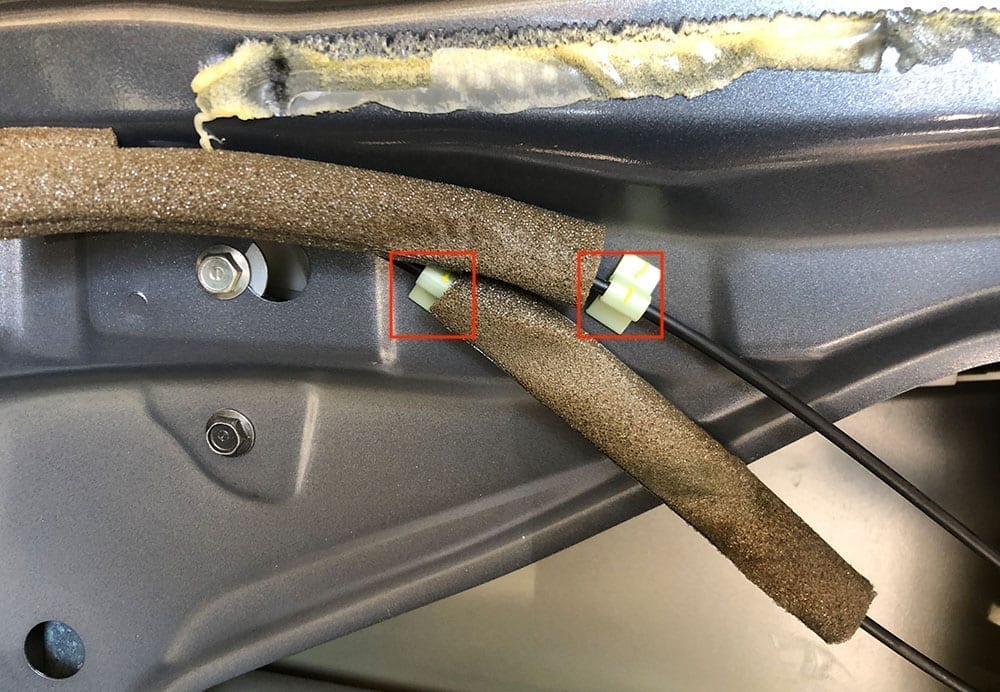
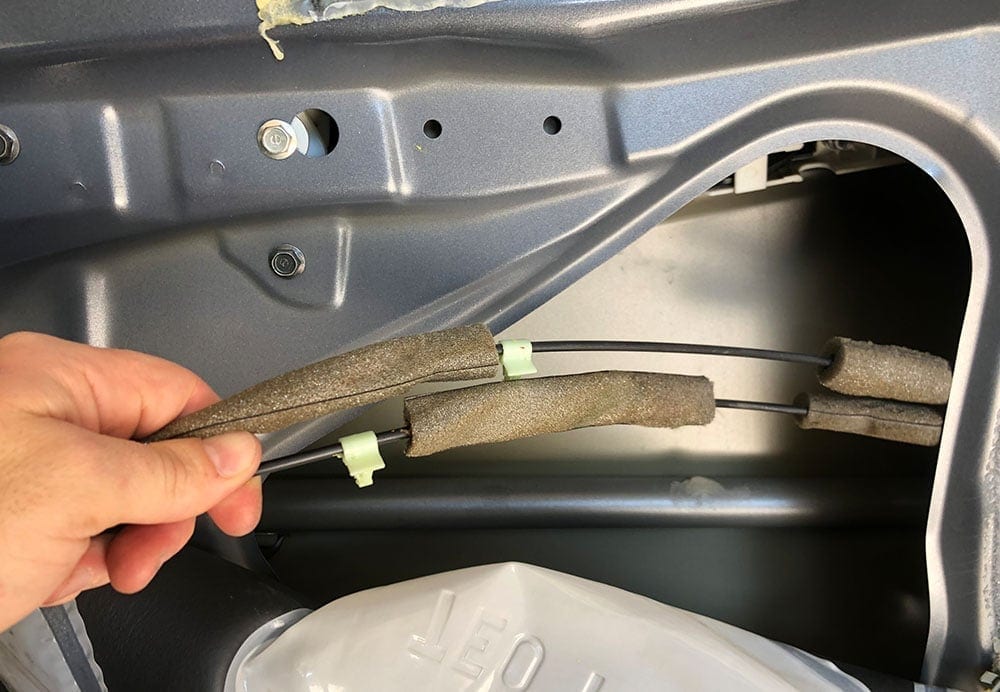
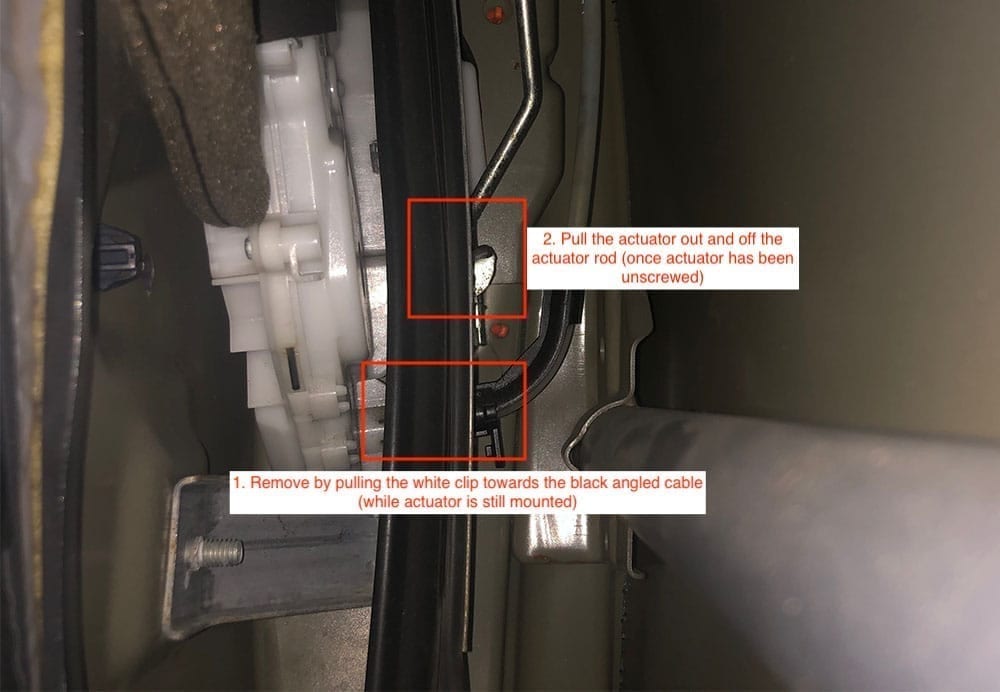
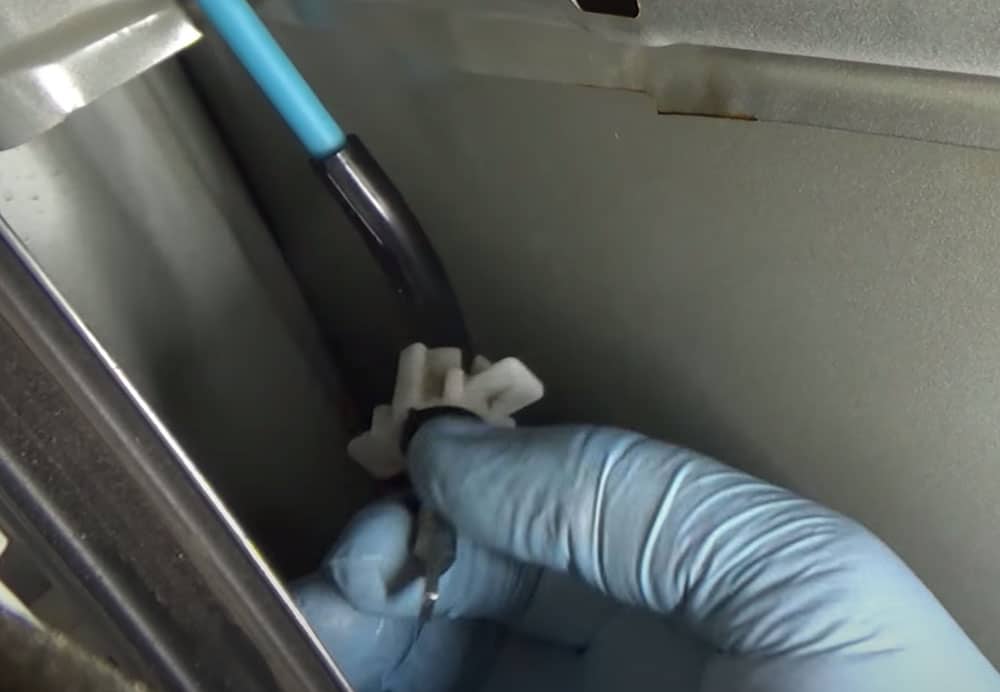
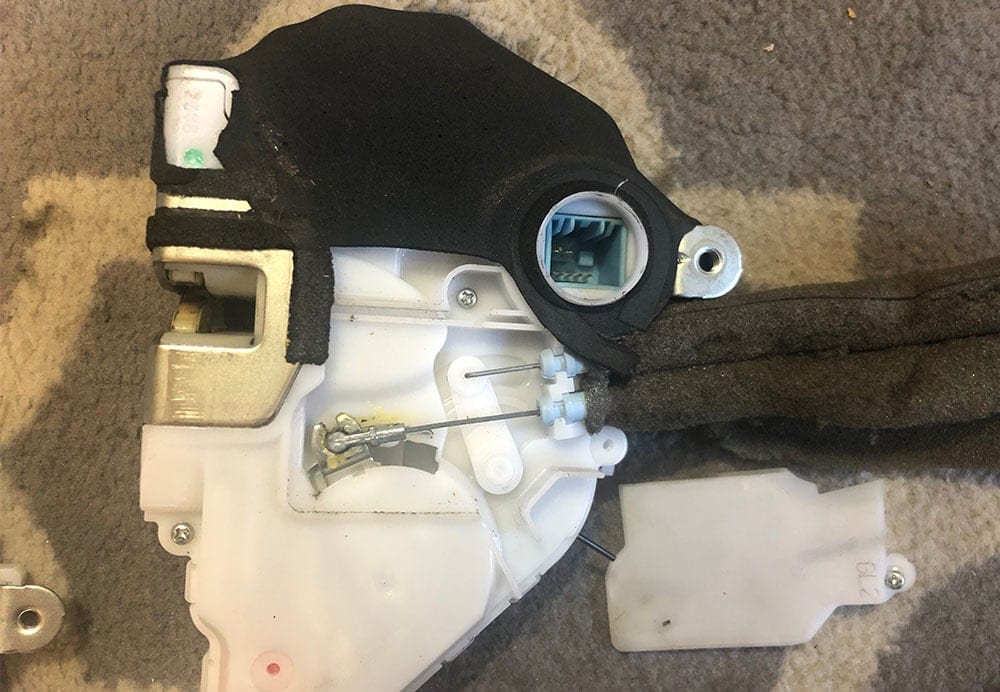
Using the slit in the damping to access the actuator, for those who are replacing the driver side actuator you'll need to remove a single cable that feeds directly into the back side of the actuator (*note this single cable that goes to the back-side of the actuator is only located on the driver side door actuator). To do this, you need to grasp the white clip that surrounds the black cable housing and pull it away from the actuator to get it to unclip. Once it's unclipped you can remove the cable from the actuator itself (see images). Finally, pull out the plug that powers the actuator.
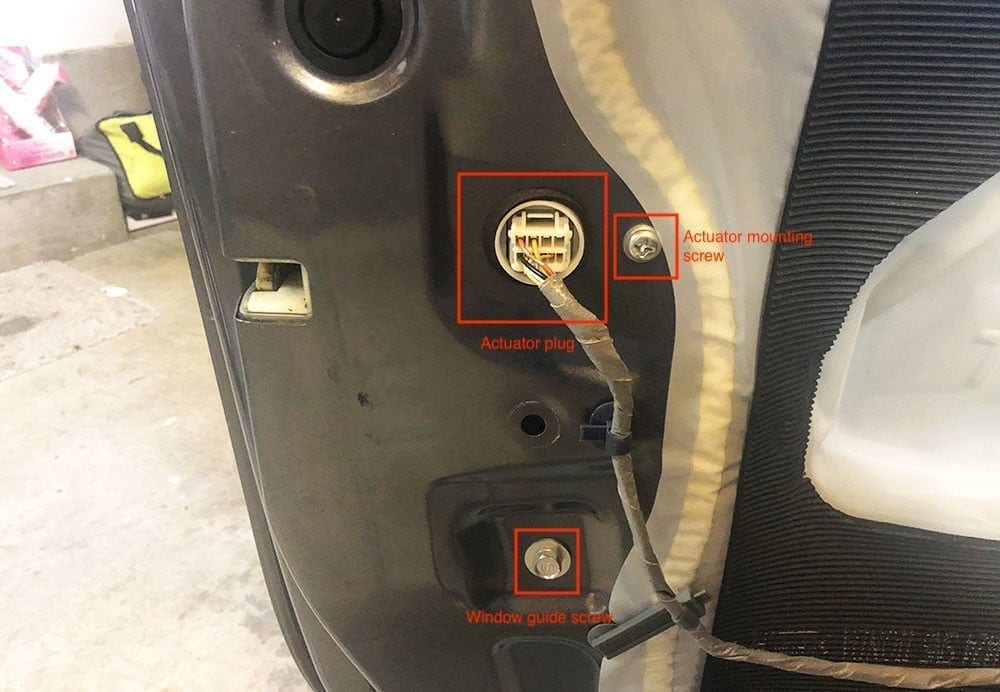
With the cables unhooked from the door and the single cable removed from the back side of the actuator you're ready to unmount the actuator from the door. There are a total of 4 phillips screws that hold the actuator to the door. Remove all 4 screws along with the 10mm bolt that holds the window guide behind the door. This will allow you to pull the actuator from behind the door a little easier with the window guide pushed aside.
Start to pull the actuator from the door, working the remaining rod out. Once the rod is removed you can pull actuator out completely and begin the process of preparing your new actuator.

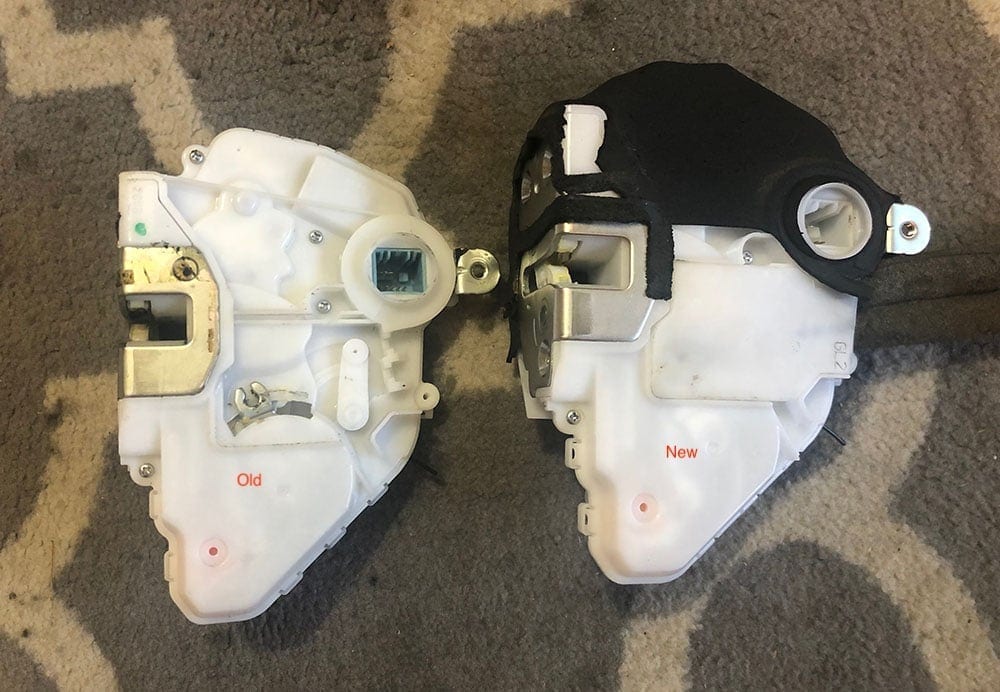
Step 3: Prepping Your New Door Actuator
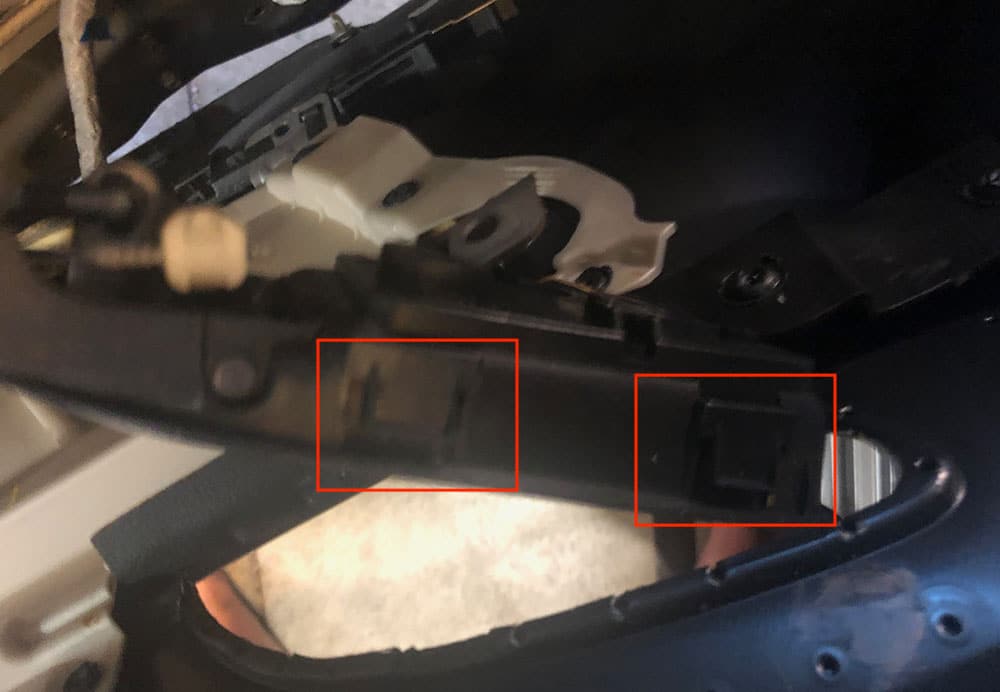
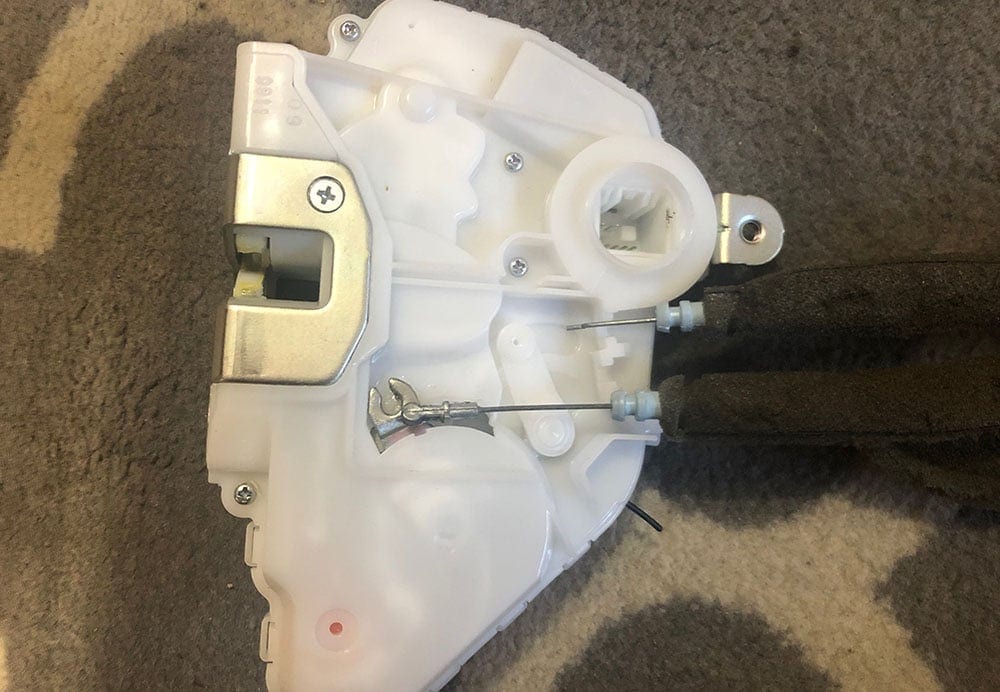
There's a couple things you'll need to do to prepare your new door actuator for installation. First, the door handle cables that run to the interior door handle will need to be pulled from the old actuator and installed on the new one. There's a panel that covers the cables with a single phillips screw holding the cover in place. Unscrew the panel to gain access to the two cables.
Remove the two cables from the old actuator and then place it onto the new one along with the cable cover, screwing it back into place.
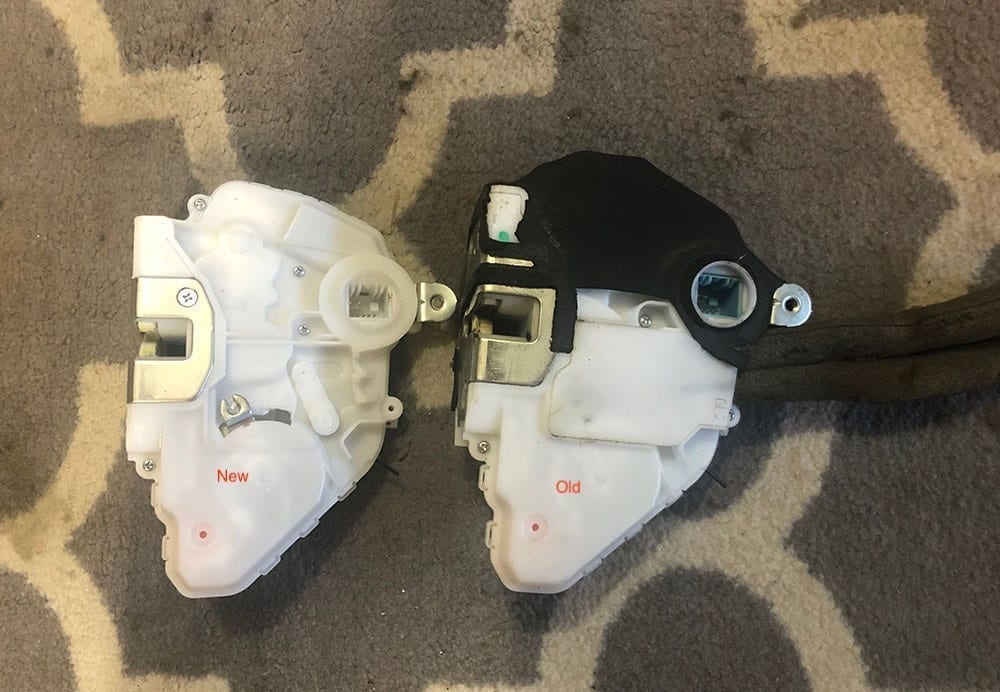
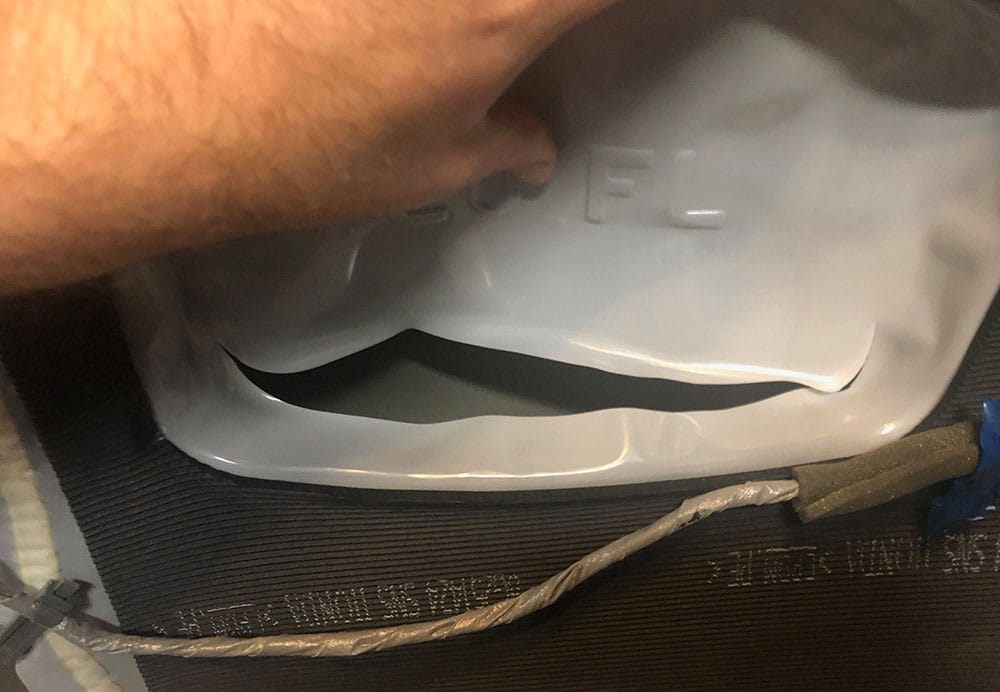
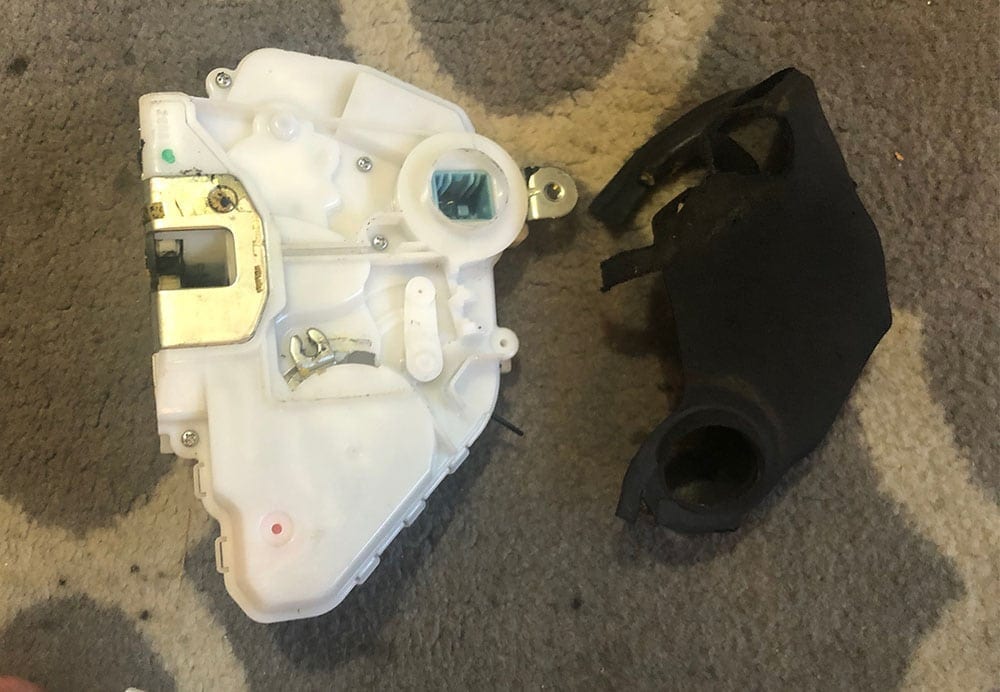
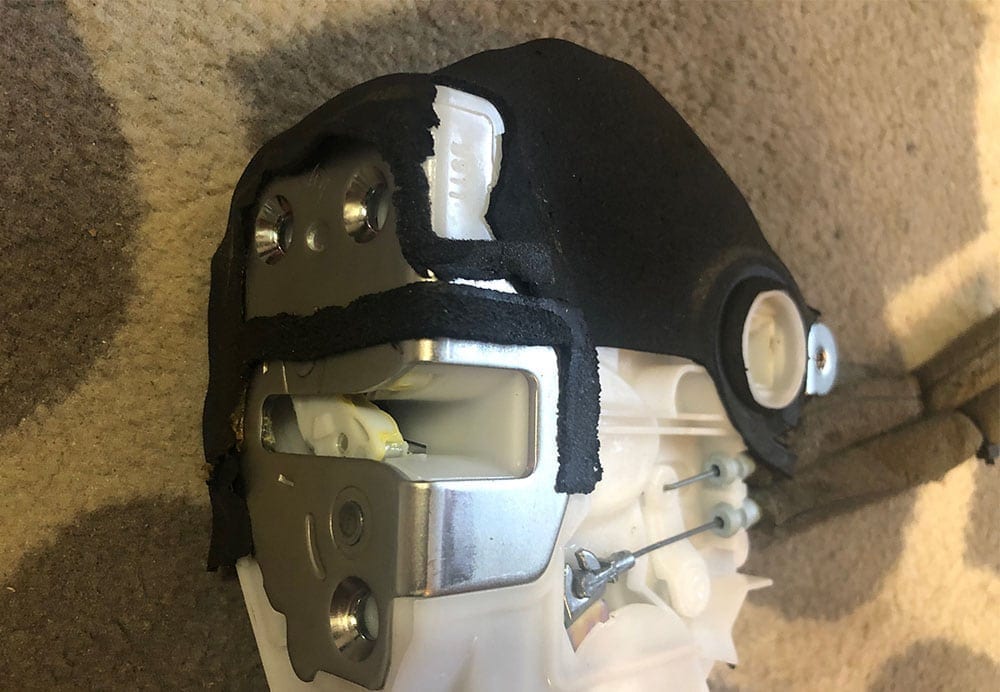
Once the cables are in place on the new actuator, the only thing left to do is to remove the old padding that's on the old actuator and place it onto the new one. Unfortunately, the new actuator doesn't come with the padding so it'll need to be reused from the old, broken unit.
I used a razor blade to separate the padding from the actuator with minimal damage and then used a few dabs of super glue to fuse it to the new one. For the most part, the padding is placed between the door and the actuator so naturally when it's mounted it'll stay in place.
Step 4: Re-installing Your Actuator and Door Panel
The rest of the process is pretty simple. Re-install your actuator, feeding the actuator rod back into the actuator and then mounting it to the door. Plug the actuator plug back in, then insert and re-clip the single cable back into the backside of the actuator.
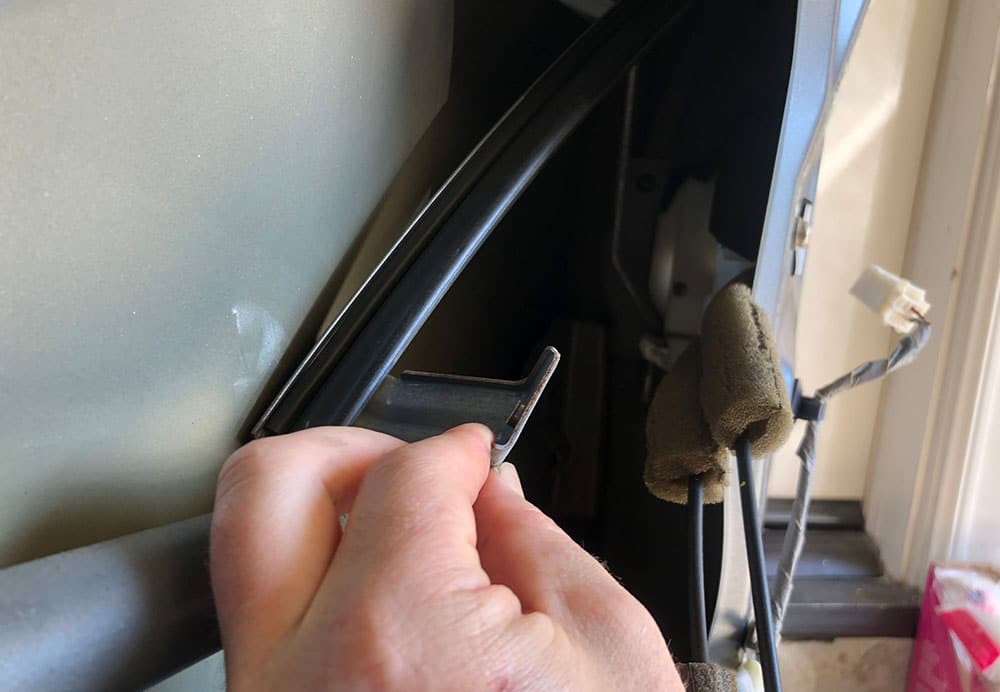
After the actuator is mounted and the cables are in place, be sure to re-install your window guide and screw it in, along with clipping back the door handle cables to the door.
At this point, you're ready to test your new actuator. Close your door (note that you should ensure the door is unlocked before you close it), and then use your remove to lock and unlock to ensure your new actuator is working properly.
As for the slit that you cut (if you cut one) into the damping, I used some heavy duty duct tape to seal it back up. With the damping fixed you can re-install the door panel, ensuring that the window and door lock buttons are plugged back in. Re-install your tweeter, and you're done!
Hope you enjoyed the how-to, please feel free to leave us a note or ask questions in the comments below!