In this article: I'll unbox and review Stinger's DC2-S12B 12″ loaded subwoofer enclosure. I'll provide an in-depth overview of it's core features and specs, and then install it in a Toyota 4Runner to listen to it first hand.
Building custom subwoofer enclosures and stereos aren't for everyone. They're time consuming, more expensive and require a level of expertise/knowledge that many don't have and aren't interested in researching. Sometimes, prefab is the ideal solution to add powerful bass to your vehicle without getting in over your head building and wiring a more complex custom system.
Prefab, or loaded subwoofer enclosures, offer a ton of value and convenience without sacrificing sound quality. They're much easier to install, removable when you want the room in your trunk back, and more often than not look like an integrated piece of your vehicle.
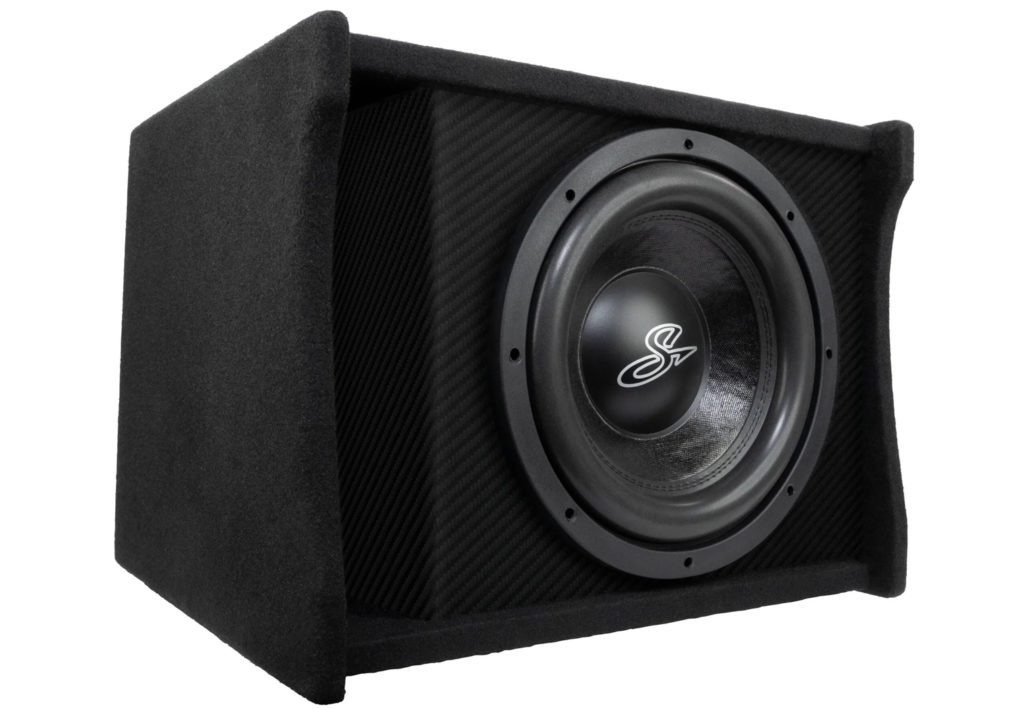
Stinger's DC2-S12B 12″ loaded subwoofer enclosure is a great example of a drop-in prefab sub that's great for your trunk, back of your Jeep, 4Runner or Bronco – anywhere that you can fit it really. It's designed to perform well, but also add flare to wherever you put it instead of creating an eye sore.
In this review, I'll unbox the DC2-S12B for you and detail some of the key features I think are important when looking for a loaded enclosure like this. I'll walk you through my installation process in a Toyota 4Runner and tell you what I think about the unit. By the end of this review, you should have all the information you need to decide whether or not this subwoofer is good for you. And if I didn't answer your questions, drop me a comment in the comment section at the bottom of the article!
Stinger DC2-S12B Unbox, Overview & Specs
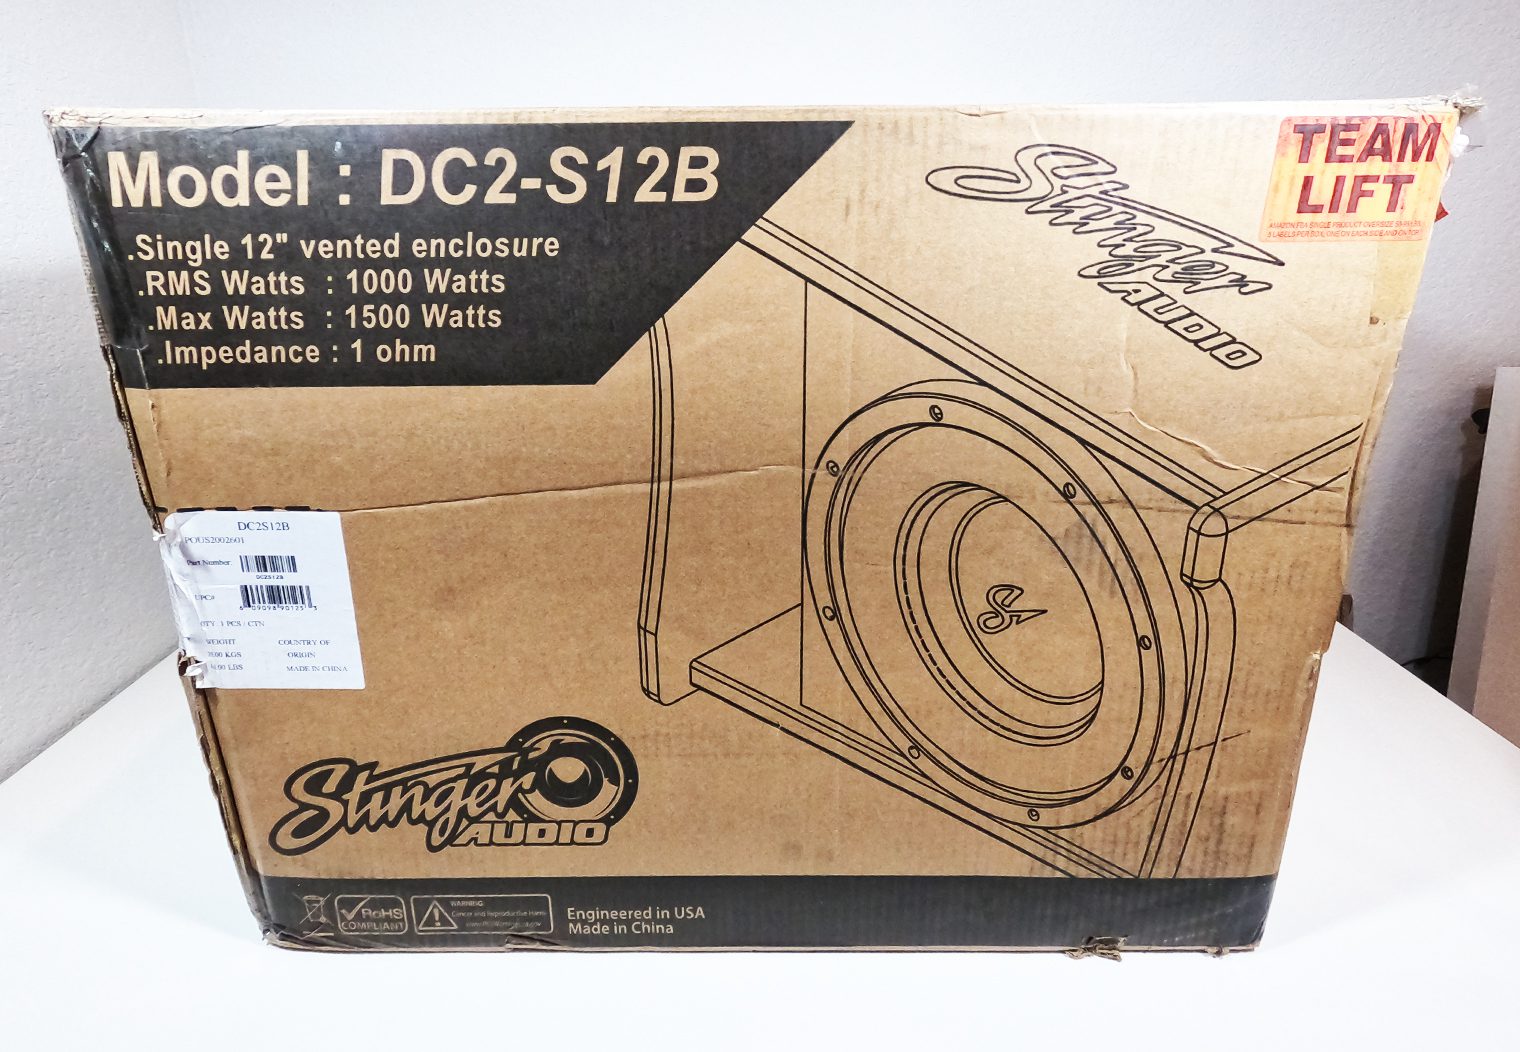
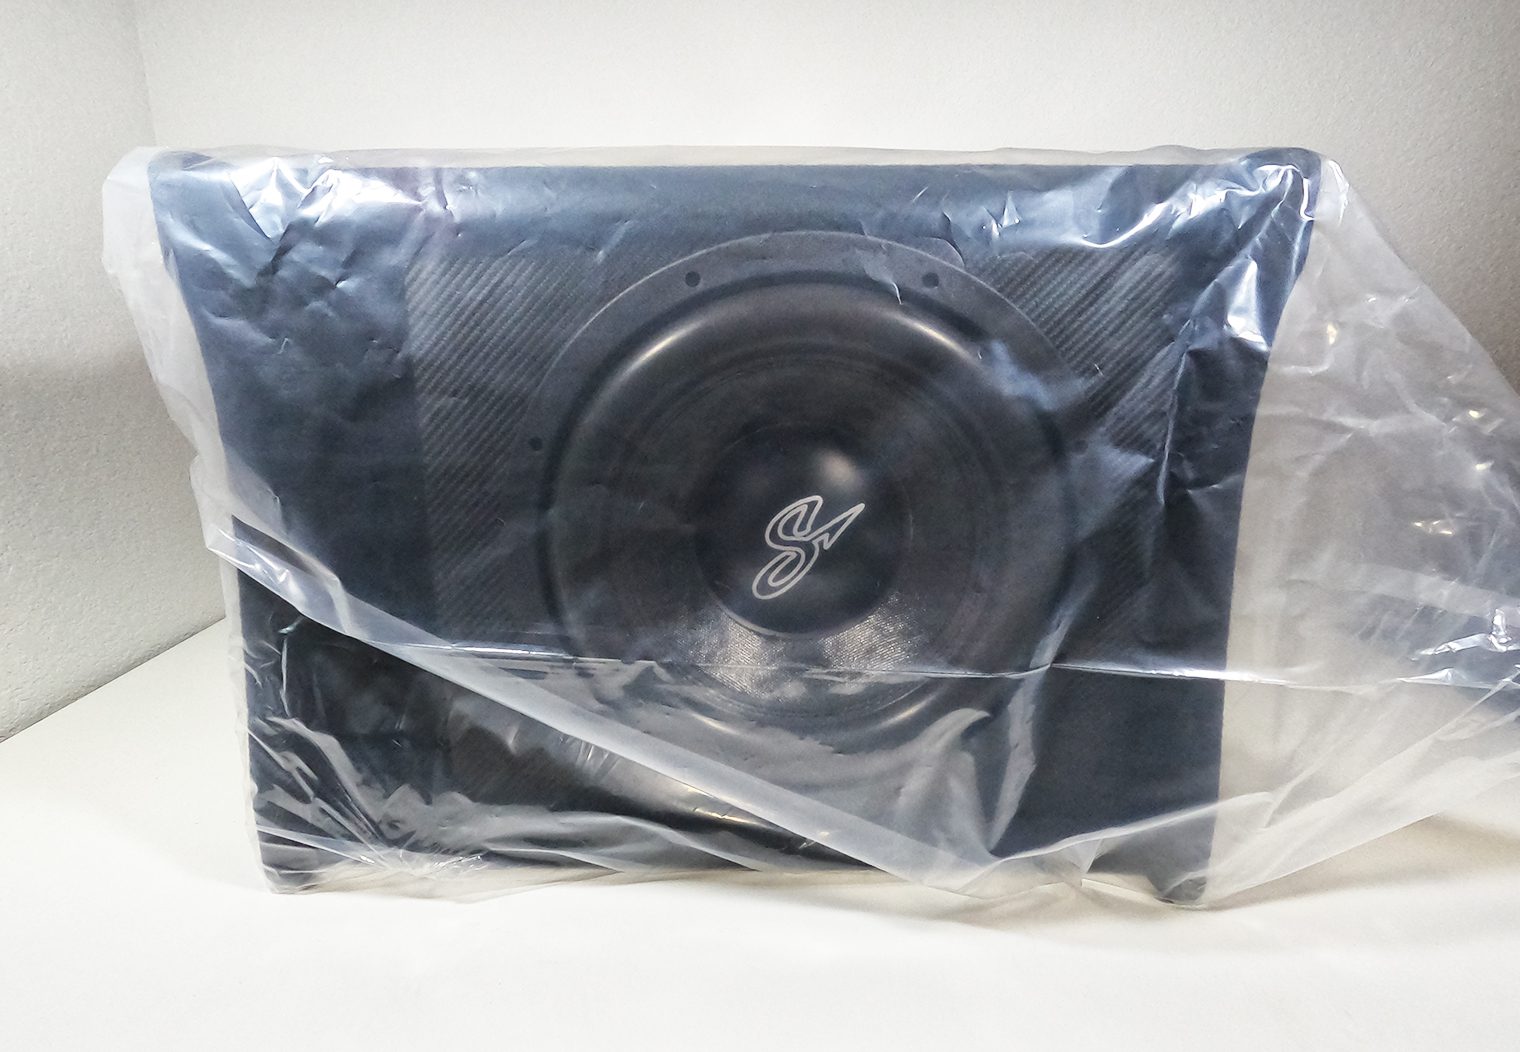
The DC2-S12B's packaging doubles as a shipping box. It has heavy duty handles and everything. Lift with your knees! When you open the box for the first time you're greeted with a quick guide and the top of the loaded enclosure with its “Stinger Audio” logo. The packaging was adequate and had plenty of support along the edges of the enclosure to prevent damage to corners. Stinger also wrapped the entire enclosure with plastic, which is great for protecting against dust, dirt, and other materials that might damage the enclosure or carpet.
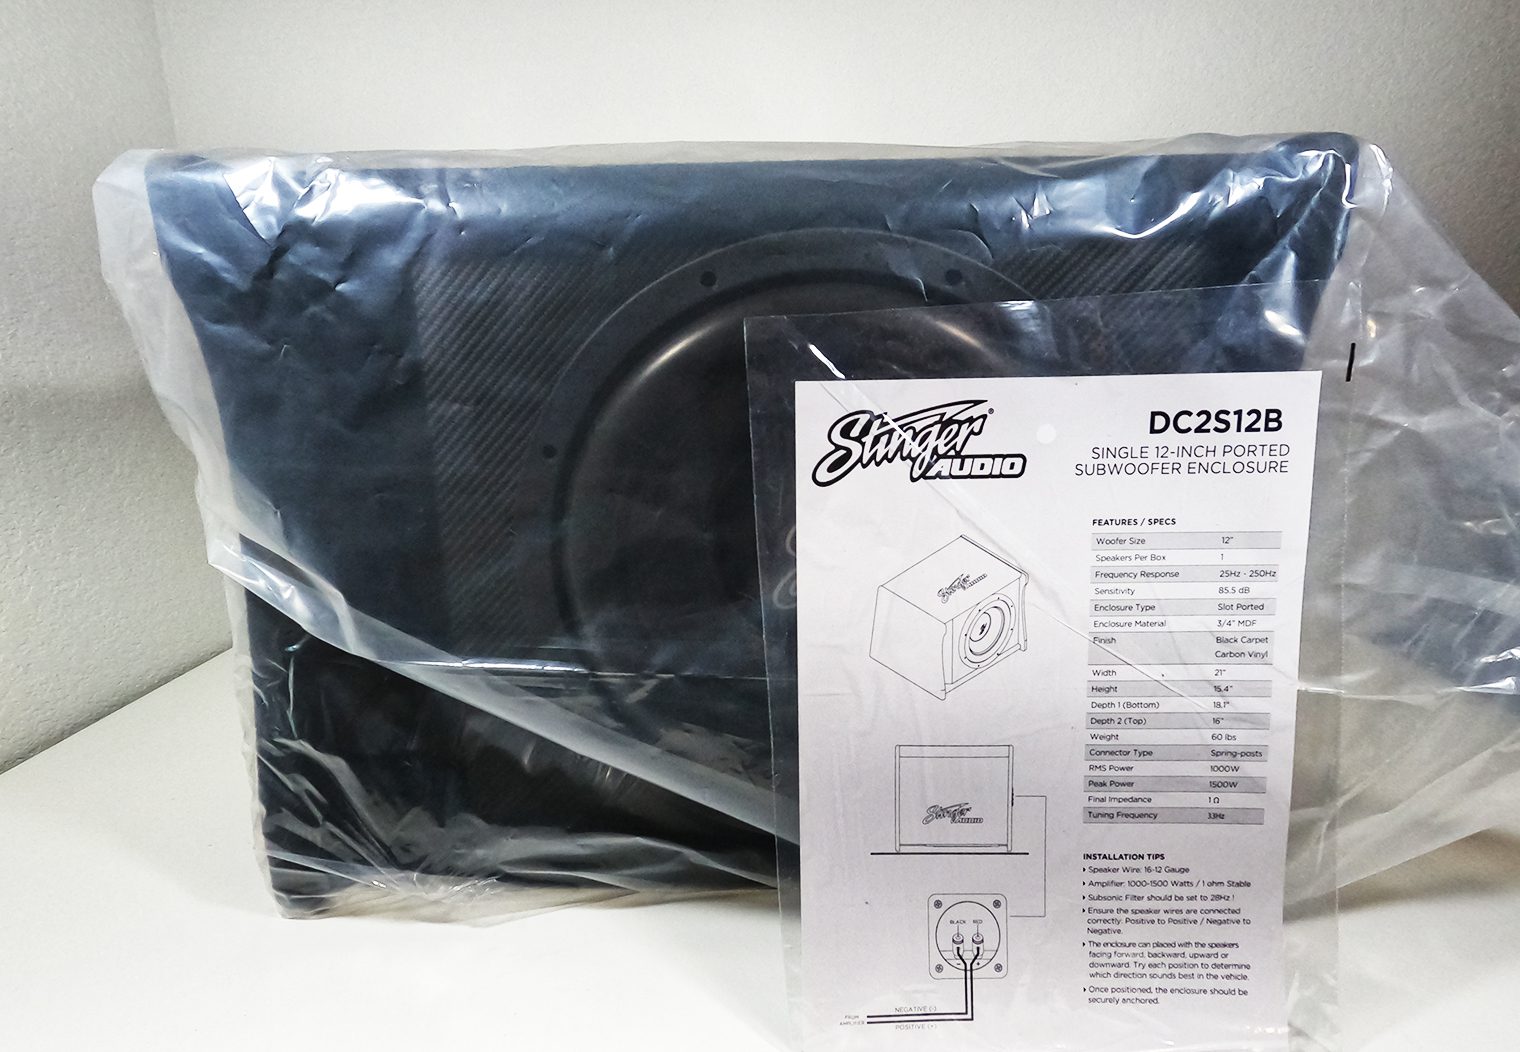
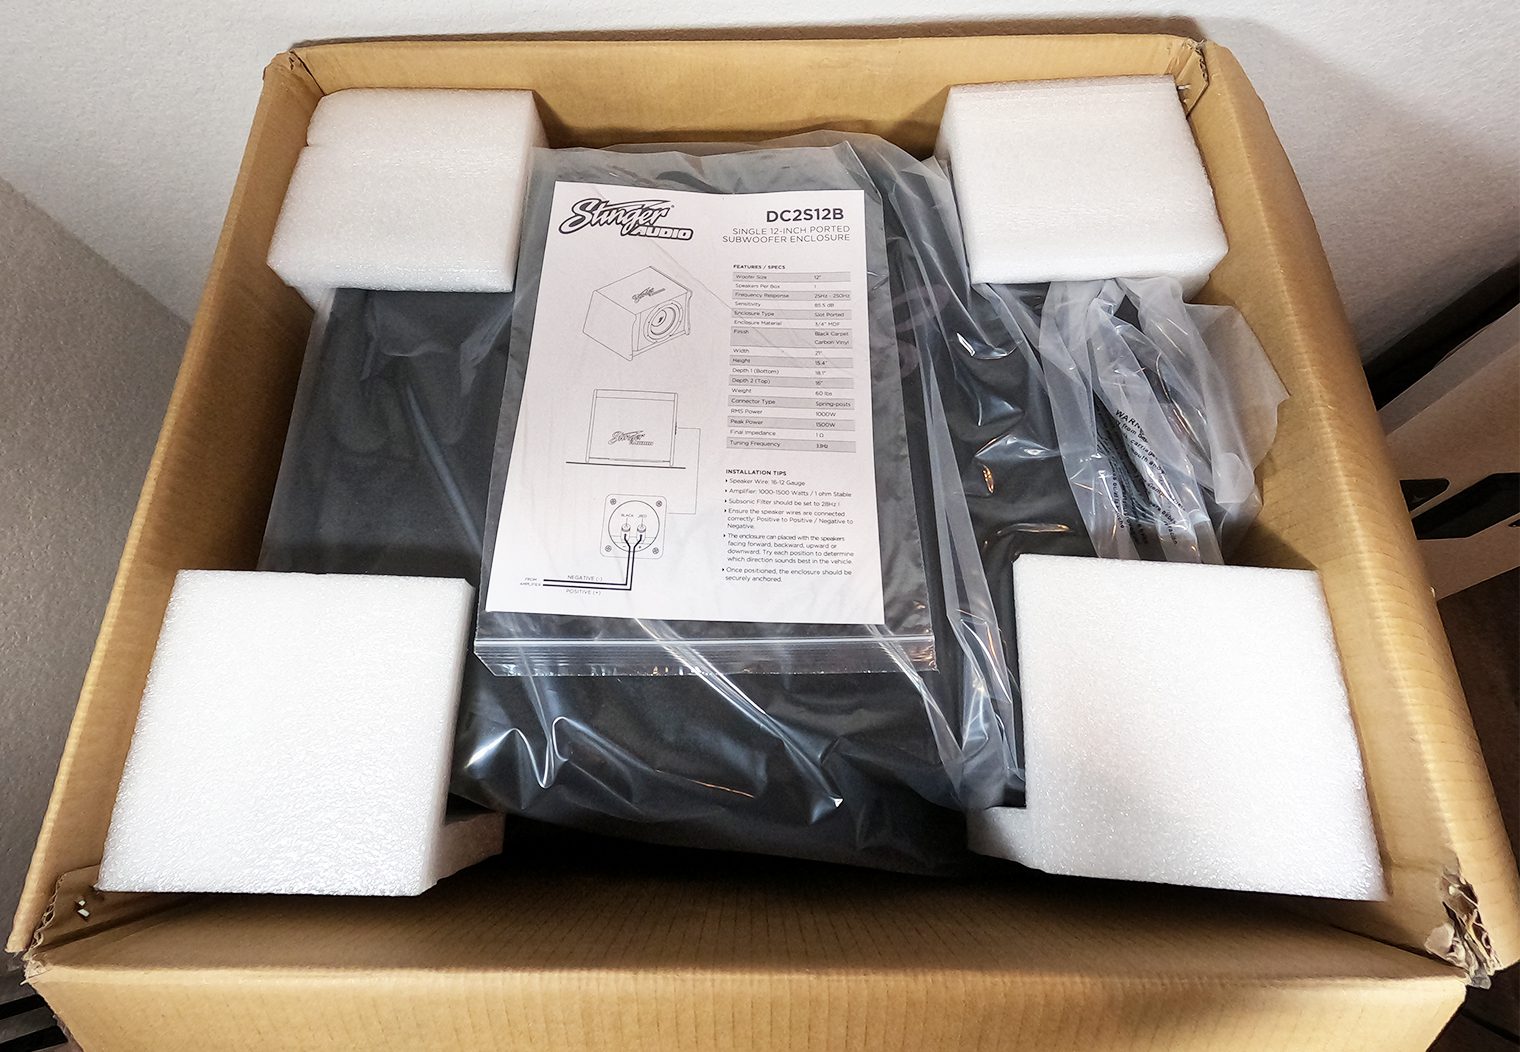
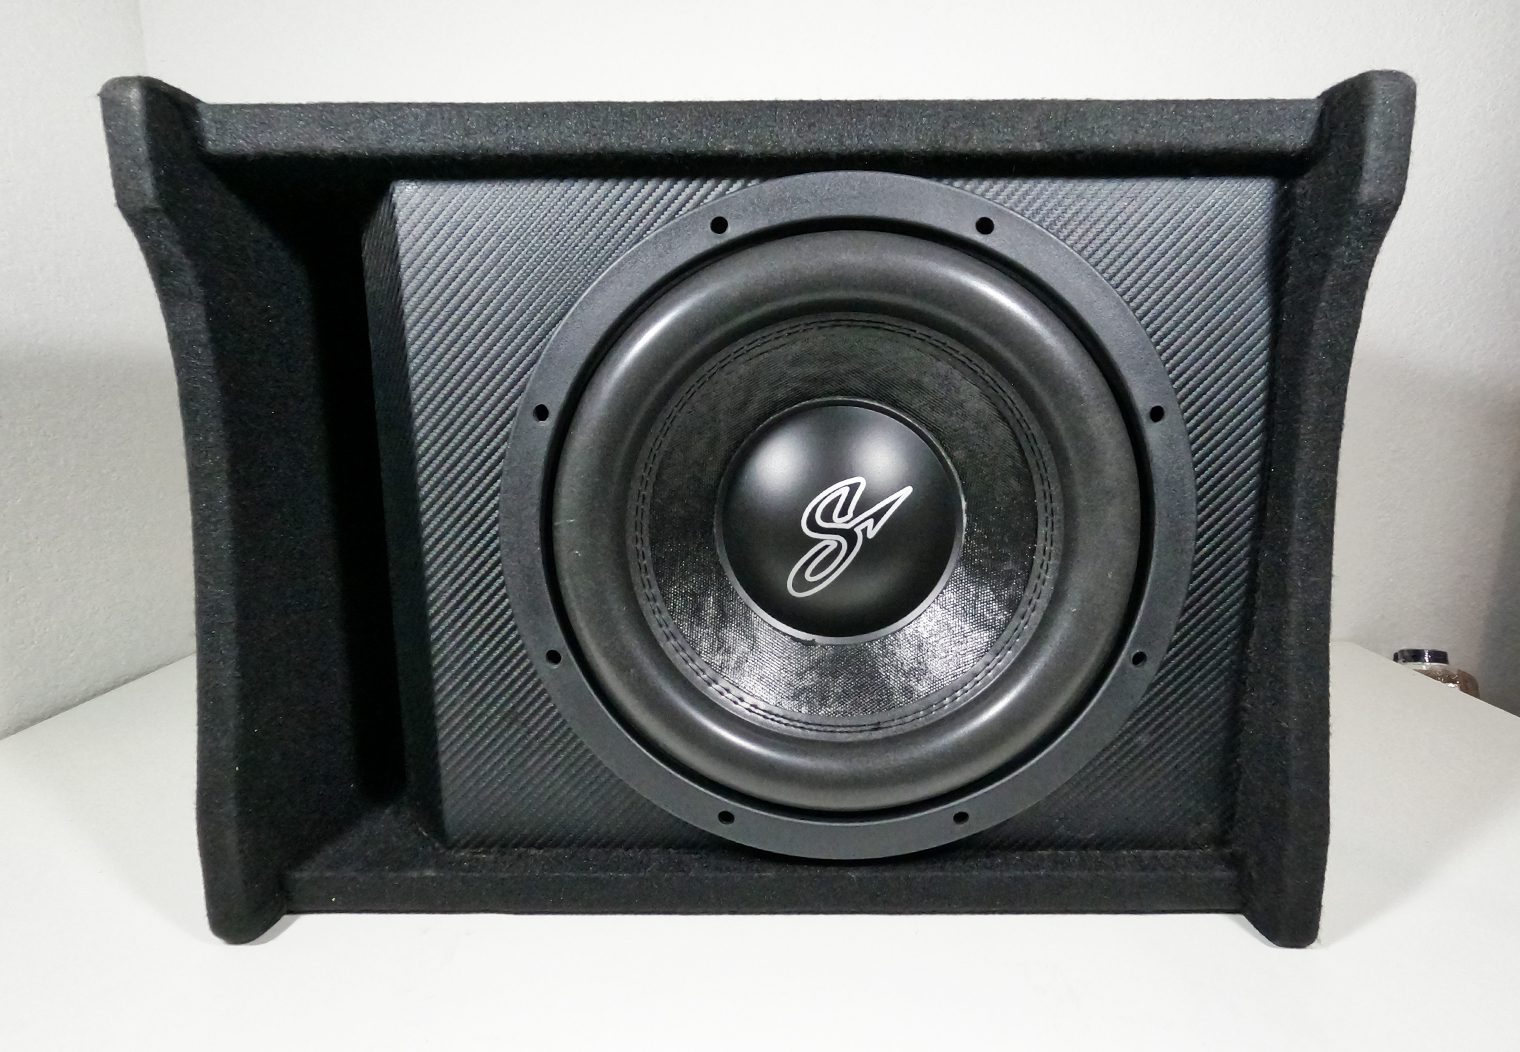
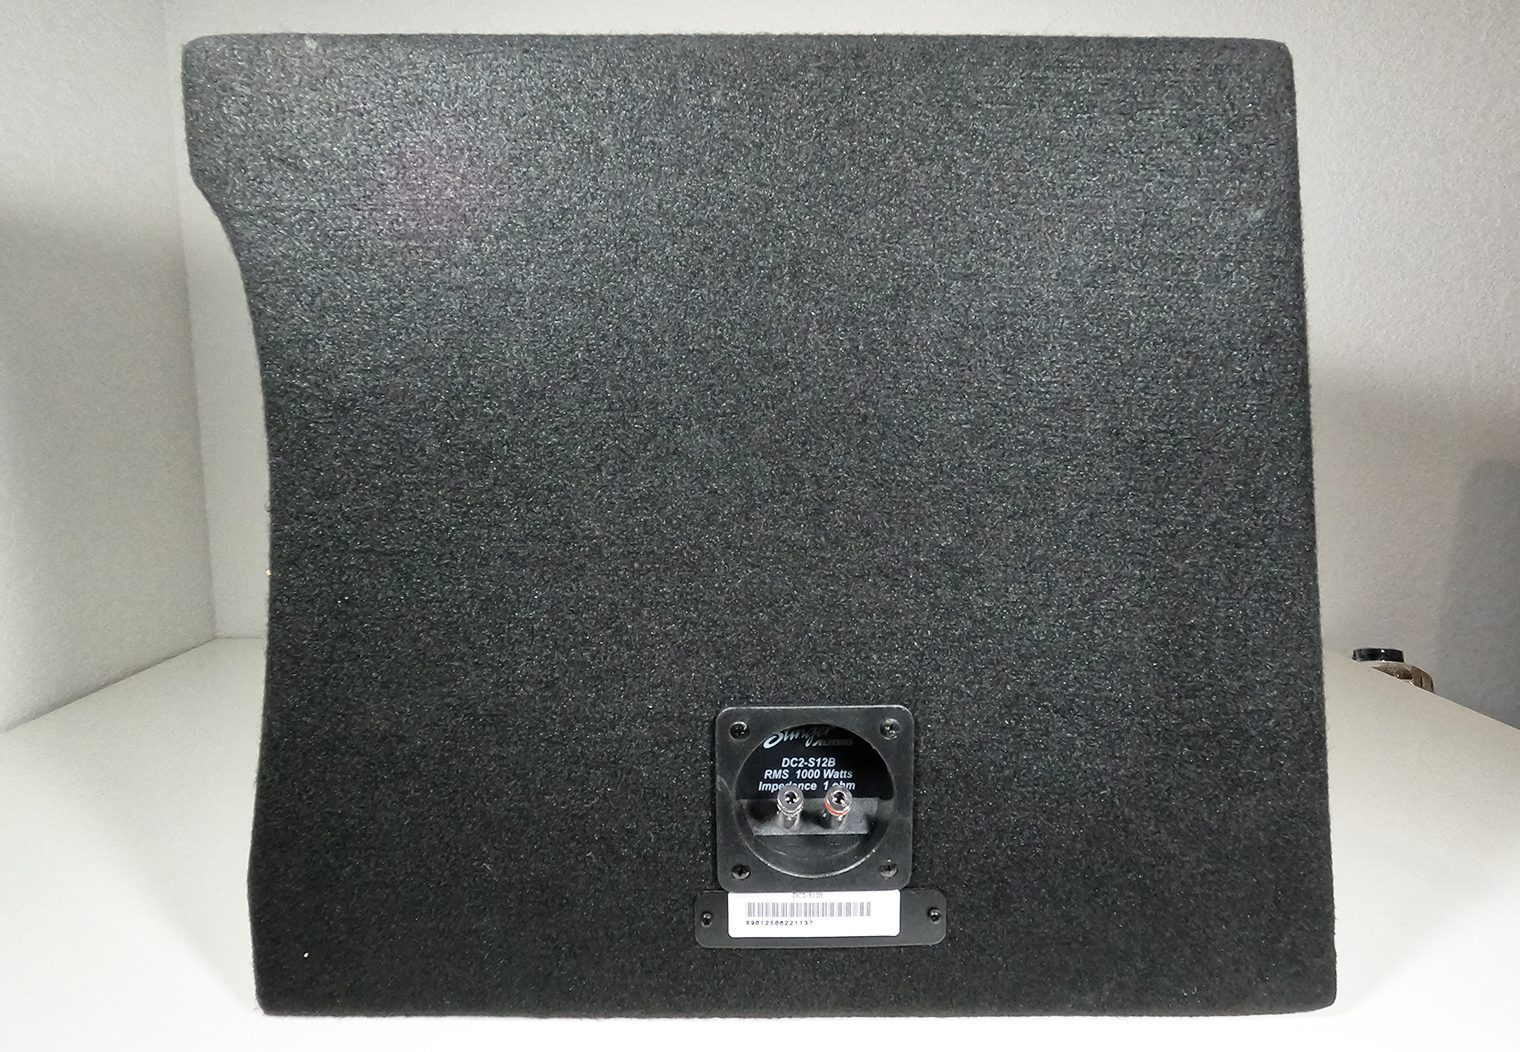
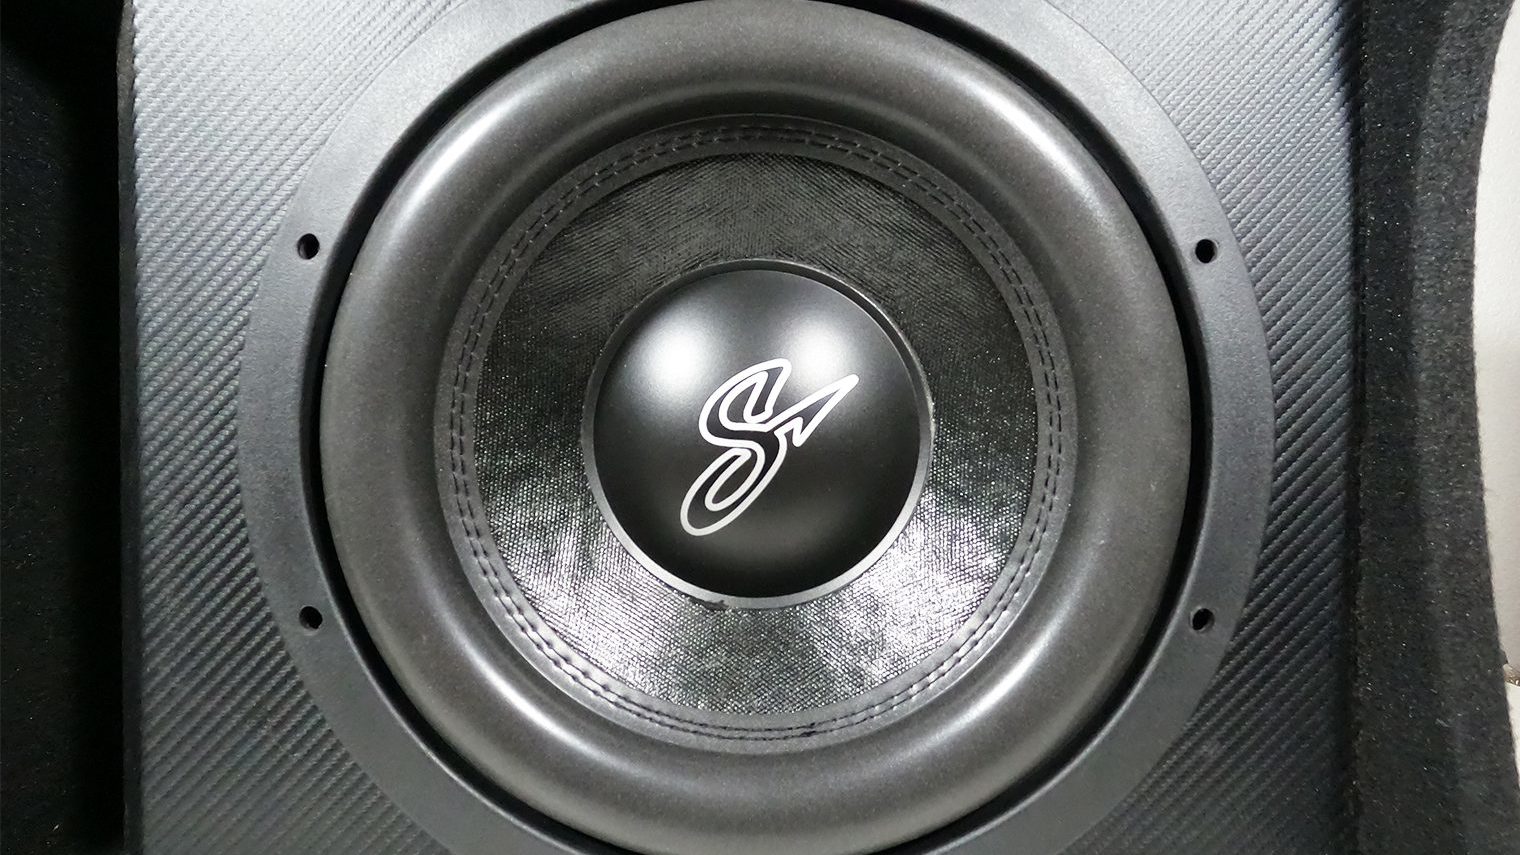
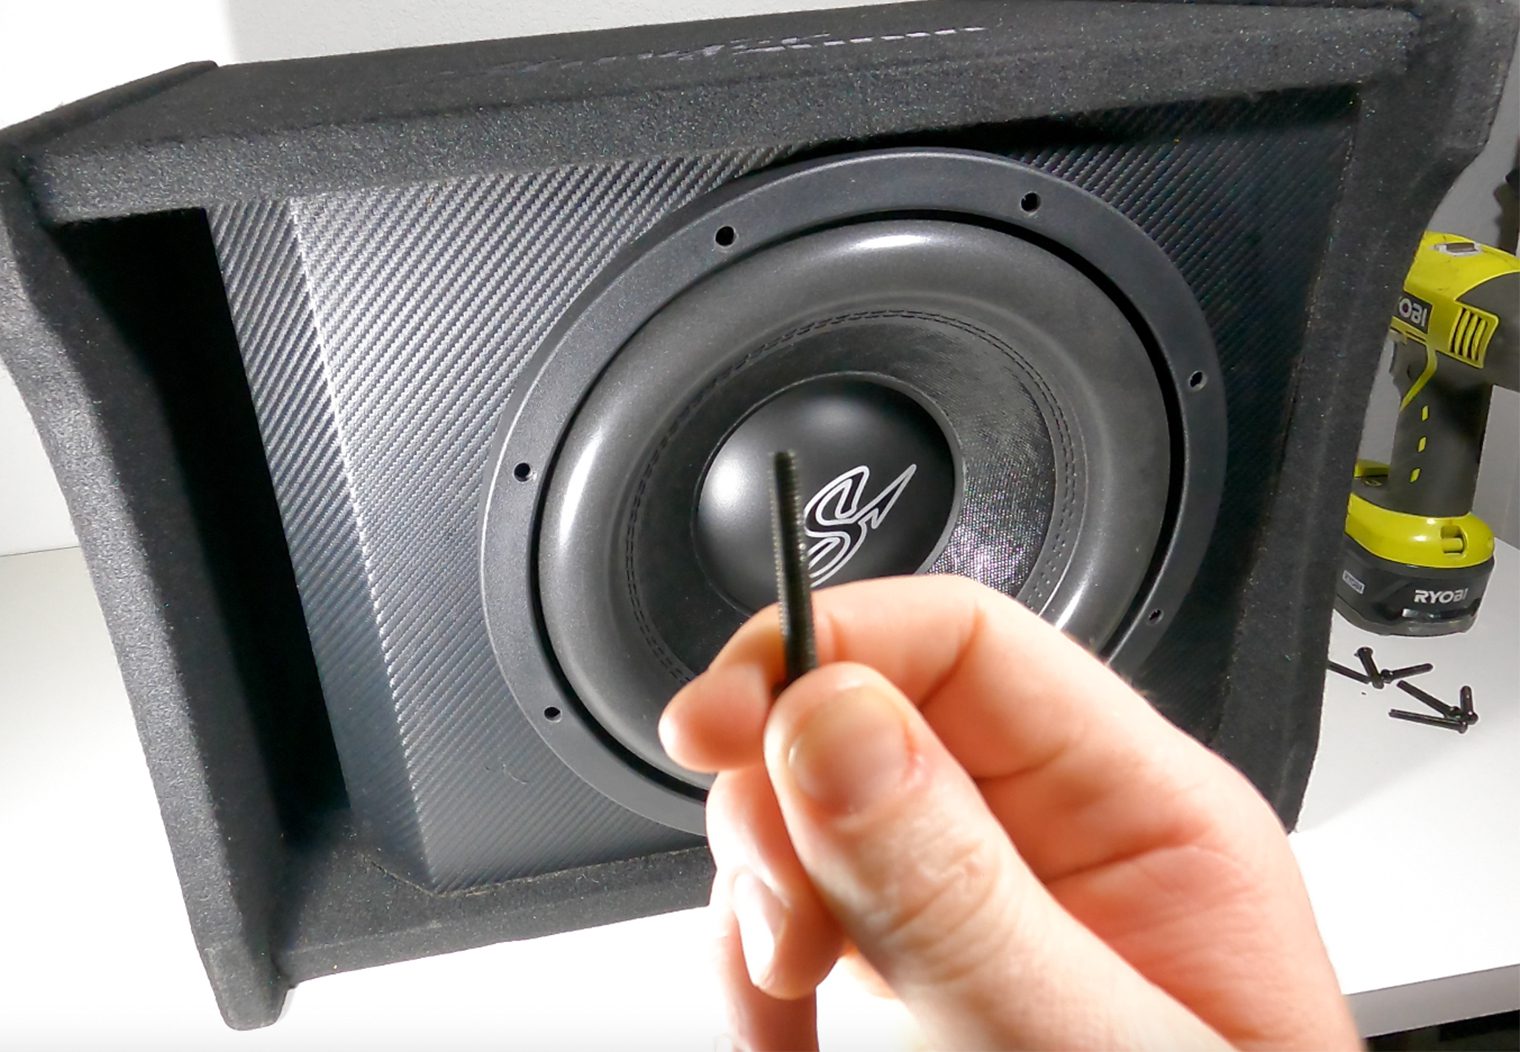
Stinger's DC2-S12B comes preassembled and preloaded. From the factory, all you need to do is open the box, pull it out and plug it in. It's a ported enclosure, made from 3/4in MDF all around. 3/4″ is pretty much the standard with mid-grade and higher-grade enclosures. Anything less than 3/4″ for a setup like this would be concerning. It comes loaded with Stinger's 12″ DC2-12D2 subwoofer, which is securely mounted at the face of the enclosure.
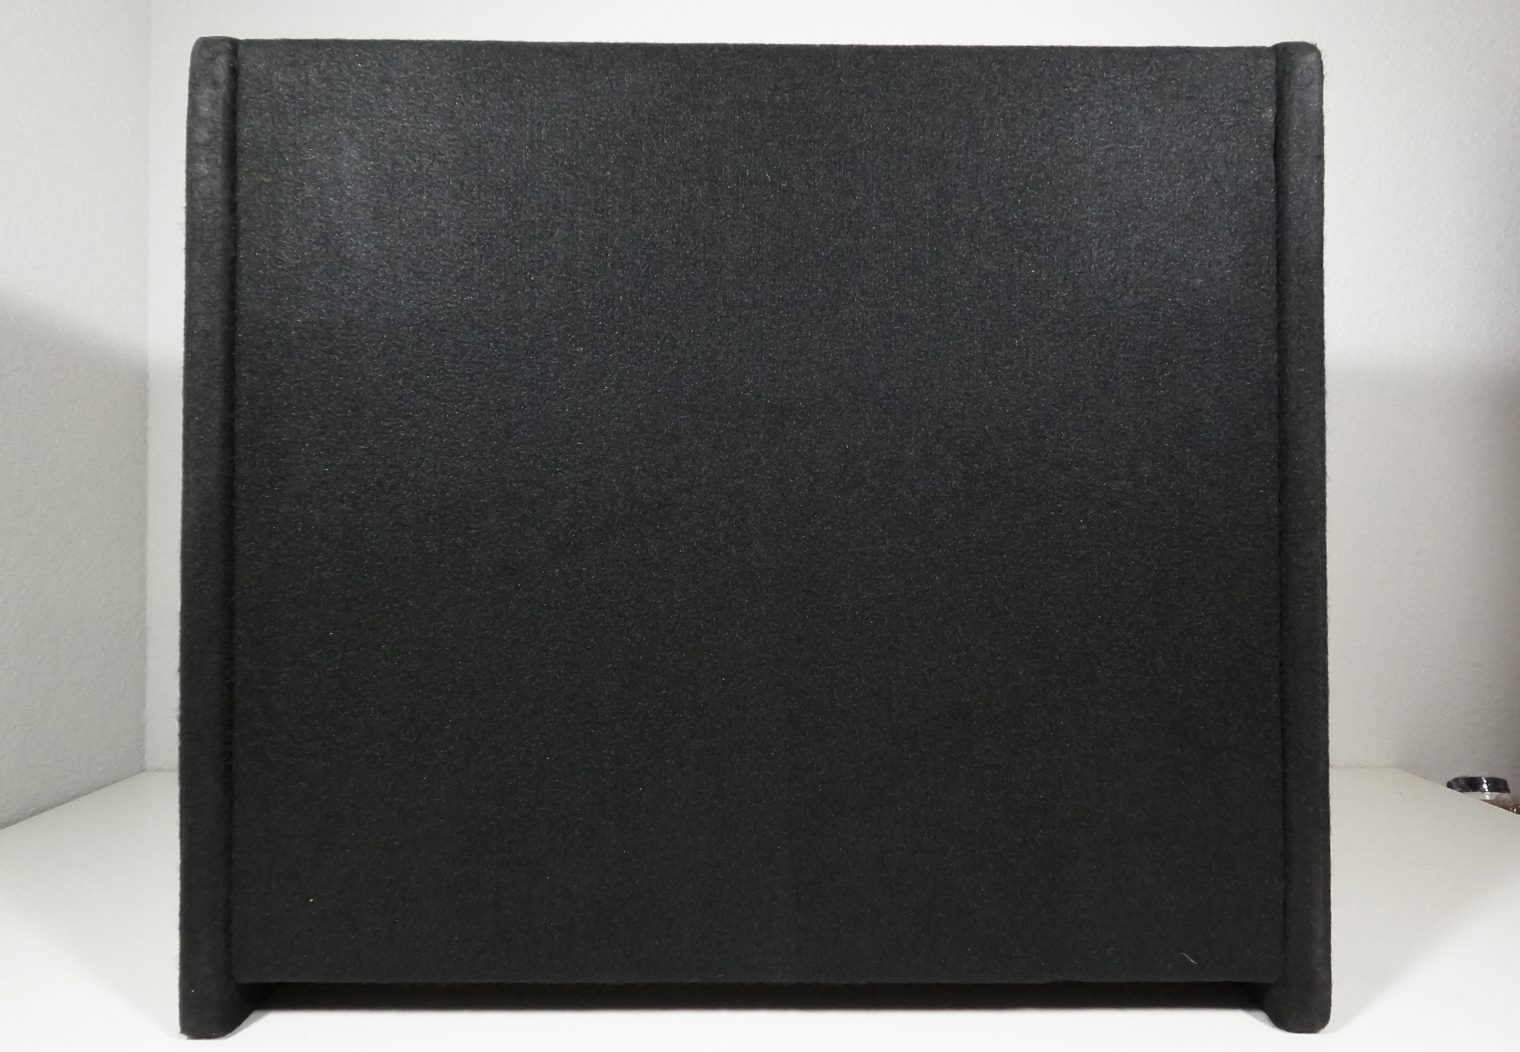
The box measures 21″ wide by 15 1/2″ tall and 18″ deep. It's not a compact enclosure, but it's a great size for the trunk of your car, or the back of your Jeep, Bronco, 4Runner or SUV. It's heavy too – it weights about 60lbs. The packaging came labeled with “TEAM LIFT” stickers all over it so knew it was going to be a heavy one before I picked it up.
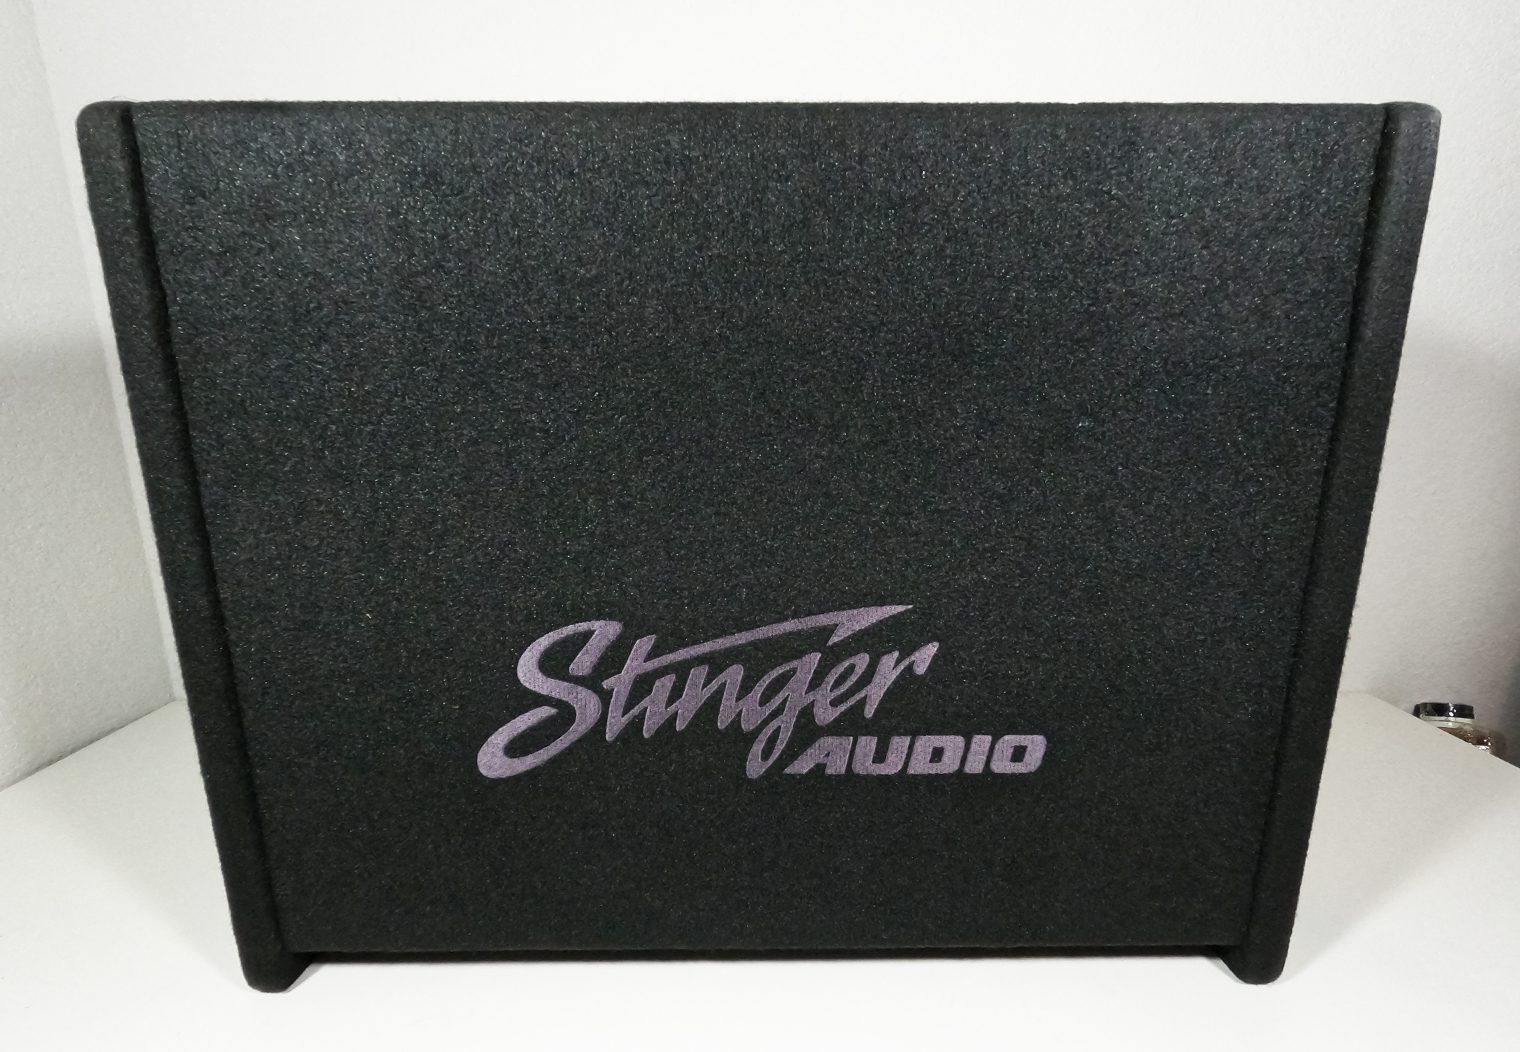
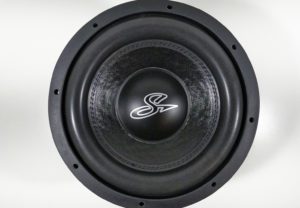
I really liked the look of the enclosure. The carbon vinyl is a really nice touch and looks high end. Its sleek logo that's embroidered into the black carpet on the top is a nice touch too. When I inspected the seams and edges, it looked well done. The upholstery/carpeting is tight and looks well done.
On the face of the enclosure, the sub is very well secured (I'll remove it and show you some closeup pictures of the sub itself later in the review).
Here are a few of the Stinger DC2-S12B key specs:
- 12″ Ported Loaded Subwoofer Enclosure
- DC2-12D2 12″ Dual 2ohm Subwoofer (pre-wired for 1ohm)
- 1000W RMS, 1500W Peak Power Handling
- Weight: 60lbs total (sub + enclosure)
- Dimensions: 21″x15.5″x18″
- Frequency Response: 25hz – 250hz
- Sensitivity: 85.5dB
- Recommended wire gauge: 12-16 AWG
Stinger DC2-12D2 Subwoofer Features
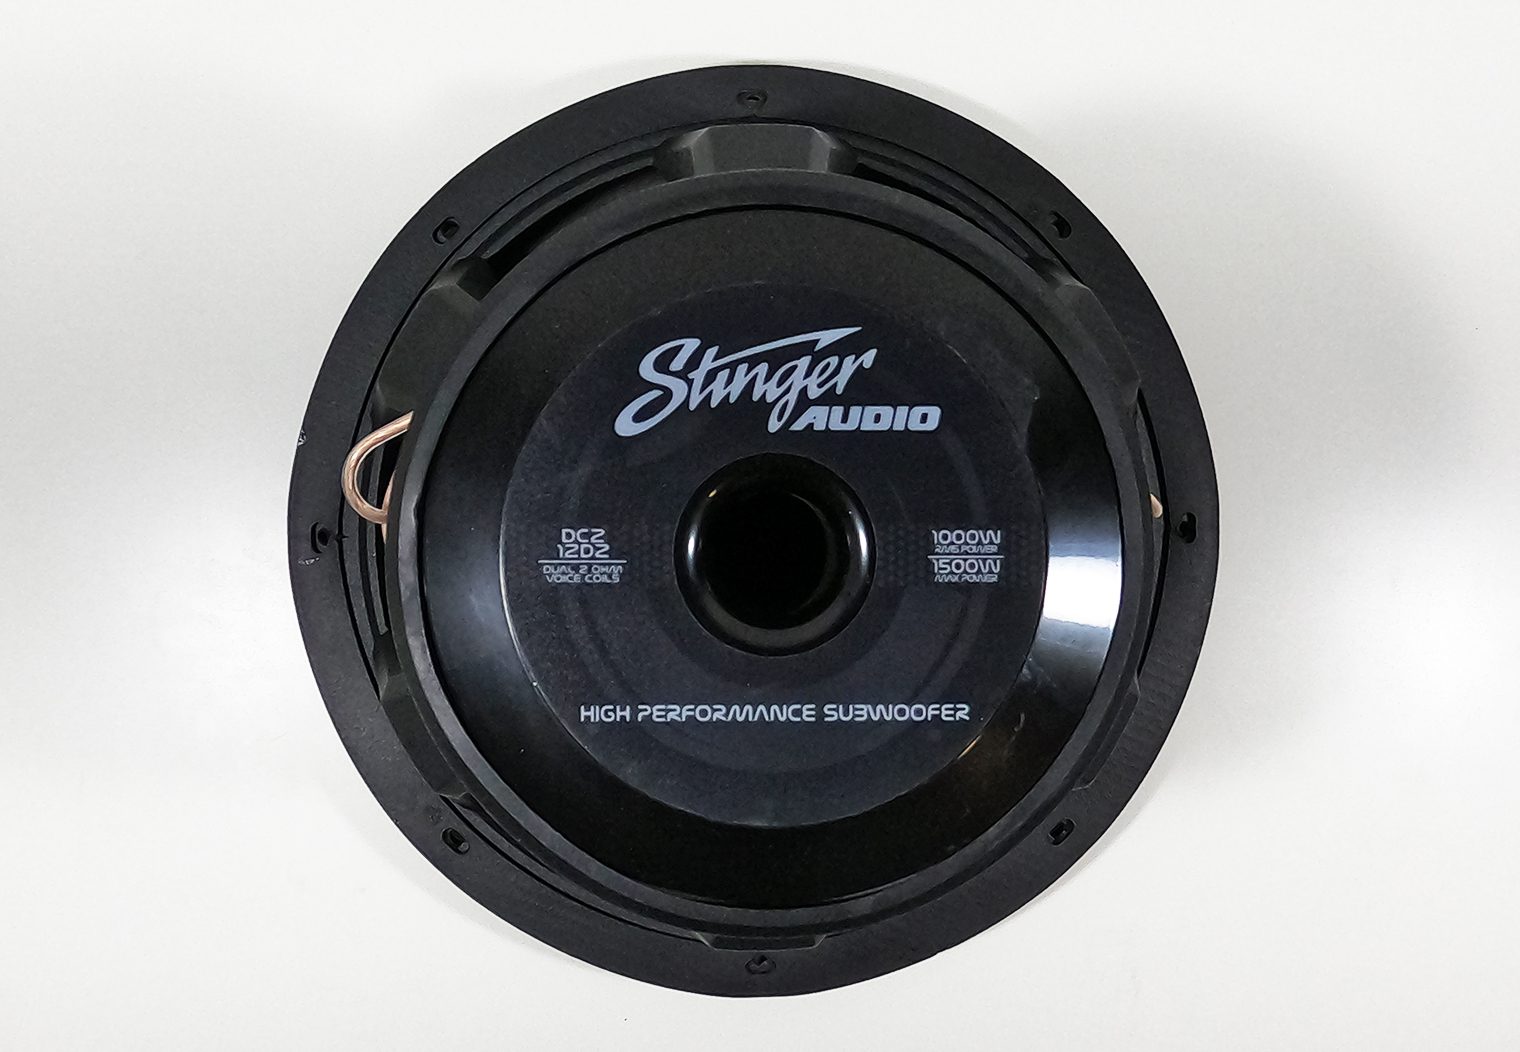
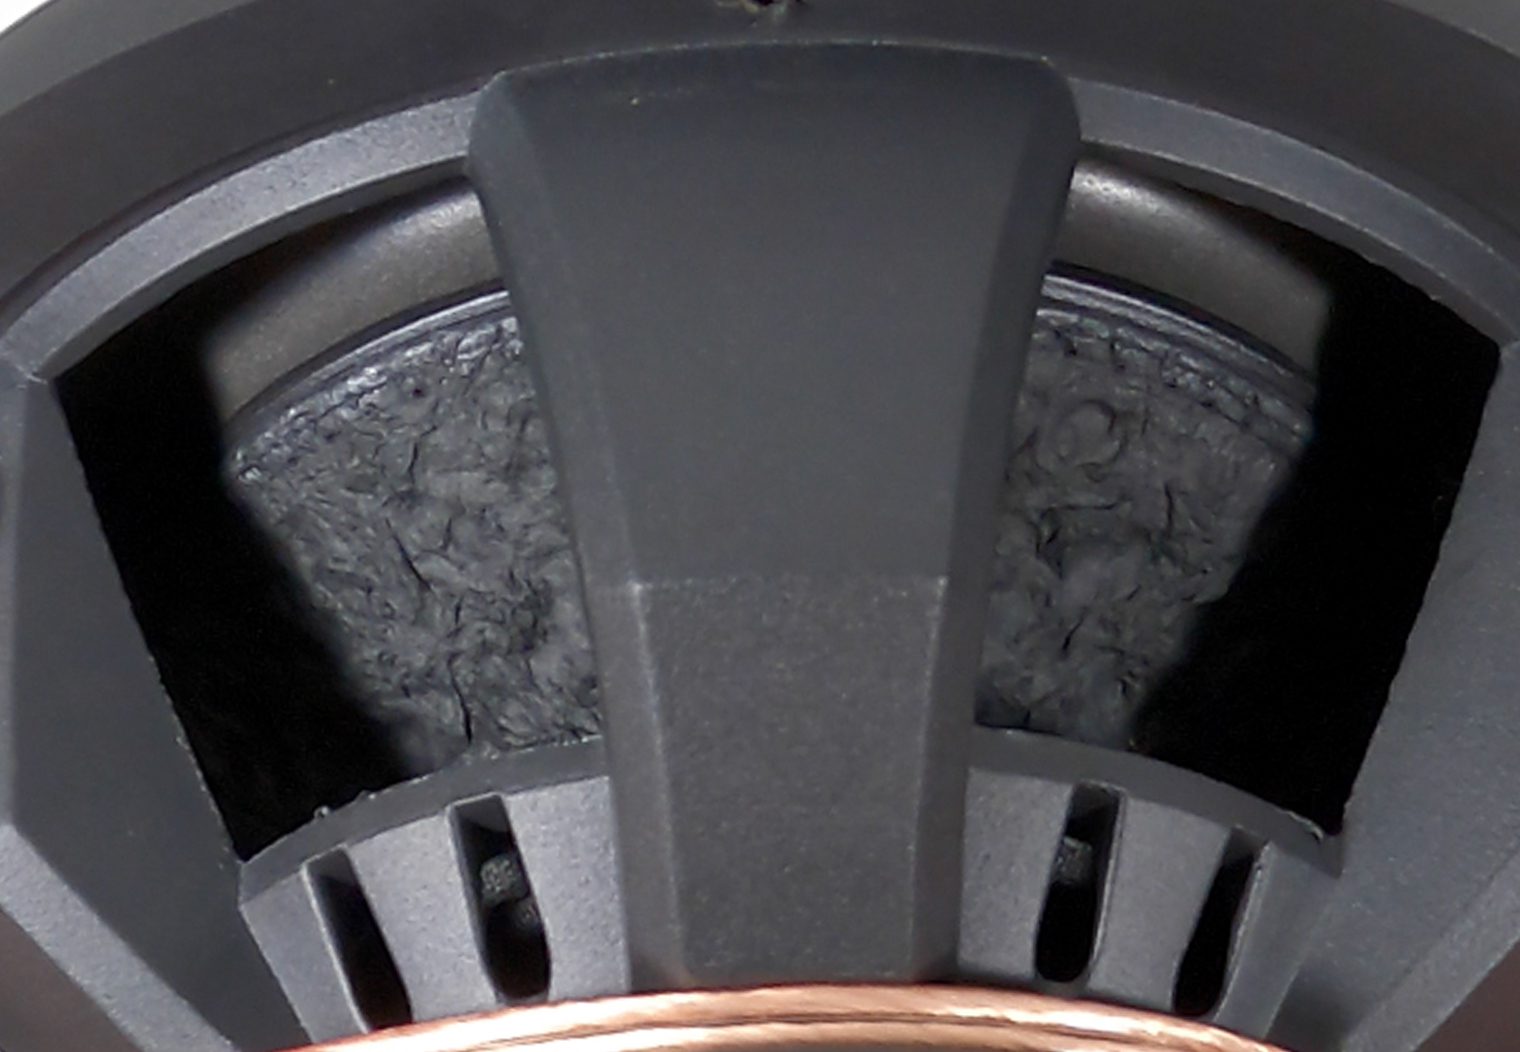
I went ahead and removed the subwoofer from the enclosure to get a better look at the inner side of the enclosure, but more importantly the subwoofer itself. Stinger's DC2-12D2 is pretty stout. It weighed in around 26lbs when I put it on the scale, so nearly half the weight of the setup. When you turn the sub around to take a look at the motor, you can really see where the weight comes from – the massive high density ferrite magnet.
Ferrite is a pretty common magnet material on subwoofers. Pound for pound, Ferrite isn't not as strong as a neodymium magnet, for example, and is heavier than many other magnet types. But, they do perform well (some would argue better sometimes) when used on speakers that are built for higher volume.
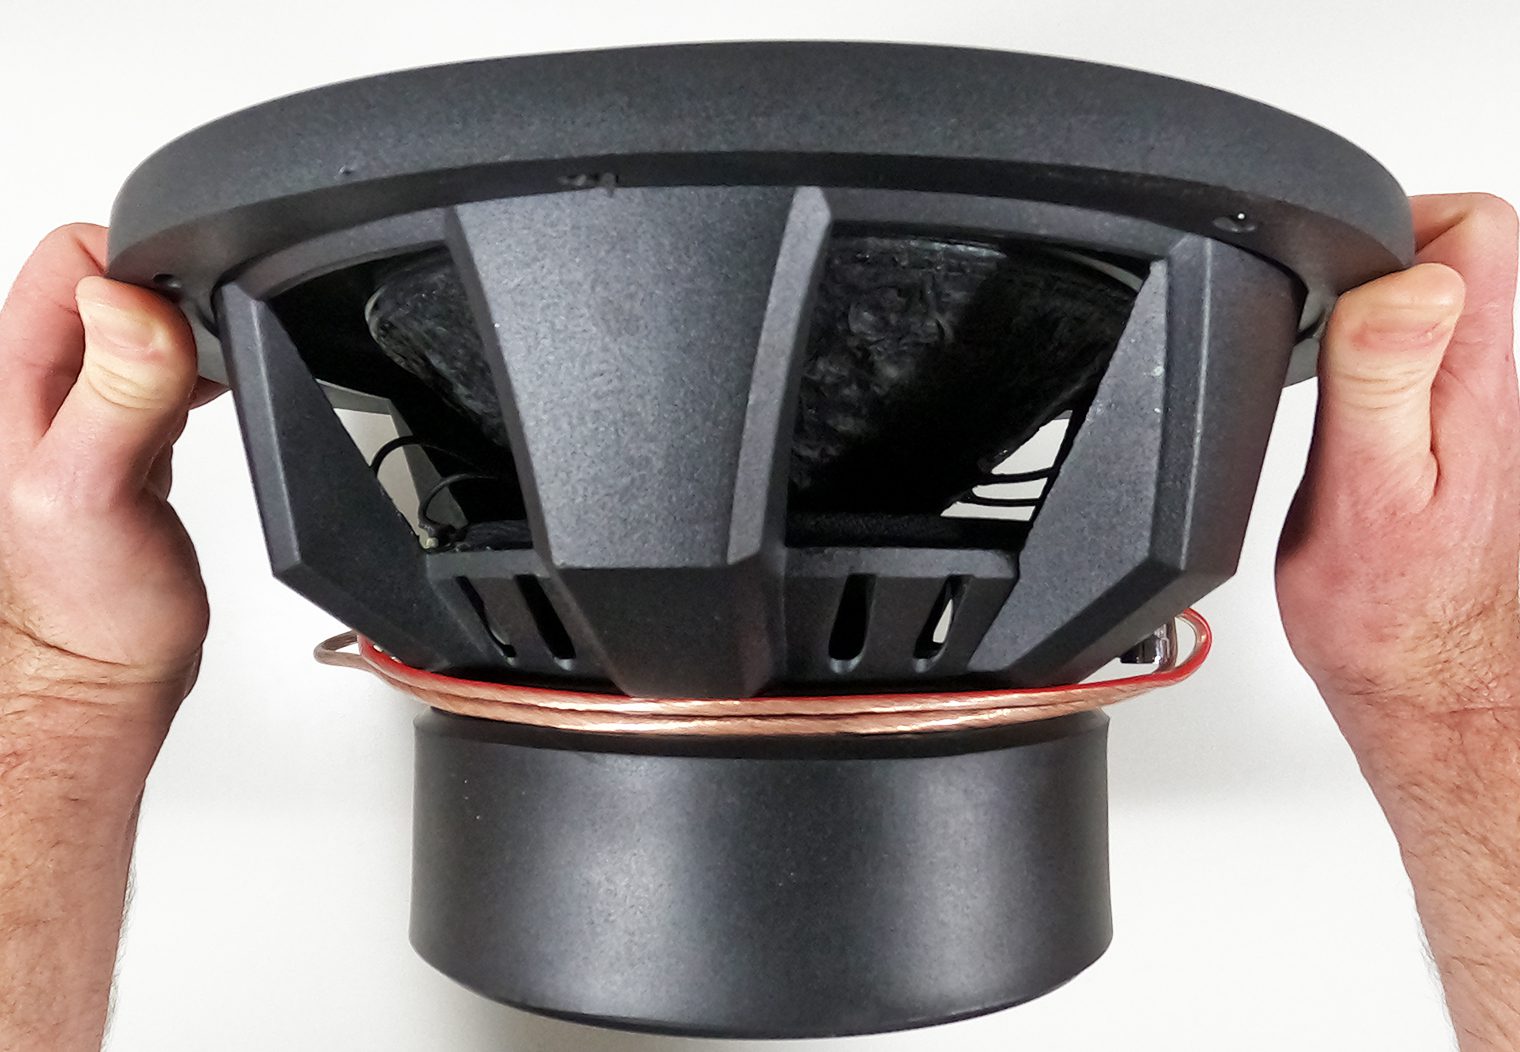
The sub features a cast aluminum, one piece frame. Cast aluminum is the ideal choice for sub frames. It's strong, light and dissipates heat well. This frame looks like its engineered for some serious load – specifically its massive 6 beams. No concerns about rigidity, unwanted resonance, strength or longevity here.
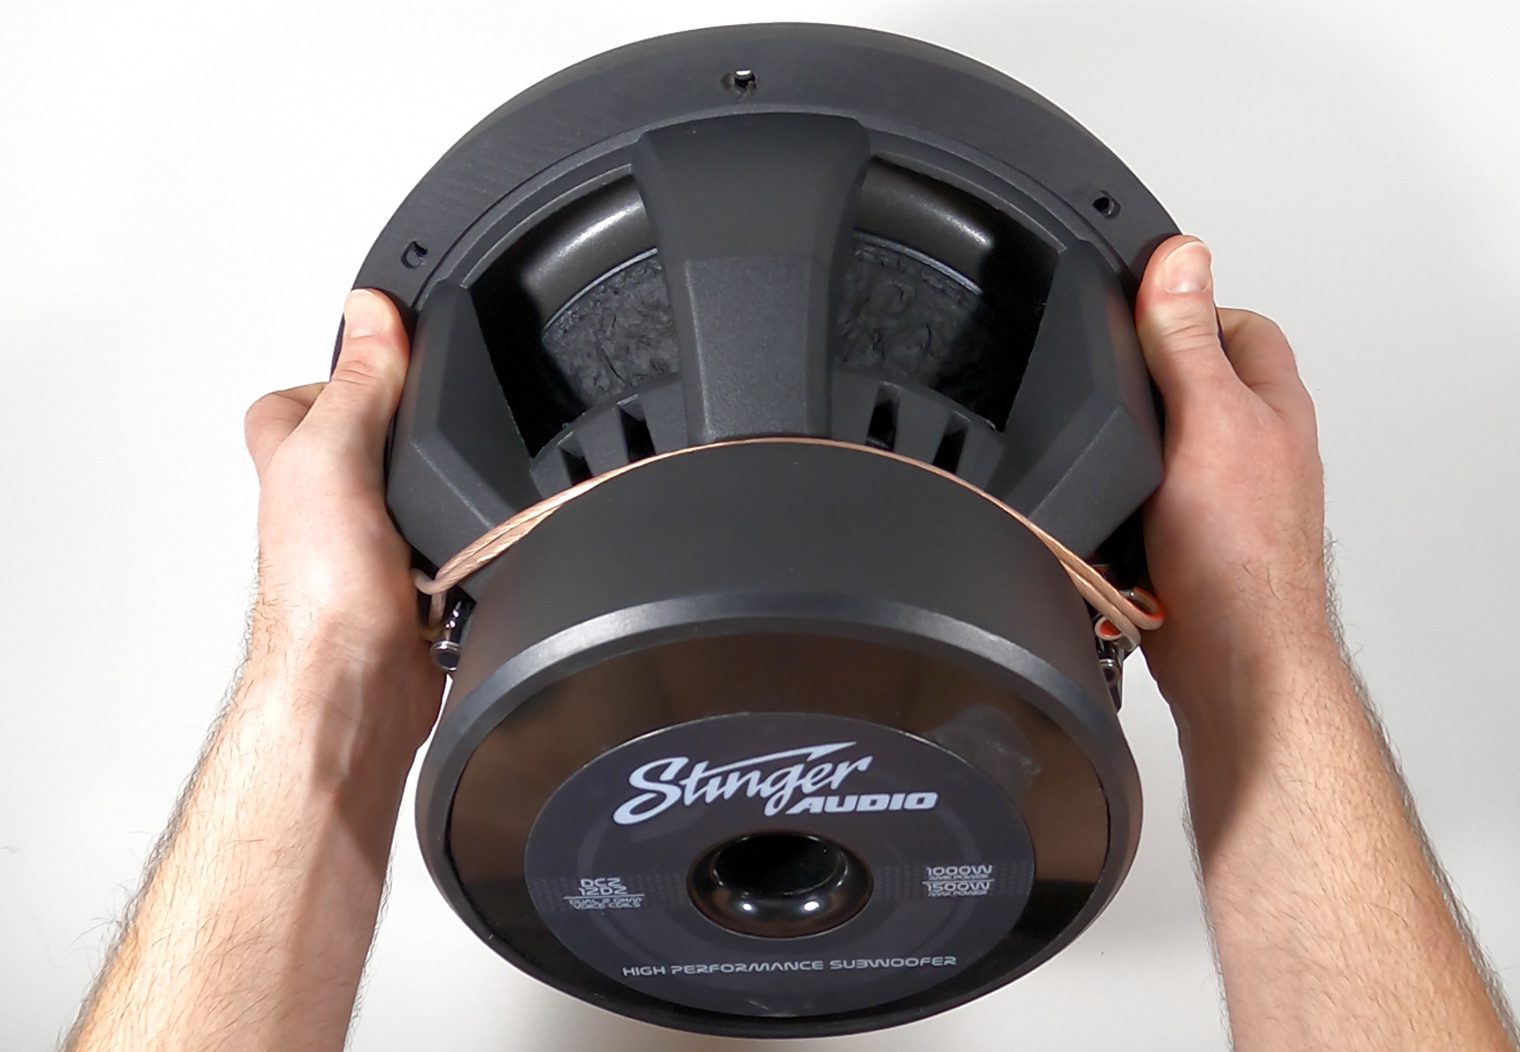
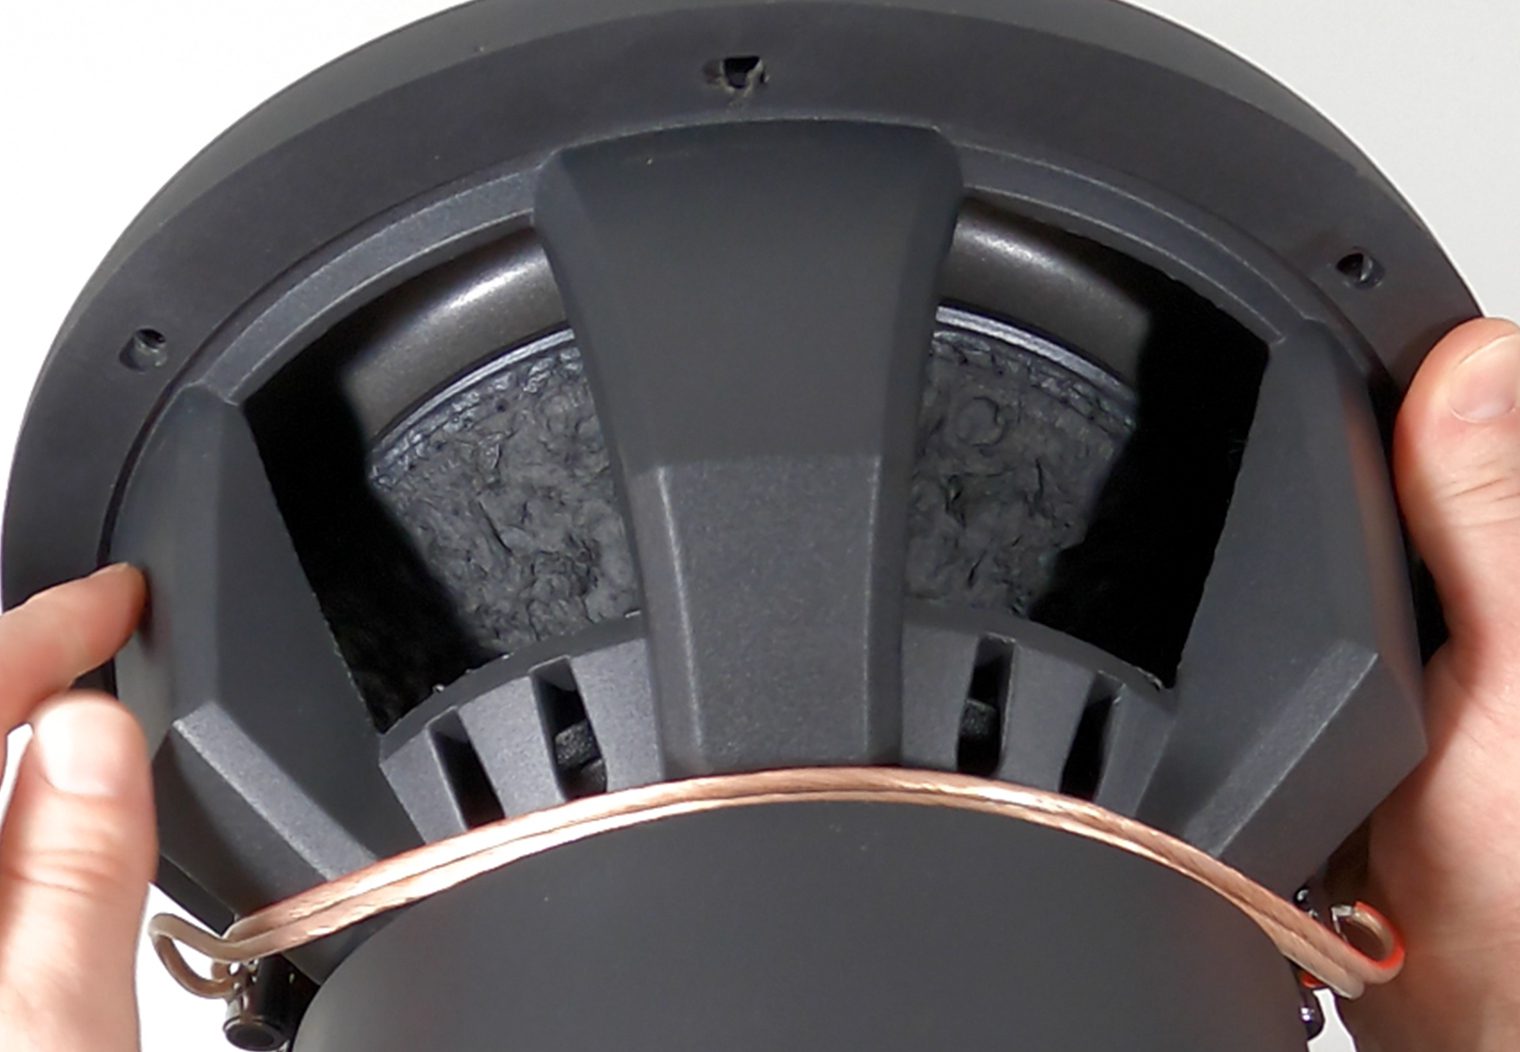
You can also see some ventilation that's designed into the cast aluminum frame that allows air to enter and escape to cool the voice coil and motor. Cooling is always important, especially when you're looking at a 1000w subwoofer!
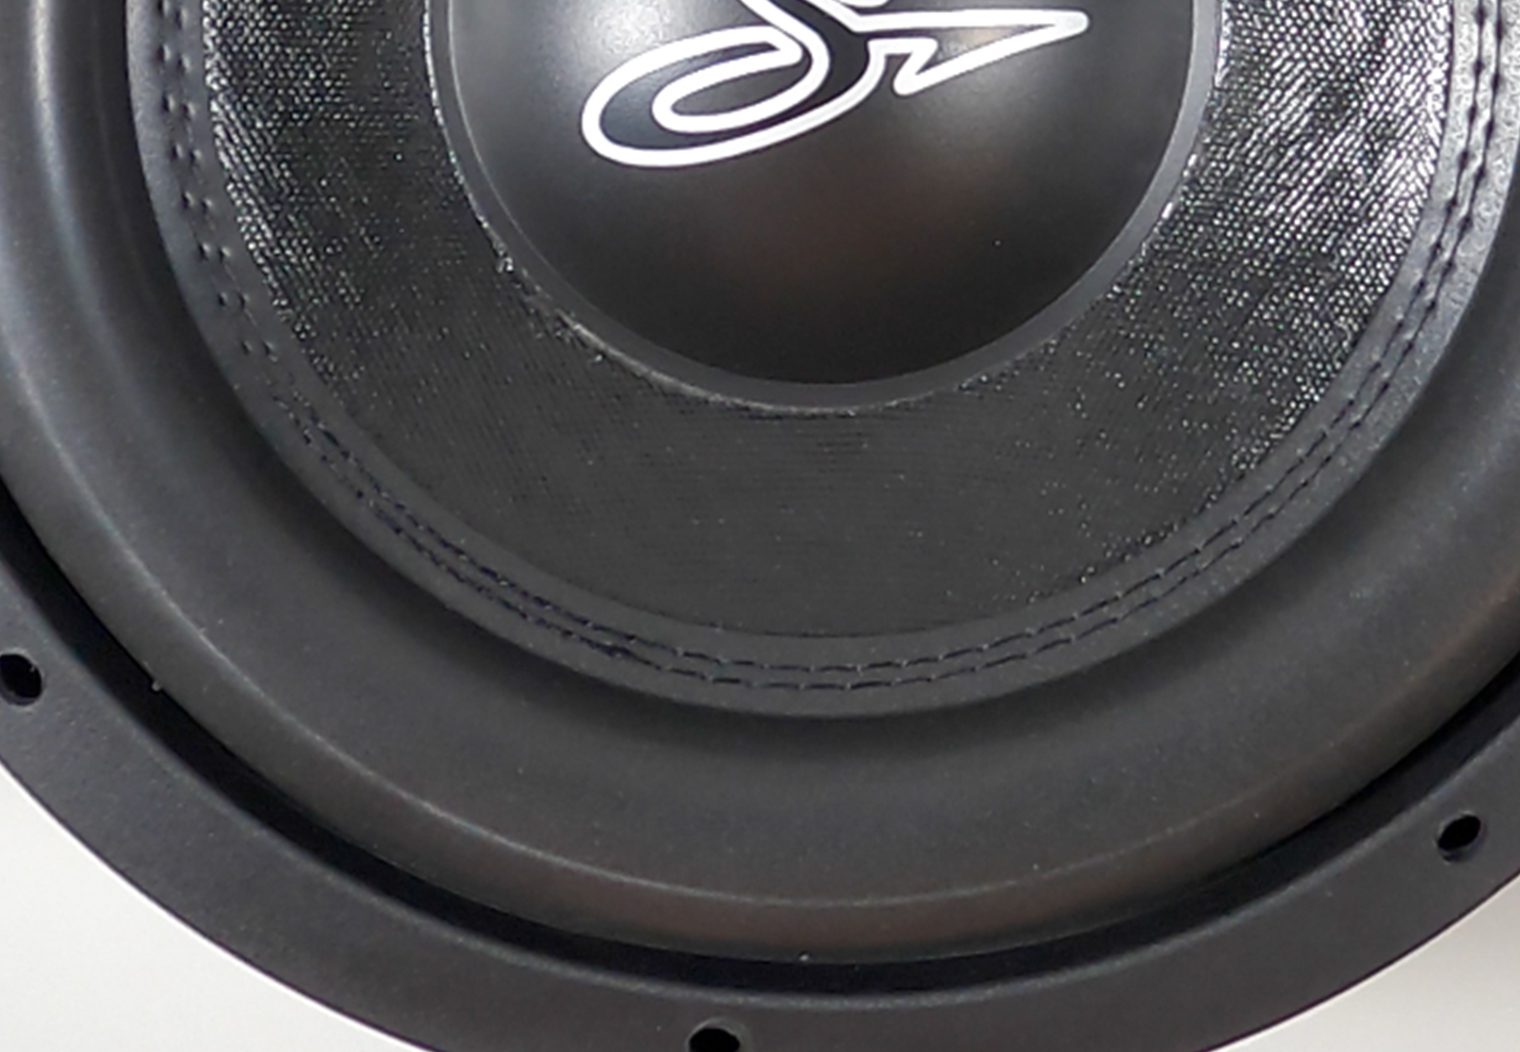
Flip the subwoofer over to the front and you'll see a relatively straight forward subwoofer cone, dust cap and surround. The cone is made from a fiber matrix paper cone. Basically, they use a paper fiber or pulp blend, press it into shape and then add a strong resin to hold it together. Different manufacturers have different blends and techniques to make the cones rigid and durable. As long as it is resin filled or reinforced, normally they’re pretty tough and aren’t susceptible to moisture or humidity.
You can normally get a better look at the pulp/fiber material and thickness when you look at the back side of the cone. When I flipped the sub around I could see that the cone material is thick, although it doesn't look to aesthetically pleasing from the back side so I probably wouldn't use this sub to invert-mount. In general, I think the cone material on the DC2-12D2 is rigid and sturdy. My only concern about paper fiber or pulp material is that they're more susceptible to moisture, spills, water and etc. As long as you don't think you'll be putting damp materials like clothes, jackets, towels, etc on top of the subwoofer you shouldn't have to worry about this.
In case I missed something important, here's a full list of the DC2-12D2 sub features:
- Cast Aluminum Frame
- Ultimate Frame material – minimizes overall resonance and provides accurate sound with less distortion
- 3” copper voice coil
- Black Anodized Voice Coil Former for heat dissipation
- High density ferrite magnet
- CFL³ Technology Voice Coil: 3x more structurally rigid, prolonging the life of voice coil
- MLB Collar Technology: enables micro level bonding with cone & spider for increased strength
- Fiber matrix paper cone to strengthen the rigidity of the woofer’s cone body to minimize the distortion while increasing the handling of high pressure produced in the subwoofer enclosure
- Dual Cap Topology (D.C.T.) for an added layer of distortion reduction
- Linear Surround Technology for high excursion
- High density, wide profile compressed foam surround stitched to the cone
- Magnetic FEA High Efficiency Motor: provides highest possible, efficient motor design
- Thermal Efficient Design via Vented Motor: providing better thermal efficiency, reduces motor compression and extended low frequency response
- Double Looped and Sleeved Lead Wires for High Excursion: reduces wire roping and allows high excursion, increased flexibility and long life
- Push Type Terminals provide consistent tension to the power wire
- Linear Long Throw Dual layered spider Suspension for increased output and power handling
- Coupled top Plate (C.T.P.): Extended magnet field will give voice coil more control for linear sound reproduction.
Other Notable Features
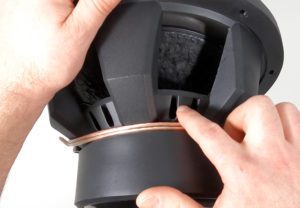
When I pulled the subwoofer from the enclosure, I was pleasantly surprised to see the lengths that Stinger went to improve the structural integrity of the enclosure. There's a ton of internal bracing throughout the inside of the box behind the subwoofer that'll definitely limit distortion and unwanted resonance.
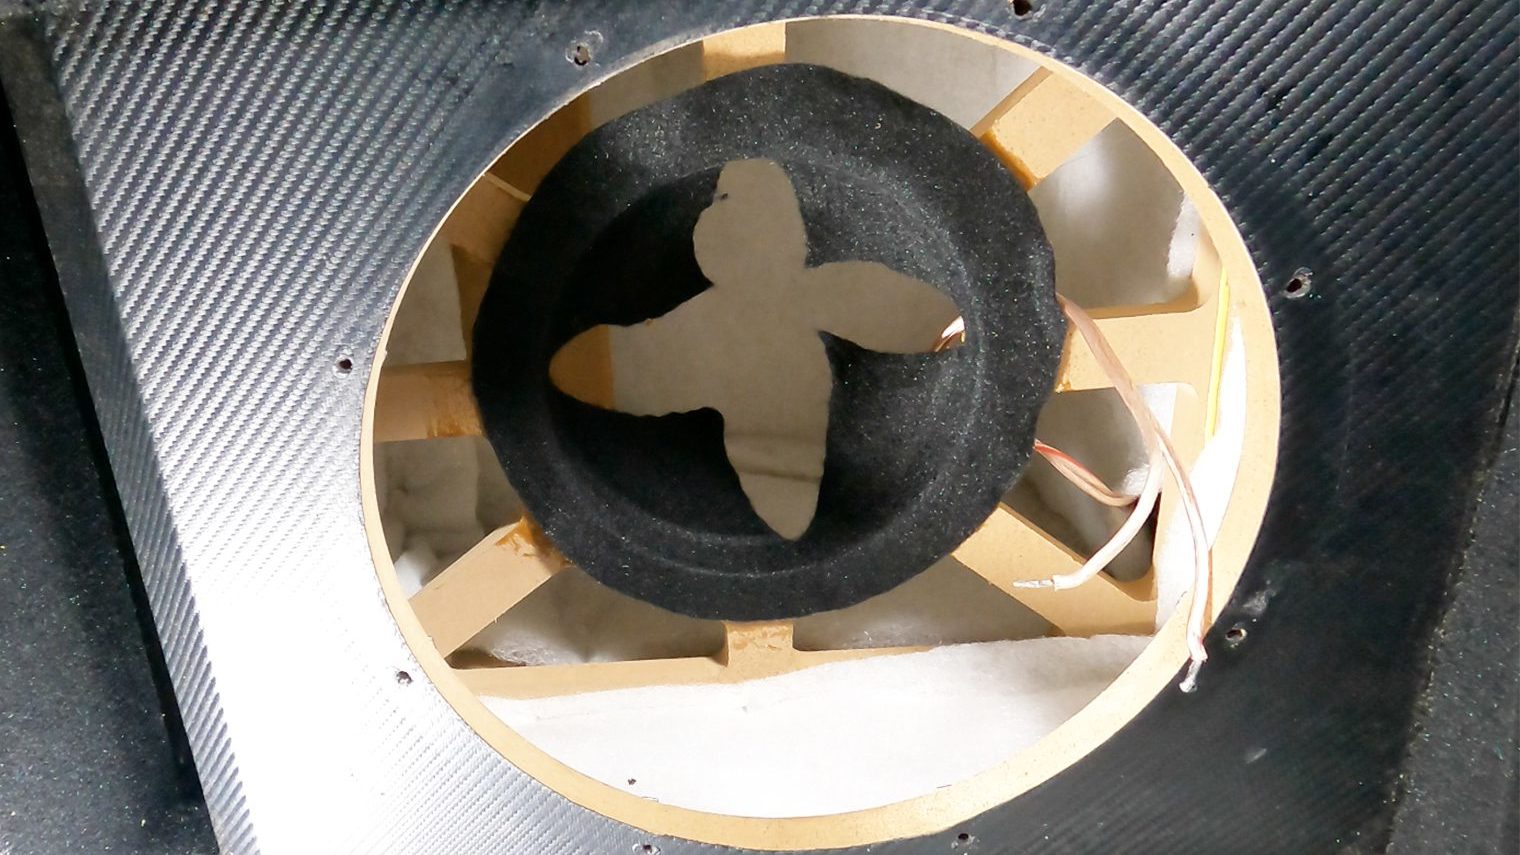
I also noticed that Stinger chose to use some machine screws with machine screw anchors to hold the subwoofer in place. I personally prefer this and is a good sign that the structure and the rest of this enclosure is built to withstand some serious vibration.
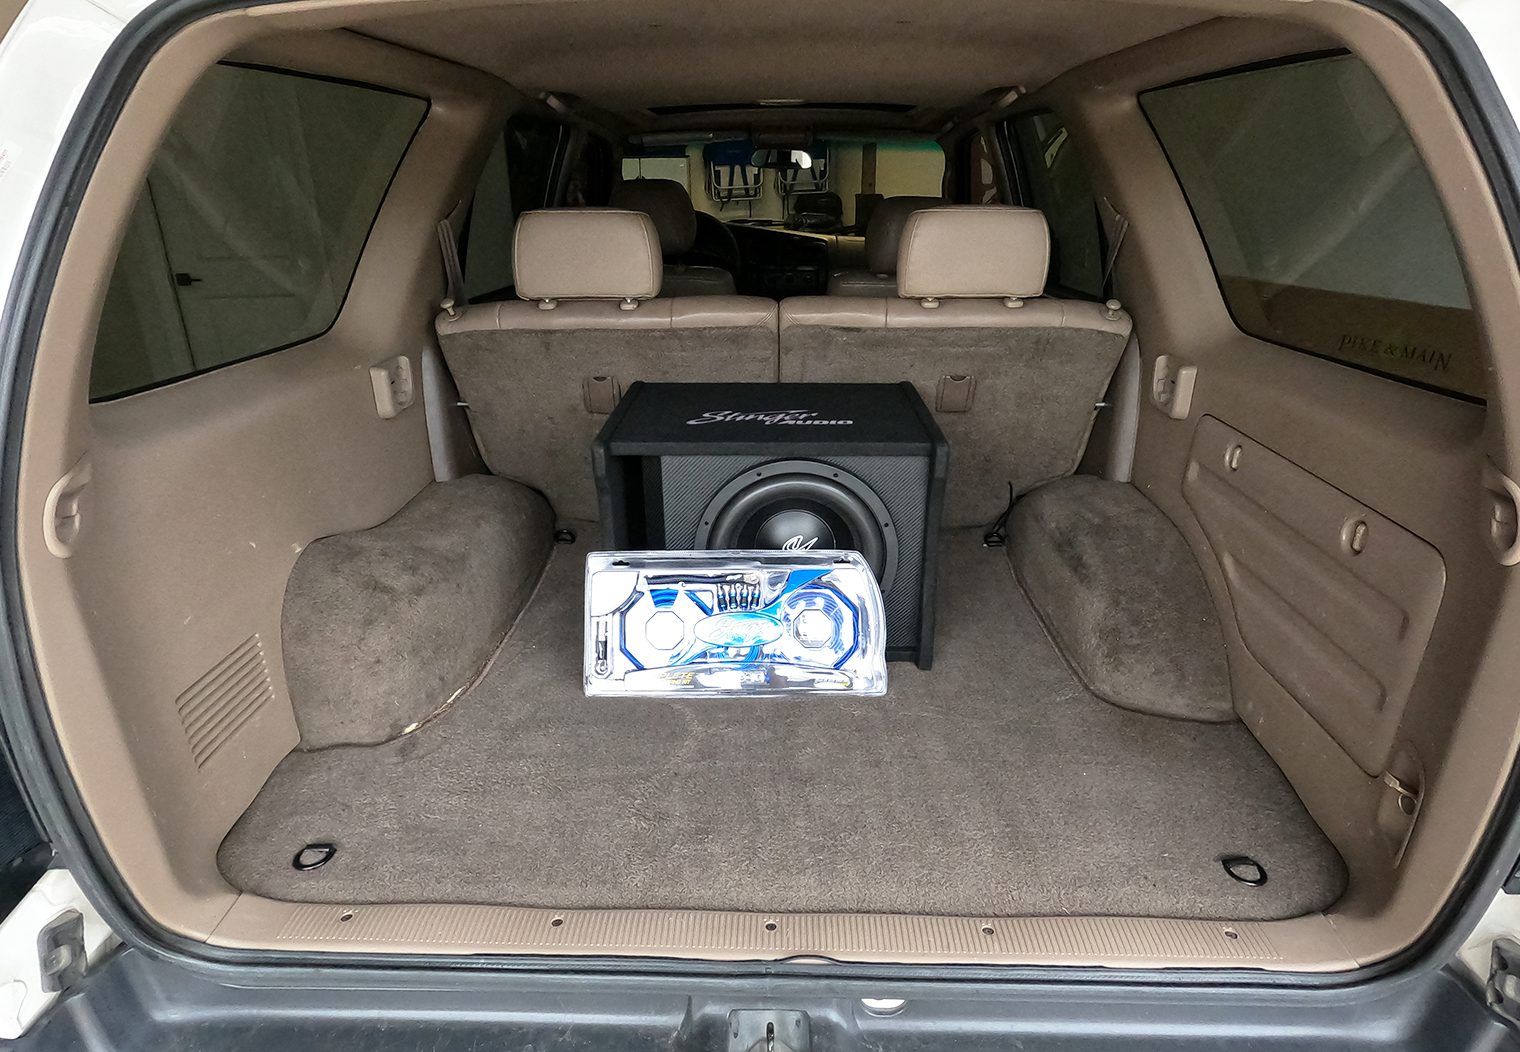
Installing & Listening to the DC2-S12B Subwoofer Enclosure in a Toyota 4Runner
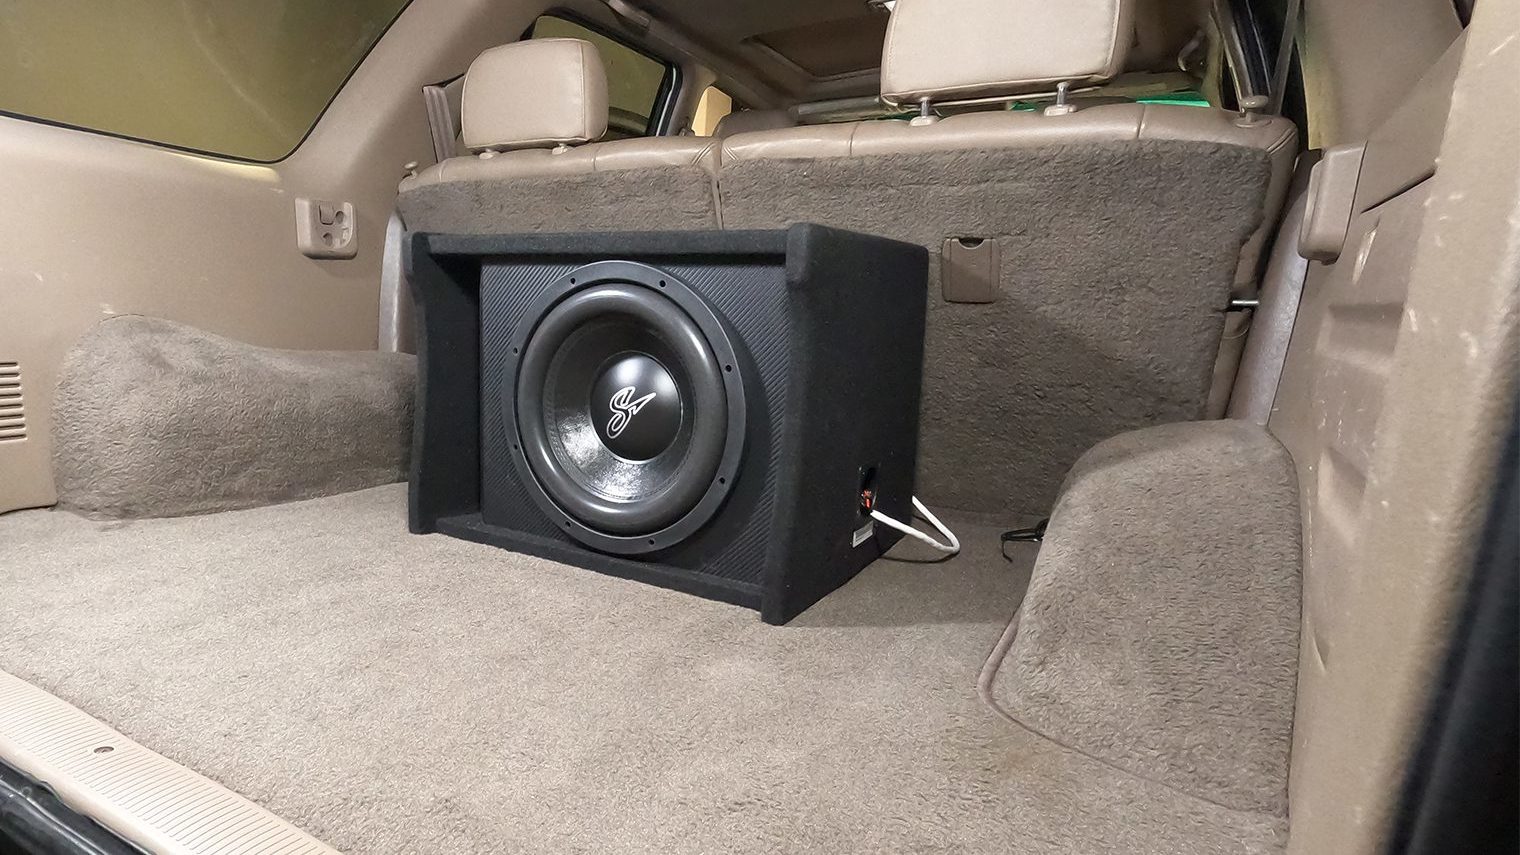
I chose to install this enclosure in a 2001 Toyota 4Runner. The owner already had replaced the speakers and head unit in this vehicle and was looking to add some bass without the need for custom work. Perfect fit for Stinger's DC2-S12B.
Installing the Amplifier
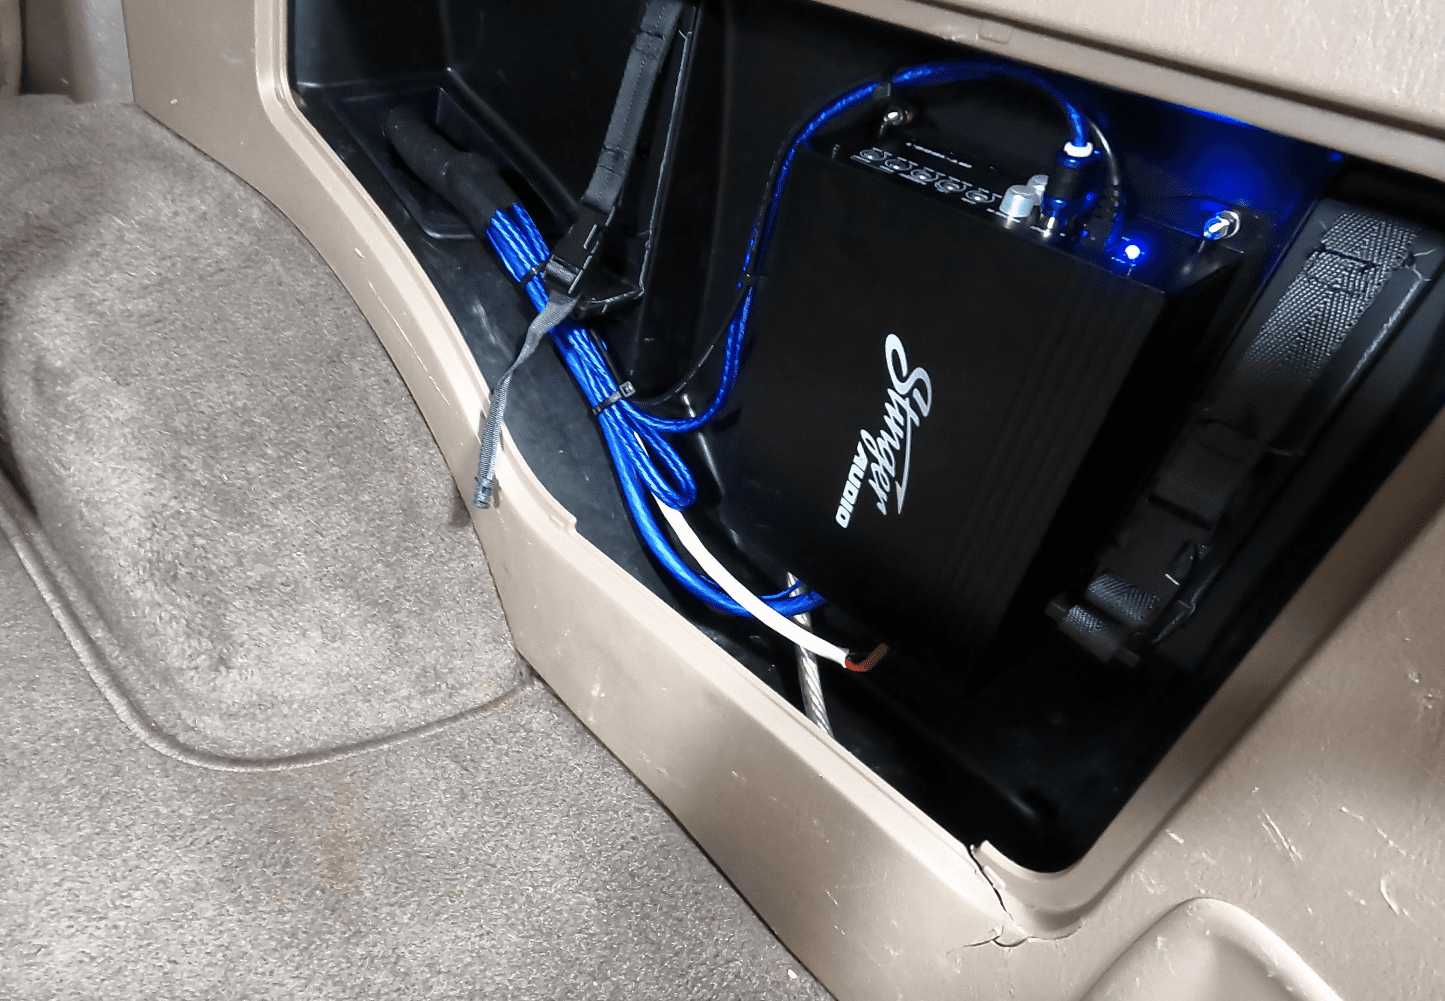
This subwoofer is definitely thirsty, so to match the power requirements for the DC2-12D2 sub, Stinger makes a perfectly matched 1000 watt class D monoblock amplifier – their MT-1000.1. I definitely recommend this amplifier for this setup. And to further simplify the install, I used Stinger's 4GA TRU-SPEC complete wiring kit. This kit includes everything you need to wire up the amplifier and subwoofer – RCAs, Power & Ground Wire, Remote along with the recommended 16GA subwoofer speaker wire.

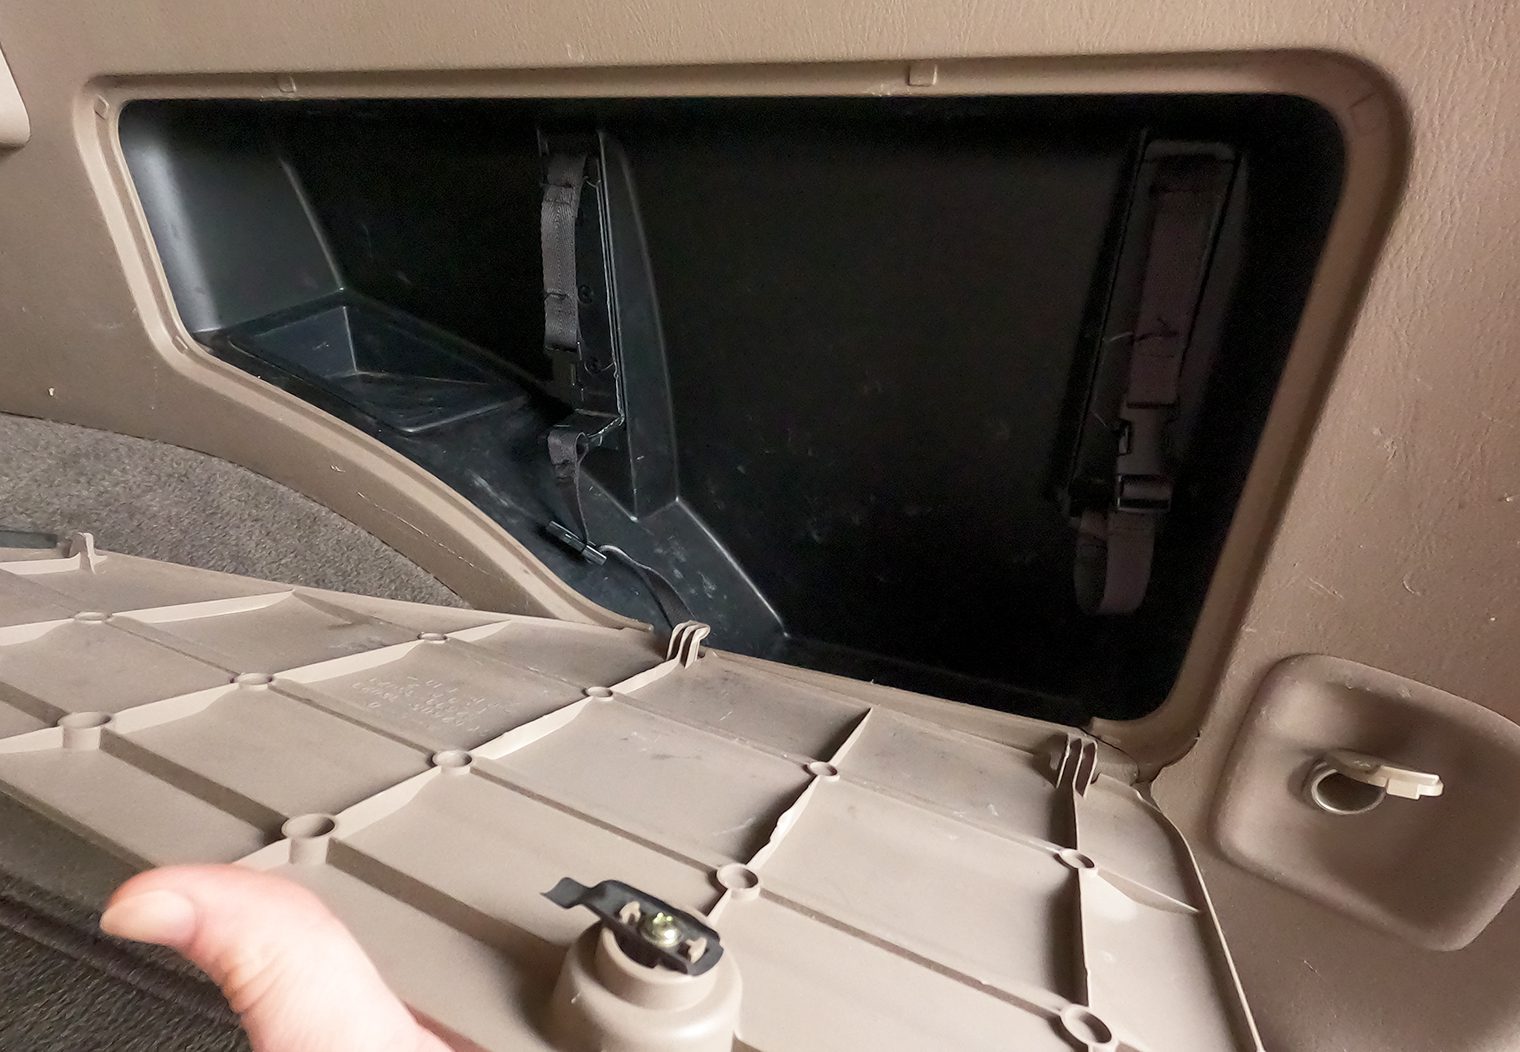
First, I chose to install the amplifier behind the storage panel on the rear passenger side of the 4Runner. The MT-1000.1 is super compact – measuring only ~8″ x 6″ x 2″, so it fit perfectly tucked away in this cubby. I really liked this location – it was very accessible, easy to wire, easy to mount the amplifier to and it hid the amplifier nicely for a clean look.
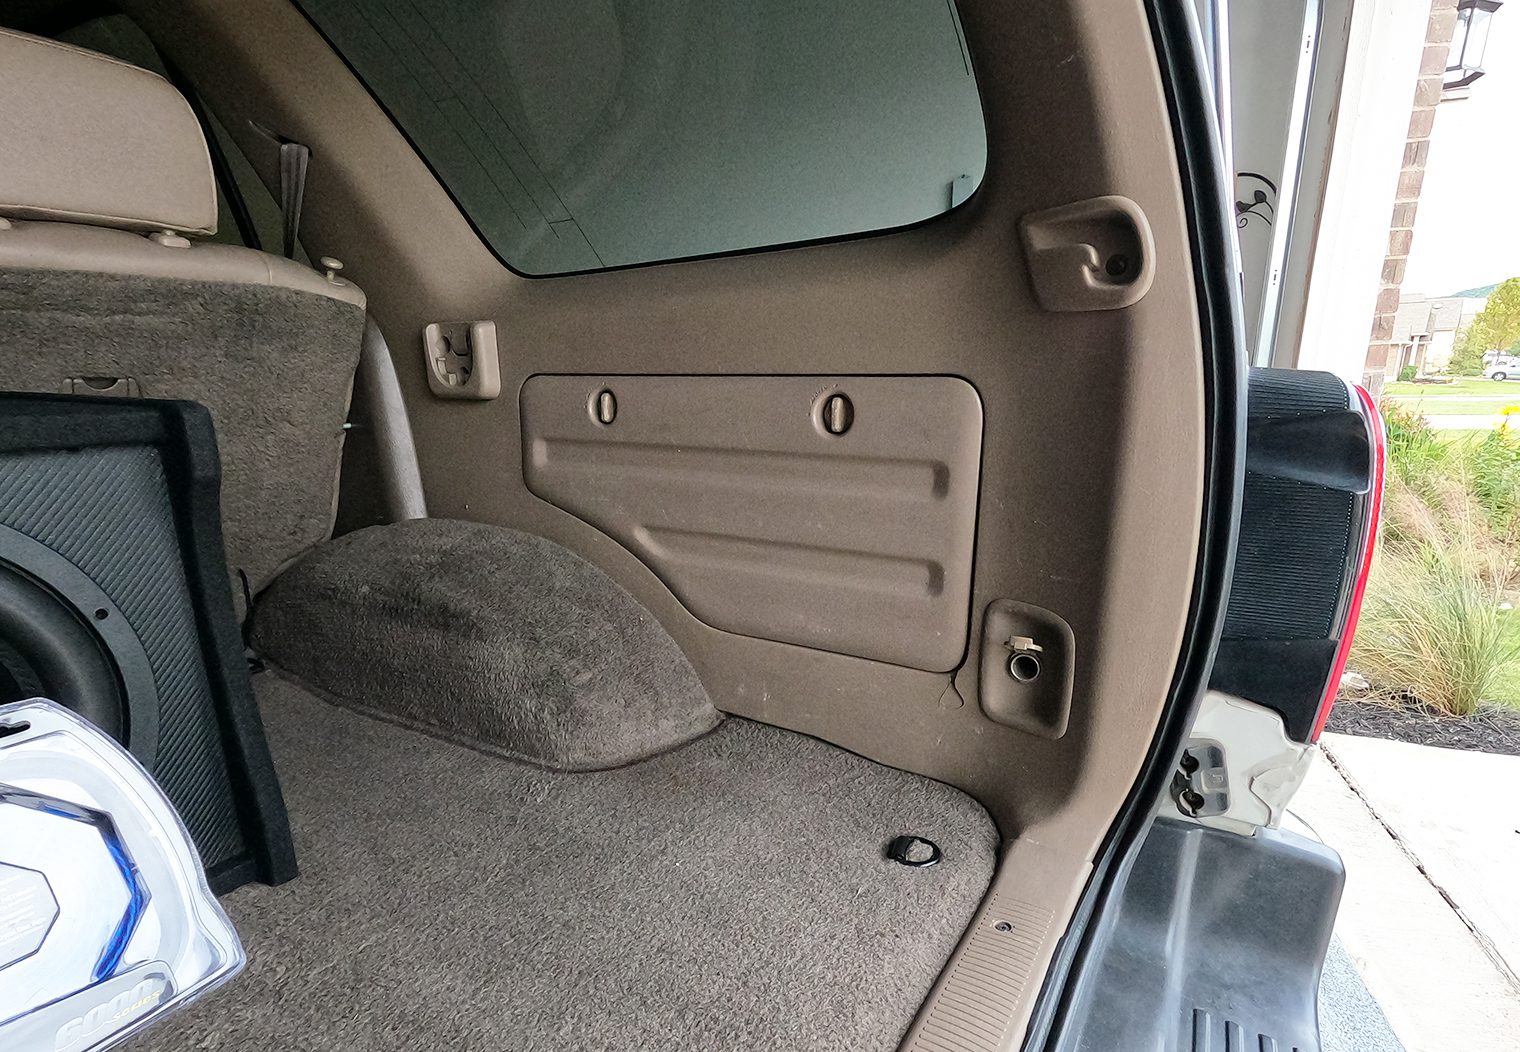
I used machine screws to mount the amp in the cubby, making sure to double nut the screw to prevent vibrations from loosening the nut. An alternative would just be to use a nylon insert lock nut as well.
Once the amp was mounted, I could re-mount the panel and begin working the wire through the panel to the amplifier. I cut a 1″ hole through the snap-in trim piece at the front of the panel and then ran a fleece electrical tape-wrapped loom (which housed all of my wiring) through the drilled hole. Then, with everything in place, mounted and wrapped I could cut some of the wire to length and wire up the amplifier.

Mounting the Subwoofer Control Knob
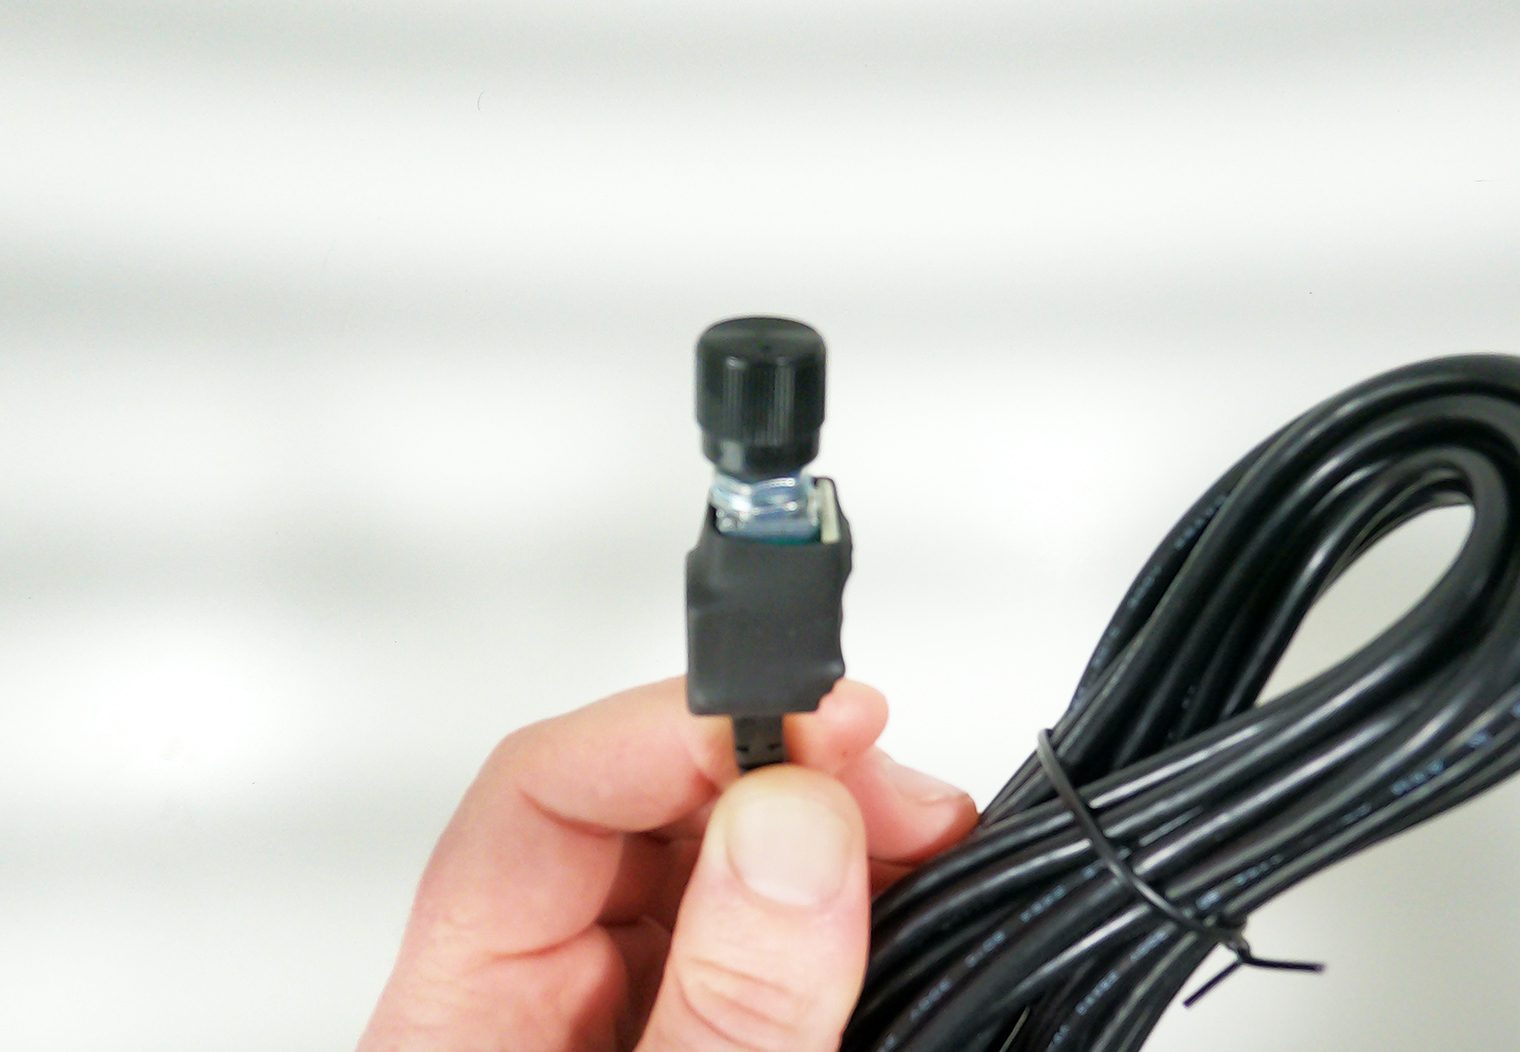
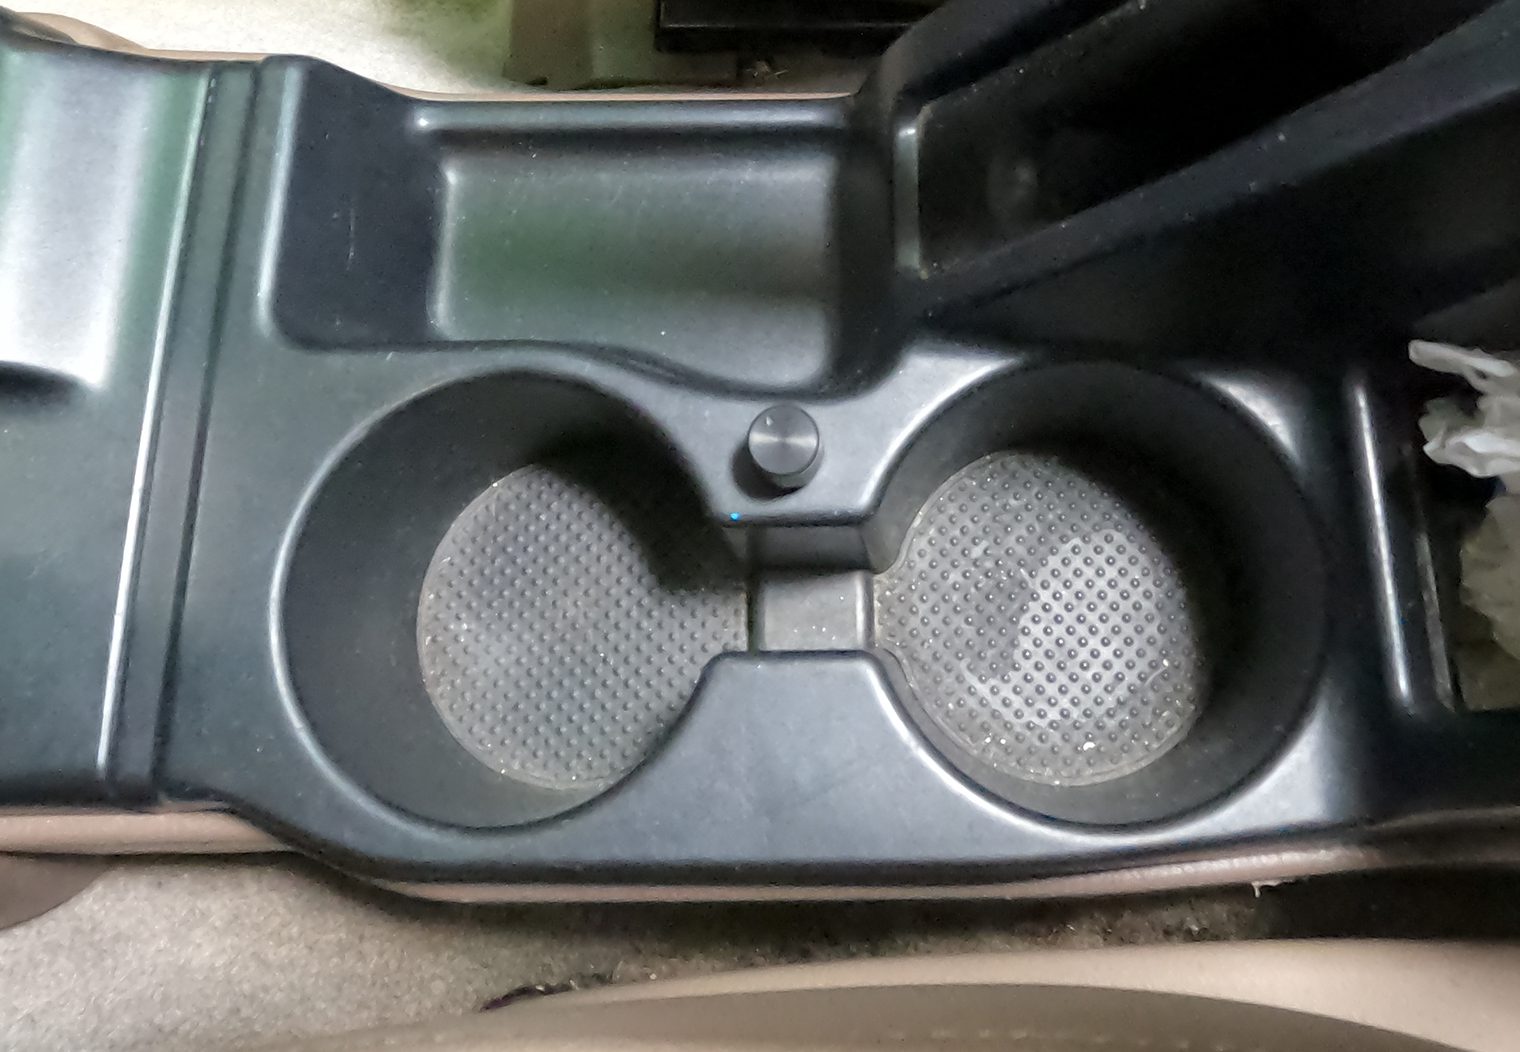
Stinger's MT-1000.1 monoblock also came with a wired subwoofer control. This is absolutely necessary for a setup like this so that you can easily match the subwoofer volume to the song you're listening to.
I chose the center console for the location of this subwoofer volume knob. It's out of the way, easy to access for the driver and easy to wire straight under the carpet through to the console. The black knob also went well with the black trim.
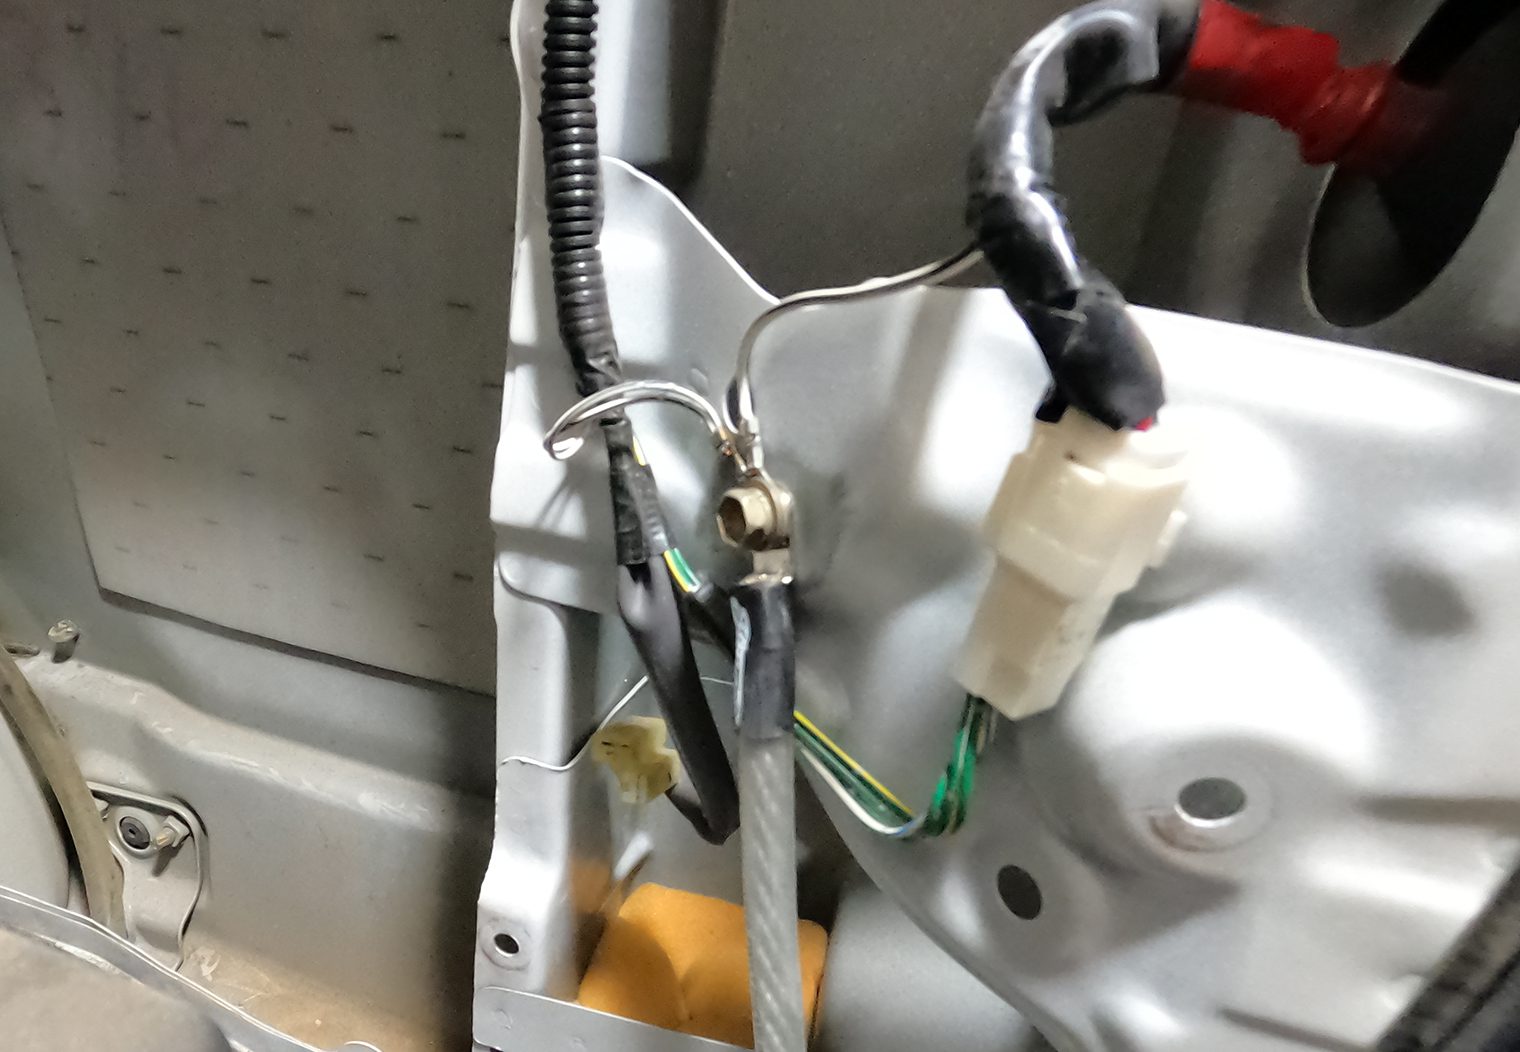
Plugging in the Sub
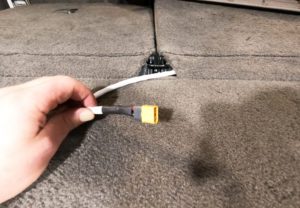
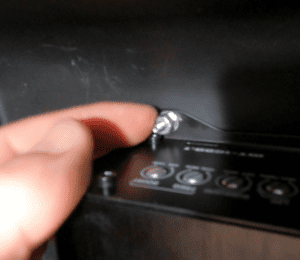
For subwoofers like this Stinger, I always like to further simplify the removal and re-installation for cases where I might need the trunk for a large item. The DC2-S12B does have push terminals which simplifies the process of unplugging the box but that would just leave exposed, potentially powered wire in the trunk. I like to use XT60 plugs for this use case. It allows for simple unplug and removal of the sub without leaving exposed wire in the trunk.
Tuning up the Amp and Sub
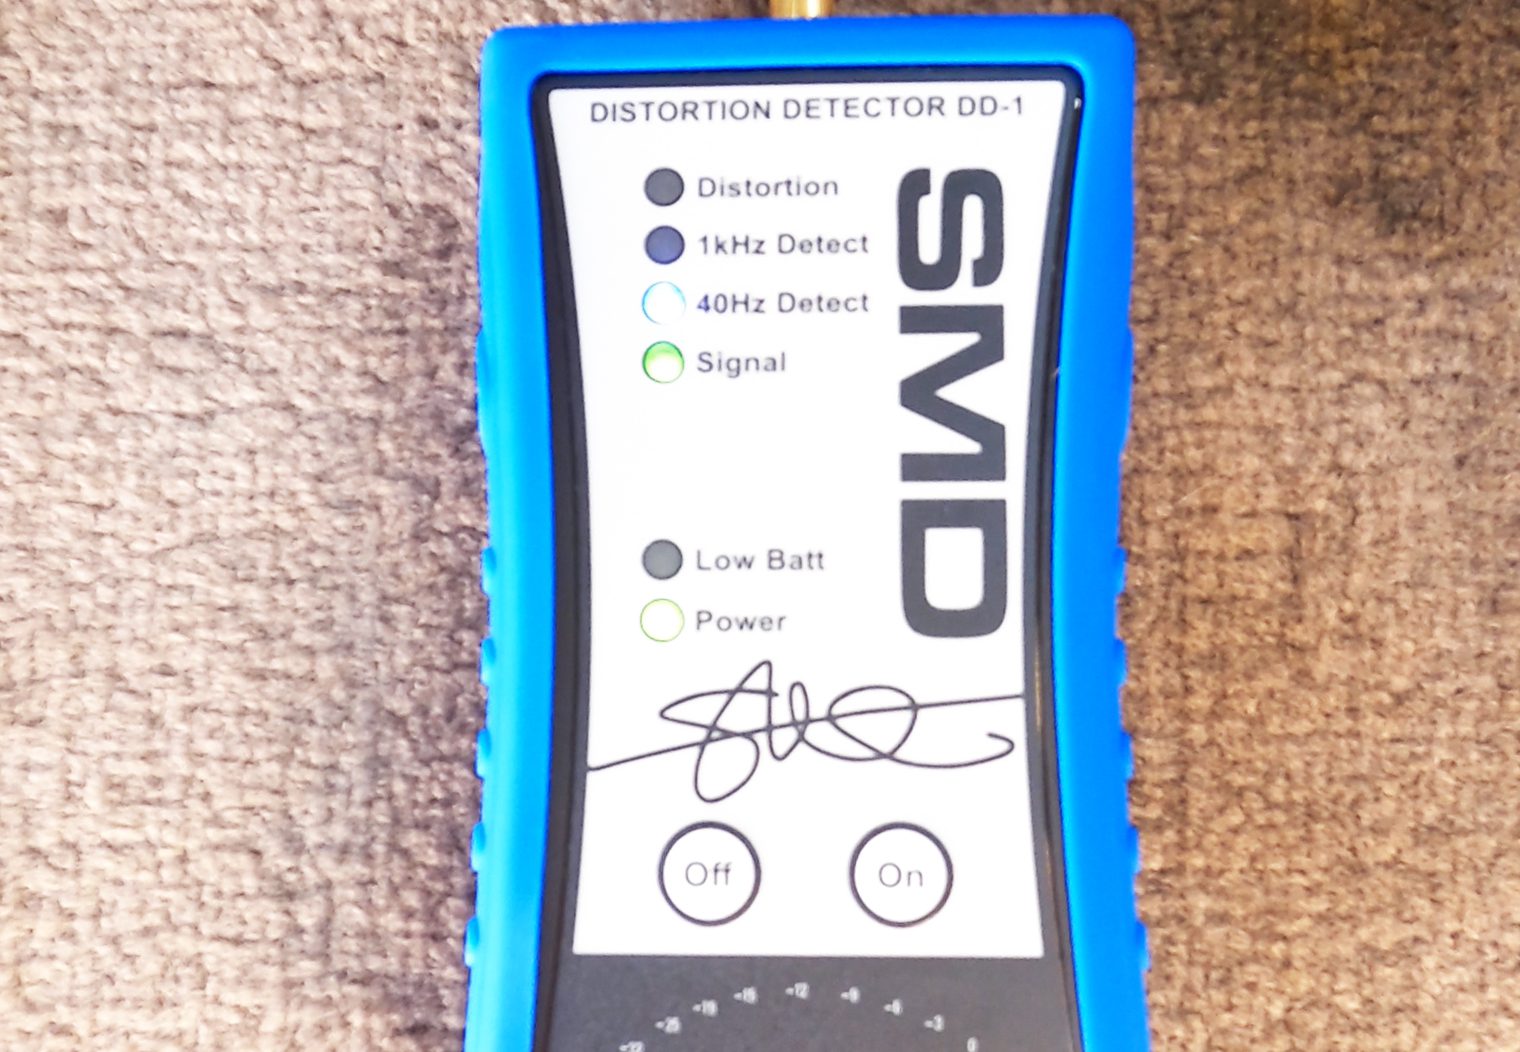
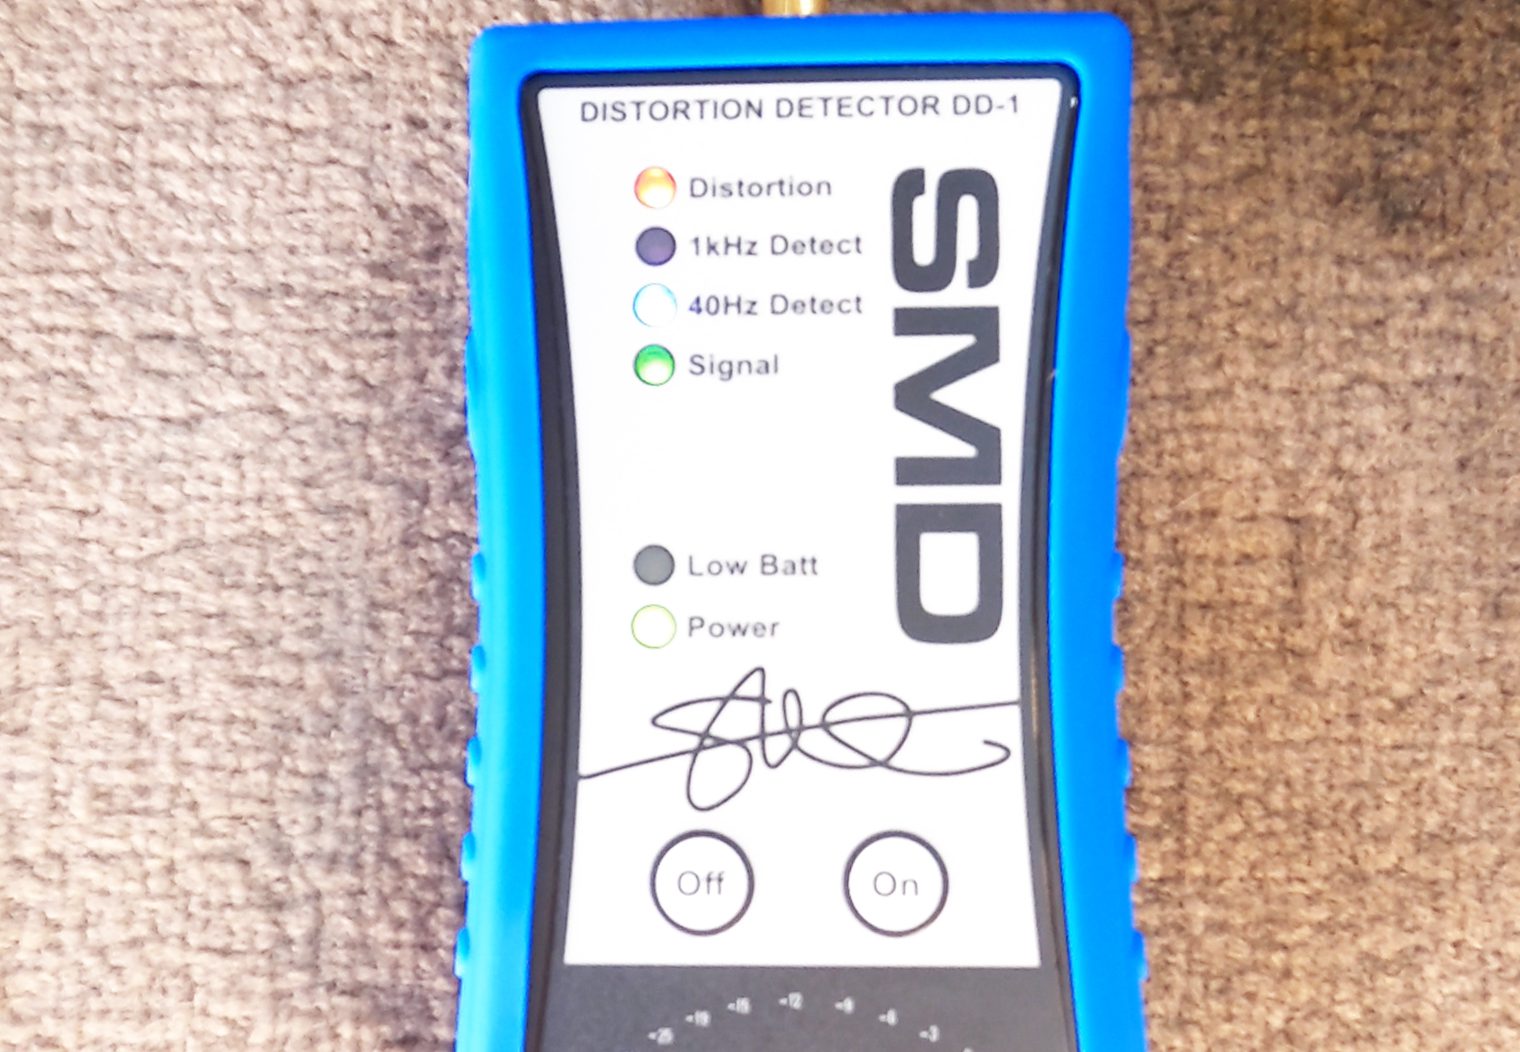
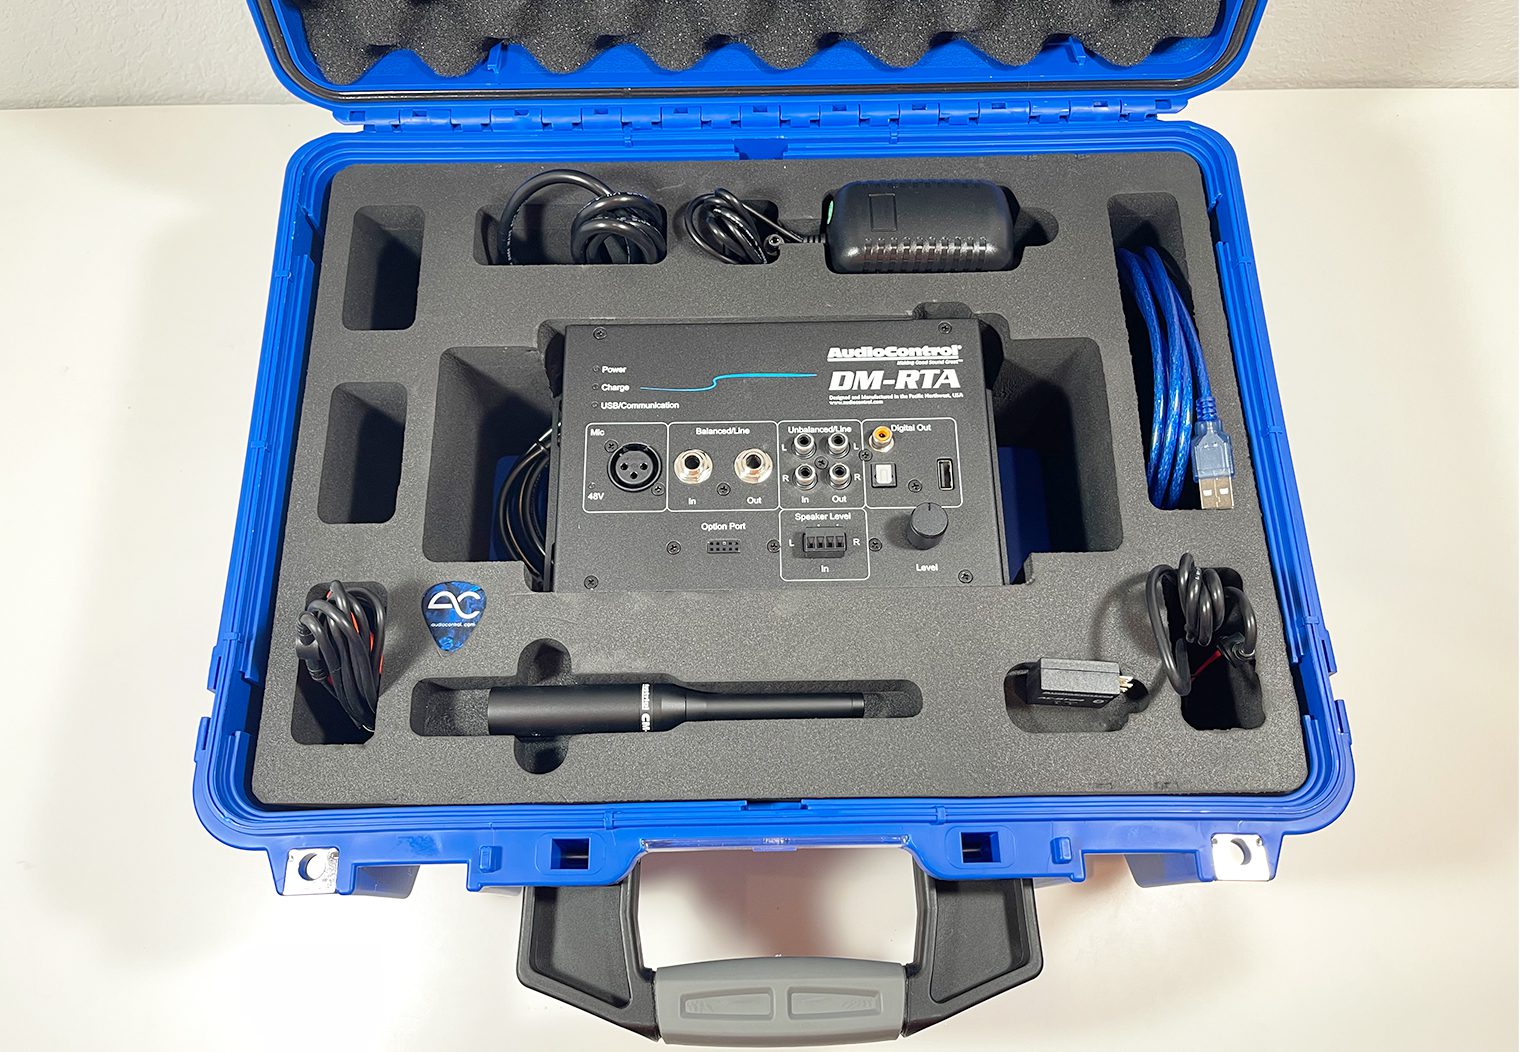
With the amplifier installed and wired, and the subwoofer plugged in I moved onto tuning the amp gains. To do this, I used the SMD DD-1 distortion detector and a 40hz signal tone from my phone.
The SMD makes it an easy task to identify exactly what point your amplifier will start to distort the signal to a speaker or subwoofer. To use this type of device you need to make sure that:
- The subwoofer or speaker that you're tuning isn't connected. So I unplugged the Stinger sub using my XT60 plugs.
- The other speakers in your system are either outside of the crossover limits that you have set (in my case, all of the other speakers in my system did not play frequencies lower than 100hz) or are disconnected as well.
With the head unit turned up to about 90% volume, all of the other amplifier configurations zeroed out and the test tone playing on my phone, I slowly turned the amplifier gain until the SMD recognized distortion. Then, I backed the gain off again until the detector did not register any distortion. By setting the amplifier gain this way before I began playing music I could ensure that I would not damage the subwoofer with a distorted signal.
Now I'm ready for the sound test!
Decibel & Sound Test
It wasn't a surprise that, with a 1000 watt RMS rating, the DC2-S12B would be loud. And with Stinger's MT1000.1 amp, I was confident that I was going to get the most out of the setup. After listening for the first time, I wasn't disappointed. It's definitely up there with the top 5 loudest 12 inch subwoofers I have heard.
The ported design really plays a role here too, and does a great job at maximizing the output. It also makes it a fantastic choice for top-down vehicles like your Wranglers, Rubicons and Broncos. After playing a couple songs between rock, EDM, rap and pop I was impressed with the output but where this sub really shines is the high volume, bass heavy songs.
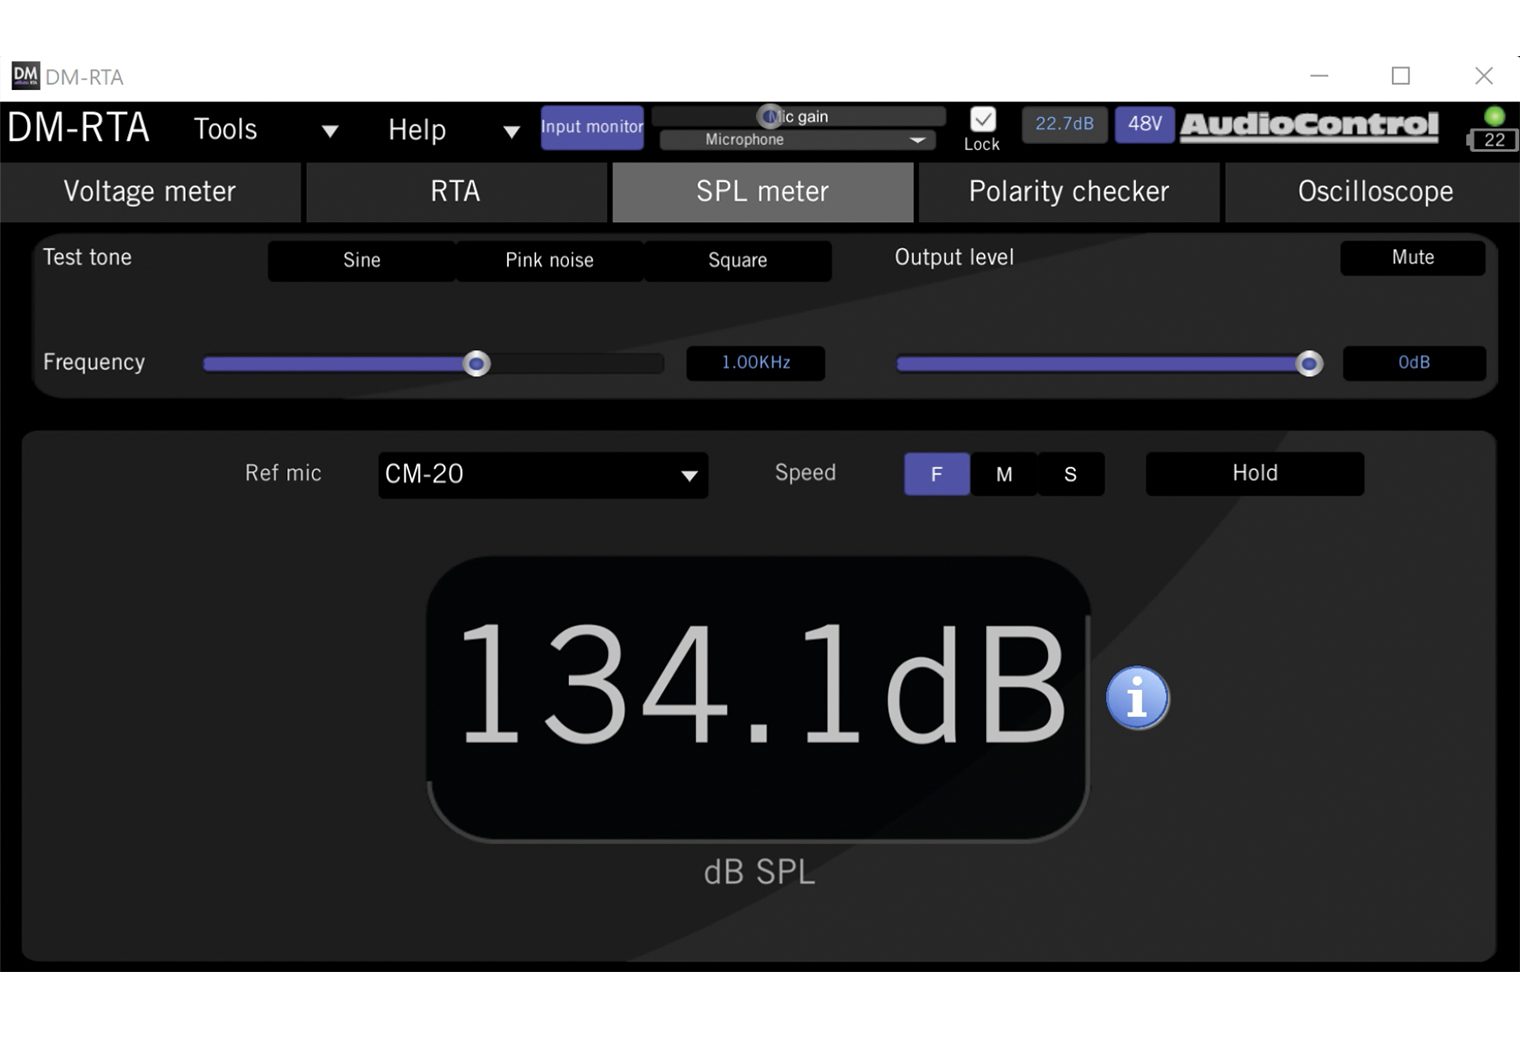
To measure the exact decibel output of this subwoofer, I pulled out my AudioControl DM-RTA real time analyzer and mic. Using the SPL meter tool on the DM-RTA desktop app, I cranked up the volume for a few of my favorite bass-heavy songs to get a good measurement. The output was impressive for a single 12″ sub. I registered 134.1dB on the meter at its peak from the listening position in the front driver seat.
Conclusion
I'm impressed. Stinger's DC2-12D2 12″ slams in this enclosure setup. And with a 134+ dB measure on the DM-RTA's SPL meter, the DC2-S12B is definitely among the higher output single 12″ subs I've tested.
I also thought the enclosure was very well constructed and supported, and the carpet/carbon vinyl upholstery looked great. The enclosure is pretty large though, so I recommend having a quick-release or plug like the XT60 that I wired to easily remove the enclosure if you think you'll ever need the trunk space. All in all, if you're looking for a 12″ subwoofer setup that's easy to install, easy to remove and'll pump out a ton of bass, the DC2-12D2's a great option!

This is the most clear, concise, easy to follow and understand product review I’ve ever read, as well as being a complete, detailed step-by-step installation manual with invaluable knowledge, tips and suggestions that can only possibly be attained through the time and experience necessary to understand the car audio field so thuroughly that they are capable of creating a review that make the process so simple to follow and understand that a complete novice with no experience is able to successfully complete the entire install on the first try using nothing more than this review as a guide. I appreciate your attention to detail and the wisdom you included in your review. Those extra tips and suggestions were the keystone to my ability to complete the installation successfully. I appreciate you taking the time to share your knowledge with the public, free of cost. The internet was a Godsend for anyone with a thirst for knowledge and started as an endless resource of factual information about any subject you cared to learn about. It’s impossible to find truthful information in a world where everyone and everything is for sale. Thank you for being a breath of fresh air for those who genuinely want to learn how something is done effectively.