In this article: I'll unbox and review two of Sony's new Mobile ES amplifiers – the XM-1ES and XM-4ES. I'll pull them out of the box and give you a closeup look at the terminals, inputs/outputs and the control panel and I'll review all of their key features including channel configurations and signal summing.
Sony's Mobile ES lineup was introduced in 2021. We covered the release, reviewed some of the Mobile ES speakers and even installed a custom stereo on a VW GTI with them. They're Sony's flagship automotive audio products, tailored towards the audio enthusiast. So they are high performance, high output products. Definitely not an entry level series.
They’ve been continually adding new products to the Mobile ES line as time goes on. The latest addition to the lineup is three new amplifiers and a pair of 12 inch subwoofers. I was lucky to get my hands on two of the new amplifiers (thanks Sony!) – the XM-1ES monoblock and the 4 channel XM-4ES. There’s also a 5 channel that is a part of the lineup, l but I don’t have that available to unbox right now. This review, however, is still very relevant to those who are looking at the 5 channel XM-5ES.
So in this review, I’ll unbox these two amplifiers and walk you through their key features, including some of the control panel functionality, terminal design, signal summing and so on. Hopefully by the time you finish this review, you'll have the information you need to decide whether the Mobile ES amps are for you!
Unboxing the Mobile ES Amplifiers
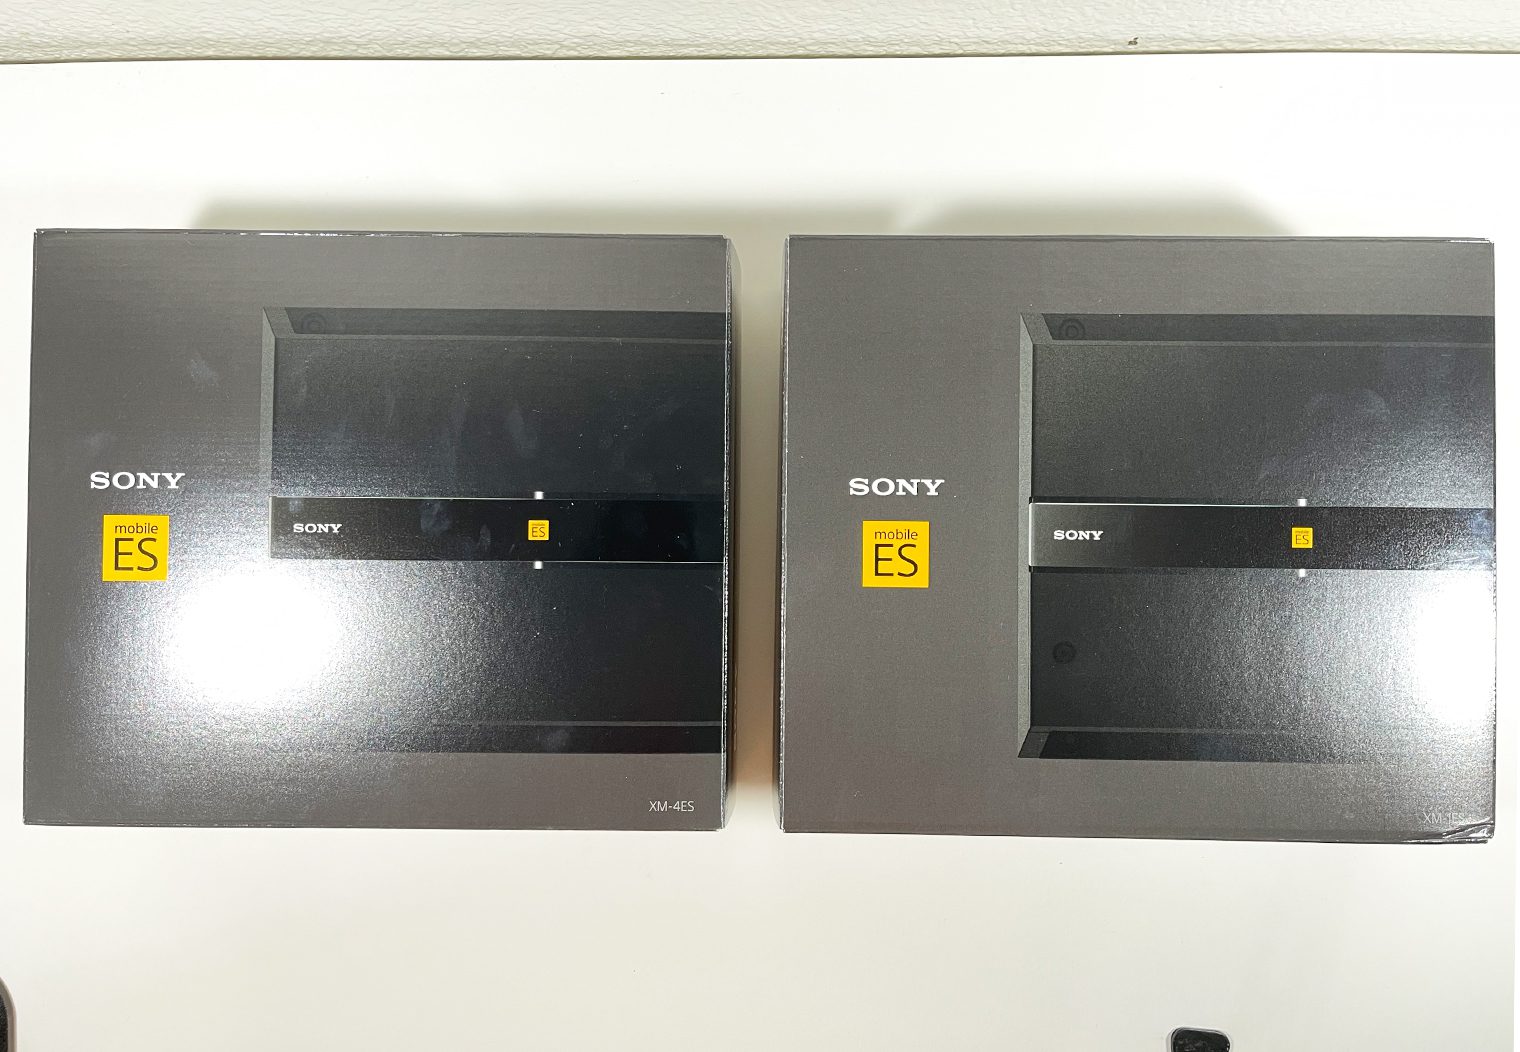
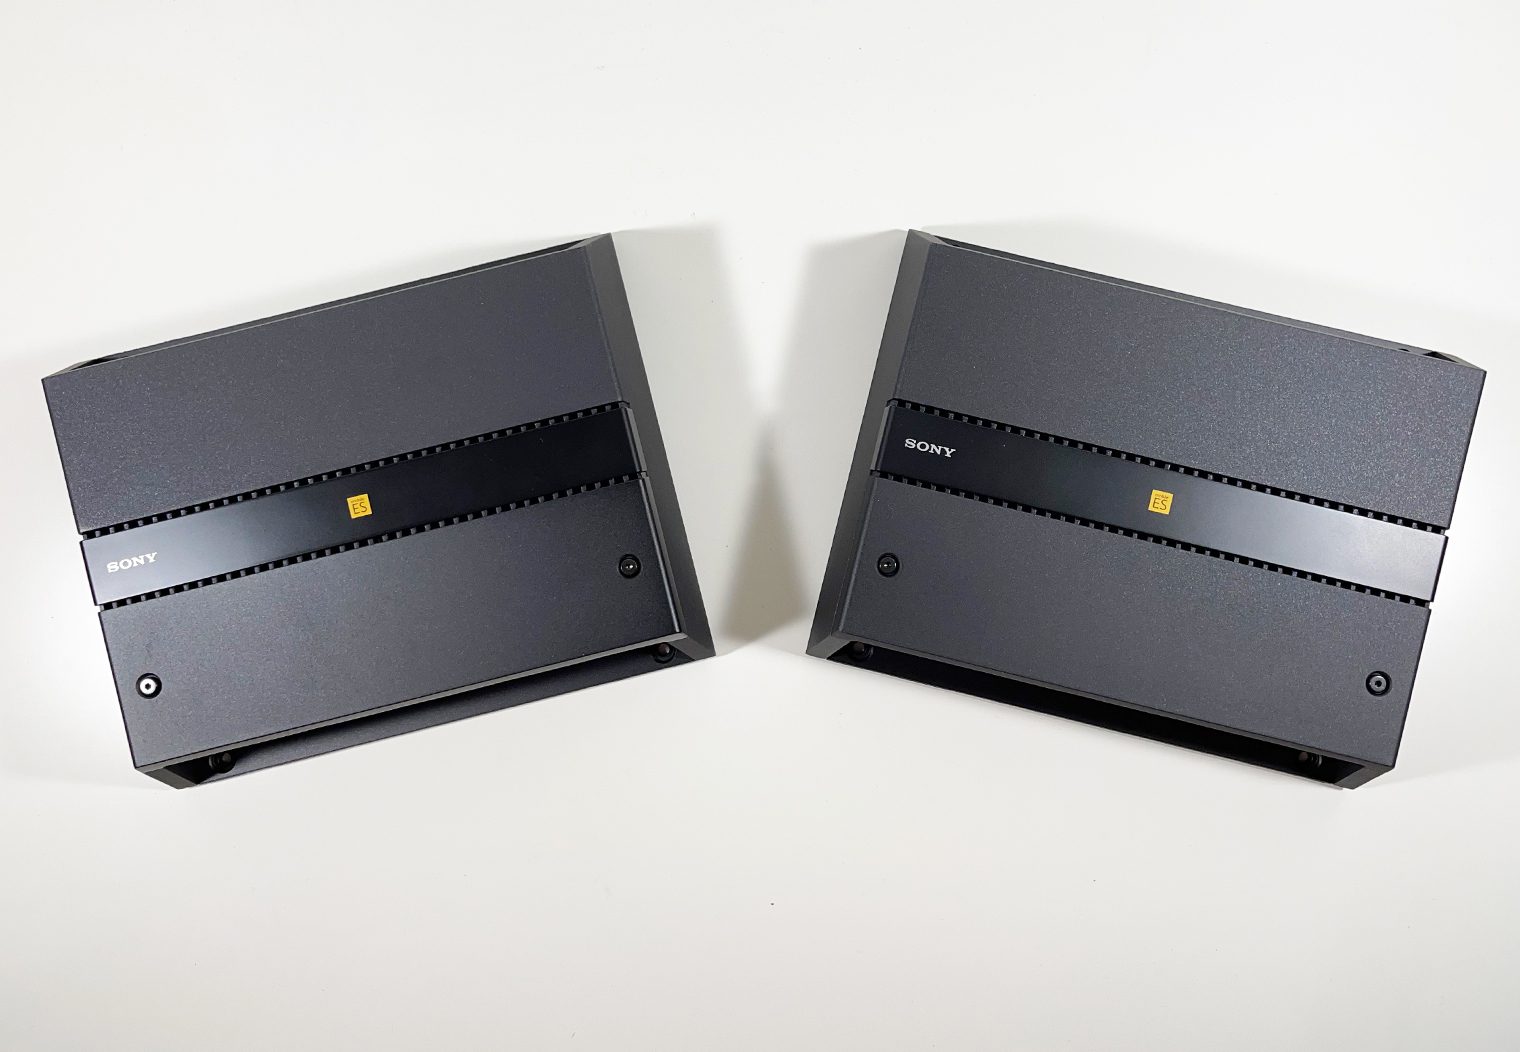
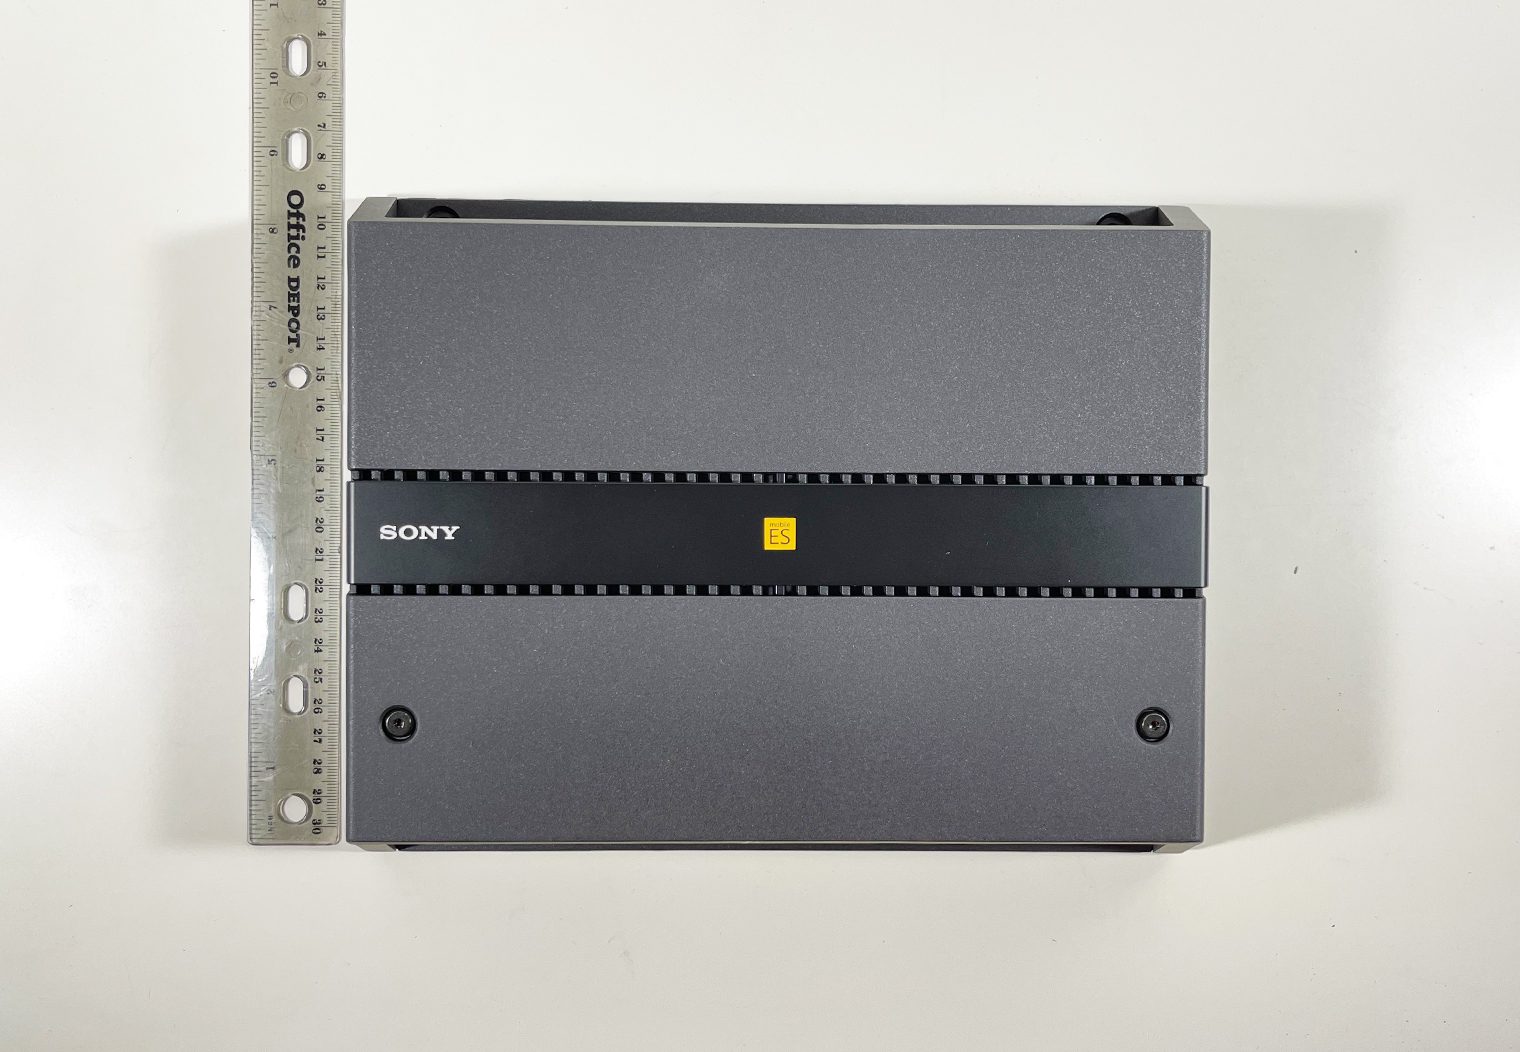
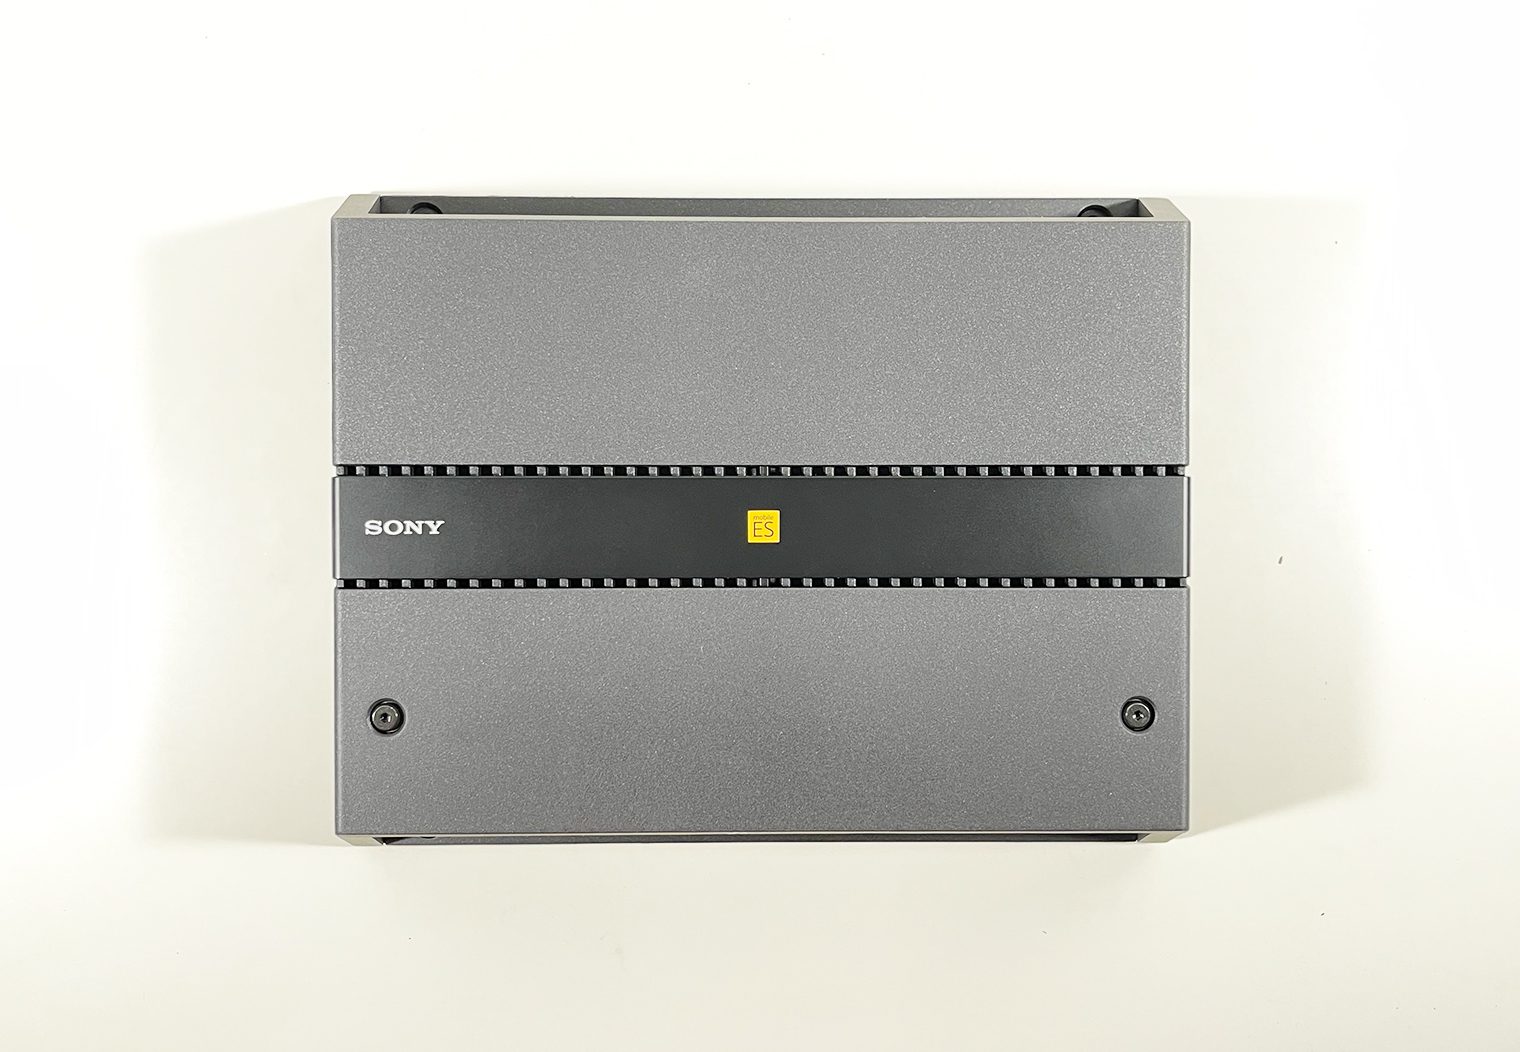
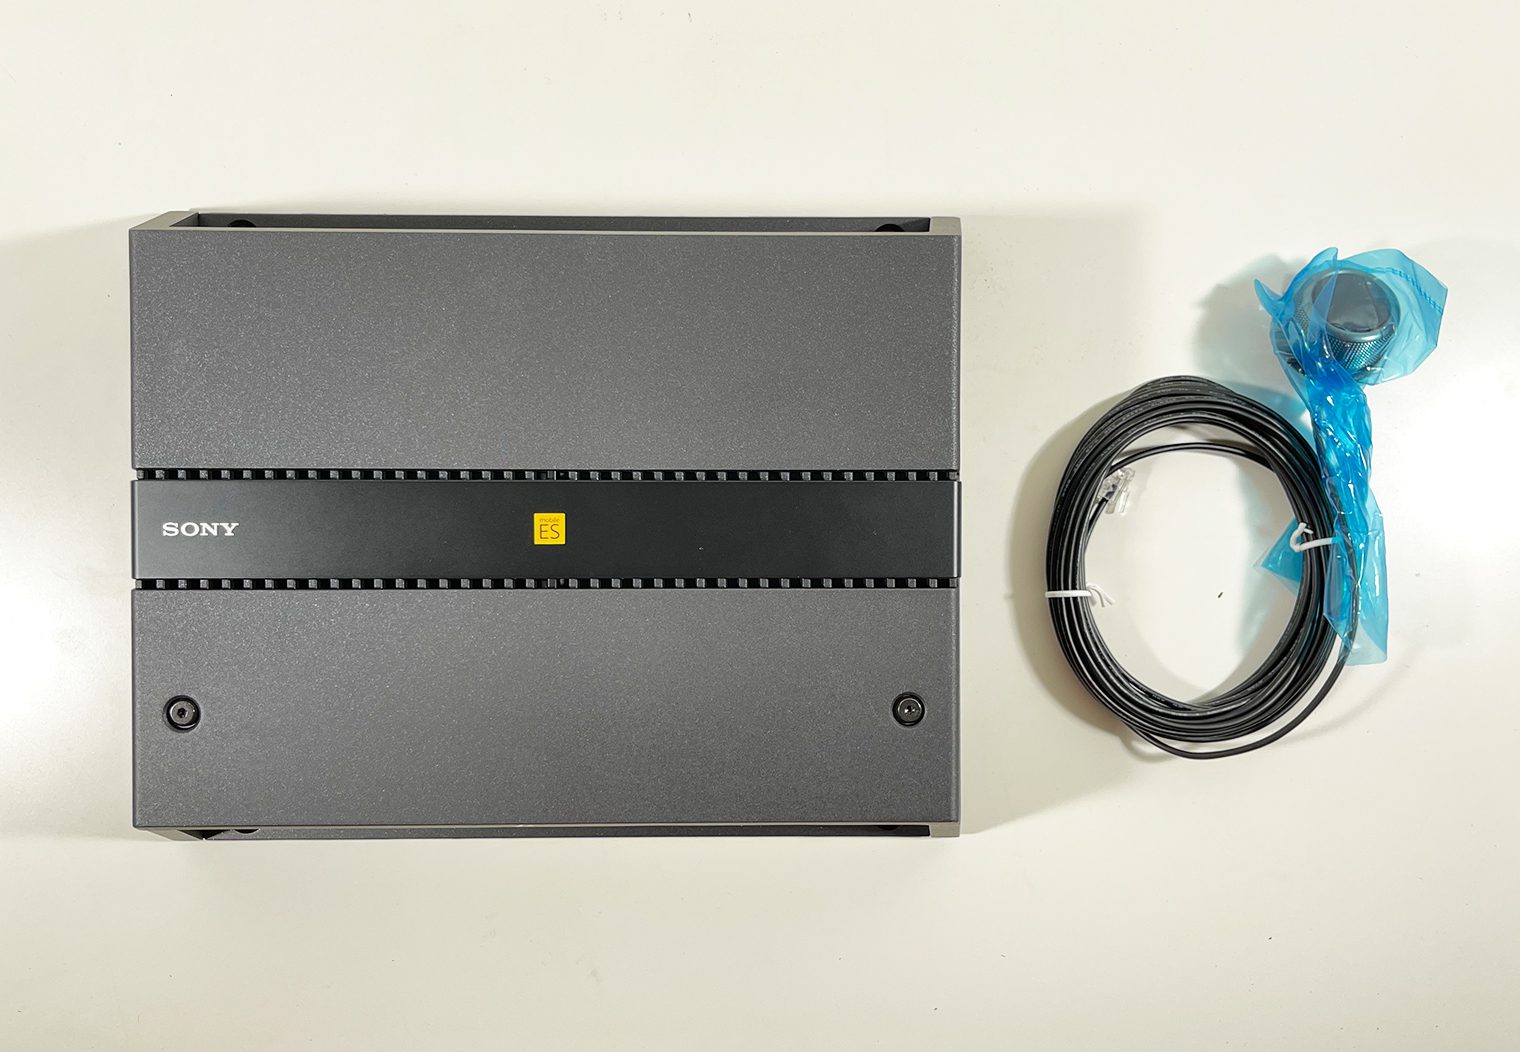
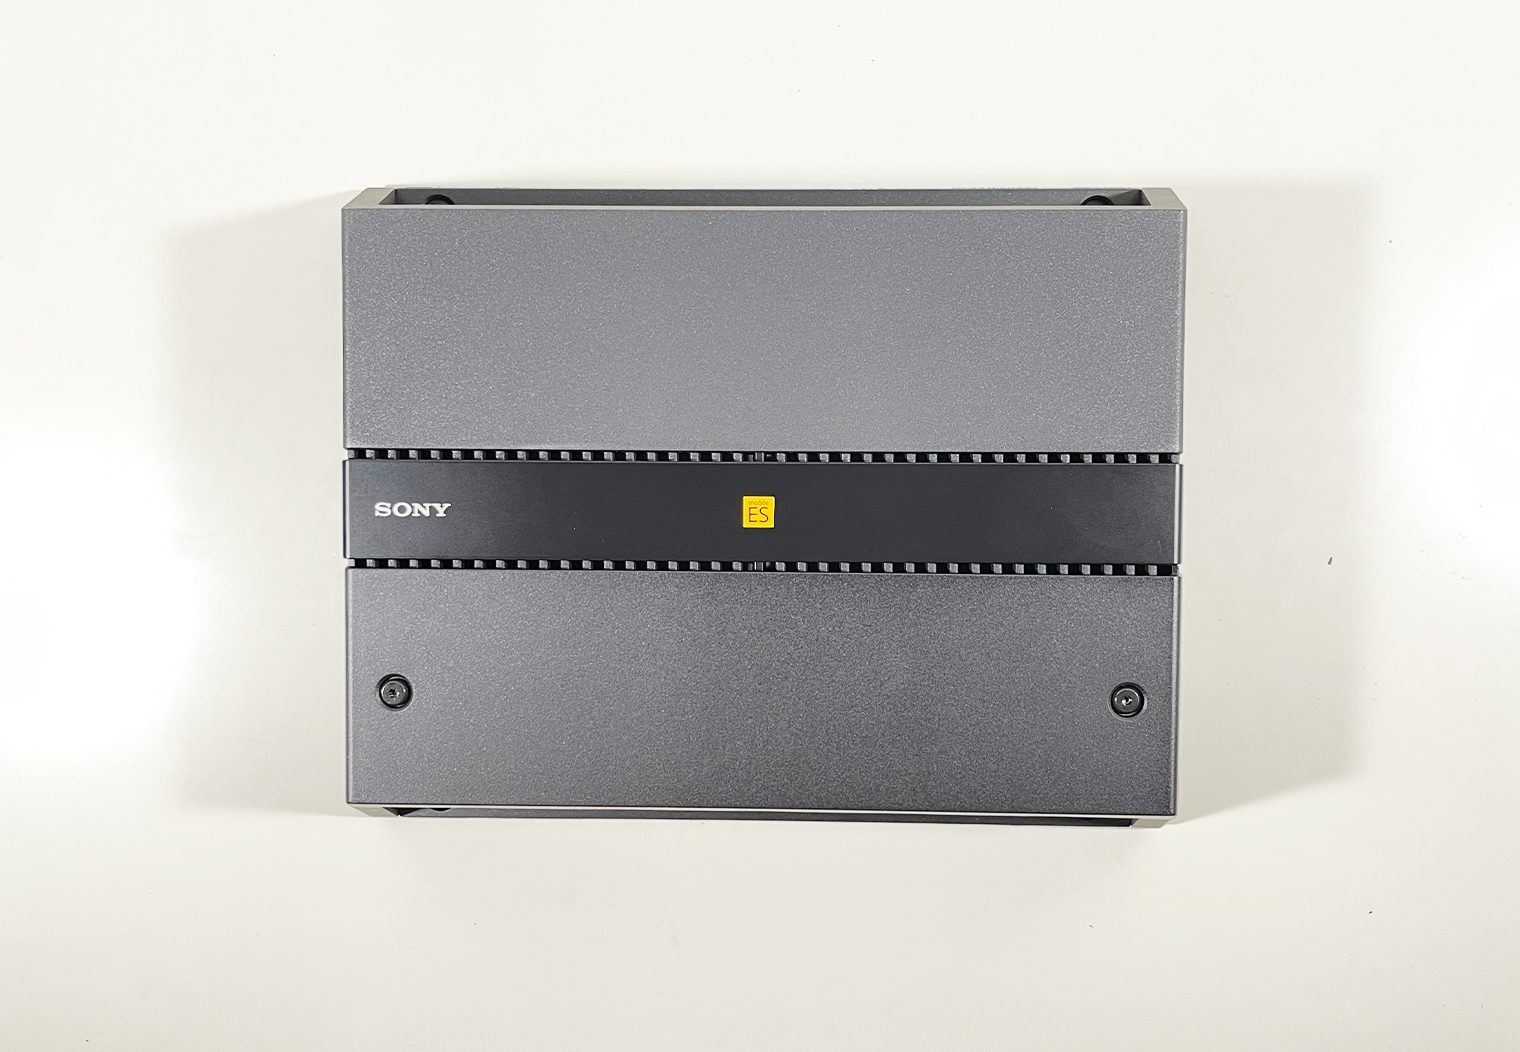
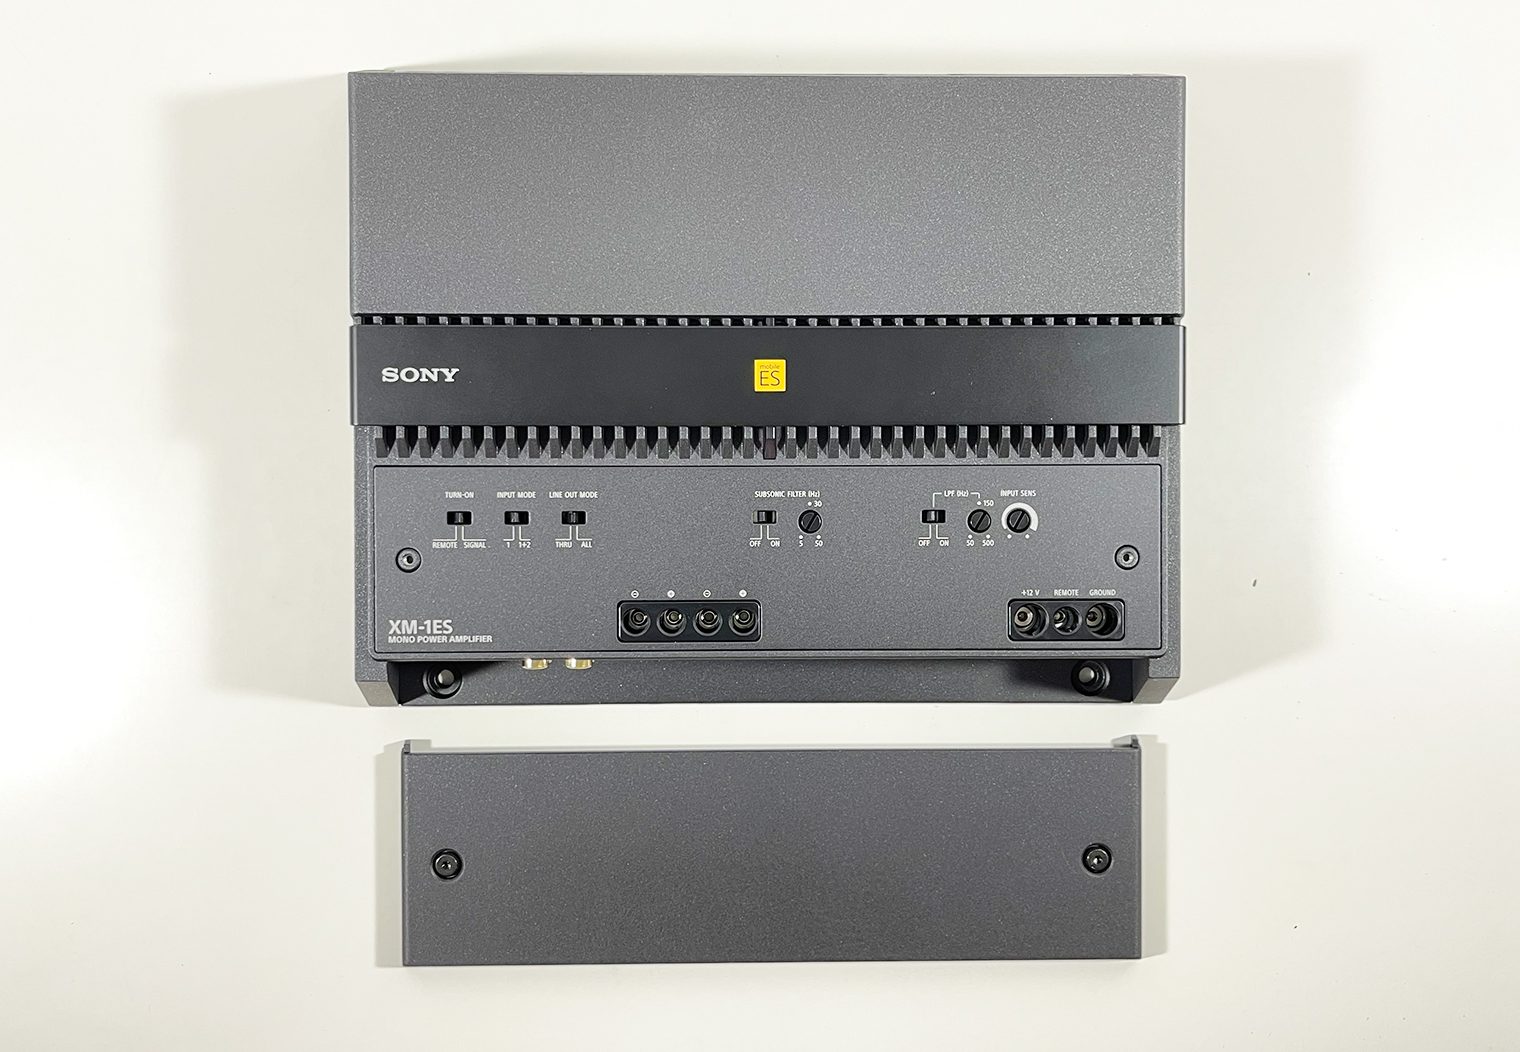
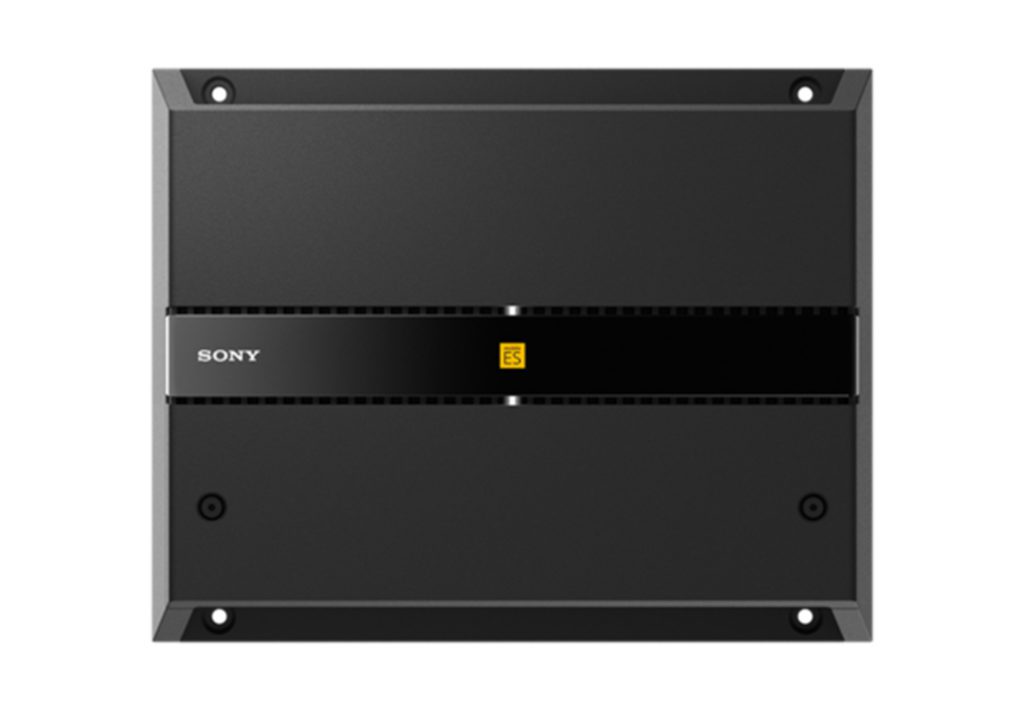
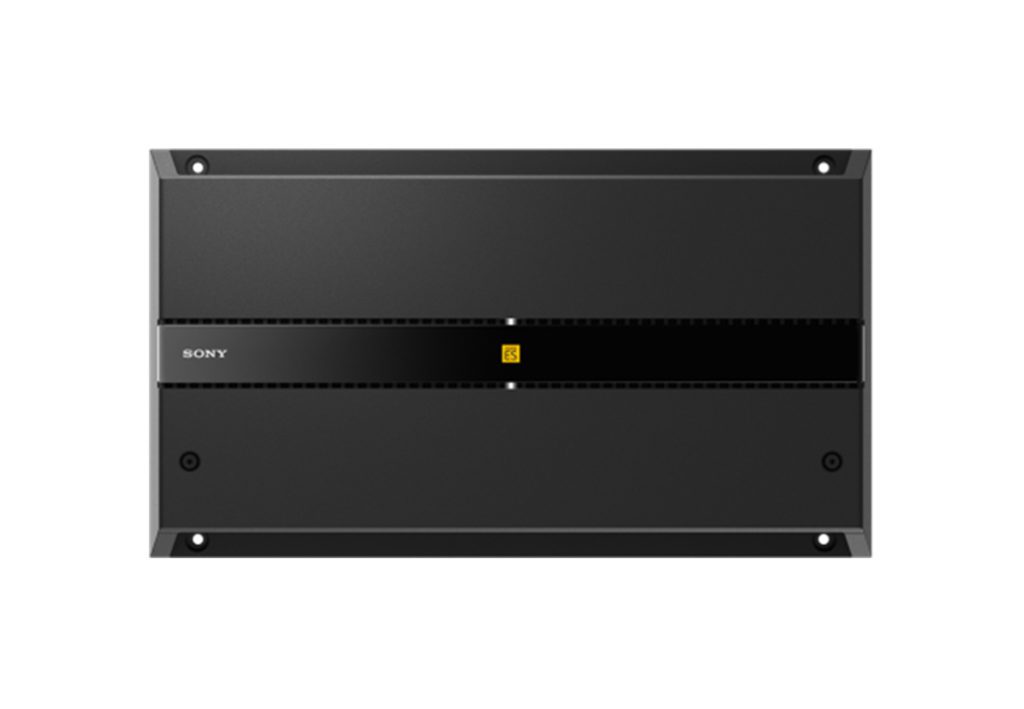
I personally love the look and design of Sony's Mobile ES lineup of speakers, and wasn't disappointed when I opened up their amplifiers for the first time. The textured black casing and edgy design really caught my eye. I'd show them off in an install if I could!
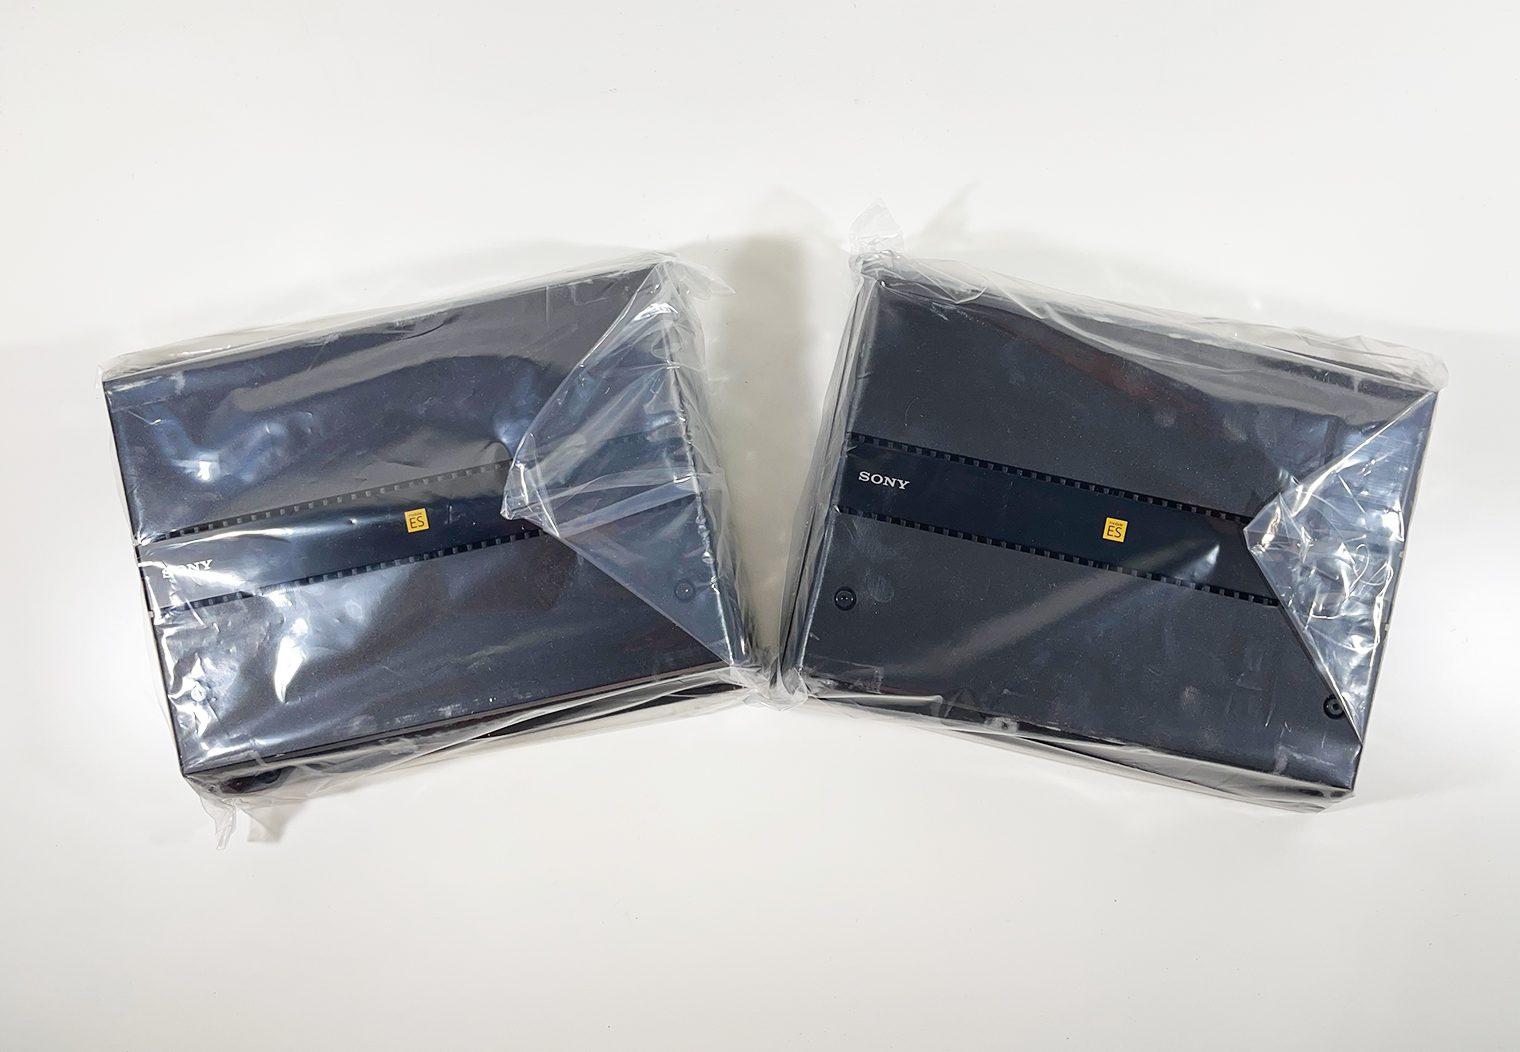
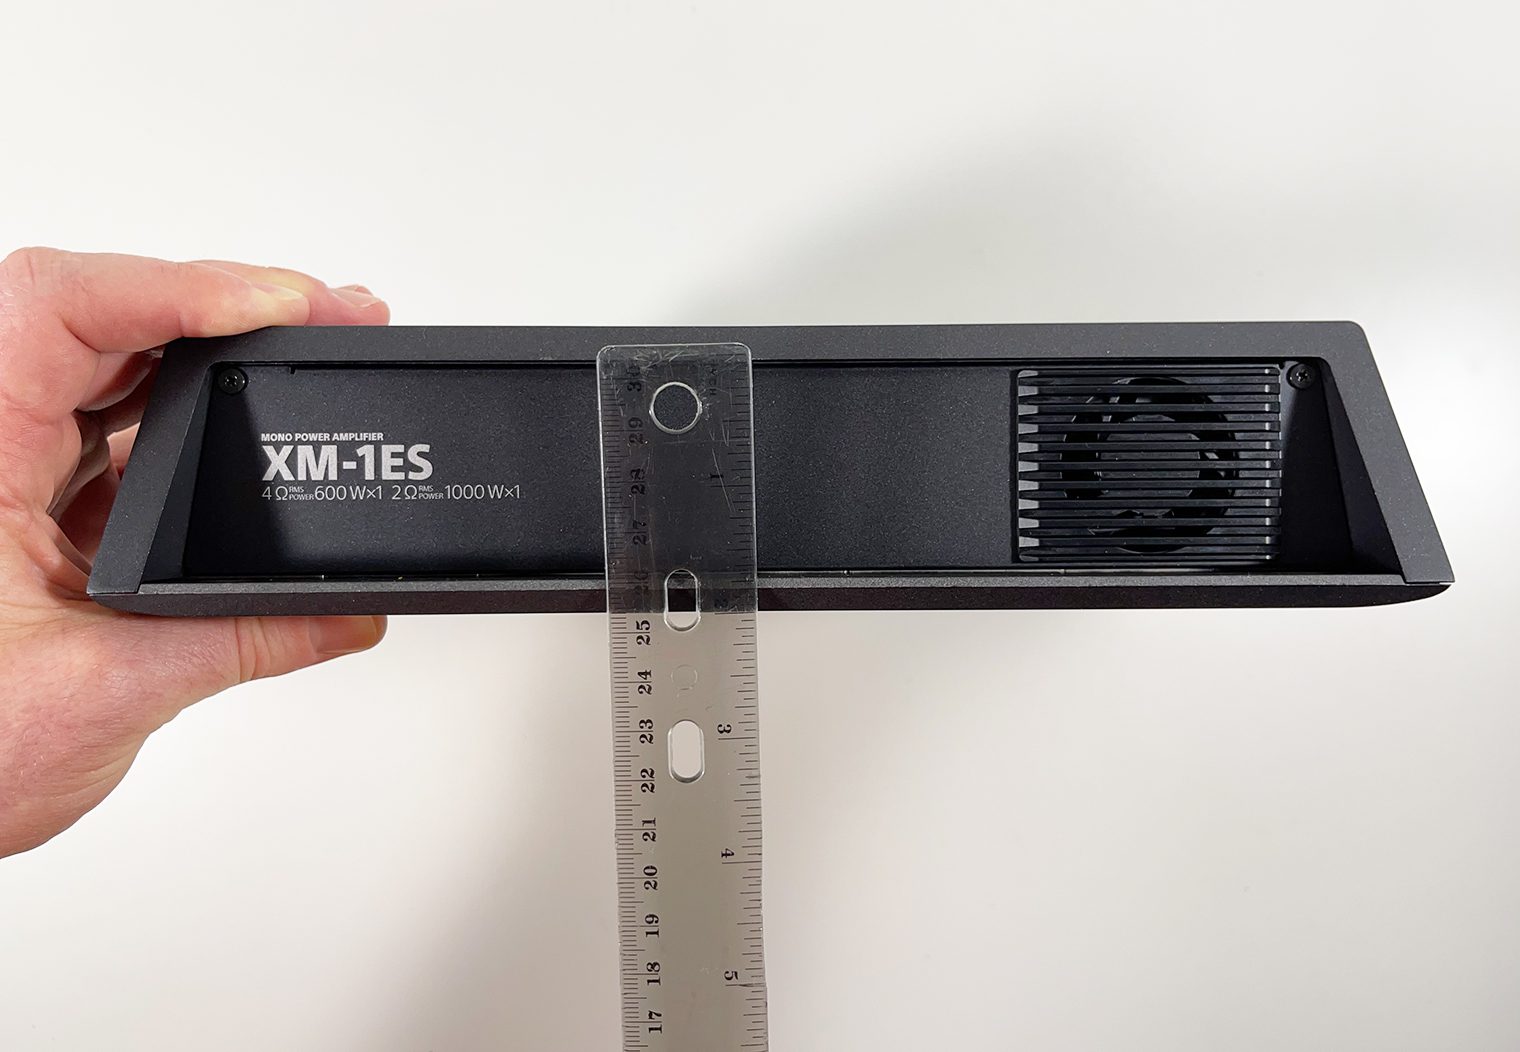
Next to looks, I was also satisfied with the dimensions. You may be wondering if these amplifiers will fit underneath or behind a seat in your car. They're Class D, so they're a little more compact than other amplifier classes. The monoblock is about 10 ½” by 8 ½ inches by 2 ½ inches tall roughly. And the 4 channel is on the same platform, so it’s the same size as the mono. Great choice for under the seat or behind truck seats if you needed, but double check your vehicle to be sure.

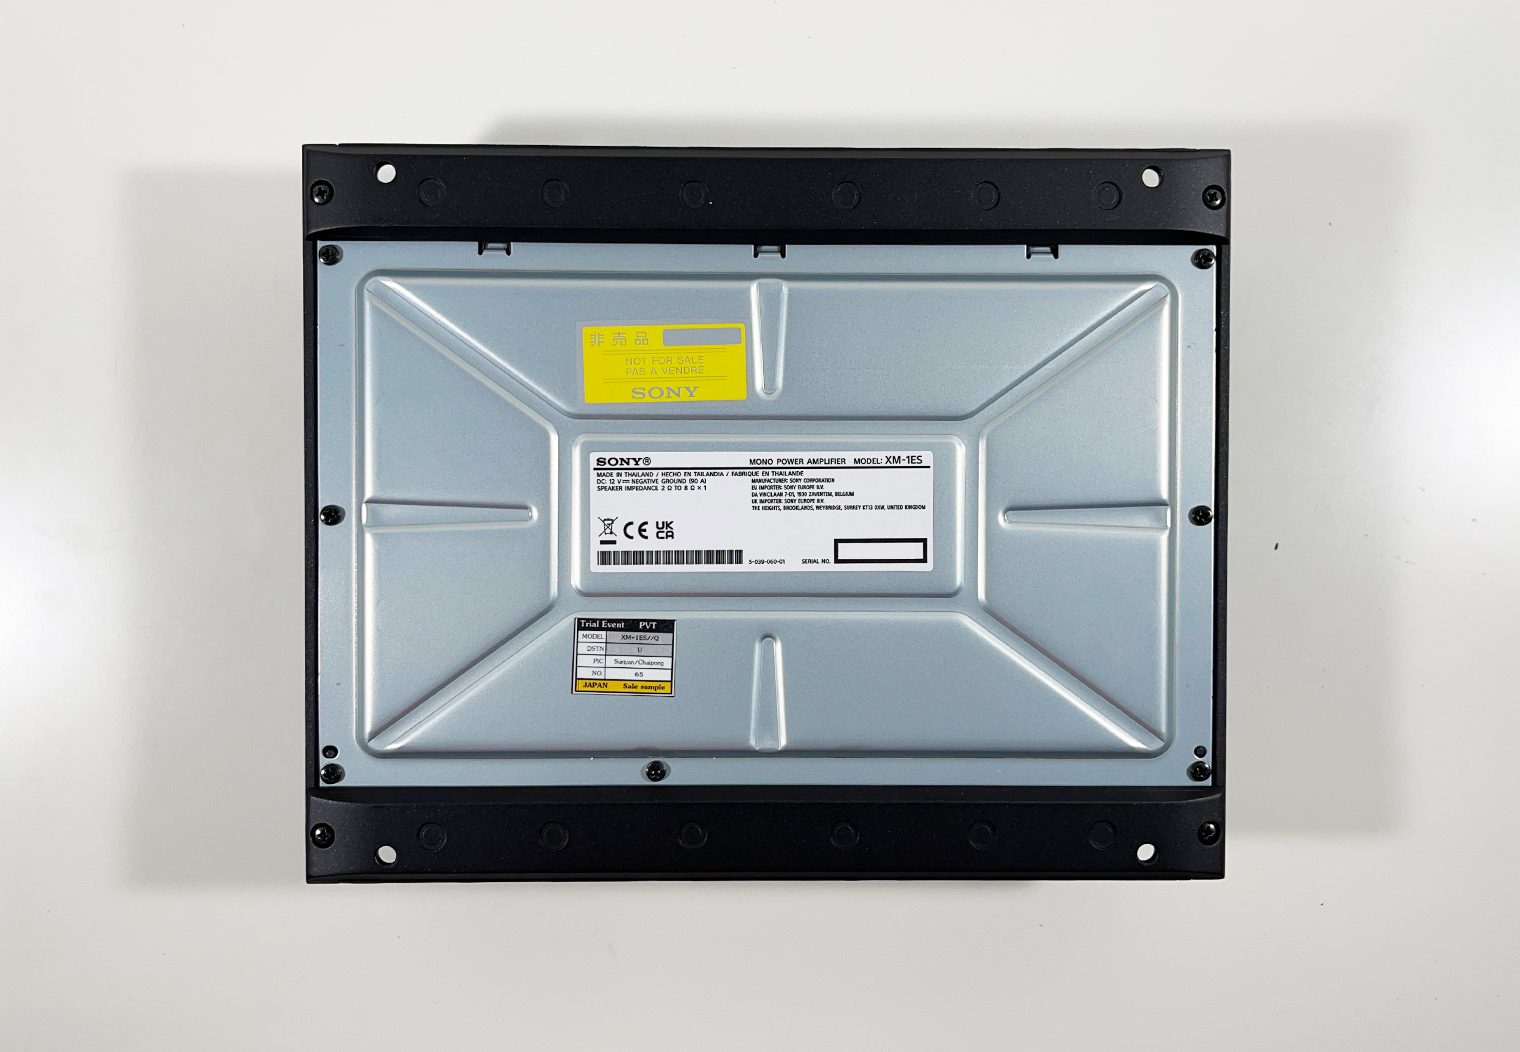
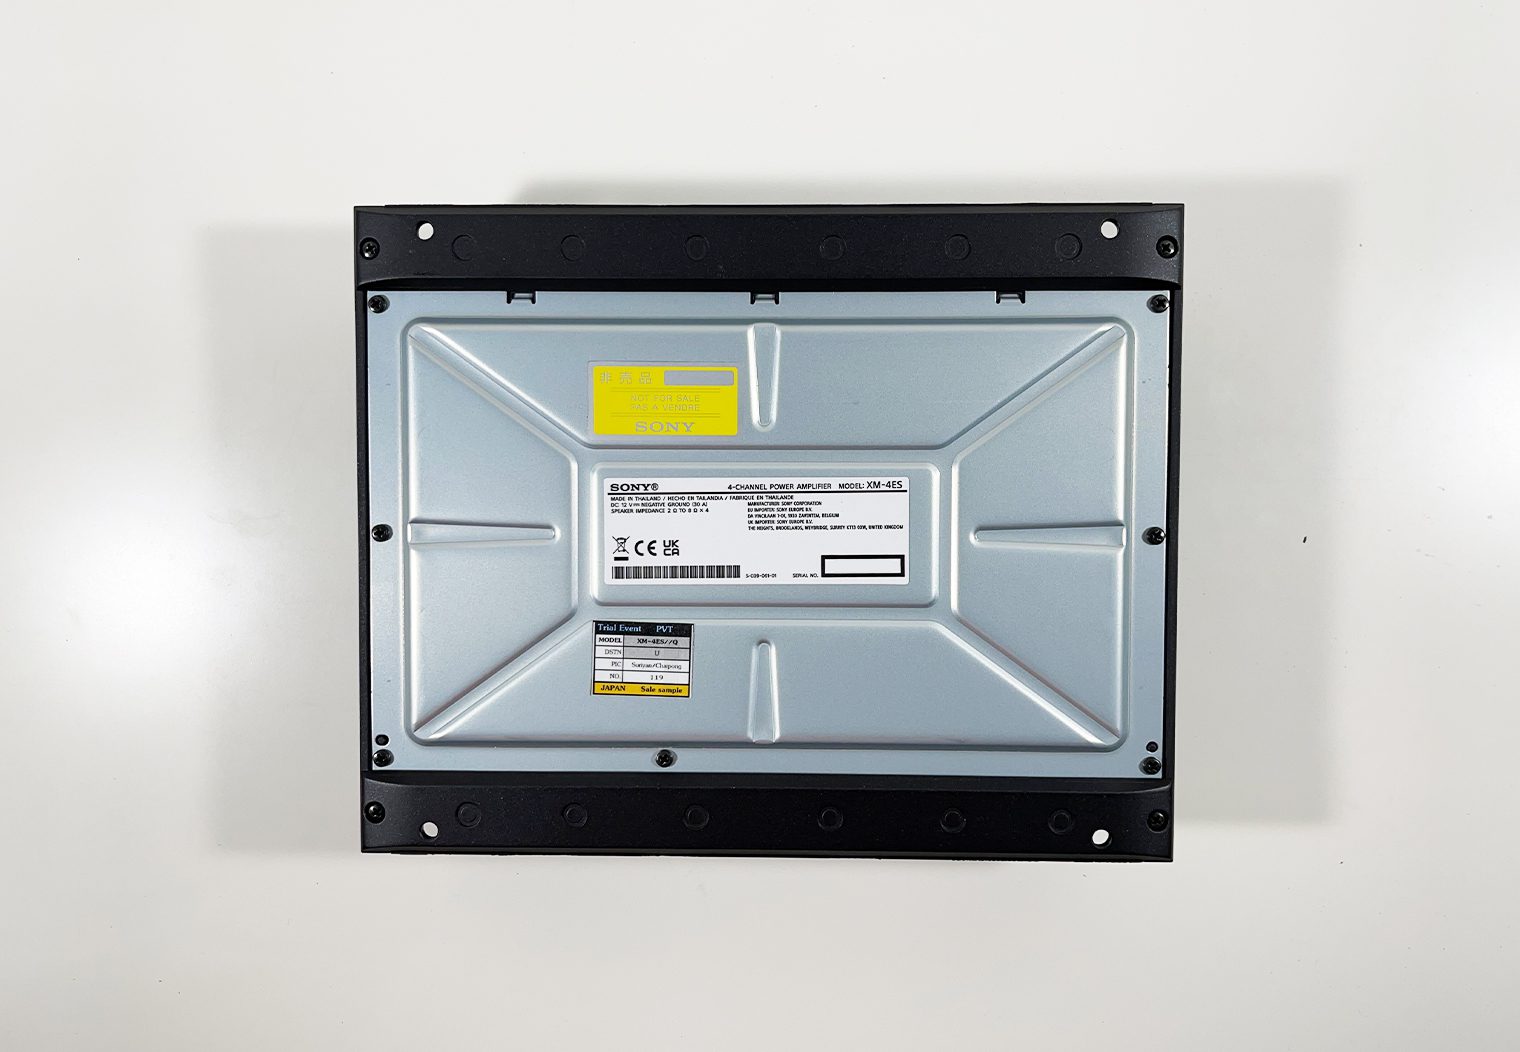
They use an aluminum case which is relatively standard for amps. Great for heat dissipation. But Sony also makes a point to mention the amps feature a 1.2mm thick bottom plate and call out that they’re resonance-damping. My best guess here is that by increasing the thickness of the frame and bottom plate, the more rigid the amps are. And the more rigid the amps are, the less impact vibrations or frequencies have on the performance or output at high volumes.
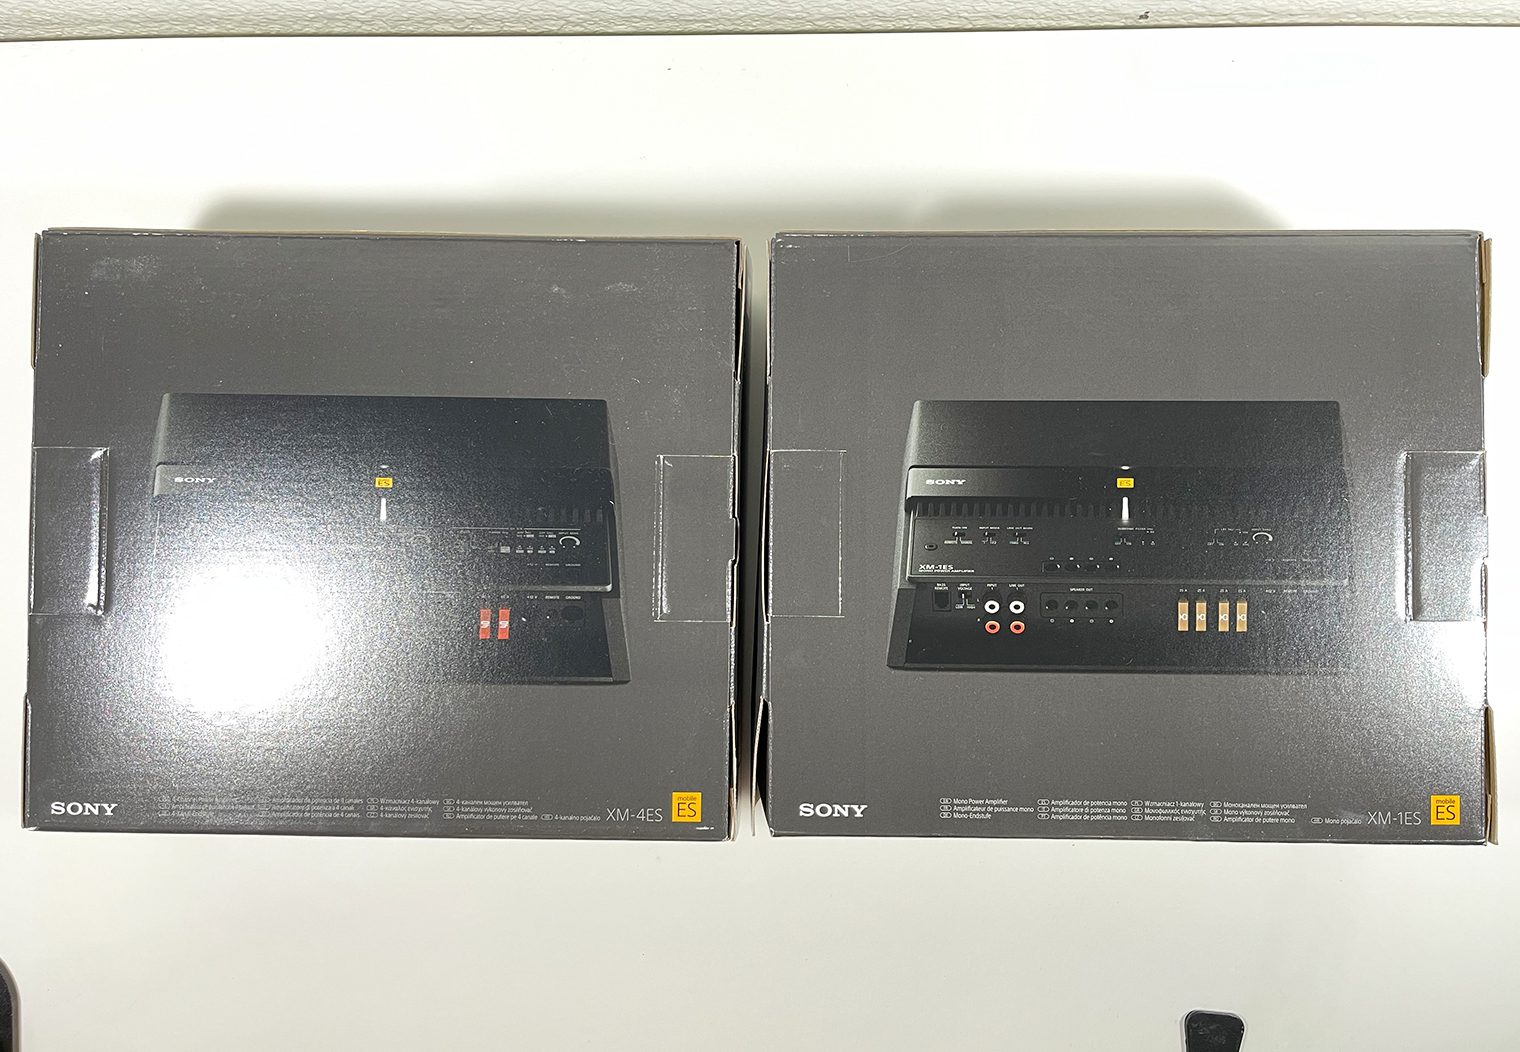
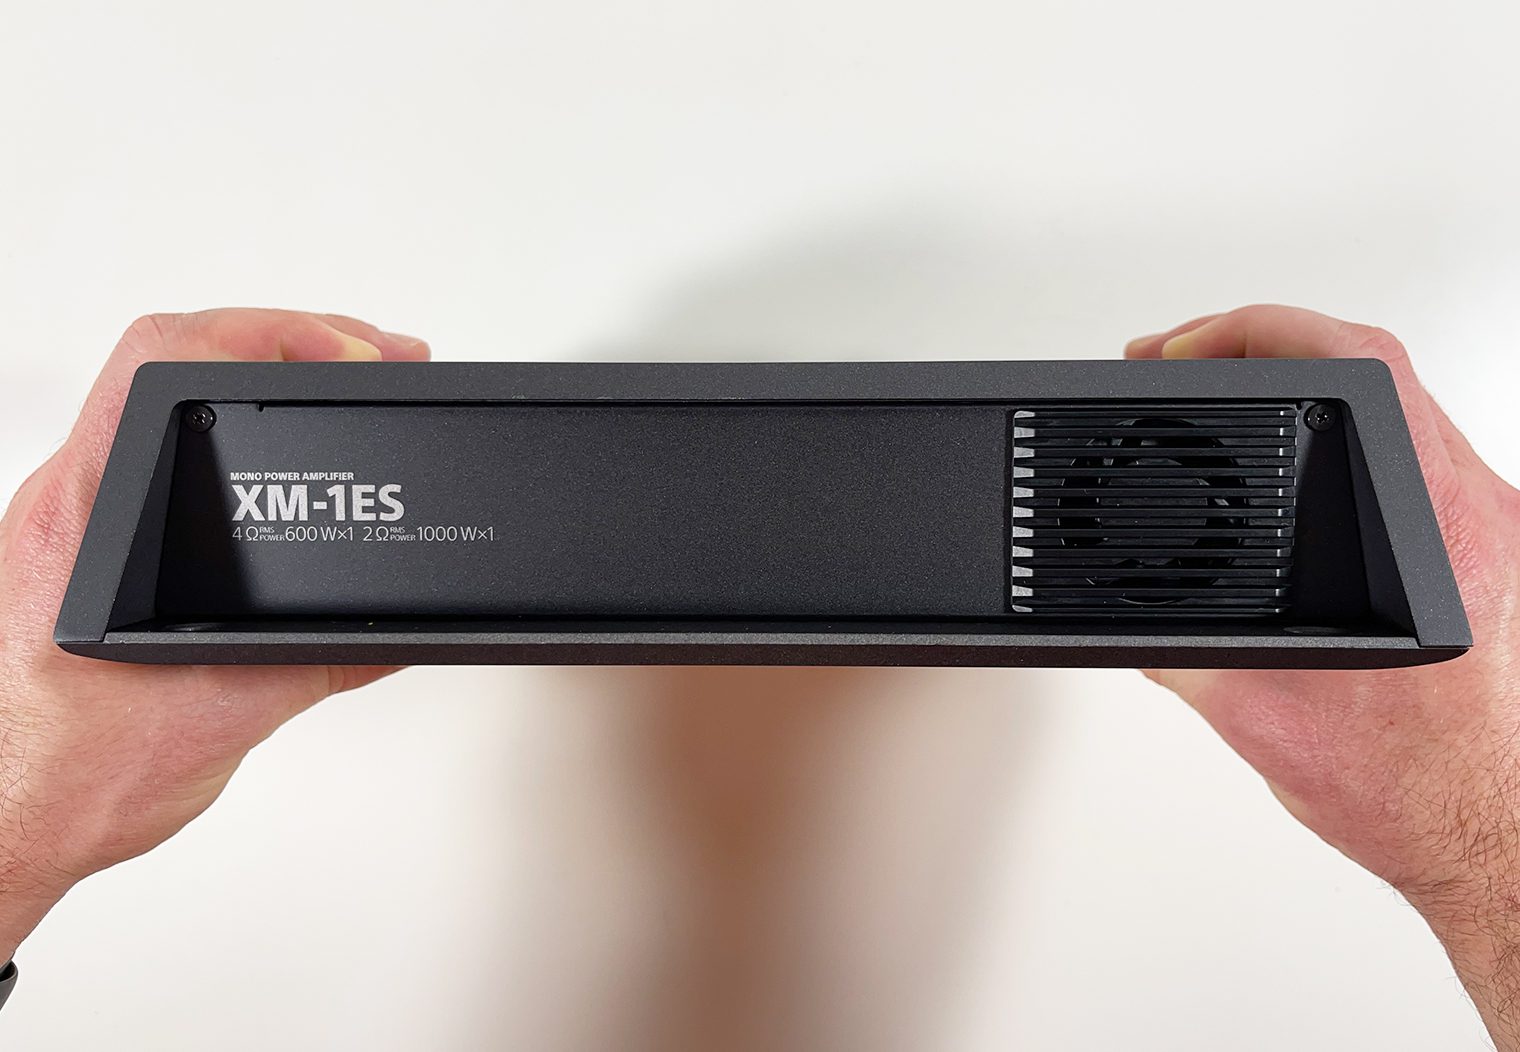
XM-1ES Monoblock:
XM-4ES 4 Channel:

Key Features
The Mobile ES amplifiers are high-resolution audio compatible, which essentially means that they will play a higher bit depth and higher quality audio formats than traditional CDs. Most of the time, amplifiers aren't the bottleneck for audio formats though, it's your music player/source (e.g. head unit). Let's dive a little deeper into some of the key features of the amplifiers that differentiate them from others.
And just a forewarning, some of the features here are geared towards configuring and tuning the input/output of the amplifiers. By nature, it's a little technical. For DIYers, I would recommend familiarizing yourself with some of the common terminology and features of an amplifier. For a brief overview, check out our quick guide to tuning an amplifier.
Control Panel
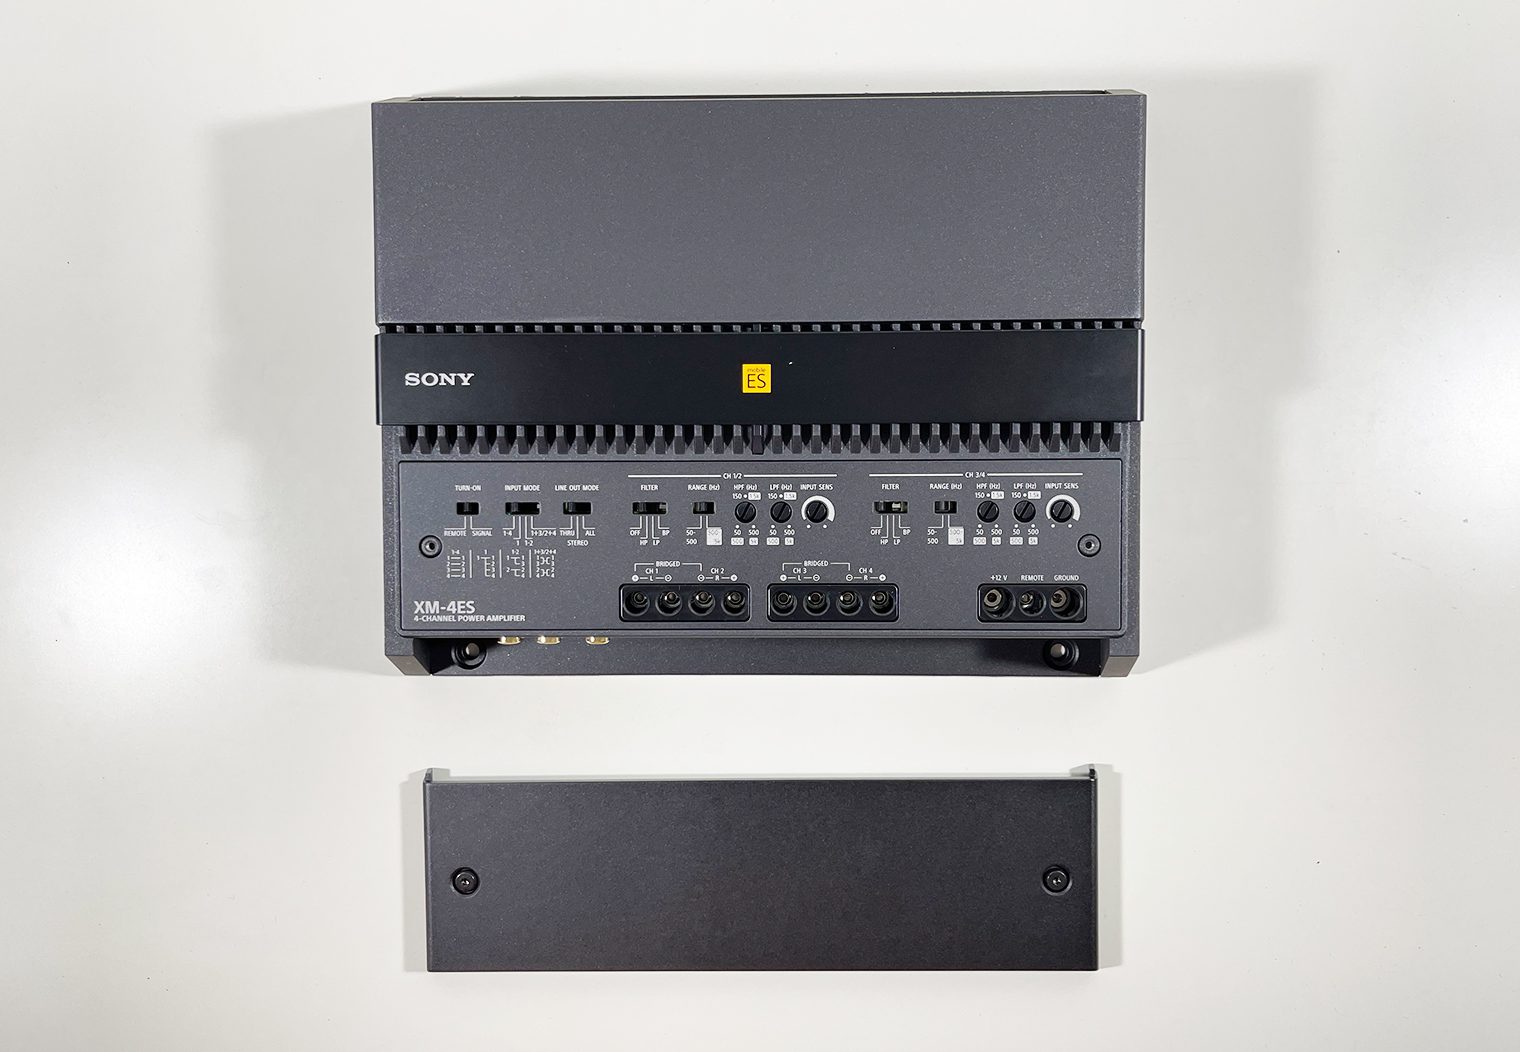
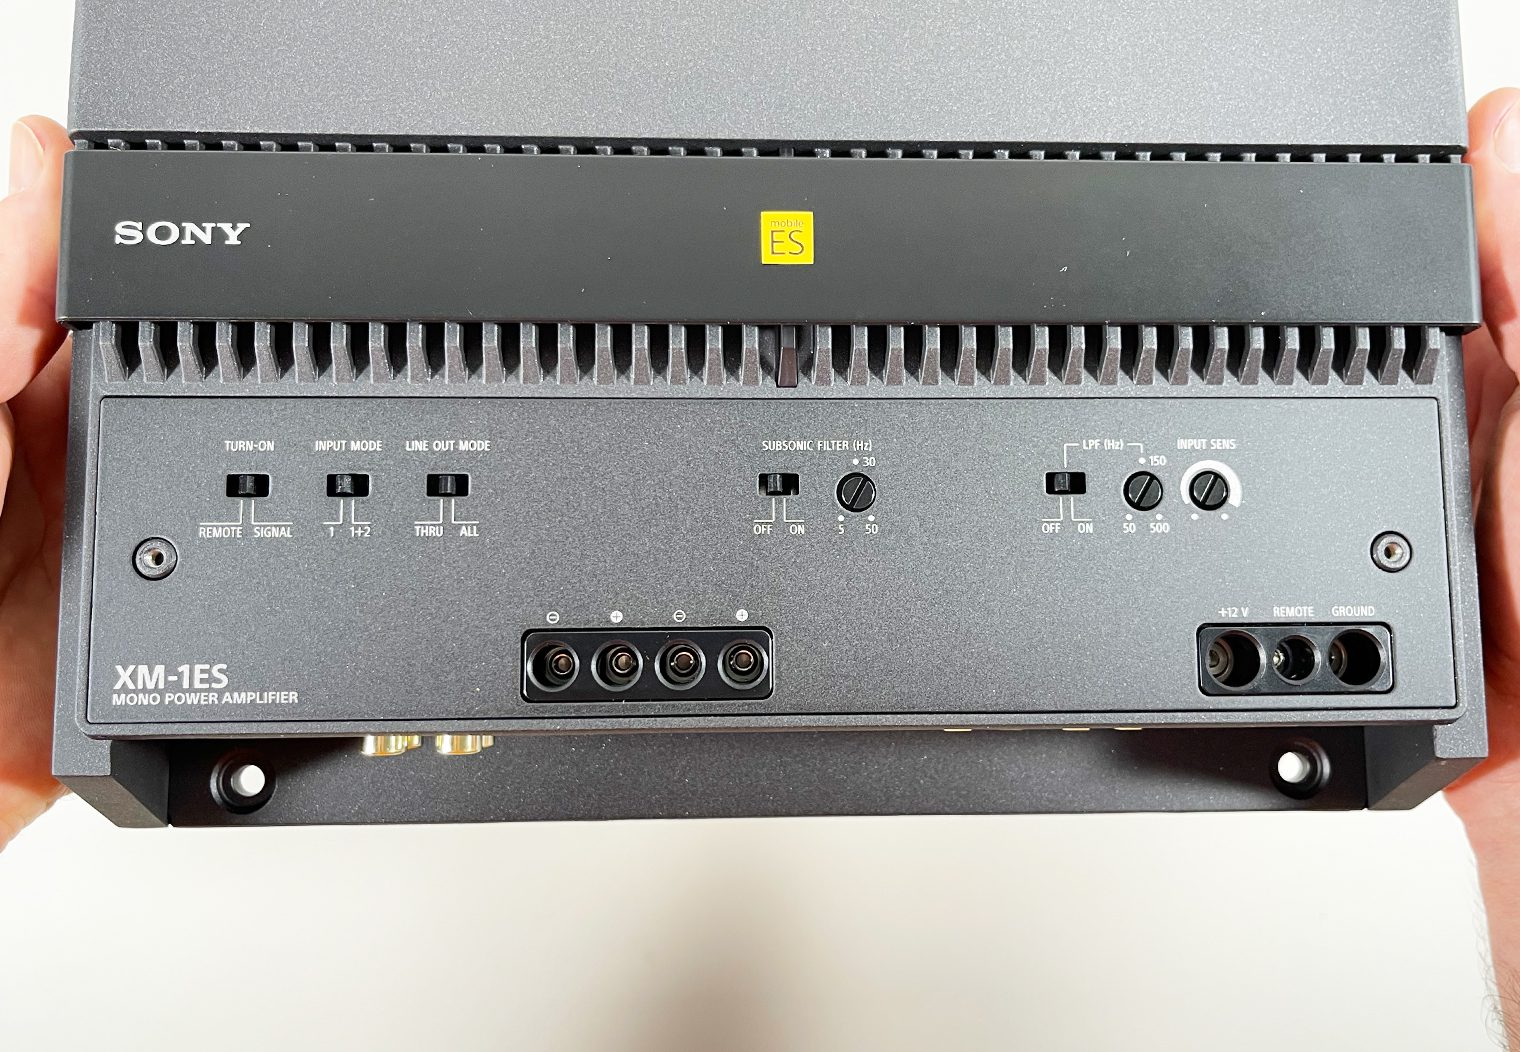
On the face of the amplifier, there are two allen screws which hold on a protective panel. Underneath the panel is where you’re find all of the various controls to tune and configure the amp. The Mobile ES amps do not have a built-in DSP or software that will allow you to tune them via an app like their XM-GS6DSP that we reviewed. But, unlike the XM-GS6DSP, these have much broader number of configurations that they’ll support when it comes to channel inputs and outputs. Especially on the 4 and 5 channel amps.
What I like about the control panel on these amplifiers is that even though it might look daunting at first, everything is very well organized and labeled so it doesn't take much time to find your bearings and understand what you're looking at. That said, these probably wouldn't be my recommended choice for a first-time DIYer who's looking to install and tune their own stereo without help.
Input, Output & Summing Configurations
Whether you’re using one RCA input to power the system, a stereo input with 2 RCAs, want to pass a signal from one amplifier to another and daisy chain the signal – the Mobile ES amplifiers are a powerful and flexible platform that give you ample configuration options. This really stood out to me when I was looking at the manuals and controls.
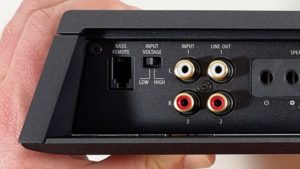
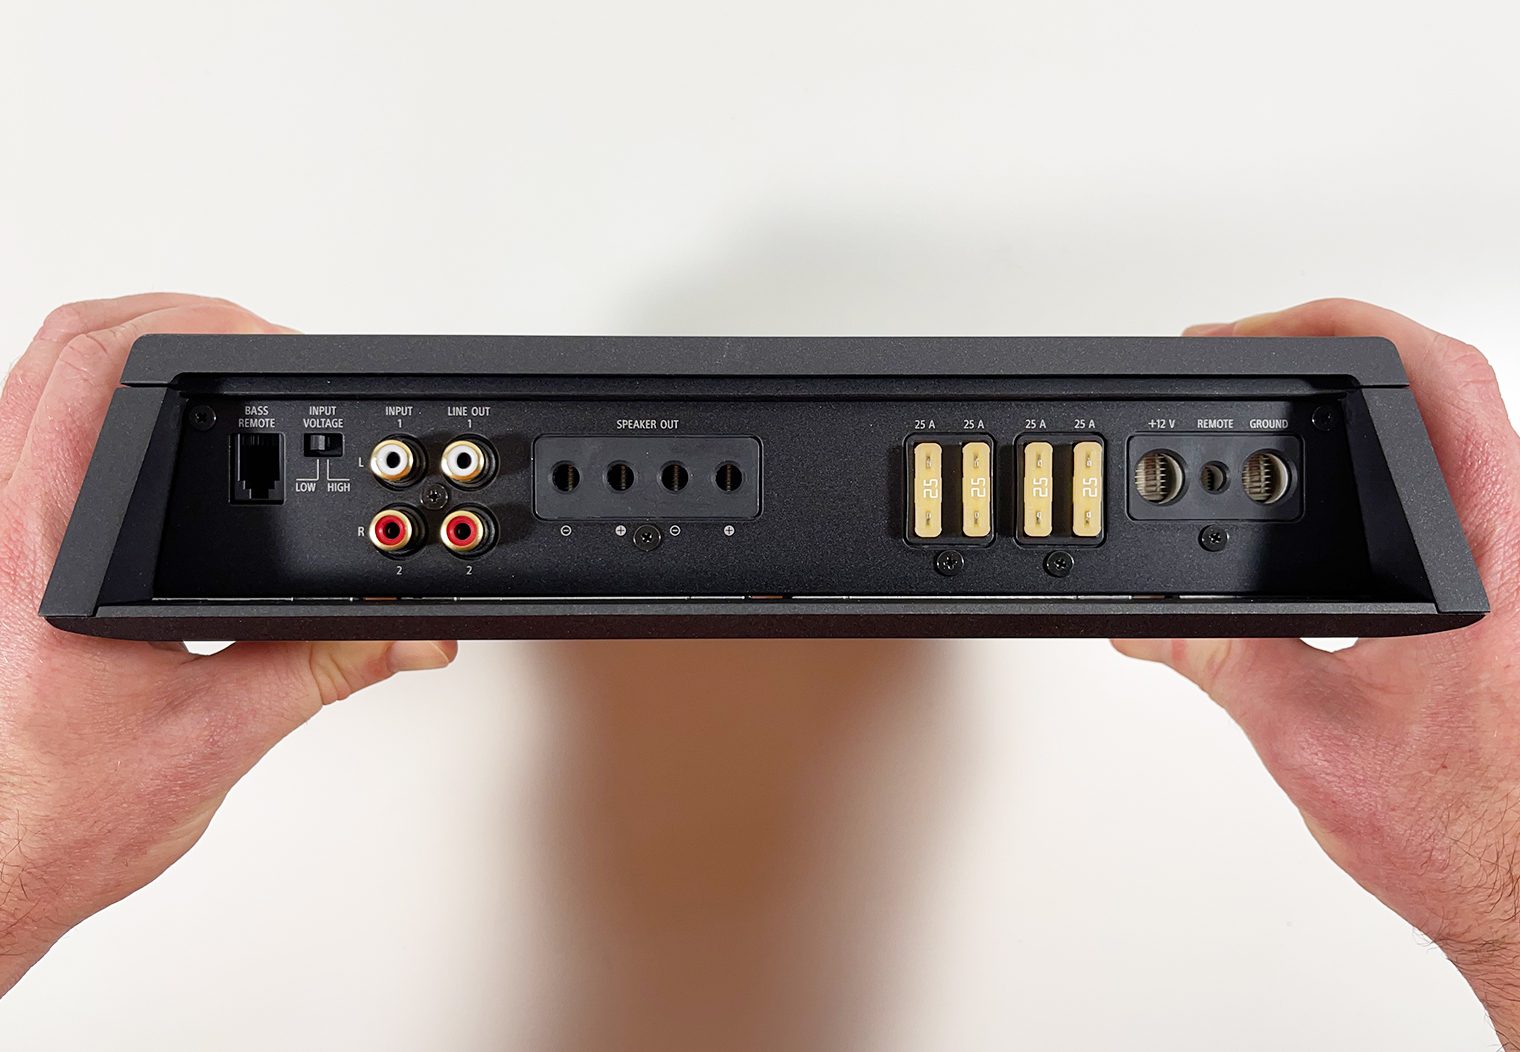
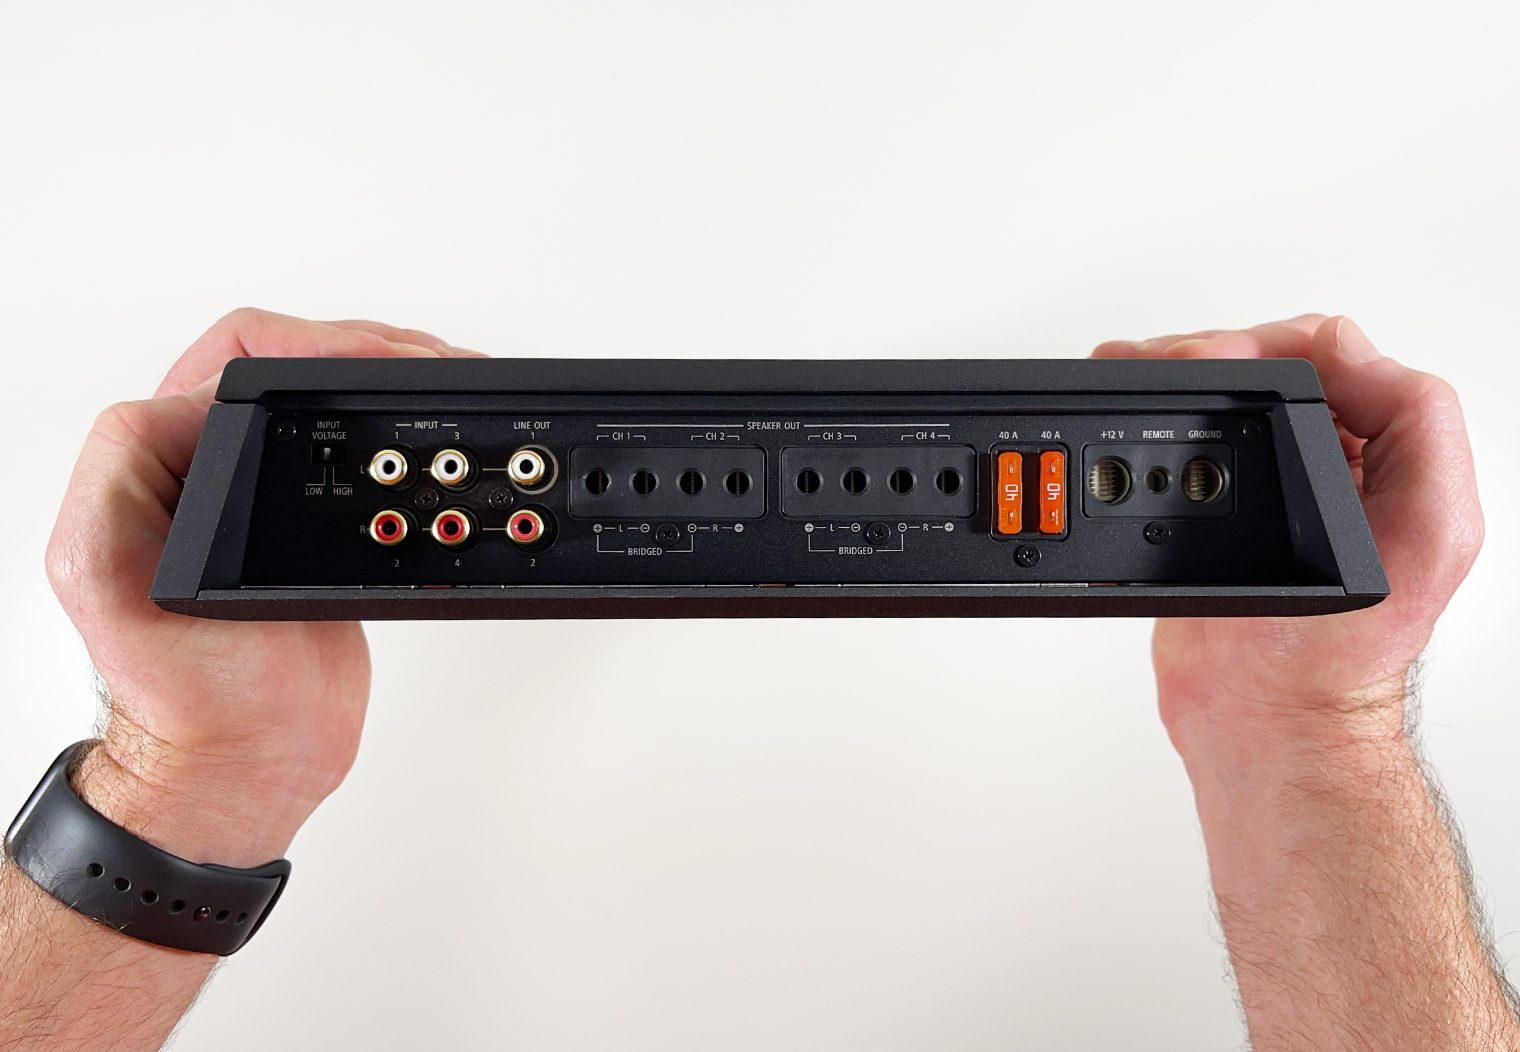
Starting with the terminal panel, you can choose either a low voltage or high voltage signal input. A low voltage signal is basically what would come out of the back of an aftermarket head unit in the form of RCAs. Also known as a pre-amp signal, low voltage is typically between 2v and 5v. Or, you could use a high voltage signal input. In other words, use your existing speaker wire for signal. The important thing to note is that you’d need an RCA adapter for the high voltage signal. You can’t simply plug in your speaker wire into the amplifier like some other amps. RCA adapters are a small added step, but it’s nice to have the option to have either a high or low voltage signal input.

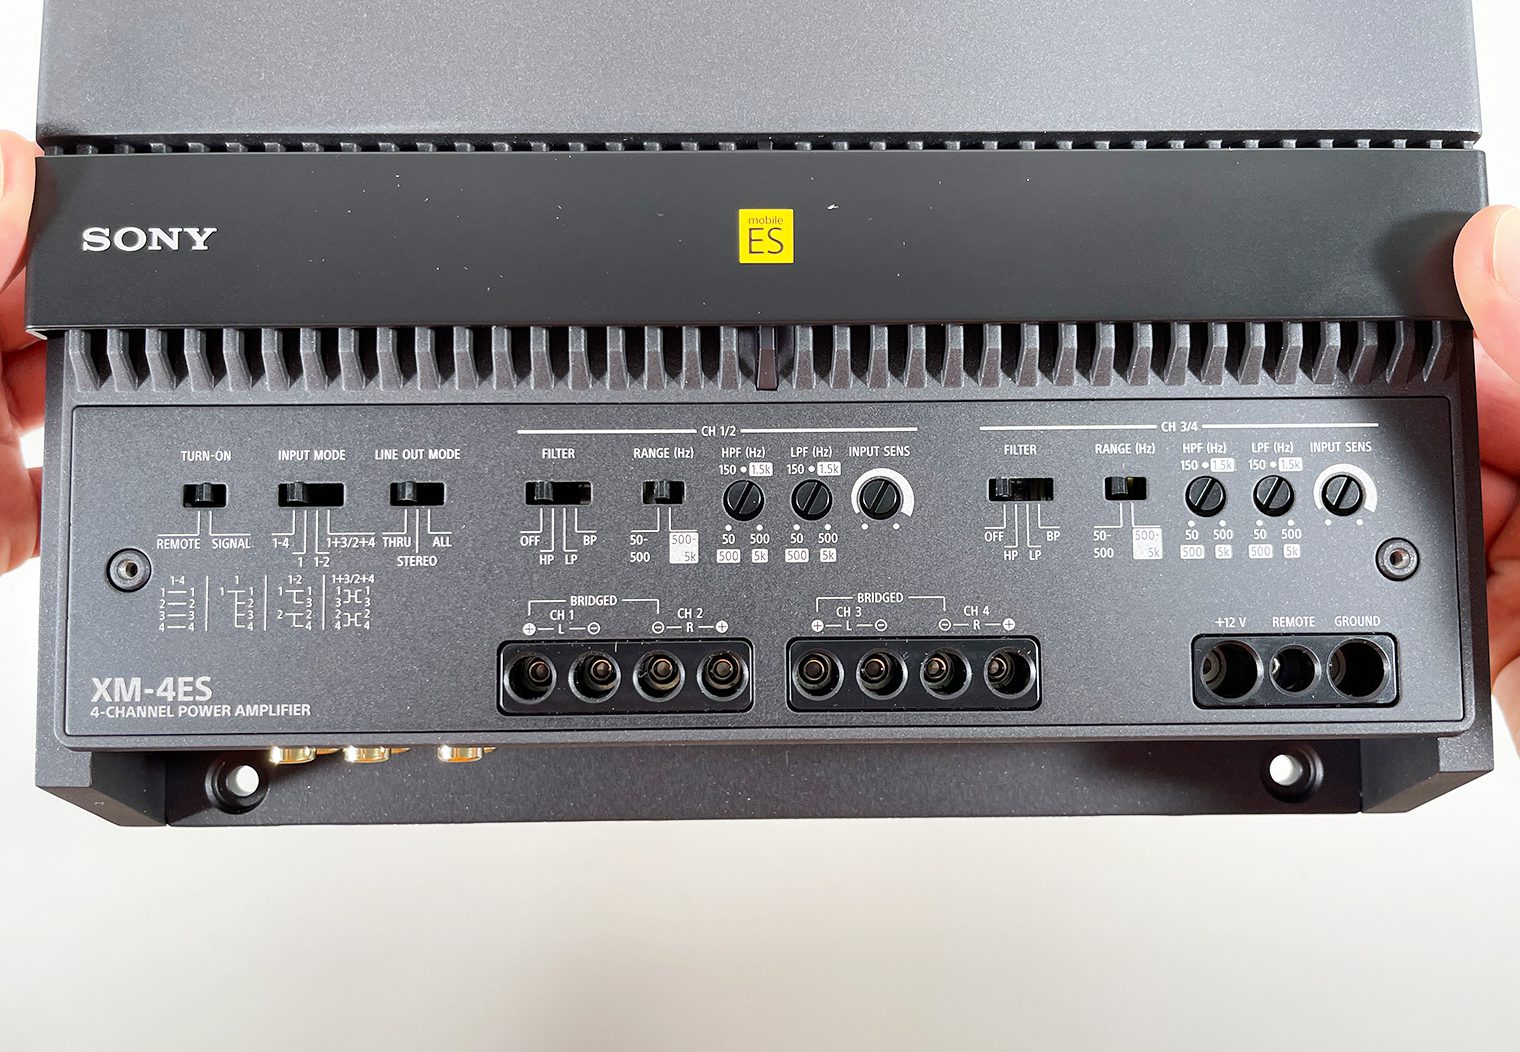
Now for the good stuff! On the control panel, you have an amp turn on selector. The “REMOTE” selection will tell the amp to use 12v power as it's ‘switch', and the “SIGNAL” selection will use the speaker signal to tell it when to turn on and off. The “REMOTE” option is standard, but having a “SIGNAL” selection could simplify your wiring in case you can’t, or don’t want to, run a 12v amp turn-on signal wire to the amplifier. Simply select the “SIGNAL” option to tell the amplifier to turn on when it senses audio in the input signal.
Next, let's talk about the input mode and line out mode selections, which I think are one of the key benefits of these amplifiers. Surprisingly, despite the various configurations on this panel, Sony did a good job at organizing them and labeling them to simplify your setup. They also detail them out very well on the manual that comes in the box. Use that as your source of truth!
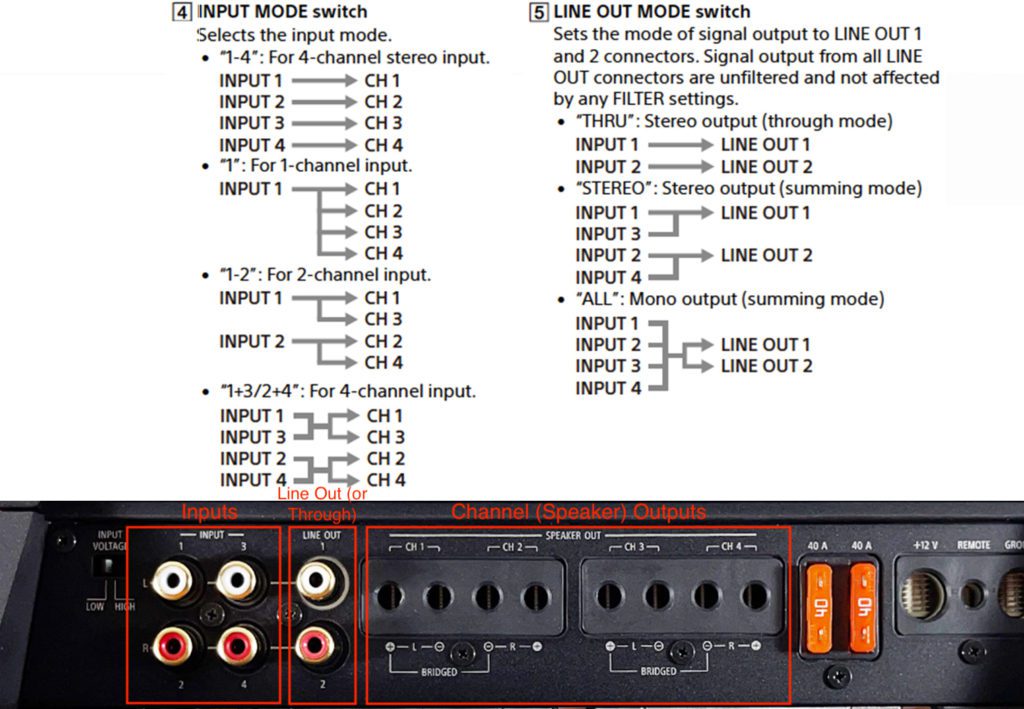
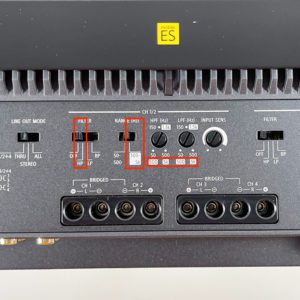
To better visualize the various input and line output combinations in the manual, I created a quick image that shows you the modes along with the terminal panel on the amplifier. I labeled the different components too so that you can reference them when I get into detail. You can always scroll back up to this photo if it gets out of frame to better understand how the inputs will power the outputs.
Using the input mode and line out mode switches, Sony offers a ton of built-in flexibility in their Mobile ES amps. Clean signal can be tough to find on some vehicles. You may only have a front signal or a rear. Or, you may have to sum multiple signals in order to get a full frequency range. There's always edge cases, but I'm pretty confident that the configuration options on these amplifiers will cover 99% of scenarios in a manageable way.
Input Mode
Let's talk about the “Input Mode” first. There are four different selections:
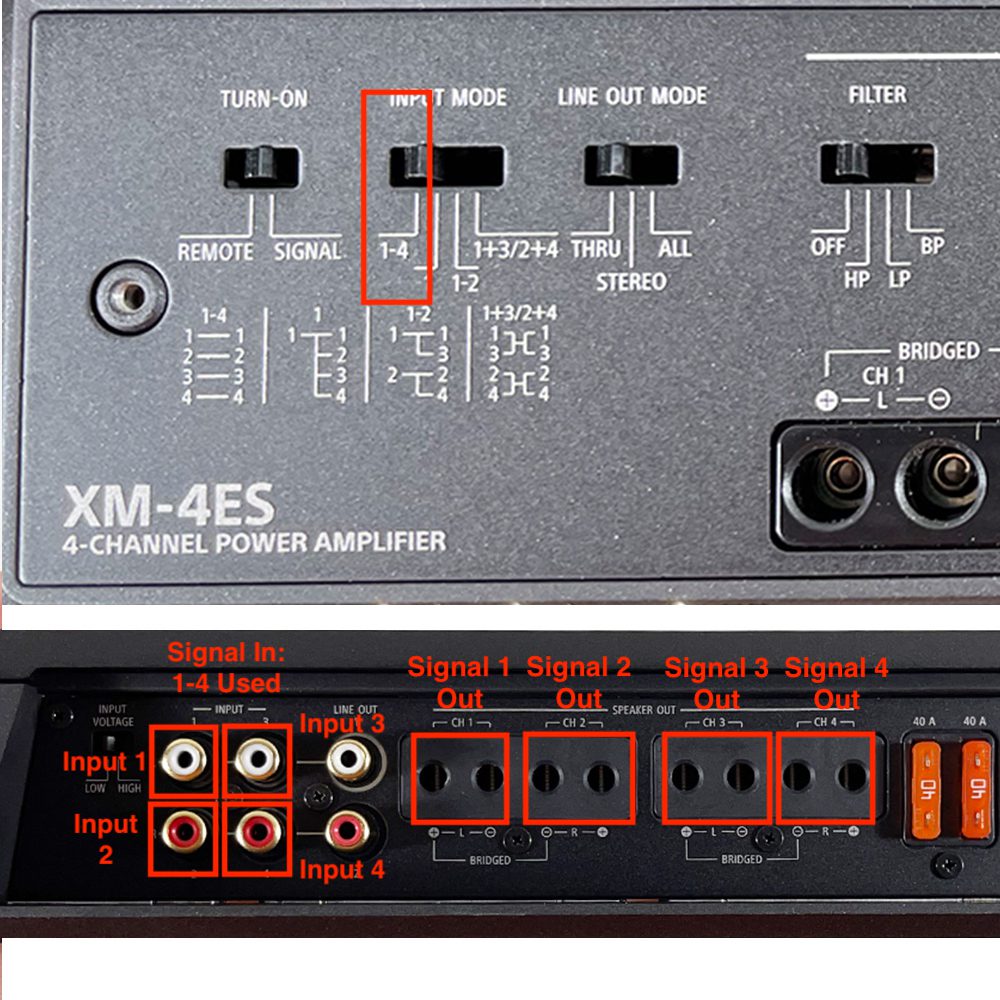
First, you have “1-4” on the left, which means the amplifier will use all four of the RCA channel inputs in the terminal panel. Input 1 will amplify the signal to channel 1, input 2 will be amplified to channel 2 and so on (reference the labels above if you're not sure the difference between input and channel).
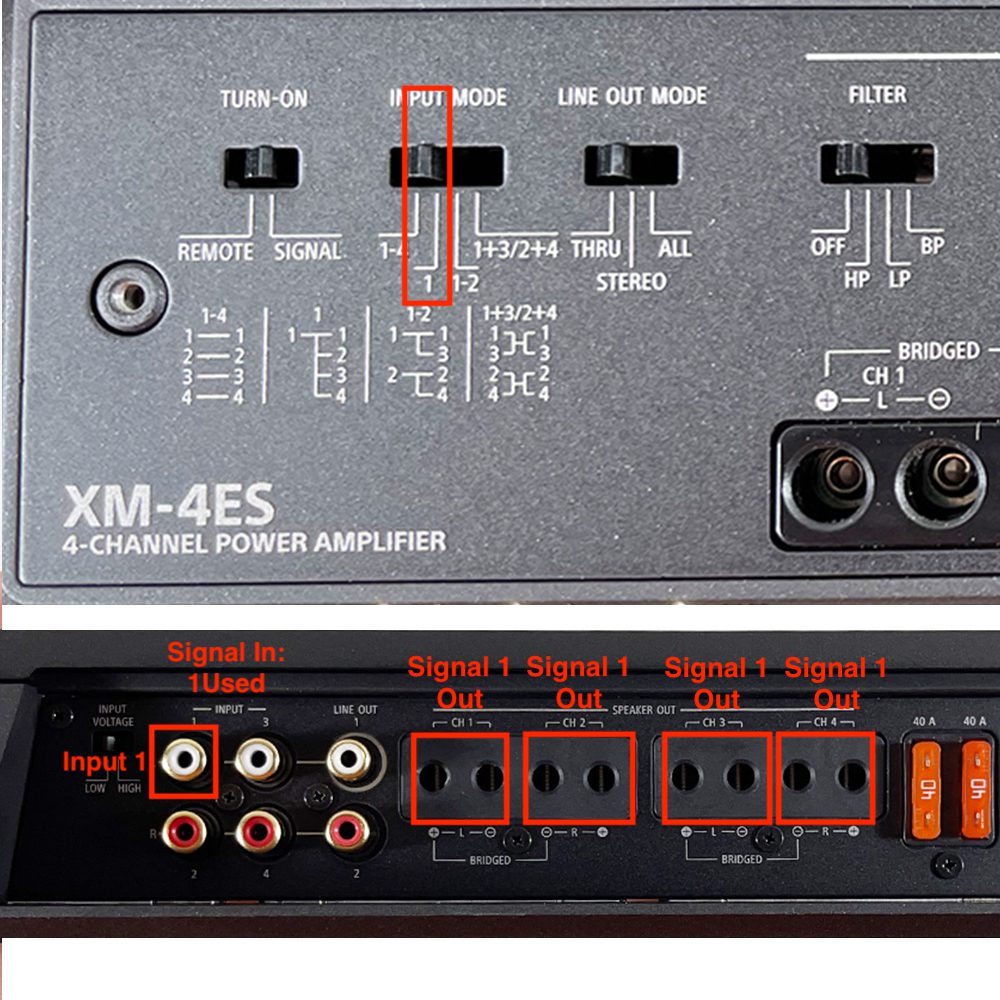
The Input Mode “1” will pull a mono signal from the RCA input 1, and amplify that signal to all four channels equally. This is for use cases in high-end vehicles that can have between 16-36 speakers from the factory. With the Mono input mode, you can send LF, RF, LR, and RR signal RCAs to individual amplifiers to break the vehicle into ‘quadrants'. So it's really for a vehicle that has a high number of speakers that can all be grouped into one signal.
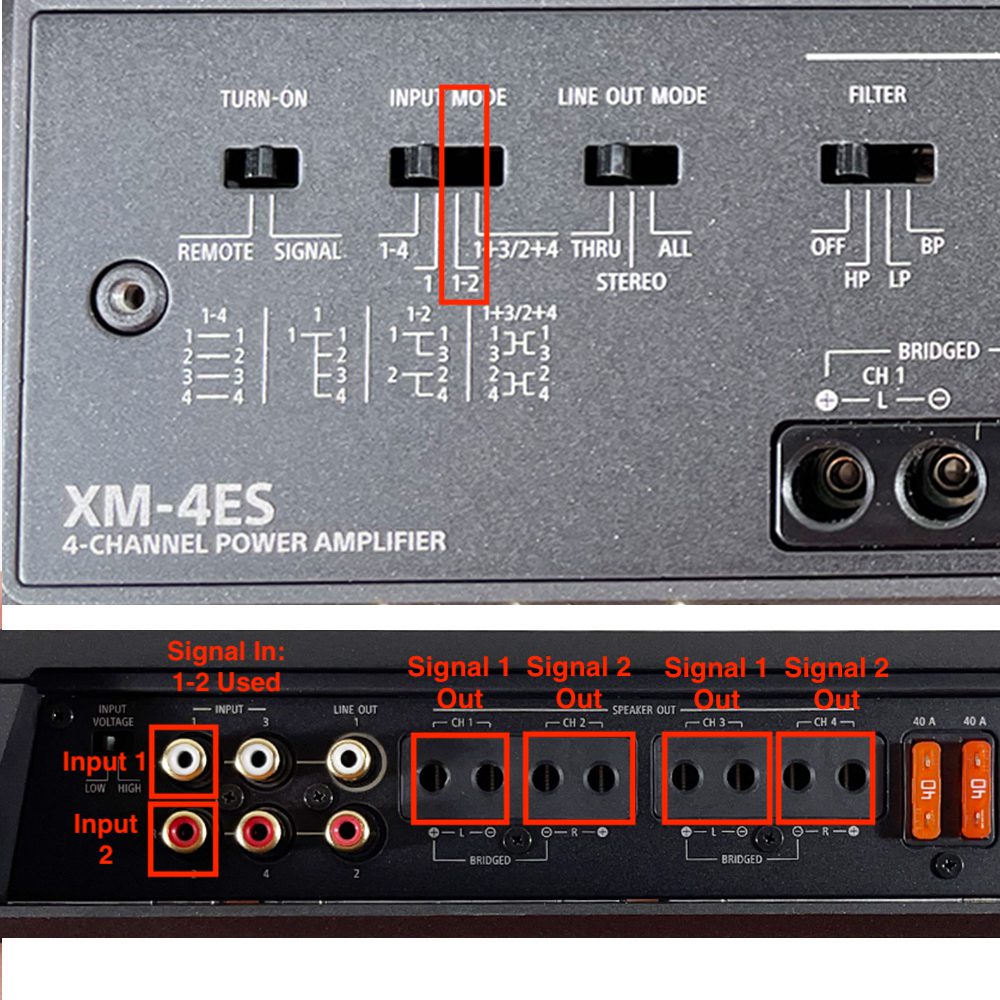
“1-2” will take the signal from input 1 and amplify it to channels 1 and 3, take the signal 2 input and amplify it to channels 2 and 4. It's essentially taking a stereo input (left and right) and multiplying/extending it to the appropriate left and right channel outputs on the amp. You only need input 1 and 2 in order to amplify all four channel outputs.
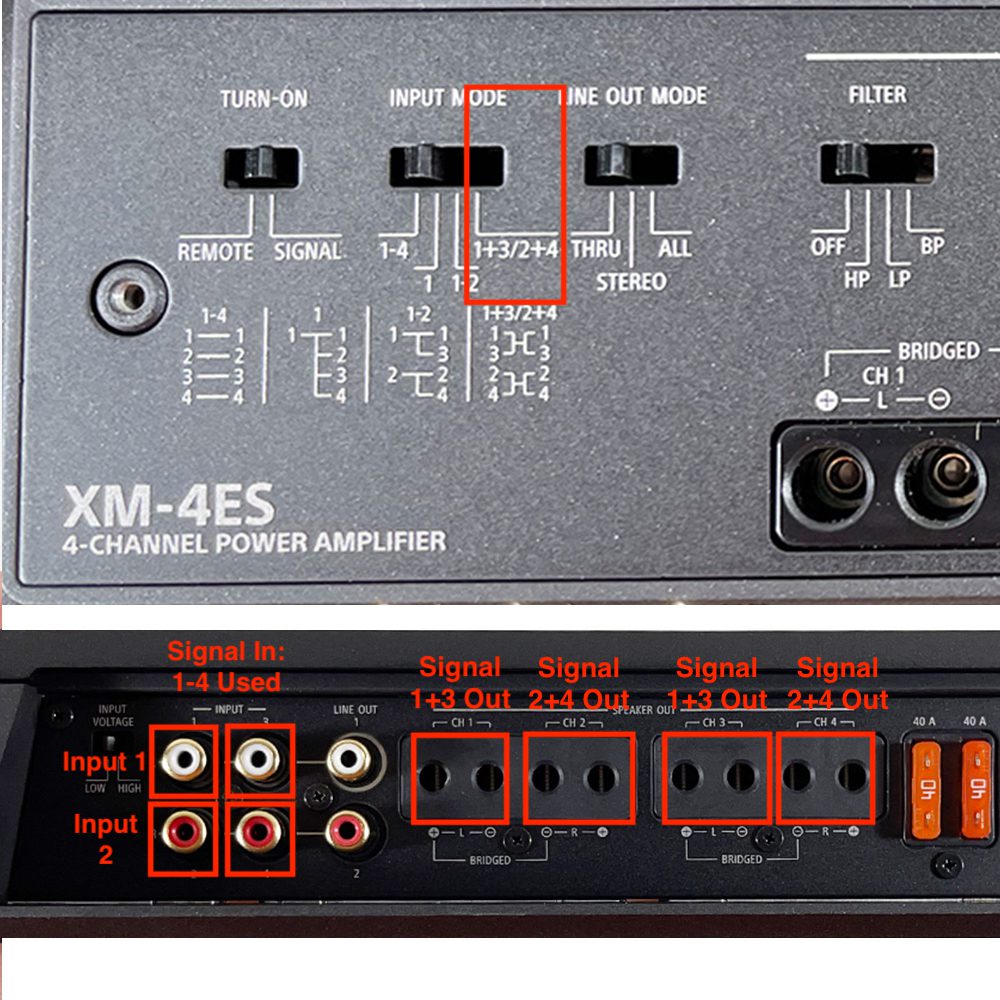
Then, there’s the last selection – “1+3/2+4”. This is the most interesting of the bunch because it’ll sum/combine the frequencies from inputs 1 and 3, and amplify the combined frequency for channel outputs 1 and 3. And it’ll do the same for 2 and 4. Let’s talk about why you might need this though.
Let’s say you have a 3 ½ inch speaker, like one of the dash speakers in the new Broncos, and then a 5 1/4 inch in the Bronco's kick panel. Your goal is to replace these two speakers with a 6 ½ inch component system with a 6 1/2″ driver in the kick panel and a 1″ tweeter in the dash. For this use case, you’ll probably want to use the high voltage selection on the amplifier, and take the 3 ½ inch signal along with the signal from the 5 ¼ inch speaker and combine them for use for your 6 ½ inch component. So this option will sum the frequencies and then you can utilize the filters downstream to box them based on the specs of your speaker choice. The possibilities are really endless.
Line Output Mode
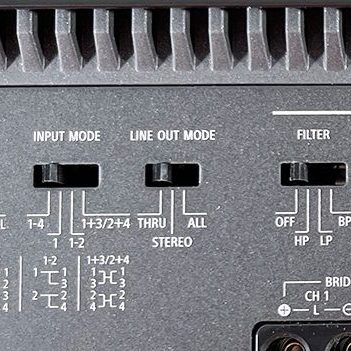
To the right of the Input Mode, you'll find the “LINE OUT MODE”. This selector will enable you to pass the input signal through to another amplifier. This could greatly simplify the amount of signal wire that you have to run throughout the vehicle, and also prevent the dreaded scenario of splitting signal wires. It's worth noting that your selection on the Input Mode does not impact the Line Output signal. The line out signal is also not affected by the filters you configure either.
There are three Line Out Mode options:
- “THRU”, which takes the input 1 and 2 and passes it through untouched.
- “STEREO” which will SUM the frequencies from inputs 1 and 3 along with inputs 2 and 4 and then pass them through.
- And finally “ALL”, which will take the sum of ALL inputs (1-4) and pass them through both line out 1 and 2 equally.
I really like this summing feature because it gives you the ability to tweak or modify the signal that you're going to pass to the next amplifier. If you wanted to pass a signal onto another 4 channel, you’d probably use either the THRU or STEREO (assuming you were powering similar speakers). Or, if you just wanted to pass a summed mono output to another monoblock amp, or potentially a DSP or something to modify the signal, you could also do that. Very flexible.
Signal Filters & Ranges
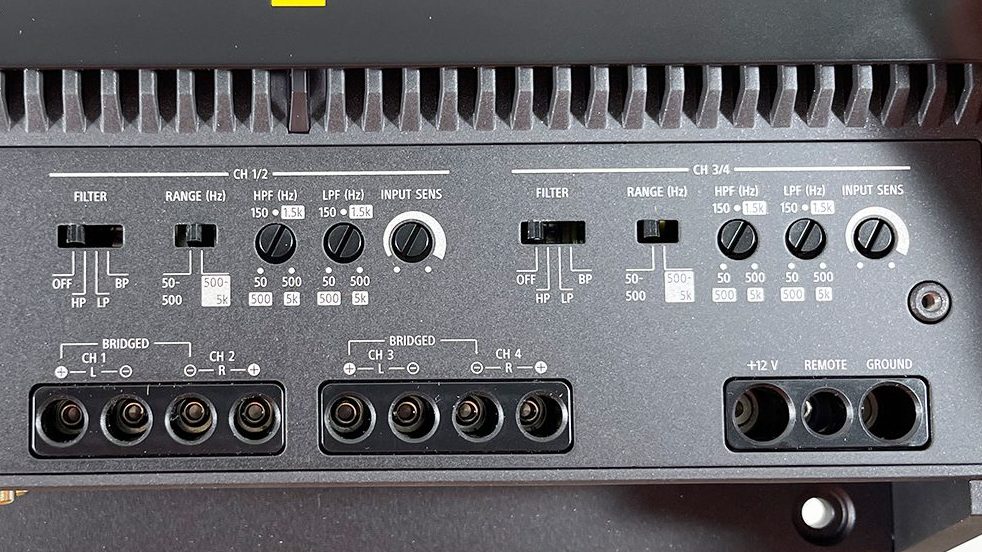
The next set of controls are duplicated: one for channels 1/2 and another for channels 3/4. They allow you to configure each pair of channel outputs independently.
Going from left to right, the first selection is the “FILTER”. Filters are standard on amplifiers. Depending on what type of speaker you’re powering, you’ll either select “OFF”, “HP” or “LP”. “BP”, or Band pass, isn’t as common though. This option will basically fix the output to the ranges you see on the amplifier (LPF: 50 – 500hz, HPF: 500-5khz). It’s kinda like selecting “OFF” but wraps a little more control around the frequencies.
To the right of the Filter is “Range”. Range is is also pretty cool (and a less common) feature in my opinion because it gives you control over the floor AND the ceiling frequencies independently, regardless which filter you have selected (HP or LP). If you look below the range toggle, you can see “50 – 500 hz” (left) and “500 – 5k hz” (right). This will lock HPF and LPF controls into that range. Depending on which range you select, the HPF and LPF control knobs will operate within that range of frequencies and allow you to tune within that range. If you look closely, the ranges are either highlighted with a white background or not. This indicates the frequency range that you you'll tune the HPF and LPF within depending on your selection.
Here’s a scenario for you that might describe it a little better:
Let’s say you have a 6 ½ inch component speaker, but you wanted to power the tweeters with channels 1 and 2 and the main driver's with channel 3 and 4. In this scenario, you could use the HP filter (high pass), combined with the 500-5k “RANGE” (since it's not a subwoofer). You would then set the frequency floor using the LPF which is now operating between 500 and 5khz (based on your “RANGE” selection) and then set the frequency ceiling using the HPF (which is also operating between your selected 500 and 5khz “RANGE). You would do this independently for the tweeters and the main driver.
This setup will effectively prevent the super high frequencies from being passed in the channel that's powering your main driver, and prevent the lower frequencies from passing into your tweeter channels. It also allows you to bi-amp the system. Pretty powerful. Most amplifiers have just a high pass or low pass filter and depending on what you select on the filter toggle, you basically use a single knob to set the floor or ceiling, but not both. It effectively eliminates the need for an in-line crossover or band-pass filter.
Other Features
There's a couple other quick features worth noting on these amplifiers. Most importantly, Sony calls out some of the internal components like the types of inductors and OFC wires that are used, along with a power supply block and DC converter that’s designed to minimize interference. These are of course important and good to see in a high quality amplifier because feedback, buzzing or other interference can be a huge drag. They don’t call out any specific features that will eliminate interference from, let’s say, a less than ideal ground or inconsistent voltage across your system. You still need to do your due diligence on that front during your installation and wiring.
They also feature some nice hardware like hex screws for the terminals which are common in higher-end amplifiers and nice to see.
Amplifier Quick Specs
The Mobile ES lineup has very respectable power outputs and specs. The XM-1ES monoblock can handle 600 watt RMS @ 4 ohms or 1000 watt output @ 2 ohms. It’s obviously designed for subwoofers and comes with a dedicated wired volume control knob for you to control the sub volume independently.
The XM-4ES 4 channel amplifier puts out 100 watts RMS per channel @ 4 ohms, 165 watts per channel @ 2 ohms. Or you can bridge the two channels to produce 2 x 330 watt outputs @ 4 ohms. It's a great choice for powering all four door speakers in your car.
And then the XM-5ES 5 channel has a power handling of 100 watts x 4 channels + 450 watts RMS @ 4 ohms, or 165 watts x 4 + 750 watts RMS @ 2 ohms. It's basically the 4 channel amplifier with an added channel to power a subwoofer (like most 5 channel amps). And similar to the 4 channel, you can bridge the 4 channels to produce 2 x 330 watts RMS @ 4 ohms + 450 @ 4 ohms or 750 @ 2 ohms. This is a great choice for a 4 speaker + 1 sub setup in your car.
More importantly though, these amps are very well aligned with the various other products in the Mobile ES lineup. So, for example, if you wanted to pair one of these amps up with their Mobile ES speakers like the 6×9 or 6 ½, the 4 and 5 channels' 100 watt RMS output @ 4 ohms is aa close to a perfect power match as it gets. Similarly, if you chose to power their 10 inch or 12 inch subs, they’re very well aligned with the 5 channel's 450 watt output or the monoblock’s 600 watt output @ 4 ohms.
So, like many manufacturers who introduce a lineup with a variety of products, these amplifiers very well matched and suited to work together with the other products in the Mobile ES lineup.
Click on an amplifier to see the full product specs page.
- type: Monoblock
- power handling (RMS):
- 600W x 1 @ 4 ohms
- 1,000W x 1 @ 2 ohms
- Frequency Response: 10-500 hz

- type: 4-channel
- power handling (RMS):
- 100W x 4 @ 4 ohms
- 165W x 4 @ 2 ohms
- Frequency Response: 10-40k hz
- type: 5-channel
- power handling (RMS):
- 100 W x4, 450 W x1 @ 4 ohms
- 165 W x4, 750 W x1 @ 2 ohms
- Frequency Response: 10 hz–40k Hz / 10–500 hz
Looking to purchase one or another amplifier? Crutchfield is one of the few retailers right now that carry Sony's Mobile ES lineup along with so many other options for amplifiers. Head on over to Crutchfield's Car Audio Shop and search for the amplifier you want today!
Conclusion
Overall, I was really impressed with the Mobile ES amps. They seem like they align very well with the Mobile ES lineup's goal to produce high quality, high output products geared towards the audiophile.
I really like look of these amplifiers, the specs, and what really stands out to me is the configuration options for inputs, outputs and line outputs. The control that that the amplifier gives you over frequency ranges, like setting the upper and lower thresholds, is a really nice add too. You could probably mimic some of the features via an external DSP, or even using the XAV-9500ES Mobile ES head unit's parametric equalizer or advanced crossover control interface. But, it’s great to hard-set these and provides ideal tuning/configuration control.
I'm really excited to combine these amplifiers with their new Mobile ES 12″ subwoofers and speakers in the lineup!
