In this article: I'll unbox and review iDatastart's HC4.5 all-in one remote start kit, their TL5 Toyota T-Harness and Drone X1 GPS/LTE module. I'll walk you through their key features and then install them on a Toyota Tundra.
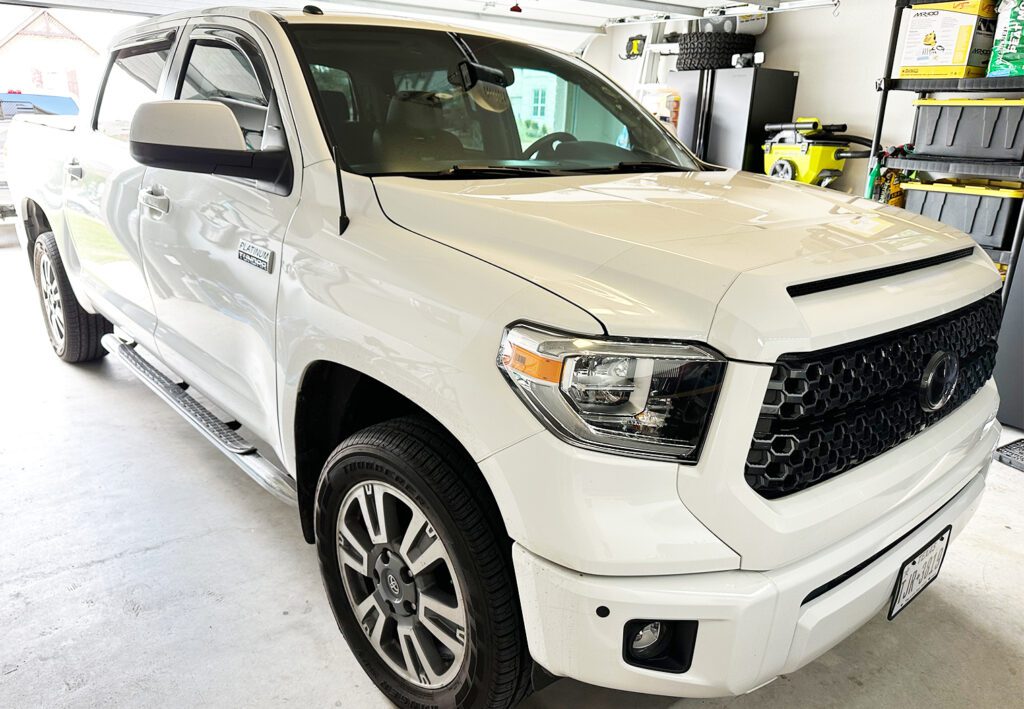
A friend of mine recently picked up a used 2019 Toyota Tundra, Platinum trim package, and although I'm big fan of the Tundras I was pretty shocked to learn that it did not come from the factory with remote start. Any ‘Platinum' or higher trim level packages in any vehicle that was made in the last 5-7 years should feature it by now. It was a factory option for my 2014 Ram 1500 when I purchased it – why wouldn't a truck with A/C seats, leather interior and adaptive cruise control NOT have remote start?
It just so happened that iDatastart had announced the release of their new programmable, TFT LCD remote start kit – the HC4.5 – so I took the opportunity to test and install the kit in the Tundra. The HC4.5 is iDatastart's new flagship remote car starter by ADS (Automotive Data Solutions) with an extended range and programmable remote via a micro USB cable (among other features). I've tested out some of ADS products before, notably an older model of their remote start in a 2016 Ram 1500, and was happy with the features and functionality. So I was confident that I wouldn't be disappointed with this unit.
So in this article, I'm going to unbox and review a brand new HC4.5 remote start along with a TL5 vehicle-specific Toyota T-Harness and a Drone X1 GPS/LTE module. I'll walk through all of the key features of the various products and provide some of my own feedback along the way. Then, I'll head out to the garage and install this setup in a 2019 Toyota Tundra.
*It's worth noting that this review/article is not intended to be an install guide. Although I will walk through my experience and proved a high level installation overview, I would still recommend seeking a professional installer if you are not familiar with your vehicle's wiring and how to interpret some of the wiring diagrams. Incorrectly wiring this type of system can do damage to your vehicle's electronics.*
So let's get started!
Unboxing & Overview of the iDatastart HC4.5, TL5 & Drone X1
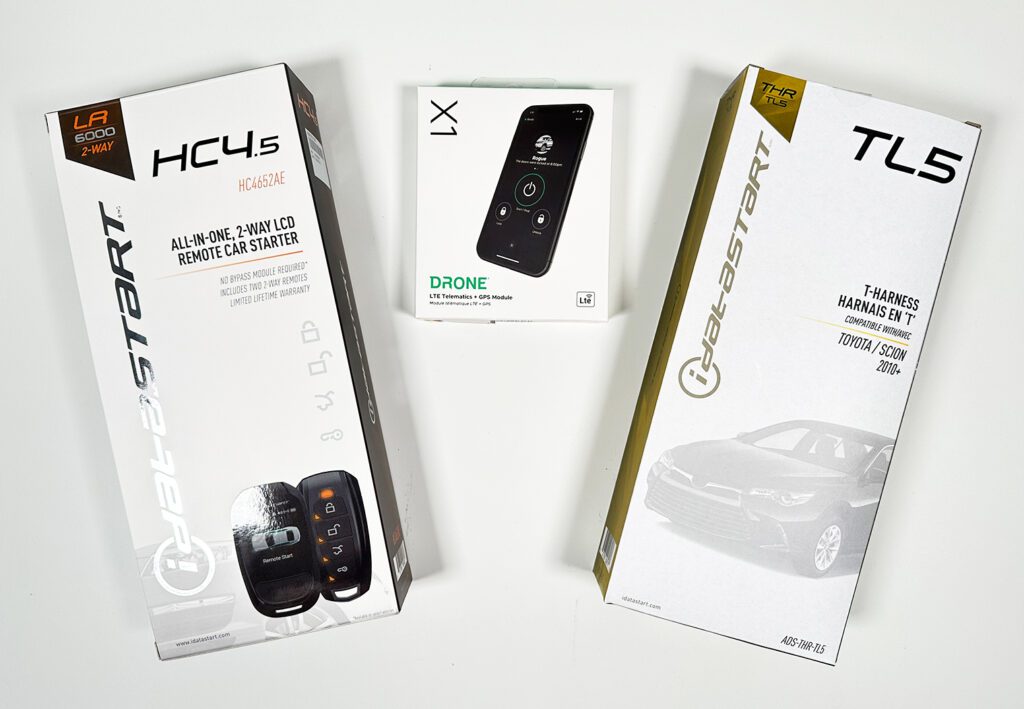
For this install, I chose to use three main components from ADS. Each are sold separately but integrate together to create a more comprehensive system that's easier to install. I highly recommend this setup for any (compatible) vehicle to maximize the features of this all-in-one remote start system and eliminate 90% (or more) of the necessary wiring work required to install it.
iDatastart HC4.5 Remote Starter
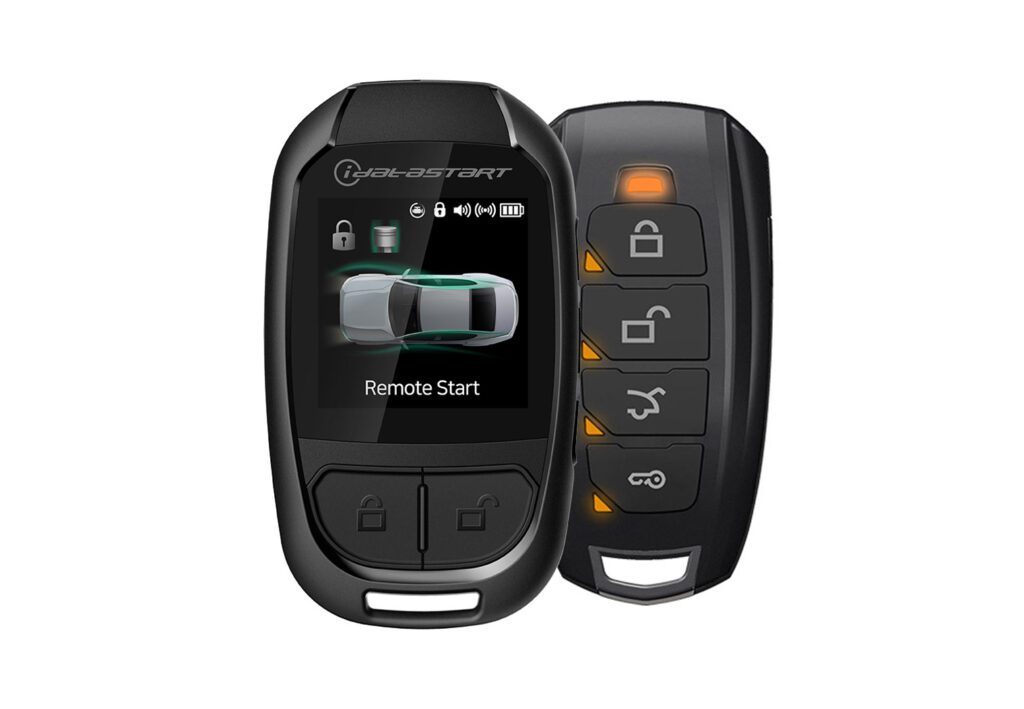
First, the remote start system itself – iDatastart's HC4.5. This is an all-in-one alarm system and remote car starter with two, separate included 2-way remotes. One of which features a nice TFT LCD screen. 2-way meaning the remote talks to your car and the car talks back, providing you with information about your car directly on the remote.
It's compatible with a ton of vehicles beyond this 2019 Tundra, so if you're interested in purchasing one, this review is completely relevant to you as well. And if you're wondering if your vehicle is compatible, iDatastart's homepage has a vehicle compatibility check where you can add your vehicle information and see if their products will work for your setup.
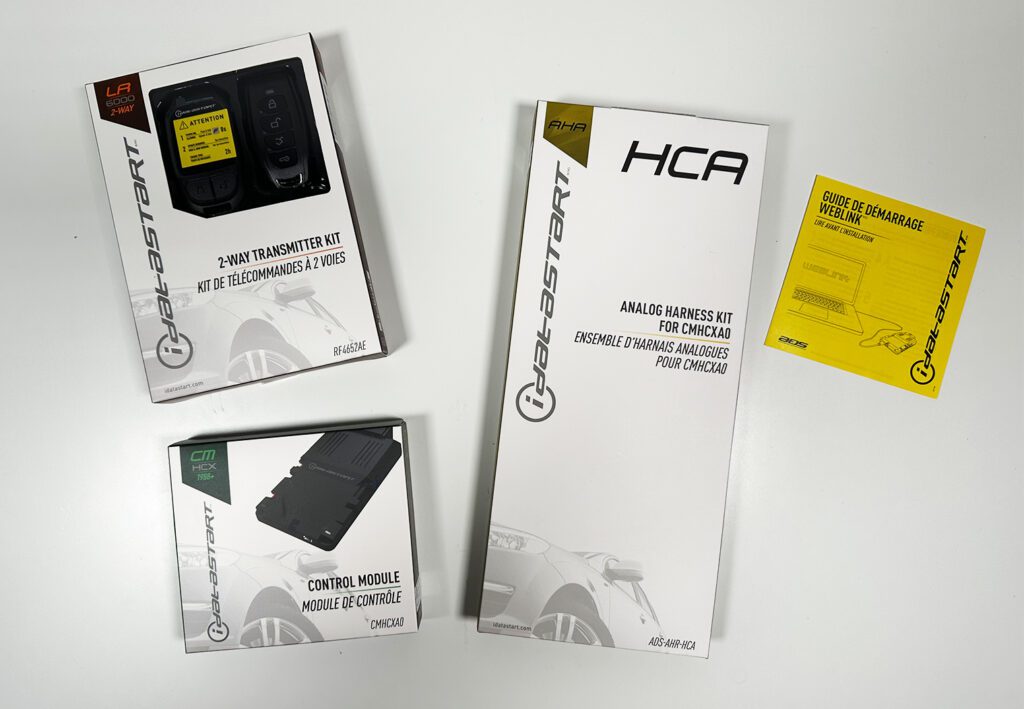
Inside the outer packaging, you'll find three separate boxes within that house the remotes and antennae, the control unit and then the universal wiring harness (for those who don't want to purchase a vehicle specific one).
Starting with the fun stuff first! In the “2-way transmitter kit”, the two remotes are up front and center when you open the box up. Both remotes feature a 6 thousand feet range, which equates to a little over a mile. While I'm sure that terrain, buildings and other interfering factors might have an impact on that range, this is among the higher-ranged remote starts out of the box that I've seen.
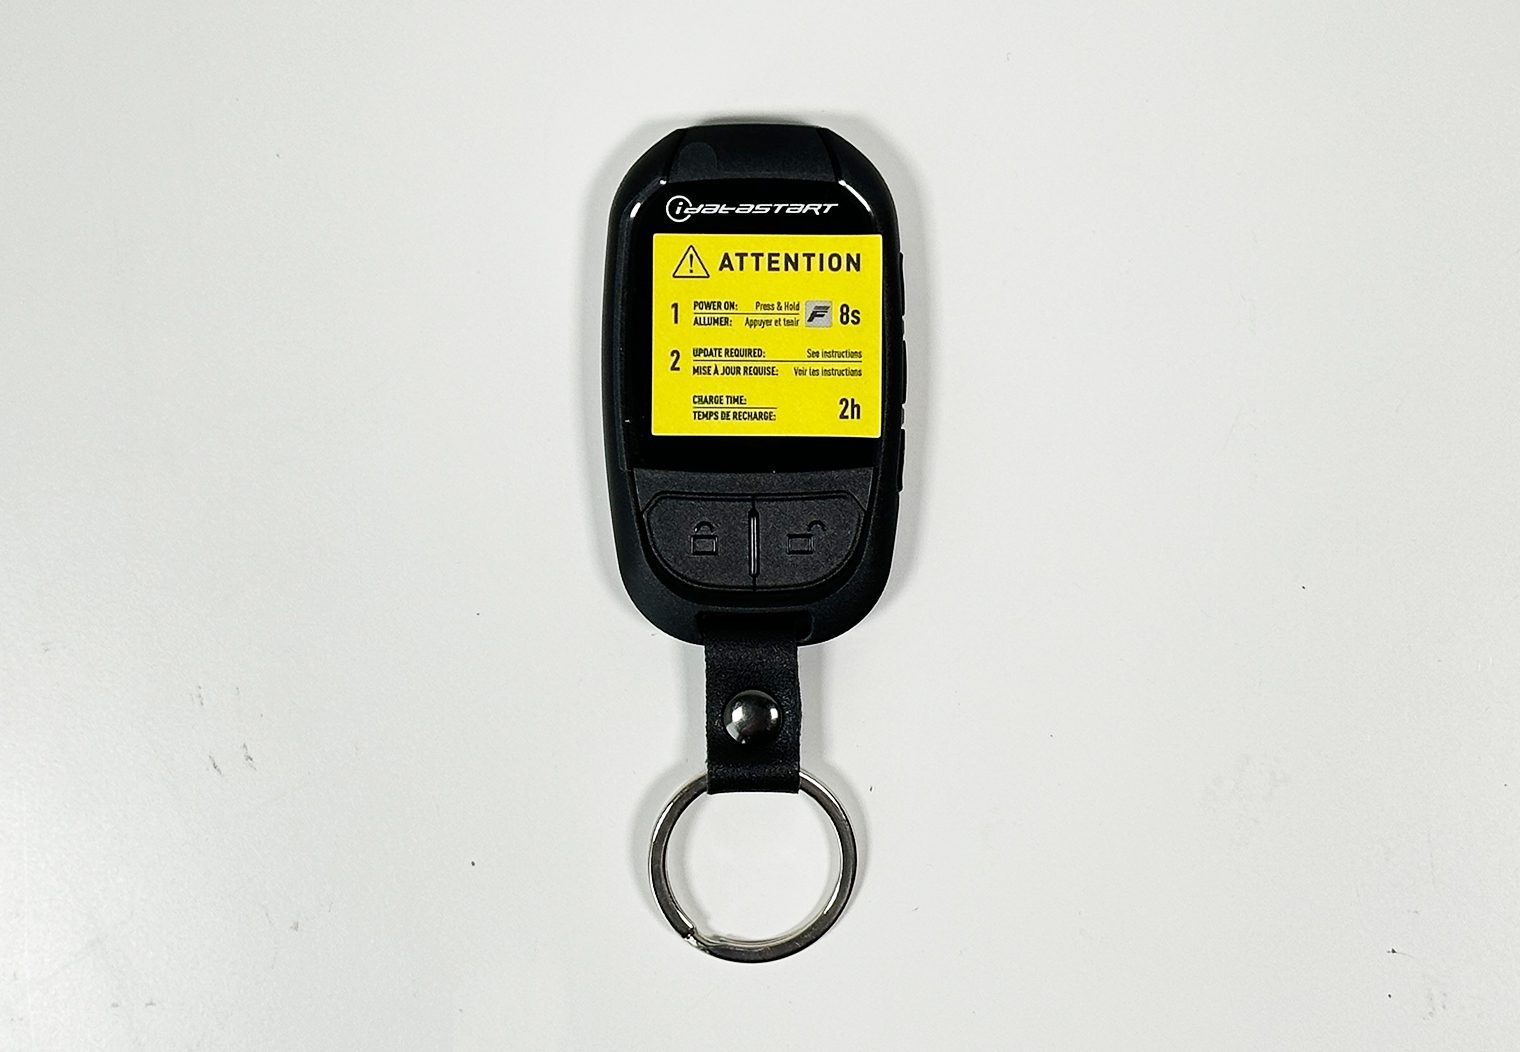
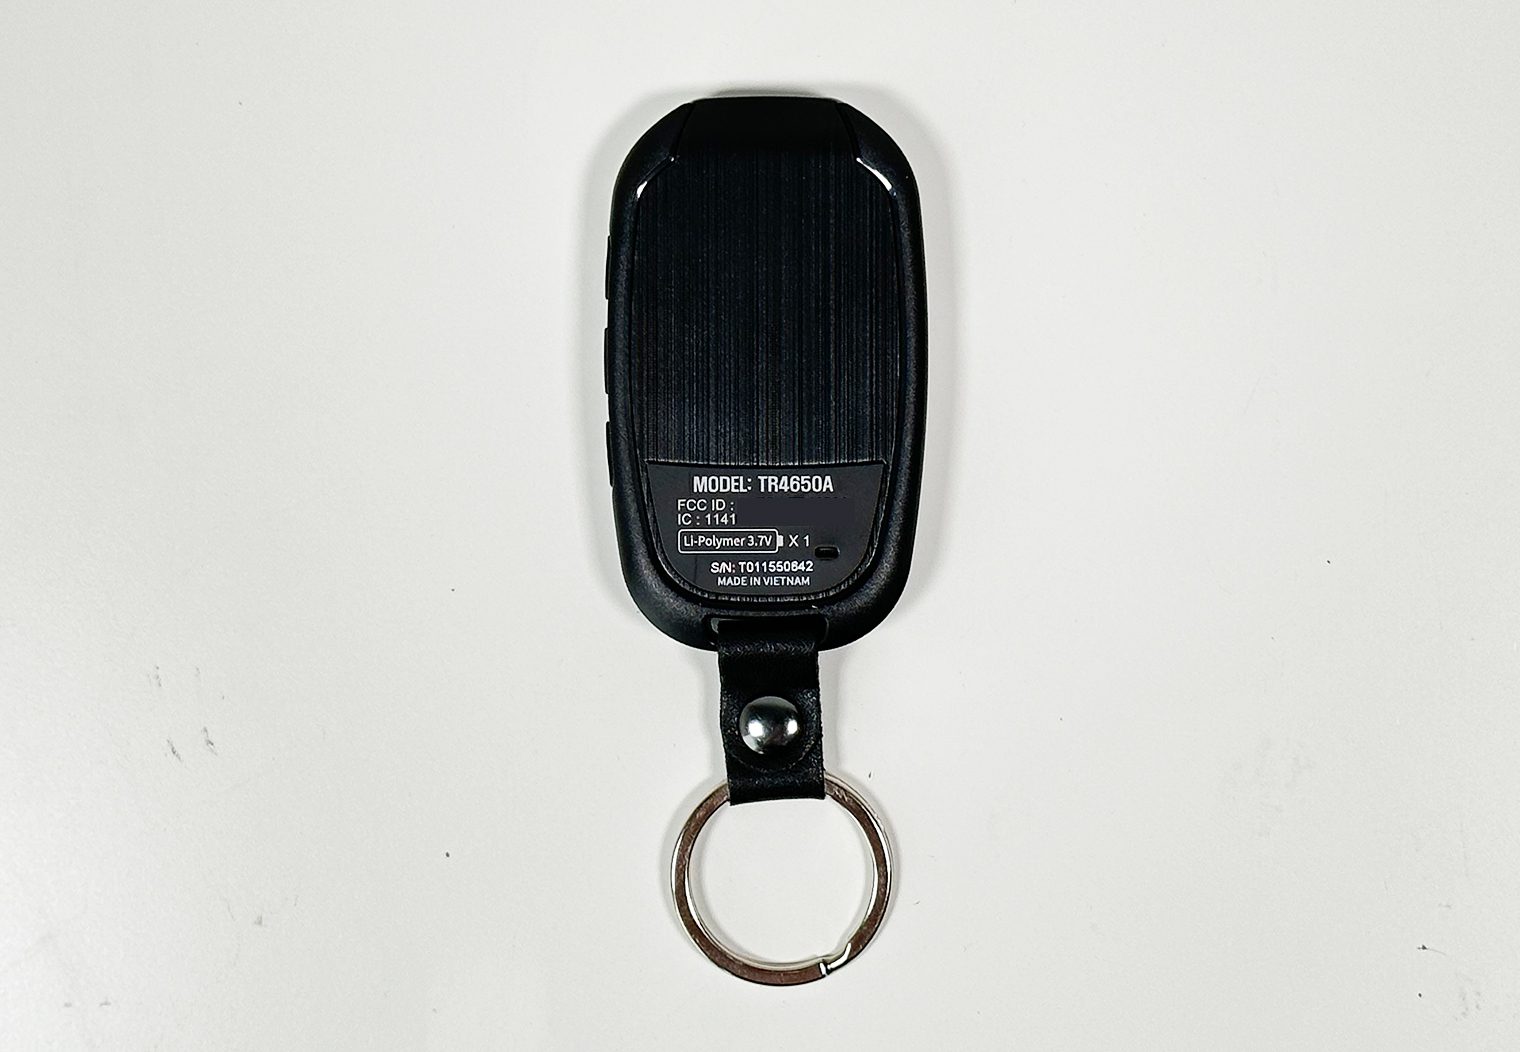
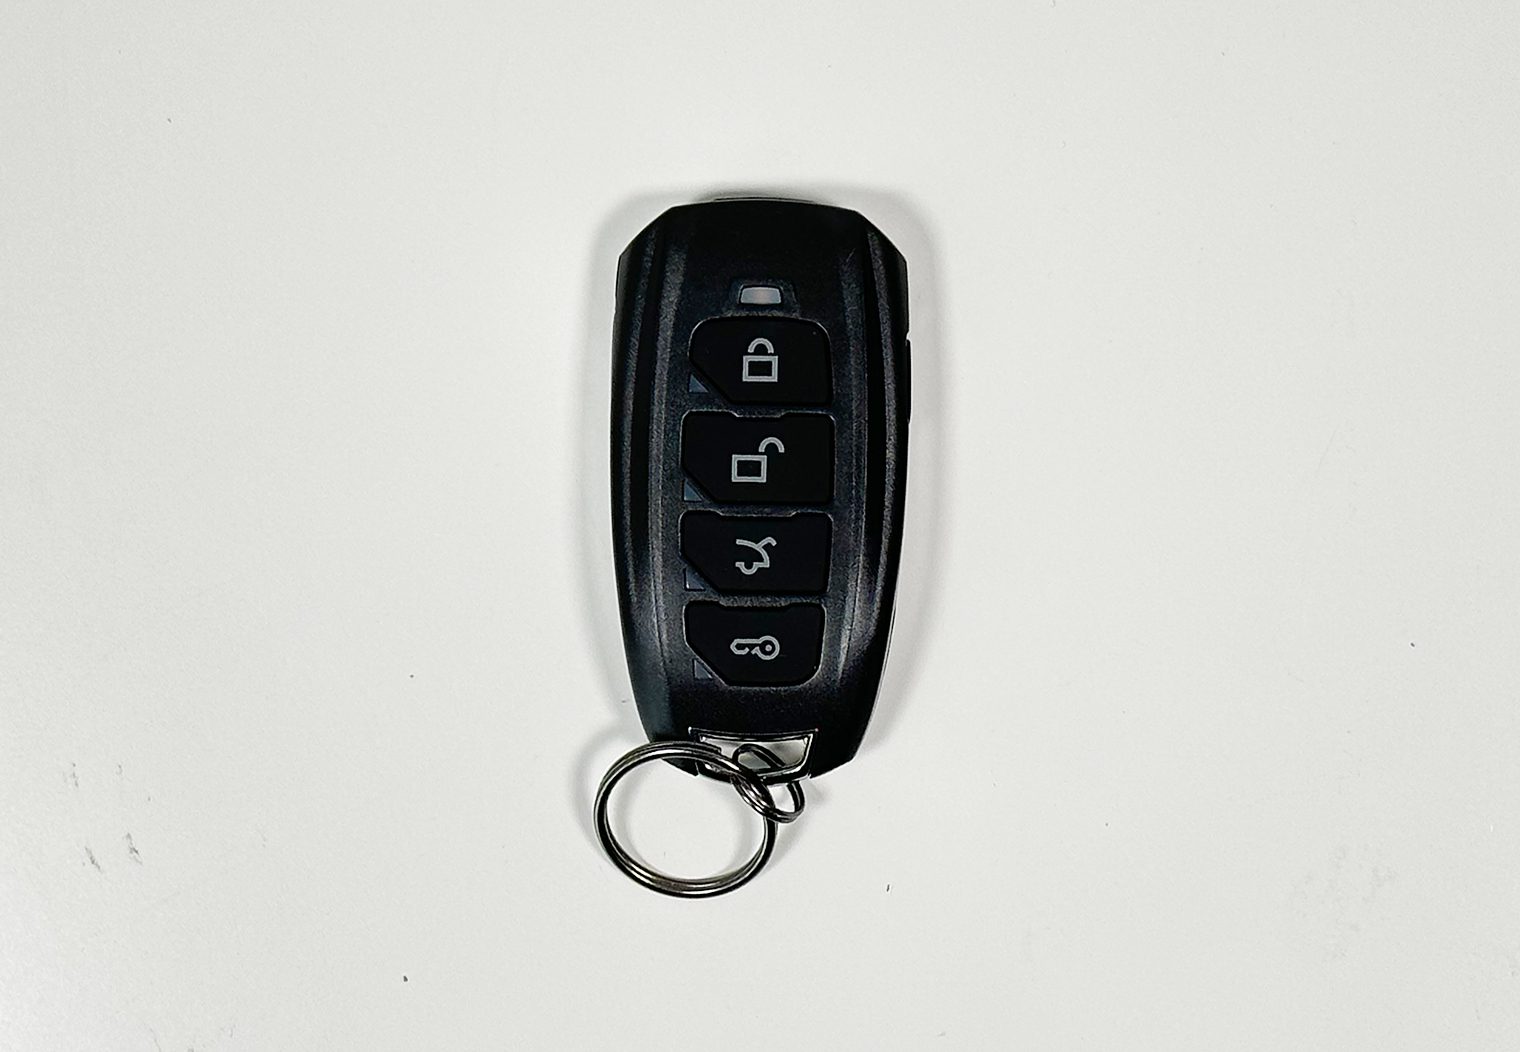
The primary remote is the TR4650A. This is the remote that you'll find the LCD screen. It'll tell you a variety of key information about your car while you're away. This includes:
- Shock detection
- If the doors are open
- If your trunk or hood is open
- If the alarm has been triggered
- If ignition has been detected
- And so on
The remote also has vibration, so it will vibrate if one or more of the sensors are triggered such as shock detection, or the alarm. Great feature for when it's in your pocket and the alert might not be audible.
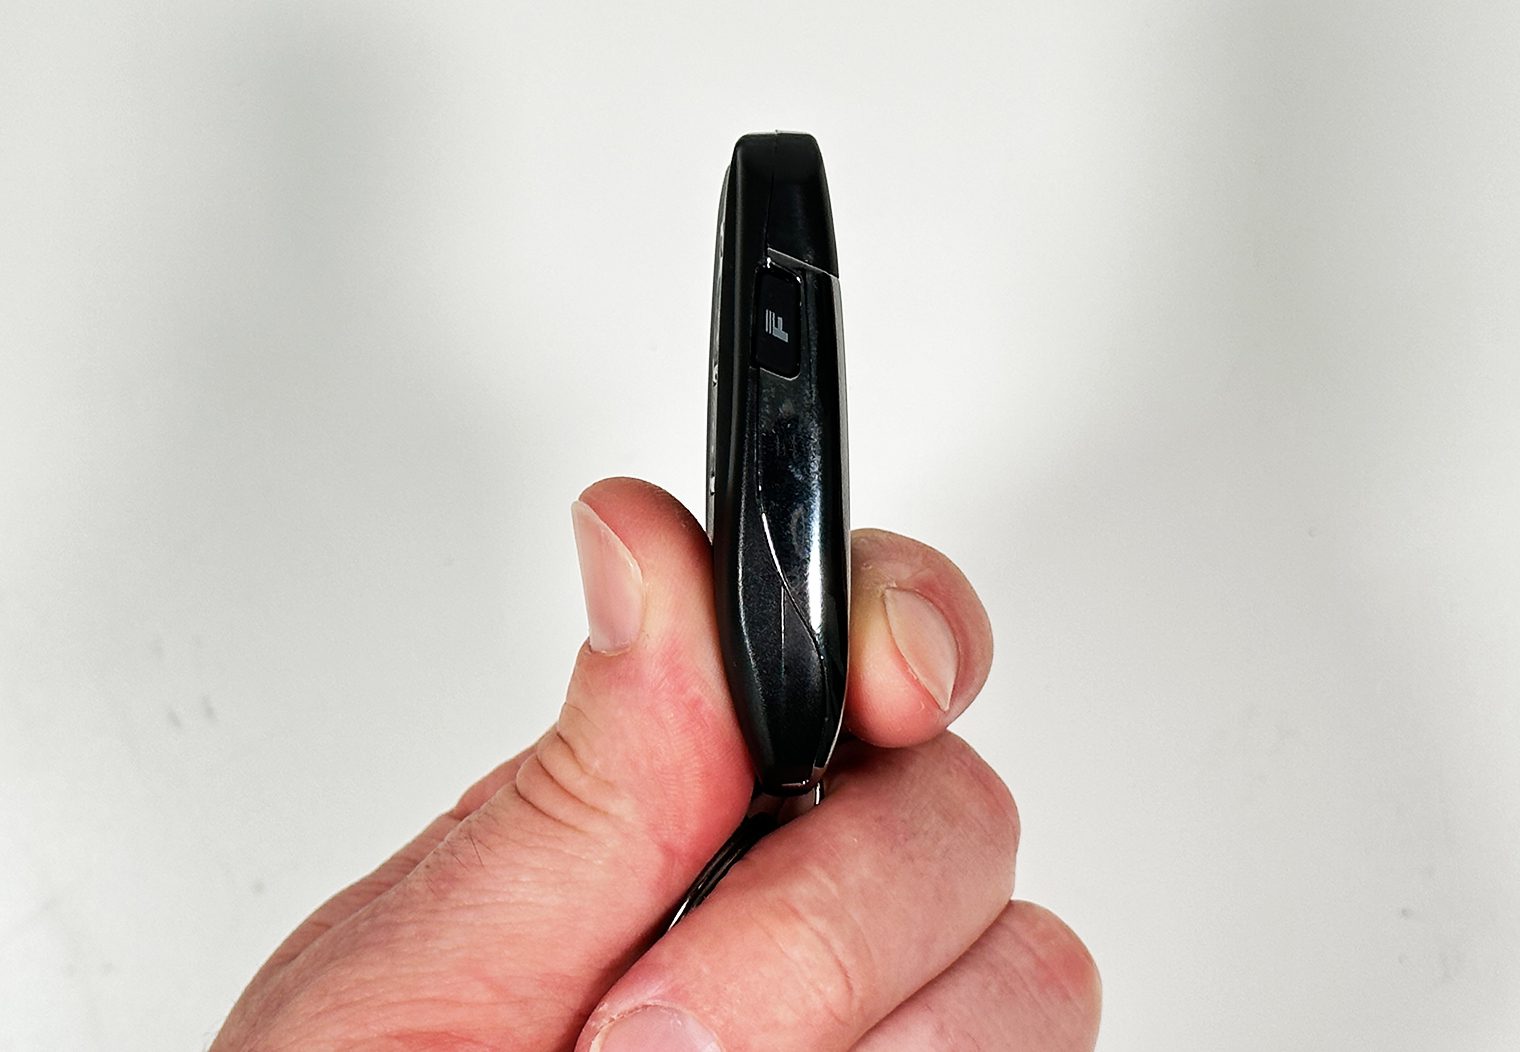
Between the front and the side, there are a total of 5 different buttons. The most obvious being on the front to lock and unlock your vehicle, but on the side you'll also find three others:
- Function/menu button
- Trunk release
- Information/valet button
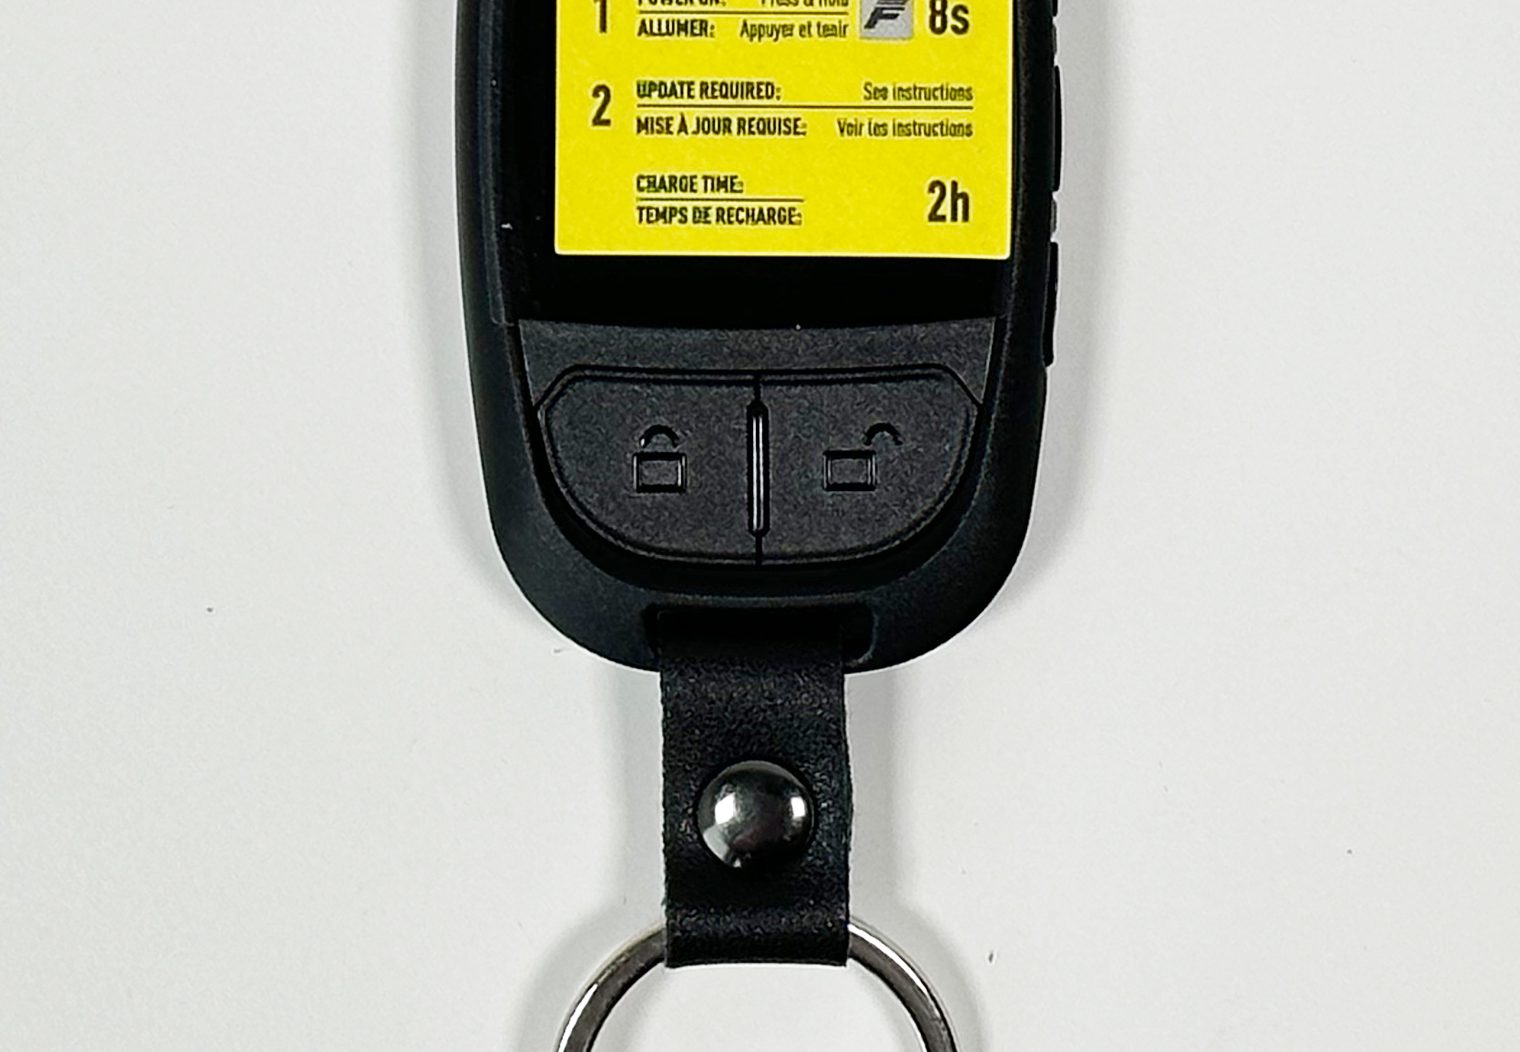
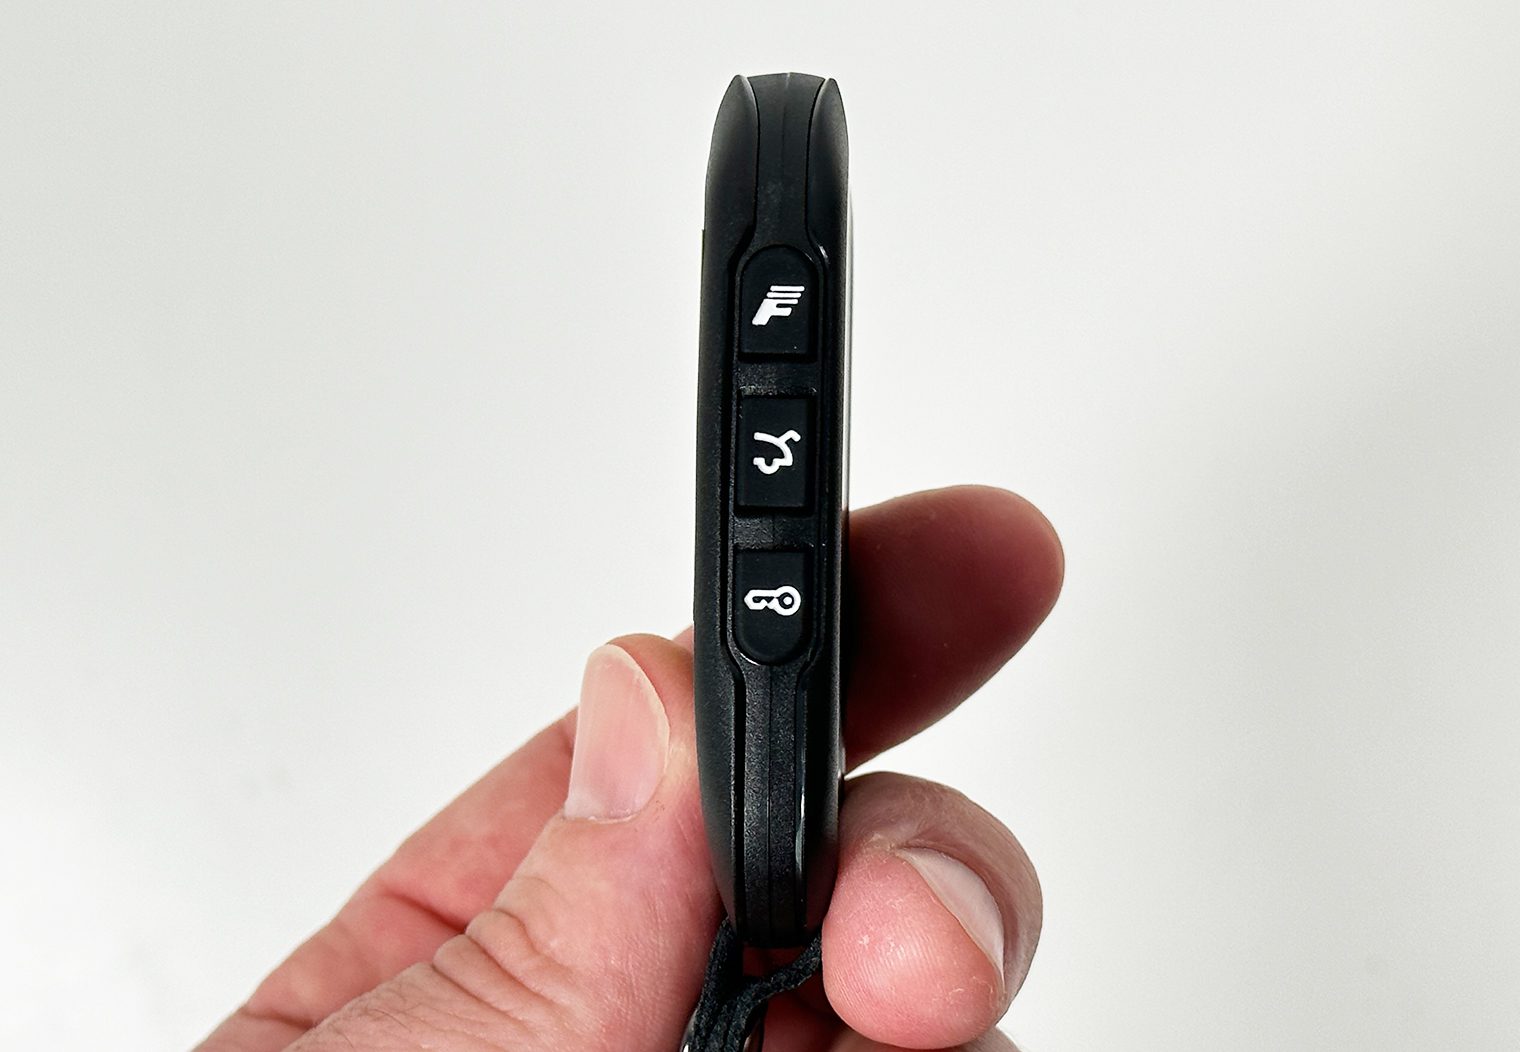
These buttons can be used in sequence to trigger a variety of commands. For example if you click on the function button once and then the key button it'll trigger the valet mode.
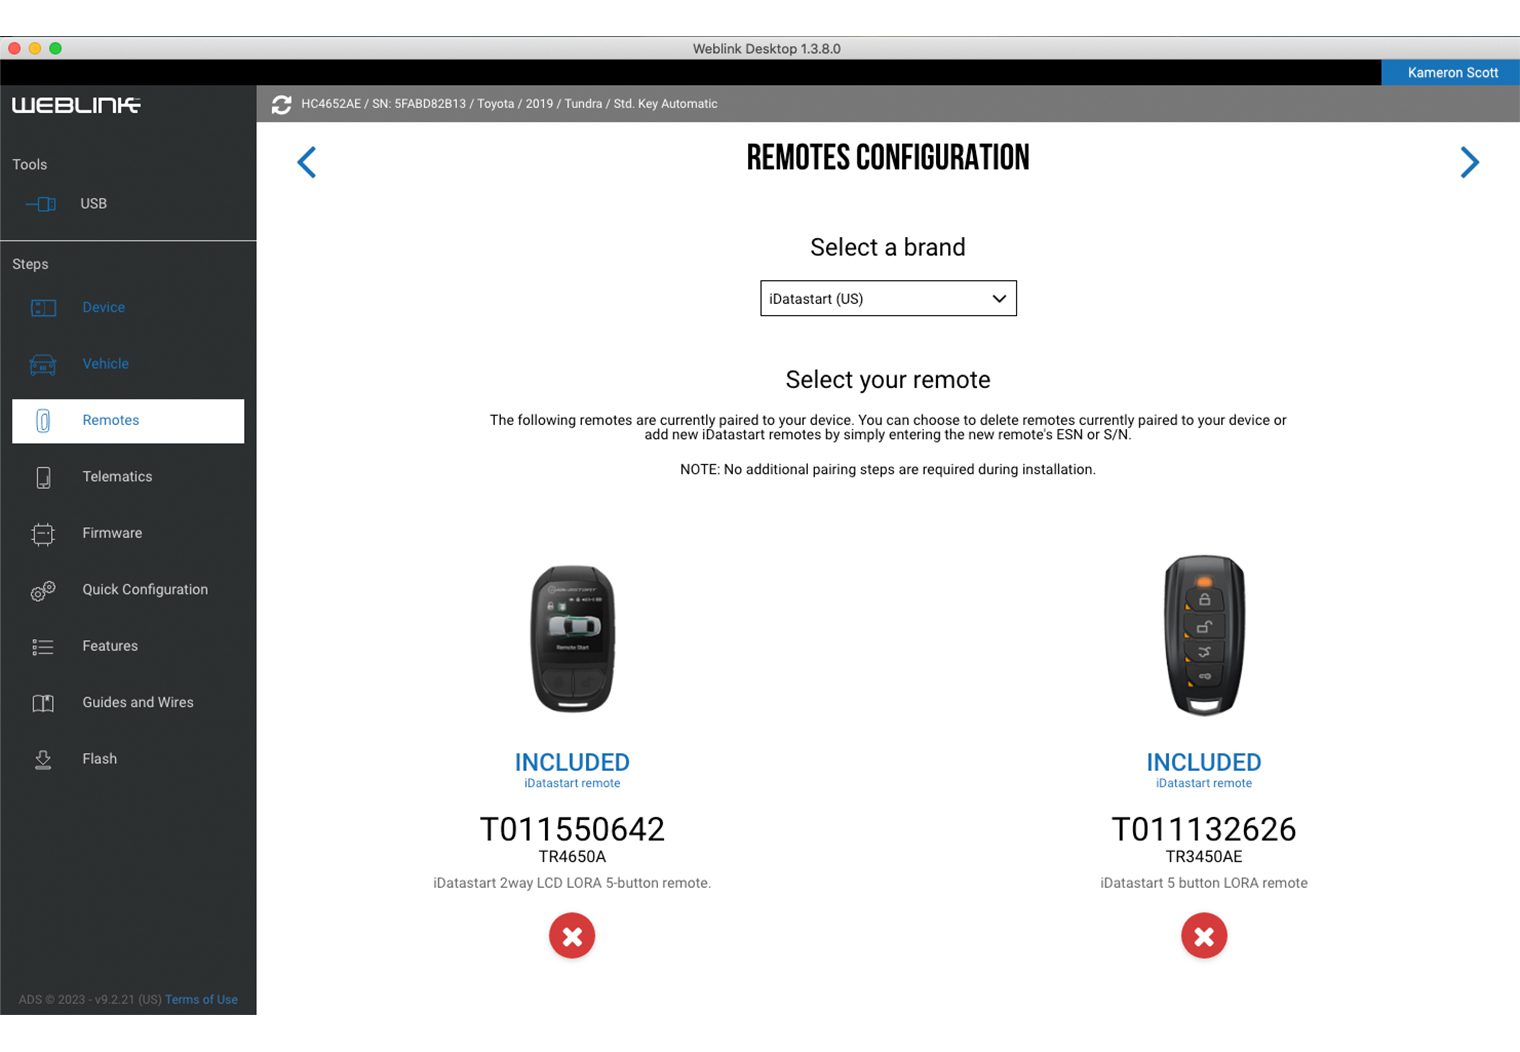
But one of the standout features of this system is the programmable and rechargeable functionality that the primary remote has. If you look at the top of the remote you'll find a micro-usb port that will allow you to program it to an existing (compatible) iDatastart remote start system, or upgrade the firmware as well. This is particularly great if you loose or break a remote and want to purchase a replacement (or add another). You can simply purchase a single remote and then program it to your existing system using iDatastart's WebLink program.

One of the things I also liked that iDatalink included in this kit alongside the primary remote was a pair of screen protectors. These are similar to what you'd put on your smartphone screen to protect it from scratches. Keys get beat up – whether it's from being in your pockets, dropping them or placing them on rough surfaces. So having a couple extra screen protectors was a great idea and shows they were thinking about the user! They even come with the wipe cloth and alcohol pads!
The secondary remote that comes included in this kit is the TR2450AE. This is a more simplistic/traditional remote. It has all of the same buttons that the primary remote has, the same range too. And like the TR4650A, the various buttons can be used together to trigger a variety of commands. According to the manual, up to 30!
The TR2450AE is also a 2-way remote like the primary, however instead of displaying information on the LCD screen it will indicate different alerts via the lights to the bottom left corner of each button. But unlike the primary remote, it is not rechargeable and doesn't feature vibration.
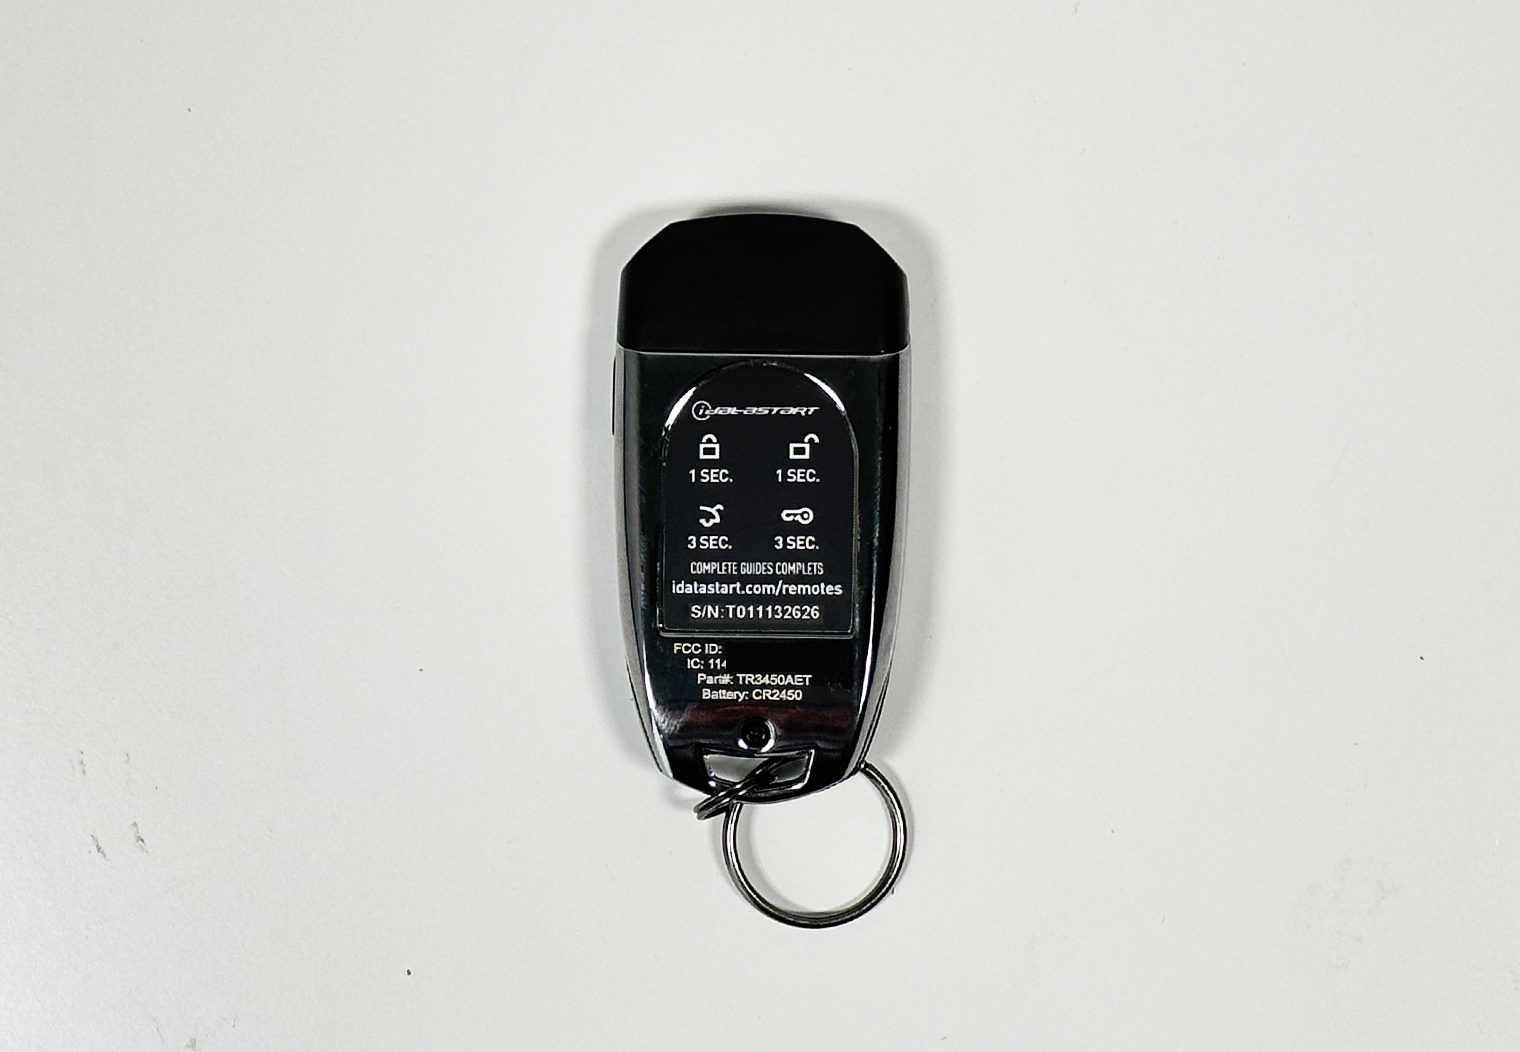
The last component included in the “2-way transmitter kit” box is the antenna – this is what the two remotes use to communicate to the system at far distances. It'll plug directly into the brain of the system. iDatastart also provides a micro-usb cable to use for programming and charging the TR4650A remote.
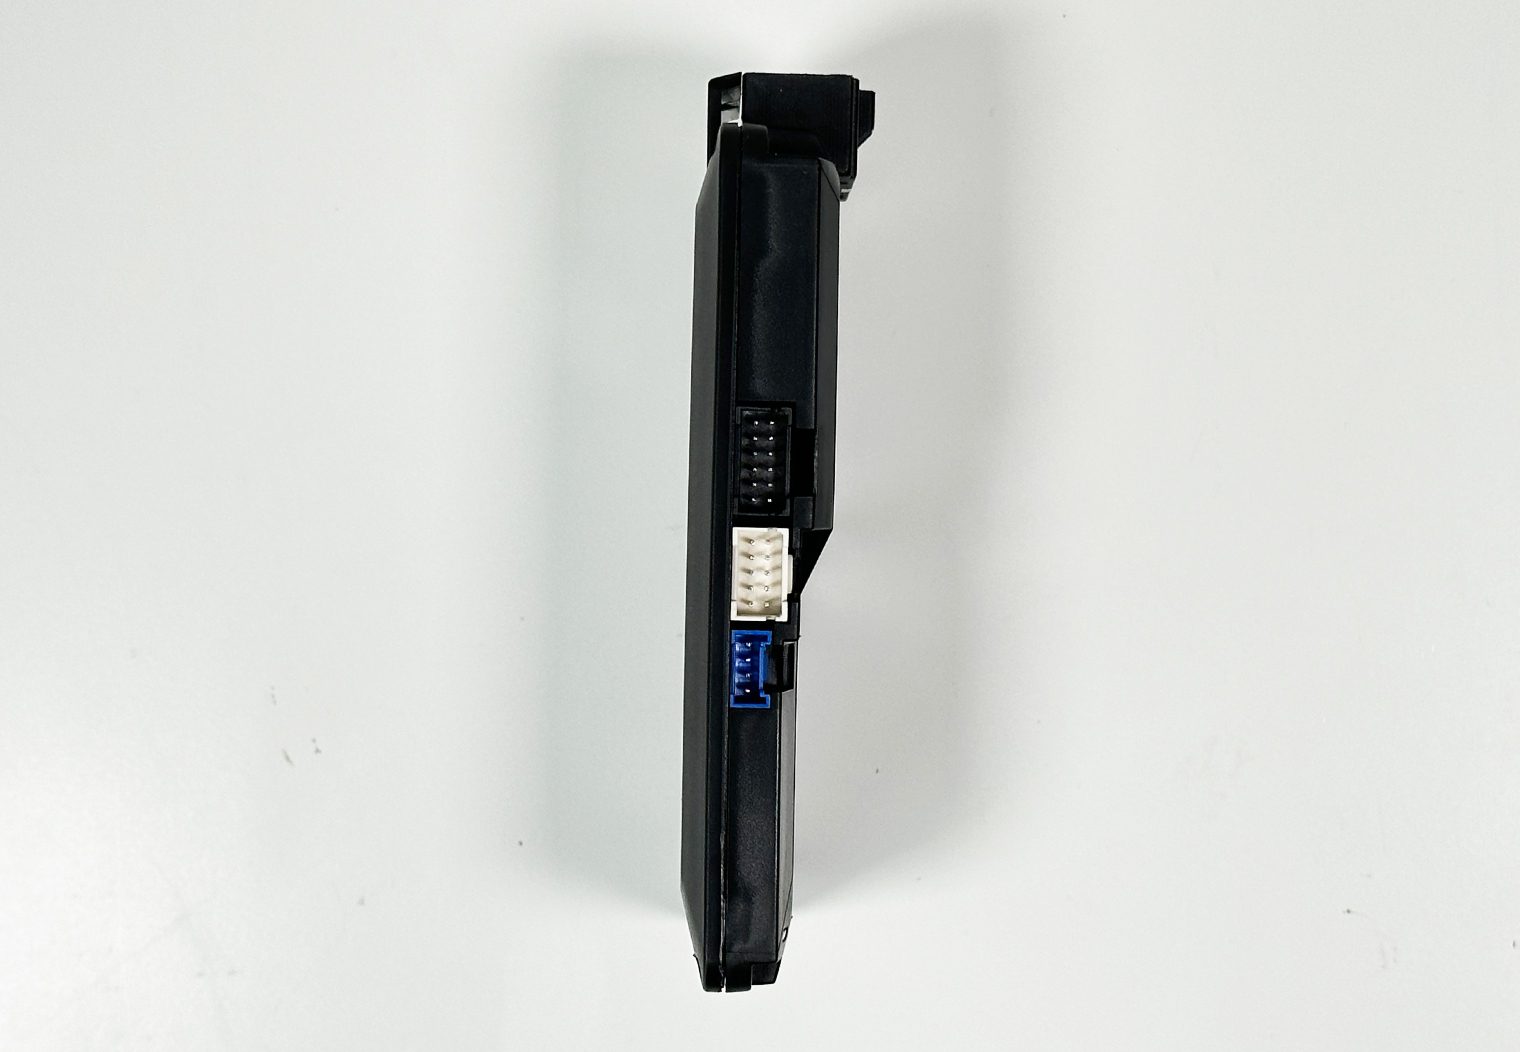
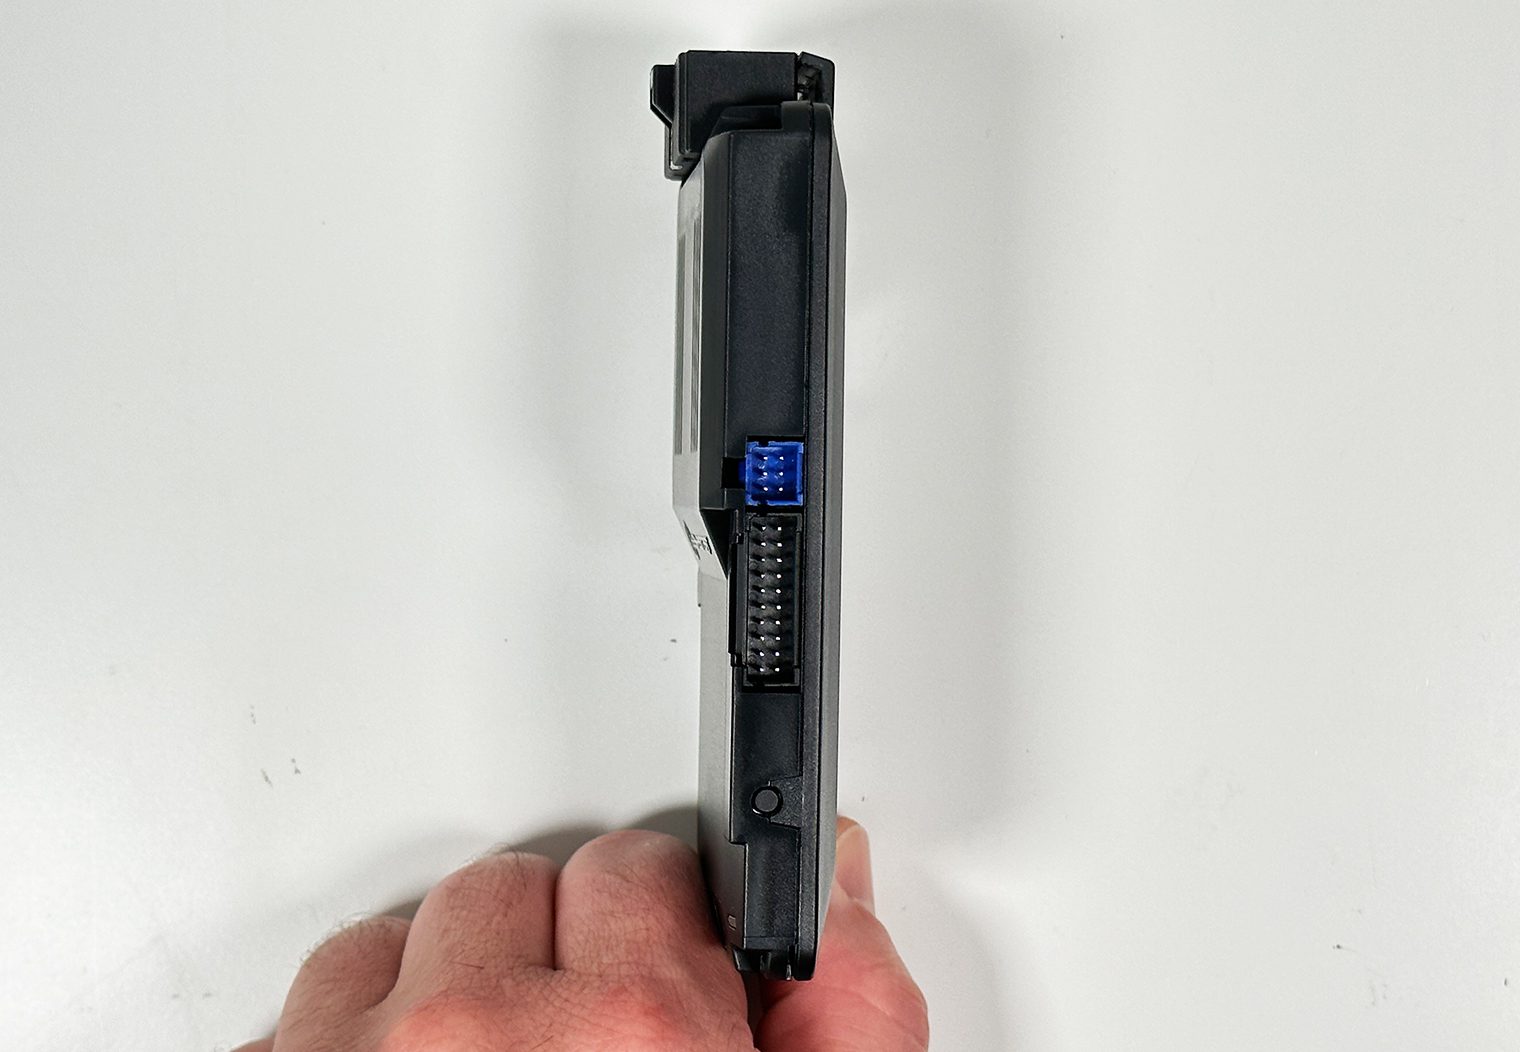
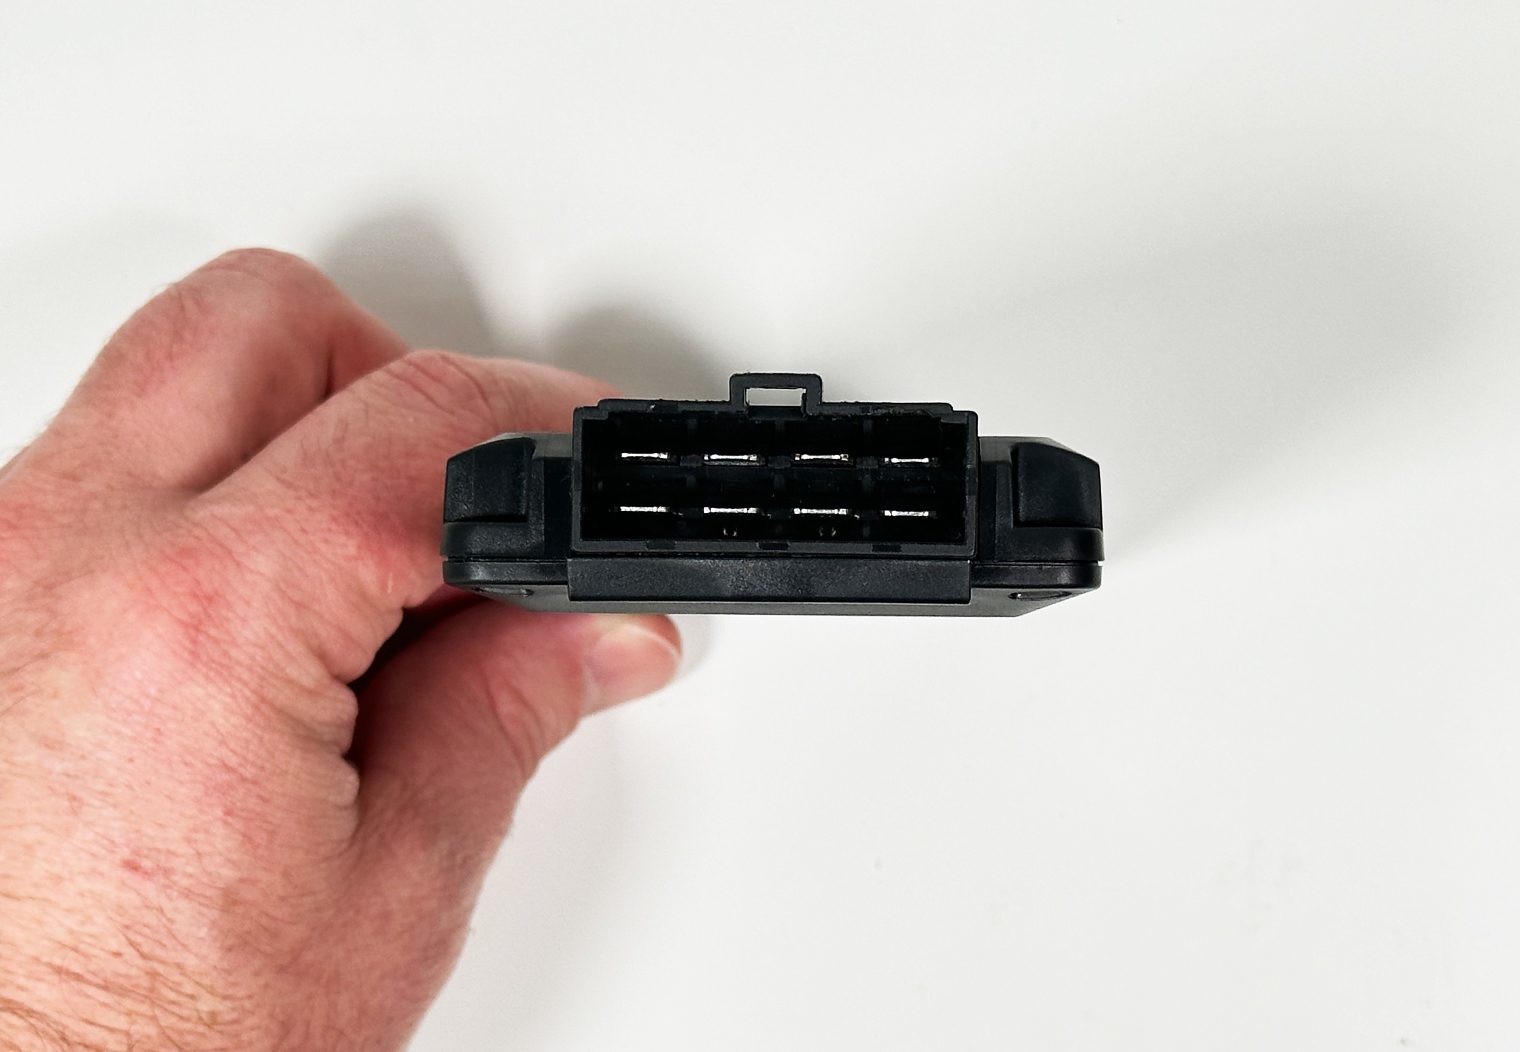
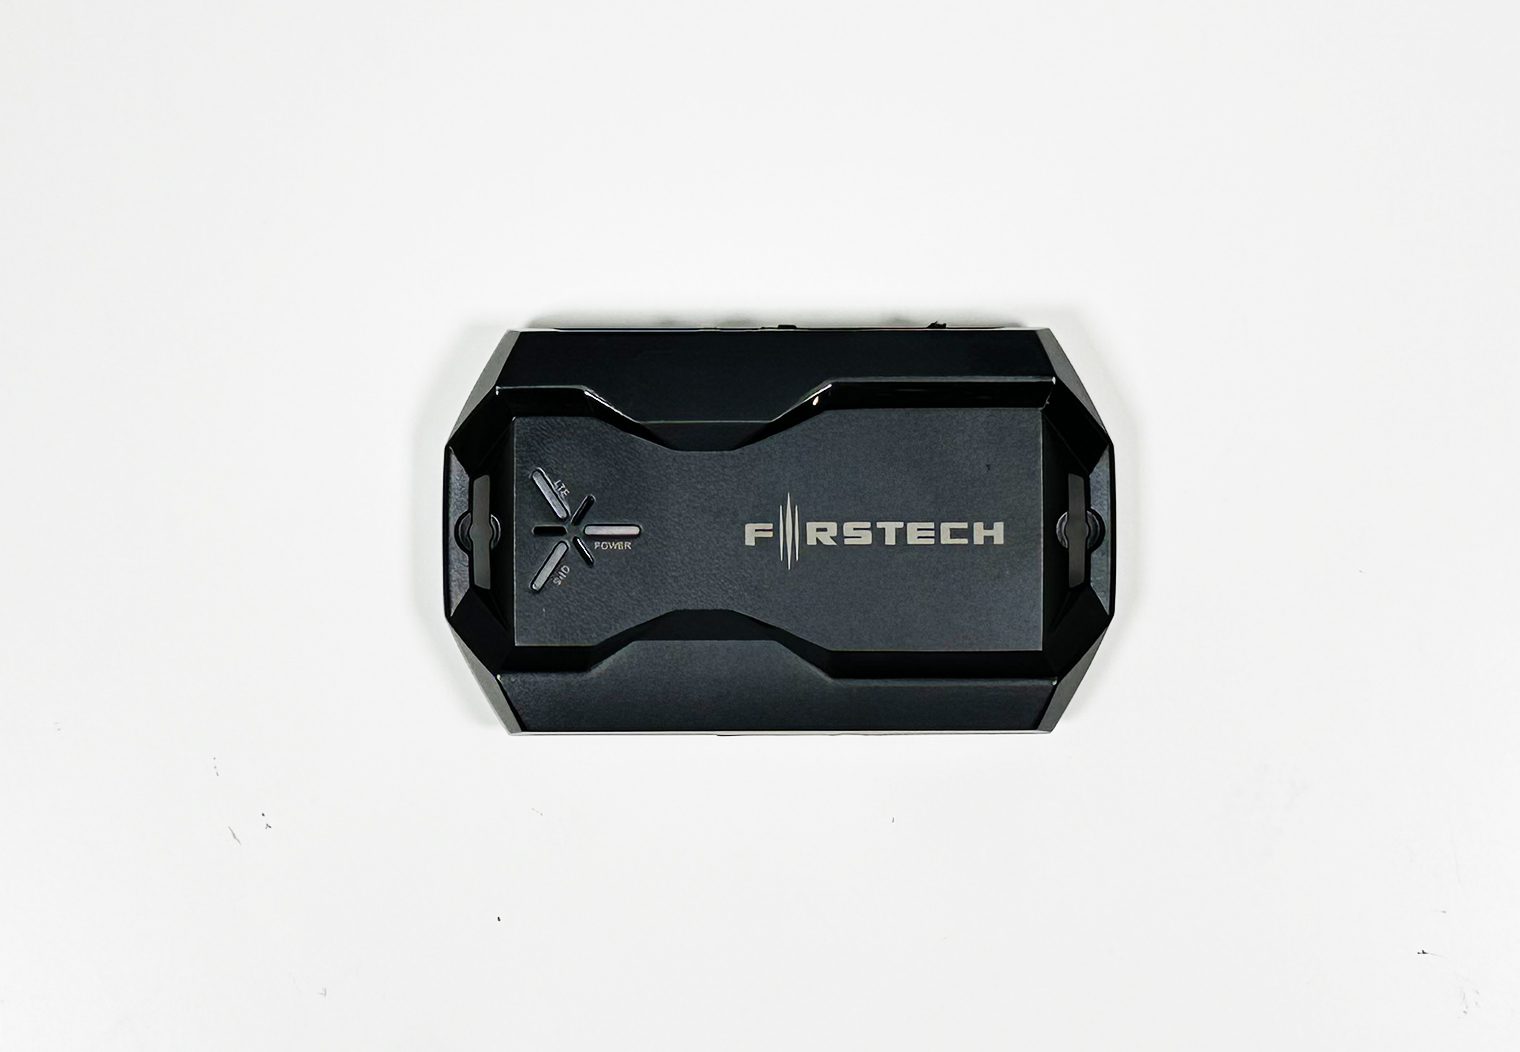
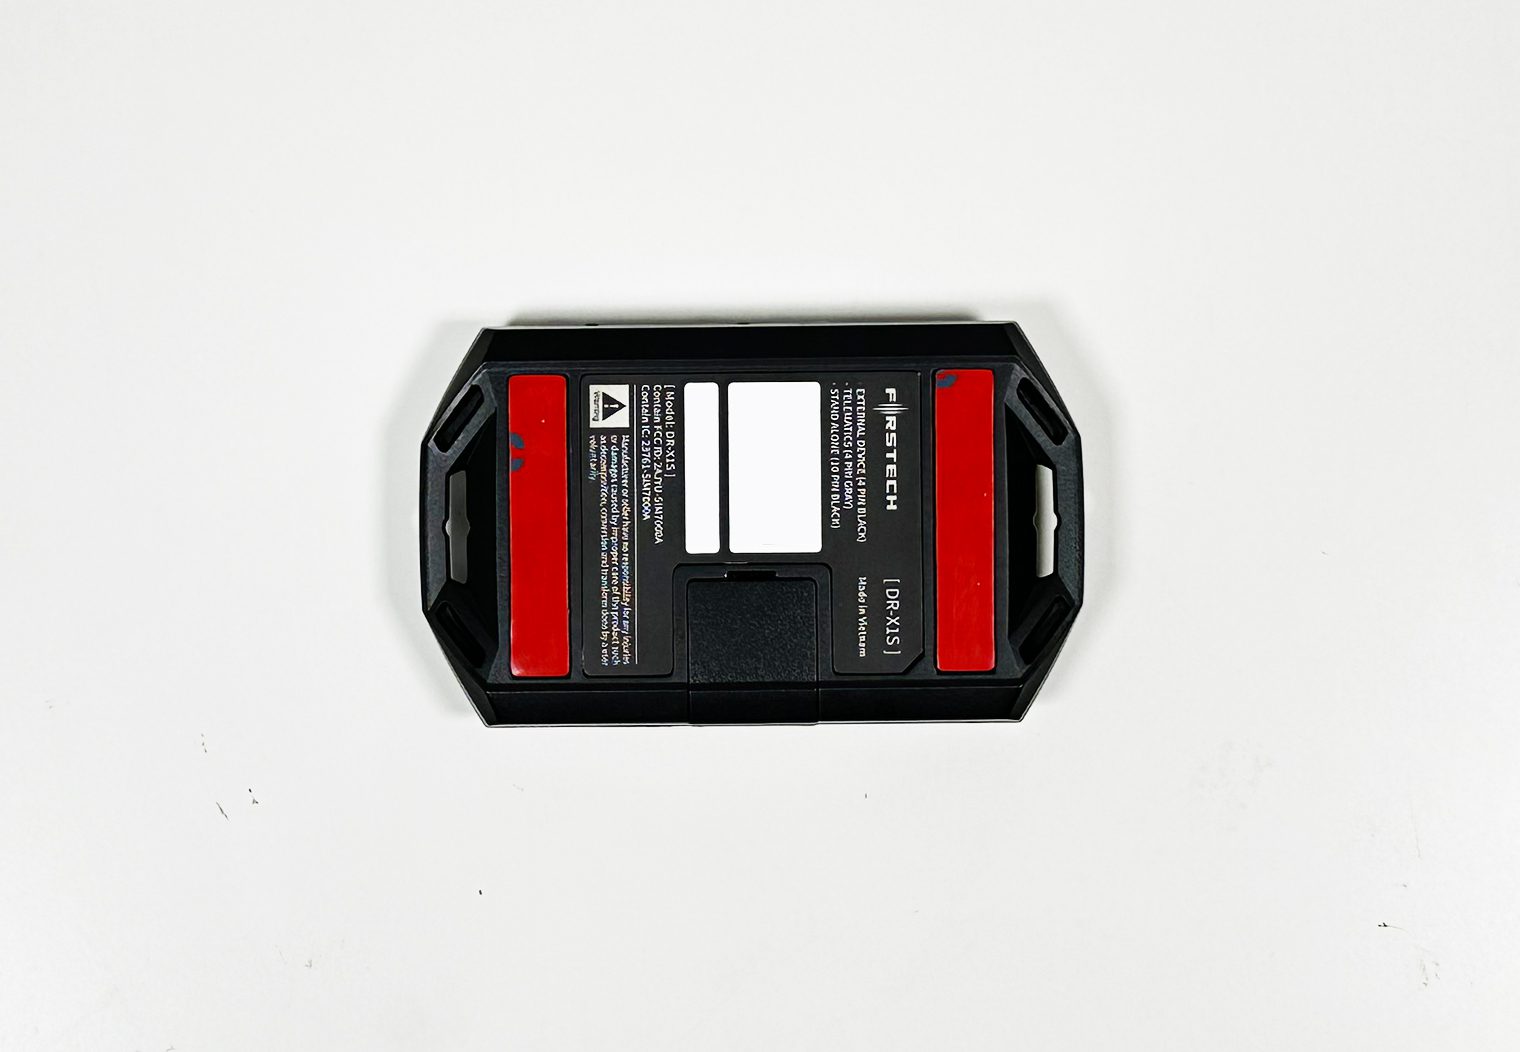
Speaking of the brain, the second box in the HC4.5 kit houses the HCX control module. The HCX is the central control unit that powers and controls the system. You'll take all of the various components and wire harnesses, including the antennae, and connect them into their respective plug on the HCX. It's relatively small in size, which makes it easy to find a spot to mount it to under the dash of your vehicle. On each of the four edges it also has slots for zip ties to simplify mounting.
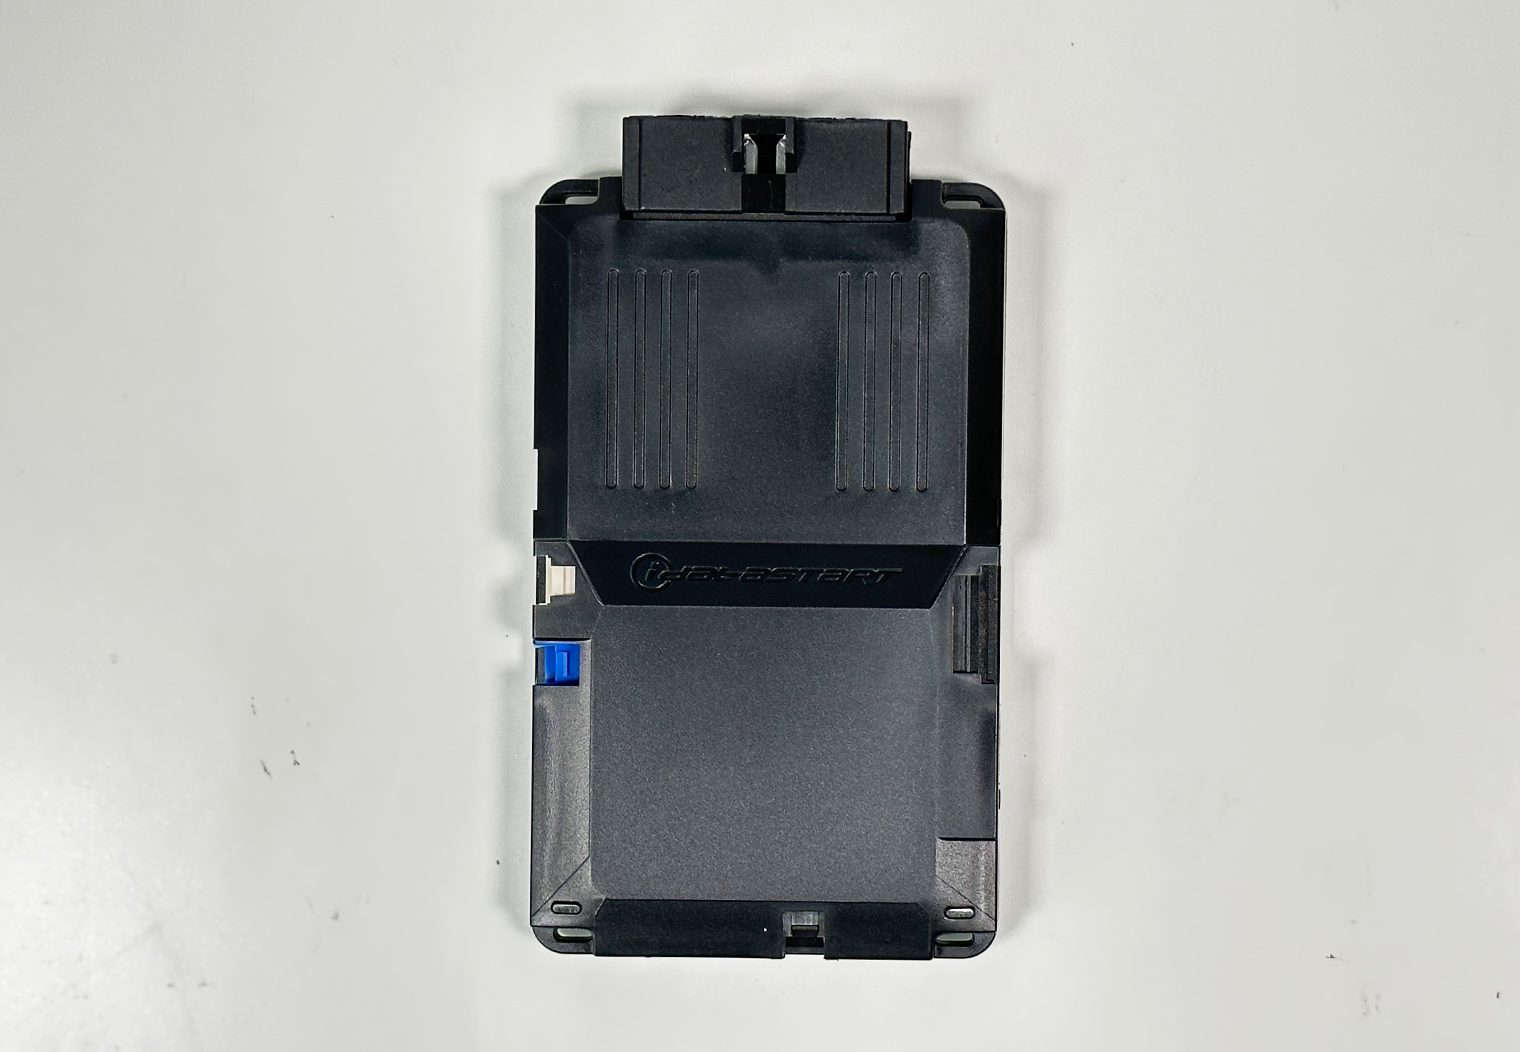
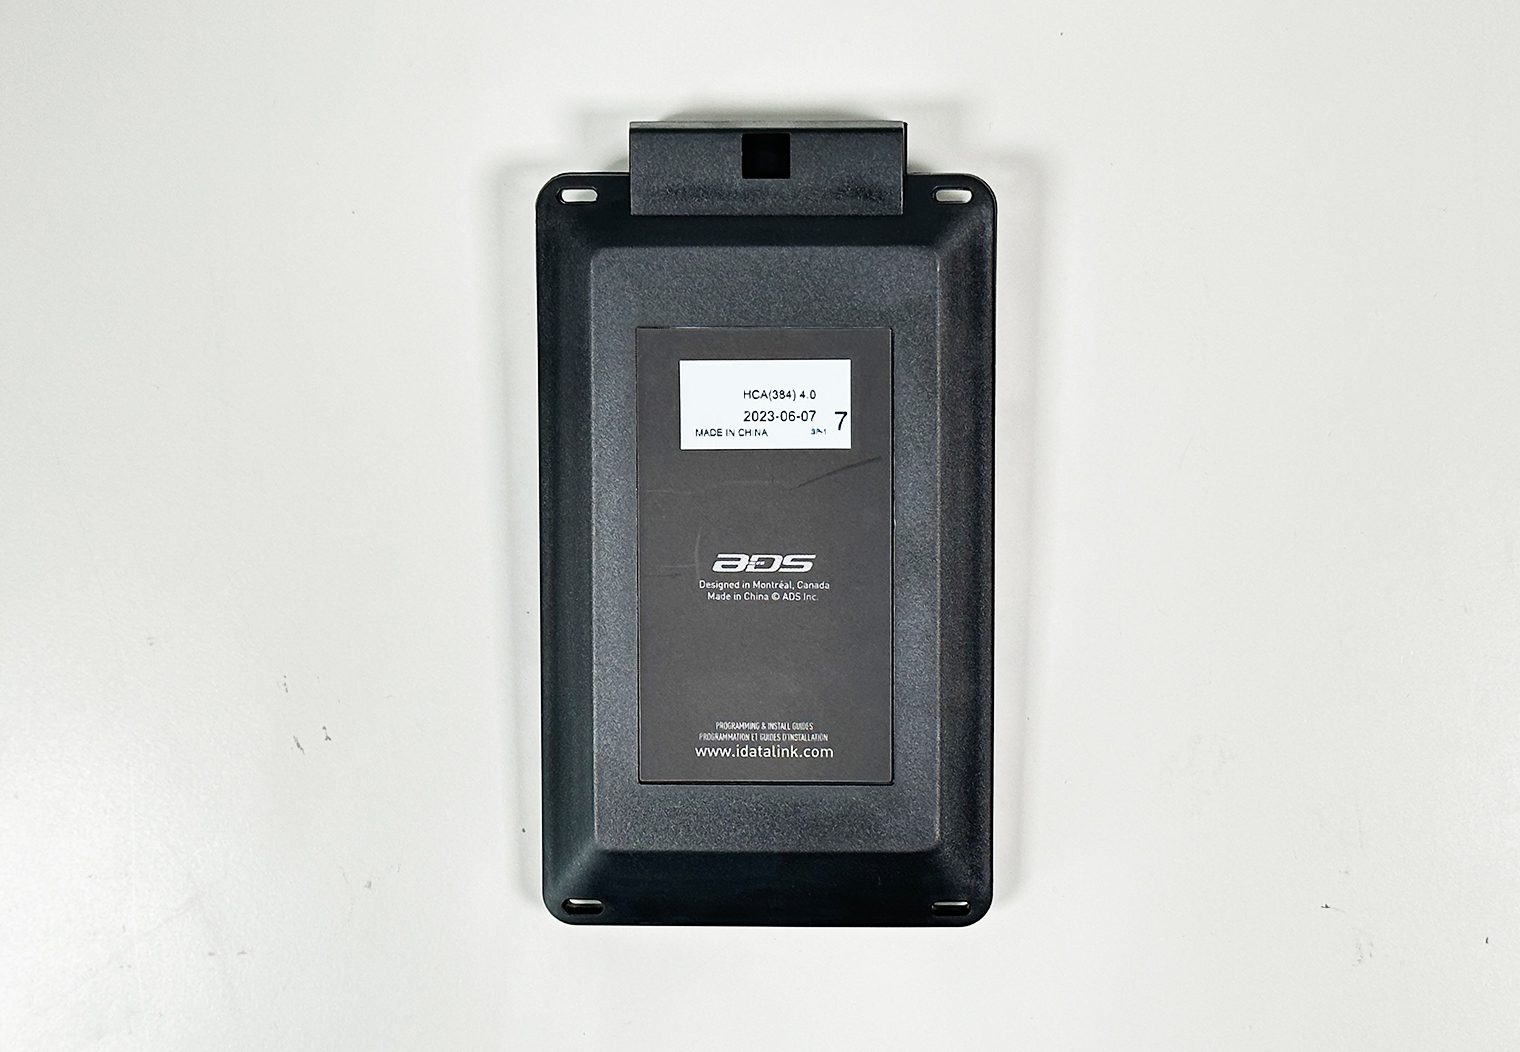
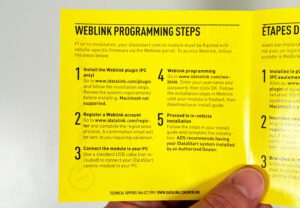
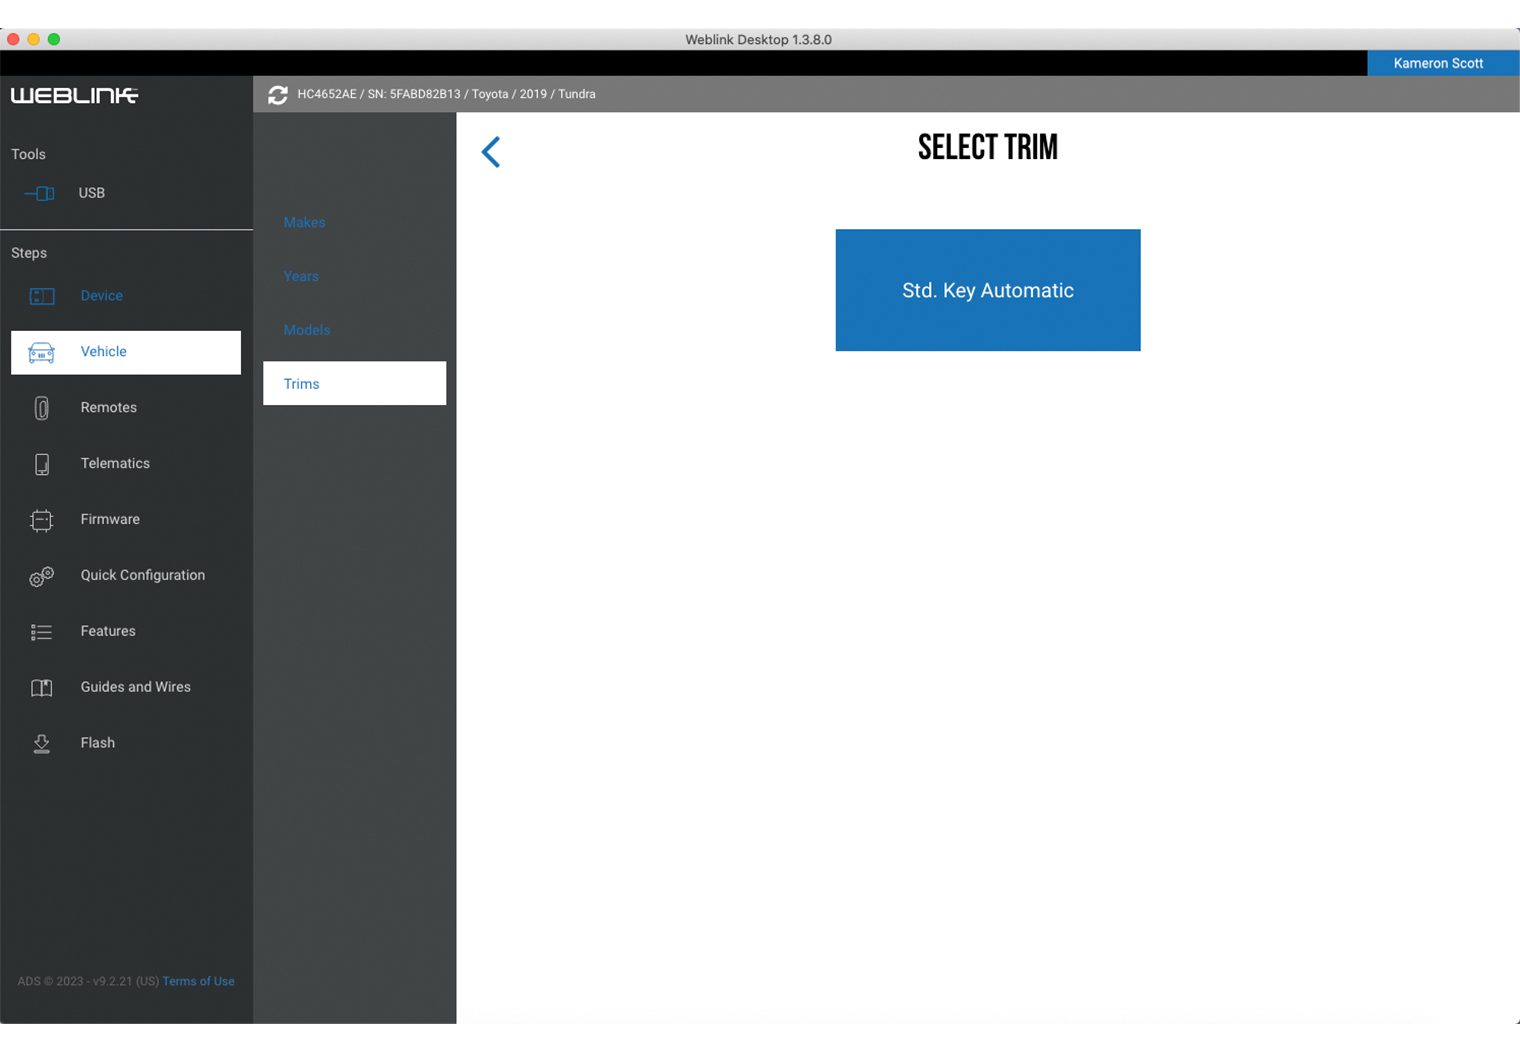
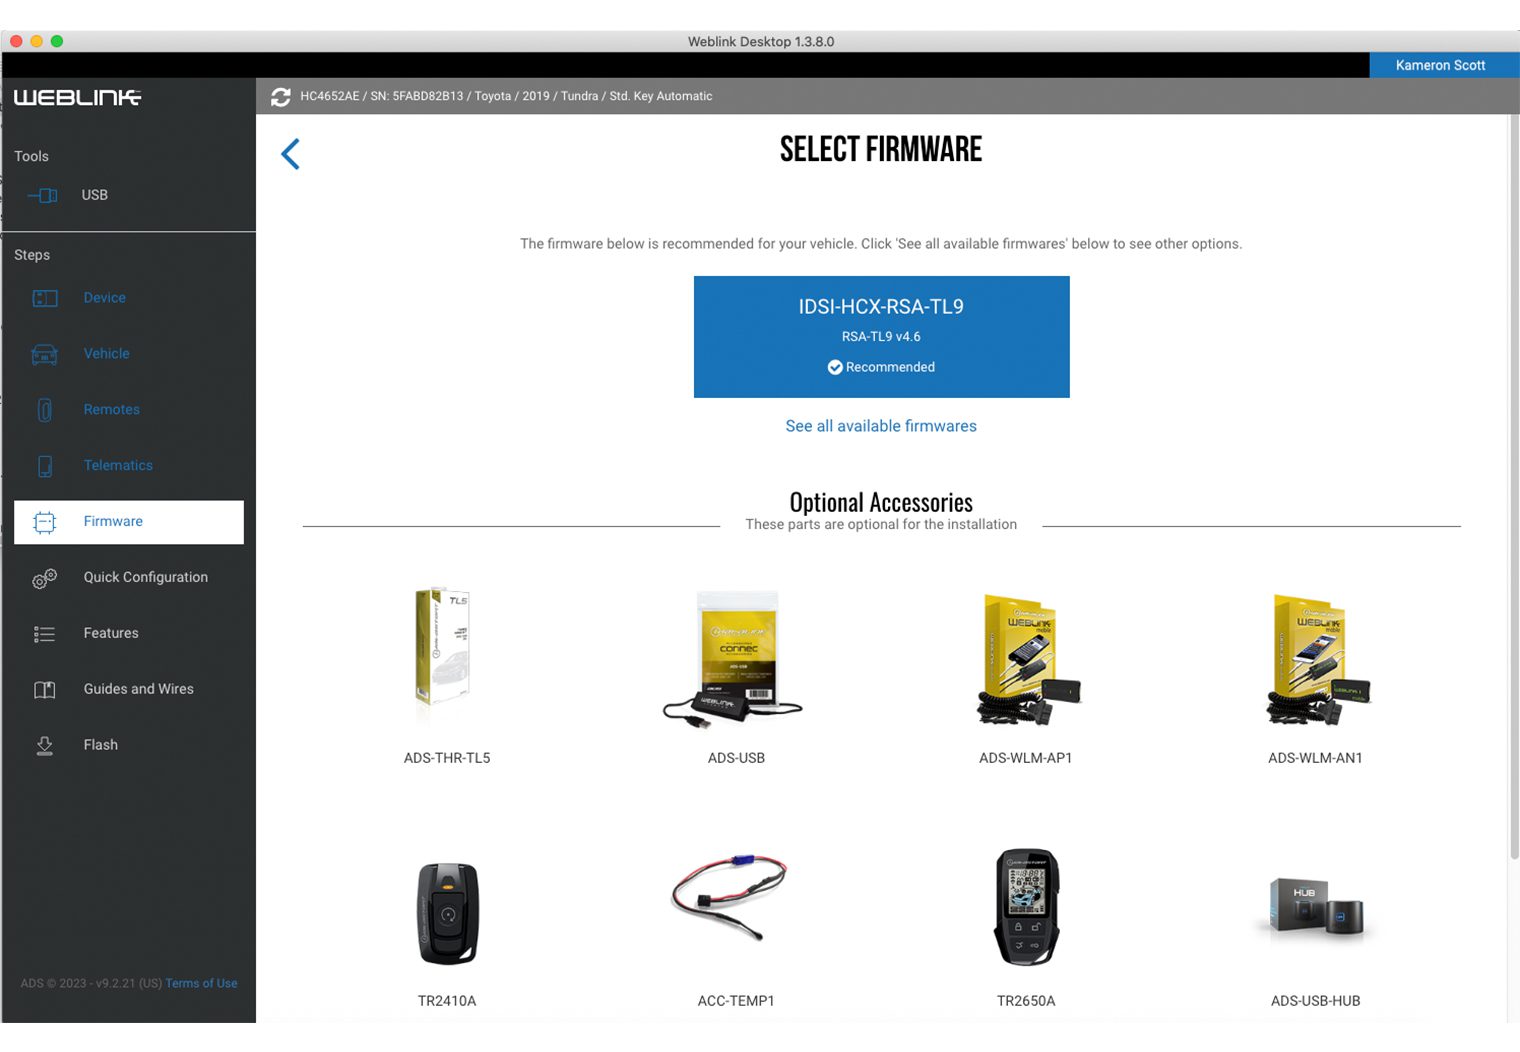
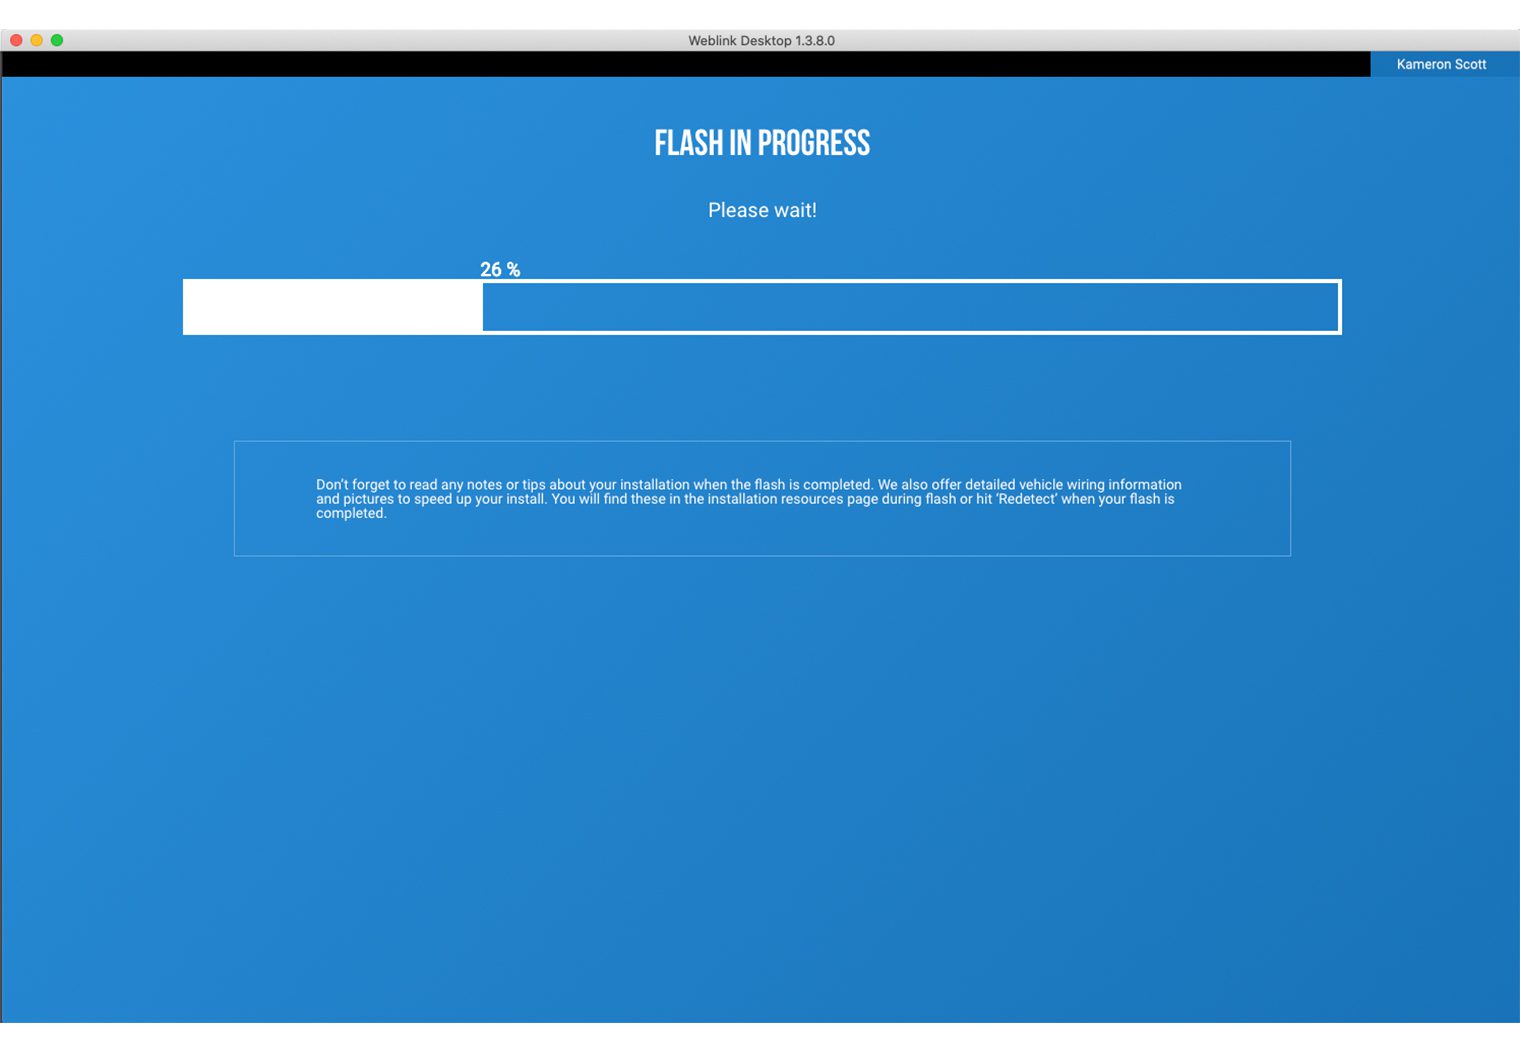
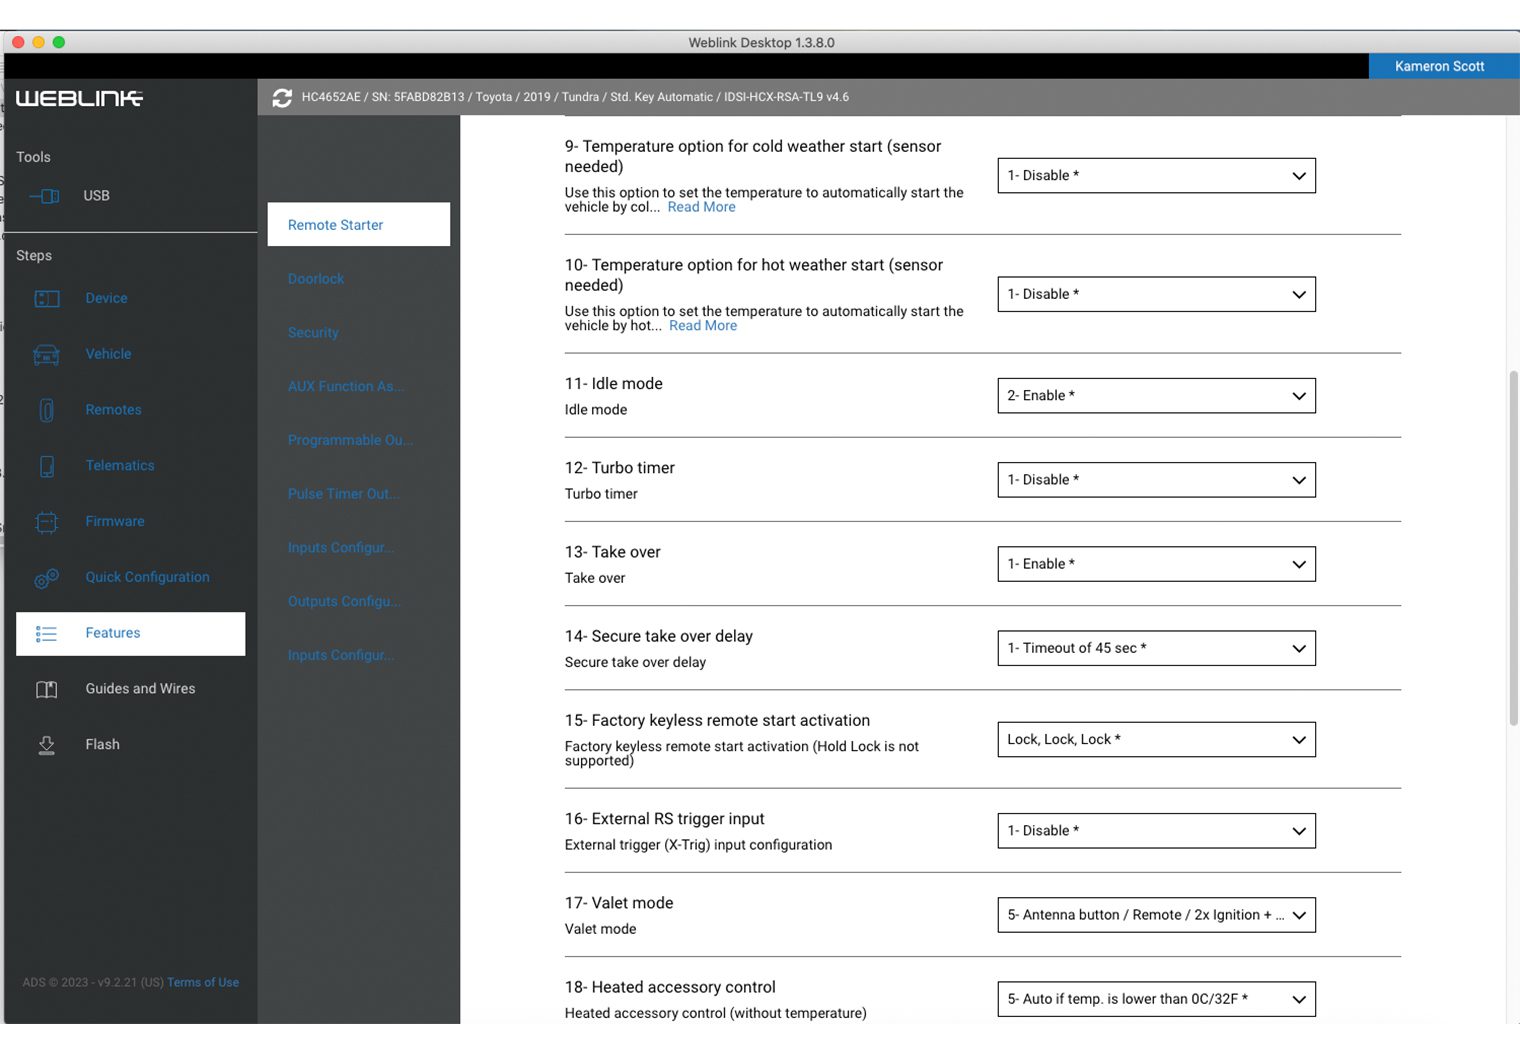
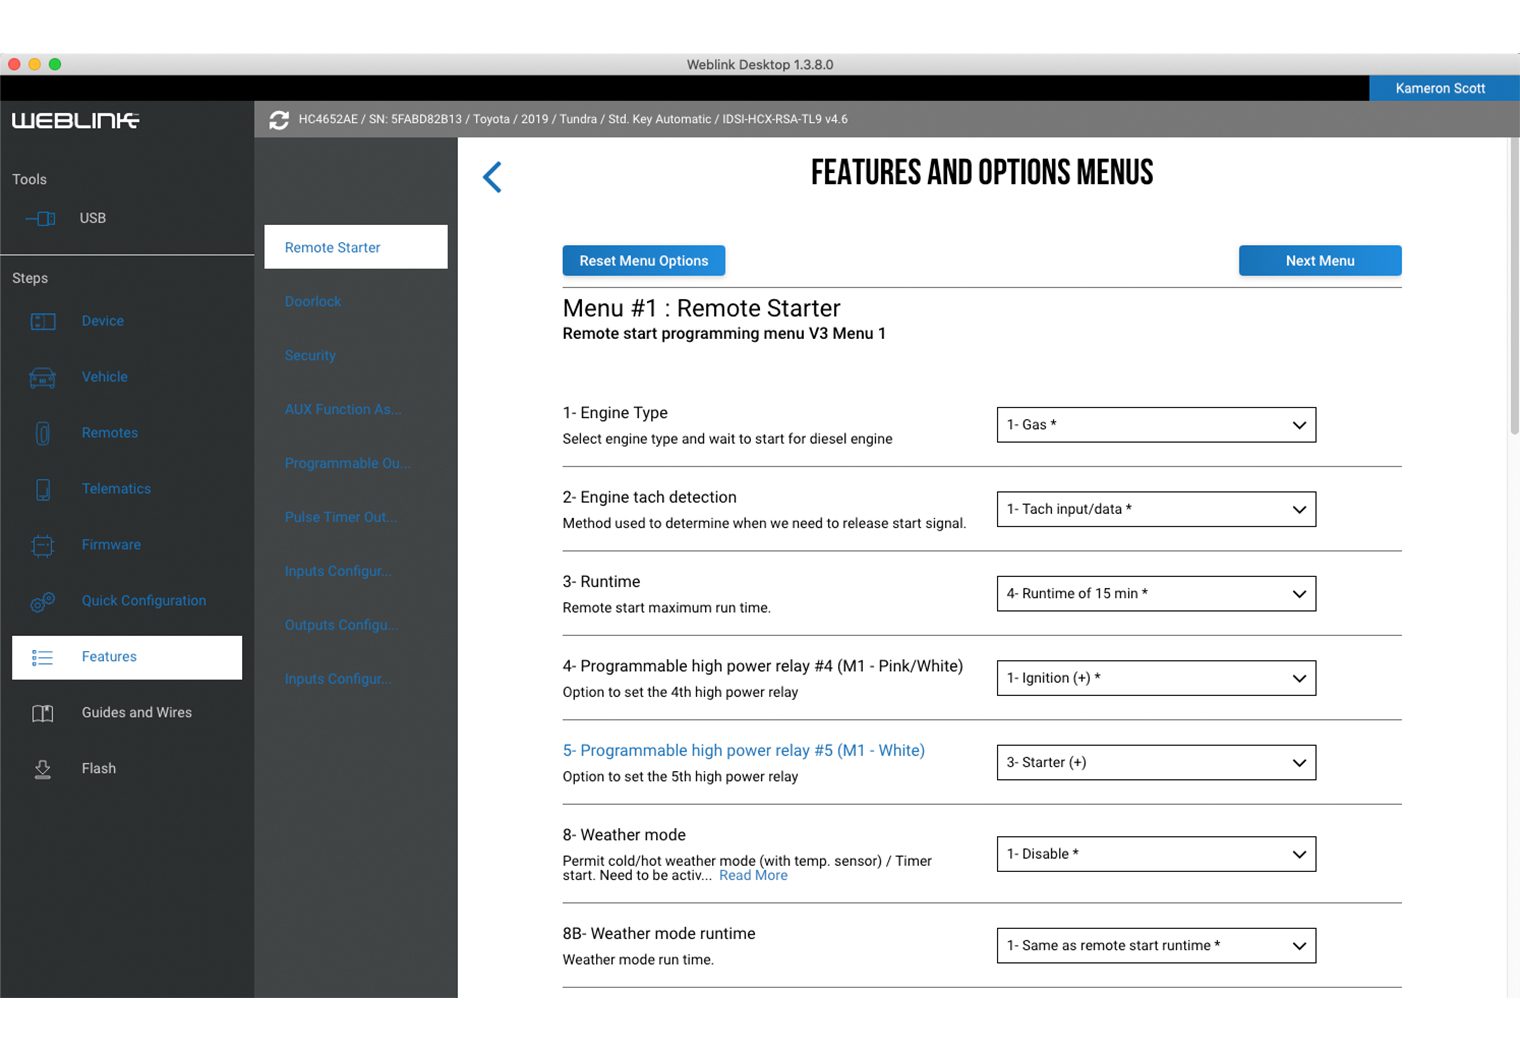
In the HCX box, iDatalink also provides you with a quick guide for programming. Out of the box, the HCX control module is not programmed for your vehicle, so programming is a necessary step before installation. Between the WebLink quick guide and instructions on iDatastart's WebLink program, you'll find the correct firmware for your vehicle and then flash the unit with it. The programming process takes about 5-10 minutes. iDatalink has a good instructional video that I'd recommend taking a look at to get familiar with the process. Note that you'll be required to download the WebLink program on your computer though (the video walks through the process on a web browser). I'll walk you through a few of the steps that I took to program the HCX once I get into the installation portion of this review.
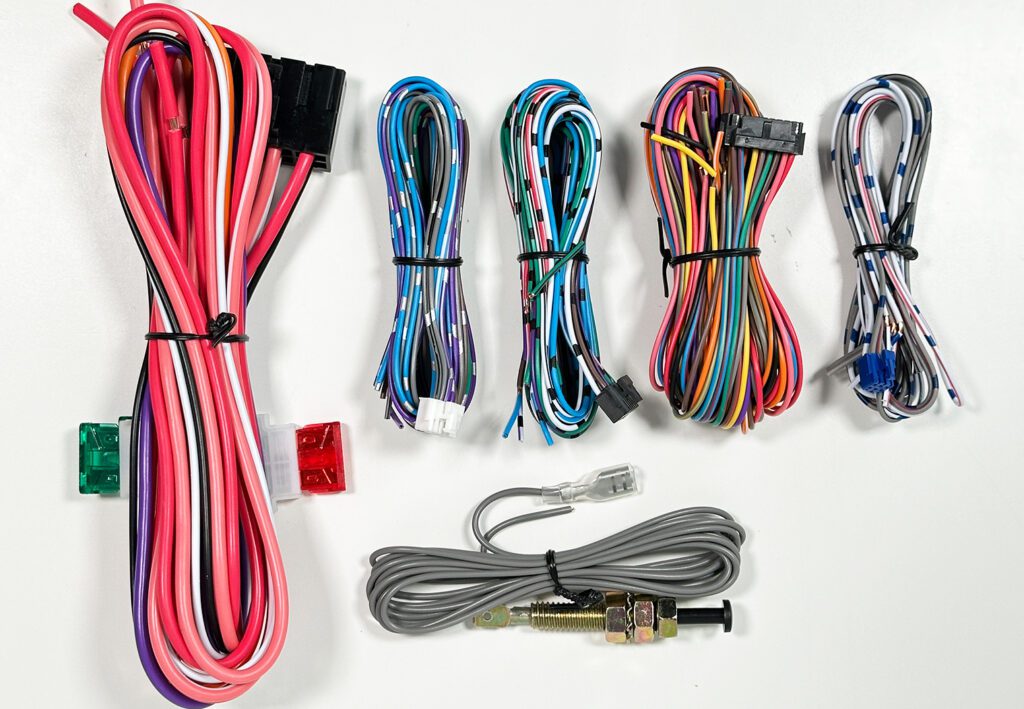
The last of the three packages in the HC4.5 is the “Analog Harness Kit..”. This is where you'll find the universal/hard-wire harnesses and hood pin. iDatastart includes the hood pin for older vehicles that don't have a hood sensor built in, but most newer vehicles have this built-in.
The wiring kit that comes with the HC4.5 kit is ‘universal', meaning it's not vehicle specific. If you're comfortable wiring up this system yourself, and want to find each individual wire in your vehicle's harnesses (or you just don't want to pay the extra cost of one of the vehicle-specific harnesses that iDatalink sells), these are the harnesses what you'll use in conjunction with the detailed installation wiring diagrams that are available in iDatalink's WebLink program or on their website.
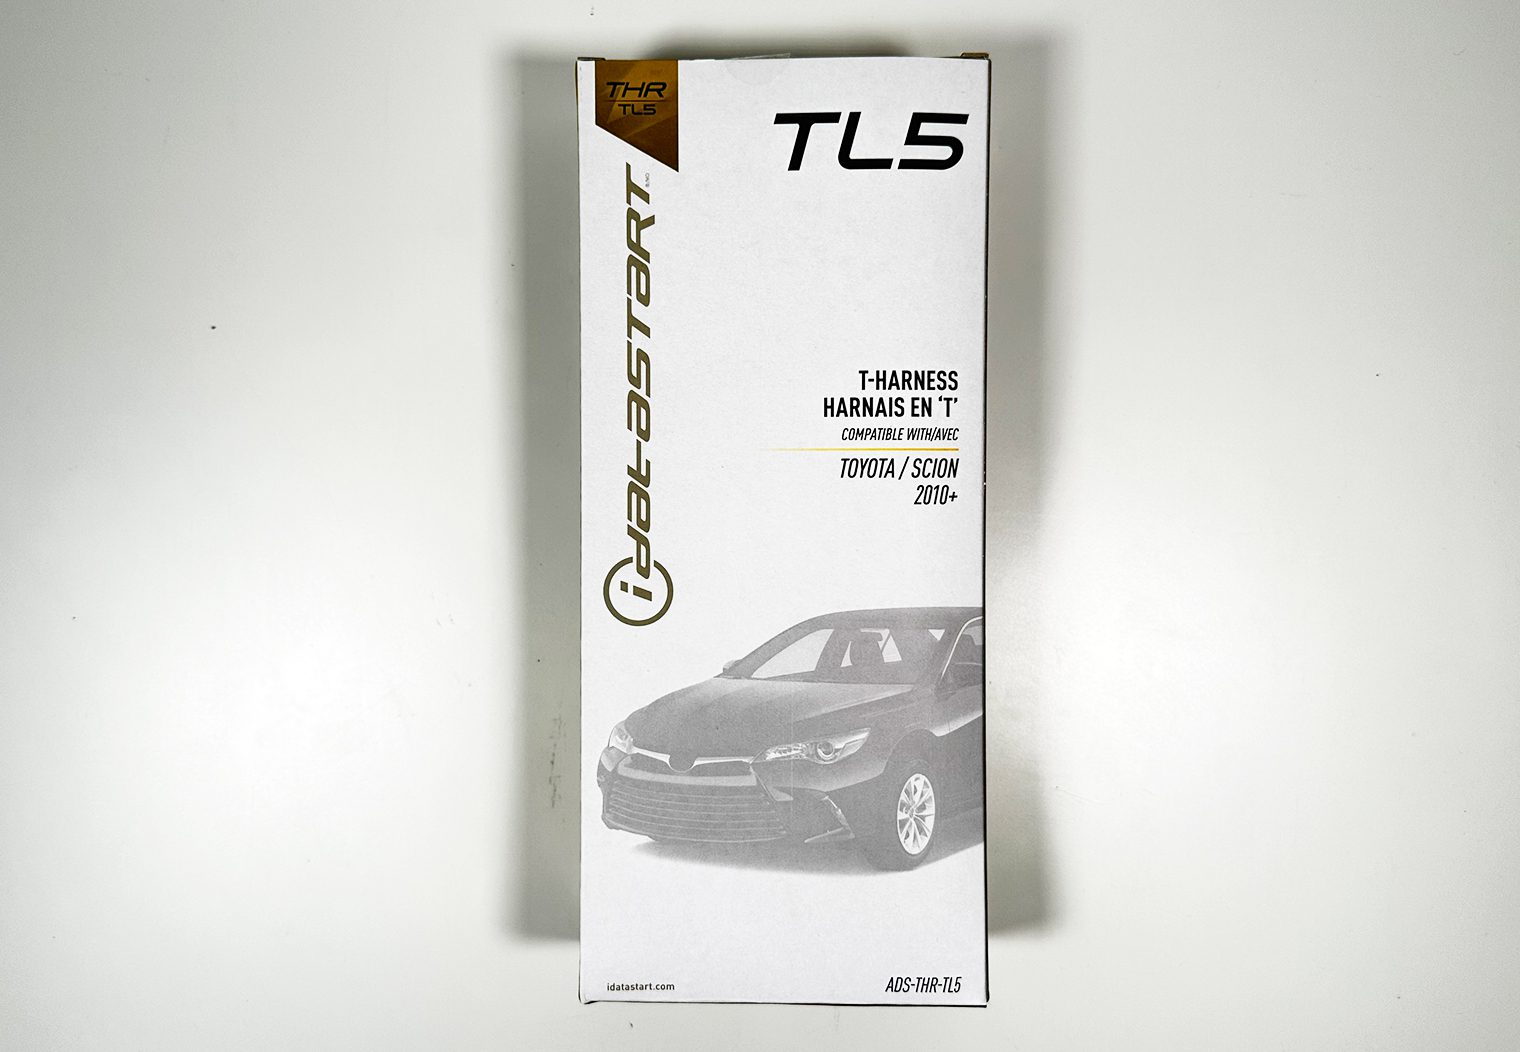
iDatastart TL5 T-Harness
Great segue into iDatastart's vehicle specific T-Harnesses. If you're like me, and decide to use one of the vehicle specific harness like the TL5, you can toss that included universal wiring harness out and instead use the components from T-Harness.
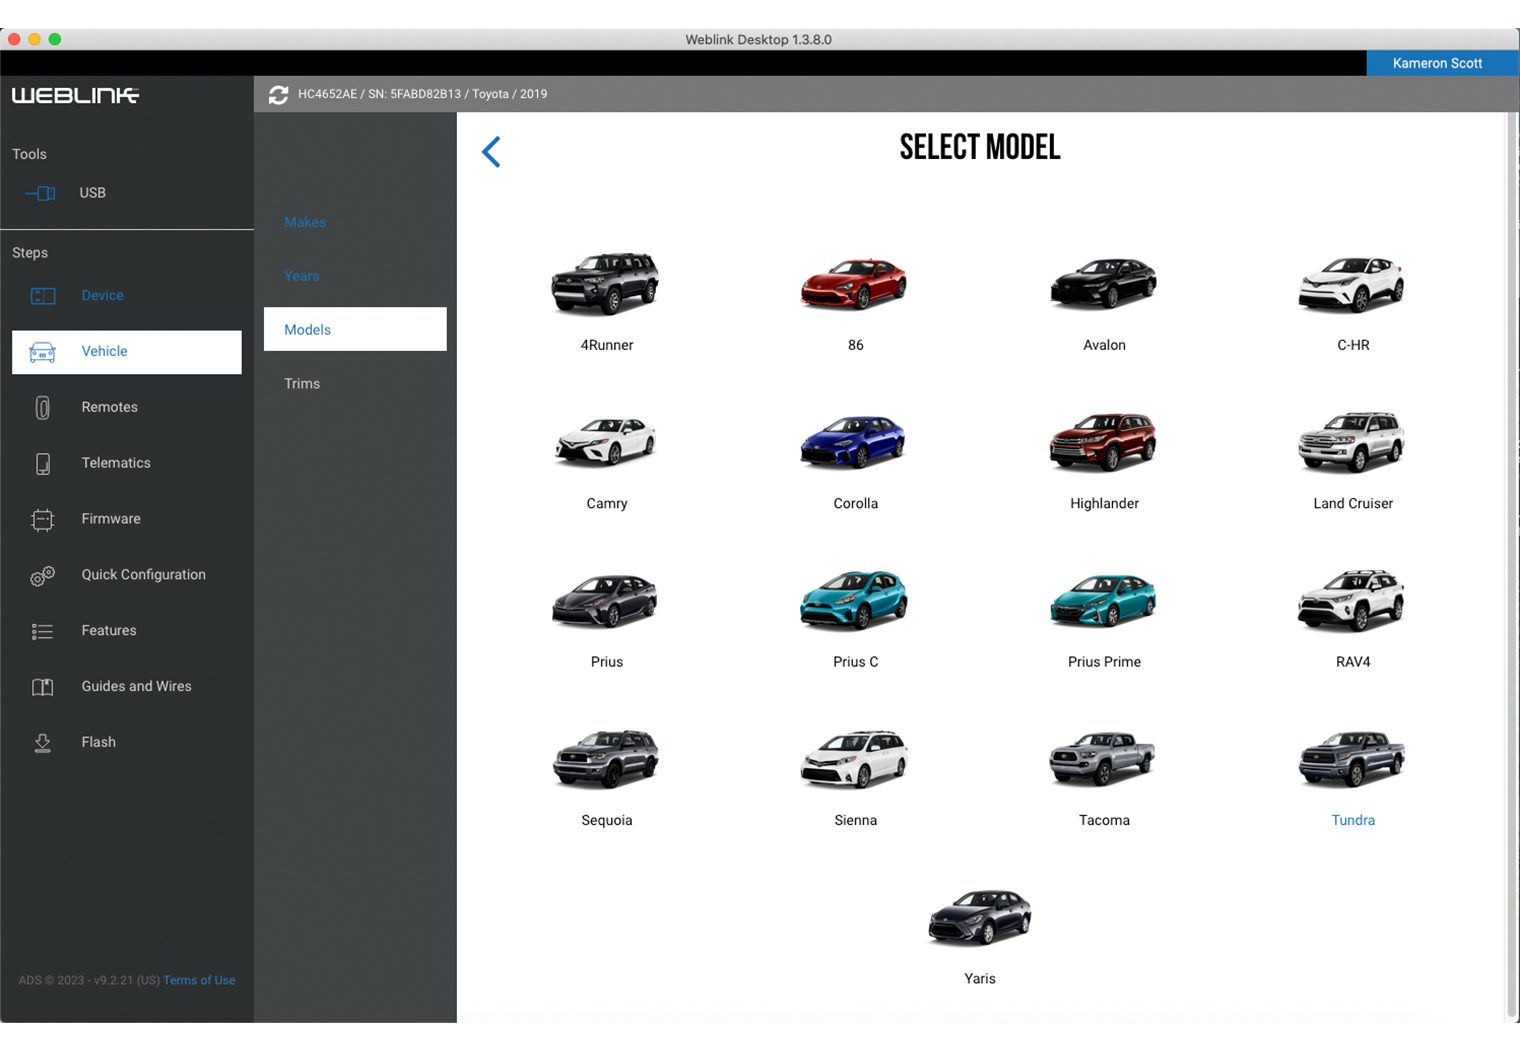
The TL5, in particular, is designed for Toyota and Scion vehicles 2010 and newer (at least at the time of this article). So if you have a Tundra or other Toyota model within this timeframe, this review is also a great resource for you! But be sure to use iDatastart's vehicle compatibility checker on their website to confirm the exact harness that's right for your vehicle. Just in case.
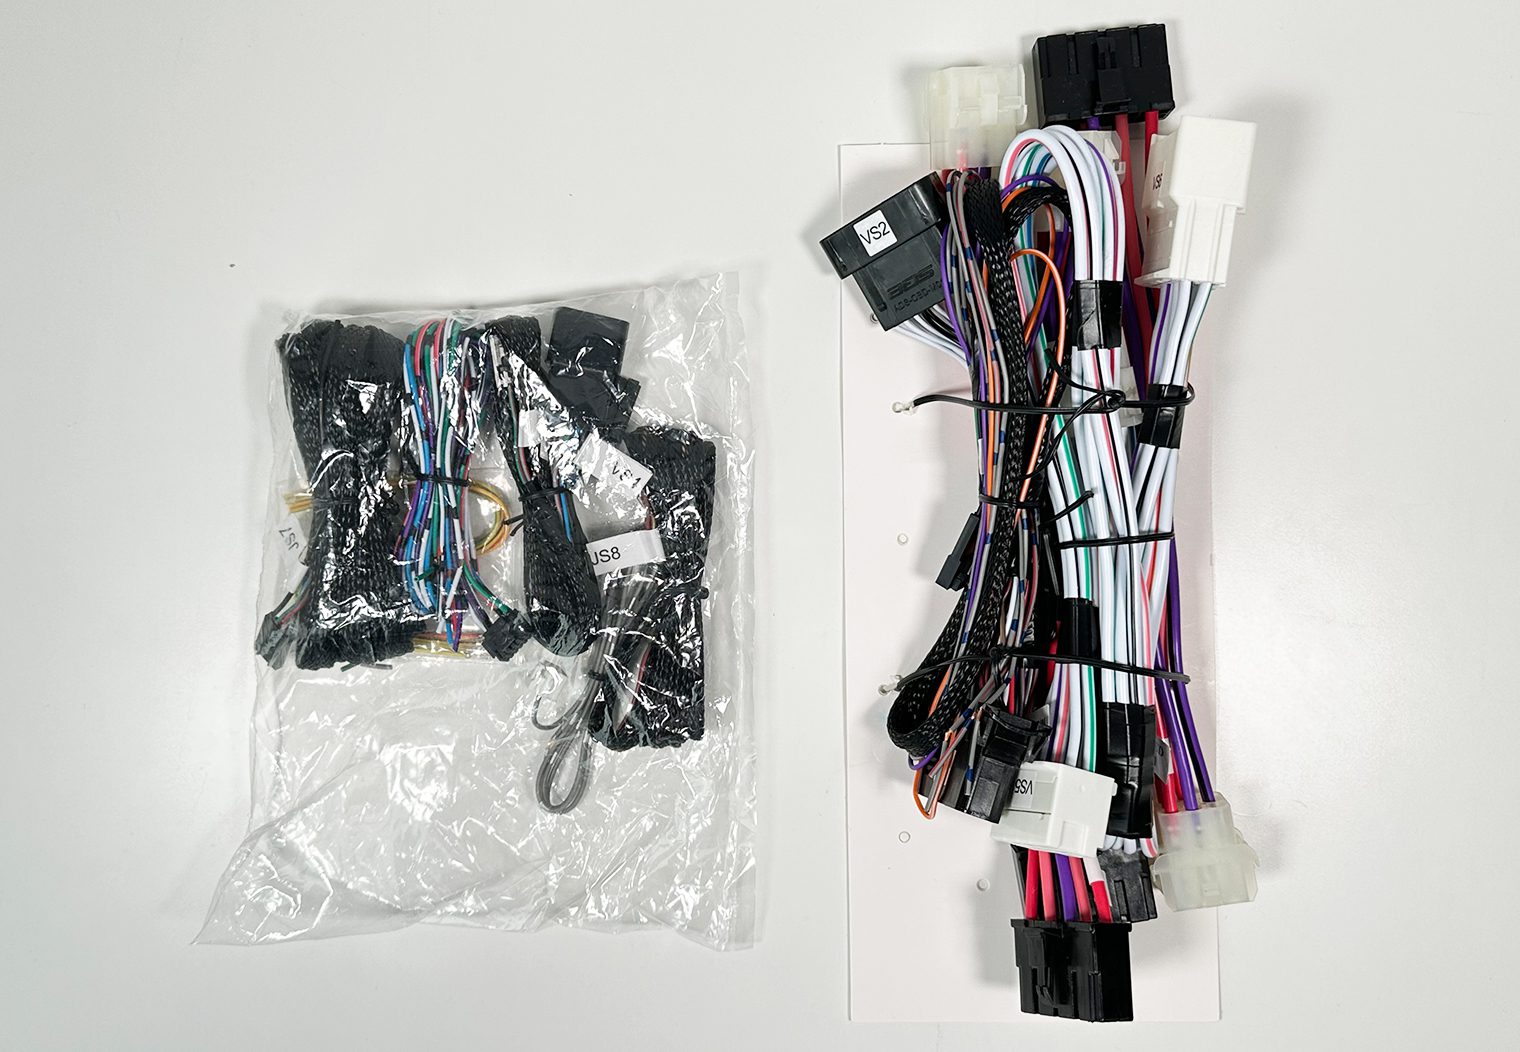
These T-Harnesses dumb-down the wiring and installation by at least 95%. It turns the wiring and install virtually into a plug and play system. I'll show you more about what I mean in the installation section of this article, but the harness is complete with vehicle-specific female plugs that you'll use to plug your vehicle's OEM harness into, and then the matching male plugs to plug back into your vehicle to complete the connection.
It does not come with an installation manual in the box though. Likely because the TL5 is compatible with several vehicles and each vehicle is slightly different. You can find the wiring diagrams on the WebLink program while you're flashing the HCX control unit and print them out. I found them to be very thorough.
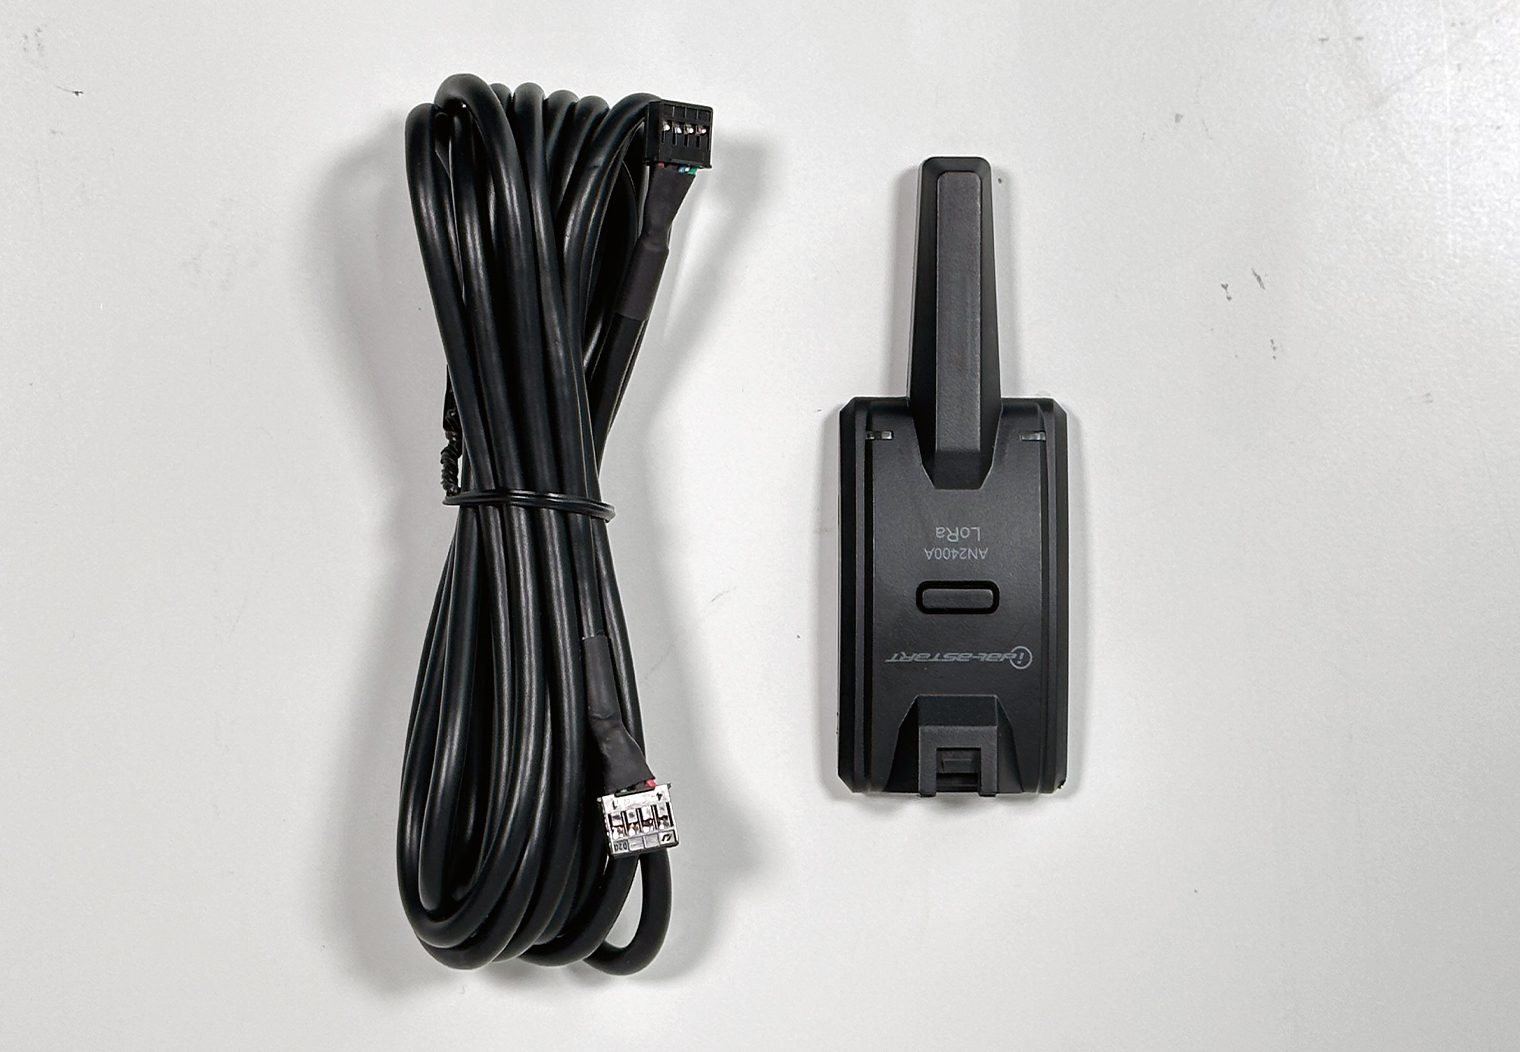
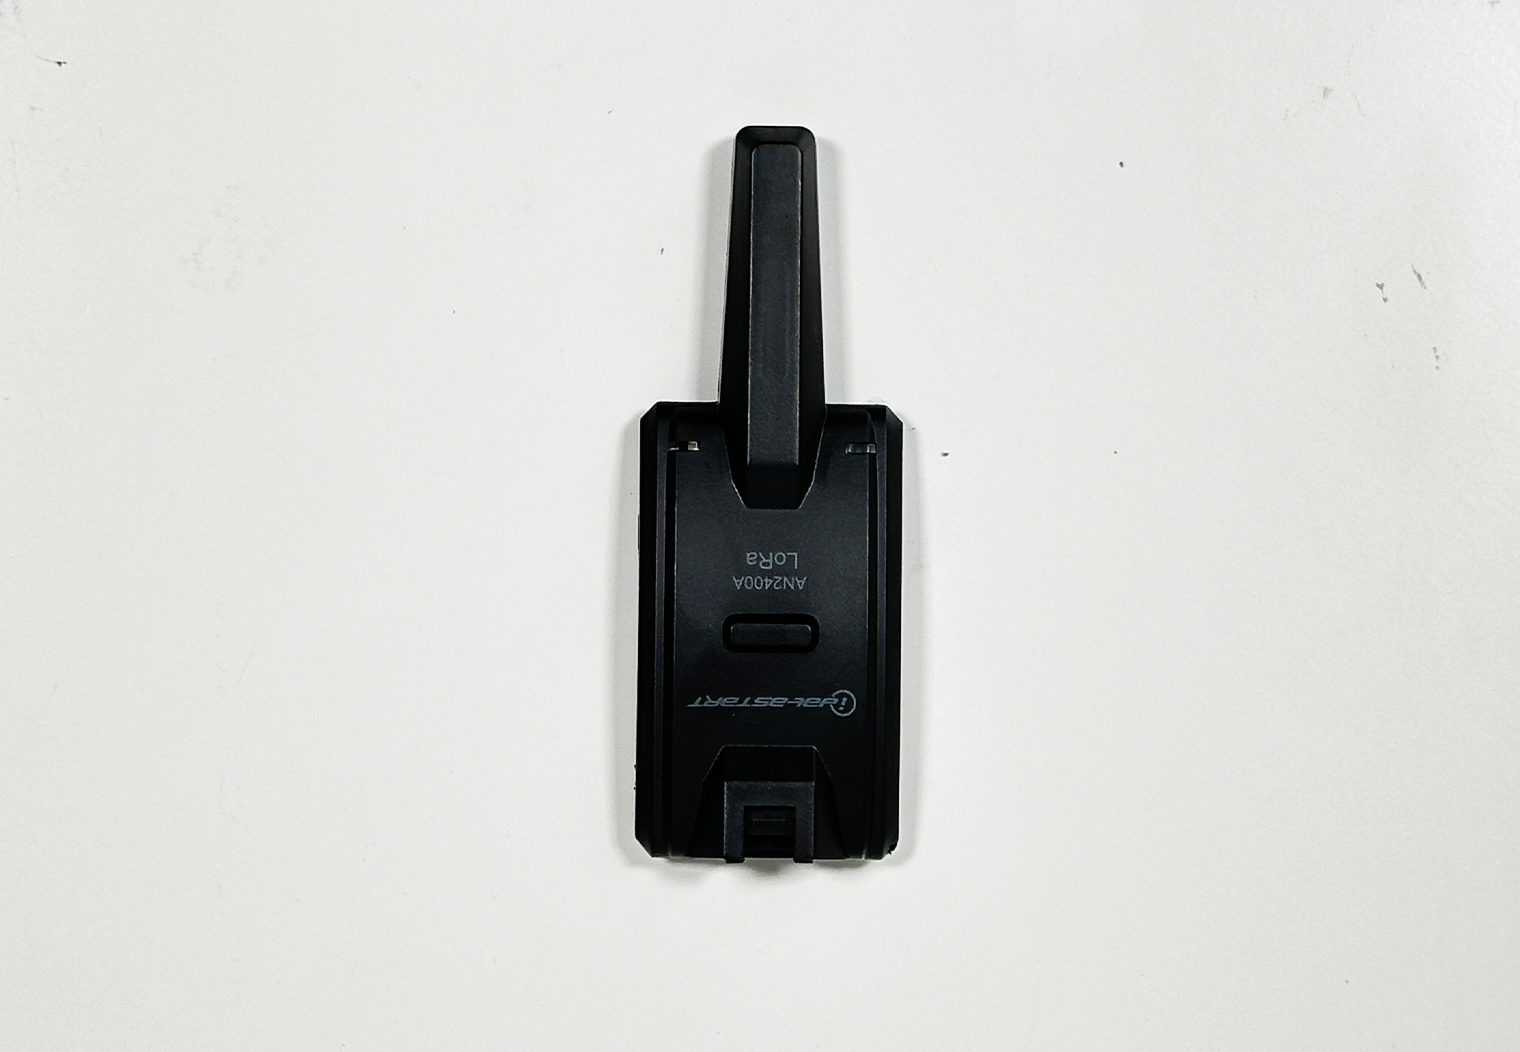
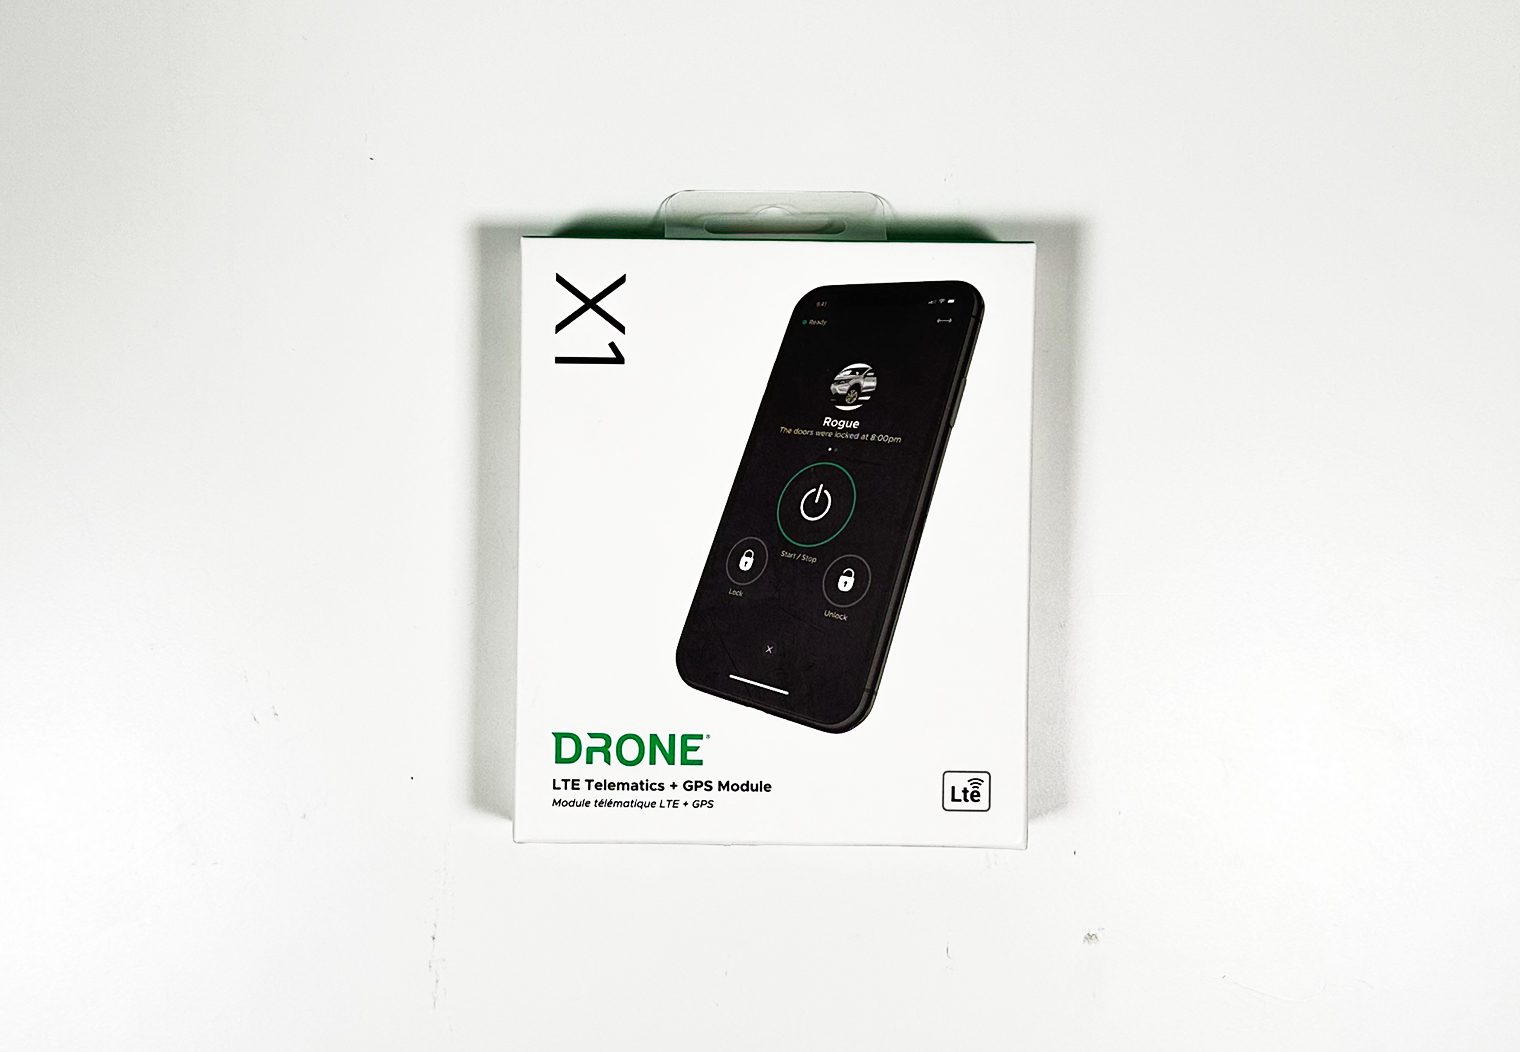
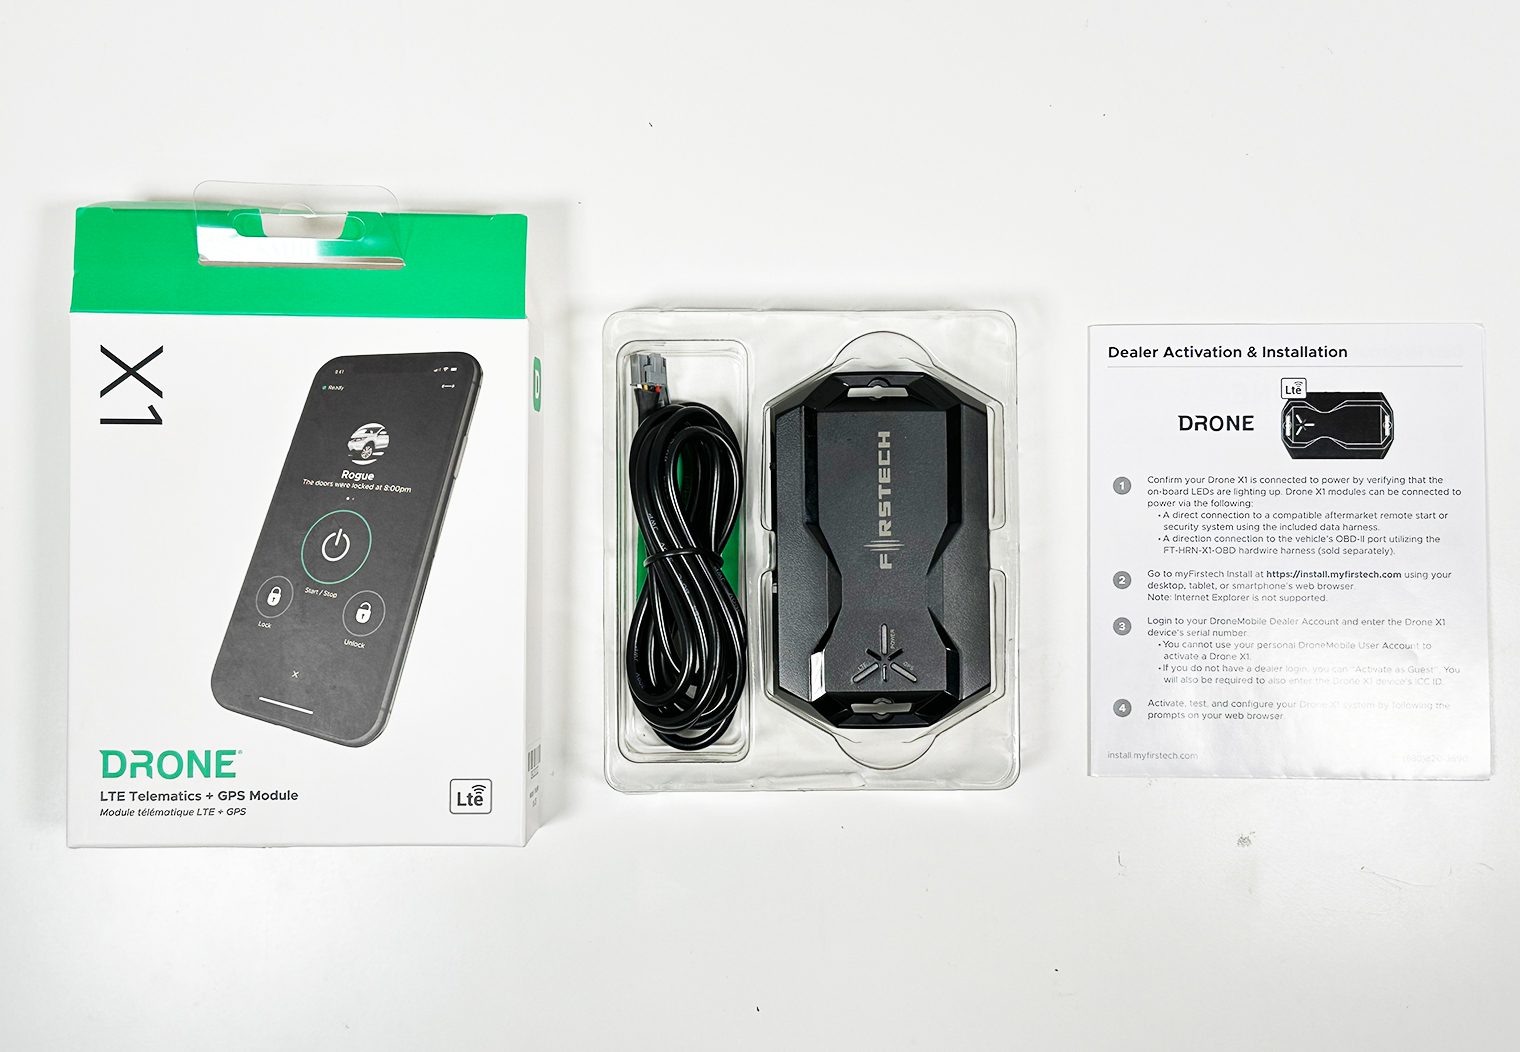
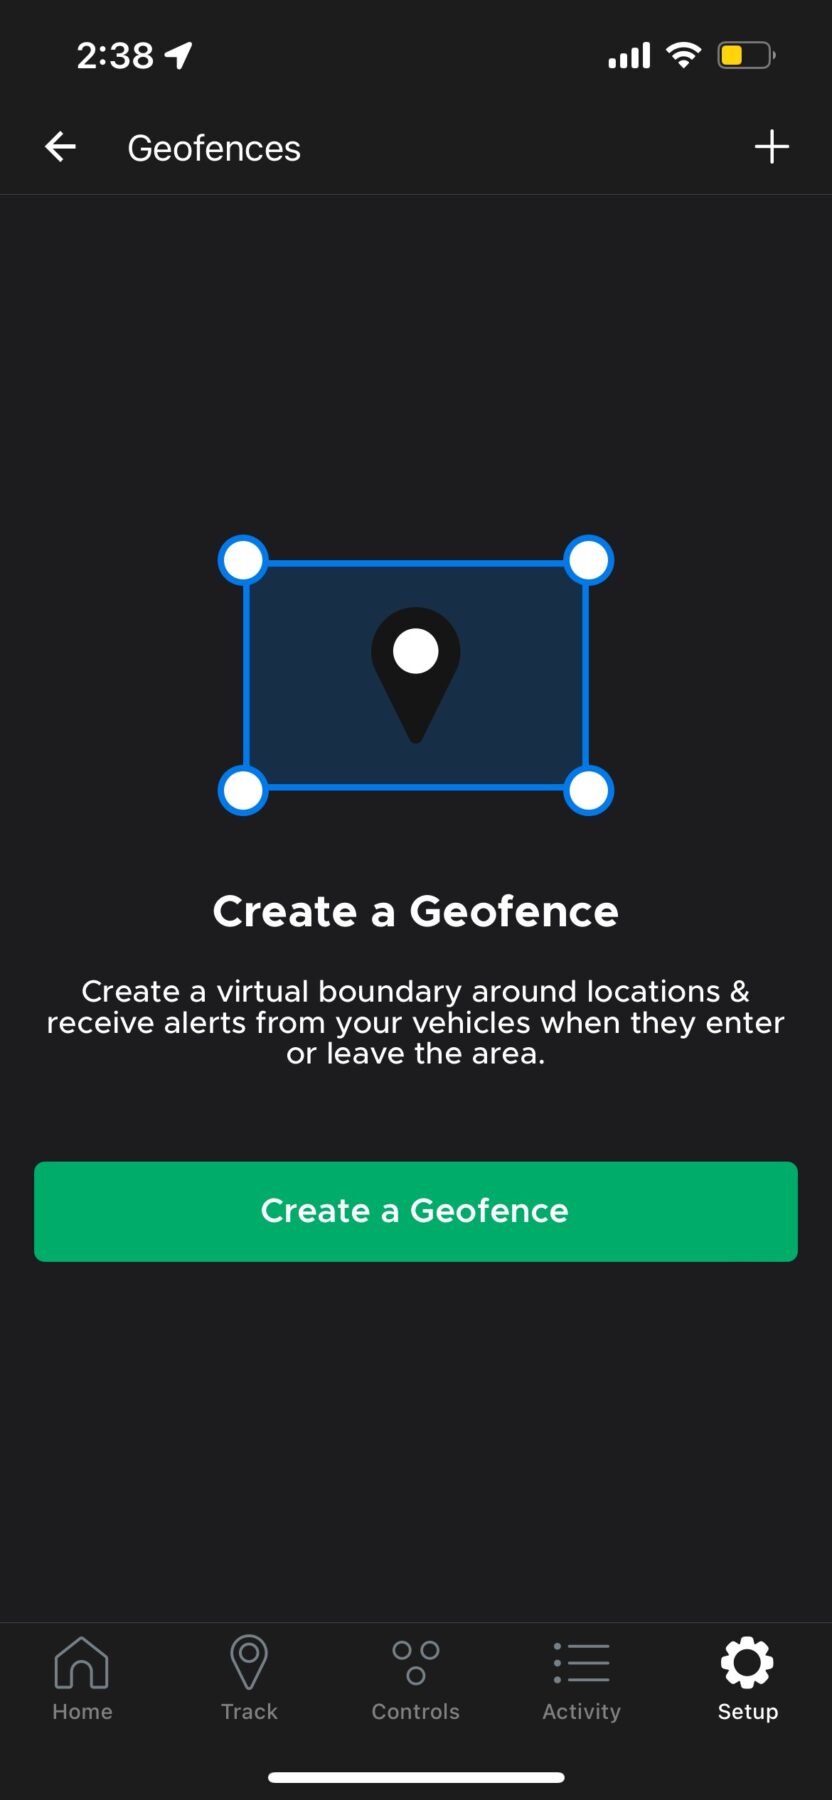
Drone X1 GPS/LTE Module
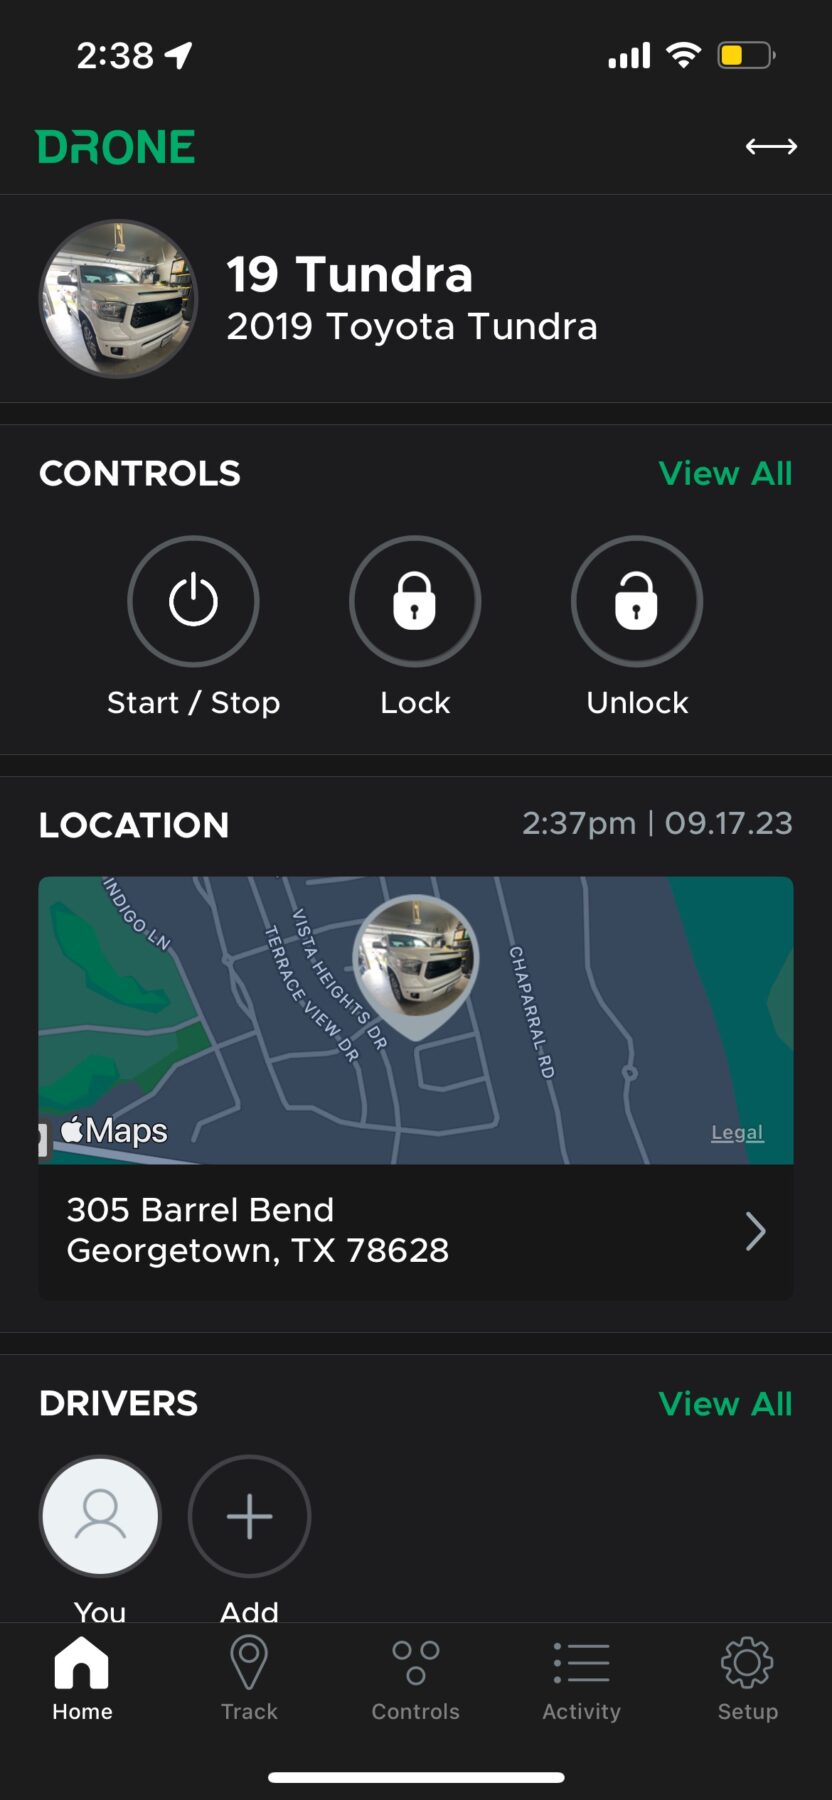
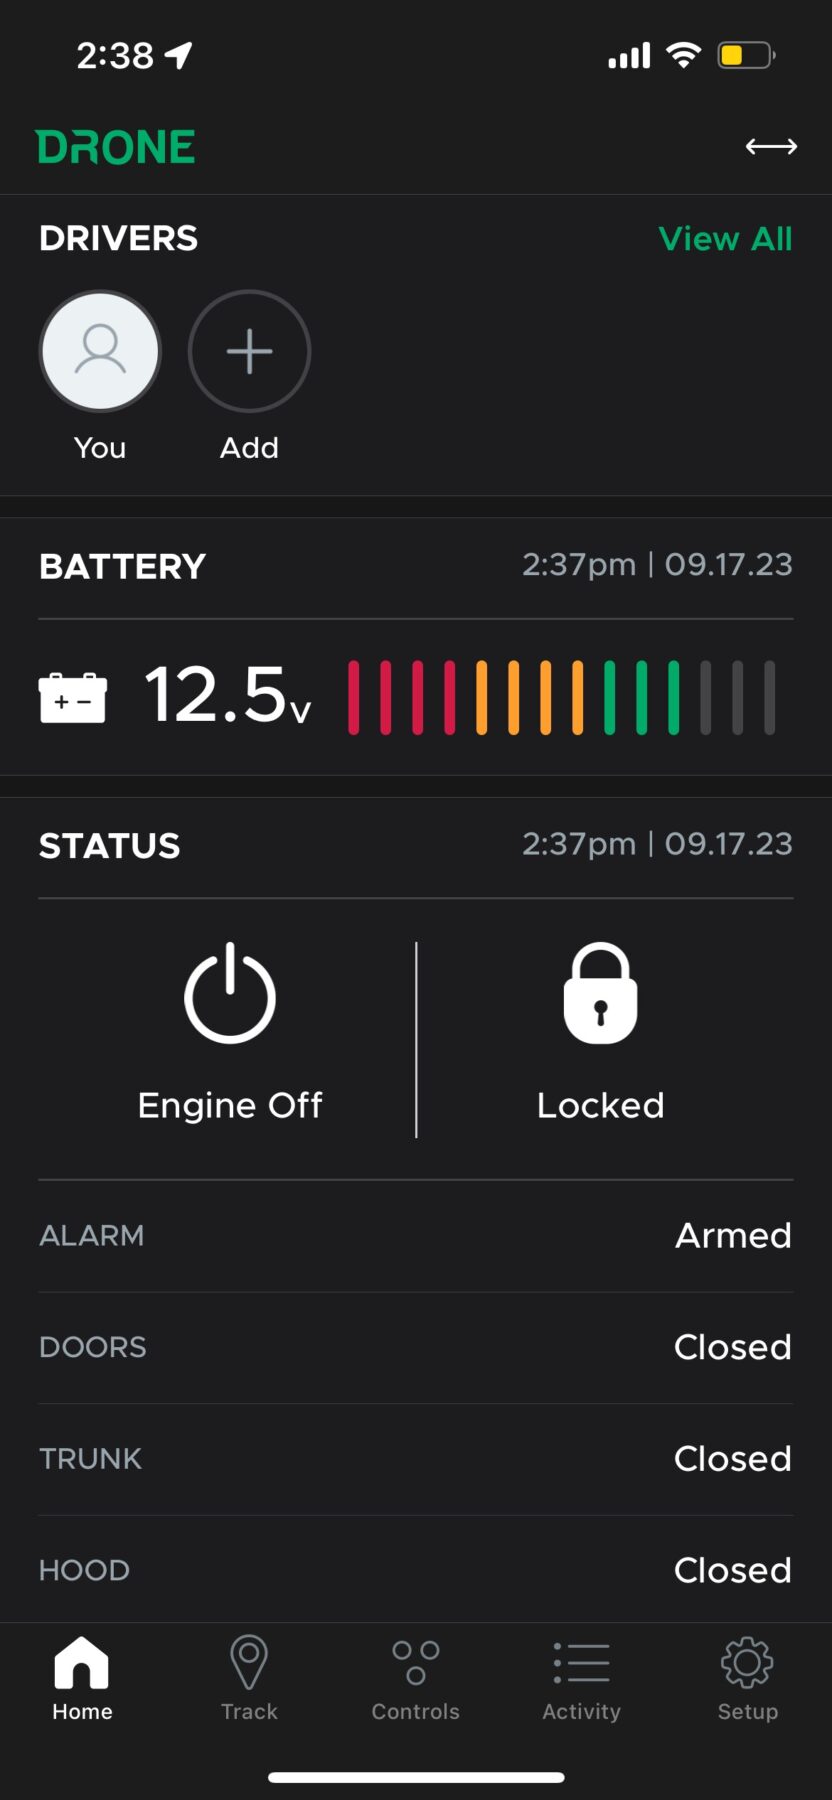
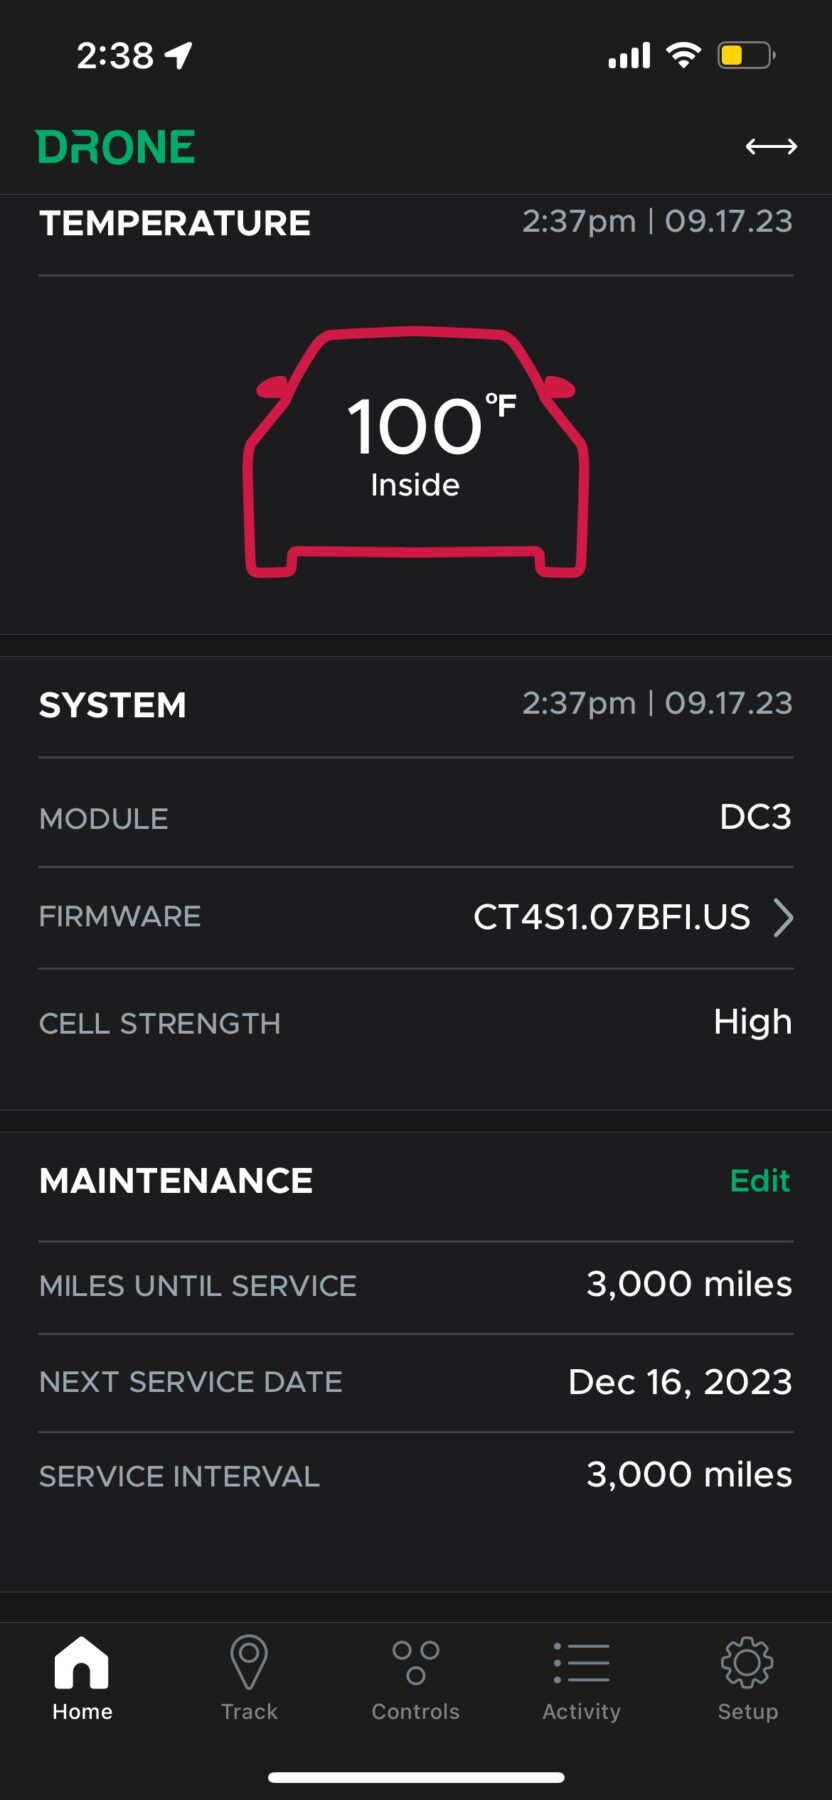
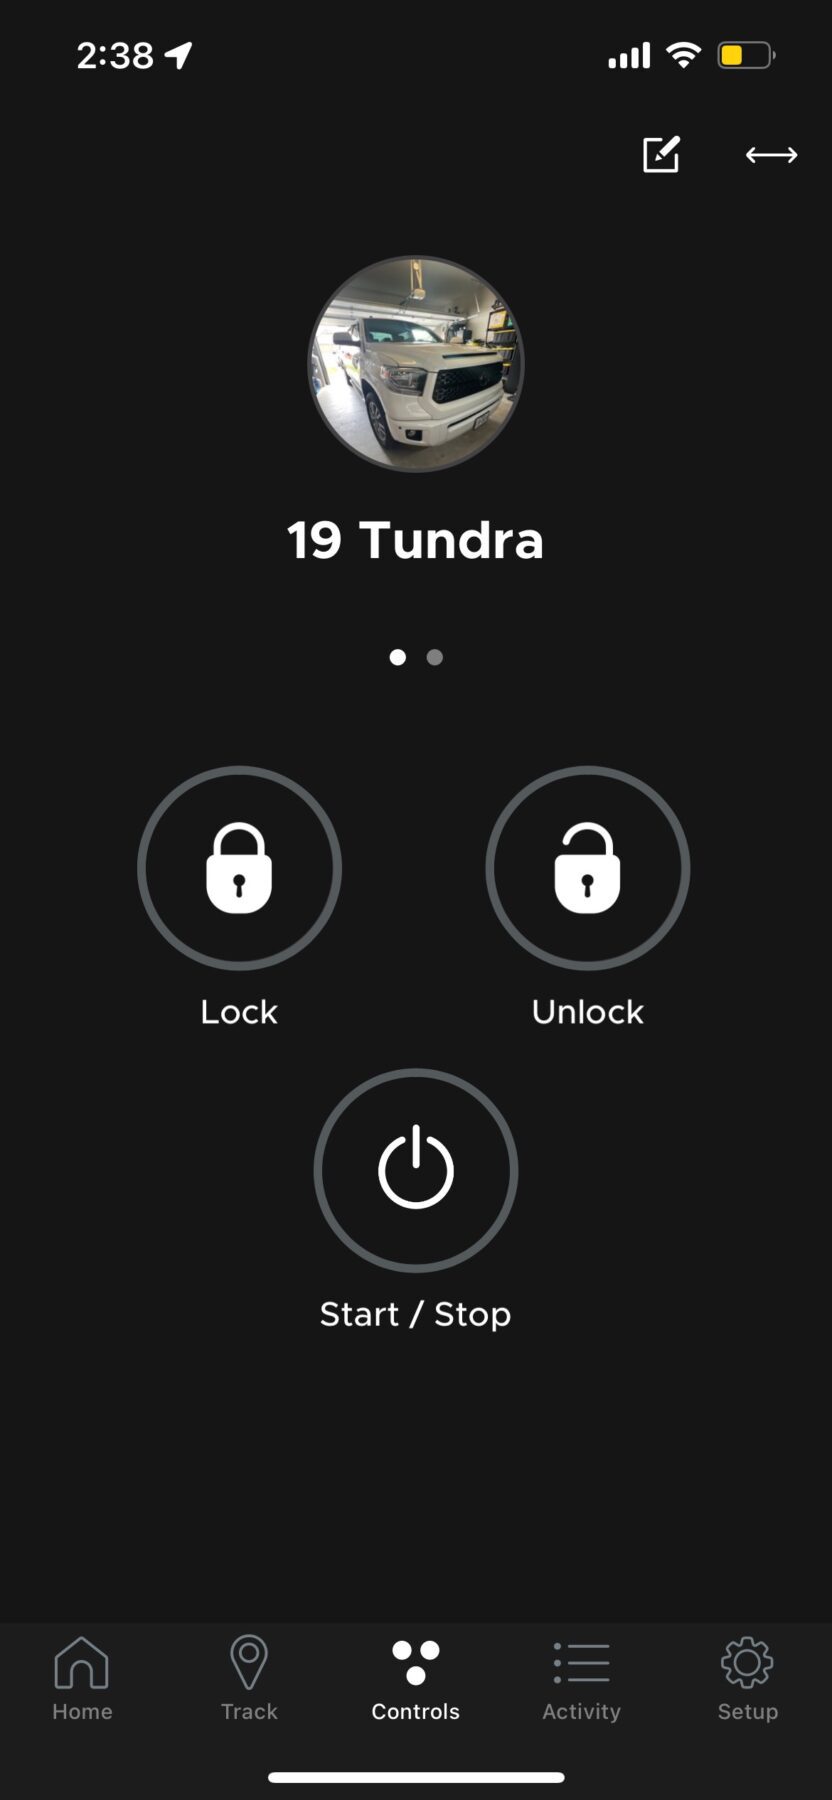
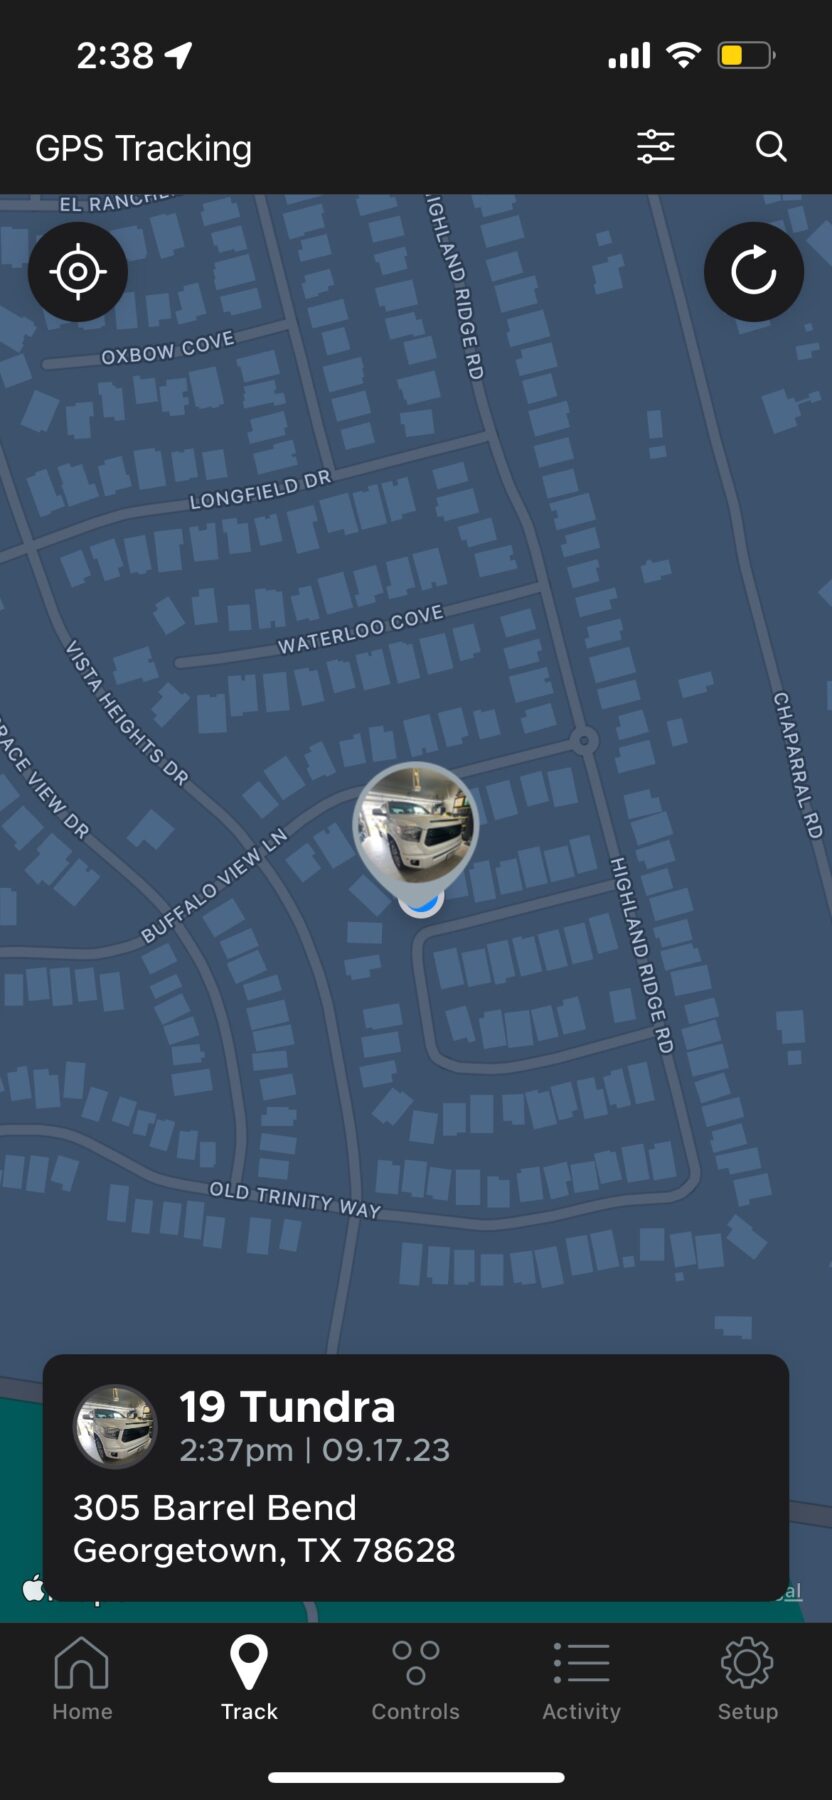
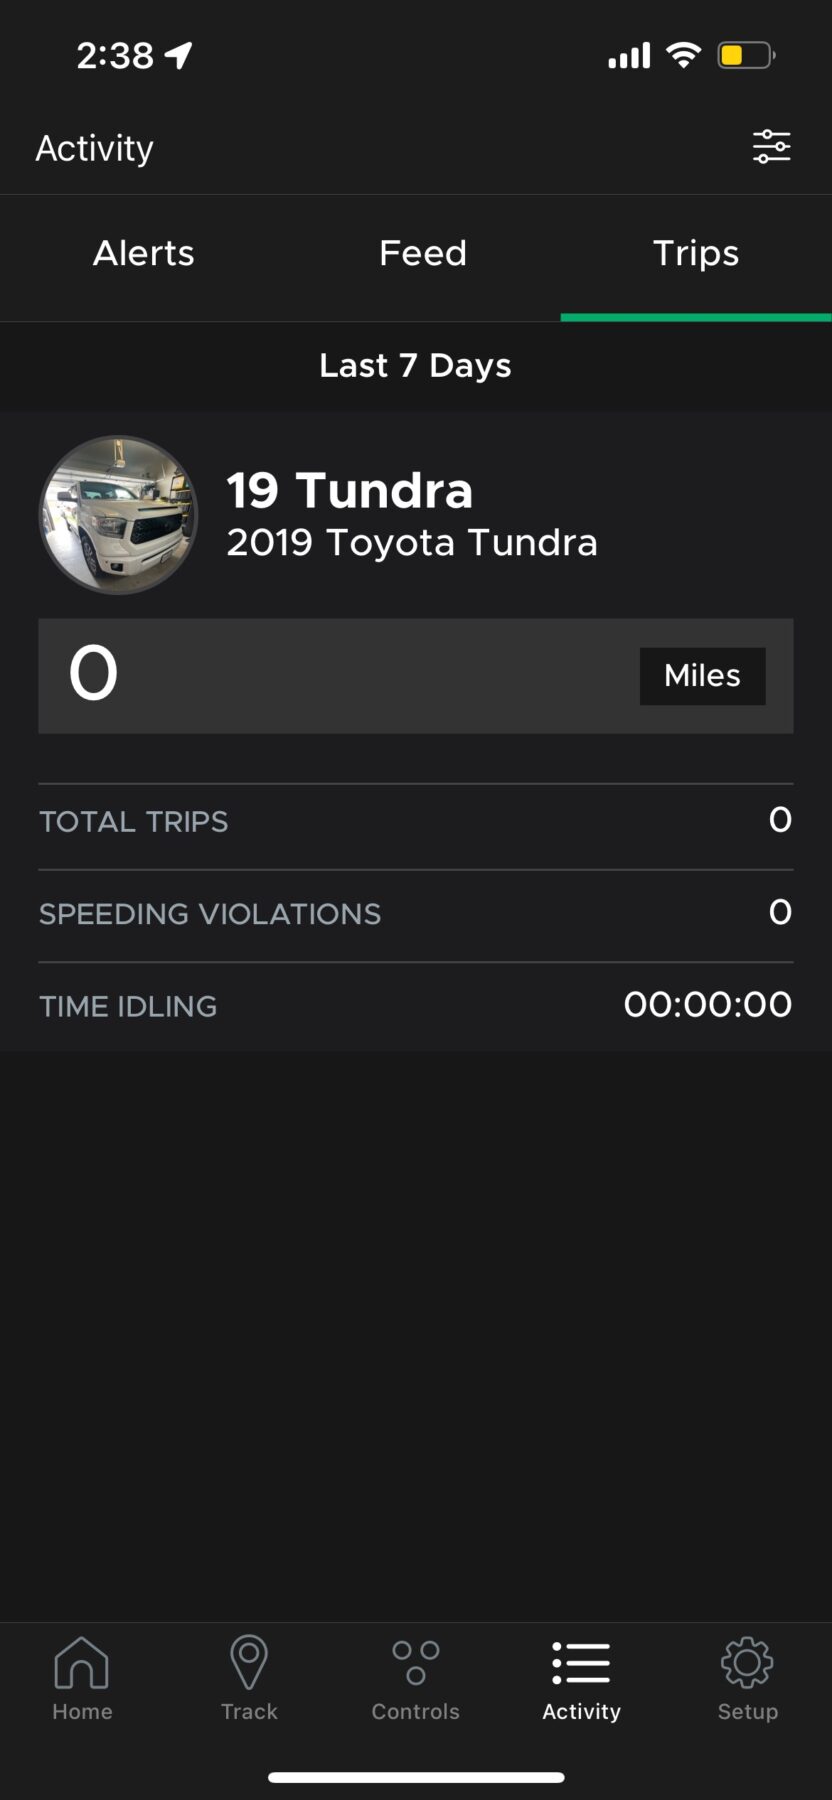
The final component I'm installing in this setup is the Drone X1 GPS/LTE module. This is an ADS product as well, so it simply plugs into the HCX control unit in the HC4.5. But what does the Drone X1 do? Well, if you want to control remote start, lock/unlock features and a variety of other GPS related controls directly from your smartphone, then this is the product you'll want. ADS also sells a Drone X1 Max unit that has some added functionality, but both serve the same general purpose – they enable GPS tracking of your vehicle AND full control over your remote starter from an app on your smartphone. Some of the core features include:
- Lock/Unlock/Start/Stop
- Vehicle information – Battery, Temperature, Status
- GPS tracking – tracking the location of the vehicle on a map within the app.
- Set curfew alerts – alerts for when a vehicle was driven after curfew hours. Probably a feature for you teenage parents out there!
- Maintenance reminders – reminders to check oil, rotate tires and more based on mileage tracked using GPS
So by having the X1 in addition to iDatastart's HC4.5, it lets you get the most out of the HC4.5 by combining GPS/LTE connectivity with all of the functionality that is enabled by the remote start – directly from your smartphone.
Only downside to this – it’s a monthly paid service. You'll get a 30 day trial period, however afterwards you will be required to purchase a subscription. At the time of this review, plans start at $4/month for the basic remote start functionality, and go all the way up to 40$/month to enable the comprehensive GPS features. It also relies on your smartphone AND the Drone X1 to have cellular service (or internet) in order to work. Without service, you're stuck with your primary or secondary remotes.
Installing HC4.5 Remote Start in a Toyota Tundra
This HC4.5, TL5 and Drone X1 are going into a 2019 Toyota Tundra, however the general process is the same for any vehicle. The difference from vehicle to vehicle will be in the T-Harness and the specific wires/harnesses that it connects to. I'd like to mention again before I dive into my installation process that this is not intended to be a “How To”. Rather, this is just a documentation of my process. Although the installation might be straight forward for DIYers who are familiar with vehicle wiring like this, I would recommend reading through the installation wiring diagram/manuals thoroughly before you choose whether or not to have a professional install it.
Programming the HC4.5 HCX Control Unit
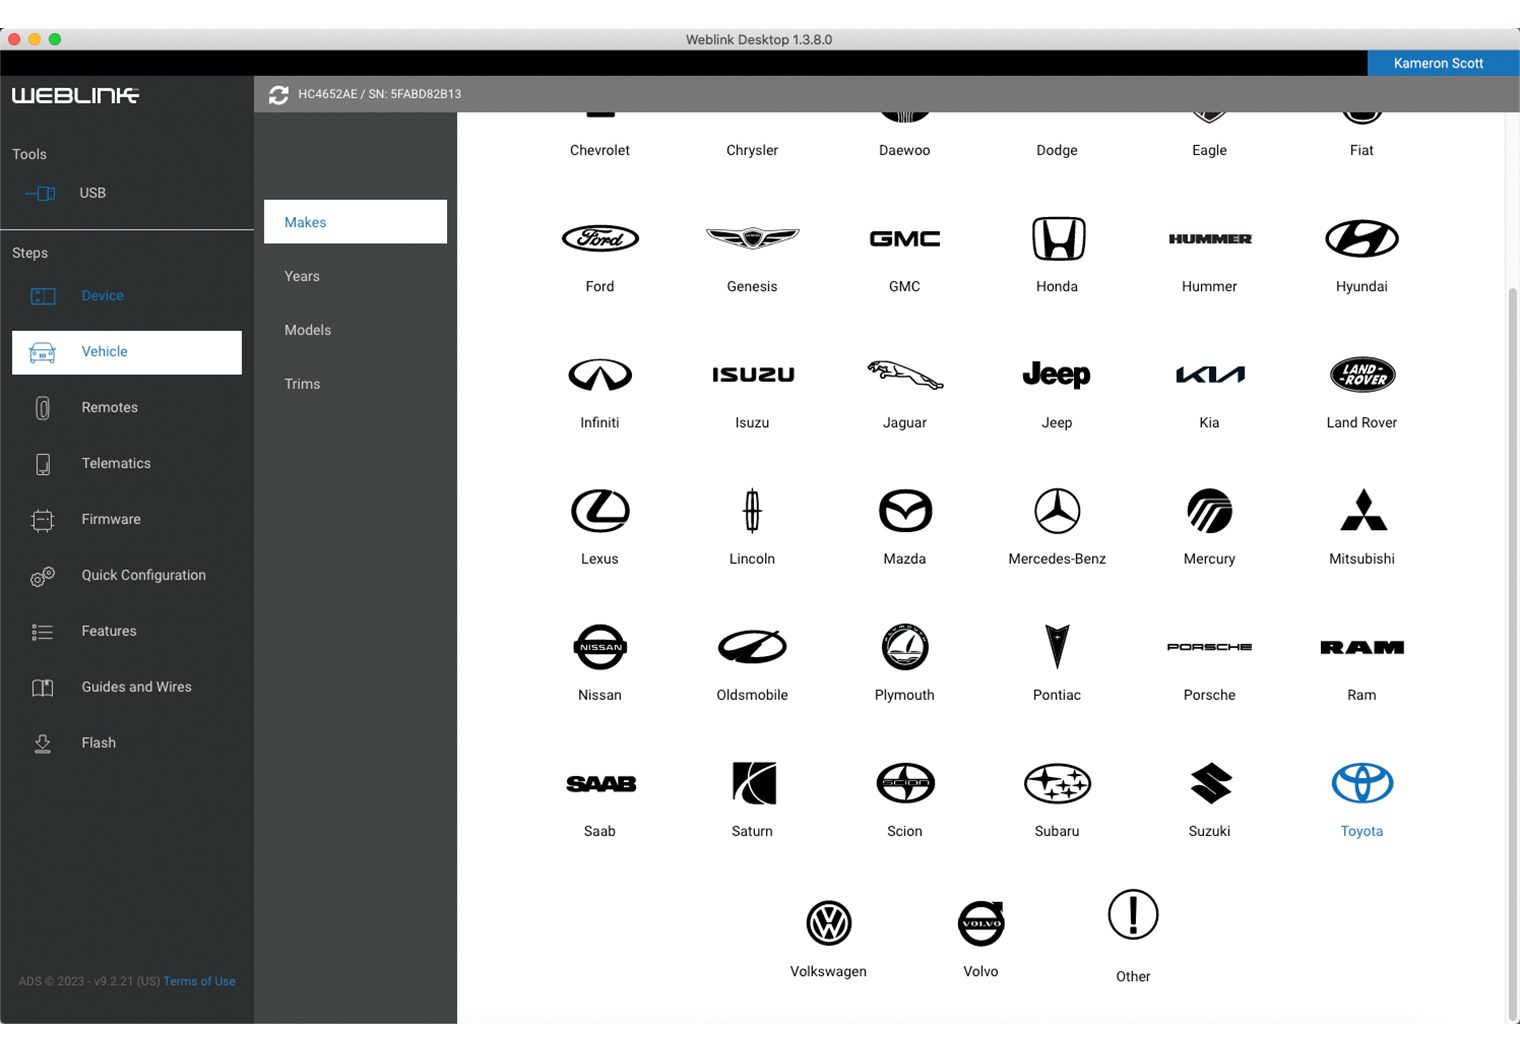
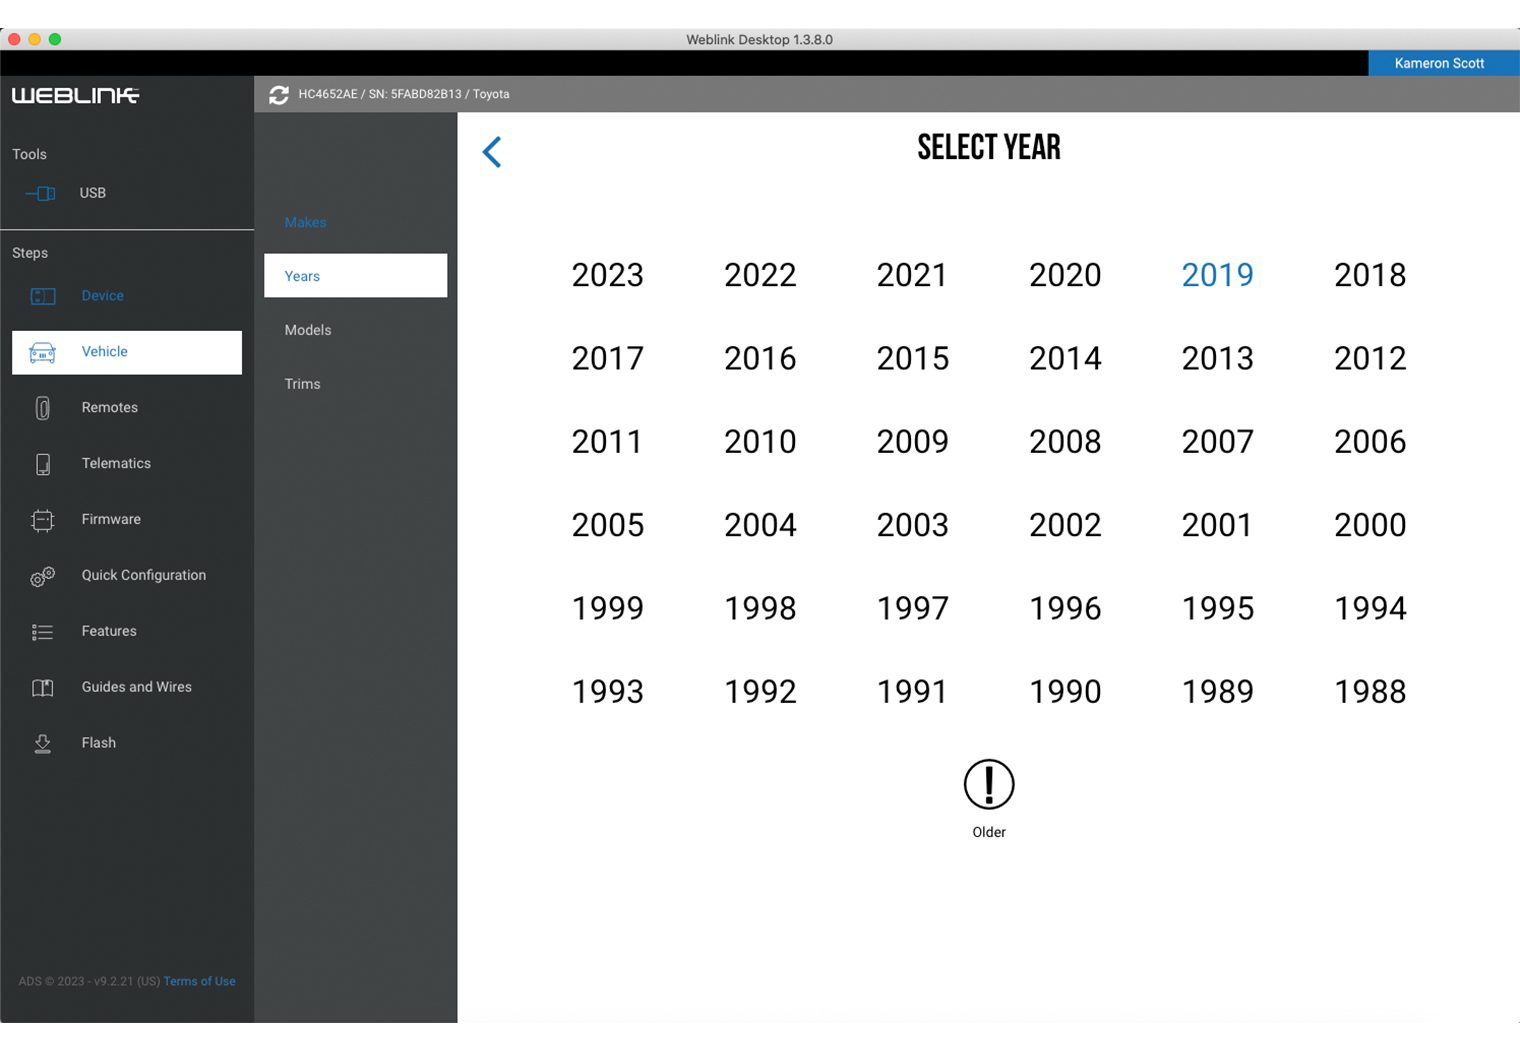
The first step that I took before installing this system into the truck was program the HCX. I took to the computer to find iDatastart's WebLink program. You can find the weblink program at http://www.weblinkupdater.com, and download the program from there. It's compatible for both Mac and PC (I used a Mac).
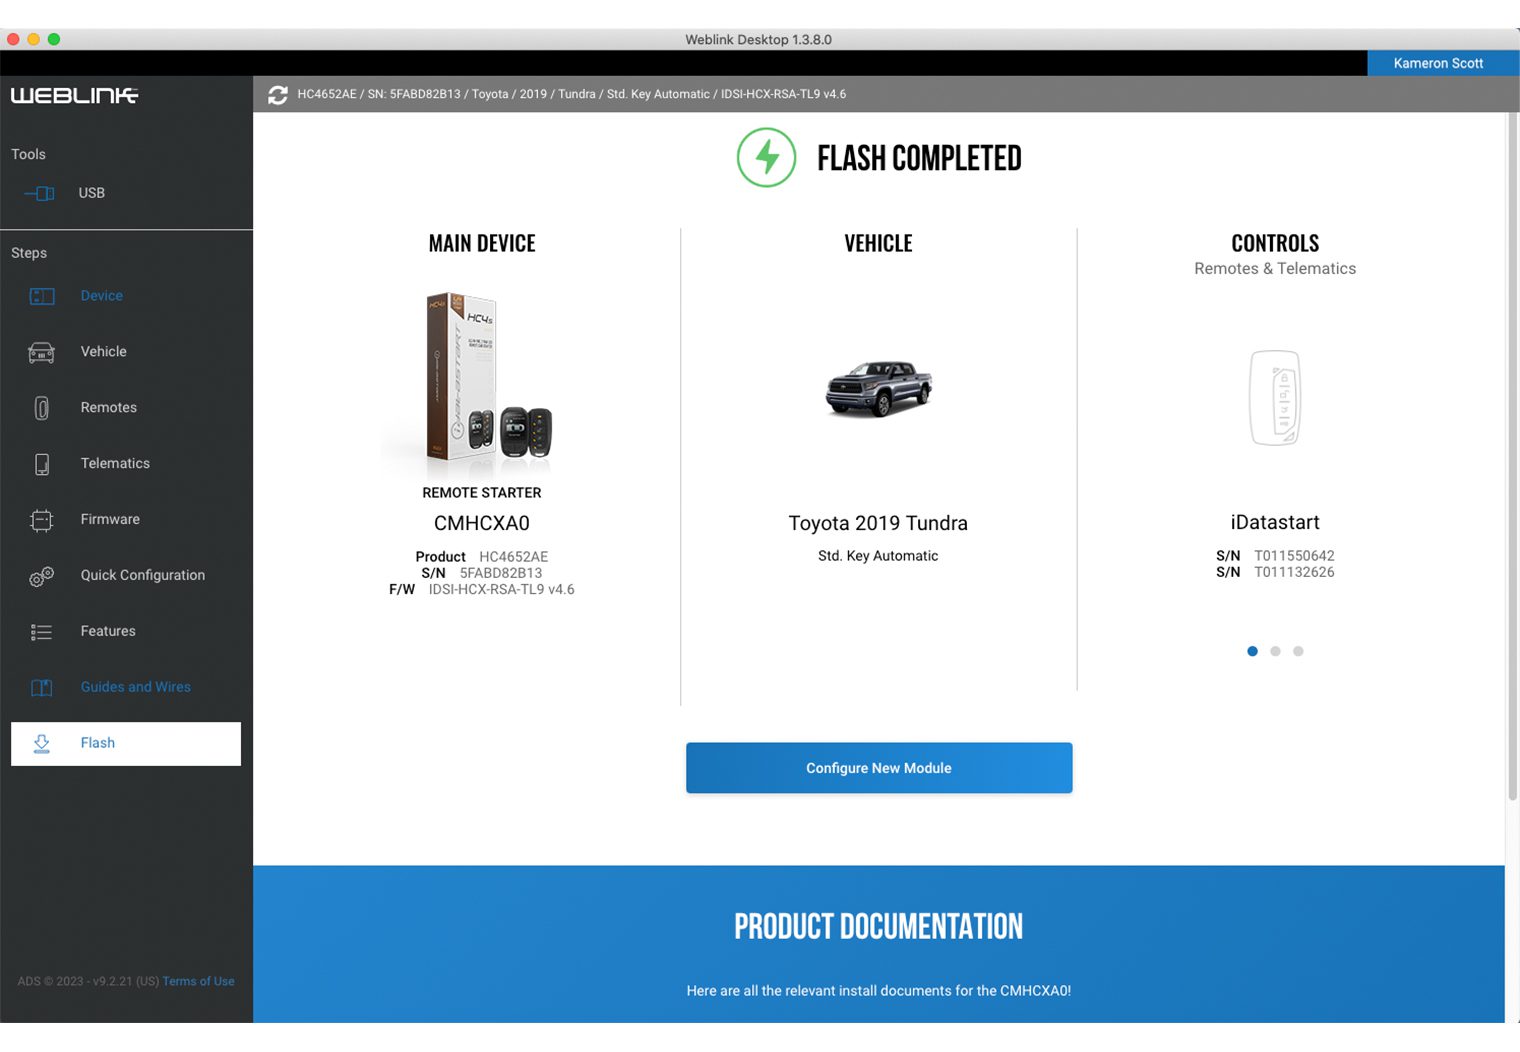
Once the WebLink application was installed and opened up on my computer, I connected the HCX control module to the computer via the included micro-usb cable. It'll identify the device and take you to the homescreen where you'll find the option to “Configure New Module”. Click on the button and follow the instructions. It's really as simple as that. So for brevity, here's a slideshow of the step-by-step screens I went through to program the unit.


Two things to note down if you choose to do this yourself –
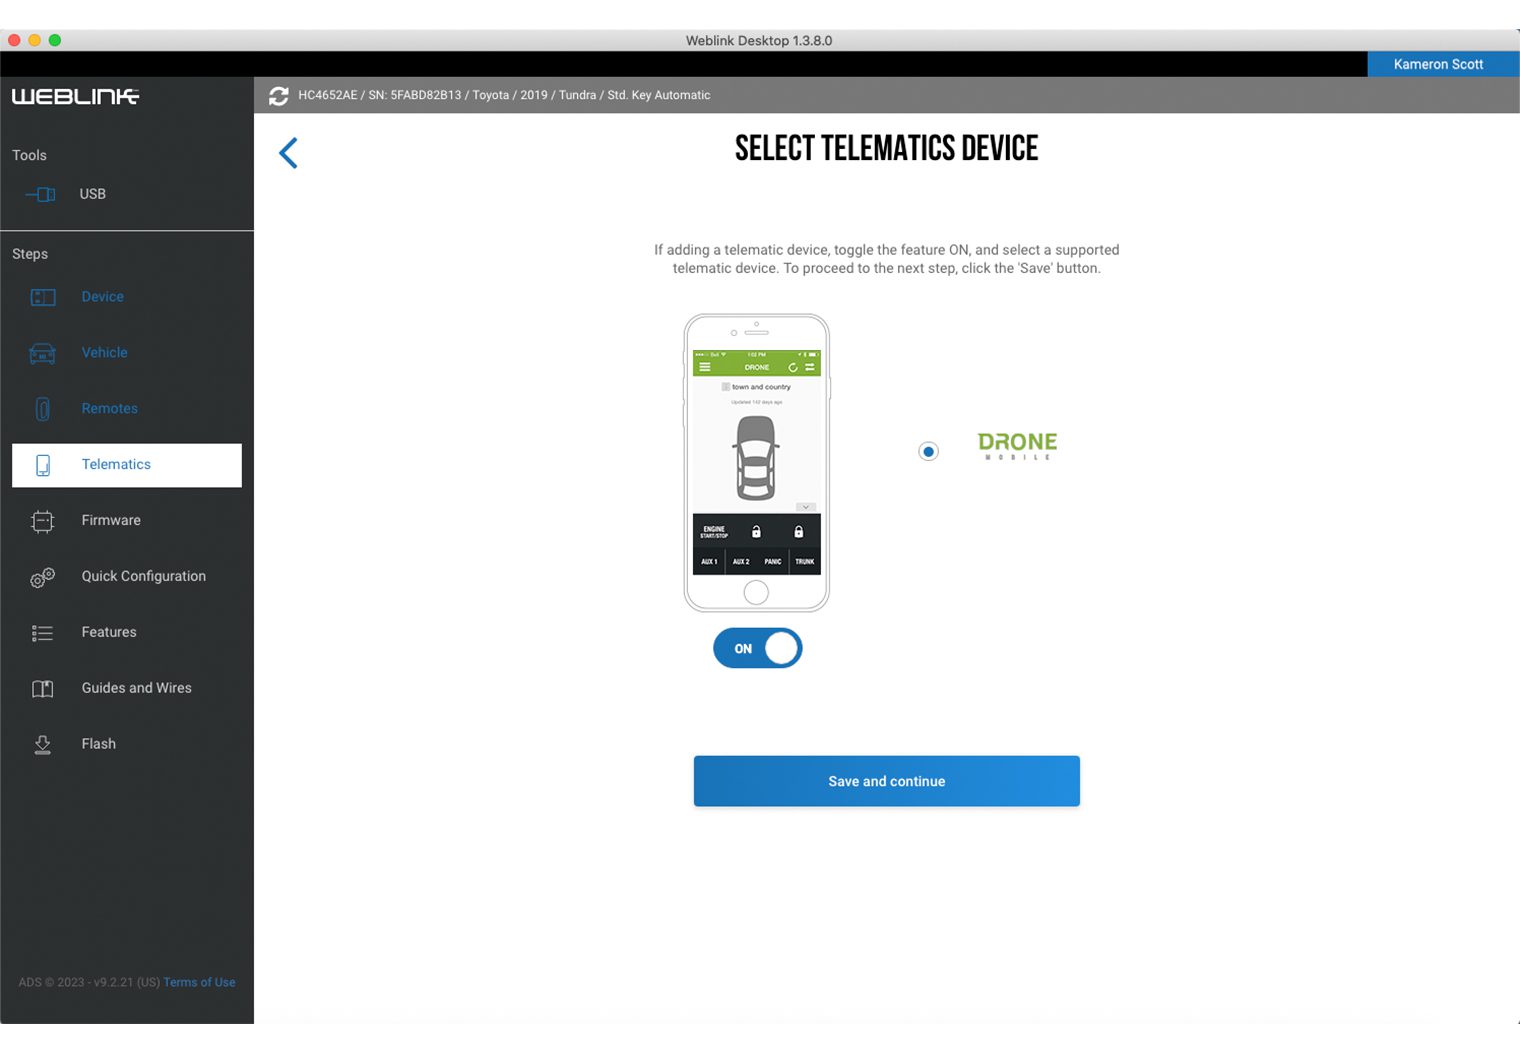
- Up front, early in the configuration process it asks if you will be connecting a Drone unit. It's a checkbox. Check the box to ensure compatibility with the Drone X1 unit if you choose to install one like I am.
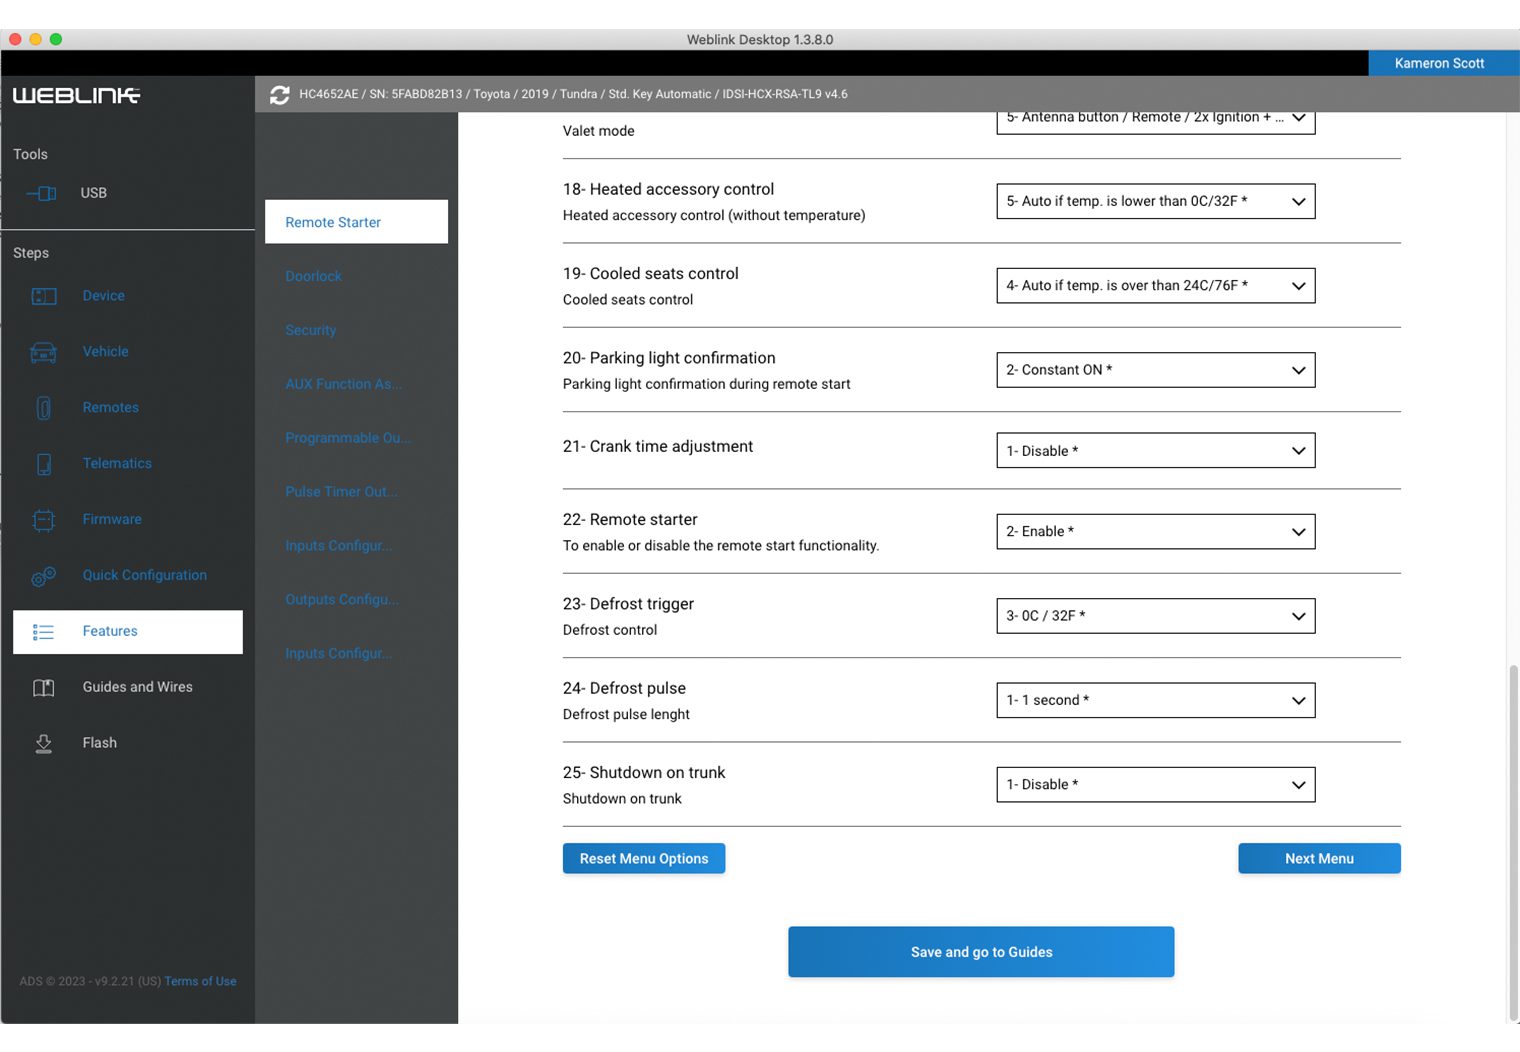
- There is a “Features and Options Menus” section that you can choose to view as a part of the initial configuration. Within this part of WebLink, you can choose to customize a very granular sets of controls. For example, the runtime when you trigger remote start – you can choose something like 5 min, 10 min, 15 min or etc. There's over 25 of these types of configurations.
Alternatively, you could just choose to bypass these granular settings and choose the “Quick” option with defaults and it should work just fine.
Wiring Preparation
Generally, I like to lay everything out on the table before any car wiring project or stereo project that I do. It helps me visualize the components and make sure I'm not improvising on the fly from the floor of a car. So that's what I did here first – I pulled out all of the components and wiring and leveraged the installation wiring diagram to connect everything together on the table to reduce any surprises and get an understanding of the setup.
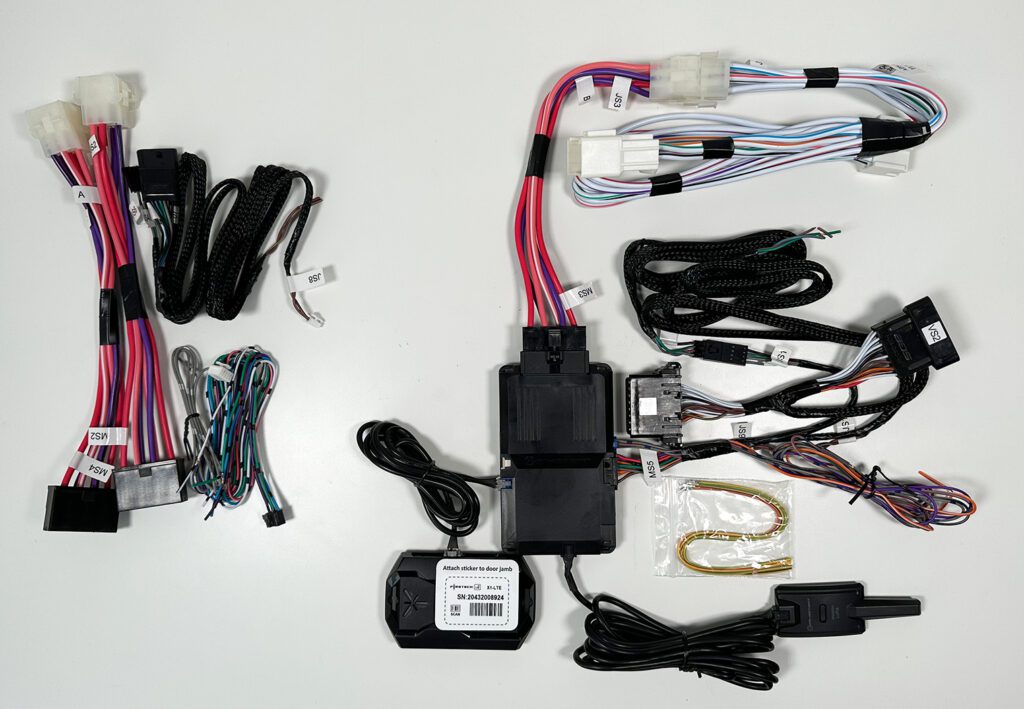
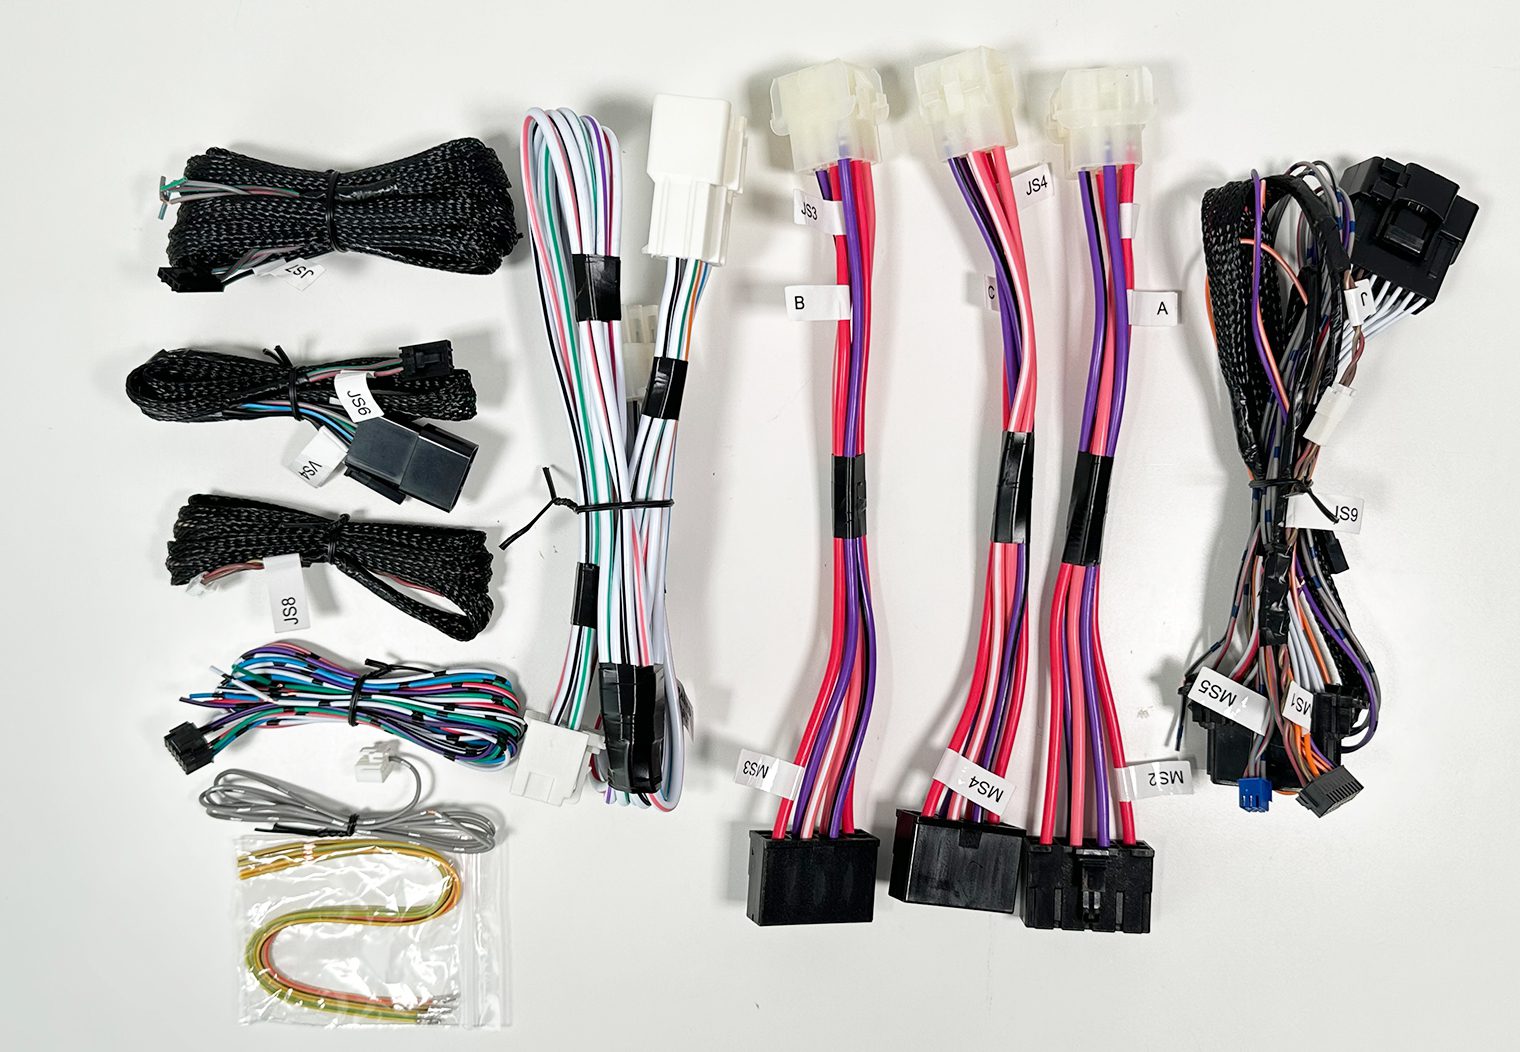
What I liked about the TL5 T-Harness is that it really dumbed down the install process. iDatastart compiled a comprehensive wiring guide for every compatible vehicle too, which tells you:
- Where each harness plugs into the HCX control module
- Where each harness plugs into in the vehicle with approximate locations in the dash where to find them
- Which harnesses will not be used in the installation
- Certain nuances about the vehicle wiring indicated by a caution yellow !
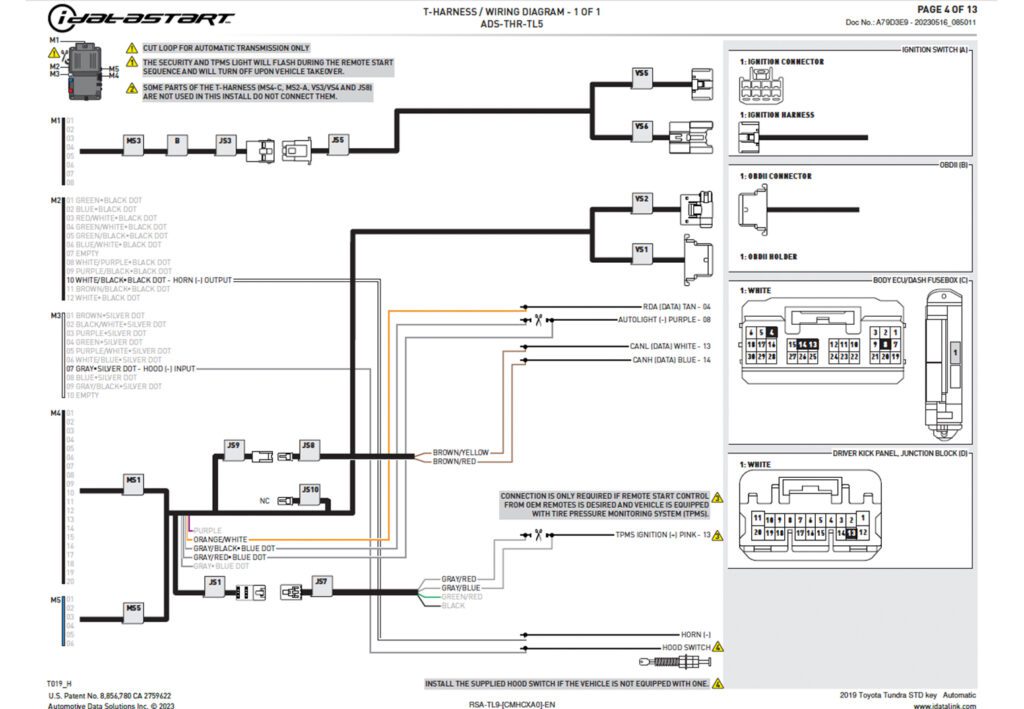
The left hand side of the diagram represents the HCX control module and the right side is the vehicle harness. After a minute or two looking at the diagram and the various components, it was pretty self-explanatory on how to connect everything. iDatastart labels every component on the wire harnesses and match them to the diagram in the install guide. All I did was find each of the plugs according to the diagram and plug it in where it calls to.
They also call out specific wires that will need to be tapped into or cut with the precise wire color, harness plug and pin number within the plug. For the Tundra, there were around four wires I would need to find, but they were very clearly indicated so I know exactly where to look and what to look for when I start the installation on the truck.
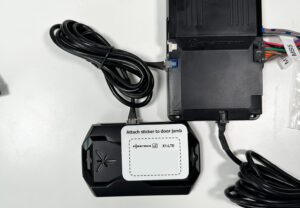
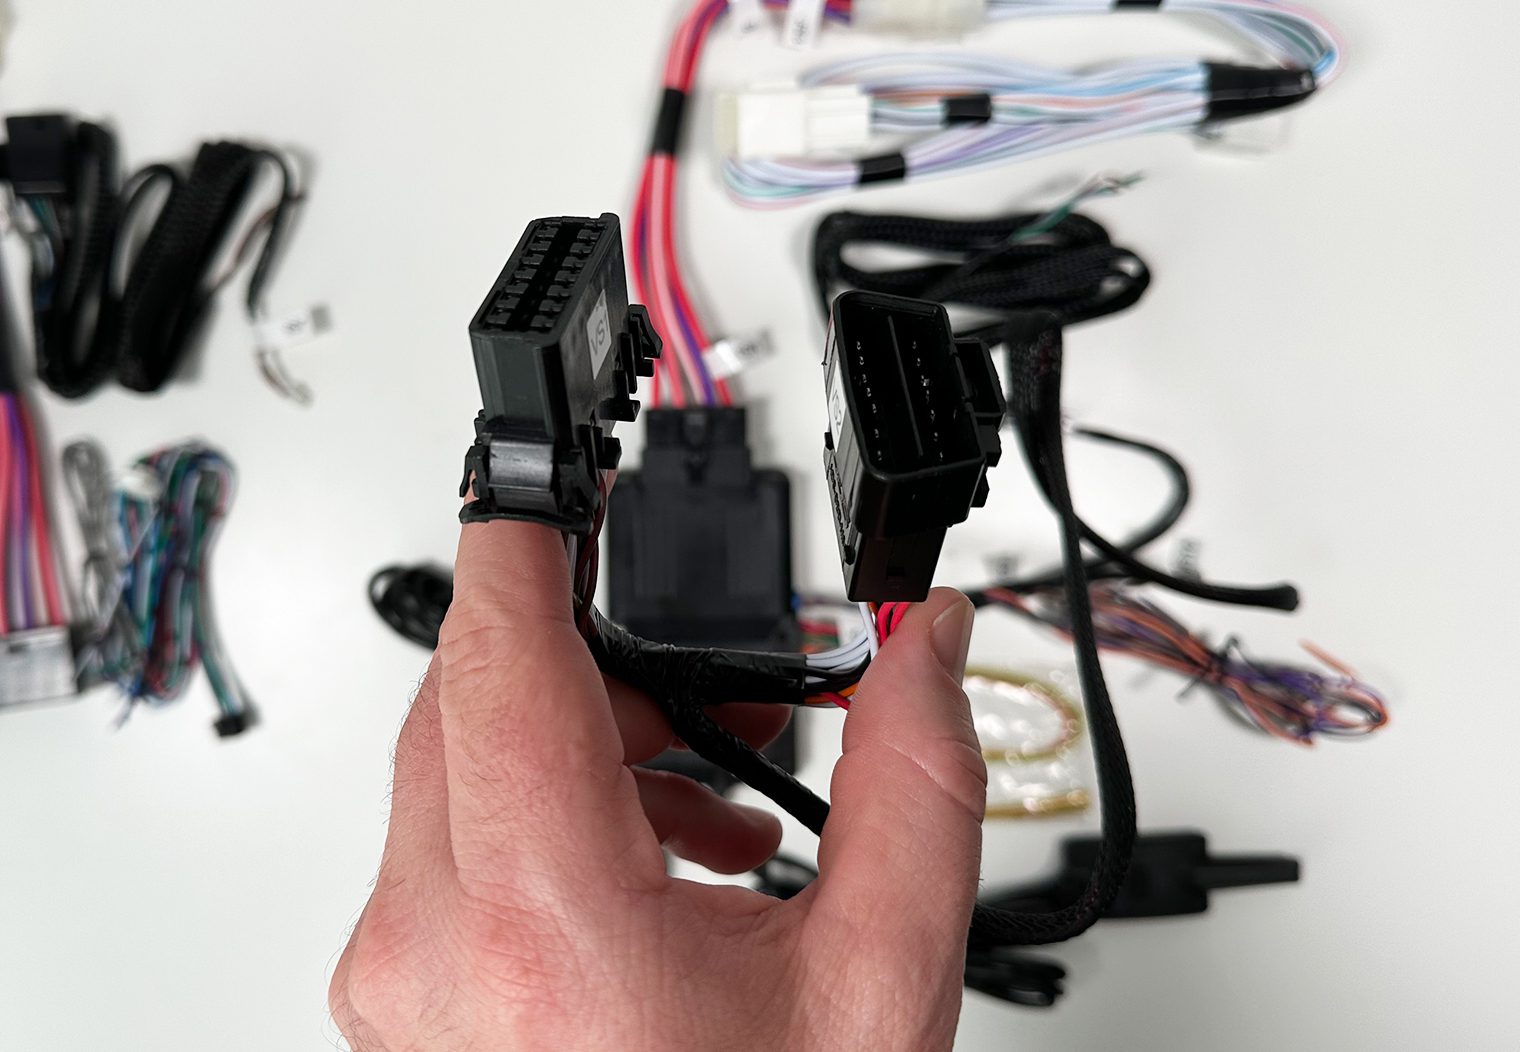
The one thing that was not as easy to verify was where the antenna and Drone X1 plugs went on the HCX. Both share the same pin harness. But after some digging, I was able to confirm that the Drone X1 plugs directly into the BLUE M2 plug on the left side of the HCX while the antenna plugs into the bottom Black plug.
That's pretty much it. With everything mocked up I was confident this would be a pretty straight forward installation and was ready to take to the truck.
Wiring the Remote Start in the Truck
A little about the 2019 Tundra this is going into, this is the Platinum edition so it has all the bells and whisles:
- Leather interior
- Heated and cooled seats
- Adaptive cruise control
- The upgrade JBL stereo with GPS, backup camera
- Sunroof
- And so on
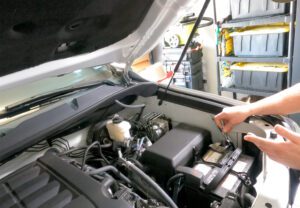
The very first thing to do in any stereo or wiring project on the car is to disconnect the battery. It’s important to do this to prevent damage or blown fuses if you accidentally wire something incorrectly or ground a positive wire during the process. The wires that are tapped into in this process could do permanent damage to your vehicle if wired incorrectly or shorted.
Then I began removing the panels in the dash area to scope out where the wire harnesses are that I need to tap into based on the T-Harness wiring diagram that I showed you.
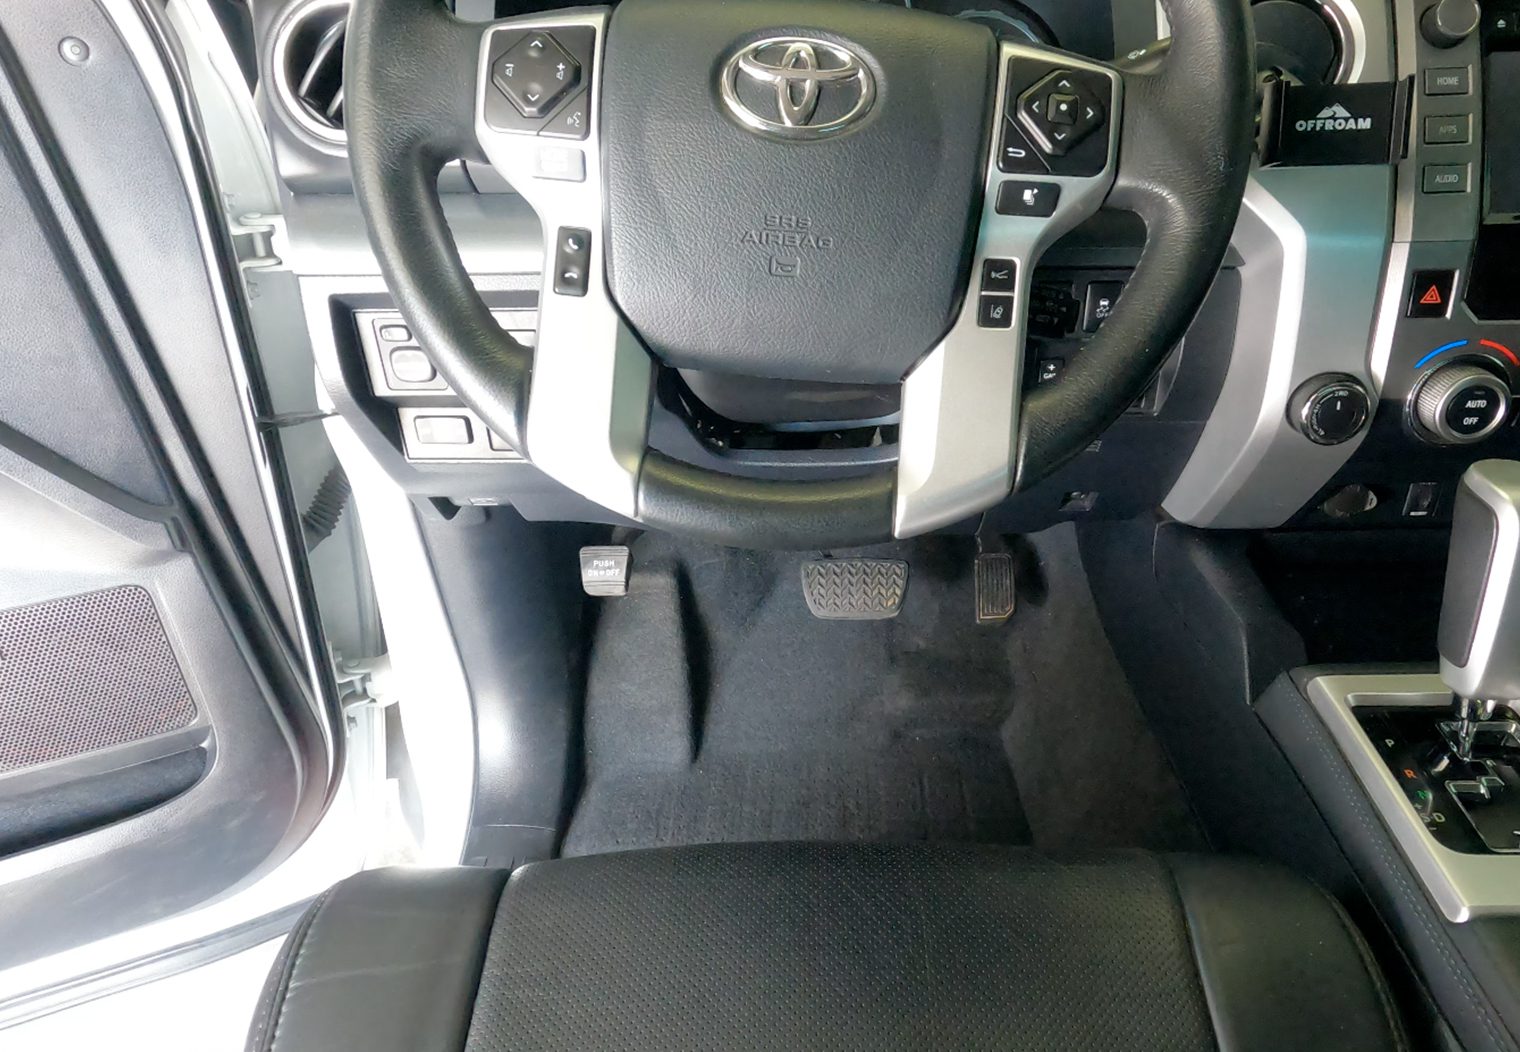
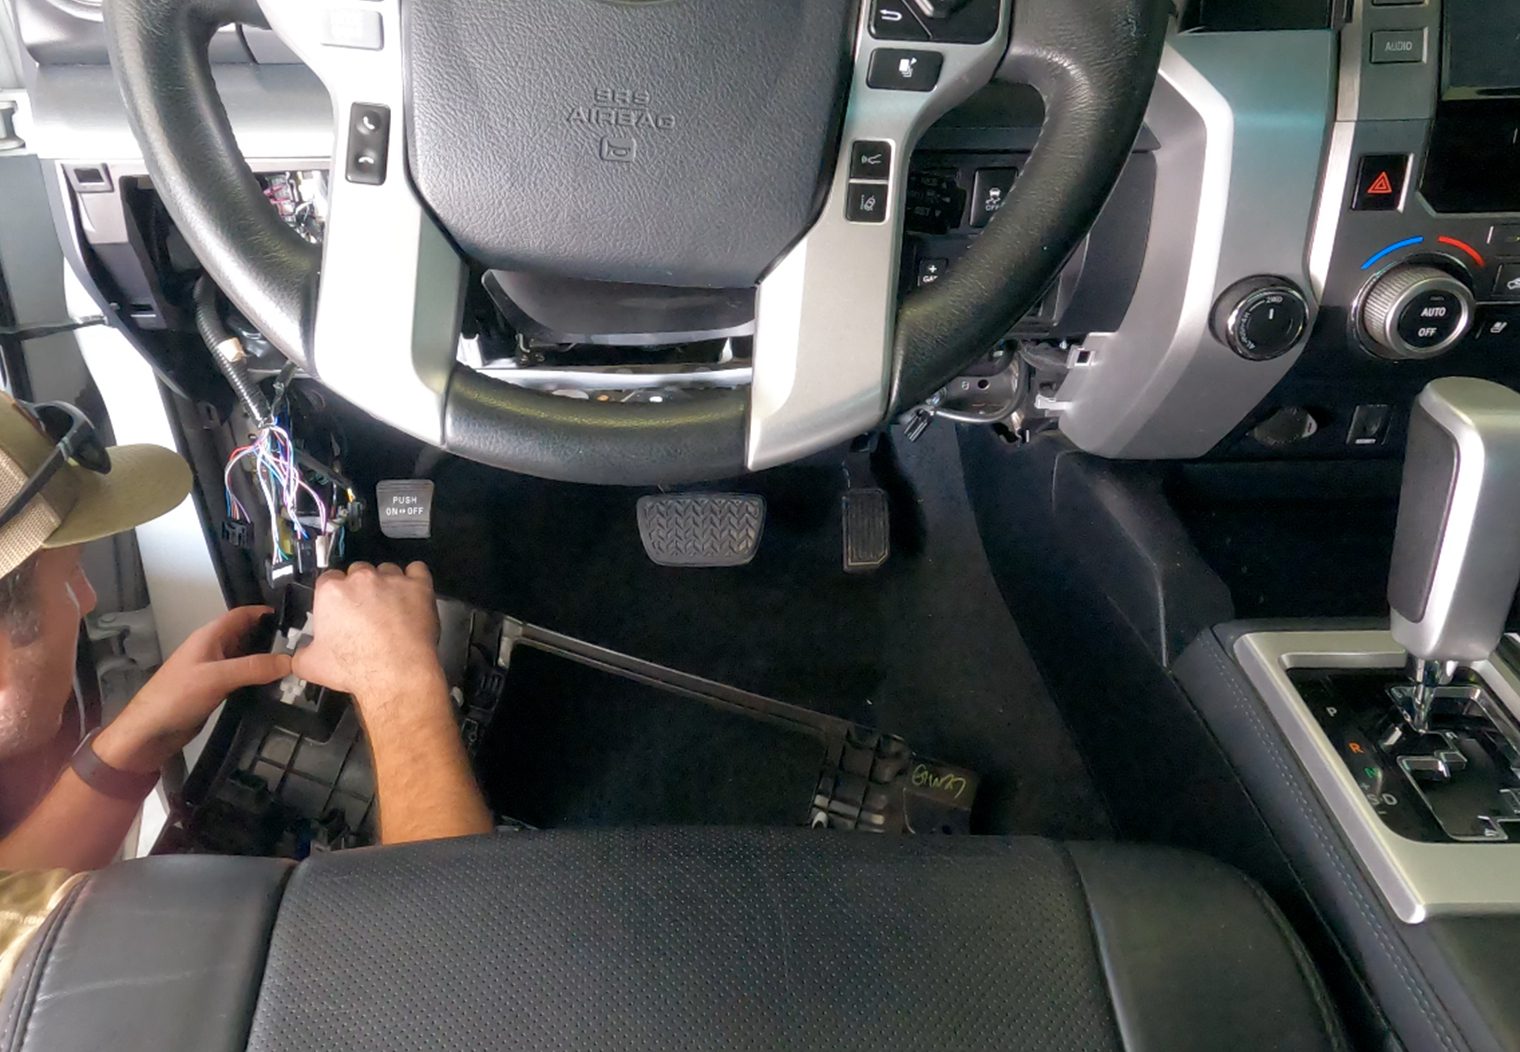
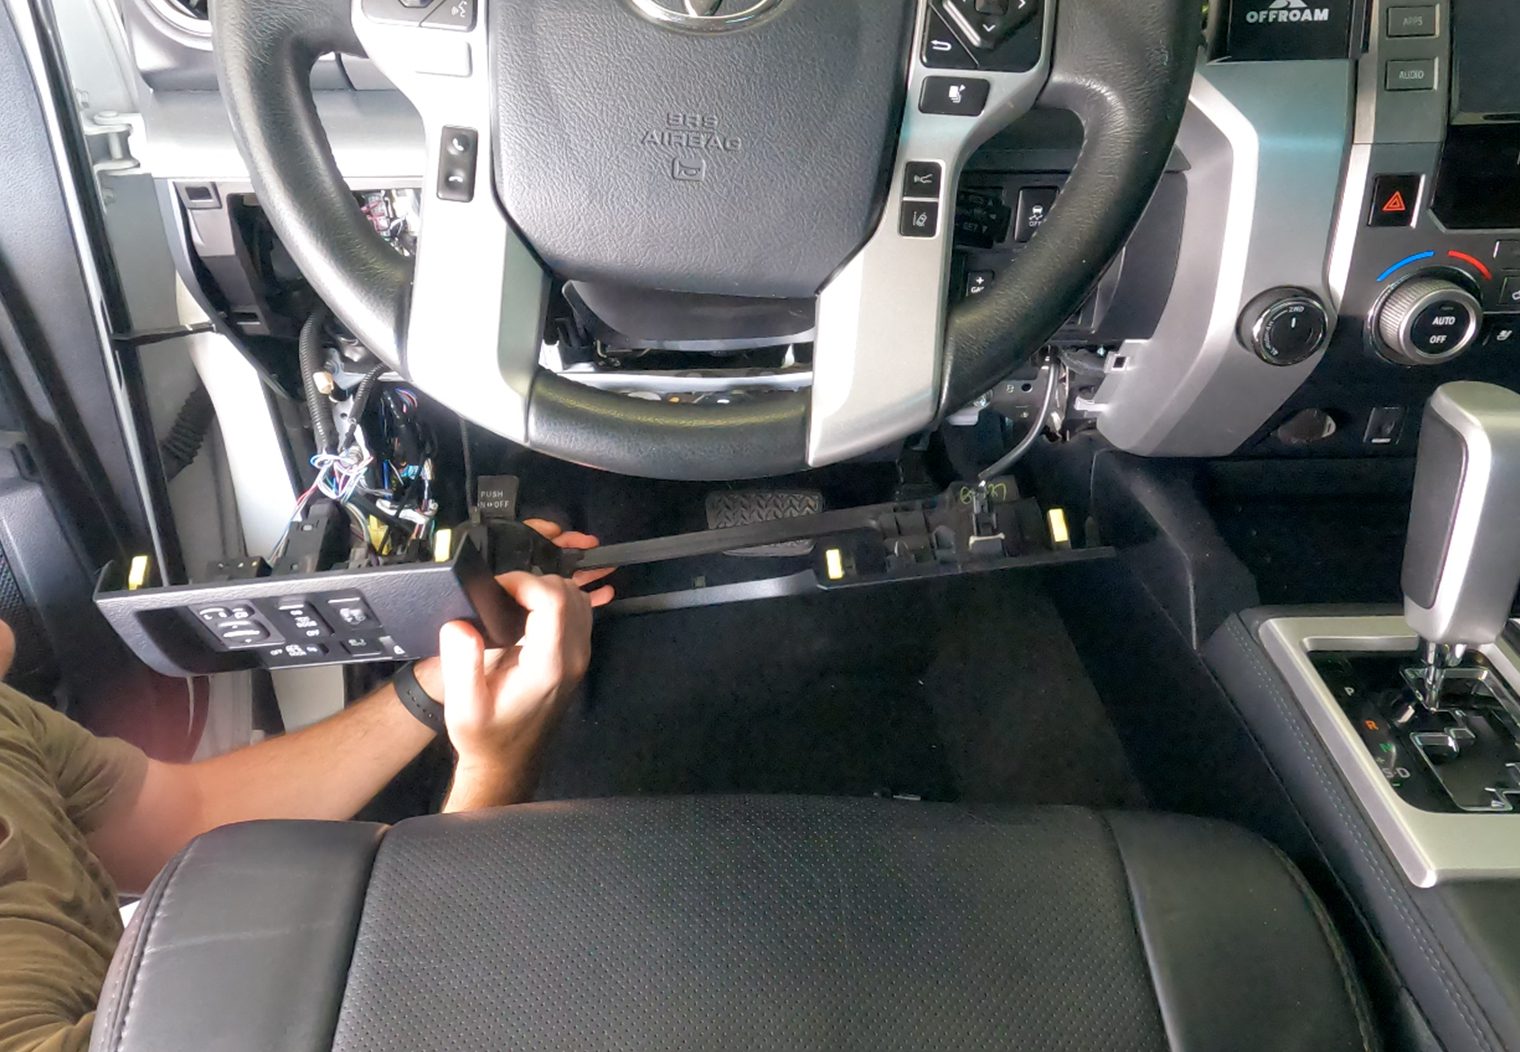
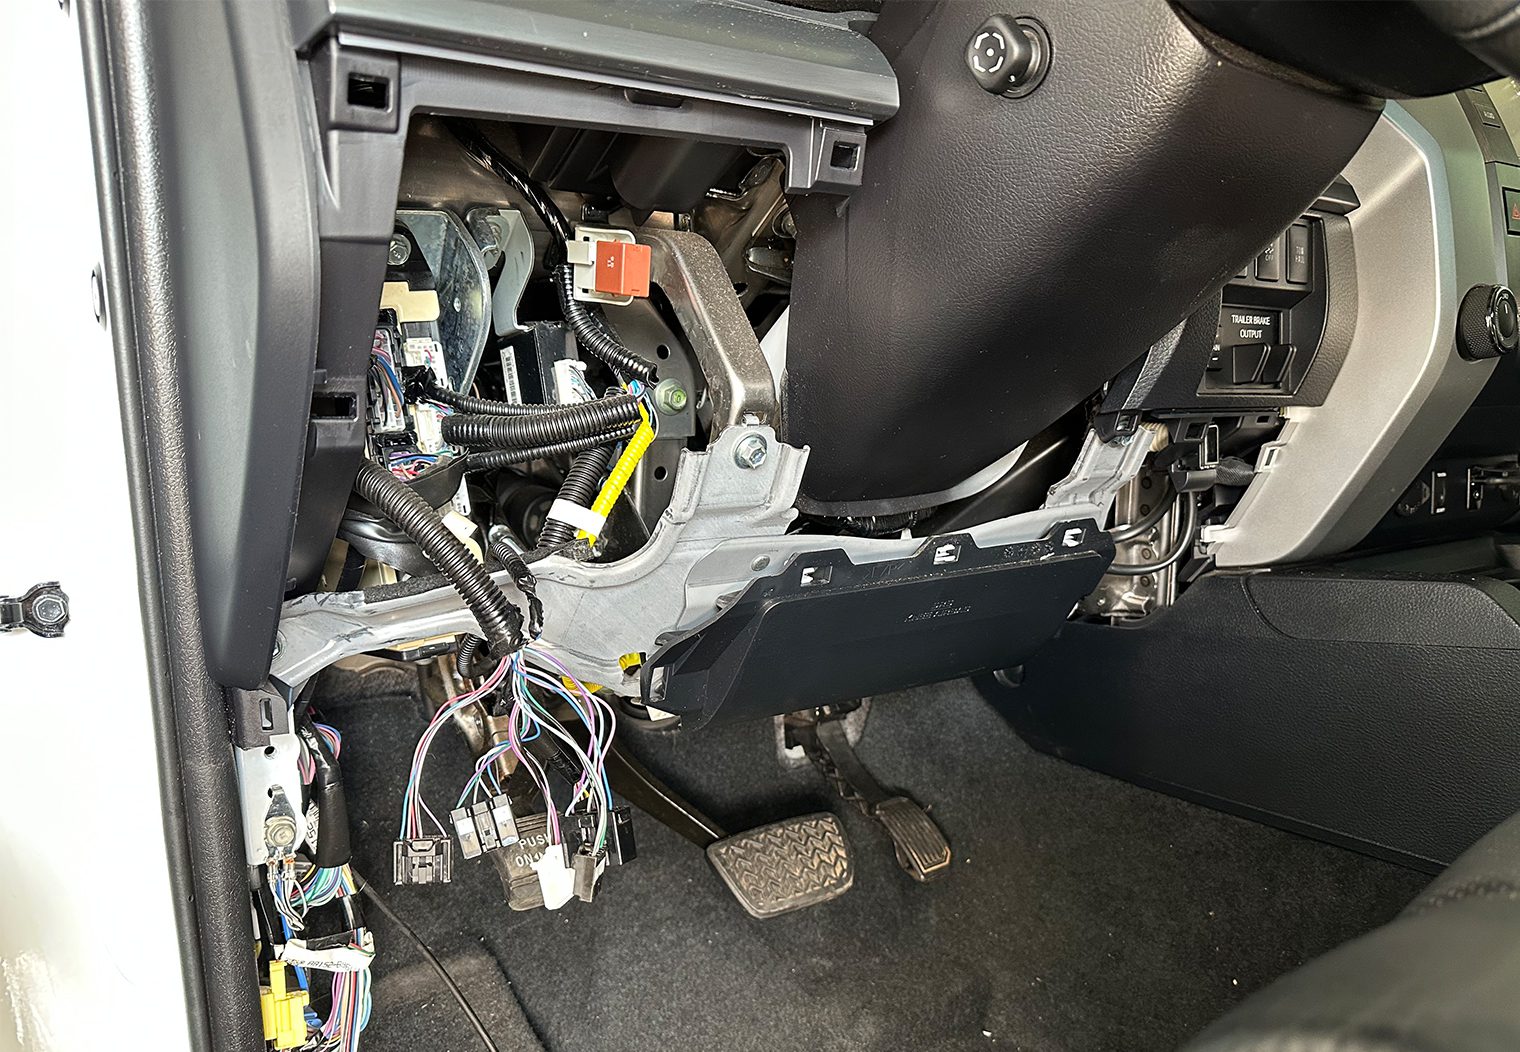
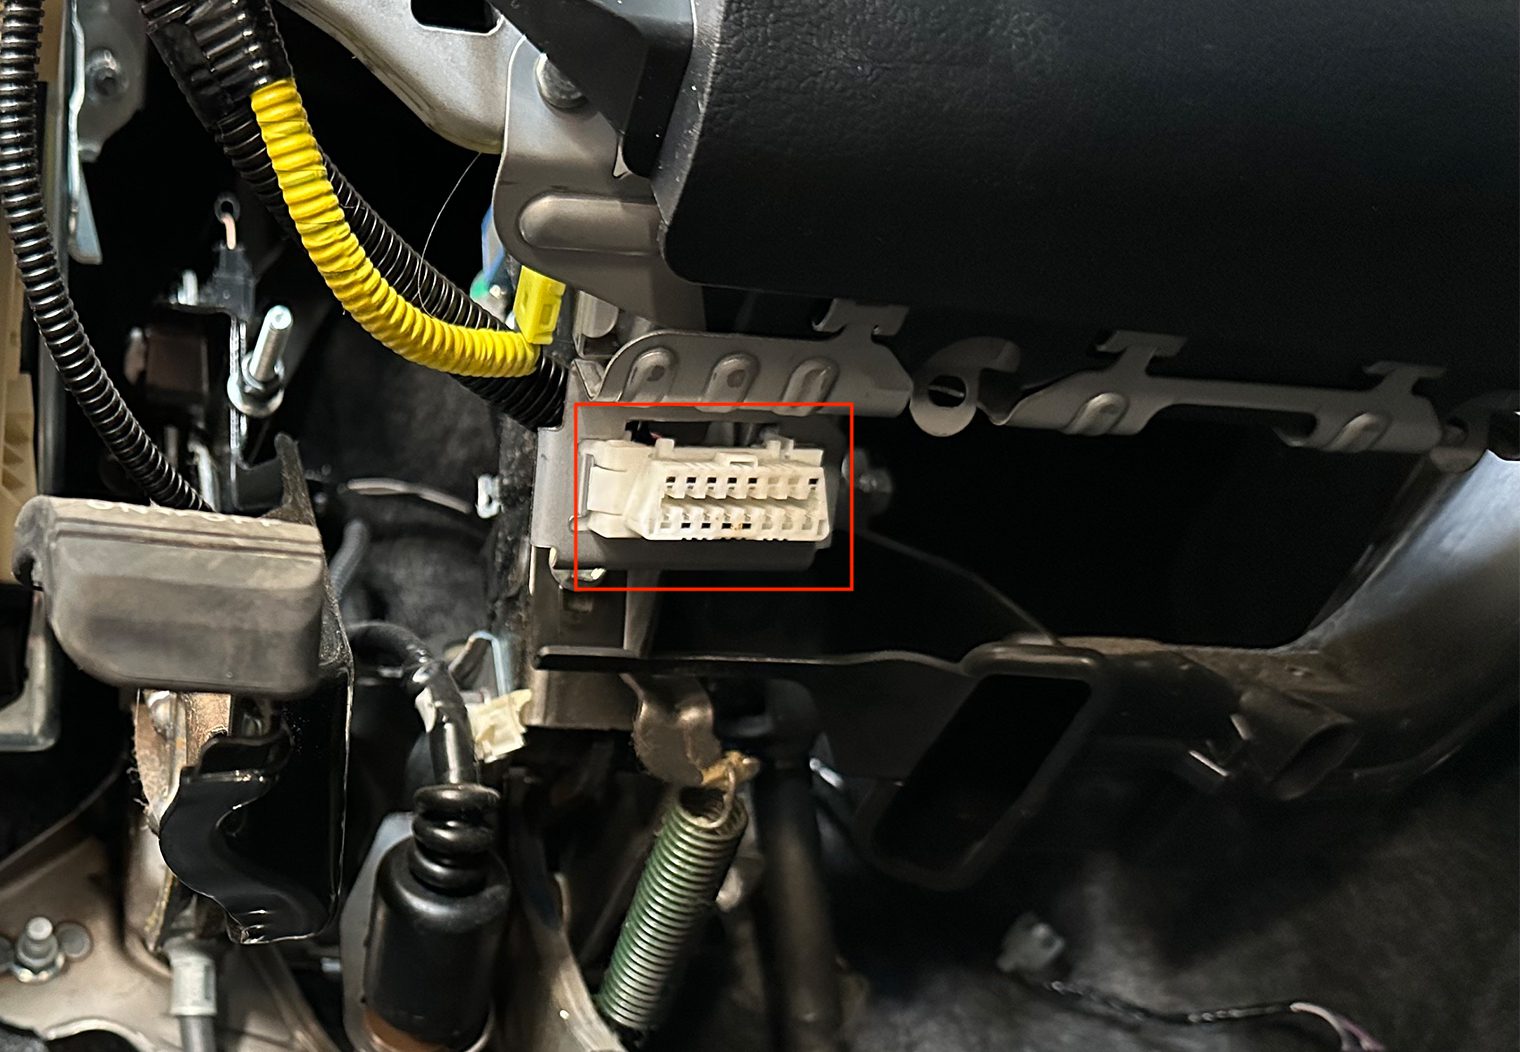
With all of the panels removed I could start to find the four different areas of focus for wiring:
- Ignition connector
- The OBDII connector
- Body ECS/ Dash Fusebox
- The junction block behind the kick panel
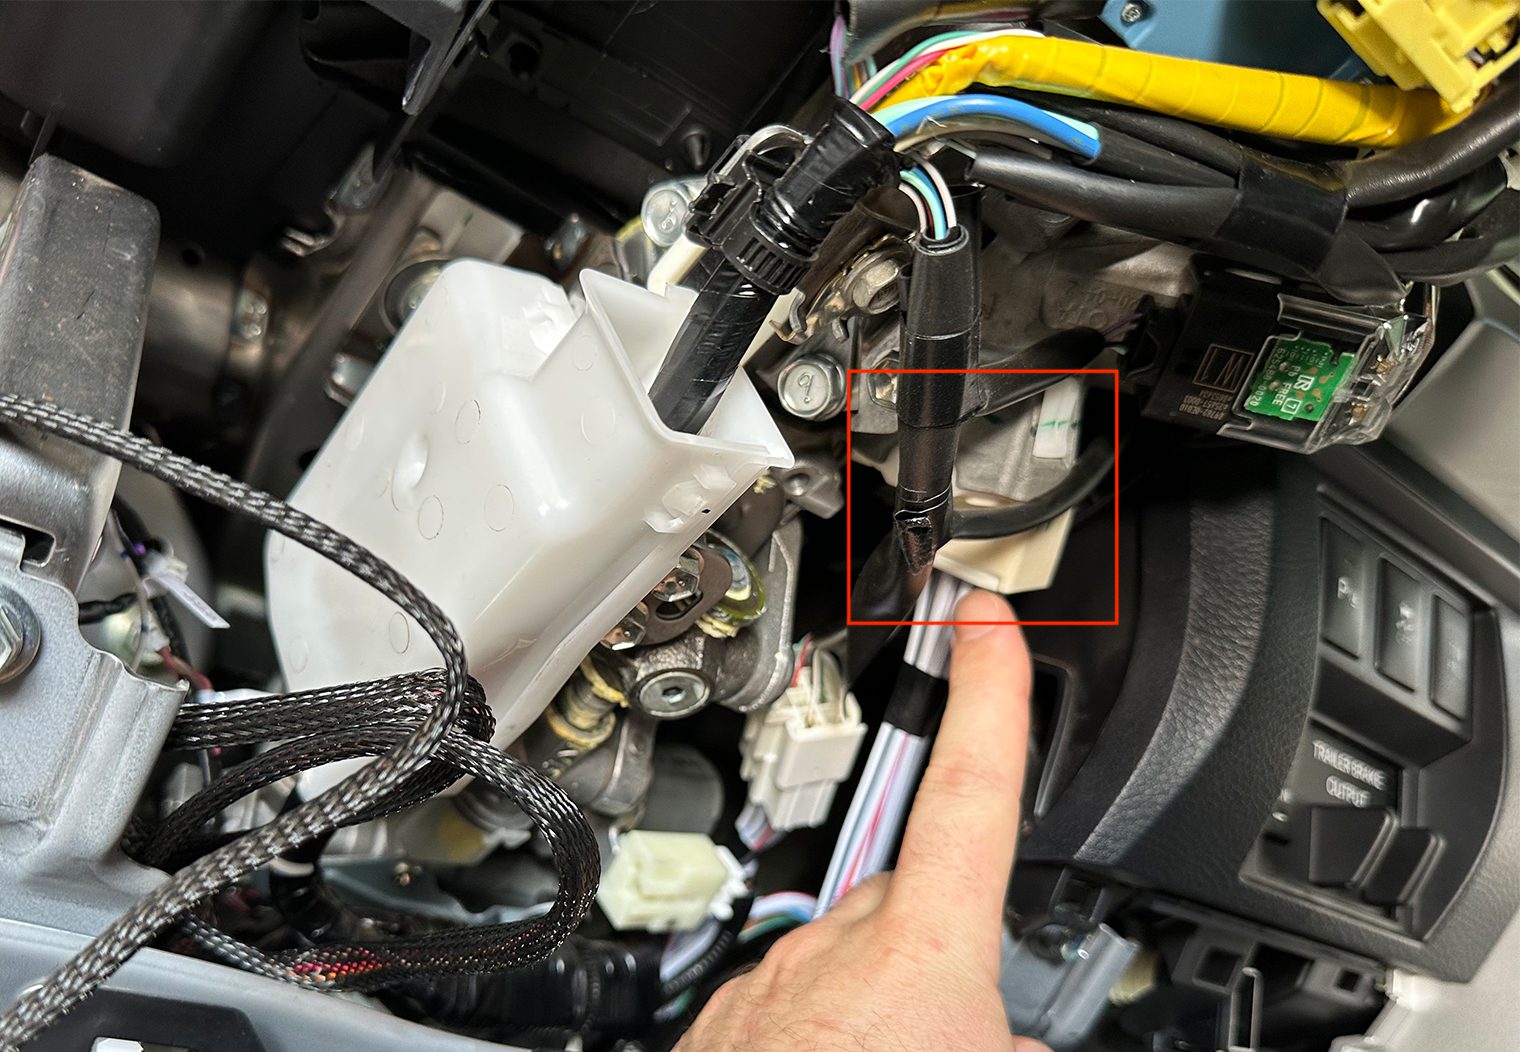
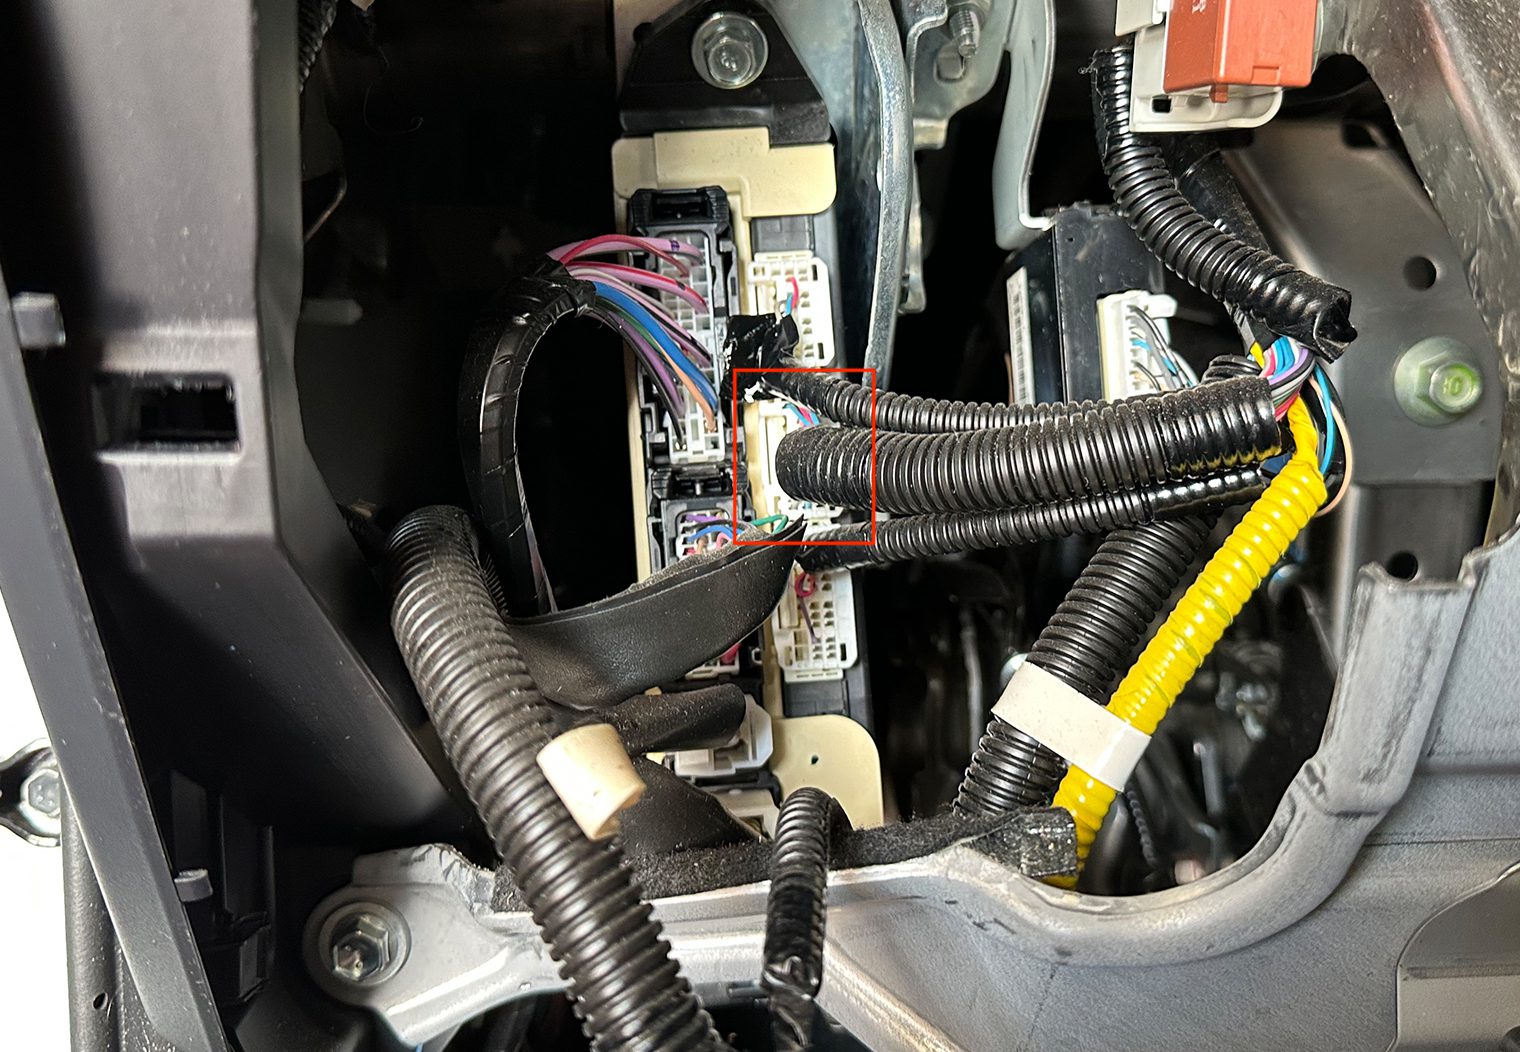

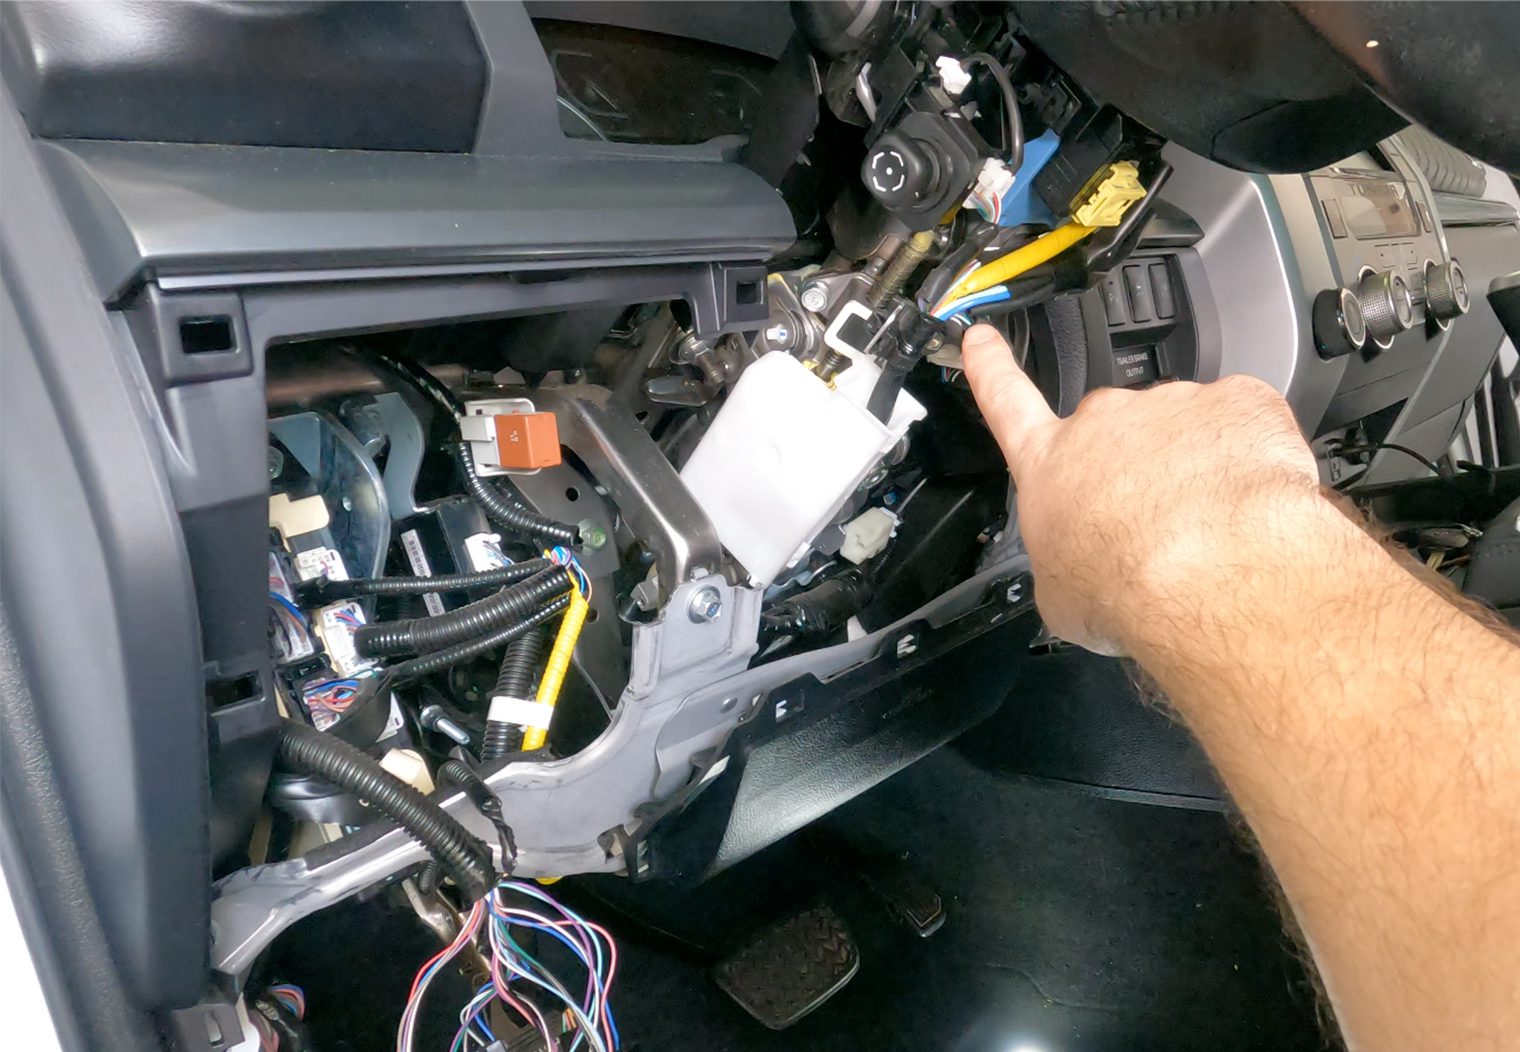
After I found all of the harnesses and boxes, I began to tap/cut into the different wires that the instructions call out. Mainly in the Dash Fusebox. I used a combination of wiretaps and soldering depending on whether I was tapping or cutting/connecting.
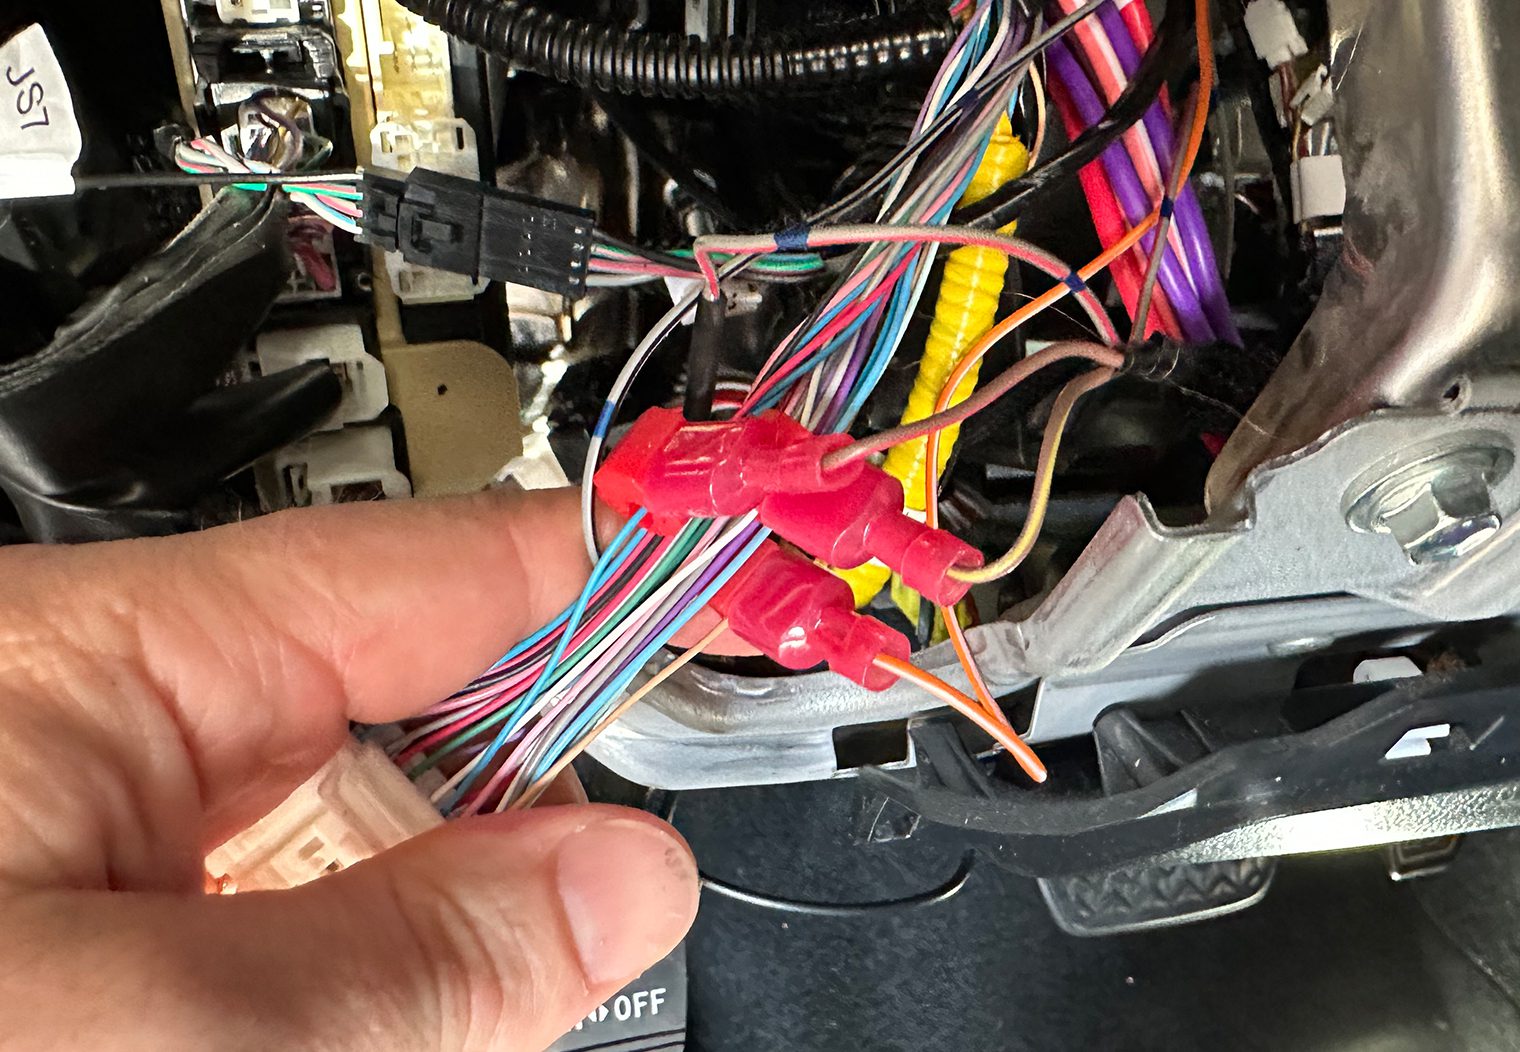

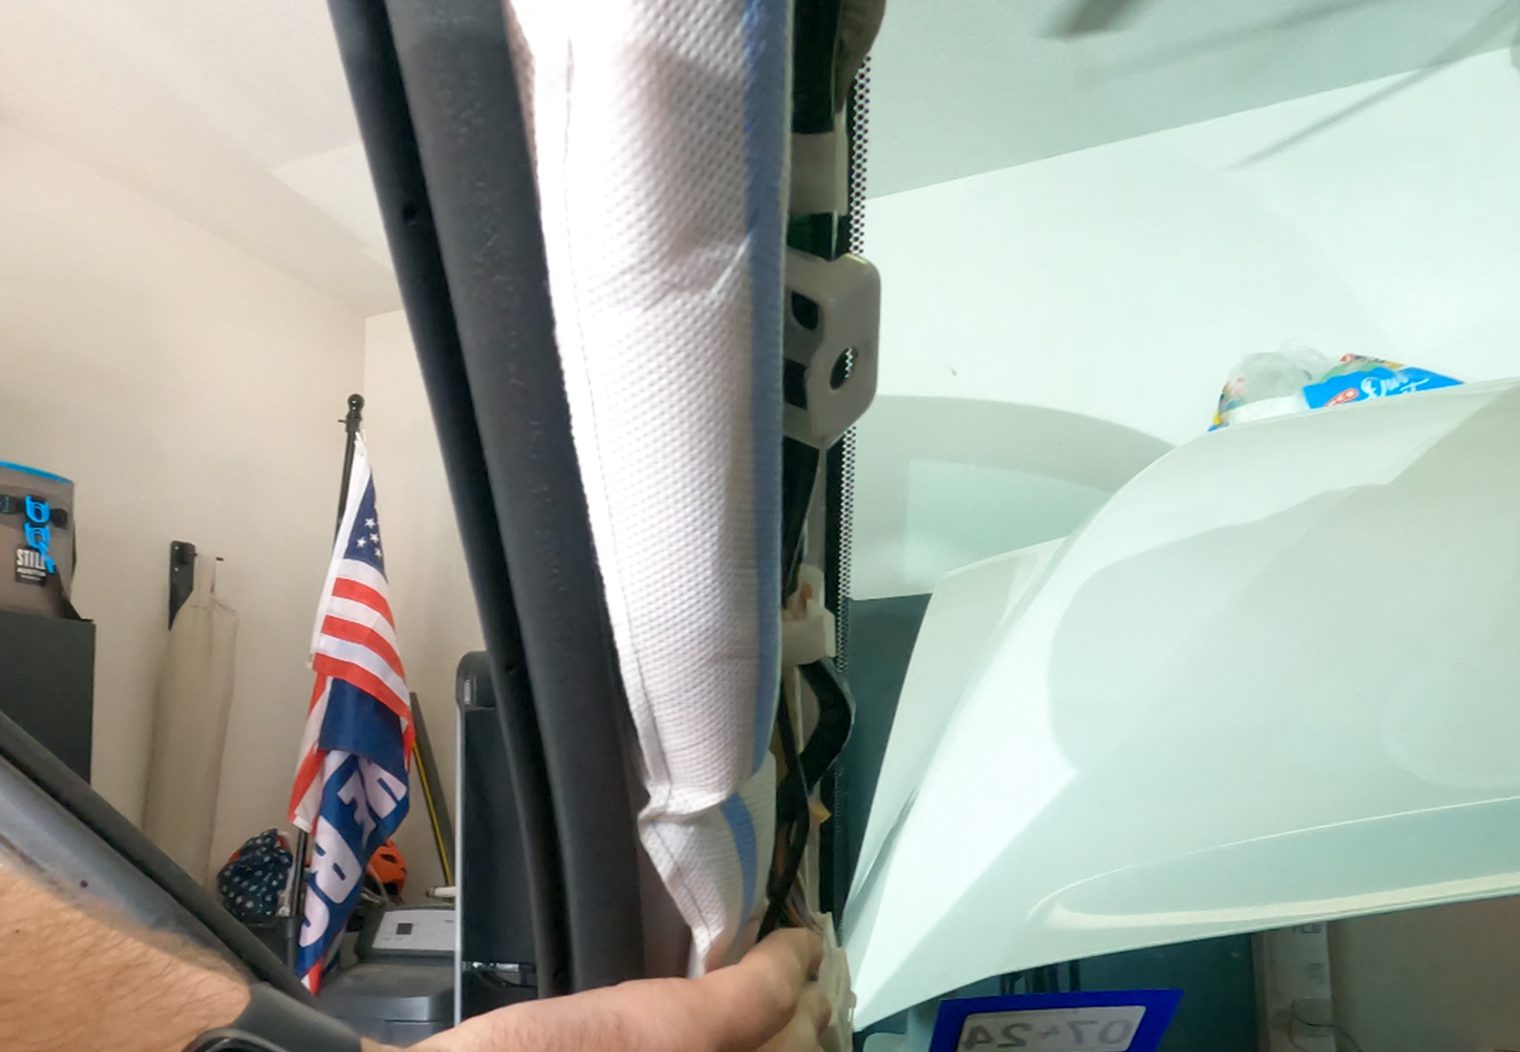
With the manual wiring completed and all the harnesses plugged into their correct location, I cleaned things up and secured some of the modules with some zip ties. The last component to wire was the remote start antenna. I chose to place this at the center of the windshield near the rear view mirror. I think the key thing here is that it’s elevated and away from other potential interfering signals.
Some people place this on the passenger side A-pillar, driver side A-pillar or even centrally on the rear of the cab. One thing to caution with wiring the antenna along the A-pillars on a vehicle is interference with airbags. In the picture below you'll notice an airbag in the A-pillar. I made sure that the wire was tucked above the airbag alongside the existing wire harness to prevent any interference with the airbag if it deployed.
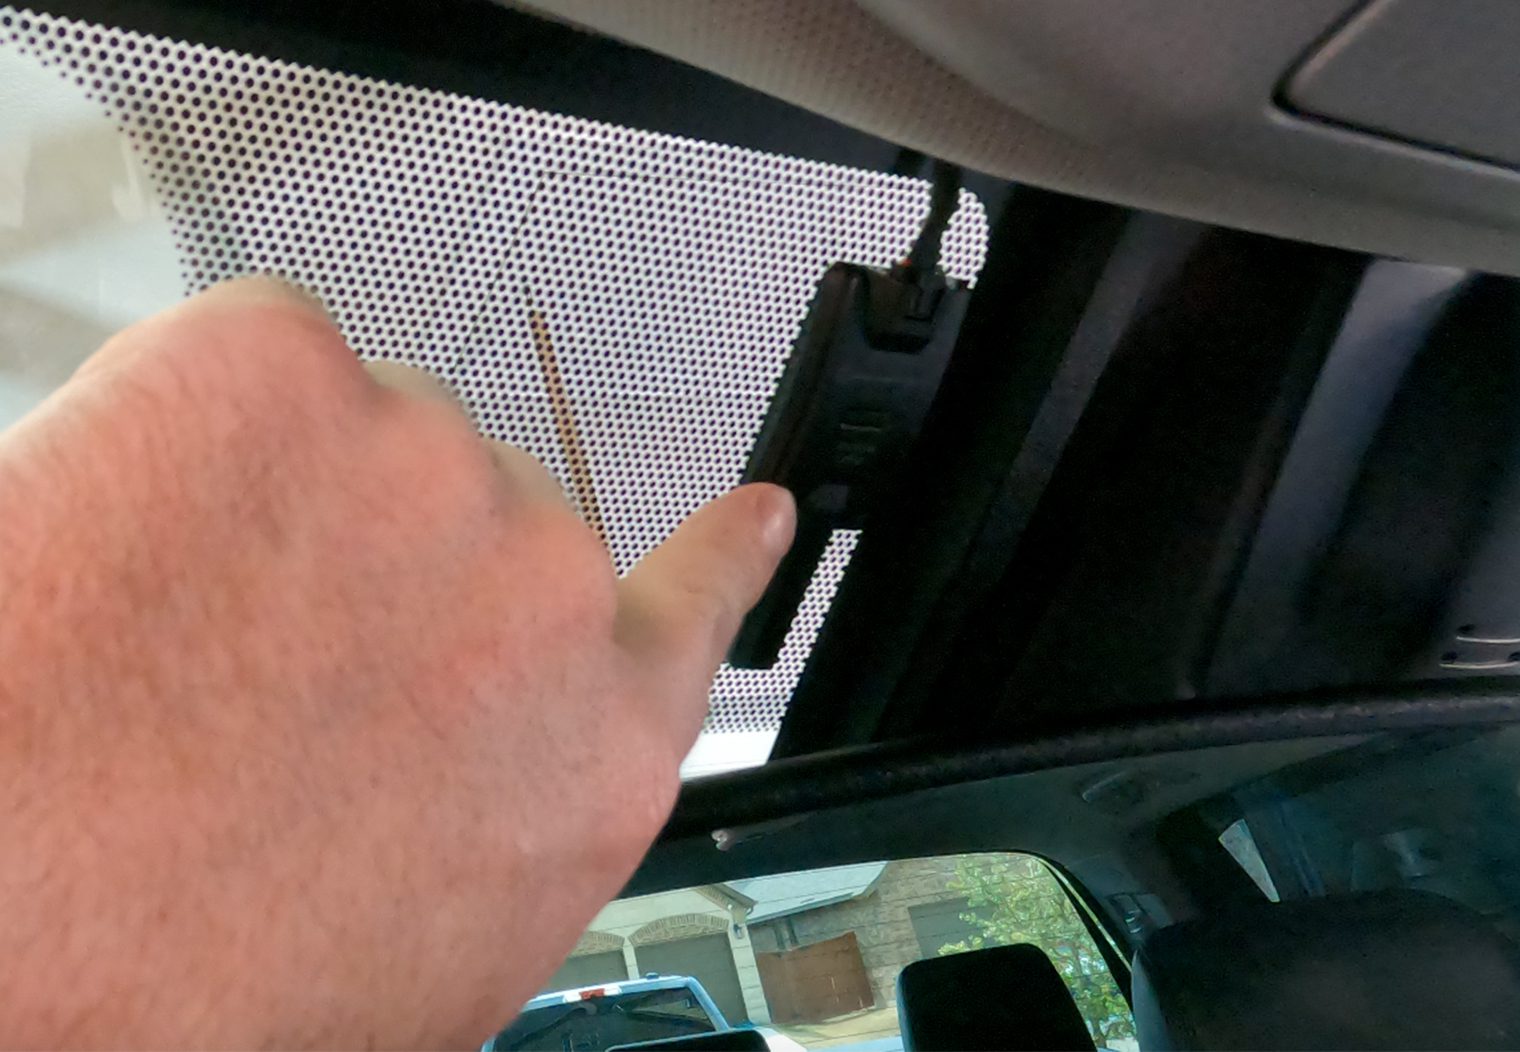
With the antenna plugged into the HCX, secured and cleaned up, that wrapped up the wiring! The next thing to do was reconnect the battery and fire everything up for a test.
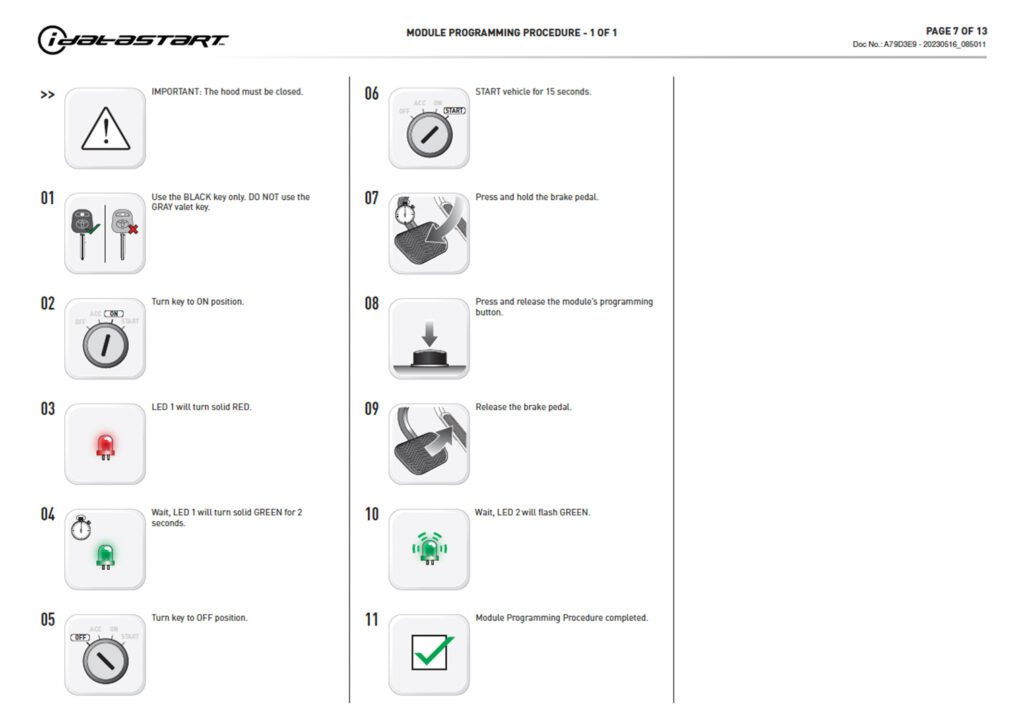
Final Programming & Activation
Once the system had power, I went through the programming procedures that the installation instructions called for on the HC4.5. You can find those instructions on the same set of instructions as the wiring diagram. Keep in mind that I already flashed the HCX with the Tundra's firmware, but these are necessary steps to take in order to wrap up the programming aspect and make the unit functional.
Additionally, the Drone X1 requires power in order to activate the unit. Once you've installed and programmed the HC4.5, this activation process can be done on the Drone Mobile app using the unit's serial information provided in the box. You can download the app here:
This is what will activate the SIM card that's in the unit and enable it to connect to a cellular service.
And that's a wrap!
Wrapping Up & General Thoughts About the HC4.5
My experience with this setup has been overwhelmingly positive so far. For professional installers, ADS/iDatalink does a fantastic job at documenting the installation process with vehicle-specific T-Harnesses and wiring diagrams that make this a breeze. For DIYers, I would still consider this an intermediate installation that requires knowledge of your vehicle's harness, how to tap thing gauge wire, and also a level of programming – both on your computer and manually in the vehicle. This installation took me roughly 4-5 hours from start to finish.
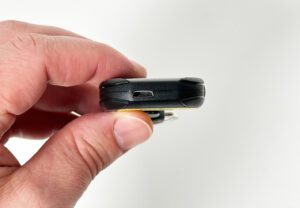
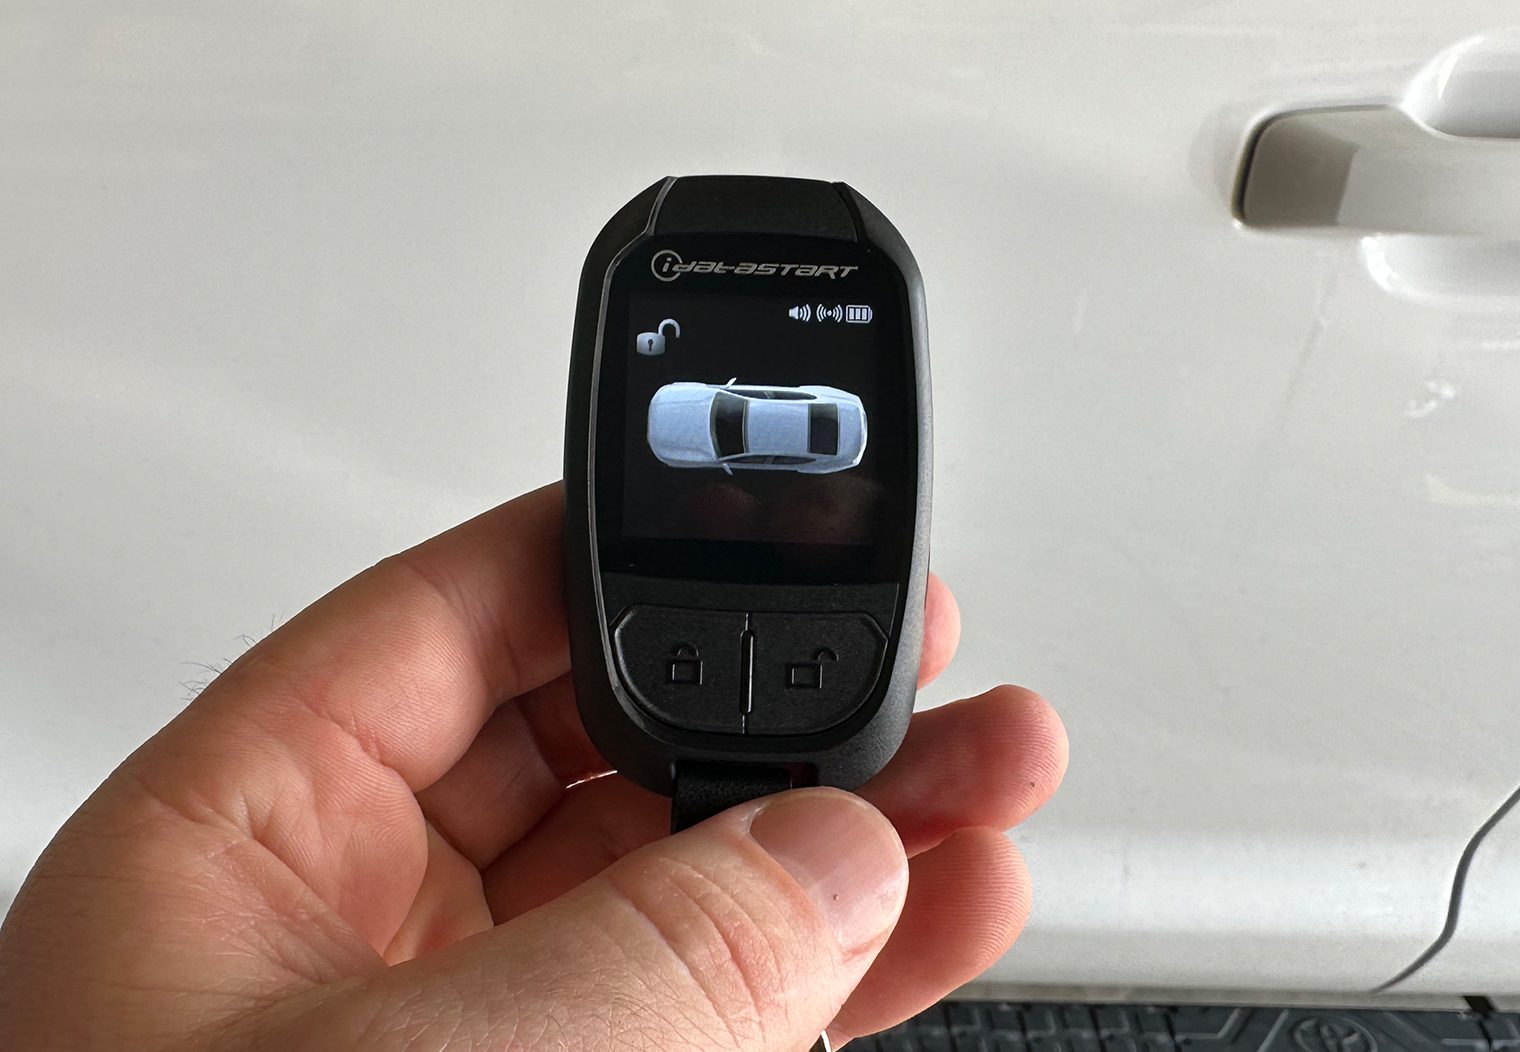
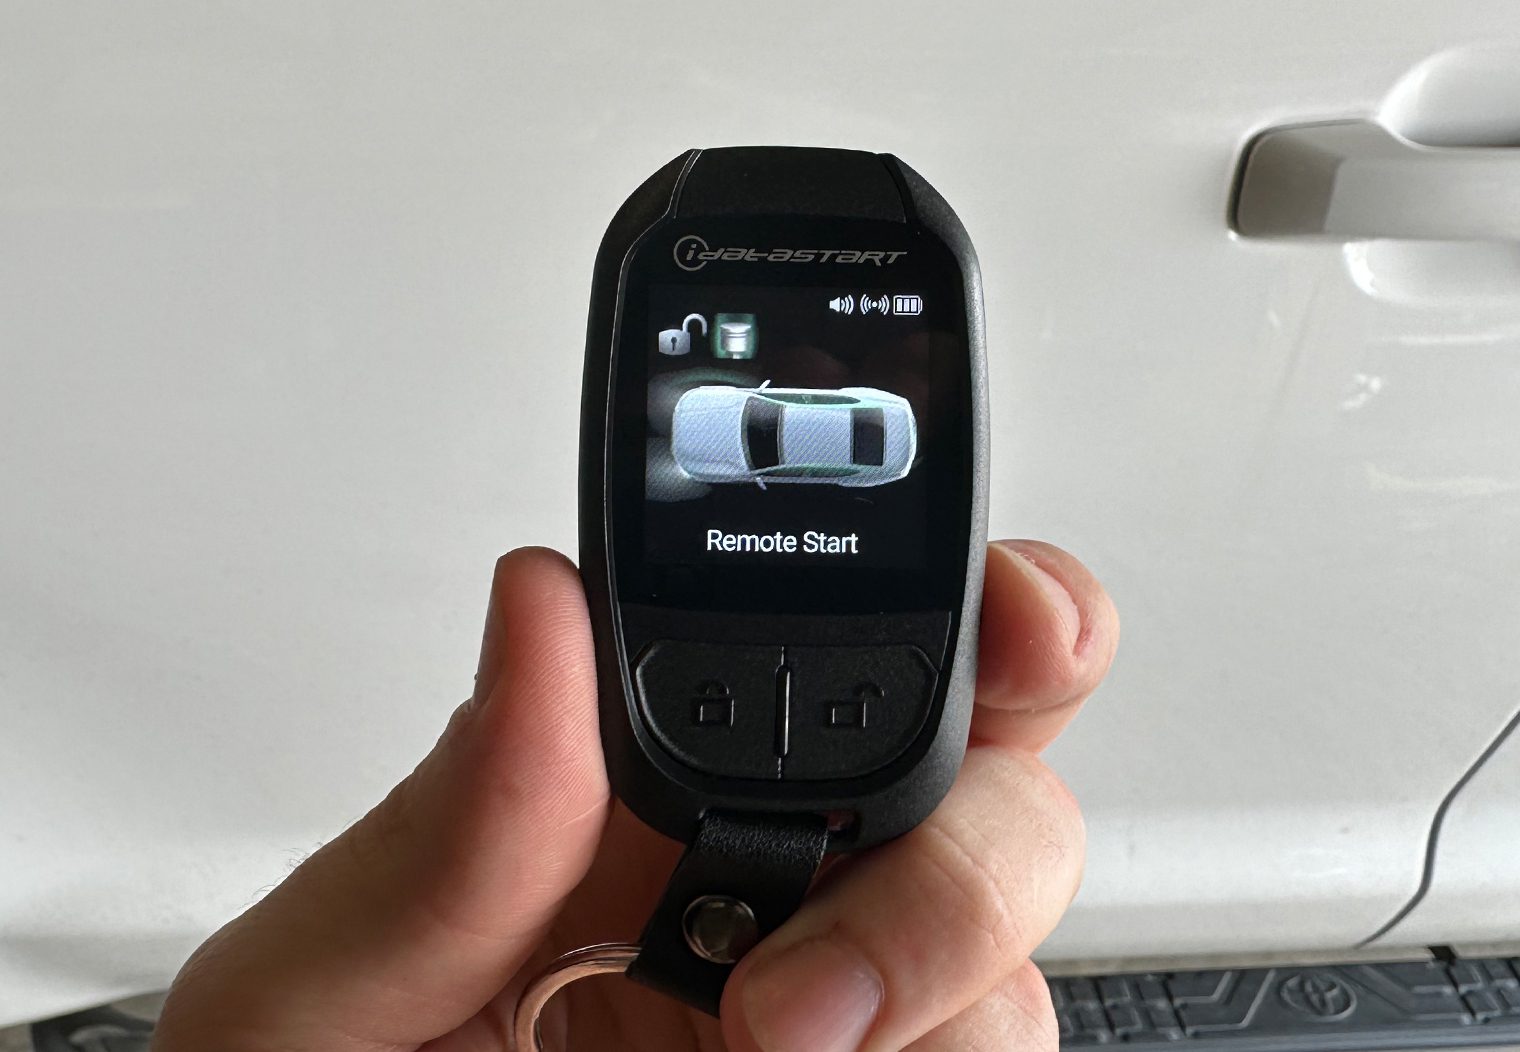
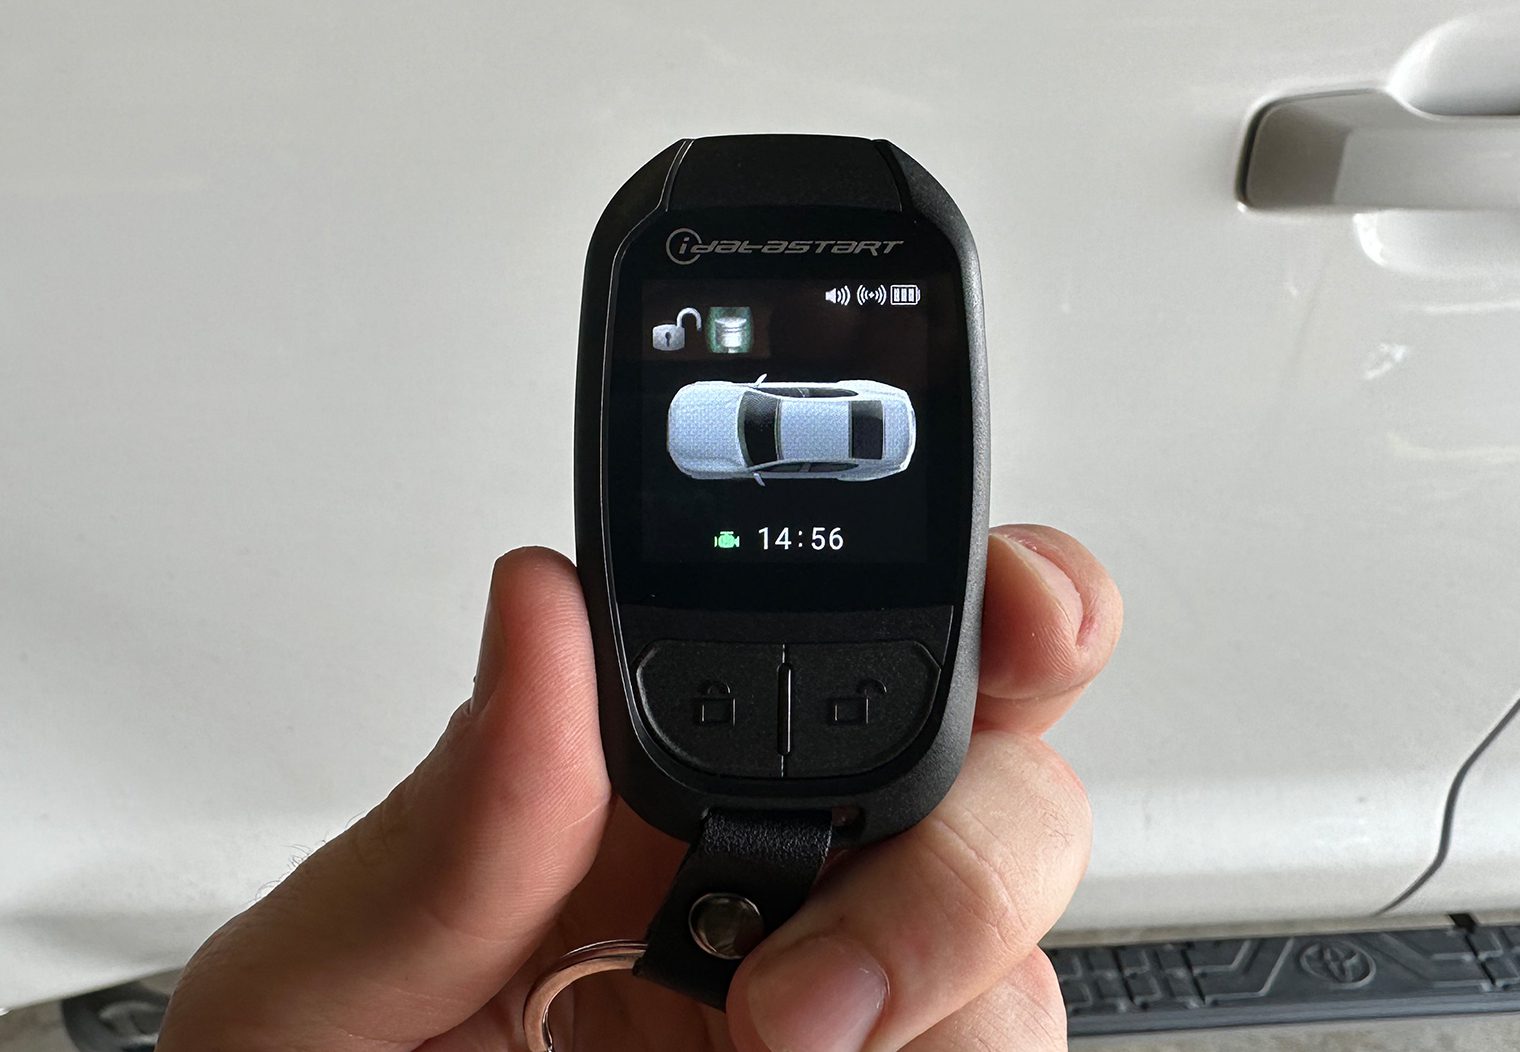
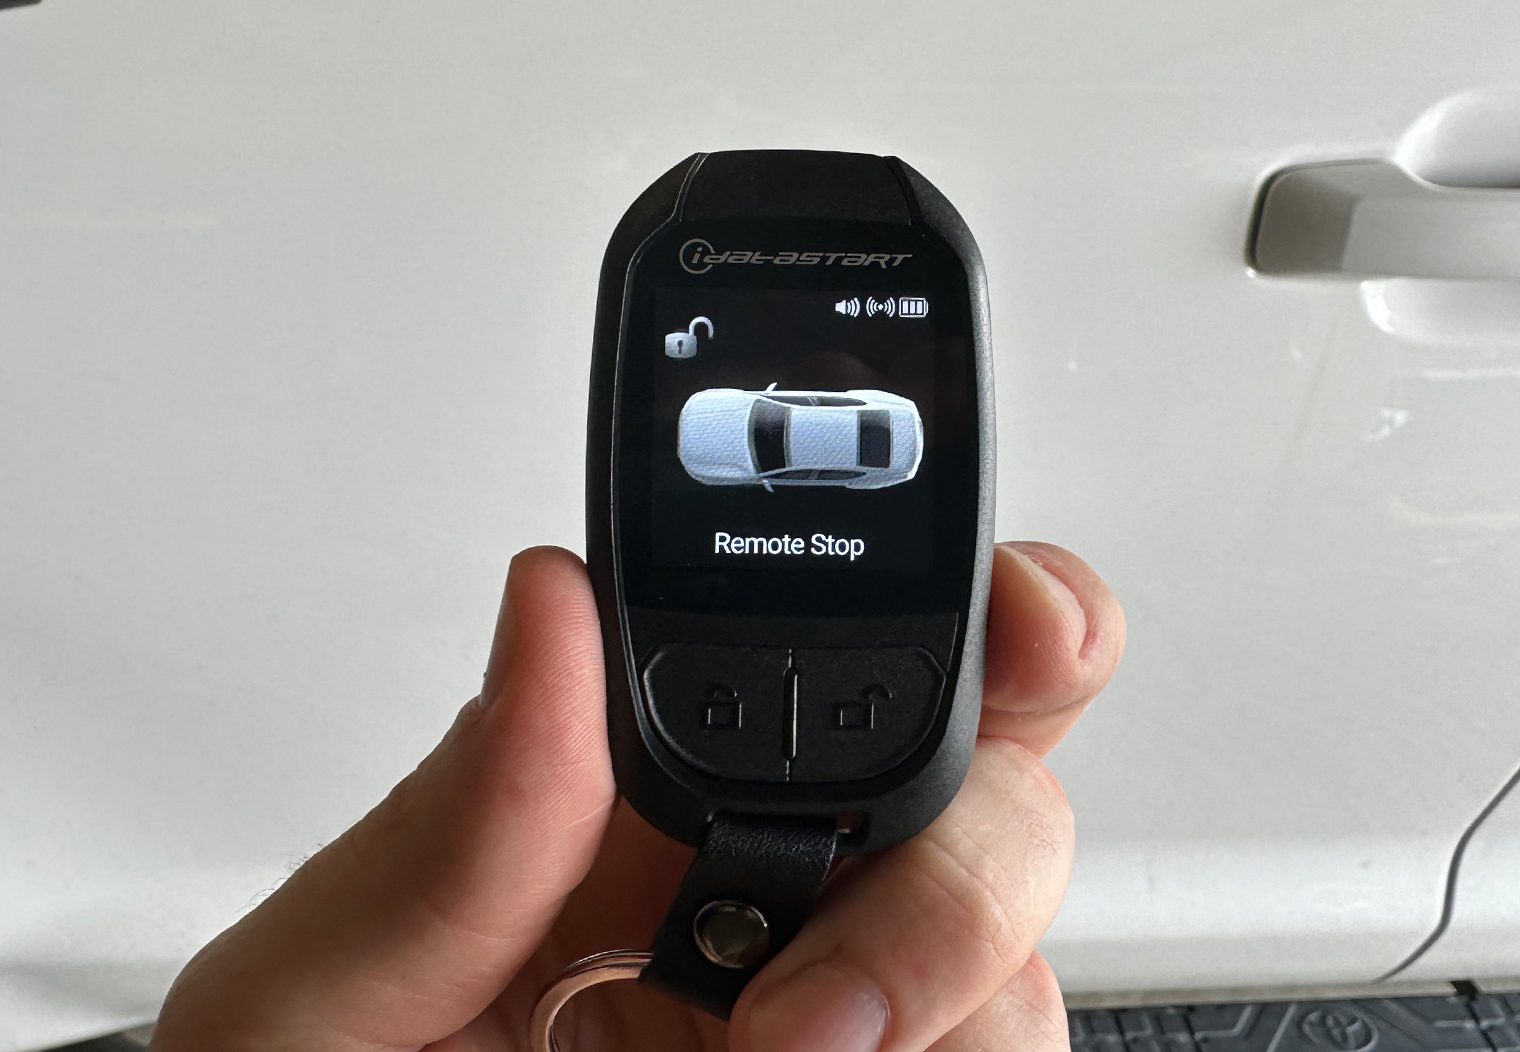
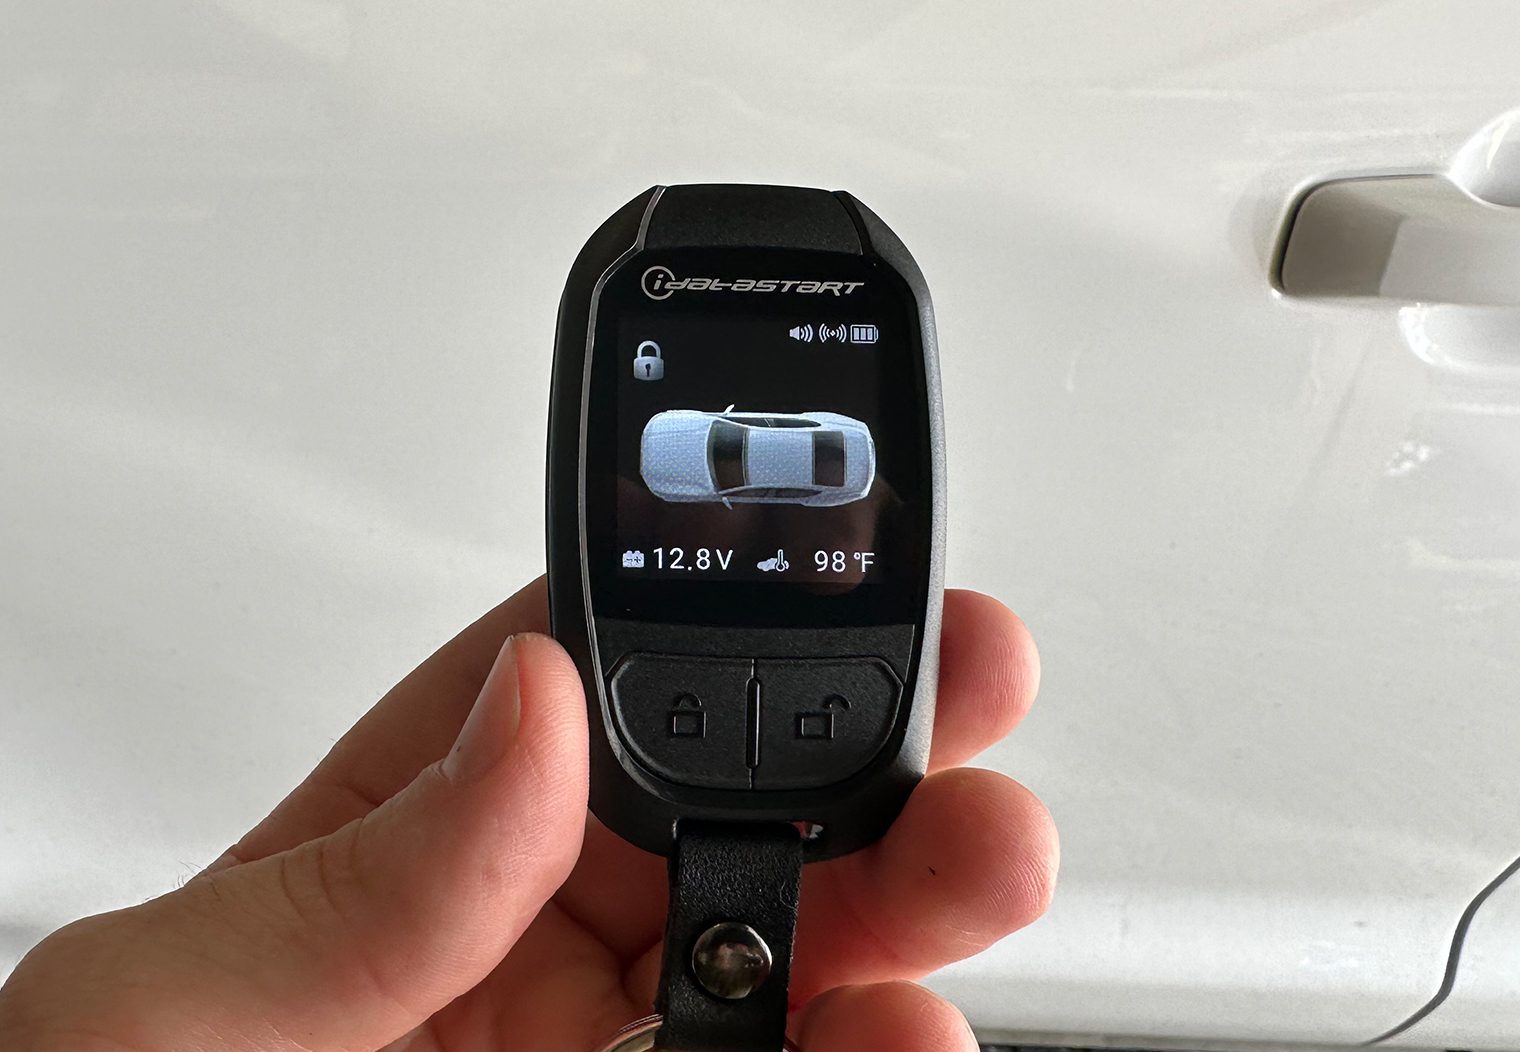
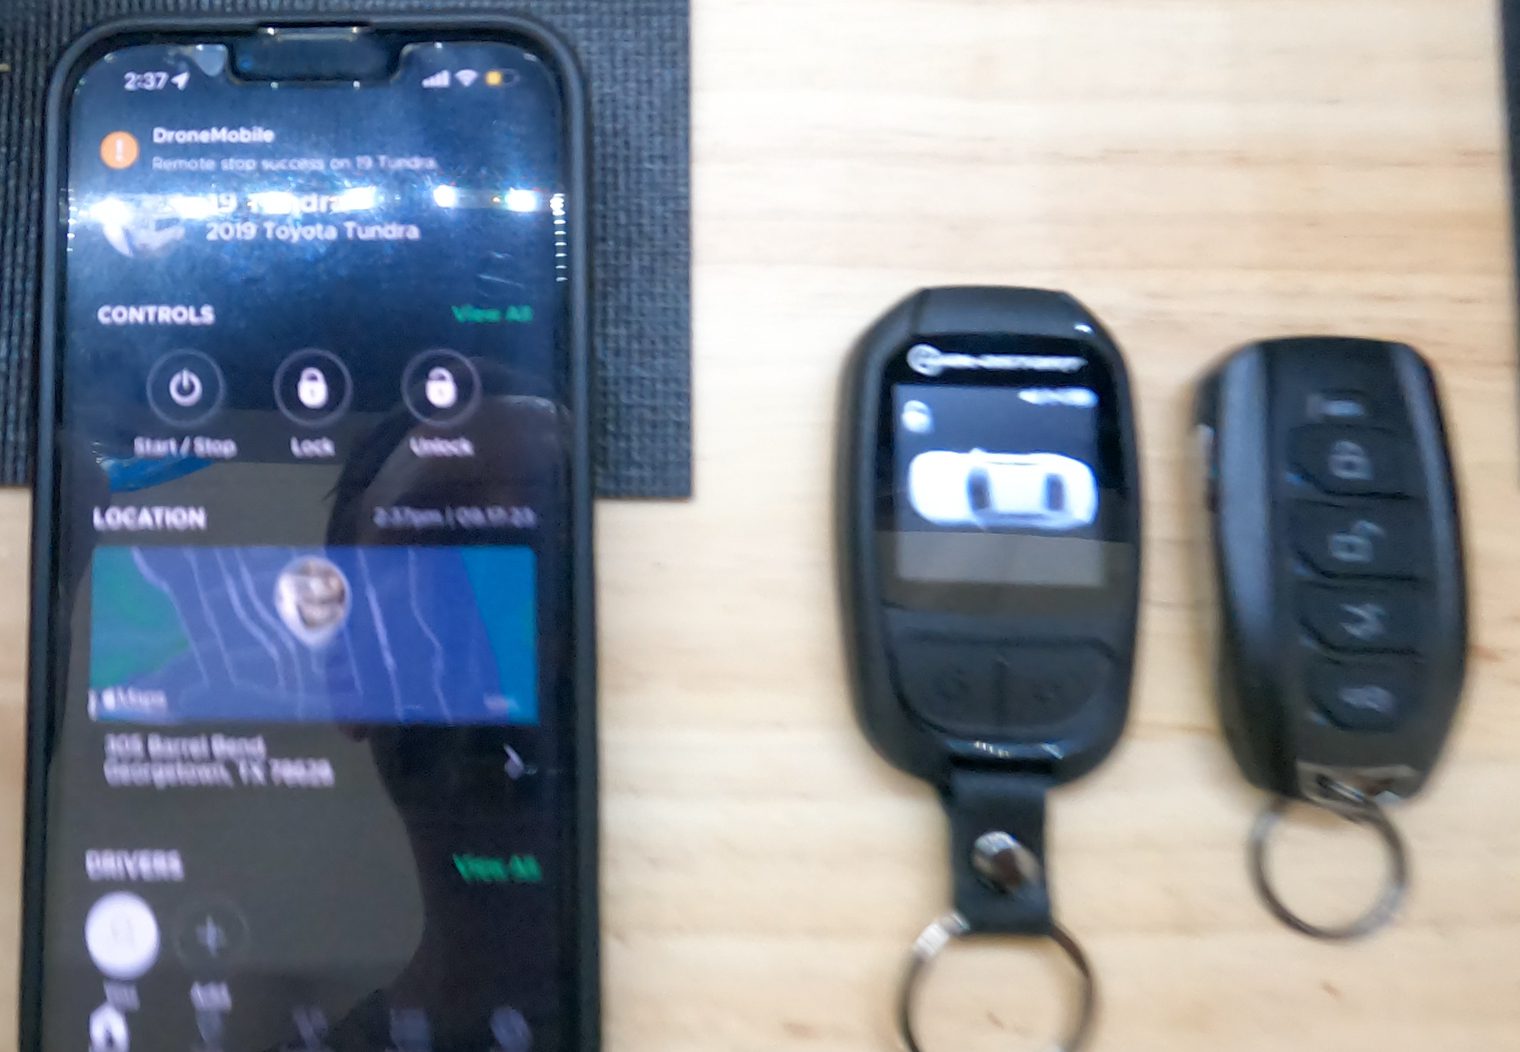
I am sold on the LCD 2-way primary remote. The vehicle data that it displays and notifications it provides you with when you're away from your vehicle are great. Here are a few photos of the remote in use after the install:
But what's awesome about this setup and the Drone X1 unit is that remote range is irrelevant if your vehicle and phone have service. You can lock, unlock, start, stop and see a variety of vehicle and GPS data directly from the mobile app. It's this Drone X1 unit that I think really brings this system into the modern age. I compare it with my 2021 F-150 with the Ford app that it comes with from the factory – where I can access all of the vehicle and location data directly from my mobile Ford app. The HC4.5 and Drone X1 integrate seamlessly together to create a modern alarm and remote start system. There is a subscription for this service, but ADS does a nice job carving out a subscription plan based on the features you're interested in. The remote start and lock/unlock subscription is relatively cheap too – around 4$/month.
Here are a few screenshots of the mobile app and the key features within:
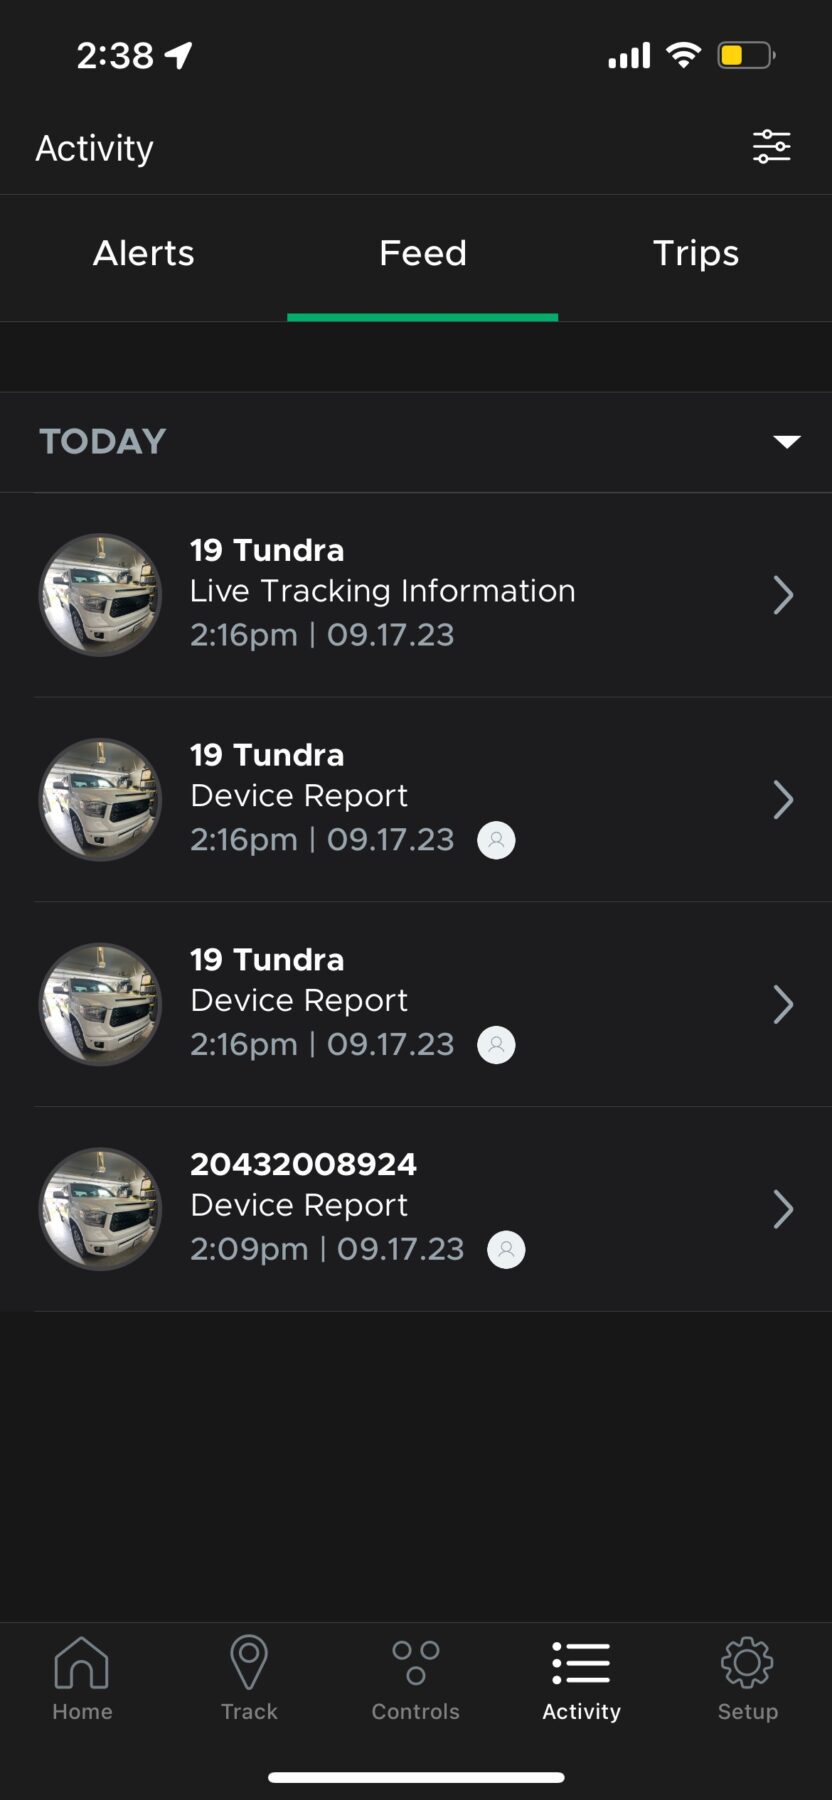
One of the things I particularly enjoyed about the integration between the app and the remotes is that if you made a command on one (lock, unlock or start), the other would notify you of the command. For example, if I clicked the “unlock” button on one of the remotes, I would receive a notification on my phone (if you had notifications turned on). And vice versa, if I clicked the “start” button in the DroneMobile app, the primary remote would notify me that the vehicle had been started. Here are a couple examples (sorry for the poor image quality!):

All-in-all I was very pleased with this installation, the quality of the product and how well everything integrated seamlessly together!
