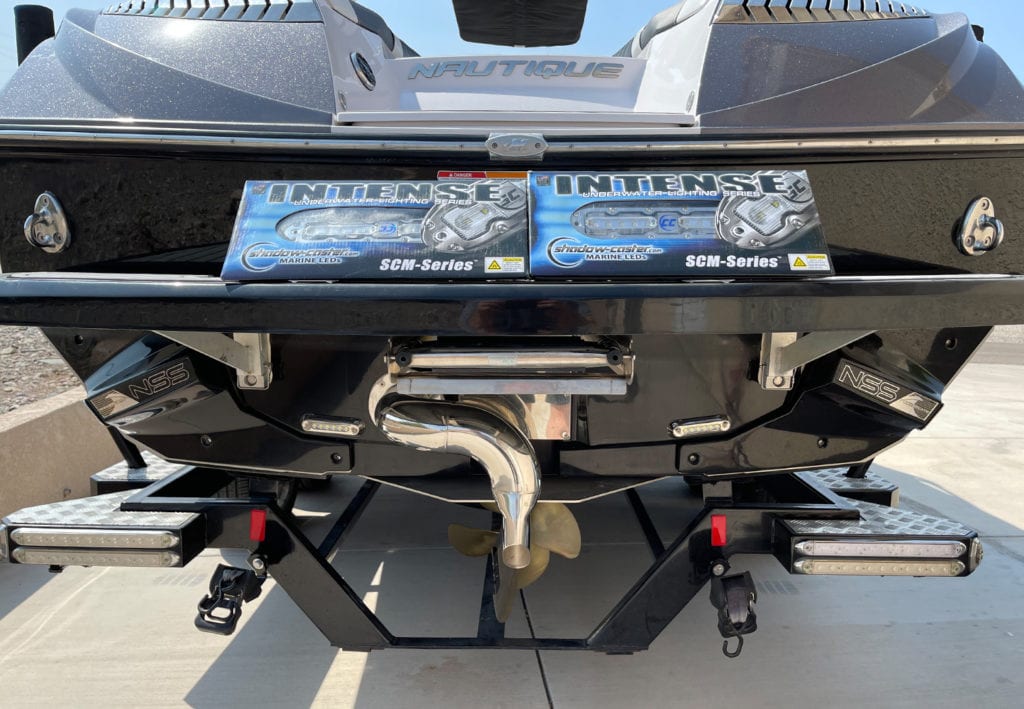
In this article: I'll walk through how I upgraded my G23's underwater LEDs and installed two new Shadow Caster SCM-10-EXT-CC lights using the factory wiring and modified mounting location.
Earlier in the year, I unboxed and reviewed a set of Shadow Caster SCM-10-EXT-CC underwater LED lights with the intent of installing them on my Nautique G23. I was pretty excited with their design and how the stainless steel casing would look on the transom, but I was even more excited with the brightness and performance when I tested them at home.
This installation was on a 2013-2014 gen Nautique G23 – the first of the G series. From the factory, this particular boat came wired with dual underwater LEDs but they were dismal in terms of brightness and performance on the water. They also were white, and white only. So in this article, I'll show you how I removed the OEM lighting, installed new lights over the existing holes without having to do any gel coat work, and leveraged the existing wiring and turn on functionality that I had at the helm control.
Upgrade Goals
Before I get into the installation, it's worth noting what I was trying to achieve here to give context as to why I did the things I did. First off, this installation was not done in a shop and I did not have access to professional grade materials like fiberglass, epoxy, gel coat and the prep/finish tools to fill holes in the hull. I wanted to install lights that could cover and seal the existing holes that the OEM lights made in my hull without having fiberglass or gelcoat work done.
I also wanted the lights to look nice and match the look of the transom and trailer, thus the stainless look and preference of the Shadow Caster. I've installed bronze Lumitec SeaBlazeX2s on an older Nautique but didn't feel like the look would match the stainless components on the helm of this boat.
From a wiring perspective, I wanted to keep this simple and leverage the existing power wire so that I could still toggle the lights on and off at the helm screen. I knew I wouldn't be changing colors frequently, nor the mode, so the placement of the Shadow Caster switch that toggles color and controls the mode wasn't really important to me (thus the placement I chose to place the switch). I also didn't want to place the switch at the helm because I didn't feel like the design matched well with the components on the dash.
Finally I wanted to have lights that were bright enough to show off with color options, but surfing behind the boat at night wasn't necessarily a priority of mine otherwise I may have stacked up on the number of lights.
Hopefully this provides context into why I did what I did in this installation because by no means is it the only/best way to do things. Ultimately you'll want to assess your goals and plan your installation accordingly.
Parts & Tools
Here's a list of products and tools that I used to install these new Shadow Casters on my boat. Click on one of the links to be taken to the Amazon page (this is how I make money for the writeup!).
Parts:
- Shadow Caster SCM-10-EXT-CC (2) – $610 per
- Shadow Caster SCM-SWITCH-O/O/M (1) – $21
- Marine Grade Connectors (Spade is all you really need) – $15
- Solder Seal Connectors – $20
- 3M 5200 Black Sealant – $25
- Wire Ties – $10
- Electrical Tape – $7
Tools:
- Wire Stripper/Cutter
- Drill
- Drill Bits – 1/8″ and 5/8″
- 1″ Stainless #8 Screws
- Phillips screwdriver
- Torch
- Wire crimp tool
- Scissors
Uninstalling the OEM Lights
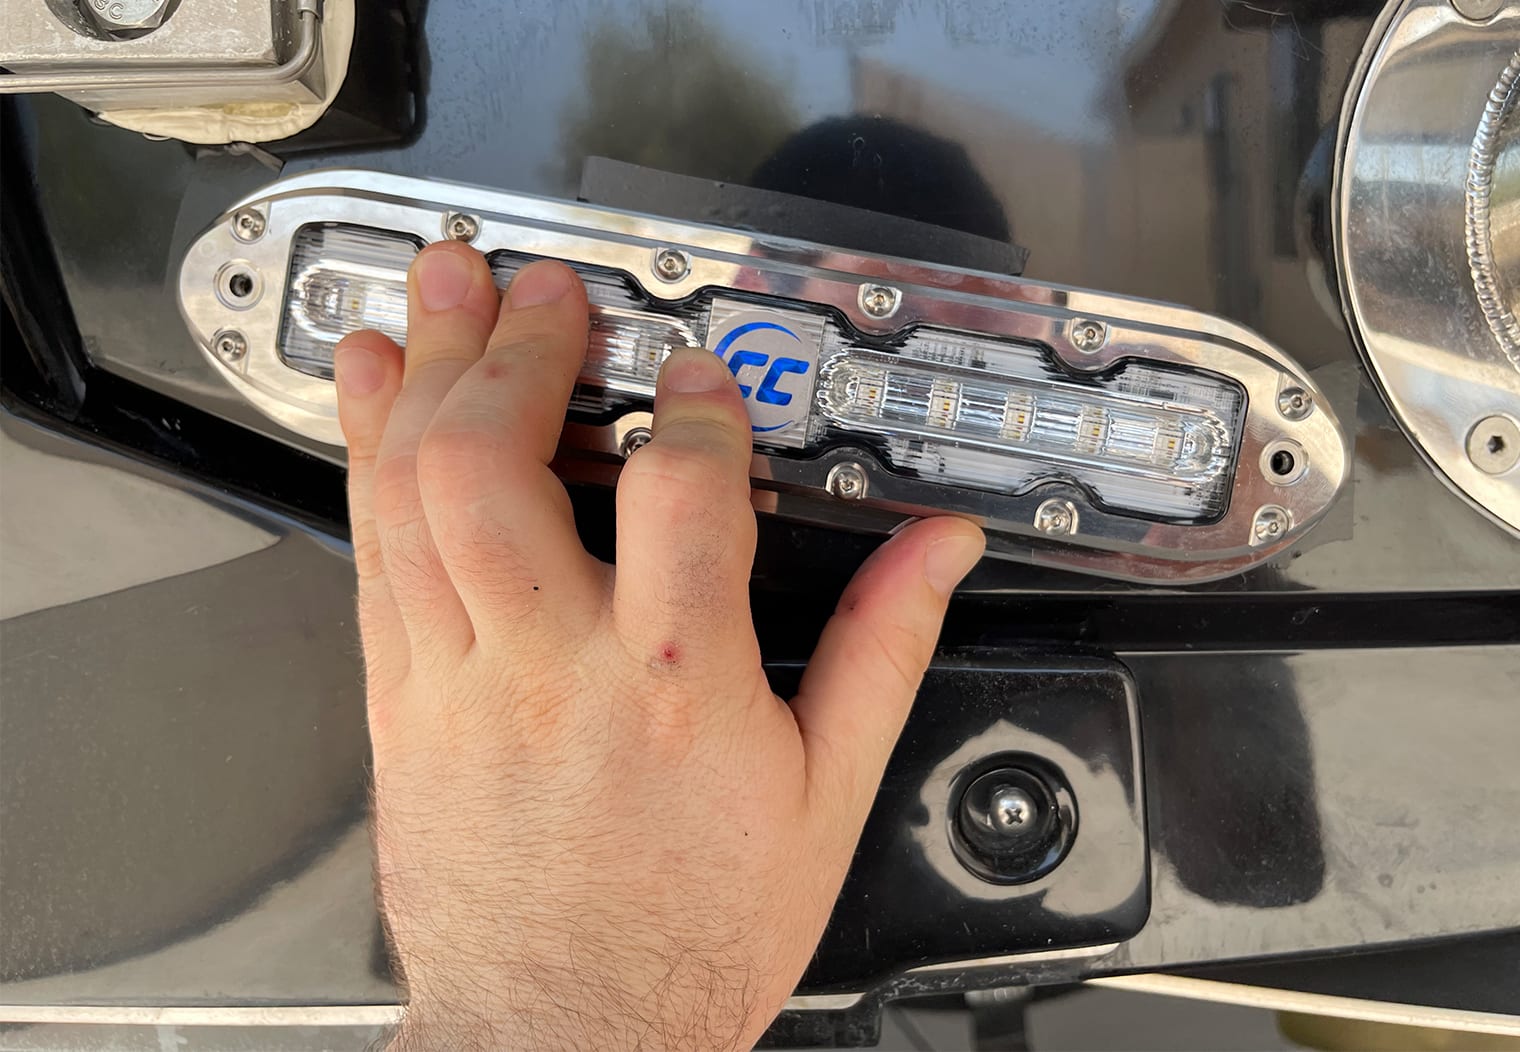
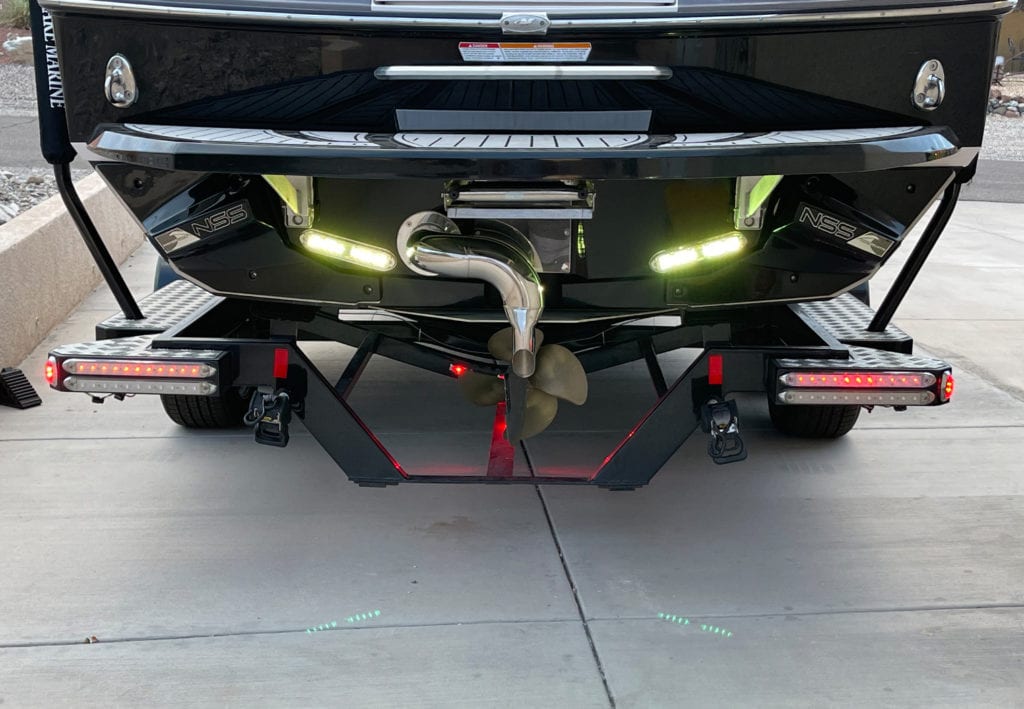
So let's dive on in! Like I mentioned, this G23 came off the assembly line with unsatisfactory underwater LED lights. At the time though, it was probably a nice upgrade. Uninstalling these OEM lights was pretty simple. There are two stainless screws that hold the lights in place. Behind the lights, there's sealant that will need to be broken in order to fully remove the lights. To break the lights from the sealant, I simply twisted the lights clockwise until it came loose and then pulled the lights from the transom and cut the wire.
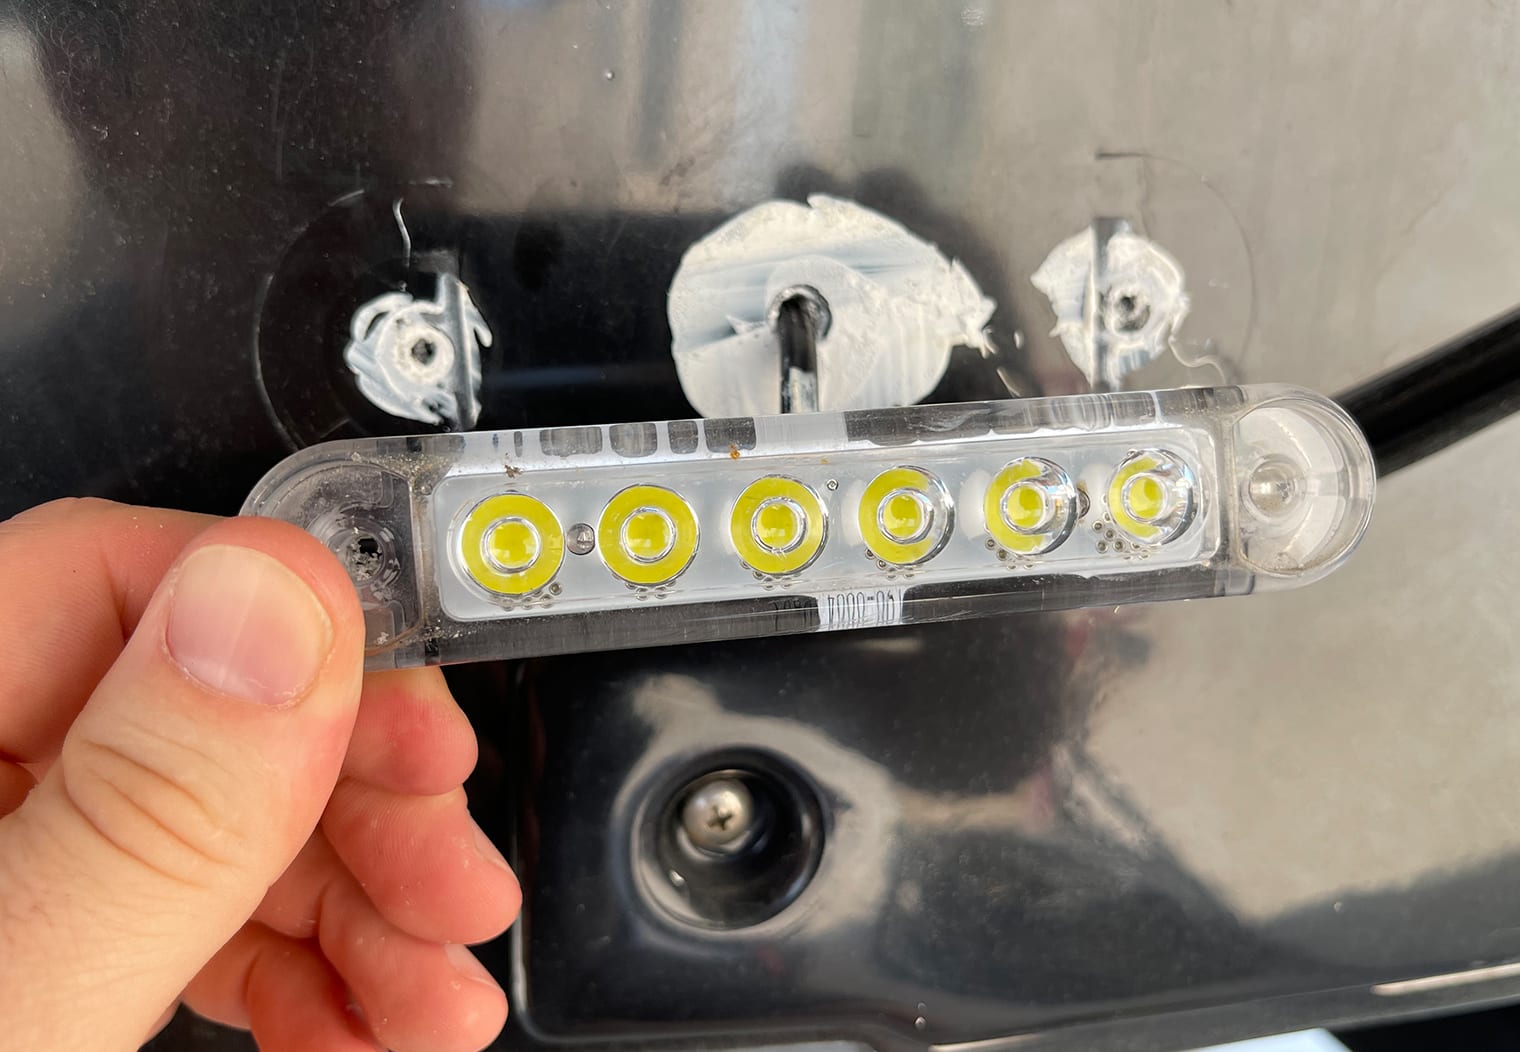
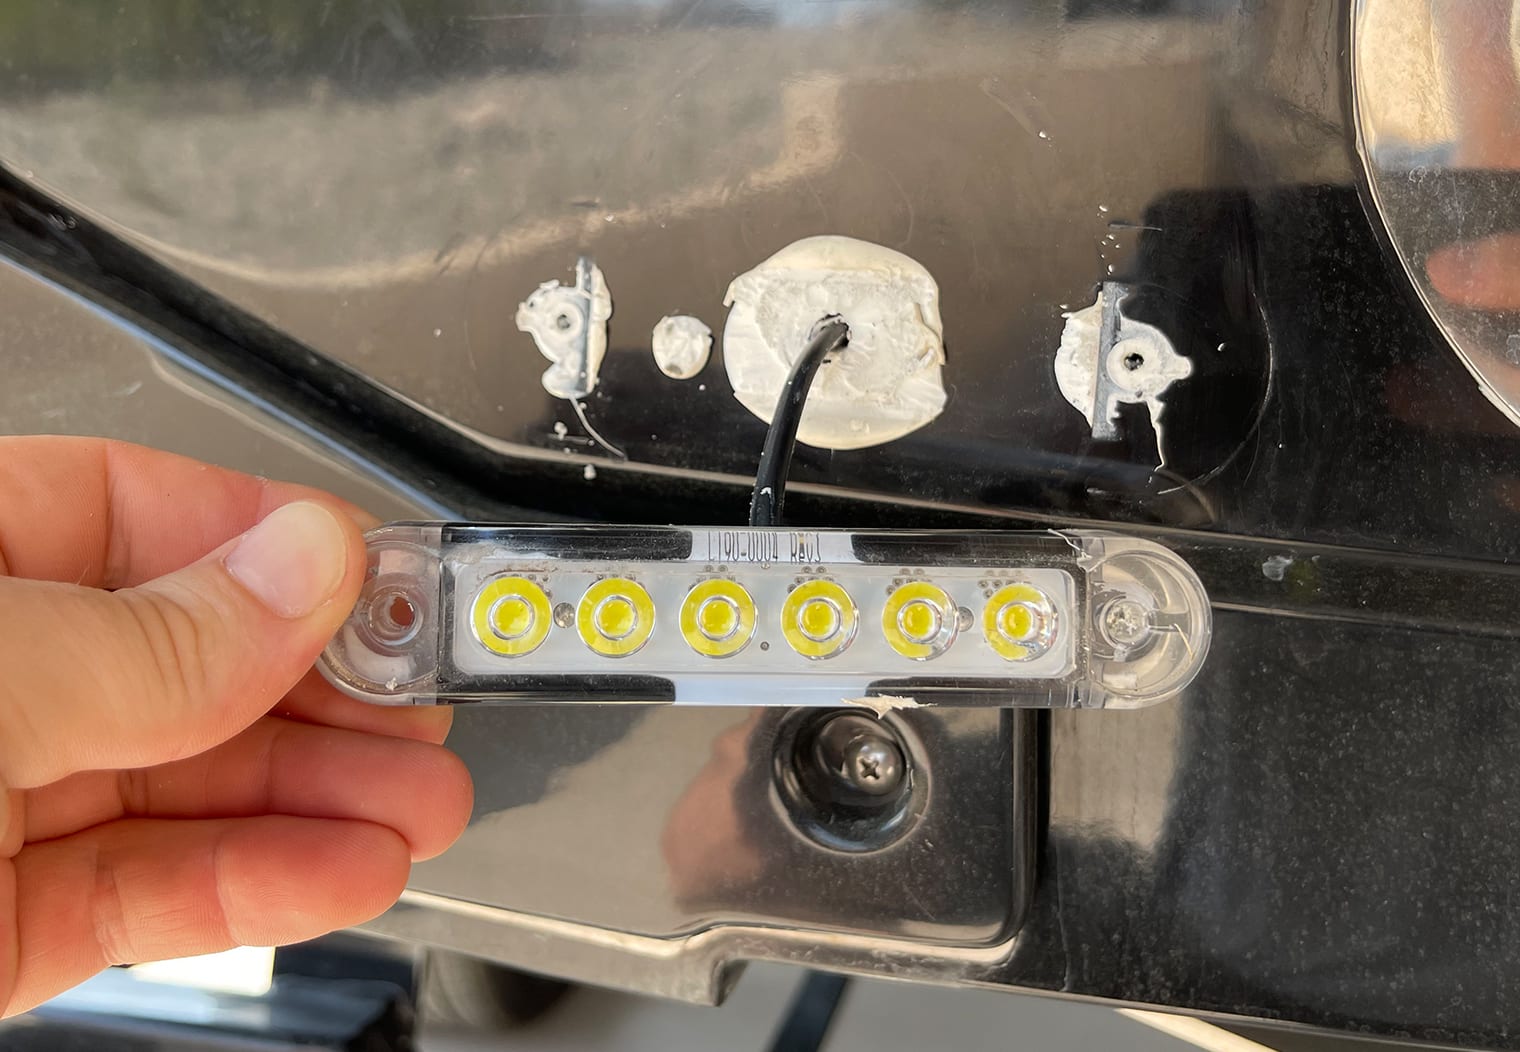
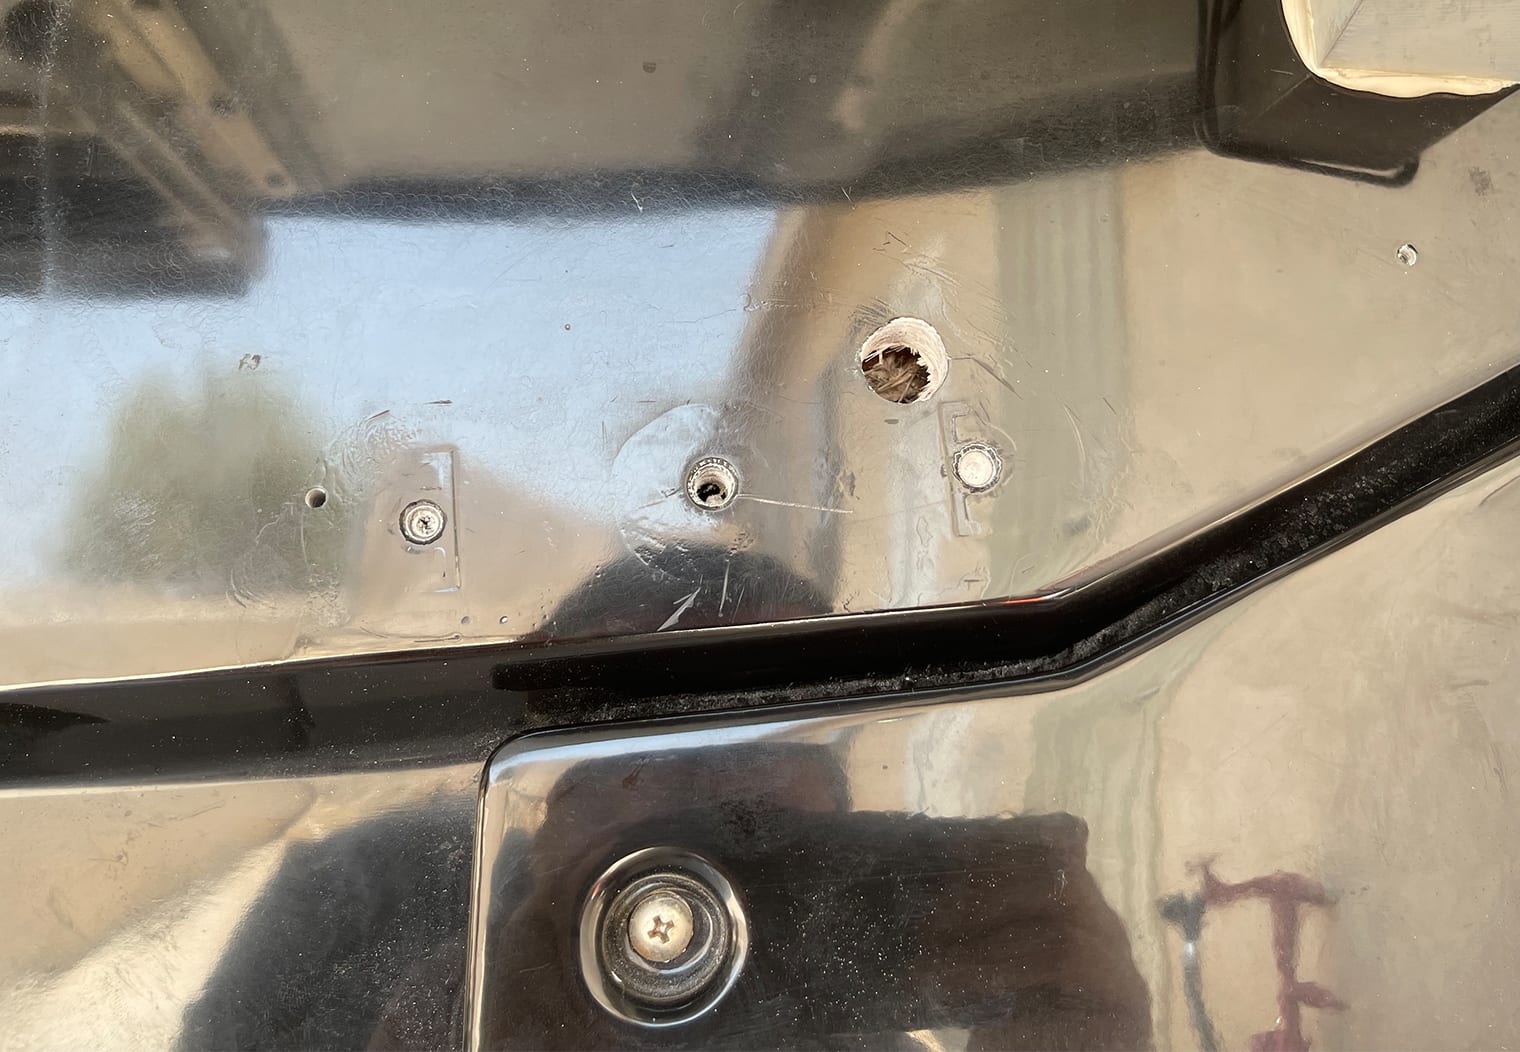
After unscrewing and twisting the two lights loose, I cut the wire and pushed it back into the hull. This would allow me to clean all of the remnant sealant off of the hull and in the holes before I began to measure and mount the new lights.
To clean it up, I literally just used a microfiber towel and some 409. It took a little elbow grease but worked just fine. In all honesty I did it this way because I didn't have the time to research chemicals that could damage the gel coat (e.g. gasket remover, vinyl remover, adhesive remover, etc). There's probably easier ways – if you know of some, feel free to comment below! But I'm not going to personally recommend something I didn't try.
It's also worth pointing out that I cleaned the excess sealant inside the OEM mounting holes and the through-hole for the OEM lighting wire to ensure the best seal later on when I mounted the new lights.
Once the lights were out and the hull was cleaned up, I moved on to mounting up the new Shadow Casters!
Mounting New Shadow Caster LEDs
Now begins the fun part – measuring, drilling and mounting the new Shadow Casters. This is actually a pretty straight forward process. Like I mentioned in my goals section above, I wanted lights that would allow me to seal and hide the OEM light mounting holes. These Shadow Casters are perfect for that. The measurement, drilling, sealing and mounting portion of this project took me about 2-3 hours total.
Placing the Templates
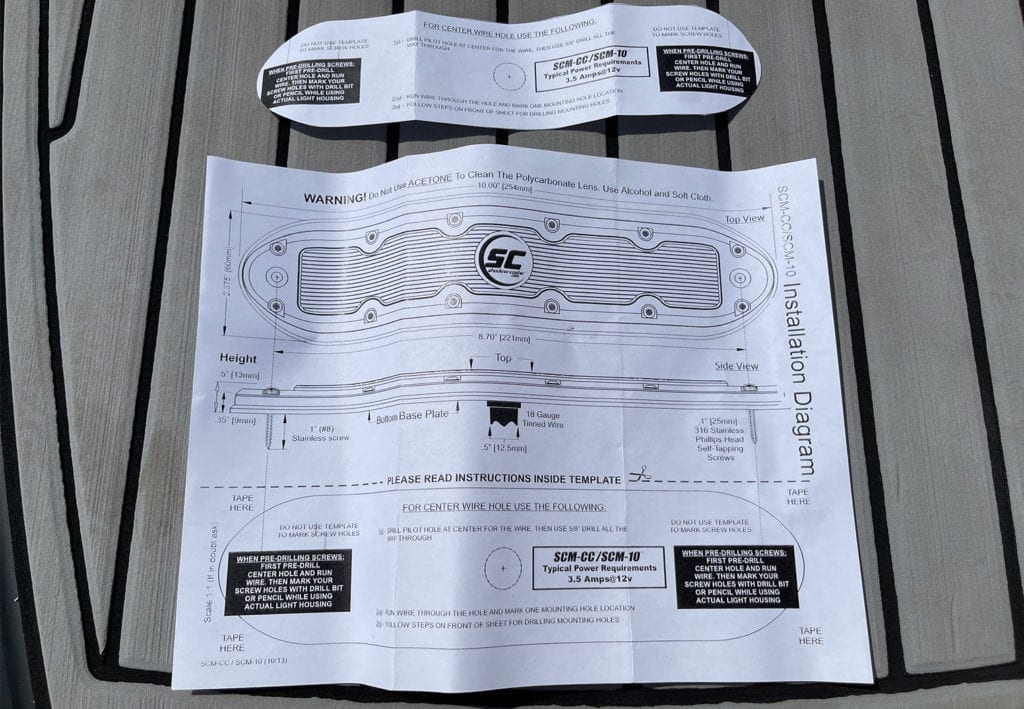
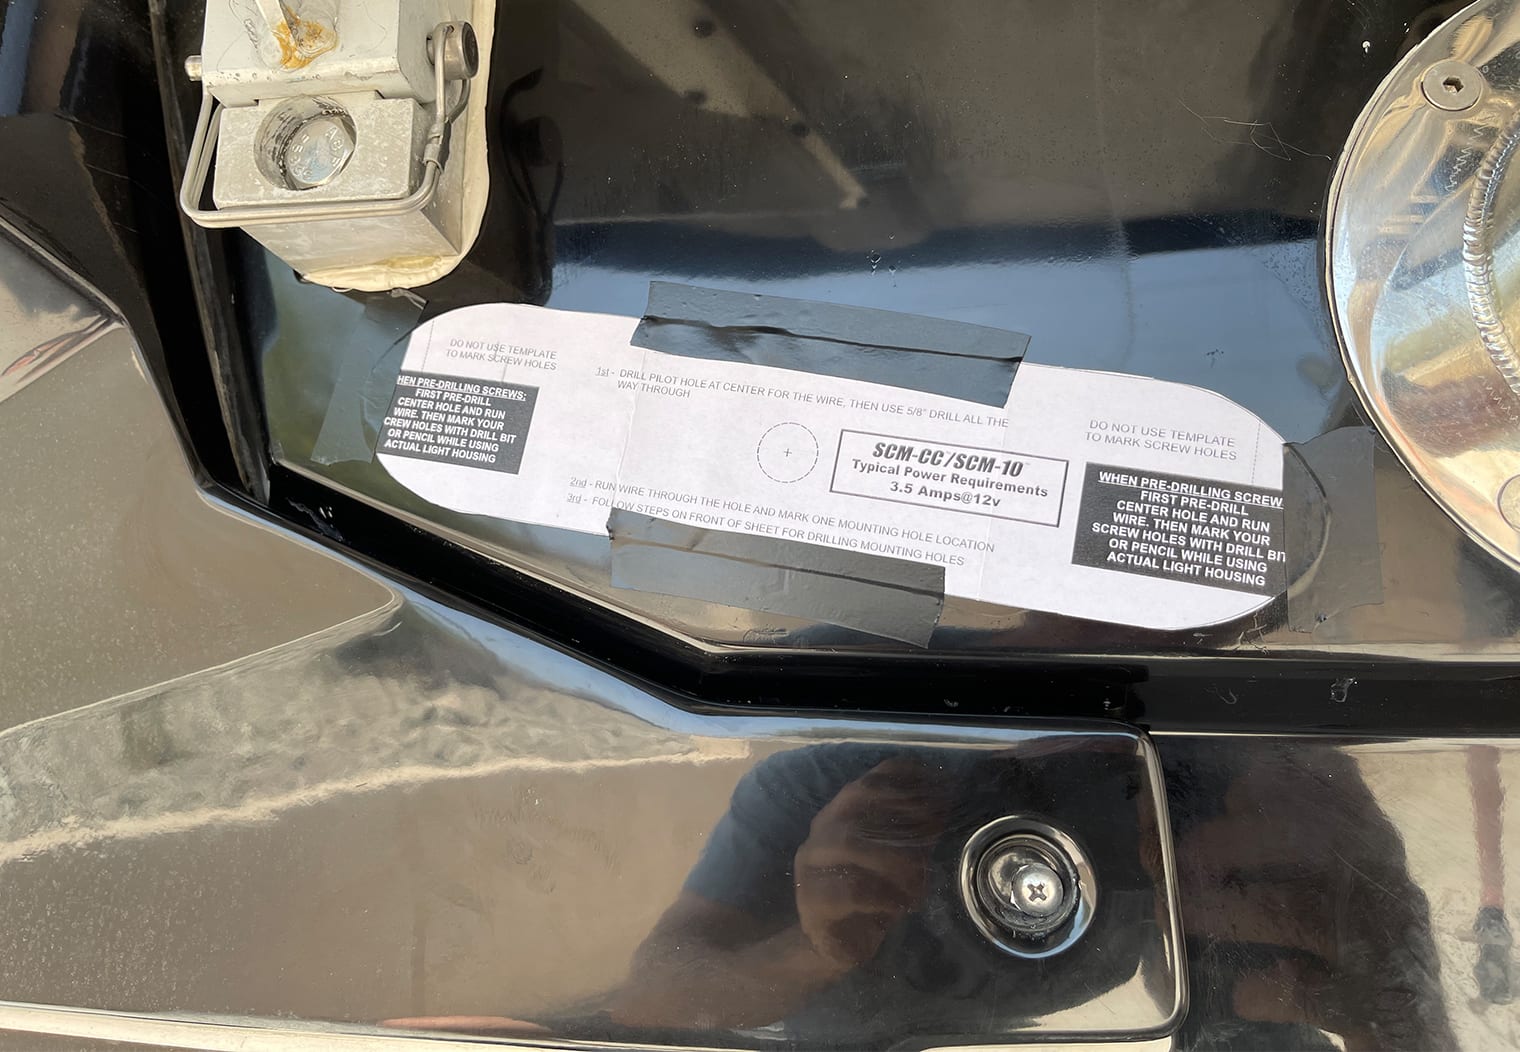
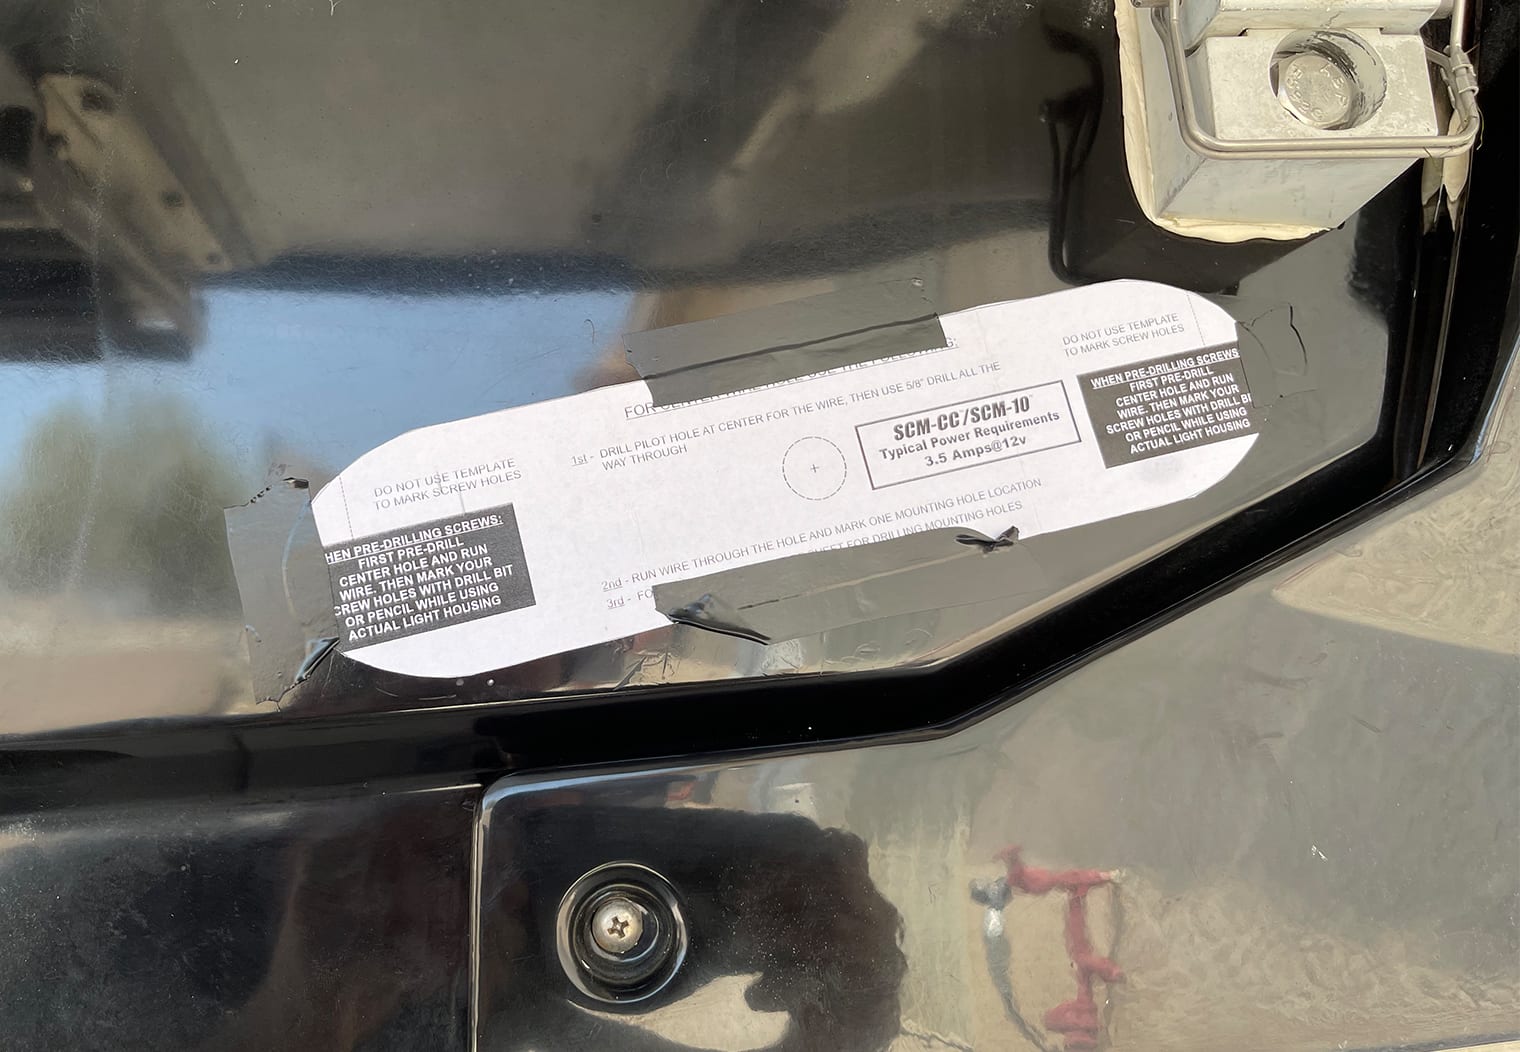
The first thing I did before mounting the lights was to cut the templates out. Shadow Caster provides you with a template guide that you can cut out and place directly on the hull.
With both cut, I could now place them on the hull to ensure:
- They were even and symmetrical
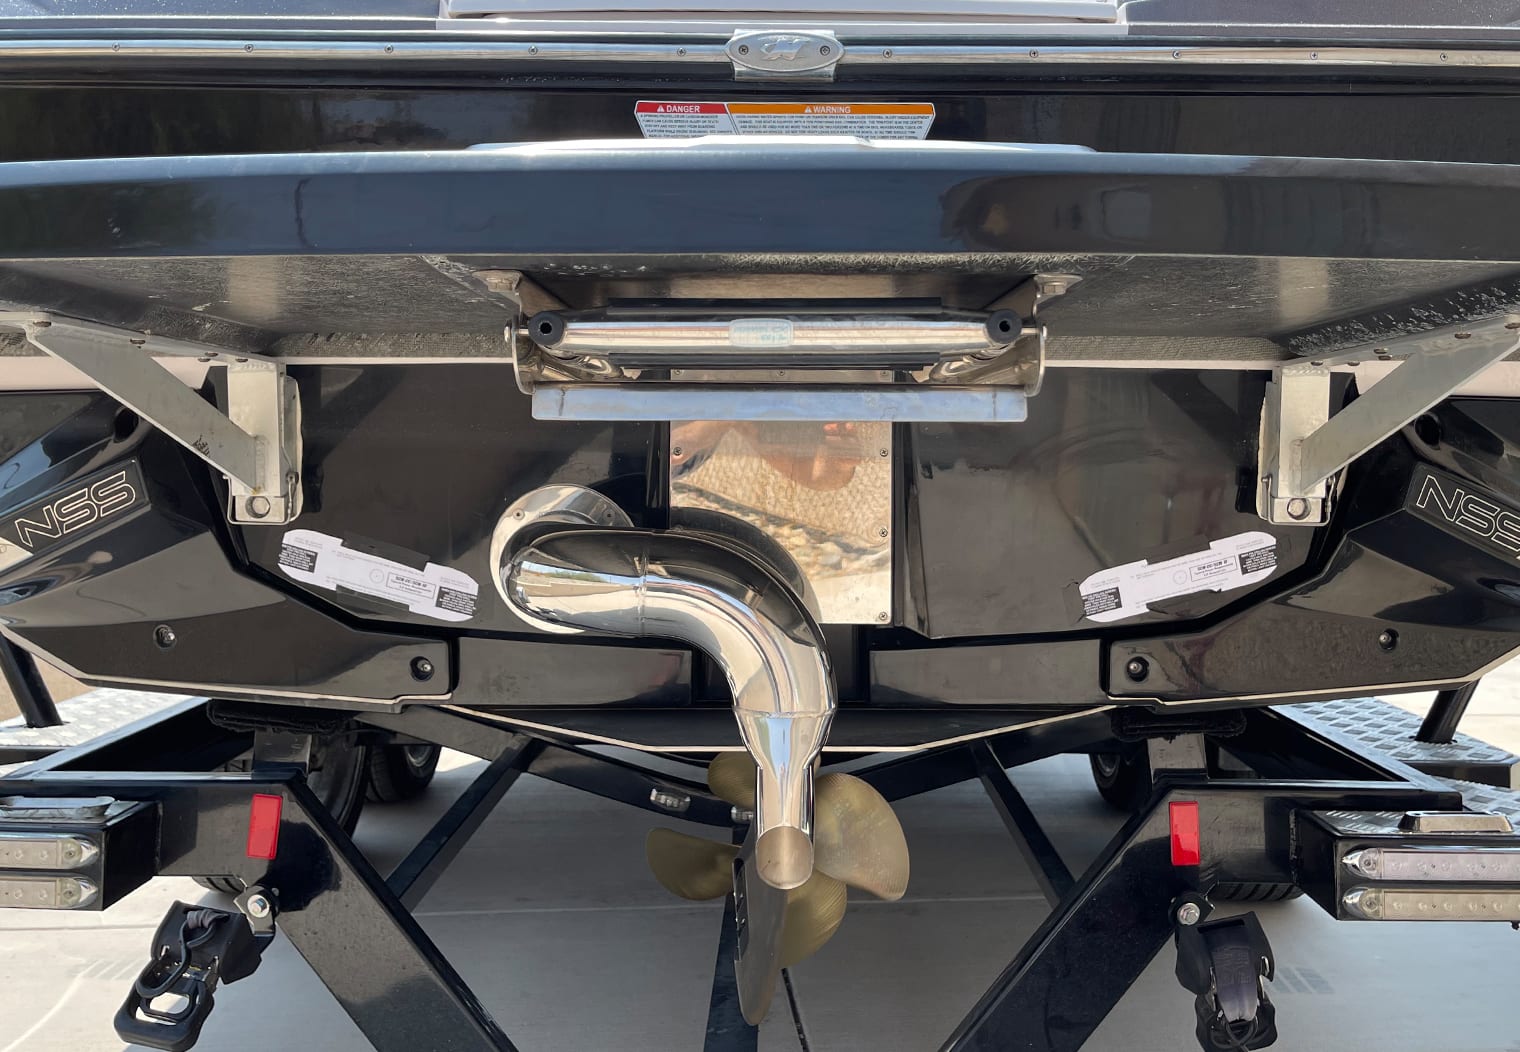
- They were in a location that wouldn't be compromised by the exhaust
- They covered up the holes that the OEM lights left so that I could seal them well
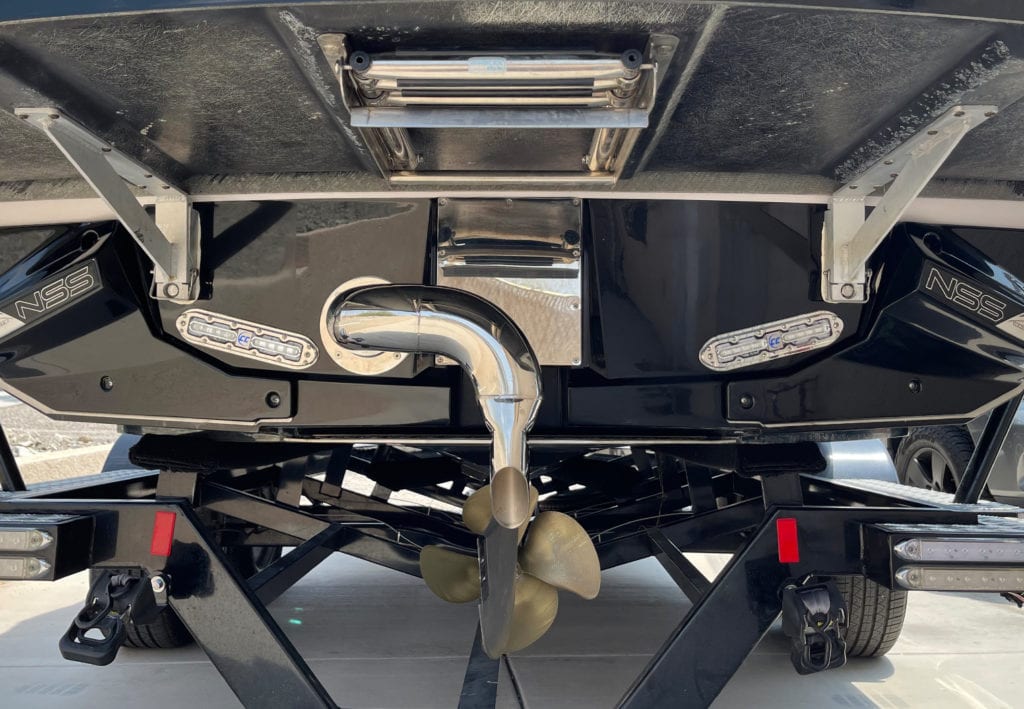
Using electrical tape, I mounted the two templates on both sides of the transom. I measured from the edge of the central plate that covers the wake mechanism and the brackets that hold the swim step to ensure they were identical on both sides. I also had a few friends eyeball it just to make sure.
Drilling the Holes
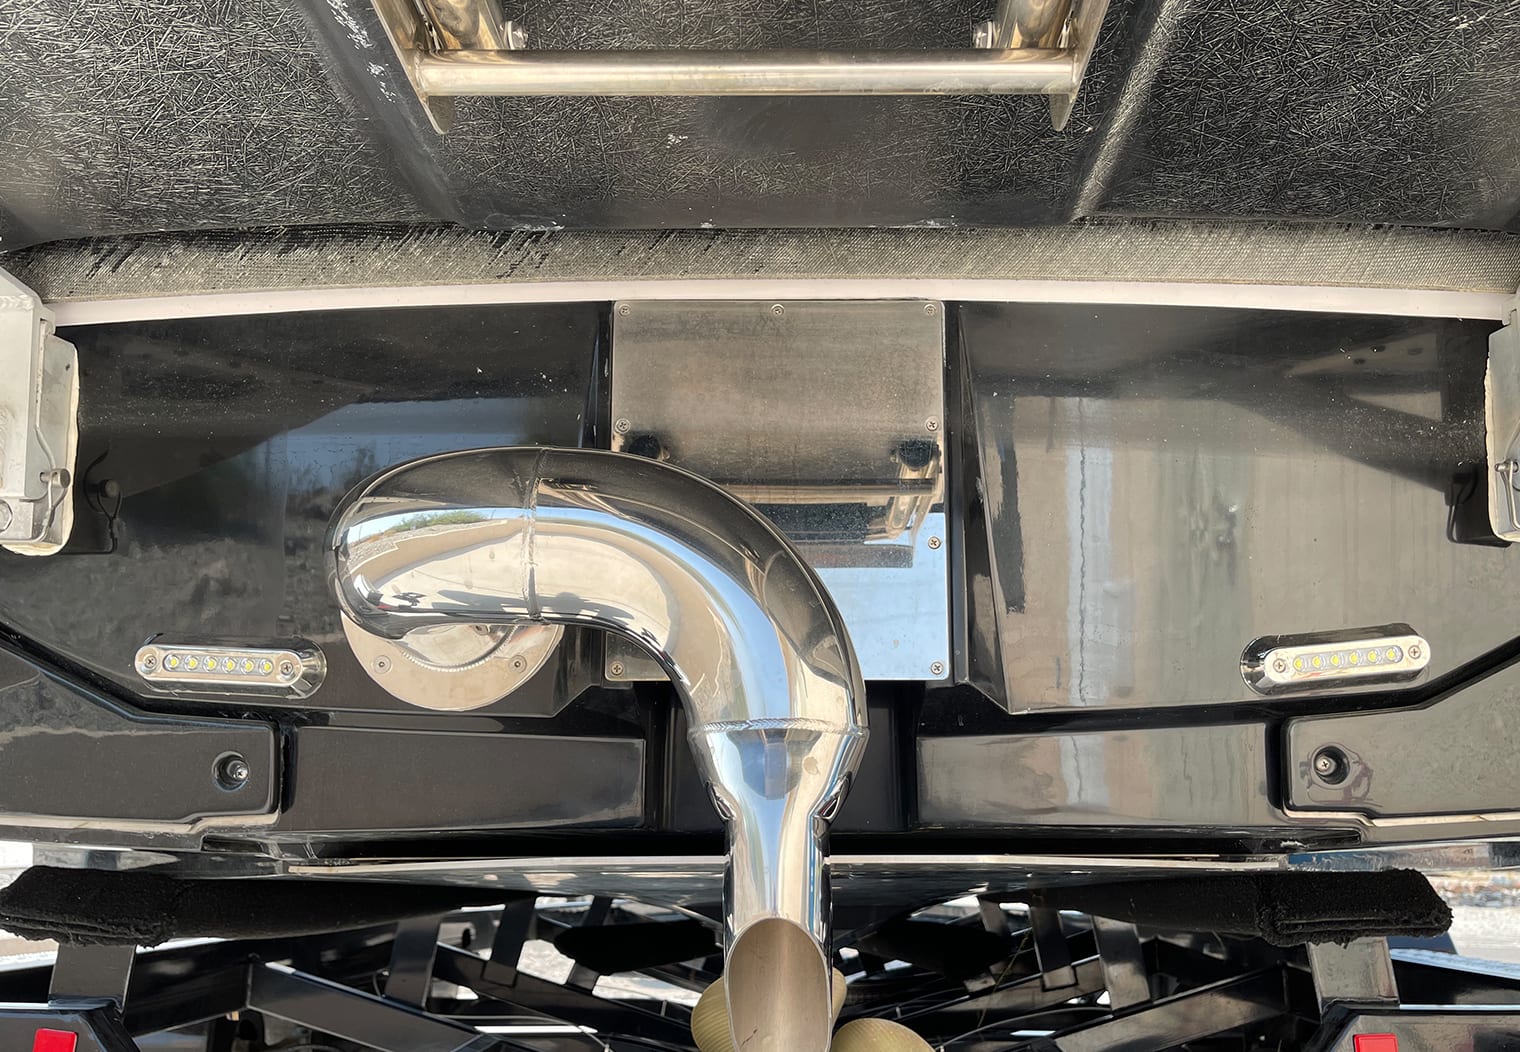
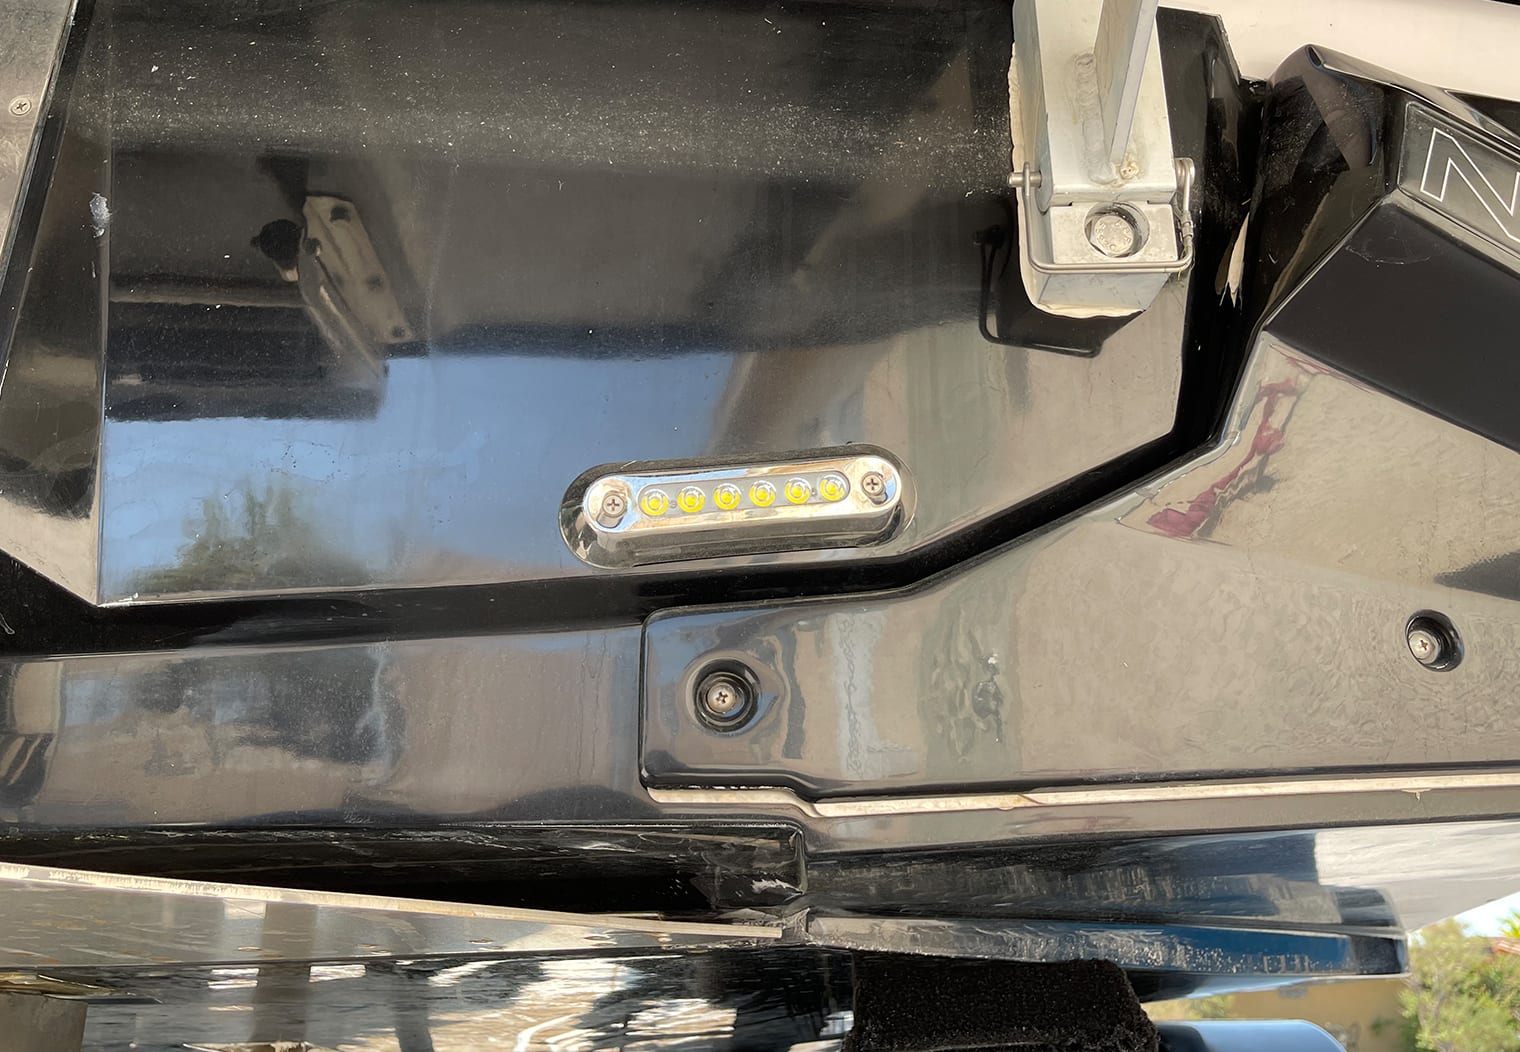
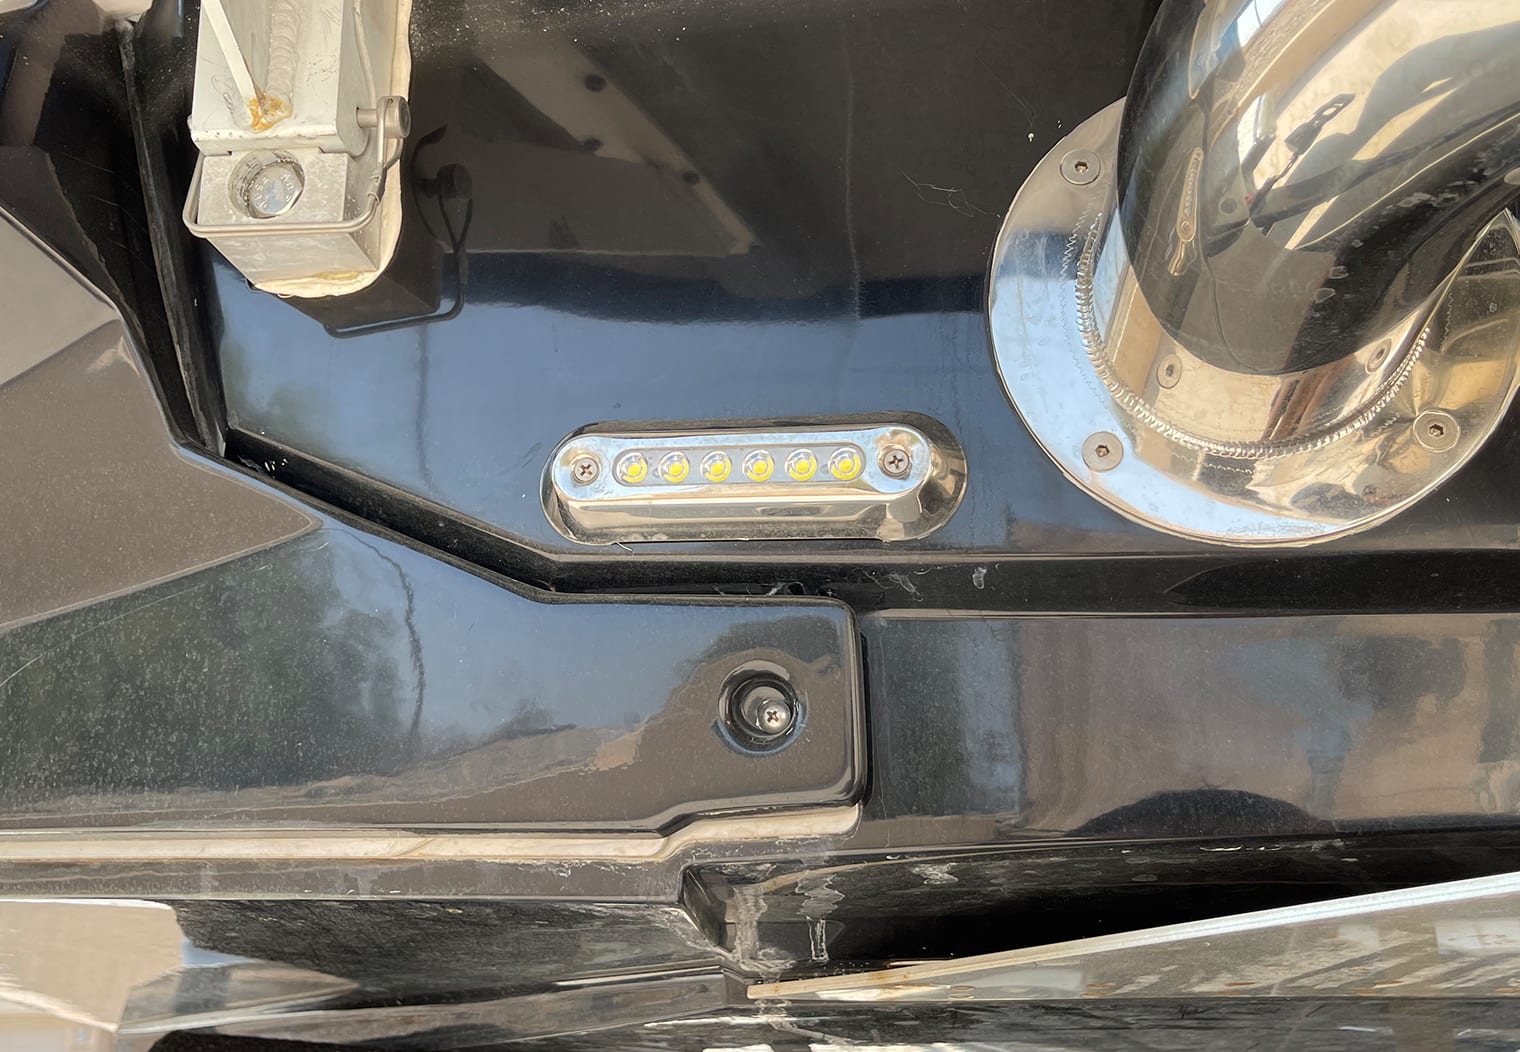
In the Shadow Caster instructions, it calls to drill out the central wiring hole first into your hull, then to place the light on the surface and mark the two mounting holes on the sides. This is to ensure that there's no binding or pressure that will get placed on the central wiring chord that goes through the hull. So this is what I did. It's worth noting that the placement I chose was very close to drilling into the hull support on the inner side of the hull which would have made wiring and mounting very difficult.
With the templates placed in the location I wanted them, I used a 1/8″ drill bit first to mark and drill the center point of the center hole. I then followed it up with a 5/8″ drill bit as called for in the instructions. Note – once you drill the center hole, I recommend keeping the templates in place so that you can line up and mark your mounting holes using the LED light itself.
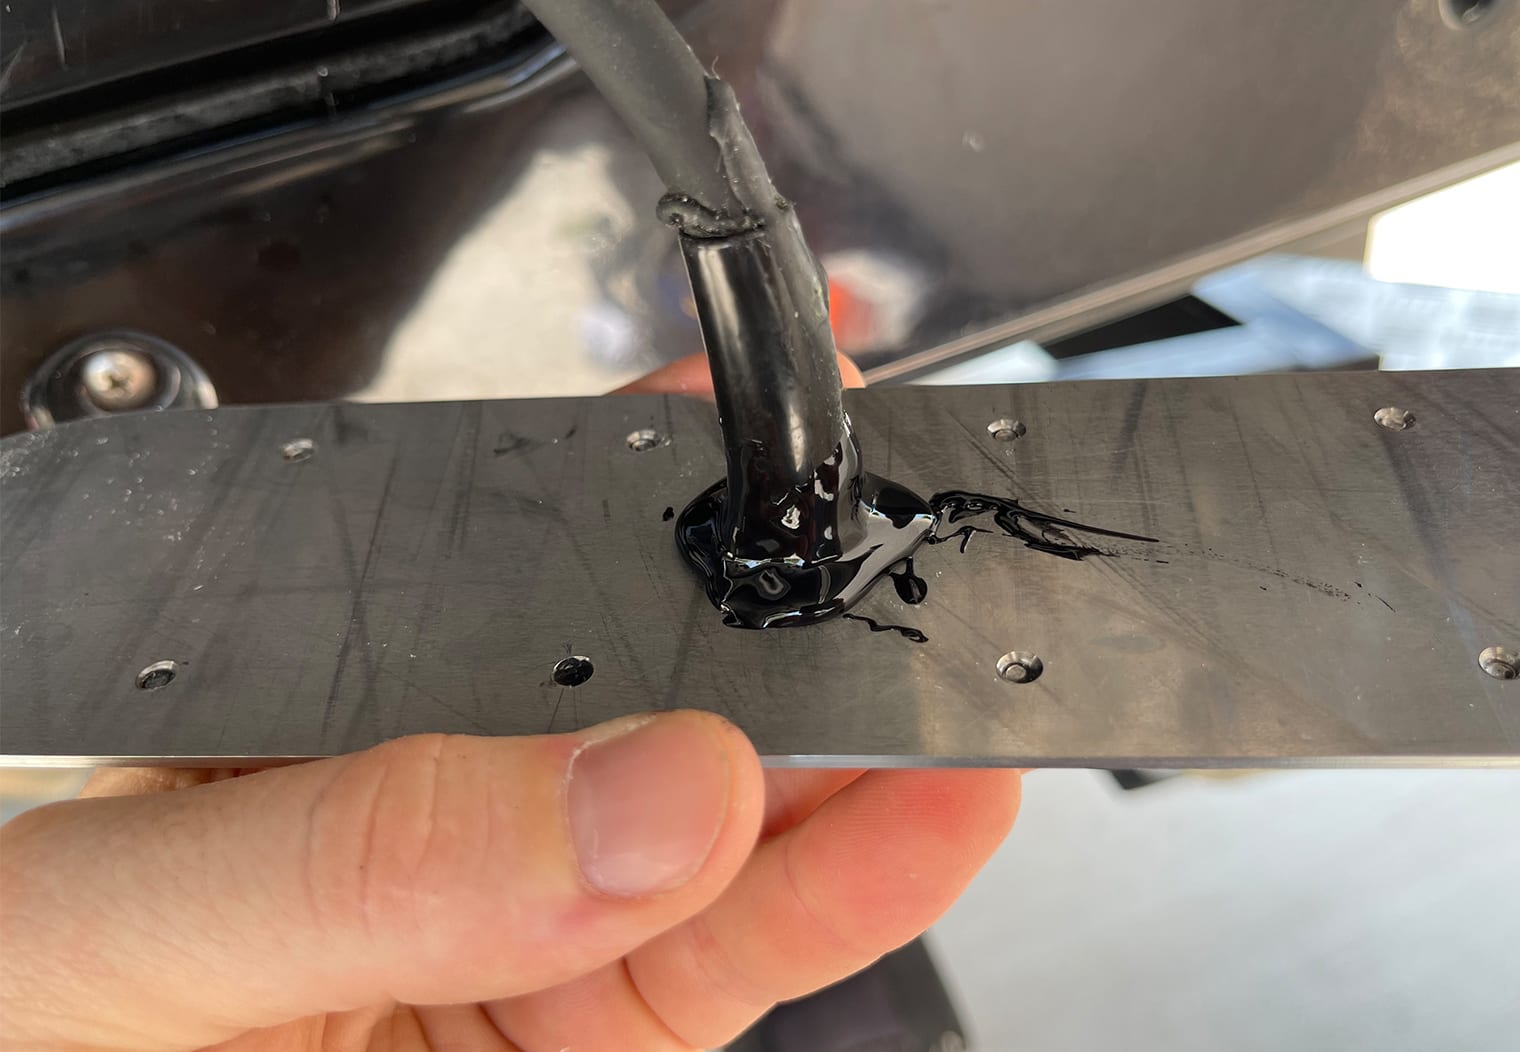
Sealing and Mounting
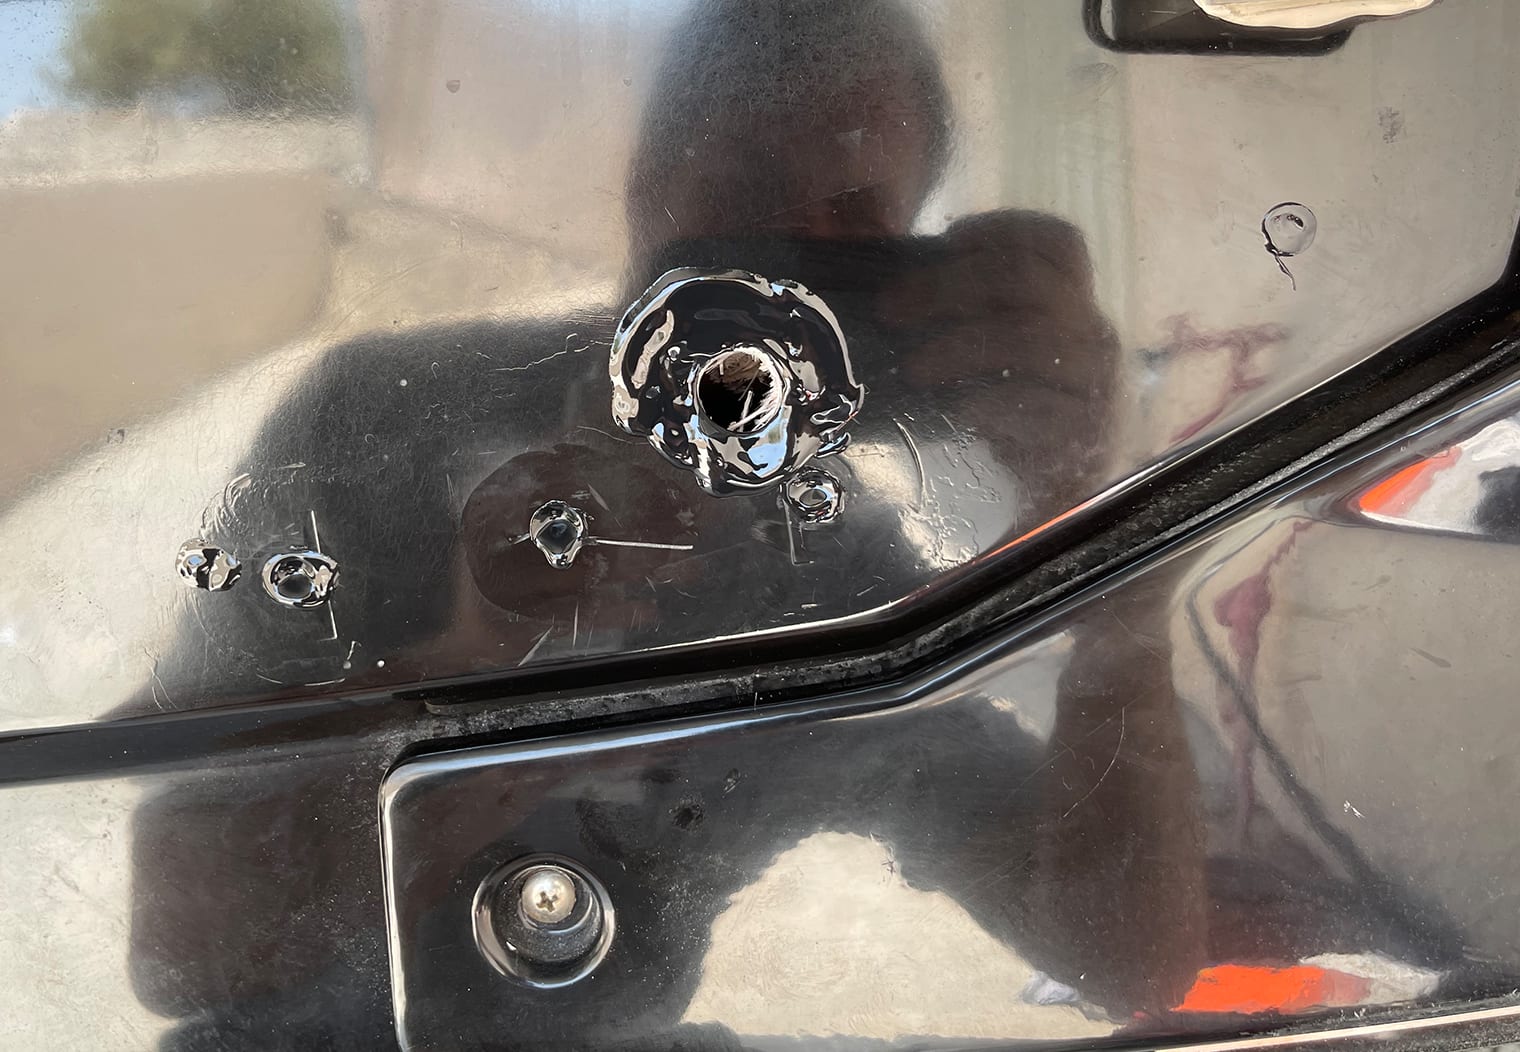
Once the holes were drilled and I tested the fitment of the screws and that they didn't hit any resistance or break on the way, in I started to fill and seal the holes. It's worth noting that the screws that came with the light were a little long. The outer screws actually hit some heavy resistance against the inner hull support so I purchased some 1″ #8 stainless screws for the outer mounting locations so that I didn't break a screw in the hull. I highly recommend this if you choose the same location on your G23.
To seal up the new lights, I chose 3M 5200. The instructions call for 4200, which is a much quicker-drying solution and isn't nearly as permanent. But it's also white and they don't make a black 4200 that I could find. So Instead I chose the 5200, which was black so that I didn't see any white sealant while filling and mounting up the new lights. Again, the 4200 is not as permanent as the 5200 and might be the better choice for you. So if you don't mind the white, I'd recommend 4200.
To begin sealing, I started by feeding the led wire through the central hole until I had about 8 inches of wire to spare. I let the light hang while I began to seal up the holes from the OEM lights along with the newly drilled holes including the mounting screw holes. Once I was done with the hull I moved on to the outer part of the central wiring that's on the back of the Shadow Caster light to ensure a good seal around the wire. Finally, once all of the sealant was in place I lined up the light to the mounting screw holes and started twisting the screws in by hand.
I would also recommend tightening the screws up in an alternating fashion with a screwdriver. The worst (and surprisingly easy) thing you can do at this point is break off a screw in the hull and have to drill it out or drill a new hole. Do not, I repeat, Do Not use an impact drill for screwing these in.
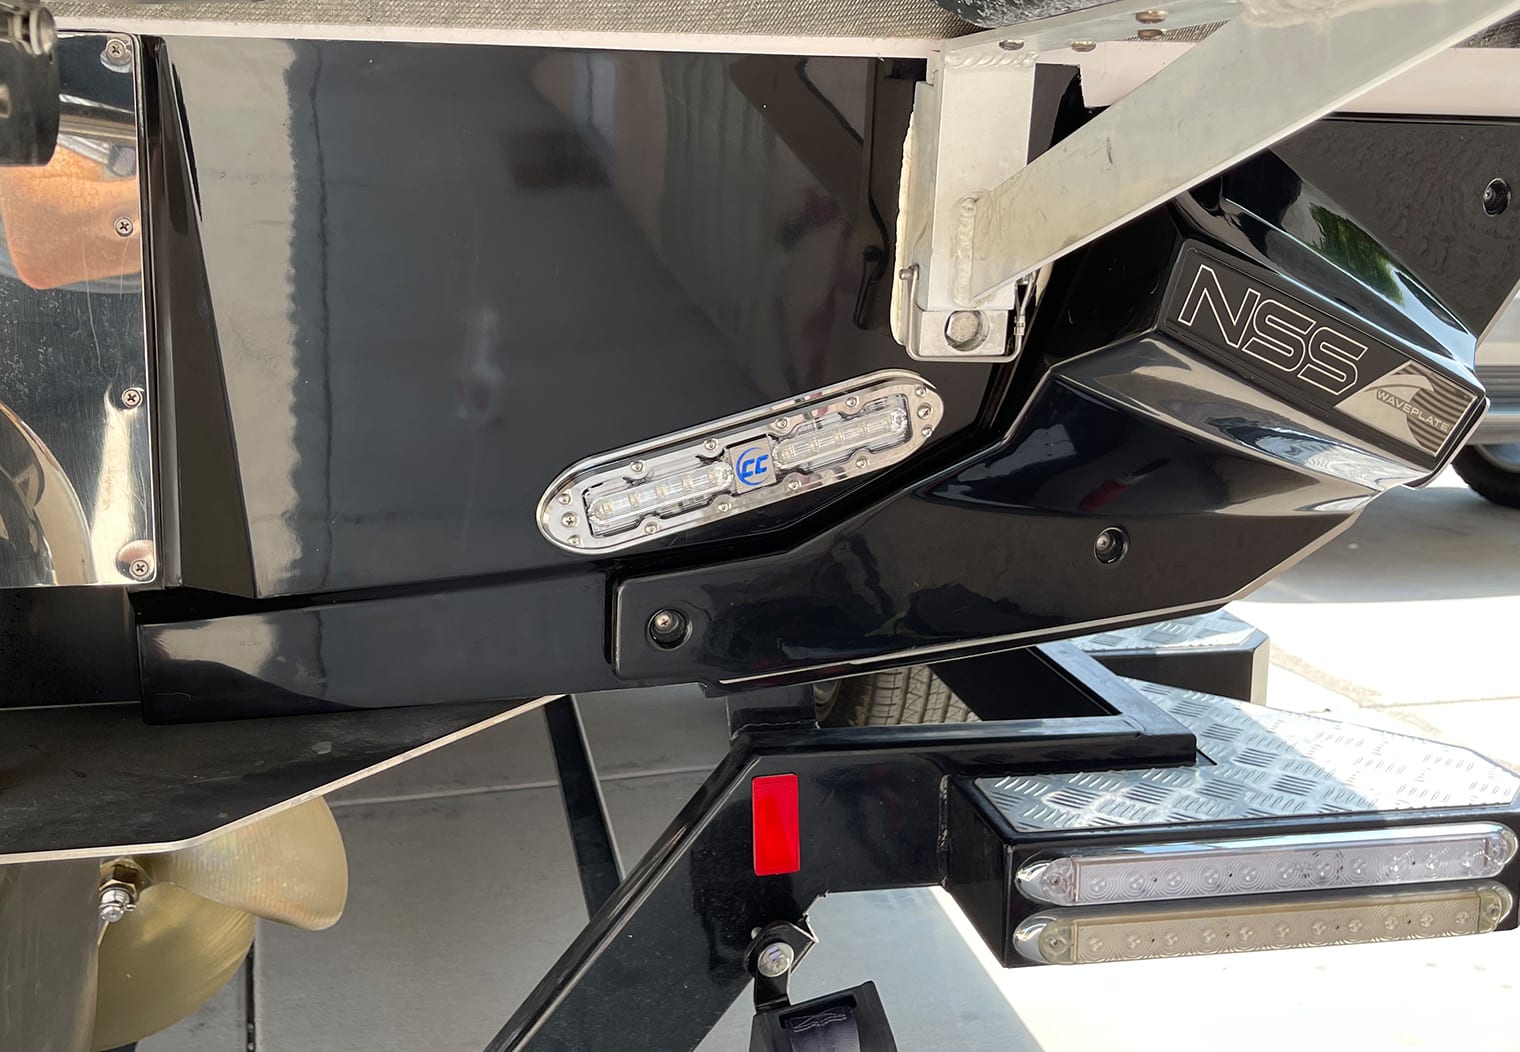
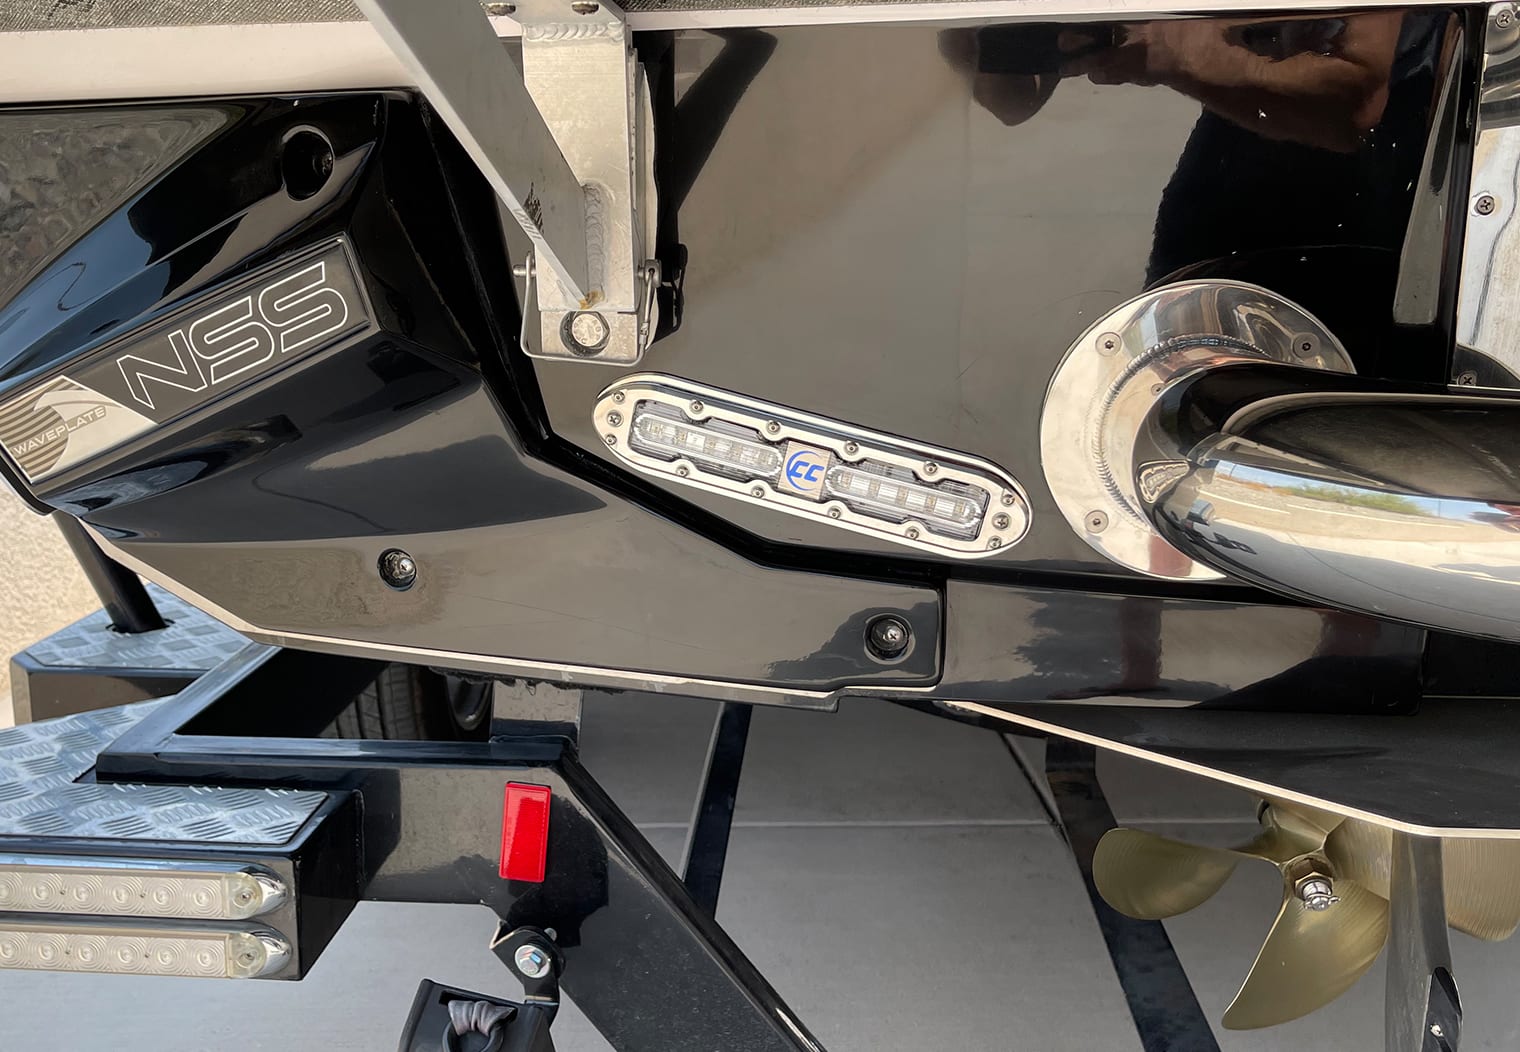
Here's a couple photos of the lights once everything was all sealed up and mounted.
Wiring the Lights Up
Now, for the not-so-fun part. Mounting the lights is pretty straight forward and you have a space to sit comfortably while you work on the transom. Wiring, on the other hand is very uncomfortable as you weave, zip tie and pull wire through the engine bay and along side the rail. This process took about 3-4 hours to do.
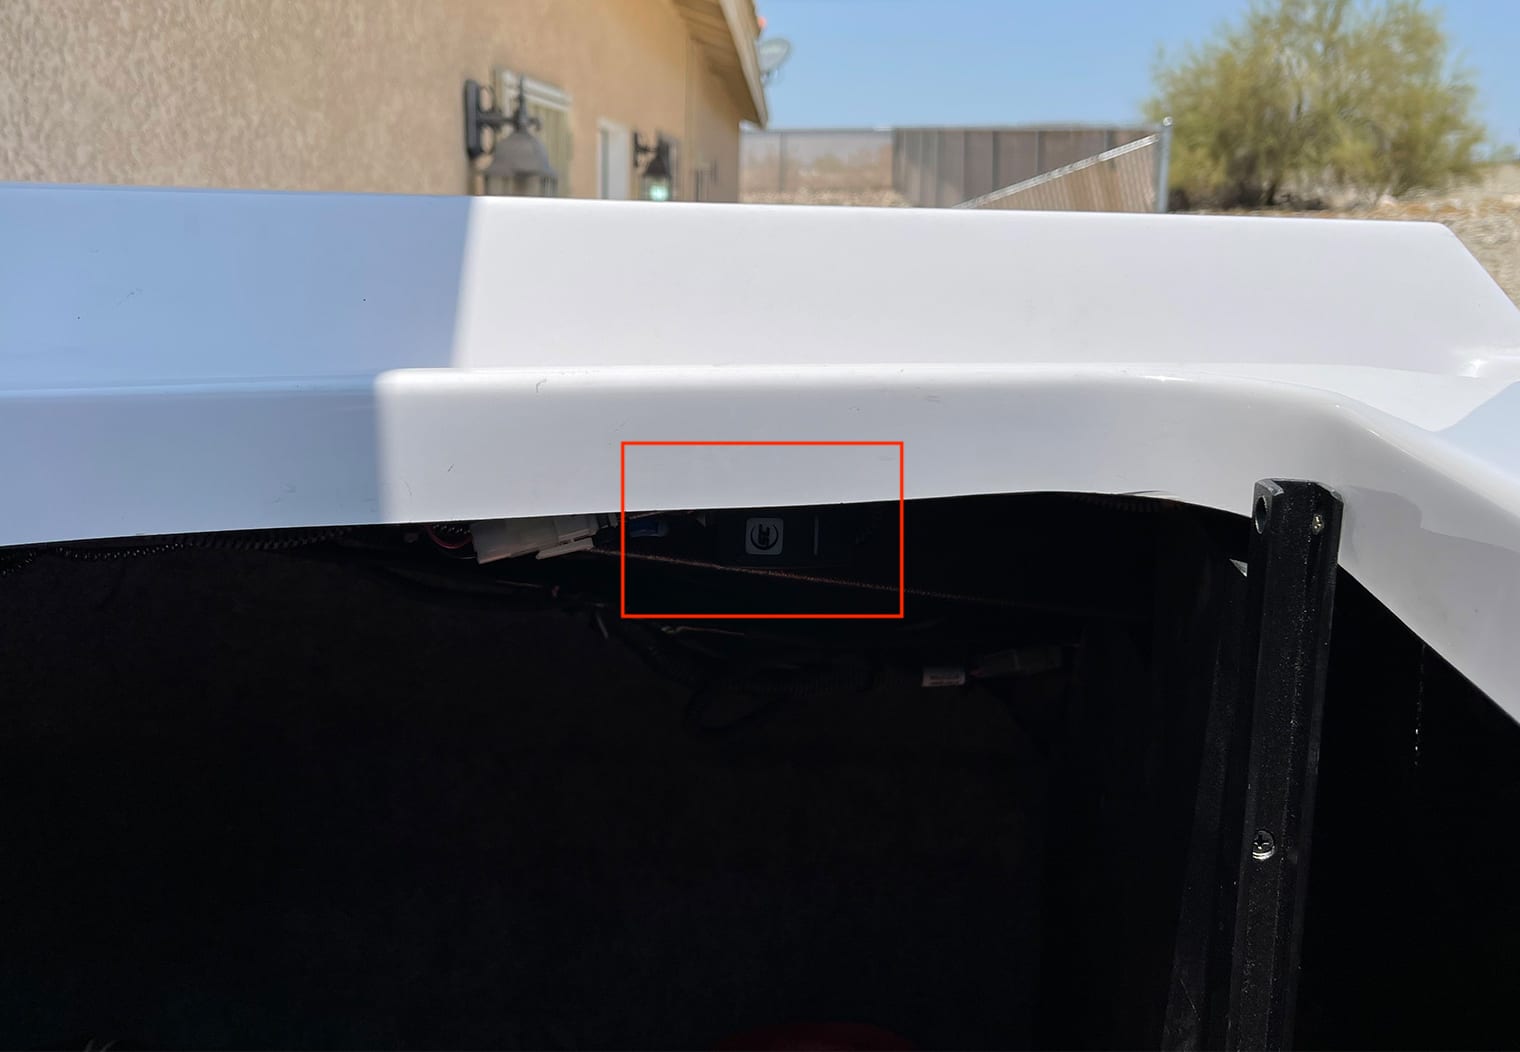
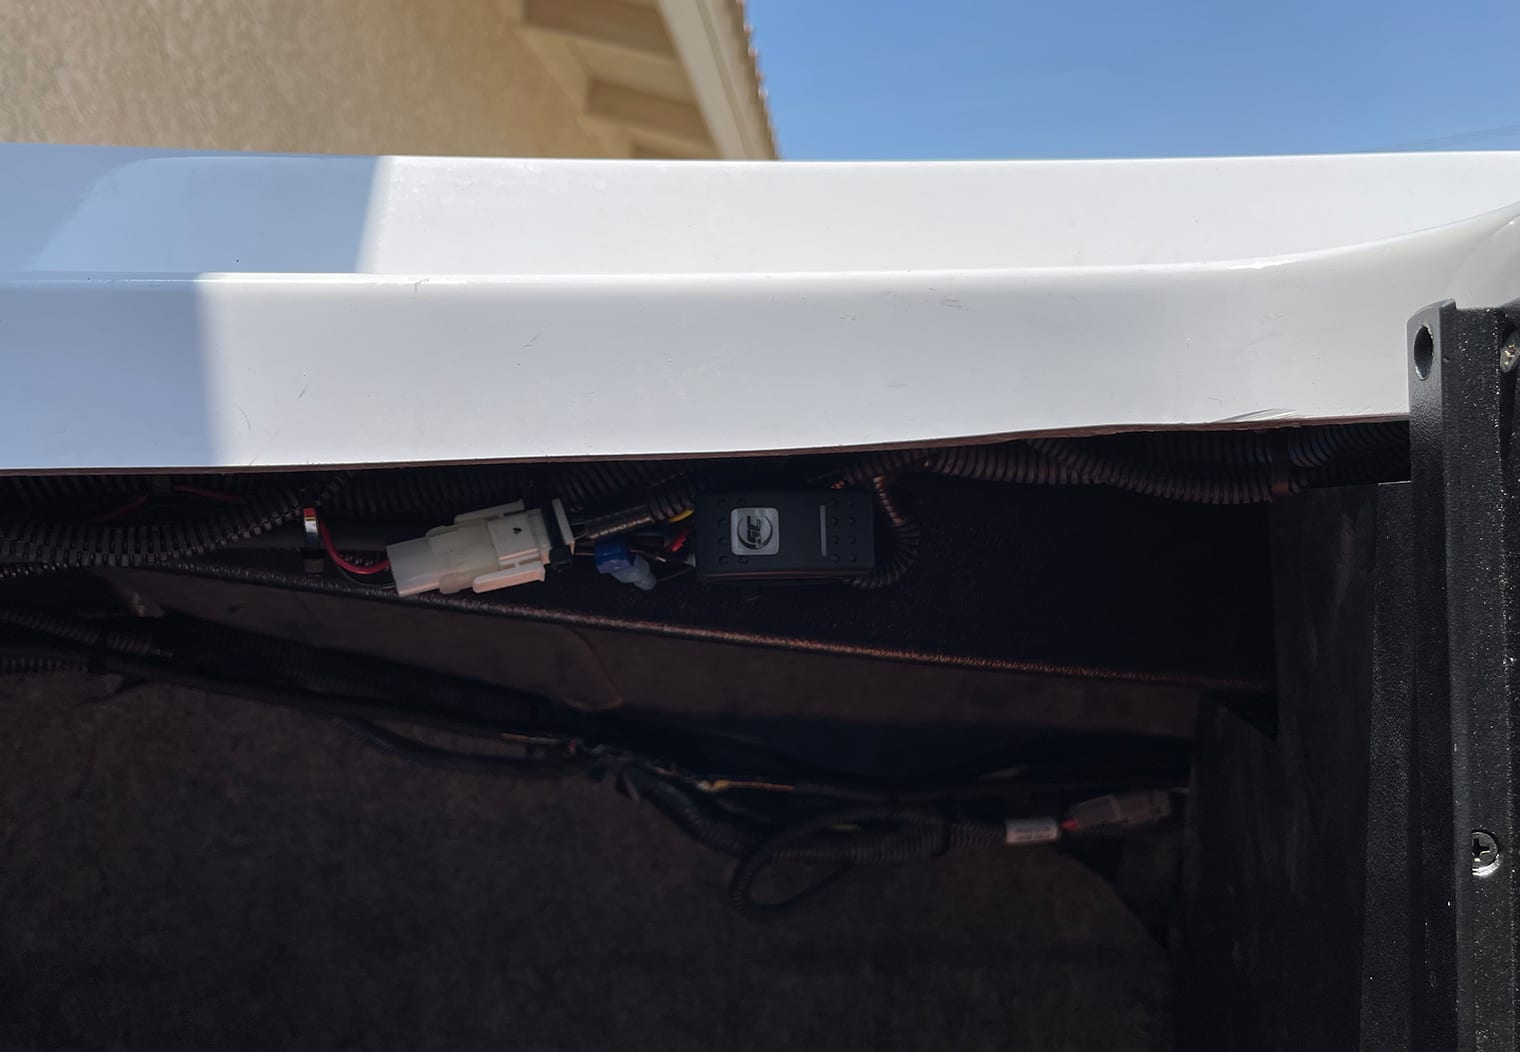
I'll start out by mentioning again that I chose to place Shadow Caster's SCM-SWITCH-O/O/M underneath the back side of the starboard rear compartment. This simplified the wiring, but it also didn't require me to place a switch on or near my dash, which has no switches. The switch allows you to easily control the color and the mode. You can read more about this in my unboxing and review of the lights. Without the switch, you might be able to control the color via your dash switch by quickly turning it off and on but I didn't test this out. I chose this placement because I knew that once I set a color, it would be very rare for me to change it and/or the mode so it really didn't matter whether the switch was accessible to me. If you want convenient control of the light colors, I'd recommend placing the switch underneath the dash or under the throttle area.
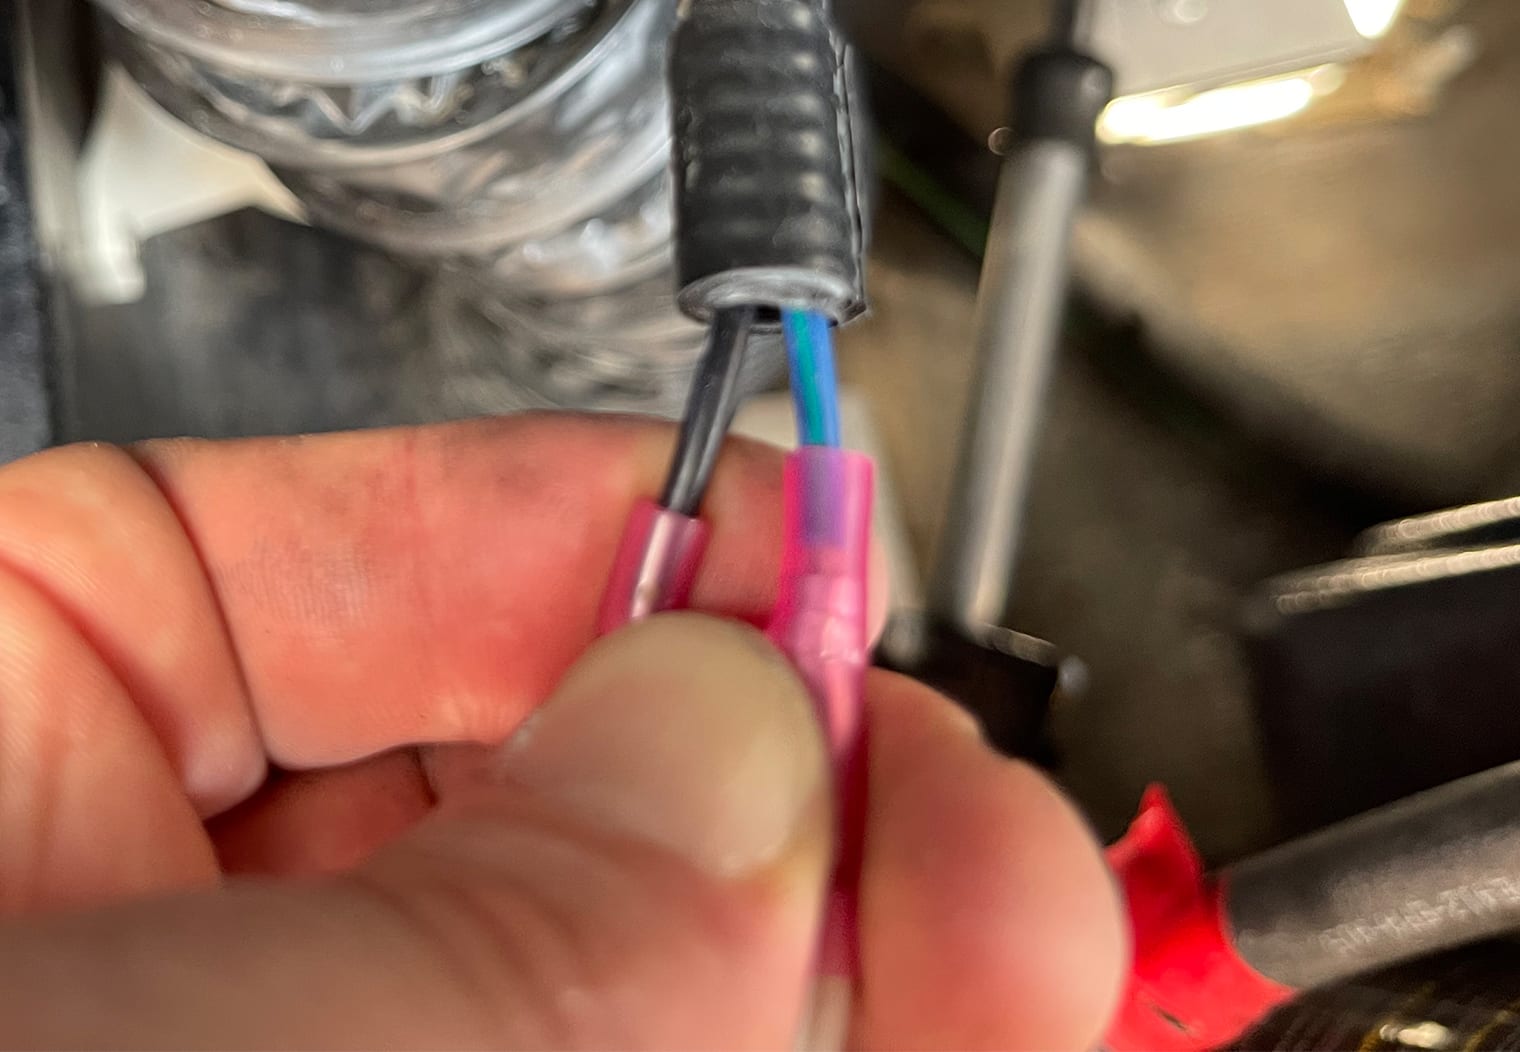
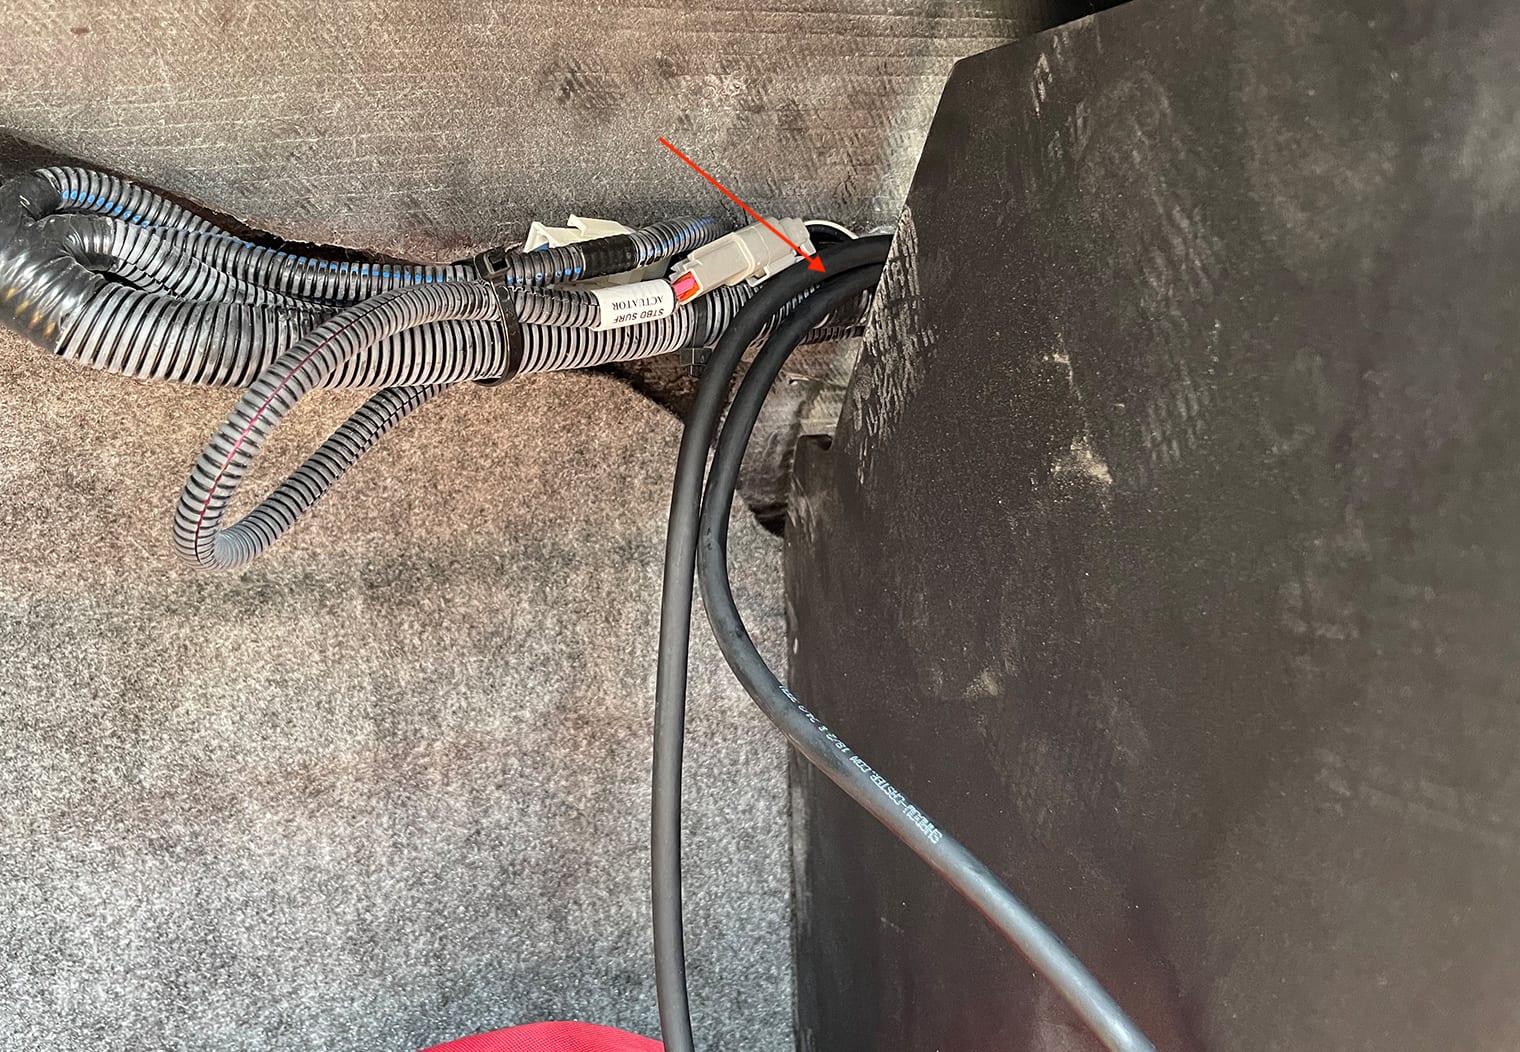
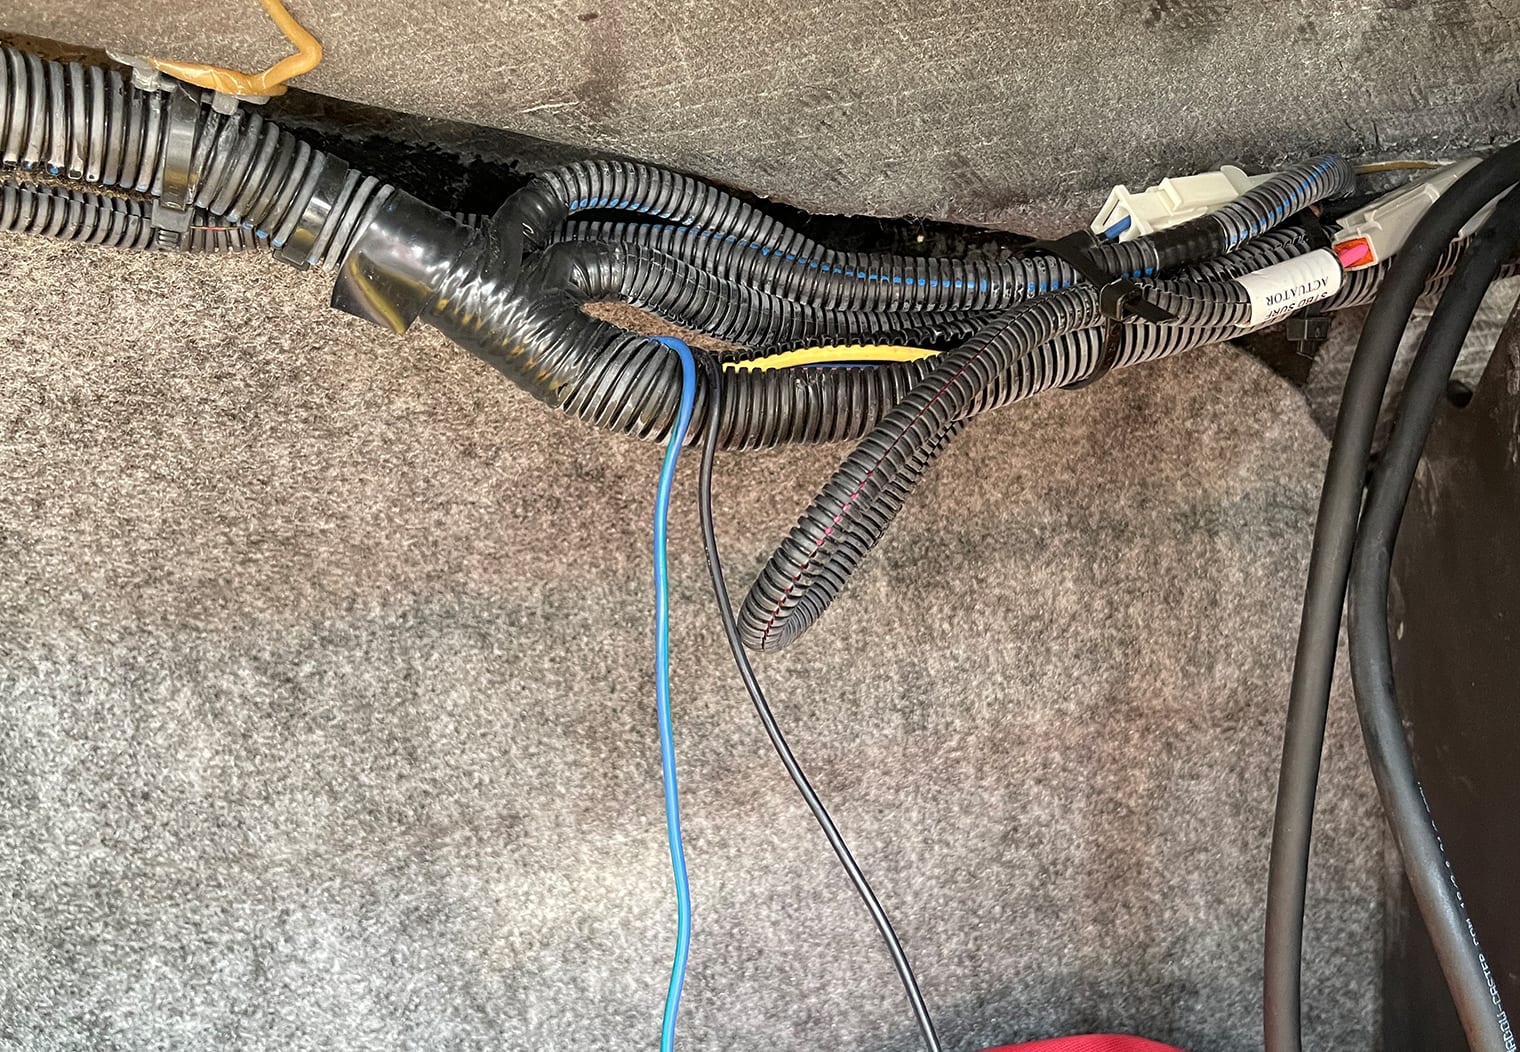
To wire up the power for these lights, I reused the existing power to the OEM lights. This was super easy – I just followed the old wiring to were they met the larger boat harness to find the colors and then pulled them through to the location I was mounting the switch in the compartment. Here's a look at the wire colors from my boat:
- Blue w/ green: Positive
- Black w/ purple: Negative
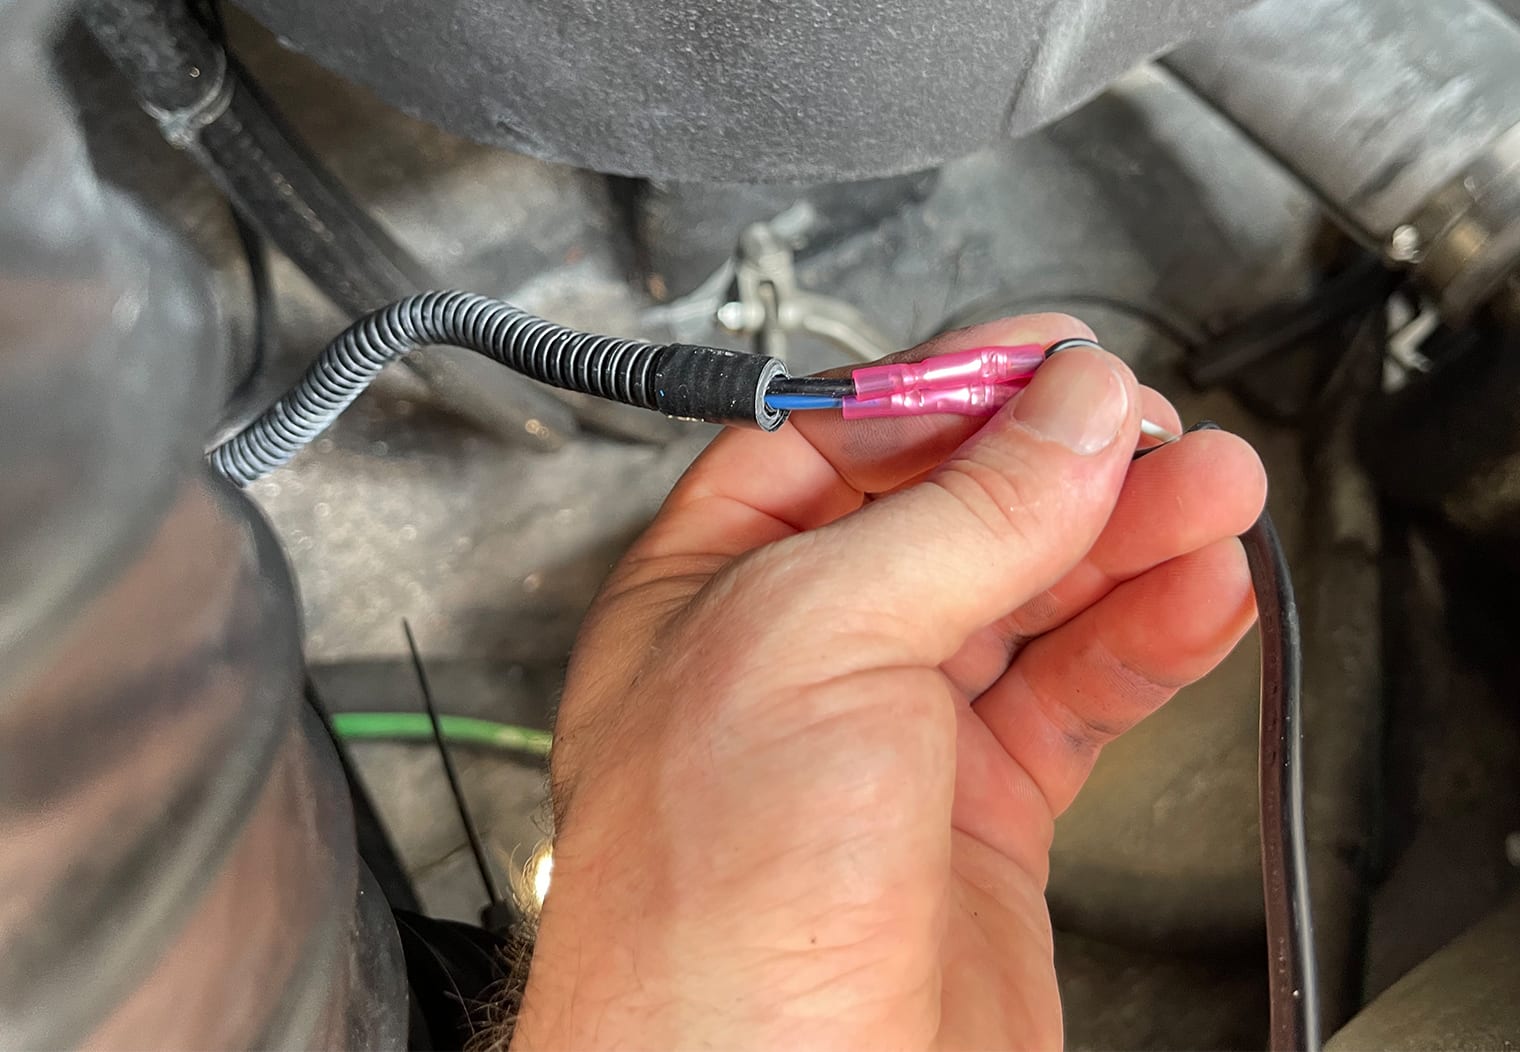
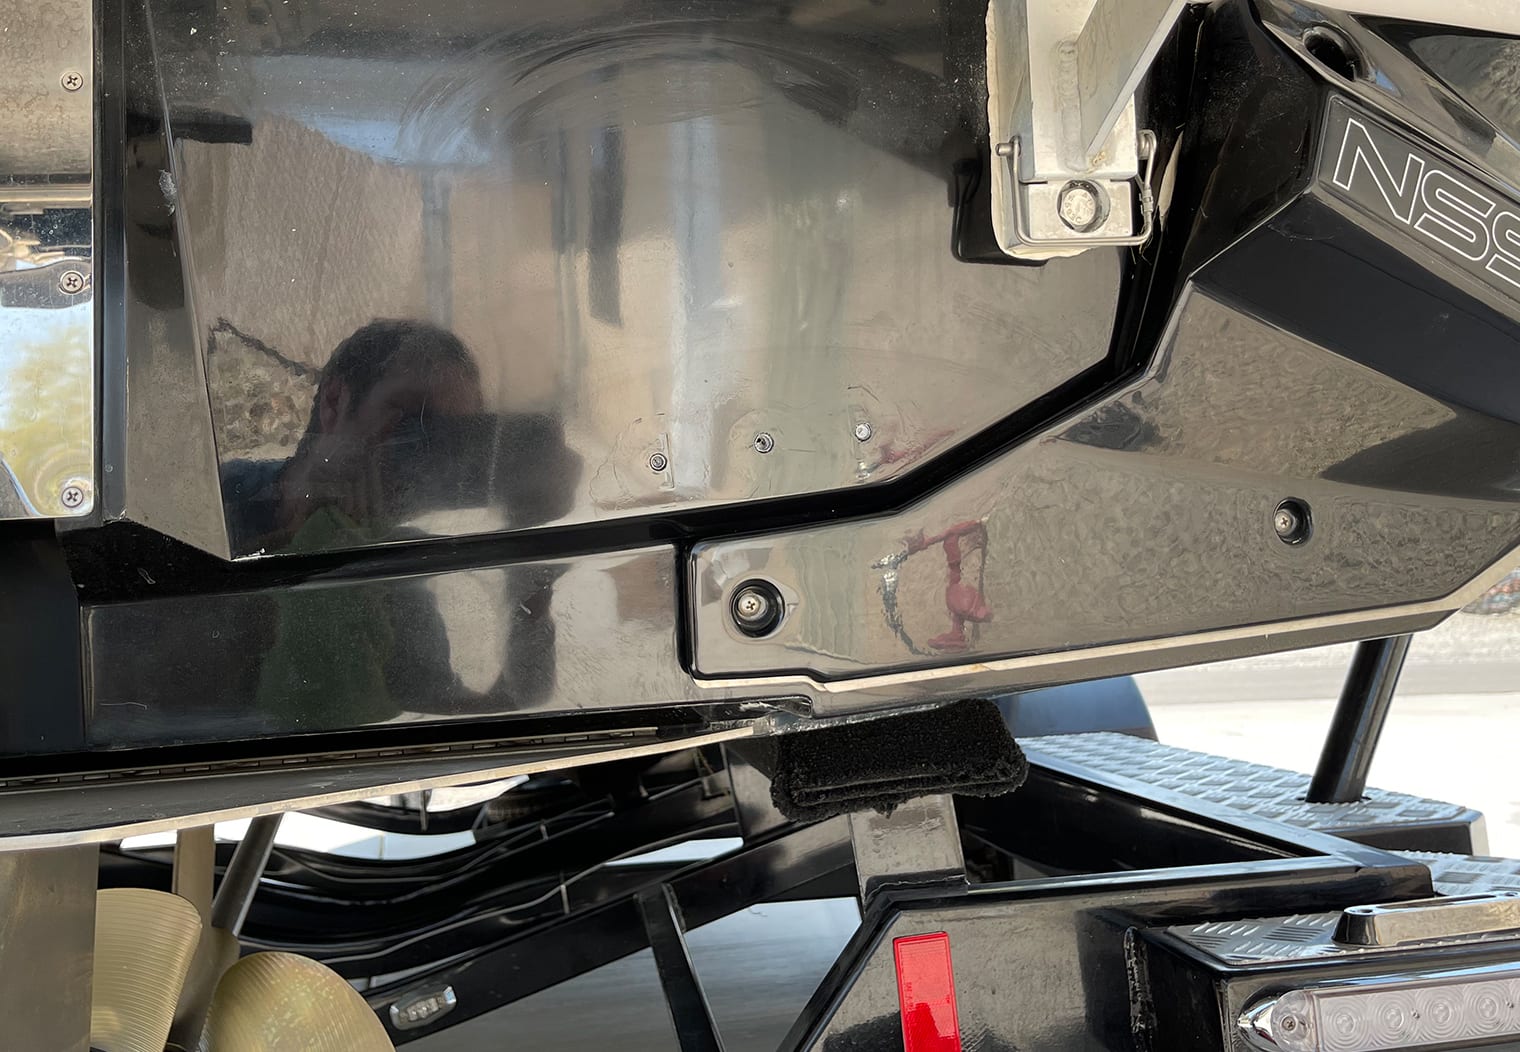
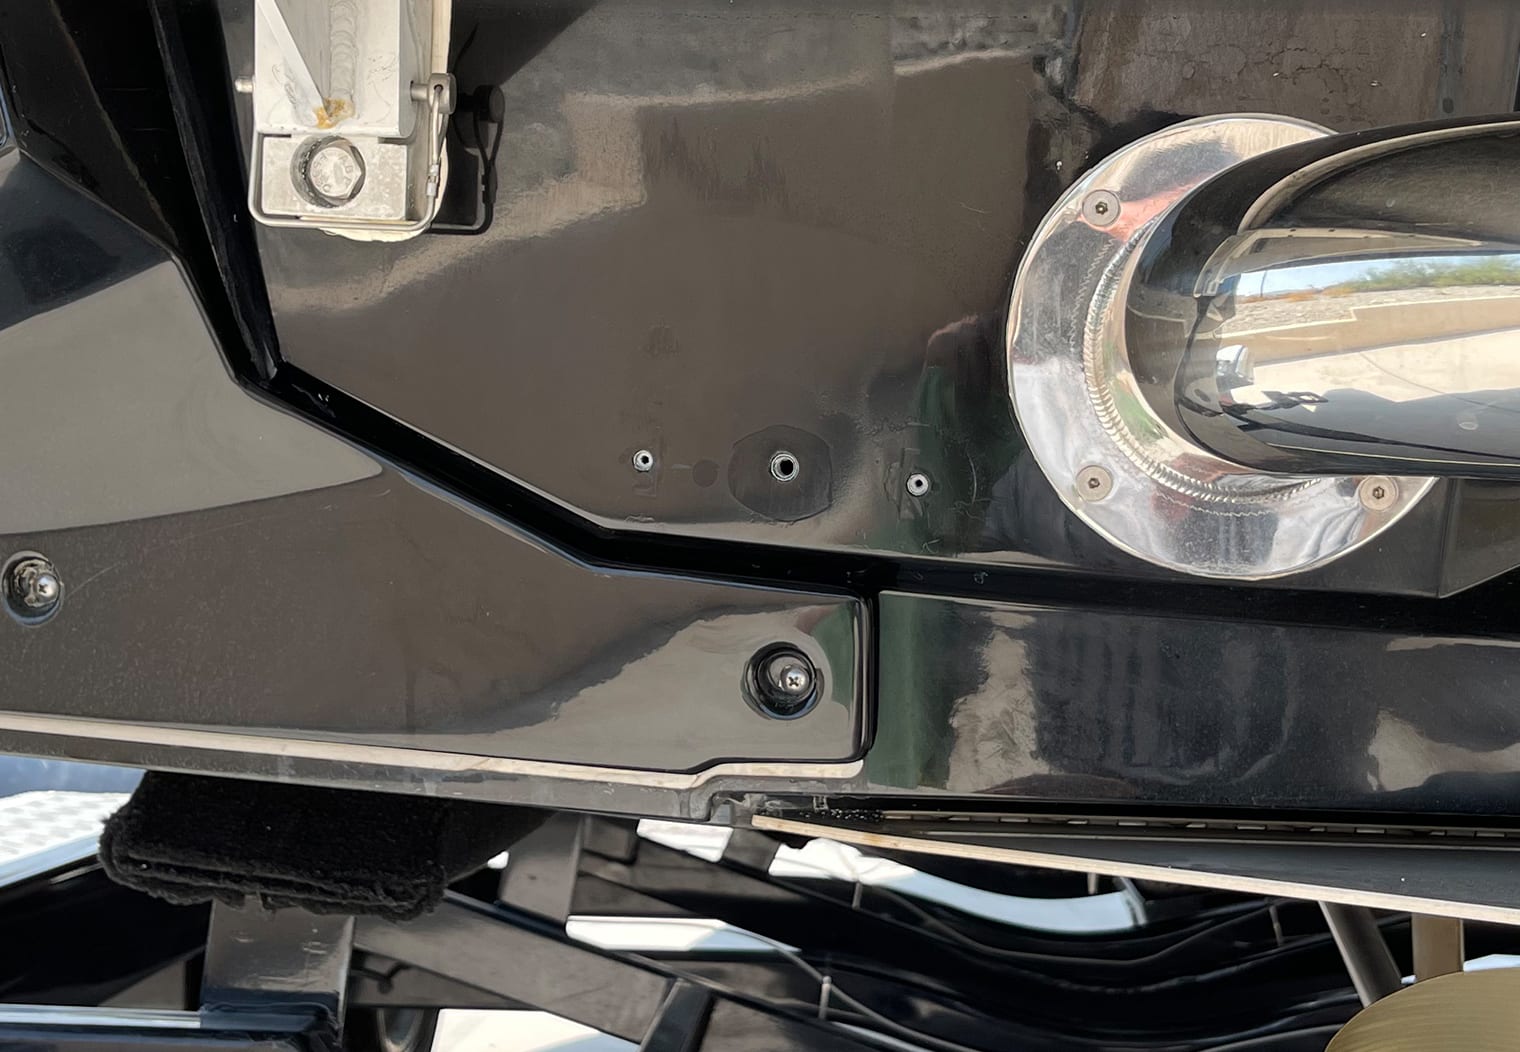
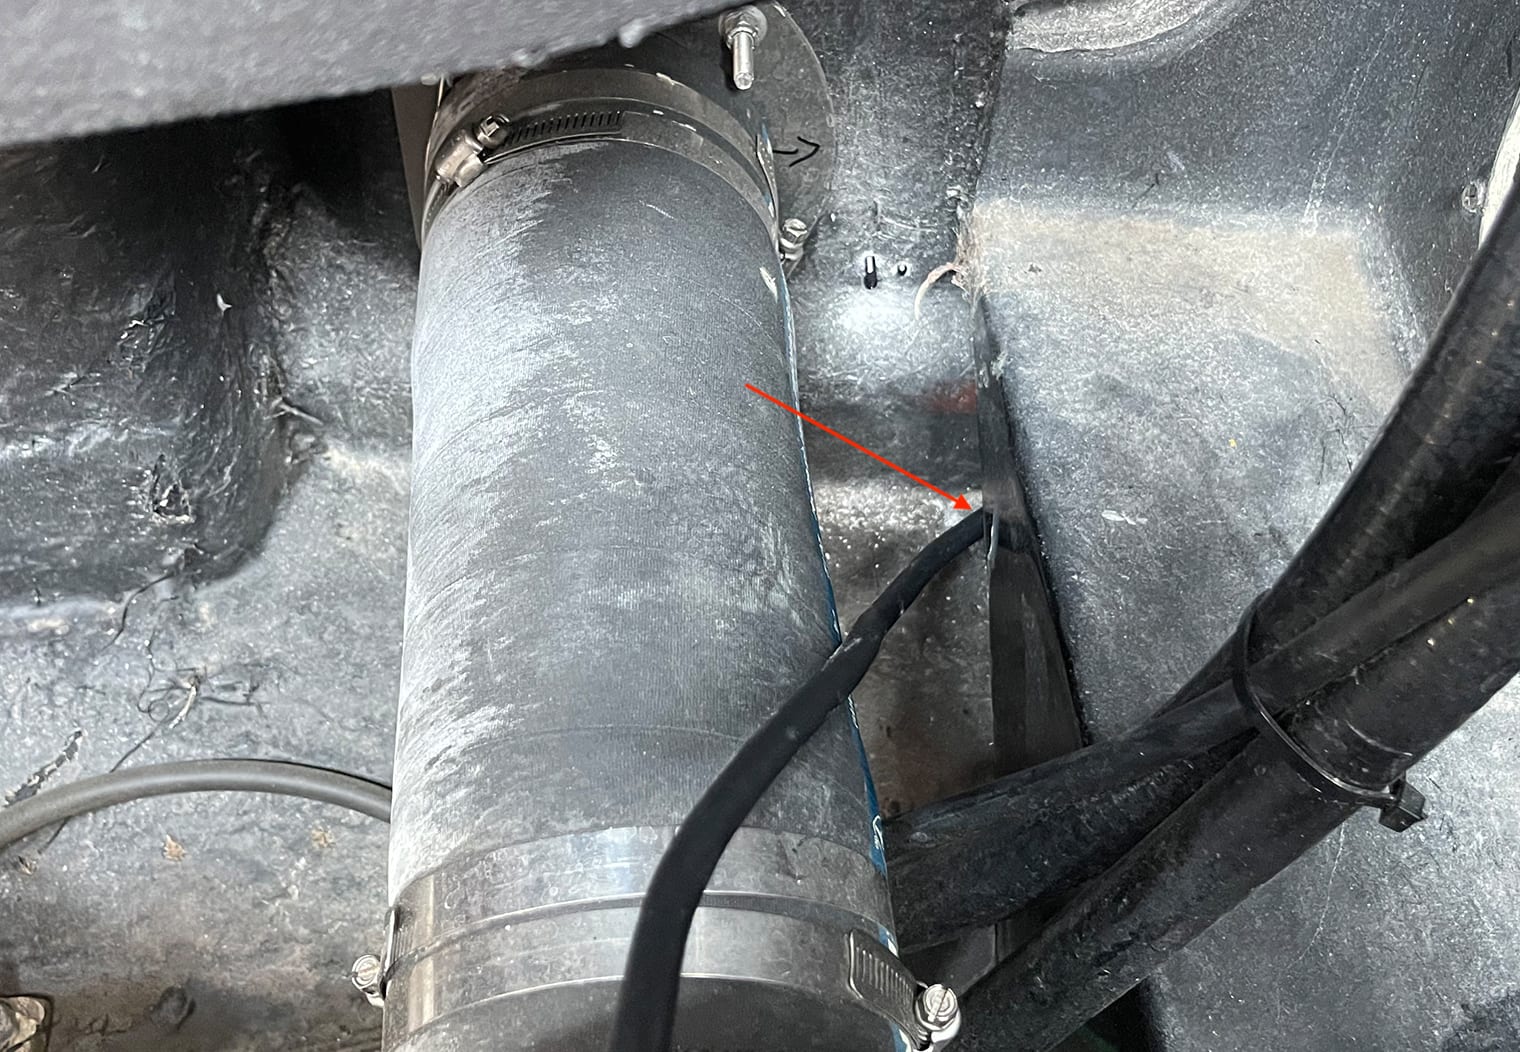
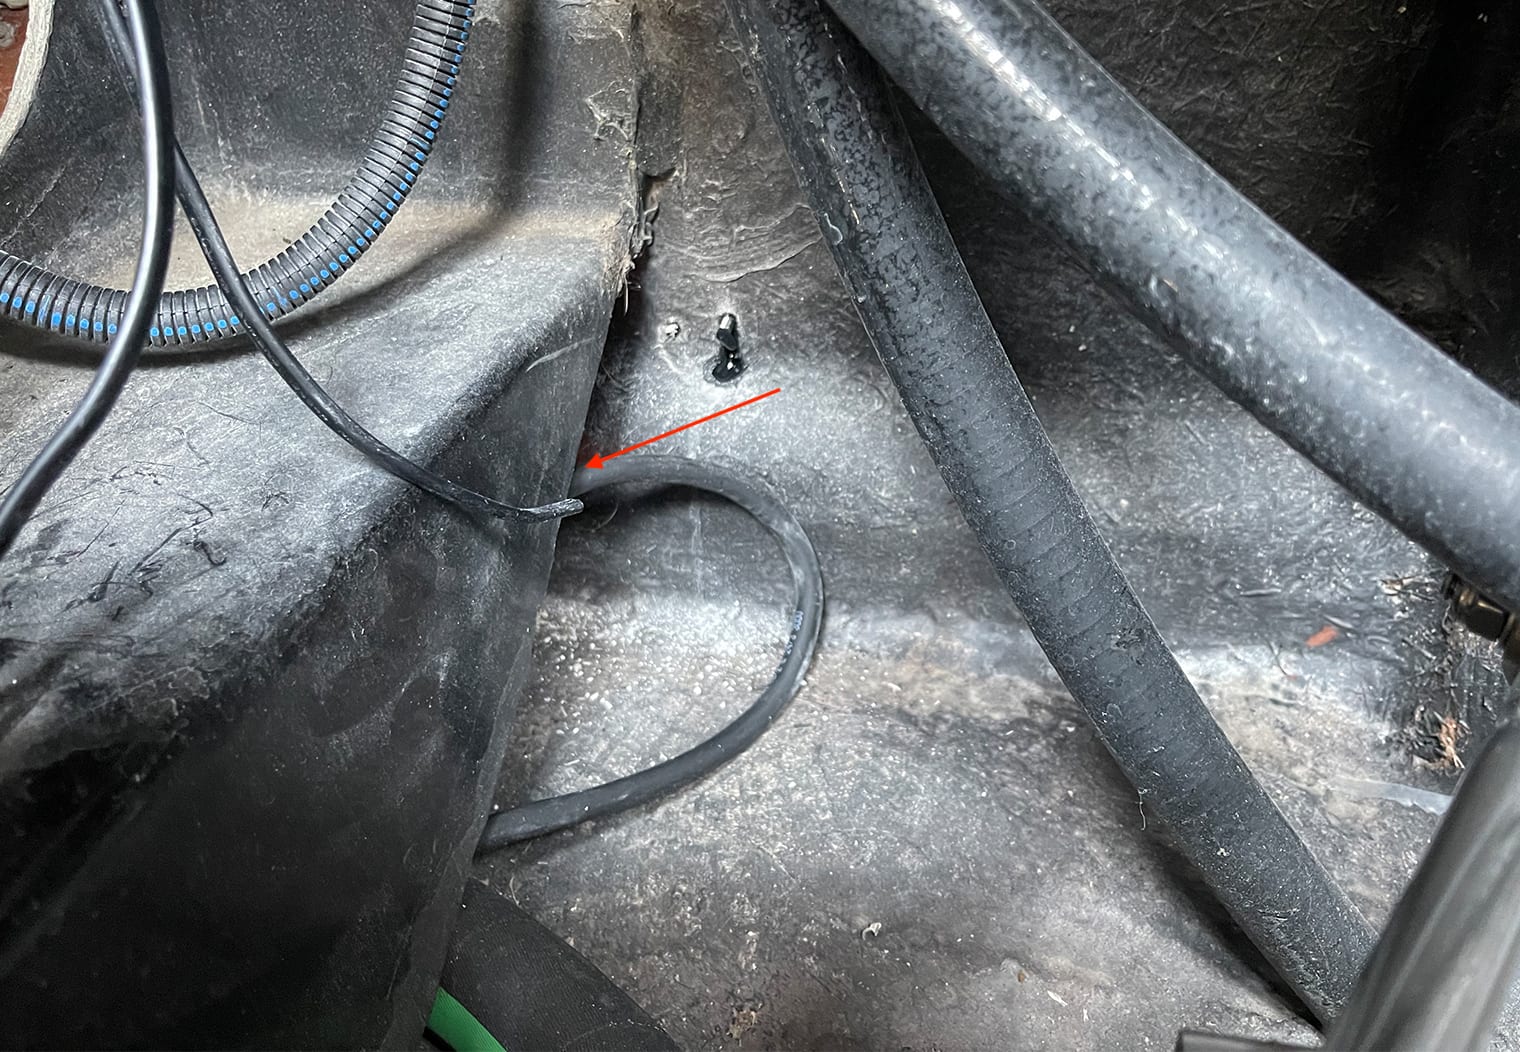
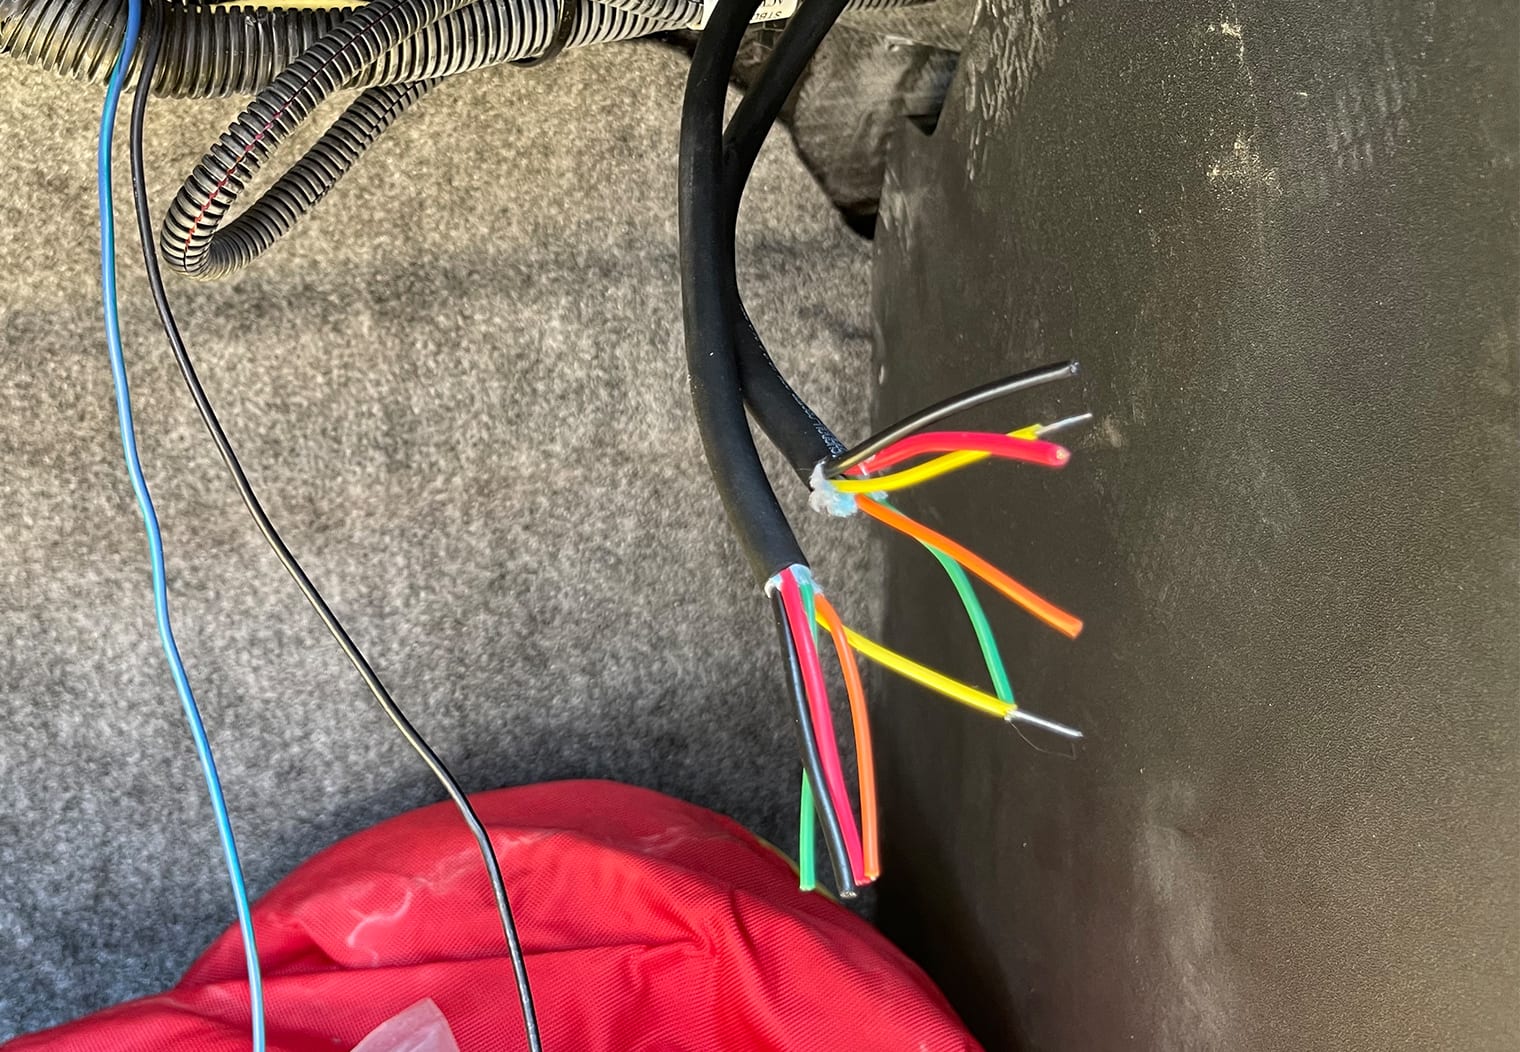
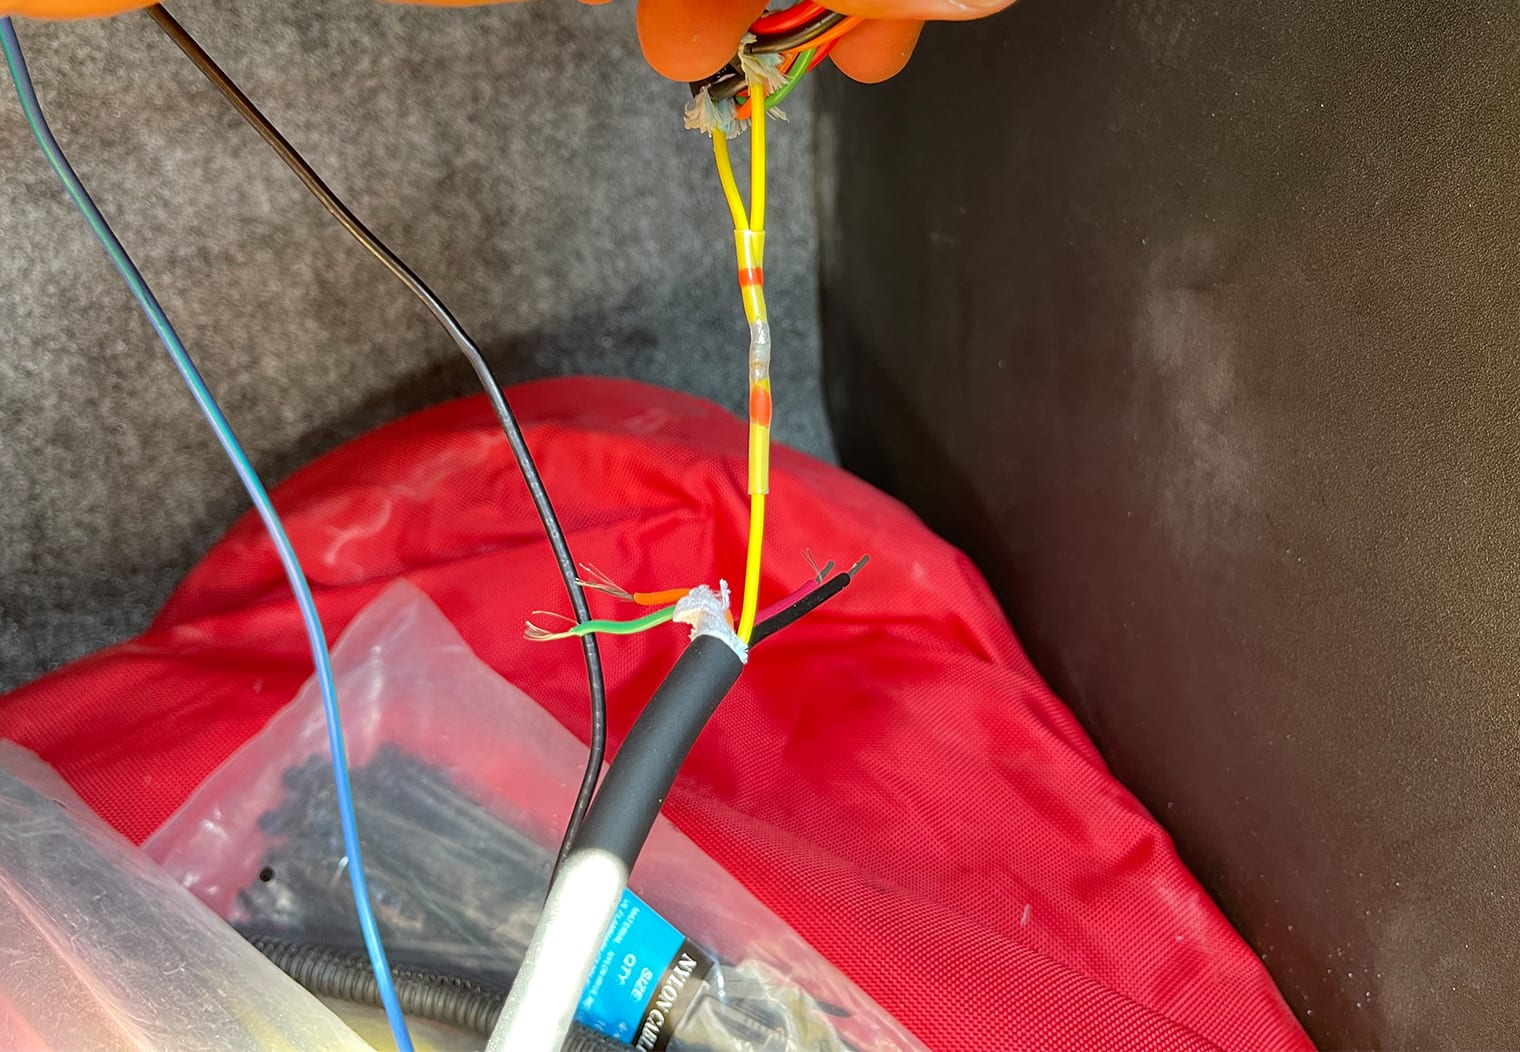
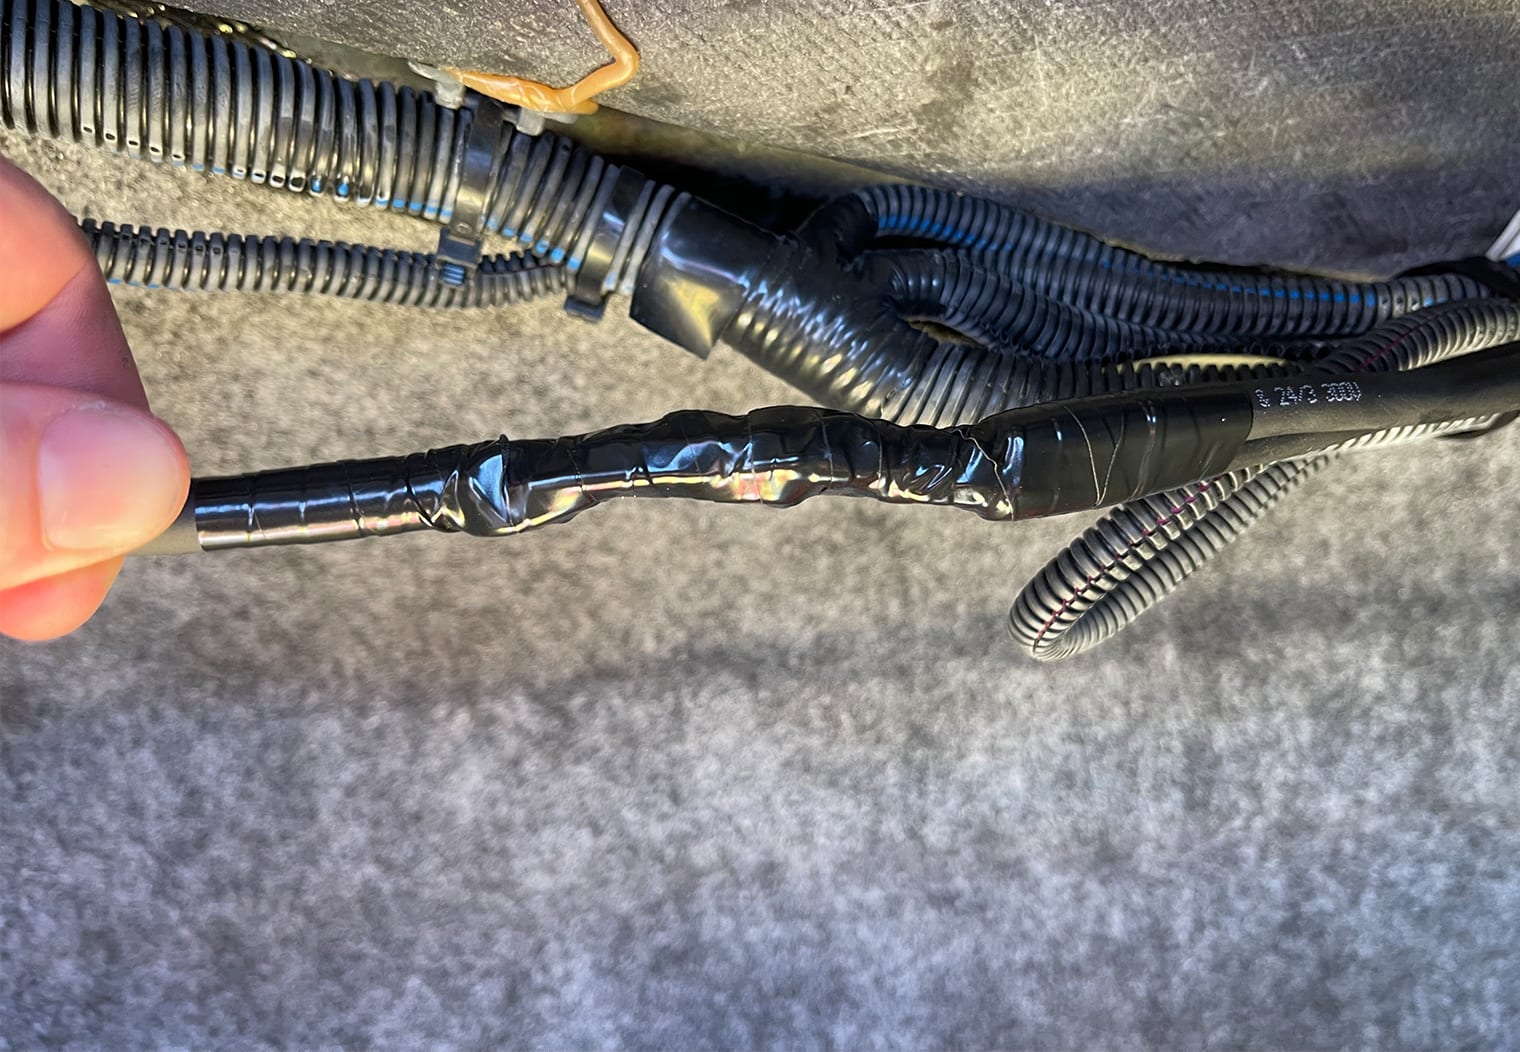
I fed the wire from the two new Shadow Casters from the bottom side of the hull through to the starboard storage compartment where I could join them and then wire them to the switch. I used zip ties to run them along existing wire harnesses. Also, I joined them at the back of the compartment because the port side light wire wouldn't have reached all the way to where I was mounting the switch. Here's some photos of how and where I ran the new light wiring, along with where I zip tied them.
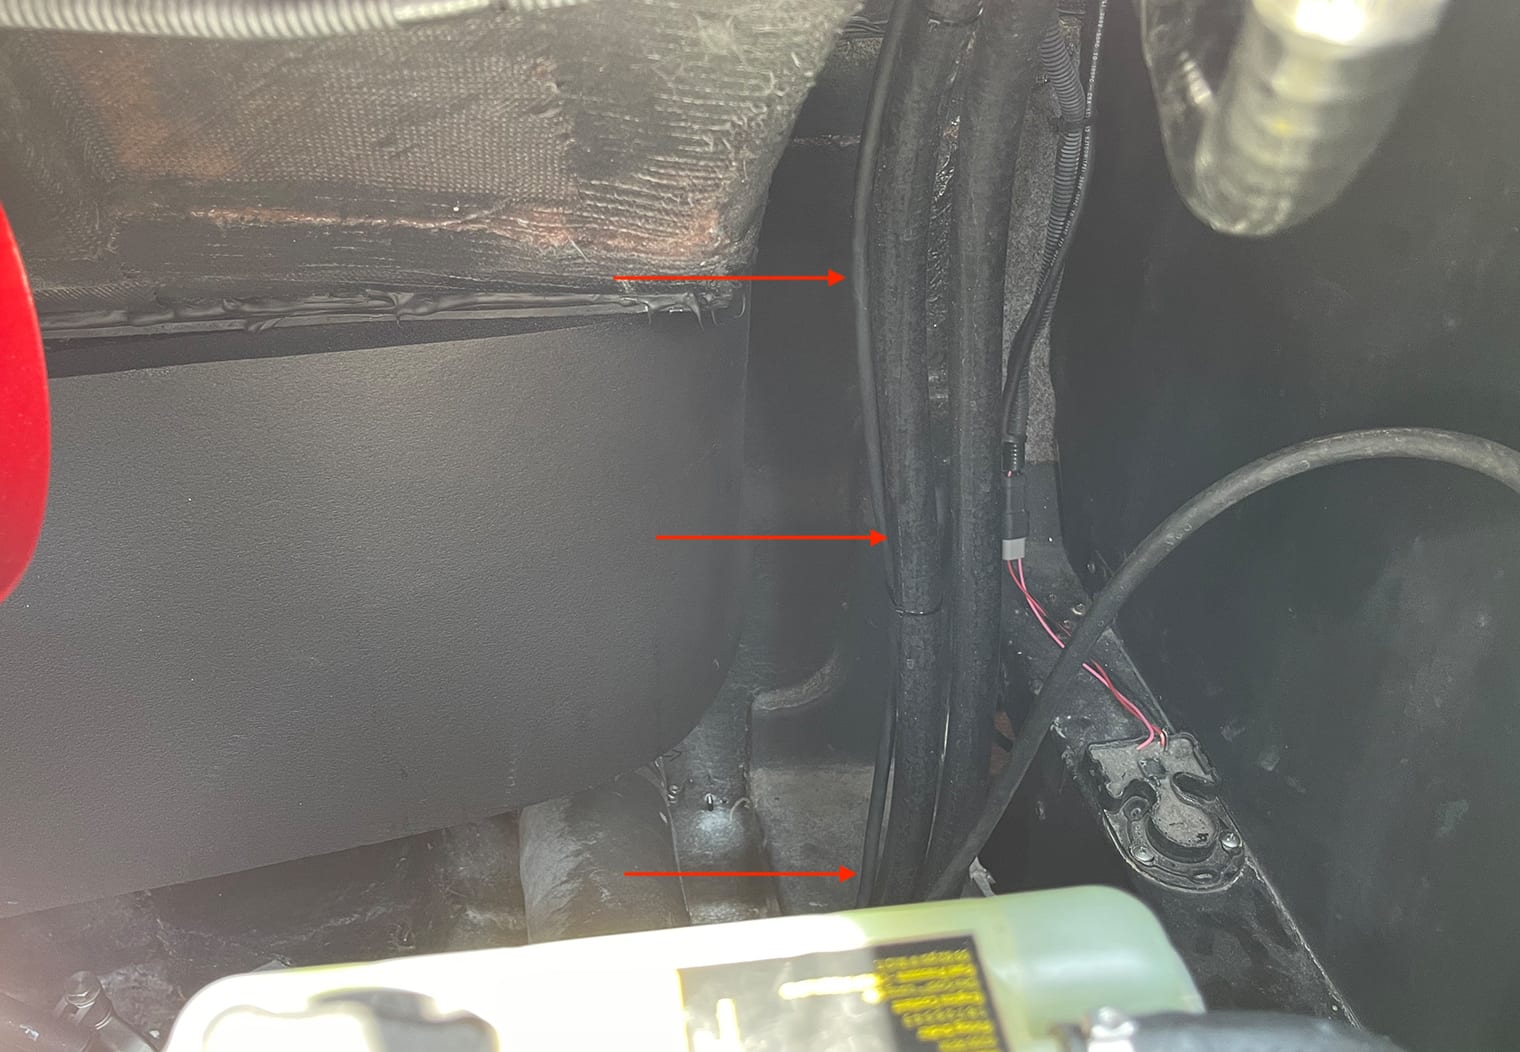
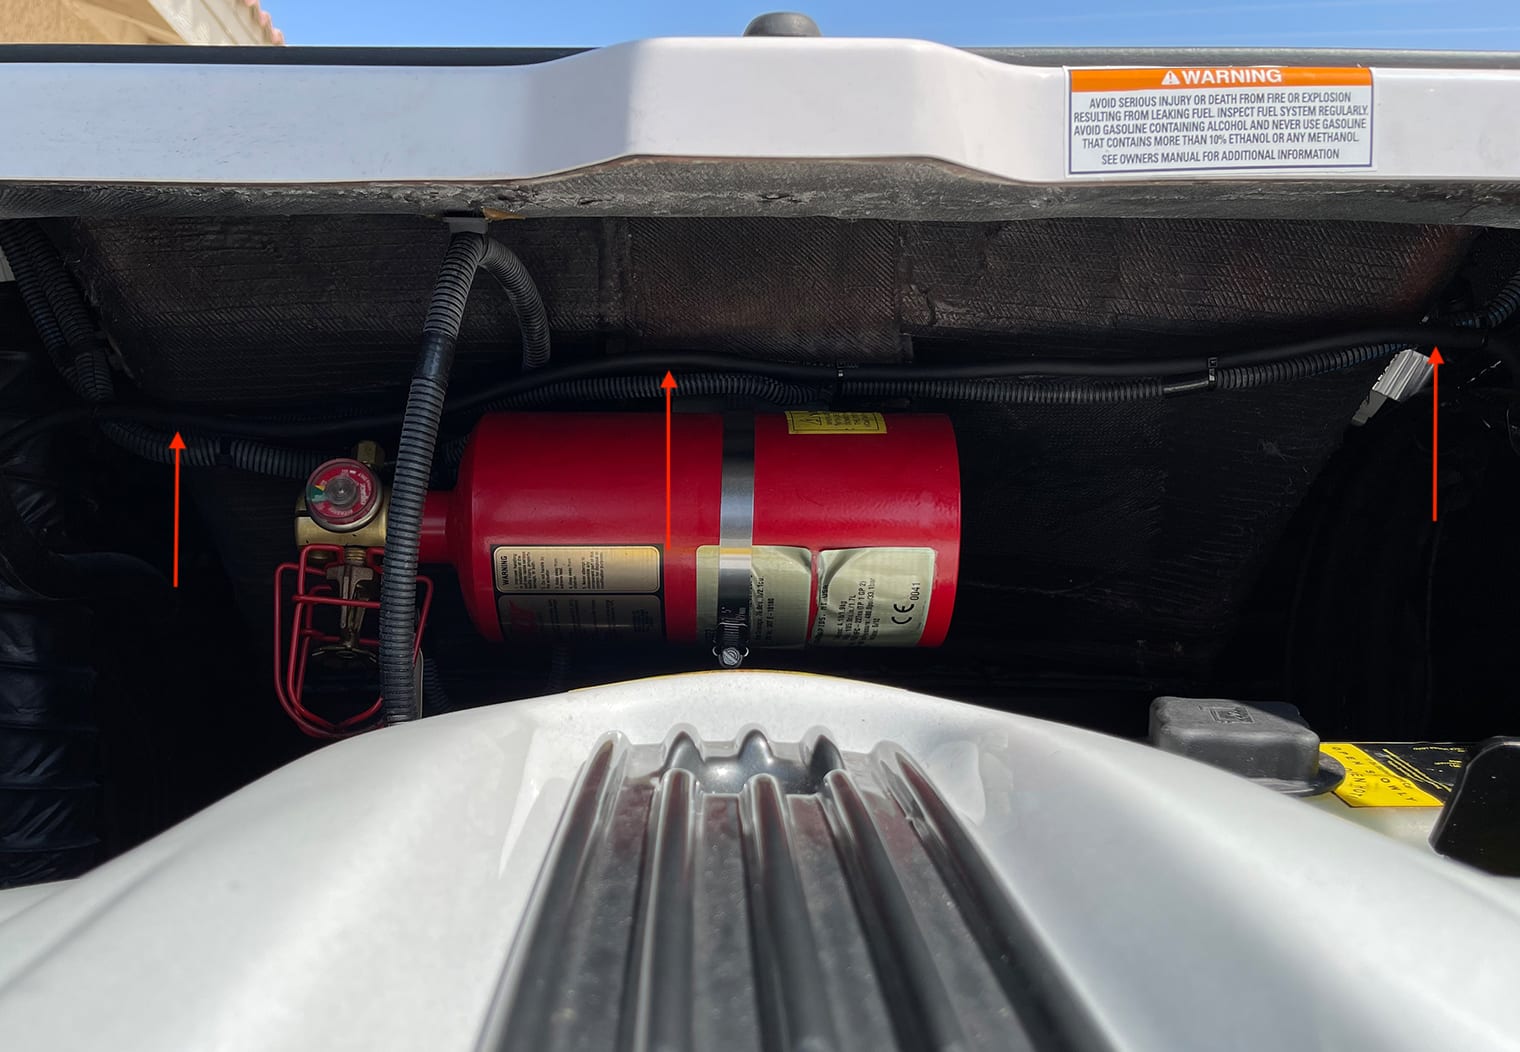
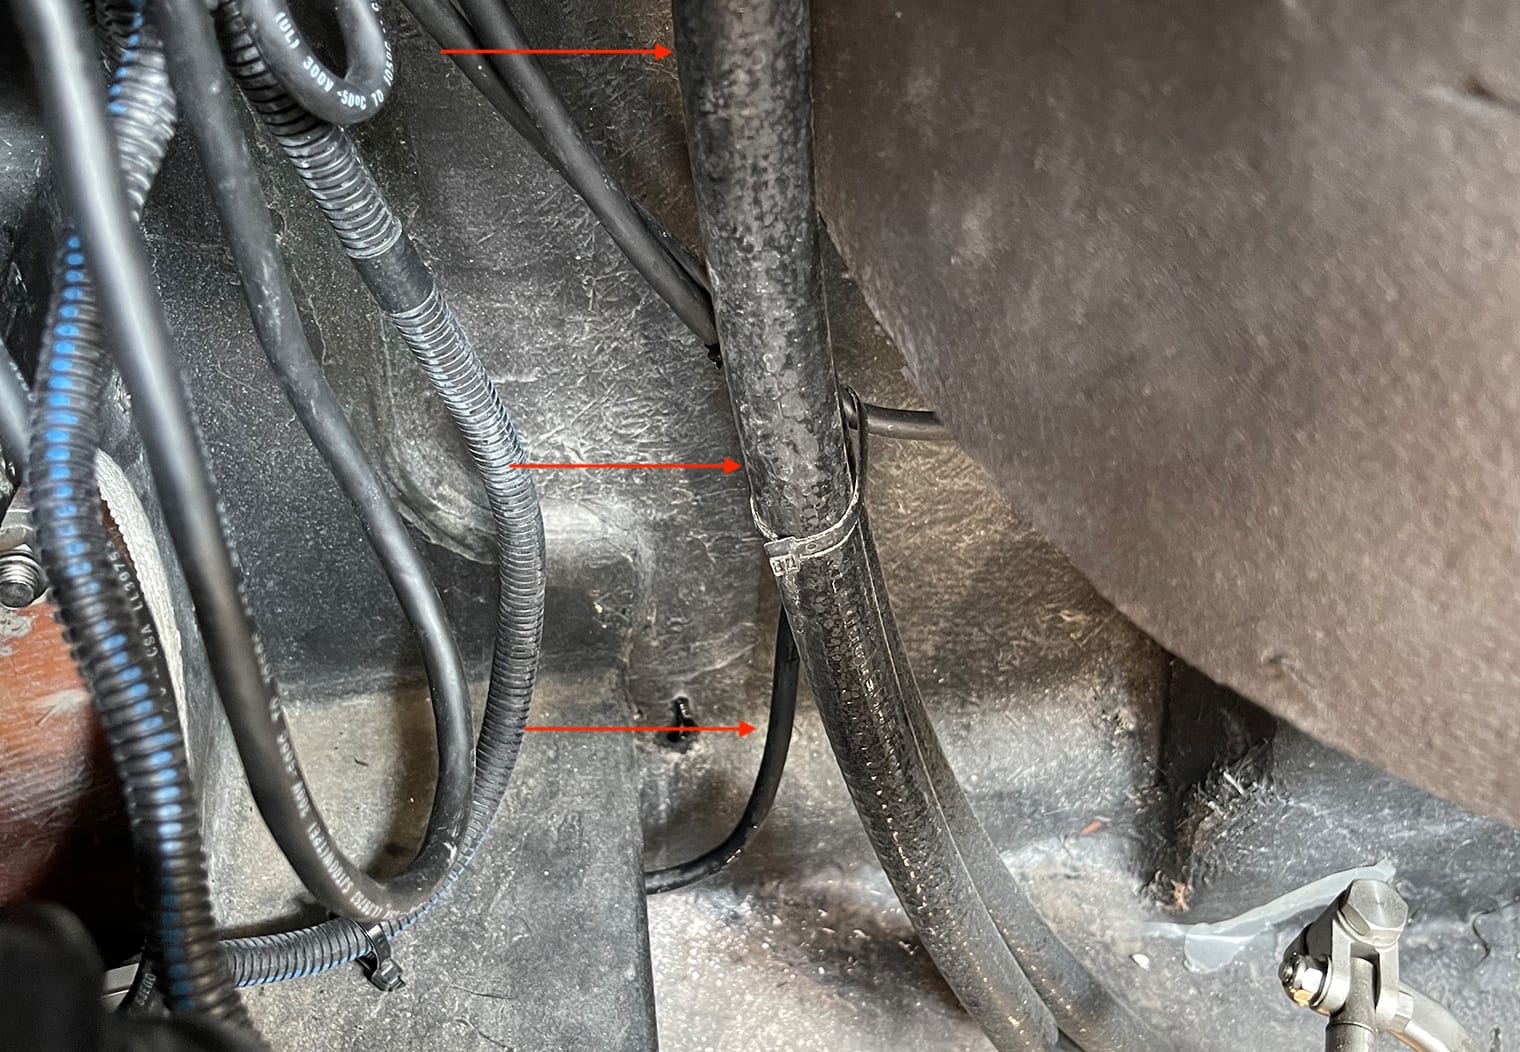
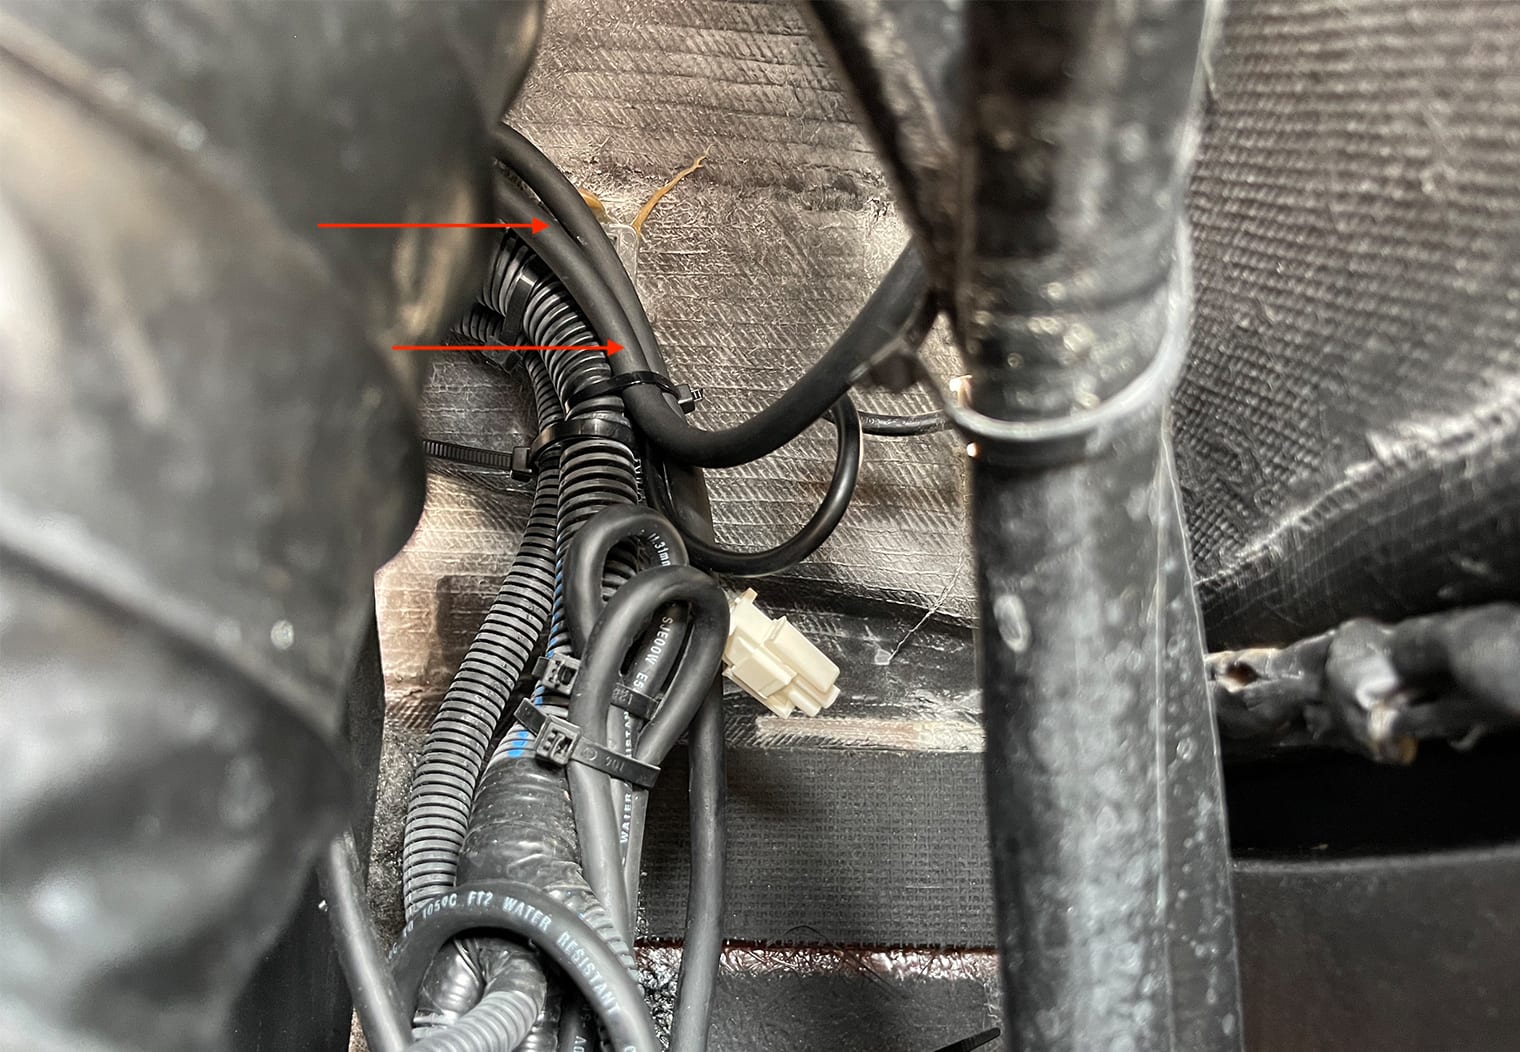
Once both light wiring was in the compartment, I started to join them together into a single wire that I could then run to the switch. I used solder seal connectors (the greatest invention) to join each wire together and then sealed it up with 3M electrical tape afterwards. It's important to note here that if you're using the SCM-SWITCH-O/O/M, you'll only need the green wire here. The rest can be left out. In my pictures below I joined them anyway in case I decide to purchase or use their lighting control systems in the future.
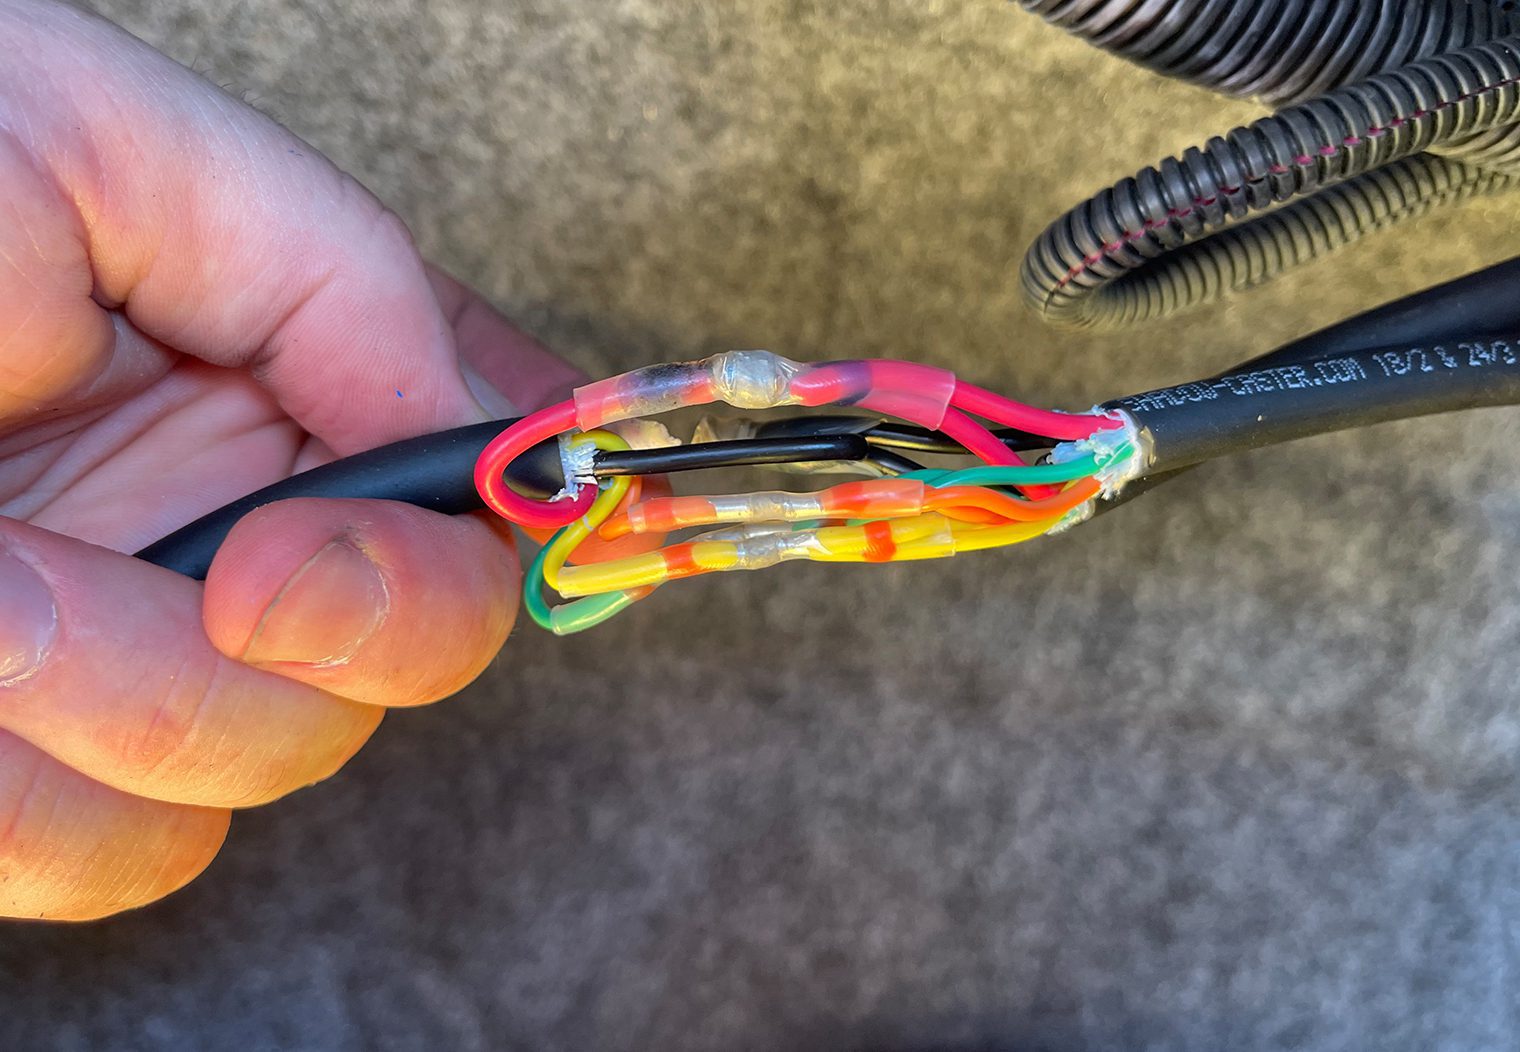

With the wires joined, the next step was to wire up the Shadow Caster switch to the OEM power and ground, and then hook up the light's power, ground and green wire to the switch (see the diagram below).
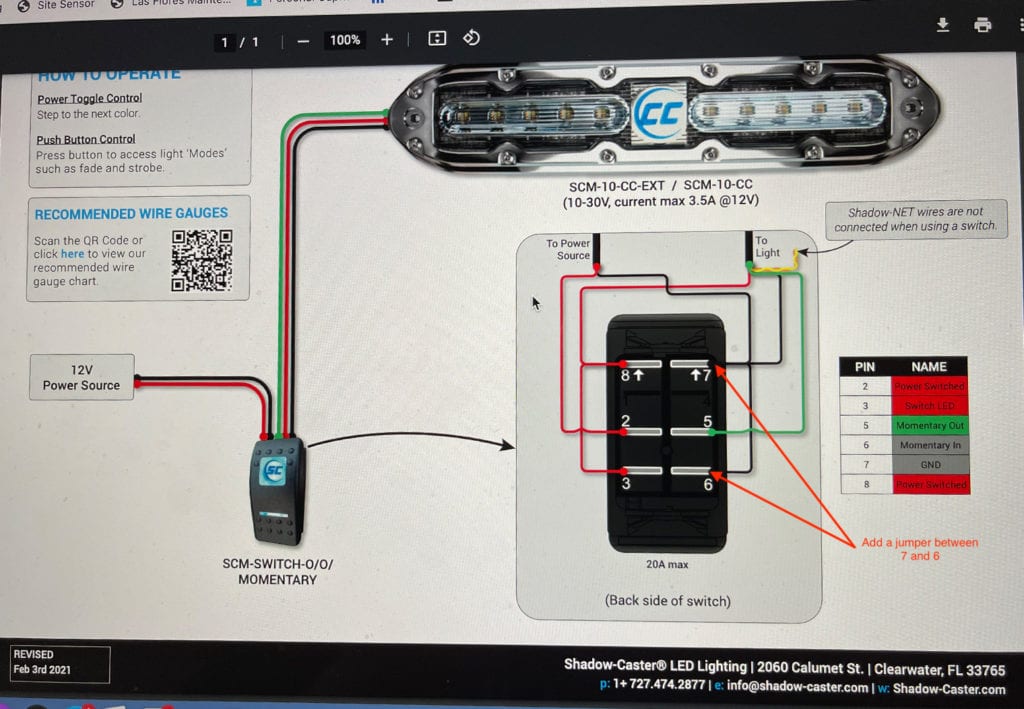
At the time of writing this article, the diagram on Shadow Caster's website doesn't clearly indicate that there should be a ground jumper in between pin 7 and pin 6. I had to test and figure this out the hard way. The diagram shows a ‘hop' on the right which is confusing. You will need a jumper between both 8-3 and 7-6 in order for this to function properly. To wire the switch up, I just used standard spade connectors that you can find at your local hardware store to plug into the back of the switch.
Once the switch was wired, I mounted the switch to the harness along the rail in the compartment and tested it out.
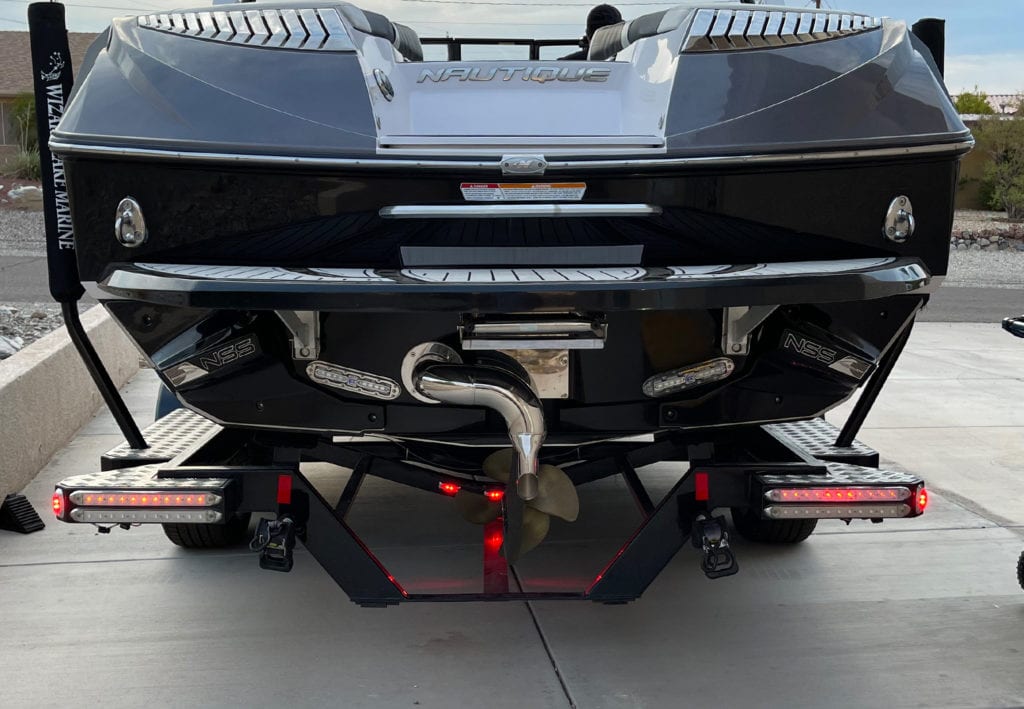
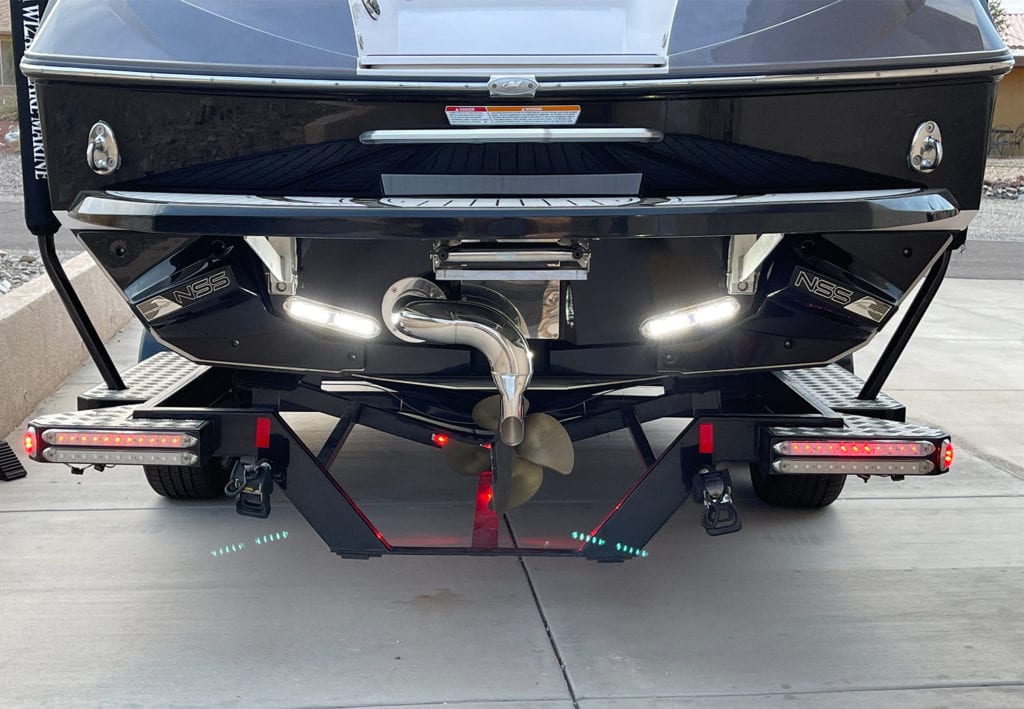
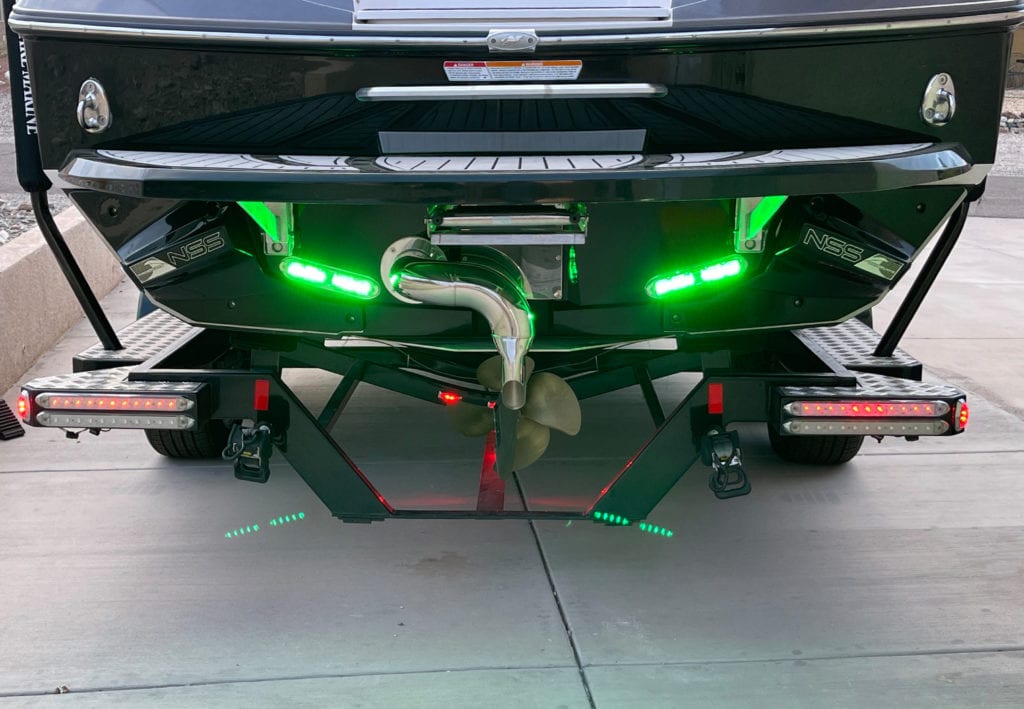
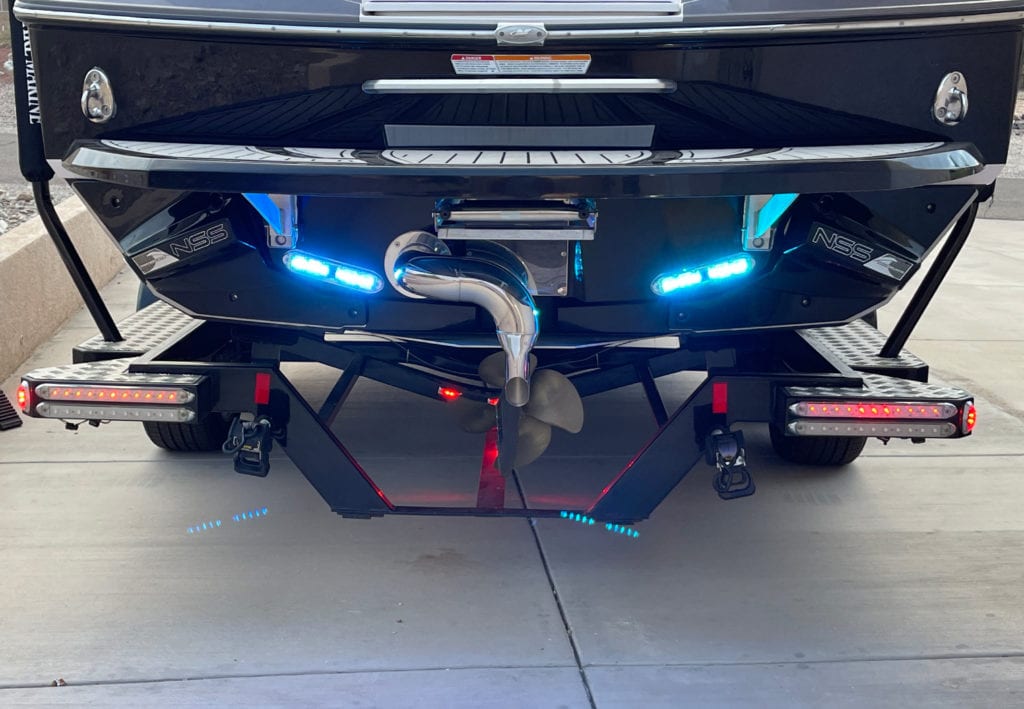
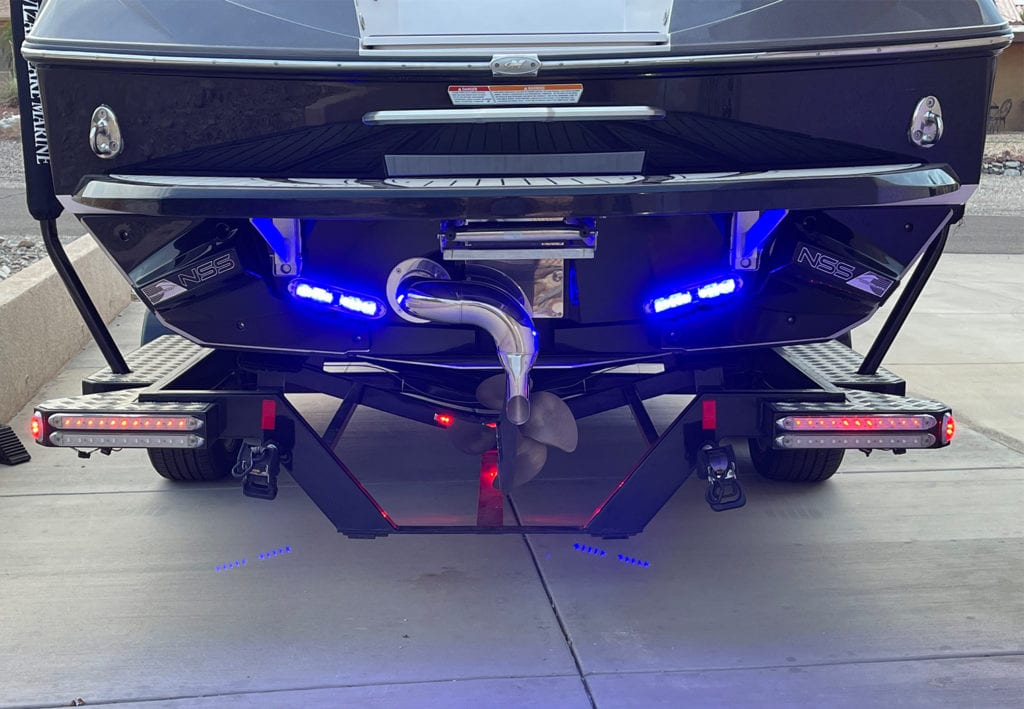
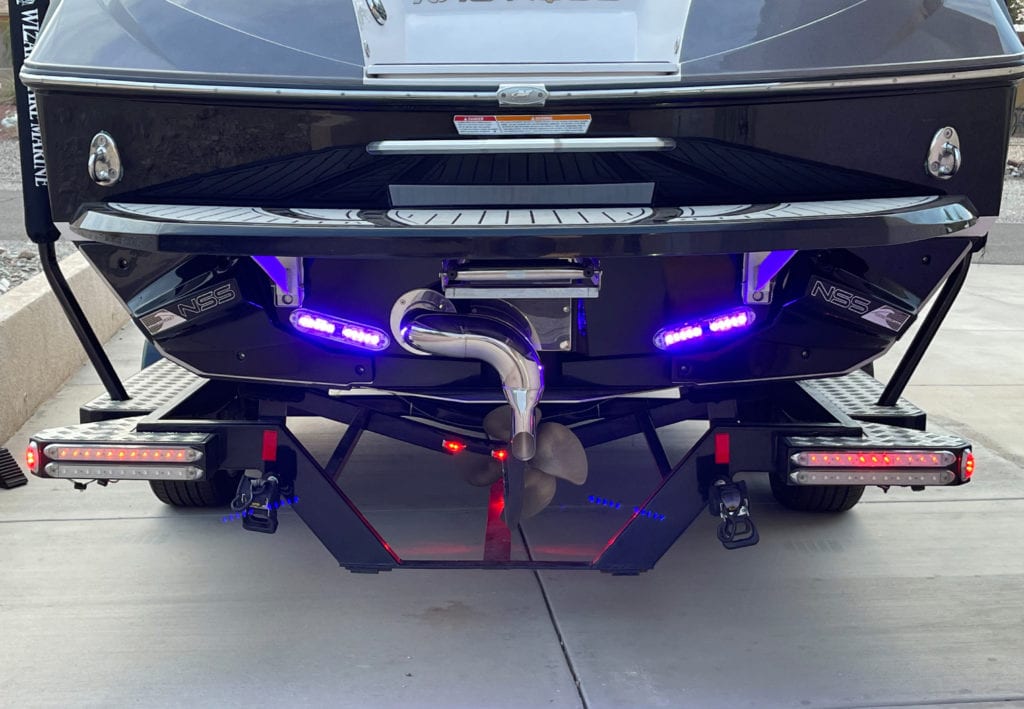
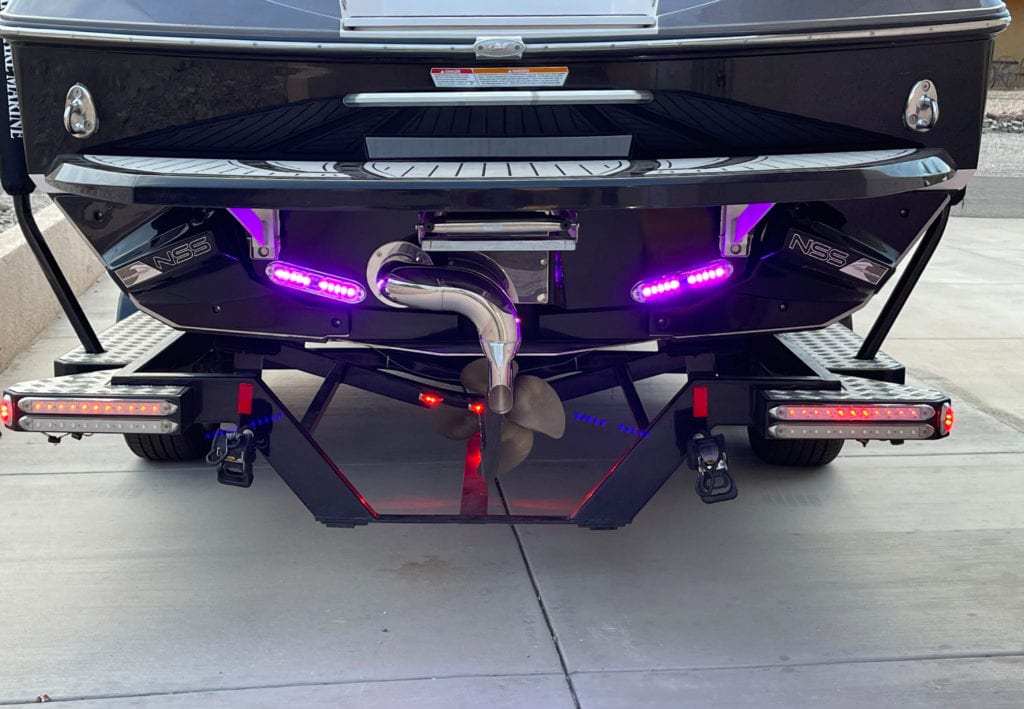
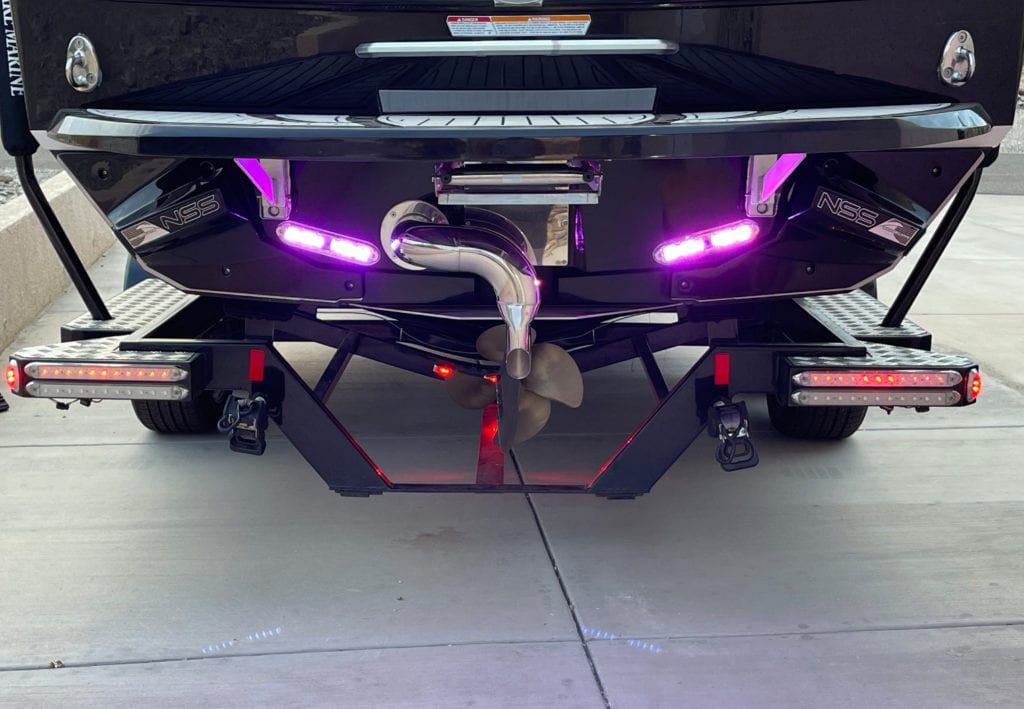
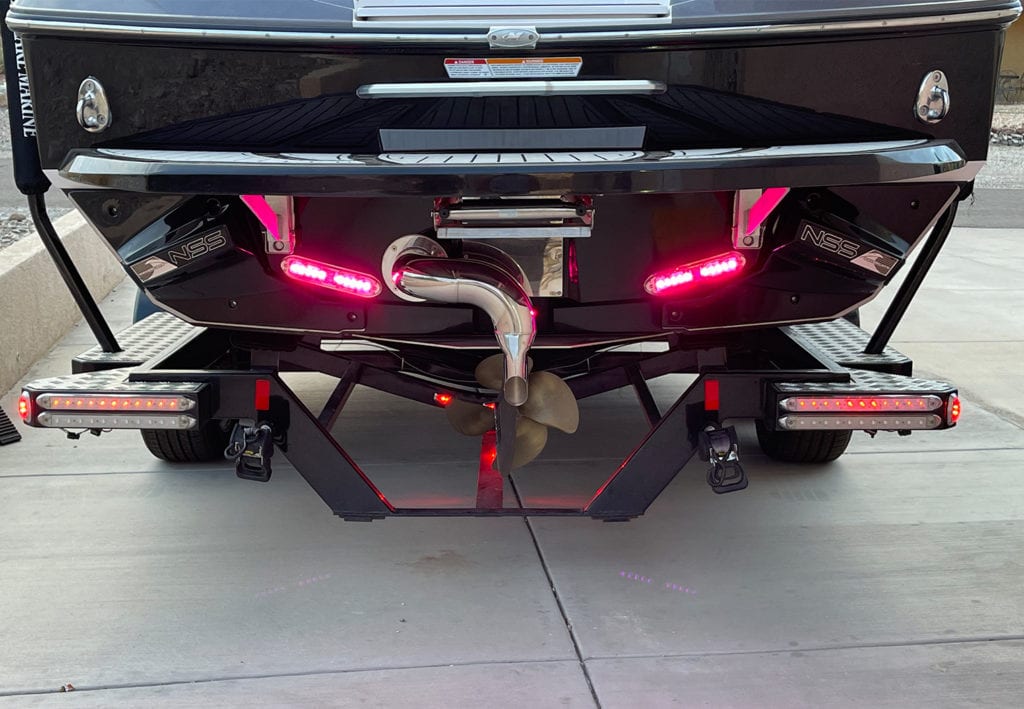
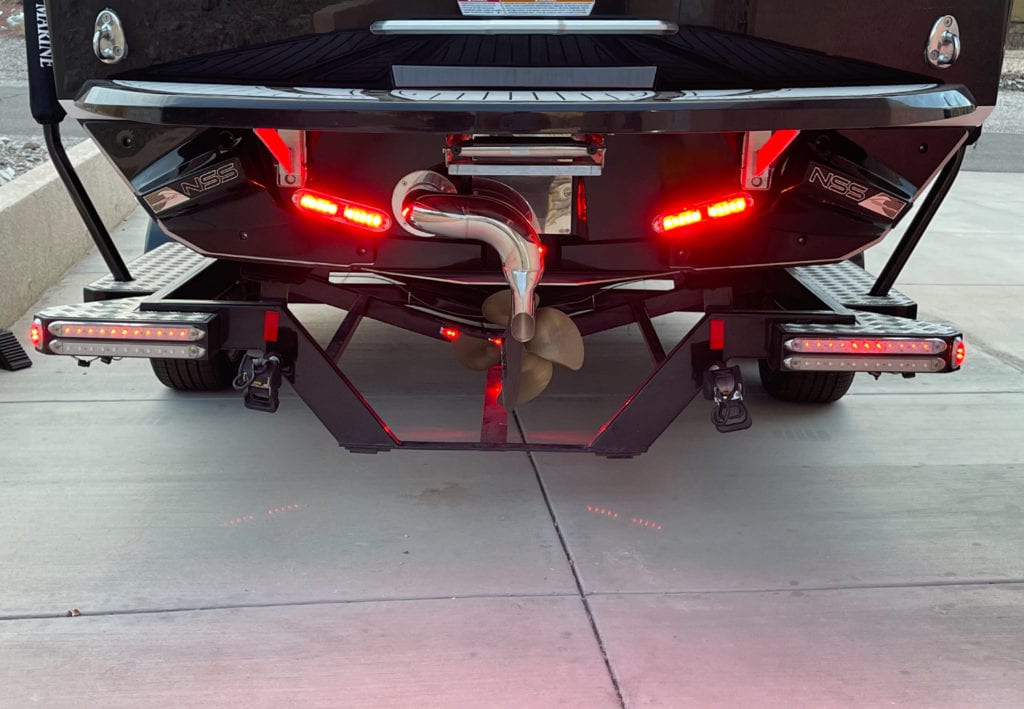
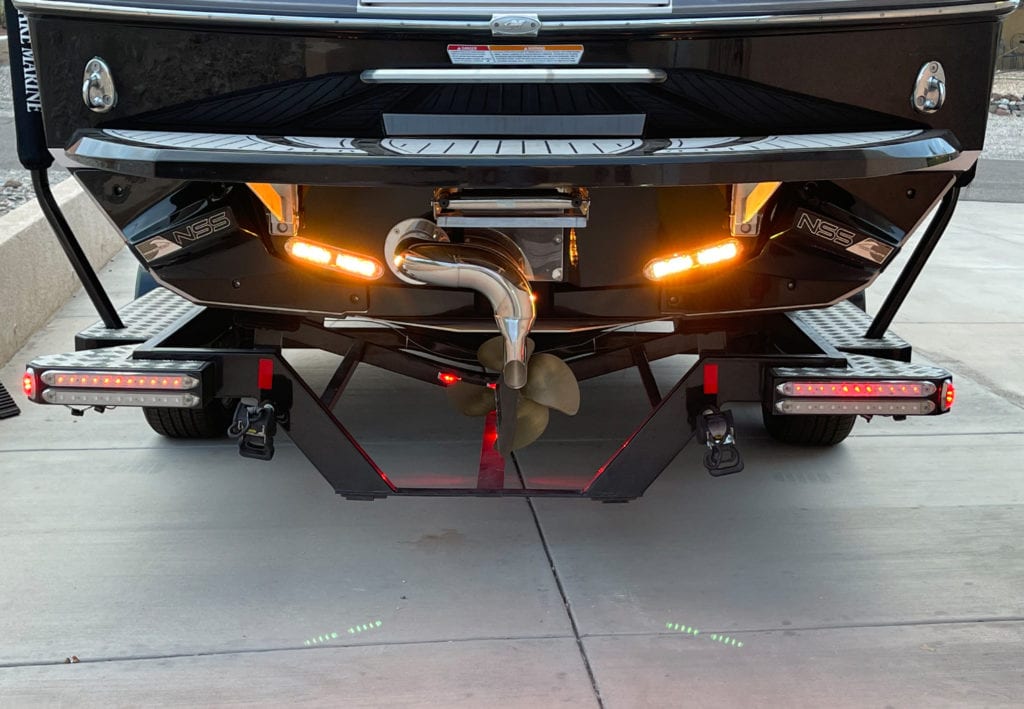
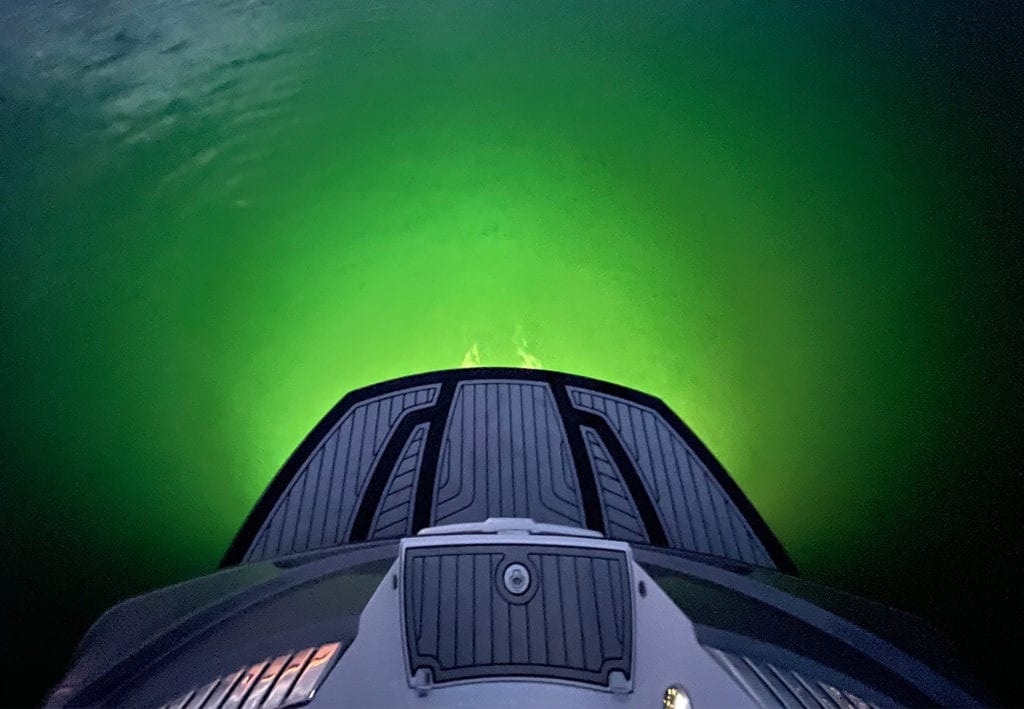
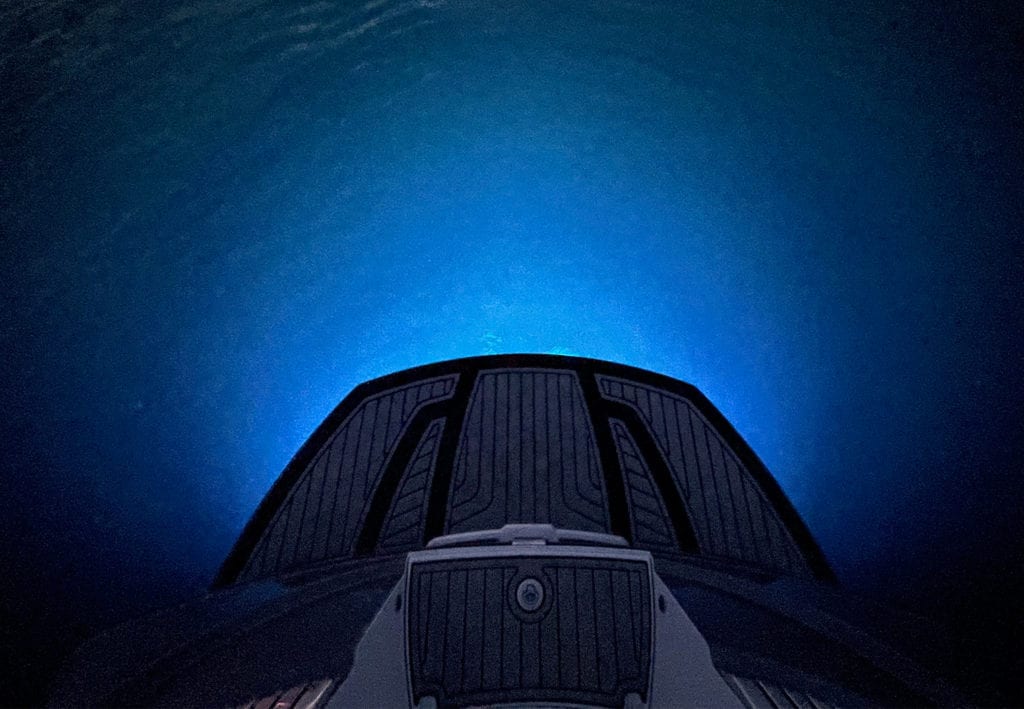
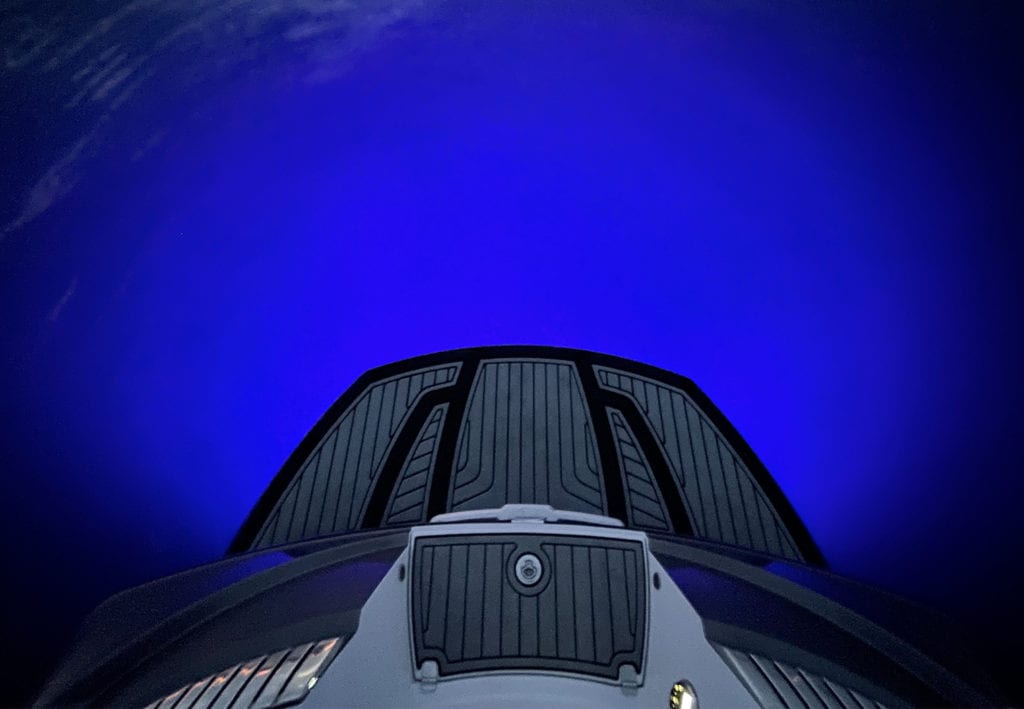
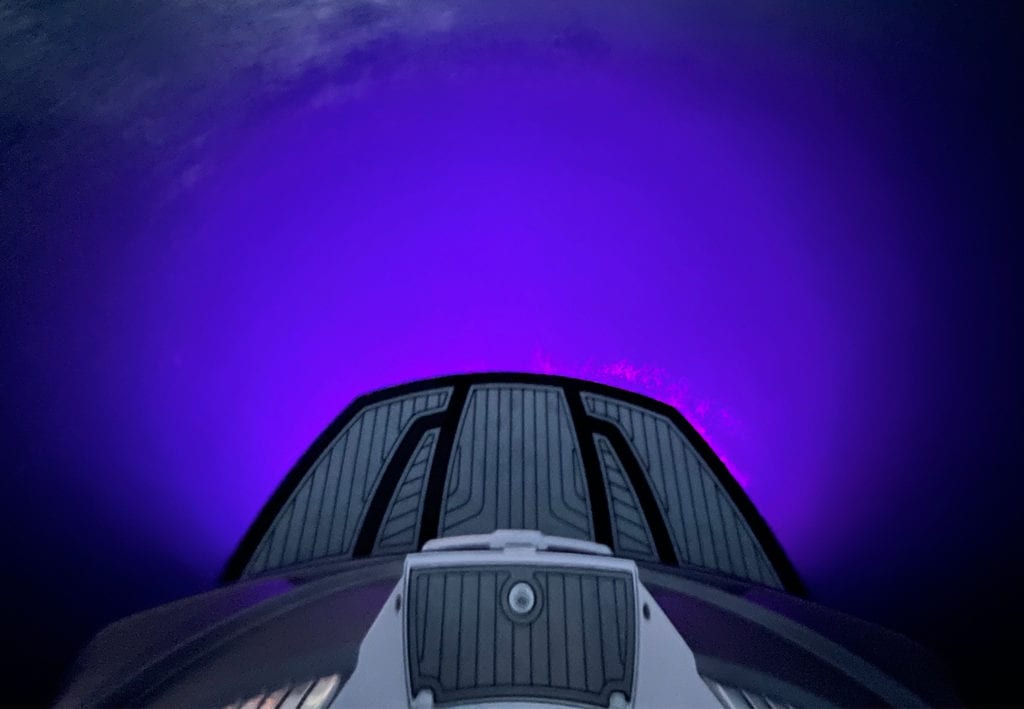
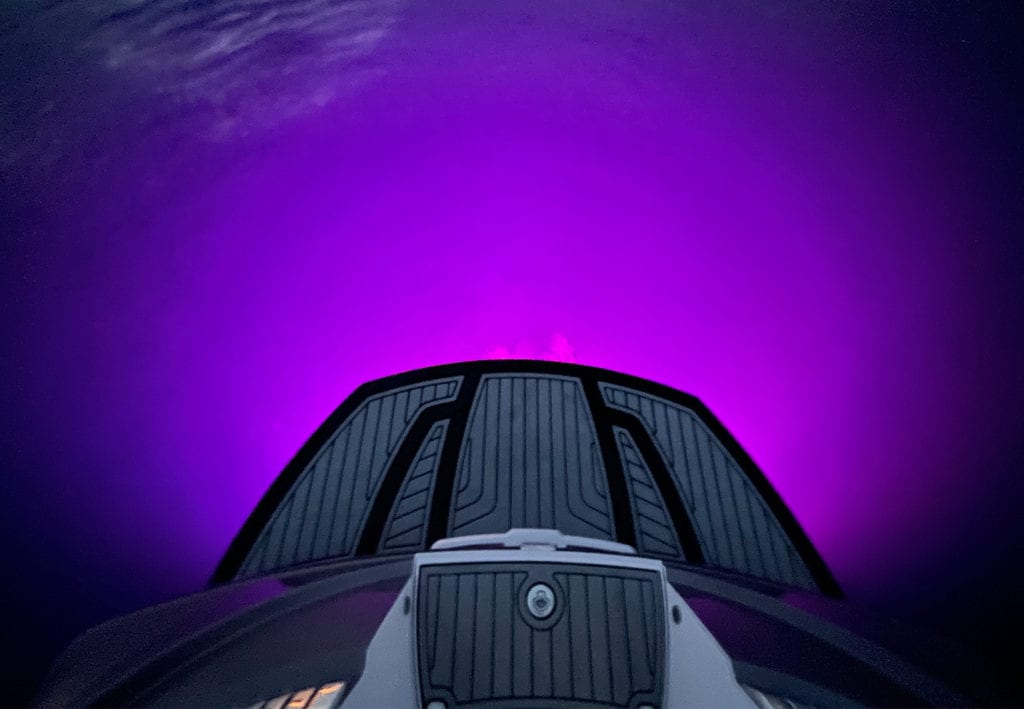
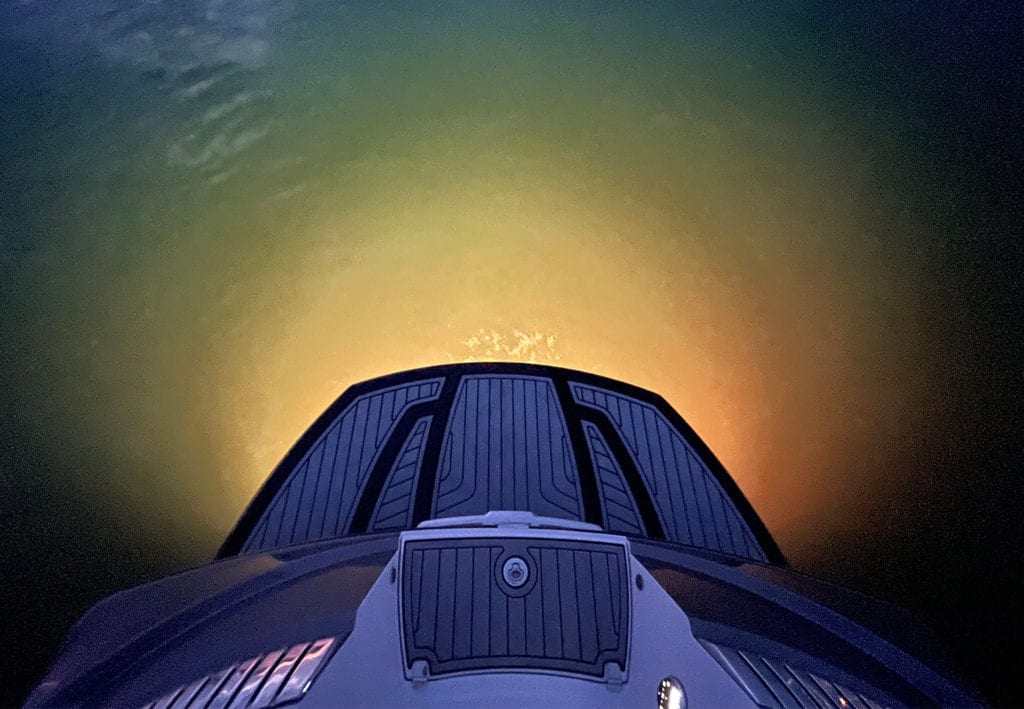
Testing the Shadow Casters On Trailer and In Water
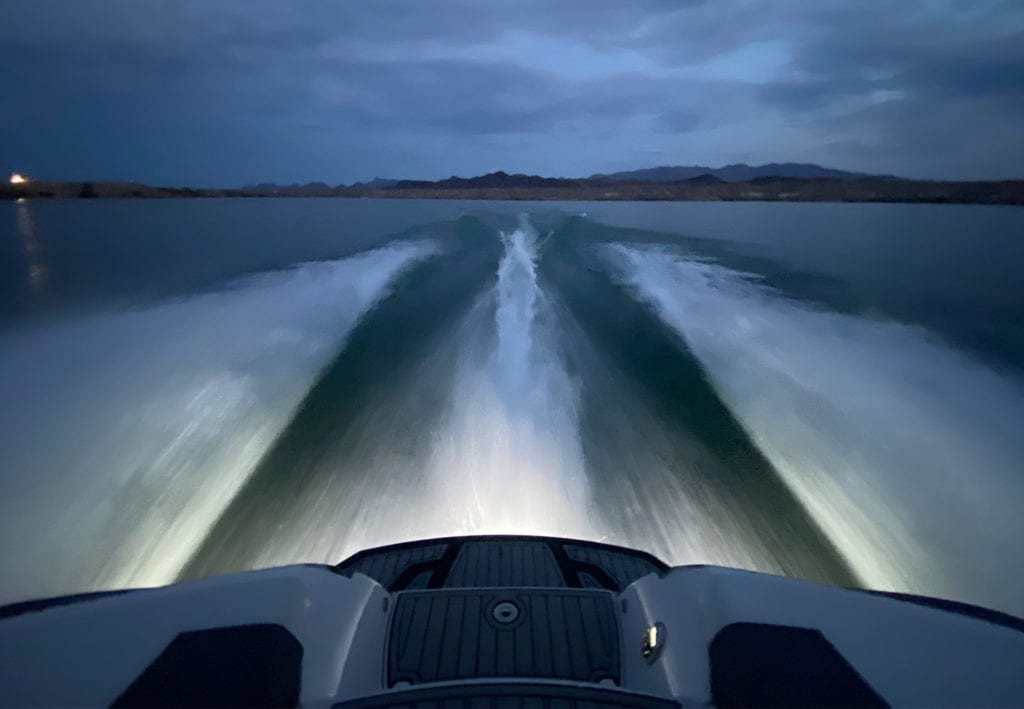
Finally. The moment of truth! I tested out a series of colors both on the trailer and in the water at night to show the colors and brightness. I was very pleased with the results. They were an incredible step-up from the OEM lights in terms of brightness – I'd say 2-3 times brighter. The colors were super vibrant too. What I don't think these lights will do is give you enough brightness to light up the entire wake if you're trying to surf at night. You're going to need more Lumens for that or another light.
Nonetheless, I'm really pleased with how these came out, how they look while the boat's on the trailer and how they perform in the water. Here's a ton of photos on the trailer and in the water.
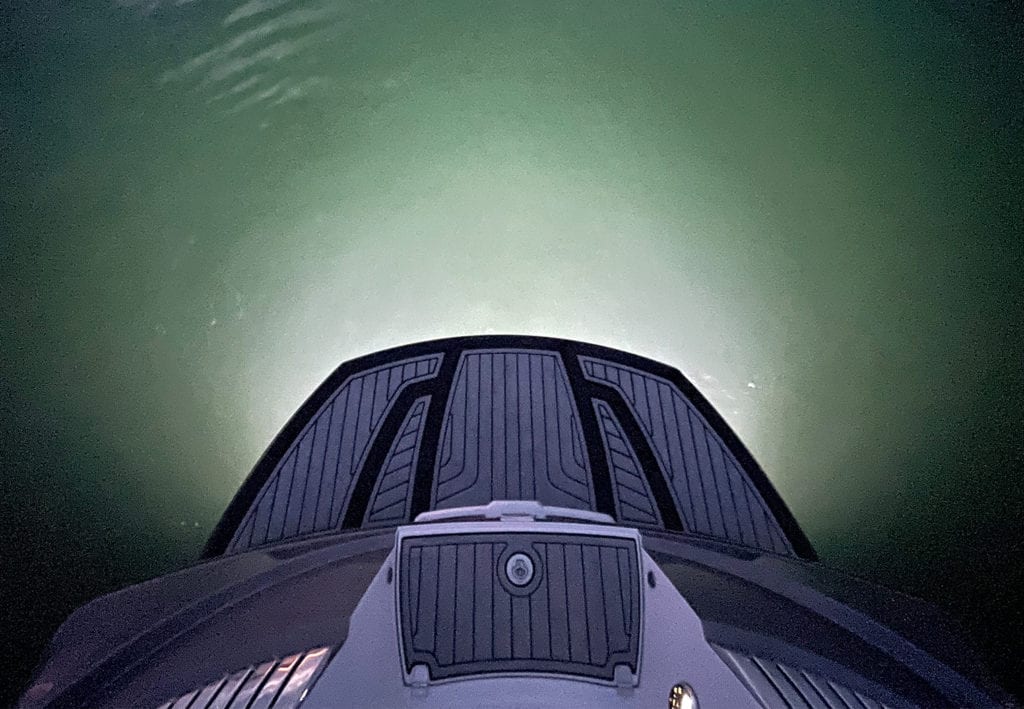
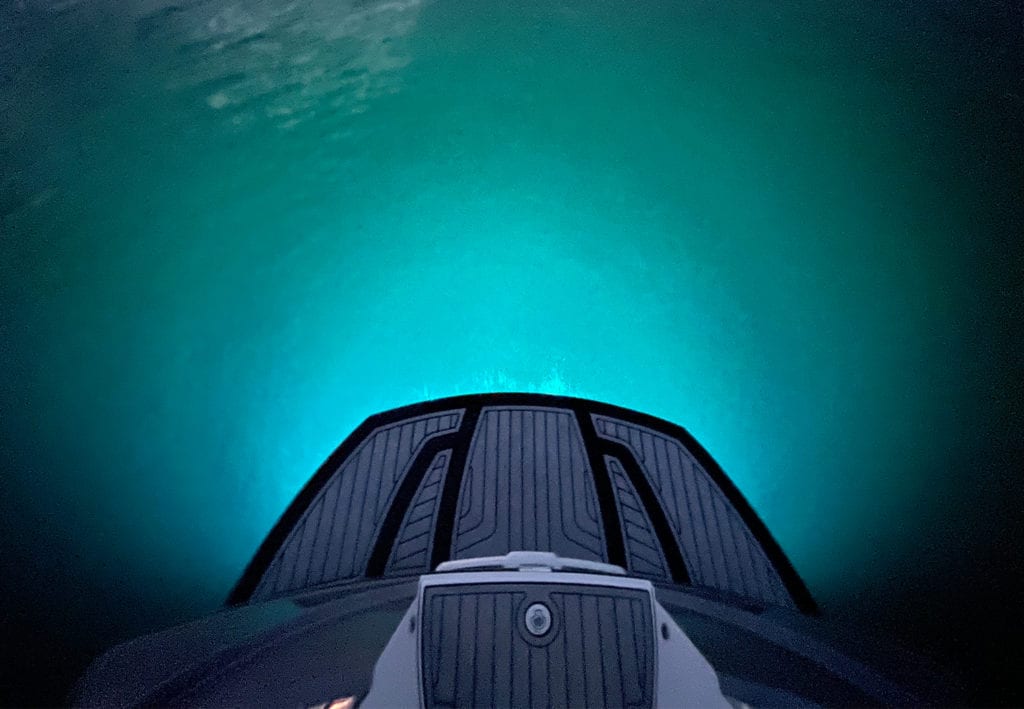
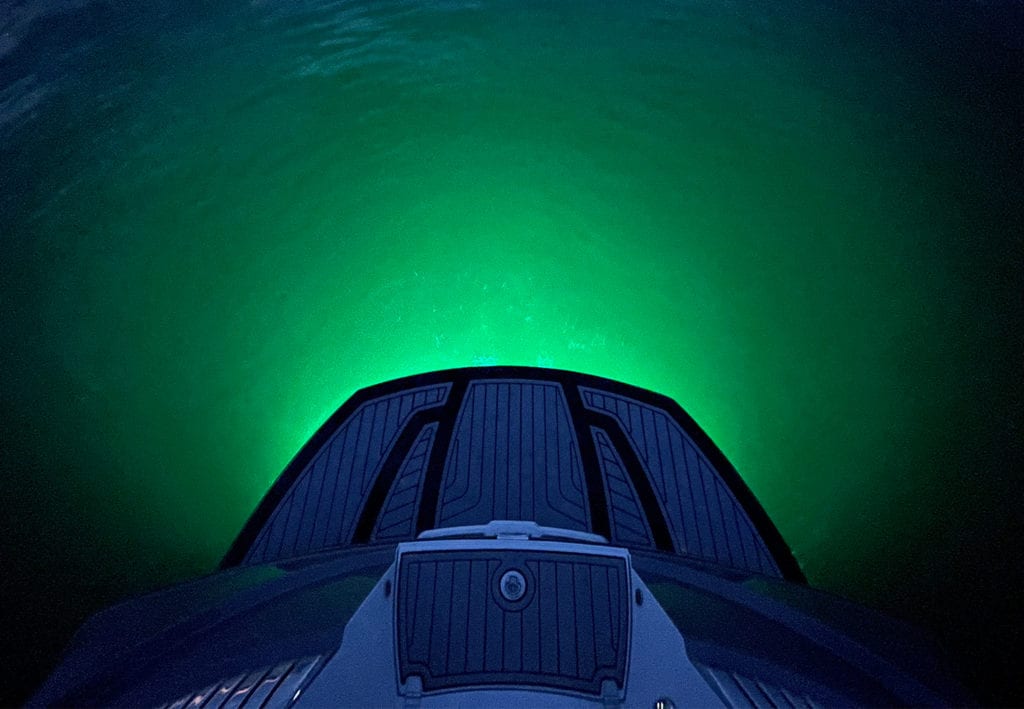


I also took a short clip cycling through the colors under water.

Hi how are you
How much lighting power in the two in white color only
How many Lumens
How much
Thank you
Hello. Thanks for your comment! Each light is rated at 3750 lumens. Typically the rating is for the white color so I would expect the white to emit close to this rating. They’re priced around $600. You can find them here on Amazon: https://amzn.to/3ZwBtVD